


Cathead
-
Posts
3,046 -
Joined
-
Last visited


About Cathead

- Birthday 09/08/1979
Recent Profile Visitors
7,102 profile views


-
 Canute reacted to a post in a topic:
Caroline N by mbp521 - Scale 1:64 - Mississippi River Towboat
Canute reacted to a post in a topic:
Caroline N by mbp521 - Scale 1:64 - Mississippi River Towboat
-
Canute reacted to a post in a topic:
Caroline N by mbp521 - Scale 1:64 - Mississippi River Towboat
-
Cathead reacted to a post in a topic:
Caroline N by mbp521 - Scale 1:64 - Mississippi River Towboat
-
 mbp521 reacted to a post in a topic:
Caroline N by mbp521 - Scale 1:64 - Mississippi River Towboat
mbp521 reacted to a post in a topic:
Caroline N by mbp521 - Scale 1:64 - Mississippi River Towboat
-
mbp521 reacted to a post in a topic:
Caroline N by mbp521 - Scale 1:64 - Mississippi River Towboat
-
mtaylor reacted to a post in a topic:
Caroline N by mbp521 - Scale 1:64 - Mississippi River Towboat
-
mtaylor reacted to a post in a topic:
Caroline N by mbp521 - Scale 1:64 - Mississippi River Towboat
-
Cathead reacted to a post in a topic:
11th century viking crew and freight in 1:25
-
gsdpic reacted to a post in a topic:
Caroline N by mbp521 - Scale 1:64 - Mississippi River Towboat
-
kurtvd19 reacted to a post in a topic:
Caroline N by mbp521 - Scale 1:64 - Mississippi River Towboat
-
Keith Black reacted to a post in a topic:
Caroline N by mbp521 - Scale 1:64 - Mississippi River Towboat
-
 If cutting an insert into the base is too hard, Brian could also make a veneer sheet the same thickness as the mirror and cut the mirror shape out of that, which is almost certainly easier to do than routing out the base with a laser or regular router.
 -
Cathead reacted to a post in a topic:
Caroline N by mbp521 - Scale 1:64 - Mississippi River Towboat
-
Keith Black reacted to a post in a topic:
Caroline N by mbp521 - Scale 1:64 - Mississippi River Towboat
-
Absolutely. To my way of thinking, not only does it show off your workmanship more effectively, but it gives the viewer a better angle into something we otherwise never see in the real world (details below the waterline). If part of the goal of modeling is education (a core mission of the NRG), then given you've put the work into those normally hidden details, make them as accessible as possible! I'd bet the vast majority of people have no idea that's what towboat propulsion looks like, as opposed to a vague idea of some sort of basic ship's propellor like on the Titanic or something. As for proper lighting, pretty much everyone has a flashlight in their pockets these days, so it's not hard to get light to where it's needed. This is one of the reasons I haven't bothered running lighting into my steamboat models; it's so much easier just to point my phone light in toward the machinery if anyone wants to see it in detail. That and I don't like working with electronics but that's not the point!
-
Cathead reacted to a post in a topic:
Caroline N by mbp521 - Scale 1:64 - Mississippi River Towboat
-
Cathead reacted to a post in a topic:
11th century viking crew and freight in 1:25
-
Cathead reacted to a post in a topic:
Roar Ege by Scottish Guy - Billing Boats - 1:25
-
Those instructions are startlingly bad for an American manufacturer. Not because Americans are any better than anyone else, but because the English in there reads like the non-native gibberish normally encountered in badly translated foreign manuals. You're doing a good job of being persistent and developing new and interesting ways to meet the kit's challenges.
- 73 replies
-
- 3
-
-
-
- Roar Ege
- Billing Boats
- (and 2 more)
-
Cathead reacted to a post in a topic:
11th century viking crew and freight in 1:25
-
Even pulled up on a shore, you could have one armed guard (easier to source) watching things while assuming the rest of the crew are off refilling water barrels or taking care of other essential business. Lots of possibilities! I do think a wharf scene would look pretty cool, and same point about a single armed guard.
-
Cathead reacted to a post in a topic:
11th century viking crew and freight in 1:25
-
Cathead reacted to a post in a topic:
HMS Sophie by TBlack - kit-bashing Jack Aubrey's first command from the Vanguard Models HMS Speedy
-
Cathead reacted to a post in a topic:
HMS Sophie by TBlack - kit-bashing Jack Aubrey's first command from the Vanguard Models HMS Speedy
-
You can build a diorama without crew...perhaps moored to a wharf, or pulled up on a beach with cargo unloaded?
-
Thanks, all, and Keith - I agree. I think that's one the best model I've ever built. Guess I'm going downhill now!
-
Note to self: use a thesaurus to assemble a list of superlatives before Brian's next update. Or switch to a new language; I've always been partial to German's "ausgezeichnet" because just pronouncing it provides a feeling of accomplishment. I totally agree with Keith that the bottom needs to be visible somehow. You may not go this direction, but a great benefit of the larger display cabinet I had built for my models is that the multi-level glass shelving makes it easy to see the undersides, which is especially good for my openly framed Bertrand's hull. It's also a lot more space- and material-efficient than a bunch of individual glass cases. Also, as a fellow Mac user, welcome! One thing I particularly appreciate is the seamless coordination of photos (and other documents) between phone and computer, then up to iCloud storage, so I don't have to think about manual backups or worry about the loss of a device.
-
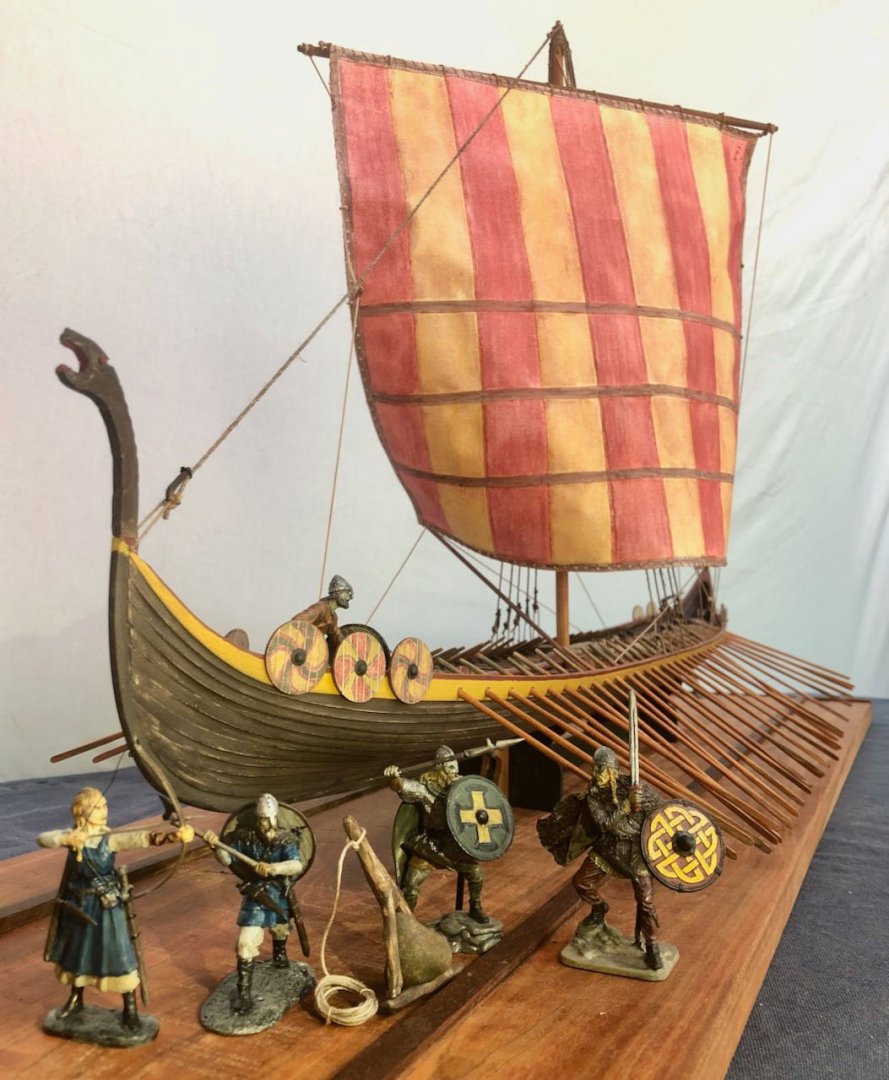
When I built my longship, I was able to find a whole set of 1:32 bare metal figures that were quite well done. That would be pretty close to your scale, most people can't tell the difference. I had a great time hand-painting them. Here they are displayed with my vessel, whose build log is linked below if it's of interest and use (there's more detail in there about painting them and so on, too).
-
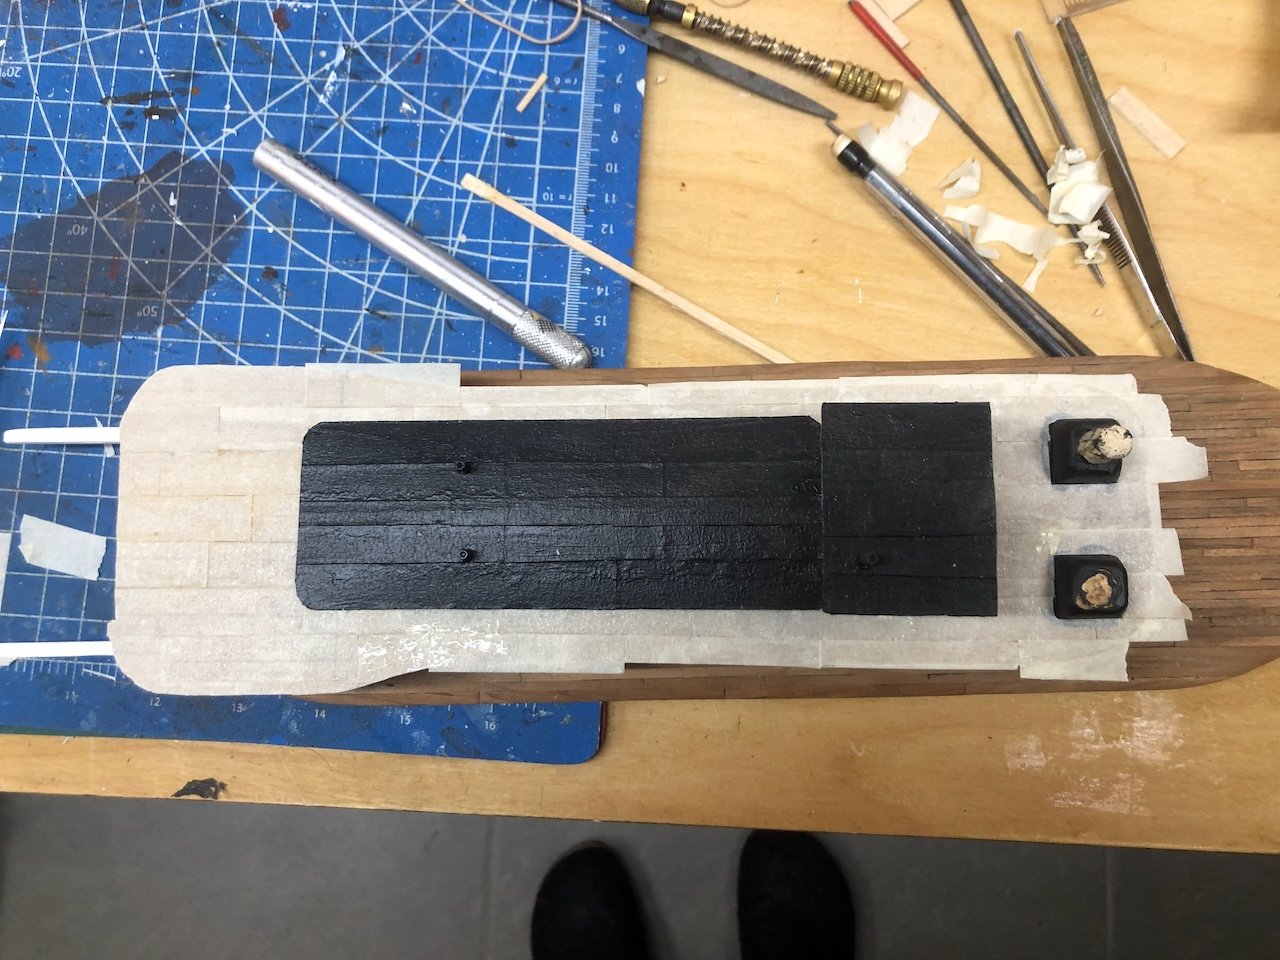
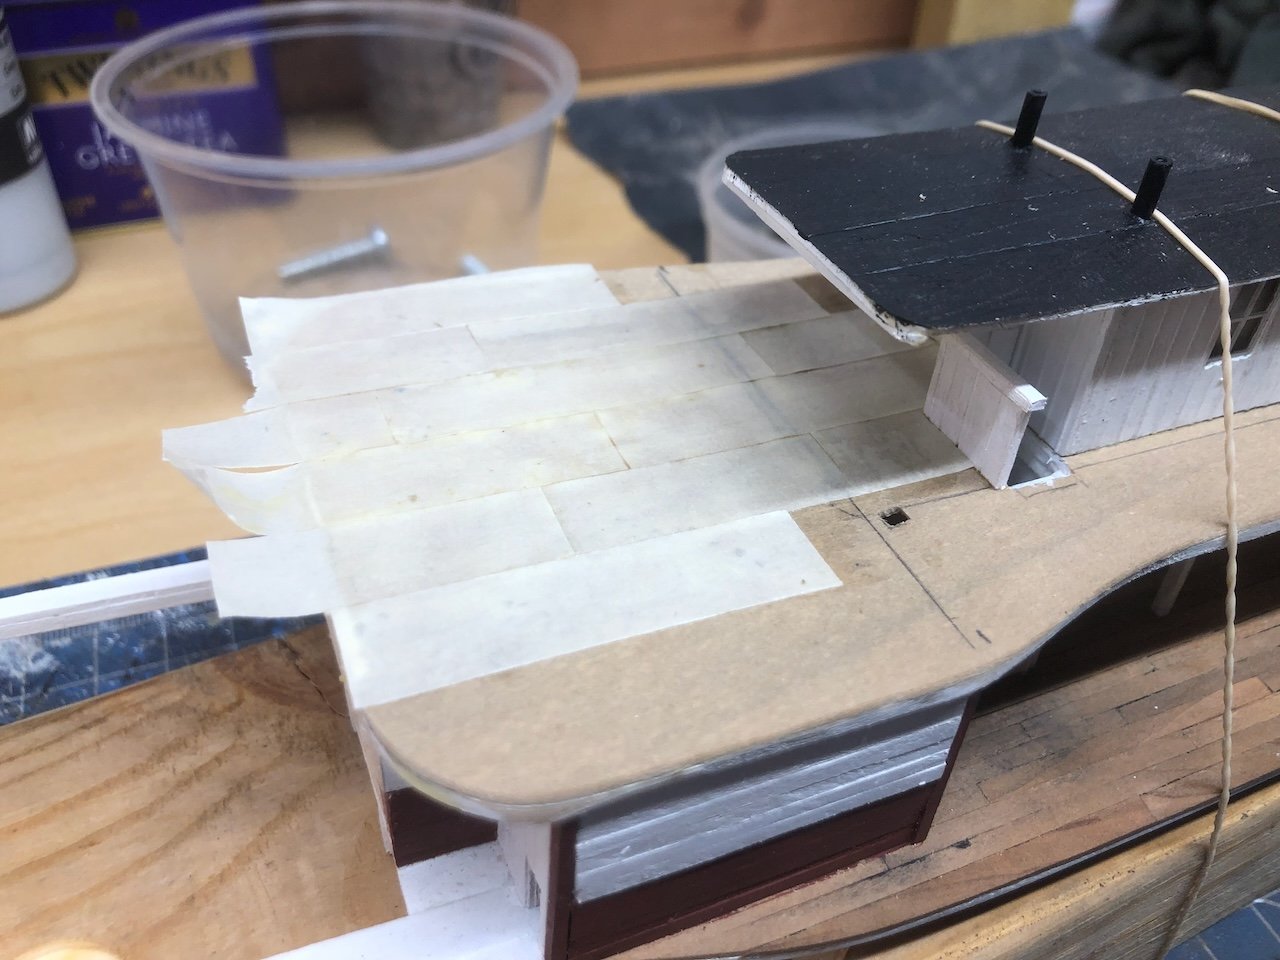
I apply each strip separately. Cut to fit as needed, smear wood glue on the tacky surface, apply, use a strip of wood or my finger to rub smooth and flat (sometimes bubbles get trapped), then move on to the next one. Another benefit to doing it that way is that the tape itself is just tacky enough that sliding it into an exact position is tricky because it catches. A film of wood glue on the bottom means it slides effortlessly and can be adjusted to exactly where you want it, then snugged down with some gentle pressure.
-
Wefalck, I absolutely agree that tape on its own would not be a good idea, but recall that earlier I described how the masking tape is attached with a layer of carpenter's glue once it's cut to fit. The glue soaks into the tape and not only holds it quite solidly once dry, but stiffens it so that it's easier to trim. The paint provides another round of stiffener. The same method used on my Arabia has shown no signs of alteration in ~4 years of the highly variable environmental conditions within my house (from bone-dry firewood-heated air in winter to humid summer air only partly buffered by air conditioning, and temperature variations from the 50s-80s F). So I'm pretty comfortable with the method. The venue is setting up large square tables, one for each model, so people can view them from all sides but they're not easily reachable (especially by little hands). Still a little nerve-wracking but worth it, I think.
-
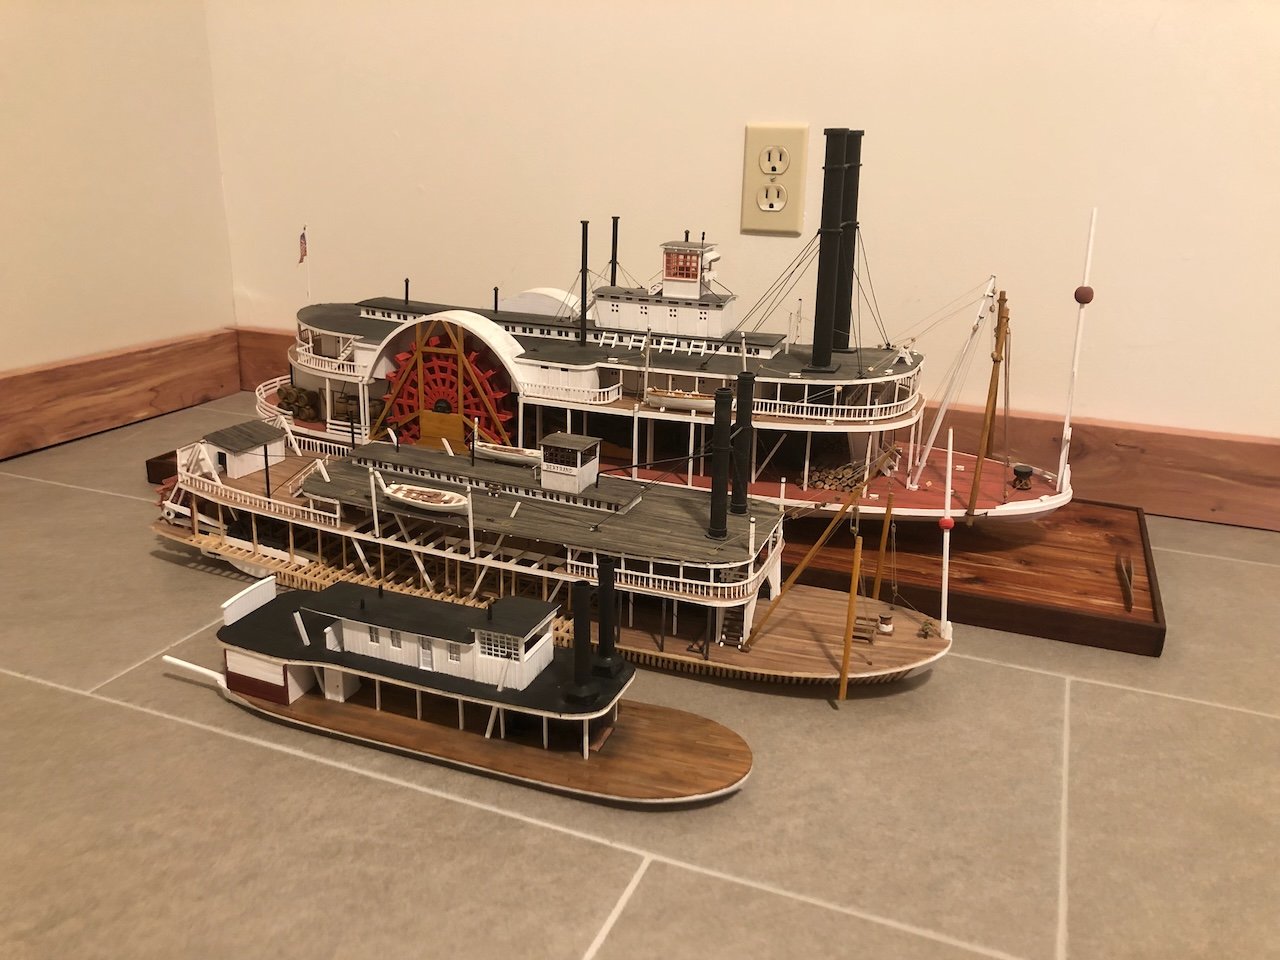
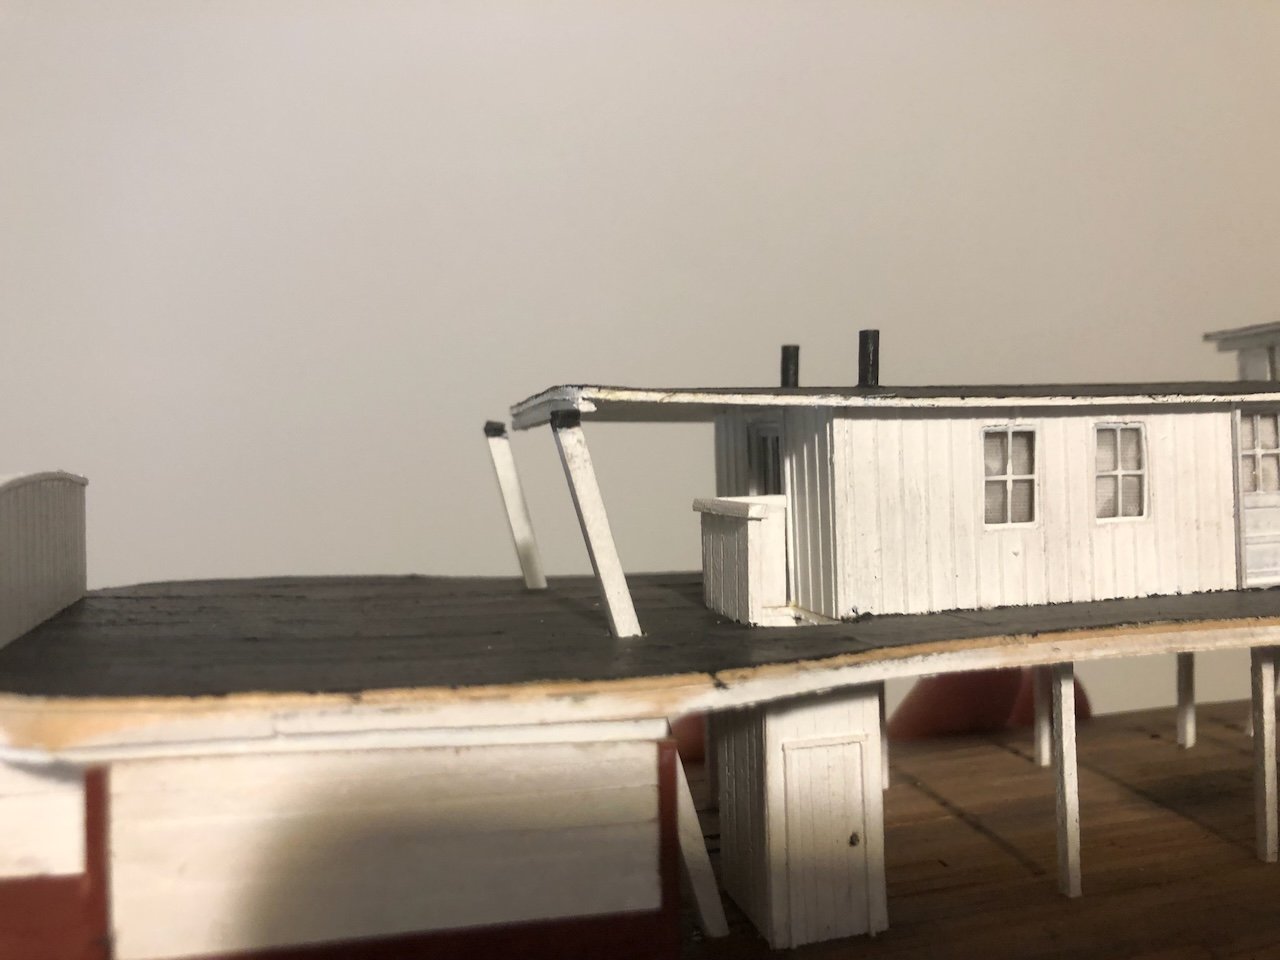
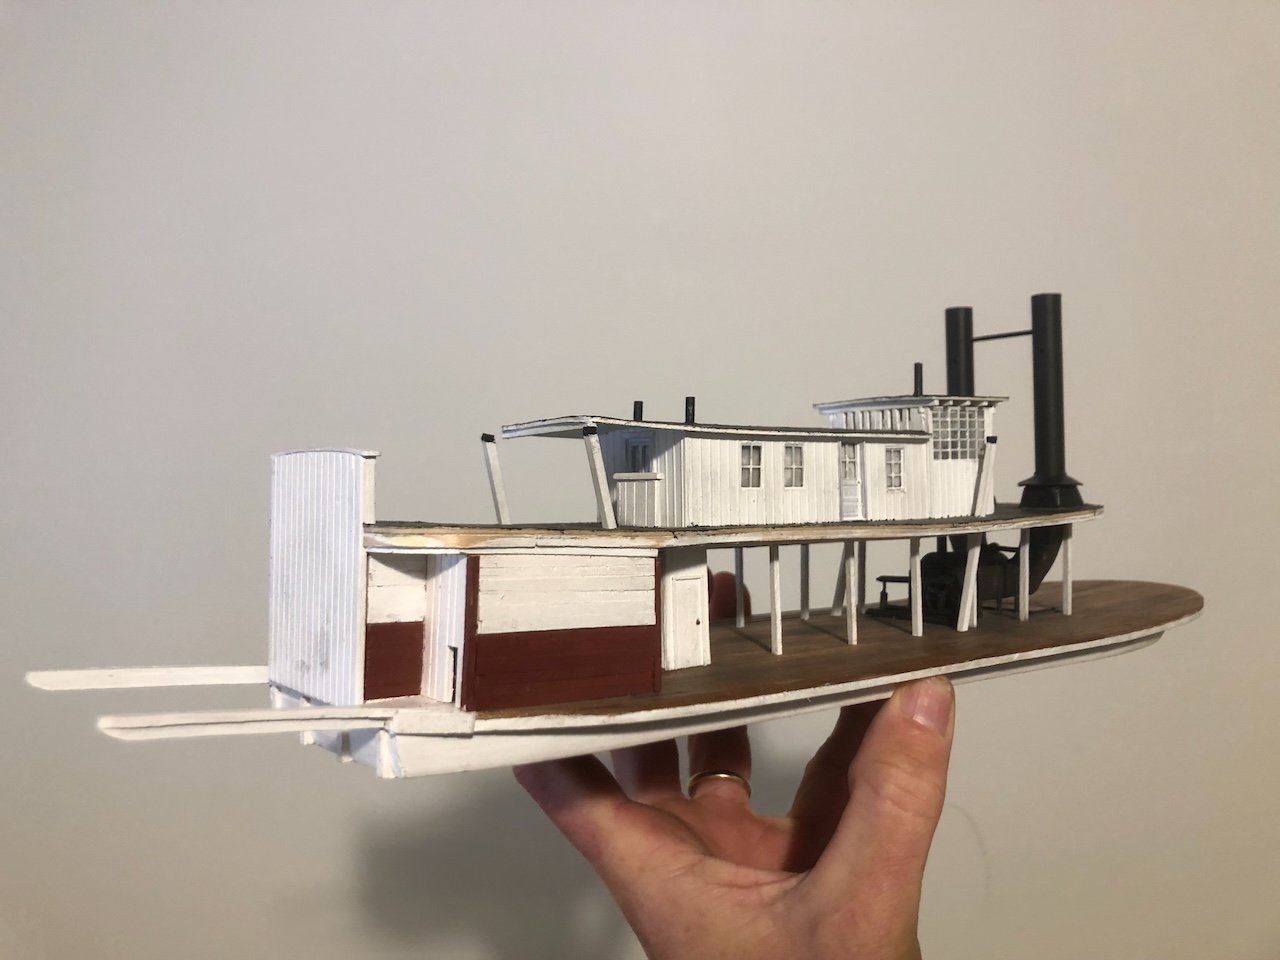
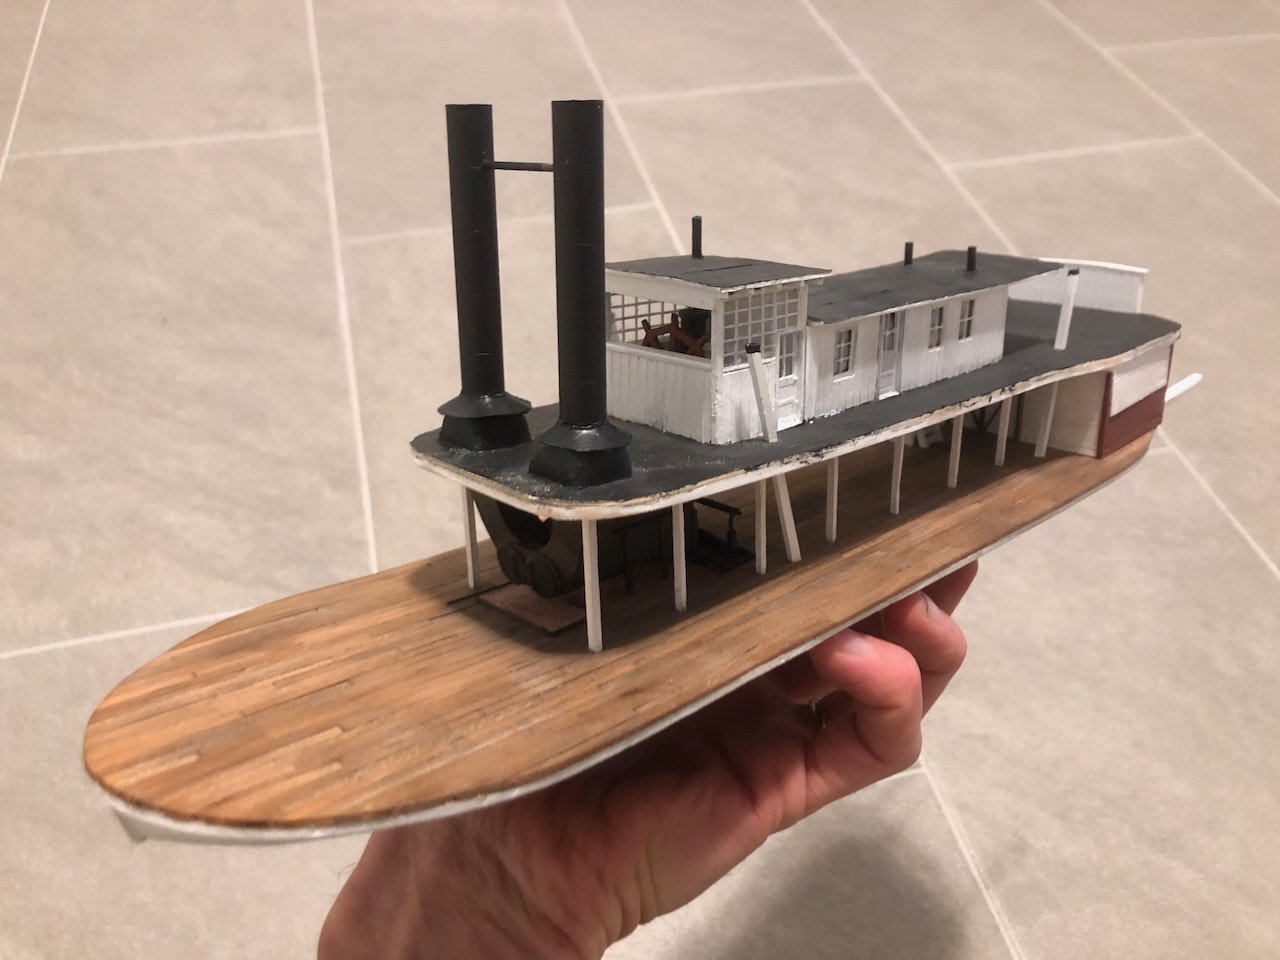
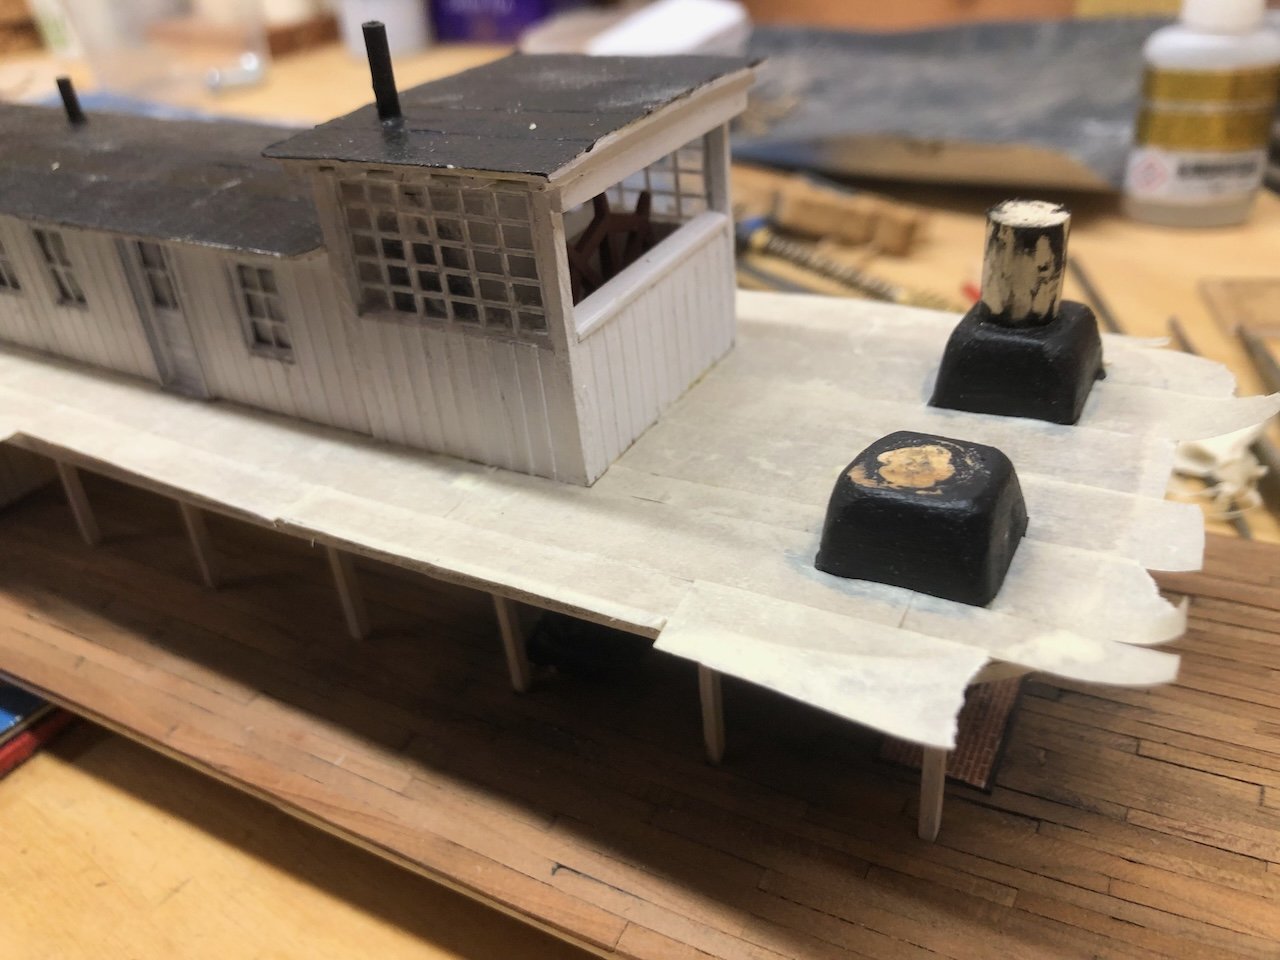
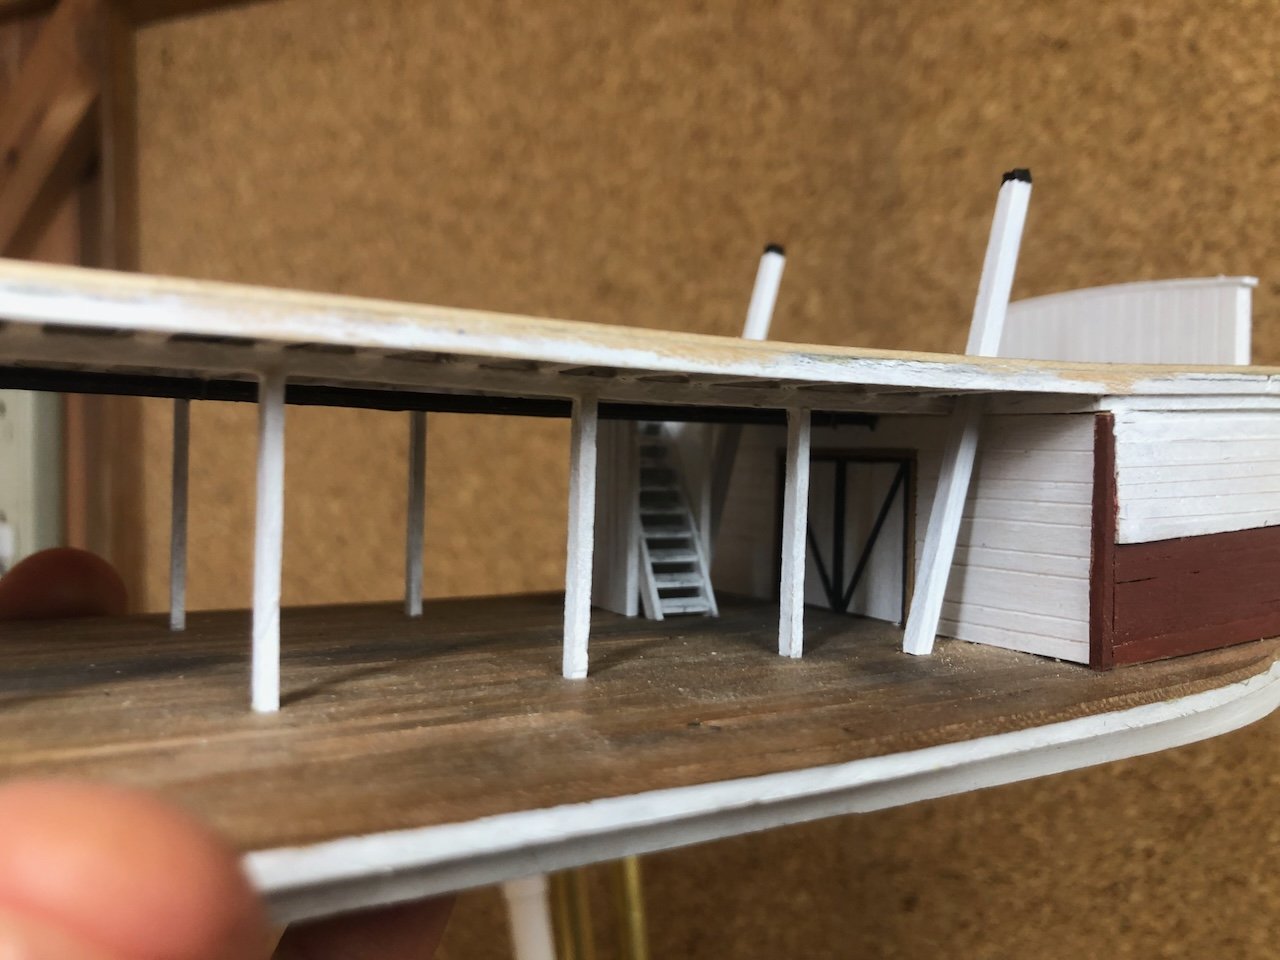
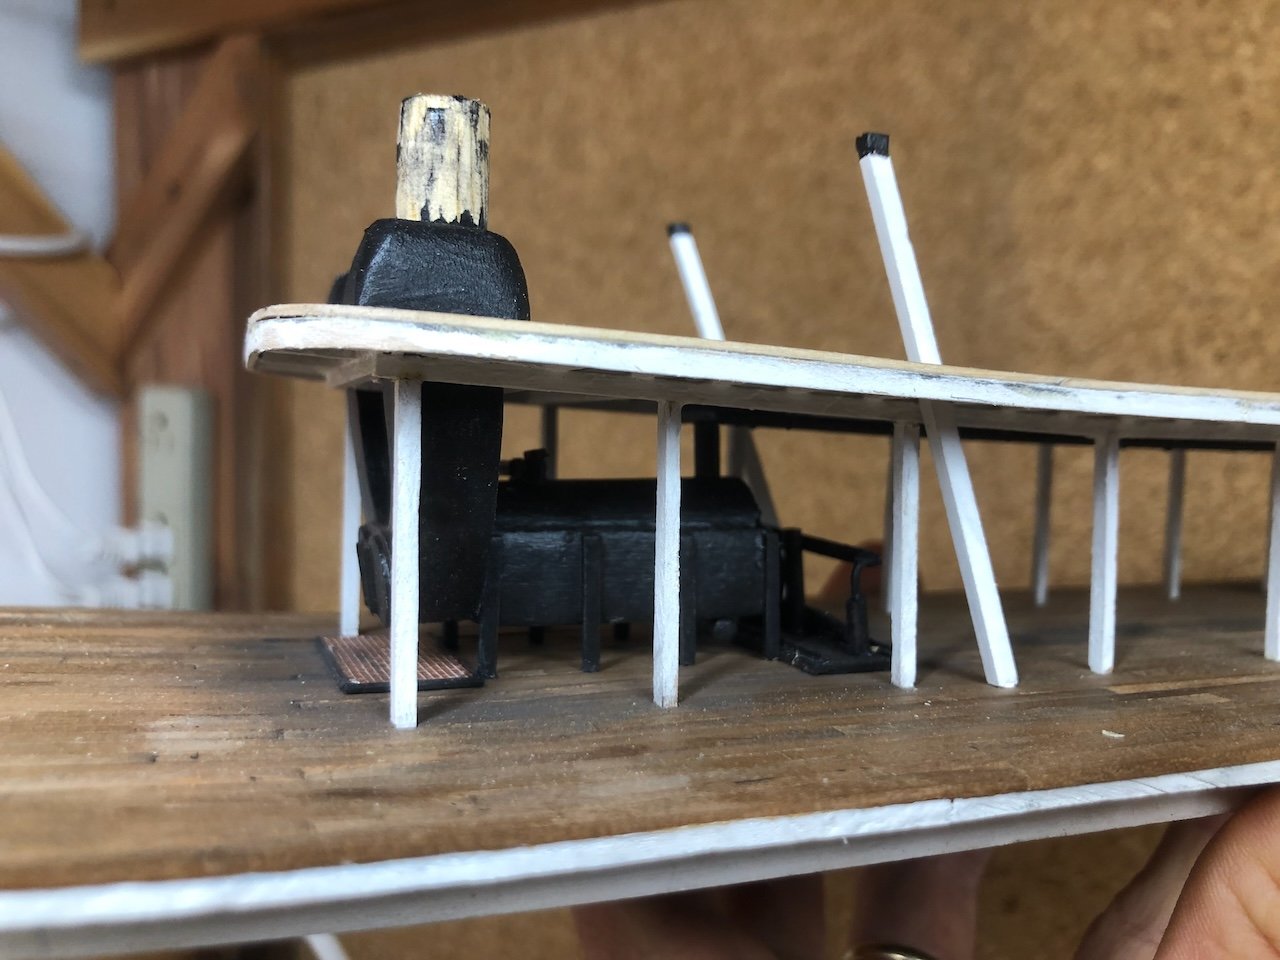
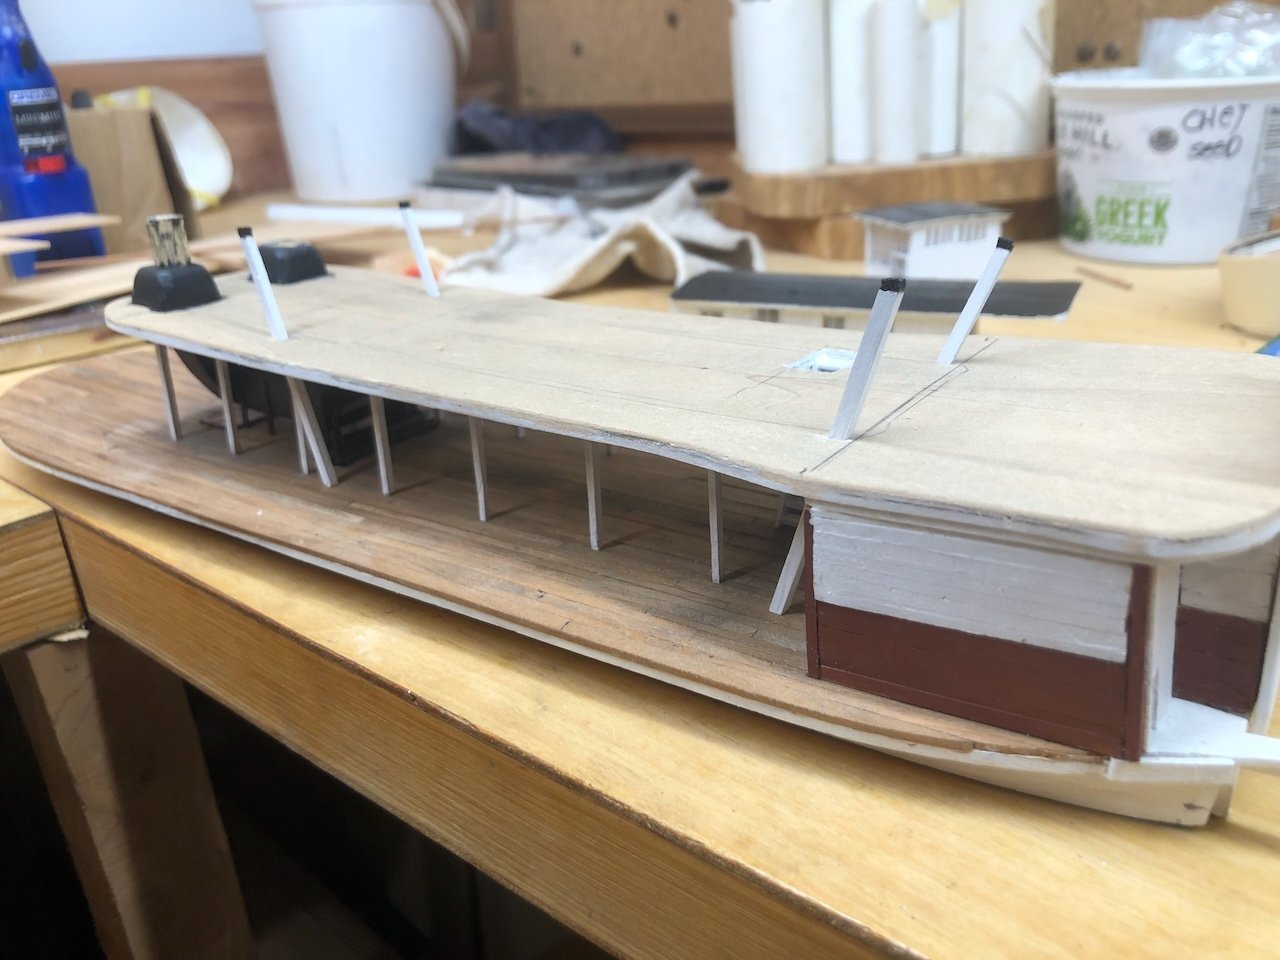
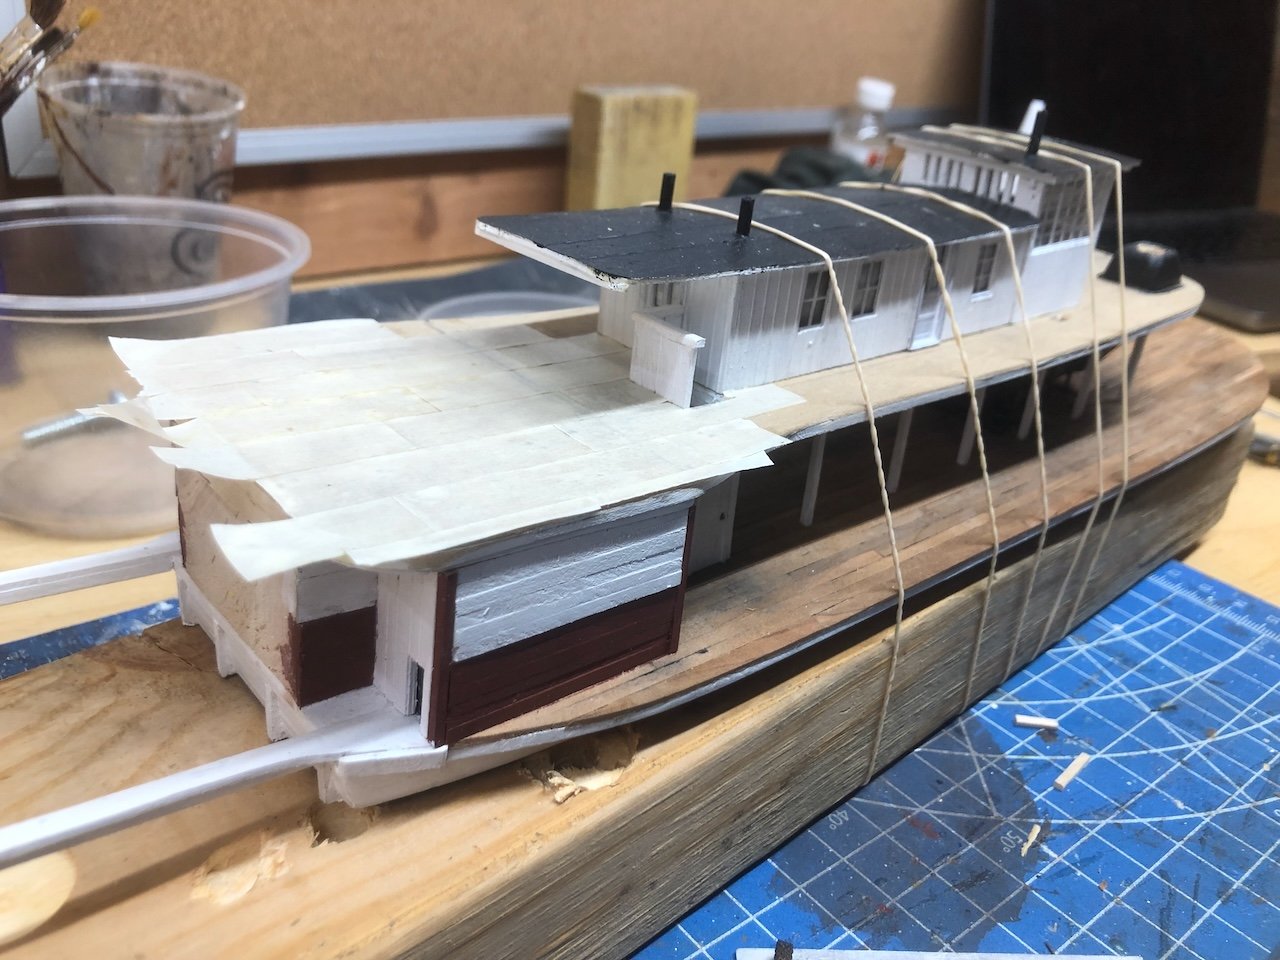
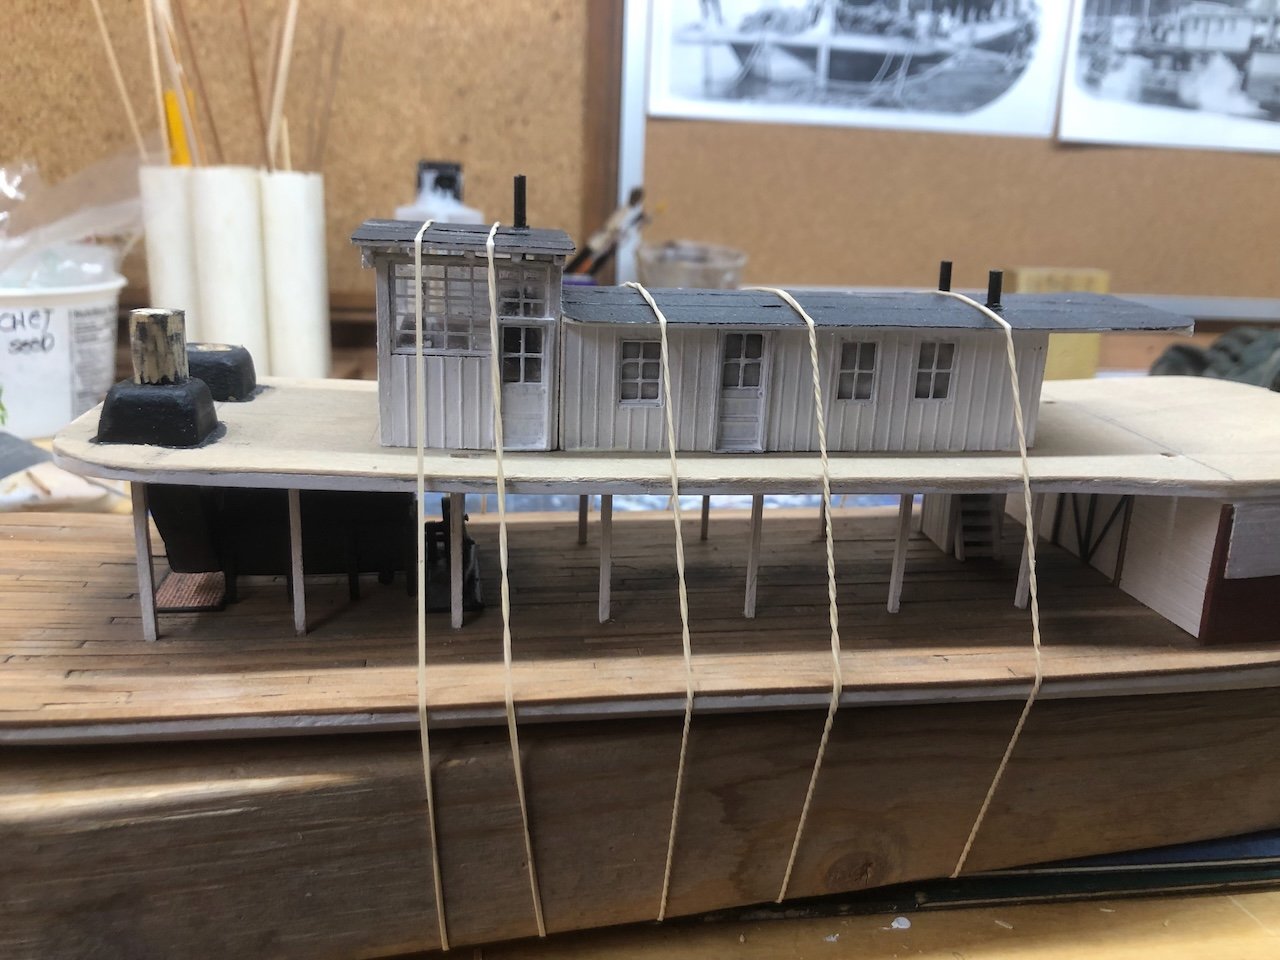
A few shots of carefully working the masking-tape "canvas" around the rest of the boiler deck: Lots of fiddly cutting and fitting here. But another benefit to masking tape is that it holds its shape stiffly and is easier to shape and fit than something floppier like silkspan or tissue. And it's just sticky enough on its own to stay put when you're trying to draw or cut a careful line, while still being easy to move when you want. I finally reached the point where a bunch of these overlapping mini-projects all came together. So here she is with cabins and pilot house attached, deck fully canvassed and painted, hog chain posts installed, and stern planking applied. Careful eyes will notice that I haven't yet installed the support posts for the rear cabin roof overhang, but it's plenty stable for now. I'm not worried about the messy appearance of the boiler deck's edge because that will get wrapped in a thin plank veneer. On Sunday, I'll be giving a talk on the evolution of steamboat design along the Missouri River, at a regional cultural center that specializes in supporting educational and artistic programming. I initially developed this talk back in 2021 as an online lecture for a regional non-profit that works along the Missouri River (you can view the talk recording here if interested), but this will be the first time I've given it to an in-person audience. As a bonus, I'll be displaying three of my steamboat models, the first time any of them have been presented to the public. Here they are all lined up and ready to go: In the back is Arabia (1:64), in the middle is Bertrand (1:87), and of course in the foreground is Peerless (1:87). All three operated on the Missouri River, from 1853-1856, 1864-1865, and 1893-1903, respectively. Model size is misleading, as Arabia is at a larger scale though she's actually very close in size to Bertrand. On the other hand, Bertrand and Peerless are the same scale, so you can really see how tiny the latter was in comparison to her ancestors. This talk has been scheduled for a long time, and I'd originally hoped to have Peerless done for this talk, but when it became clear that wouldn't happen, I aimed to at least reach a clearly presentable and semi-complete stage, which I just barely did! Thanks as always for following along, and helping me get to this point.

- 254 replies
-
- 17
-
-

-
While no expert, I've personally found that I like to do both. An initial blackening in highly diluted solution, followed by painting. The blackening seems to rough up the surface slightly and the paint grips better and looks more natural than when applied straight to brass. I've also used primer followed by paint but that ends up thicker than I like.
-
Quality instructions or not is a HUGE divider for kit manufacturers. There are only a handful that really bother to do it right. The rest are a sink or swim mentality.
-
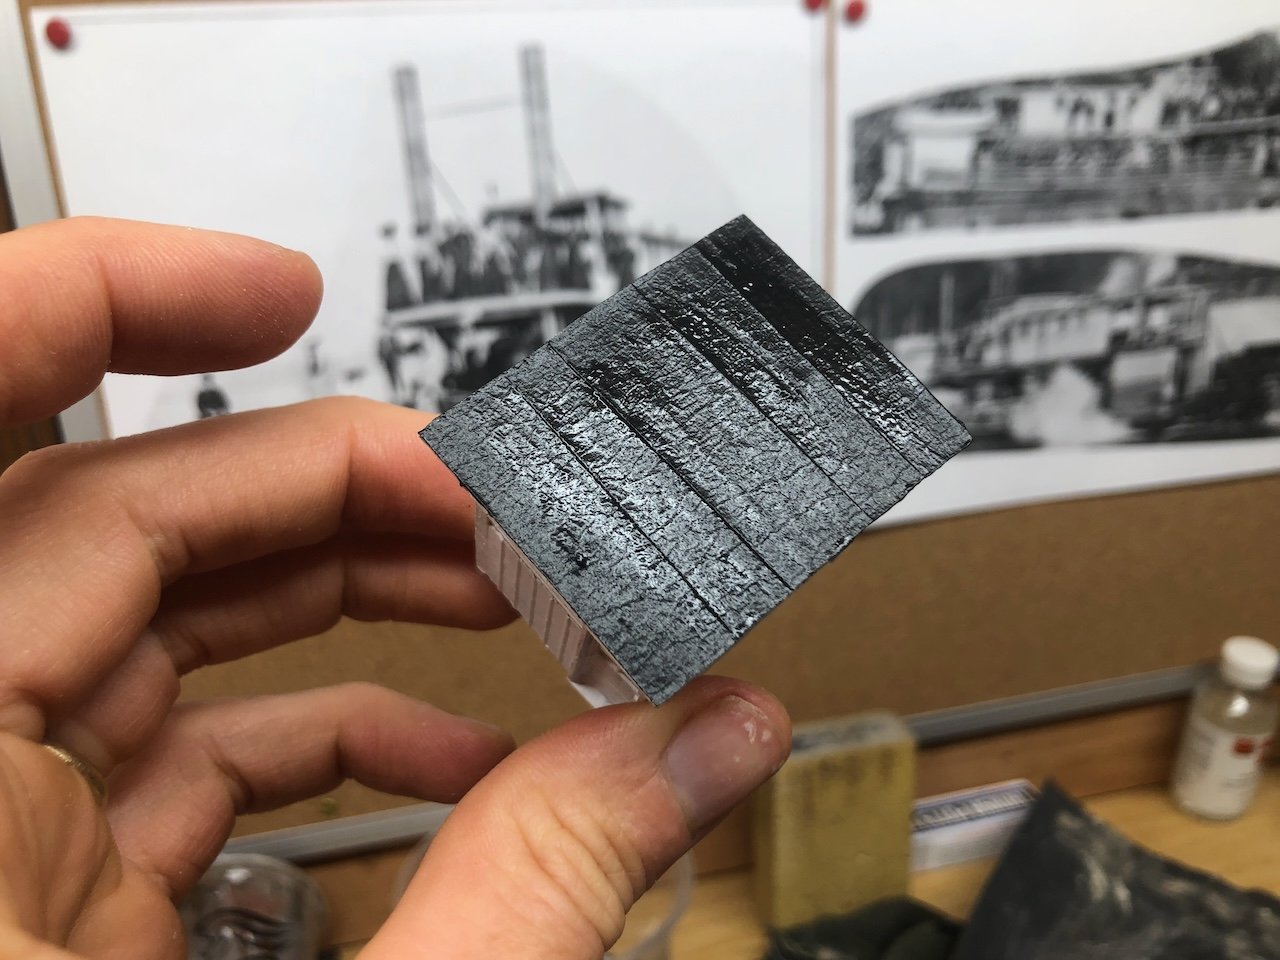
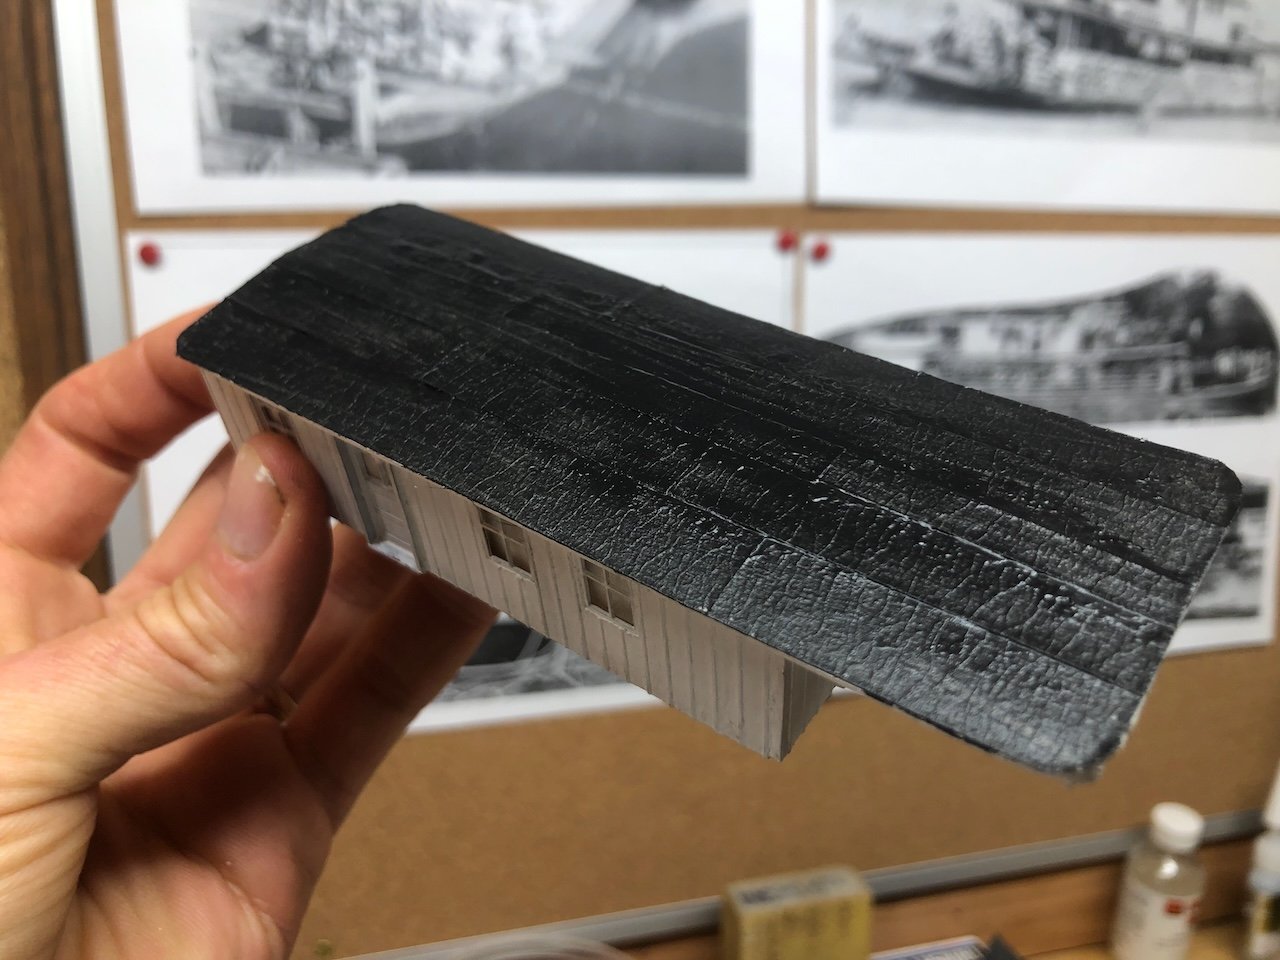
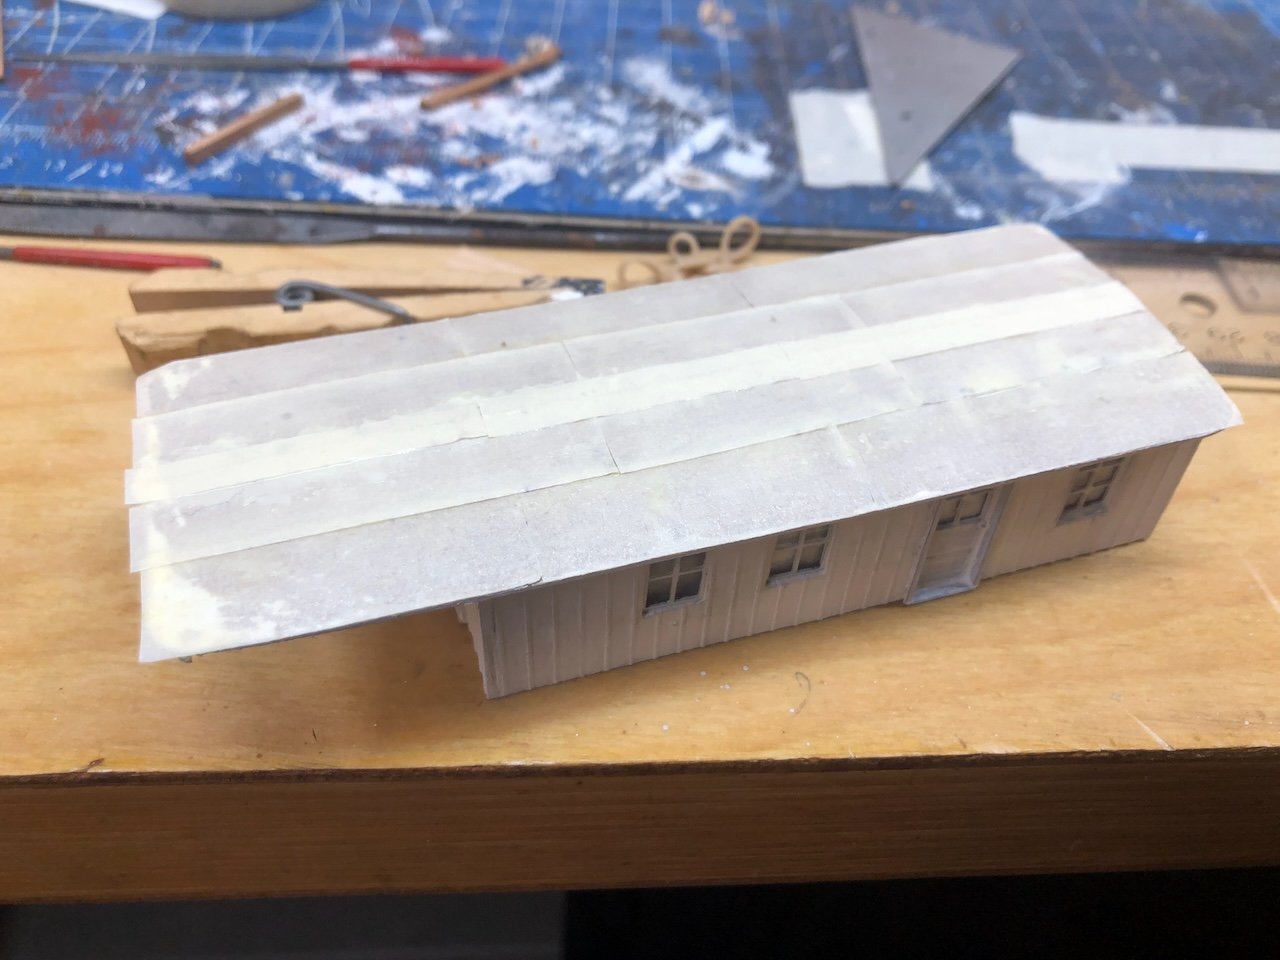
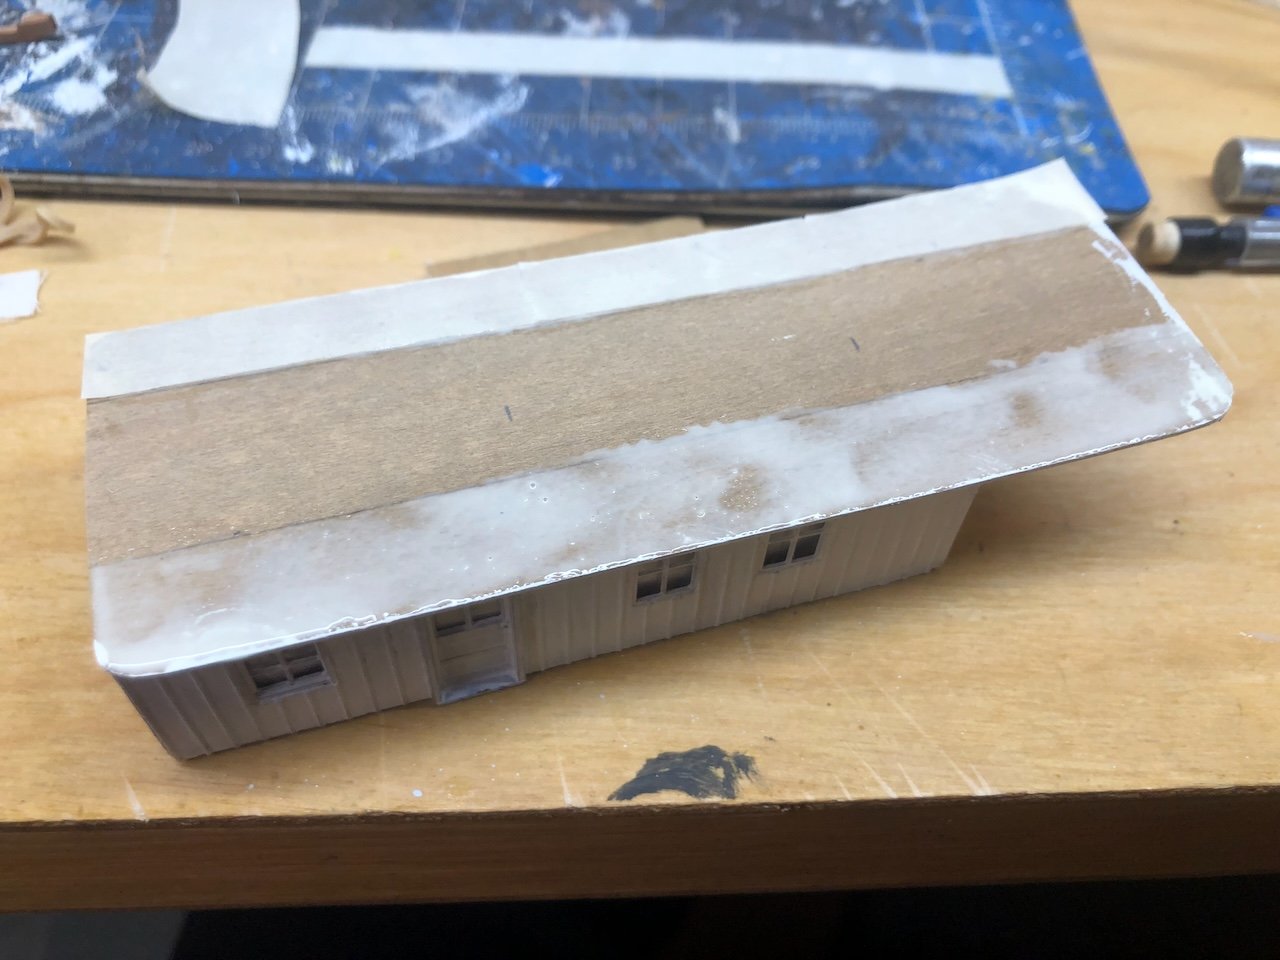
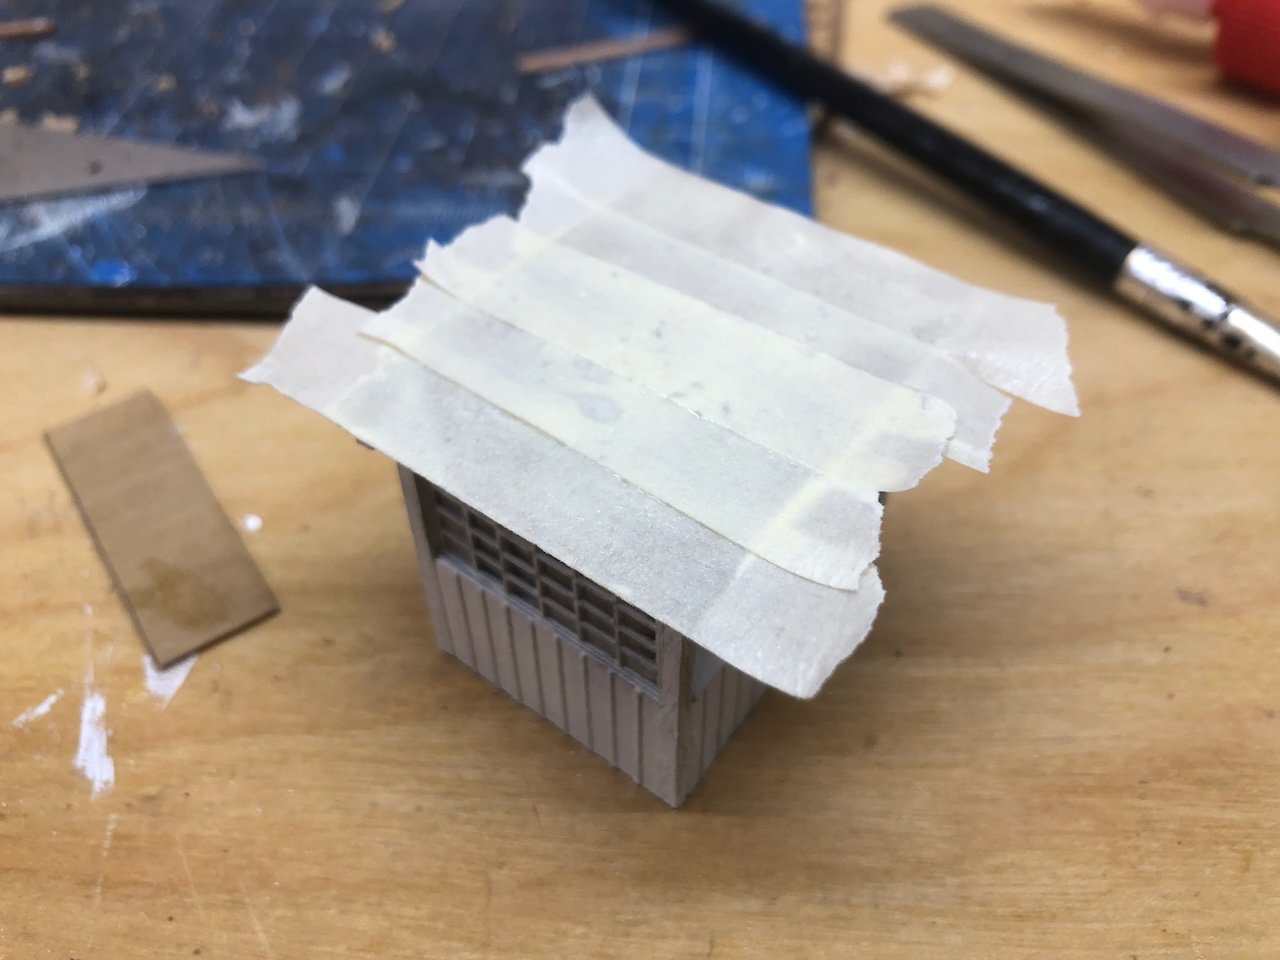
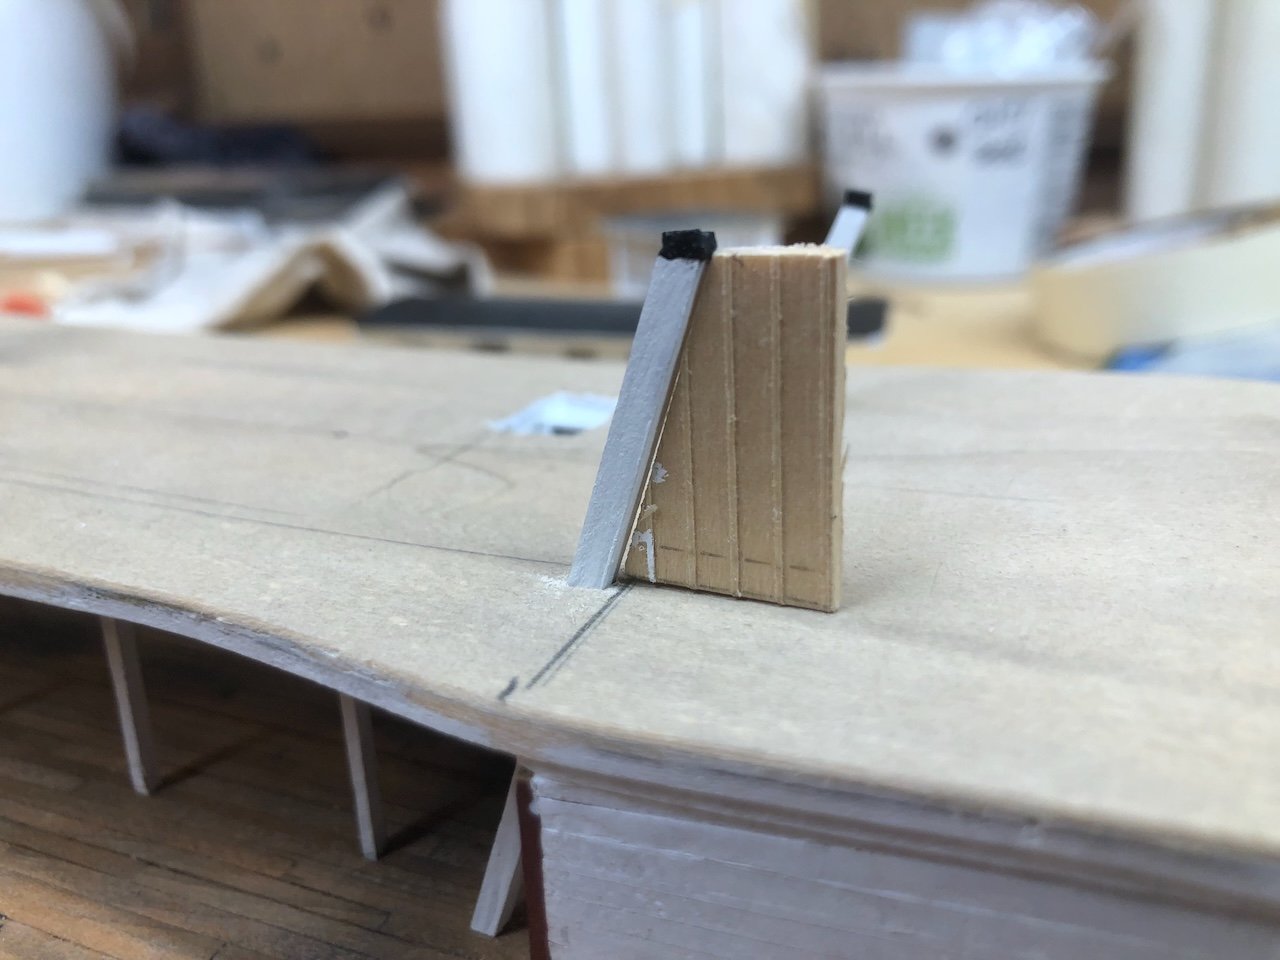
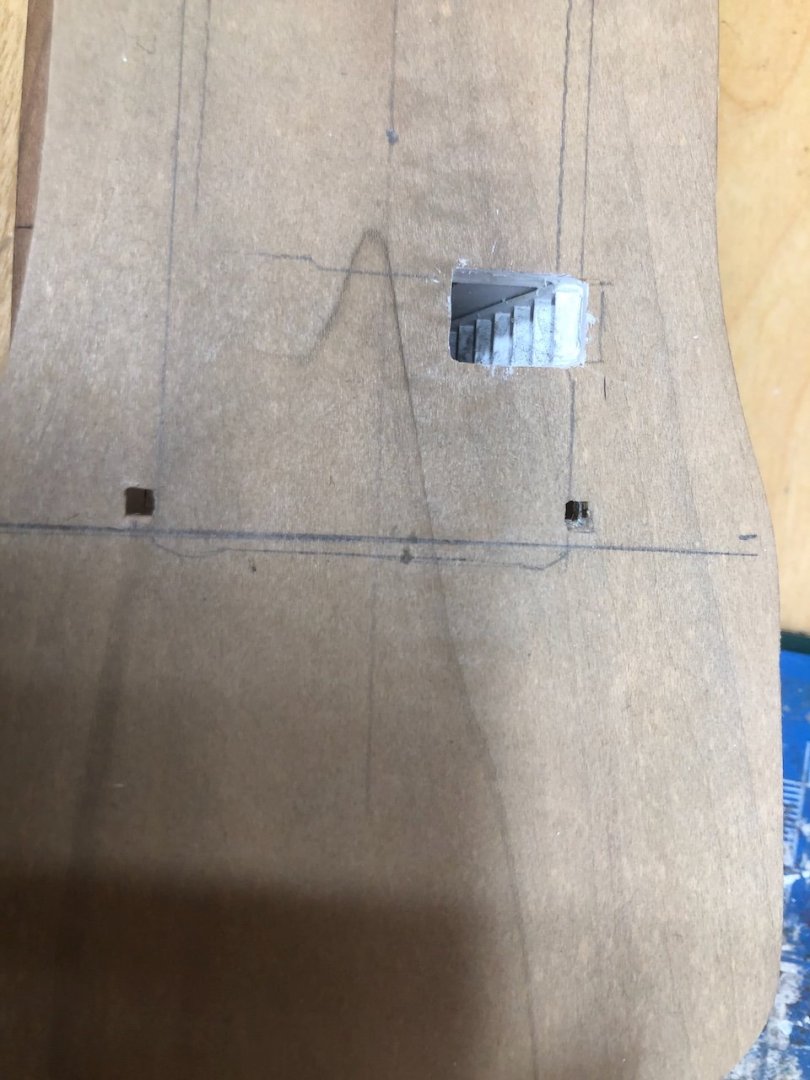
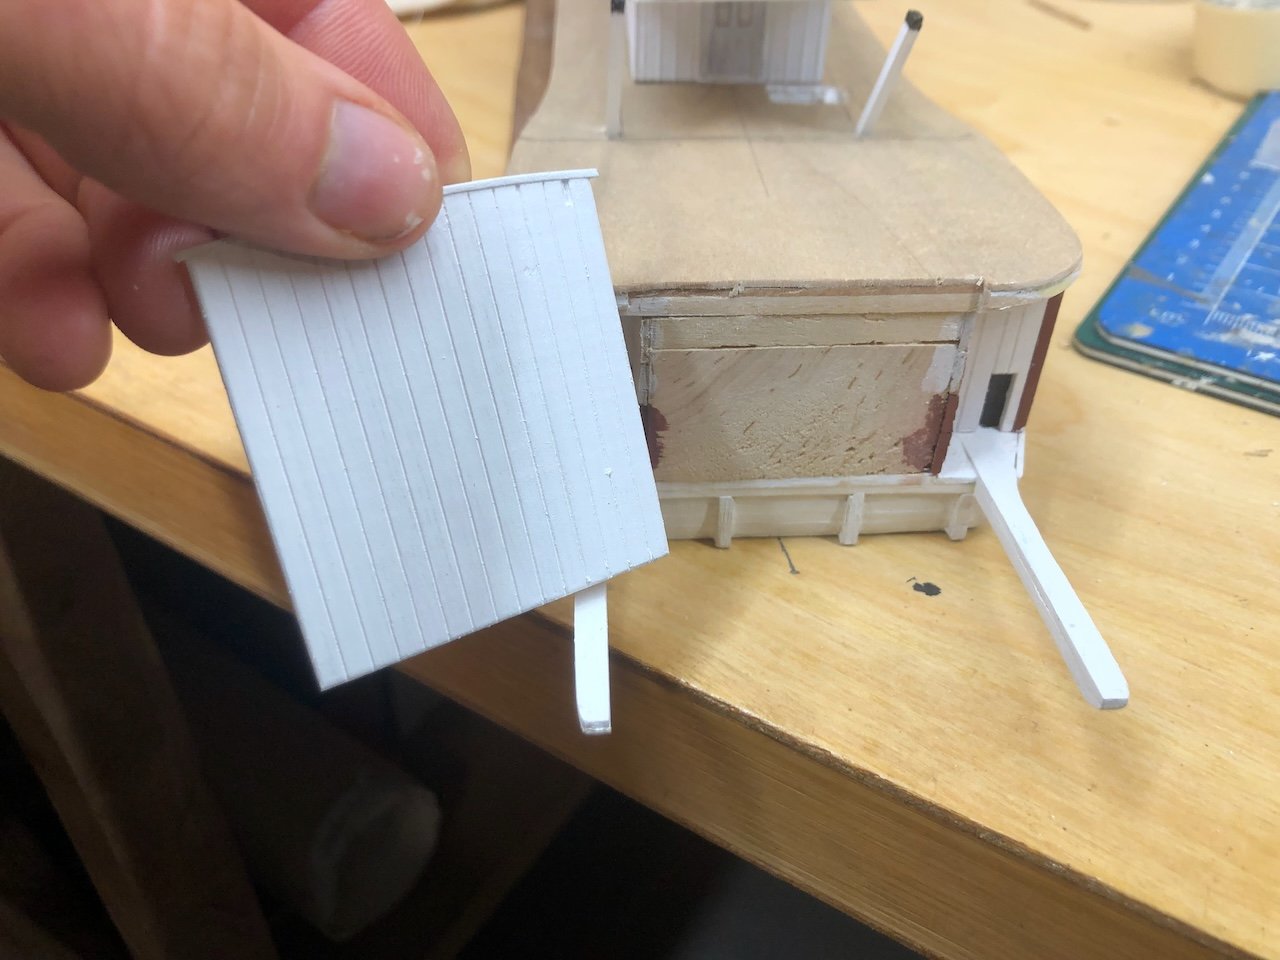
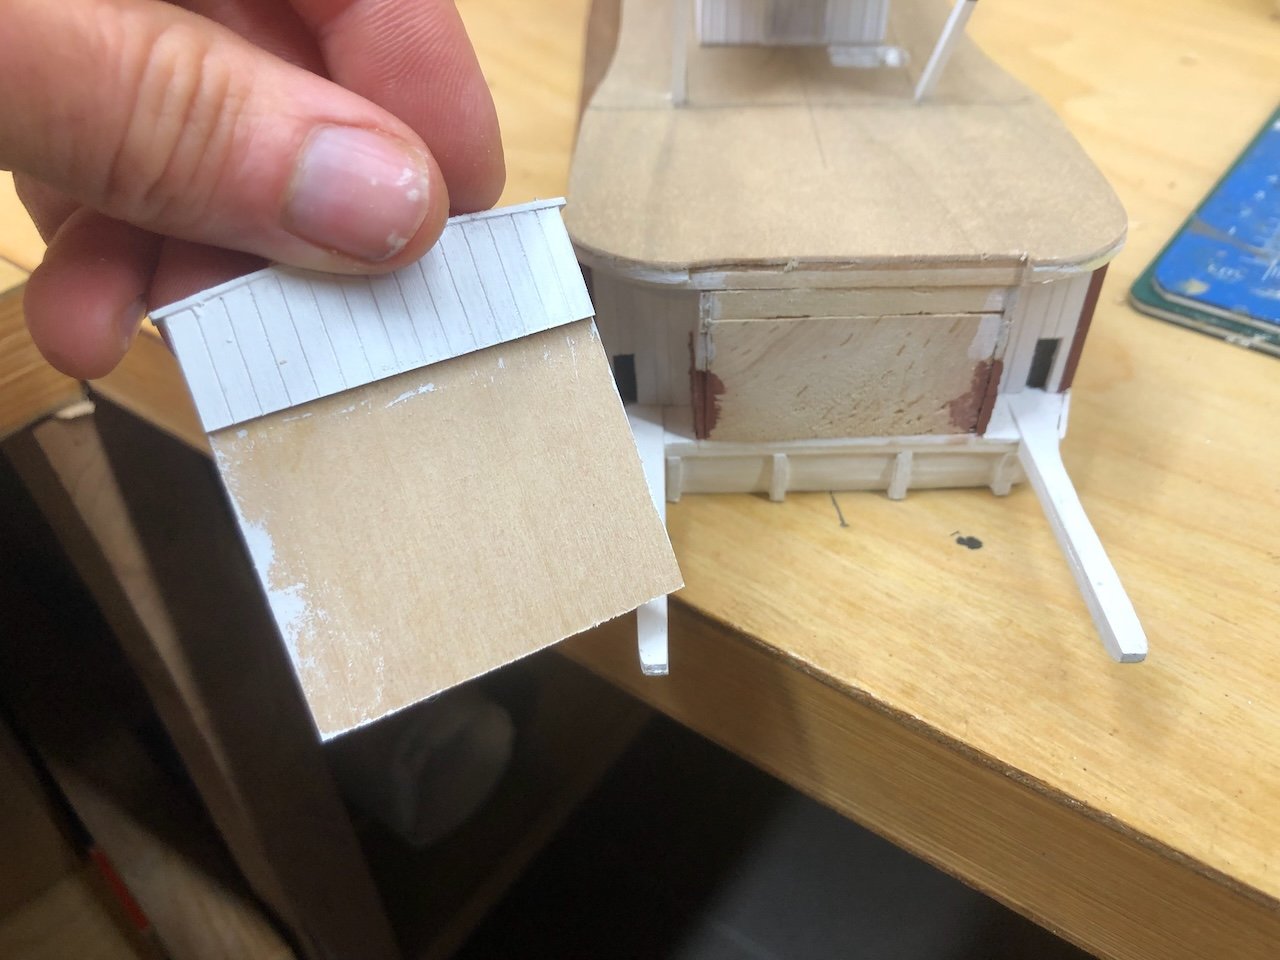
Time for a big dump of progress photos! I completely failed to take photos of building the roof for the pilot house and cabin, but it wasn't complicated. I just cut a thin sheet of wood to the shape I wanted, spread glue on the "rafters", and secured everything with rubber bands. The photo story picks up again as I applied the simulated canvas. I used the same method as I did on Arabia: strips of masking tape held down with a thin layer of wood glue. When that's dried overnight, I trim the edges and paint it. It's held up perfectly on that last model, I really like the texture, and it's more forgiving to work with than tissue paper or silkspan or other options. Plus it's dirt cheap. Here's a sequence showing the progression of slightly overlapping layers on the gently arching cabin roof: And the same for the pilot house: I'll use some pastels to weather this a little, dull it down, and give it some subtle variation in tone. In the meantime I worked on laying out the support posts for the hog chains, which needed to be carefully situated to run just along the outside edge of the cabin roof. So I marked the final location of the cabin and carefully laid out where I wanted the posts to go through the boiler deck. Then I drilled a series of small holes and used a sharp knife tip and then small files to make the final shape: I then made a simple jig for the angle I wanted the posts to sit at, and used this to set them up. Here they've already been cut and painted. The black tips are meant to represent the iron caps that actually held the hog chains onto the wooden posts. And here are a few shots of the fore and aft hog chain posts resting in place (not yet glued); you'll notice I temporarily removed the chimneys to avoid any possible damage as I worked on all this: I also built the assembly that goes over the stern, which I'd left off until now since it rises above the boiler deck and I didn't want to bump or snap it while doing earlier work on the deck. Finally it was time to start attaching things for good. Here I've glued down the cabin and pilot house (big step!): And while that was drying I got started laying down the "canvas" on the boiler deck, working up to the aft part of the cabin. I'll let this all dry completely before proceeding up either side of the cabin. A close look will also show that I built and attached the little L-shaped guard wall around the staircase up to the boiler deck. Once all the boiler deck canvas is laid, I'll (re)cut the hog chain post holes, paint it carefully (trying to avoid the cabin walls), then attach the stern piece. At that point the model will really be coming together though a lot of detail work remains to be done (not to mention the paddle wheel, which I'm dreading). Thanks for reading (or at least skimming) through that big dump of updates!
- 254 replies
-
- 23
-
-
-
Great story and instantly familiar. I'm actually in the process of doing the same thing to my Peerless, but lucky me, there's no Texas so there's nothing to attach on top of the roof. Definitely an easier fix than some roof coverings, love how you turned that into a positive.

