BenF89
-
Posts
316 -
Joined
-
Last visited


-
 Old Collingwood reacted to a post in a topic:
S-38 Schnellboot by ir3 - Italeri - PLASTIC - RADIO
Old Collingwood reacted to a post in a topic:
S-38 Schnellboot by ir3 - Italeri - PLASTIC - RADIO
-
BenF89 reacted to a post in a topic:
HMS Kent F78 by RGL - FINISHED - Trumpeter - 1/350 - PLASTIC - Type 23 Frigate
-
BenF89 reacted to a post in a topic:
SS Edmund Fitzgerald by JKC27 - Scale 1/16" = 1ft - as she appeared before sinking on Lake Superior Nov 1975
-
popeye the sailor reacted to a post in a topic:
SS Edmund Fitzgerald by BenF89 - Iron Shipwrights - 1:350 scale - PLASTIC - with Photo Etch Details
-
popeye the sailor reacted to a post in a topic:
SS Edmund Fitzgerald by BenF89 - Iron Shipwrights - 1:350 scale - PLASTIC - with Photo Etch Details
-
Julie Mo reacted to a post in a topic:
SS Edmund Fitzgerald by BenF89 - Iron Shipwrights - 1:350 scale - PLASTIC - with Photo Etch Details
-
JKC27 reacted to a post in a topic:
SS Edmund Fitzgerald by GrandpaPhil - 1/192 - Card
-
BenF89 reacted to a post in a topic:
SS Benjamin Noble by Roger Pellett - 1:96 - Great Lakes Freighter
-
BenF89 reacted to a post in a topic:
U-552 by yvesvidal - FINISHED - Trumpeter - 1/48 - PLASTIC - Type VIIC U-boat
-
BenF89 reacted to a post in a topic:
La Niña by CRI-CRI - FINISHED - scale 1/48 - ship of Cristoforo Colombo - 1492
-
BenF89 reacted to a post in a topic:
La Niña by CRI-CRI - FINISHED - scale 1/48 - ship of Cristoforo Colombo - 1492
-
BenF89 reacted to a post in a topic:
La Niña by CRI-CRI - FINISHED - scale 1/48 - ship of Cristoforo Colombo - 1492
-
BenF89 reacted to a post in a topic:
La Niña by CRI-CRI - FINISHED - scale 1/48 - ship of Cristoforo Colombo - 1492
-
BenF89 reacted to a post in a topic:
La Niña by CRI-CRI - FINISHED - scale 1/48 - ship of Cristoforo Colombo - 1492
-
BenF89 reacted to a post in a topic:
La Niña by CRI-CRI - FINISHED - scale 1/48 - ship of Cristoforo Colombo - 1492
-
gieb8688 reacted to a post in a topic:
SS Edmund Fitzgerald by BenF89 - Iron Shipwrights - 1:350 scale - PLASTIC - with Photo Etch Details
-
gieb8688 reacted to a post in a topic:
SS Edmund Fitzgerald by BenF89 - Iron Shipwrights - 1:350 scale - PLASTIC - with Photo Etch Details
-
Nirvana reacted to a post in a topic:
Missouri by semorebutts - Trumpeter - 1/200 - PLASTIC - Pontos detail up & advanced add on
-
src reacted to a post in a topic:
SS Edmund Fitzgerald by BenF89 - Iron Shipwrights - 1:350 scale - PLASTIC - with Photo Etch Details
-
Canute reacted to a post in a topic:
SS Edmund Fitzgerald by BenF89 - Iron Shipwrights - 1:350 scale - PLASTIC - with Photo Etch Details
-
 Hi Wadayadoin - I'm right there with you. Although, I was (am) less angry and more disappointed. But, yes, for many of the same reasons she's sat on the shelf, too. Anytime I had a little motivation to get moving, the poor quality of the hull and not really knowing what to do to fix it (or spend hours researching how to fix something that should have come correctly in the first place) kept me from making any headway. So, like you, pretty bummed that I'm out a chunk of change. But, that was five or six (or seven ?!?!) years ago now, so water under the bridge between me and the manufacturer. Not ever going to buy anything else from them, but no point trying to get a refund or anything. Again, it's like you read my mind. I was going to try and fix the hull, and then use all the documentation I have to scratch build the deckhouses and such. But, at that point, I made up my mind that trying to scratch build in 1:350 would be a pain. So I resolved to do what any reasonable and sane person would do - go bigger! My current scheme is to use the information I have, including a copy of the original shipyard General Arrangement drawing in 1/16 ft = 1 ft scale (1:192) and scratch build the whole boat in 1:192. I'll use off-the-shelf 1:192 or 1:200 (probably can't tell the difference unless you squint) parts for certain things, but I'll build the hull and deckhouses and everything. Given the rate I complete models, and that I can't start it until I finish my daughter's boat, I'll probably finish it in 50-60 years hahahaha! So, yes, dead thread here. But be on the look out sometime in the next half-century for my scratch-build Fitz project!
- 40 replies
-
- 3
-
-
- edmund fitzgerald
- iron shipwrights
- (and 1 more)
-
Sorry I never replied to this! I must have missed the notification. So, no, never completed this project. I got frustrated for many of the same reasons Wadayadoin above mentions. Well, that, and I (still) haven't finished my doll boat that had a "deadline" in 2016 😳😲 (Things just kept piling up, like having ANOTHER two munchkins since I started this log, the most recent just a couple months ago … four kids take up a LOT of time, man hahaha) As for the thesis, I wish I had an electronic copy! But, alas, both my school laptop that I used AND the hard drive I backed everything up to fried. So, the only thing I can recommend for getting a copy of the thesis is to contact the Livingston Library at Webb Institute, and ask the library director what the cost for a copy is. That said, there IS a public domain technical paper that my work was incorporated into. It was published via the Society of Naval Architects and Marine Engineers in 2012, and I DO have an electronic copy of that. I was a co-author on that paper, and while it used much of what I did for my thesis, my partner added a lot of his own work as well (some of which conflicted with the conclusions I had, but, hey, I guess that's what collaboration on a shipwreck with no eyewitnesses and hard-to-pin-down failure modes looks like). The following key-word string should help you find a copy in the public domain: forensic investigation of the sinking of the ss edmund fitzgerald
- 40 replies
-
- 3
-
-
- edmund fitzgerald
- iron shipwrights
- (and 1 more)
-
I am extremely excited to see this build! I’ve been scheming of doing my own 1:192 Fitz at some point. I have a set of general arrangements at that scale- a copy of the original builder drawing from 1958. I also have a midship section detail drawing. I had several more, but got rid of them cleaning out (after taking some pictures). I got the drawings as part of the research work I did on my senior thesis for my Naval Architecture degree, which reassessed one of the sinking theories using modern naval architecture tools. So, naturally, the ship and story are very dear to me. Can’t wait to follow along!
-
Jo- the deck looks really good with the finish on it. The blood, sweat, and tears have produced an excellent result!
-
Wow, Patrick, I blink and you’re well along on another boat! I can tell you’ve really dialed in the method of how to build the hull and decks- I remember when you first attempted the lift-out decks rather than cutaway the hull! The progress is excellent so far, and I agree with your rule of thumb - if the hull looks good, it’s probably good. That’s the nice thing about ‘traditional’ hulls with nice fair lines (as opposed to floating spacecraft )
-
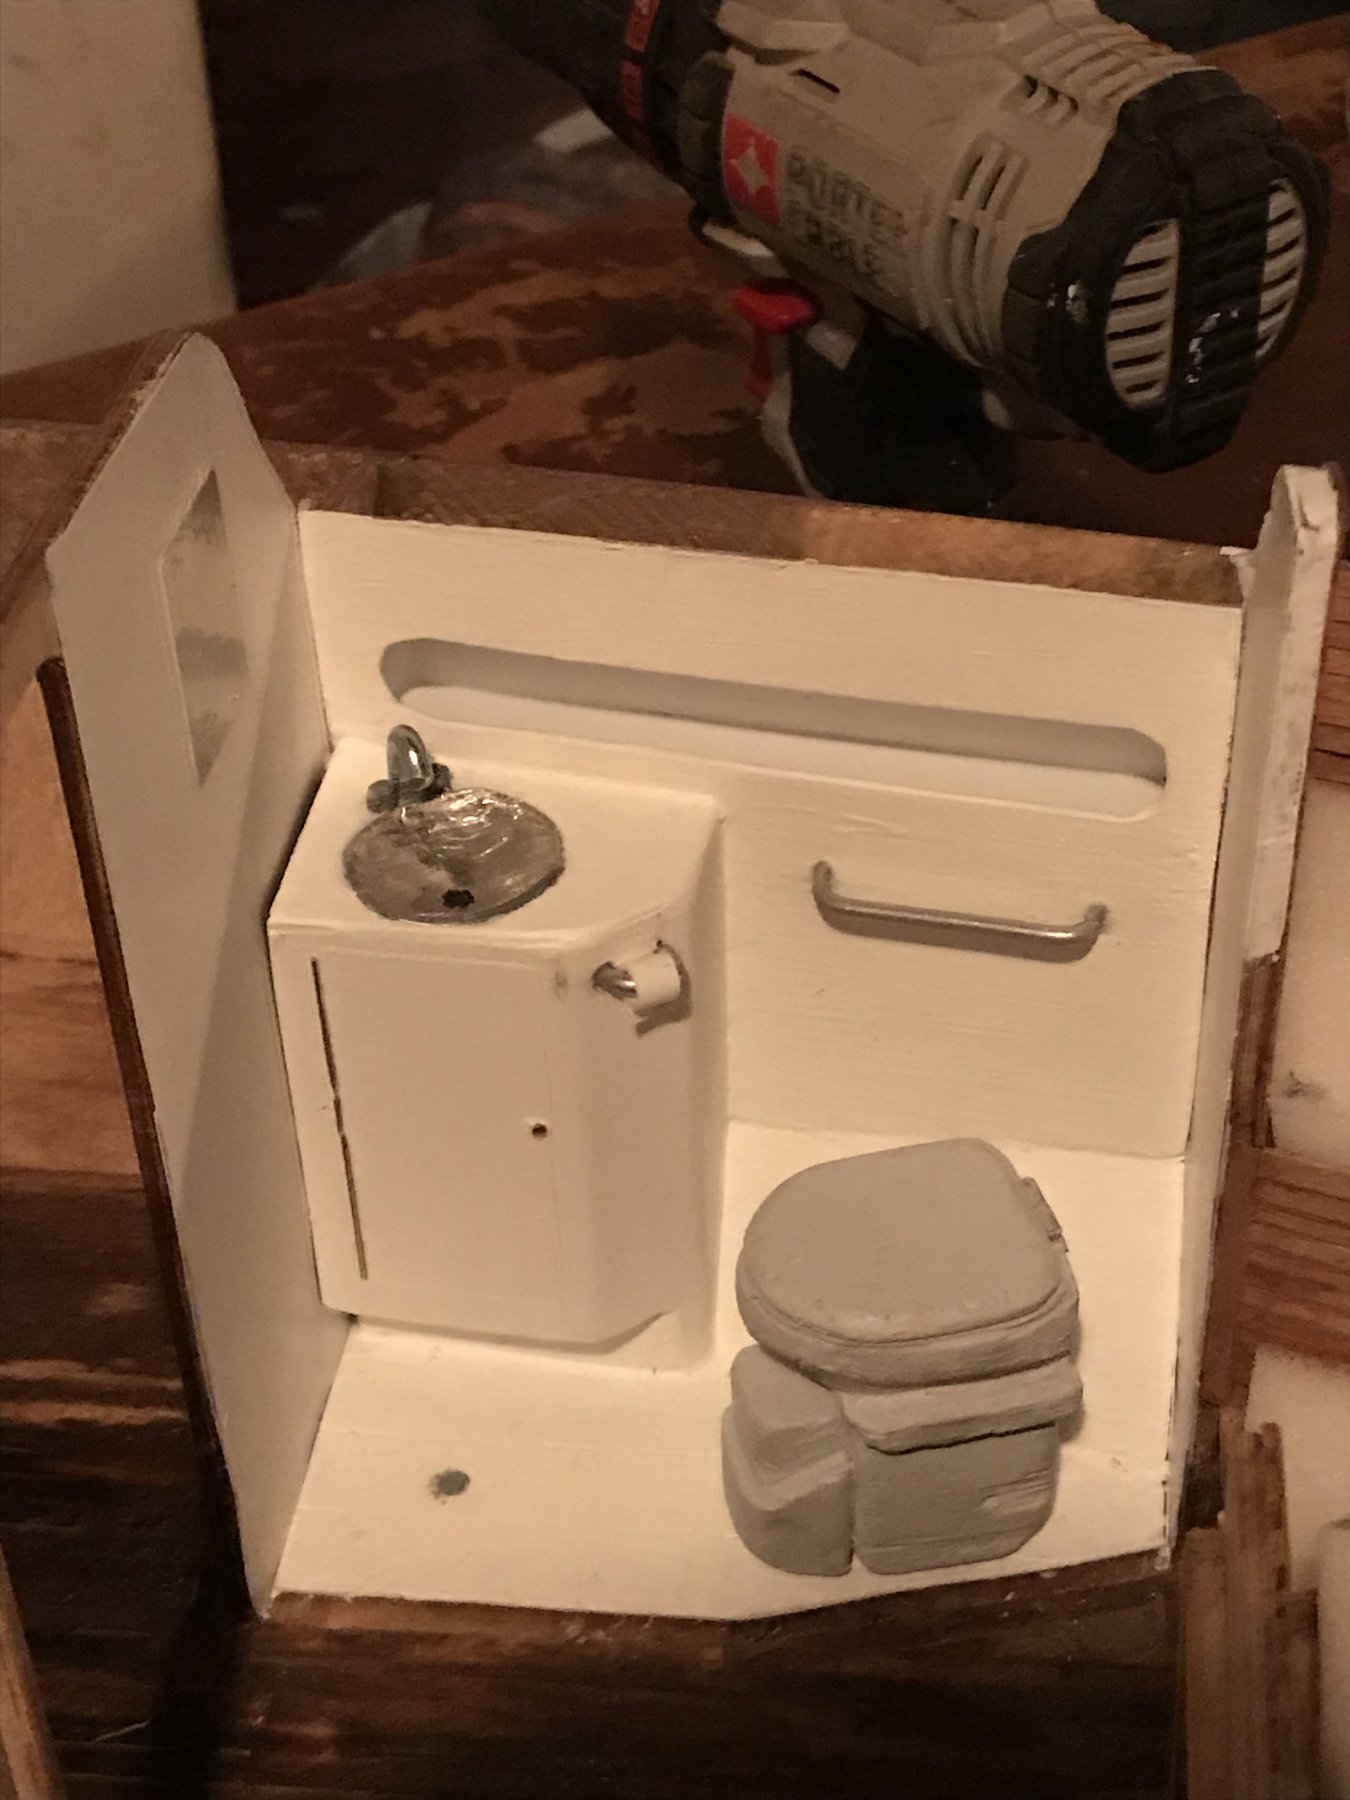
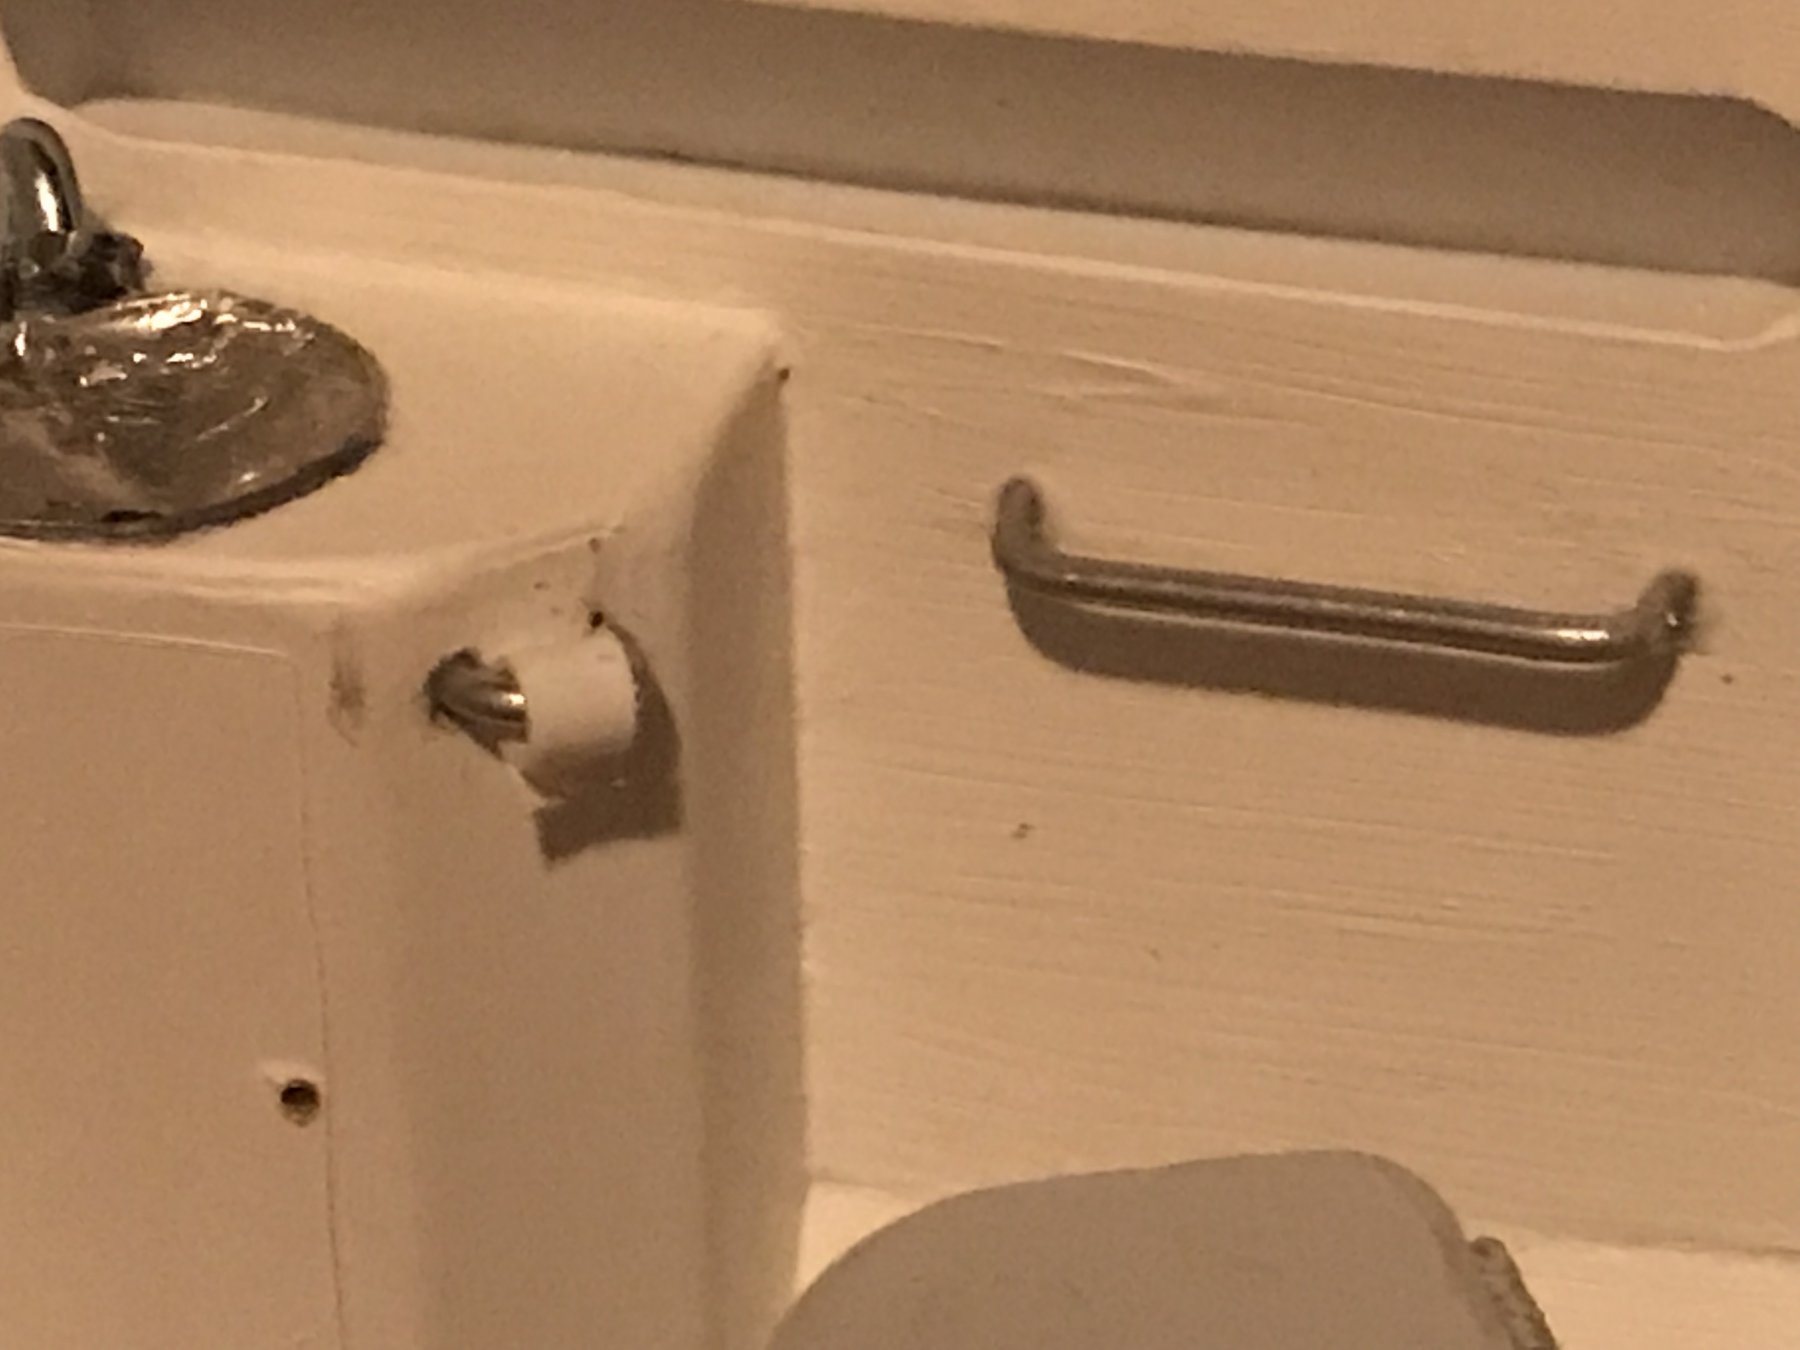
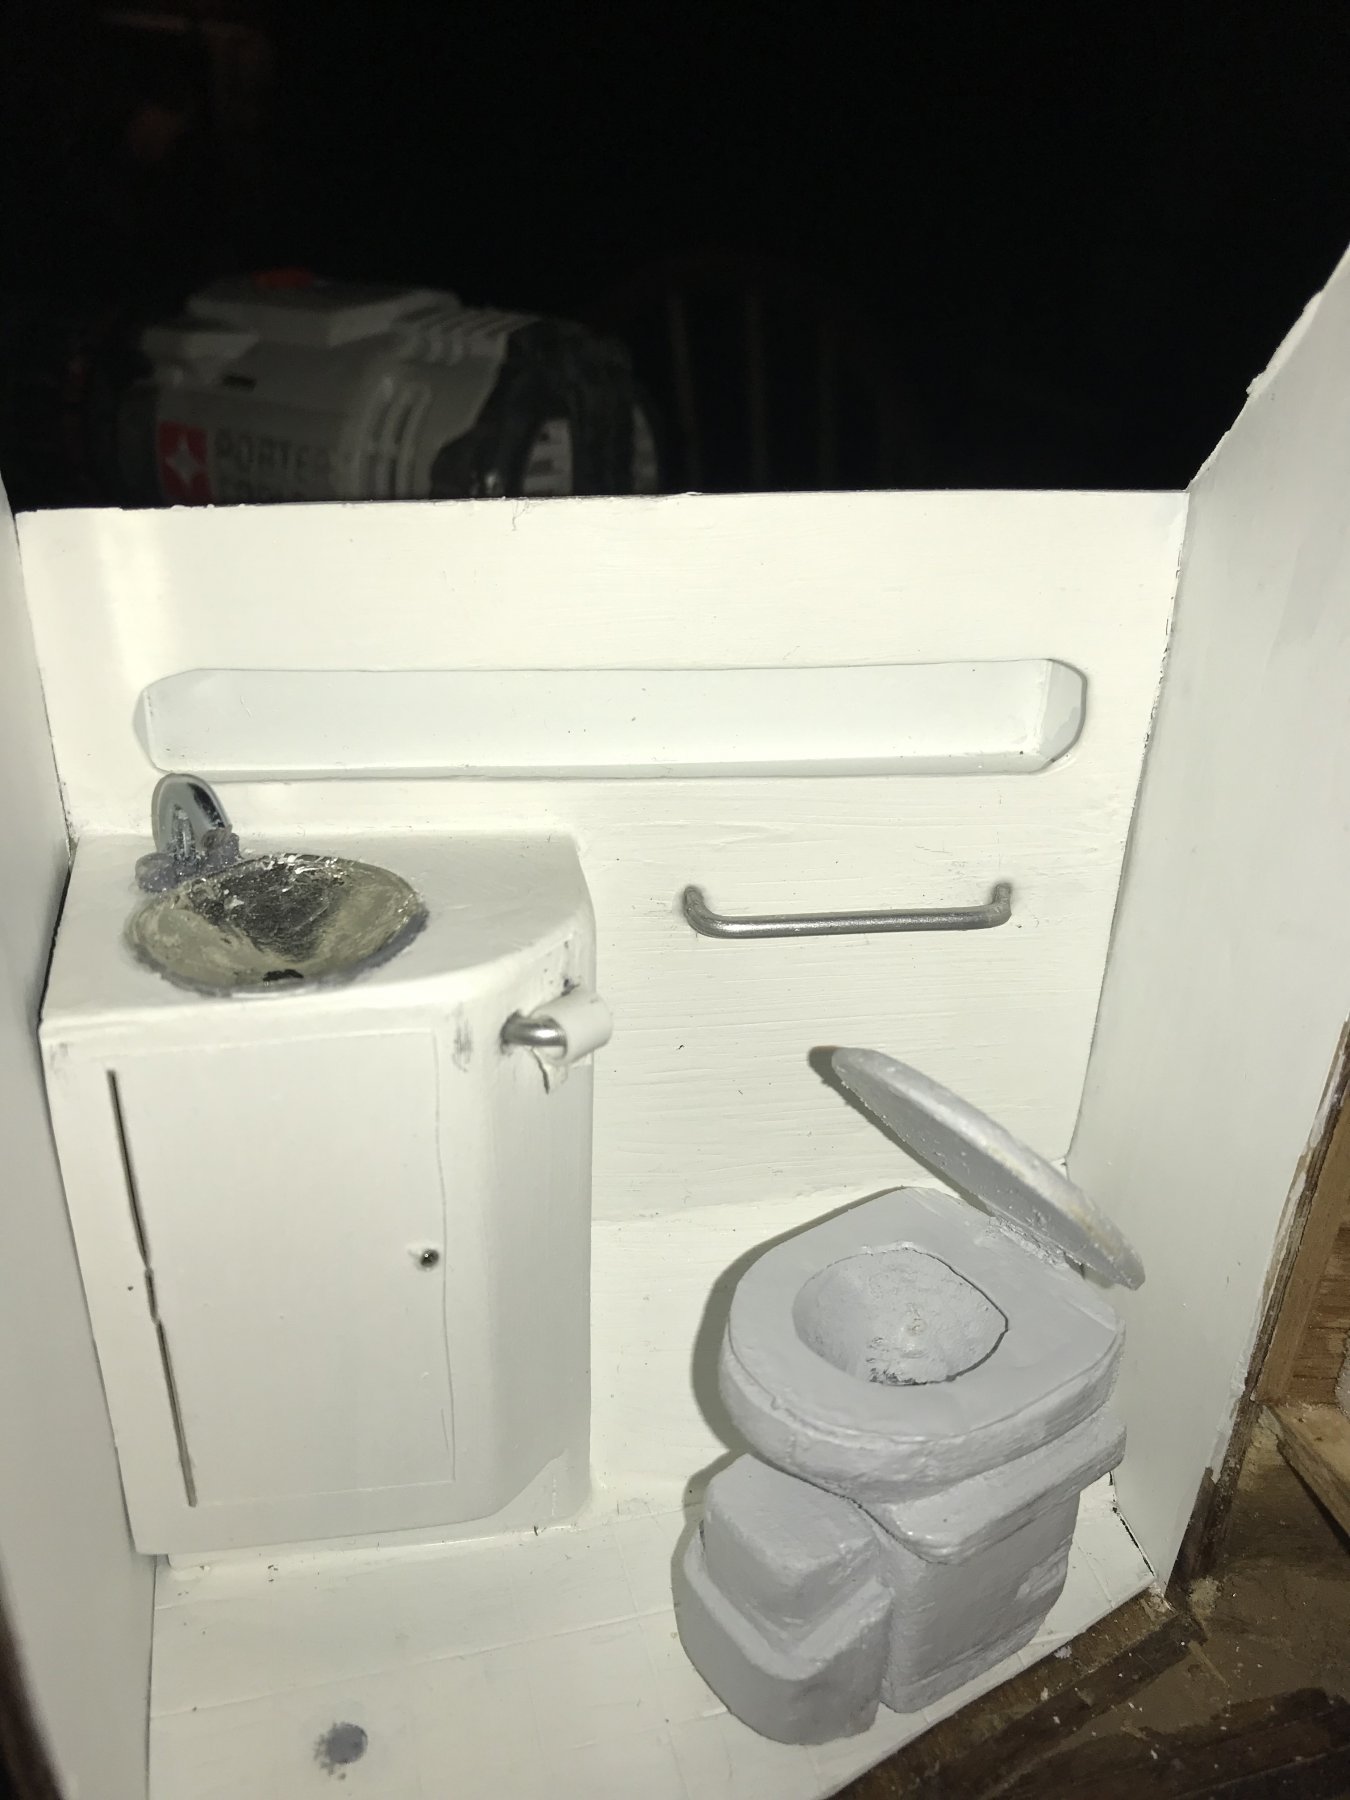
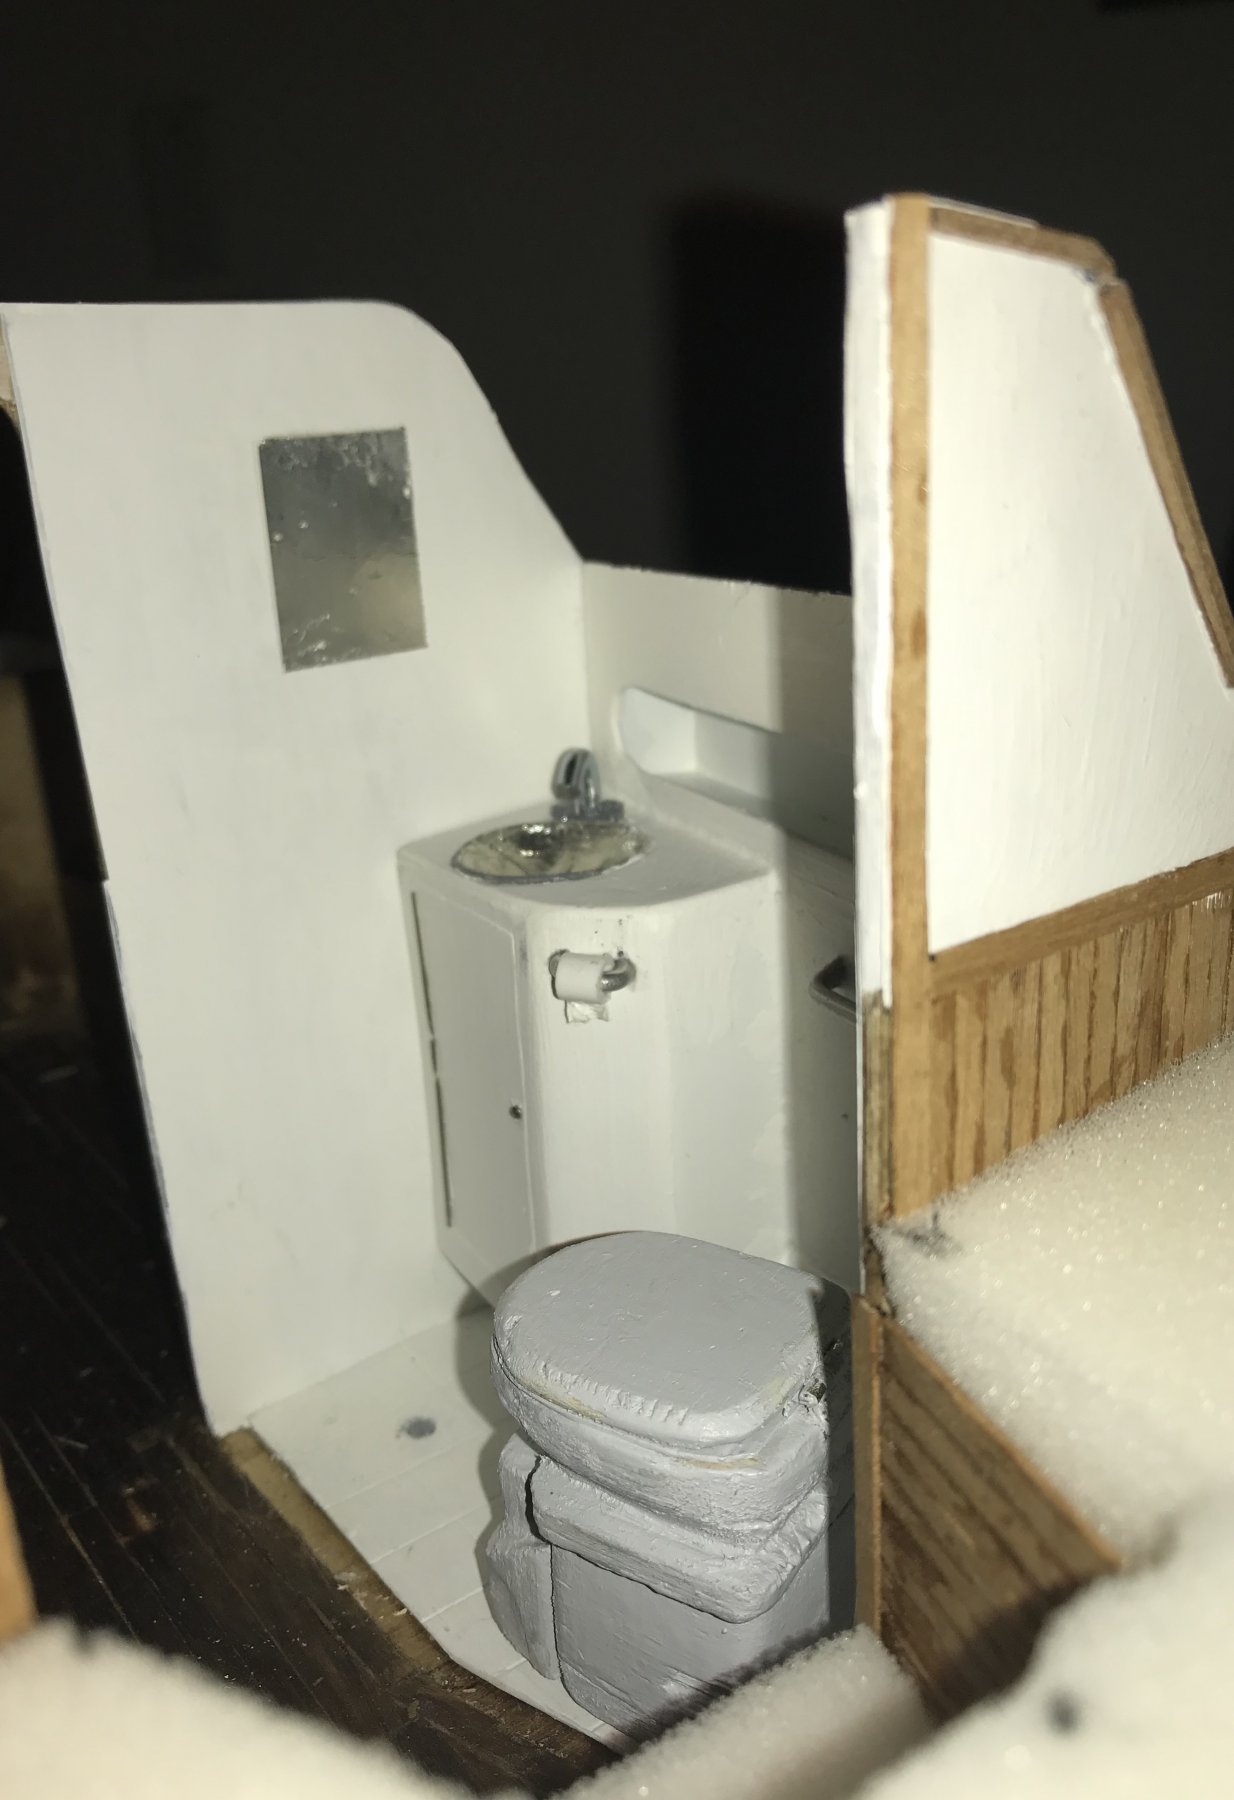
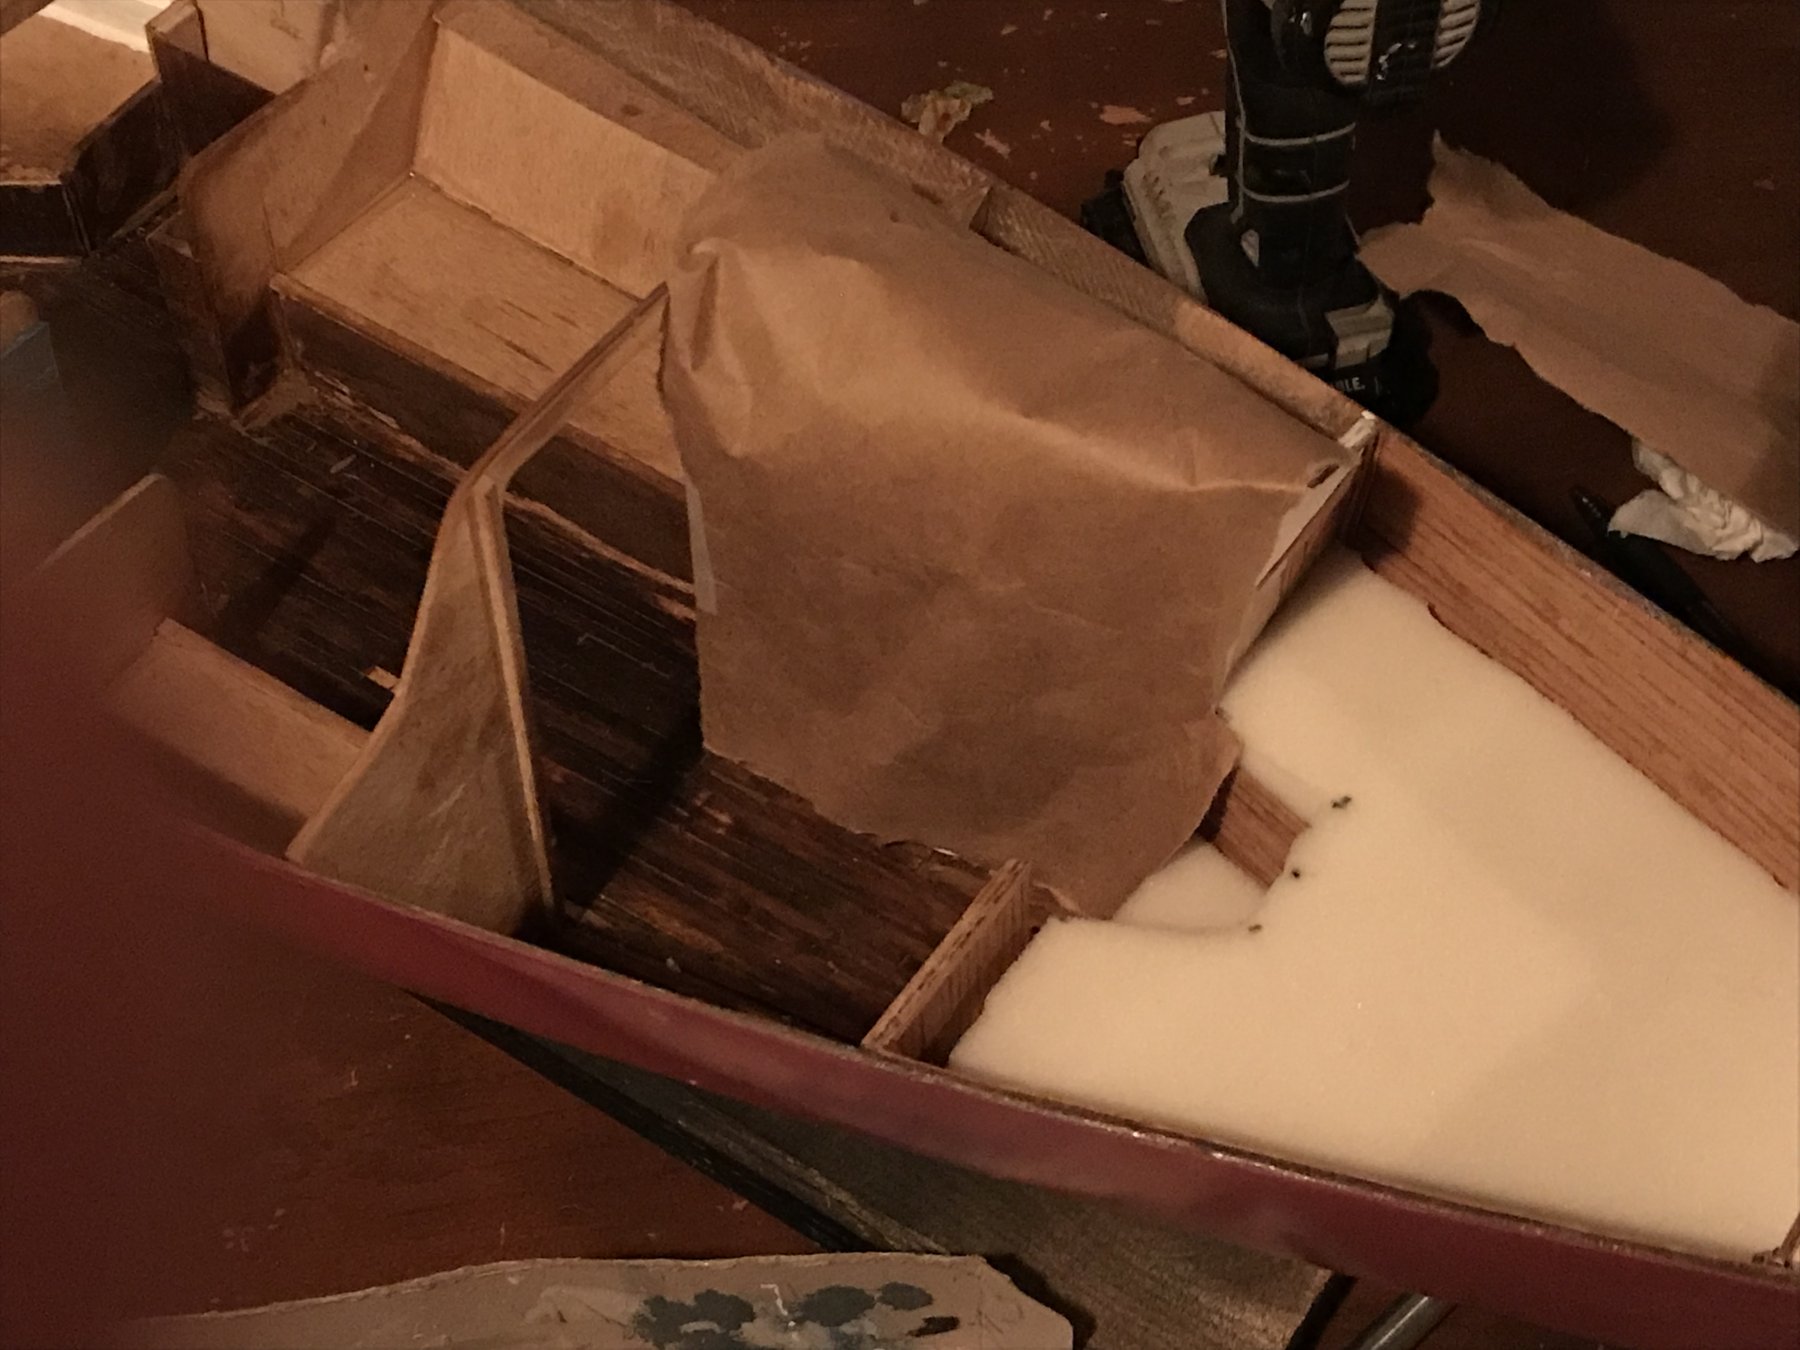
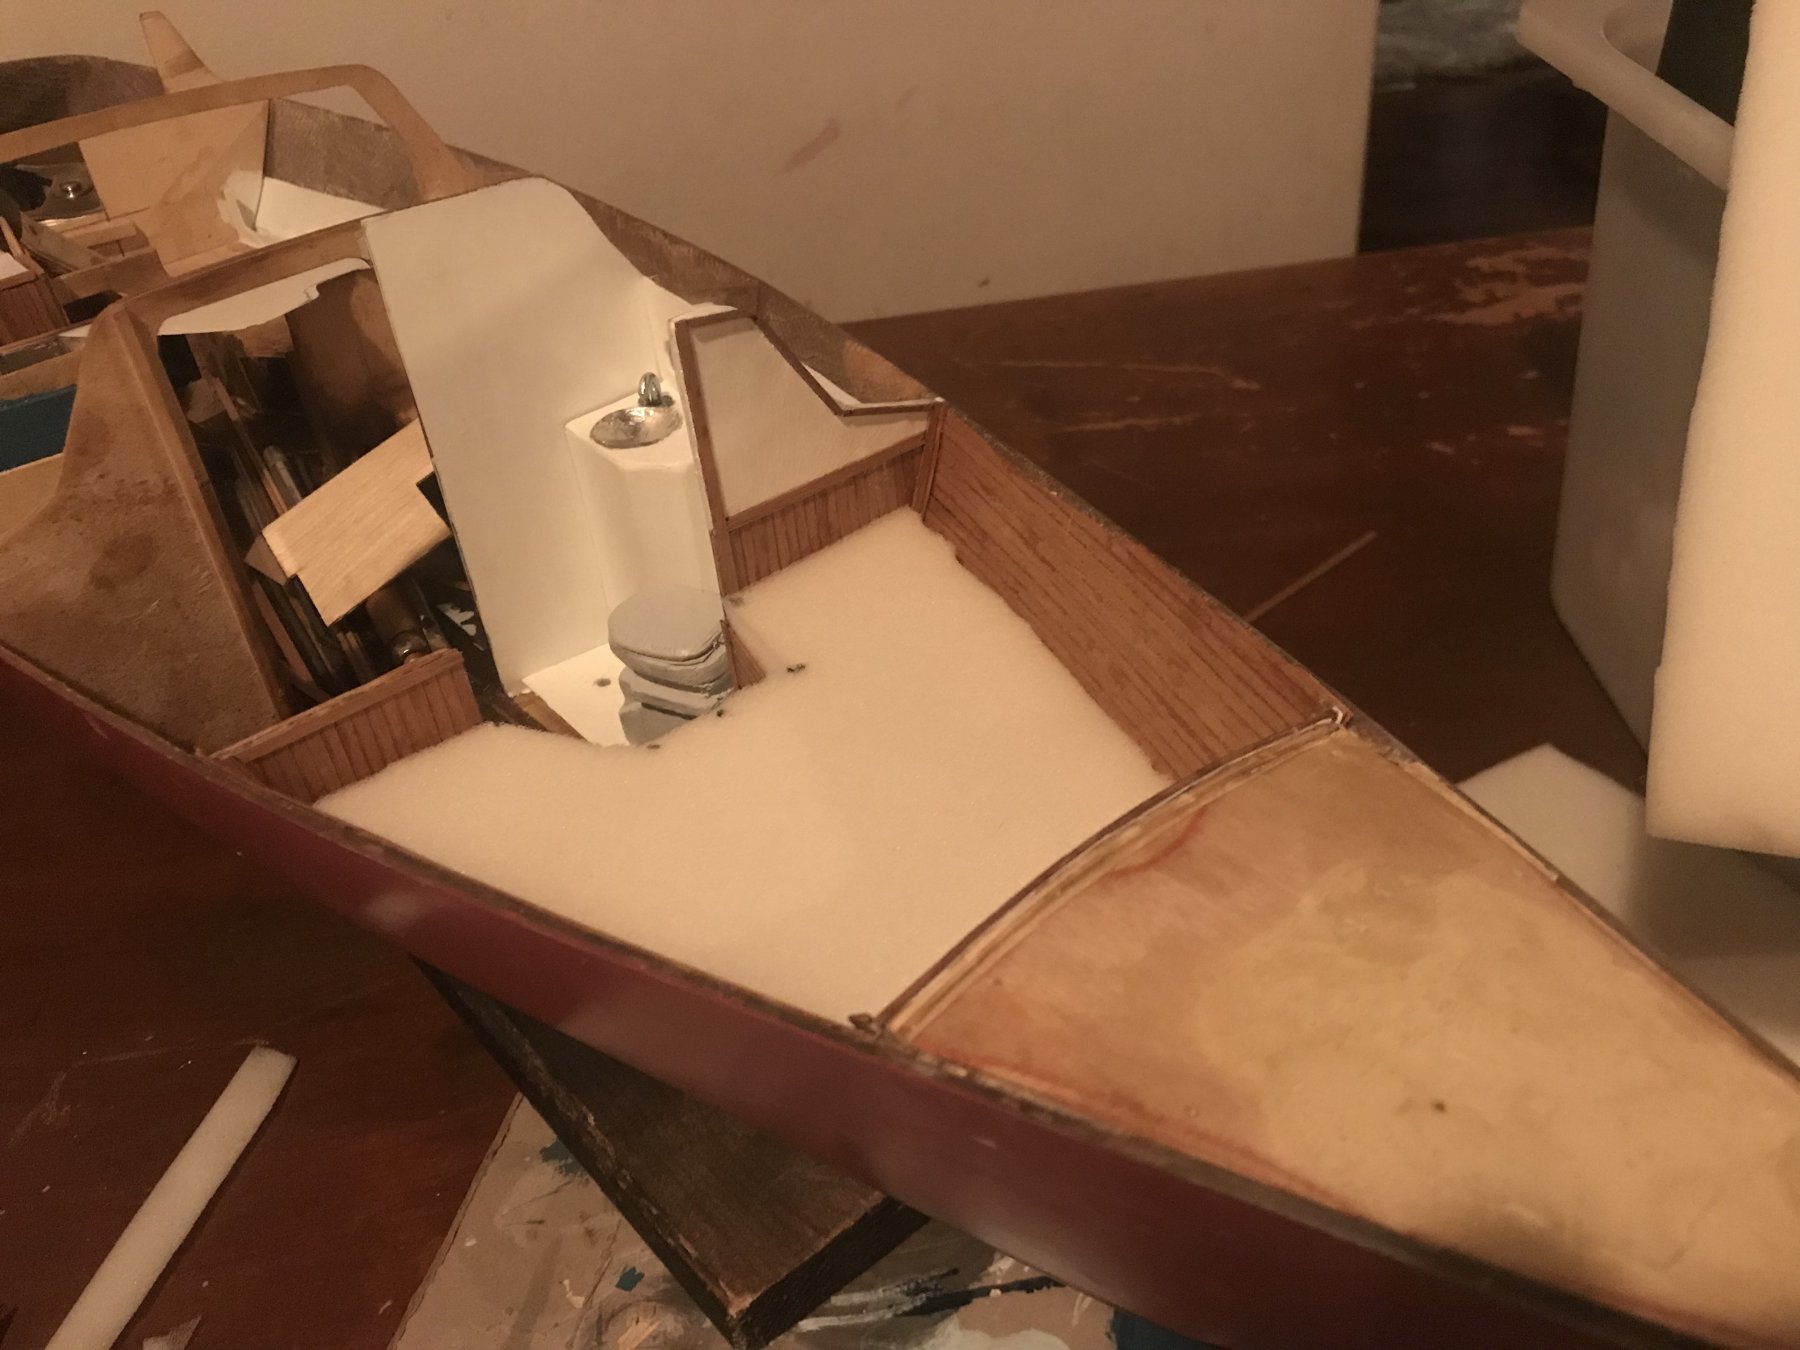
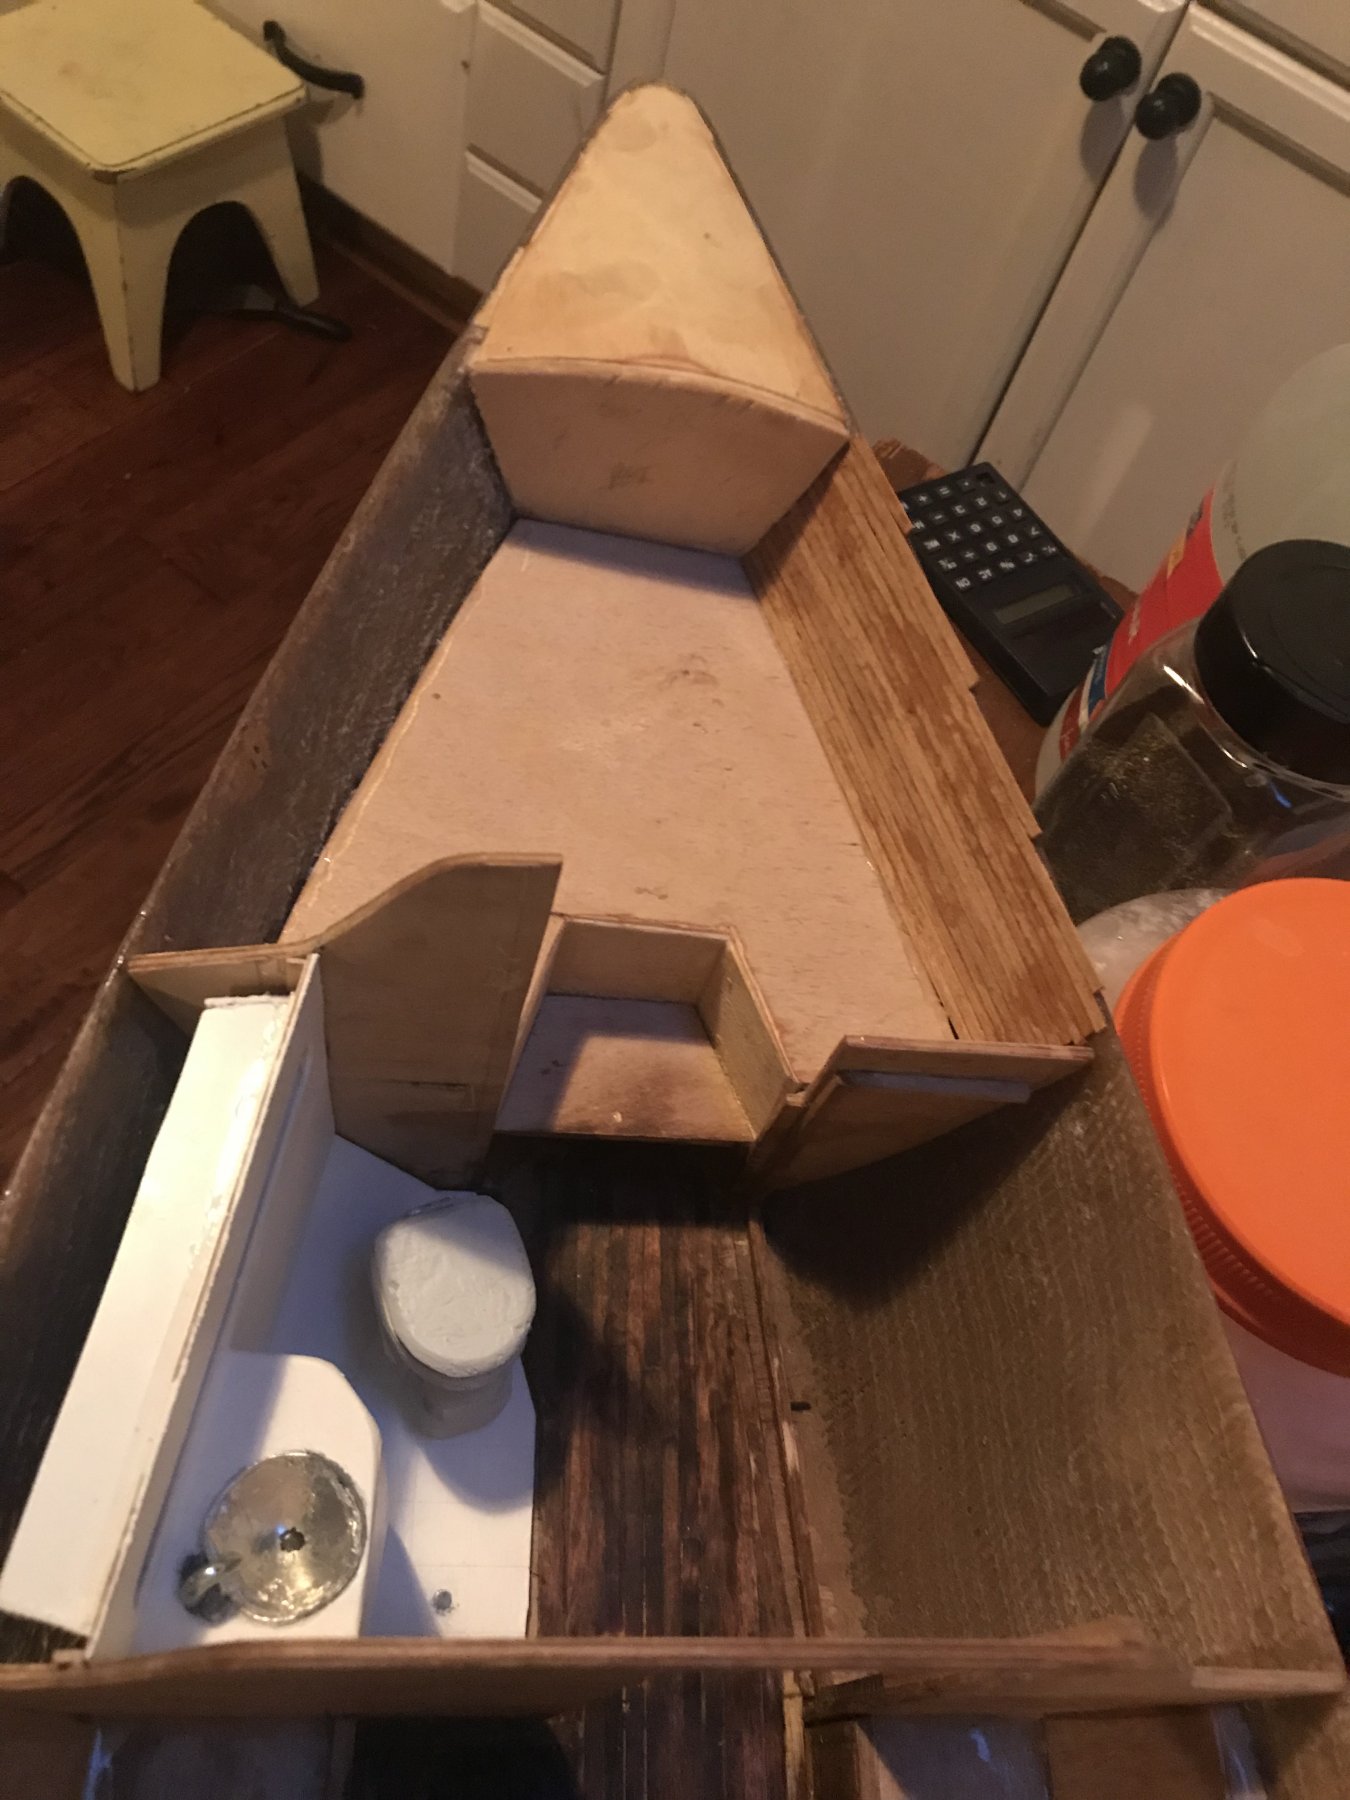
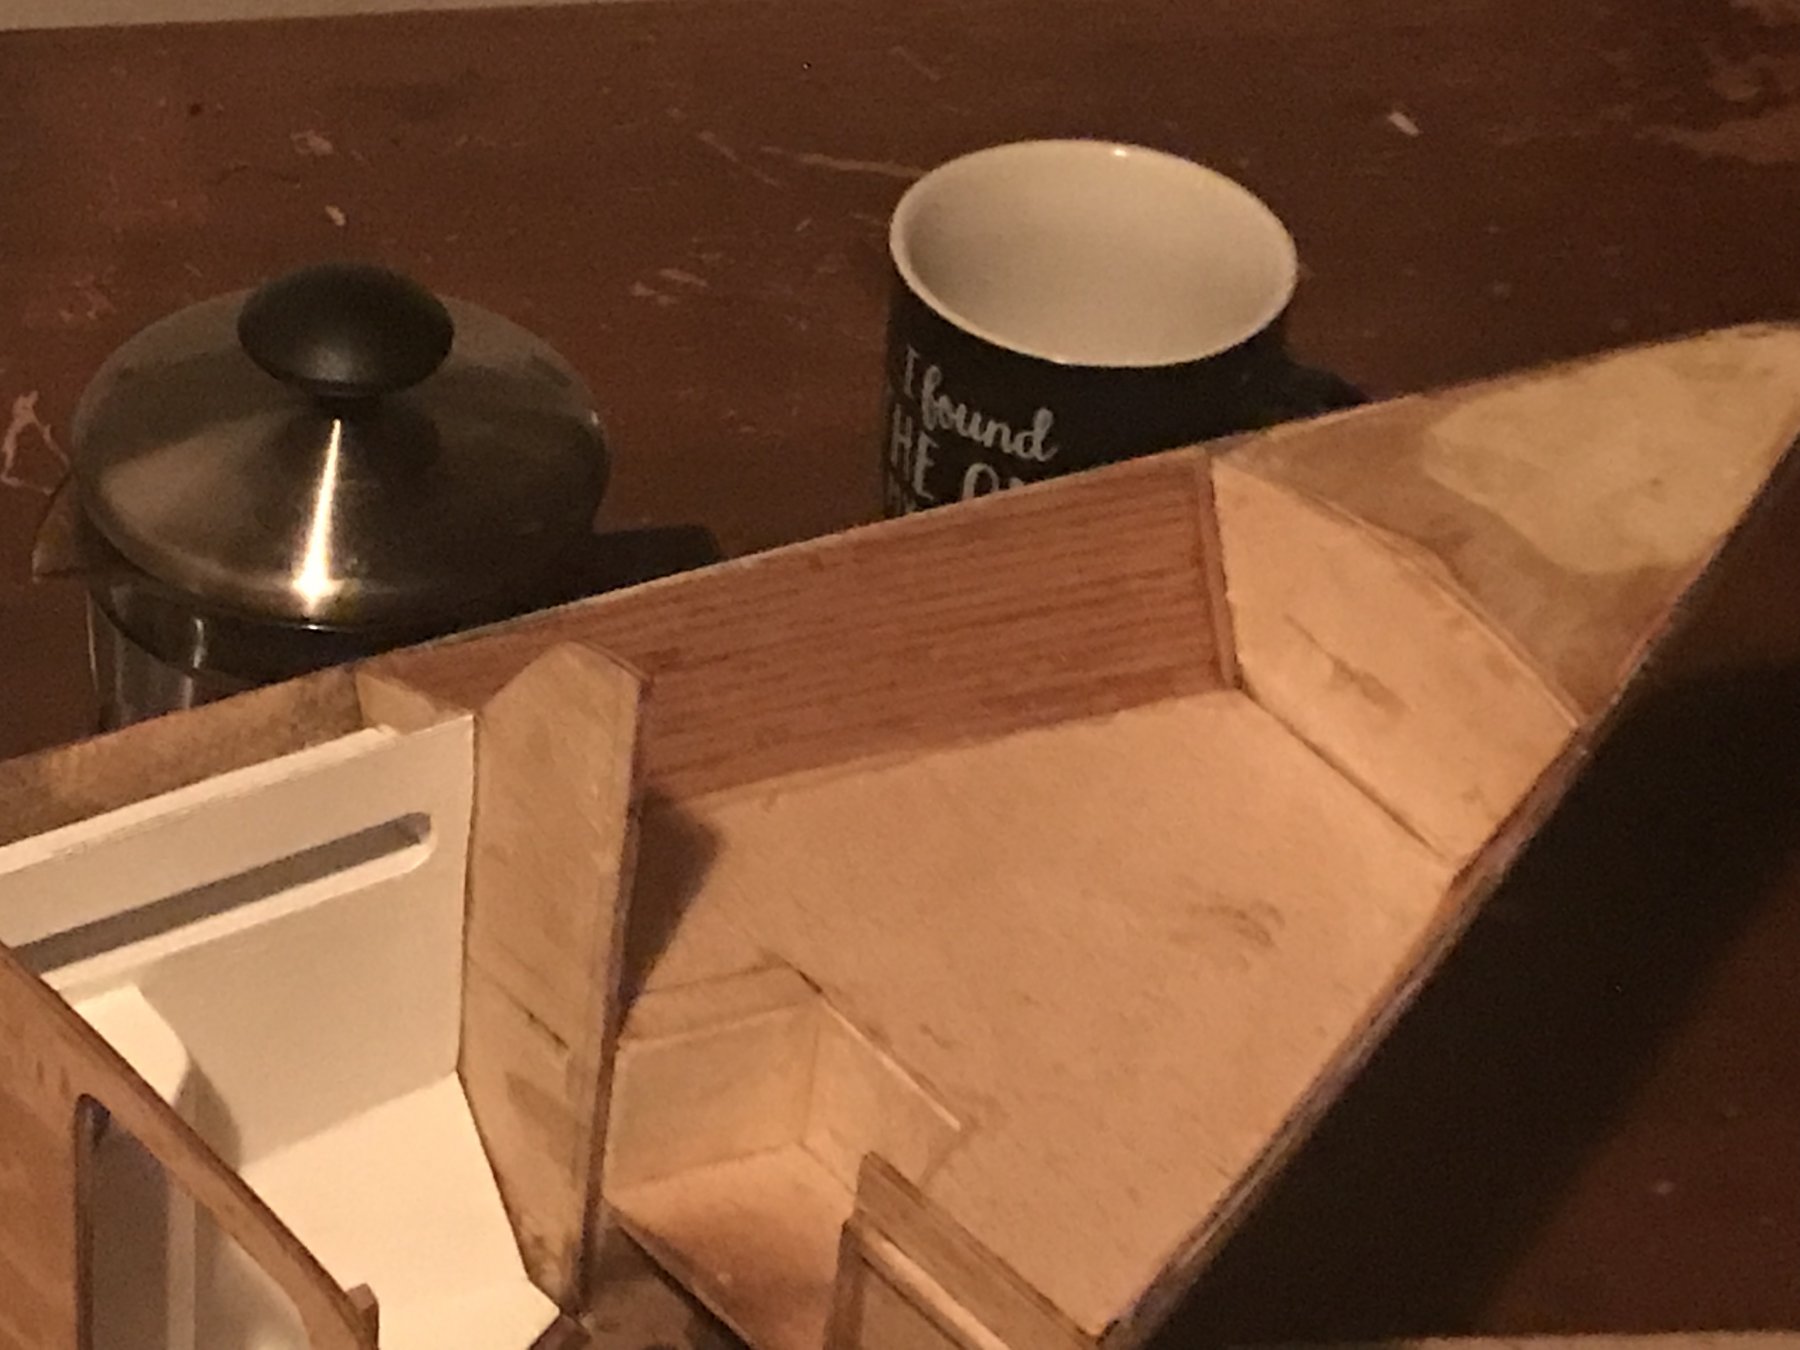
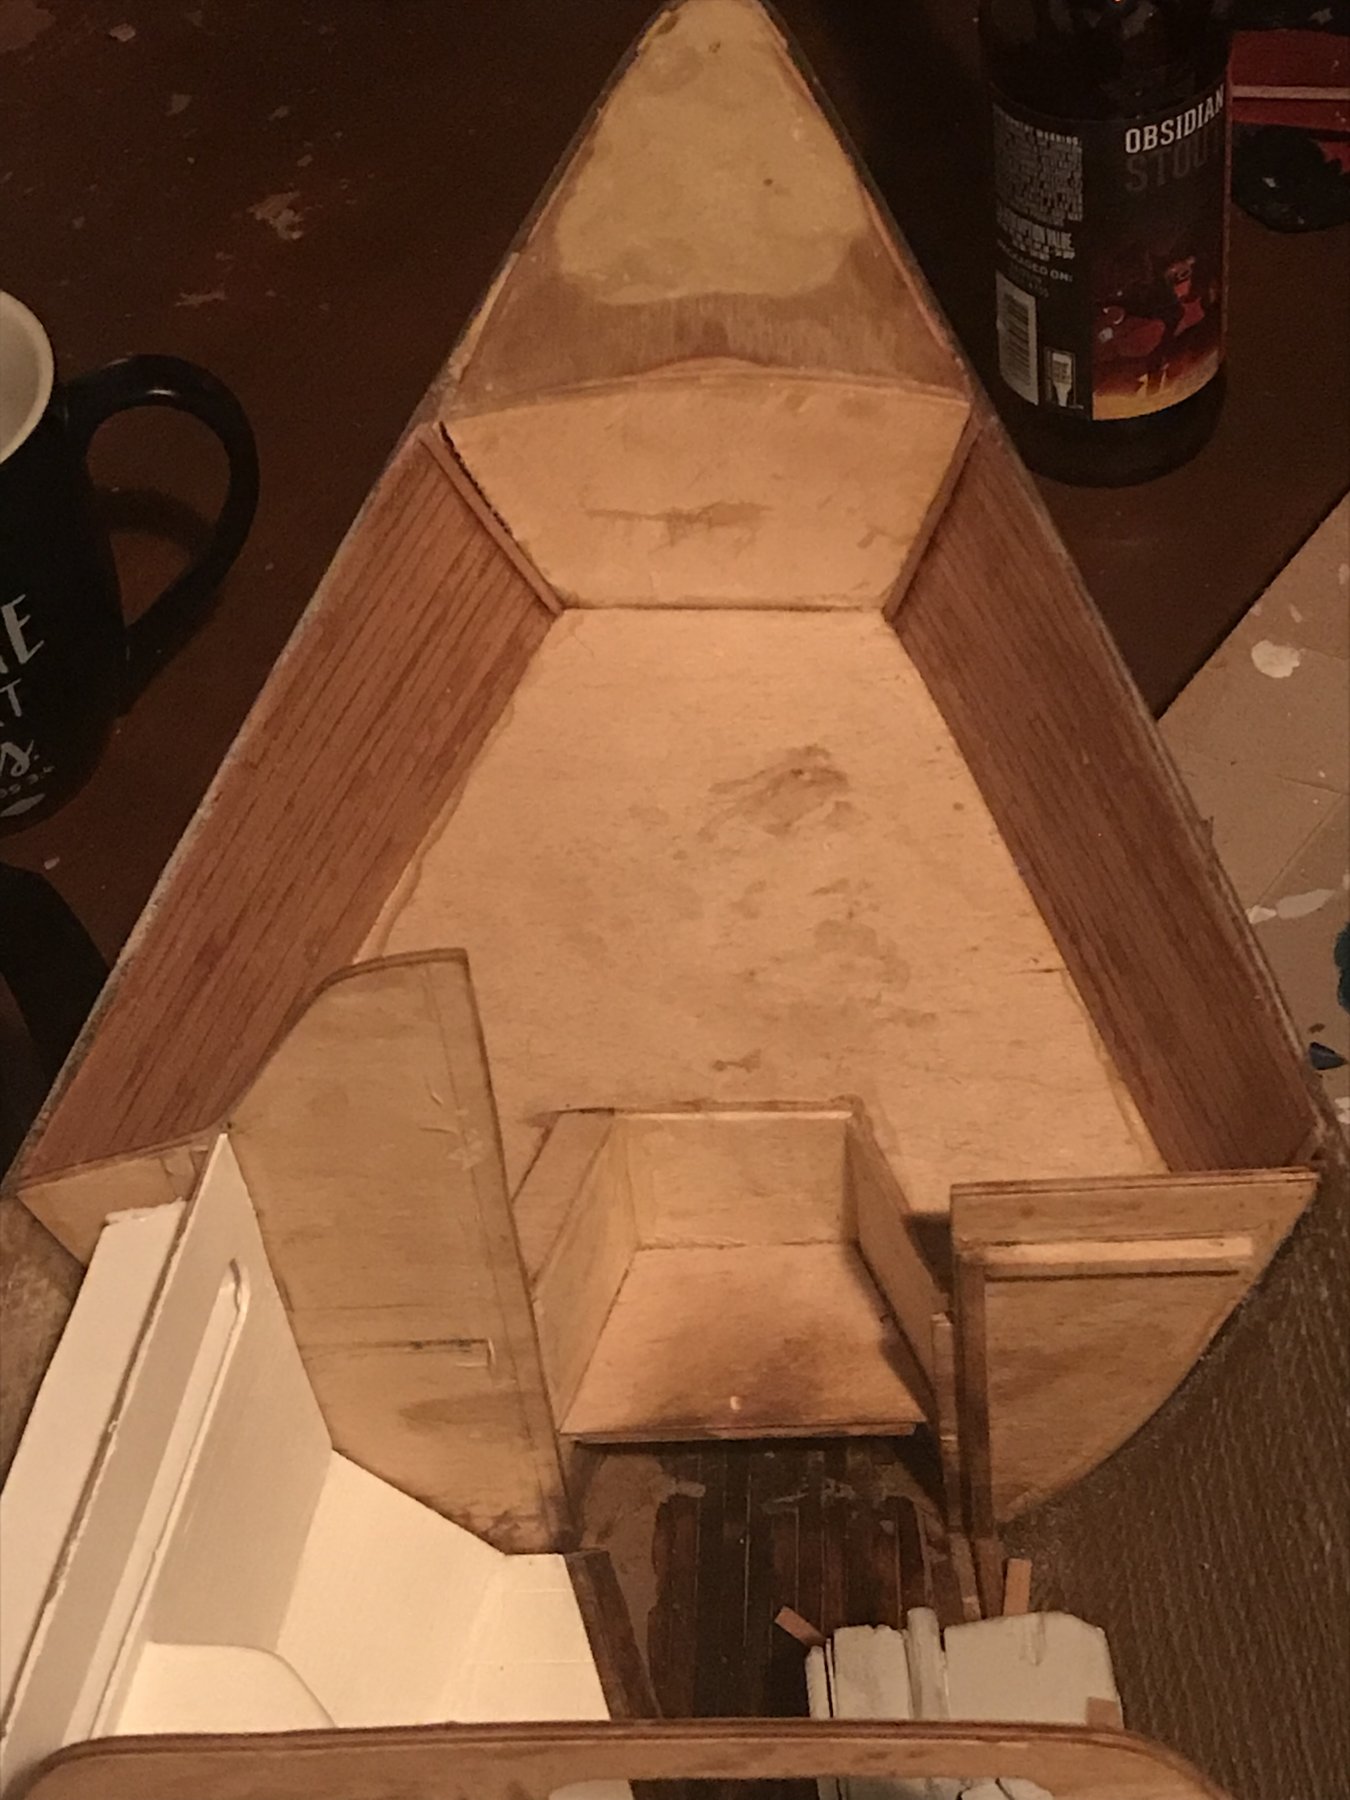
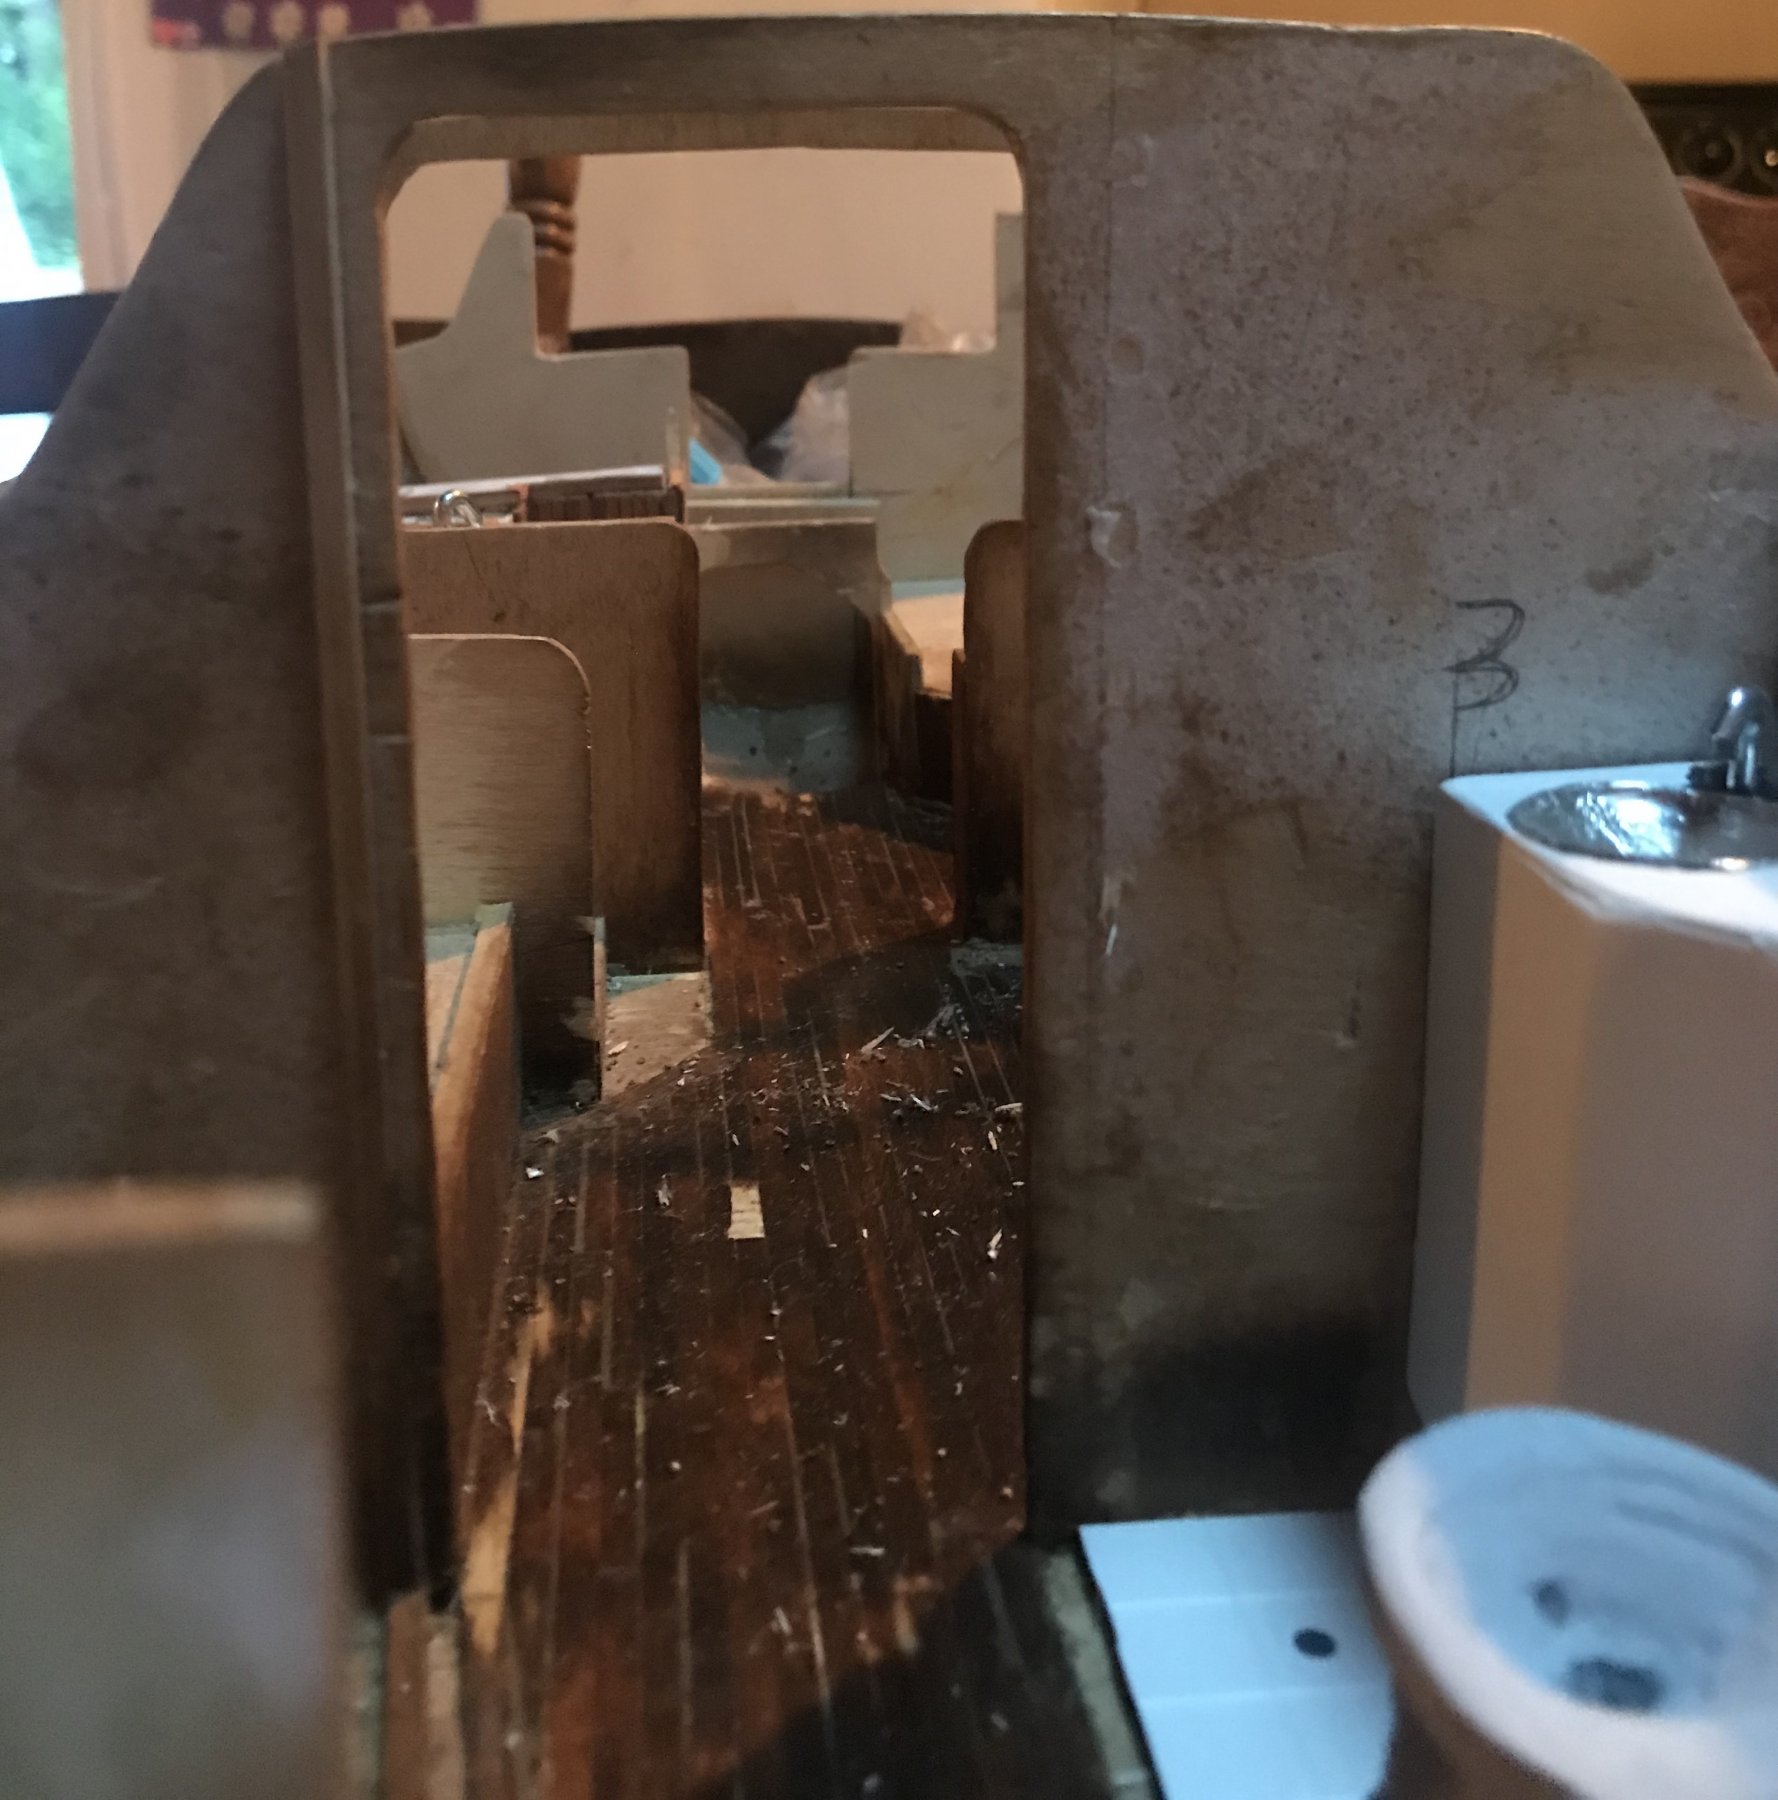
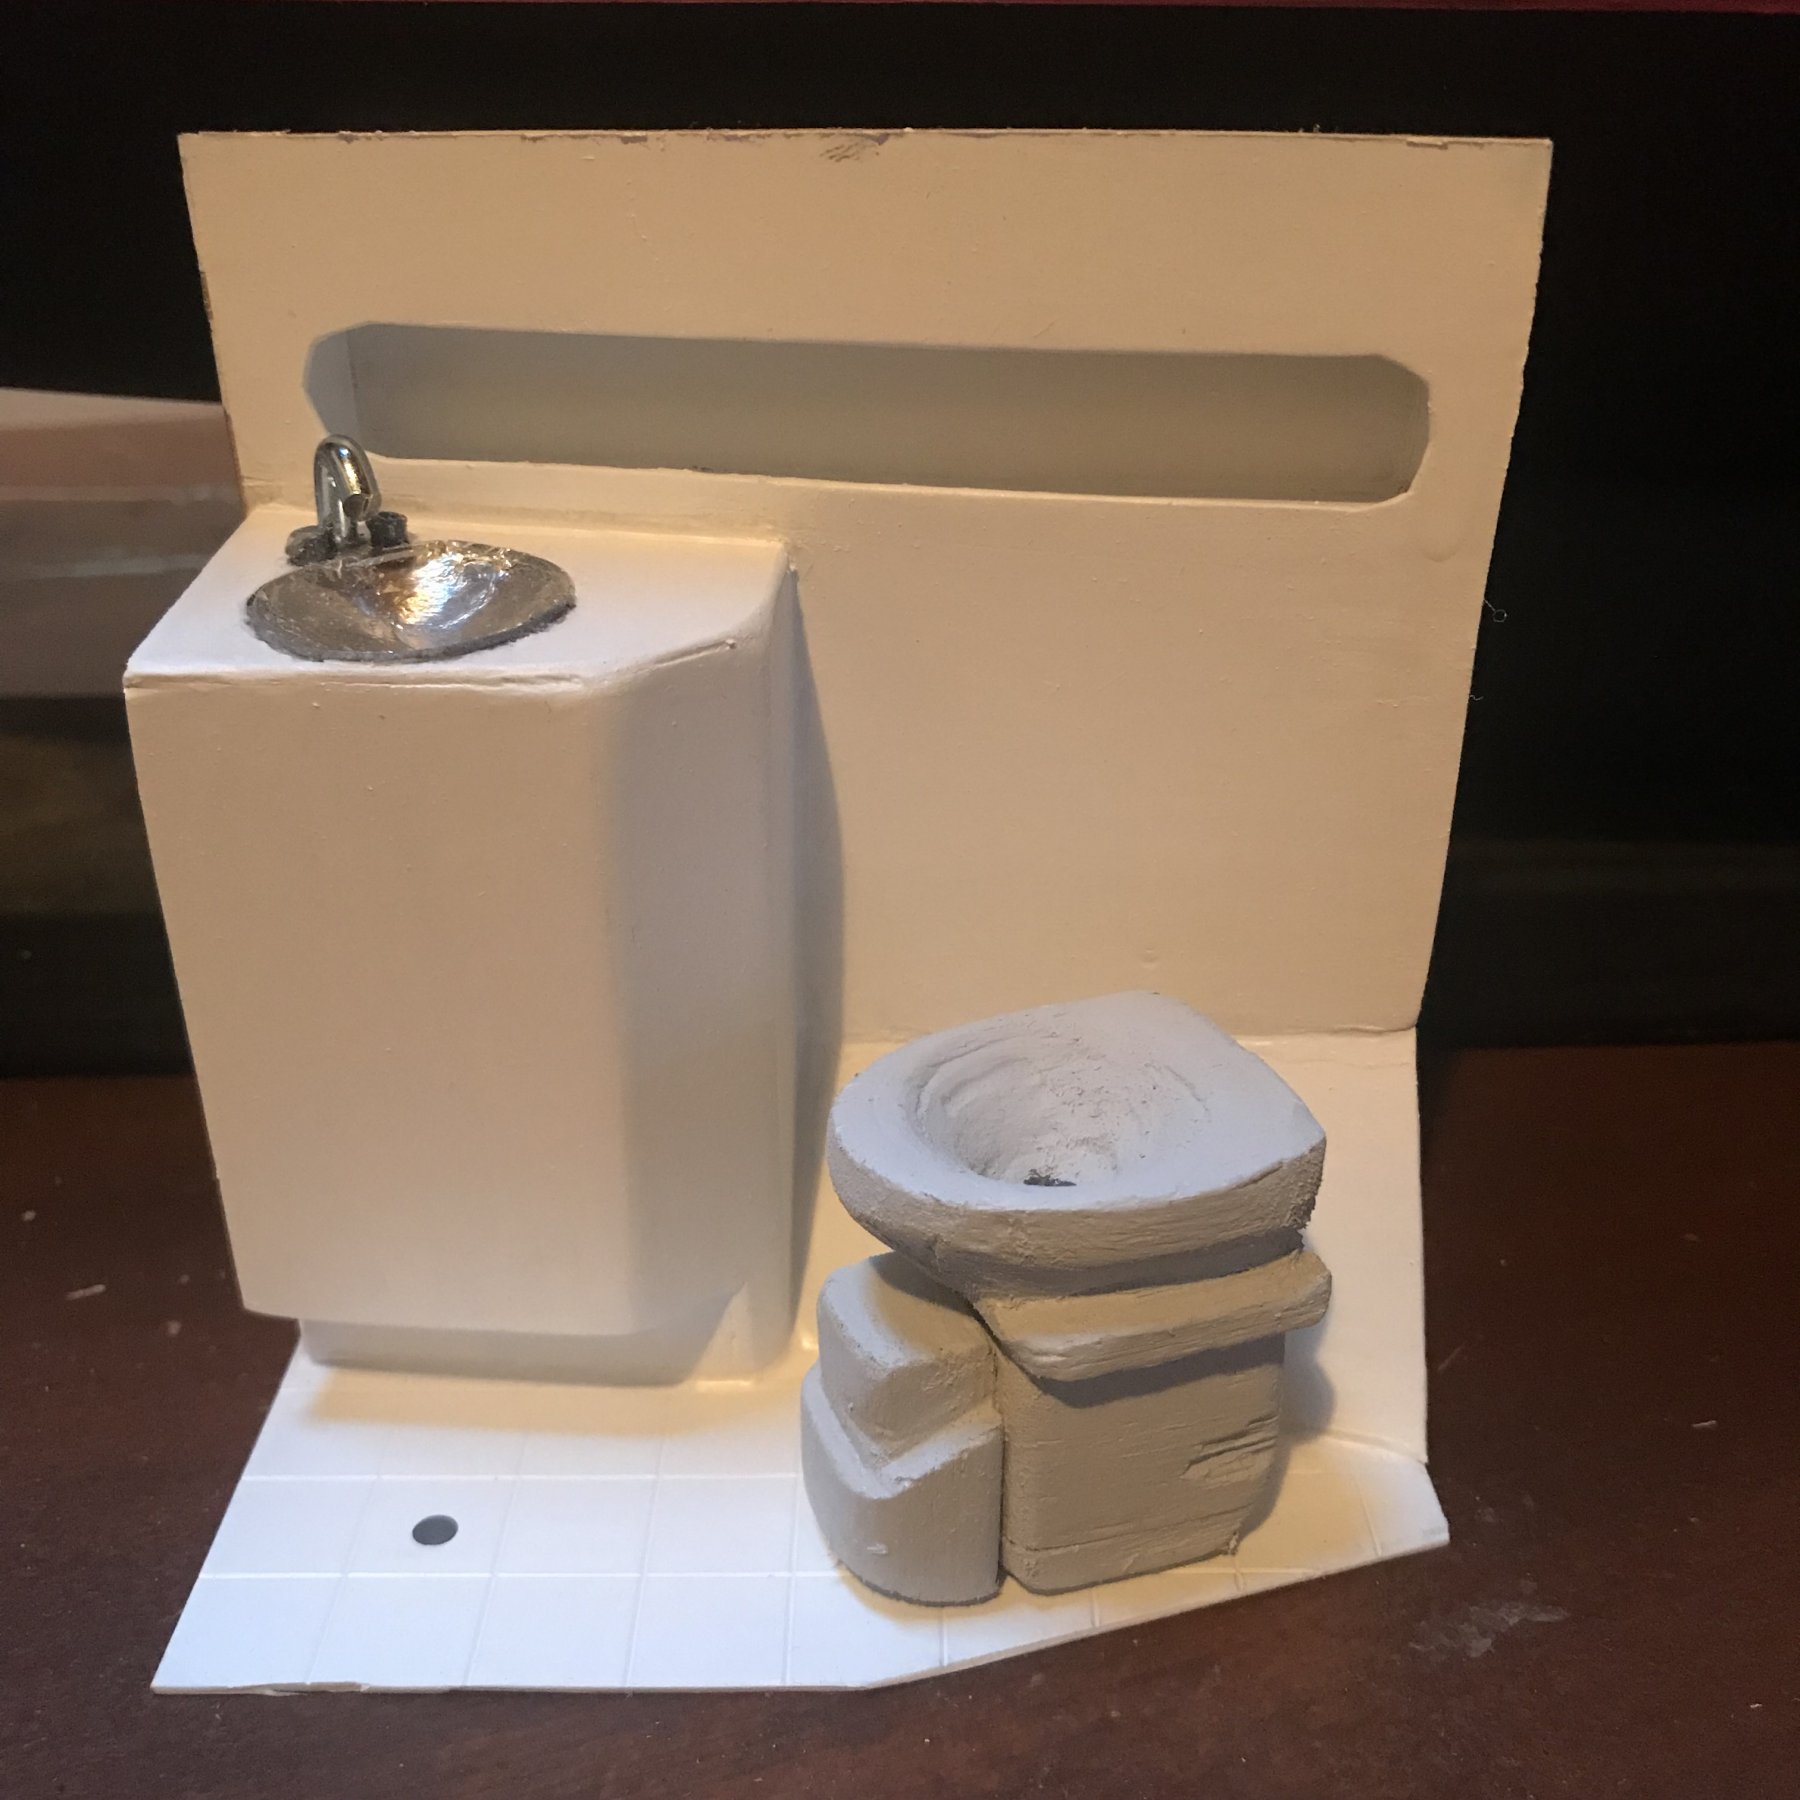
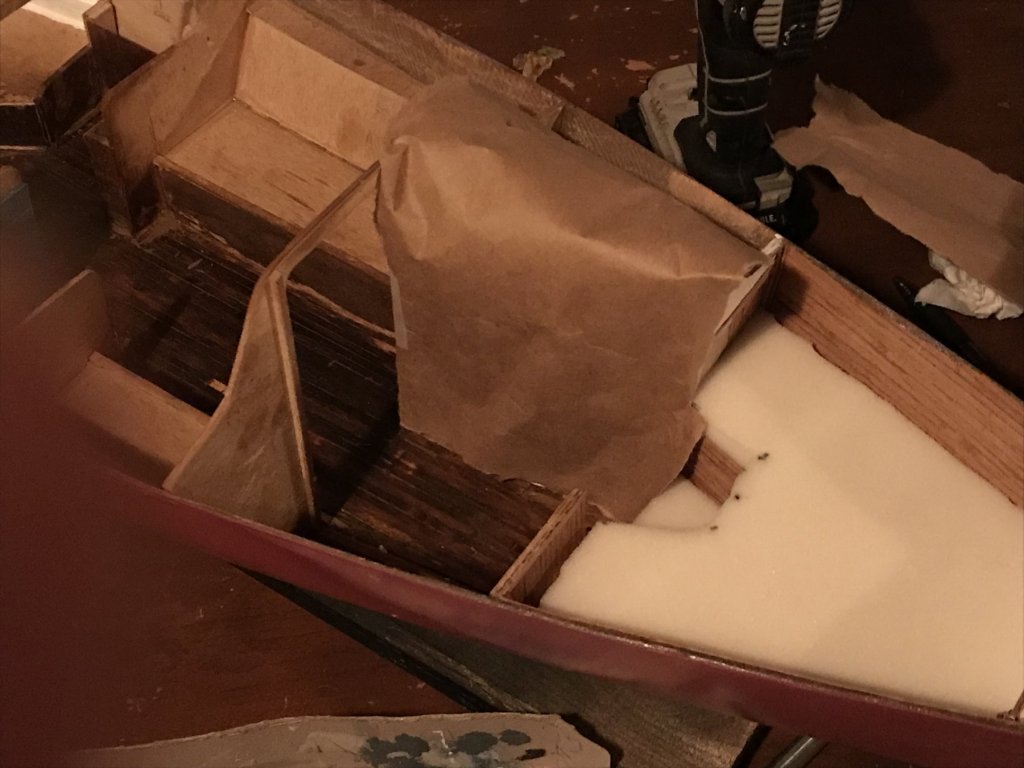
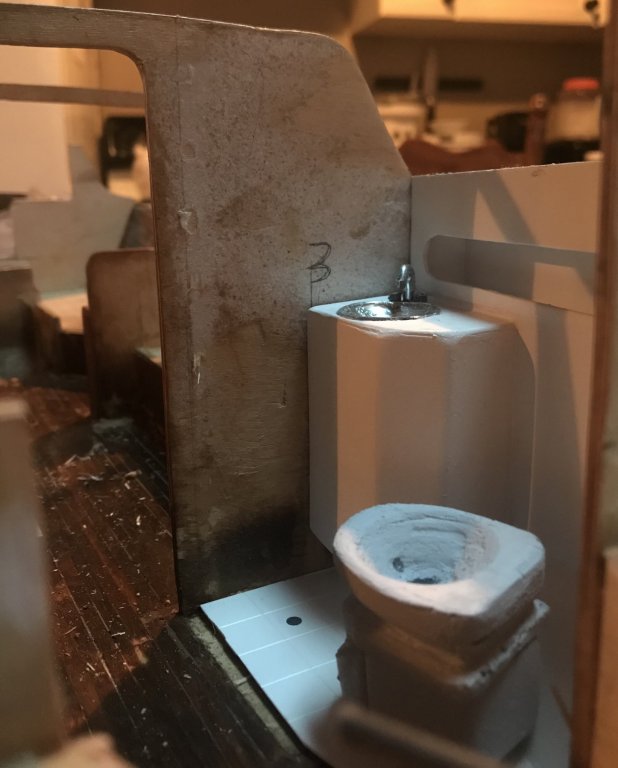
HEAD FINISHING Another milestone last night: I (finally) permanently installed the head unit and toilet into the boat. I added all the detail I wanted to add with the unit out and able to be handled/positioned as needed. Here are some shots of the (almost) final space: Some things I added to finish the space out are the details defining an access door under the sink (hinge, latch, and scored in outline), a mirror on the aft bulkhead, a towel rack/hand hold next to the toilet, and of course the toilet paper roll. Here’s a detail shot of the latter two items: The TP roll was fun to make- just some polystyrene tube with a small piece of thin polystyrene sheet glued to the back, and then while half-melted from the wet cement, the little piece of sheet was crumpled a little to look like paper. Here’s another shot of the space, with the flash on to get some more detail: Next, a semi-PoV shot from the forward berth, which better shows the mirror: And finally, some protective wrapping, to keep it safe from myself... and others: There are some small details left, like a small amount of molding around the sink cabinet to the aft bulkhead to cover a gap, and a bit of square bar to define where the wall would be. I decided to leave the wall open, to facilitate access. It could be added if it survives long enough to be a display model. ... (it likely won’t...) Again, till next time! I think I’m going to try tackling the dresser and closet on the starboard side, across from the head, now that I don’t need to get into that space to work.


-
Thanks, Patrick! Yes, she’s at the age now (just turned 6) where she understands what the boat is to be, and appreciates it. Though, there are still *some* surprises for her as it gets finished- and she wants it that way. She actually told me to cover it up once it’s done so there will be something she ‘doesn’t know about’ when she finally gets it gifted to her. The stove heater is actually one of the surprises. She’s been guessing what the ‘blue room’ is for, which has been cute. It all helps keep in focus the ‘why’ behind the project. I’ve been shooting for Christmas to have it done, and given the regular rhythm I’m getting into, I think I can do it. I’m moving into a space-by-space approach to finishing up, so I’m trying to think of a way to cover up a space once it’s finished, both to protect it from other work and from peering eyes. That said, there are still several big design hurdles to get through. One of the best things about this project and really diving into a scratch build has been building my confidence and creativity in solving these problems, so I’m excited to see how this turns out!
-
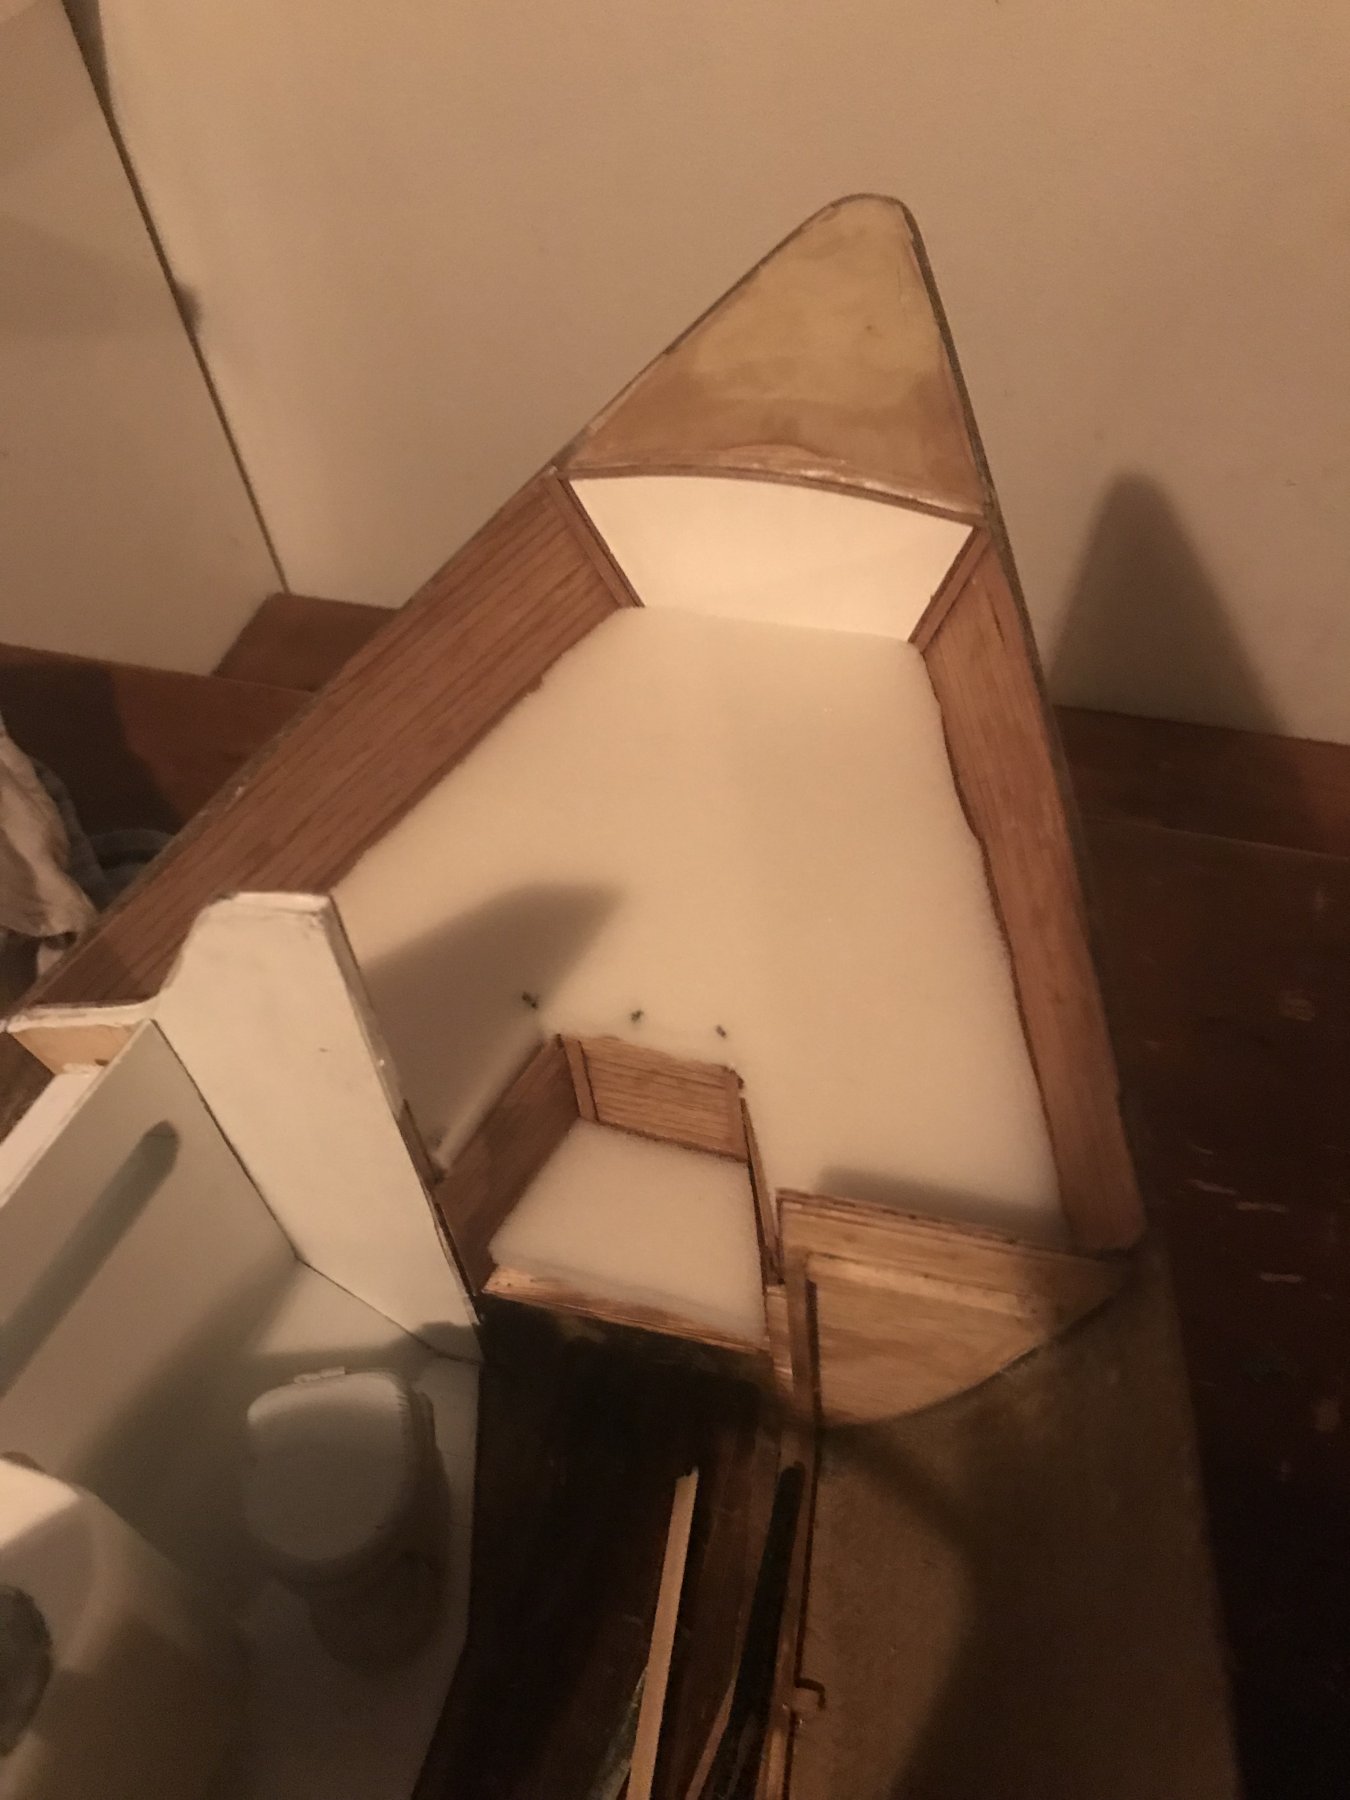
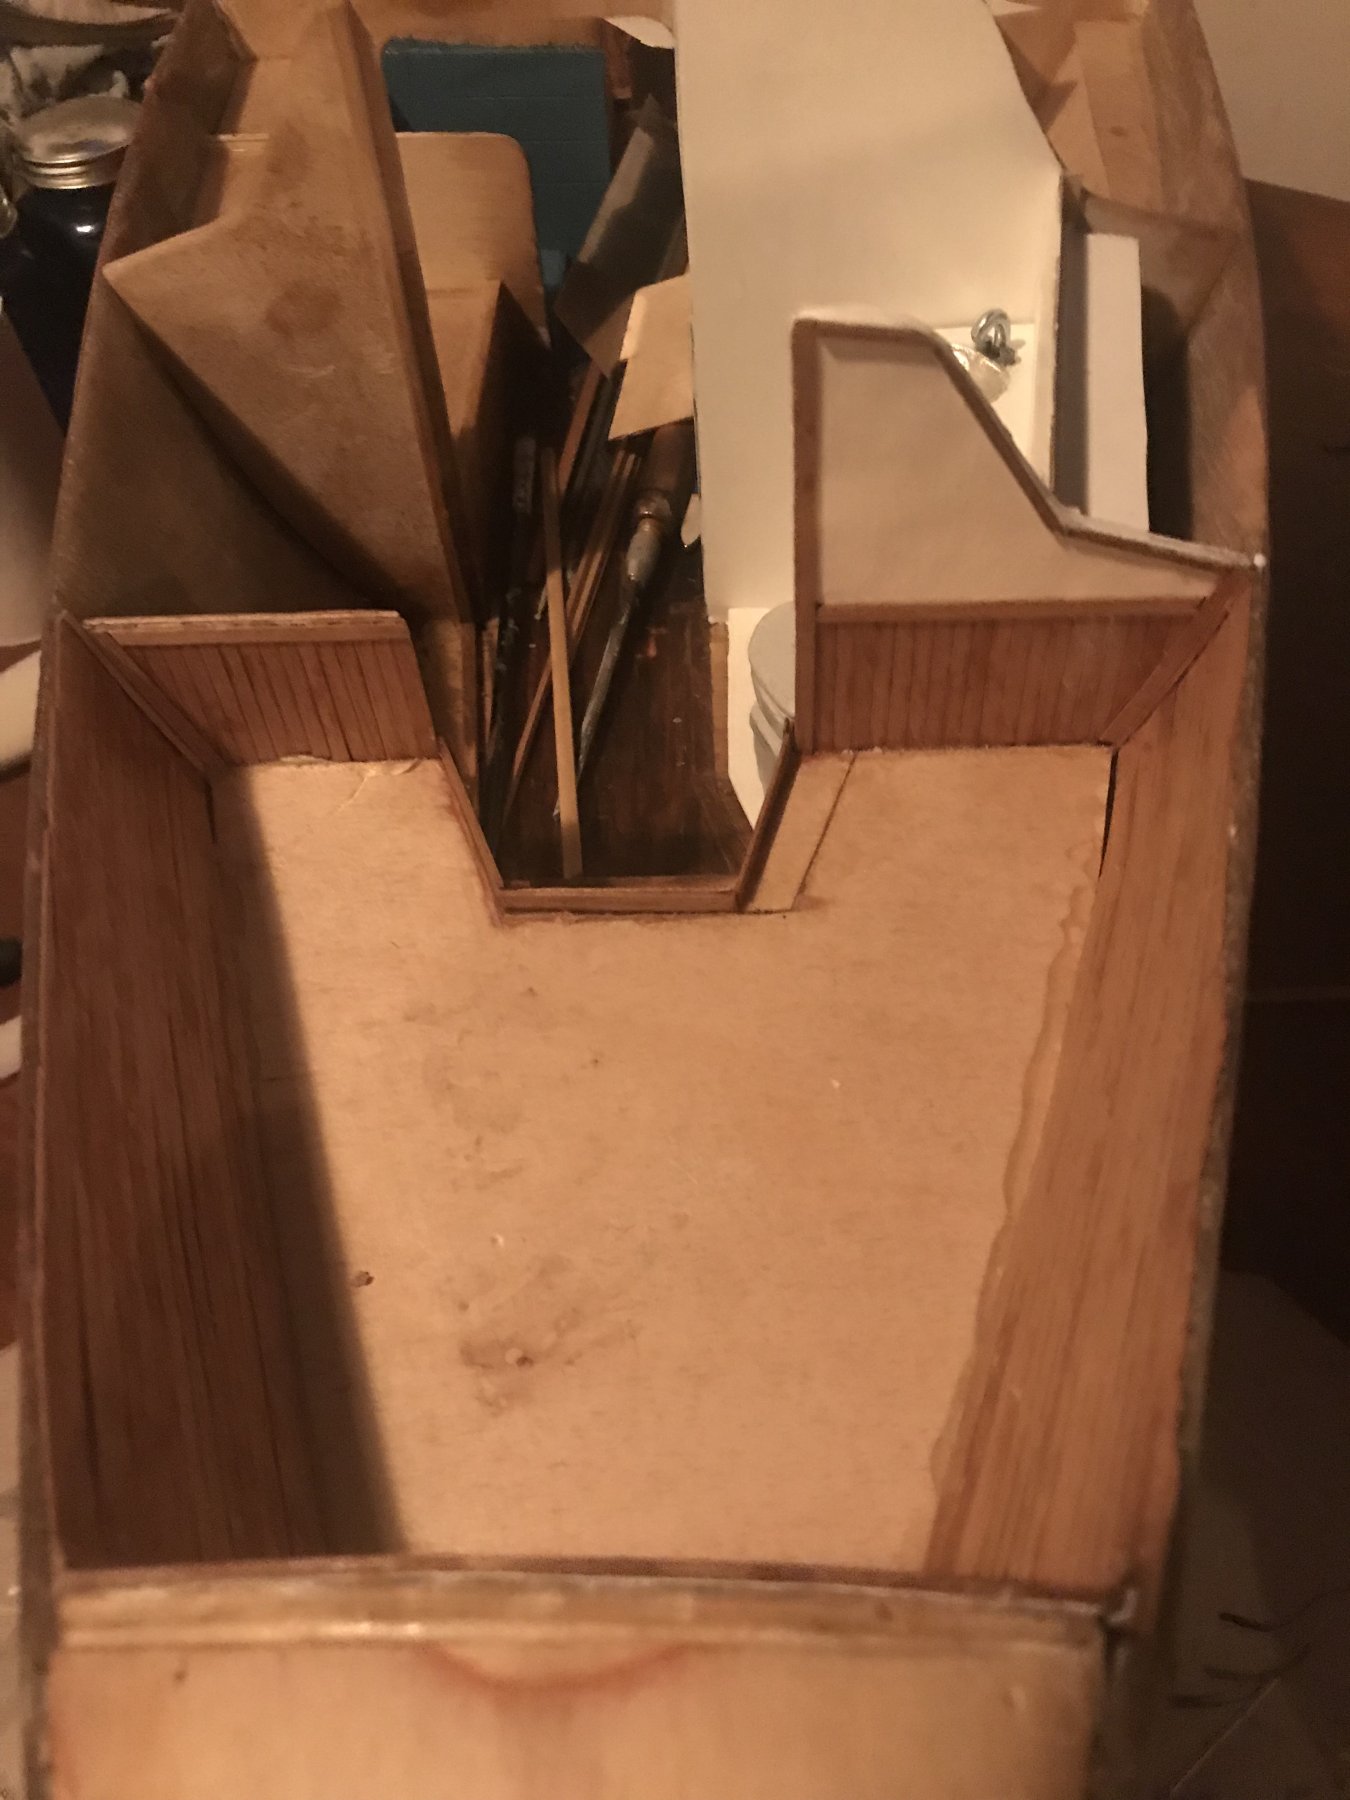
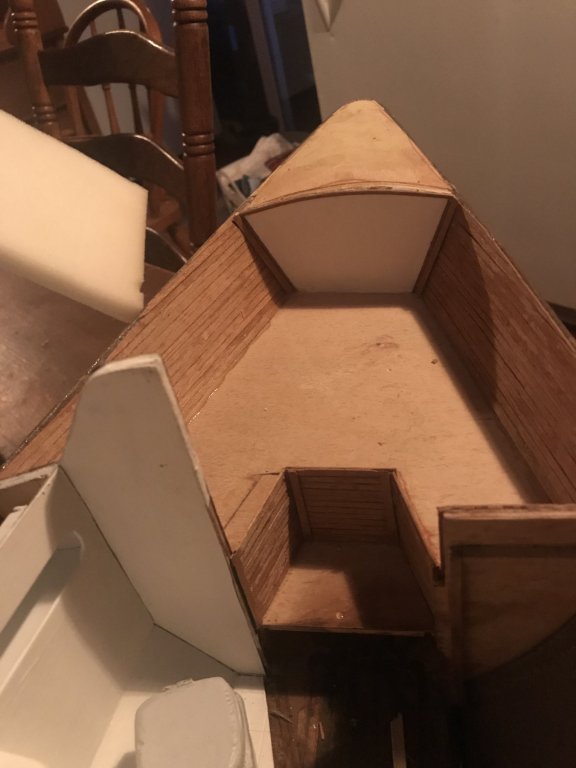
FORWARD VEE BERTH FINISHING 1 Since my last post I’ve been busy chipping away at finishing out the forward berth, and today I hit a big milestone: I have finished the hull and bulkhead details and cut the foam pad for the mattress. All that is left to finish the space is a mattress cover and bedding, both of which my wonderful wife will help me with, and then a couple shelves along the hull each side. Here are some pictures of the space without the pad, showing the final planking and bulkhead finishing: And here it is with the foam pads for the bed and seat placed: Till next time!


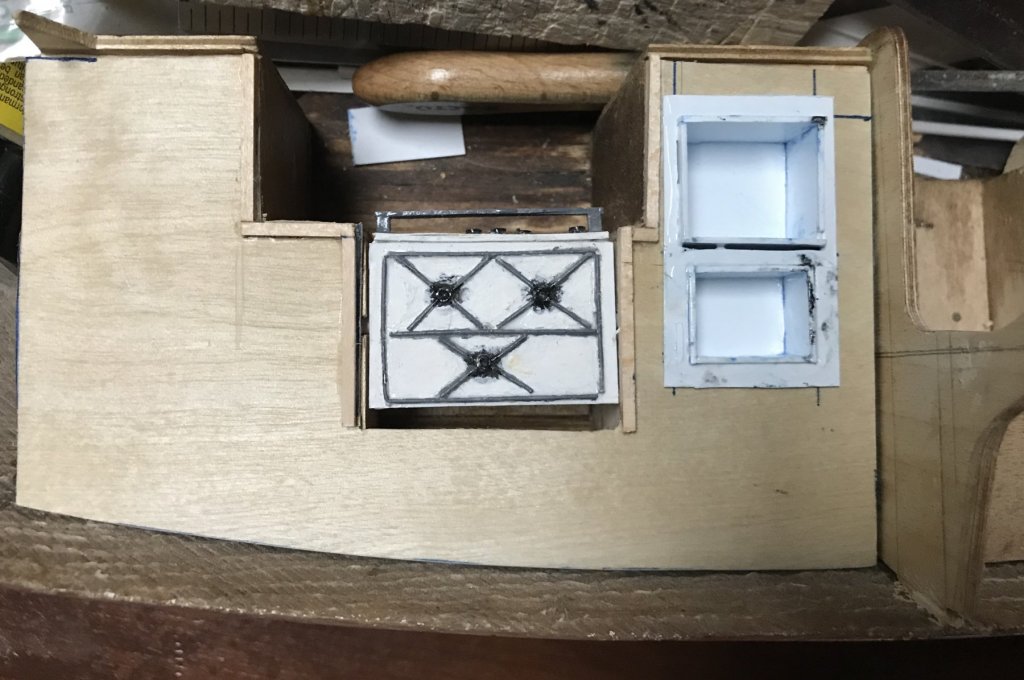
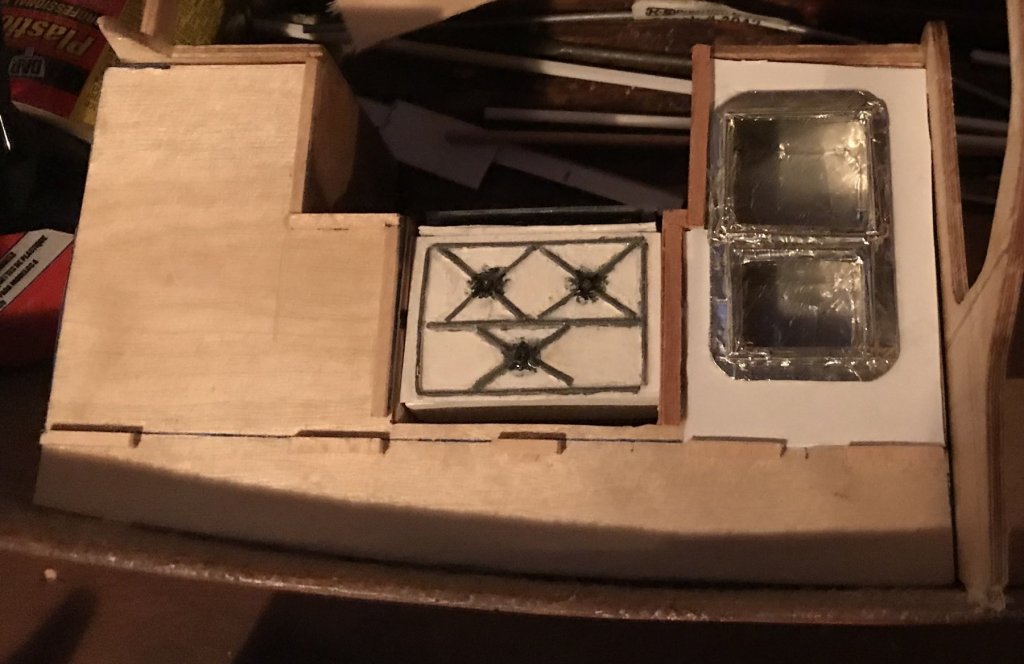
-
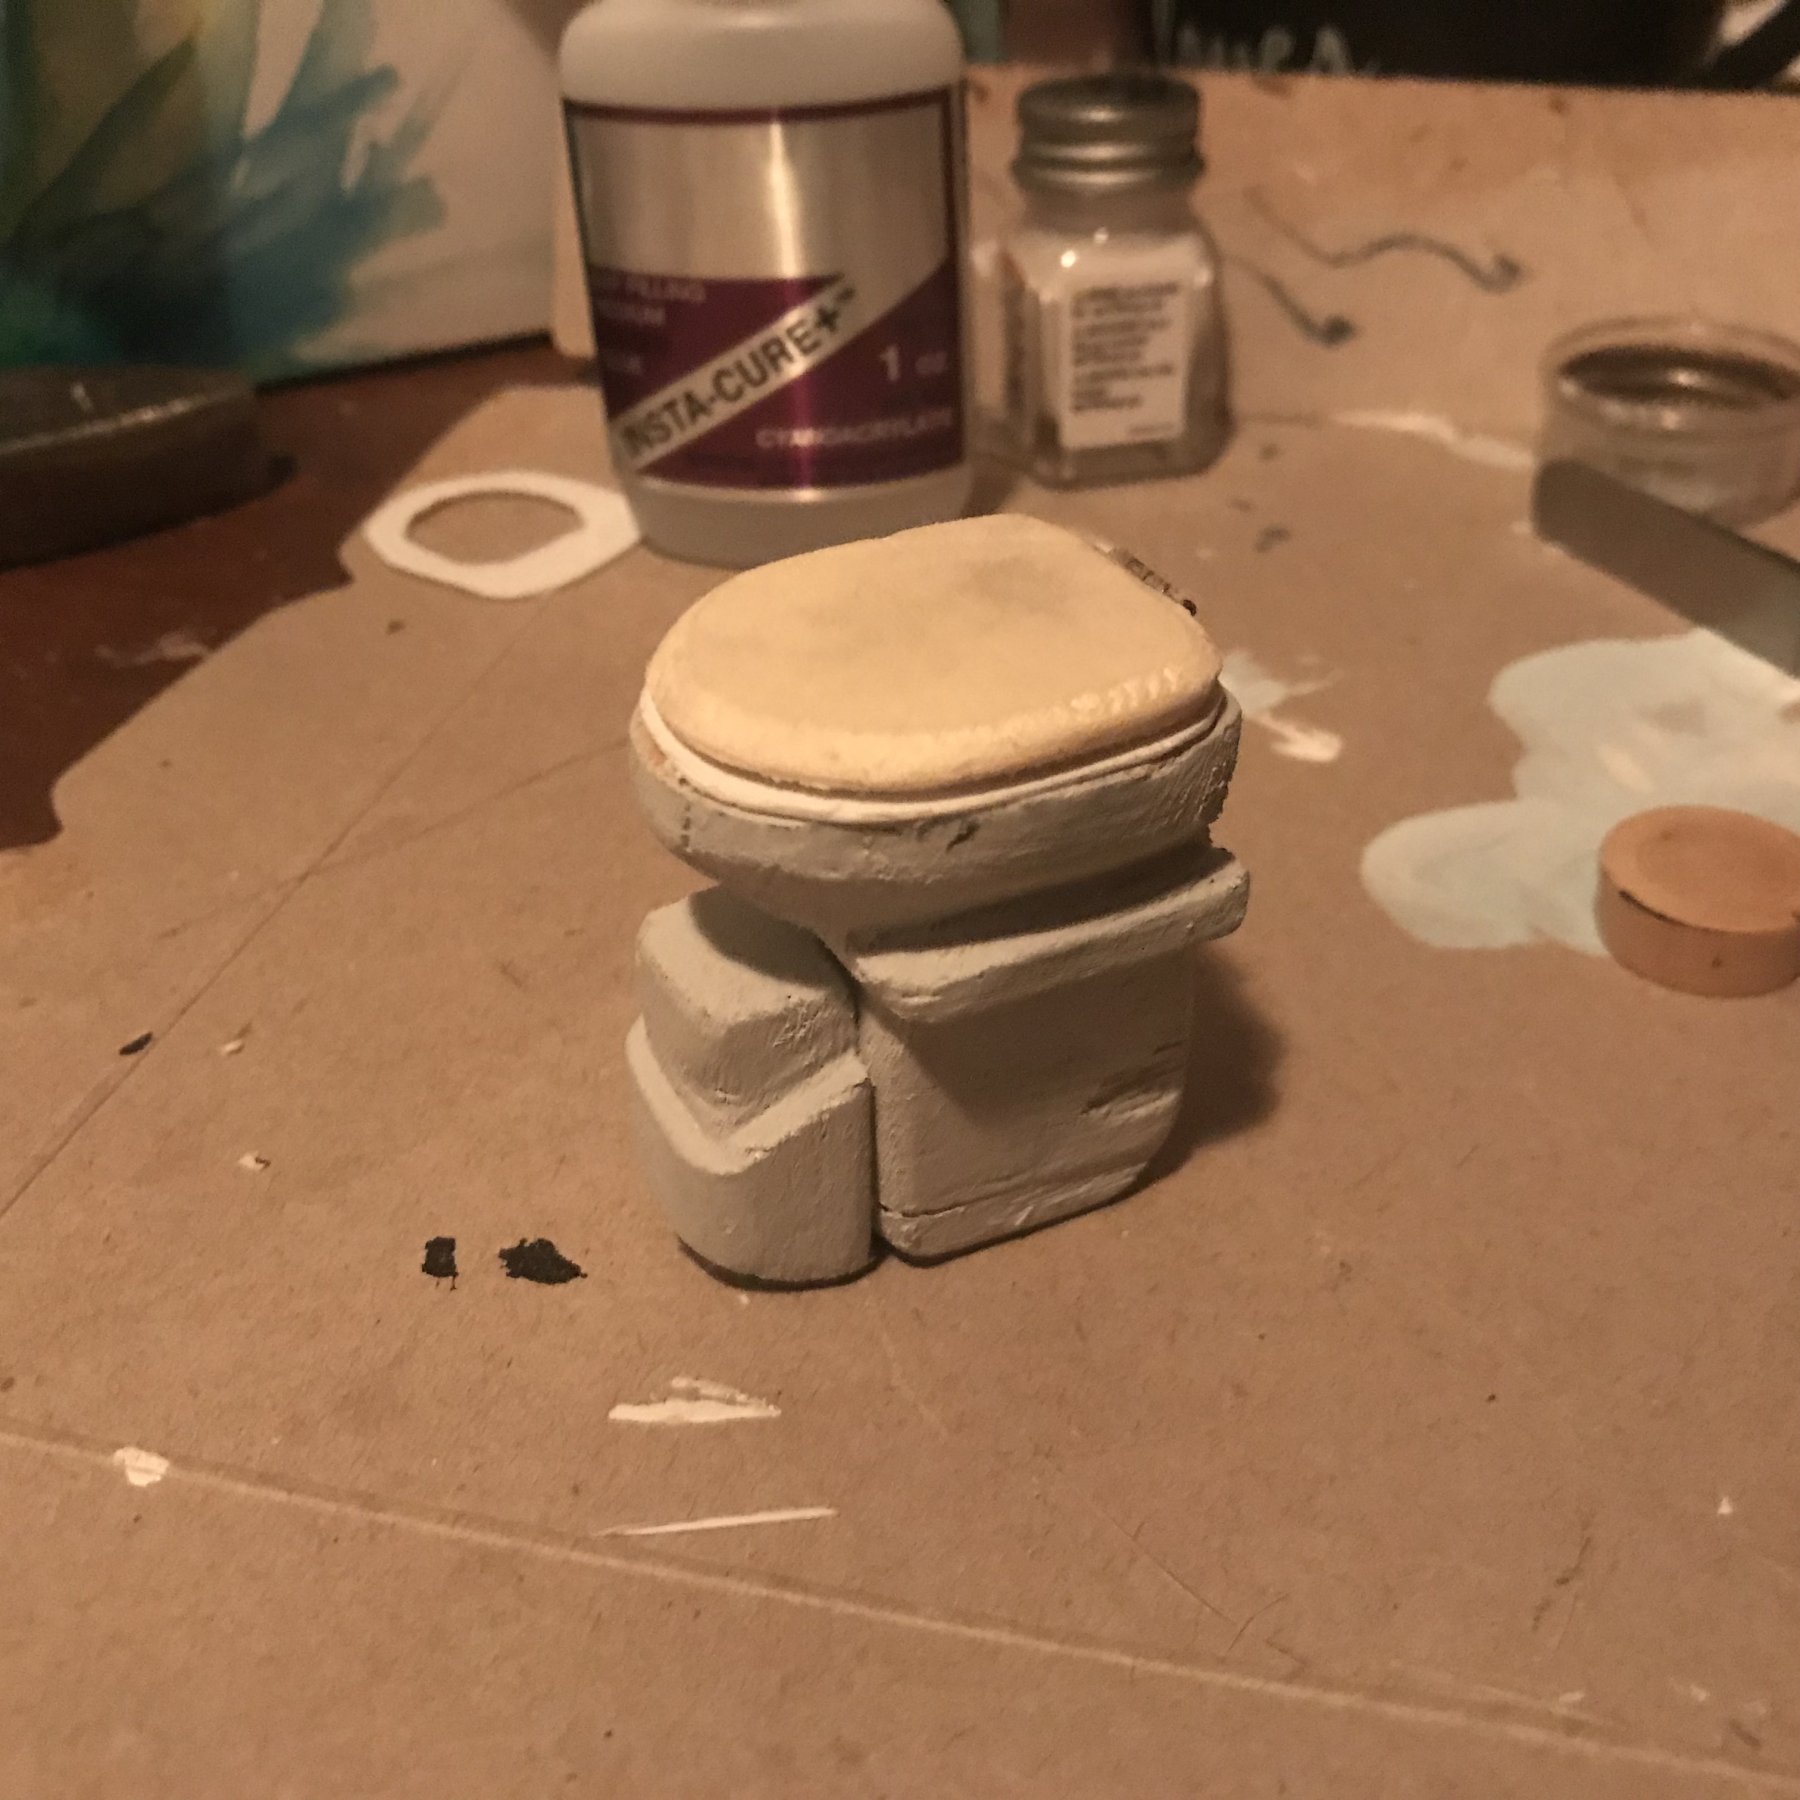
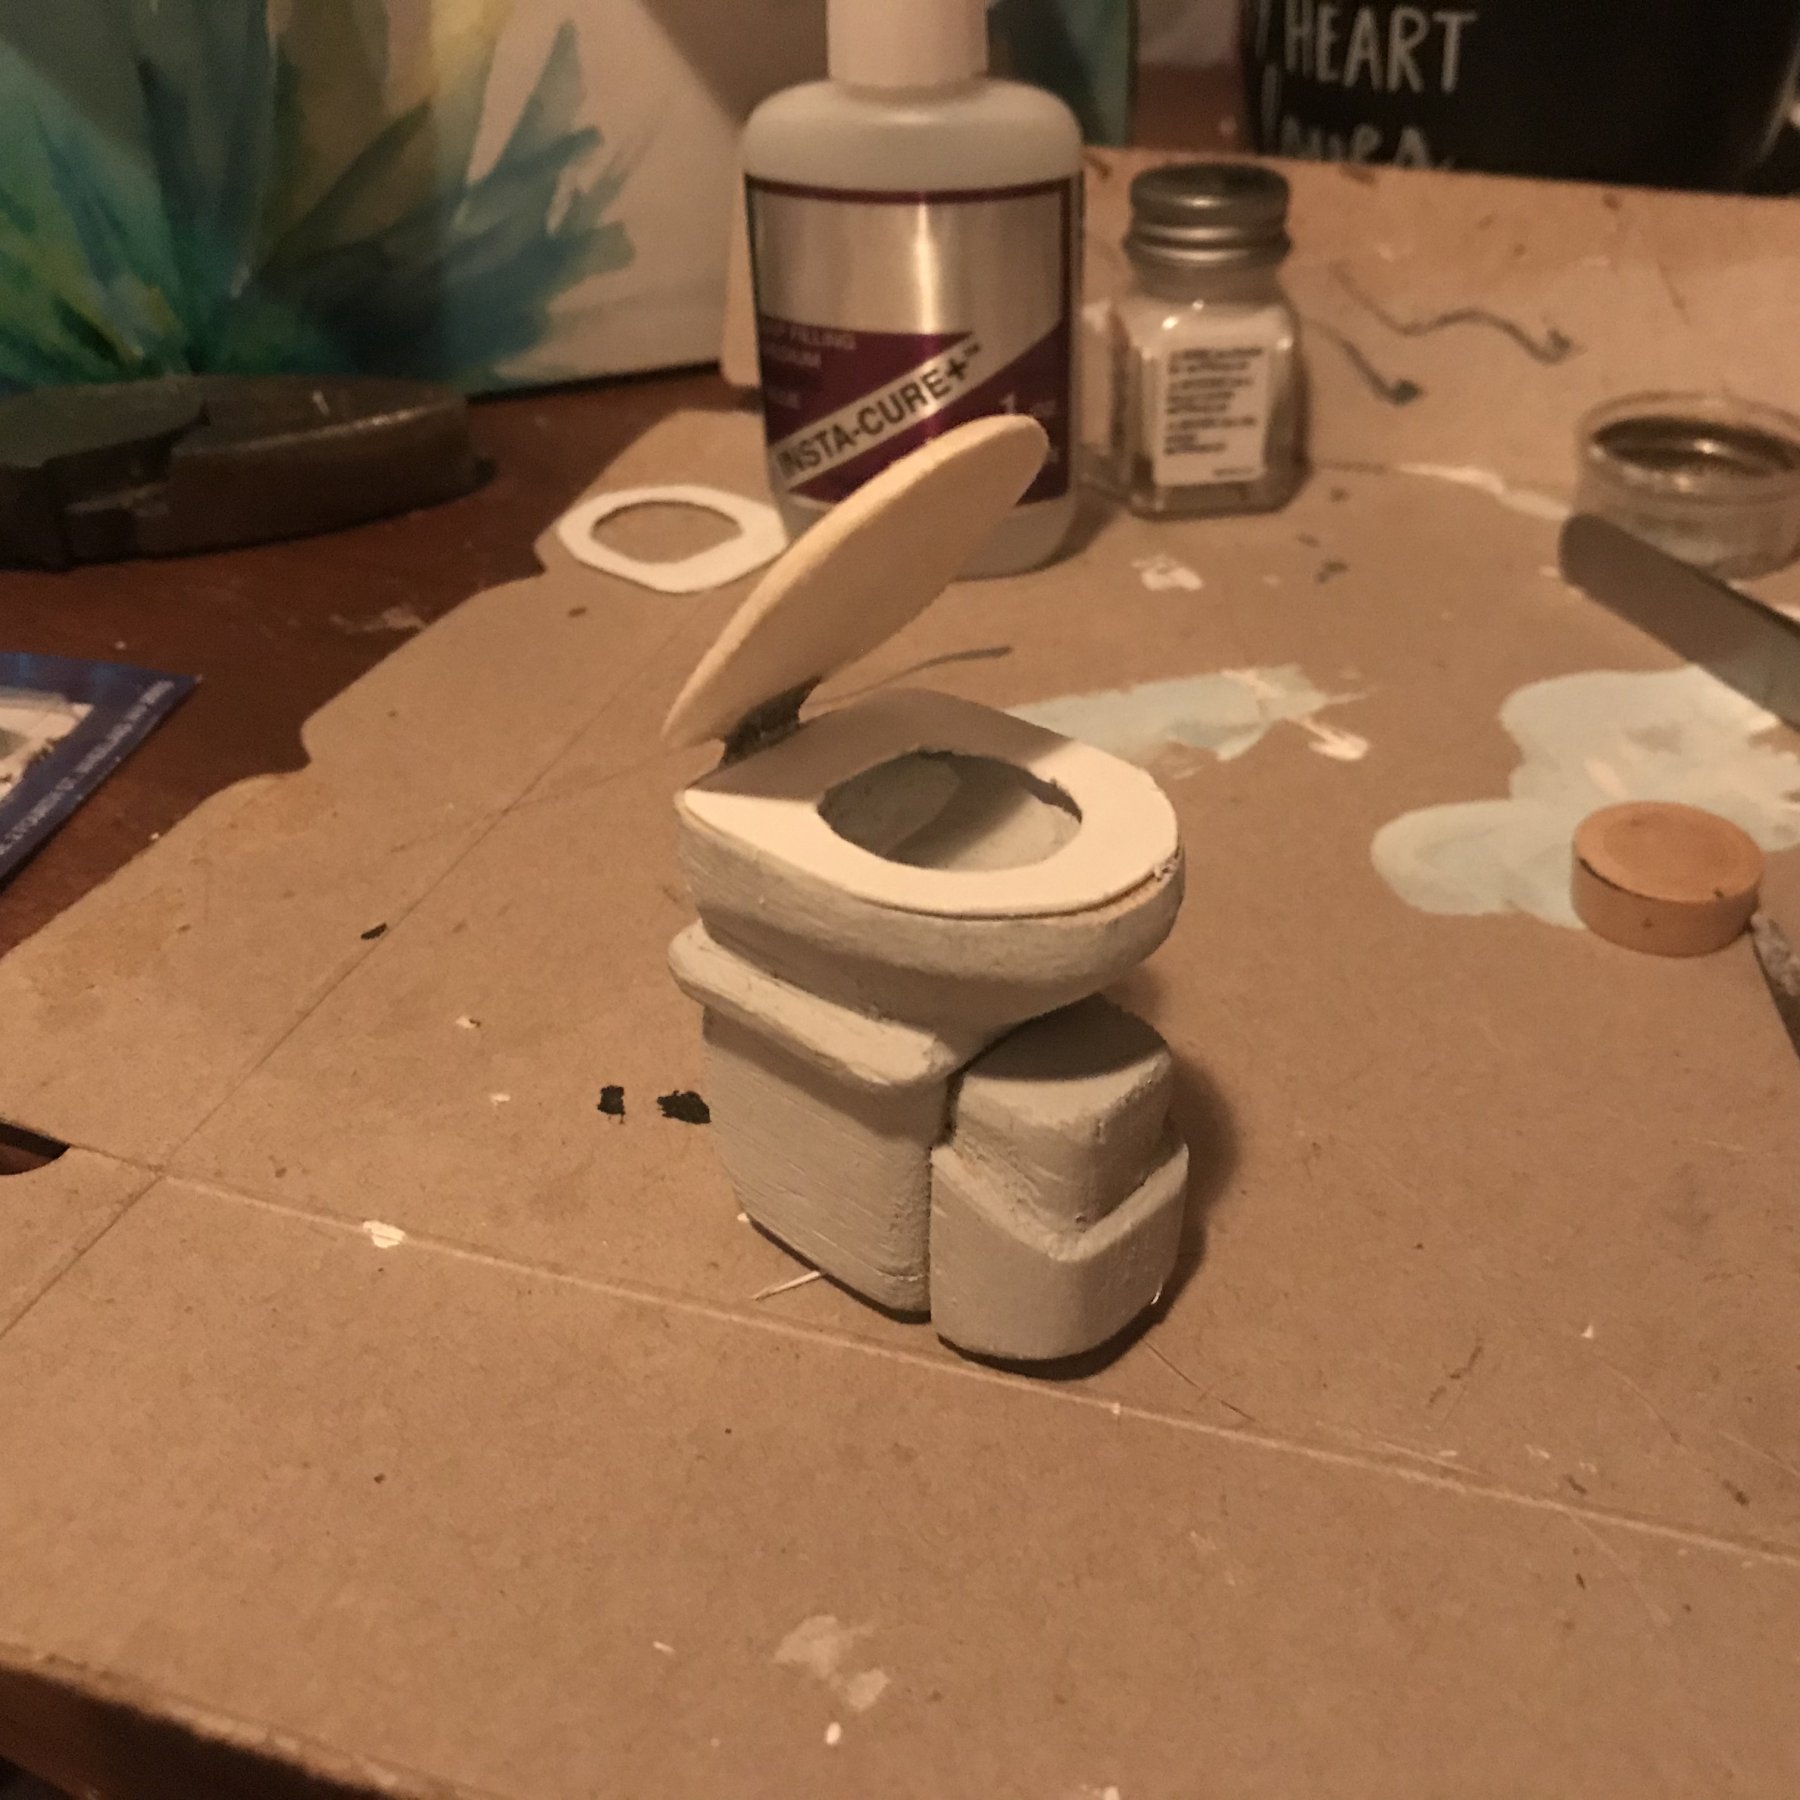
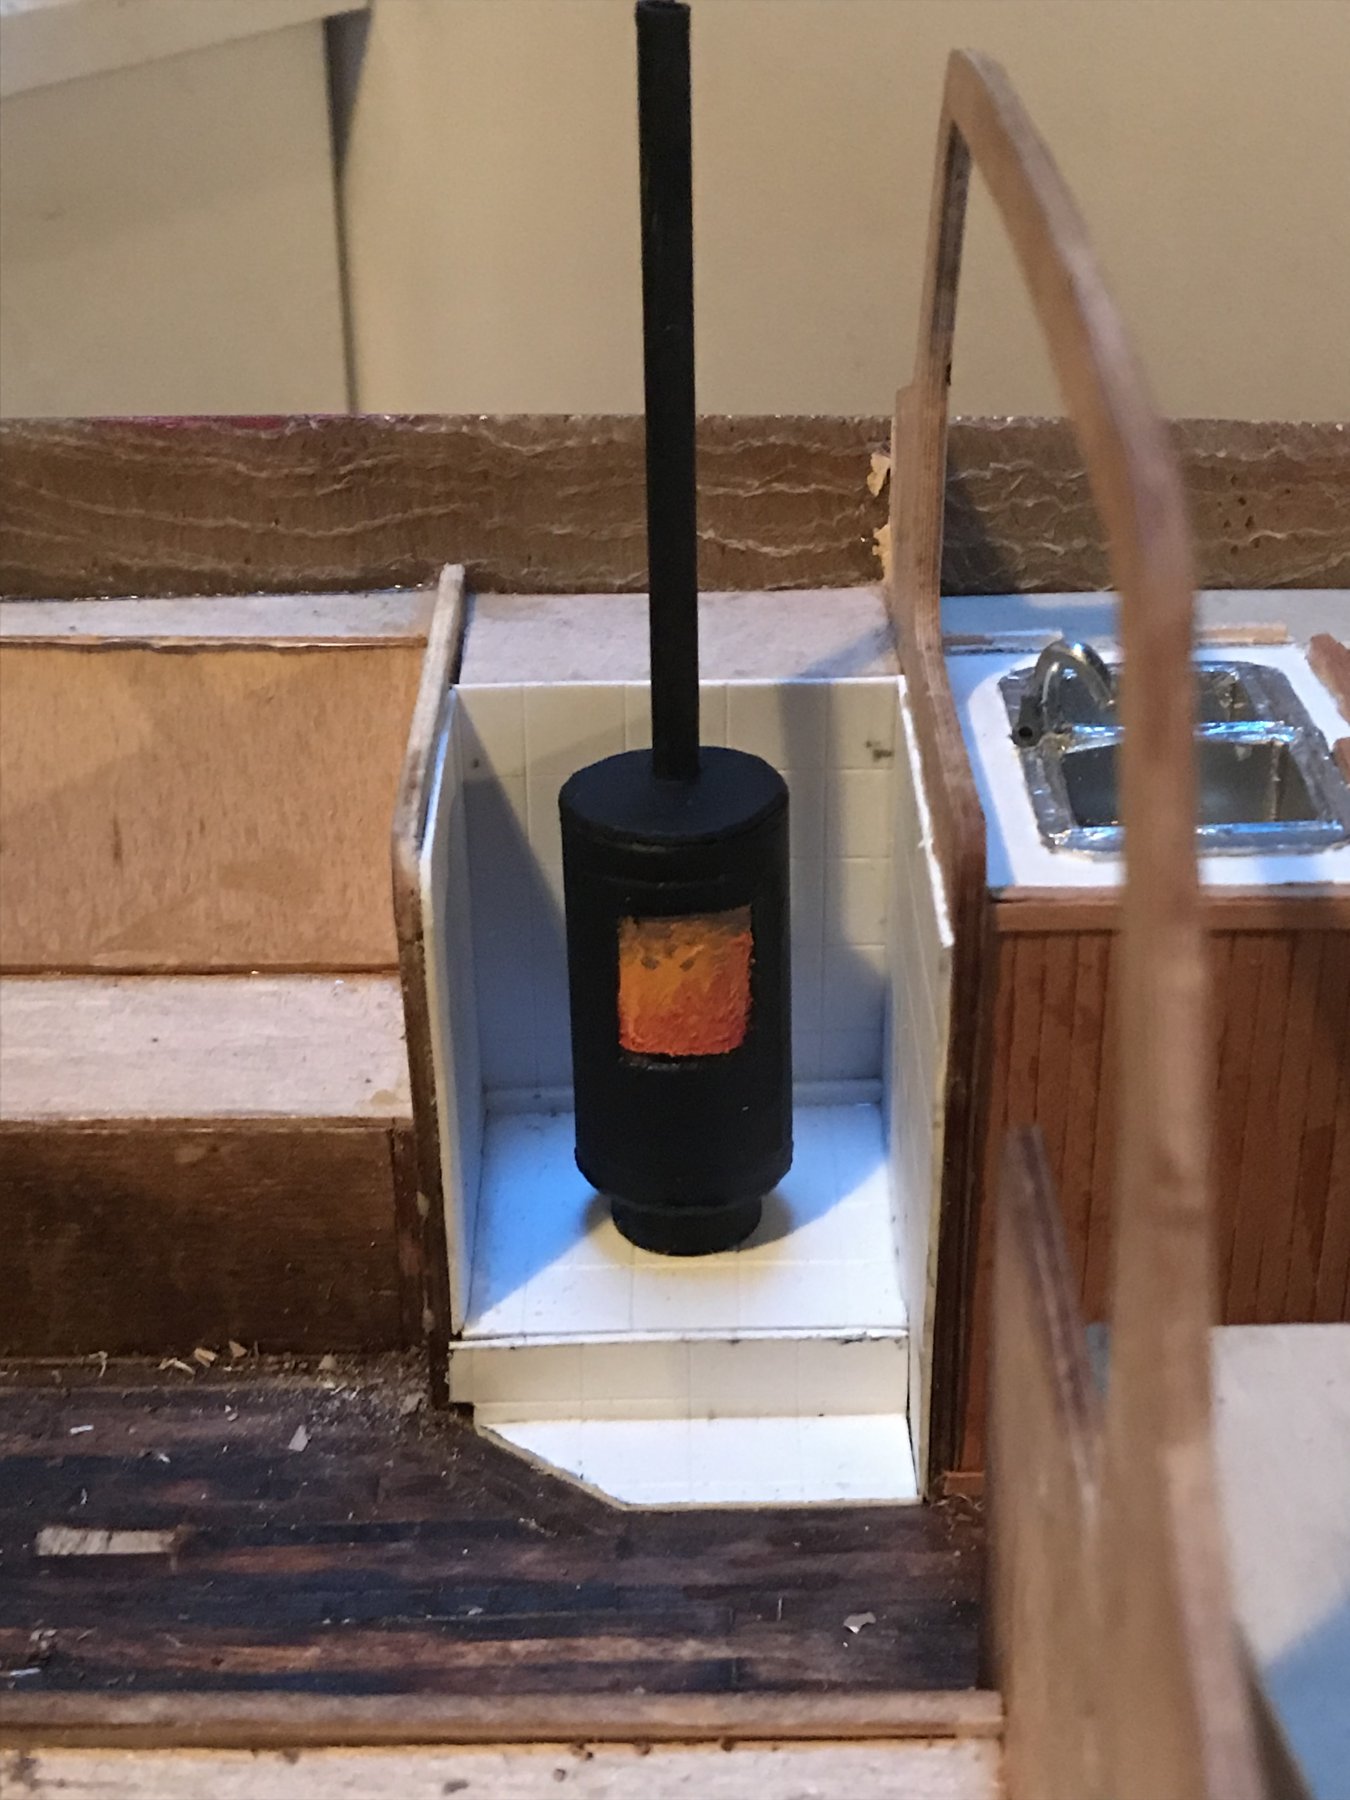
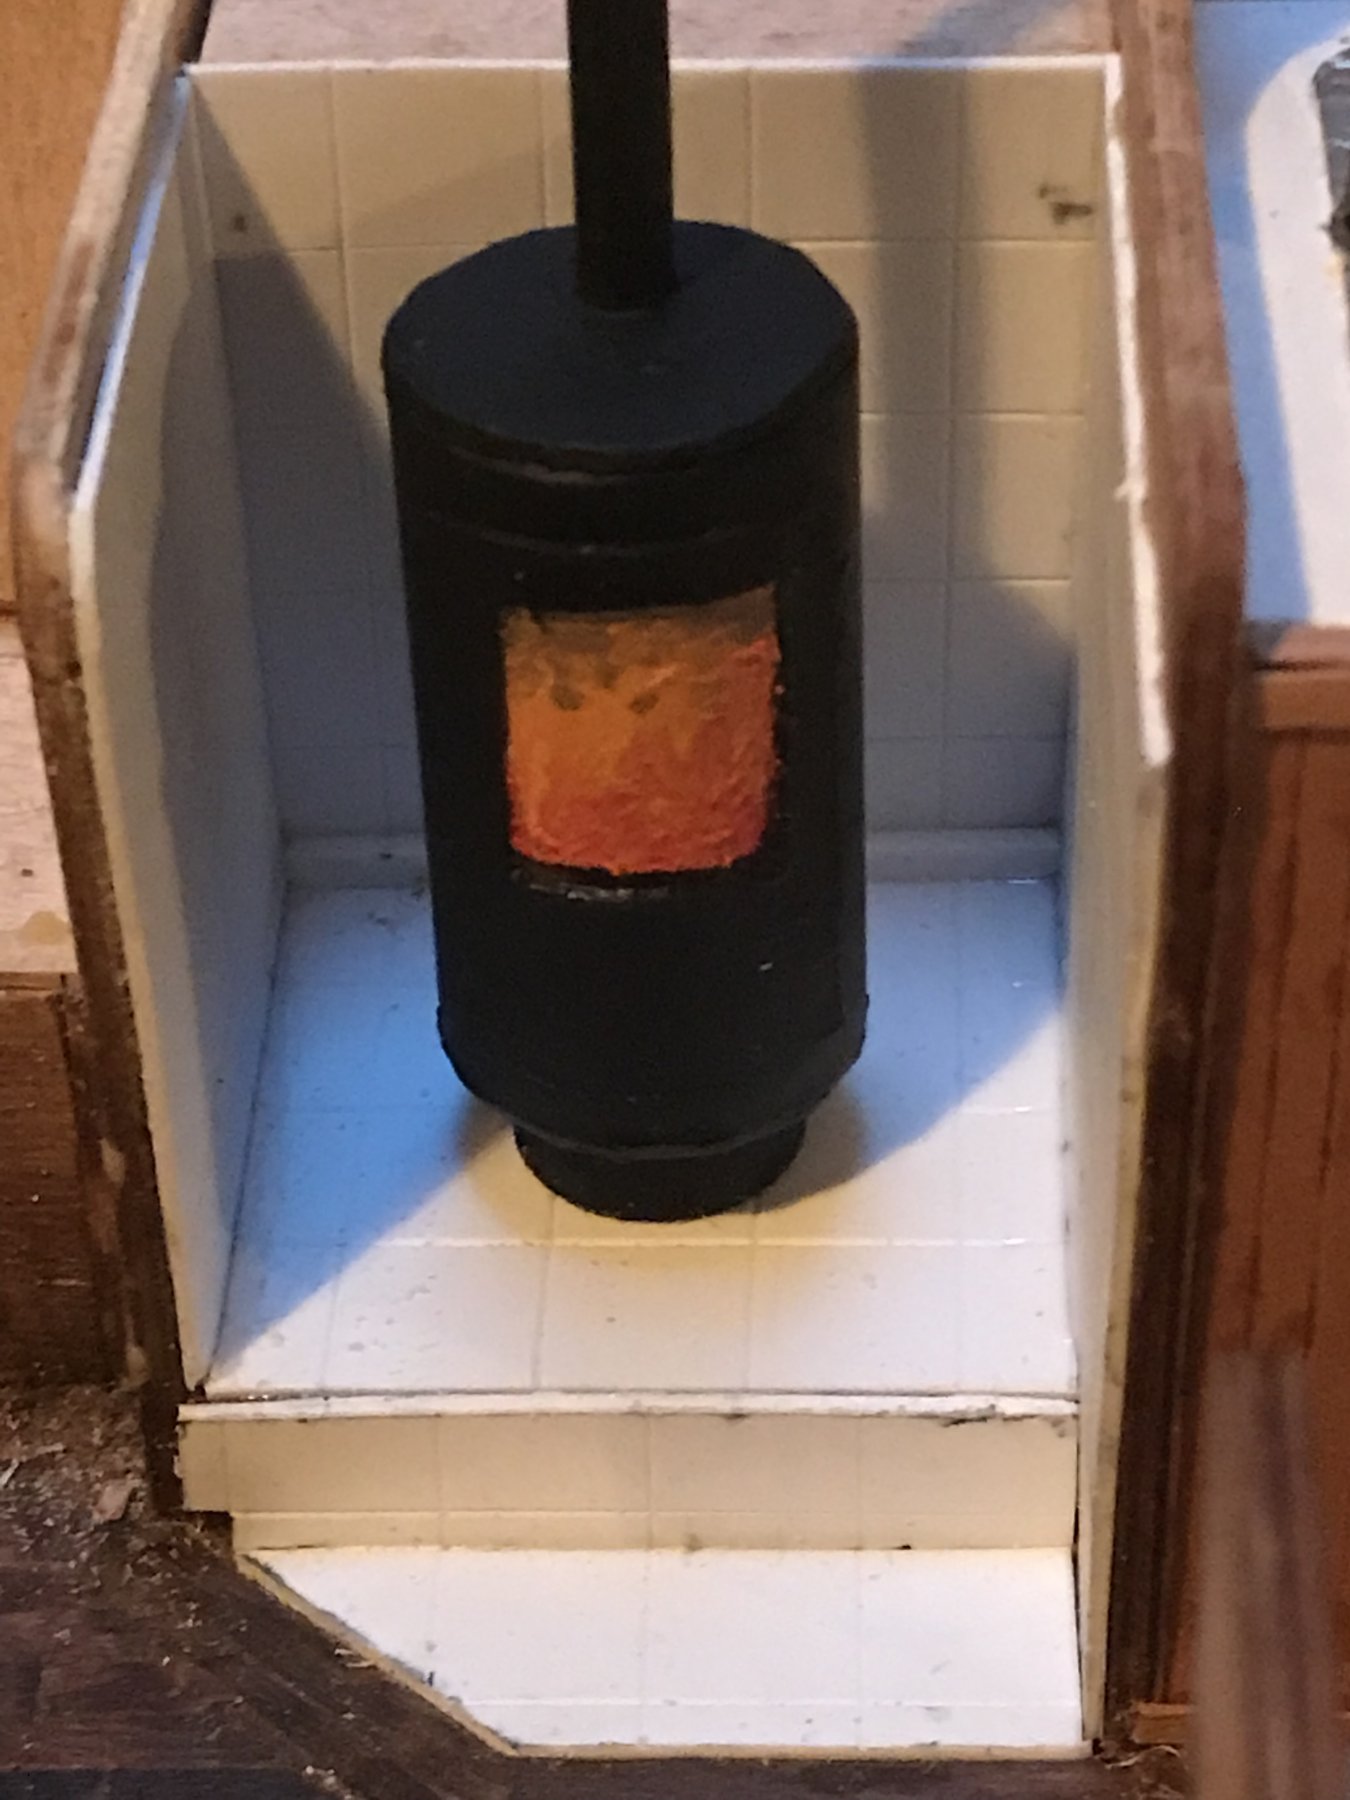
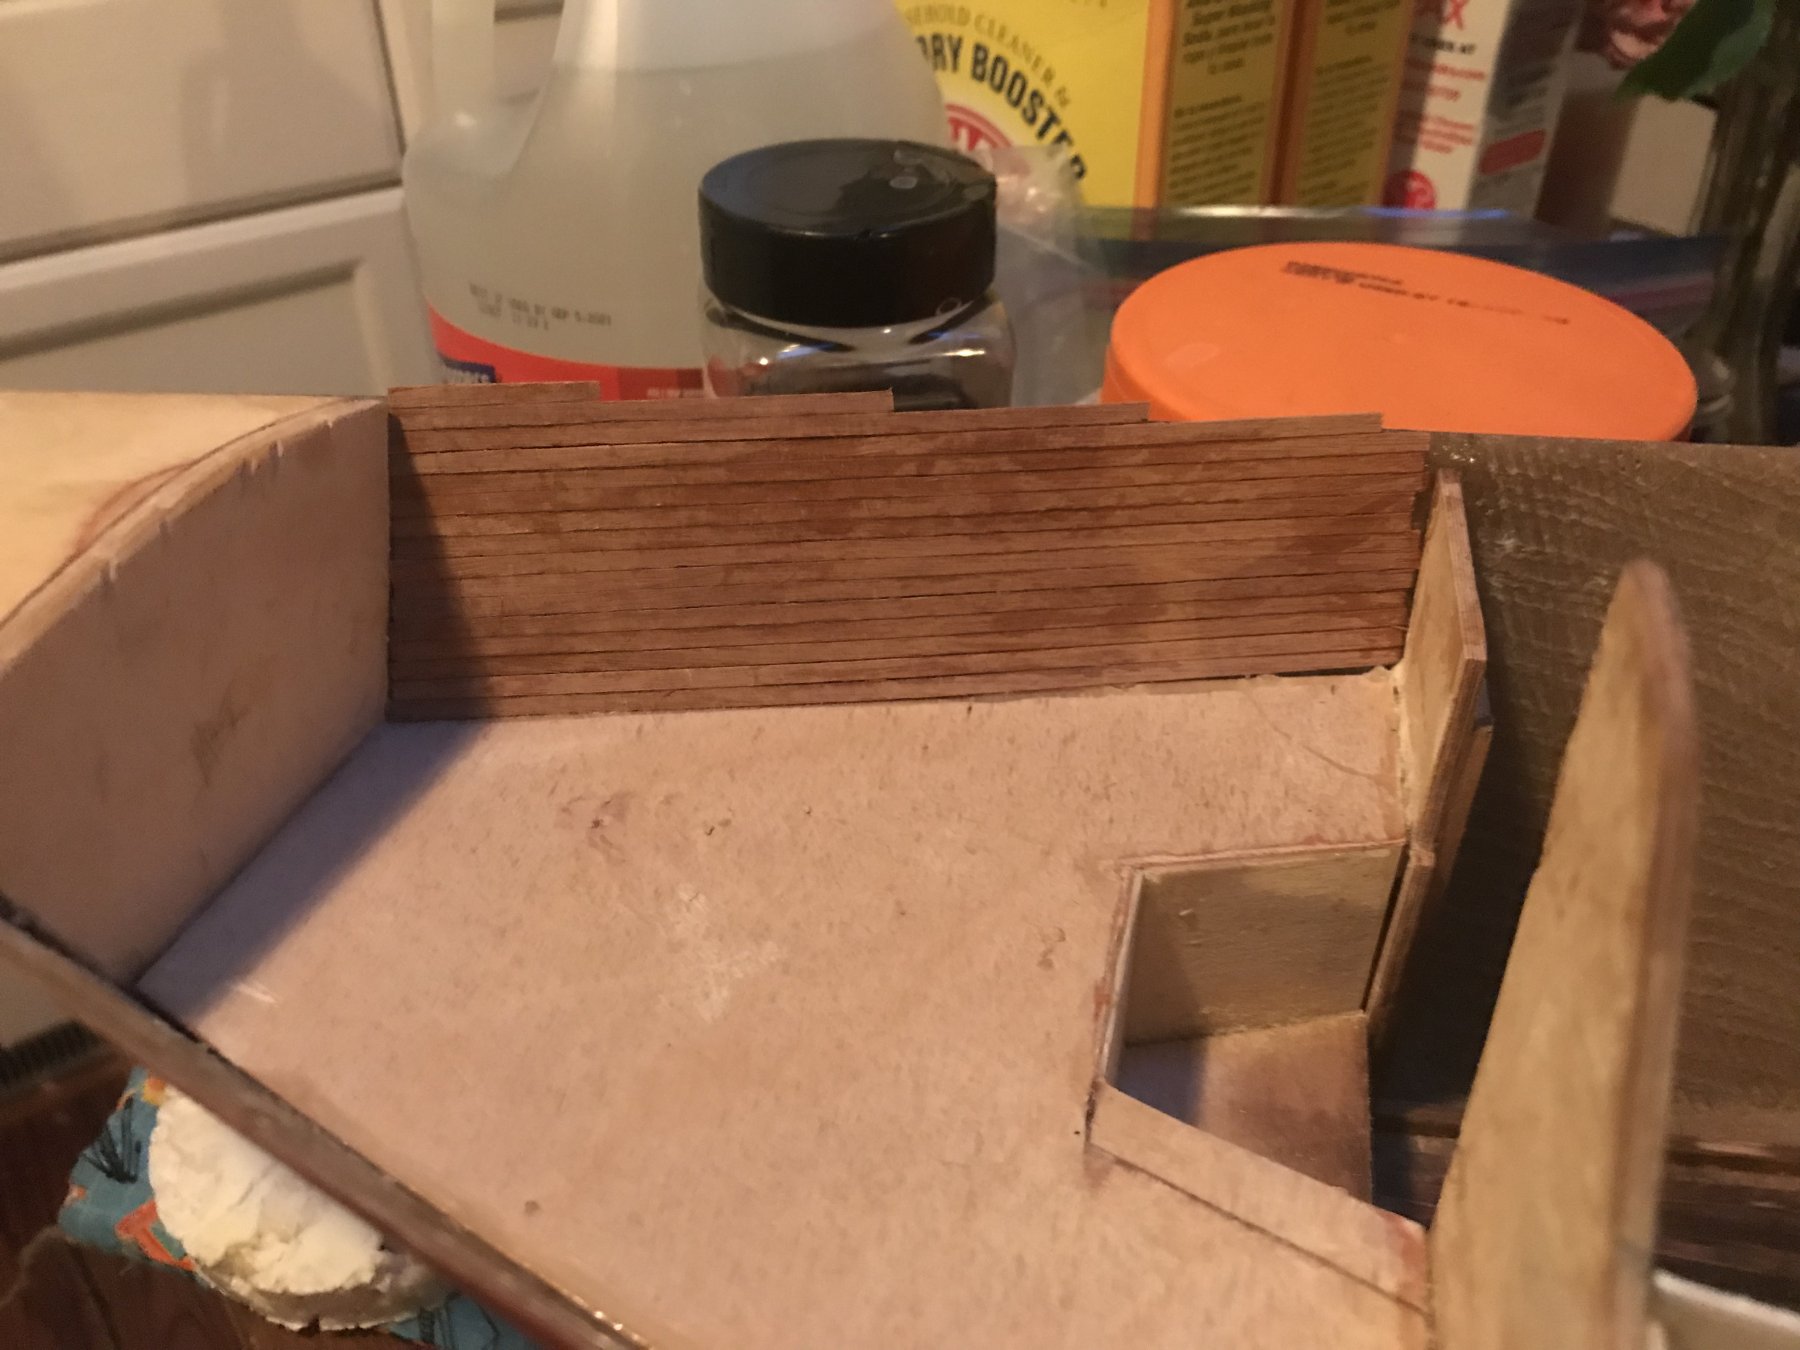
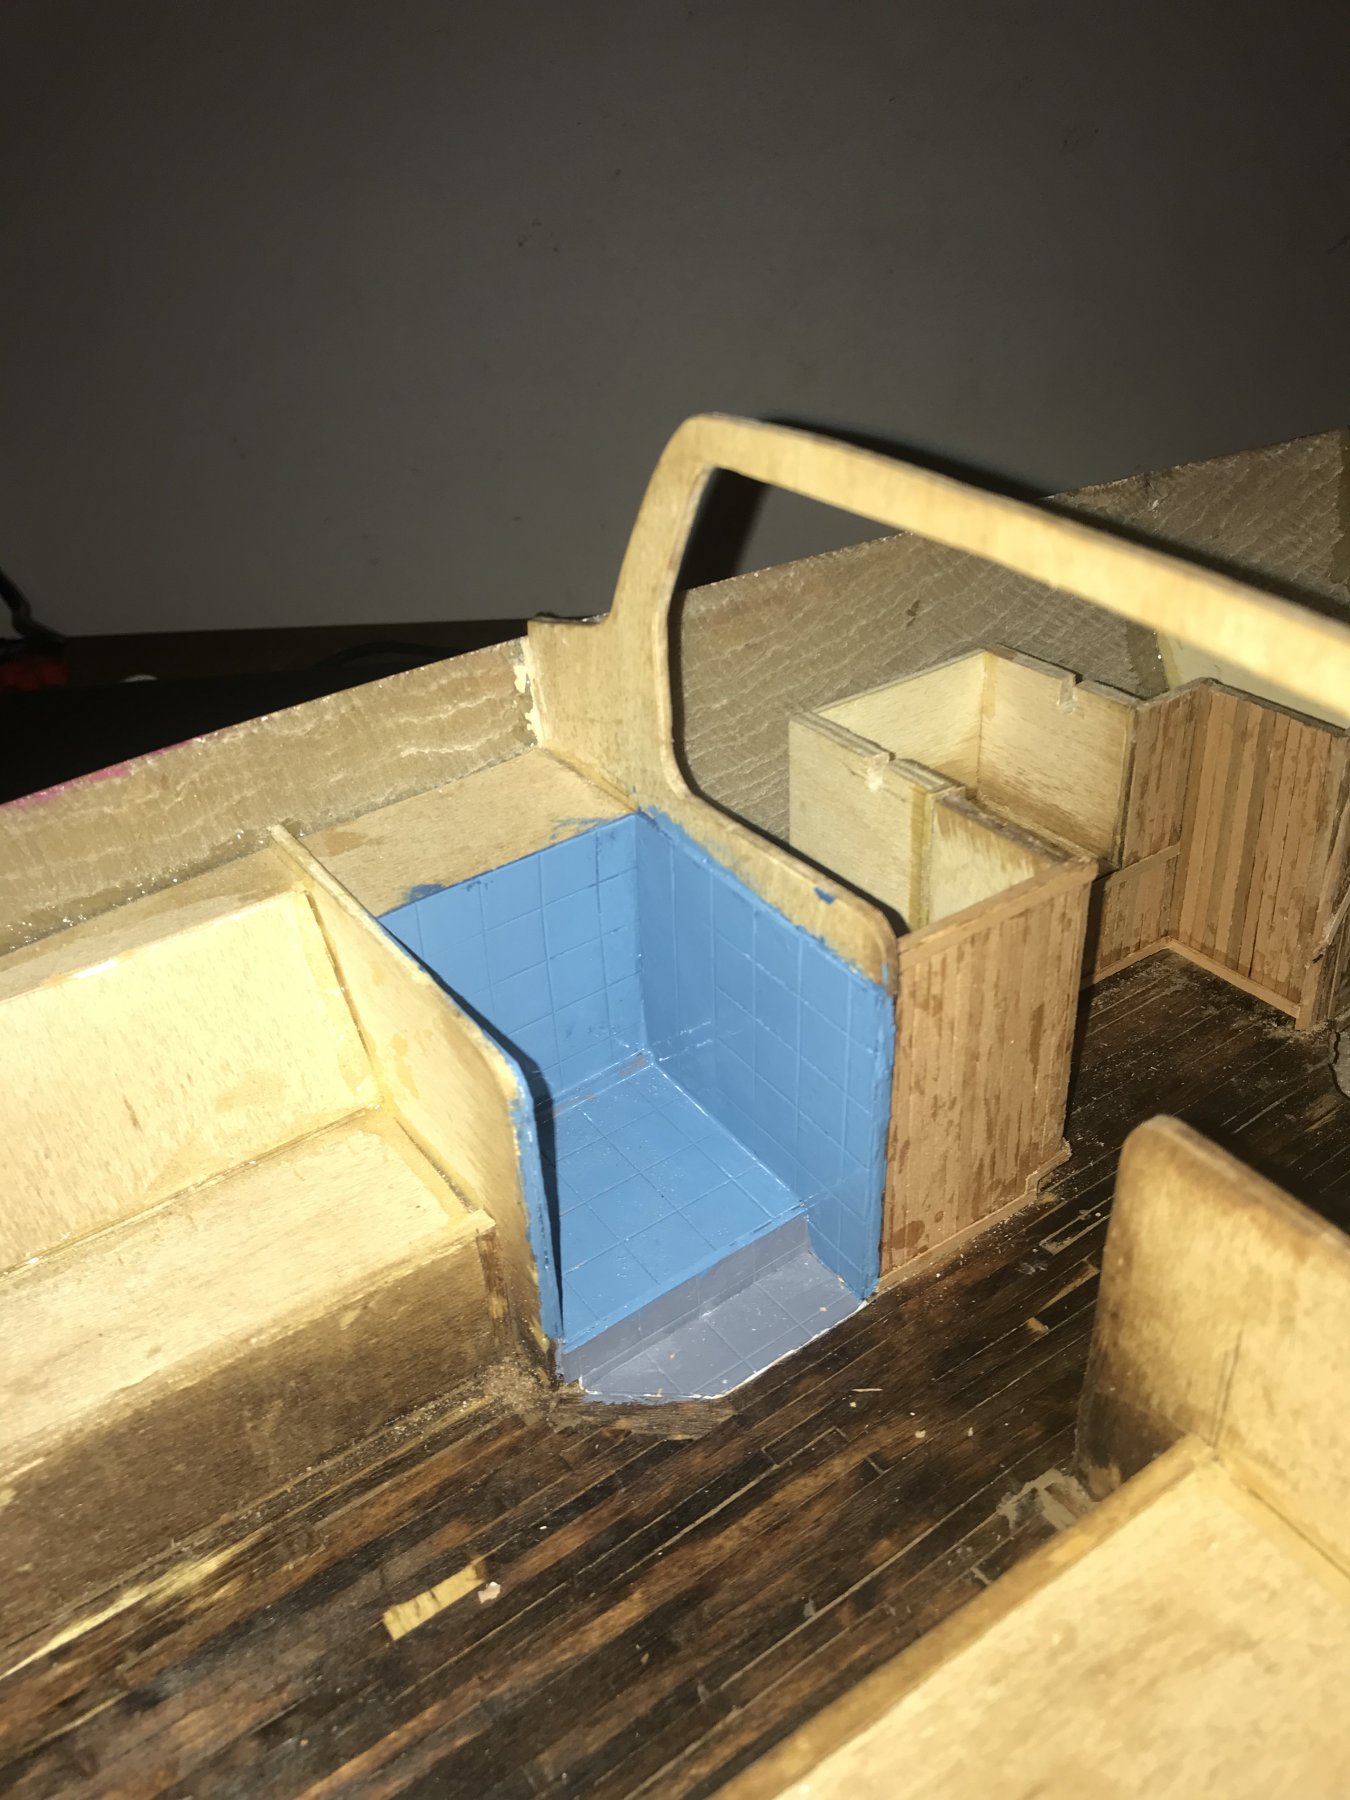
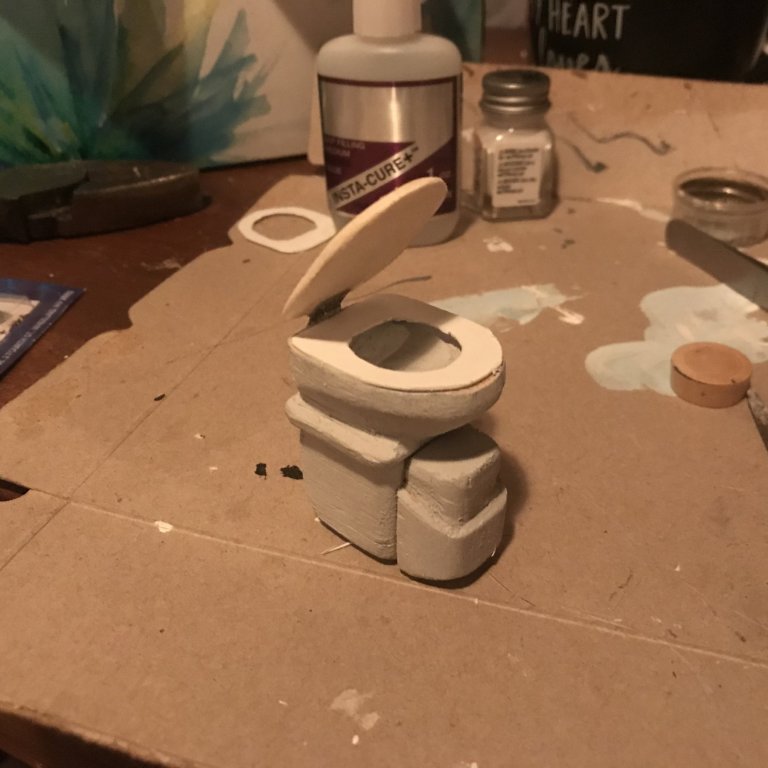
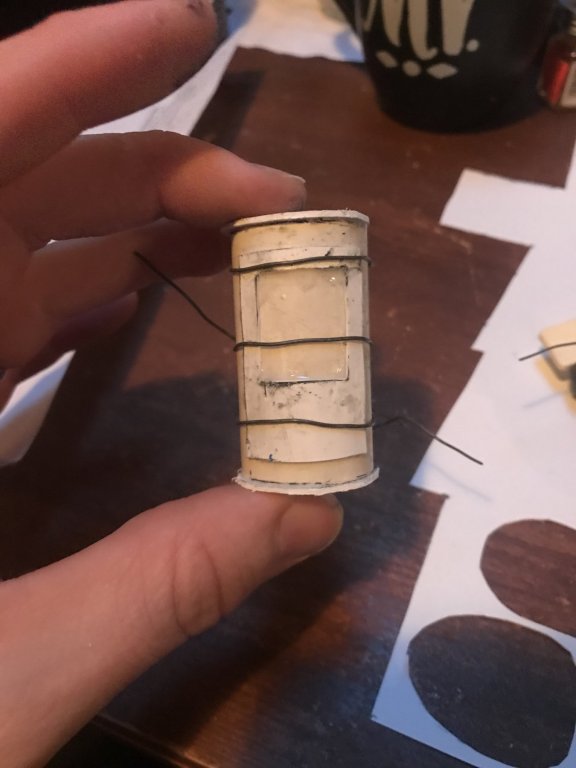
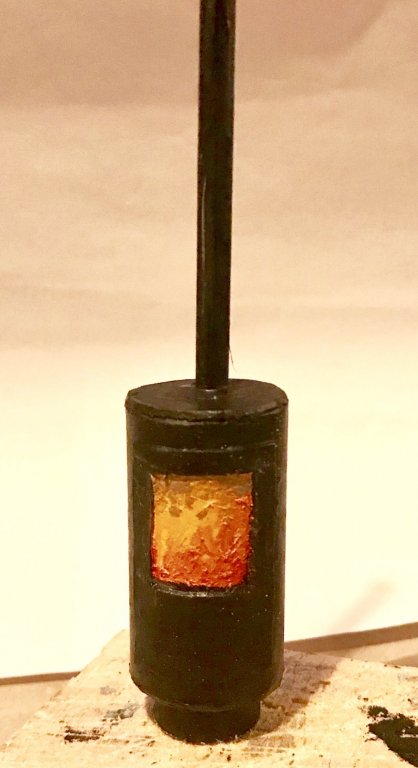
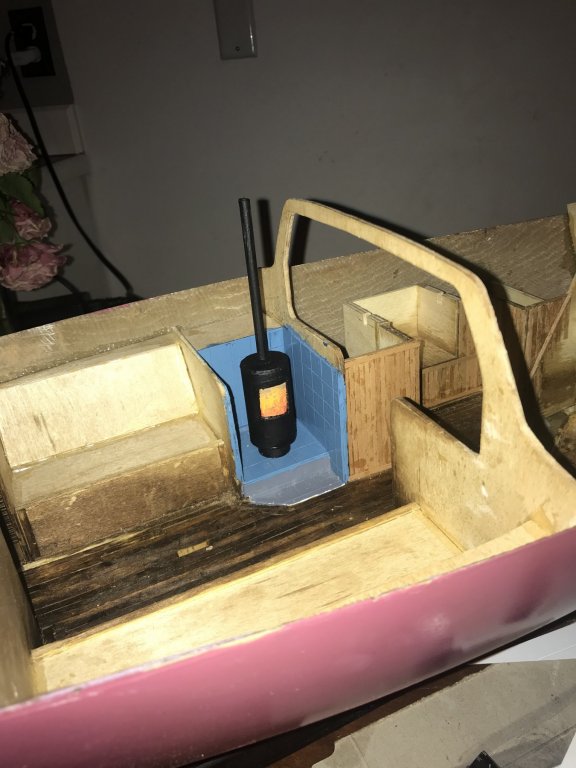
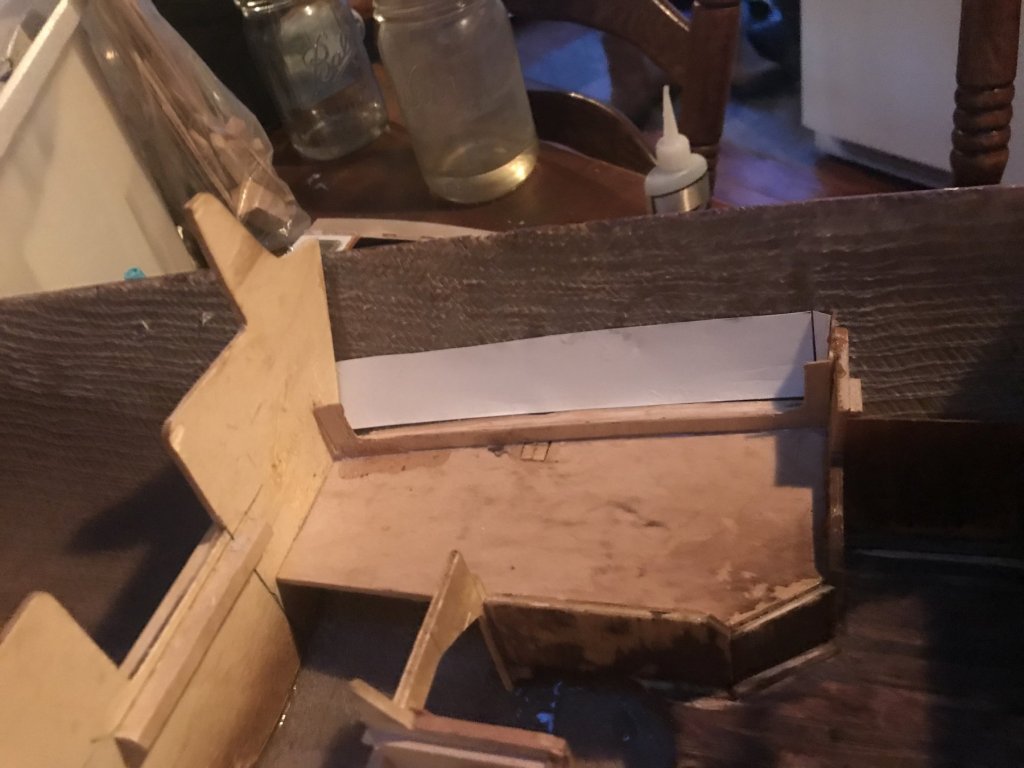
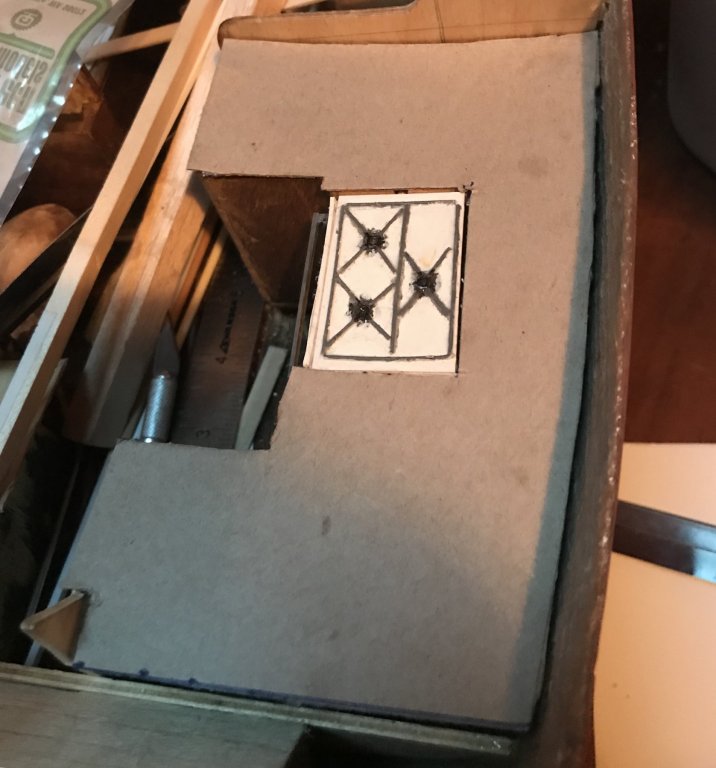
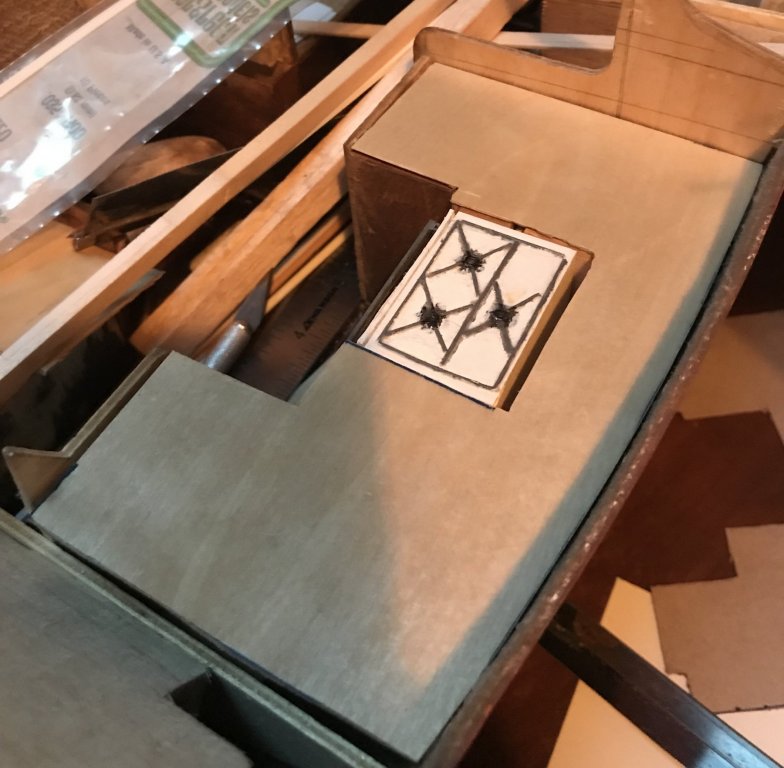
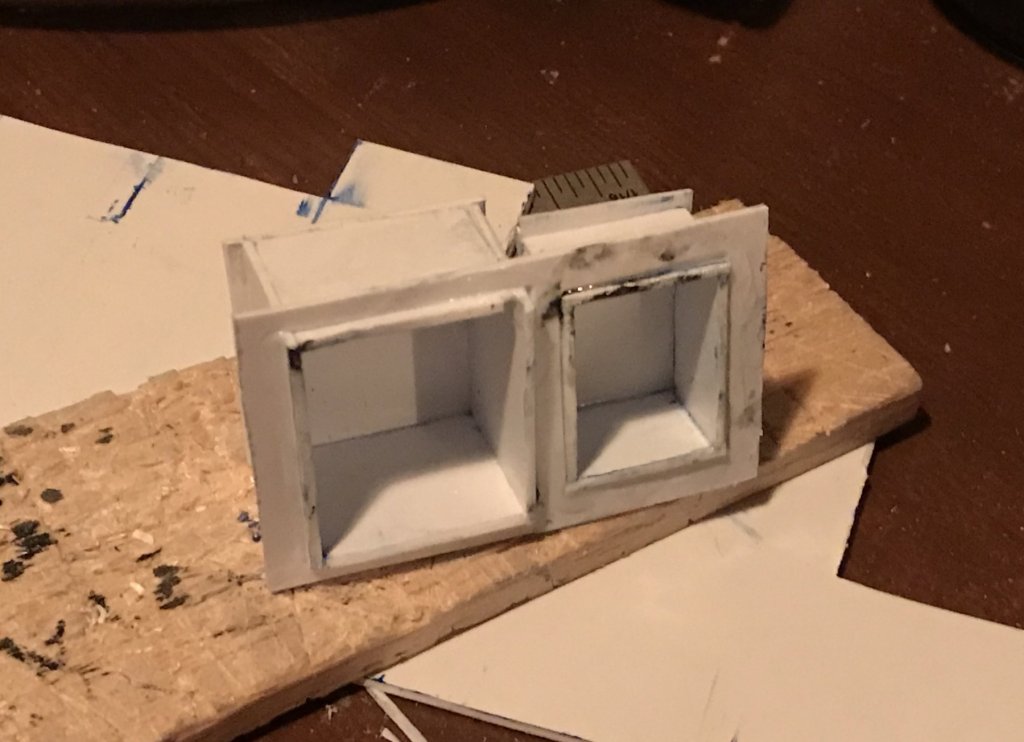
Haven’t posted in a while, but haven’t been idling, either. Here’s an update on some odds and ends I’ve been busy with. INTERIOR FINISHING ODDS AND ENDS So, first off, I finally added a lid to the marine toilet, using doll house hinges. The micro screws didn’t play so well with the balsa, but the super glue did just fine. (I did eventually paint the lid, which can be seen in a picture below) Next, I made the wood heater. I used 3/4 PVC for the body, and polystyrene for the top, bottom, door, and stove pipe. To get the polystyrene door to conform to the tight curve of the pipe, I glued the back, positioned it, then used wire to band it in place. Then, I painted it, which was fun because it was an opportunity to get ‘artsy’ with the glow of the fire through the door. After test fitting, I went in a laid the tile pattern Polystyrene, same as for the head floor. I decided to paint it a light blue, as a contrast with all the other neutral/natural coloring, since the heater and hearth are a design focal point. After this, I started doing some of the finish work along the hull. i started with what will be the inside of the quarter berth ‘cubby’. I went with white polystyrene sheathing (emulating fiberglass molding) because the space will be one of the darker ones on the boat, and I wanted to brighten it rather than stick with wood paneling. Then I started tackling the forward vee berth, which is wood planked all up the hull. I haven’t yet decided whether to plank the forward bulkhead, or sheath it white for contrast. Till next time!


-
I agree- the reference photo seems not to show the rudders on the boats. And, for boats that aren’t double ended, they go bow forward. I expect it would be the same for your boats (Titanic’s were double ended and arranged bow forward, for example). Probably just a traditional practice- it doesn’t ‘feel’ right to put the bows aft, and probably doesn’t make a difference functionally (boat is as likely to sink by stern as by bow, and it should not matter which way the boat faces anyway), so go with the ‘feeling.’
- 446 replies
-
- 3
-
-
- zebulon b vance
- deans marine
- (and 3 more)
-
Looks great! Very impressive.
-
Amazing work Patrick! Love how she’s turned out, especially that heck-uv-a hull! And, I concur that a minimalist display is a good contrast to the shapely boat- like you pointed out, it emphasizes the uniqueness. Great job!
-
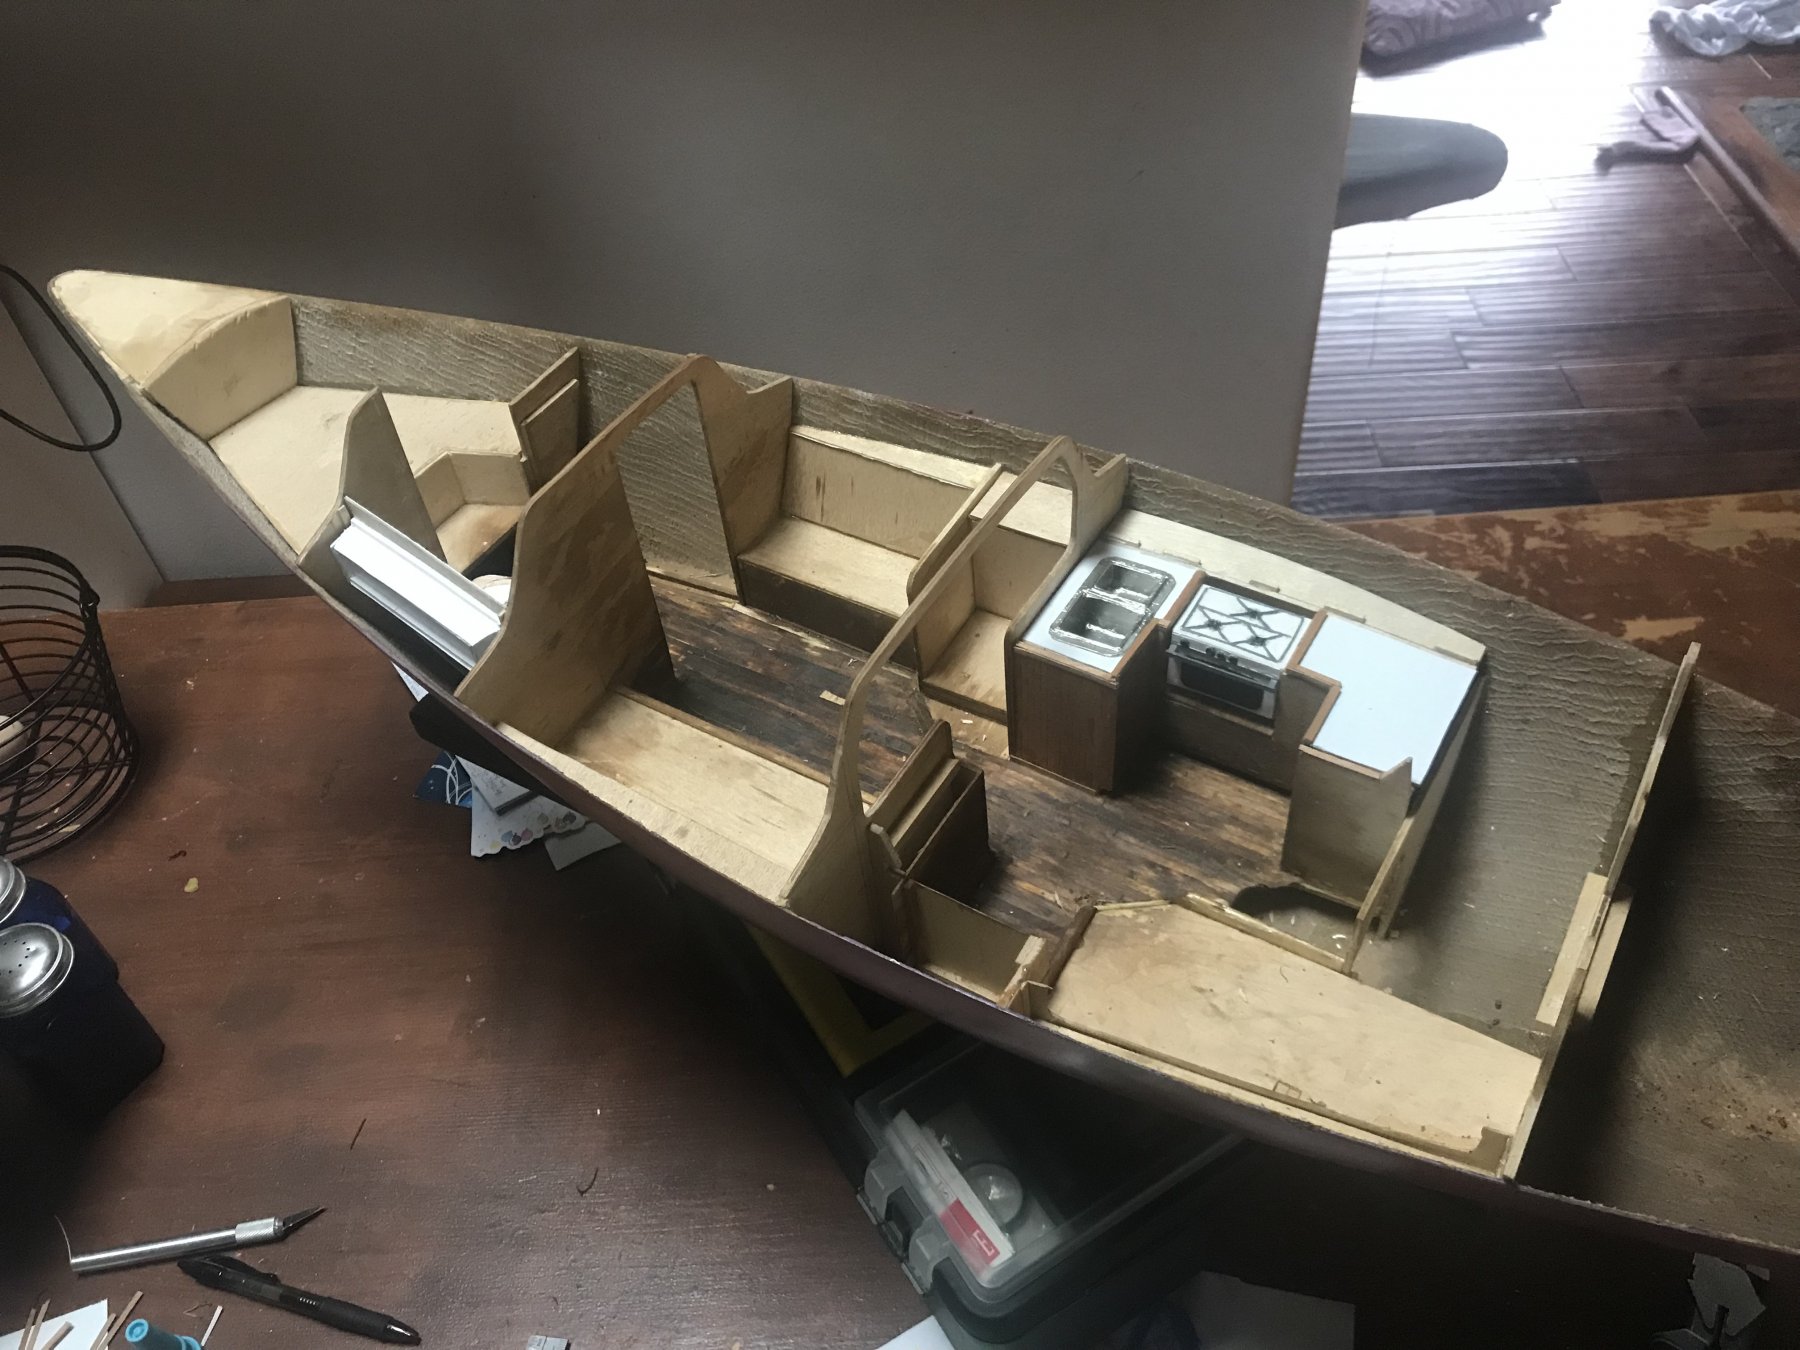
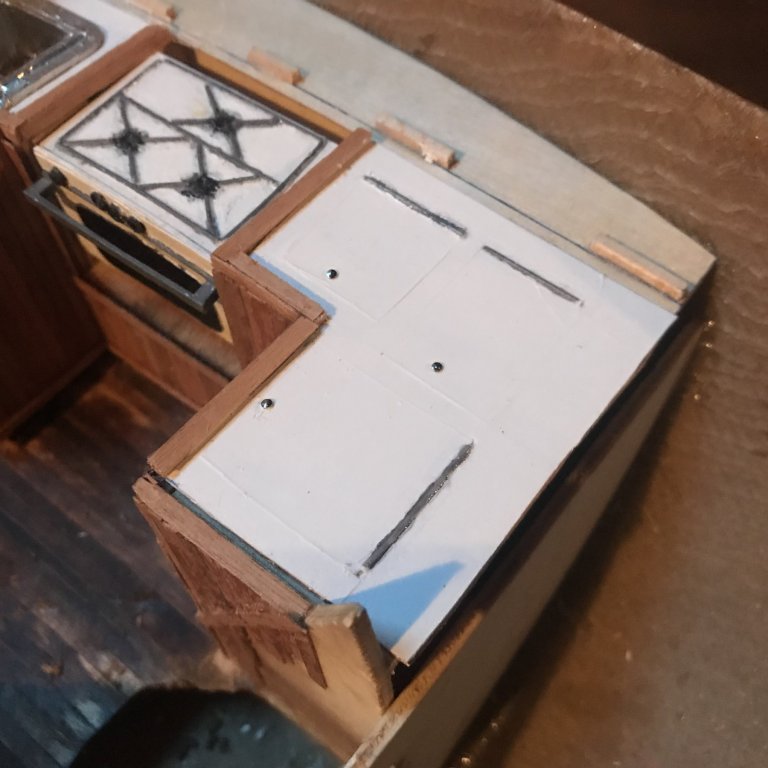
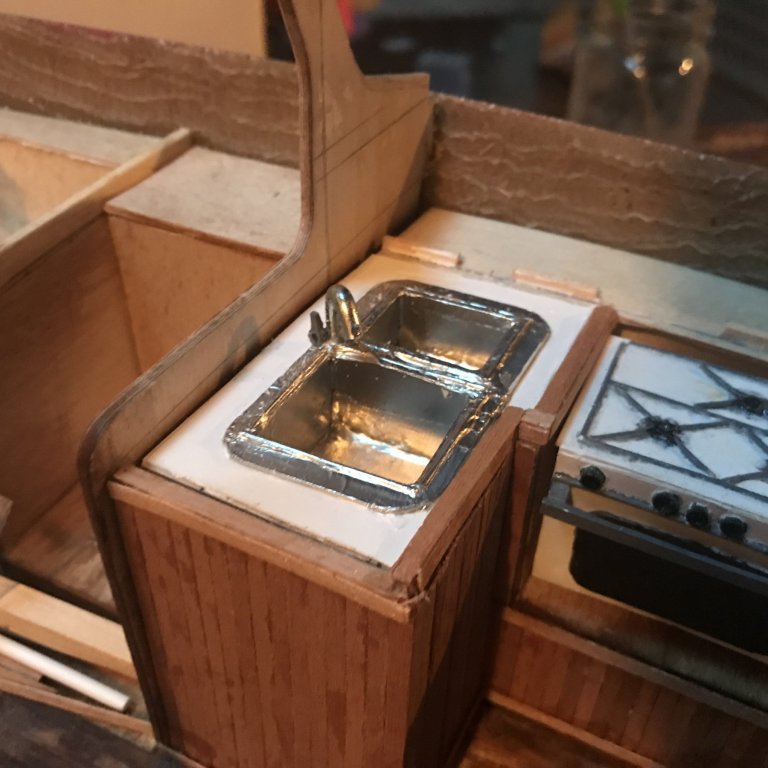
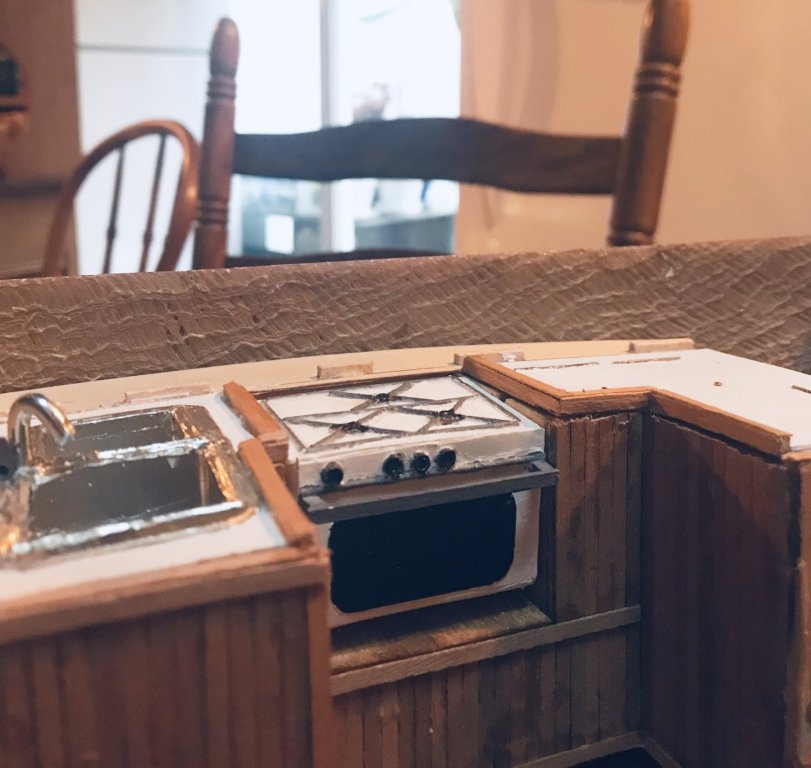
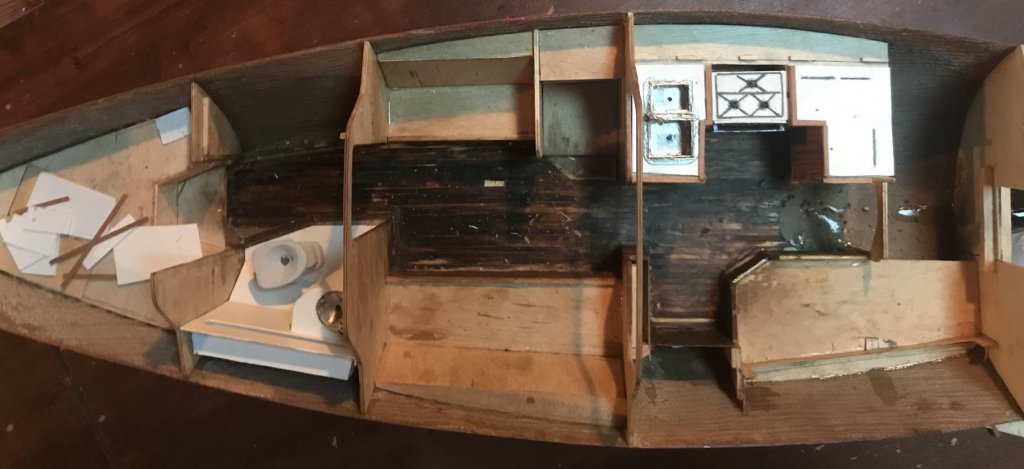
HEAD AND GALLEY FINISHING 1 Spent some time last night working on finish details for the head and galley. Got most everything painted, and added the faucet to the galley sink. I also simulated the top-opening hatches in the galley counter with some small plastic rod for the hinges and pin heads for the latches. Head: Galley: Counter Hatch details: Sink details: I decided to have some fun with updated POV shots. Sitting on fwd vee berth: Standing at nav station across from galley: And finally an aerial view of the whole boat: Till next time!


-
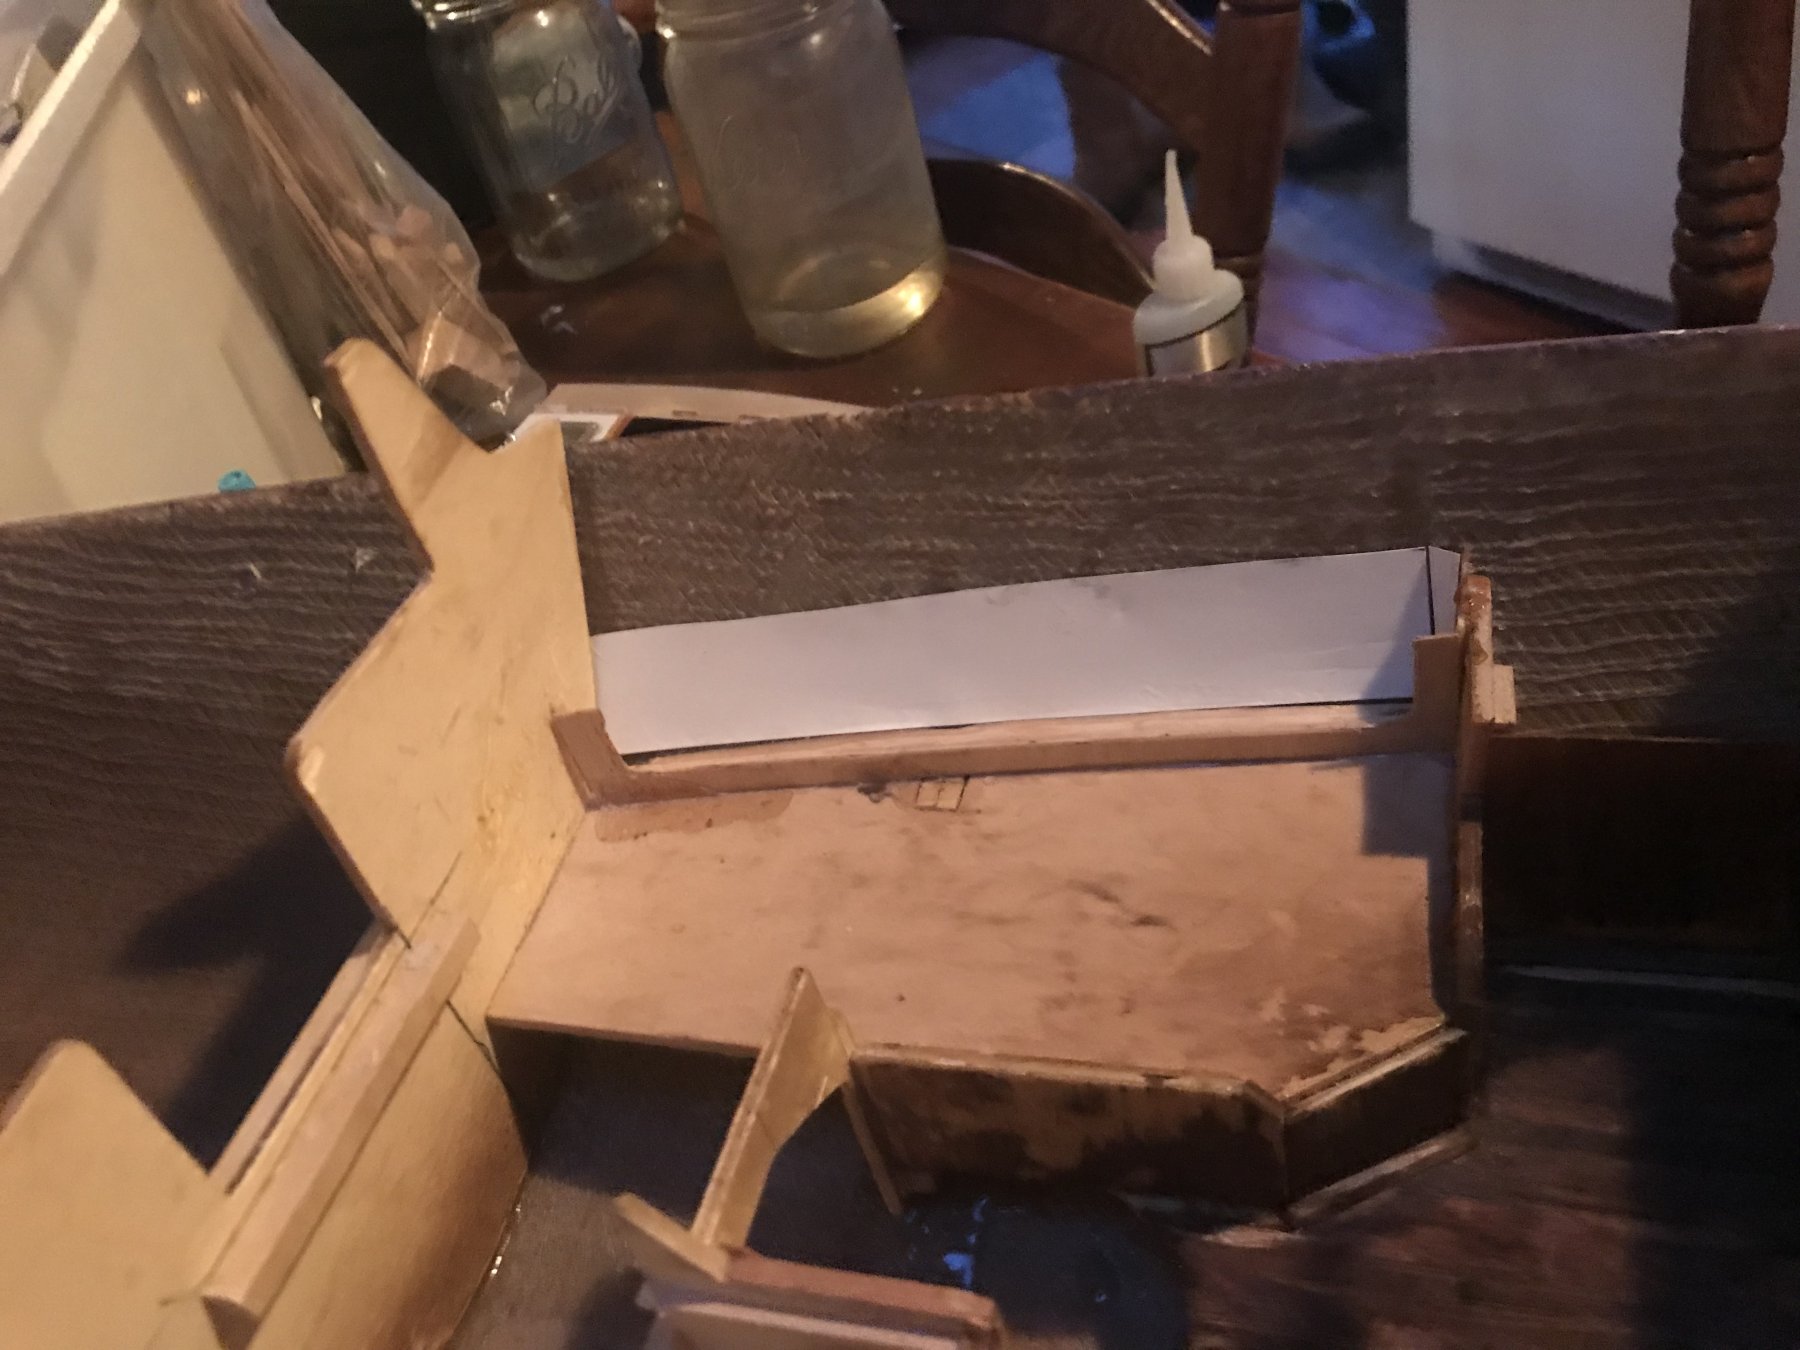
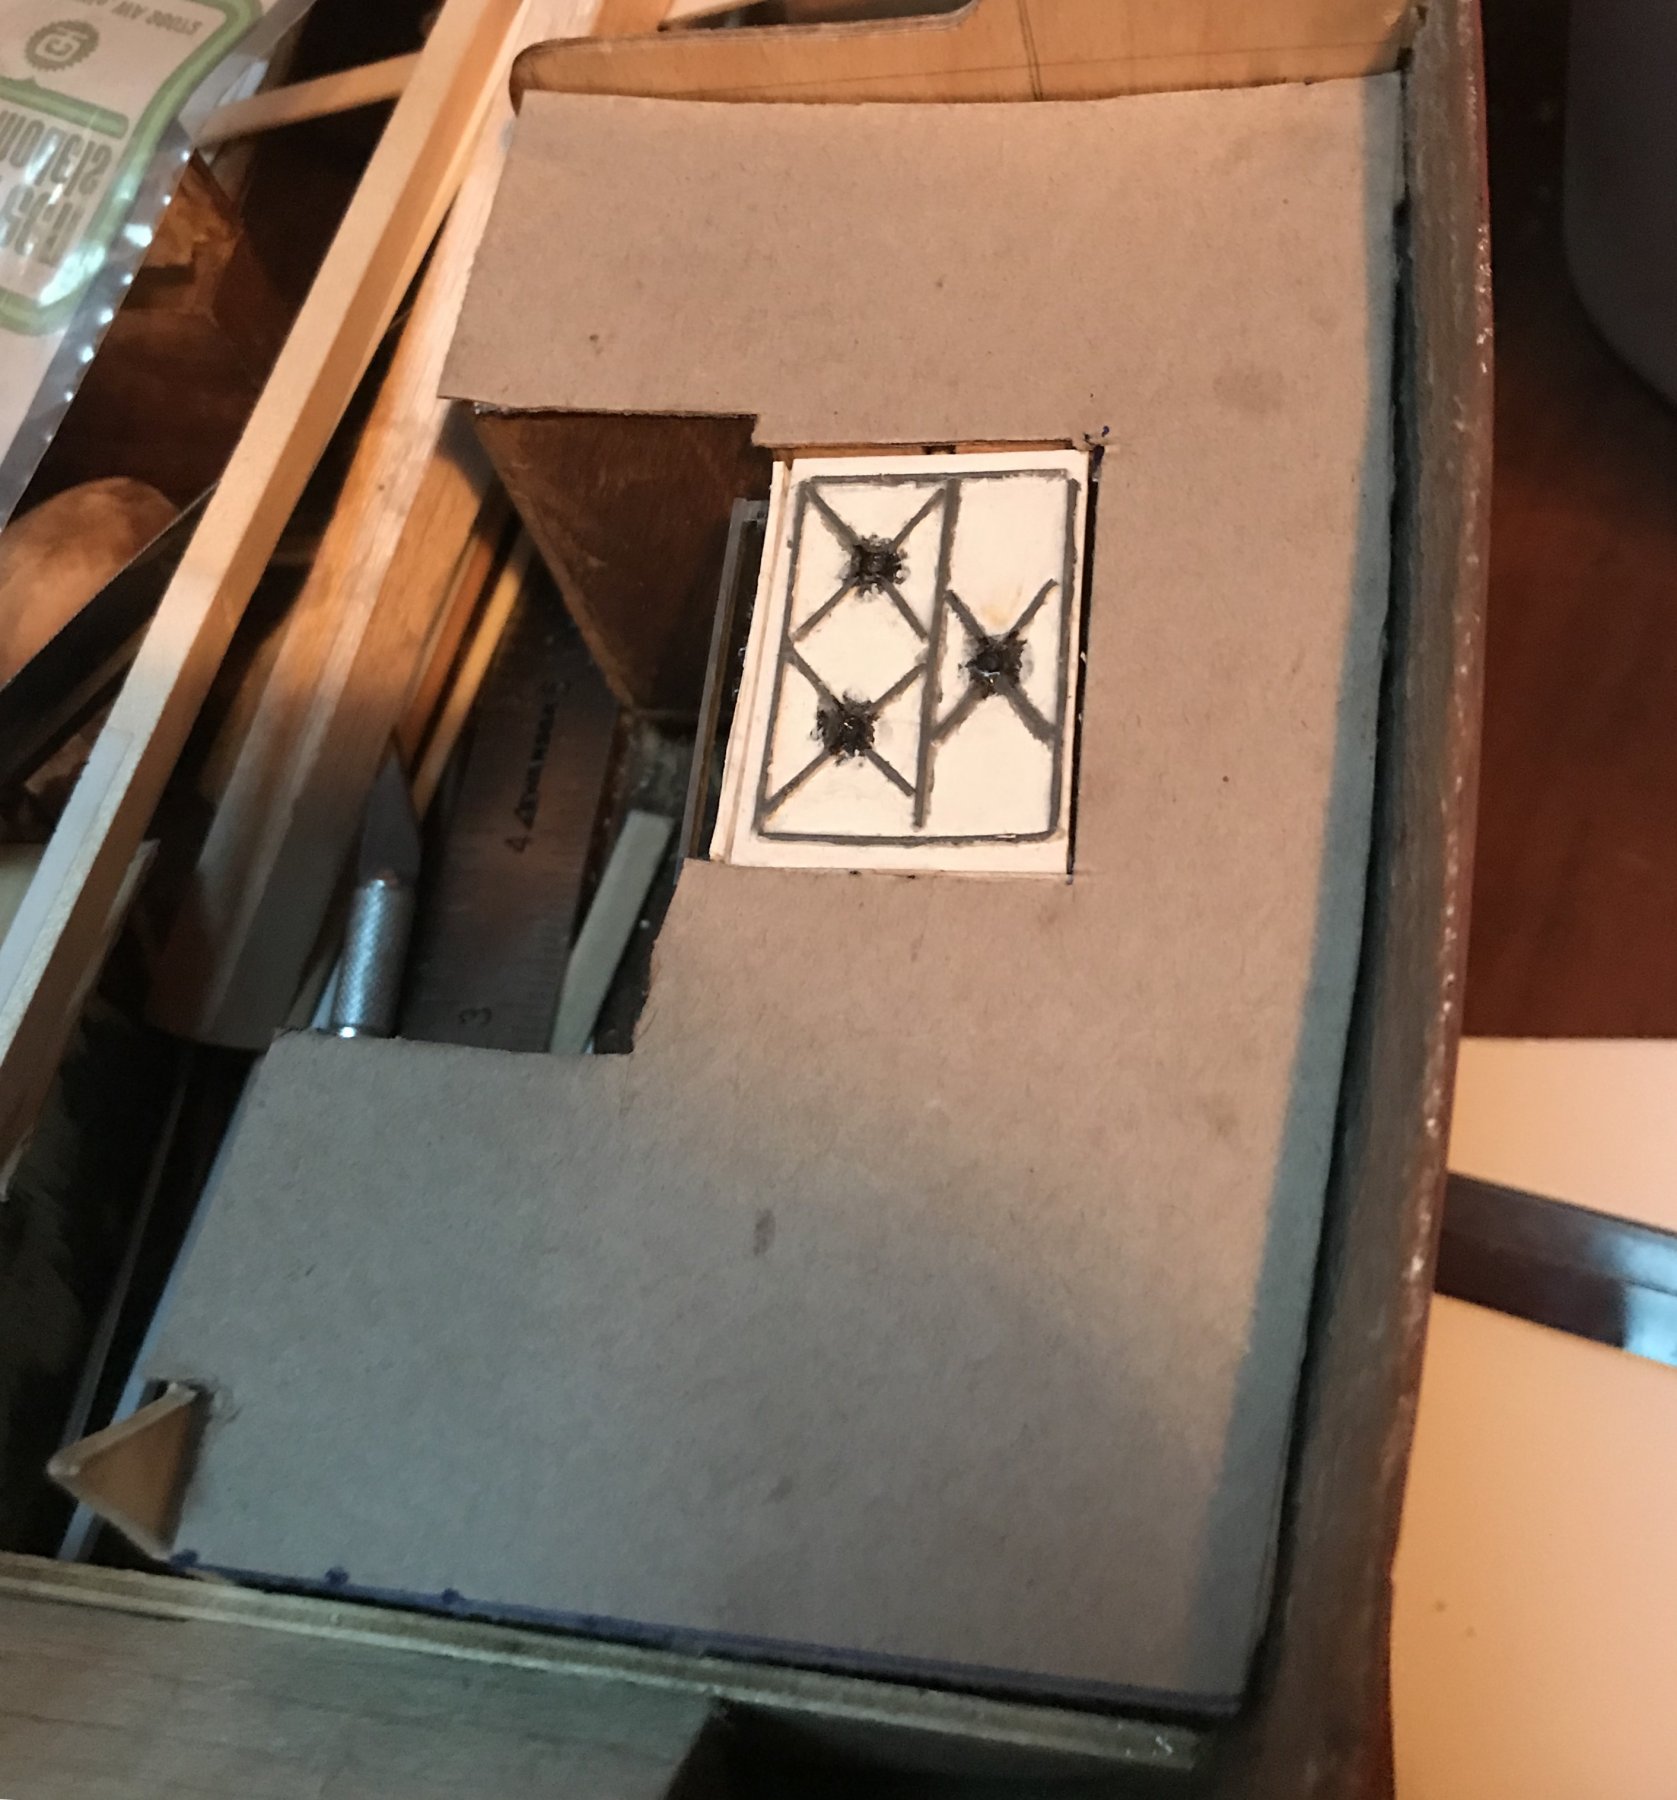
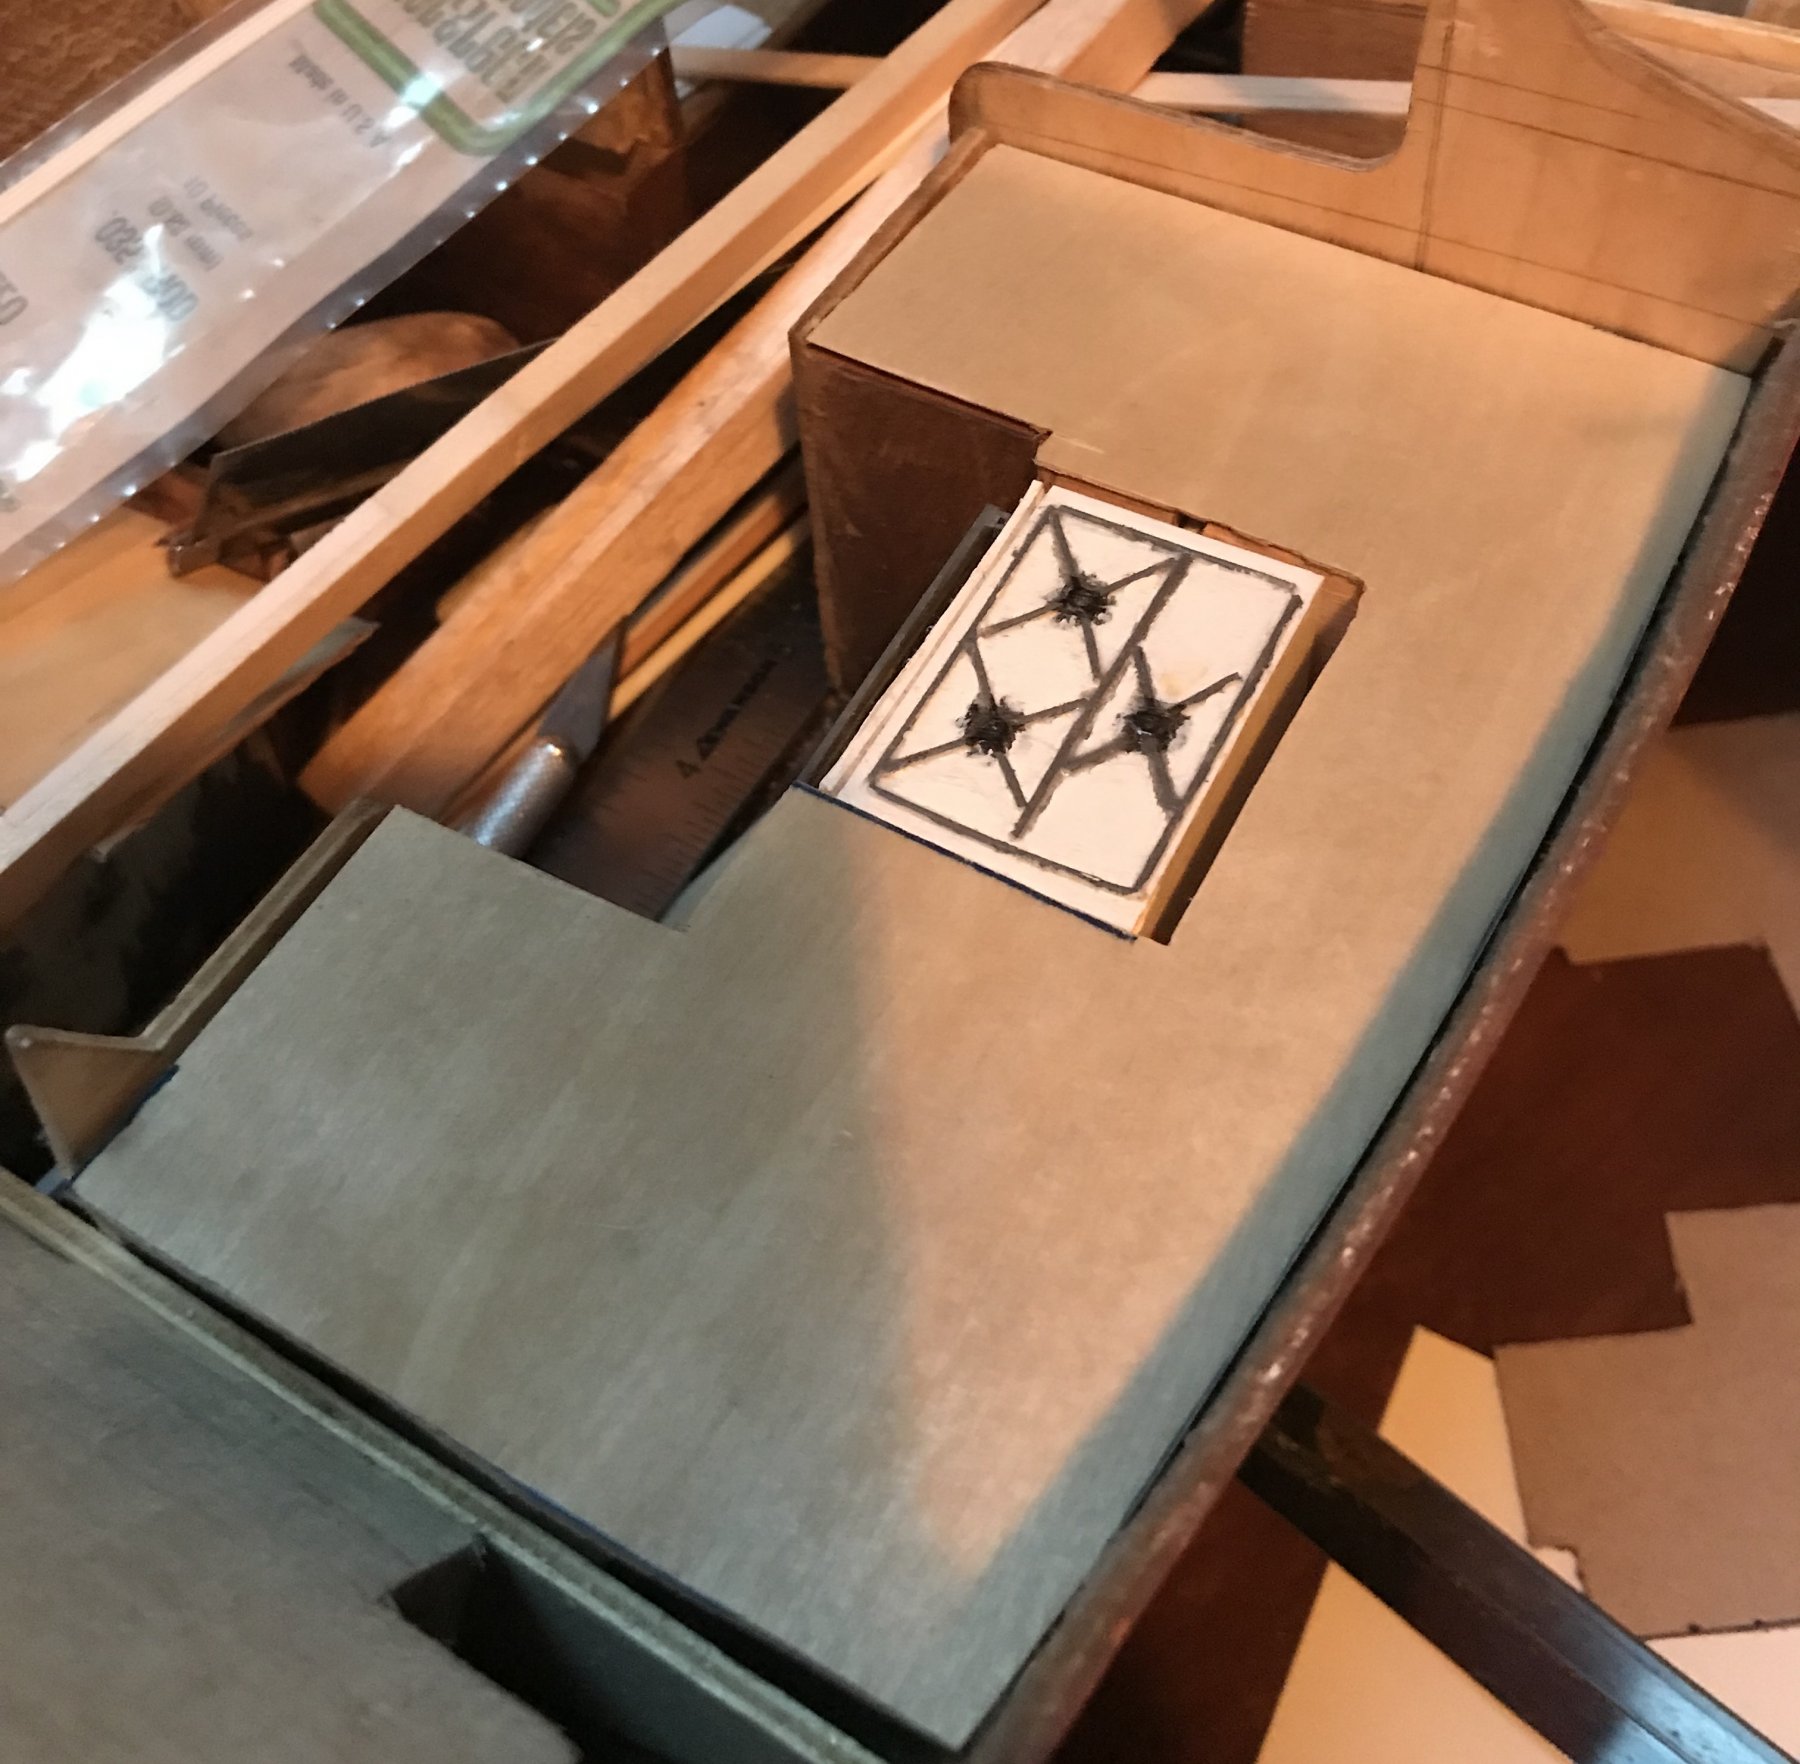
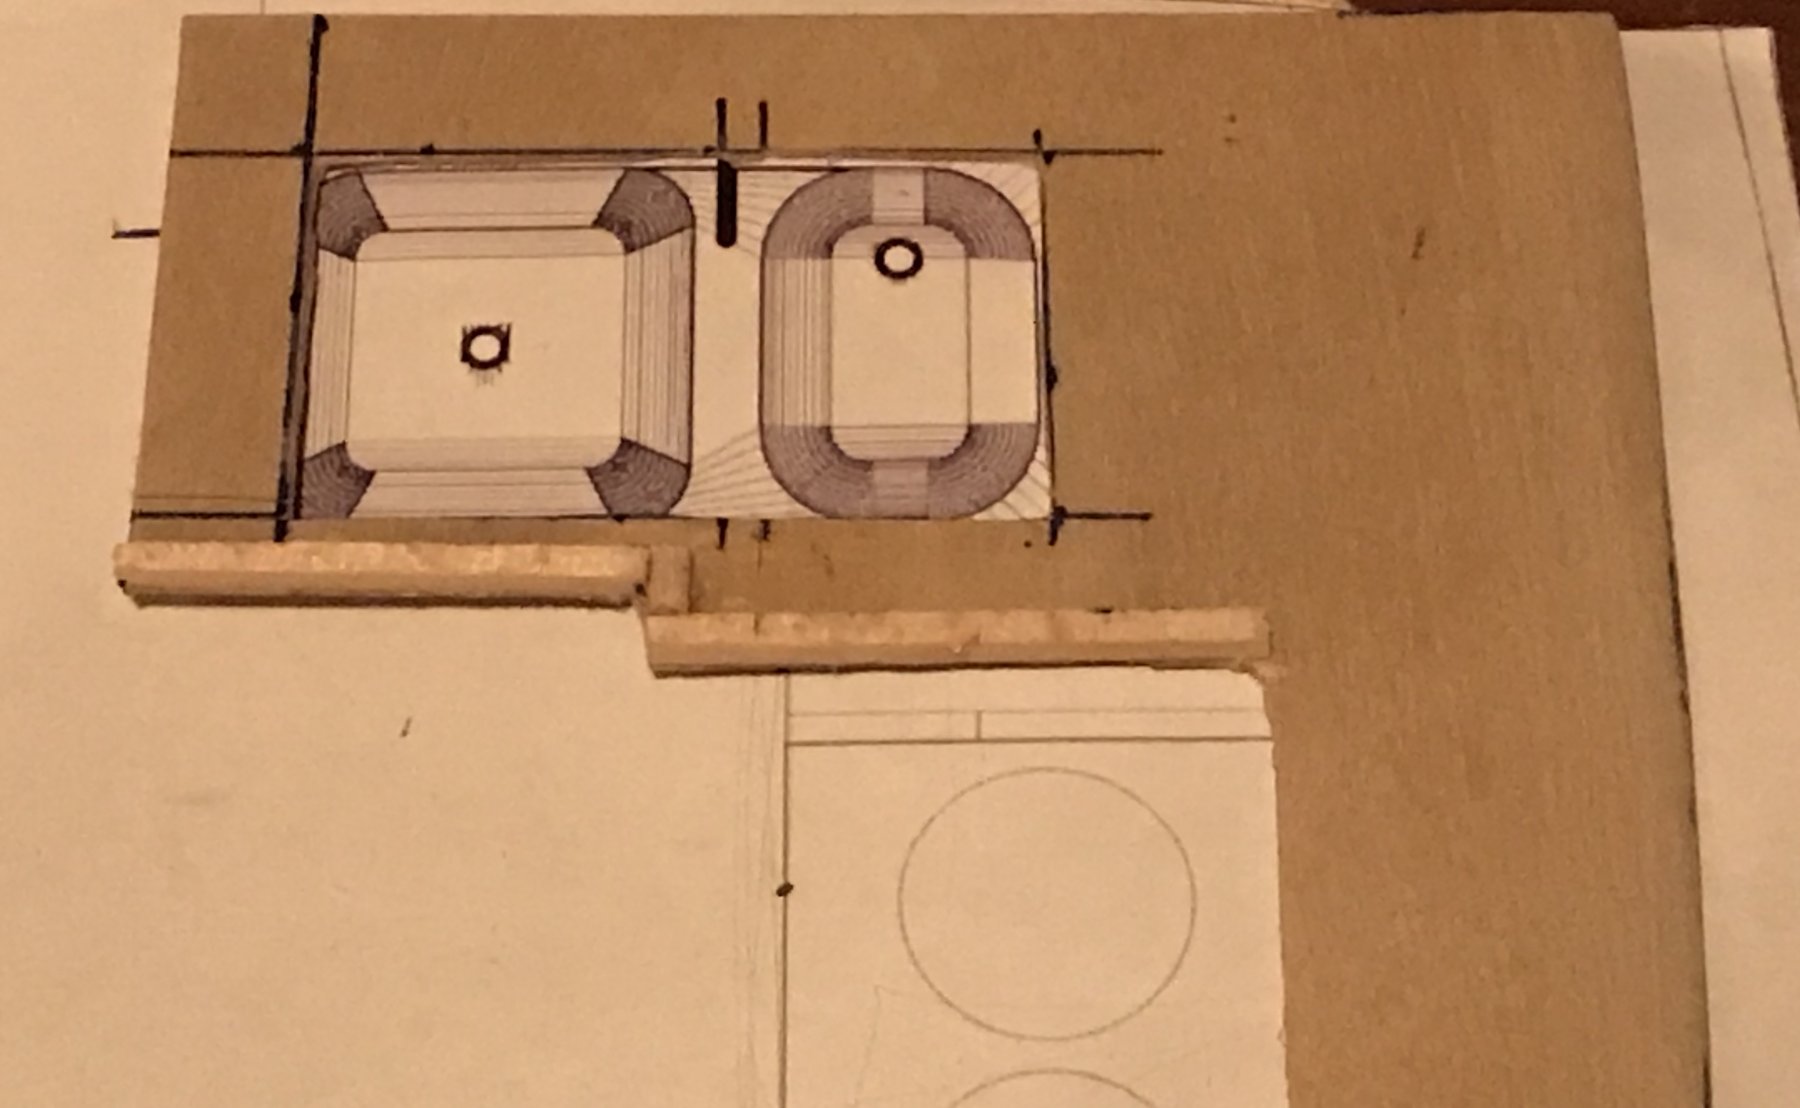
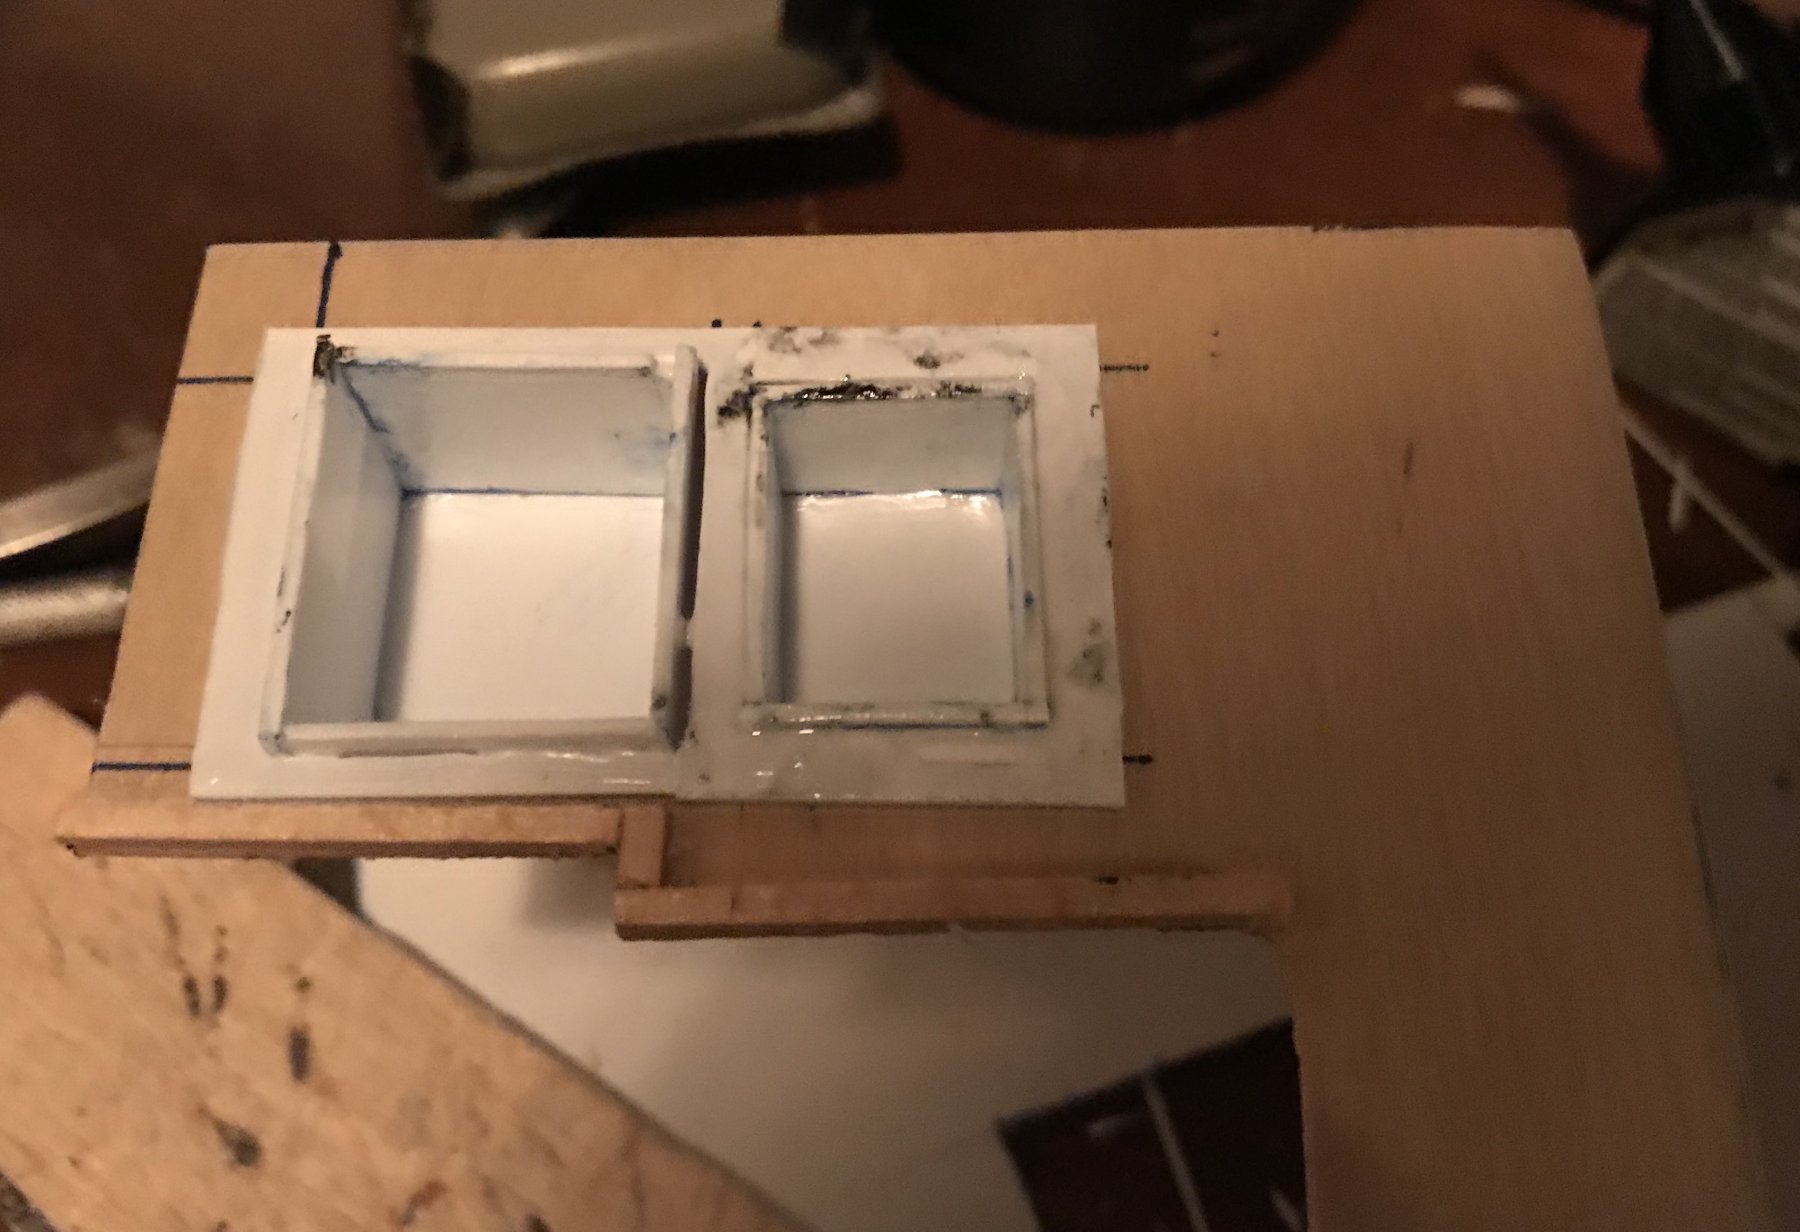
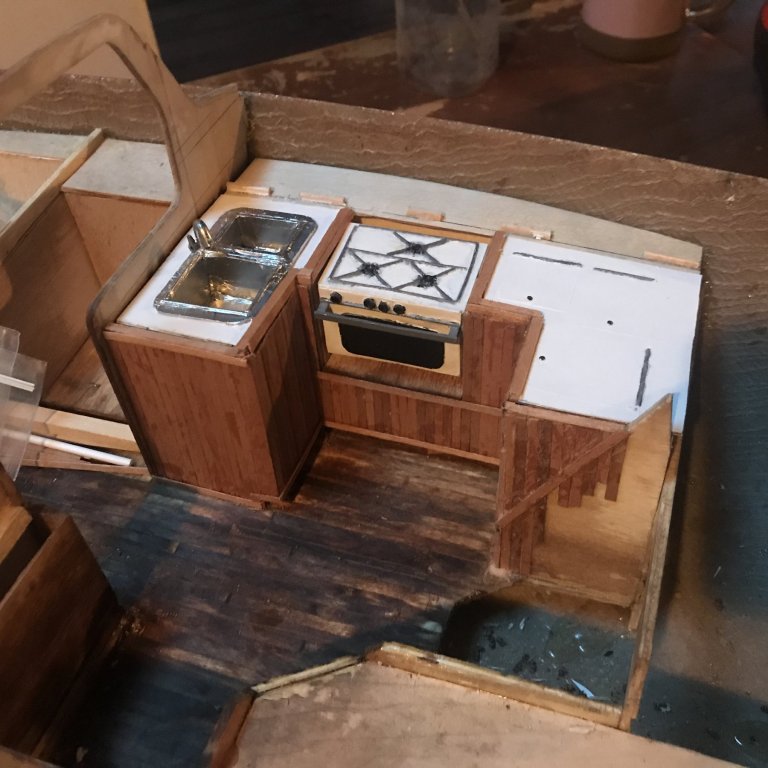
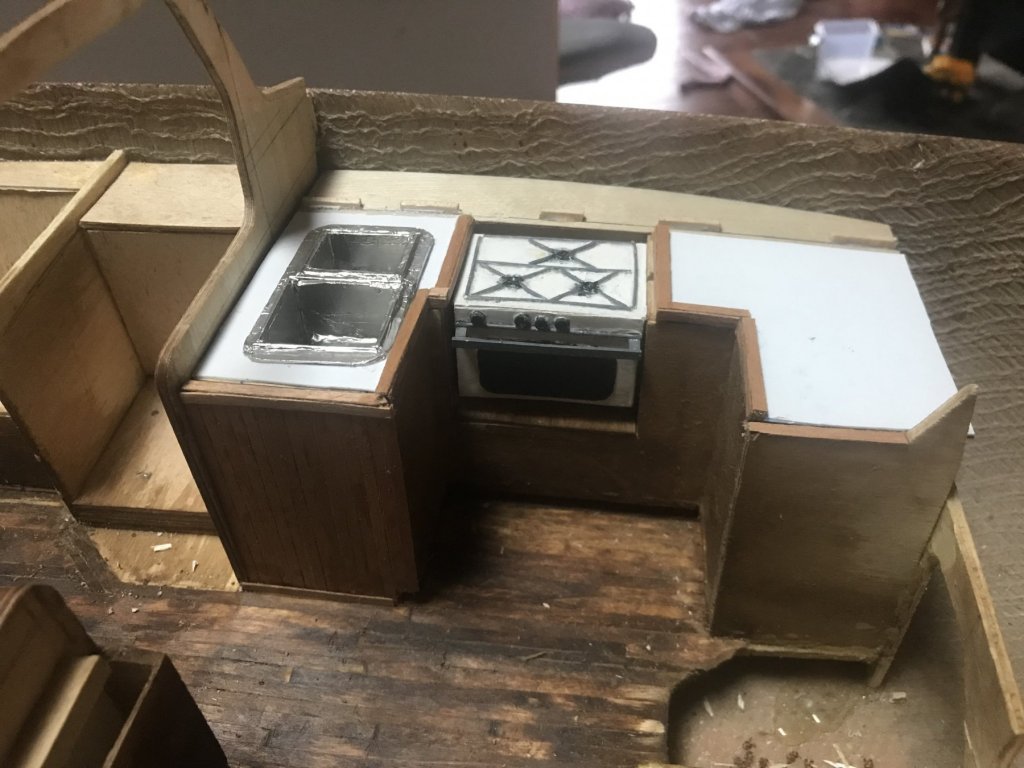
GALLEY - PART 5 Once I got as far as I could on the head without paint, I switched to working the galley. I started by templating the shape of the counter top with a piece of thin cardboard, followed by tracing and cutting out of 1/32” wood sheet. Then I added the ‘trim’/ coaming around the edge of the counter top. I used 1/8”x1/8” basswood, I think. Next came the cutout for the sink, followed by the sink’s construction. The sink was built from 0.40” polystyrene, then covered with the adhesive back foil. Once the sink was built, I dry fit it in place. The pictures show the first of several test fits as things progressed. Then I finished the counter coaming with some .5mmx3mm strips I had on hand, attached the polystyrene finish counter top, and installed the sink. I did the same to the opposite side without the sink. Then, I realized I had to get the finish planking on the galley base cabinets before attaching the counter top, because the stove would get in my way. So I planked the lower part of the galley structure. The picture shows the planking partially complete. Finally, an overall shot showing the galley in context This gets the log just about current with the boat. More to come soon!


-
Hi Patrick! Thanks for looking in! Good question - the plan is that all will be fixed in place, but there won’t be much of a deck. Only over areas that aren’t accessible anyway. It’s both bigger and smaller than it looks (if that makes any sense), but I have been trying to think through access and such. I may end up leaving the inboard wall of the head off, or make it removable to improve access (of course, with kids that will probably turn into option 1 anyway...).