


SkerryAmp
-
Posts
809 -
Joined
-
Last visited
Recent Profile Visitors
2,053 profile views


-
 kuya reacted to a post in a topic:
Modifying Harbor Freight Workbench for Full Drawer Access
kuya reacted to a post in a topic:
Modifying Harbor Freight Workbench for Full Drawer Access
-
Nirvana reacted to a post in a topic:
Modifying Harbor Freight Workbench for Full Drawer Access
-
Nirvana reacted to a post in a topic:
Modifying Harbor Freight Workbench for Full Drawer Access
-
wefalck reacted to a post in a topic:
Modifying Harbor Freight Workbench for Full Drawer Access
-
Bill Morrison reacted to a post in a topic:
Phantom by gulfmedic1 - Model Shipways - Scale 1:96 - Solid Hull - first wood ship build
-
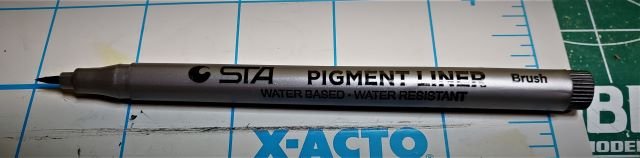
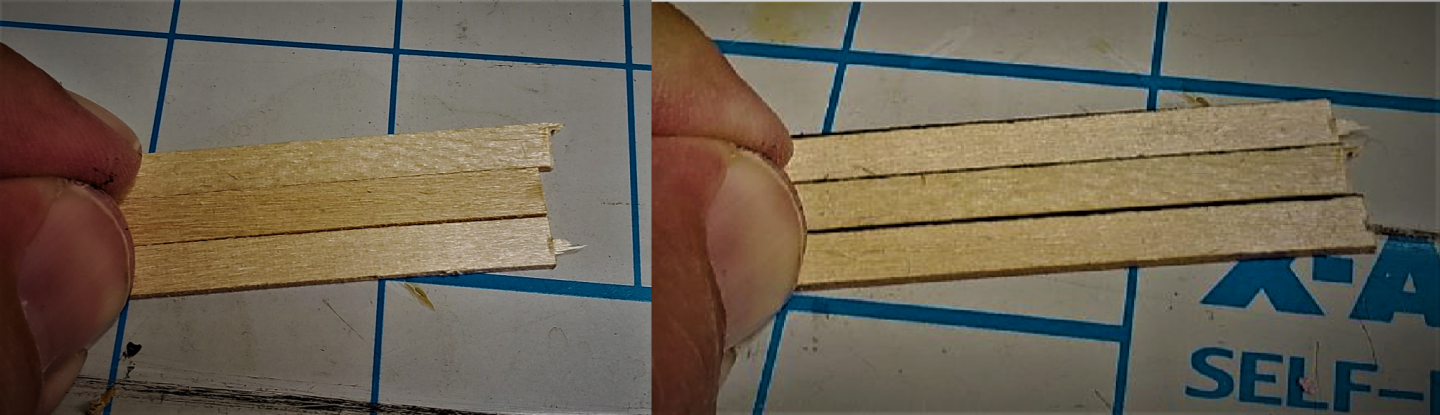
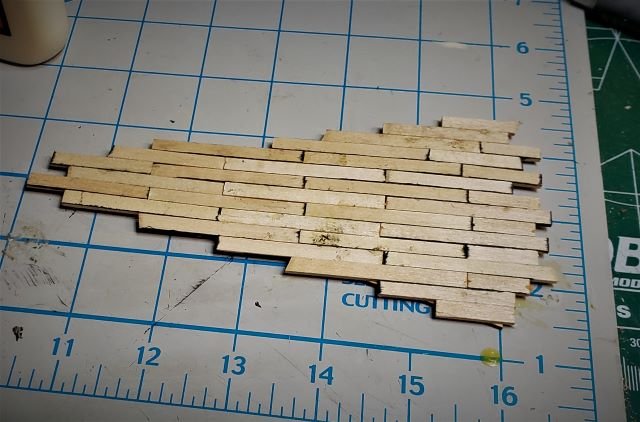
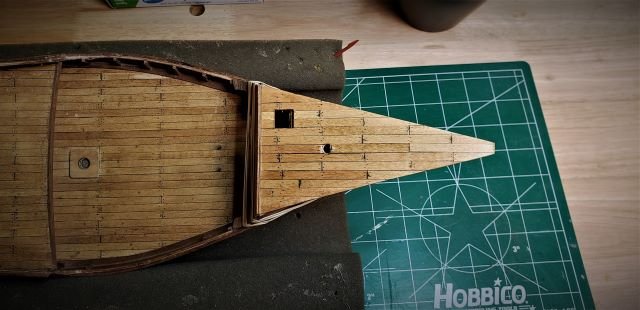
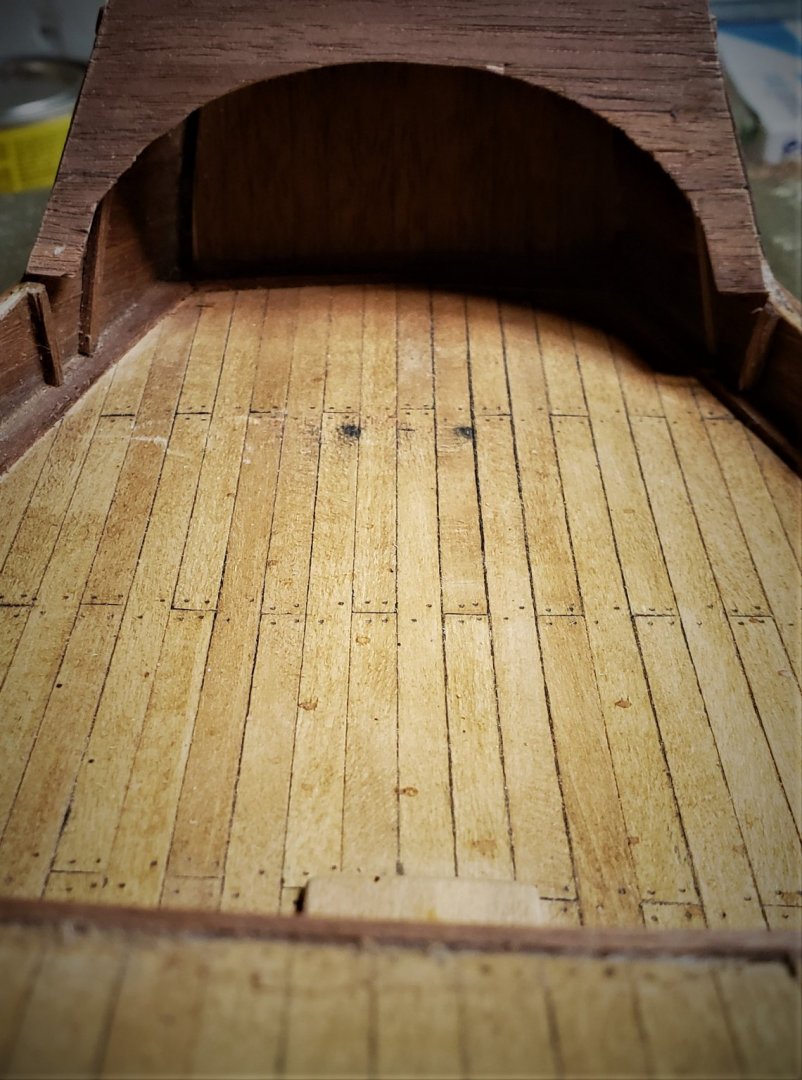
 Well here we are again! As I continue to try to get all the exterior battens back into place I hit a spot where it felt time to get the forecastle deck done. I figured this part was in very good shape so let's git r done. I started by popping the false deck out of the sheet and then cutting strips to be used as the actual decking. Very simple stuff really.... thank goodness I still had my Chopper! Before I put the decking on I wanted to simulate the caulking. I know there are many different ways to do this and just as many "tastes" as to what people like. I kind of like a nice black line which varies a little bit between pieces (some darker, thicker than others etc). So my preferred method which I picked up from the mayflower is to use archivist ink pens. These are the ones I am currently using as they come in a set of various size tips (for various size jobs!) including a brush pen which is perfect for the caulking while the others are good for nails. That is, of course, my humble opinion. The brush, as I mentioned, makes it easy to vary the strength and depth of the caulking lines - for example So, without further delay I "caulked" the edges and lay the deck WOOOOO boy is that rough lookin! One issue I did have was making sure all the decking was pressed tight and flat and even. Wasn't completely sure what to do or what to use and then it hit me! Under my mat is a sheet of metal I use for using magnets as jigs, squares and braces.. why not - a press!! If this didn't flatten it - nothing would! And it did! NICE and flat - still rough. So, trimmed the edges of course to fit the shape of the deck and then after a quick round of sanding... whalla! One deck! Still wasn't quite right though - better, but not what I was really after. So I cut out the hatch and the mast hole and sanded some more! Ahhhh, much better - now lets see if everything still lined up! OOOOOH the tension! Now that made my day. The battens were good, especially getting more on and feeling like things were moving in the right way, but putting this deck on was a bit more of a move forward - very encouraging. Although.... the color. It obviously does not match the other decking - then it hit me, I use mixes a lot - not straight stain (tends to be too rich or dark) so i cut it with natural to lighten it up or even with a gray to soften it a bit. What on earth did I use for the deck! Took some time but turns out it was 5:1 Natural to Golden Oak - or at least close to it I think I matched it up pretty well. I applied that after wiping it down with the conditioner which prevented a LOT of blotching (Basswood blotches something fierce). There is a little, but nowhere near what it would have been. At first I was like OH NO the color is not even, but after it dried I like the varying depths of color on the woods, makes it look like different deck boards were used. So, that is where we are at now. I still have more battens to finish as well as the forward veneers but have to also work out the caps - I seem to be out of the walnut so have to find wood that is a reasonable replacement and a stain mix to come close to match it - this will be interesting! FUN but interesting! Until later - happy modeling! -Adam
-
Thank you kind sir! By all means pull up a chair, beer and popcorn in the corner. It is a little slow going as I am spending a LOT of time trying to figure out ways around some holes I put myself in, so there may be delays between posts, but it will get there - by hook or by crook it will get there!!
-
Thanks Louie - it is a trip!
-
SkerryAmp reacted to a post in a topic:
Santa Maria by SkerryAmp - Artesania Latina - 1:65 - PoF
-
SkerryAmp reacted to a post in a topic:
Santa Maria by SkerryAmp - Artesania Latina - 1:65 - PoF
-
SkerryAmp reacted to a post in a topic:
Golden Hind (ex-Pelican) by Baker - FINISHED - scale 1/45 - Galleon late 16th century
-
SkerryAmp reacted to a post in a topic:
Golden Hind (ex-Pelican) by Baker - FINISHED - scale 1/45 - Galleon late 16th century
-
SkerryAmp reacted to a post in a topic:
Golden Hind (ex-Pelican) by Baker - FINISHED - scale 1/45 - Galleon late 16th century
-
SkerryAmp reacted to a post in a topic:
Golden Hind (ex-Pelican) by Baker - FINISHED - scale 1/45 - Galleon late 16th century
-
SkerryAmp reacted to a post in a topic:
Golden Hind (ex-Pelican) by Baker - FINISHED - scale 1/45 - Galleon late 16th century
-
SkerryAmp reacted to a post in a topic:
Golden Hind (ex-Pelican) by Baker - FINISHED - scale 1/45 - Galleon late 16th century
-
SkerryAmp reacted to a post in a topic:
Golden Hind (ex-Pelican) by Baker - FINISHED - scale 1/45 - Galleon late 16th century
-
SkerryAmp reacted to a post in a topic:
Golden Hind (ex-Pelican) by Baker - FINISHED - scale 1/45 - Galleon late 16th century
-
Scratchbuild - just the thought intimidates me to no end. You have an awesome run going - looks great!
-
Great start - nice and straight - interested to see this play out. Looks like I have the first seat - yay for me! Guess that means I am responsible for the beer and popcorn! Carry on good sir!
-
Welcome Guy! You came to the right place - no shortage of good advice and encouragement around here. As for your first build, a lot of good advice so far the only thing I would say is make sure it is something that interests you, that will keep you engaged! Looking forward to whatever you start with!
-
Oh, fear not you have certainly gained some experience - your work is awesome! One thing this little hiatus has given me is patience - a lot! So it is with a new look on life in general I re-approach the hobby! Let's see if it pays off. I have added to the Santa Maria for now. The Harriet Lane and Willie are DOA. Time was not good to them at all and neither kit was in a state to recover from with any form of grace - very sad really. The Santa Maria is the most open to picking back up on once I cleaned it up a bit - had a spider living in the hold of all things! The mayflower is near done but I can't find the instructions or the parts I had for it, so will need to figure out what to do there and the mamoli will also be picked back up once I get the SM chugging along! And of course I will follow along! 😃 Trying to get caught up on all the work and all the crafters I was following and the new ones is quite the challenge!
-
Thank you sir! Yeah - just a rough 3 years where life set it sights on us and just kept sucker punching - but (knock on wood, throw salt whatever it takes) looks like it is behind us, for now at least 😃
-
I have found that sanding it out and using the pre stain conditioner you mentioned is a must, especially on basswood. I have never had it go evenly without it. I have the syren, but have not dared to start building it but as for the reference photo - that looks like it is either a natural stain or a very lightened golden oak. I use Golden Oak a lot but always cut it with natural stain to lighten it up and take that dark edge off. That all being said your photo does not look that bad at all, especially since it will be obfuscated some what by the hatch. I think you are doing great and only hope I can come close to what you and others have done with this subject.
-
That is some fantastic craftsmanship - can't wait to see more!
- 949 replies
-
- 1
-
-
- syren
- model shipways
- (and 1 more)
-
Hmmm, something tells me you have done this modeling thing before Nice work!

-
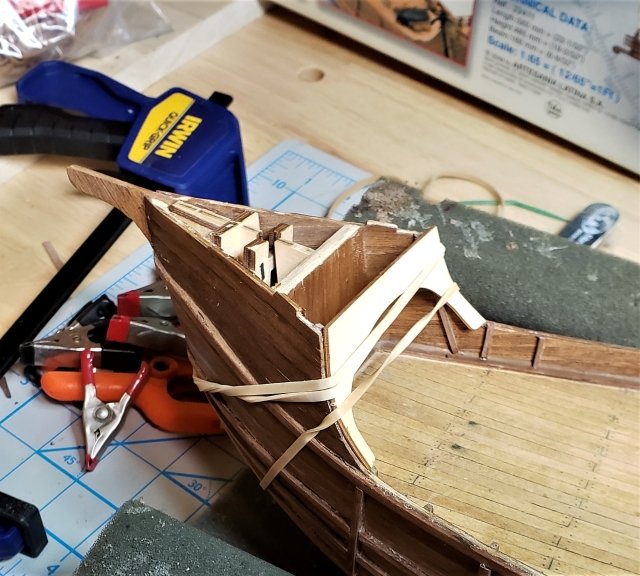
So next up we have the forward arch. Of course the plywood is not pre formed so it is very stiff and while it could be muscled into place I no longer apply brute force - so soaking, bending and strapping it is! That part went surprisingly well, so once dried and formed I slapped on the veneer (I think in the future I am going to stay away from veneer - something about it is odd) And then - after carefully trimming - we attach it to the forecastle and things are starting to move forward! Next up! The forecastle deck! Enjoy!
-
Thanks Louie - appreciate the kind words. That is my ultimate goal, make this better than I would have back then and then continue that momentum forward! So far so good - I think
-
POPEYE! So, I come back after 3 years and see you have decided to dominate not just the seas, but the land and air as well! Damn my friend - busy busy busy! I have so enjoyed going through your work - I grew up in the plastic world, worked in a hobby story around here even - Eric Fuch's, managed the one in Nashua and Burlington for several years. That is where the bug hit - loved the plastic world and it just brings me such joy to see work being done there. Sometimes makes me sad that modelling overall has diminished in popularity but love that people like yourself and others on this site are keeping it alive! Love it!
-
Revenge 1577 by Asat - Amati - 1/64
SkerryAmp replied to ASAT's topic in - Kit build logs for subjects built from 1501 - 1750
Lou - just came across this and boy what a beaut! I am always amazed at the craftsmanship of you all, and am just loving following along - you are now on my list of inspirations for clean work! Dunno how you do it - but am glad I get to see it done 😃

