James H
-
Posts
5,513 -
Joined
-
Last visited
Content Type
Profiles
Forums
Gallery
Events
Everything posted by James H
-

MSW down in UK on 25 July 2022?
James H replied to Rik Thistle's topic in How to use the MSW forum - **NO MODELING CONTENT**
It's not an issue with MSW, per se, but with an assigned block of IP numbers that isn't specific to our server. Our host is trying to get this sorted with the company that they use for this purpose, and it's taking time. The site may appear, then disappear. Unfortunately for MSW admin, we are powerless to do anything. We just have to wait for the issues between the two companies, to be resolved.- 39 replies
-
- 16
-

-

-
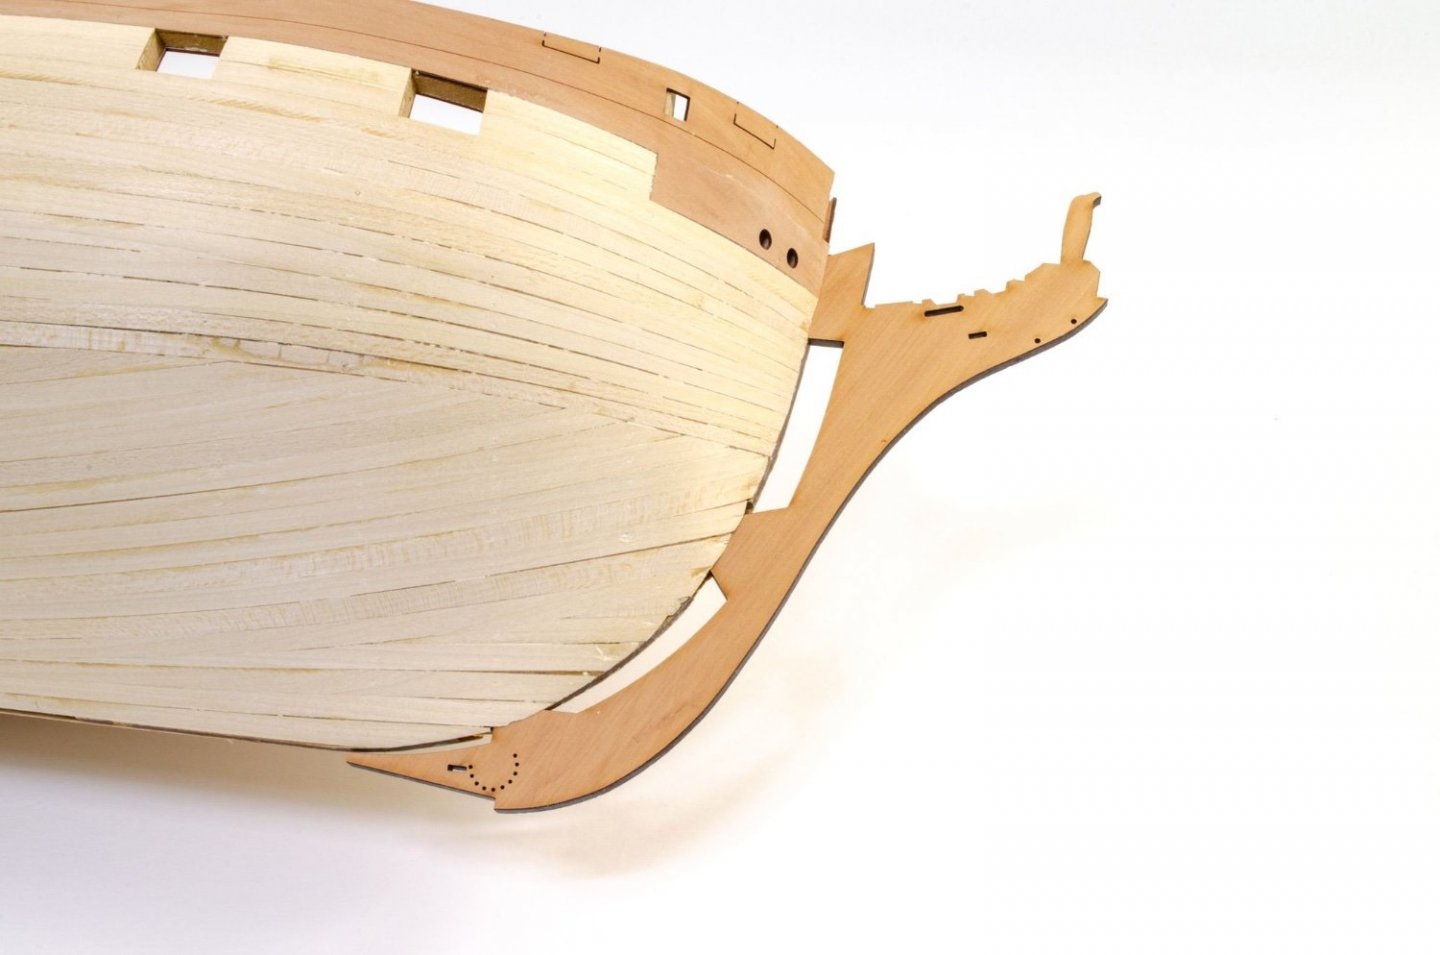
You can probably plank right to the front, over that MDF so that the planks come to a 'point'. From there, you can sand this back, flattening off that 'point' until you have the maximum joint area when the pear prow is slotted into place.
-
That is where the pear keel plugs in. I'm a little concerned that you've sanded the MDF central keel to a point at the prow and going around the underside. That should've been a flat face which is part of there the prow glues. The planks would've butted up to the side of in and been sanded, leaving that flat face for a glue surface.

-
Yes, please pos your location, titles of books and a figure you are looking at for them.
-
kit review 1:200 German Battleship Bismarck - Amati
James H replied to James H's topic in REVIEWS: Model kits
You're best asking Amati for a copy. We can't, and won't, scan drawings and distribute them. It's illegal. -
I wouldn't worry too much about it. It's obvious that it's part 60 when you are working on the model. I write all this away from the bench session with about 6 different files open, switching between them. The occasional thing will slip through the proof, but they won't cause any problem. We probably spend more time on manuals than anyone else, so you'll have to forgive little things like this.
-
Outstanding!
-
Members can't delete themselves. I don't know of any forum software that will allow that. Deletion requests need to be made to admin.
-
Ok, I'm deleting this account as you already have one, @SpyGlass The email on your main account is changed as you ask.
-
You're not really going to see it at all, unless you have a medical endoscope! Personally, I'd just leave it as it is.
-
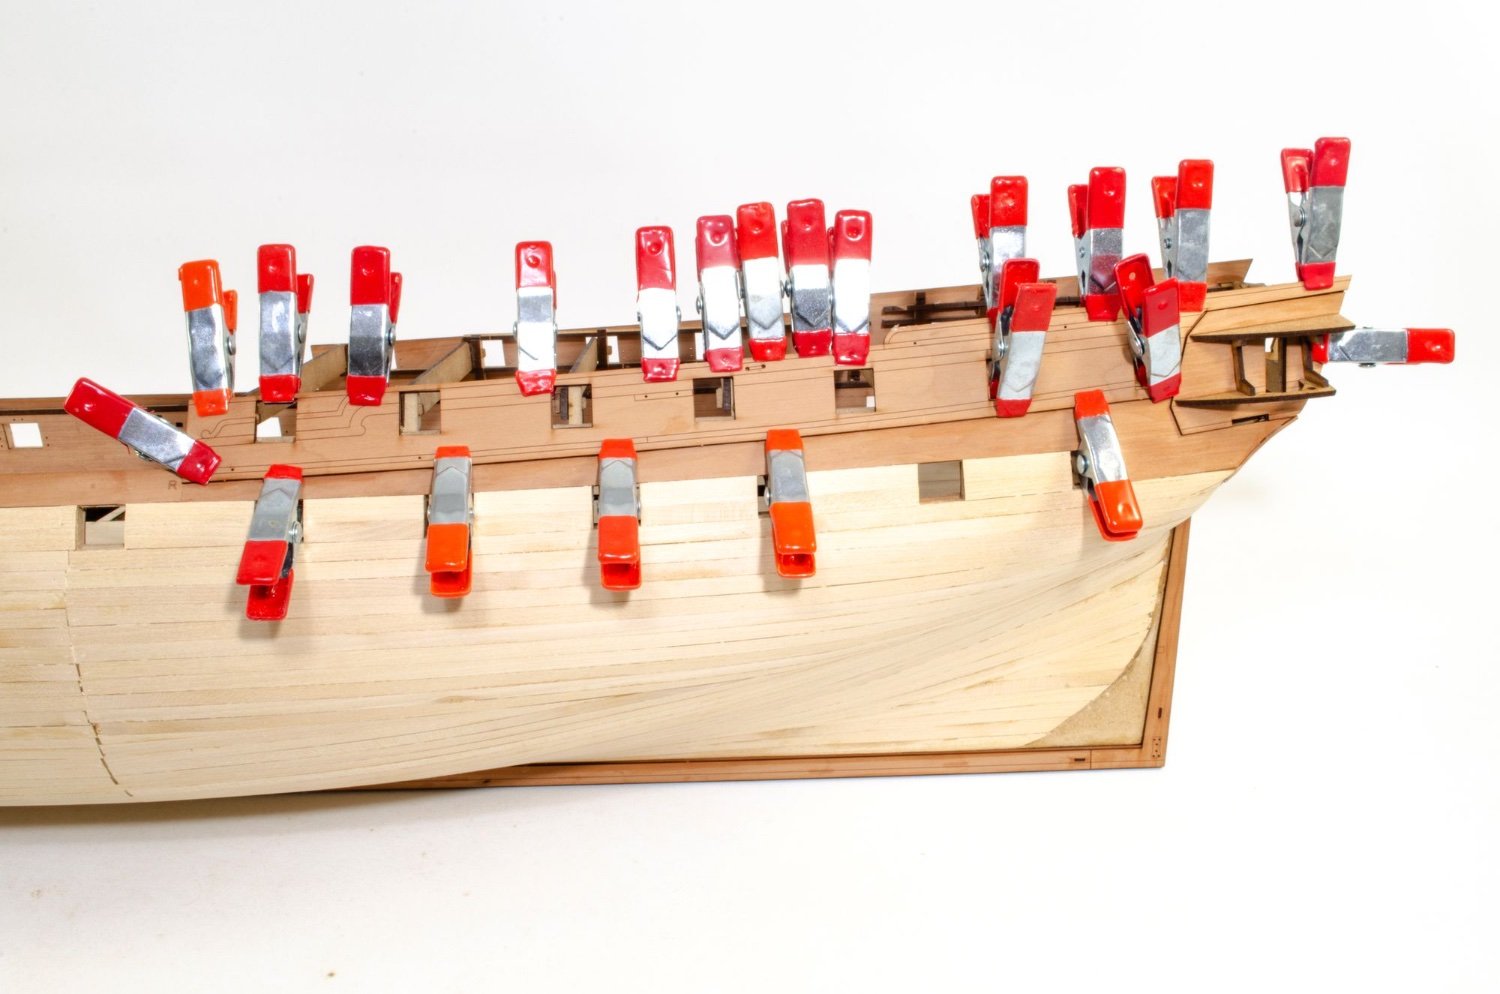
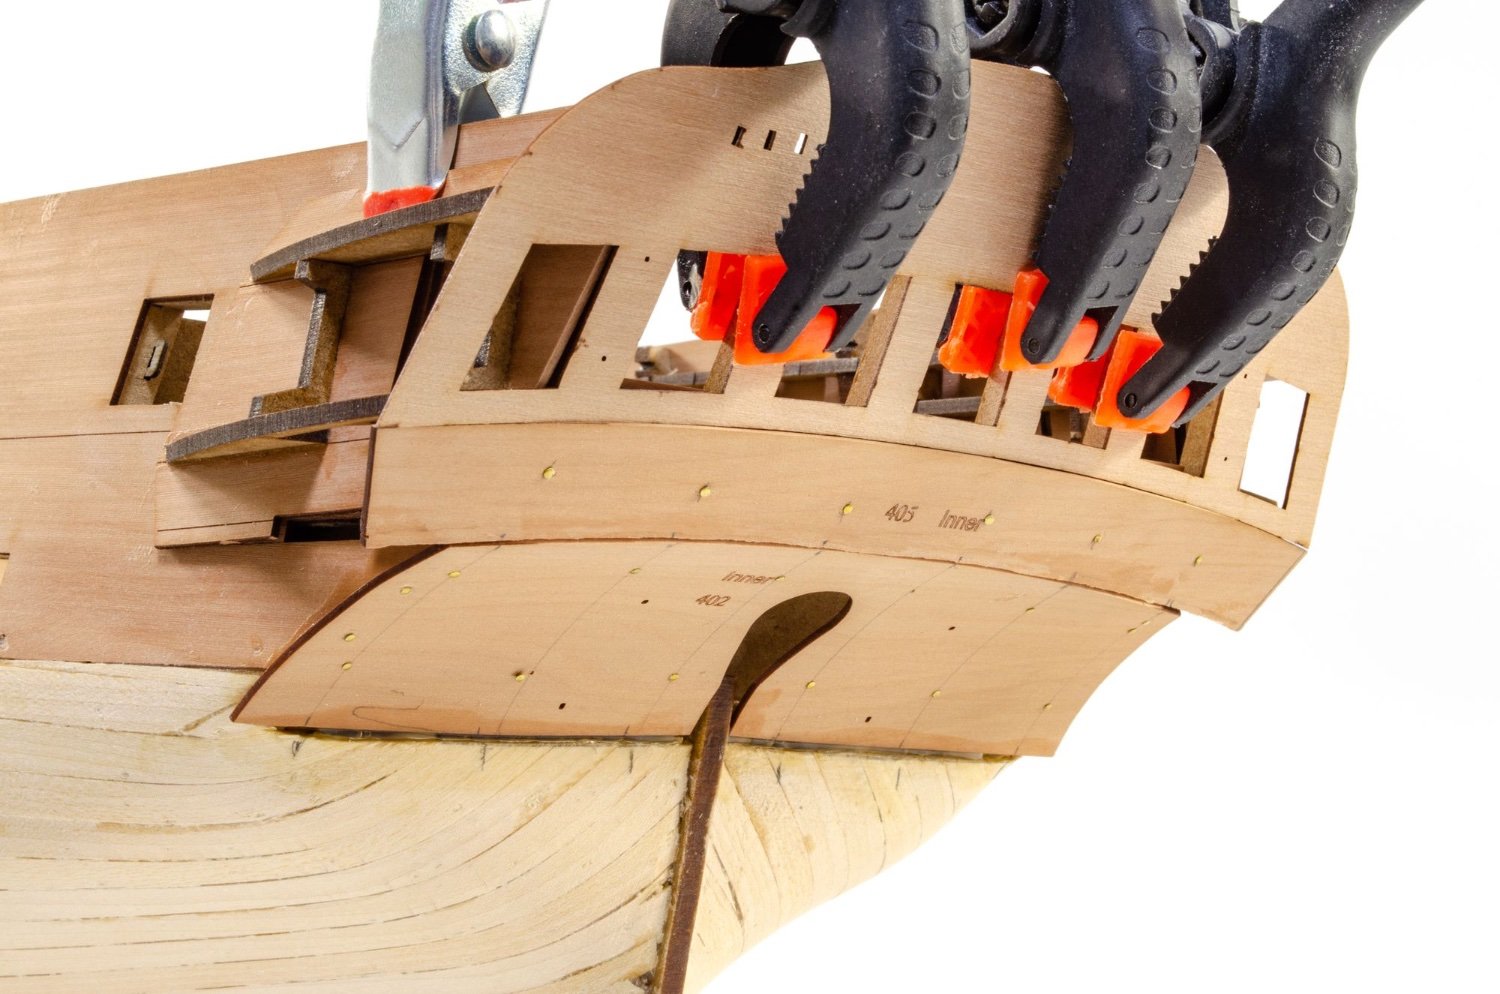
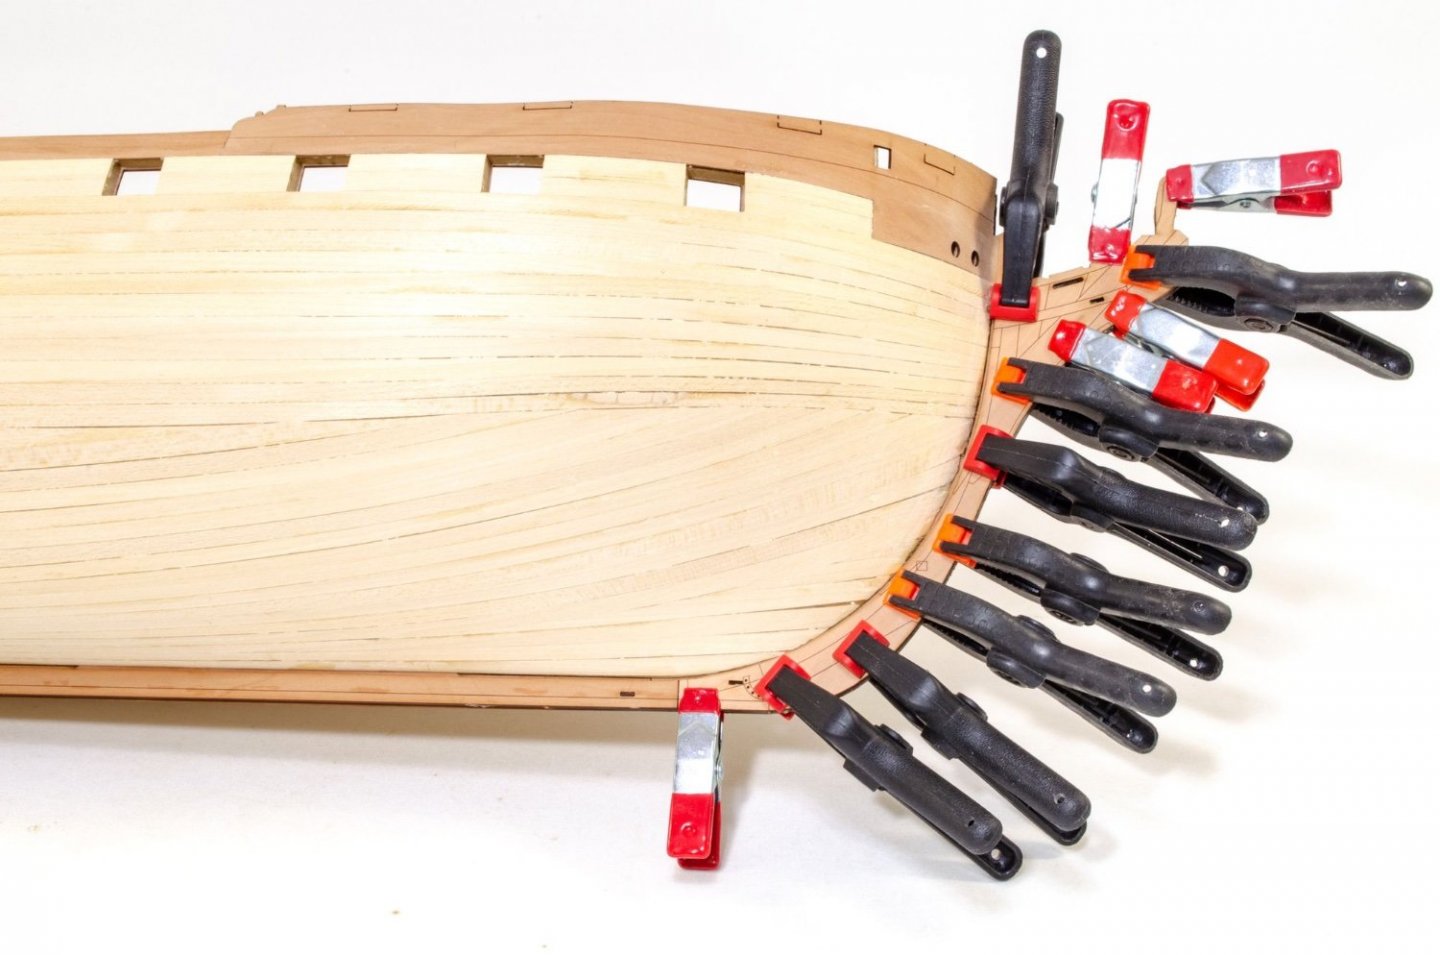
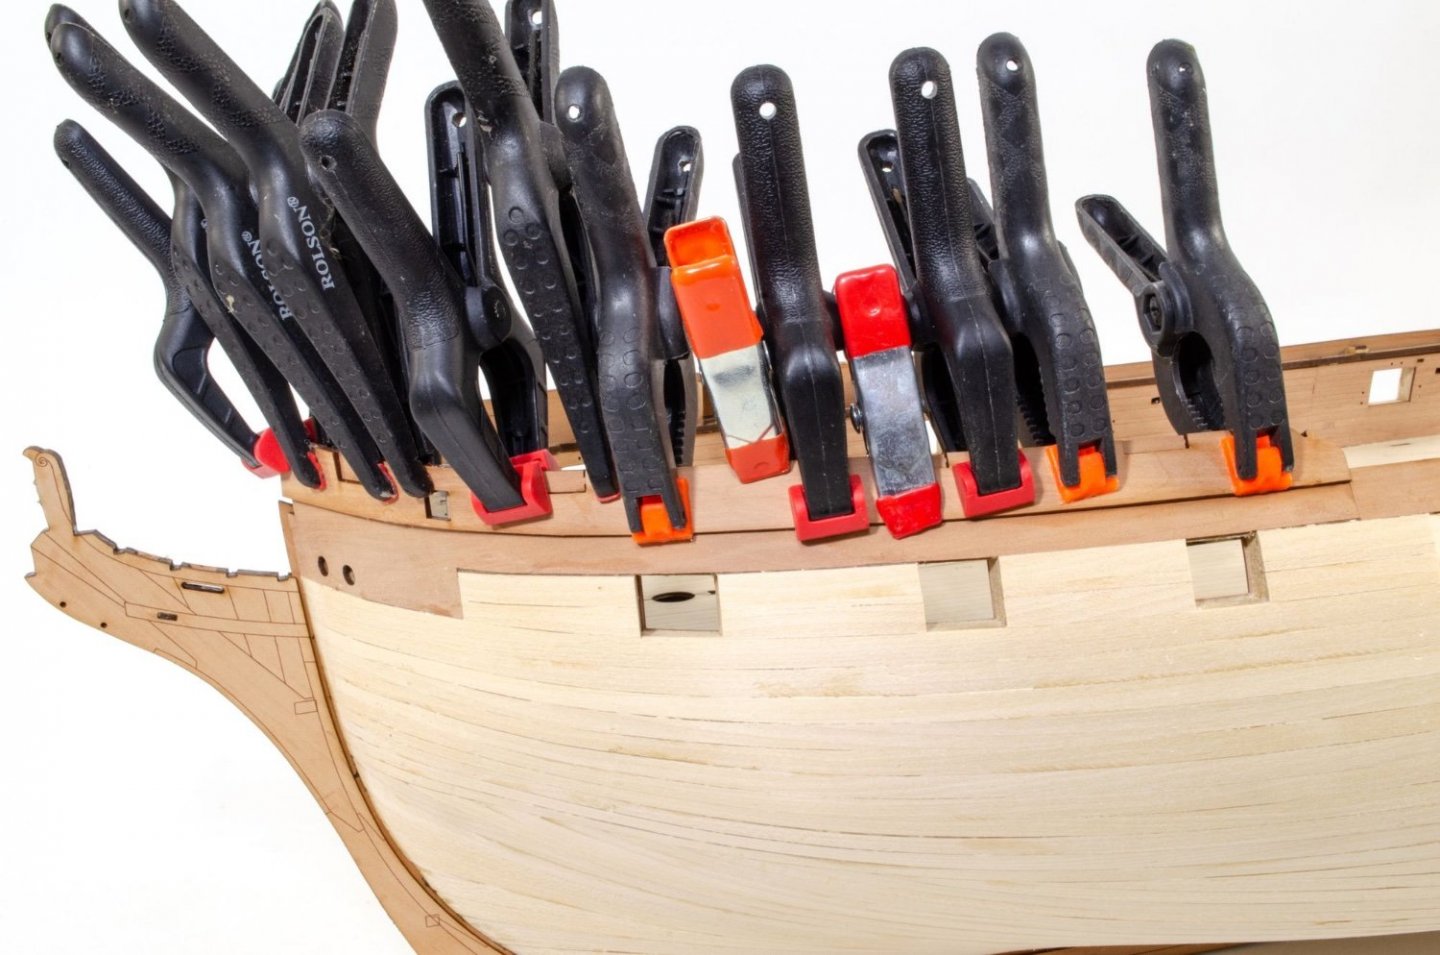
The rest of the keel is now added, and then the rudder post is fitted with its engraved facings and installed. This part sits into the notch in the keel and pushes tight up against the inner stern construction. No clamping needed! The rest of the keel and prow engraved facings are added and copiously held with clamps. You can never, ever have enough of those. The second layer of timber starts by fitting the outside forecastle bulwarks. When these are dry, the gun port blanks are removed and the hull starts to transform a little. The rear outside bulwarks are now to be fitted. The quarter gallery frames are temporarily clamped into place and the parts glued. Note that I've remove the blank in the fore gun port hole. The lower, outside counter is now glued, clamped and pinned in place. Indy now looks like this. ☺️ Until next time.


- 473 replies
-
- 48
-
-
-

-
- Indefatigable
- Vanguard Models
- (and 1 more)
-
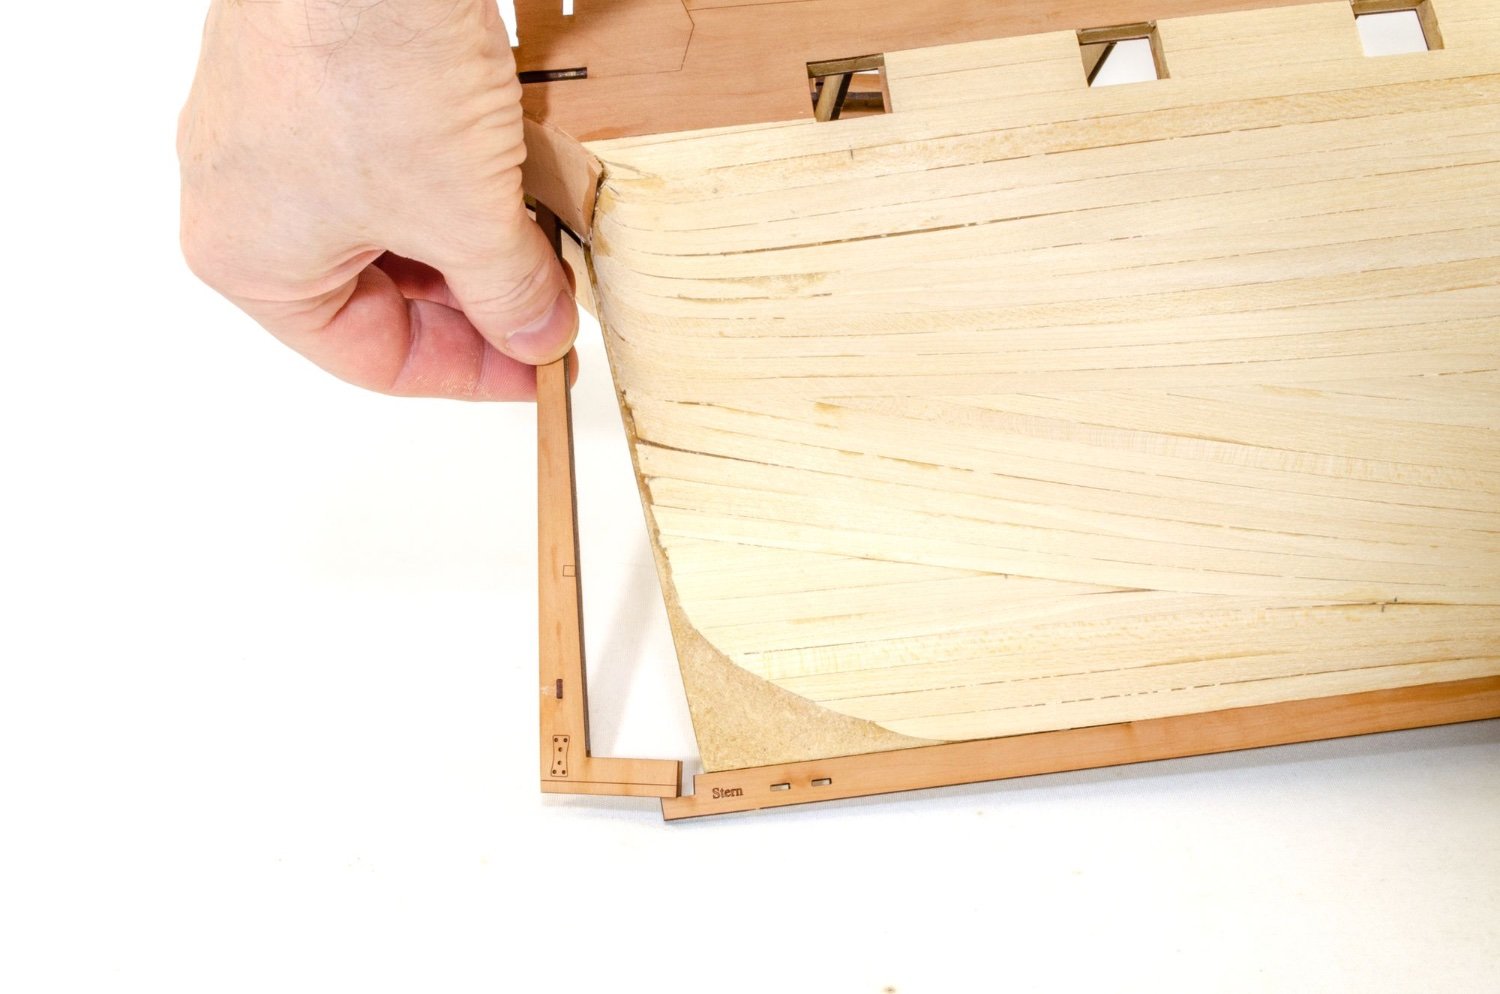
Let's bring this up to date. Another element that needs to be temporarily fitted is the shelf that sits in the rear of the day cabin, encompassing the rudder housing.This piece slots into the stern timbers and needs to be pushed the whole way in so the whole protrusion will stick out at the back. That is then sanded flush with the stern. To make sure the placement of all stern parts is exact so the rails run around the rear and onto the quarter galleries, it' VITAL that we work from the top, downwards. The main, inner stern is first temporarily clamped into place. It pays off to get this in exactly the right position. When it is correct, the stern will be 2mm above the bulwark, and the inside edge of the outer window will sit flush with the quarter gallery frames that are also clamped into place. The bottom MDF quarter gallery frame will also angle in line with the bottom of the stern. Lastly, the shelf we fitted just earlier, should sit slightly below the height of the lower window frame. It's a lot to adjust, but trust me, this is the best way of doing it. The middle counter is now positioned directly underneath this. Some bevelling is done to make sure it fits snug against the upper stern. The bottom edge of this part will sit at the point where the stern flows into the lower curve. If it doesn't, this part can be trimmed slightly. Pins are now used to hold this in place. Again, NO GLUE! The bottom stern counter can now be fitted. This was first soaked and allowed to dry around a tin so that it had a gentle curve that would take the strain off the next task. The counter is pushed up directly underneath the middle counter and the bottom edge of this part is marked with a pencil. My prototype varies very slightly to the production kit, and that will be reflected in text in manual. I now cut along the pencil line and remove the planking from above that line. The lower counter is now glued and pinned and into place. The upper parts are now removed as adding them at this stage will mean they'll get snagged. The lower counter is now shaped into the hull. The prow underwent its third revision to cater to the figurehead, and this new part was now glued into place on the hull. Next, the lower keel parts are added...


- 473 replies
-
- 29
-
-
- Indefatigable
- Vanguard Models
- (and 1 more)
-
Maybe try to slip a blade under where it's stuck down and slowly remove from the model. Those marks look like they've soaked through though. Could be needing a new part.
- 505 replies
-
- 3
-
-
- vanguard models
- Sphinx
- (and 1 more)
-
The collapsed frame is evident on the earlier photo, perhaps as a result of applying pressure in laying the deck? The dark marks look like some form of mouldering? Could that be from the glue, looking at the places where it's soaked through the very think maple deck?
- 505 replies
-
- 4
-
-
- vanguard models
- Sphinx
- (and 1 more)
-
Sale started today, for 3 months
-
...try sanding an Indefatigable hull! Chris did eventually get me to buy a palm sander, and it works well. I wish I'd got it for Sphinx at the time. For these sections on Sphinx, I just manually sanded...no Dremel. You've done a real nice job of those and it'll save some time when the hull needs fairing.
-
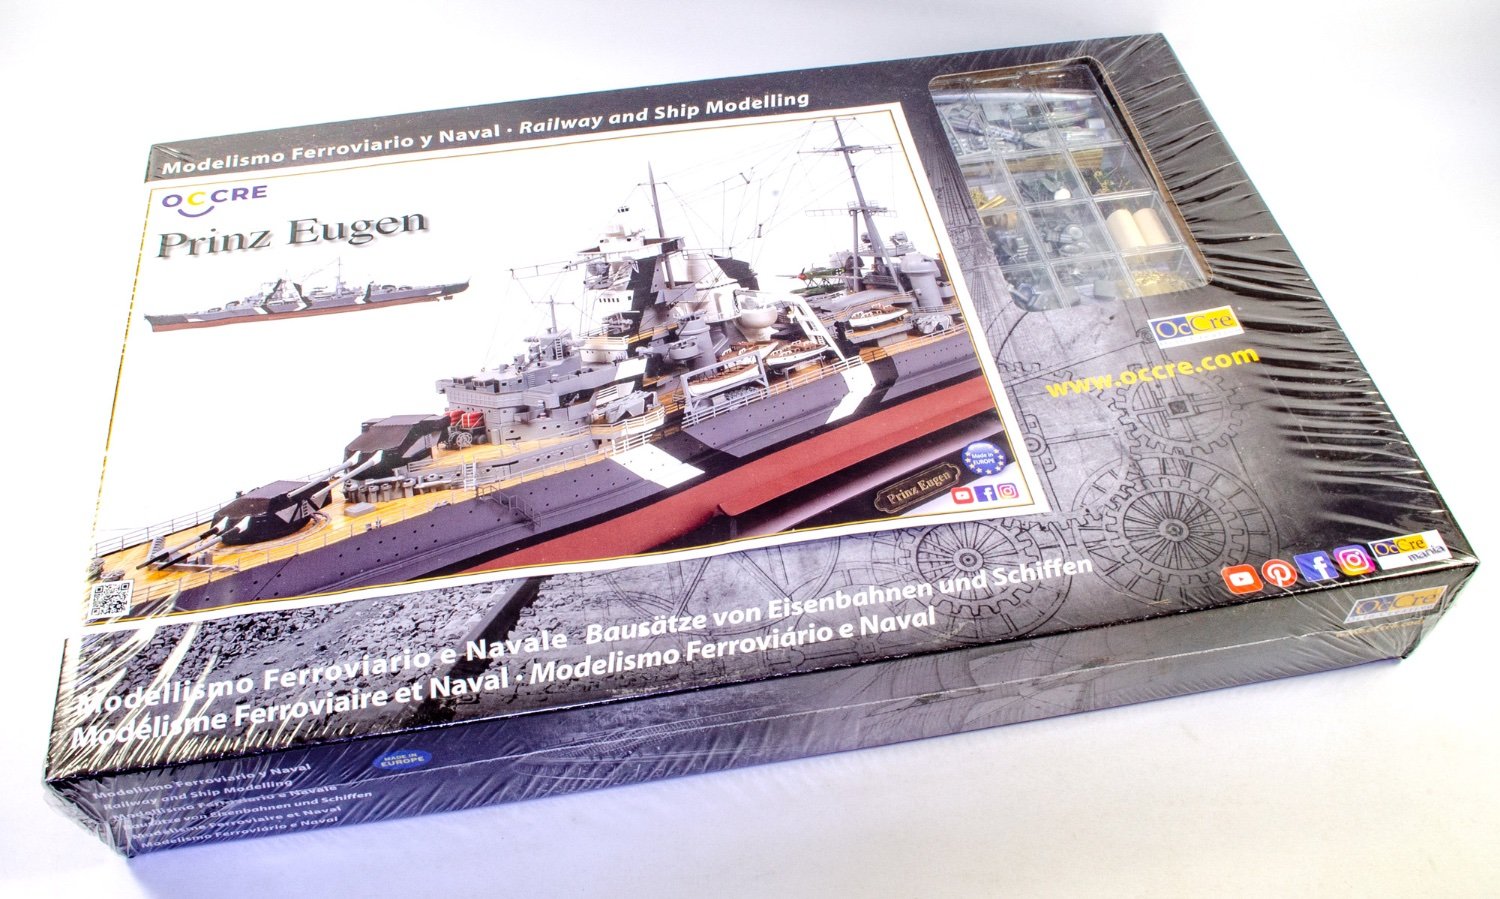
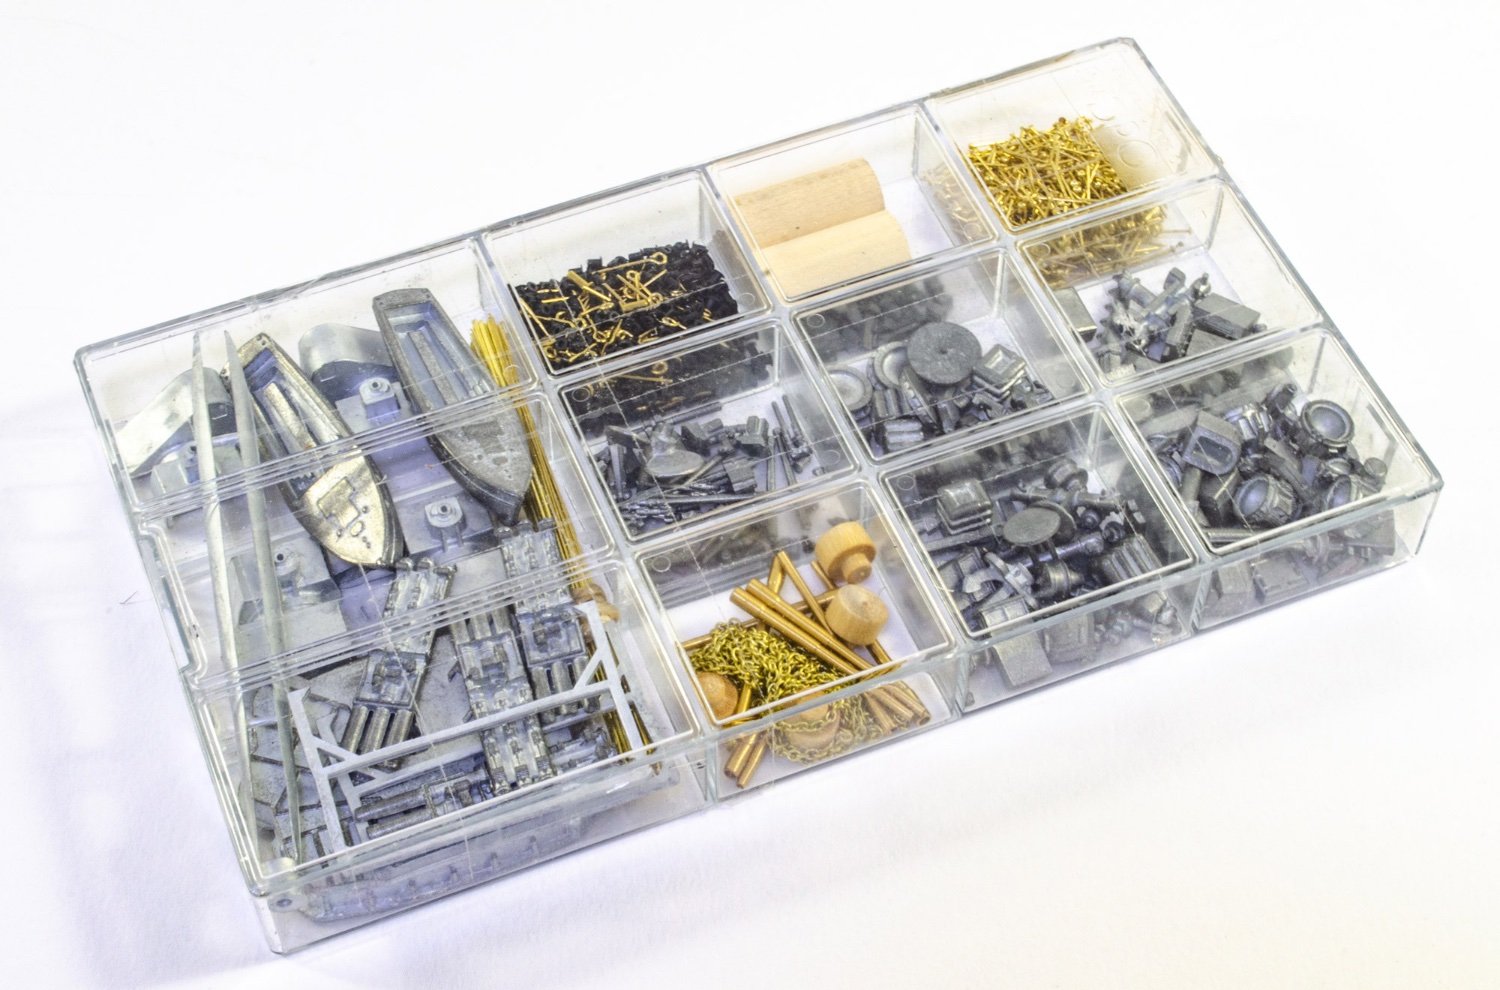
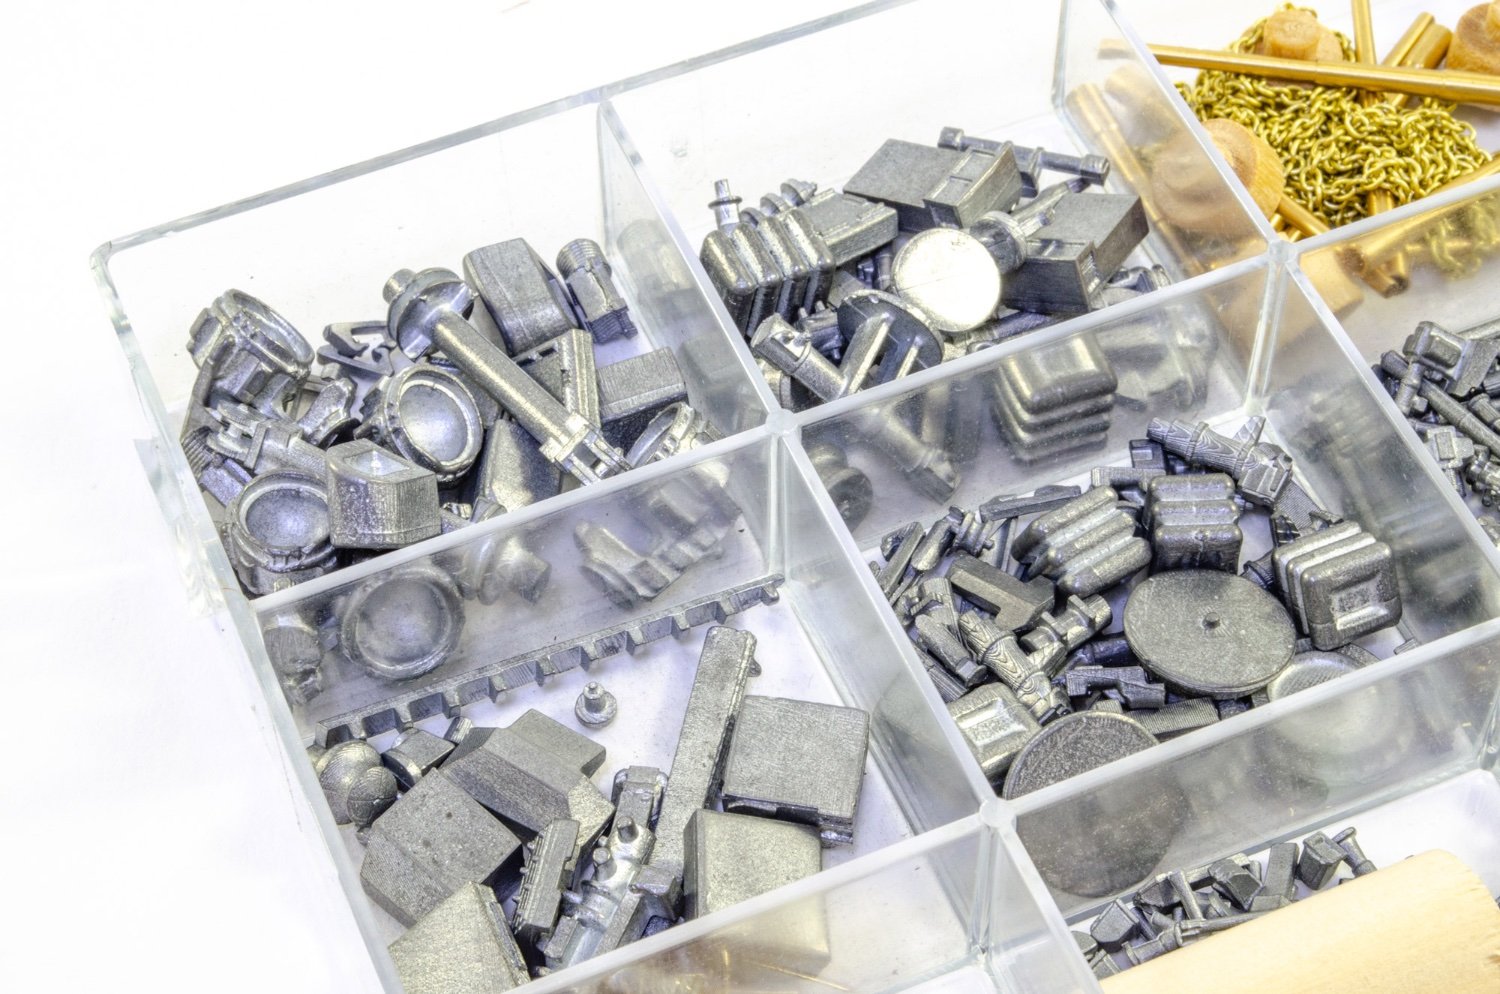
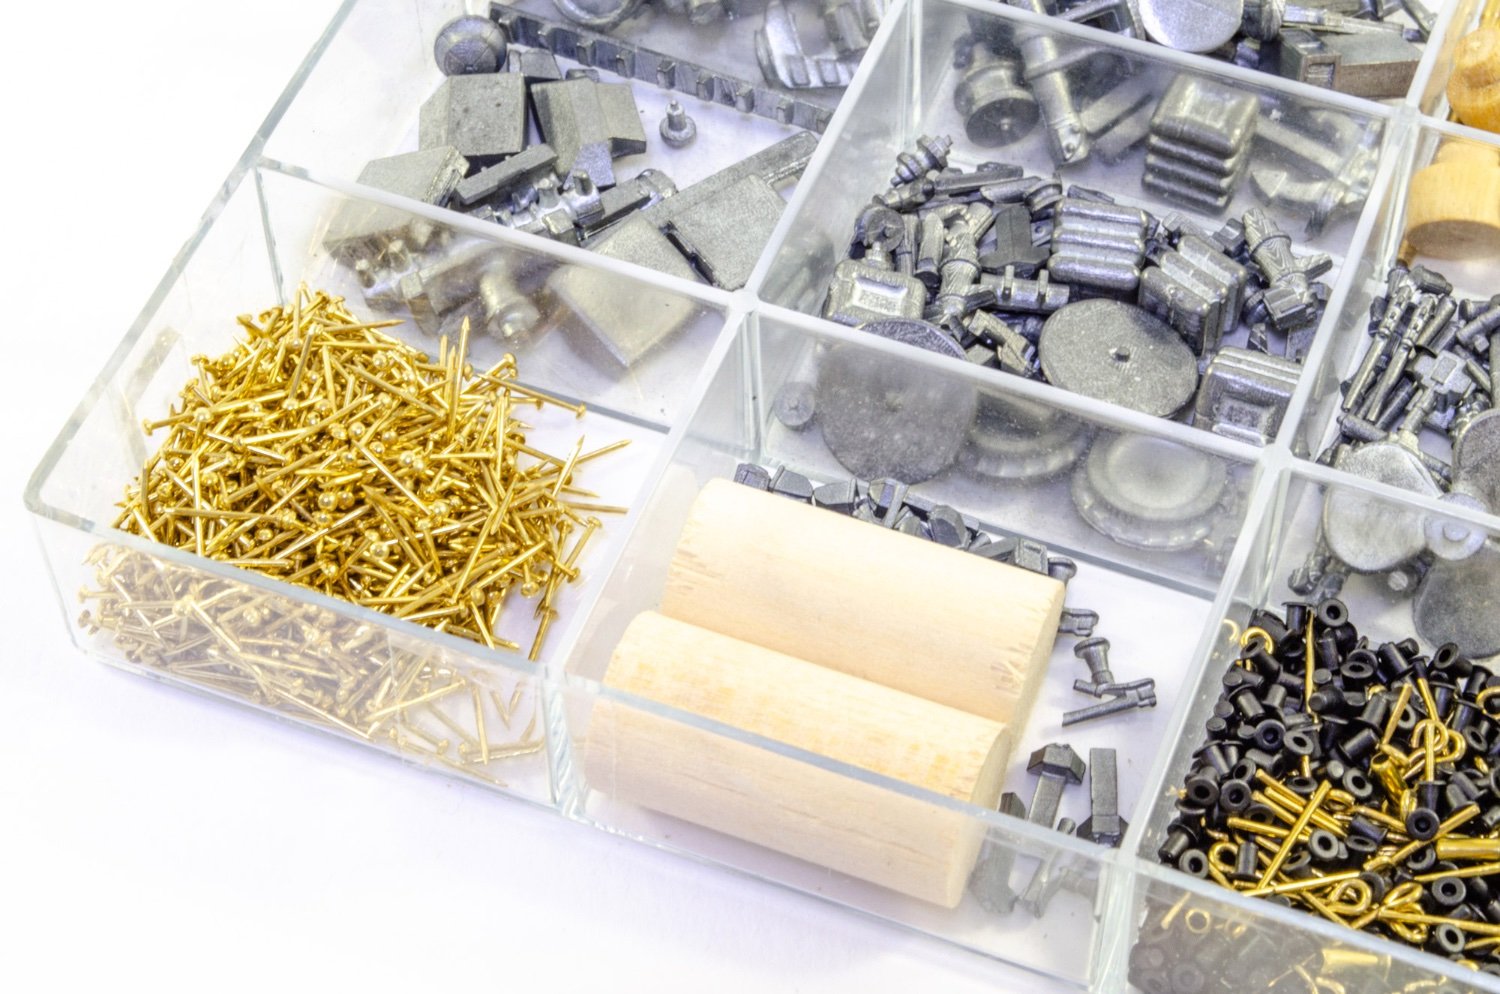
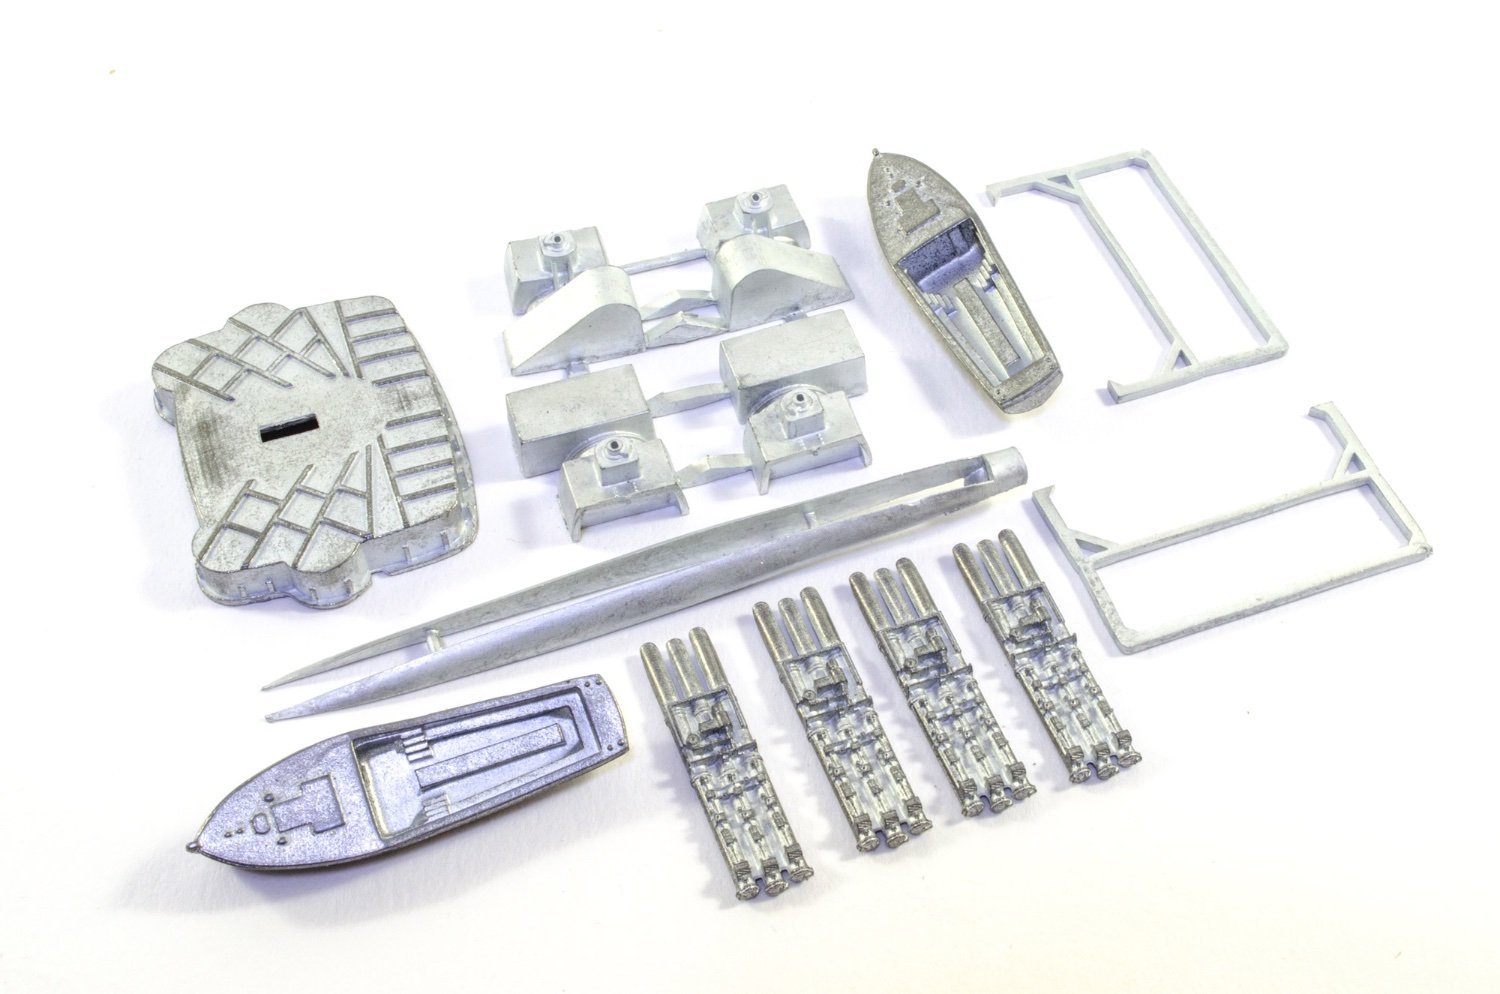
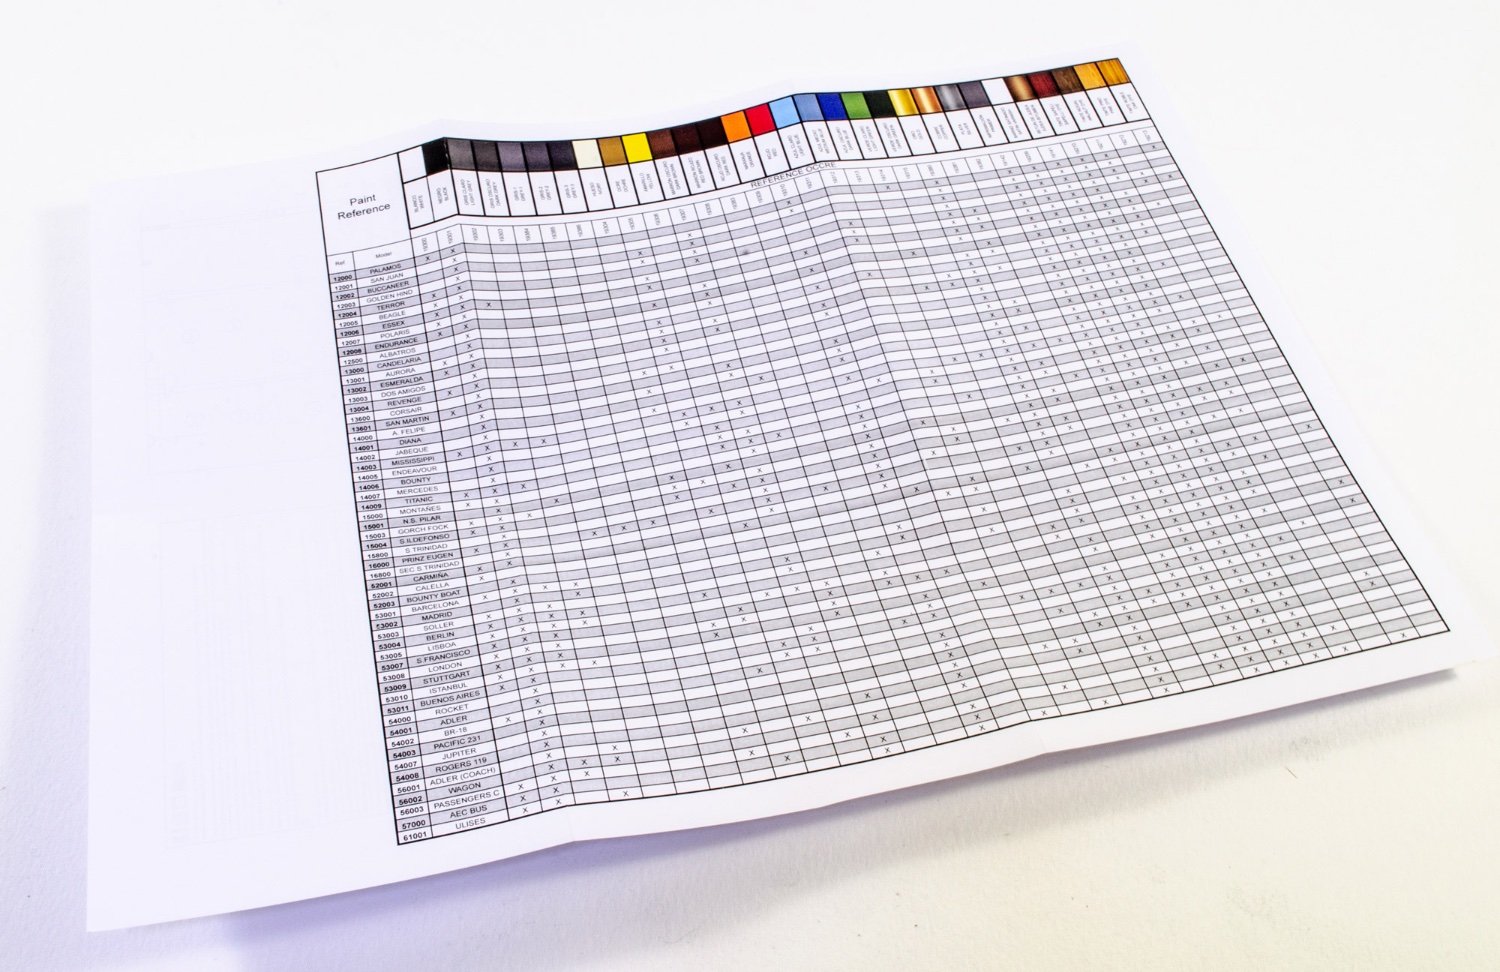
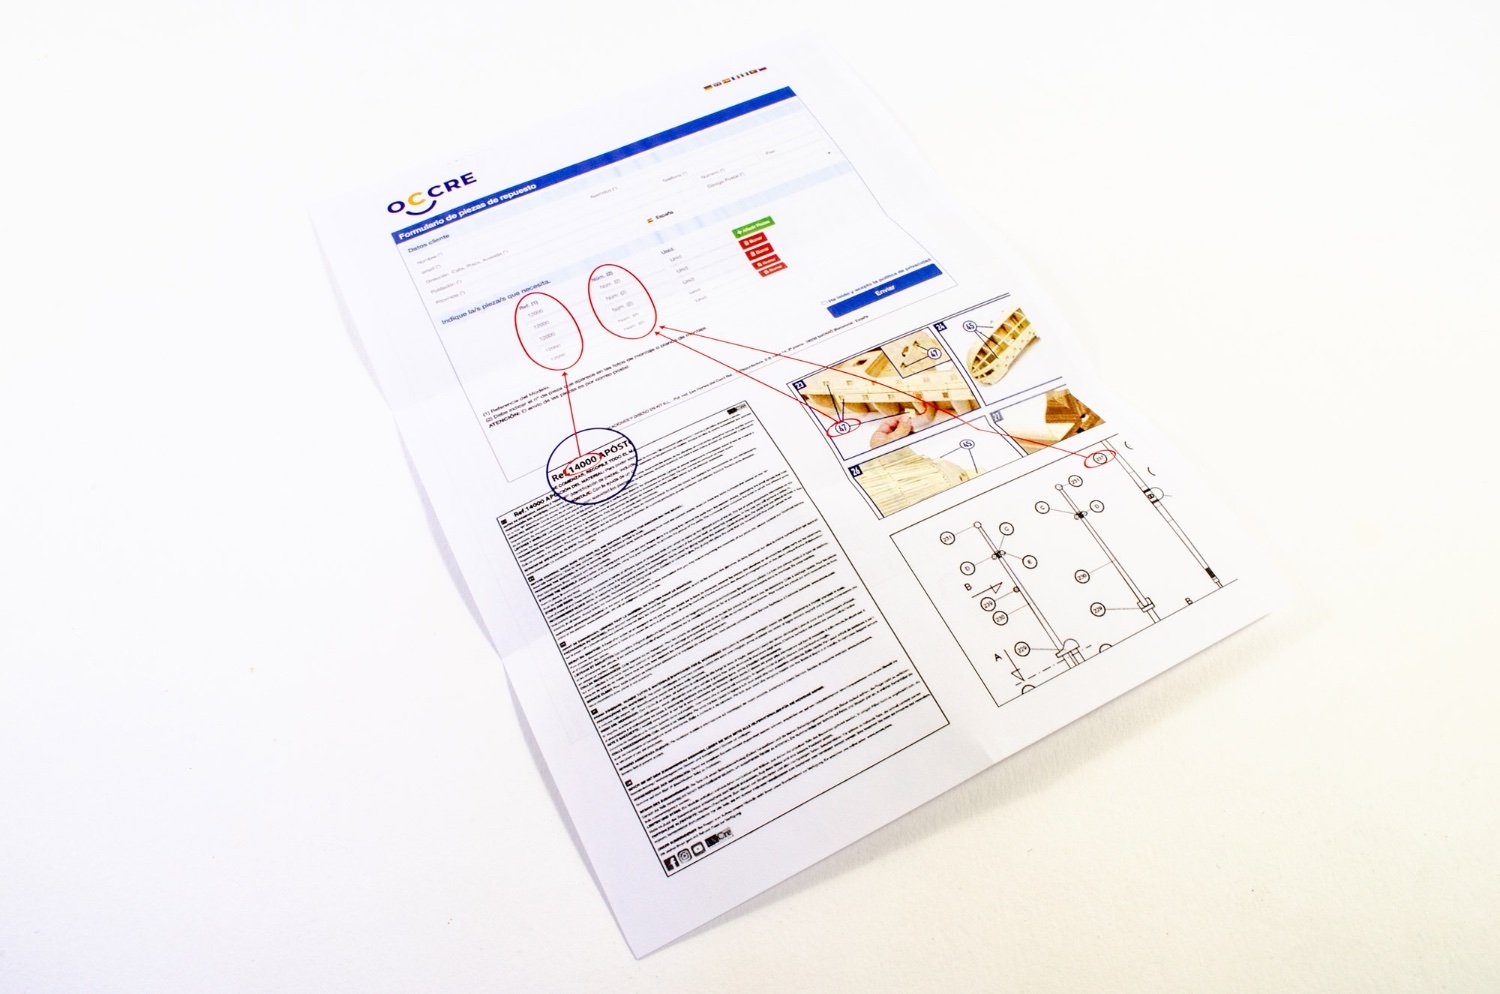
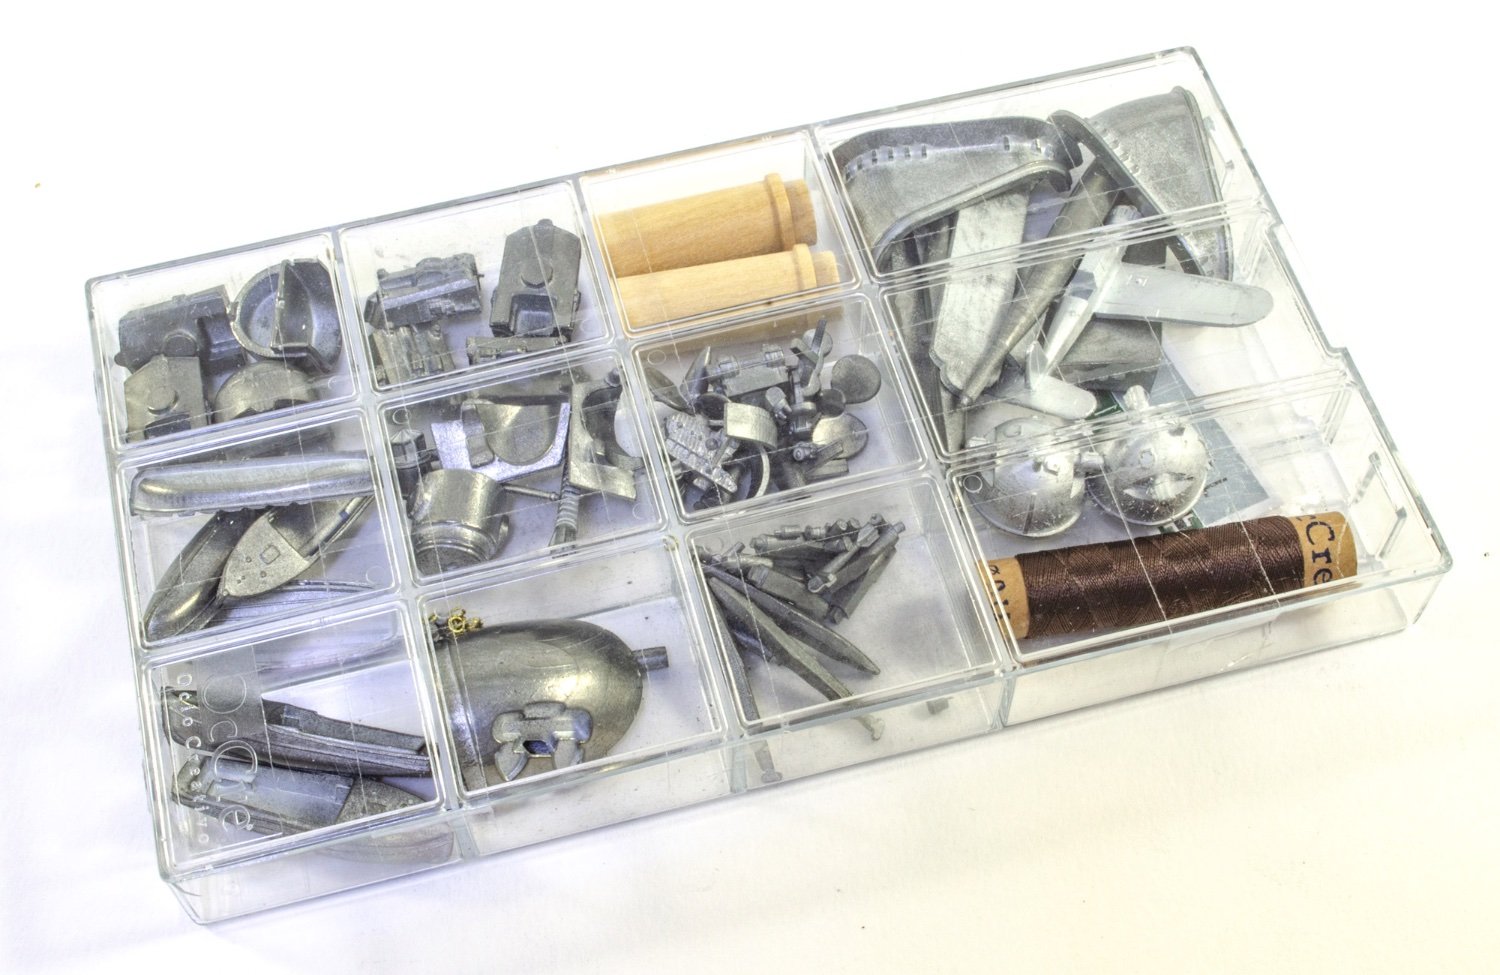
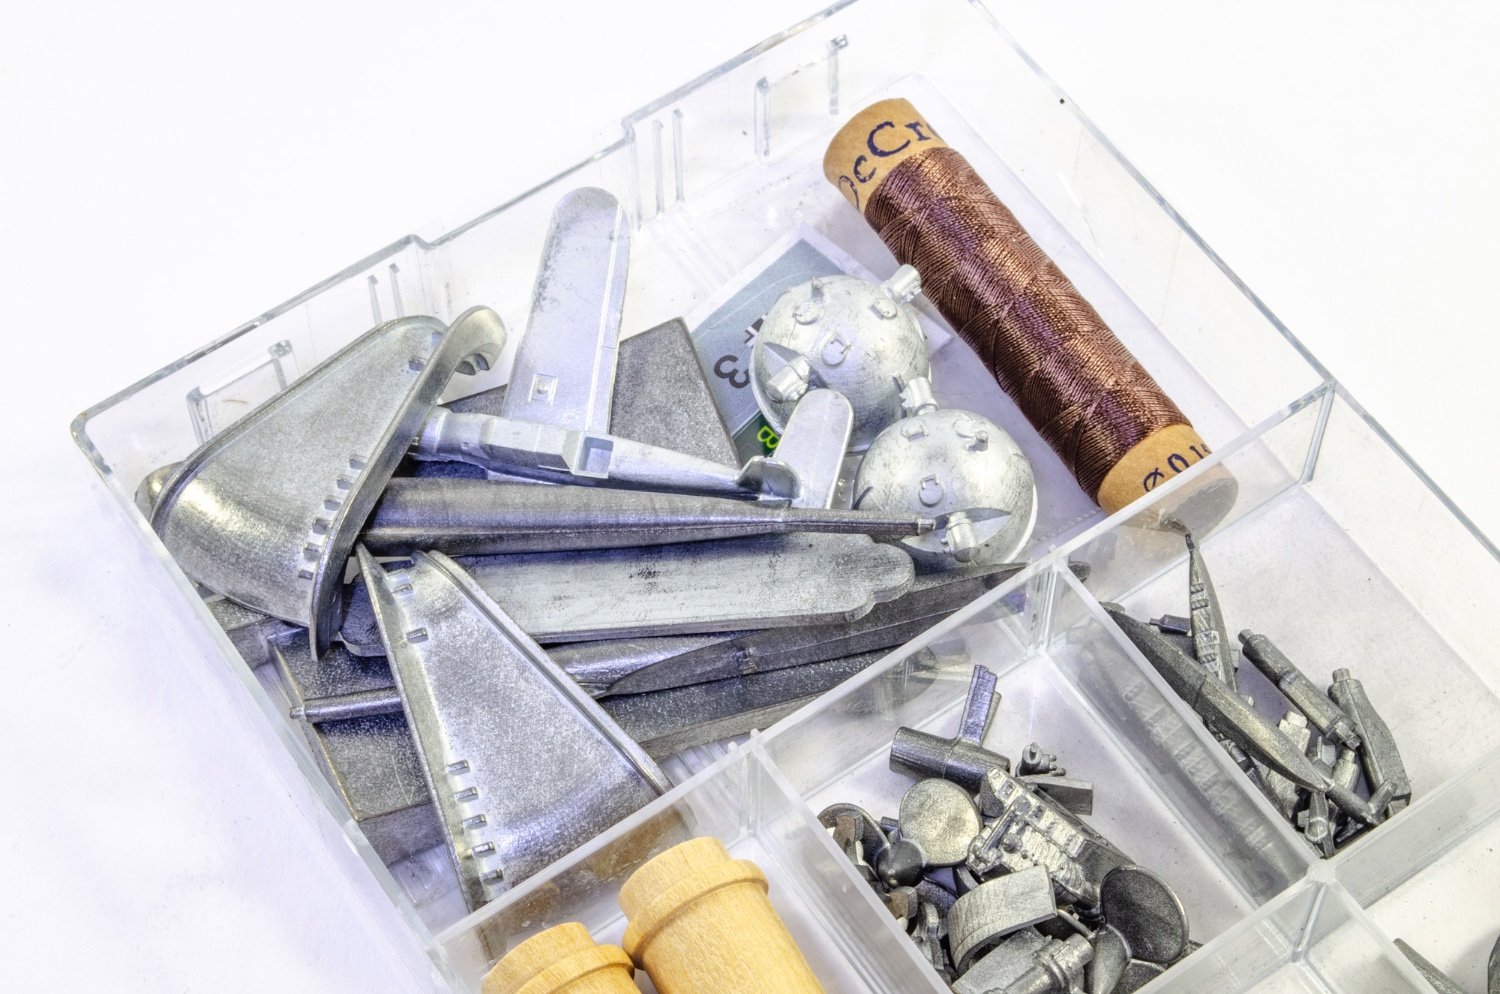
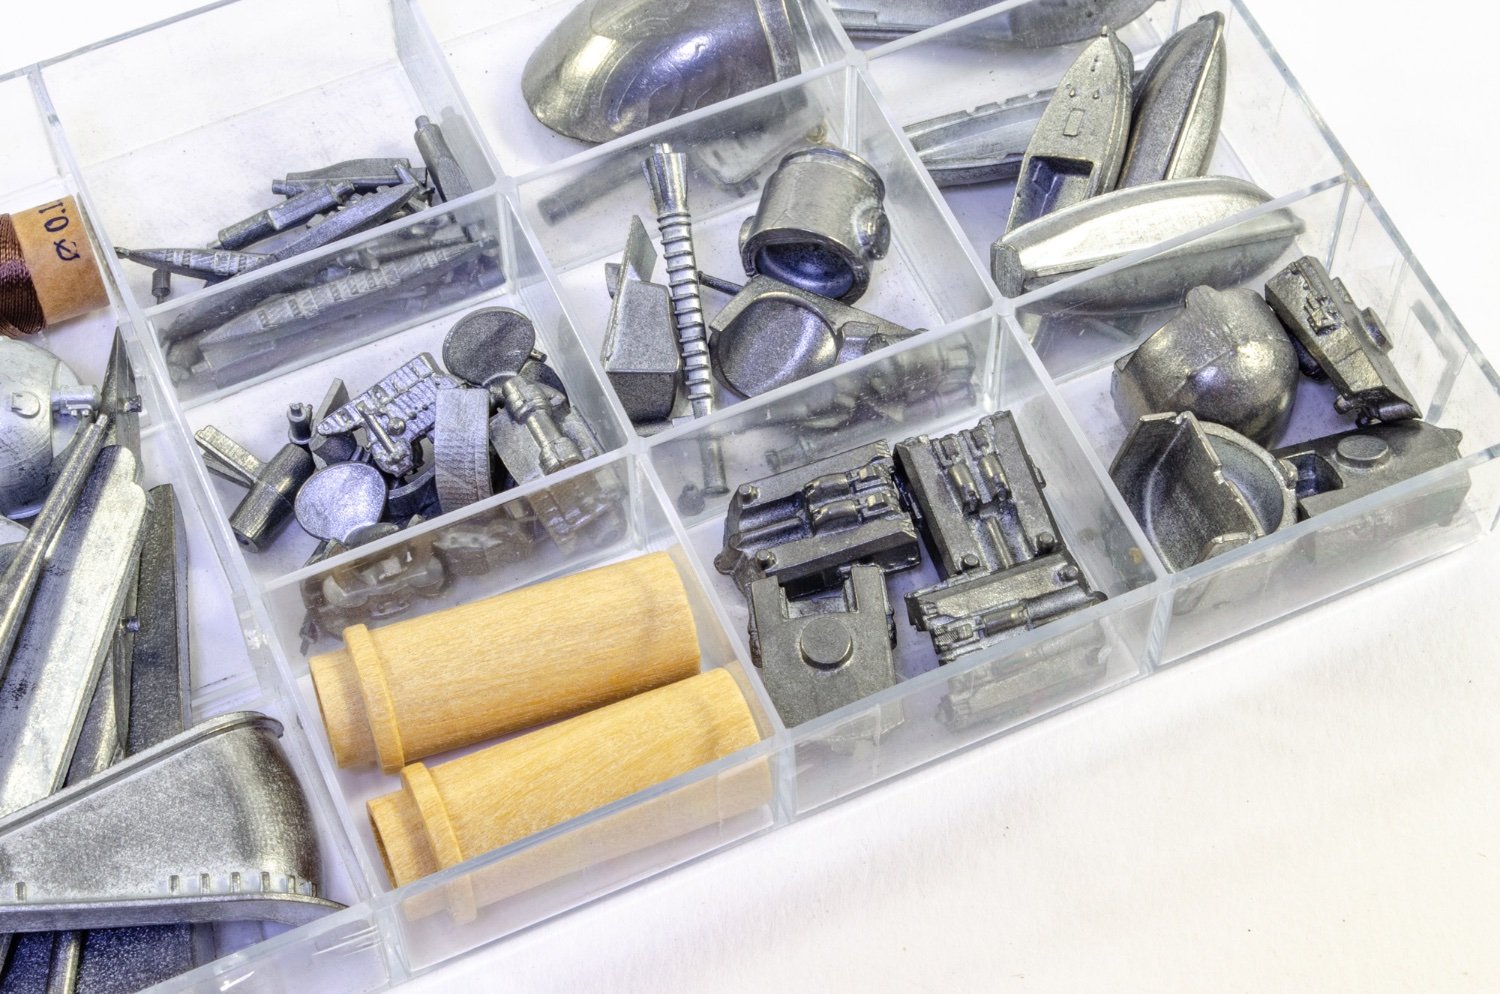
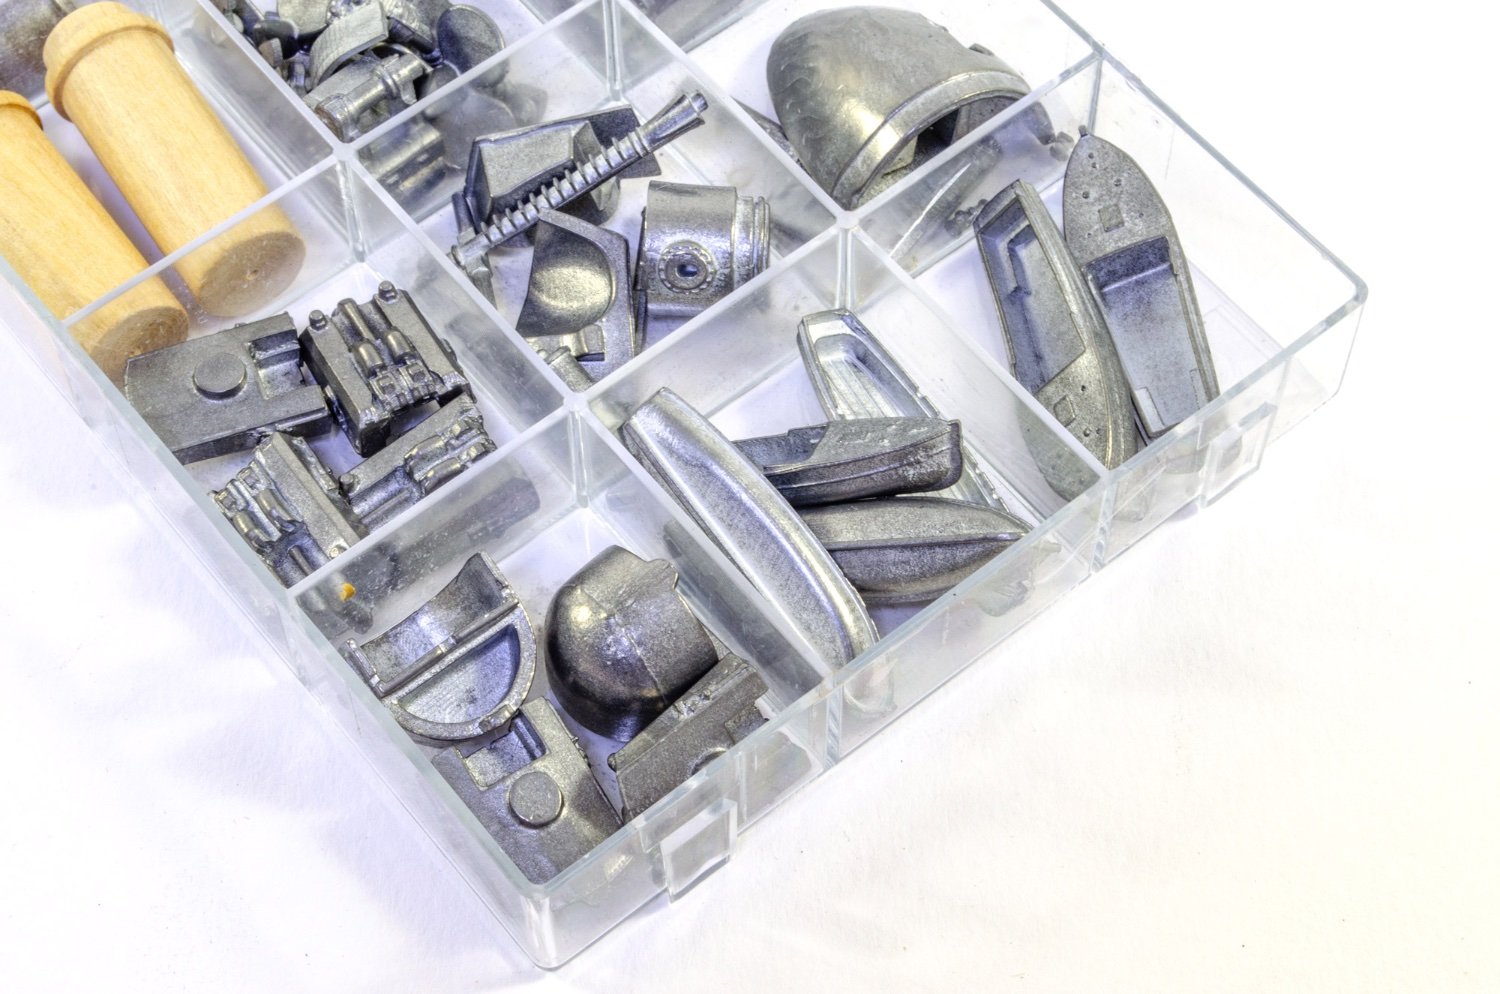
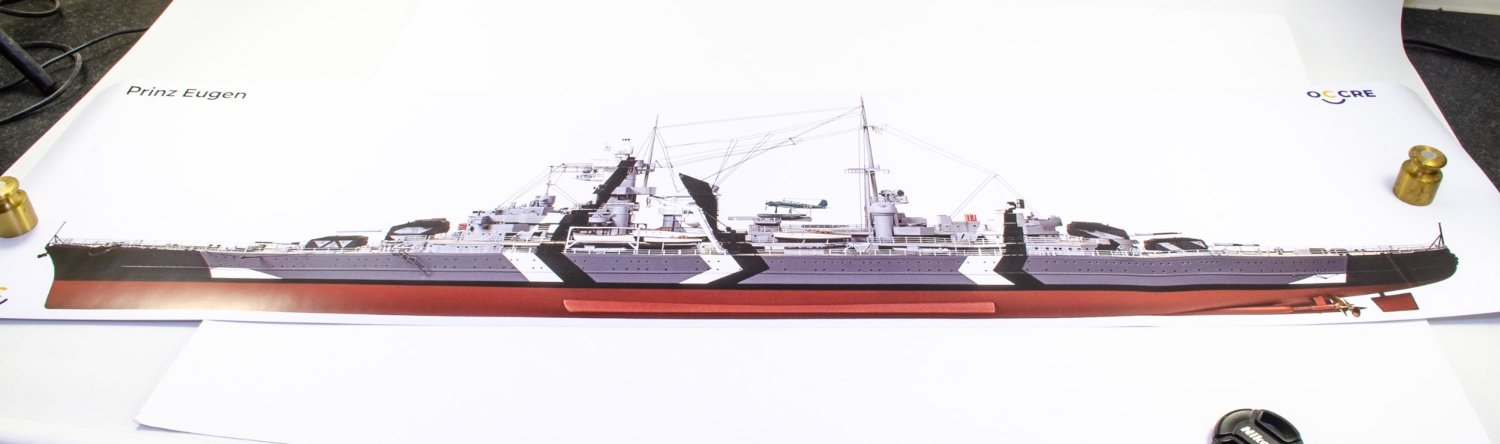
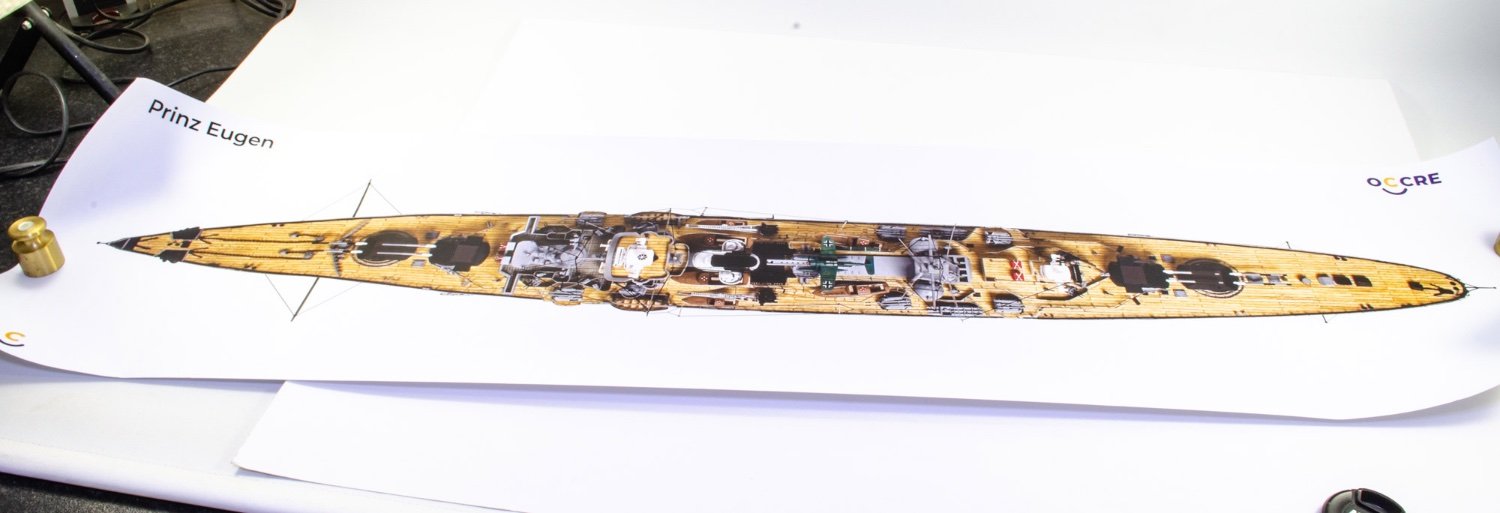
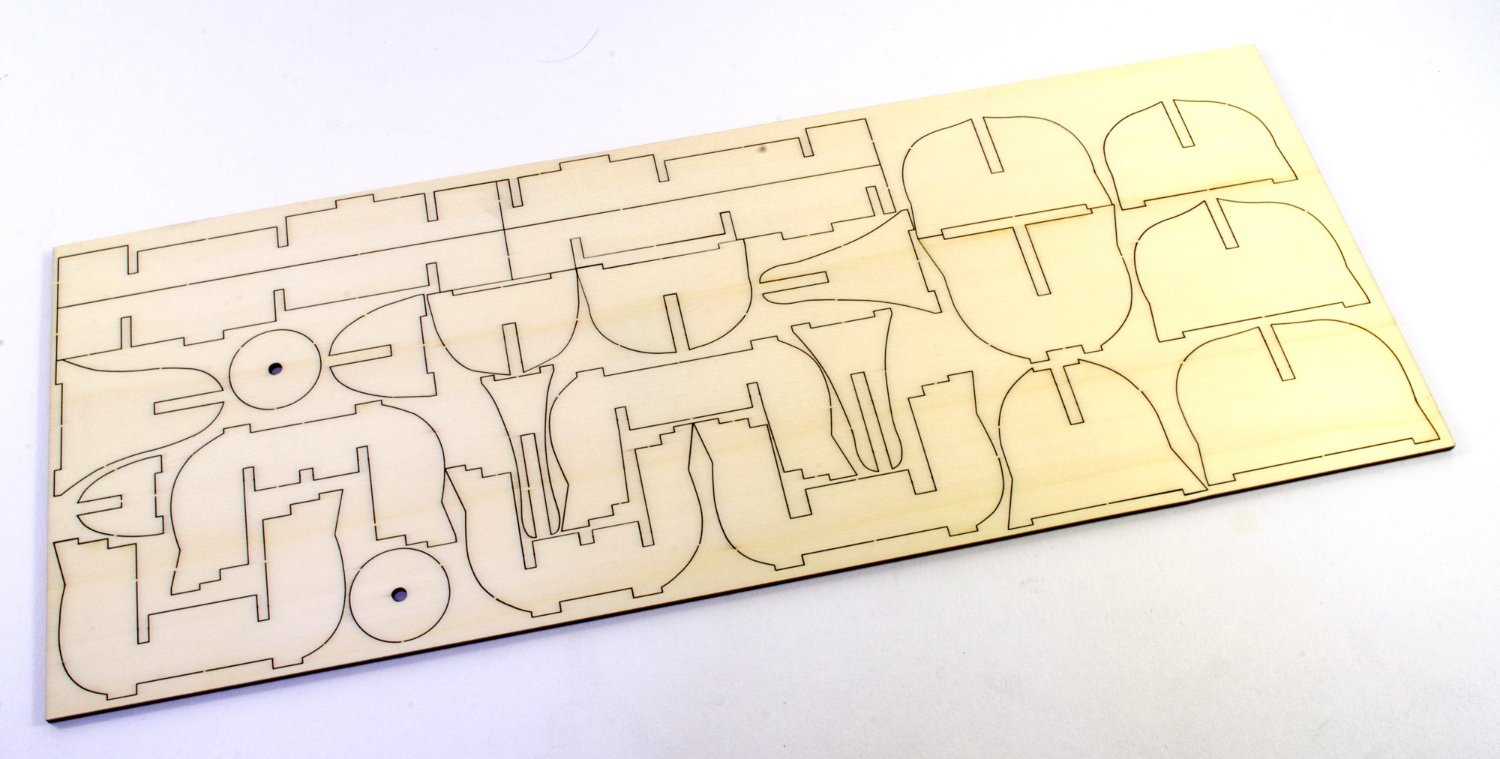
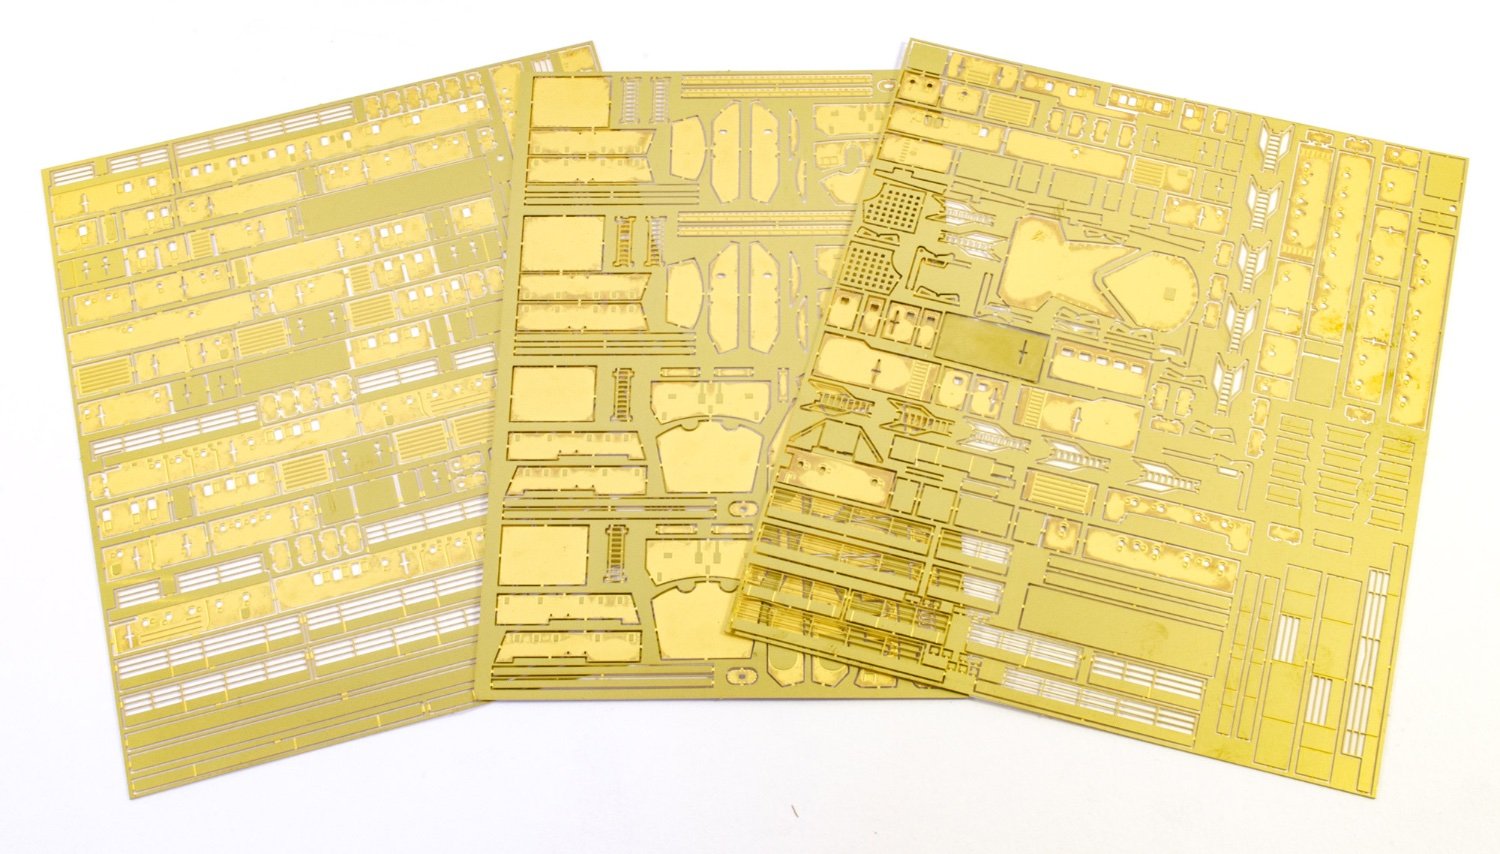
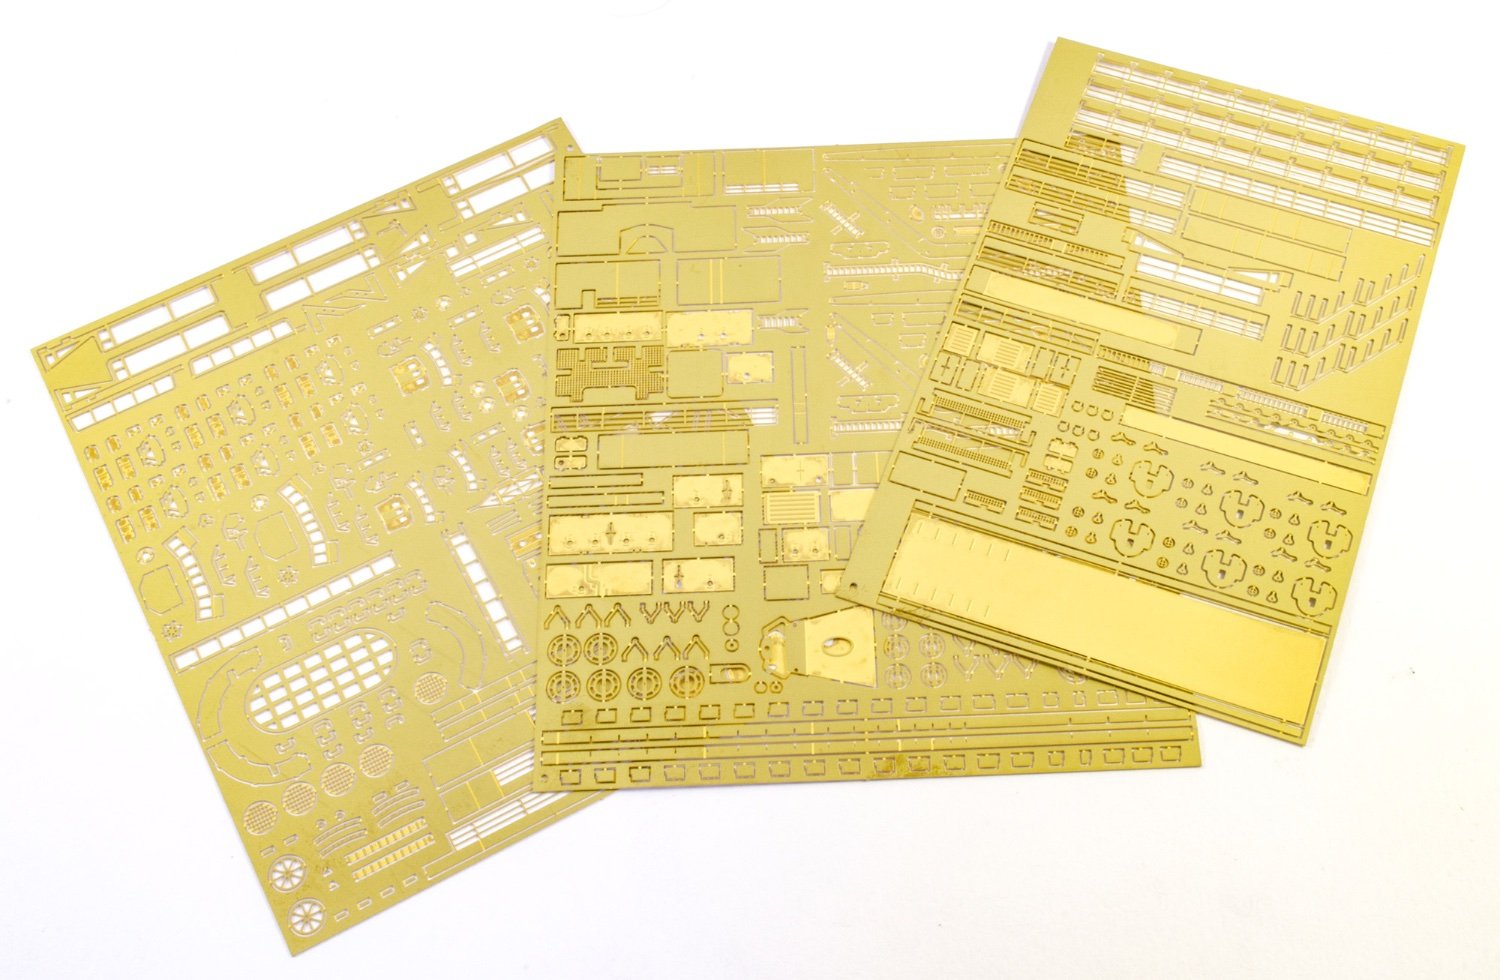
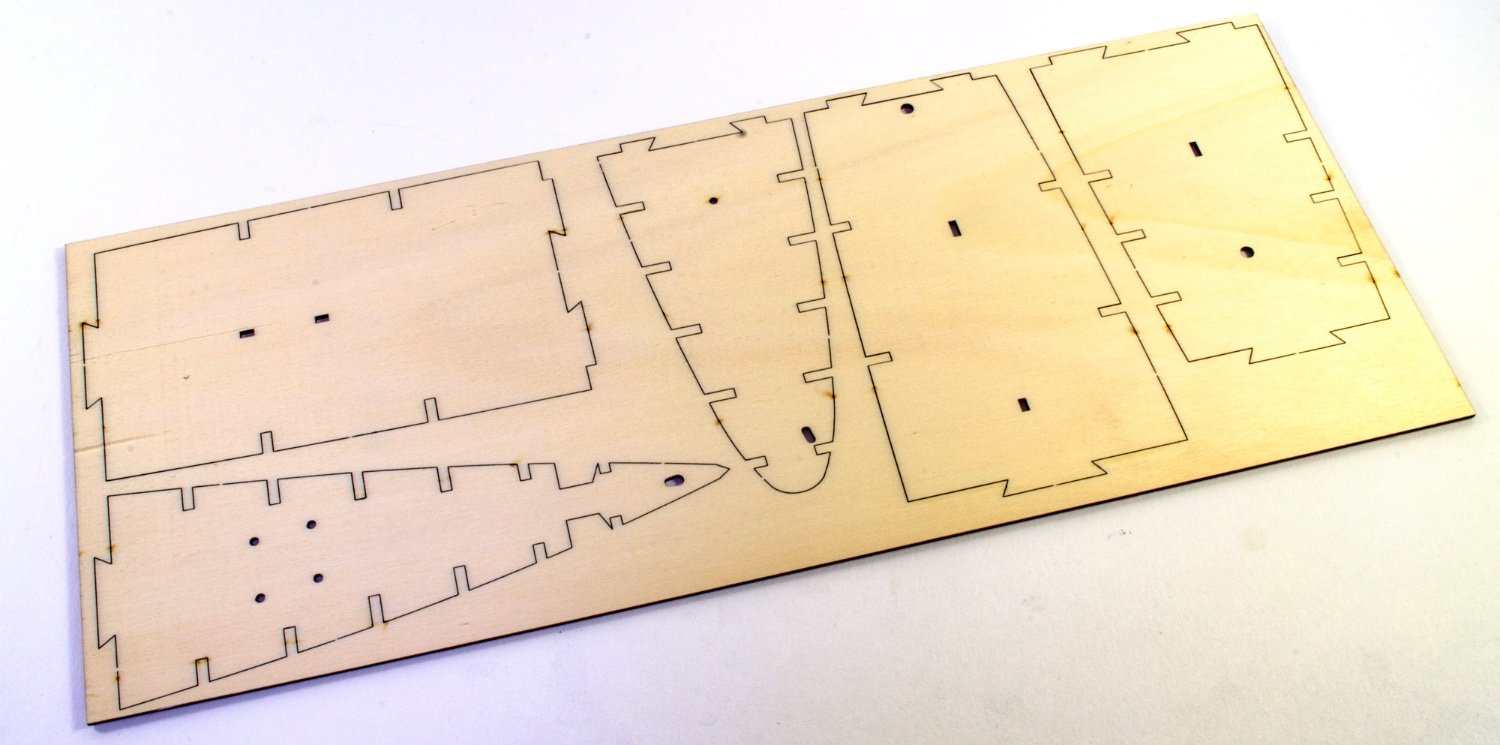
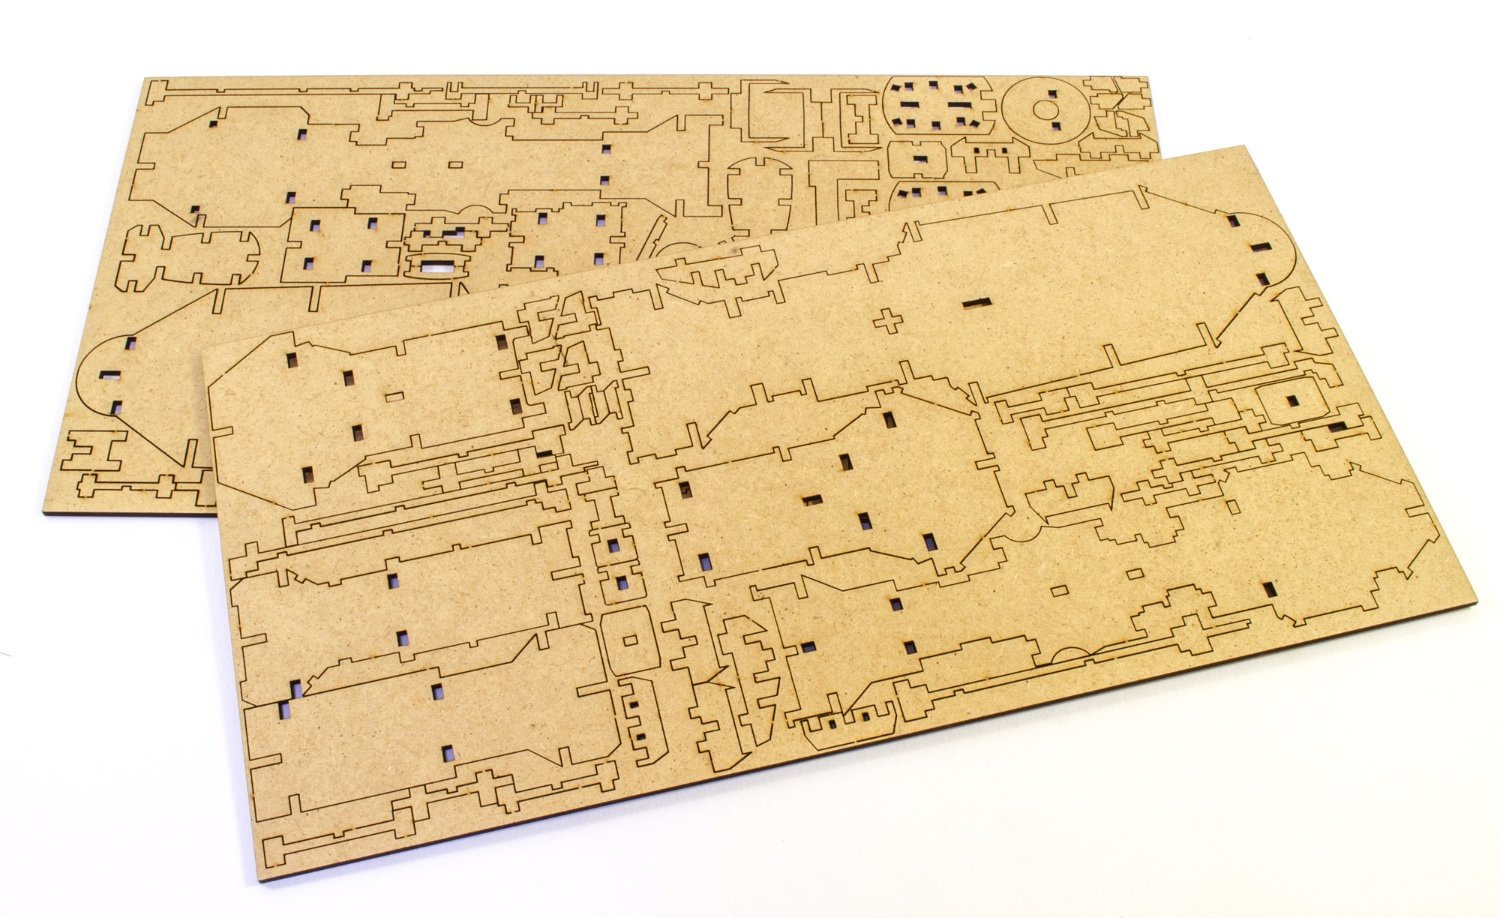
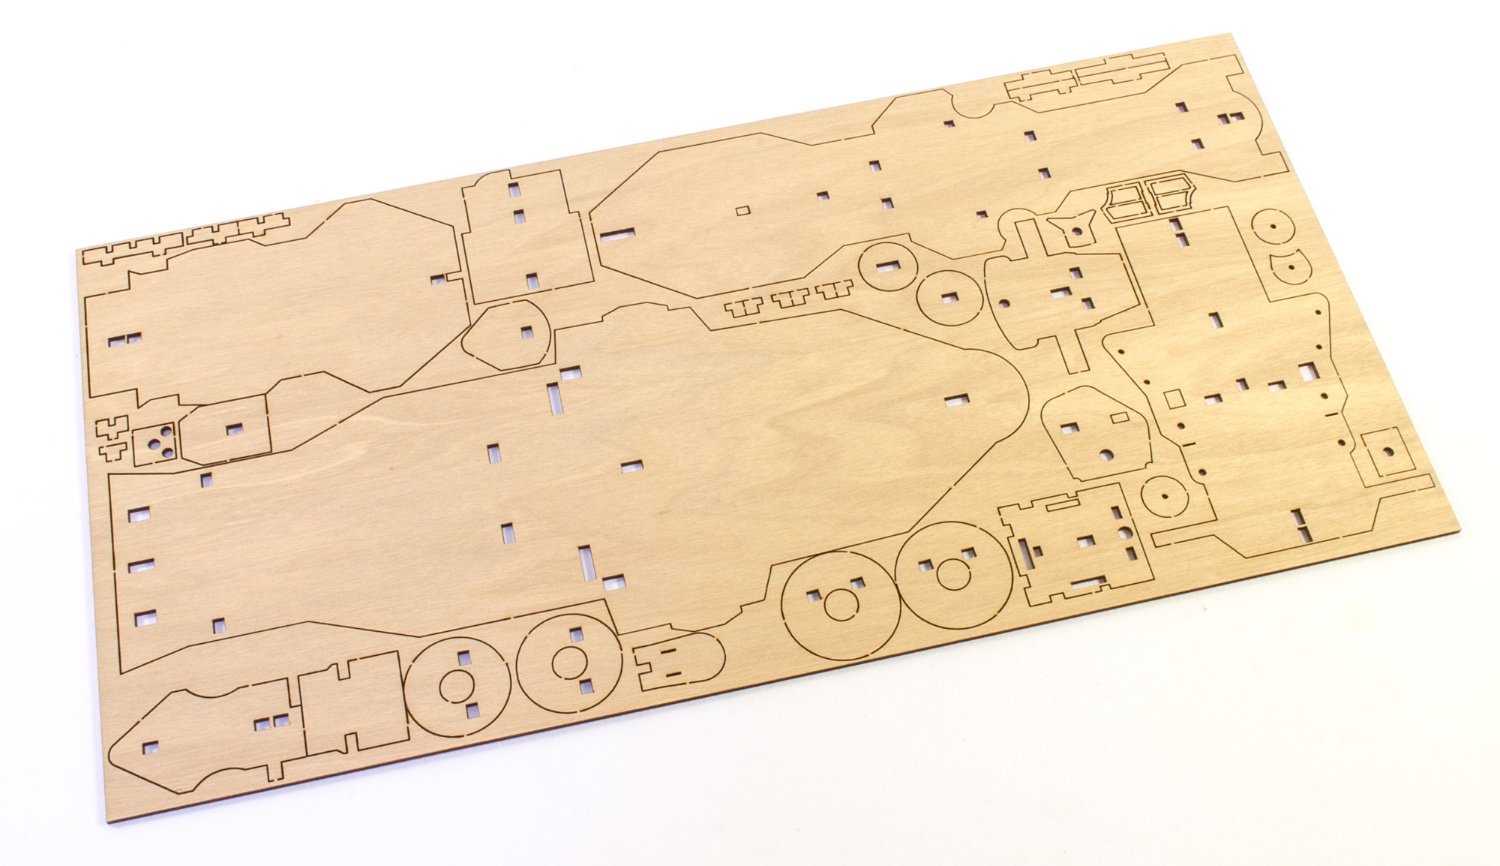
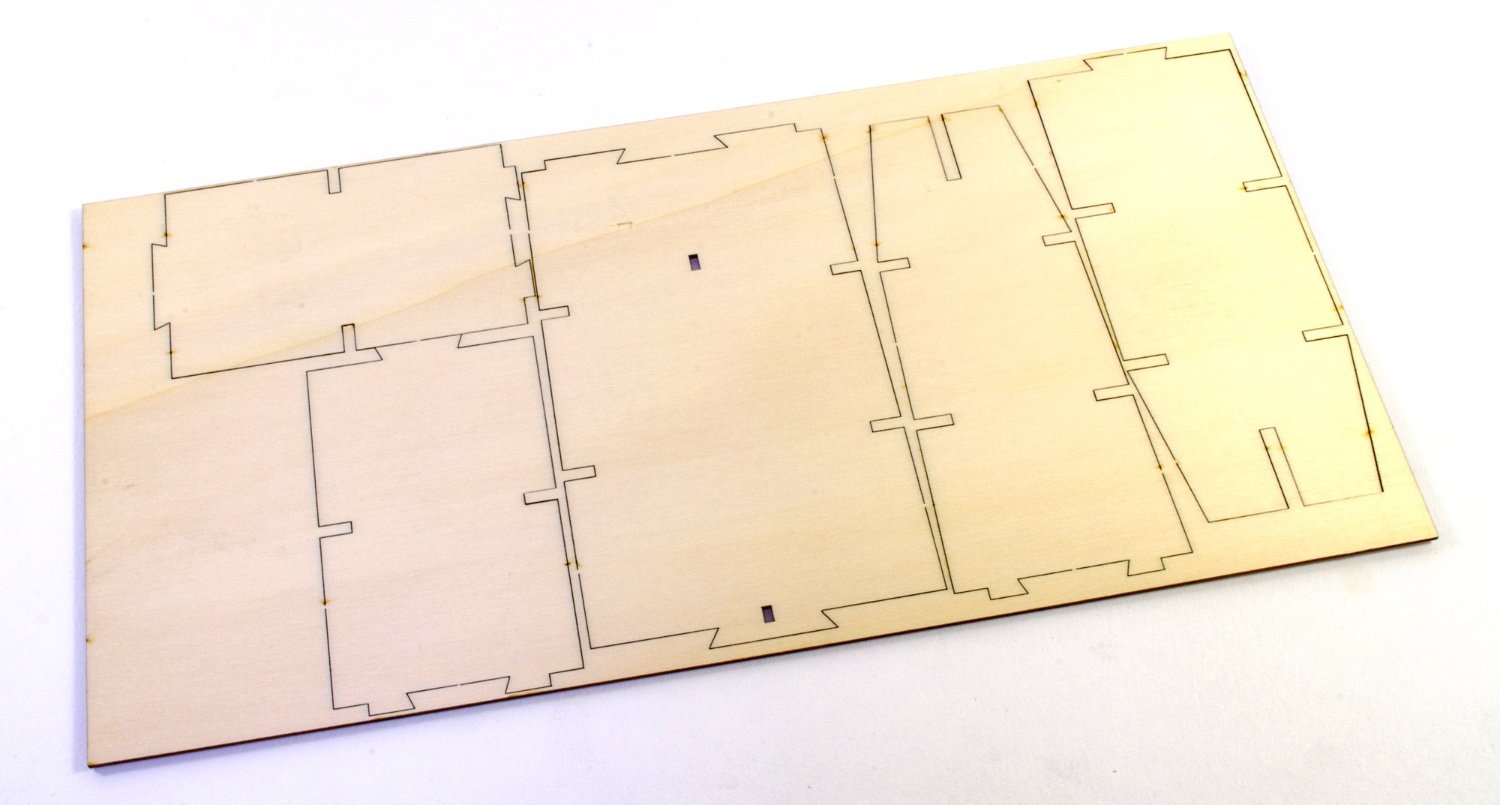
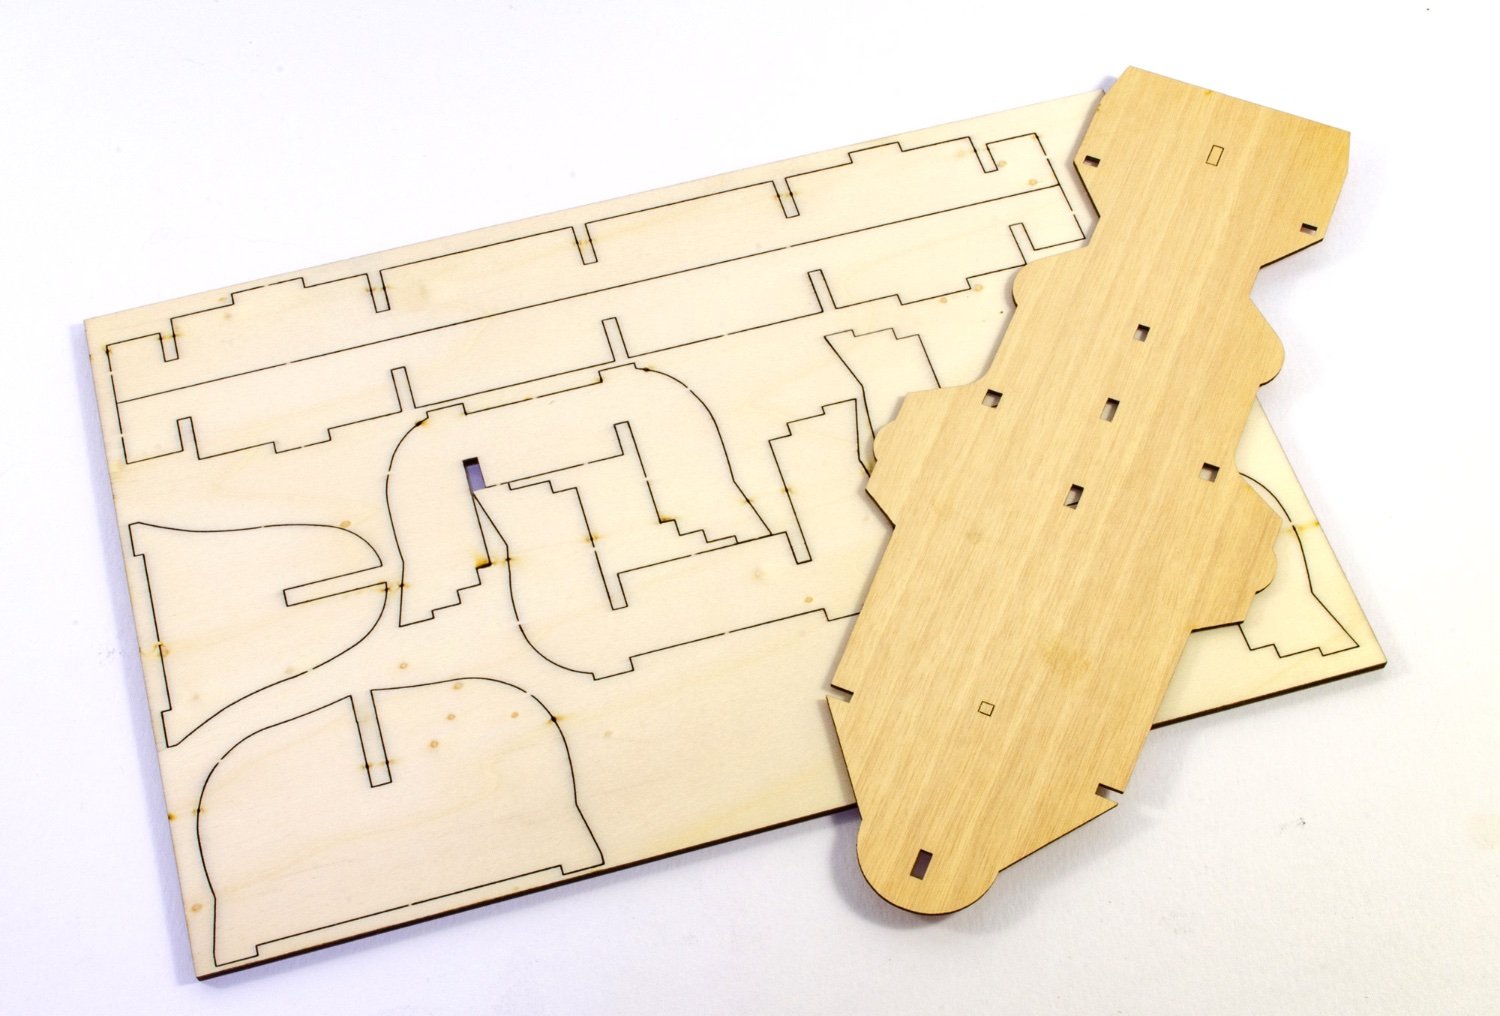
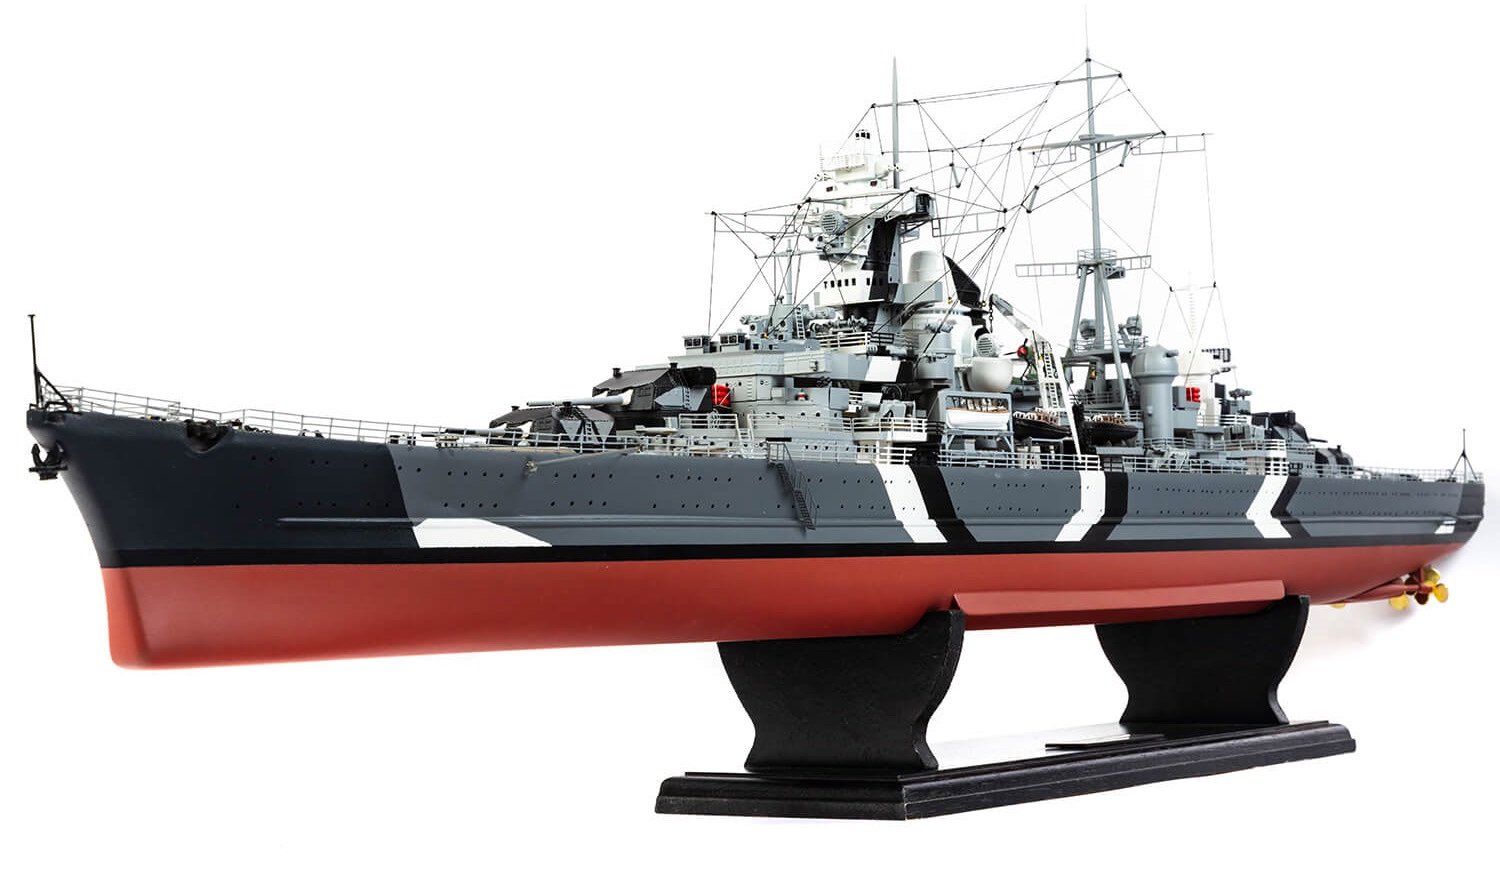
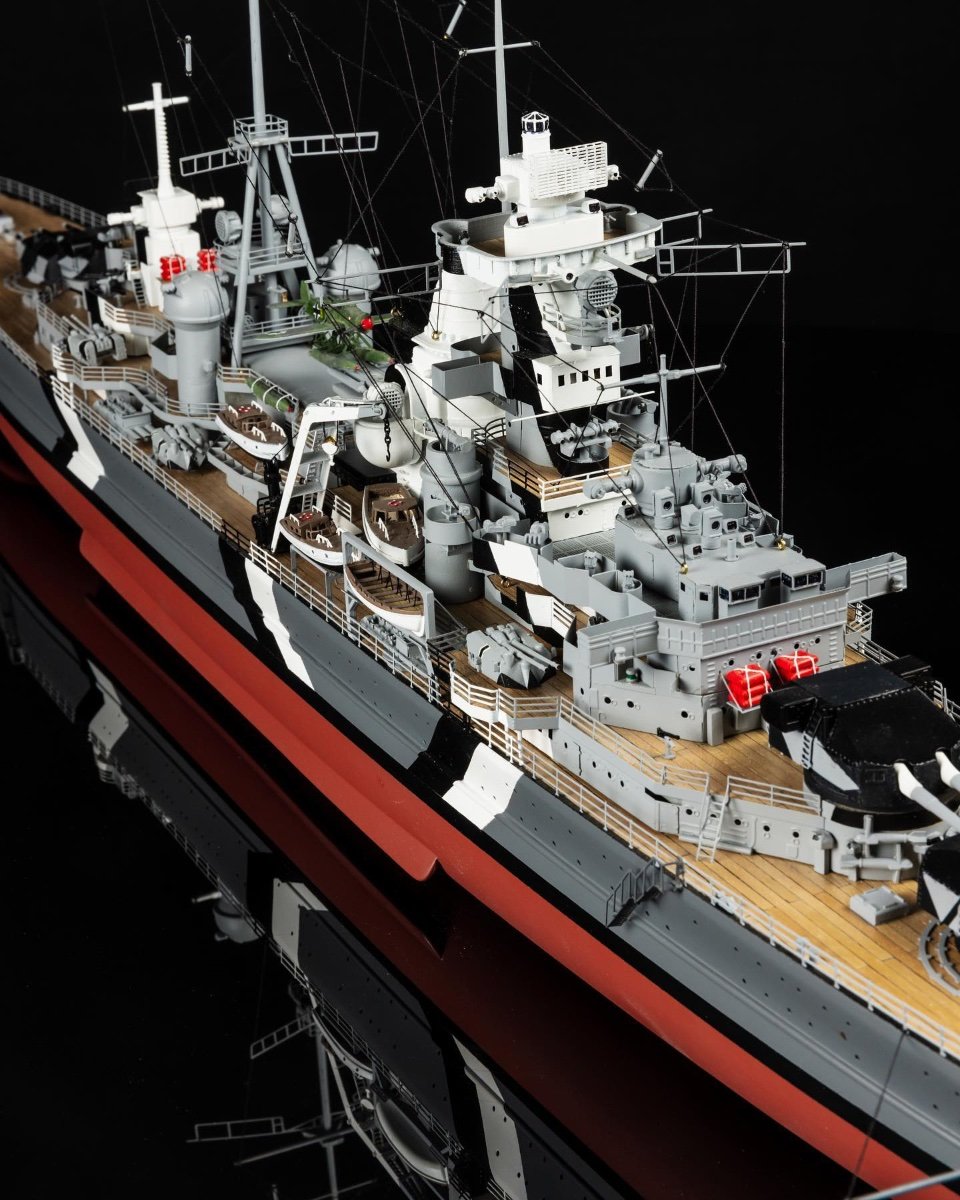
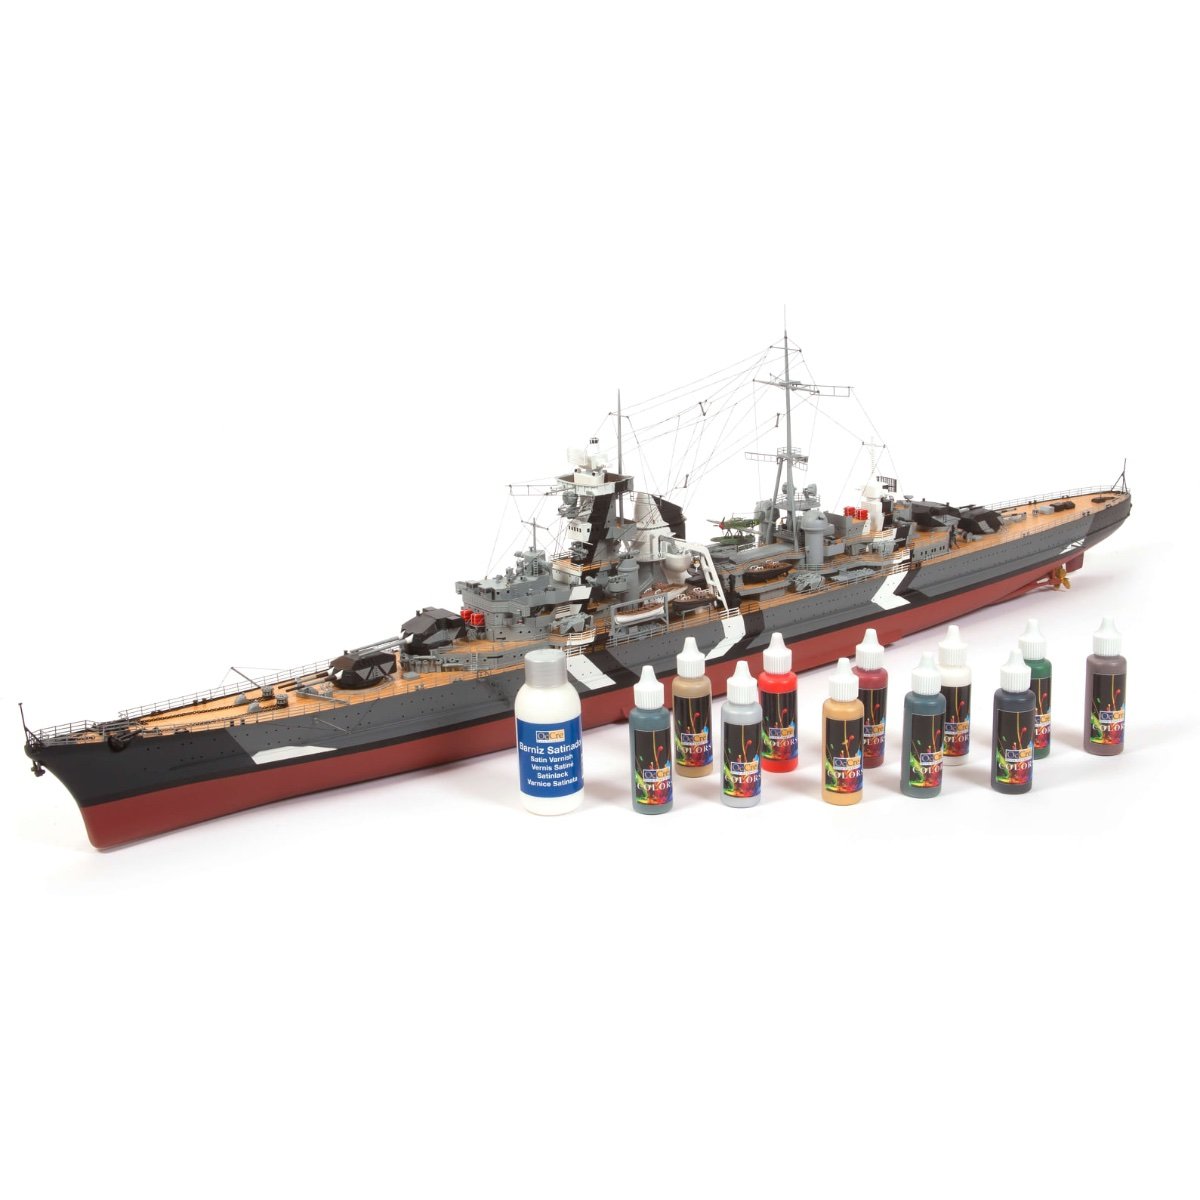
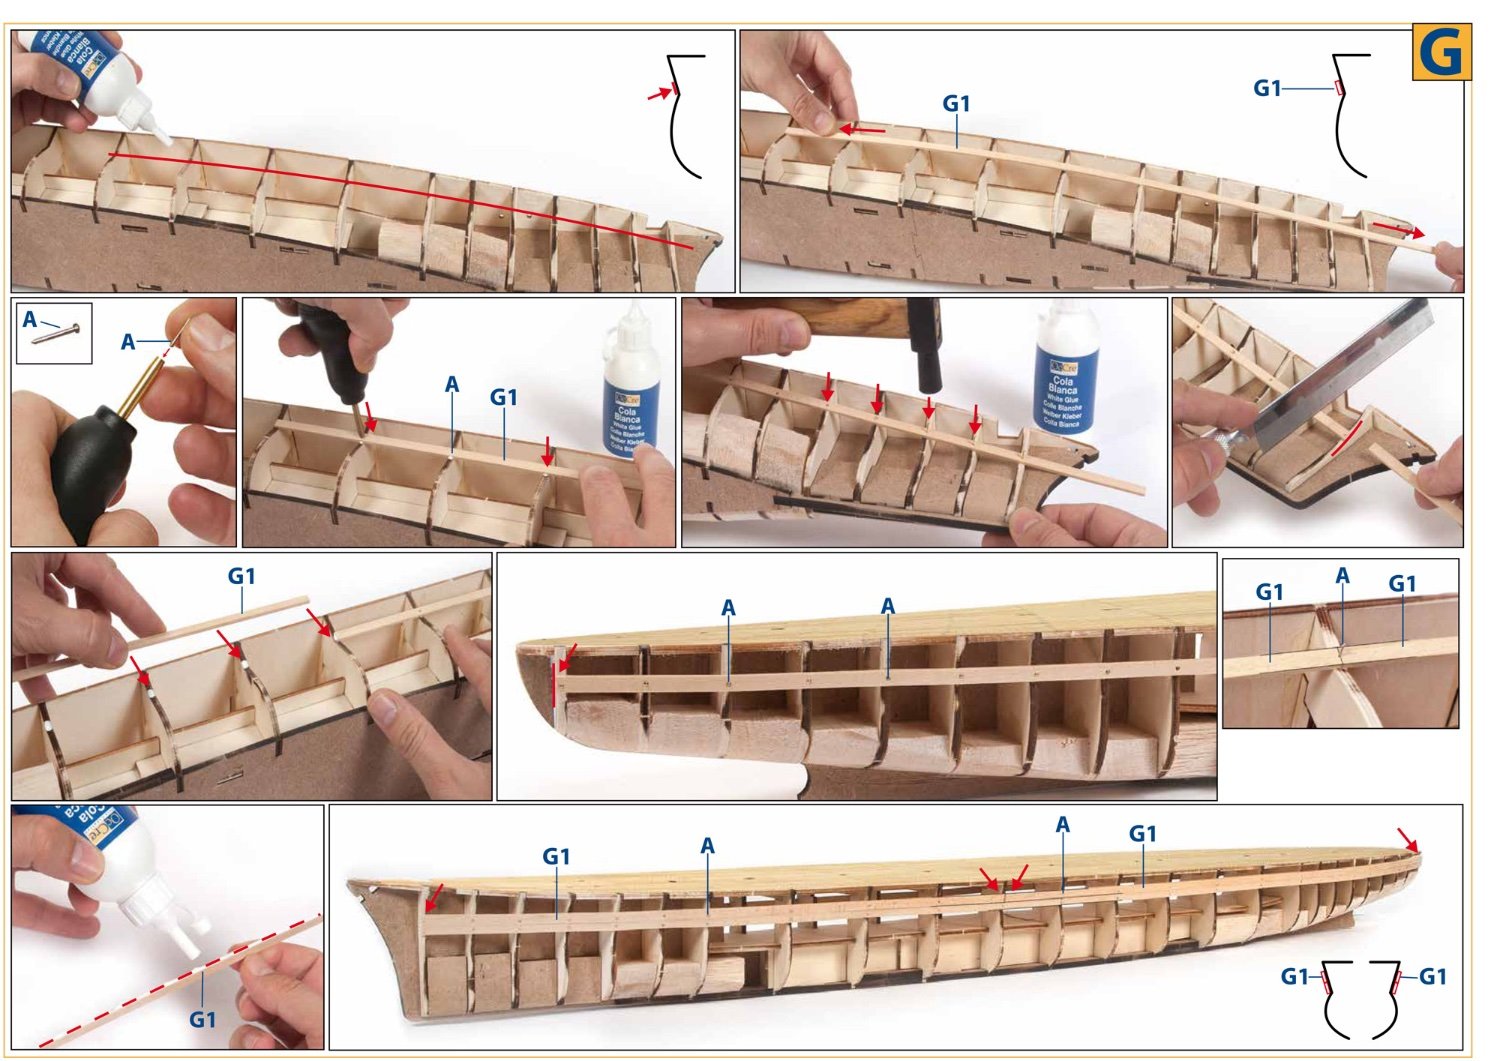
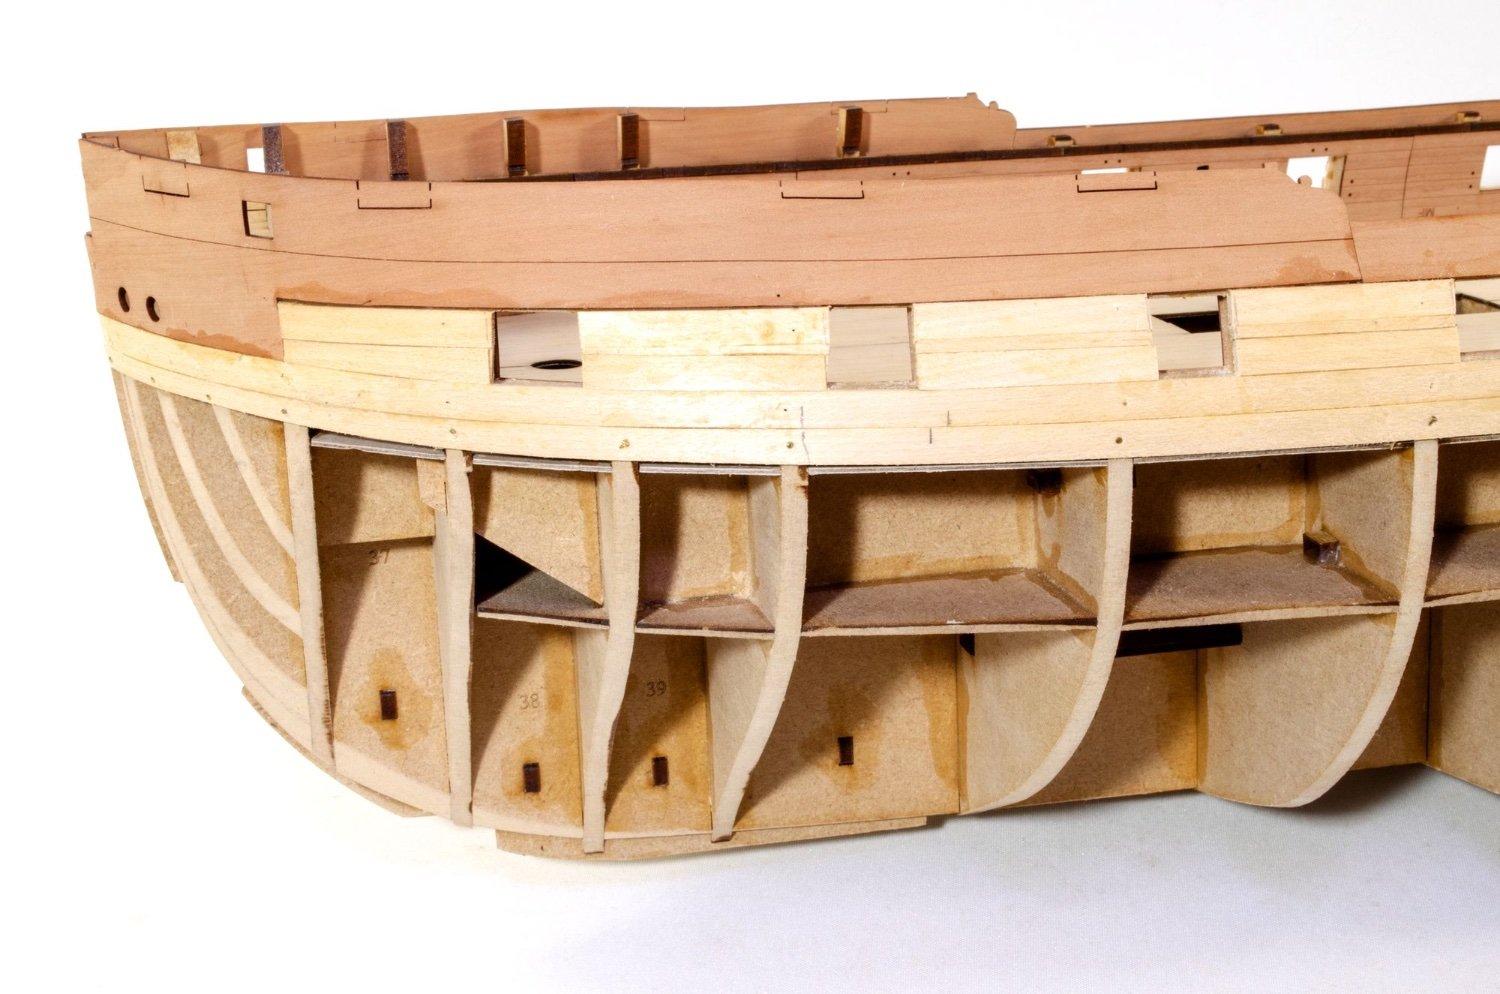
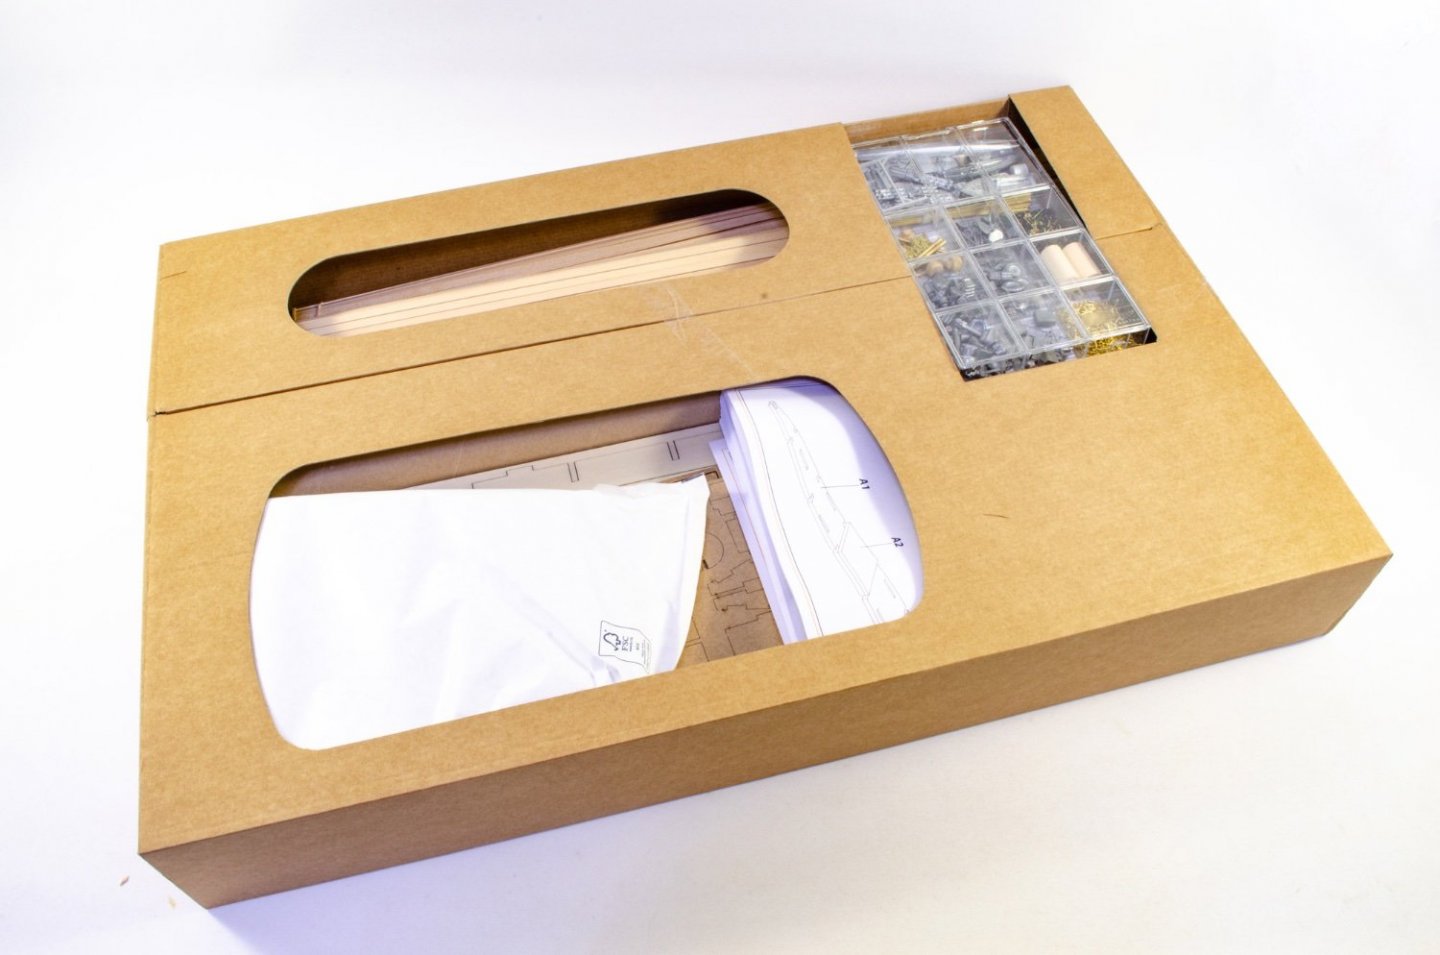
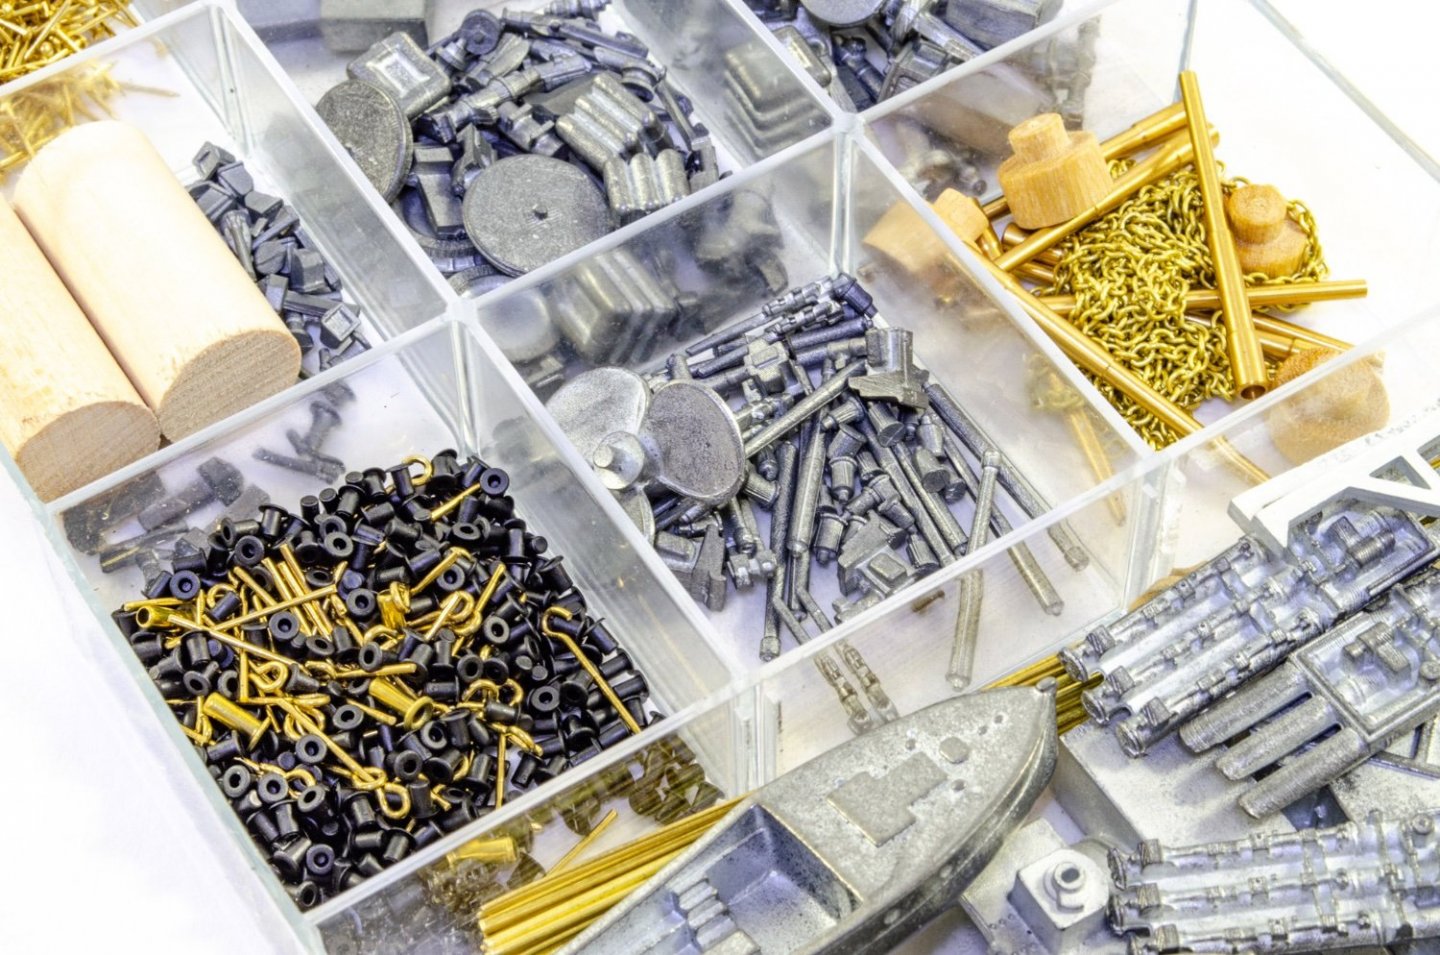
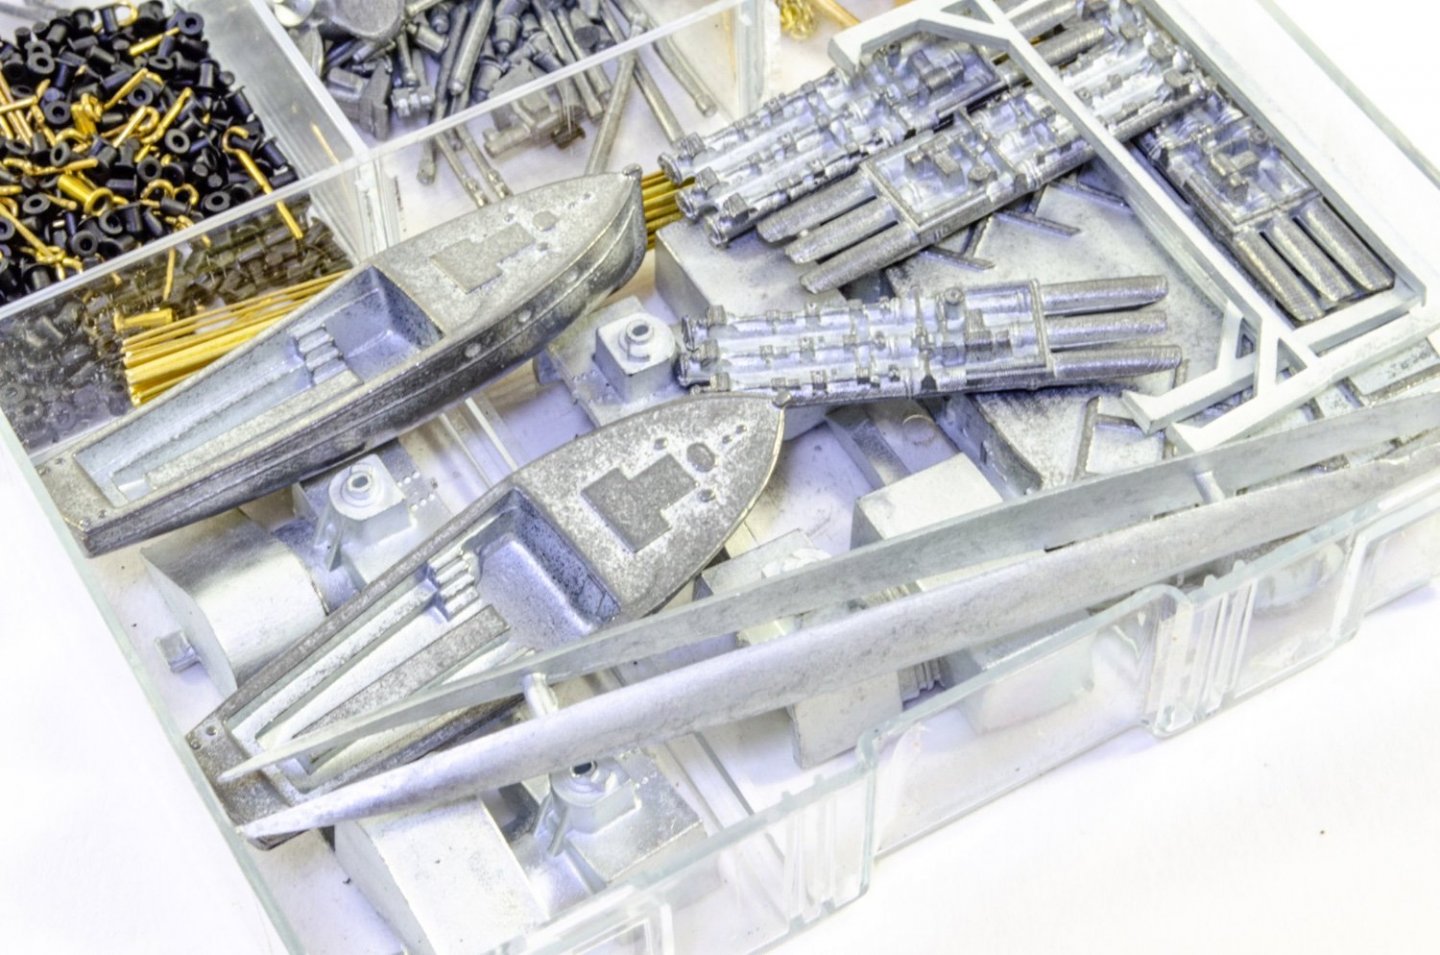
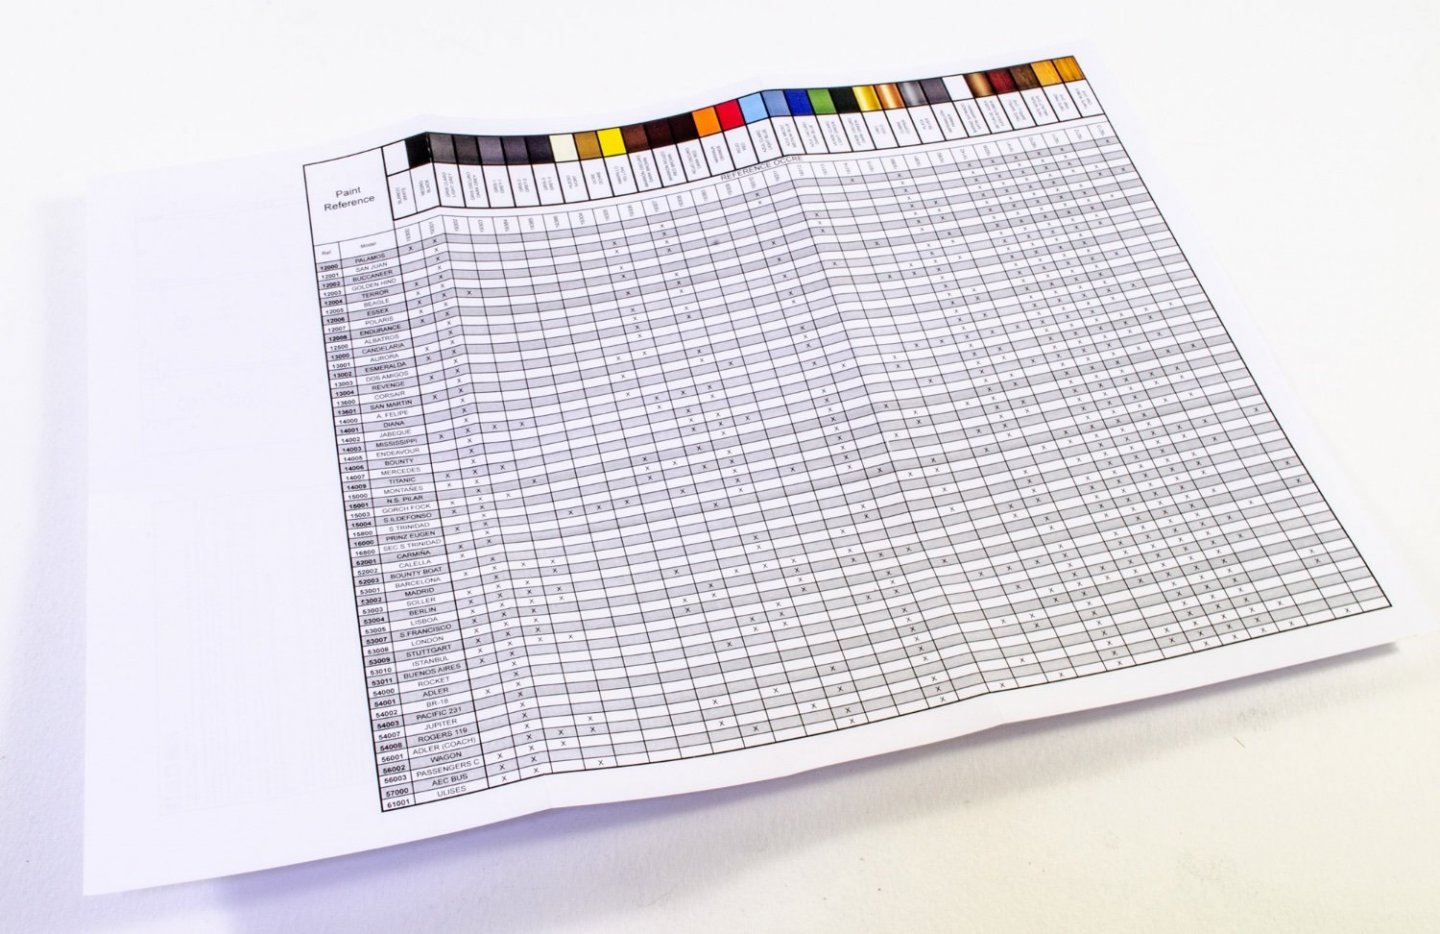
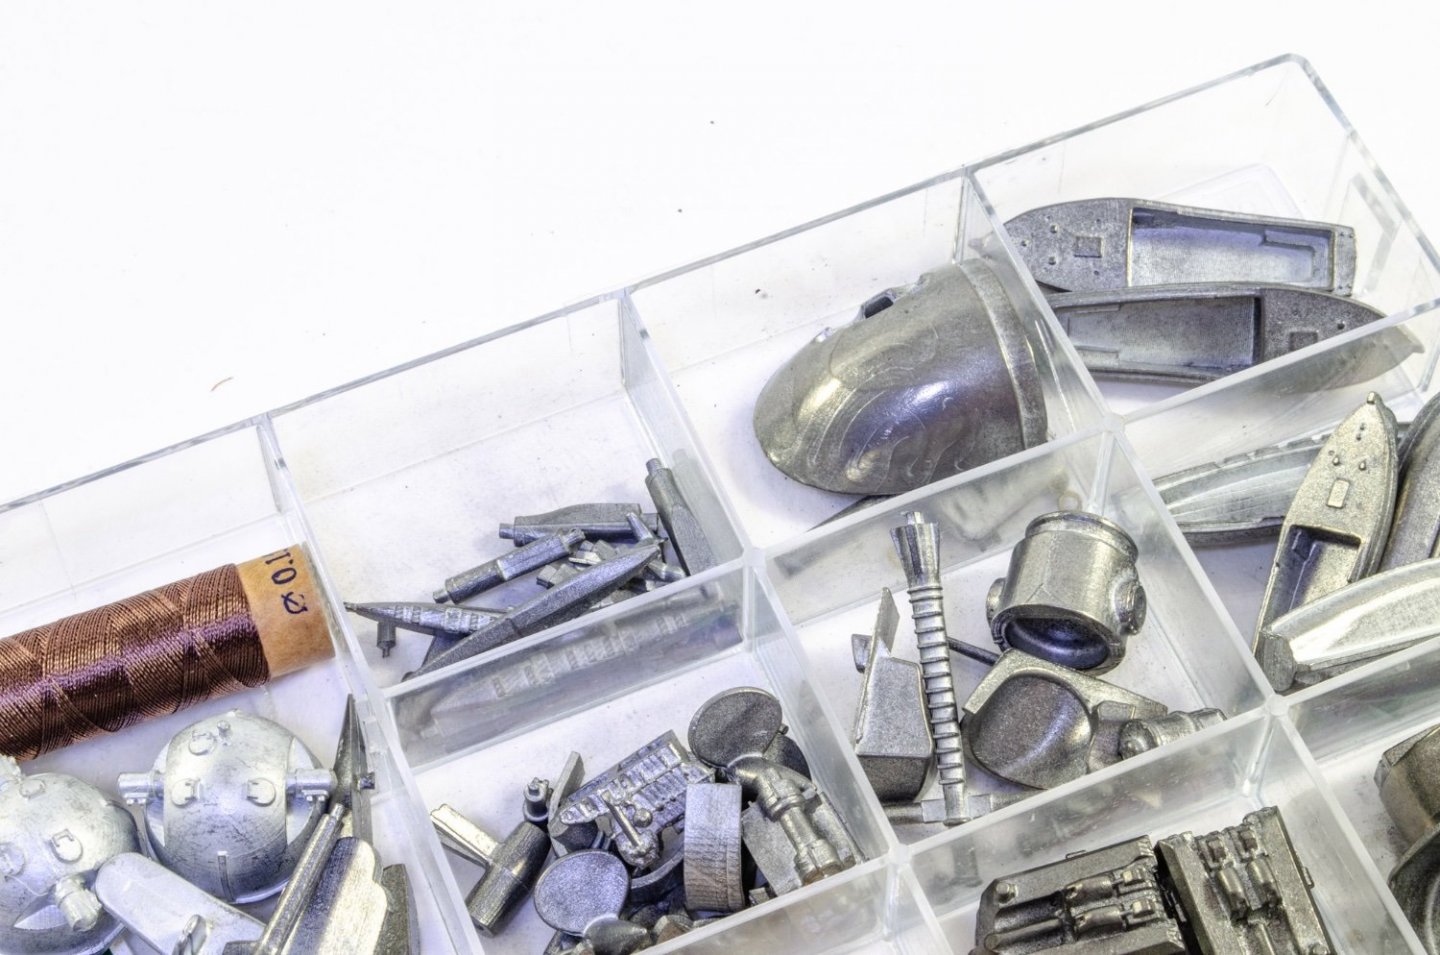
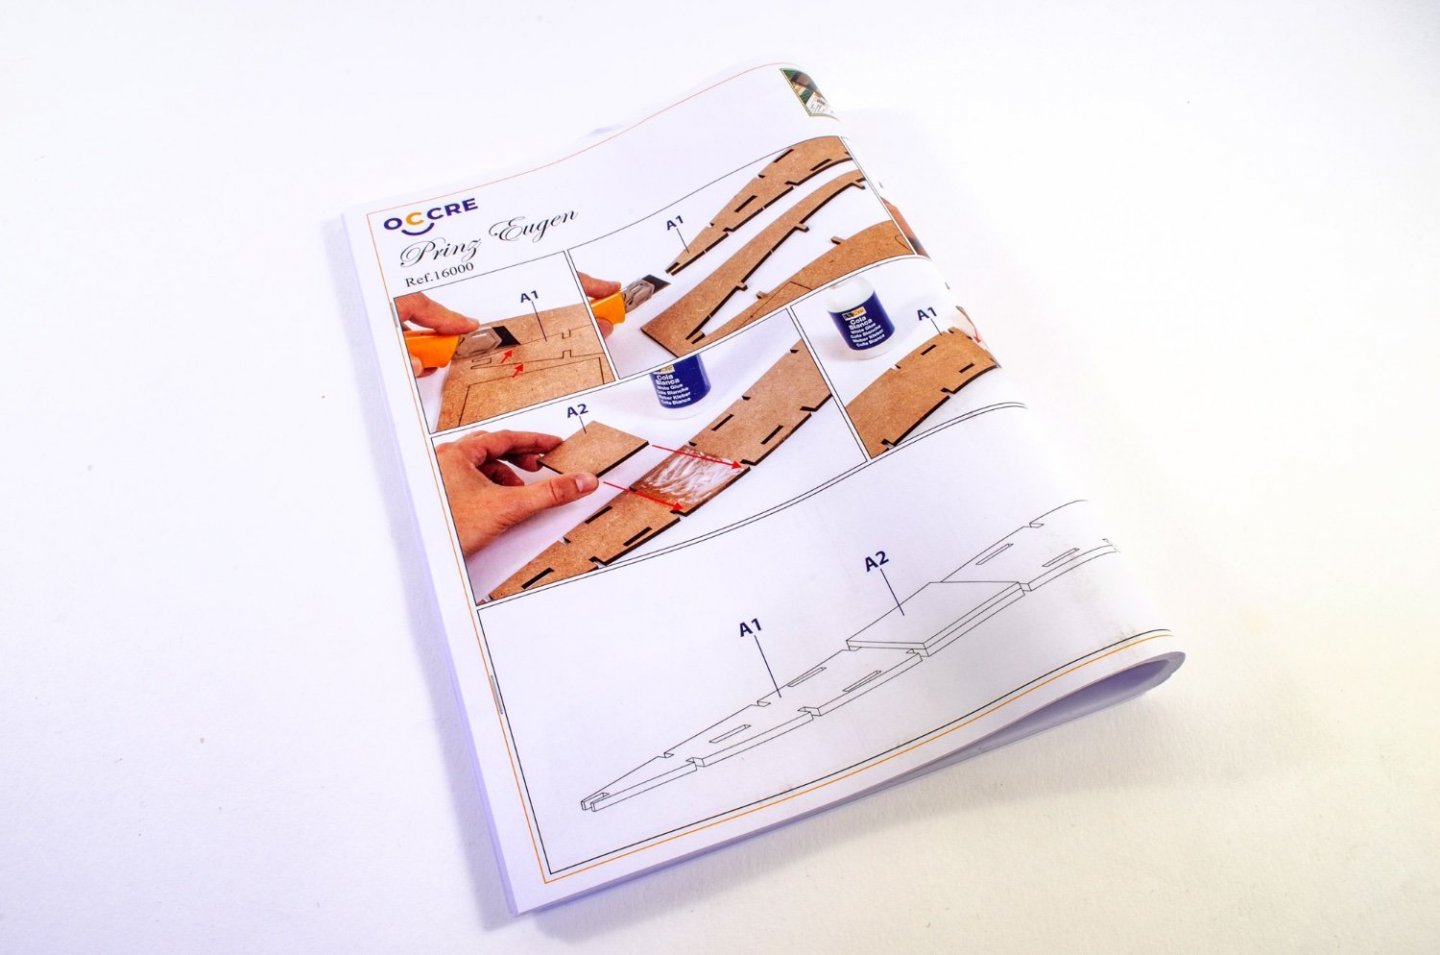
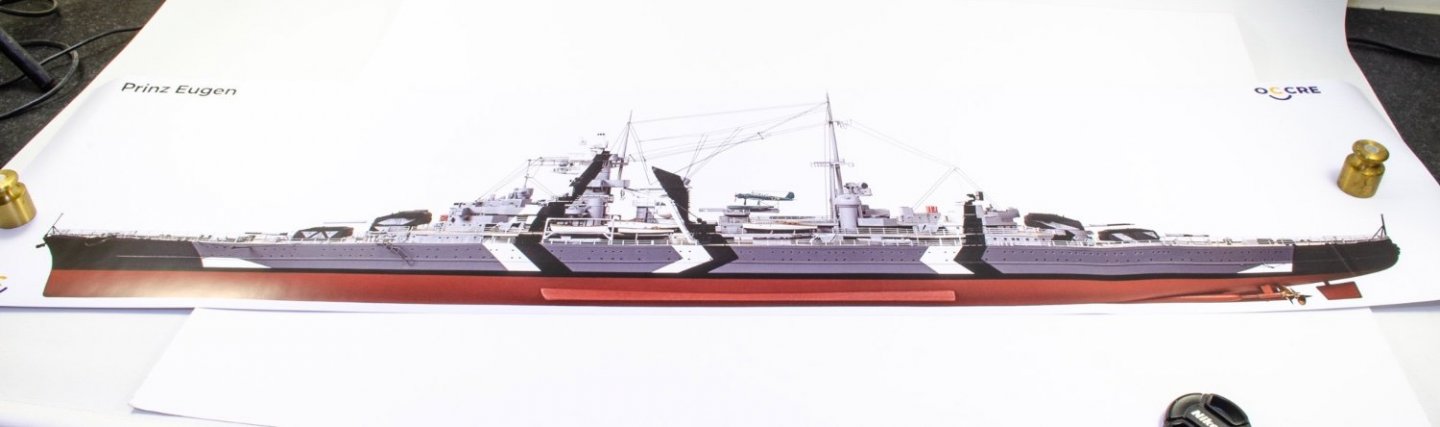
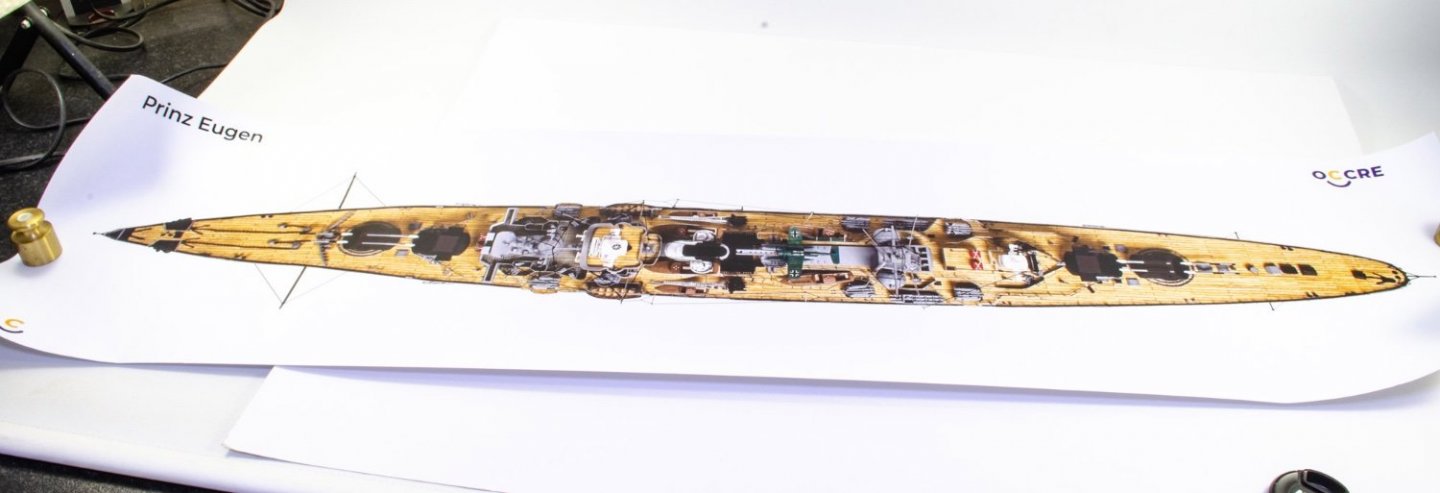
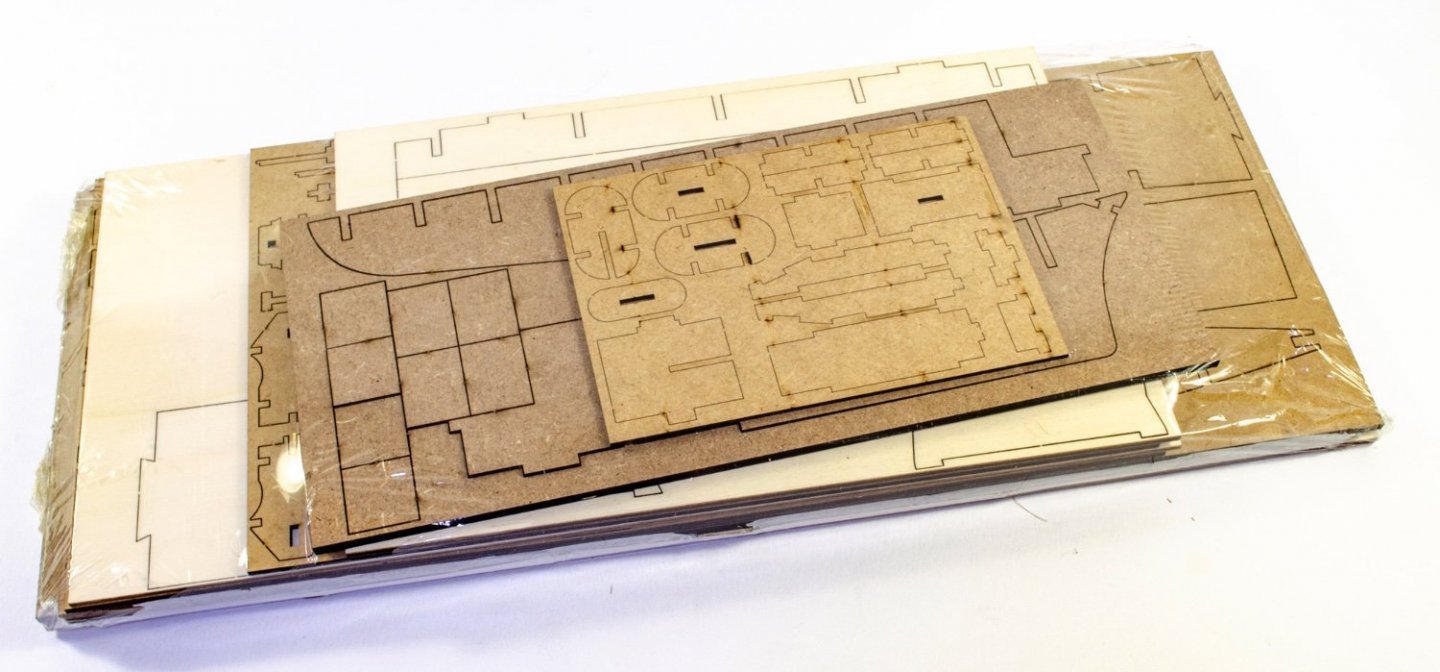
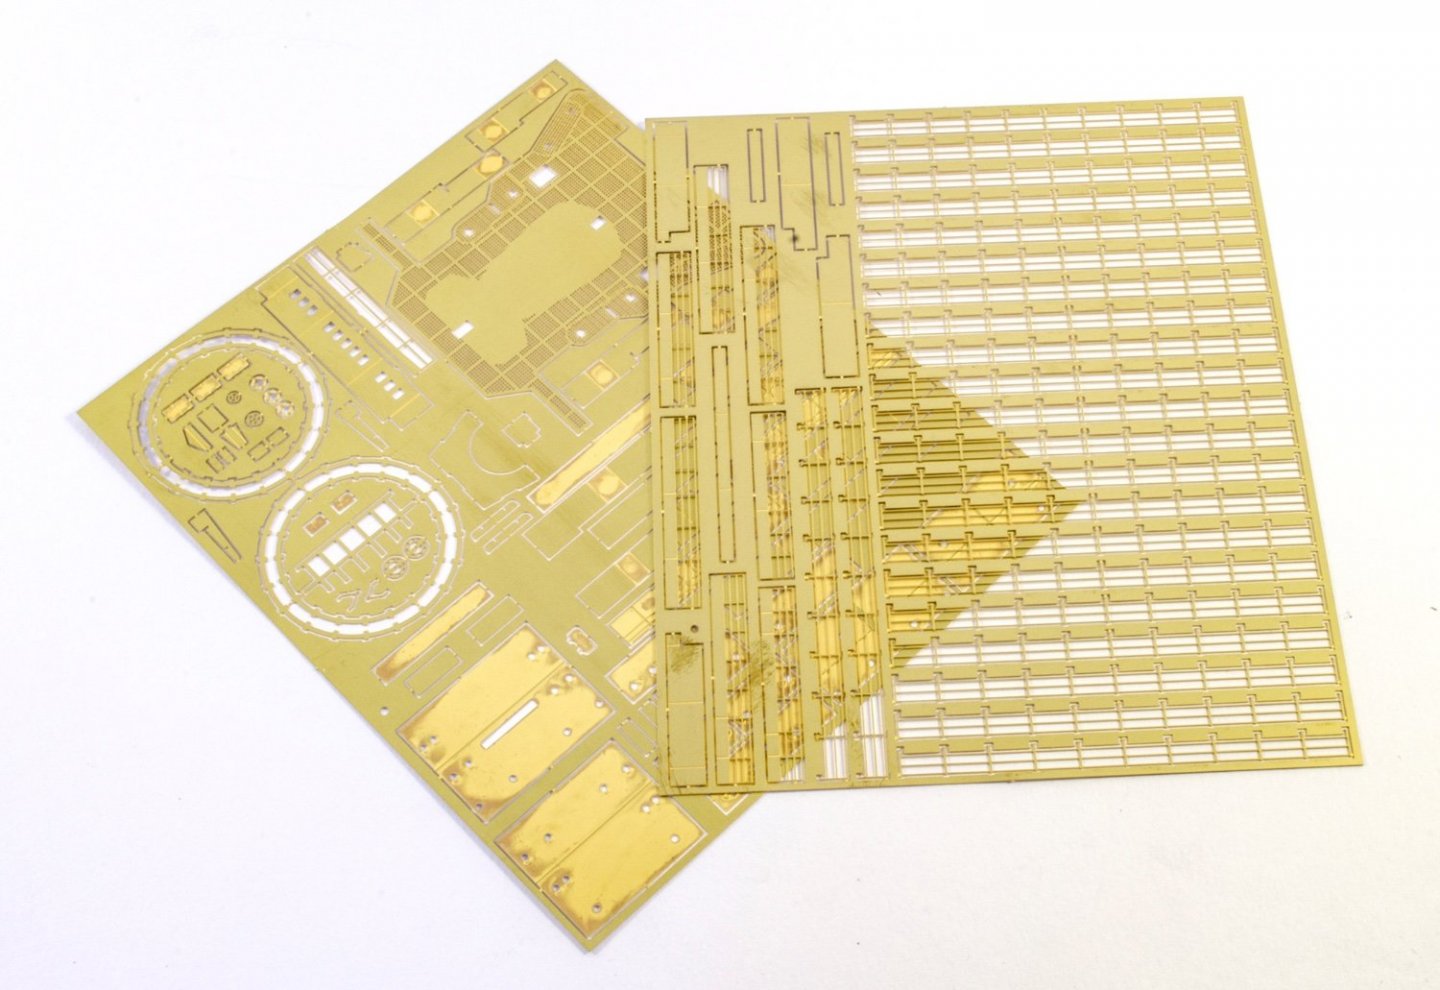
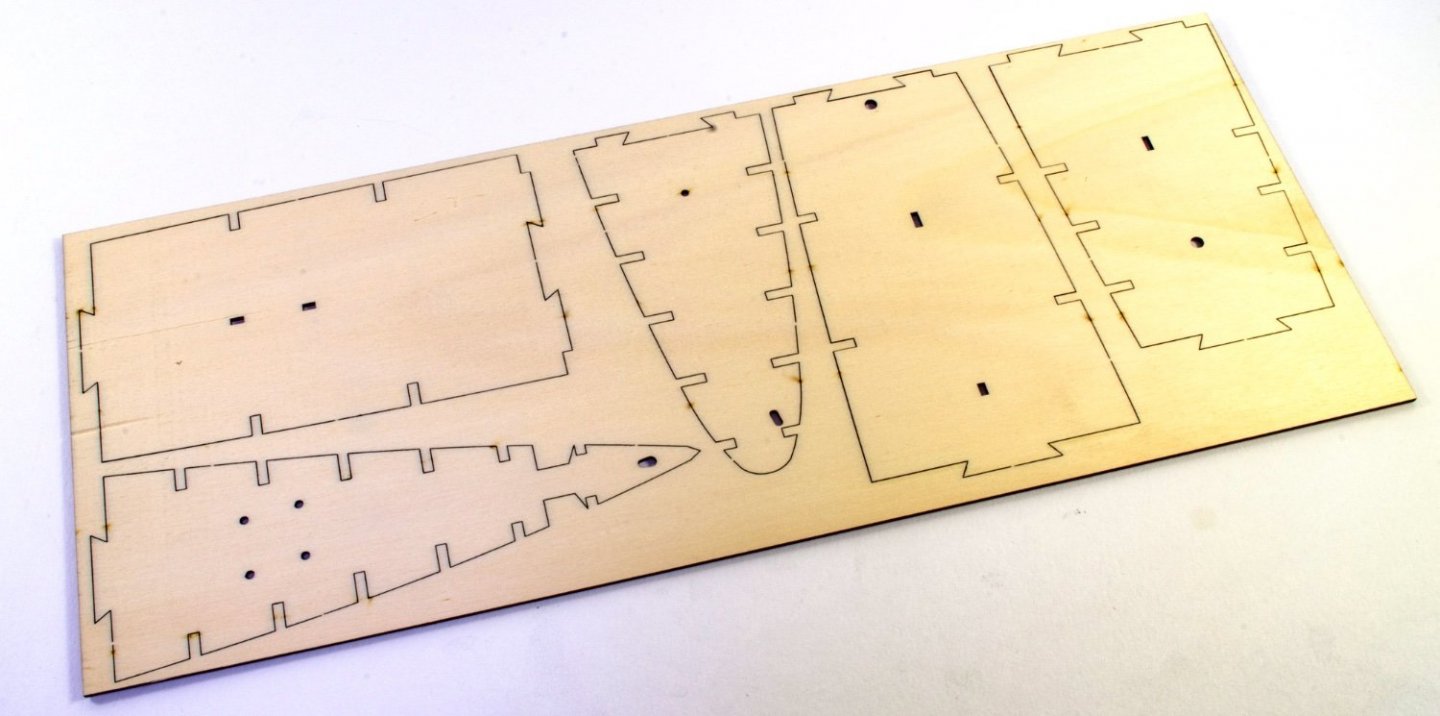
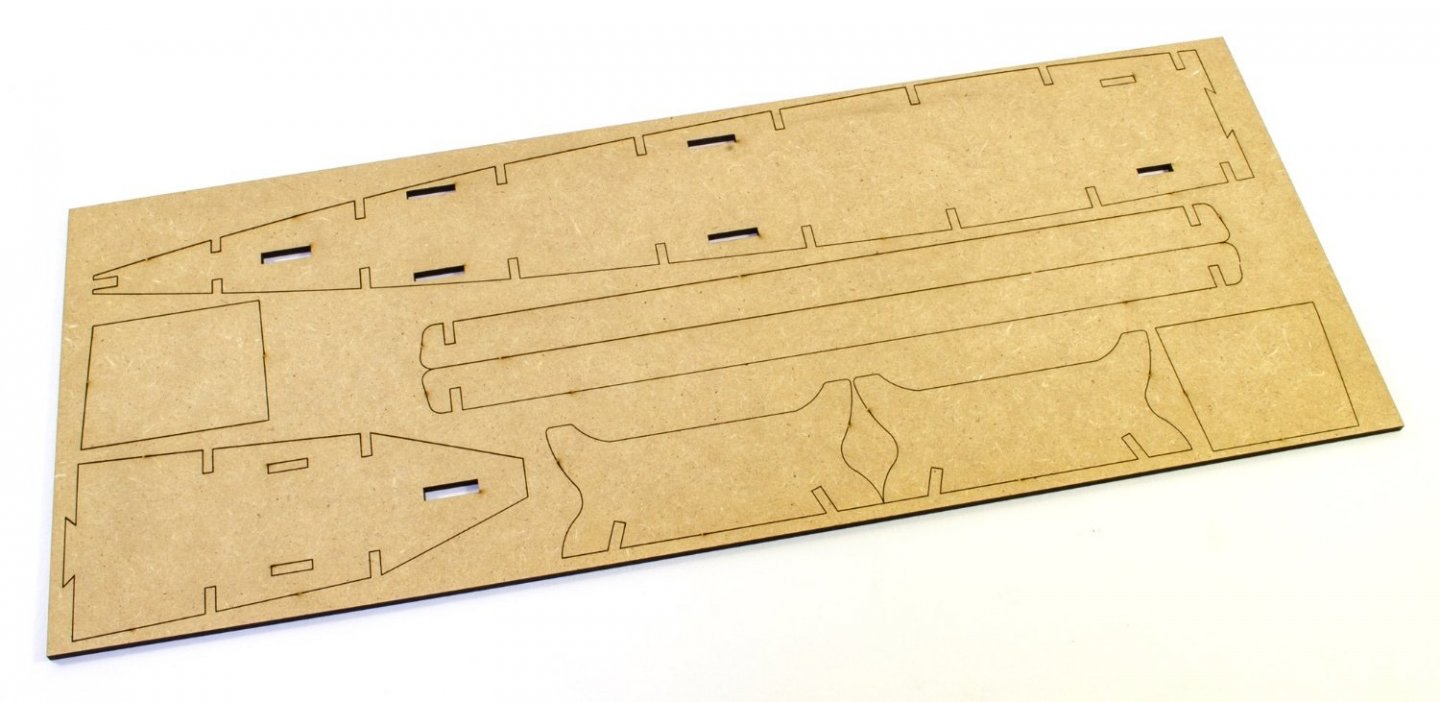
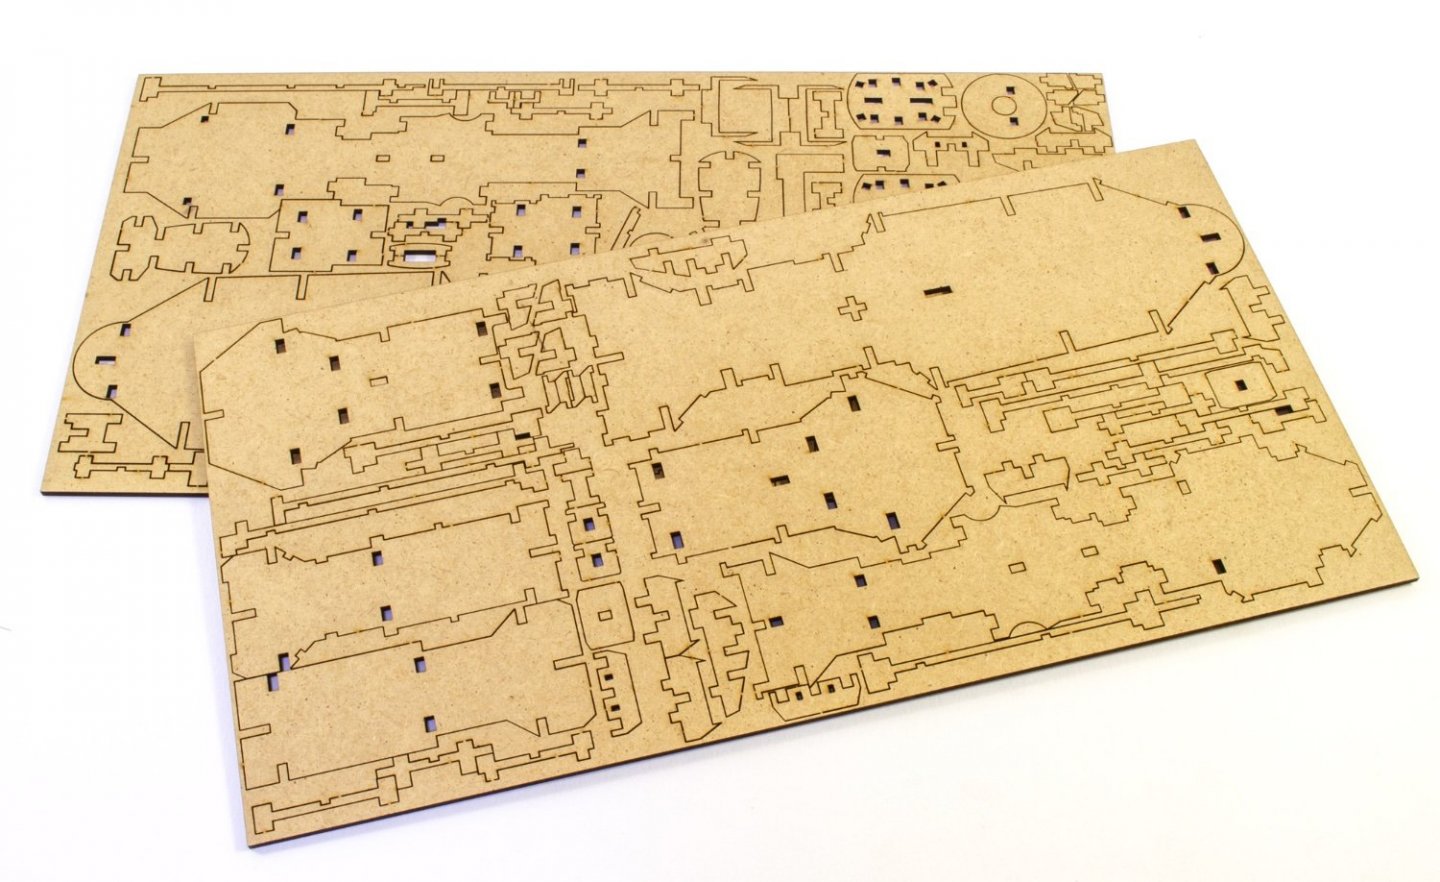
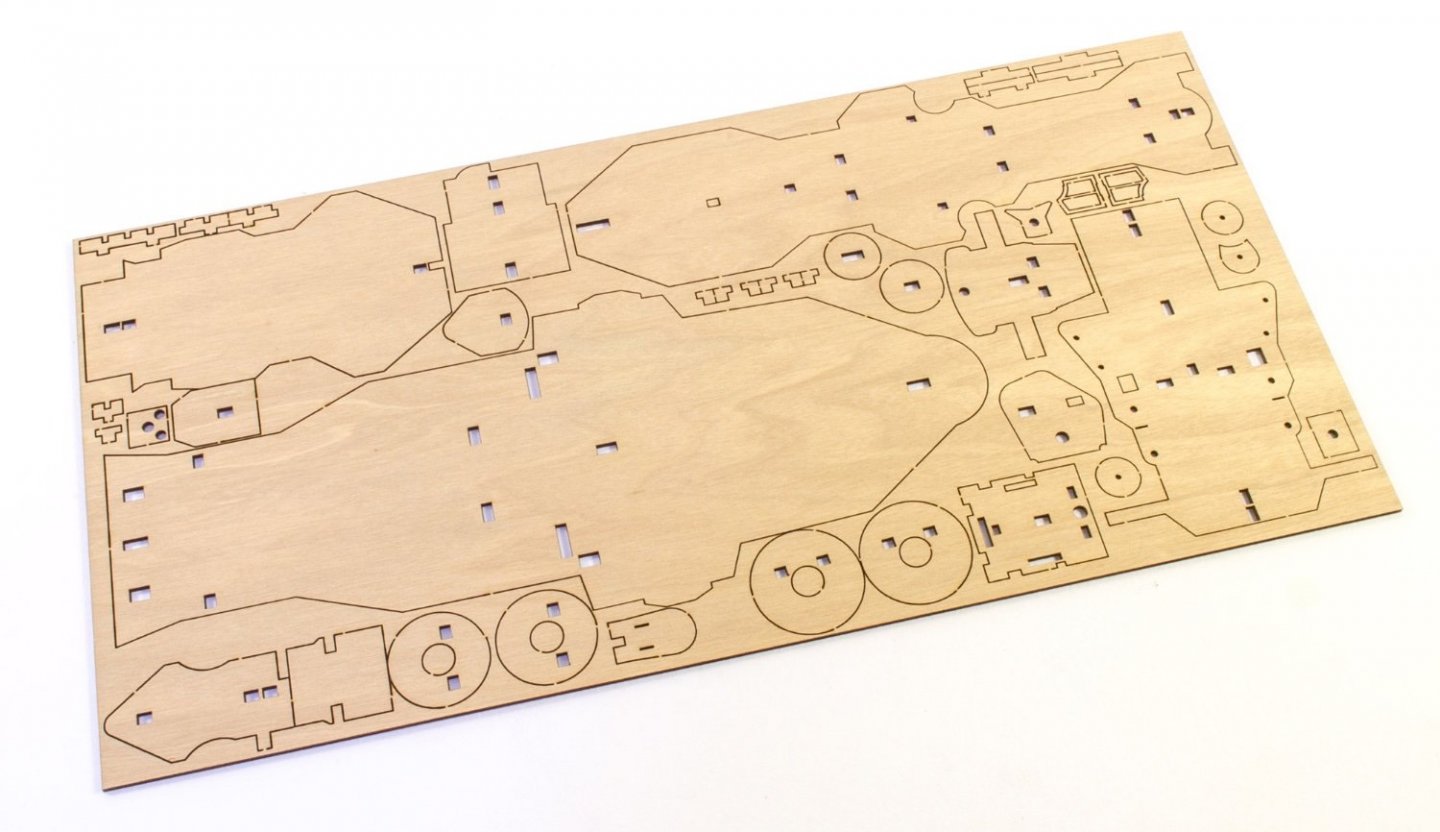
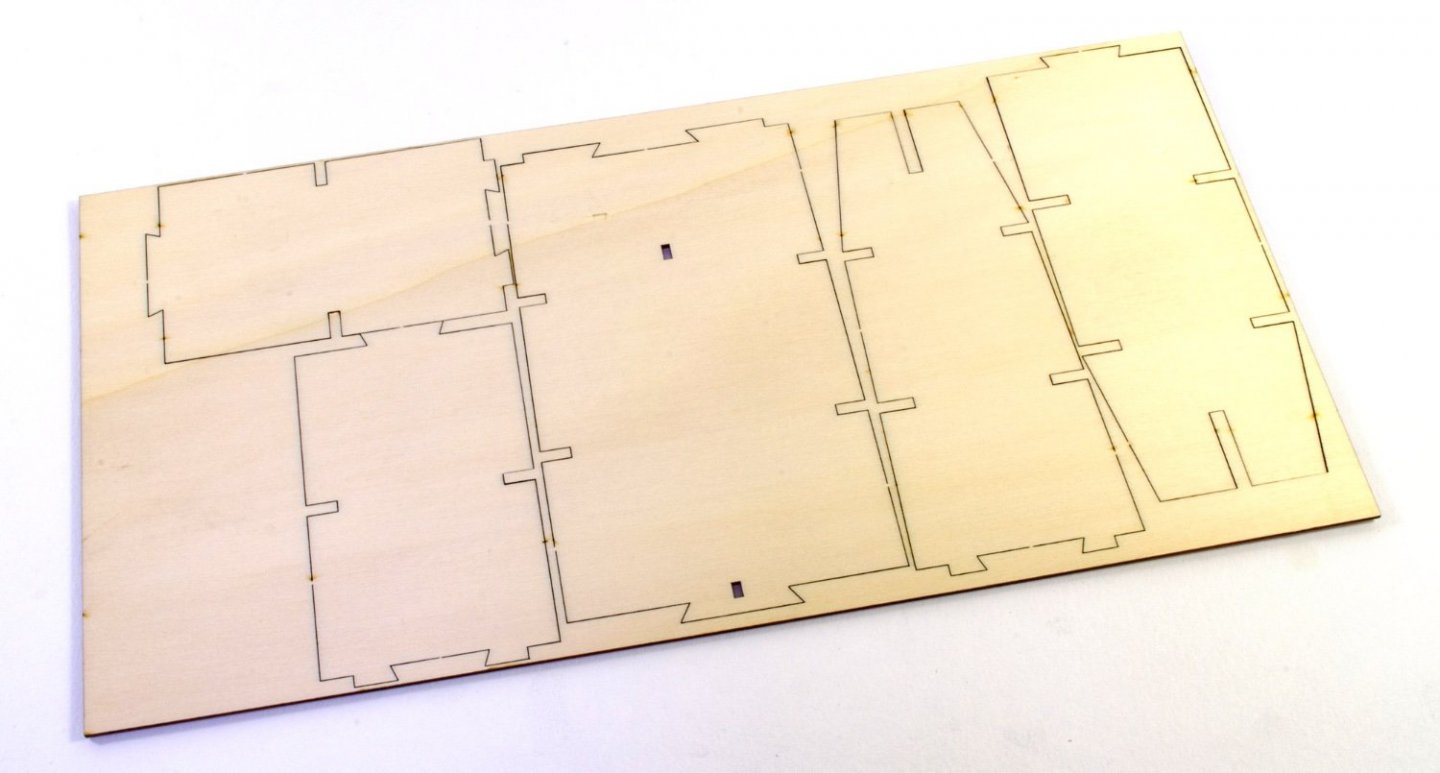
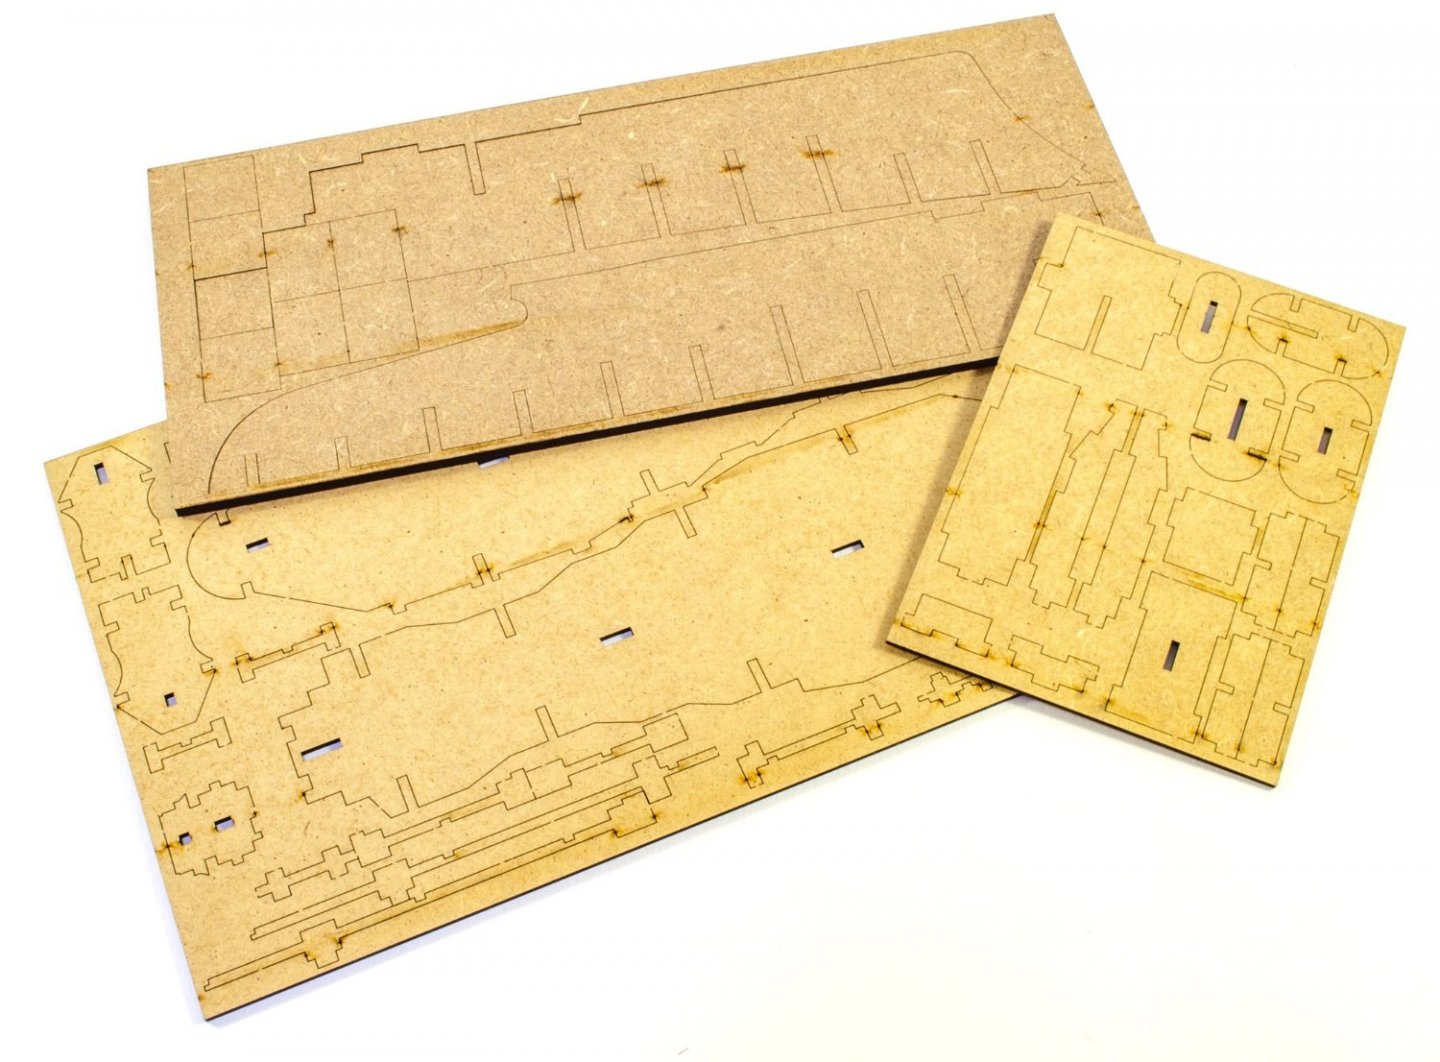
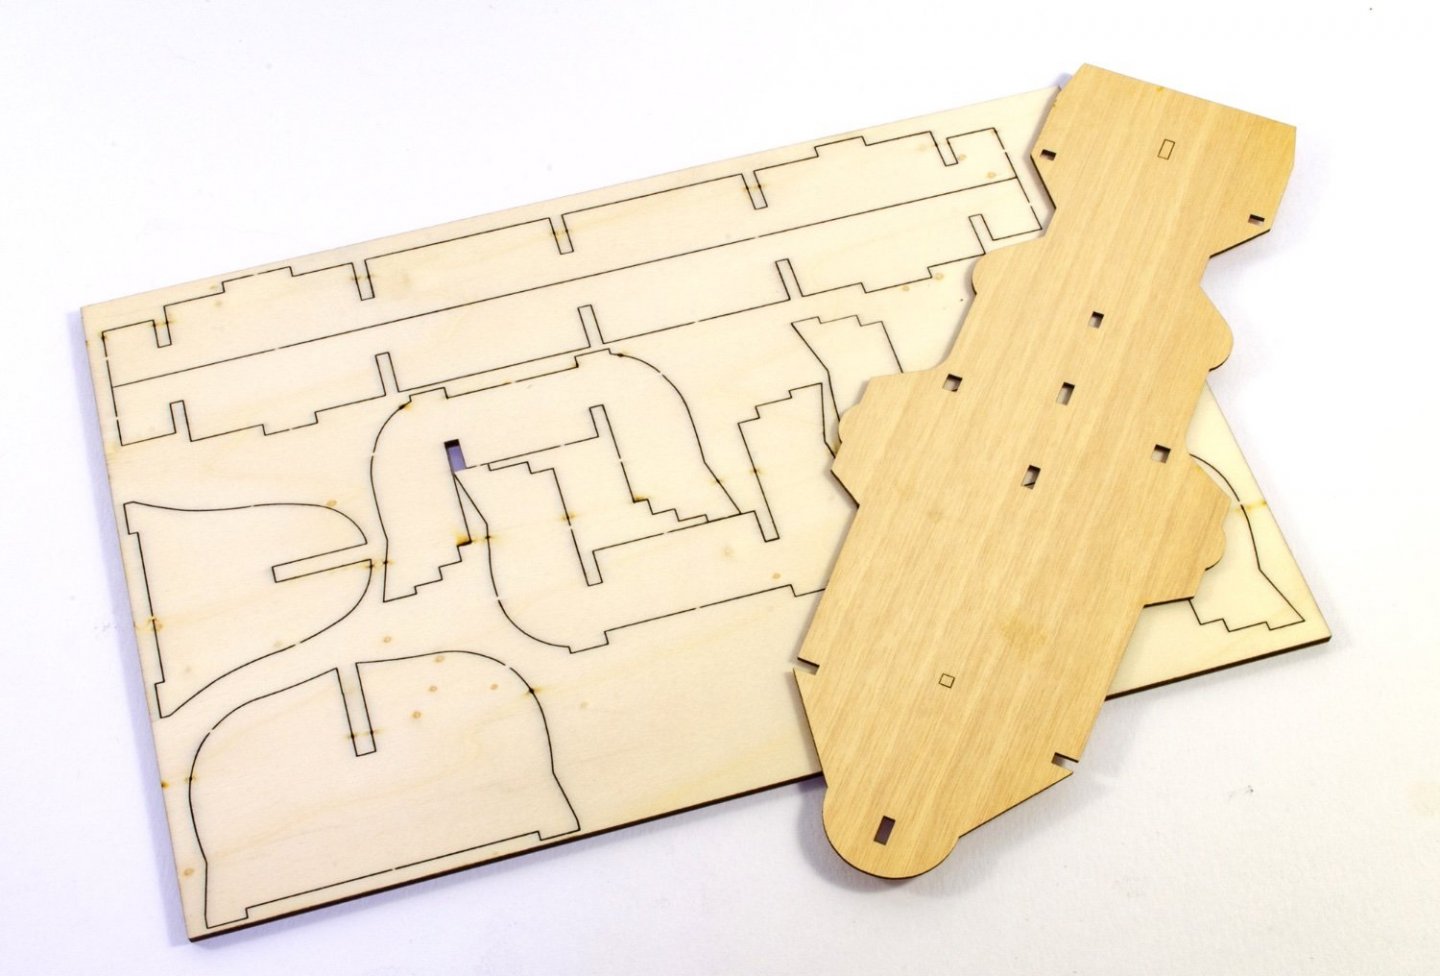
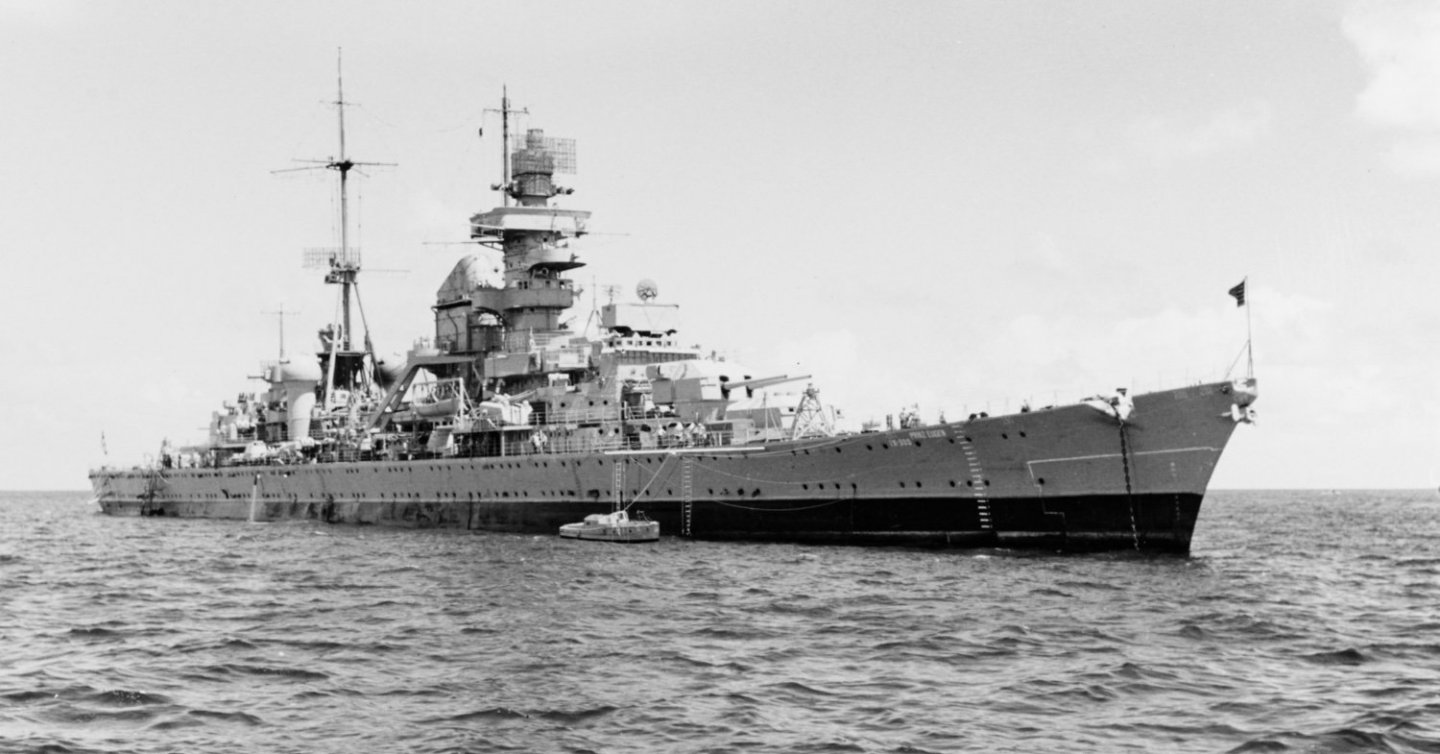
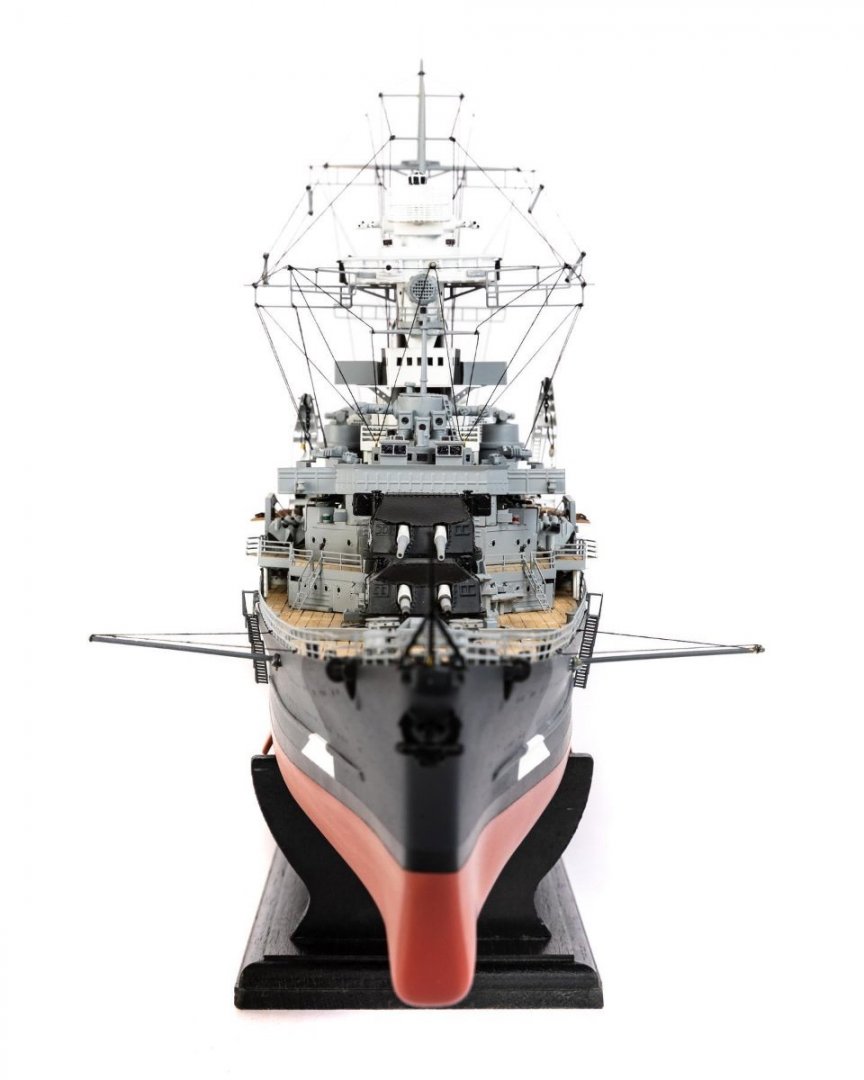
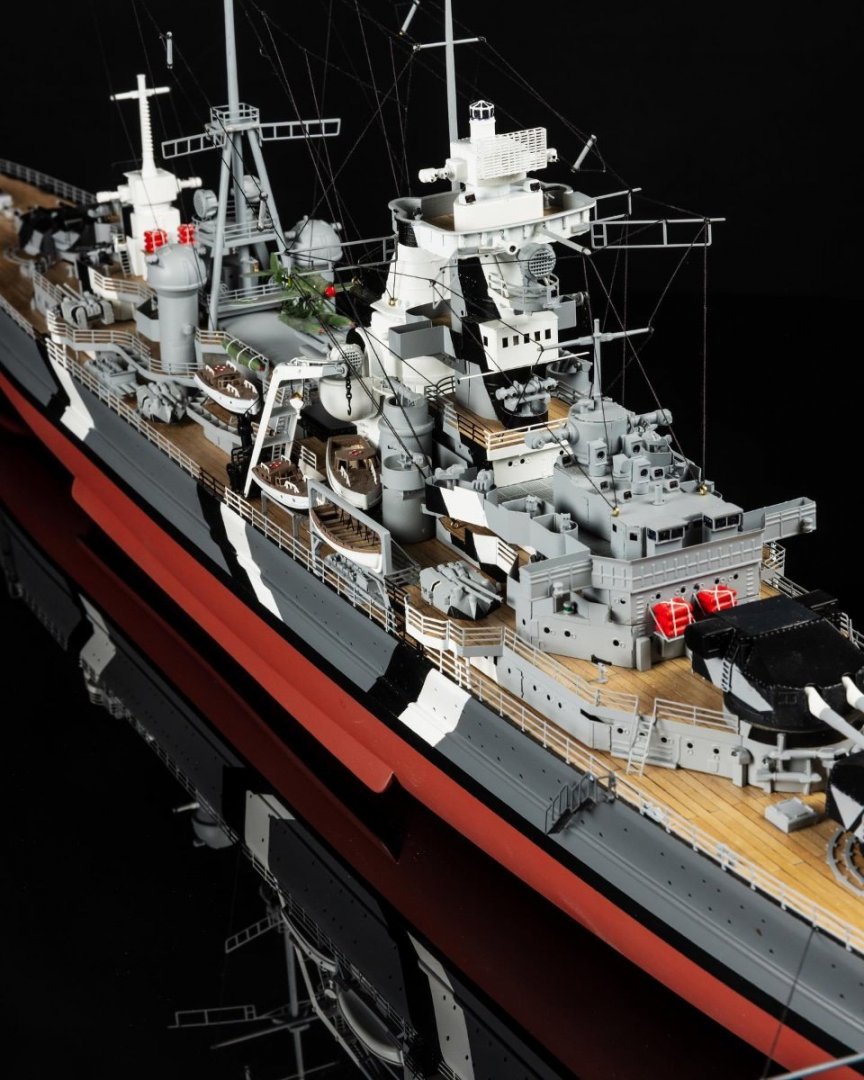
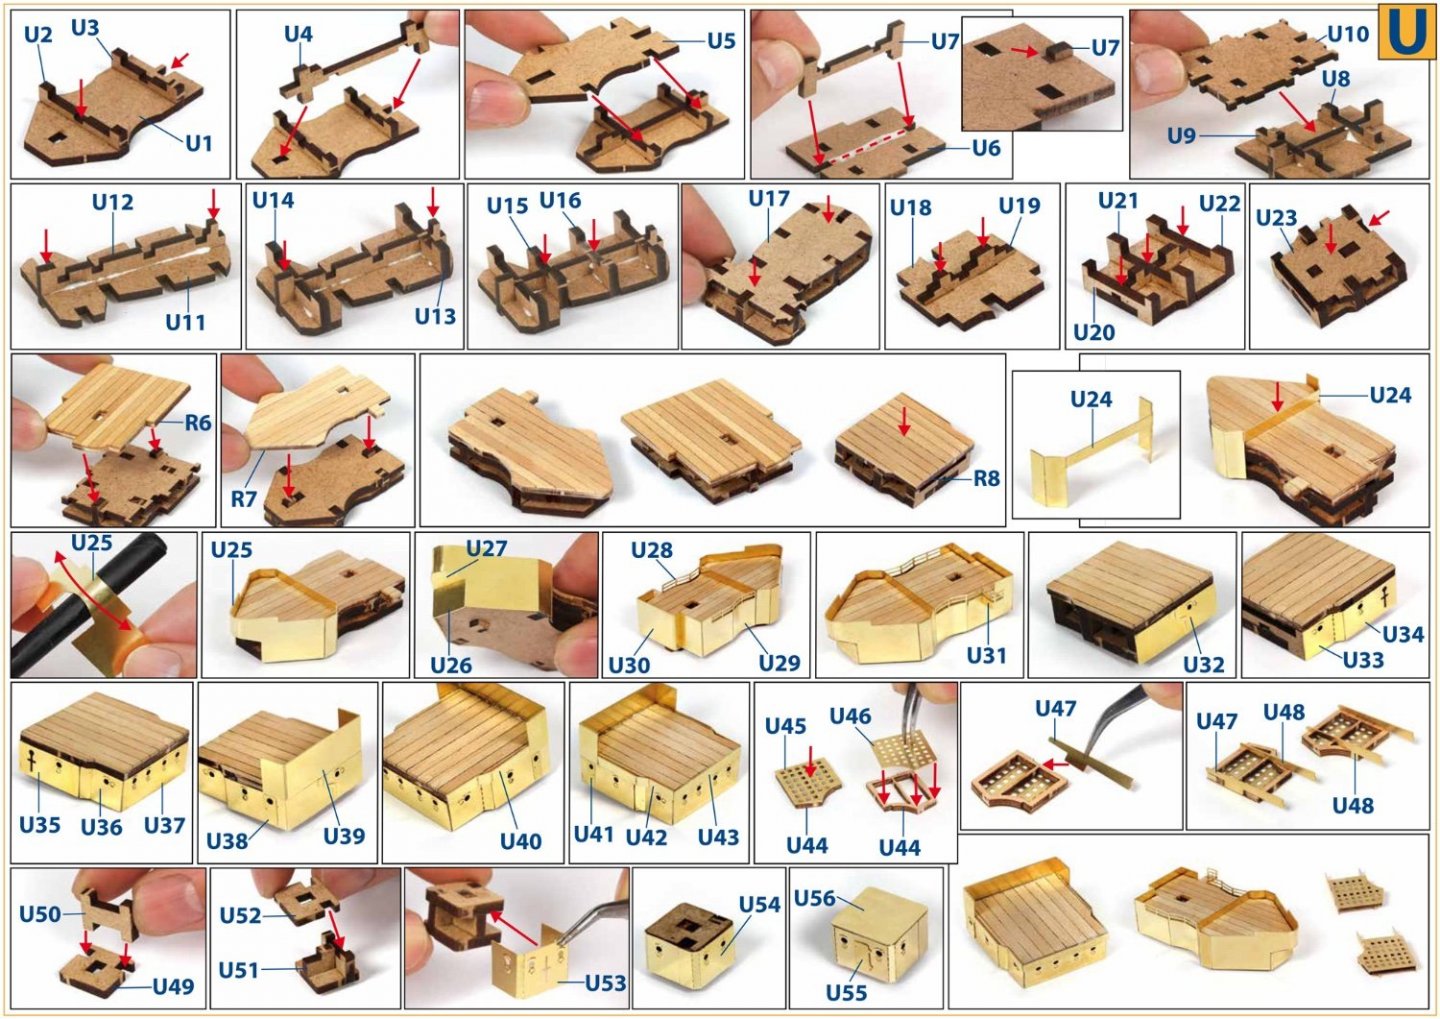
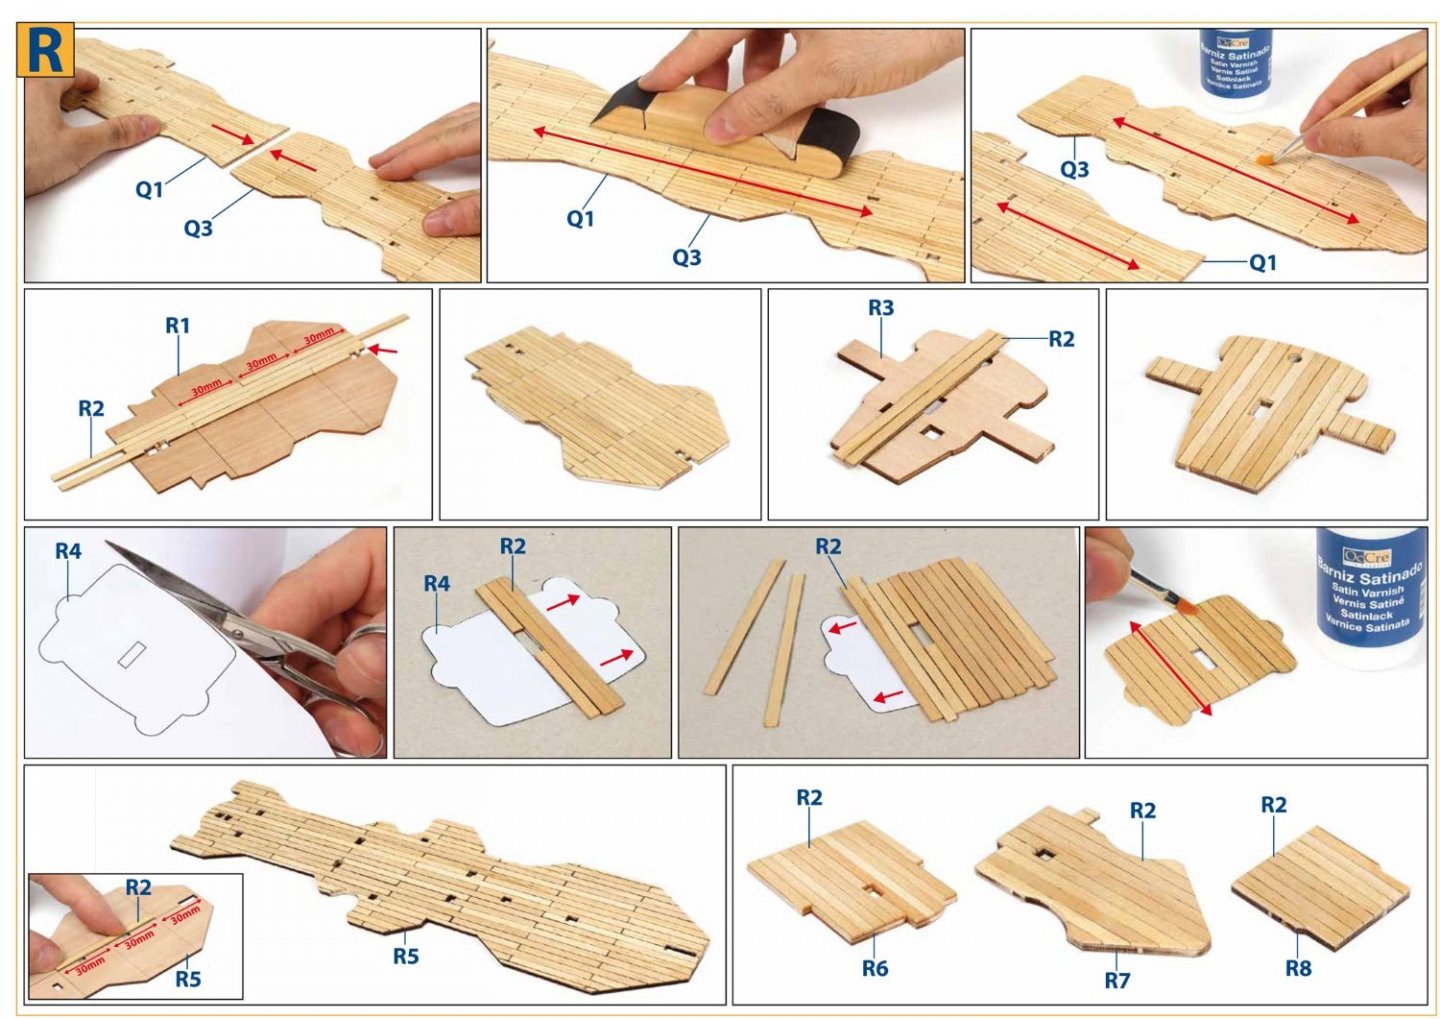
1:200 Prinz Eugen OcCre Catalogue # 16000 Available from OcCre for €499.99 Prinz Eugen was an Admiral Hipper-class heavy cruiser, the third of a class of five vessels. She served with Nazi Germany's Kriegsmarine during World War II. The ship was laid down in April 1936, launched in August 1938, and entered service after the outbreak of war, in August 1940. She was named after Prince Eugene of Savoy, an 18th-century general in the service of Austria. She was armed with a main battery of eight 20.3 cm (8 in) guns and, although nominally under the 10,000-long-ton (10,160 t) limit set by the Anglo-German Naval Agreement, actually displaced over 16,000 long tons (16,257 t). (USS) Prinz Eugen during Atomic bomb tests Prinz Eugen saw action during Operation Rheinübung, an attempted breakout into the Atlantic Ocean with the battleship Bismarck in May 1941. The two ships destroyed the British battlecruiser Hood and moderately damaged the battleship Prince of Wales in the Battle of the Denmark Strait. Prinz Eugen was detached from Bismarck during the operation to raid Allied merchant shipping, but this was cut short due to engine troubles. After putting into occupied France and undergoing repairs, the ship participated in Operation Cerberus, a daring daylight dash through the English Channel back to Germany. In February 1942, Prinz Eugen was deployed to Norway, although her time stationed there was curtailed when she was torpedoed by the British submarine Trident days after arriving in Norwegian waters. The torpedo severely damaged the ship's stern, which necessitated repairs in Germany. Upon returning to active service, the ship spent several months training officer cadets in the Baltic before serving as artillery support for the retreating German Army on the Eastern Front. After the German collapse in May 1945, she was surrendered to the British Royal Navy before being transferred to the US Navy as a war prize. After examining the ship in the United States, the US Navy assigned the cruiser to the Operation Crossroads nuclear tests at Bikini Atoll. Having survived the atomic blasts, Prinz Eugen was towed to Kwajalein Atoll, where she ultimately capsized and sank in December 1946. The wreck remains partially visible above the water approximately two miles northwest of Bucholz Army Airfield, on the edge of Enubuj. One of her screw propellers was salvaged and is on display at the Laboe Naval Memorial in Germany. From Wikipedia The kit Prinz Eugen is a brand new release from OcCre, hot on the heals of Amati’s recent Bismarck, both in the same popular 1:200 scale. The kit itself occupies a reasonably large but quite heavy generic box which has the specific kit artwork printed in colour and attached to the box lid. As is custom with OcCre, there’s a cut-out in the lid so the fittings box can be seen. Actually, that’s only one of two fittings boxes that are supplied with this release. The whole kit is also cellophaned too, to protect it further. The box is quite sturdy and lifting the lid off reveals that the contents are stored within a compartmentalised structure which is folded to separate the strip material from the sheets and plans etc. The first fittings box has a staggering number of metal parts and is quite heavy. The metal looks like a zinc alloy and the parts are all very sharply cast with nothing in the way of flash present. You will find ship’s boats etc. here amongst others. I still recommend that any cast parts are washed in soapy water first and then primed with a metal etching primer before you use them. Also in this box are pins for planking, turned wooden parts, eyelets, glass beads and chain etc. The fittings container is first removed to that the rest of the pack can be split apart. When you remove the box, there is a paint reference chart supplied. Inside the box main compartment are the numerous sheet materials, all bound in tough, shrink-wrap film. These materials consist of different colours (grades?) of MDF and also numerous sheets of ply. All are cleanly laser-cut with no real evidence of scorching. Parts aren’t numbered, so you will need to refer to the parts plans that are included. This is very common as engraving numbers everywhere can very much increase production time. The packing is very good, and none of the various MDF or ply sheets appear to have any warping. Hidden amongst the flat sheets are EIGHT sheets of photo-etch brass, protected by wraps of tissue paper. Production quality is excellent, with small retaining tabs for parts and nicely produced multi-layer etching for the various part reliefs. There is only one small area which has an etch stain, but they can be common on larger sheets. These sheets include rails, deck structure sheathing etc. Always a very good start. Also in this compartment is a Jiffy-bag containing a second clear box of fittings, identical in size to the one on display through the box lid. This box contains a vast number of cast parts which are all very crisp and clean. With this being a brand-new release, the moulds will be in A1 condition. The box also contains rigging cord and some turned wooden parts. A cardboard tube also contains two long, full size glossy sheets which depict Prinz Eugen in both side elevations and also a view down until the decks. The instructions for this kit are actually very good, being driven in photo-format. The sequences are split into an alphabetical format, so A, B, C etc. with the kit parts for each individual and extensive section, given an alphabetical prefix eg. Part W49 for build section ‘W’ etc. It’s a nice, simple way to approach thing and will help the builder locate parts far more easily too. These are printed in colour over many folded A3 sheets, and if you wanted to access them elsewhere, the whole set of instructions are available for download from OcCre, here. If you would like some very visual to guide you, then OcCre have their own YouTube channel where the whole model can be viewed at every stage of construction. Here HERE for that. The smaller compartment contains the various wooden strips, such as lime for hull planking. There is also some metal strip included here as well as block balsa! This is the first time I’ve seen this in a kit, and the idea is that you chop this up to exact size blocks and then sit between the lower bulkhead areas to add rigidity and also to help shape a solid, lower hull. I personally don’t feel these are needed, but they are there if you need the material. Perhaps one aspect of Prinz Eugen that I’m not very keen on is the planked deck. At 1:200, the supplied materials are grossly overscale, and this is why Amati decided to go for laser-engraved deck sections for their Bismarck. I wish OcCre had done the same for this kit too. My suggestion with Prinz Eugen is to cut up the strips so they are a lot narrower (or buy narrower strip material) and use that instead, instantly improving the overall appearance of the completed model. Conclusion This is actually a very nice, beautifully presented kit that shouldn’t prove too difficult to the average modeller. Construction is straightforward and very well illustrated. All parts are mapped so they are easy to find, and the kit castings (love castings, or loathe them) are sharply made with excellent definition. As already stated, the only thing Prinz Eugen needs is to do the deck planking differently. Yes, it will take longer, but the finished result will be far more rewarding. You’ll need some space to display the finished ship too, with her being 1077mm long when complete! Prinz Eugen is definitely worth your consideration if you hanker to build something without masts or sails, but don’t want to be unfaithful to your hobby of building ships in wood! Prinz Eugen Paint Set OcCre Catalogue # 90506 Available from OcCre for €59.99 OcCre have also made available a custom acrylic paint set for Prinz Eugen, consisting of eleven acrylic paints and one large bottle of acrylic satin varnish. The paint bottles are the fairly standard white-capped plastic type, but each of these contains 30ml of paint, with the larger varnish bottle being 100ml. The bottles don’t state whether the paints could be thinned for airbrushing, and I get the feeling that they may be brush applied. Our sincere thanks to OcCre for providing the products you see reviewed here on MSW. To purchase directly, click the links in the title for each item.


-
...and PayPal mostly allow 'Pay in 3', or even 'Pay in 4' now!
-
Looking real good! The back is really broken of this build now.
- 476 replies
-
- 4
-
-
-
- sphinx
- vanguard models
- (and 1 more)
-
Hello all, Ron @hollowneck has put together a very comprehensive guide to using MSW. It also includes how to register, so will also help those of you who are only seeing this as a visitor, and wish to join our community. Please head over here and take a look. You can also download it as a PDF from the page too: https://thenrg.org/resource/usingmsw
- 11 replies
-
- 12
-
-
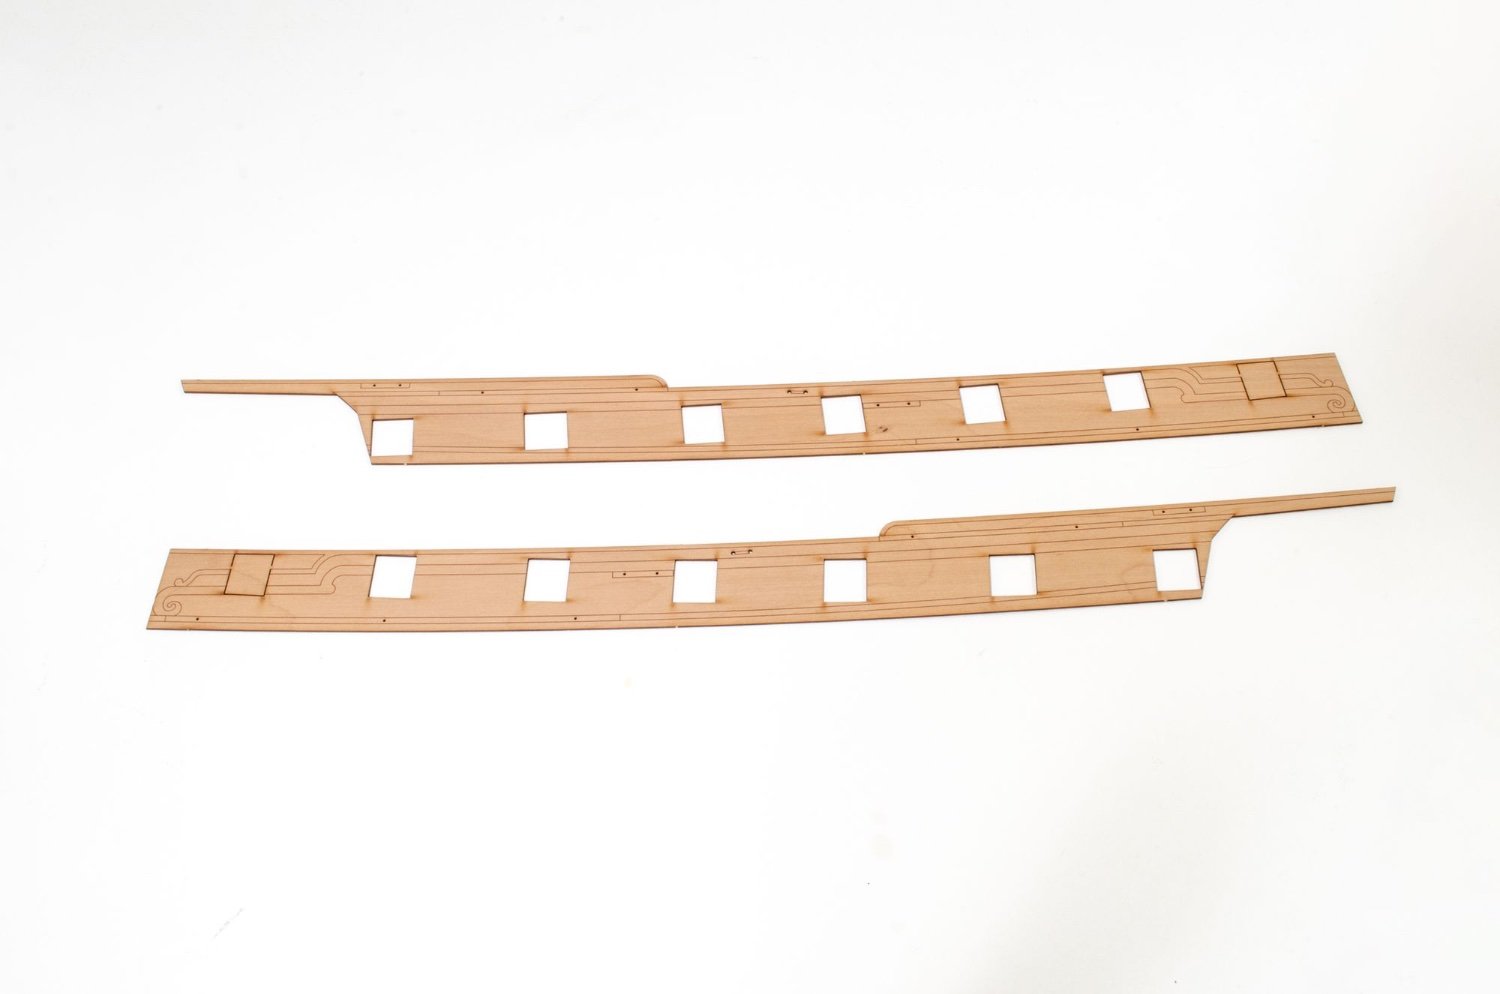
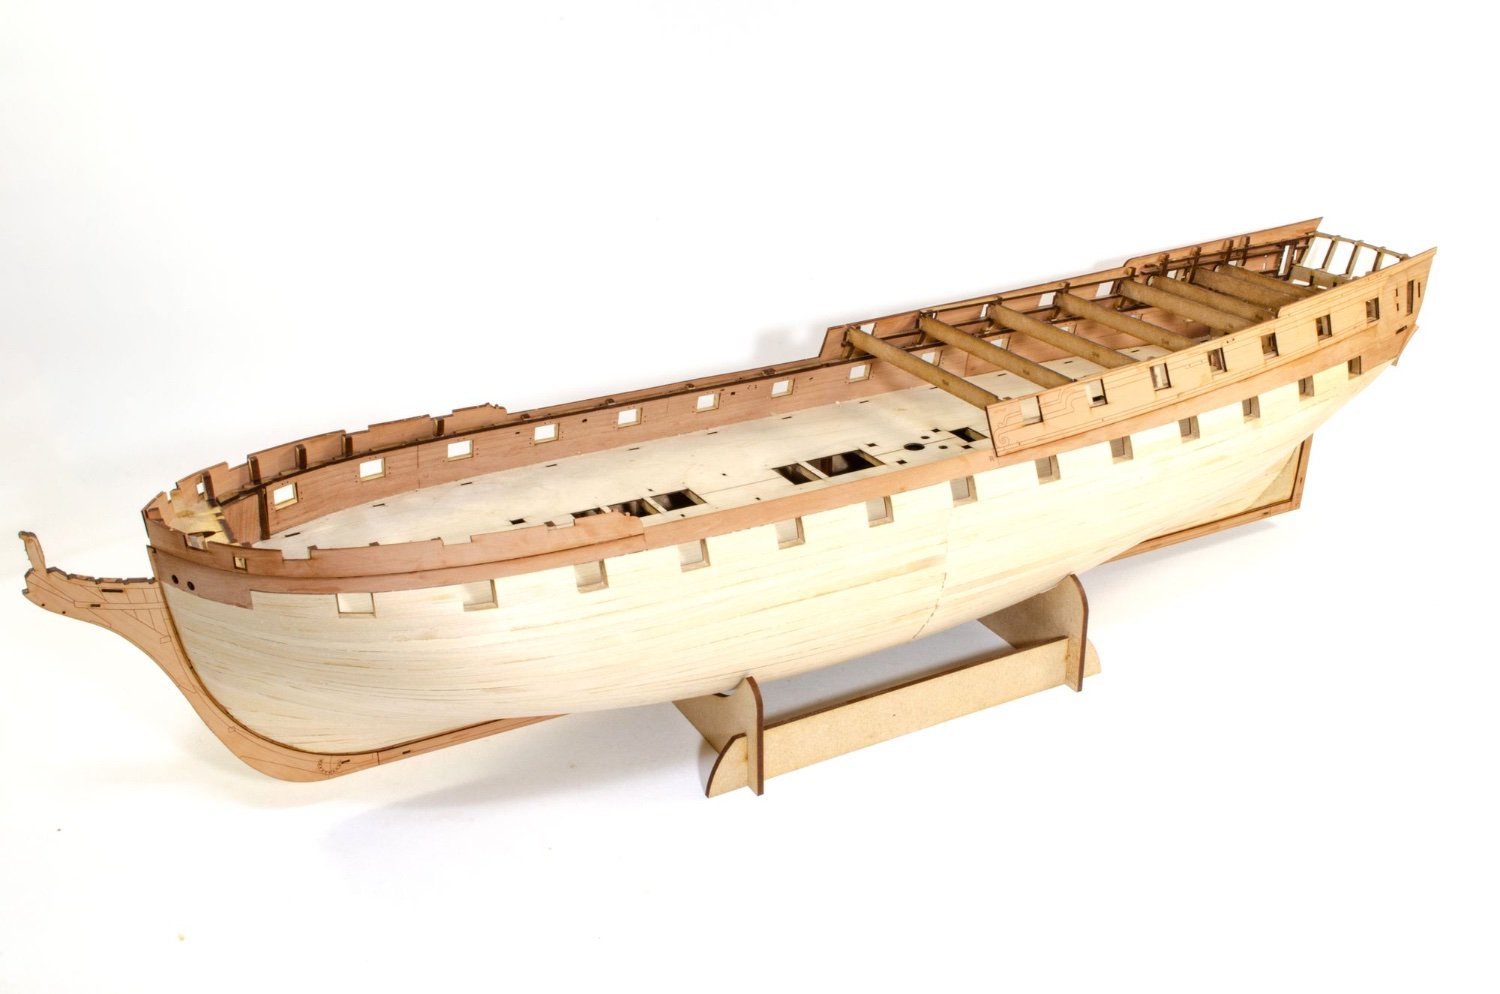
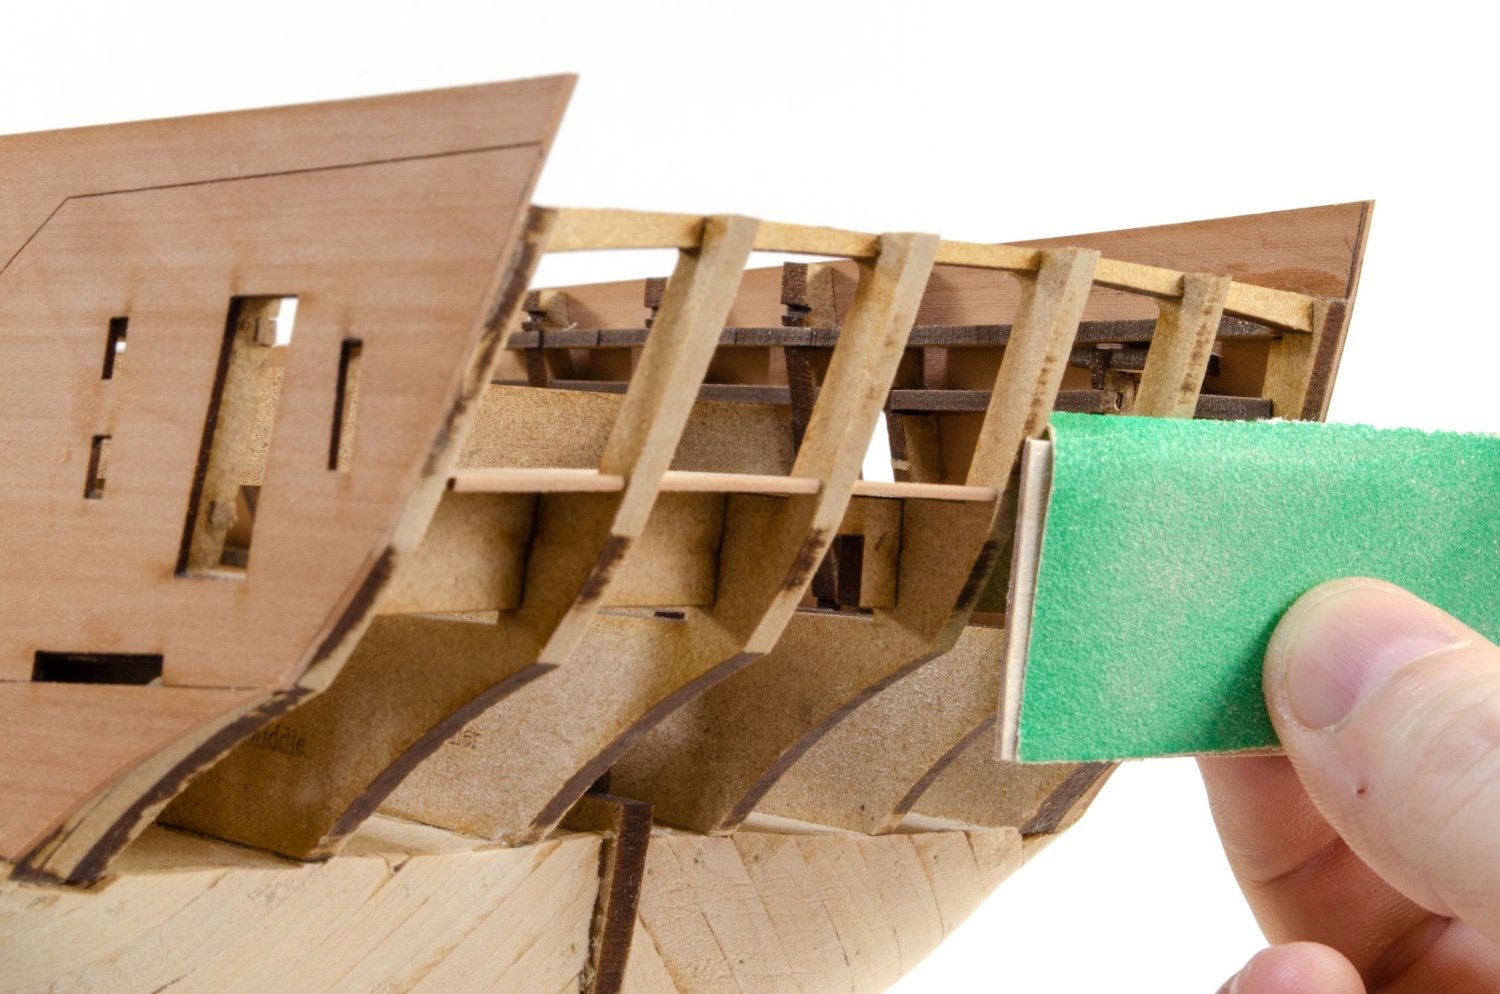
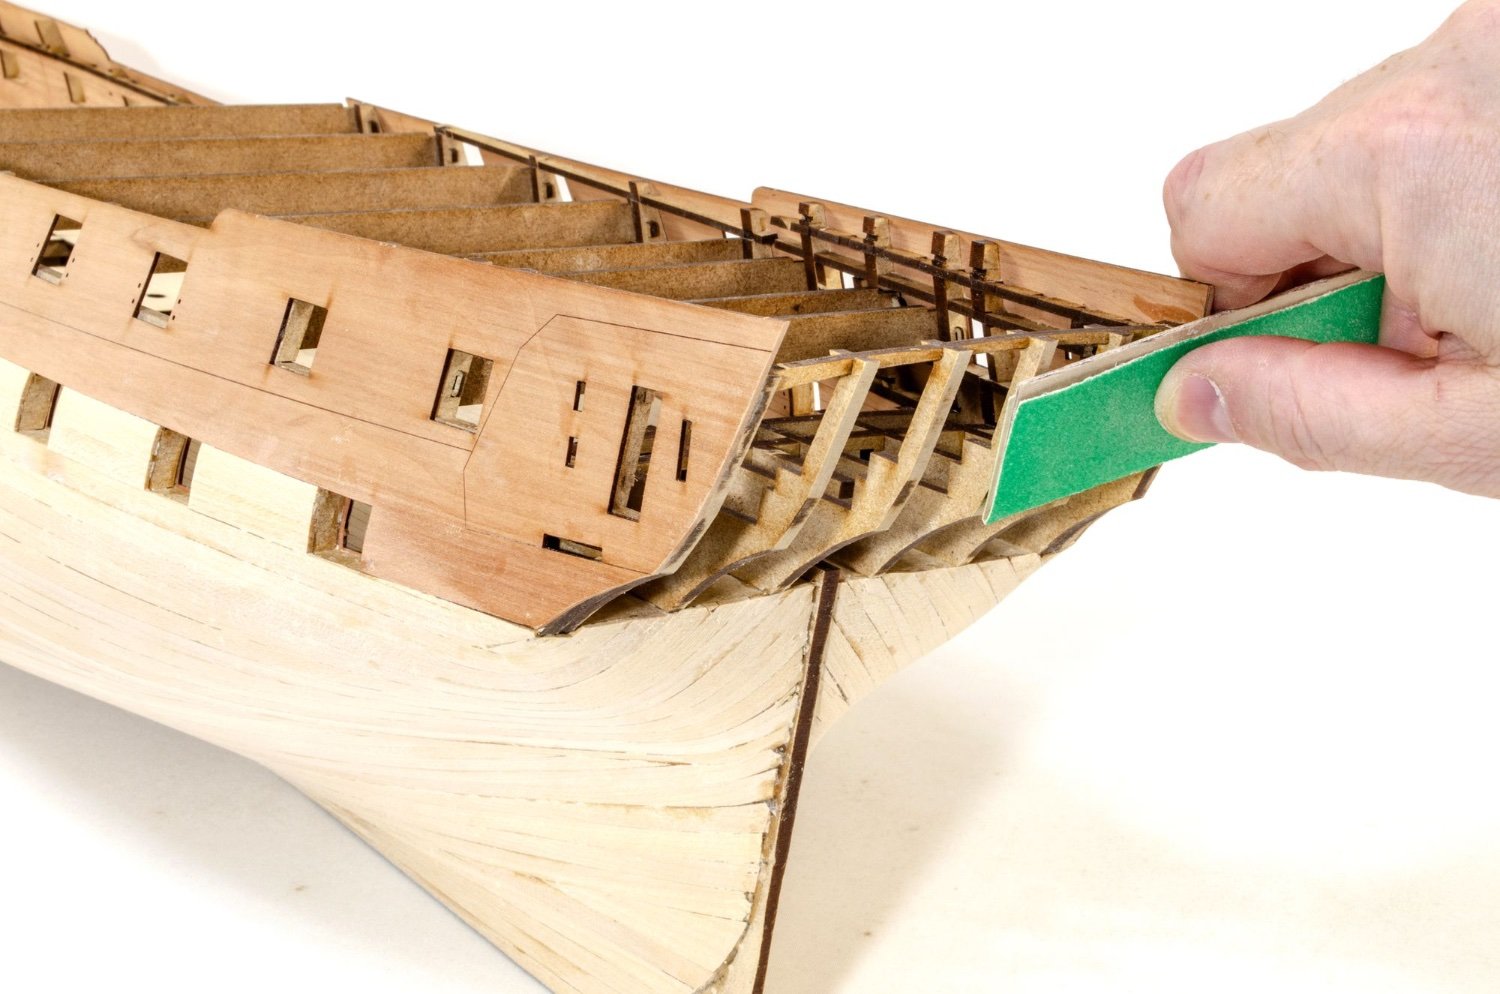
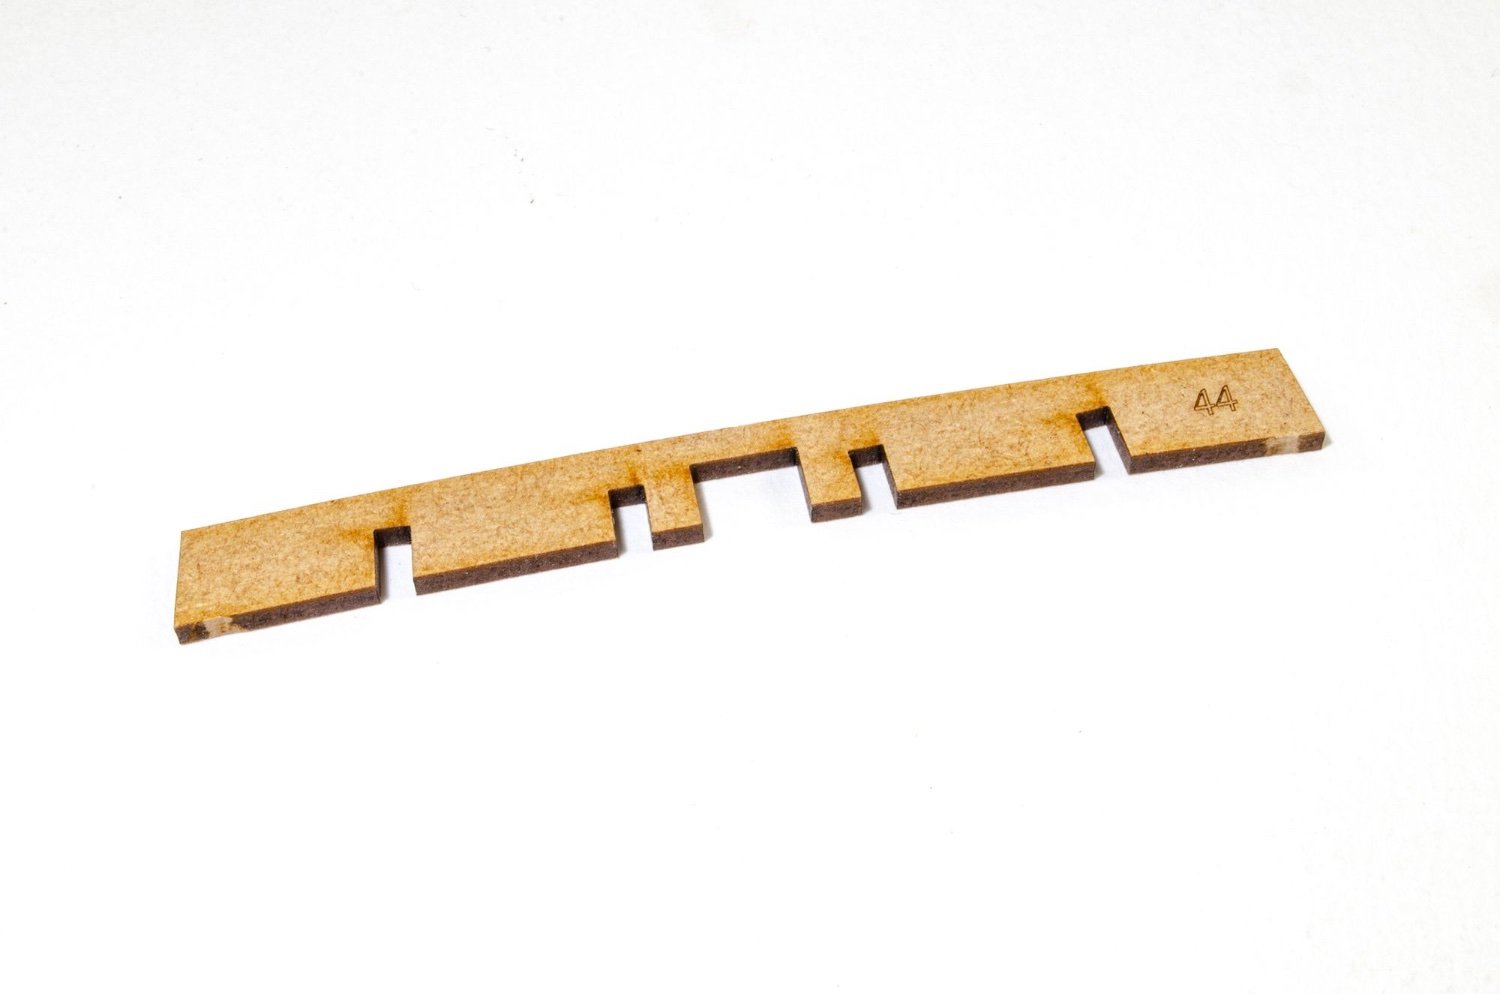
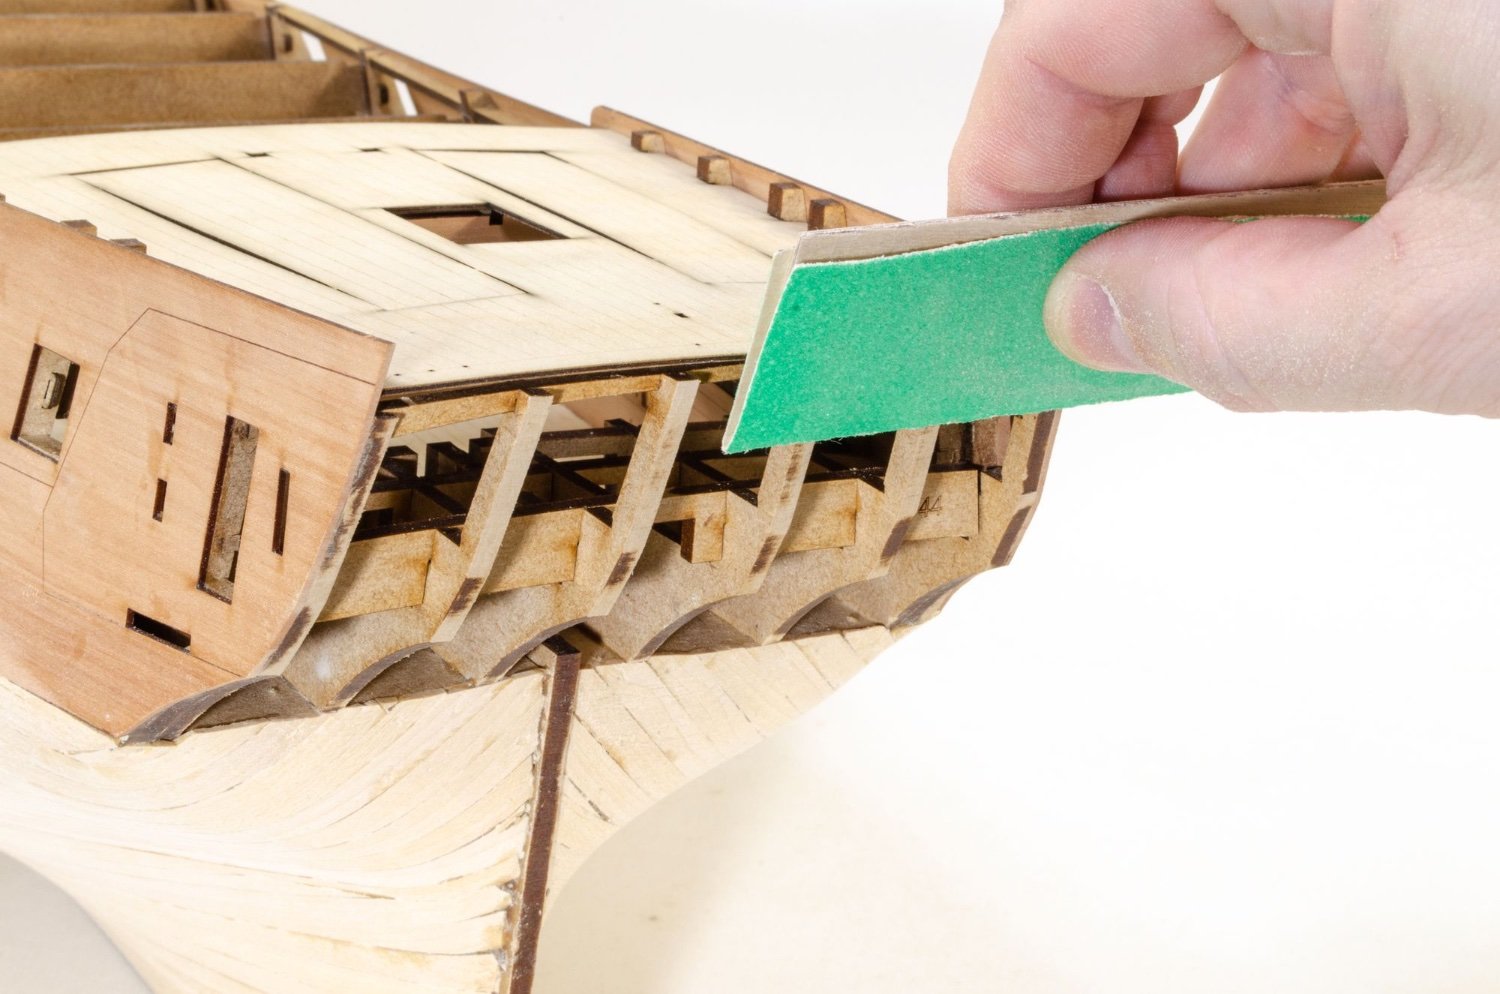
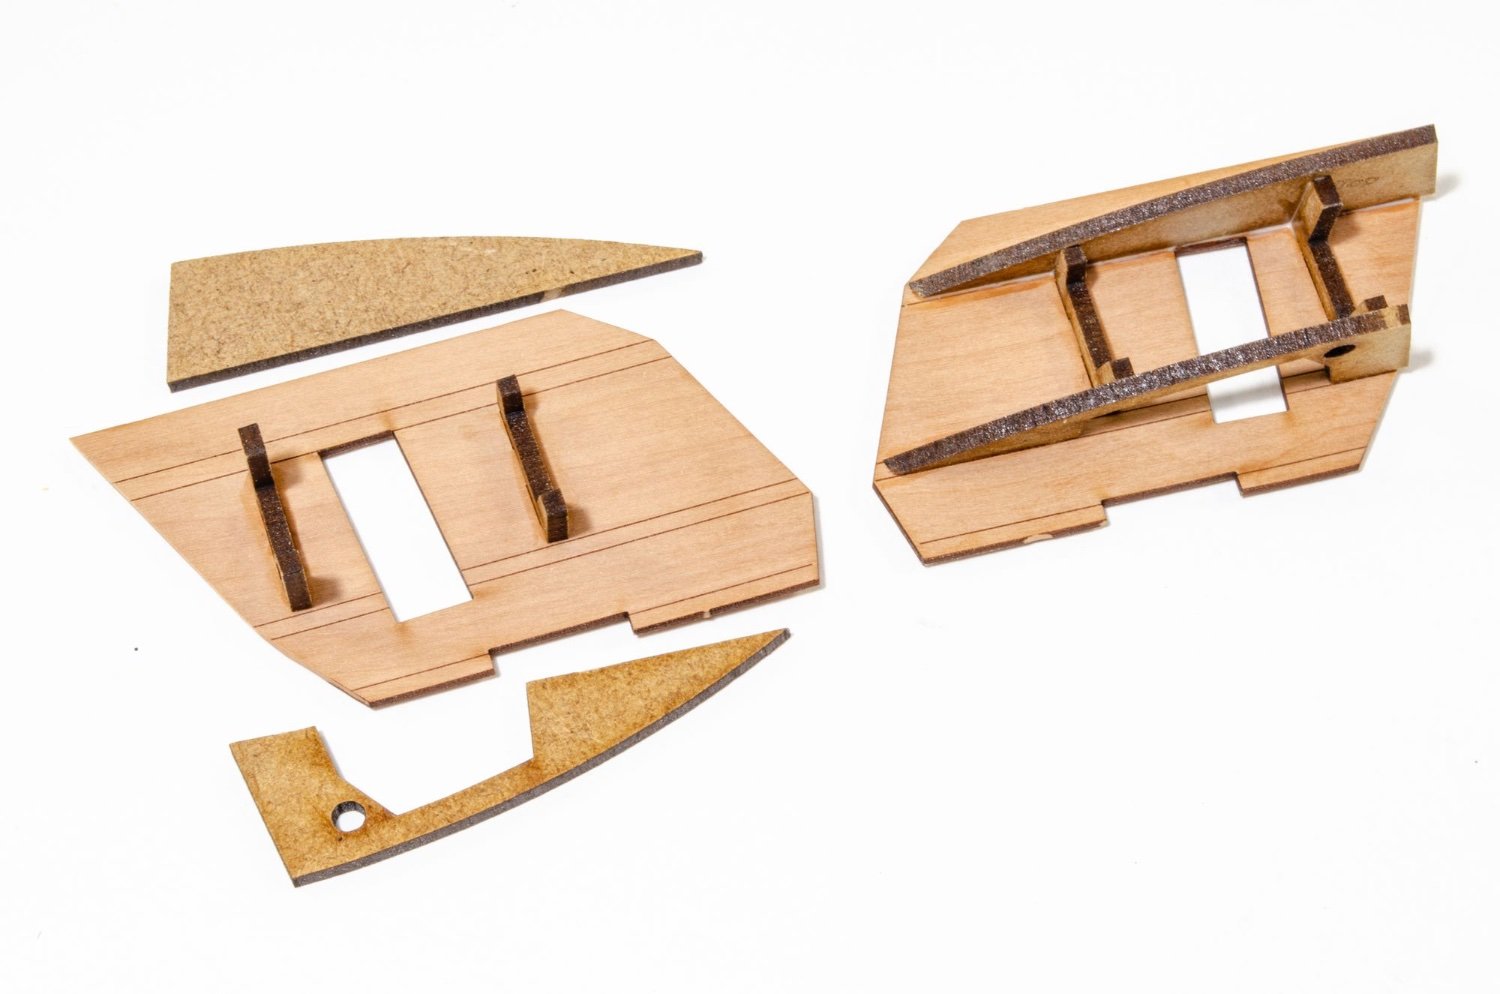
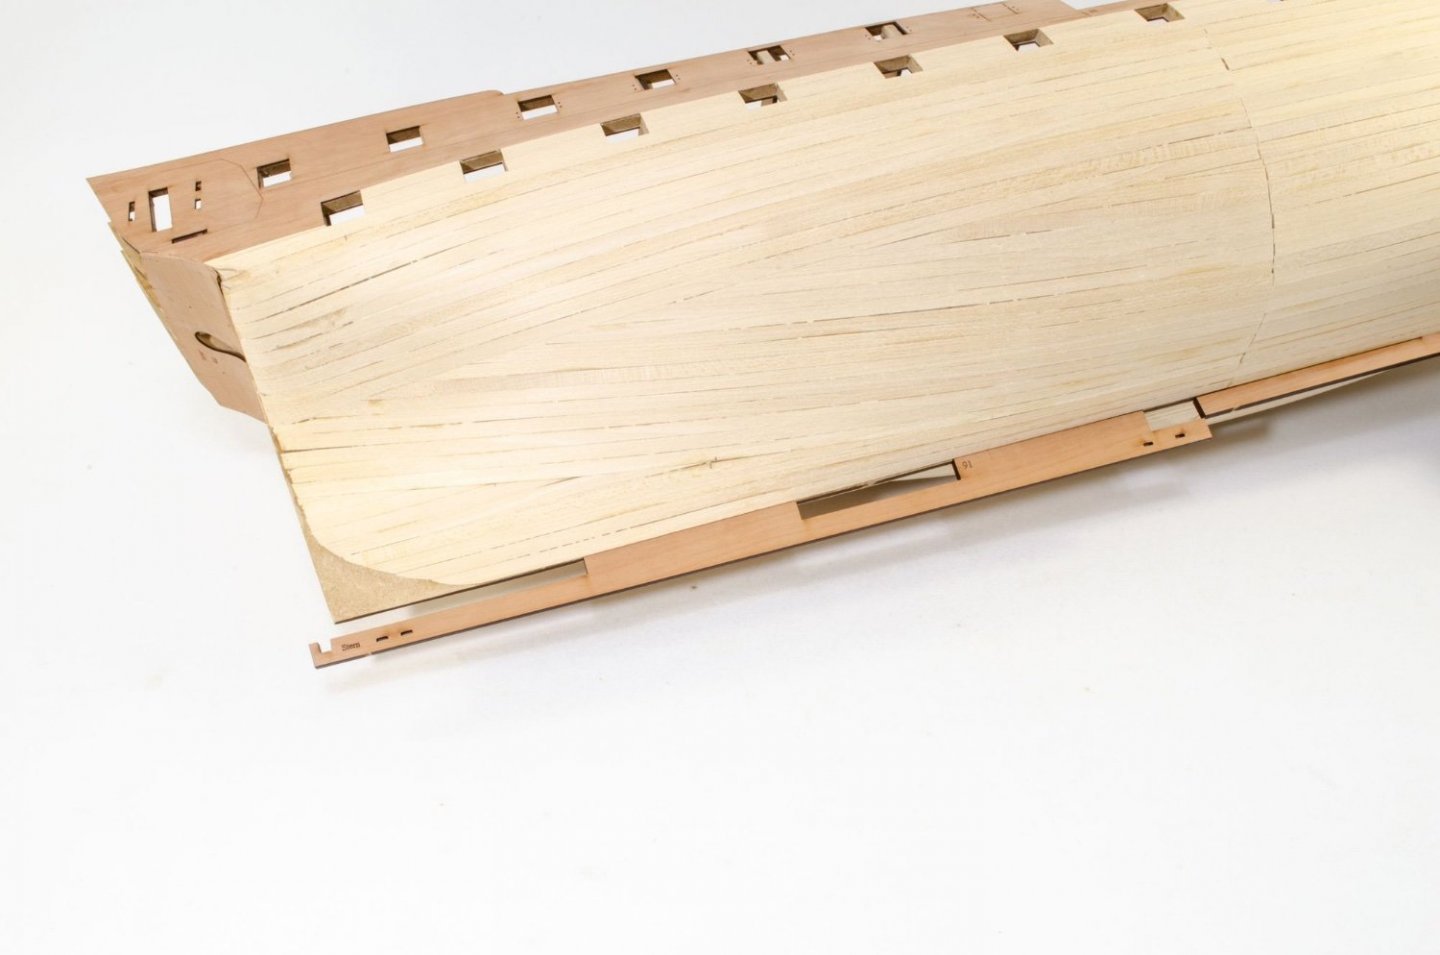
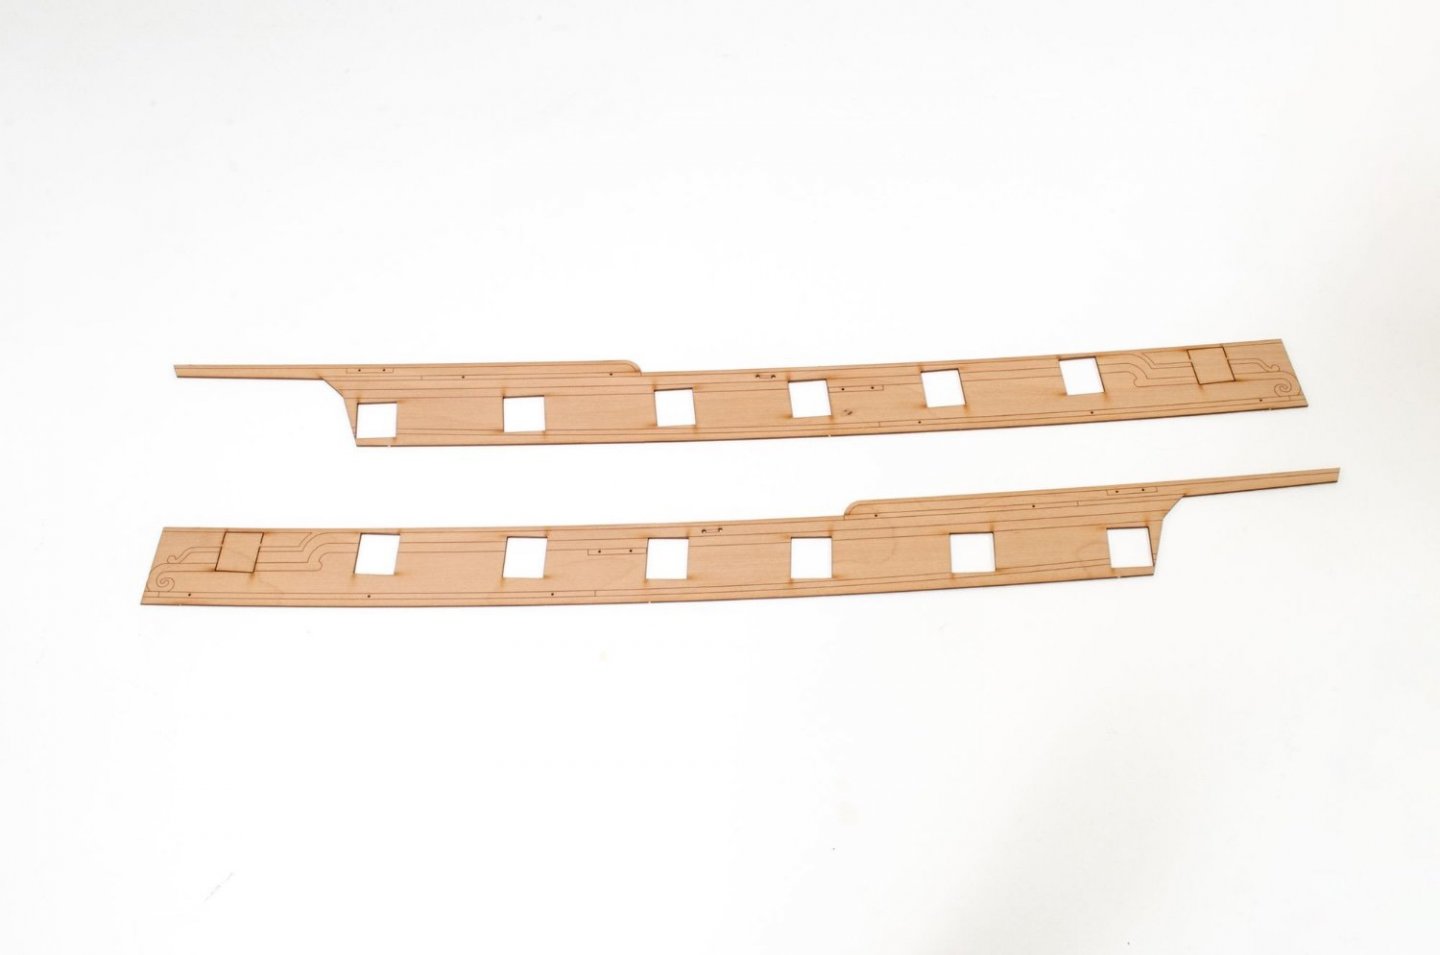
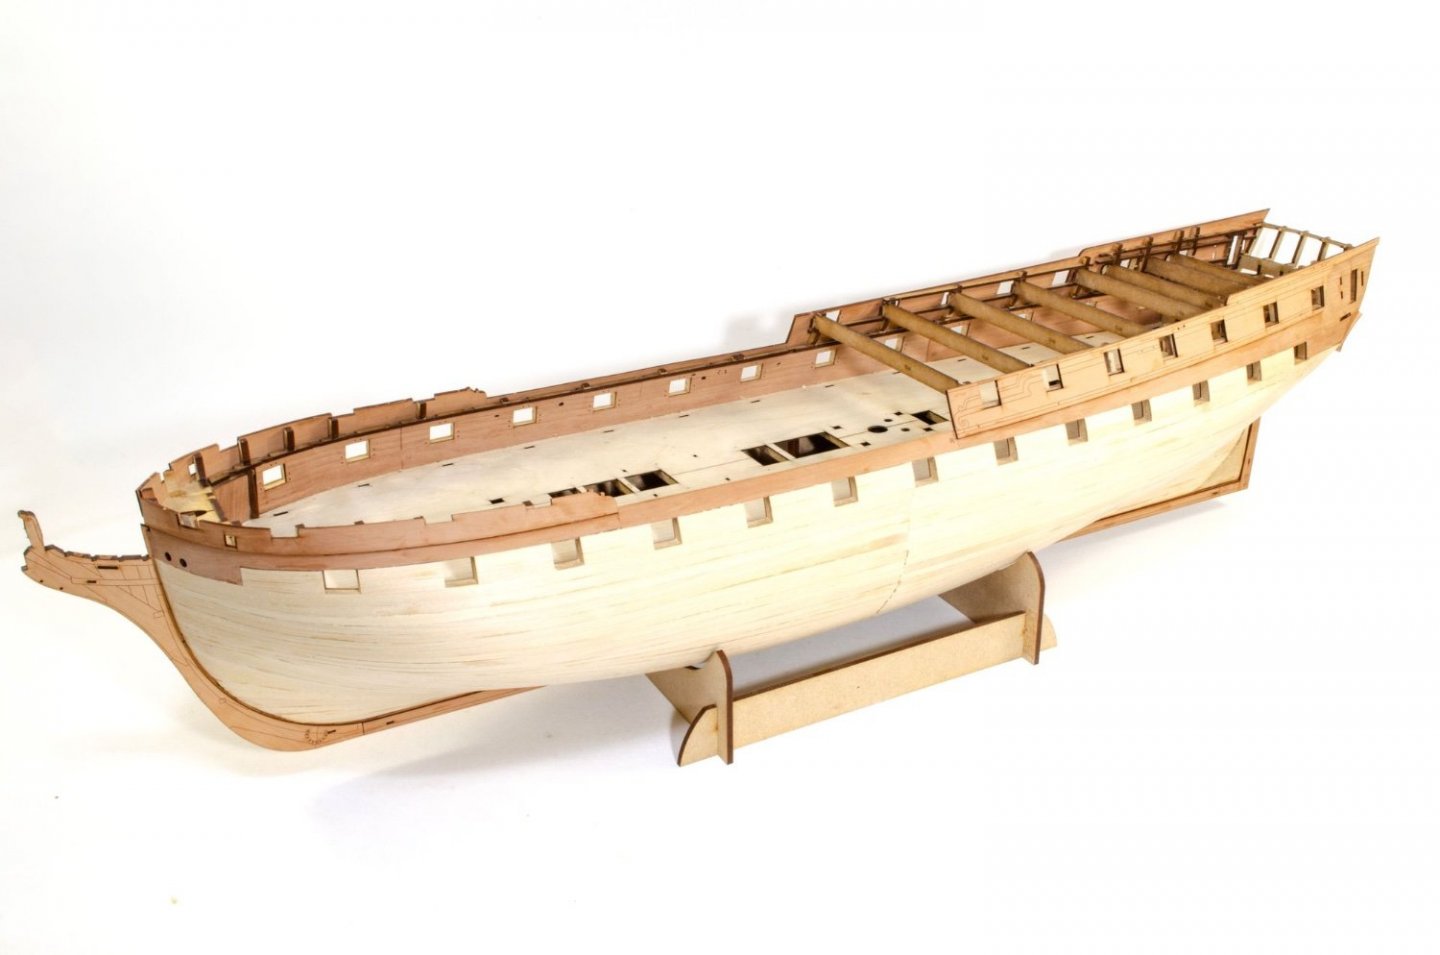
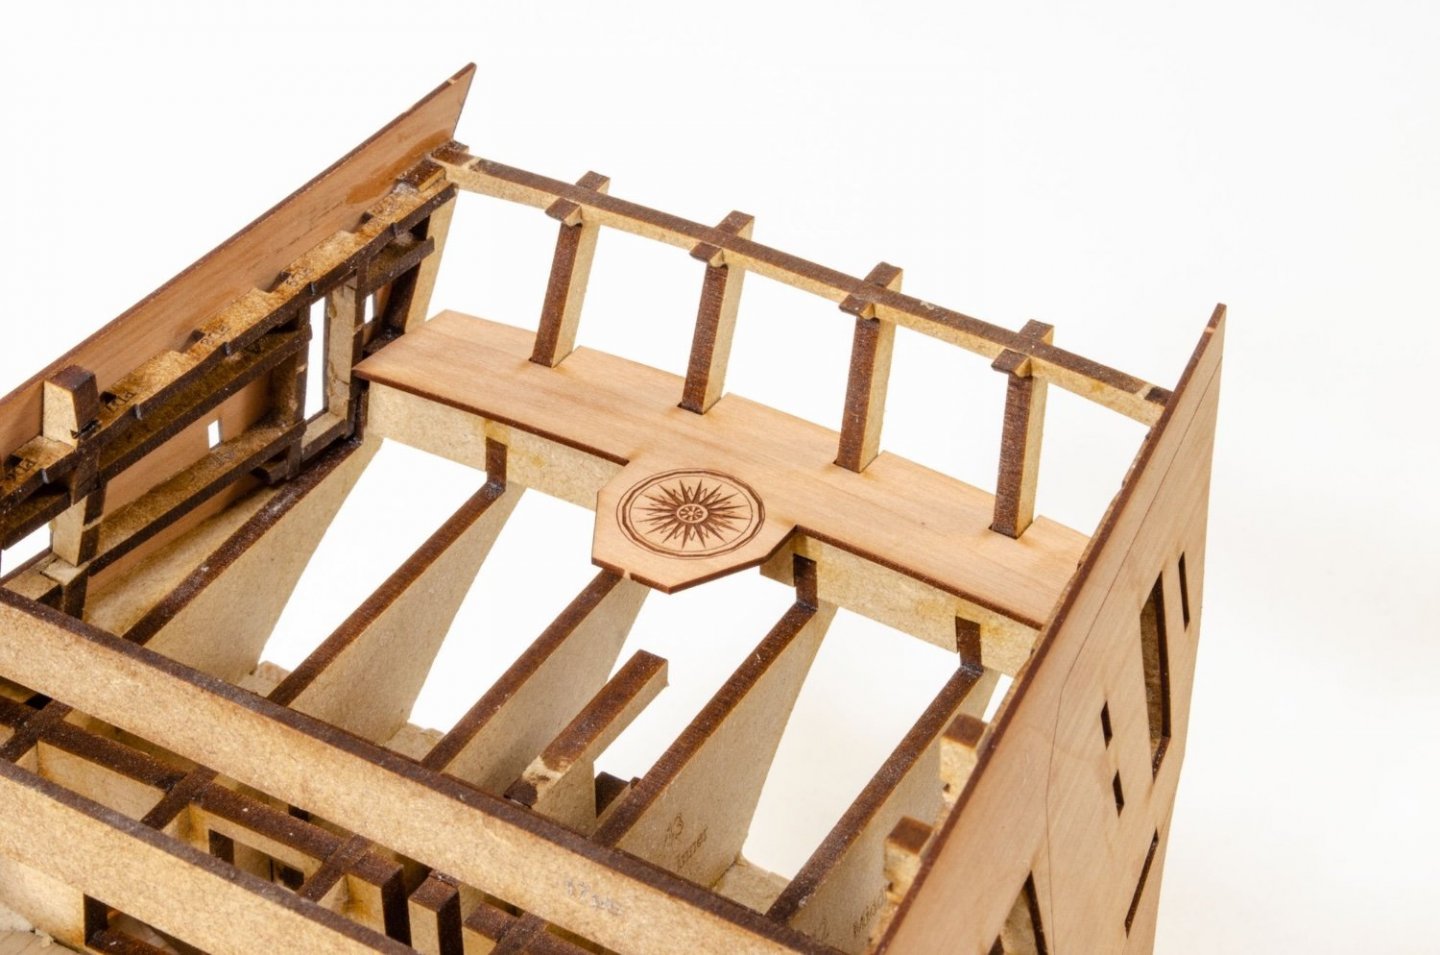
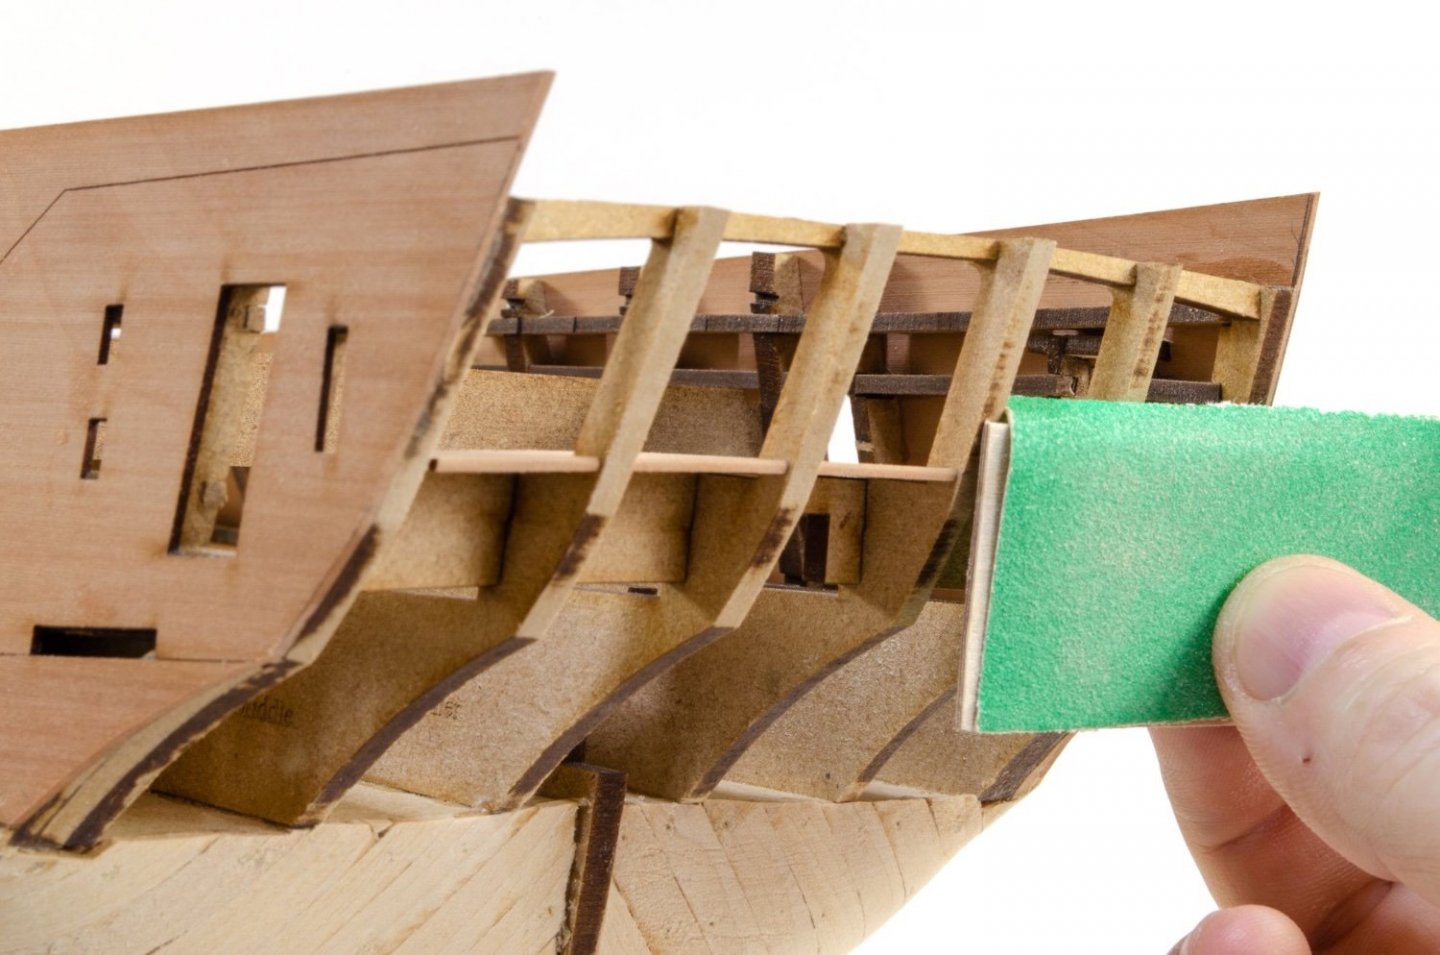
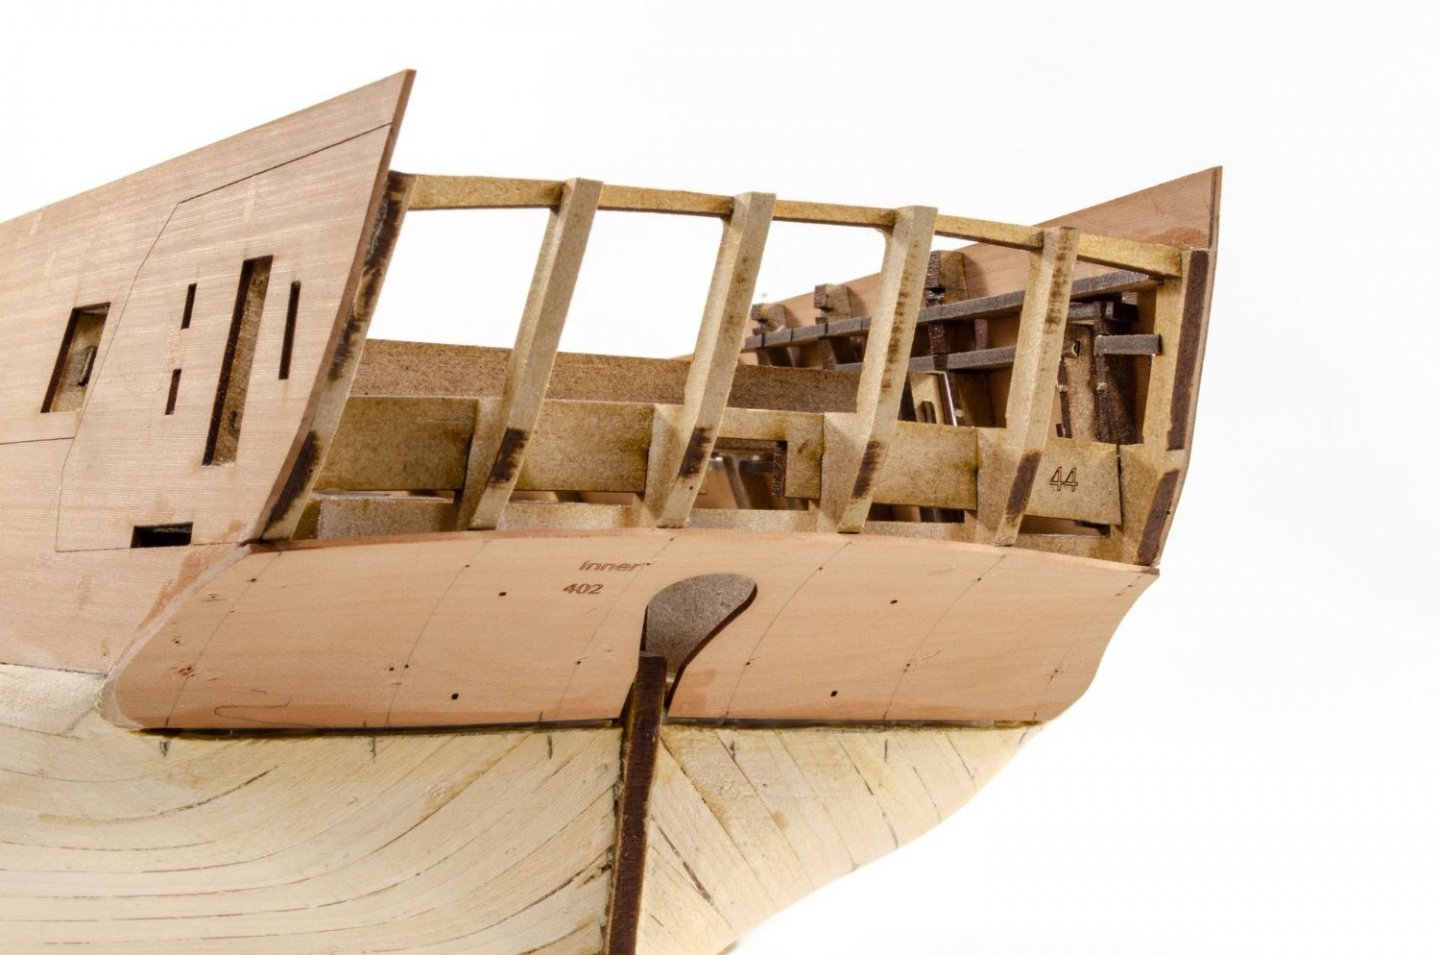
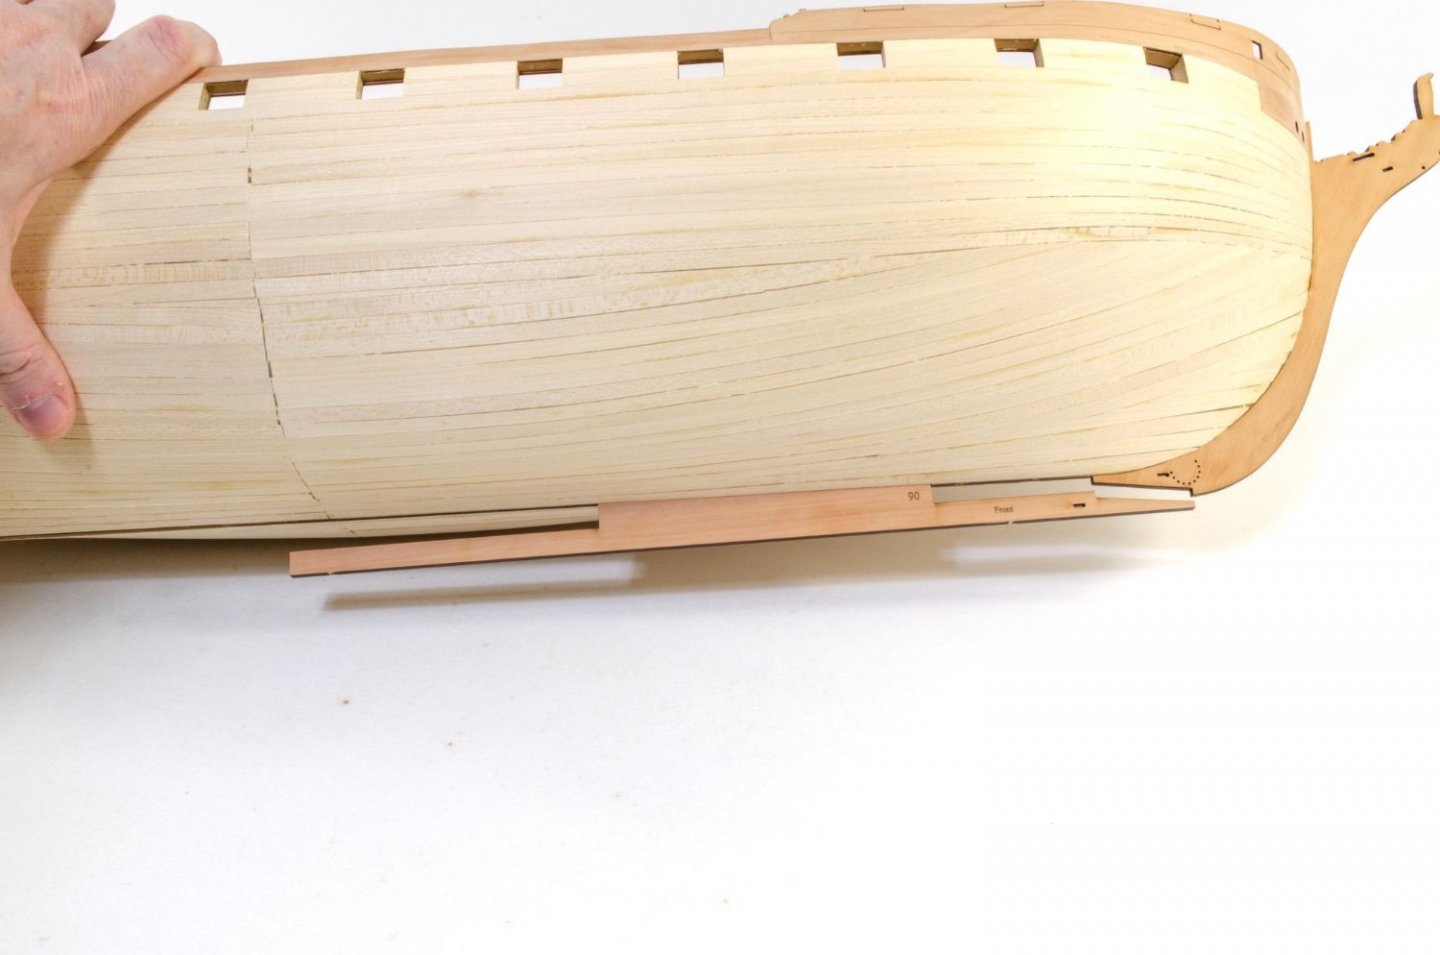
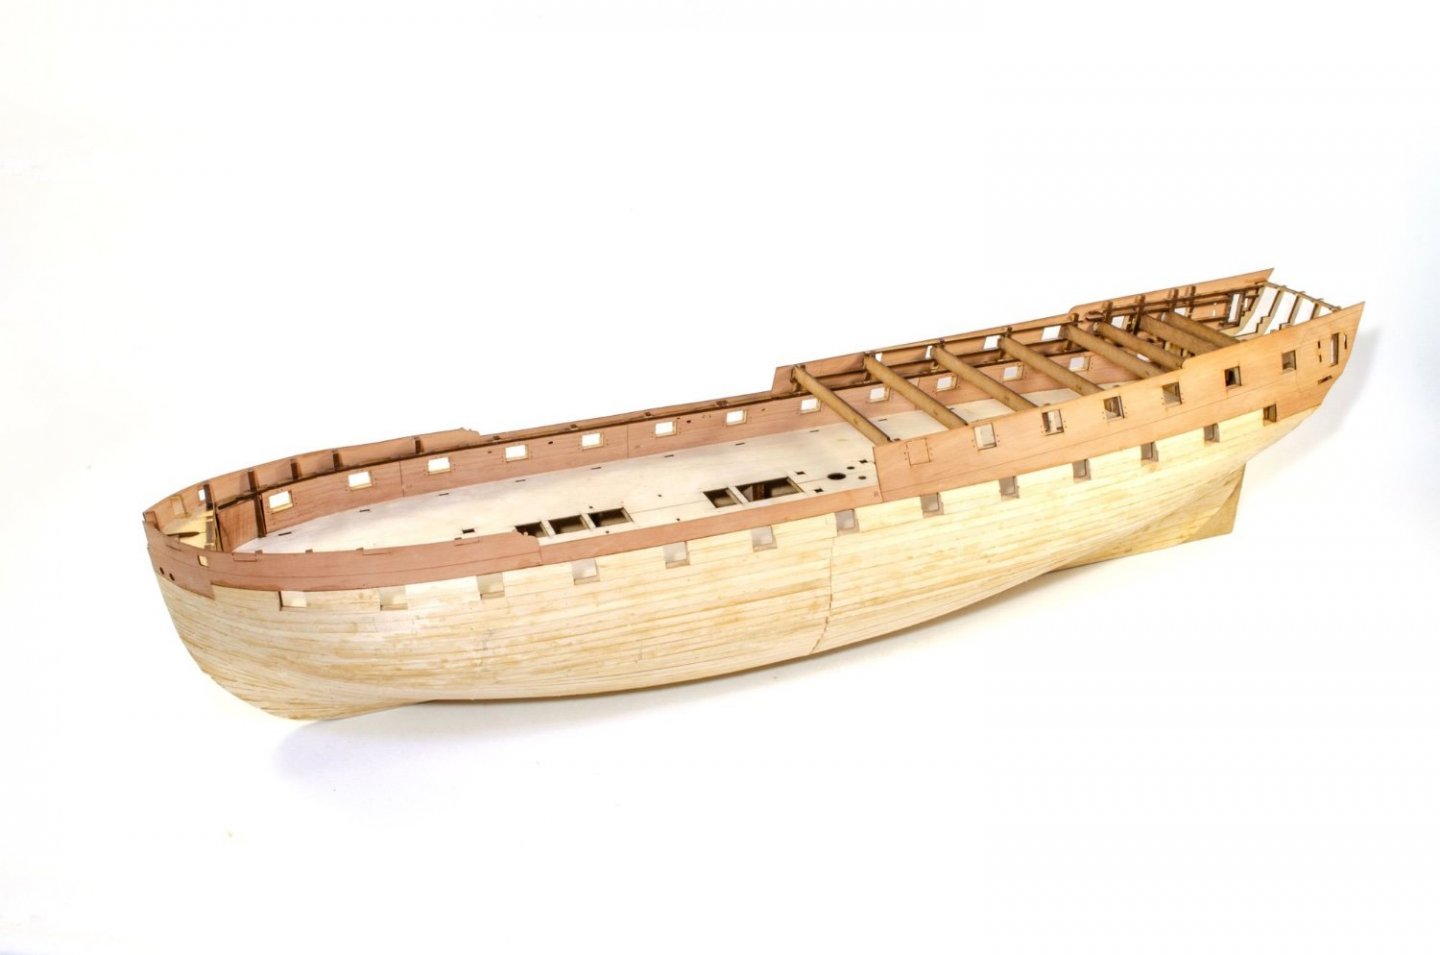
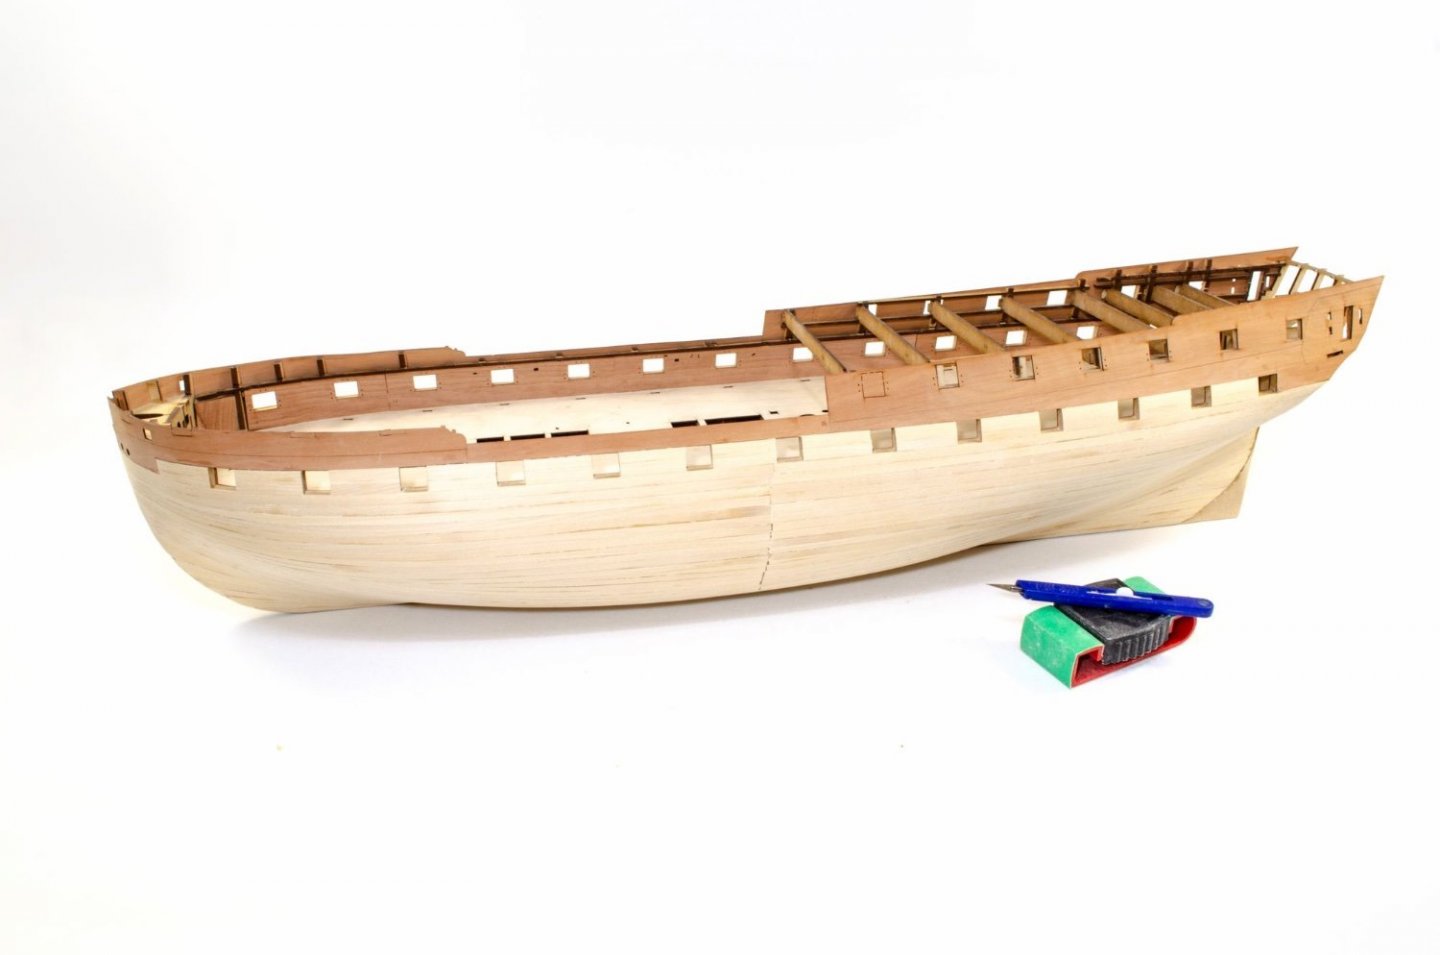
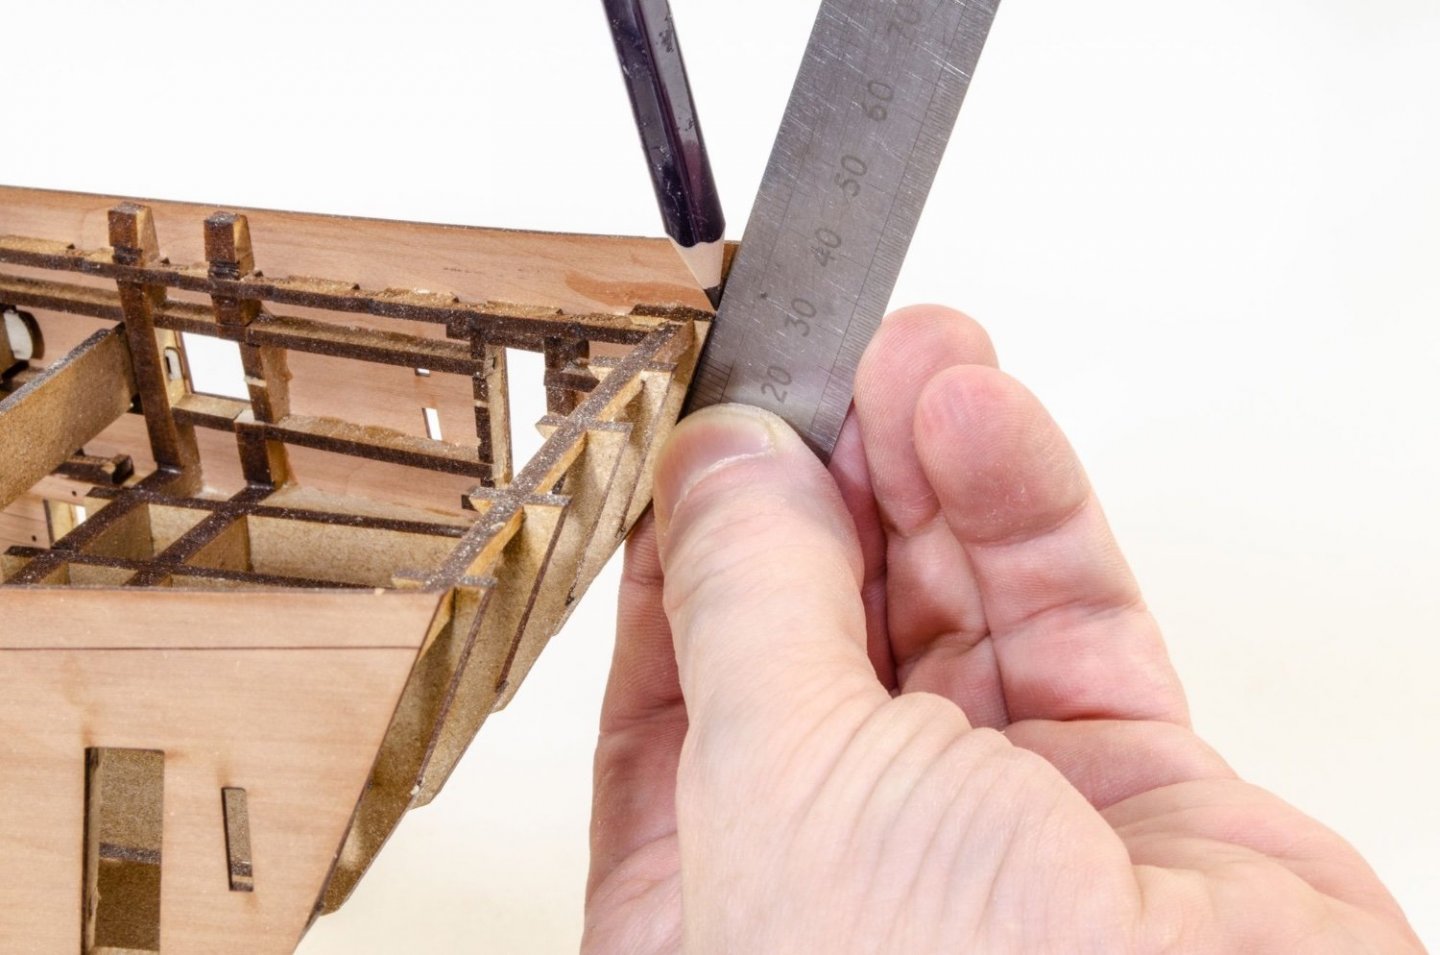
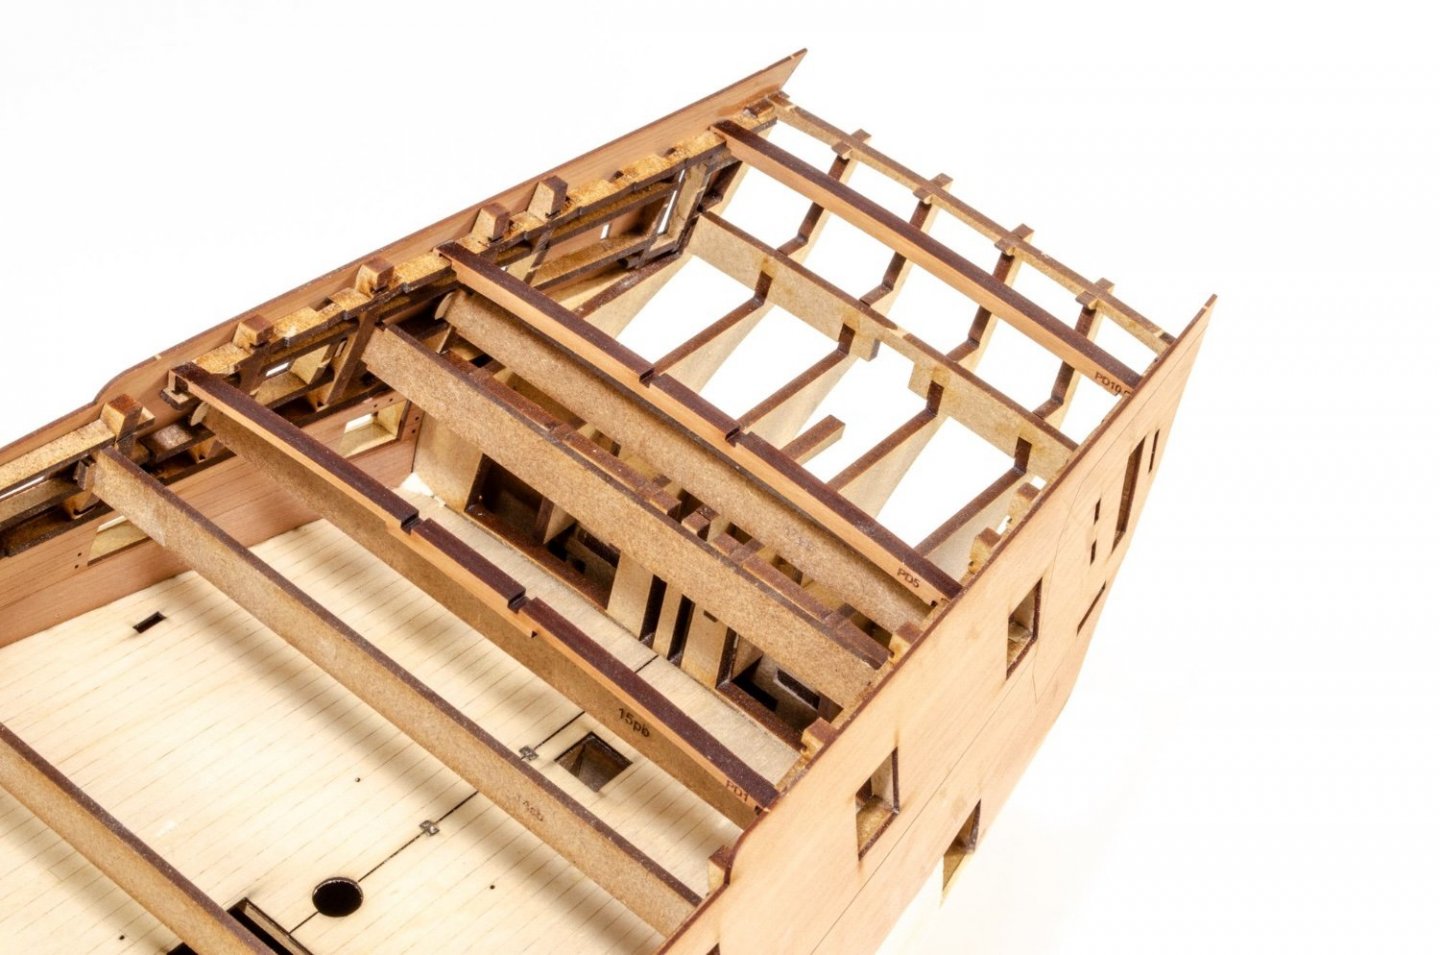
Not a massive update, and there have been two prow reworks to get it spot on. That held me up a few days in total, plus my health hasn't been conducive to extended workshop sessions. Anyway, the hull is now fully first planked in 6mm wide strips of 1.5mm thick lime. For me, that's the king of my least favourite parts done, next to sanding it! I used a combination of palm sander and manual muscle/sweat to clean up the planks. After that was done, I opened up the gun ports so they are almost at right size. The inner, side bulwarks are left a little long so they can be trimmed exactly to your own build. To level up to the stern timbers, I use a rule and pencil to drawn an extended line from the stern timbers, then trim/sand to the correct length. The lower, curved area etc. are also trimmed back to the stern timbers. This little part sits across the inside of the stern timbers. It will later have a shelf sat on top which will help with its placement. Here it is fitted. To make things easier later on in the project, three poop deck beams are slotted into place (#1, 5, and 10) so I can temporarily fit the poop deck. This will help you sand the back edge to the same as the stern. Even though I show/include this, on my prototype it fit without needing any sanding at rear. The quarter gallery frames are now built up...well partially. These will soon be temporarily fitted to help with the vital positioning of the stern elements (stern face, middle and lower counters). Until next time...


- 473 replies
-
- 34
-
-
-
- Indefatigable
- Vanguard Models
- (and 1 more)
-
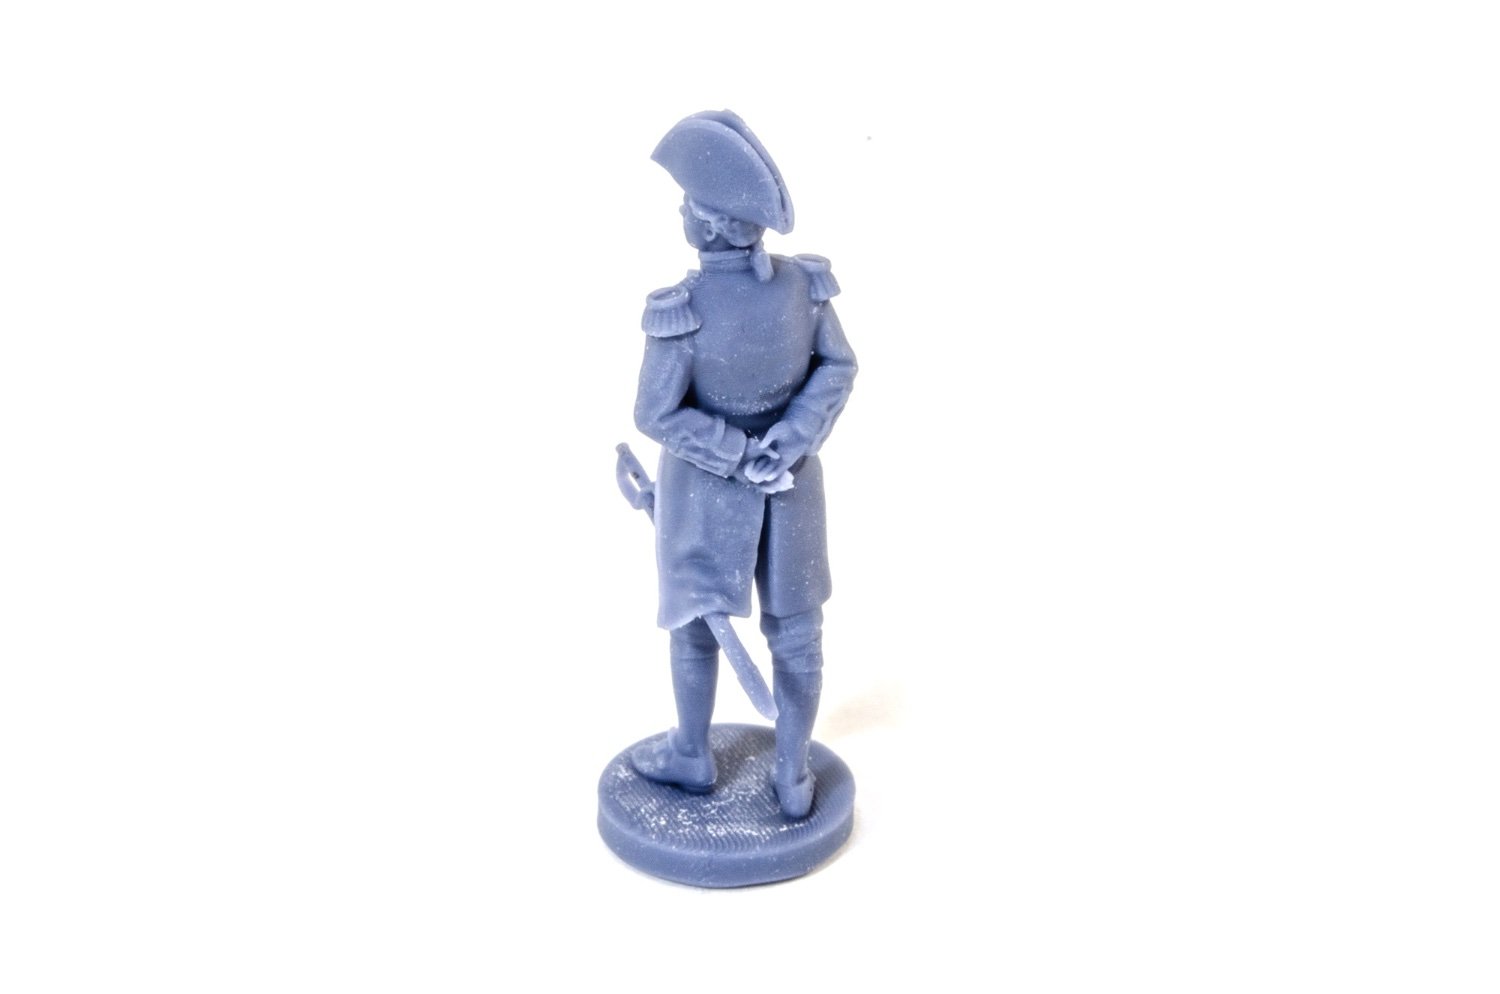
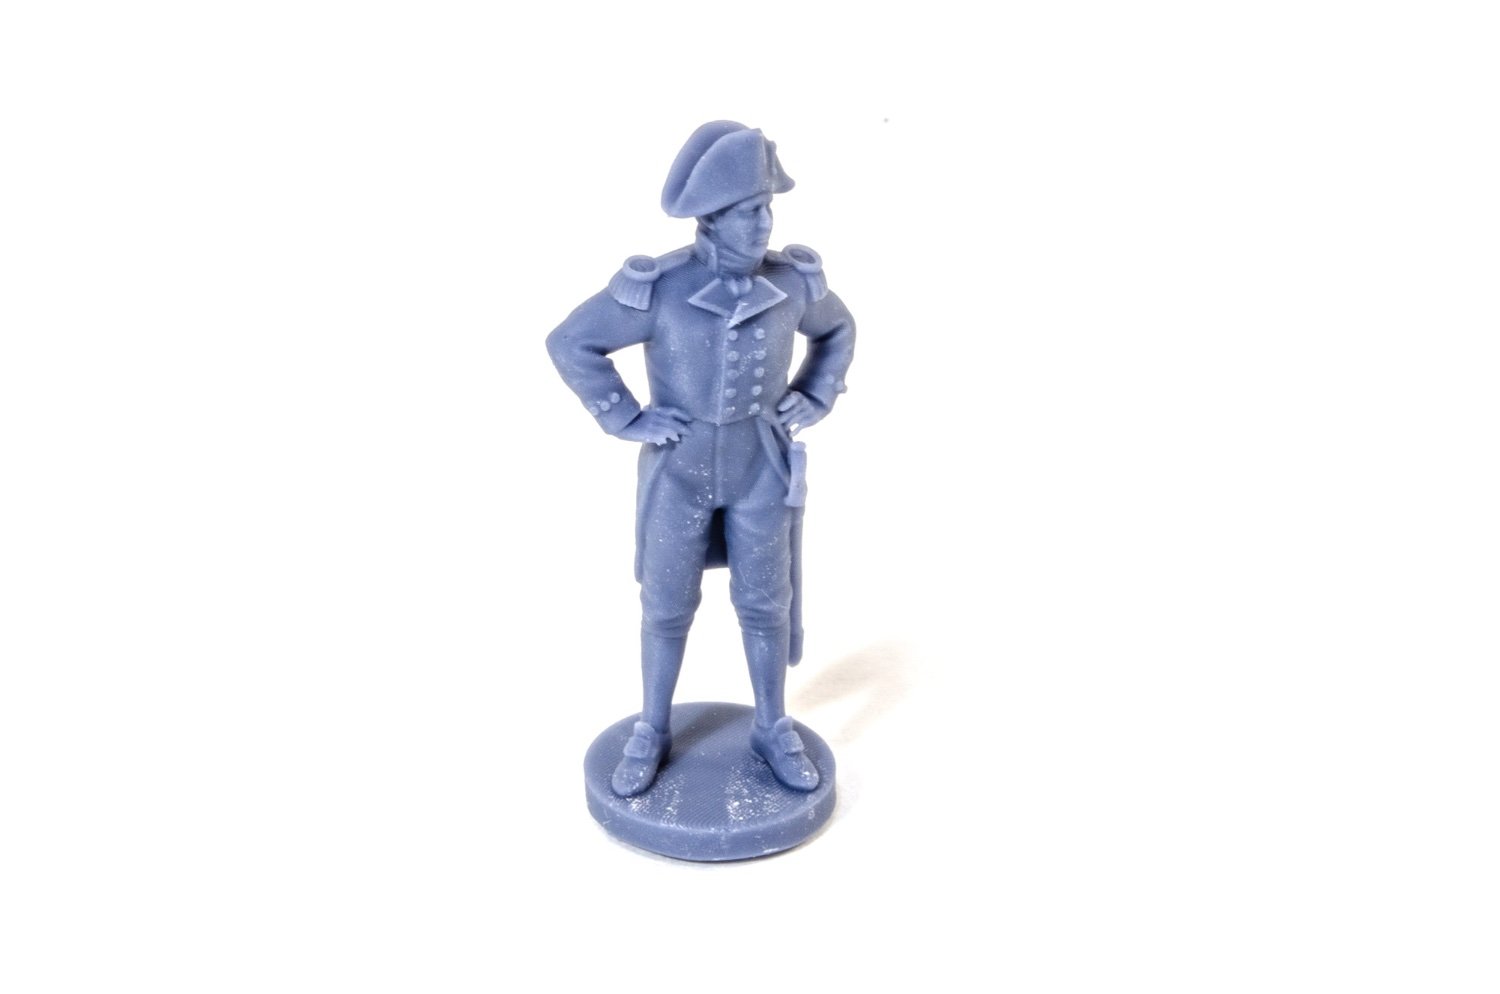
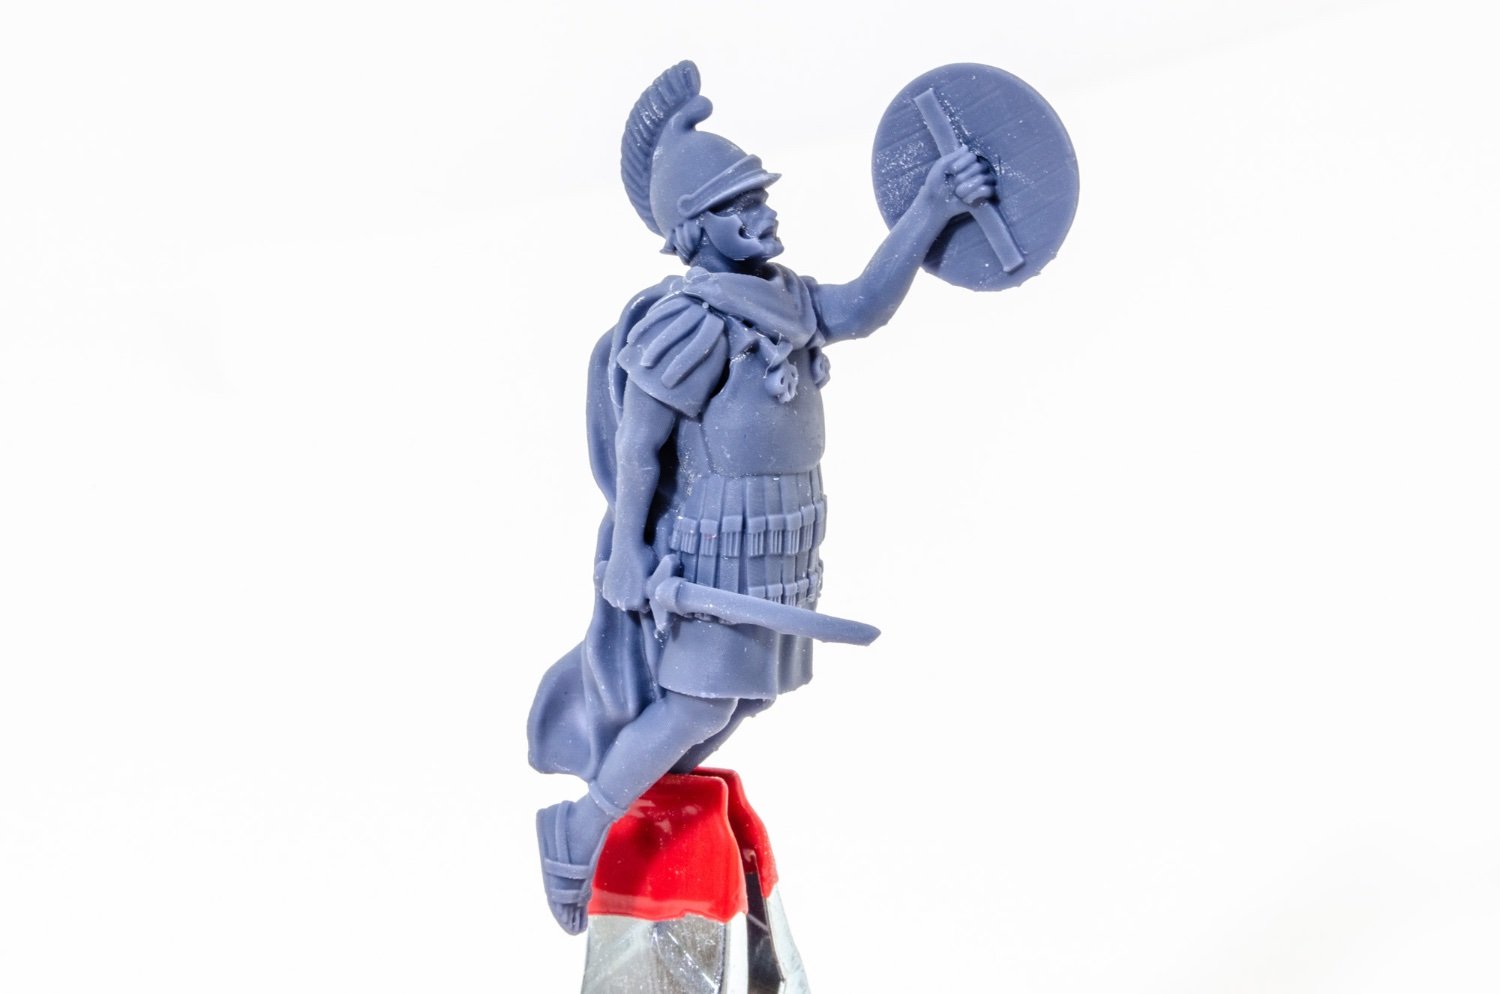
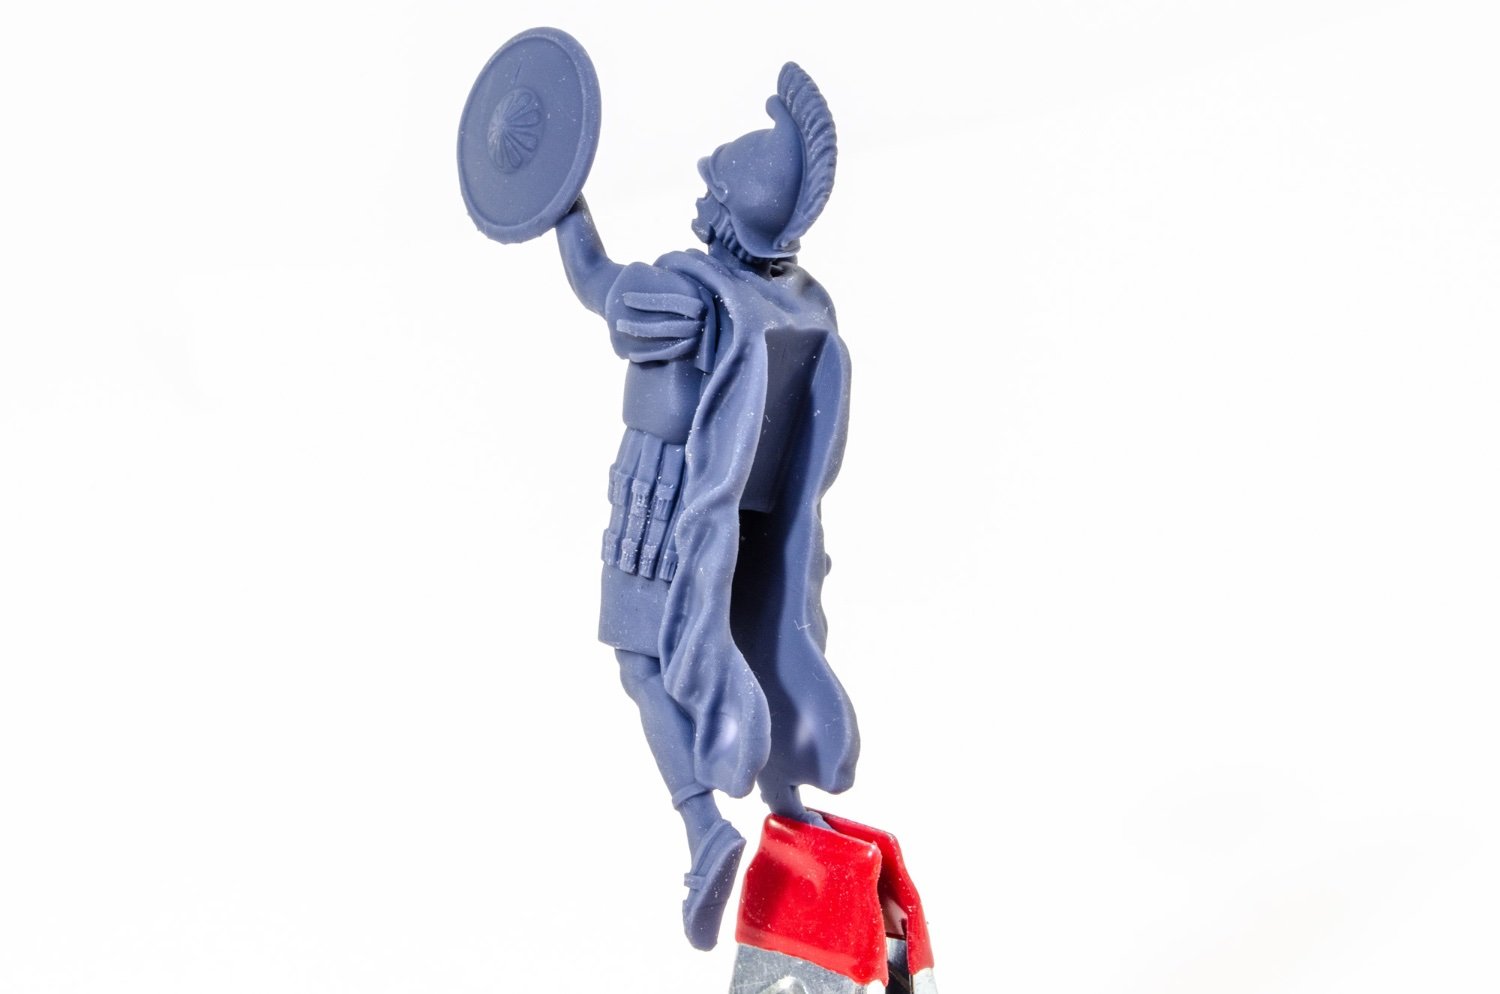
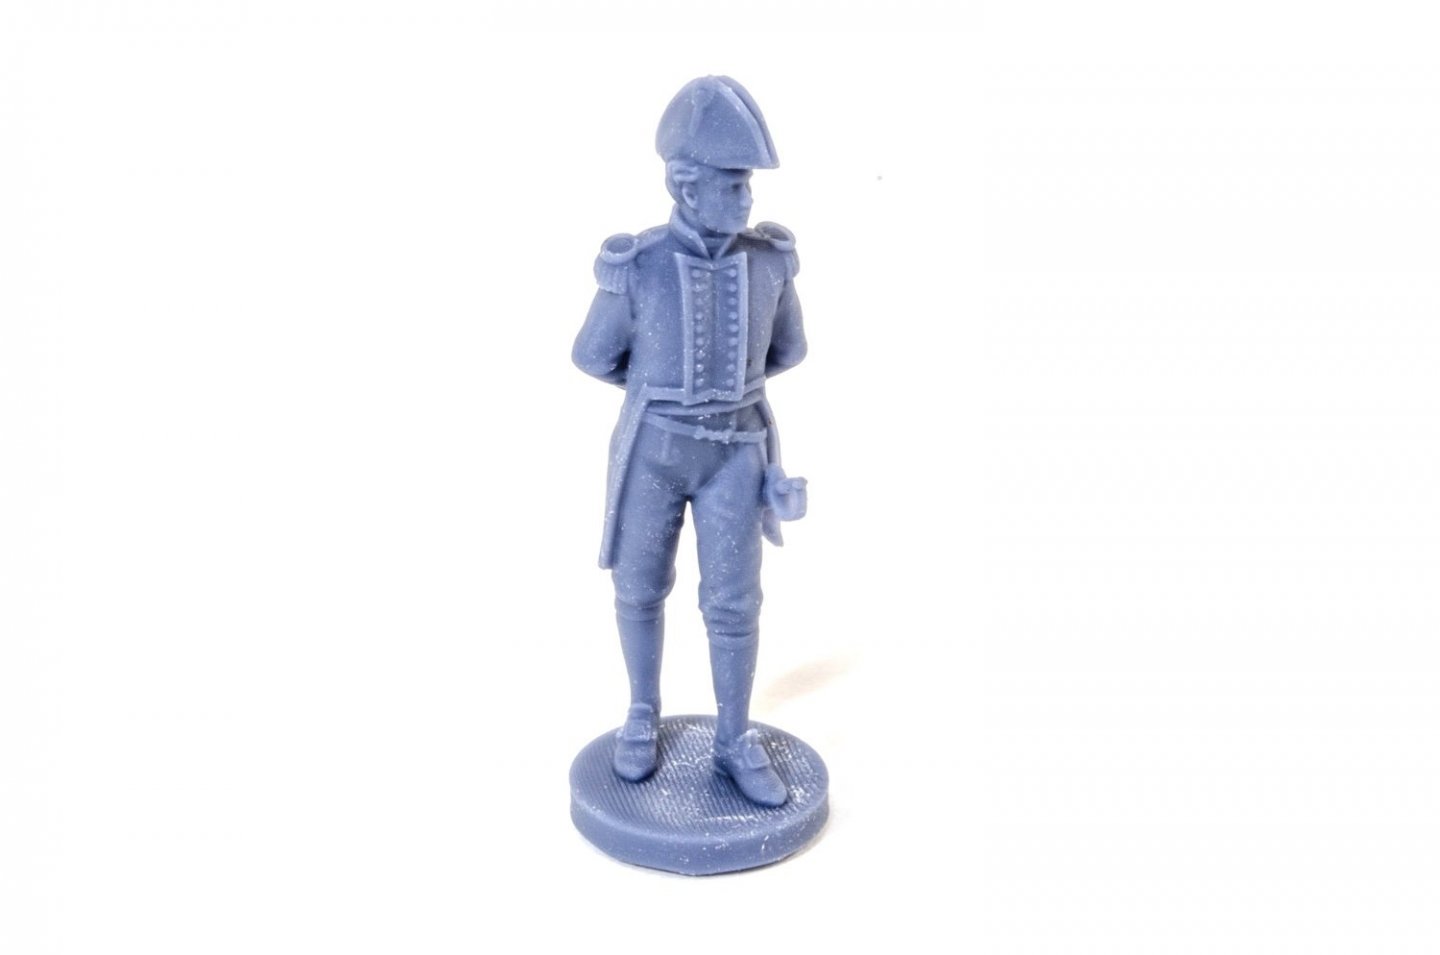
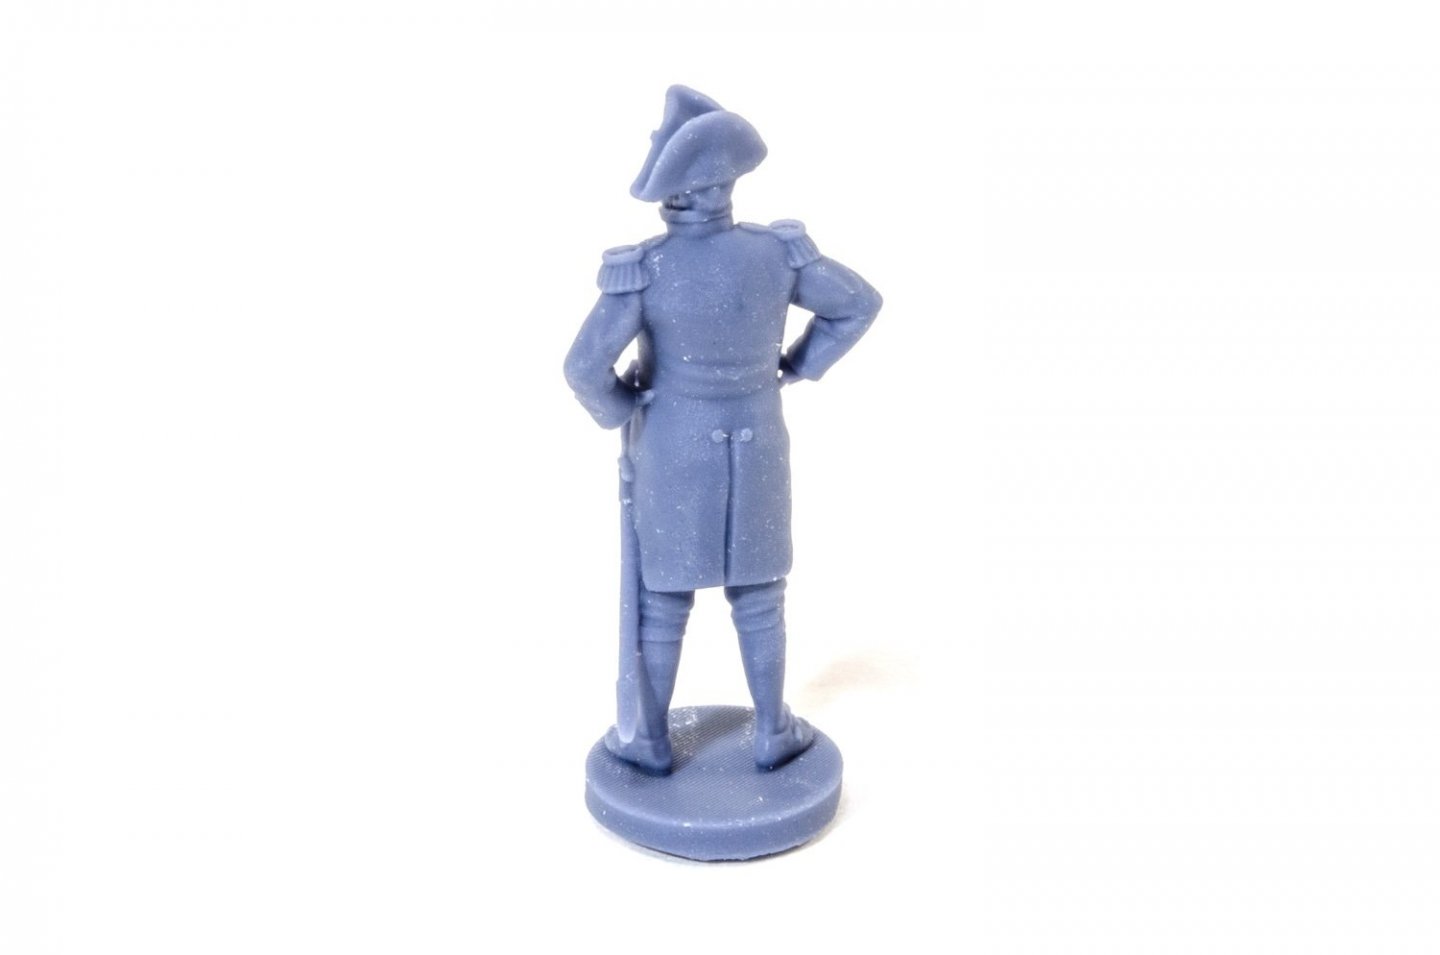
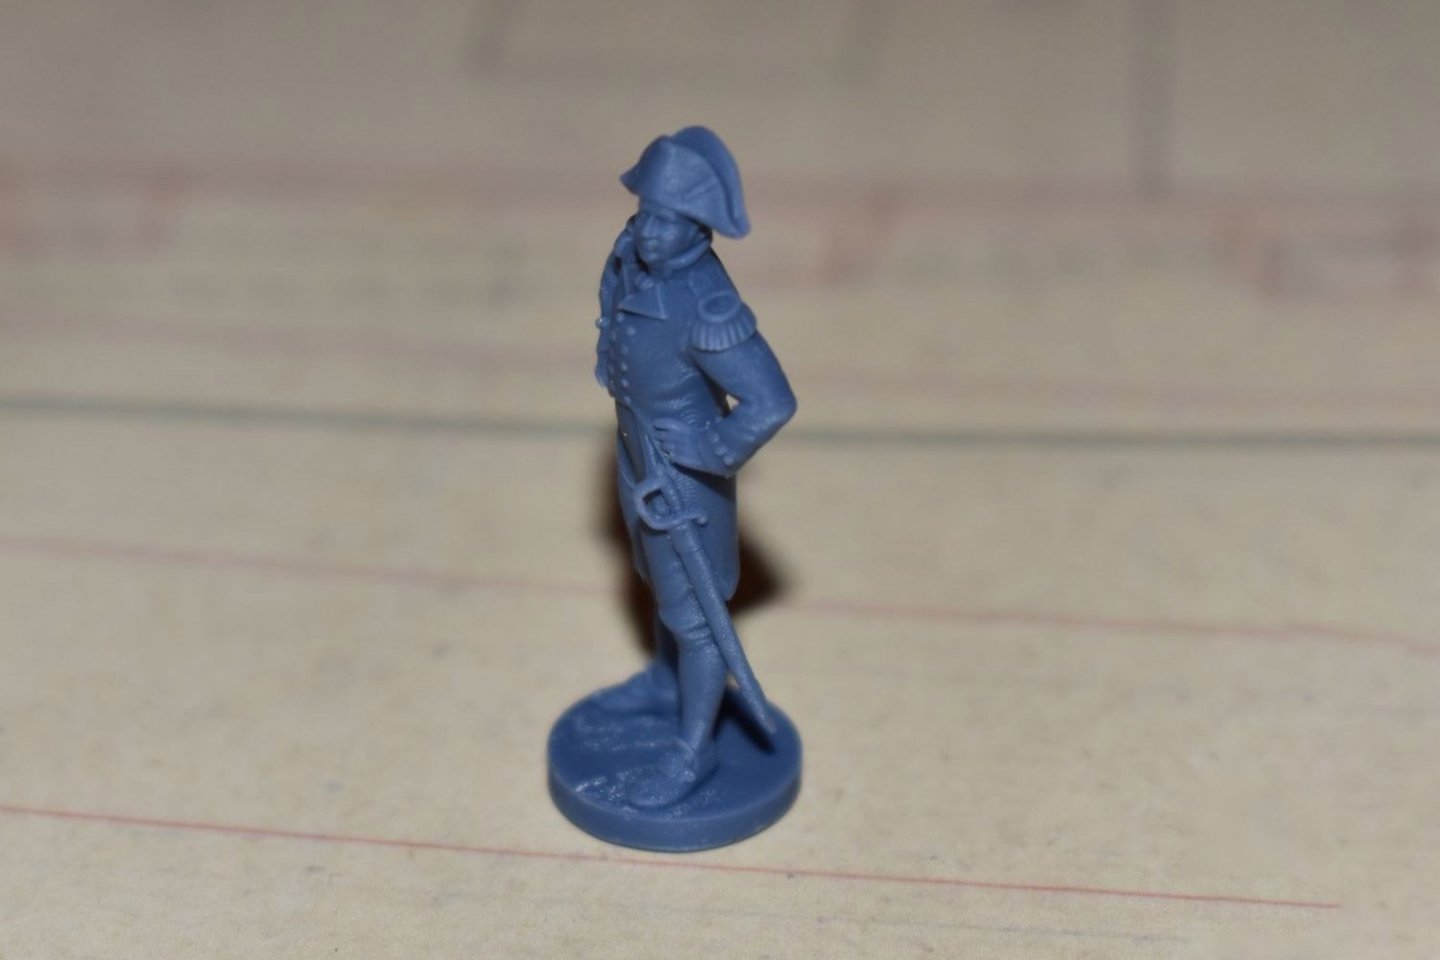
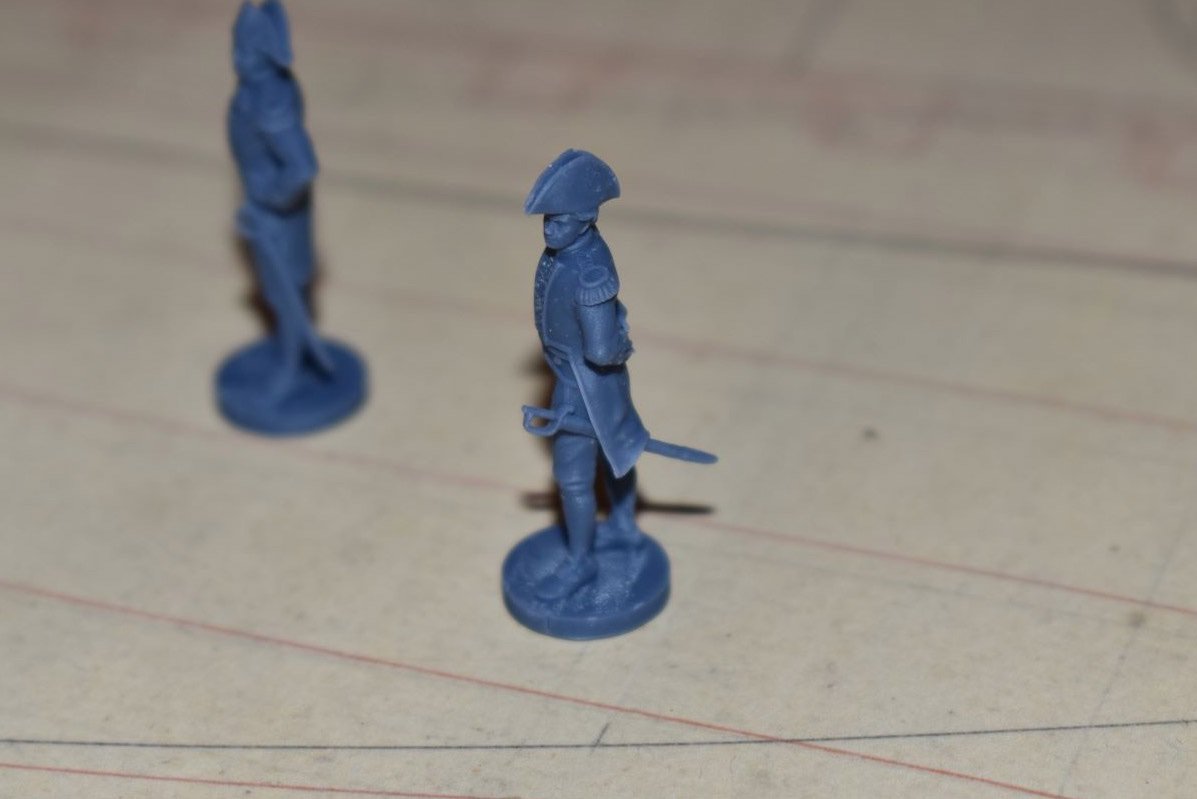
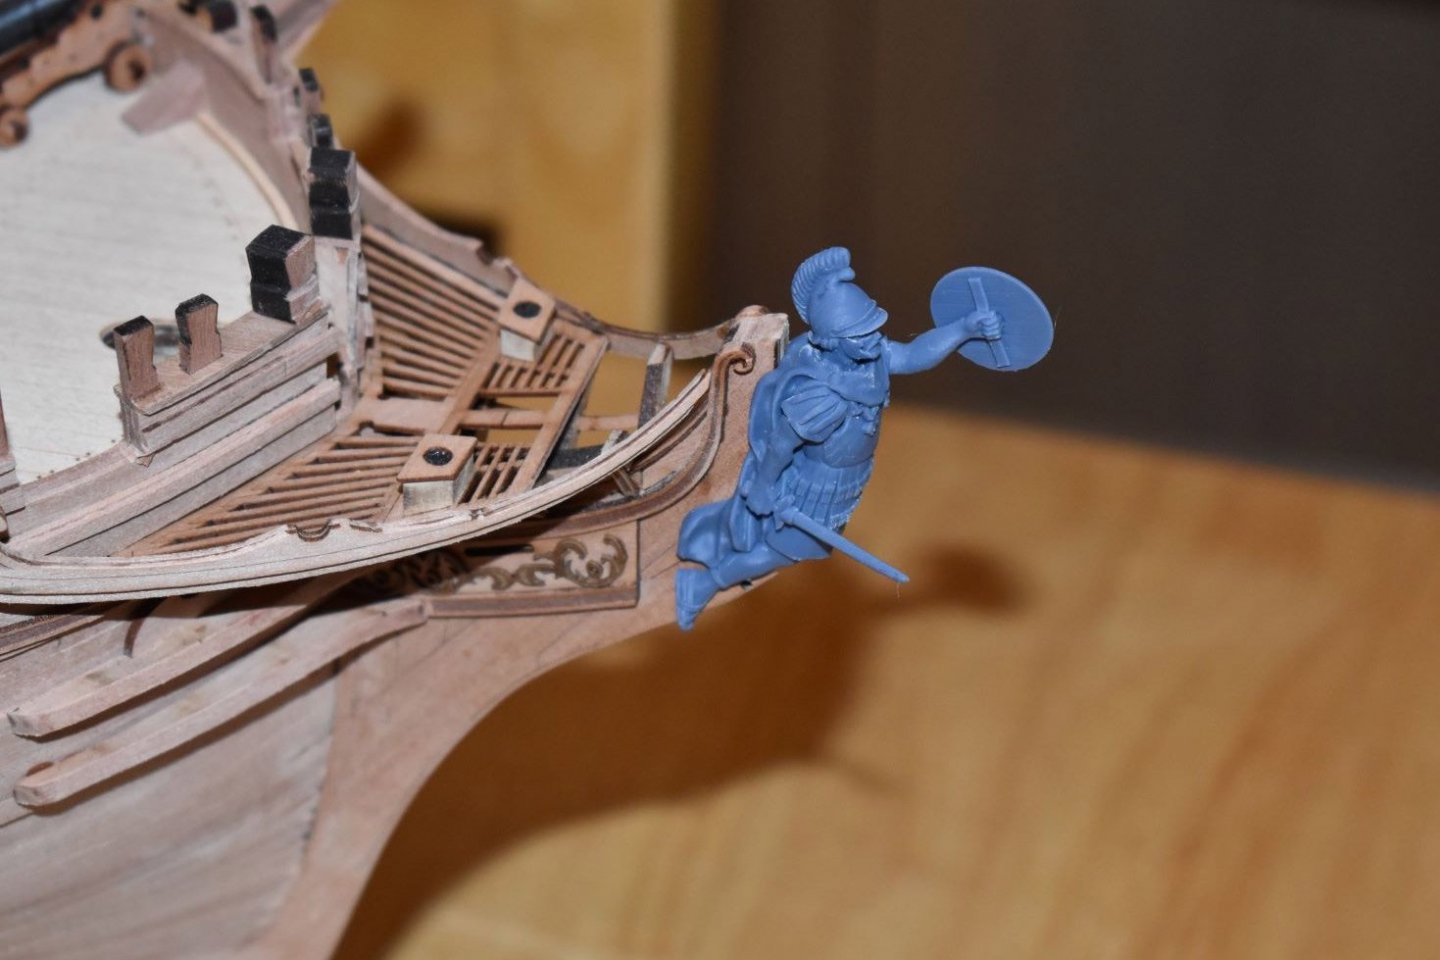
A very quick update. I've just received the masting materials from Chris, along with some amended timber parts sheets etc. Also in the pack were the Pellew and Hornblower figures, plus the Indy figurehead. I thought I'd do some pics for you of the figures. Also, the Pellew and Hornblower figures are now available for sale on the VM site, in 1:48, 1:64, and 1:72 scales. Get them while they're fresh off the press! 🤪 https://vanguardmodels.co.uk/product-category/model-figures/ Hornblower: Pellew:


- 473 replies
-
- 20
-
-
-
- Indefatigable
- Vanguard Models
- (and 1 more)
-
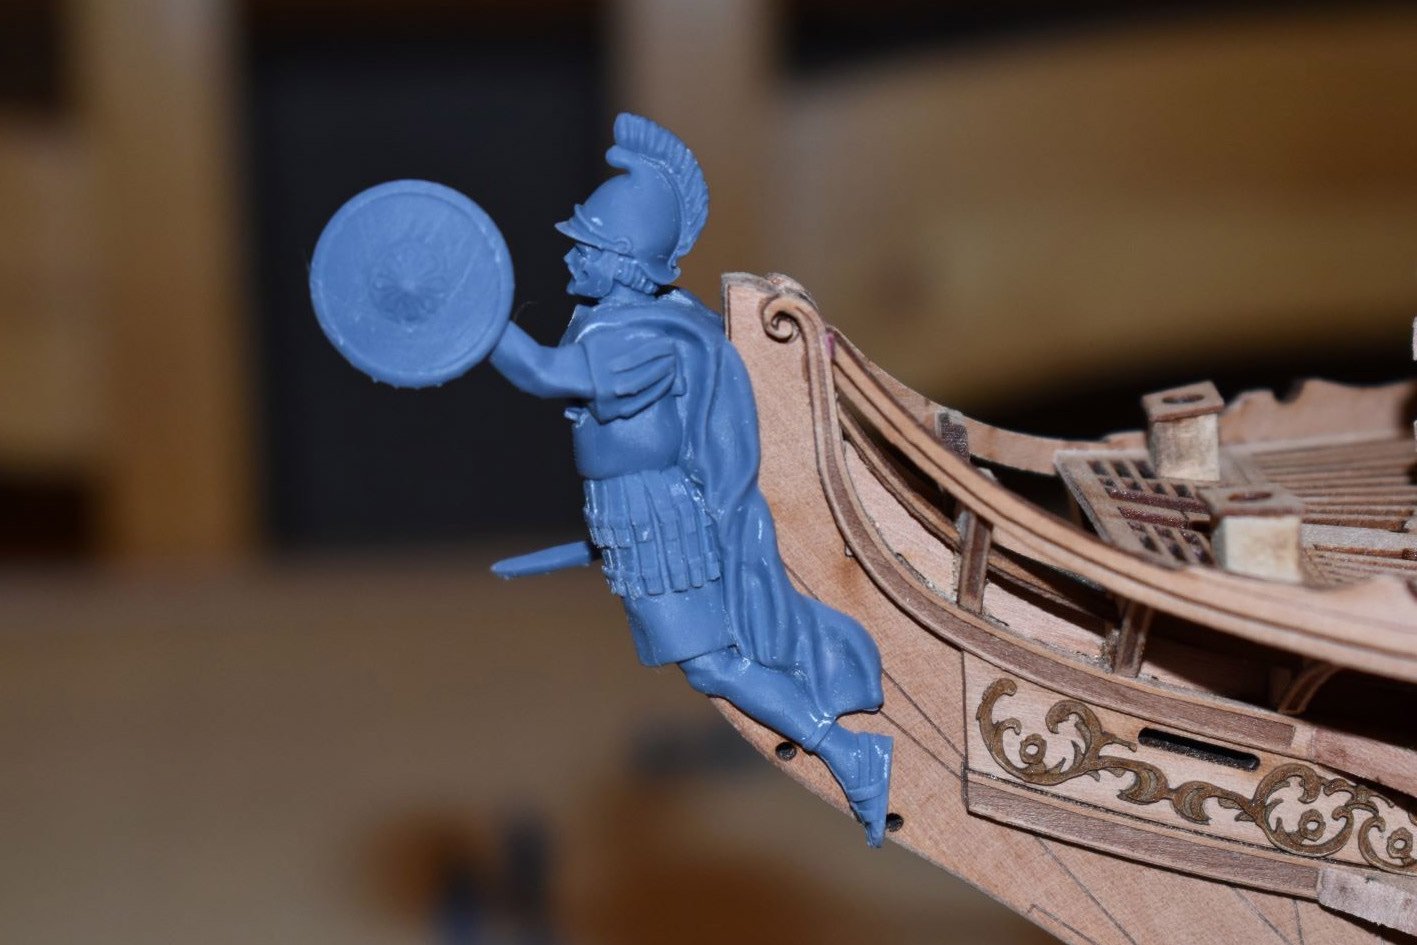
There'll be an update in the next days, but in the meantime, here are some pictures of the Indy figurehead and also 1:64 figures of both Pellew and Hornblower. Both of the figures will be on the website in the next days, but Pellew will also be included with HMS Indefatigable when the kit is released.
- 473 replies
-
- 36
-
-
-
- Indefatigable
- Vanguard Models
- (and 1 more)
-
Subscribe to this topic. As soon as I have news, this is where I'll post it.