HOLIDAY DONATION DRIVE - SUPPORT MSW - DO YOUR PART TO KEEP THIS GREAT FORUM GOING! (Only 13 donations so far - C'mon guys!)
×


James H
-
Posts
6,063 -
Joined
-
Last visited
Content Type
Profiles
Forums
Gallery
Events
Everything posted by James H
-

kit review 1:32 Fifie – The Scottish Motor Fishing Vessel by Amati
James H replied to James H's topic in REVIEWS: Model kits
No, the box says it's 230mm wide. The height is 470mm. -
You'll have about 2yrs from when I start to build this, to it being released, so you'll need to make sure that money is well looked after!
-
I think that sometimes, because the model is something like 'Victory', large and expensive, there is a tendency to call it 'Expert', when in fact, if you've built a few smaller models, you could probably tackle it. Sort of like 'Intermediate'.
-
Sorry to hear about the death, especially at this awful time too. Lovely work on Speedy. I'd be real pleased with that. Certainly nothing there that I can point out for anything.
-
I hope you'll enjoy the build. Any questions about it, and maybe anything I've not shown or later stages, feel free to ask.
-
There'll be more than one manual too. Maybe 2 or 3 manuals, depending on how Amati format it. I will try to make it as foolproof as possible, and Chris's design is such that it lends itself to ease of building. I think if you've got a few other kits under your belt, this is within a modeller's reach. Oh, and...
-
It is quite surprising just how high that waterline does go, but it's correct. There's very little space between it and the strakes.....enough for the white boot and some bare wood above it. Nice to see this coming along!
- 38 replies
-
- 2
-

-
- vanguard models
- fifie
- (and 2 more)
-
I have the 31 sheets of plans. Parts should be with me in the next week.

-
Dang, your second planking is better than mine was! What a great job you've made. Sand her nice and smooth and make sure you at least fill in any slight gaps below the waterline area (if any).
- 38 replies
-
- 1
-
-
- vanguard models
- fifie
- (and 2 more)
-
Now now! My dye mix looked right at the time! 😆
- 195 replies
-
- 3
-
-
- lady eleanor
- vanguard models
- (and 1 more)
-
kit review Kit Review - HMS ENTERPRIZE (1774) by CAF MODELS
James H replied to kljang's topic in REVIEWS: Model kits
Great to finally see a CAF kit reviewed here. Thanks for taking the time to go through all those boxes! -
Hope you wiped your feet on the way out 😄
-
So do I! I so want to see that kit built here. @PJG
-
Don't be daunted! We look forward to seeing you get this and crack that box open. Every build is a journey, no matter how much or little experience we have. That's part of the fun. There's plenty here who can and will help you. Remember, there's never such a thing as a silly question either. Just ask away! @chris watton designed that model too, so he'll be able to watch your progress.
-
You nailed it, absolutely. If you can't have a slice of the pie, then just complain that you don't like the flavour. No doubt they'll welcome this kit once ZHL has pirated it and they are guiding folk to the pirate product page. I see you're from God's own county My favourite shire. MDF has more consistent tolerances than ply....even some of the very best quality. The Vic, for example, could not have been designed in the way it was if it wasn't for those tight tolerances of the MDF. It has several hundred interlocking joints. Chris will tell you than ply can vary quite a lot in thickness from batch to batch and even across the same sheet. Accumulation of tolerance errors would have made this model a nightmare with the modeller opening up slots etc. I know MDF isn't good when it gets wet, but do some guys build there models in a swimming pool or shower? What's this about it coming to pieces with glue? Absolute rubbish. I've used very thin MDF and PVA with no problems. I know kids who use thin MDF to make things with tons of glue, and they don't have problems either. Odd eh? ❓ Also this stuff about it not being suitable for modelling (structural). Well, you've seen the Victory prototype, Chris's other designs, so it is suitable. Some folks don't like MDF and that's fine. You hear some moan about the dust from it being nasty....well those folks need to check out the hazards associated with the resins in the timber dust they create normally, including the resins bonding ply. Several countries, for example, class all wood dust as carcinogenic. The simple solution is don't breathe in any dust you create, be it timber, ply, or MDF. Haha! Chris has explained this quite a few times, so I've just done it again for him. See above
-
I might be able to get away with some stuff that won't be seen in the manuals, such as furniture.....and possibly even lighting if I hide it surreptitiously enough.
-
No reason you can’t do that. I won’t be able to with mine as it’s for the manual, but I’ll be following the builds that eventually begin on MSW.
-
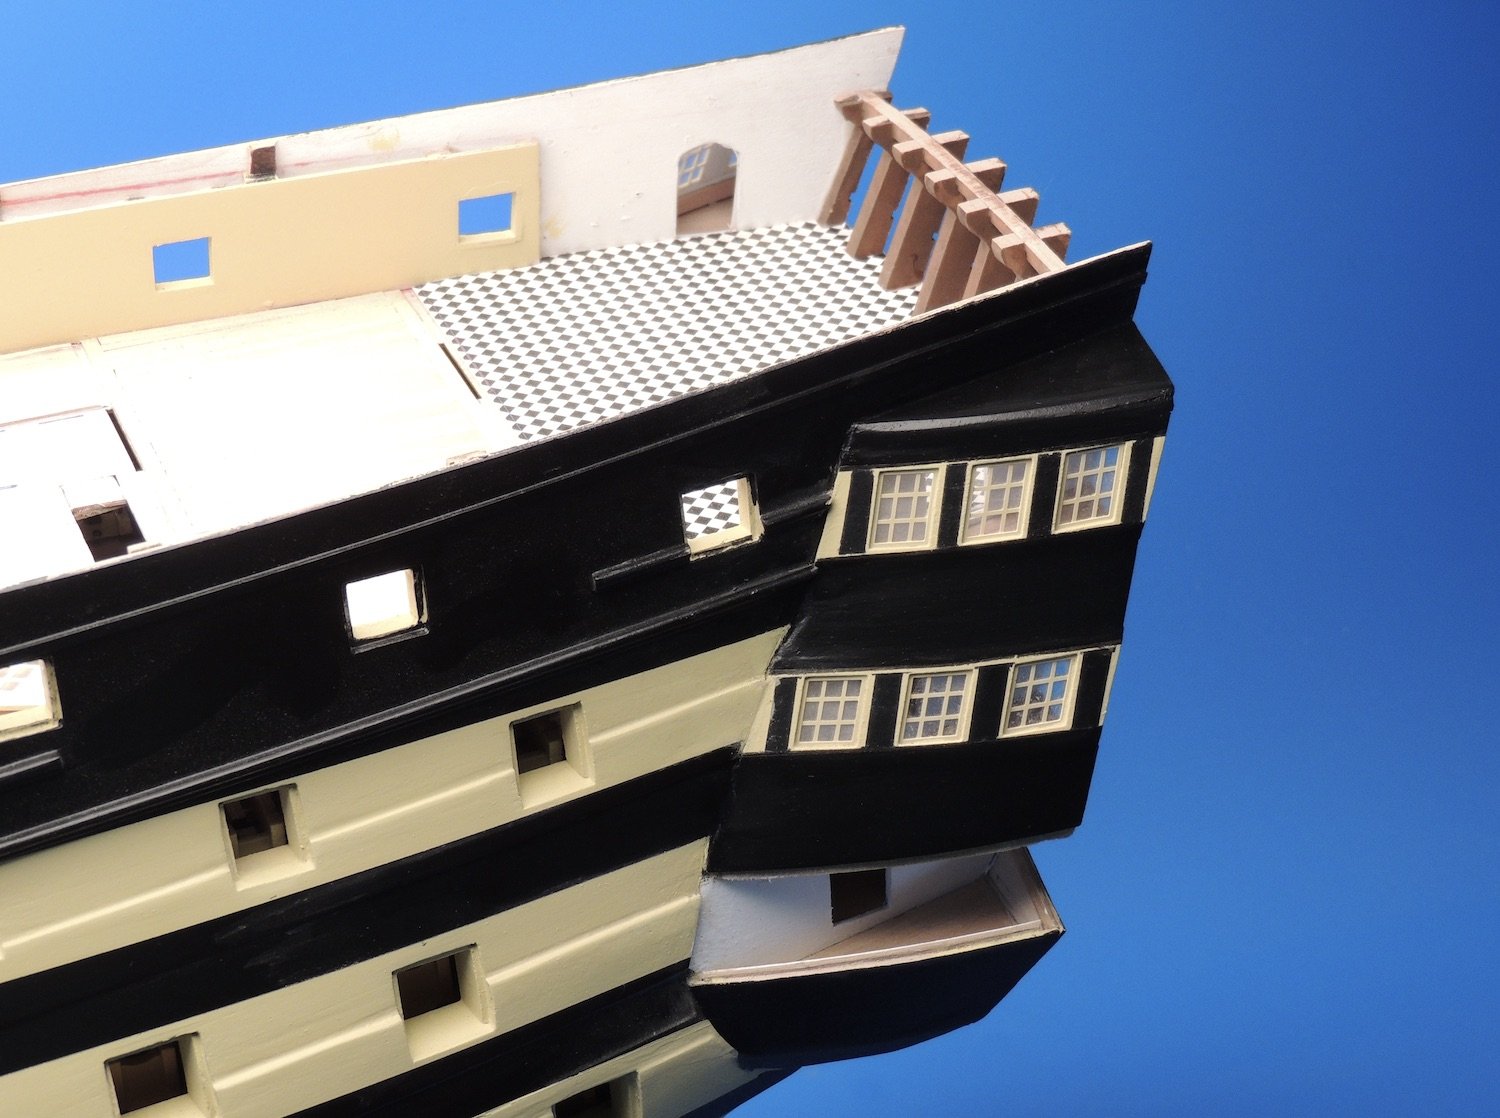
I also forgot. Unlike the Caldercraft kit, as excellent as it is, you will be able to furnish and fit out the cabins at the stern., as the decks run right through to this area. No furnishings come with the kit, but imagine putting some cabinets, tables, chairs and LED lanterns in there! Maybe there's a way I can do this without compromising anything for Amati. If I can, then I will, but it won't be seen in the manual....only on MSW! Caldercraft: Amati:

-
ancre Coureur by cafmodel - 1/48
James H replied to cafmodel's topic in - Build logs for subjects built 1751 - 1800
She looks impressive with masts. What's the overall size? -
I think so too. I suppose if Bismarck is popular, then Amati may want to try their hand with Hood. I imagine the development coats and initial production outlay for Bismarck will be quite high.
-
Ok...some answers. Bismarck is now scheduled for Autumn, possibly around October. As for HMS Hood, Amati aren't sure on that, as far as popularity goes. German battleships always sell, irrespective of the sales region, but that may not translate into HMS Hood.
-
Not sure about the Hood. I can ask. Very good question! I'll try to get an answer for you. This virus has screwed all sorts up!
-
I'm told the stuff is being packed/kitted to ship out, so I should be able to give you a glimpse of that triumvirate soon
-
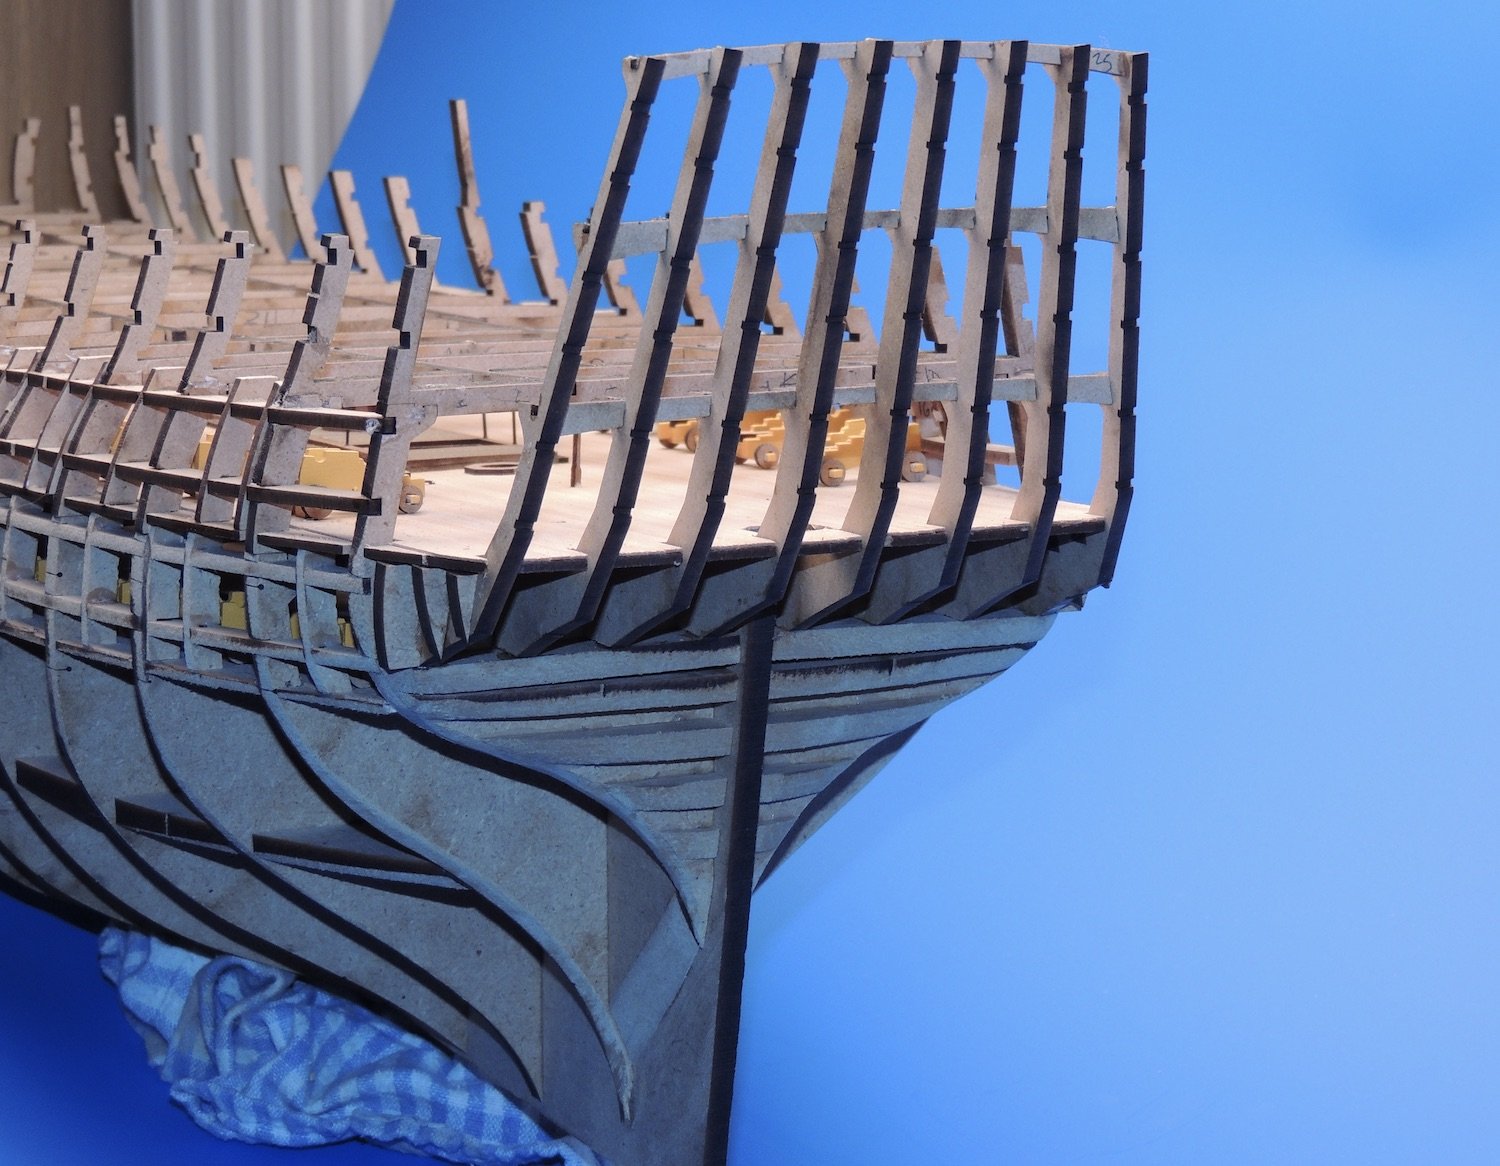
That looks fine to me. Just hit the 180 grade paper and give it an all over smooth. I see you thinned down the stern post area too, so that's good. Curving the side of that play too at stern is fine. It needs to be curved or you won't lay your second layer properly.