James H
-
Posts
6,135 -
Joined
-
Last visited
Content Type
Profiles
Forums
Gallery
Events
Everything posted by James H
-
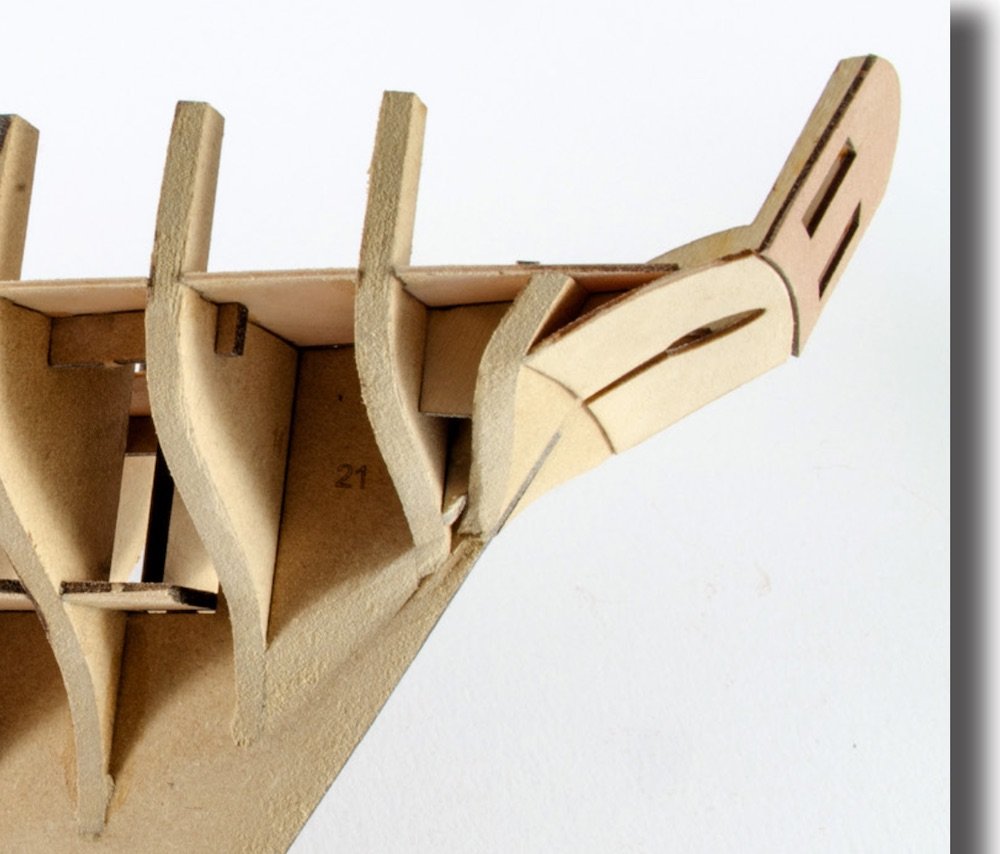
 Providing you've bevelled that rear bulkhead properly, then just pack out that low bulkhead a little as you go. You'll have no problems.
 -
It looks like that last bulkhead needs to be bevelled more, from what I can see.

-
Can you so a wider angle photo showing the stern too?
-
The kit is mostly in cherry. I have the kit with me, so expect a review on MSW in the near future.
-
I'm doing the same thing for the Duchess of Kingston at the moment. I promise to get the bulkheads numbered properly in the manual. 🤣
-
Also "new" member after a long shore leave
James H replied to SkerryAmp's topic in New member Introductions
Great to see a familiar name back in the fold 😙 -
The embarrassing this is that I used to be an ex-mag assistant editor, but when you're writing stuff like this, then you are constantly cross referencing documents, plans etc. and putting the text together. I'll try harder next time 😂
-
You can blame me for any 'muddiness', as I wrote it. Thankfully, you have a nice set of photos which helps to negate any slight numbering errors After all, you'd struggle to put those parts anywhere else 🤣
-
More like a jigsaw 🤣 Can't wait to see you make and fit those frames.
- 322 replies
-
- 3
-

-
- enterprise
- caf
- (and 1 more)
-
@Trident Model
-
I know some purists hate it, and also talk of it crumbling away in years to come, but I used CA (gel). I've seen models that are decades old and made with CA, and they are still just fine. ...but this isn't a discussion on the merits/demerits of glue. It just works for me and of course, no clamping.
- 164 replies
-
- 4
-
-
- vanguard models
- flirt
- (and 1 more)
-
Beautiful job, Martin. That case really sets it all off too. Stunning Big question.....what project next?
- 122 replies
-
- 1
-
-
- caldercraft
- agamemnon
- (and 1 more)
-
Can't wait to see you build this. You've paving the way for me and Coureur 😄
- 322 replies
-
- 3
-
-
- enterprise
- caf
- (and 1 more)
-
UPS seem to be the most consistent out of the couriers I've experienced of recent.
-
ancre Coureur by cafmodel - 1/48
James H replied to cafmodel's topic in - Build logs for subjects built 1751 - 1800
That's the plan, as soon as I have enough of the Duchess built for Chris to get his manual done and kit into production. @cafmodel Exciting to see things coming together like this. I really can't wait to see this and to get a log started here. I'll certainly be out of my comfort zone with a POF! -
Welcome back! I'm pretty sure I remember you (back in my Captainpugwash days). Looking forward to seeing you crack on with a build here again.
-
There's no difference between port and starboard bulwarks. Those are exactly the same.
- 164 replies
-
- 2
-
-
- vanguard models
- flirt
- (and 1 more)
-
ancre Coureur by cafmodel - 1/48
James H replied to cafmodel's topic in - Build logs for subjects built 1751 - 1800
As soon as DoK is done, I'll build this alongside Victory. -
That's why I now just fit a lot of the parts, and especially the deck, before gluing. I just paint glue in from underneath and that works just as well.
- 164 replies
-
- 6
-
-
- vanguard models
- flirt
- (and 1 more)
-
ancre Coureur by cafmodel - 1/48
James H replied to cafmodel's topic in - Build logs for subjects built 1751 - 1800
Thanks for posting those closer detail photos. I really can’t wait to see this! -
Glad your following. I have a few weeks now until Amati send the replacement timber sheets, so I'm working on the Duchess of Kingston at the moment, and Vic is draped in bubblewrap. Won't be too long though!
-
ancre Coureur by cafmodel - 1/48
James H replied to cafmodel's topic in - Build logs for subjects built 1751 - 1800
You painted this? -
ancre Coureur by cafmodel - 1/48
James H replied to cafmodel's topic in - Build logs for subjects built 1751 - 1800
I really cant wait to see this one! She's going to look very different to a regular POF