robnbill
-
Posts
841 -
Joined
-
Last visited
Content Type
Profiles
Forums
Gallery
Events
Everything posted by robnbill
-
 You prompted me to go look. It had been awhile since I have needed to use it so I pulled my paint box out. I was incorrect in the matte. It is actually a liquid as well. Now that I am looking at it I remember being a bit concerned since the matte base was grey but after mixing with the clear coat and thinner, it worked beautifully. Here is a photo of what I used (other than the Tamiya thinner.
-
Hi, i was just catching up on your blog. You are doing a great job. Your instincts were right on target. India Ink is color stable on the ship and can be safely used from ebonizing to coloring standing rigging. Sharpies are not. There are many nice models out there where colors are looking faded or worse after just a few months. Stay away from them if at all possible.
- 117 replies
-
- 3
-

-
- constitution
- model shipways
- (and 1 more)
-
It was Tamiya. I also used the Tamiya thinner to thin the coating. My local hobby shop did not have the matt finish coating, but they did have a powder additive that would make it matte. It was just a bit of playing with it until I got the matt finish I liked. I really like the Tamiya thinner. I actually just used it to thin white glue to soak rope for the coils. The thinner evaporated much quicker and (at least I think) gave me more control. The thinner gave the glue enough consistency that it allowed the glue to penetrate the rope evenly and when dried did not leave a heavy coating to distort the rope's finish.
-
Elijah, Find the thinnest black adhesive tape you can. If you can get to an office supply store they have chart tape. Or auto parts stores might have detailing tape. You can get that pretty small and it works great for laying out the hull. I found the thread hard to work with myself.
- 701 replies
-
- 3
-
-
- phantom
- model shipways
- (and 1 more)
-
Brig Eagle by robnbill - 1:48
robnbill replied to robnbill's topic in - Build logs for subjects built 1801 - 1850
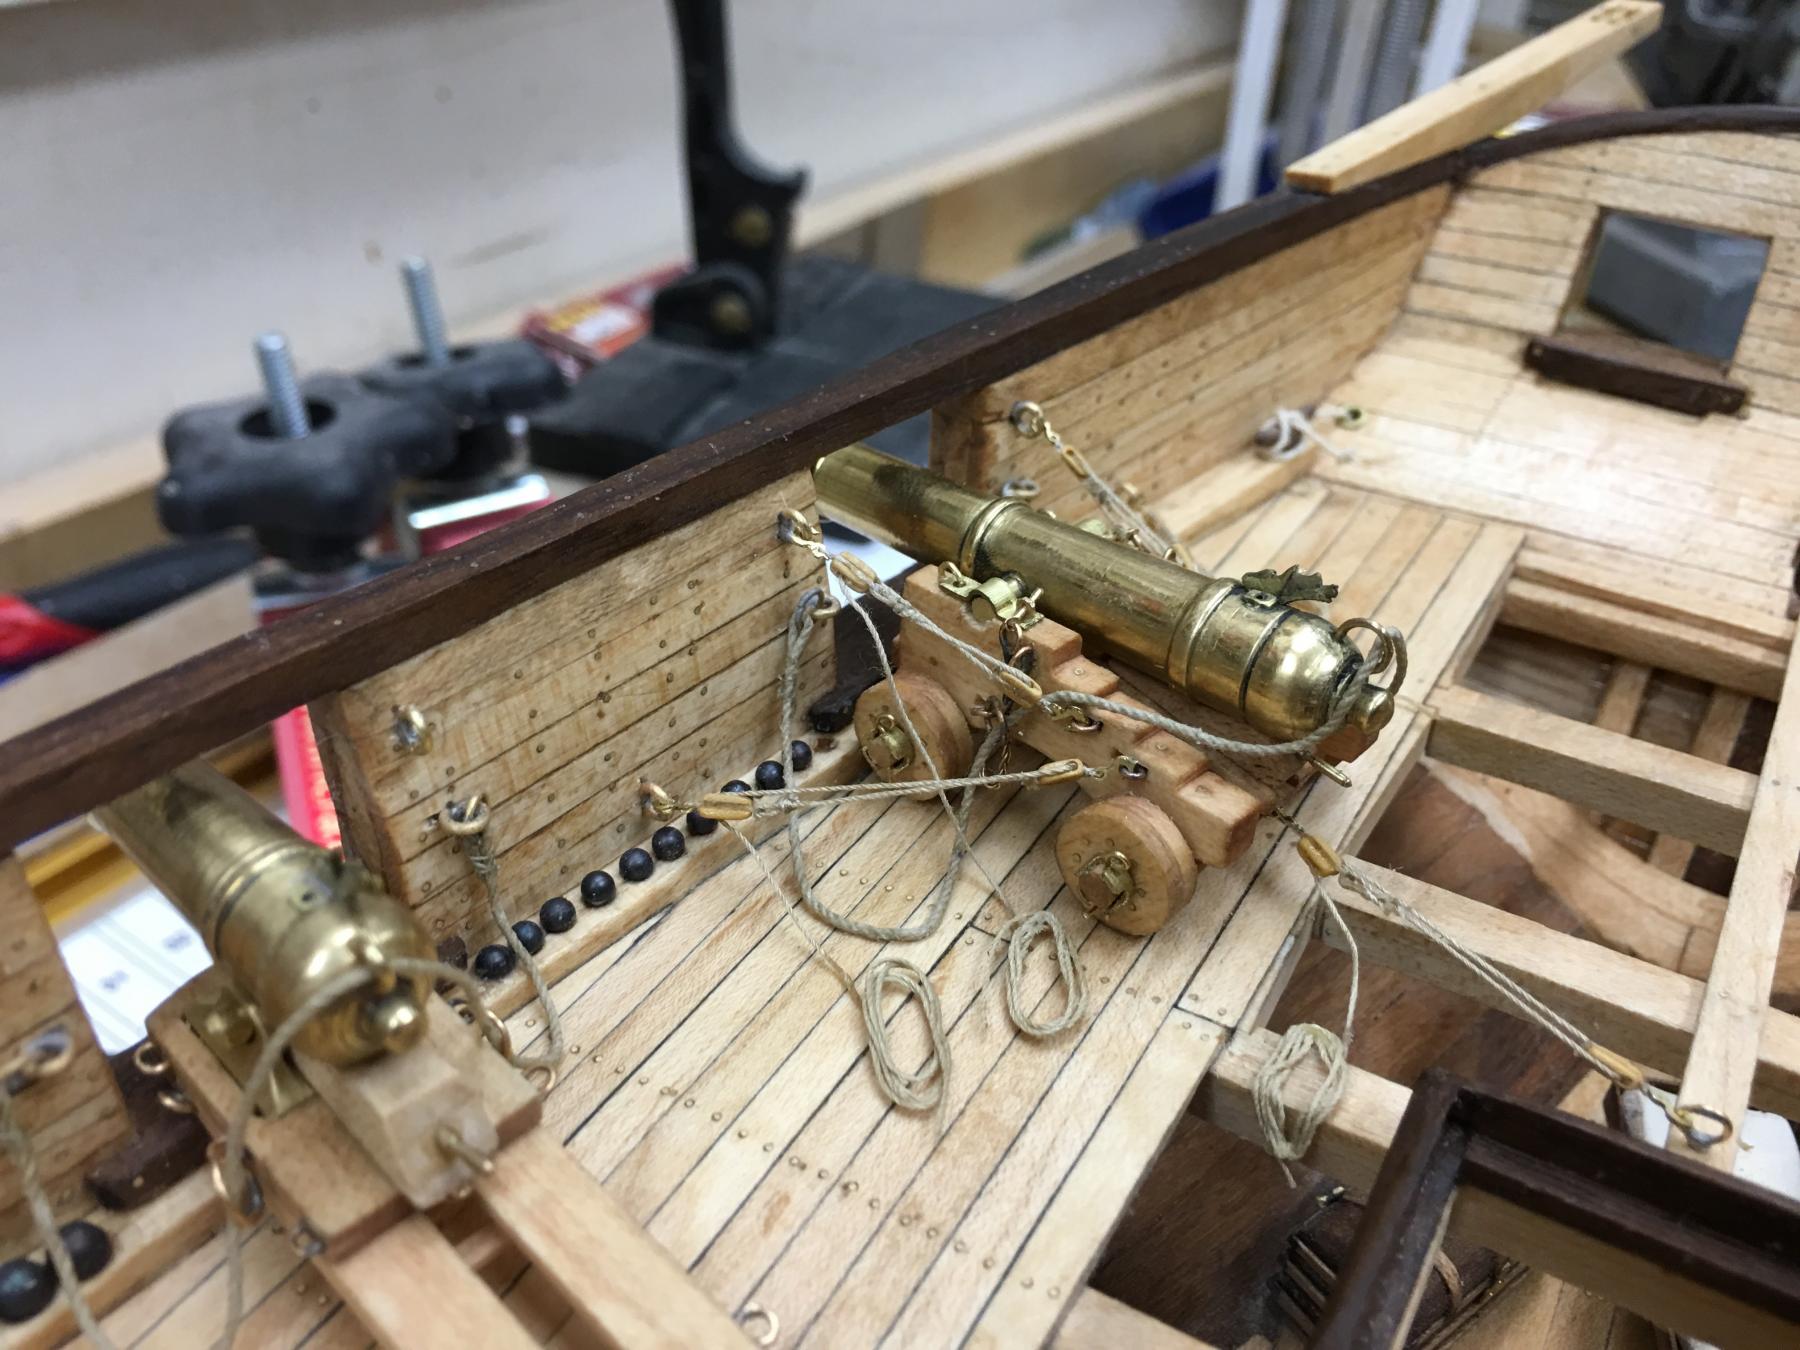
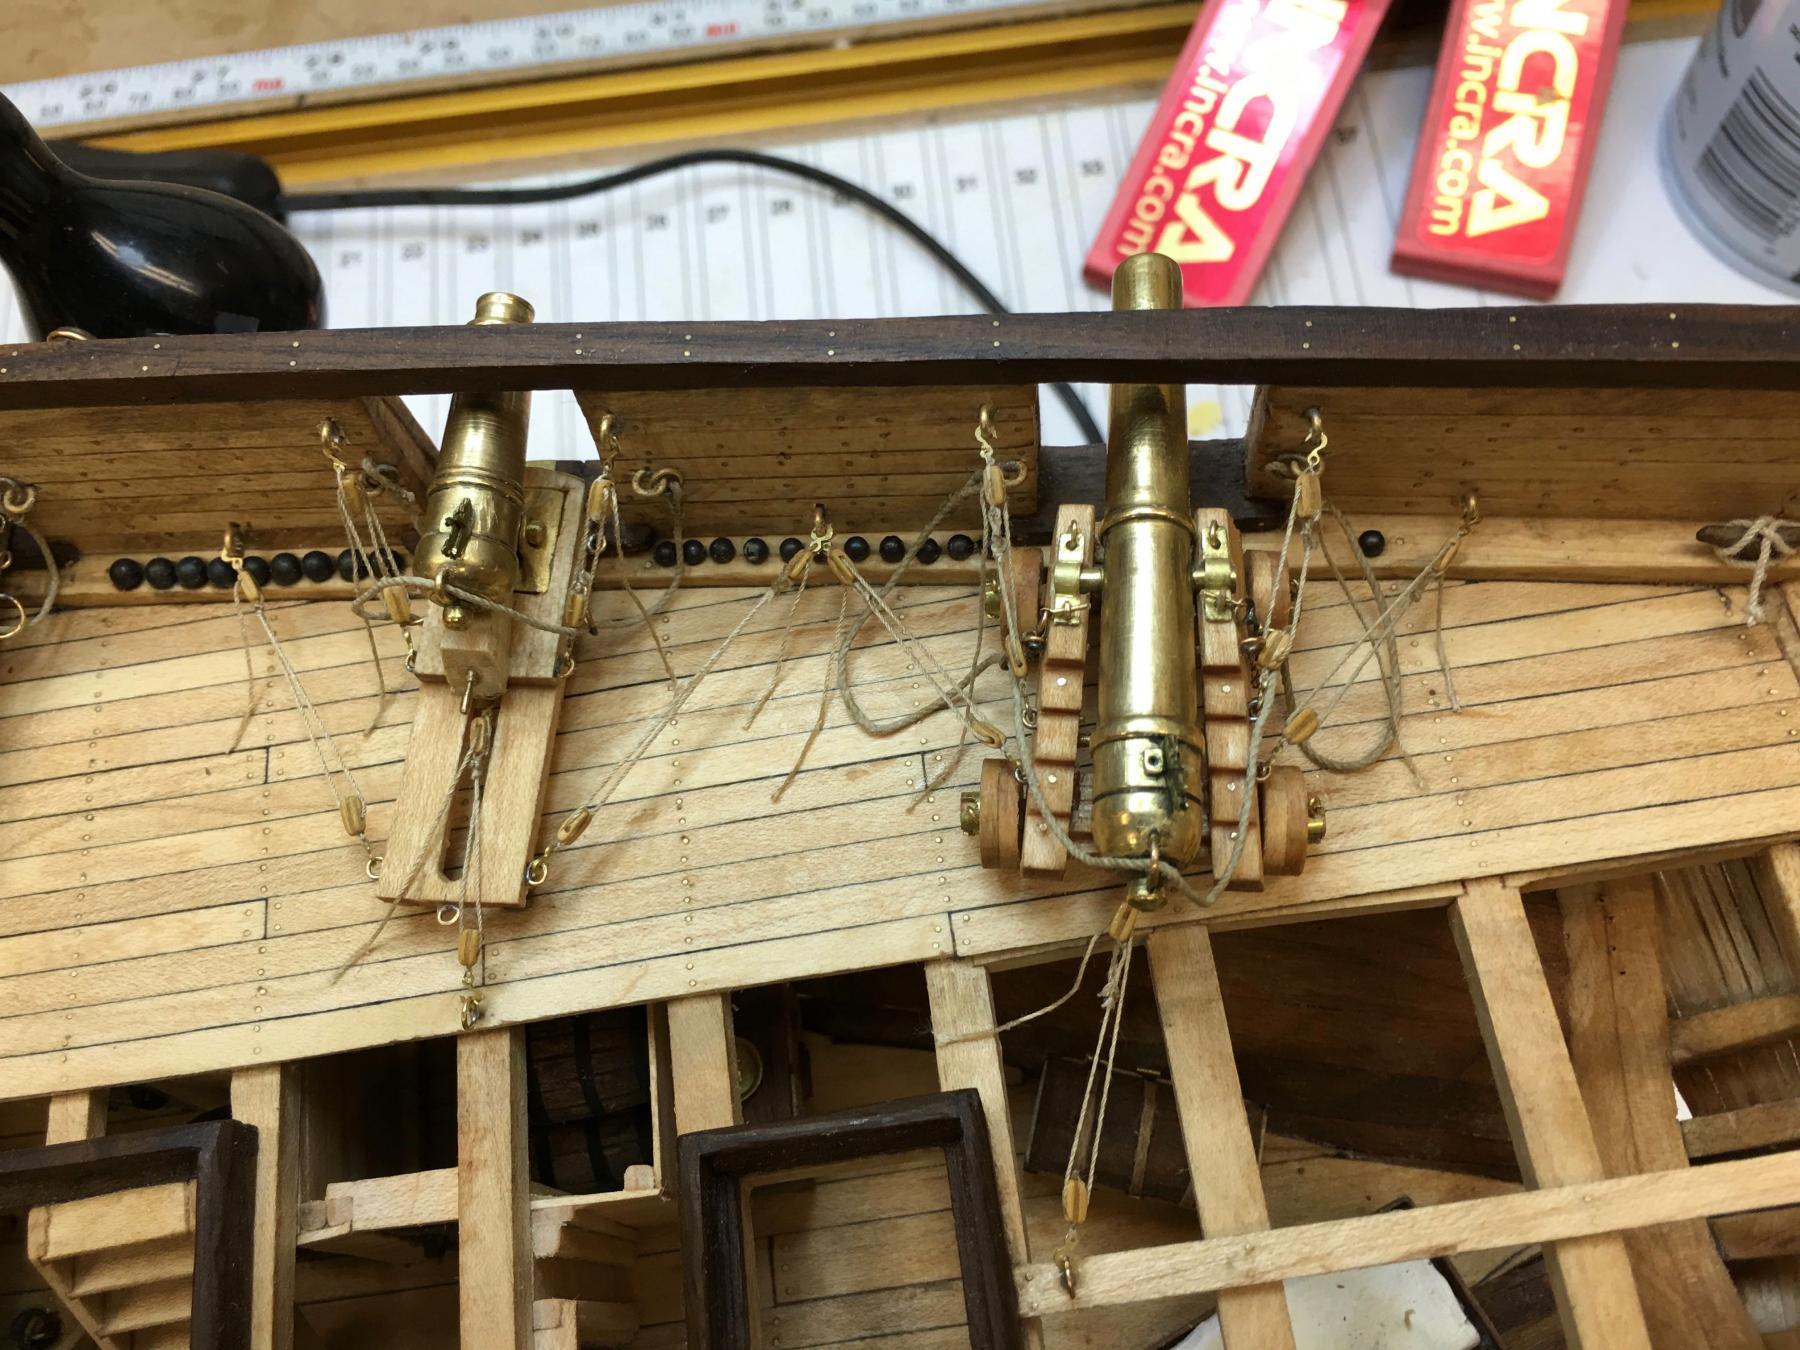
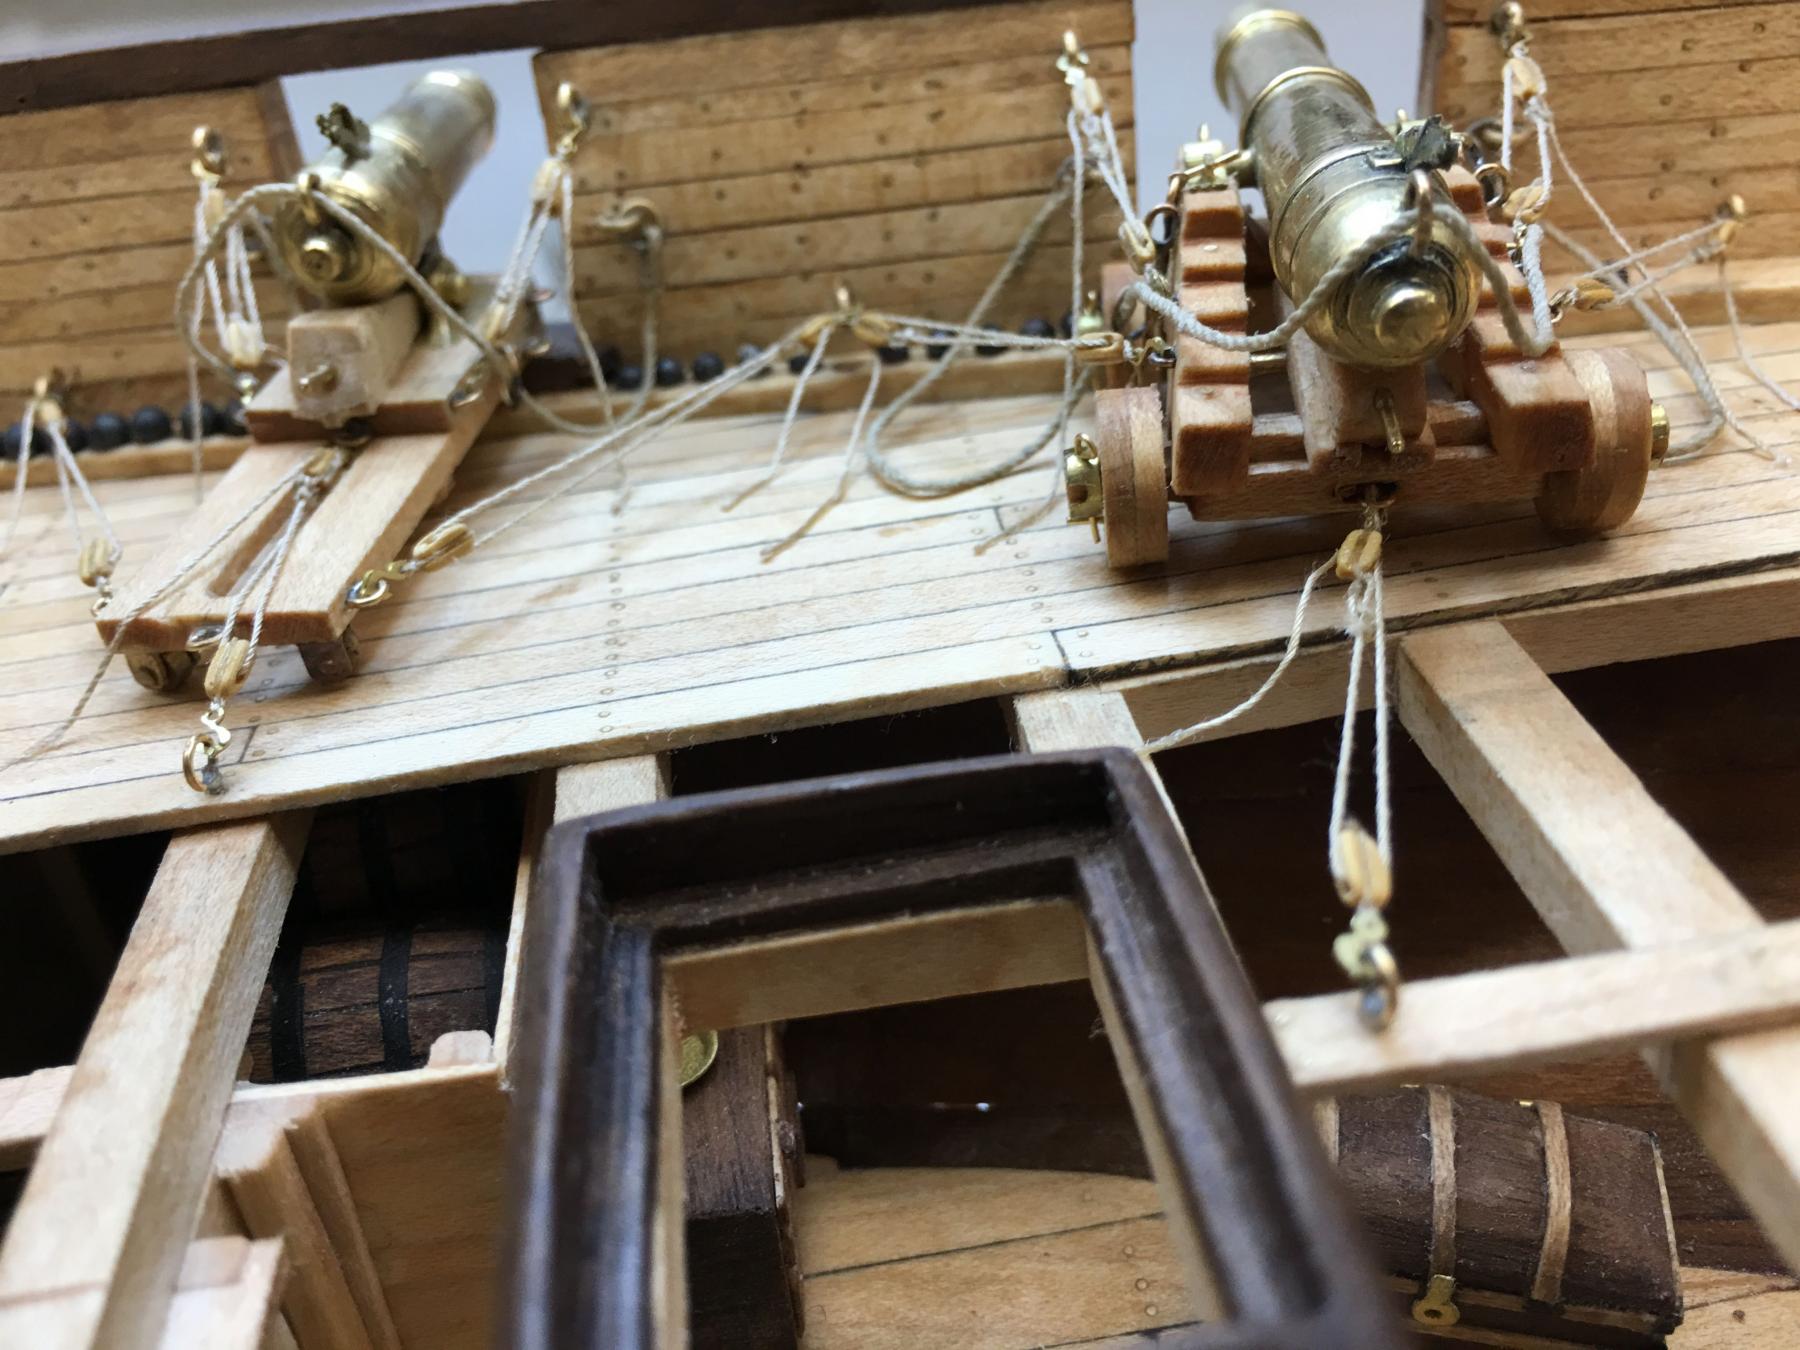
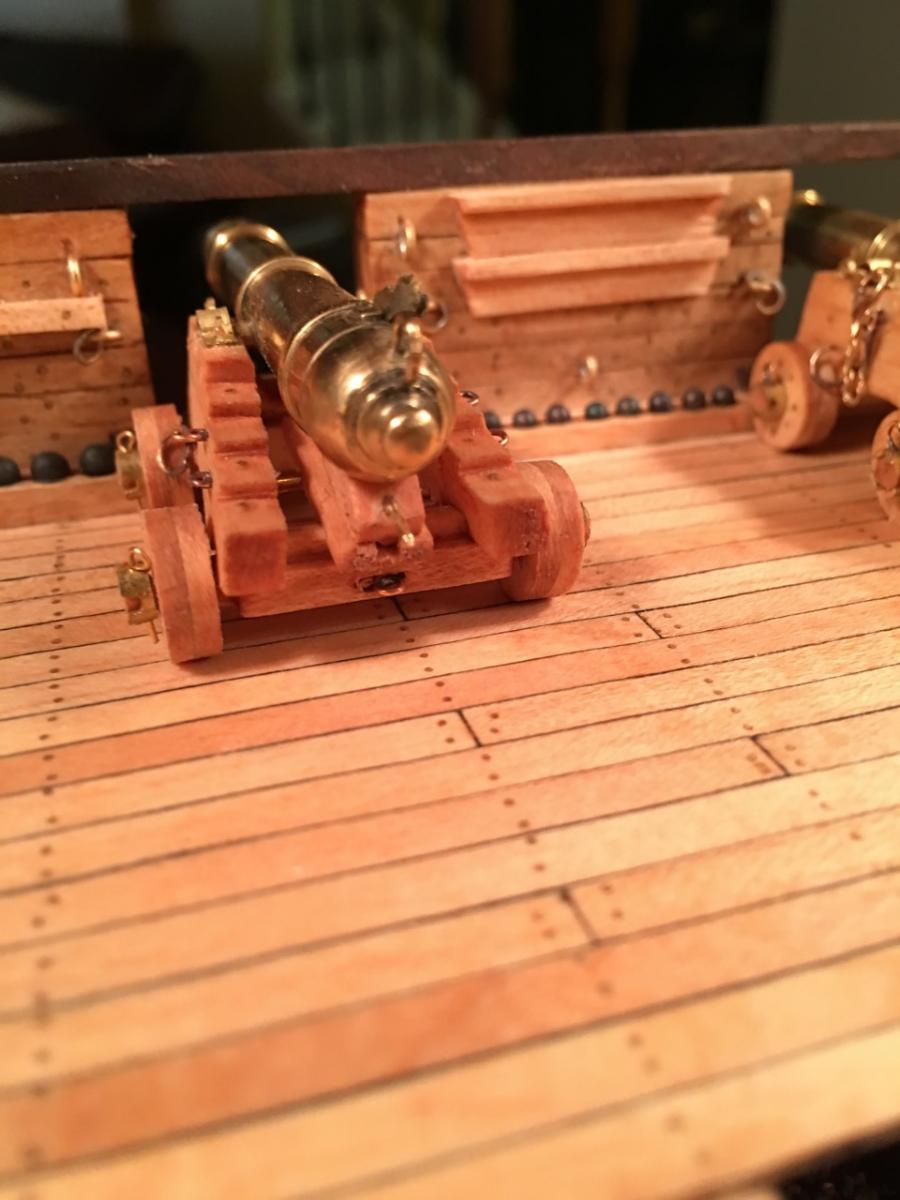
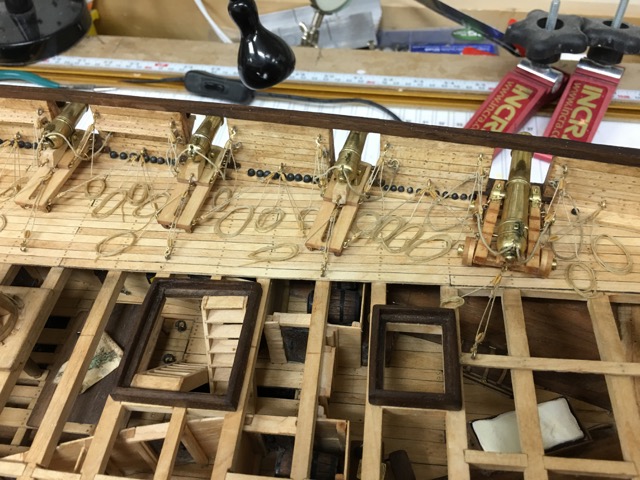
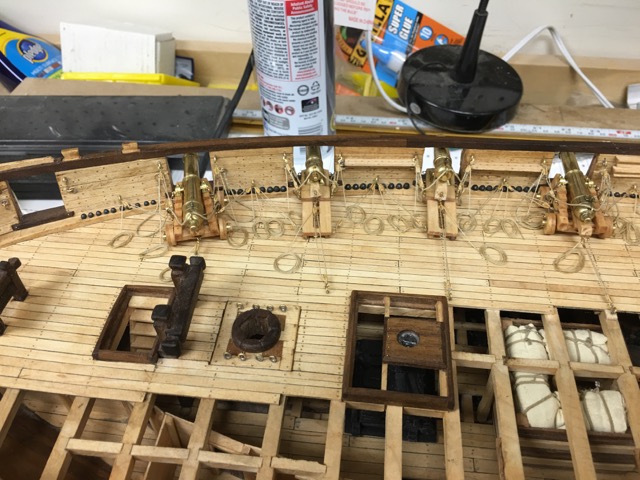
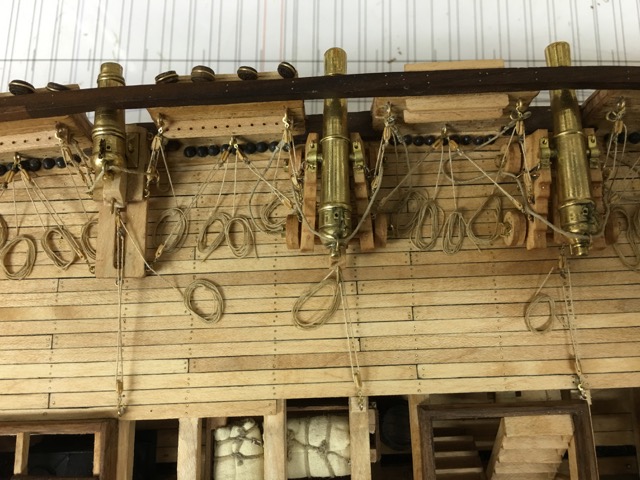
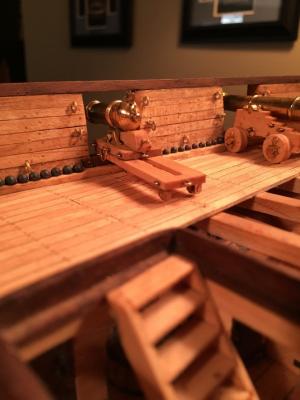
I have completed rigging the guns. I purposefully made the various coils inconsistent and a bit sloppy. Much of the crew of the Eagle had very limited ship experience. Since the guns are run out, the lanyards should not be neatly bound up, or in flemish coils. So this is what I ended up with. These would also have been unhooked before firing (I think) but having them laying on the deck really would have looked terrible. I will still play with the shape of the breeching lines, but this is close. Now it is on to the masting. I just received my new rotary table for the Milling machine. I should be able to mill the masts in a horizontal position. However these are still in the box, so I will need to play with them a bit.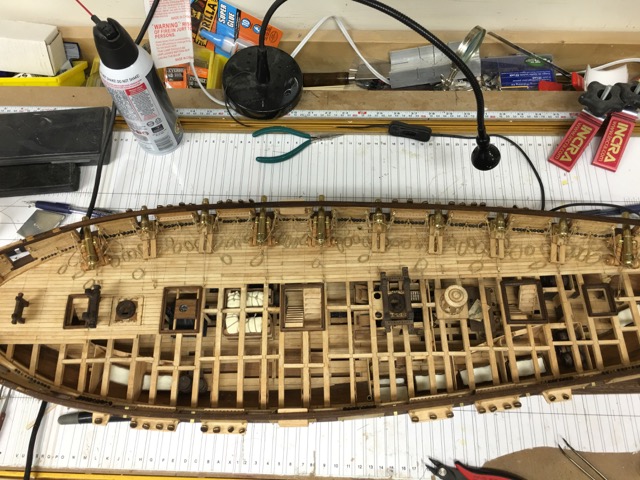
- 186 replies
-
- 26
-
-
Metric vs English
robnbill replied to jdiven's topic in Building, Framing, Planking and plating a ships hull and deck
I primarily use metric in my builds although for some things, such as scale rope, I use inches. No reasoning other than it is what I do. I find working in metric much easier. -
Brig Eagle by robnbill - 1:48
robnbill replied to robnbill's topic in - Build logs for subjects built 1801 - 1850
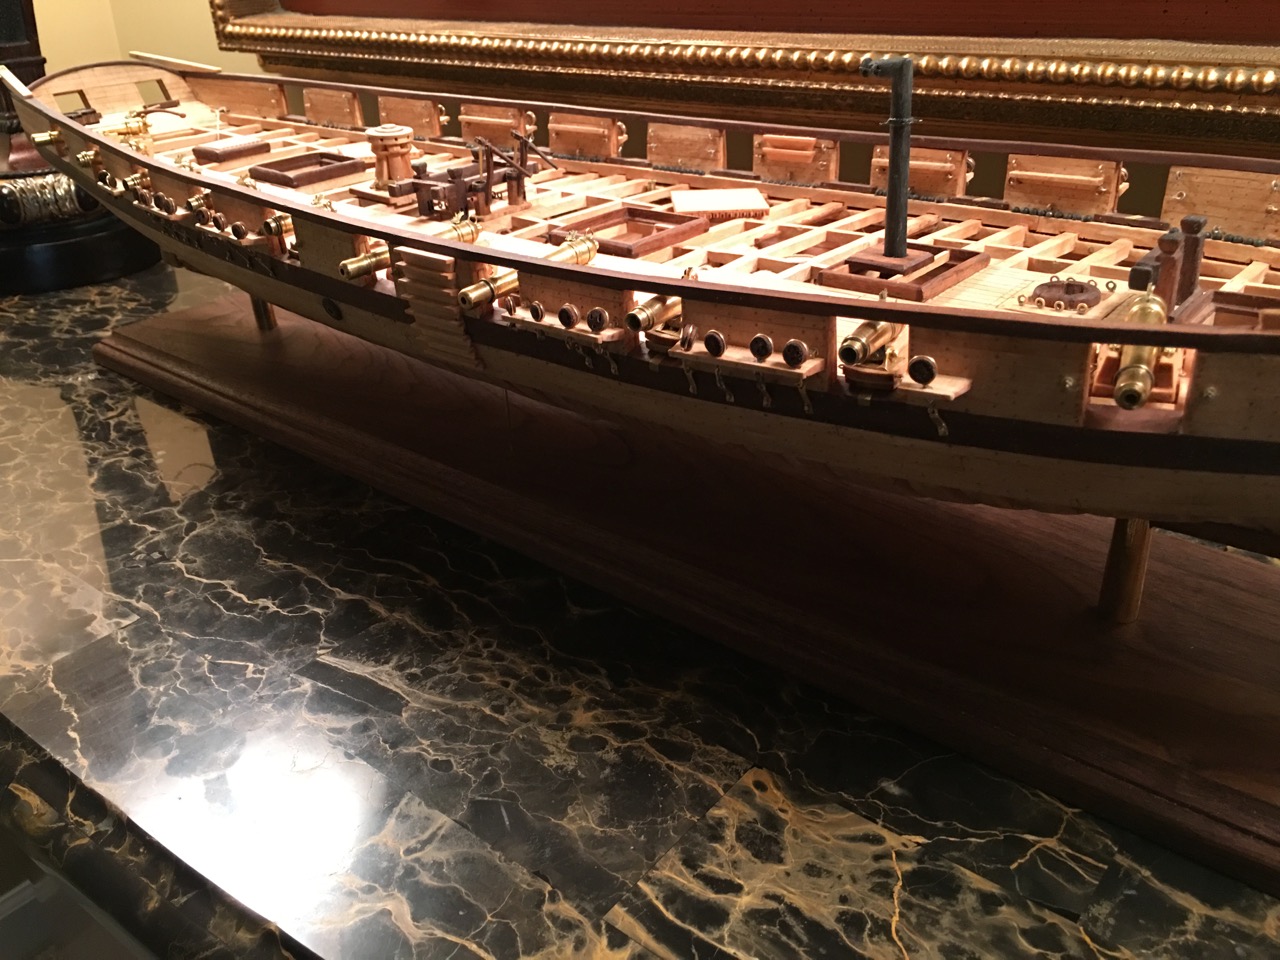
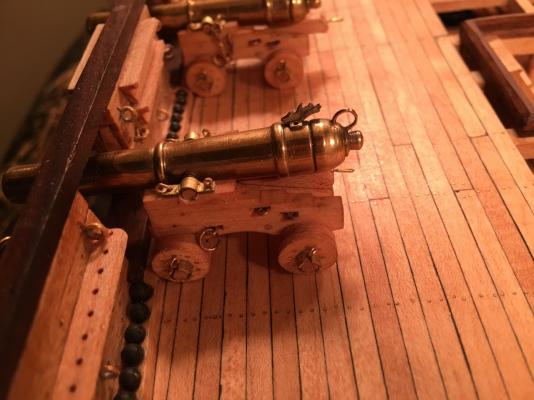
I am sorry I have taken awhile to update the log but I have been busy with the ship. In preparation for rigging the cannon/carronades I needed to accomplish a bit of homework. First, I needed to draw up the hooks for the rigging. This was etched into .015 brass sheet. This would be the equivalent of a ¾" thick hook. I also really wanted to spend dedicated time to work with the Byrnes Ropewalk to I have spent some dedicated time working on the Byrnes Ropewalk to test materials (silk, cotton, and linen), and to derive formulas for achieving the various rope scales I would need in the rigging. I will post more details on this later but have decided most of the rigging will be cotton. Once this was accomplished it was a matter of starting the assembly of the cannons to the ship. The long guns were pinned through the rear trucks and the carronades were pinned through the sled and quoin. The breeching lines were all seized to the breeching rings previously installed on the ship. Next I started rigging the blocks sets to the cannons starting at the stern long gun and working forward. The huge lesson learned in this is silk line and photo etched hooks do not mix well. The sharp edges of the brass damaged the strop sufficiently to cause them to break as I tried to rig them to the ship. I have switched the silk out with cotton which stands much stronger against the brass edges. As the cannon are rigged, the loose end of the lanyards are cut and glued to the deck. Later coils will be glued over the ends. Since the cannon are fully run out, the coils will not be Flemish coils or tied up in neatly but similarly to those shown on the photo below. These are temporary coils (not final). Here is a photo showing the first long gun and carronade rigged. The lines have been terminated where the coils will later be glued. ] Anyway, that is where she is currently, I will update again once the cannon are all rigged.


- 186 replies
-
- 22
-
-
Elijah, she is looking great. You did a fantastic job on getting the hull nice and smooth. Planking can be a lot of fun once you get your head around how it works. There are a number of great books as well as short papers on this and other sites on exactly how to do it. Just like when you started faring the solid hull, there are unique challenges/skills to learn in this step, as there will be on every step of the ship. Keep up the great work.
- 701 replies
-
- 5
-
-
- phantom
- model shipways
- (and 1 more)
-
Elijah, Sorry to just be catching up again with your build log. I noticed you had questions on how to read a body plan (post 175). I would suggest that you look at the Eagle Practicum developed by Gene Bodnar. The practicum covers scratch building the Eagle but extensively discusses how to read the various ships drawings you find when looking at ship's drawings. The practicum is a great read even if you are not building the ship itself. More importantly, Gene explains in an easy manner how to read the various lines. The practicum is free on the Model Ship Builder forum here - http://modelshipbuilder.com/page.php?183. The MSB forum is not as busy as this one, but it also includes some fabulous builders.
- 701 replies
-
- 6
-
-
- phantom
- model shipways
- (and 1 more)
-
I airbrush using Tamiya matt clear coat.
-
Brig Eagle by robnbill - 1:48
robnbill replied to robnbill's topic in - Build logs for subjects built 1801 - 1850
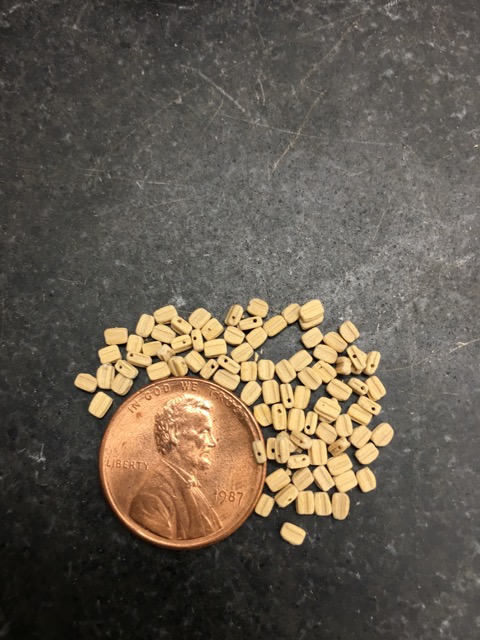
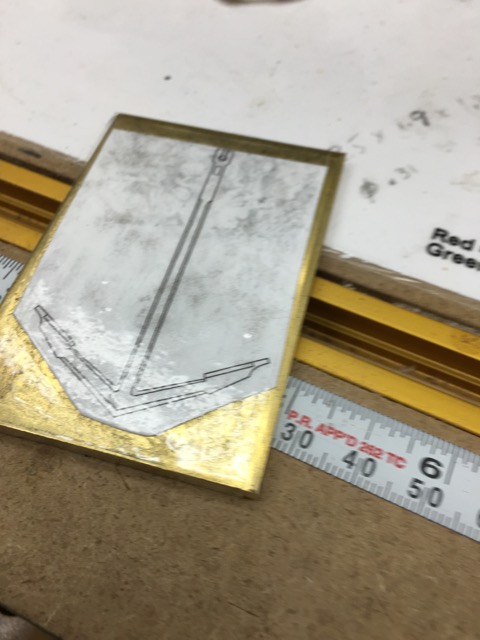
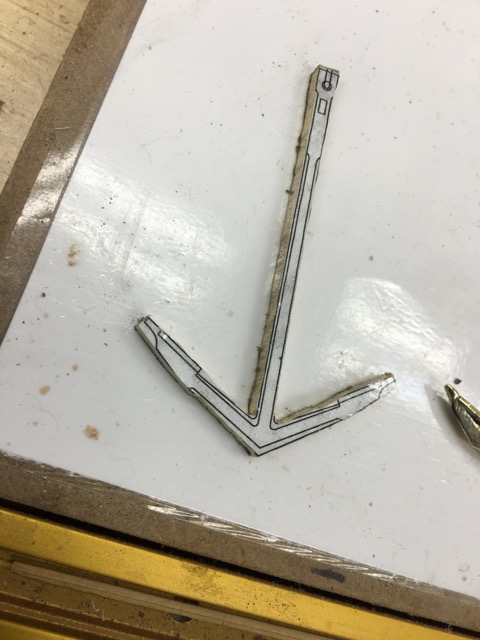
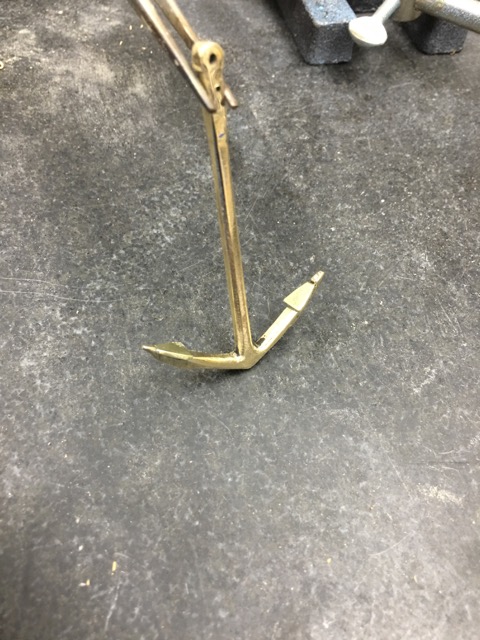
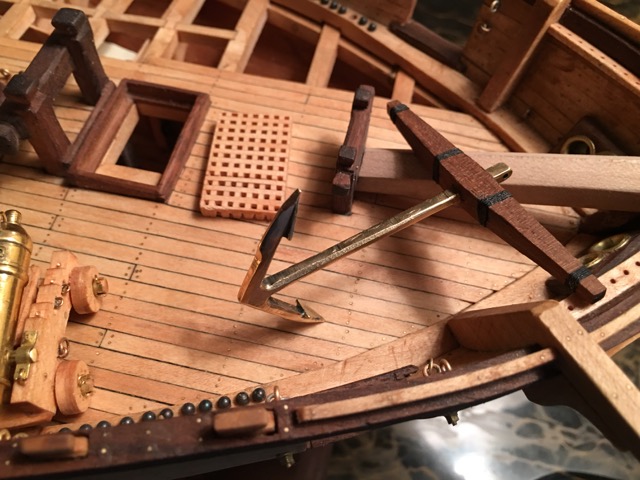
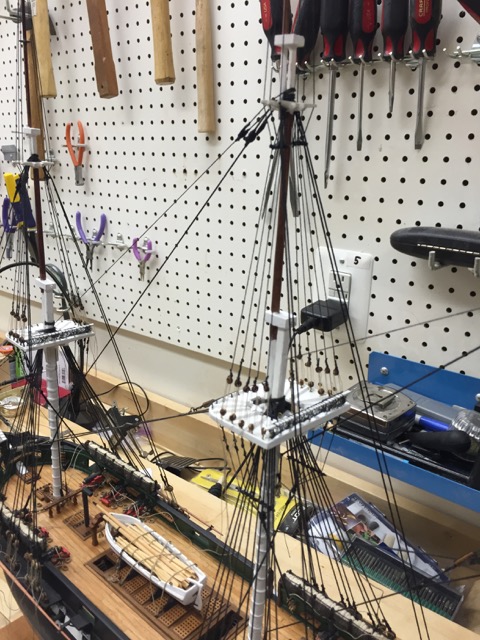
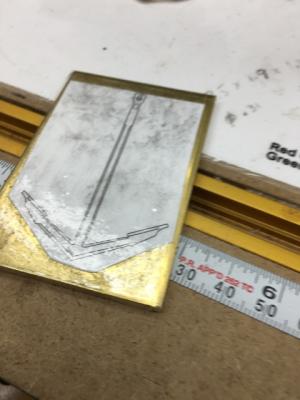
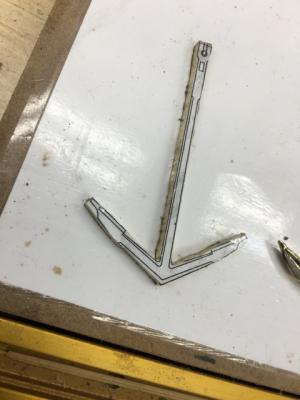
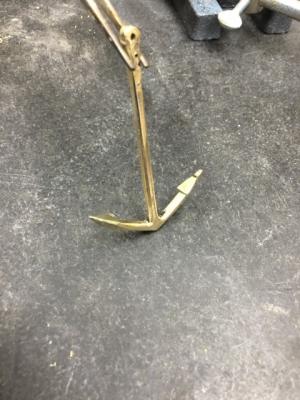
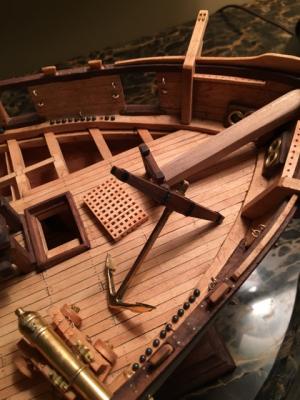
The last month has been in fits and starts. I made all the blocks to rig the cannons out of boxwood. Here is a shot of the smallest blocks. these are the single two mm blocks. Most of this work was done with the mill followed by shaping in the block tumbler. Next I started working on the hooks. After a number of different attempts at bending hooks that a 1) liked and 2) was extensible to 200 hooks, I decided to use photo etching to make them. I have completed the artwork but am waiting on some supplies for the process. I also had a setback on the rigging lines. I pulled the Byrnes ropewalk out to make the left hand breeching lines and found the control unit shorted out. Jim was very responsive and hopefully I will have the new control unit within the next few days. Since rigging was at a standstill, I moved on to the anchors. I used ⅛" brass plate to make these. I drew up the plans in DeltaCAD and printed them at scale. The pattern was glued to the face of the brass and taped over with clear packing tape. The tape acts as a lubricant during the cutting process. This shows the anchor ready to be cut out. Here is the anchor roughly cut out on the bandsaw. I used a combination of the Dremel tool, hand files, and disk sanders to smooth and shape the rough anchor. Once satisfied, I used the power buffer to polish the anchor prior to attaching the flukes. The flukes were cut from thinner plate and roughly shaped. These were clipped into position with paste flux in the joint. The photo below shows this ready to solder. You can see the small pieces of solder cut and laying on each side of the joint. Once I was satisfied that everything was in it's proper position, I hit the joint with the micro torch. This only required seconds to heat the joint enough for the solder to flow into the joint. Then it was back to the files to clean up the joint and do a final polish on the power buffer. Here is the anchor ready for the stock. The stocks were cut out of walnut with the halves glued together around the shaft. Once glued, the final shaping was done and banding added with black rope. I still have to make the rings, but the preponderance of the work on the anchors is done.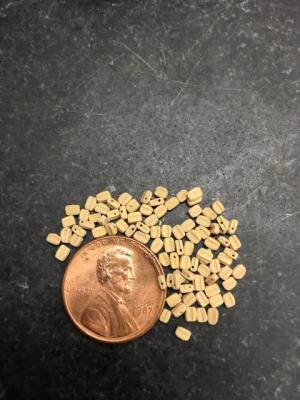


- 186 replies
-
- 22
-
-
ARGHH!!....Making A Mouse For Stays
robnbill replied to bigcreekdad's topic in Masting, rigging and sails
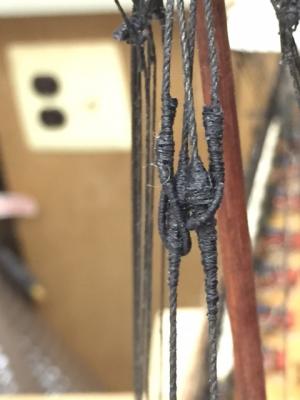
Since my Connie was 1:93, these were fairly small. So I used my serving machine to wrap black line over stay until I had the correct shape. Then I soaked this in thin CA and let it dry. This gave the the correct shape.
-
Brig Eagle by robnbill - 1:48
robnbill replied to robnbill's topic in - Build logs for subjects built 1801 - 1850
Glenn, I welcome your input. Your work is so fantastic. I poured over your photos on the Texas A&M site. Thanks! -
Glenn, I just put two and two together and realized it is your work I was admiring on the A&M site. Kevin Crisman pointed it out to me when I was discussing the Brig Eagle. Your work is outstanding.
-
There are a few books I would recommend. Since you liked Dr Crisman's "The Eagle", you would find "Coffins of the Brave" antertaining and enlightening book. This is a follow on book edited by Dr Crisman that focuses on the Lake Shipwrecks from the war of 1812, including the Niagara. "Historic Ship Models" by Wolfram zu Mondfeld is a great book for seeing what various period assemblies would look like as well as potential modeling techniques. I find it a great starting point reference. Both of these are available through Amazon. I know the Niagara is your first build. However your questions lead me to think you are leaning toward scratch building, or at least bashing your kit extensively to be more accurate. To really learn how master modelers tackle the practical aspects of modeling such as your questions on coamings as well as a host of other more historical build techniques you should look at practicums. There are many practicums available from those that are free to very expensive book series. I have found two series of books absolutely invaluable in my modeling. The first is the David Antscherl and Greg Herbert's four volume "The Fully Framed Model, HMN Swam Class". The second would be Ed Tosti's two volume set on building the HMS Naiad. All of these are available through Seawatch Books. While you may have no interest in scratch building these ships (yet!), they offer detailed methods for addressing modeling while remaining as historically accurate as desired. I say "as desired" because there are always compromises the modeler makes on the accuracy based on the scale, skills, talent and time he or she currently has to dedicate tot he task. Knowing how these masters accomplish the tasks allows you to make an informed decision.
-
A good read regarding the hurry and the resultant shortcuts they took can be found on the Texas A&M site. It is Dr. Kevin Cirsman's thesis on the Brig Eagle. She was also built by the Brown Brothers. THe site also has a plethora of great period information available for free from the various published Nautical Archeology dissertations. The dissertation link is http://nautarch.tamu.edu/Theses/abstracts/crisman.htm
-
Since you will be fully planking those areas, I would glue wood strips to them to build them out. Then sand that back when fairing.
- 3 replies
-
- 5
-
-
- fairing
- wood filler
- (and 2 more)
-
Mike, if you are interested, the Niagara Museum has plans from the 1987 restoration. While the original restoration was considered a sham, the 1987 one is not. In fact the Nautical Archeologist that documented the Brig Eagle, used those plans as examples for rigging. The plans show many details of how the deck furniture was located as well as ship's boats, rigging etc. I highly recommend if you are building the Niagara, to get these supplementary plans. The link to the plans is http://www.flagshipniagara.org/erie-maritime-museum/visit-the-gift-shop/gift-shop/. Bill
-
The Bismarck was 823' long. According to Wikipedia, the AnQing was 112meters or 367 feet. 1:350 means 1" is equal to 350" on the ship. If you divide 350 by 12, you get how many feet per inch the model represents. This means that 1" in the model is equal to 29.2' on the ship. So the Bismarck at 823' would equal a model of 28.18". The AnQing at 367' would be 12.56"
- 1 reply
-
- 4
-
-
Each Cannon would have had about 10 blocks. There would also have been blocks in the lifts for handling the ship's boats.
-
Brig Eagle by robnbill - 1:48
robnbill replied to robnbill's topic in - Build logs for subjects built 1801 - 1850
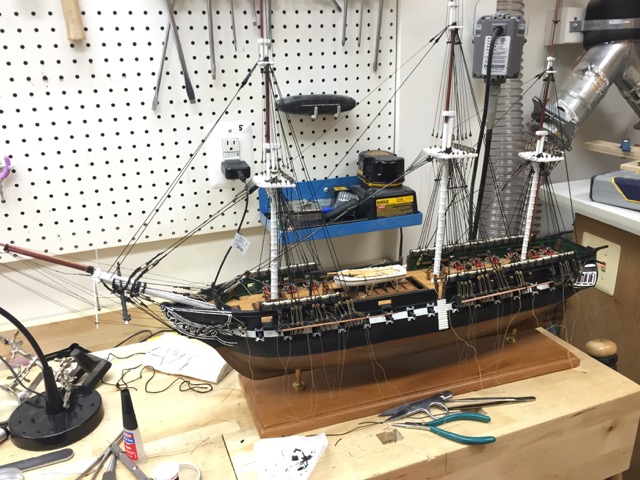
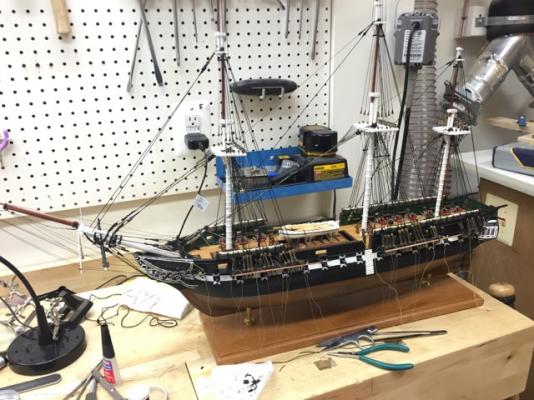
Wow the time flies. It has been slightly over a month since I updated my log. However, I have been quite busy with the ship as well as updates to my shop. Since the cannon/carronade construction was covered in detail earlier in the build log, I did not want to duplicate this but rather update the long once they all were done. First, the shop. In preparation for my next build as well as getting to the next level in my tools, I decided to ditch my router table and drill press and use the space for a new mill. I looked at all the various mills and decided to go with a full size mill with a digital read out. I have had great luck with Grizzly tools and their support as been great on all my previous tools. I chose the Grizzly G0759. This is their widely popular G0704 with a built in DRO. This is accurate to 4 microns and will display in either inches or millimeters. By going with a full size shop mill I will be able to work on larger items as well as the detailed work that our modeling demands. So far I have been very happy with the new mill. I have a great deal to learn but it will be a fun challenge. When I last left the log, I was ready to start working on duplicating the cannon and carronades based on the prototypes I built last September. The barrels were all turned and the gunlocks assemblies had been etched. I needed to duplicate the carriages and make the associated hardware. I started with the long guns and then moved to the carronades. Between the long guns and the carronades, I installed the mill. To the first task I completed on the mill was to cut the mounting yokes and mounts for the barrels. I found the long guns/carronades to be a fun sub project. My next project will be to mill the blocks for the cannon rigging. Once the cannon are rigged, I will start building the masting. Here are some shots of the Eagle with the armaments in place. This shows the carronade from inboard. The working castors can be seen here. They are not completely on the deck at this time. They will be adjusted/fine tuned during the rigging process. One of the long guns from the side. This still needs the cap square pin installed. This is the long gun from inboard.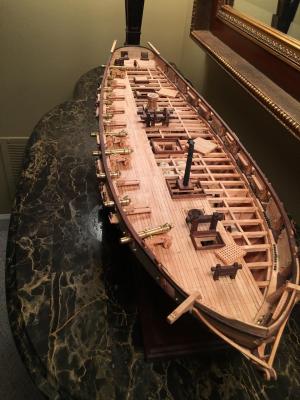


- 186 replies
-
- 20
-
-
Michael, your techniques are always so instructive. Just like the tide, you lift us all.
-
I found that a number of different fillers worked depending on the situation. If it is a small crack that will be painted over, then the white speckling compound worked great. For small cracks that would be stained over, I tend to put some wood glue in the crack then sand over it allowing the dust to fill in the crack. If you are painting over an area and have a large defect to fill, then you could use epoxy in it's various forms since it can be sanded and shaped after setting. If you are staining, I have not found any filler that could be used on larger areas (other than a small crack) that would not show up after sanding. The manner it absorbs the stain and the texture give it away. If you are truing a first planking for a second planking, then almost any filler would do as long as it adhered well to the wood.
-
I think you will still find time to break off things. I seem to anyway!