
HOLIDAY DONATION DRIVE - SUPPORT MSW - DO YOUR PART TO KEEP THIS GREAT FORUM GOING! (Only 68 donations so far out of 49,000 members - Can we at least get 100? C'mon guys!)
×


TBlack
-
Posts
1,308 -
Joined
-
Last visited
Content Type
Profiles
Forums
Gallery
Events
Everything posted by TBlack
-
 It's beautiful work, and fun to watch you put it together. But now what happens to this work of art? Tom
- 189 replies
-
- 13
-

-

-
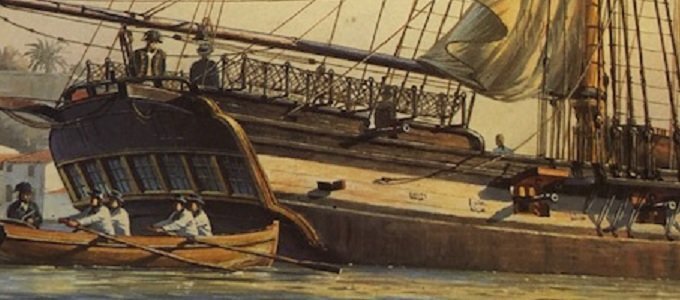
Keith, We know from the descriptions in the book that Sophie was, indeed, low in the water. So, the picture is accurate. Tom
- 341 replies
-
- 2
-
-
- Sophie
- Vanguard Models
- (and 1 more)
-
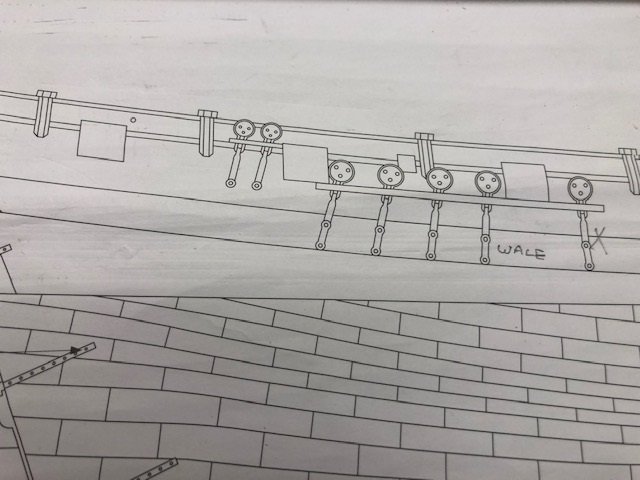
Also, if you notice in the photo, above, the main mast shrouds are attached to the black strake, and the wale is immediately below. Speedy's wale looks like this: Significant difference. Also notice that the wale in HMS Sophie follows the waterline along the after part of the ship. I need to do some drafting. Tom
- 341 replies
-
- 4
-
-
- Sophie
- Vanguard Models
- (and 1 more)
-
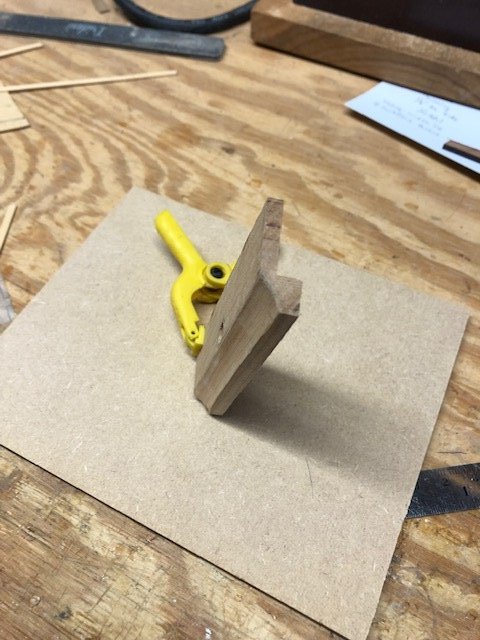
On the fourth try I've finally gotten this little bugger just right. There isn't a single 90 degree angle in it! Now I need to fix the location of the waterline and the wale which is guided by the picture: At the same time, I'm looking at where the quarterdeck bulwark meets the transom, carrying that line downward, and it looks like the outboard window is outboard of the hull line. Any thoughts? Tom
- 341 replies
-
- 4
-
-
- Sophie
- Vanguard Models
- (and 1 more)
-
Charles, I have one of these today, minus the flex shaft. And you are absolutely right on all points. It's amazing that I can get anything cut right. Tom
-
NRG VIRTUAL WORKSHOP - USING THE TABLE SAW
TBlack replied to kurtvd19's topic in NAUTICAL RESEARCH GUILD - News & Information
Roger, Do you need to use a special blade? Tom -
You mean the time they tried to drive the Jeep into the front hall? I think those are high standards! I mean who else would try that?
-
Dear Dr. I'm sure Allan can help you get to the bottom of your rigging question. I just wanted to mention that your model looks cracker jack, especially the carving. Tom
-
Great! Thanks, Greg! Oh, and what wood are you using to make your deadeyes? Tom
-
Greg, I'm having some difficulty tracking down the Euro Tools solder that you recommend. The link above doesn't seem to work, and Googling Euro Tools says page not found. So, where can a guy buy some? Tom
-
Every once in a while we're entitled to an "aha moment". I just had mine. Kevin, right you are, they are simple, and the aluminum arms should help. The standard clamps only have a throat of a couple of inches. I don't need a lot, but a 3-4" reach would be nice. Thanks for the tip. I owe you one. Tom
-
Several years ago, when Chuck Passaro was starting to offer blocks through his company, he add a visual tutorial that showed how he mass produced them. Is that tutorial still available? In addition, my brother is holding up the standards of our family. Tom
-
Glue suggestion for connection
TBlack replied to Koopyetz's topic in Modeling tools and Workshop Equipment
I'm sure the titebond is adequate. Any way to clamp the wale in position? I like elastic bands with a piece of wood between the wale and the band. Possible? Tom -
Mark, Good luck on the op, and speedy recovery. And thanks for following my log. Tom
- 505 replies
-
- 7
-
-
- vanguard models
- Sphinx
- (and 1 more)
-
Keith, The ice might melt before we're ready to celebrate. Tom
- 341 replies
-
- 3
-

-
- Sophie
- Vanguard Models
- (and 1 more)
-
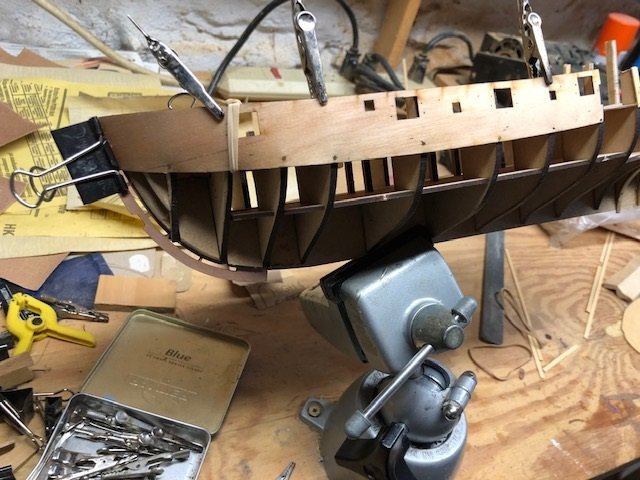
I've gotten the other side bulwark pattern in place which allows me to put the aft bulkheads in place: Because the aft bulkheads now don't have the same curvature as originally designed, they are slightly longer (now going in a straight line as opposed to arcing}. See the line I've drawn above. But also, the width between the port and starboard bulkheads now really needs to be determined. I've been using a template that measures 3.5", but that is just a guess. On the plus side, where I drew the counter on my plan and where it needs to be "as built" is coming out perfectly. I may actually be able to pull this off! Tom
- 341 replies
-
- 5
-
-
- Sophie
- Vanguard Models
- (and 1 more)
-
Kevin, Did you show the clamps earlier on in your log? If not I would like to see how you build them. Tom
-
Kevin, Nice haircut! That clamp with the very deep throat: is it commercially available, or is that custom made? You have created a work of art, and I wonder why the builders decided to plank the deck that way instead of straight planks. Tom
-
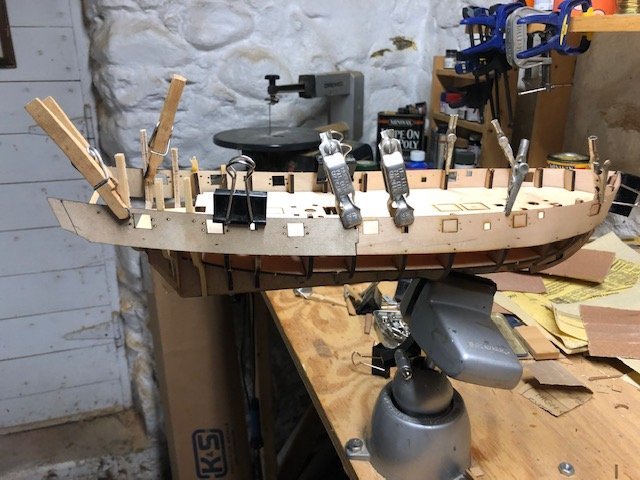
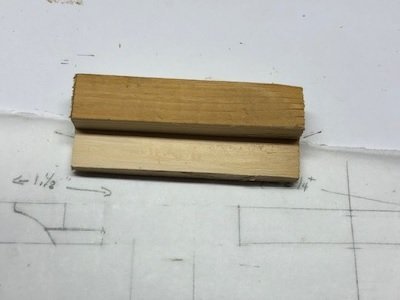
I started to make the counter piece and got this far: In trying to make the curves on the back end I managed to botch it up completely. Start again! So next I thought I ought to pay attention to Chris Watton's wonderful instructions which go toward the bow. I see from other Speedy logs that dealing with the side bulwark patterns can be interesting. Nevertheless, it's time to install on side at a time. Here is my first attempt now drying: At another site I recommended elastics and alligator clips, so couldn't use too many nails. Tom
- 341 replies
-
- 7
-
-
- Sophie
- Vanguard Models
- (and 1 more)
-
Mark, My experience with waterlines is a lot of fiddly work between black and white until it's right. So you're doing everything according to the book. Also, from this distance, the quarter galleries look good. Tom
- 505 replies
-
- 2
-
-
- vanguard models
- Sphinx
- (and 1 more)