MORE HANDBOOKS ARE ON THEIR WAY! We will let you know when they get here.
×


usedtosail
-
Posts
2,391 -
Joined
-
Last visited
Content Type
Profiles
Forums
Gallery
Events
Everything posted by usedtosail
-
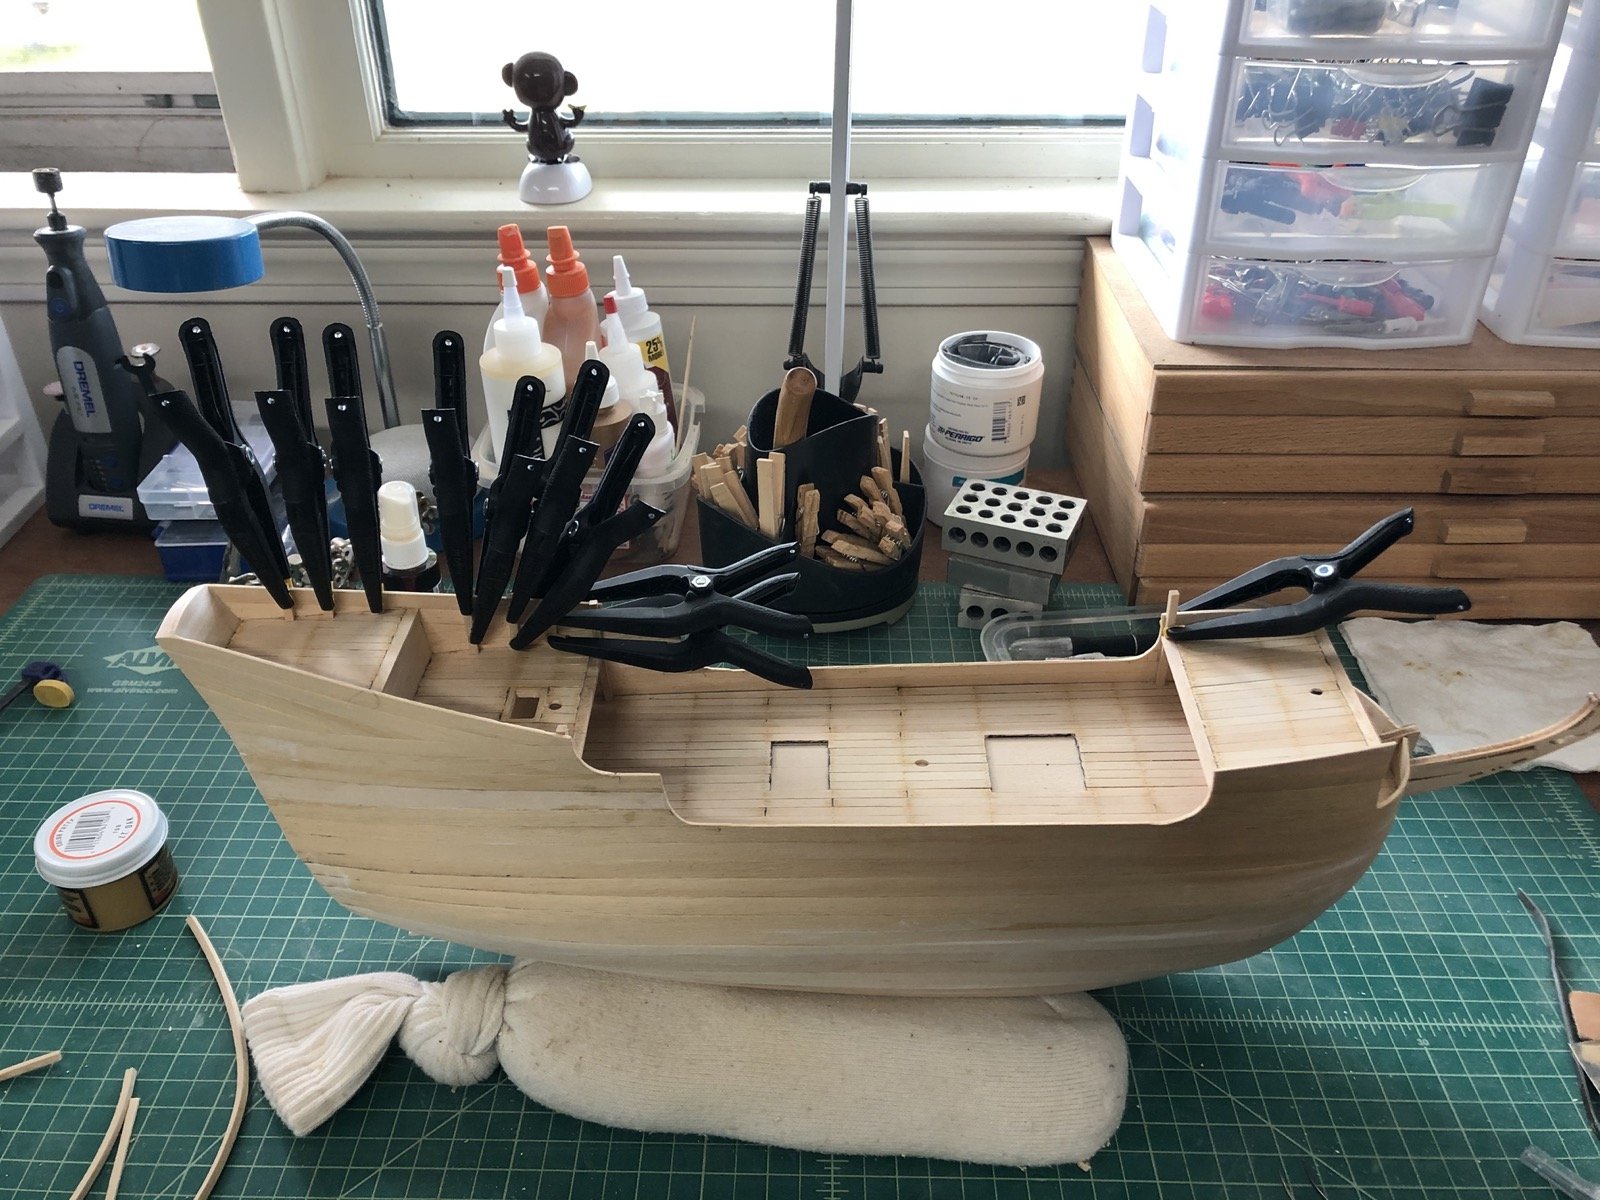
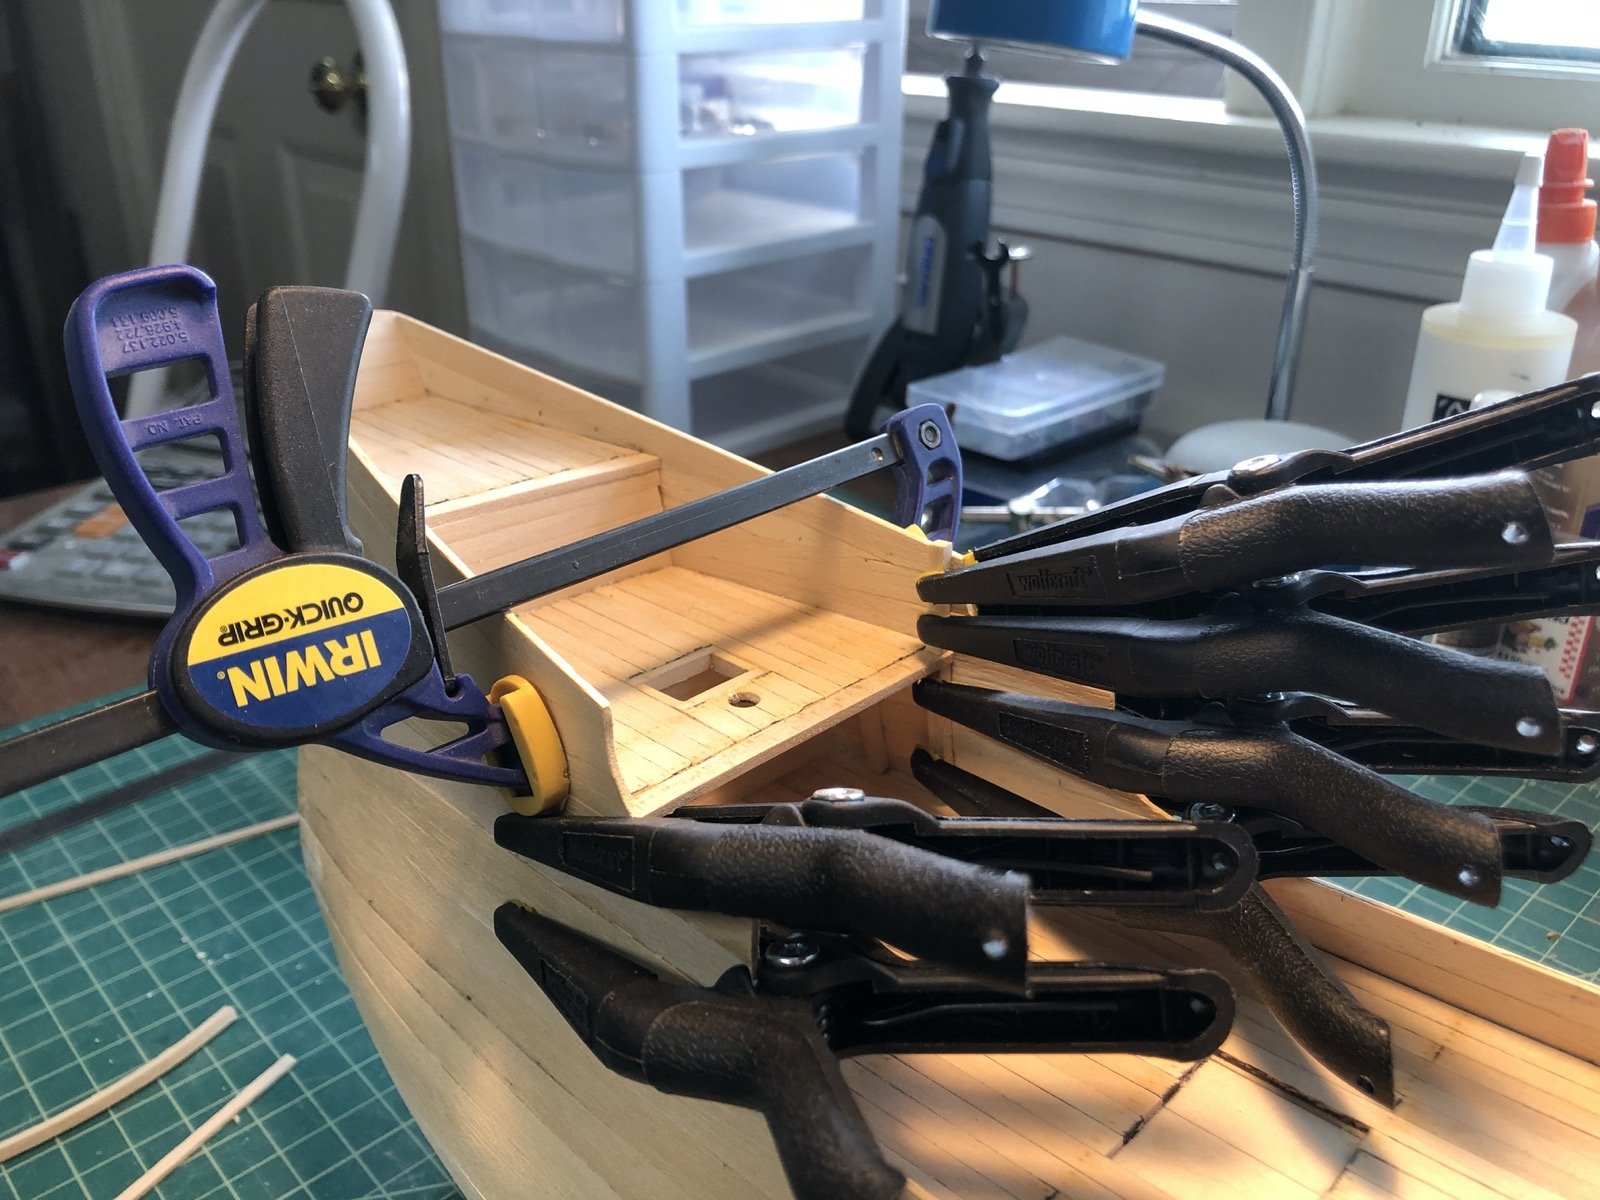
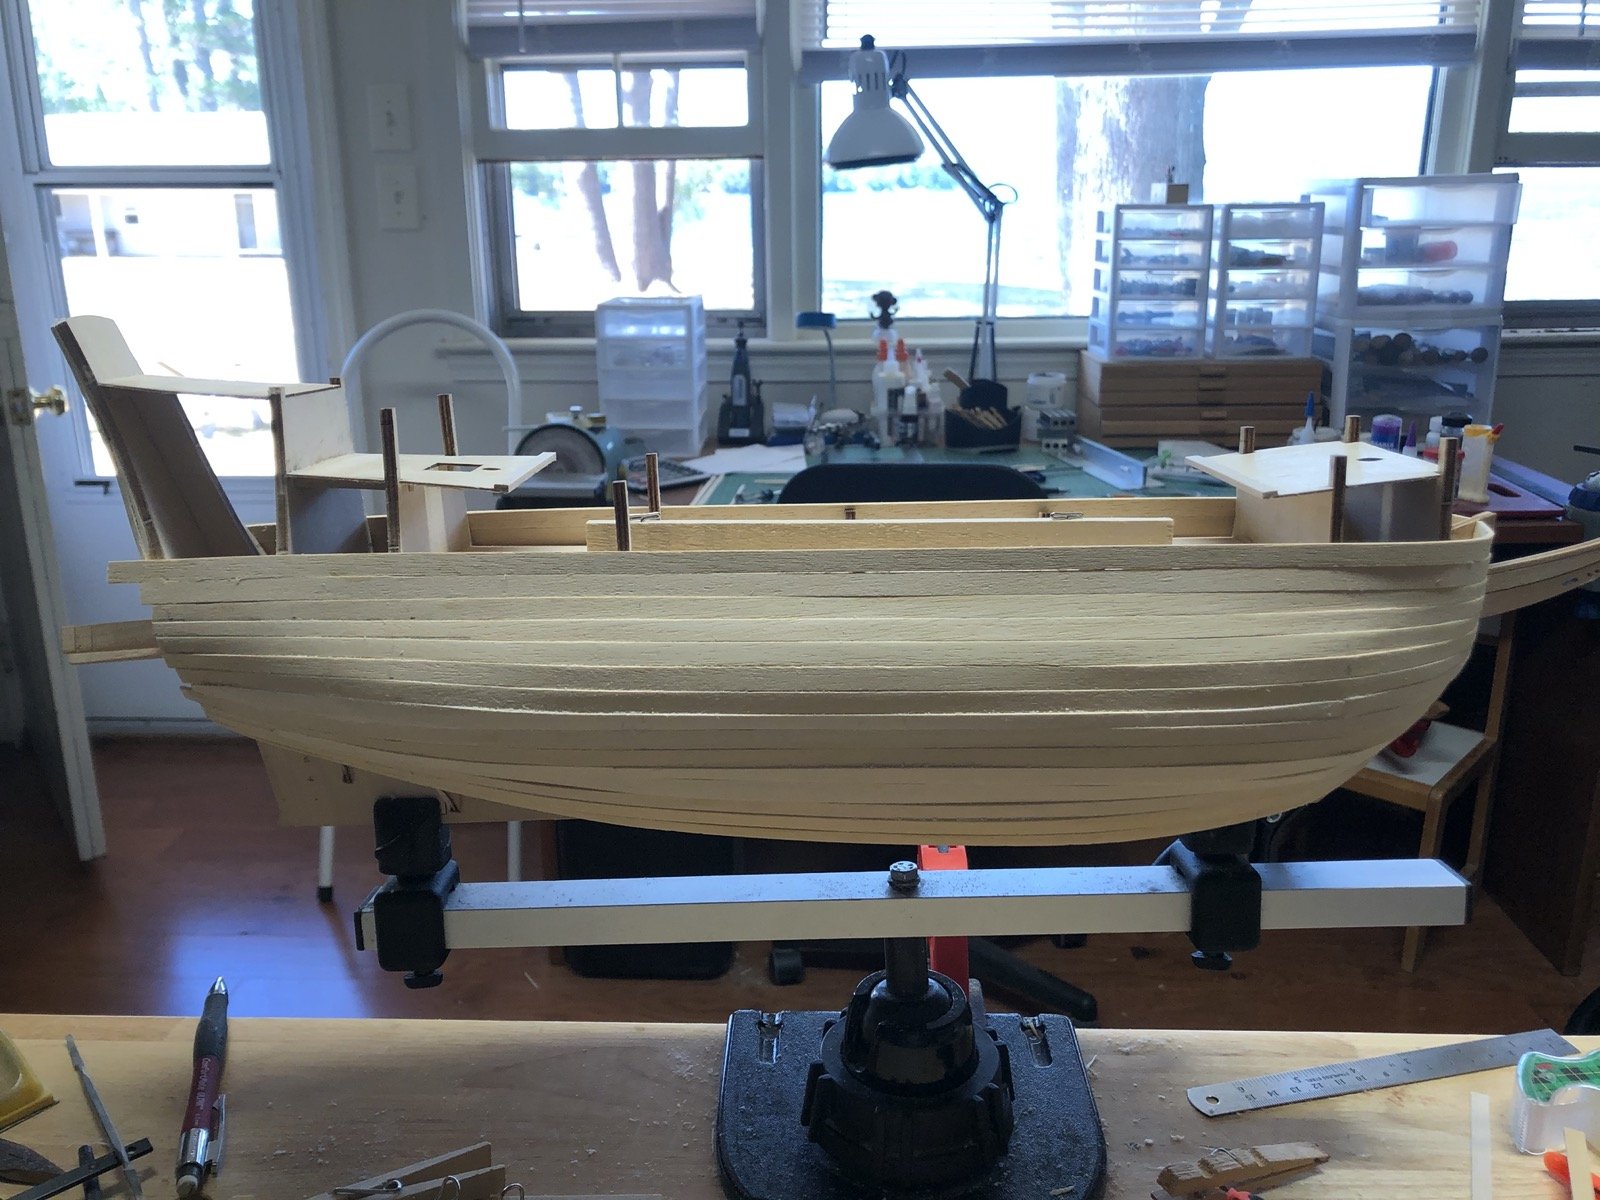
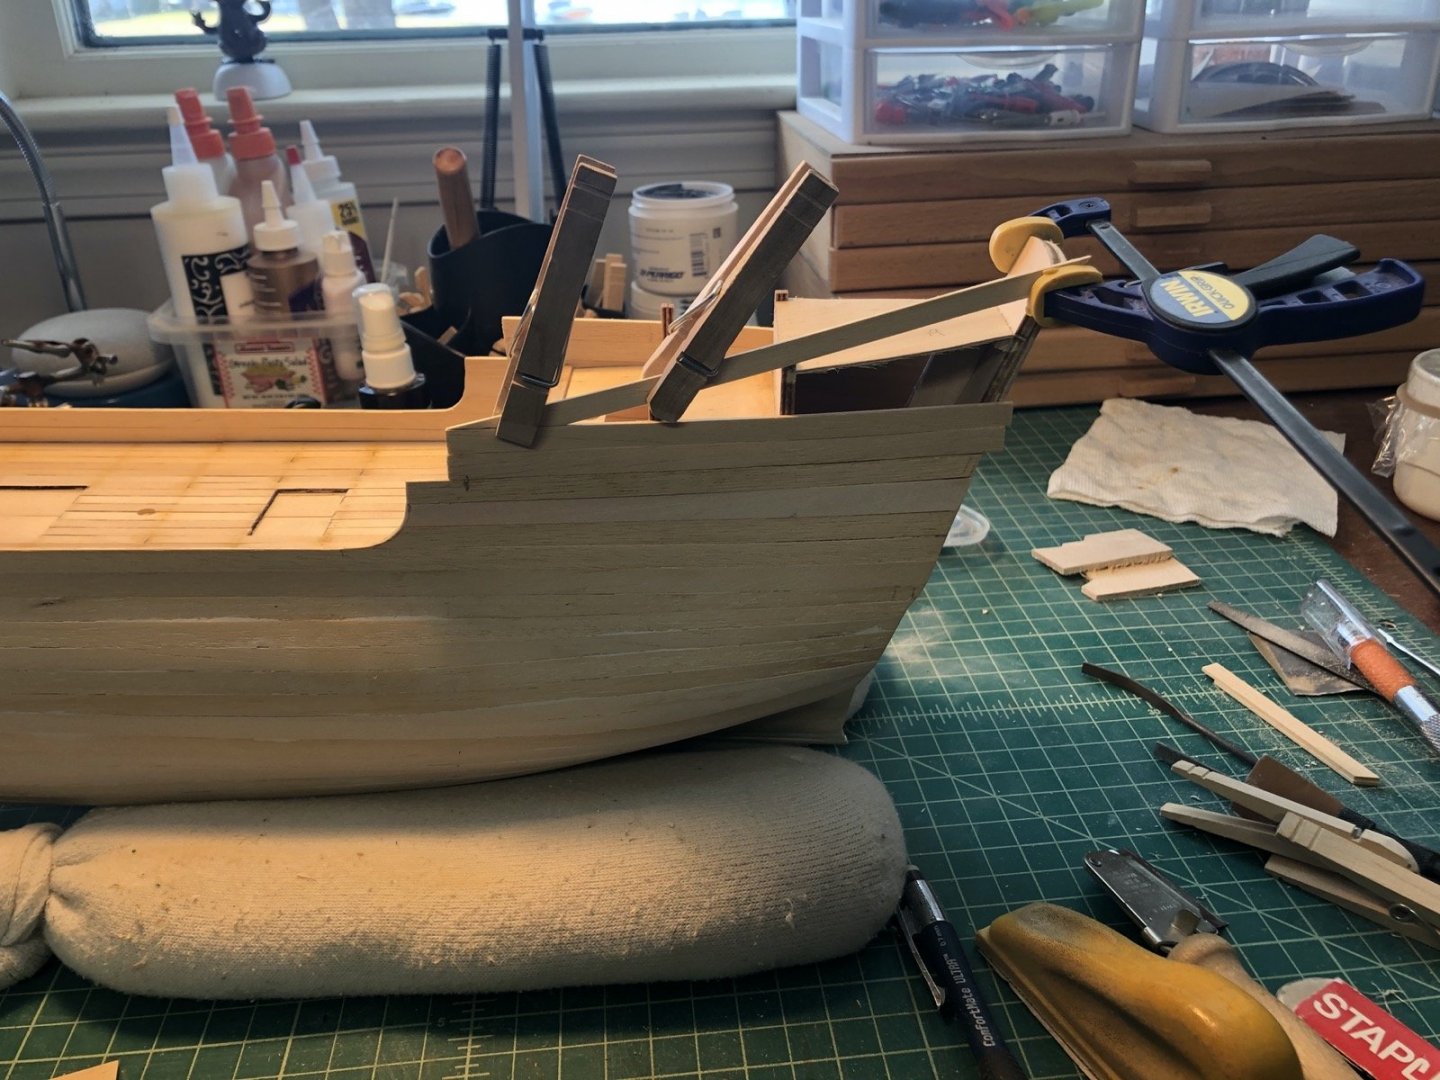
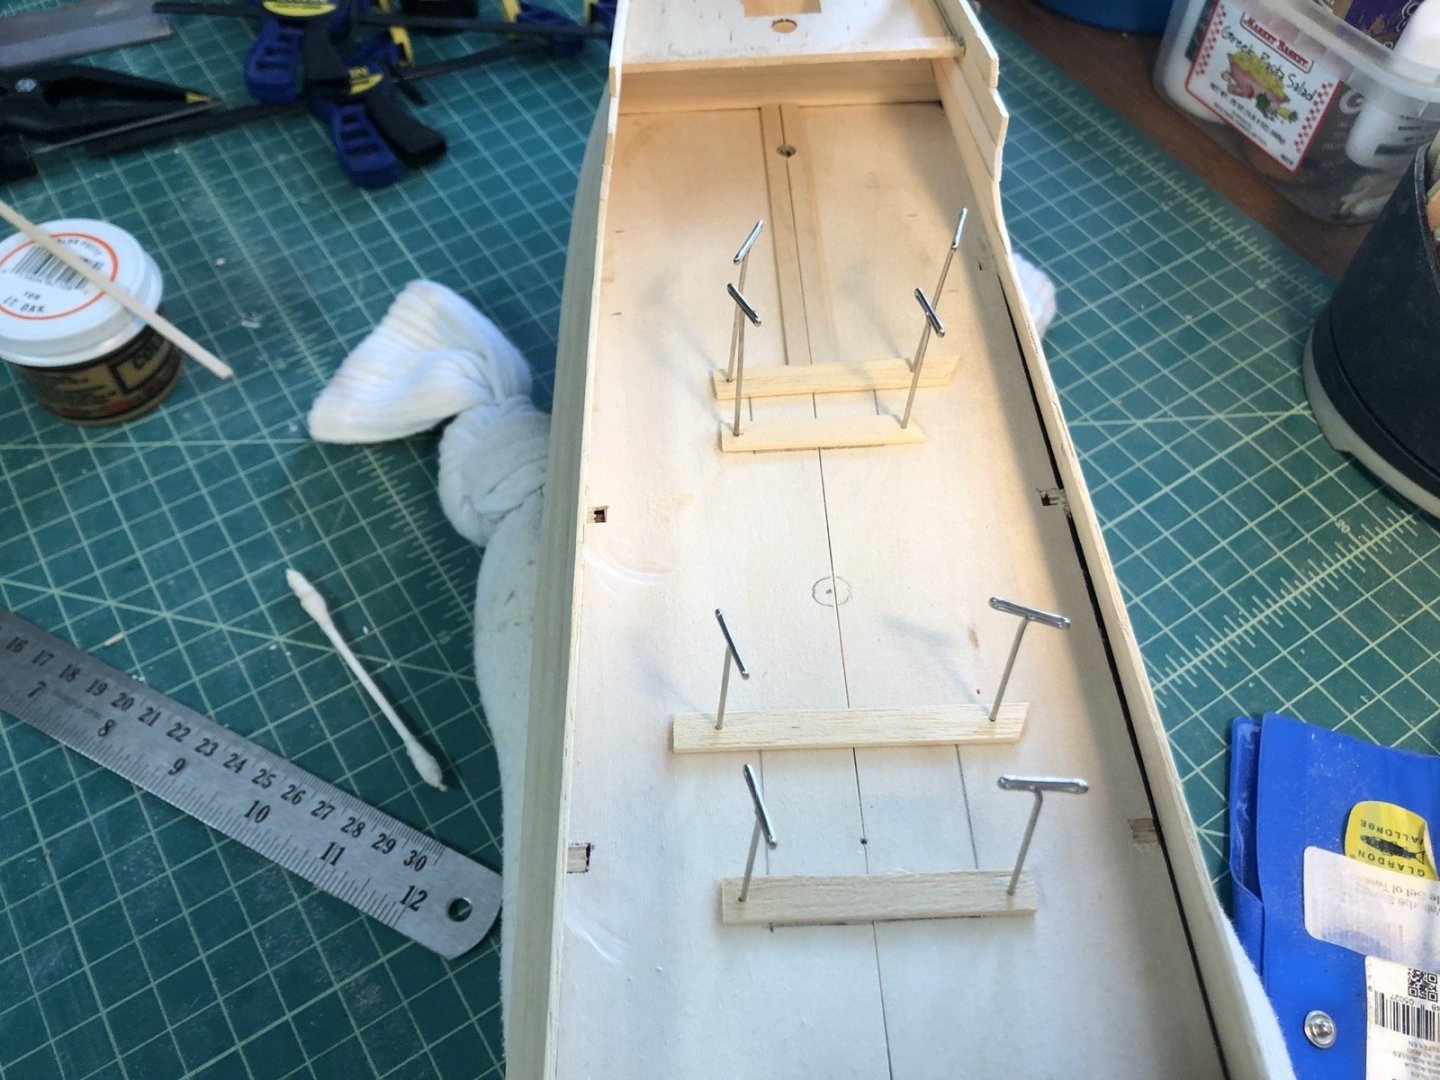
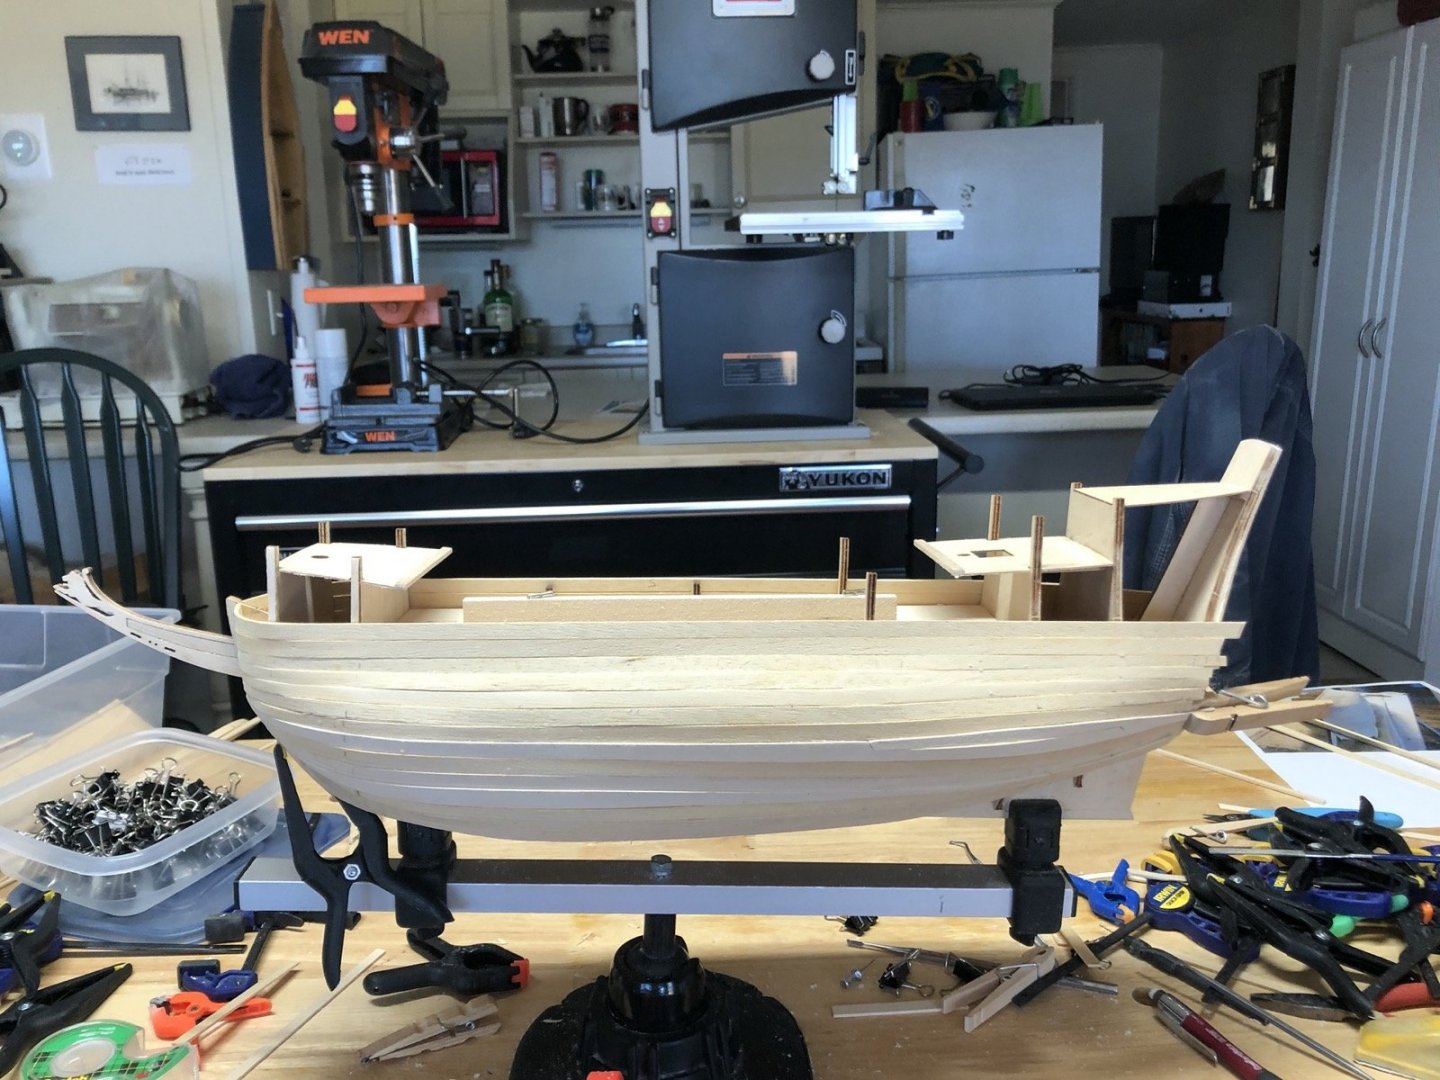
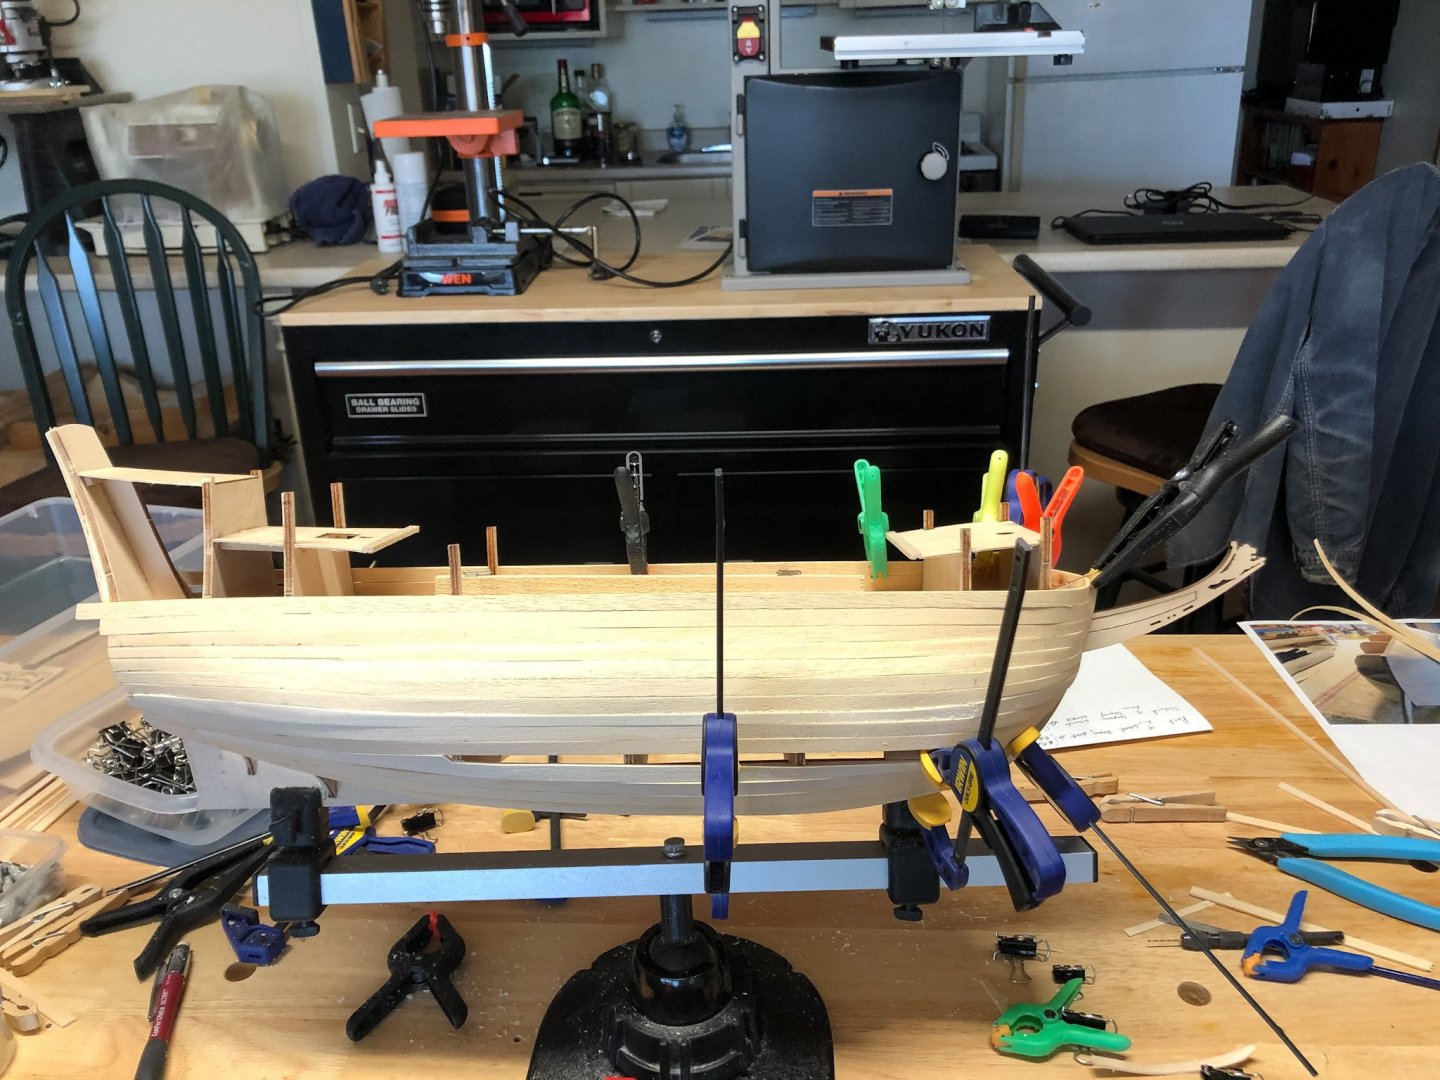
 I have started adding supports under the overhanging parts of the upper decks and the bulwark extensions. I am trying to line these up so they look like a single piece of wood that goes through the deck with some success. Here you can see the supports under the forecastle deck. Here I am gluing the supports under the first aft upper deck as well as the port bulwark extension above one of them. And here I am gluing most of the extensions on the two aft upper decks and the first extension that will support a rail on the fore castle . Luckily I have a bunch of these long reach clamps that work great for holding these tight to the bulwark planks. These extensions are also providing support for the bulwark planks, which at this stage are just edge glued together. There will be rails on the main and forecastle decks but not the aft upper decks, as that is how the replica was made. The bulwarks on the upper decks are pretty high so this makes sense to me.

- 135 replies
-
- 3
-

-
- billing boats
- half moon
- (and 1 more)
-
Thanks Popeye. I have the fitting that goes over the slot on the lower deck too. What did you do with the opening in the upper deck? Did you just plank to the edges of the opening?
-
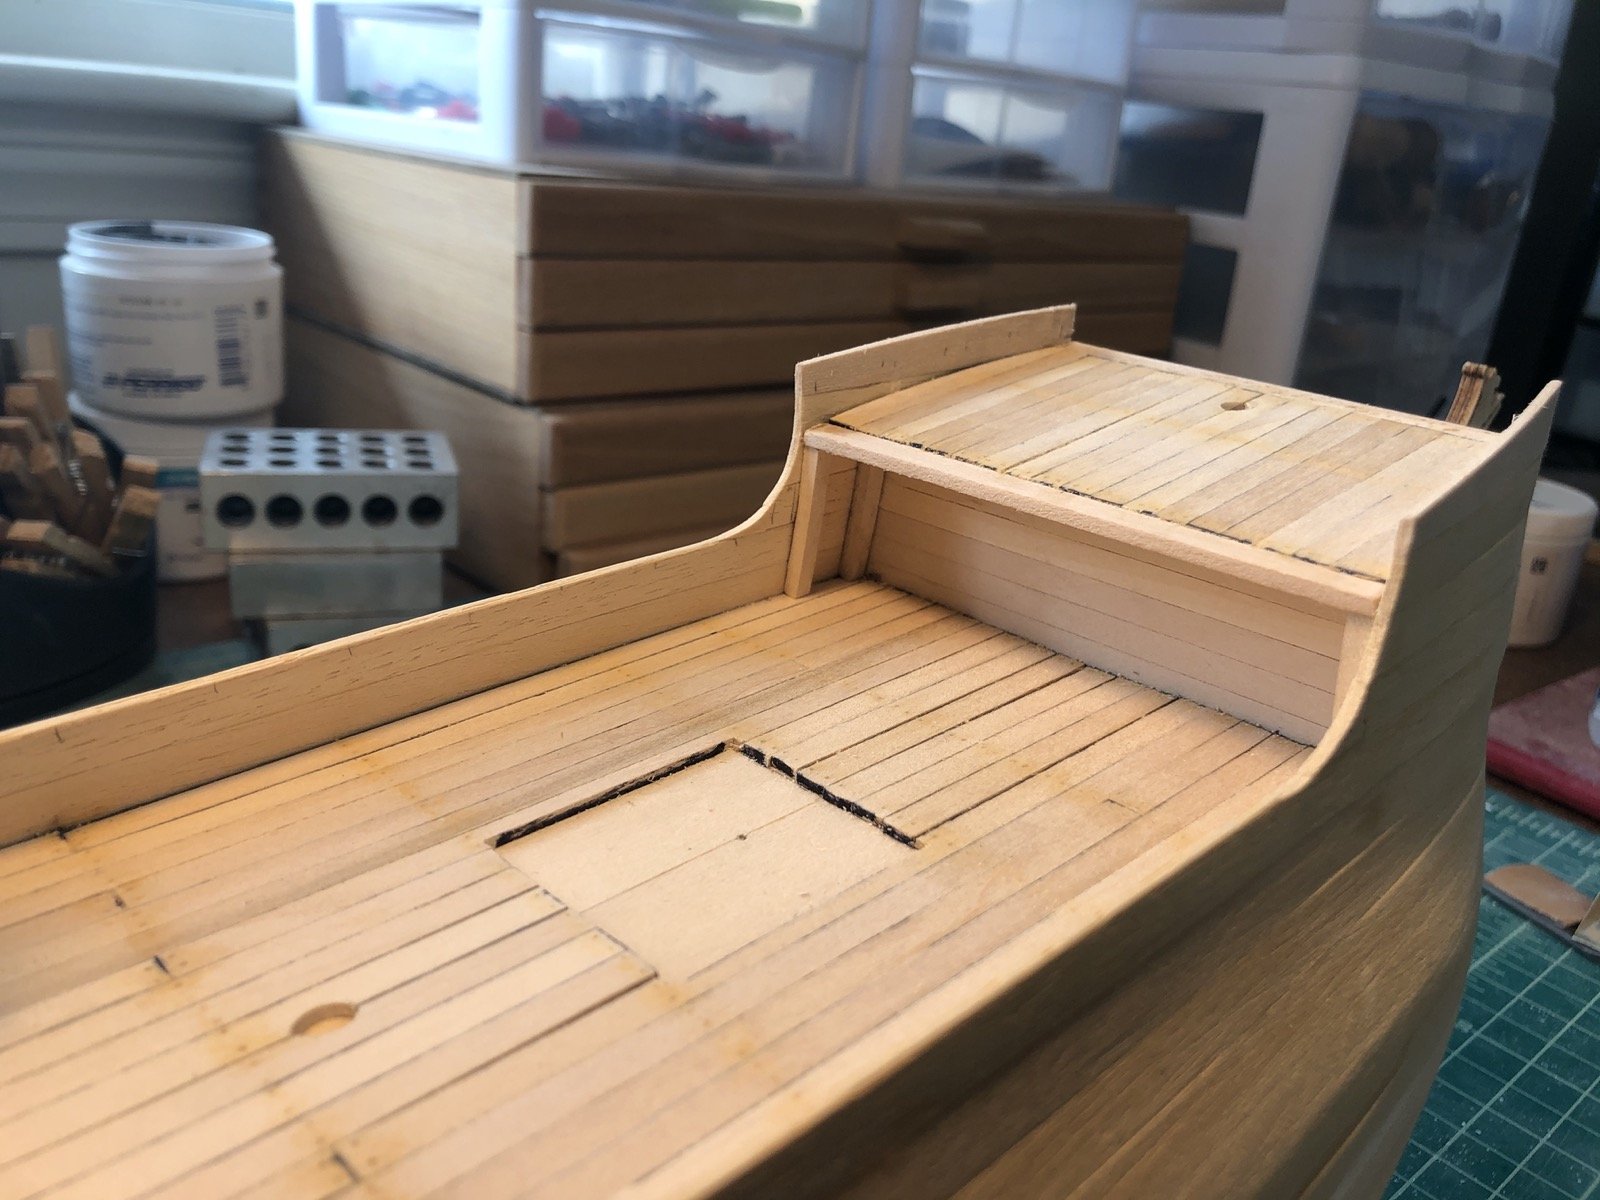
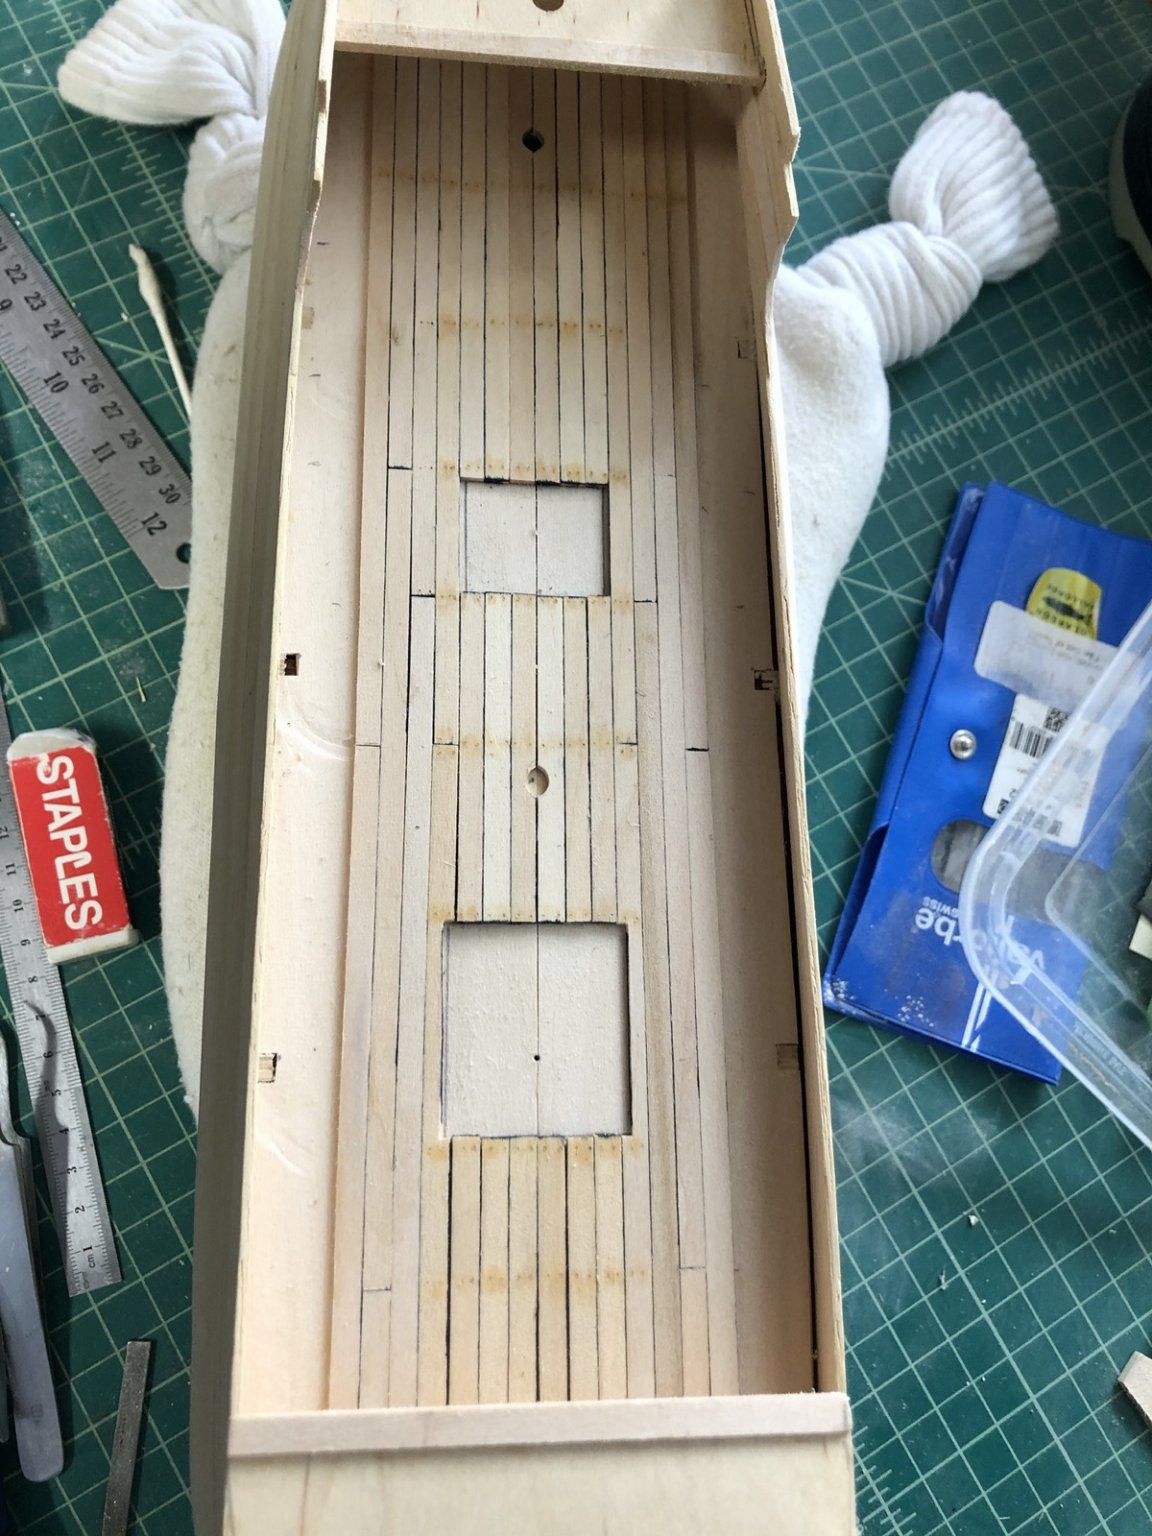
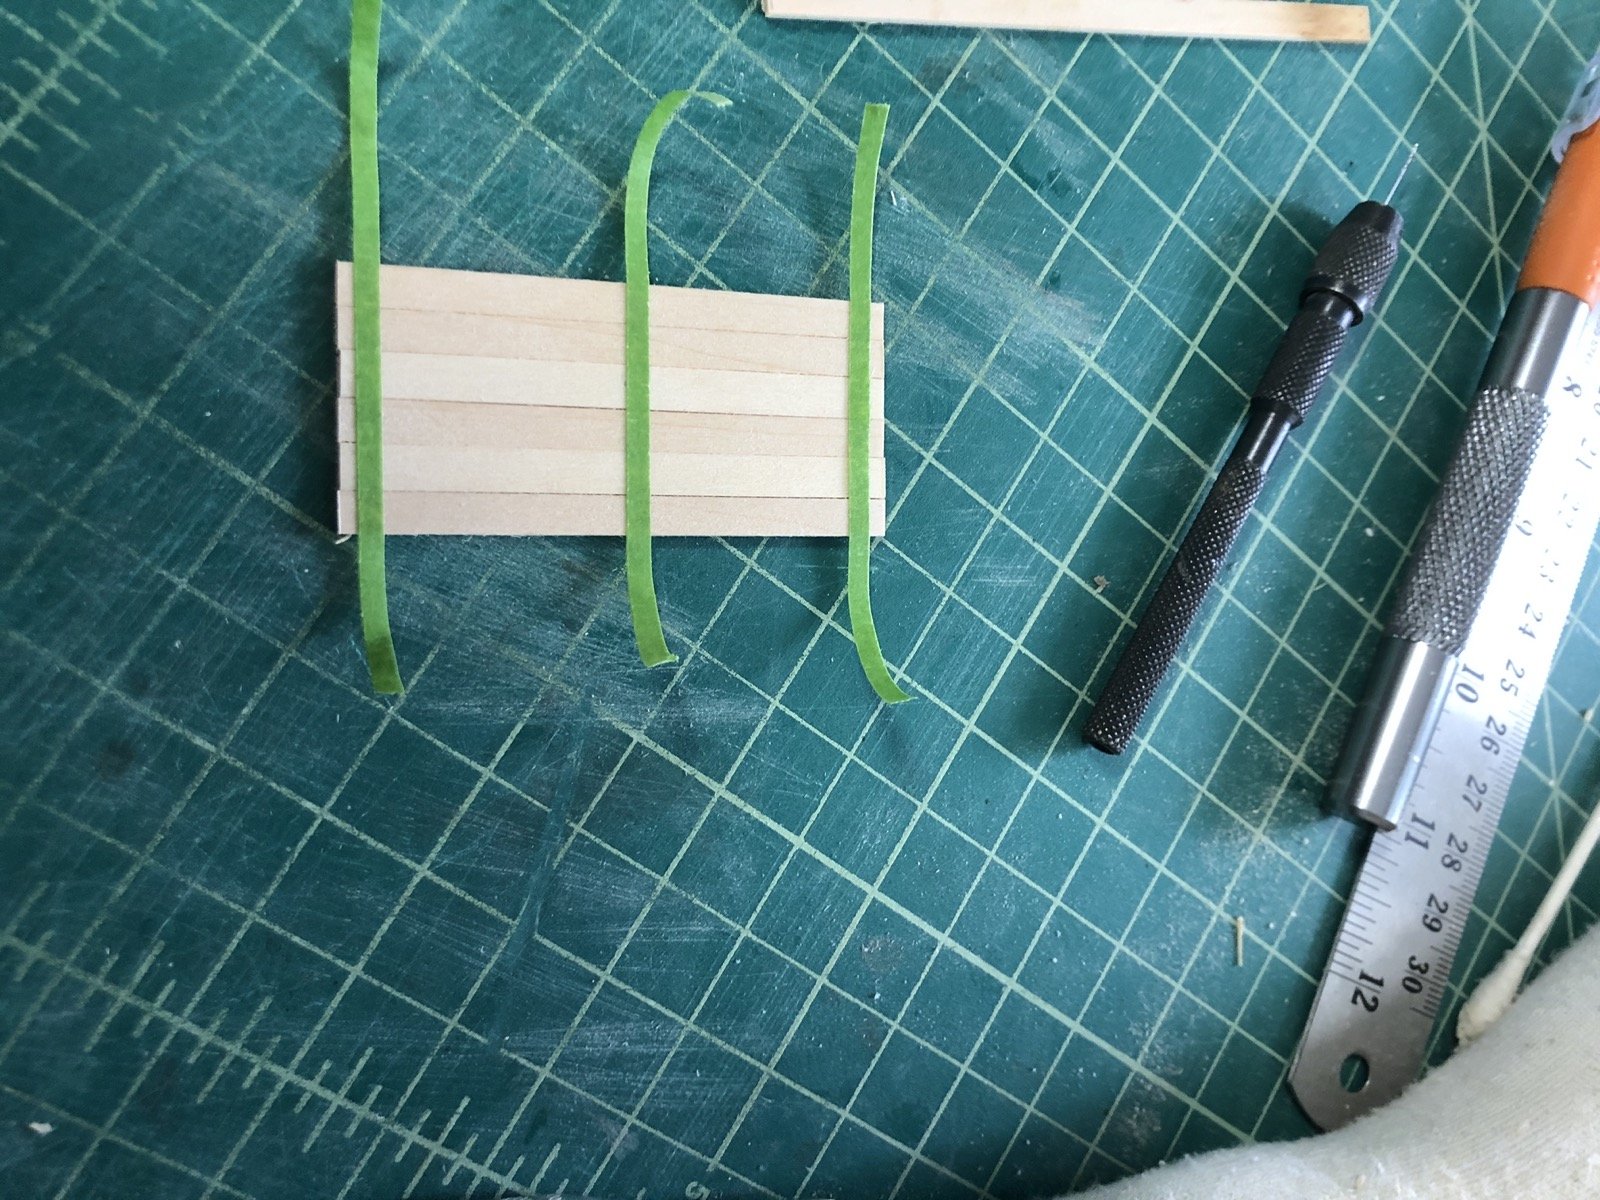
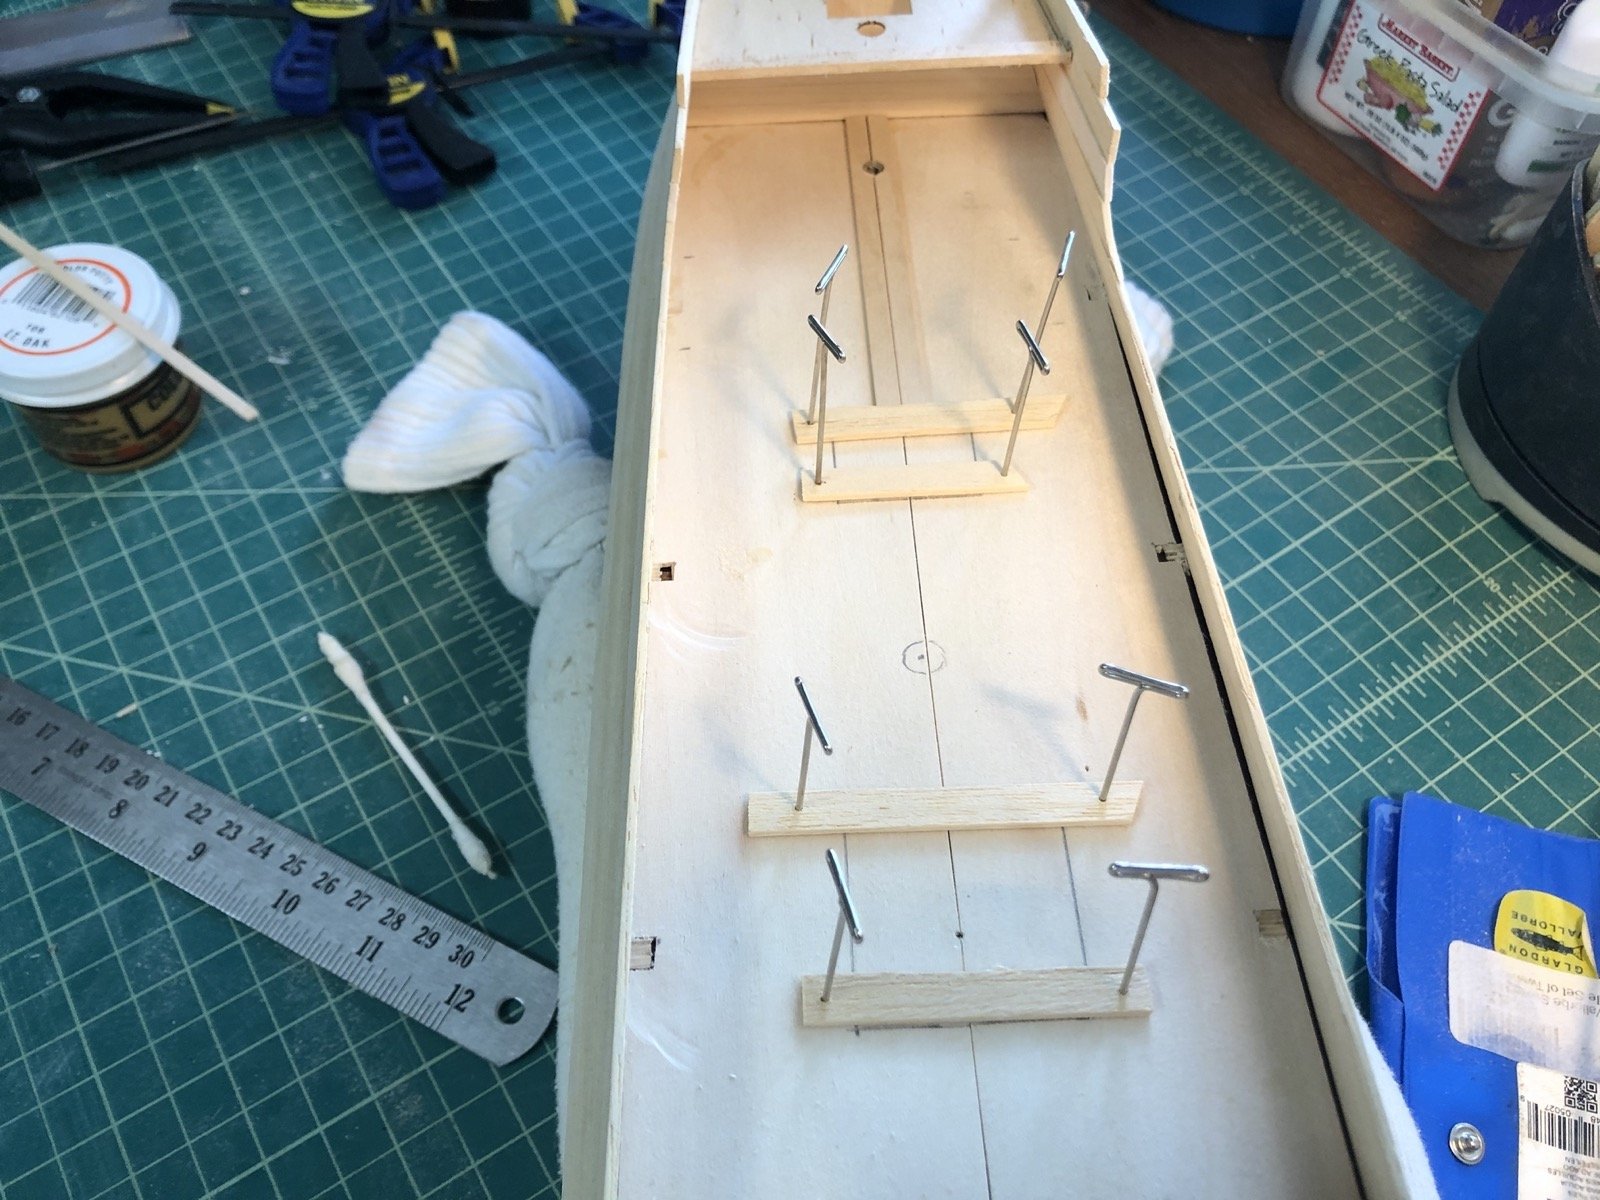
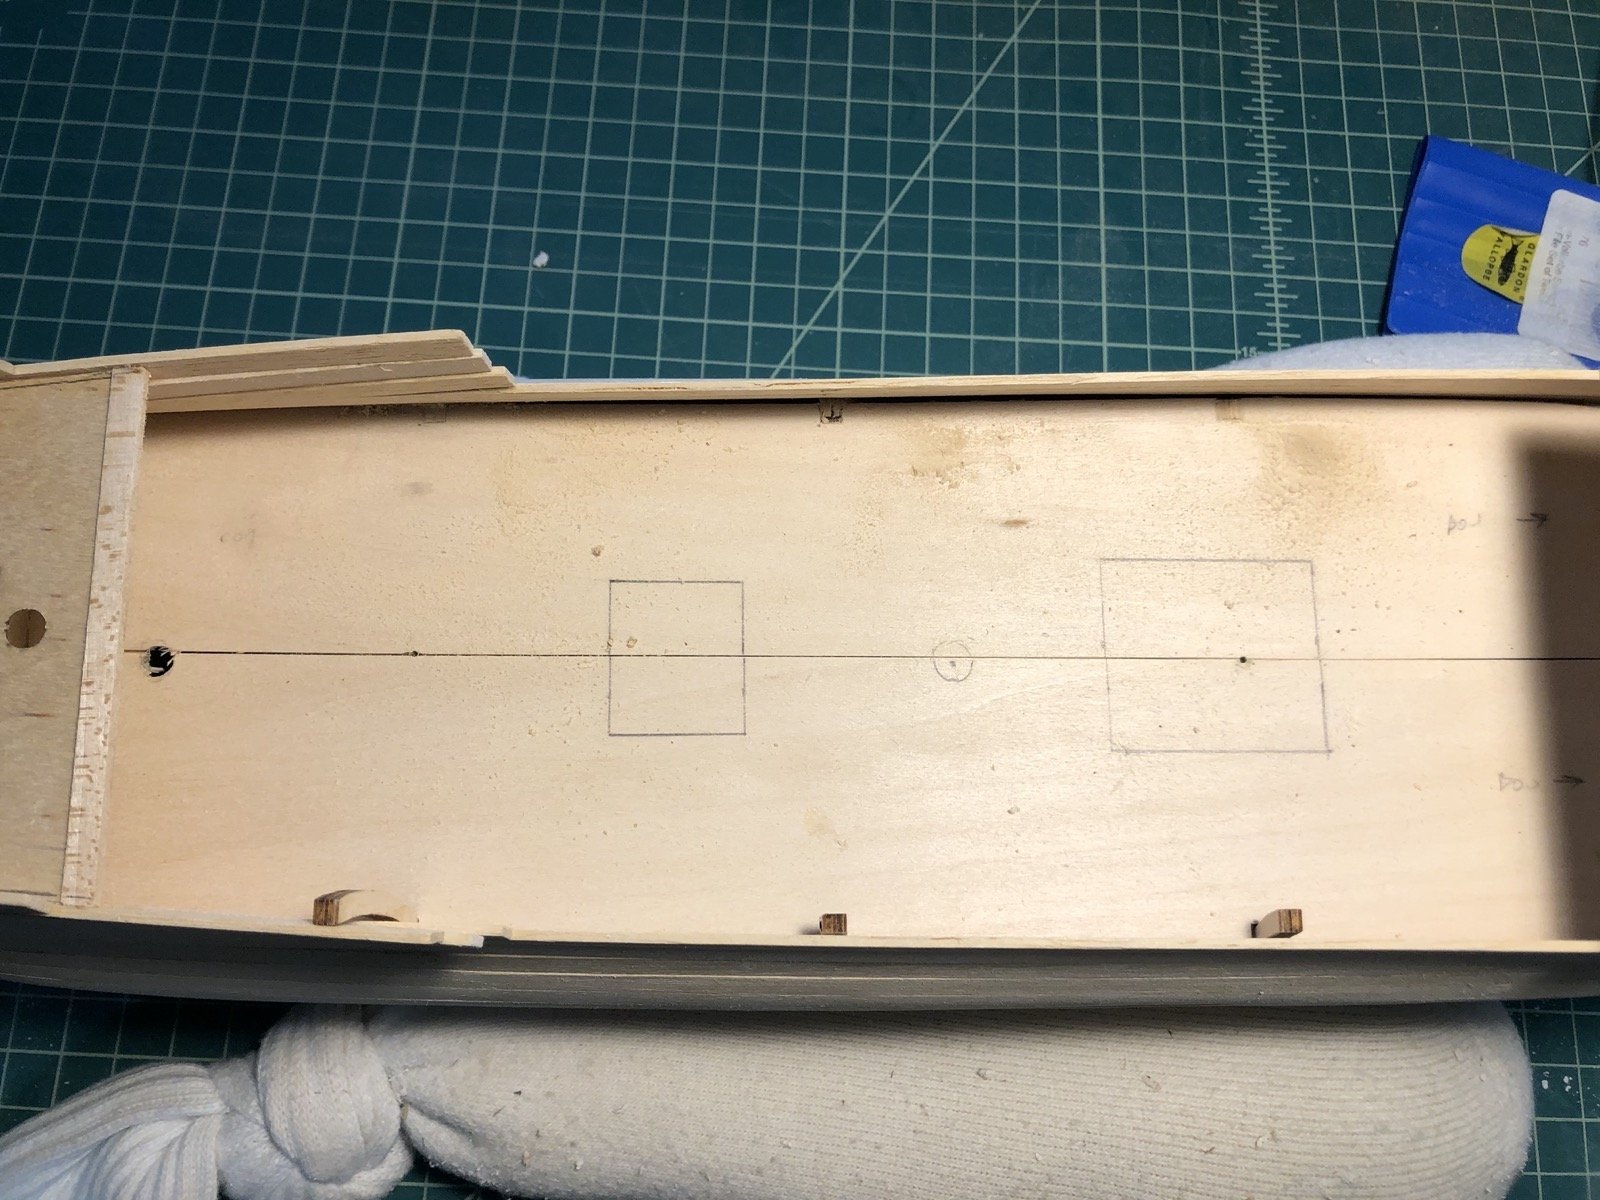
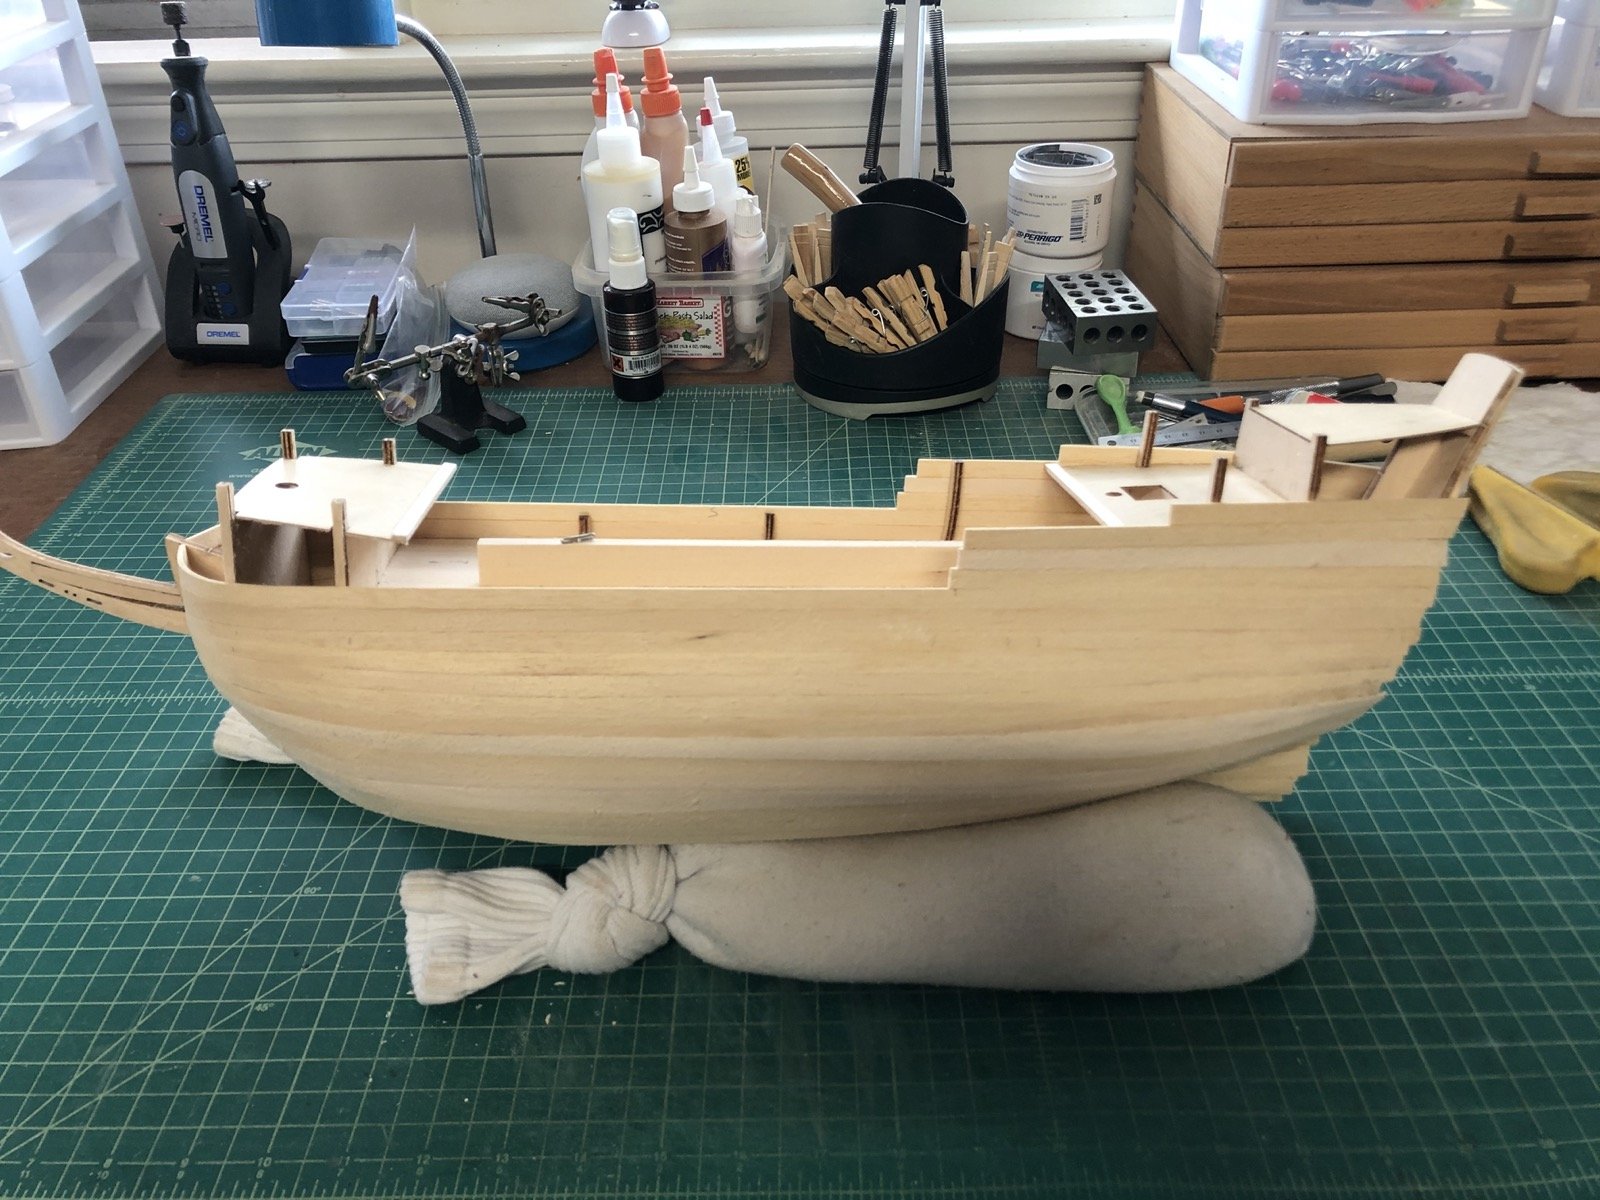
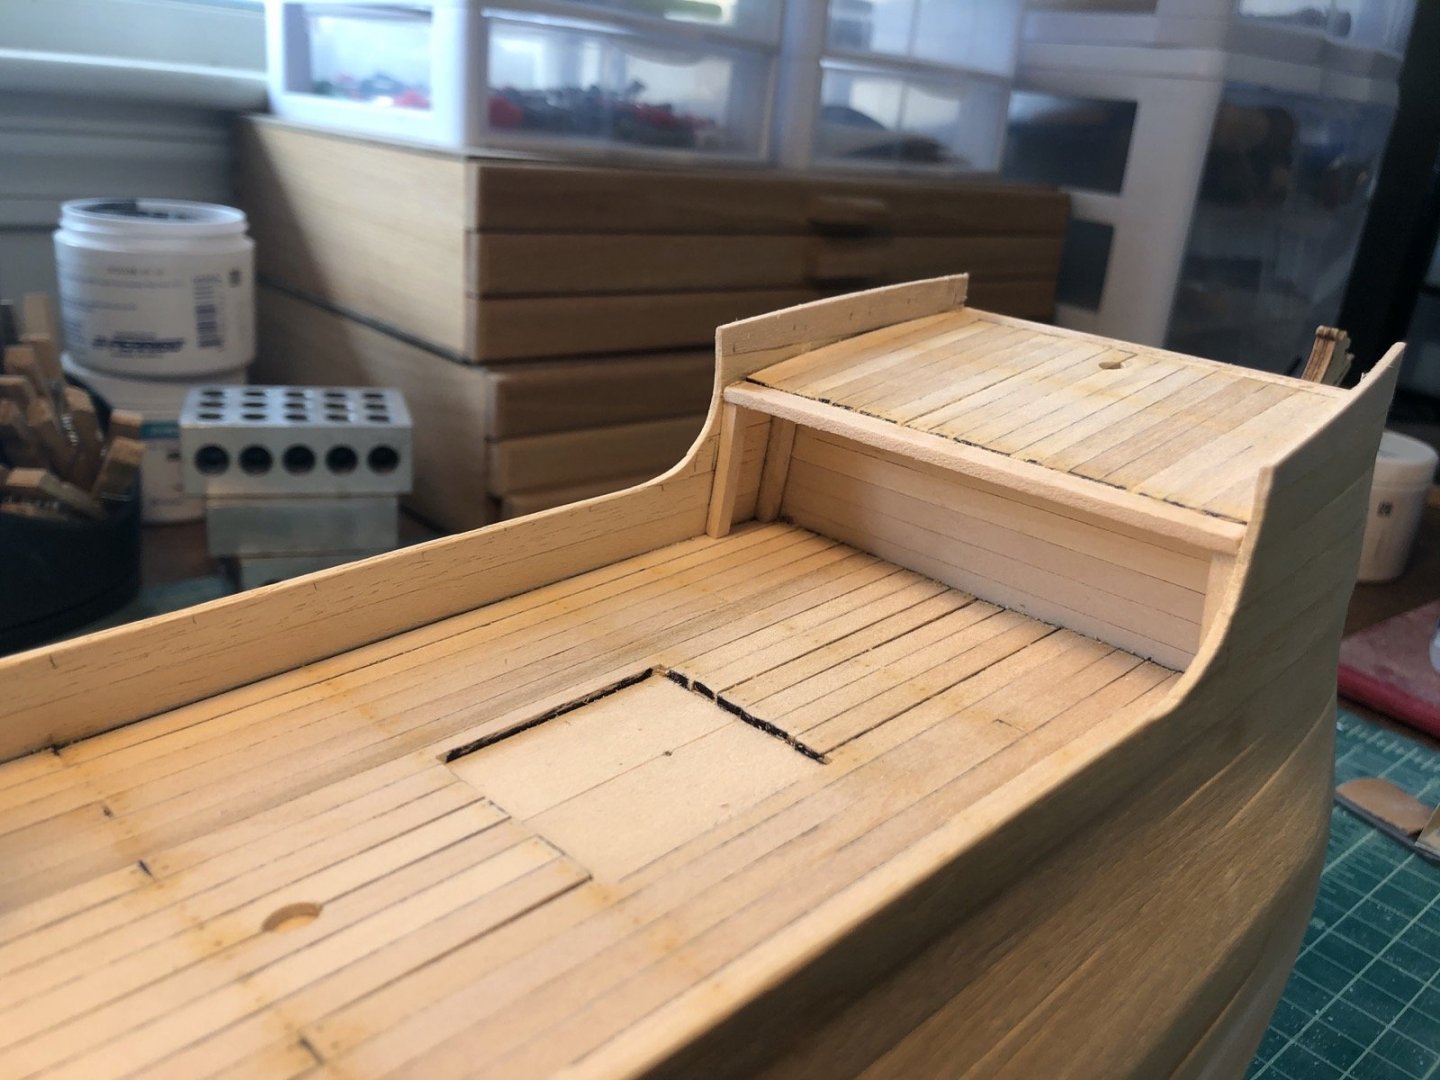
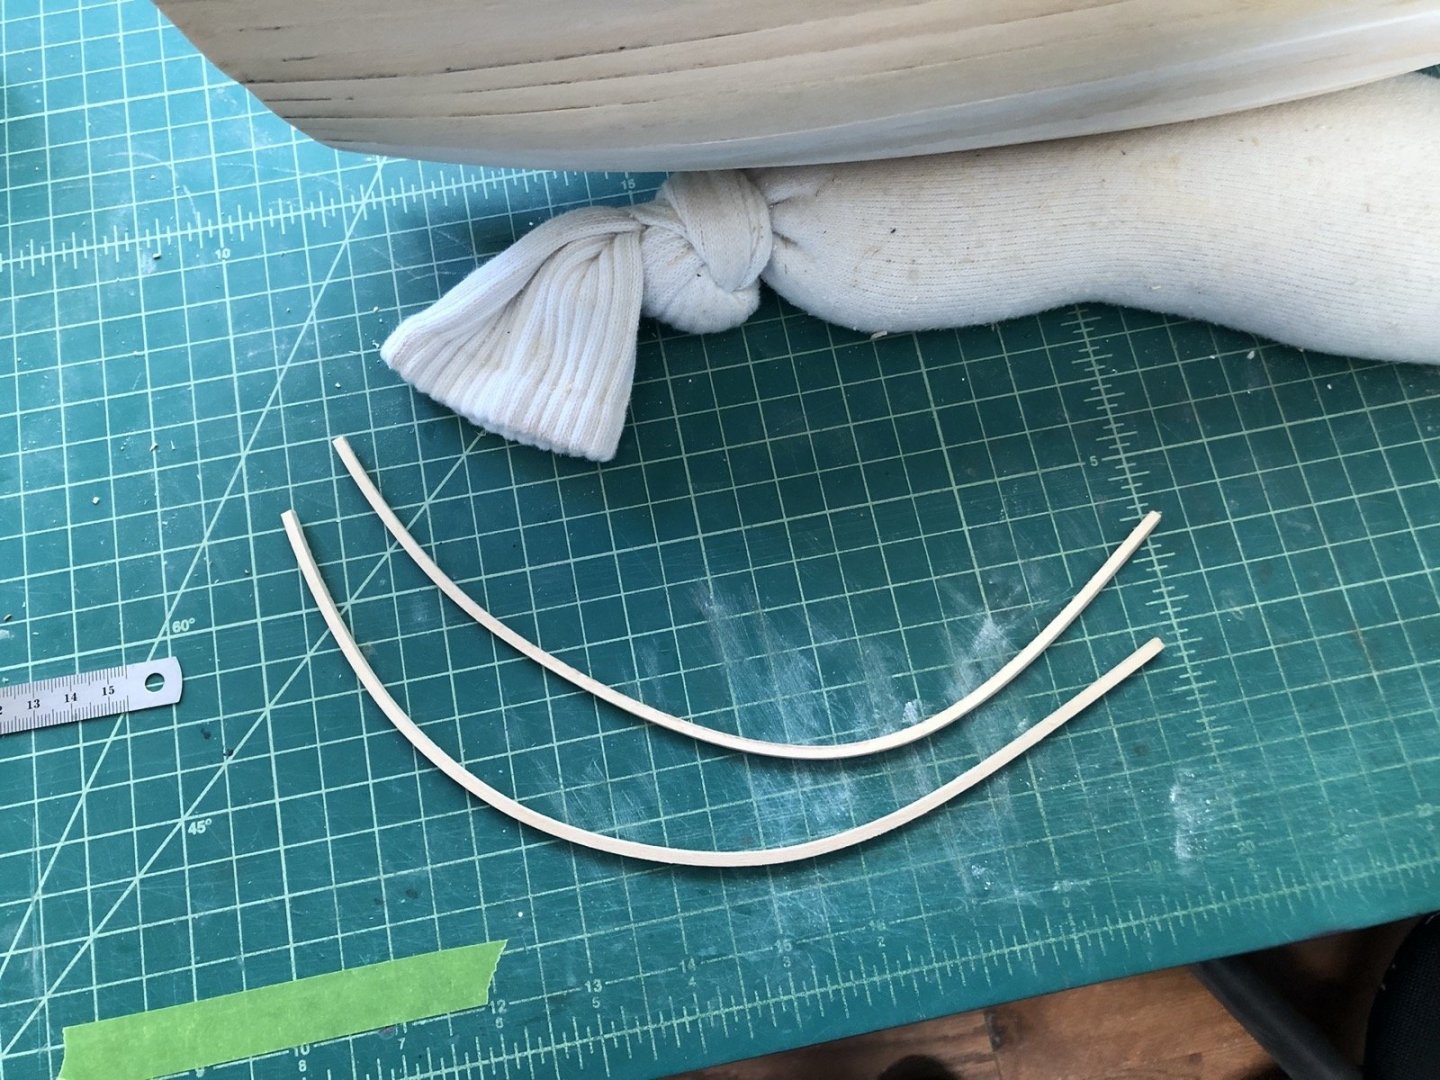
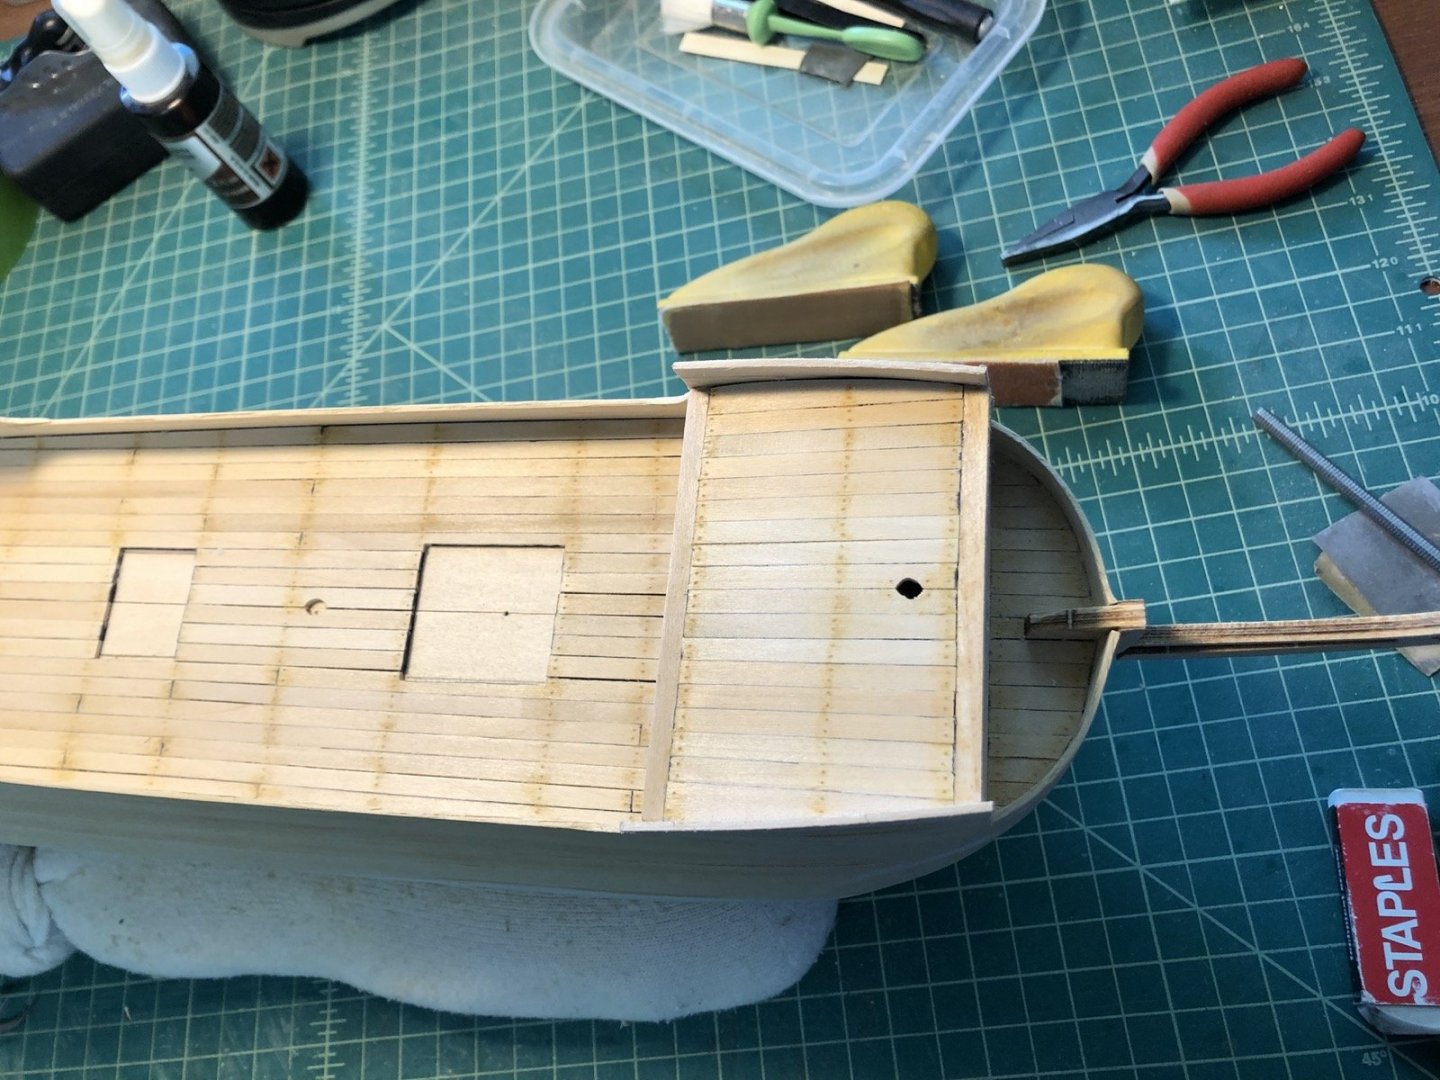
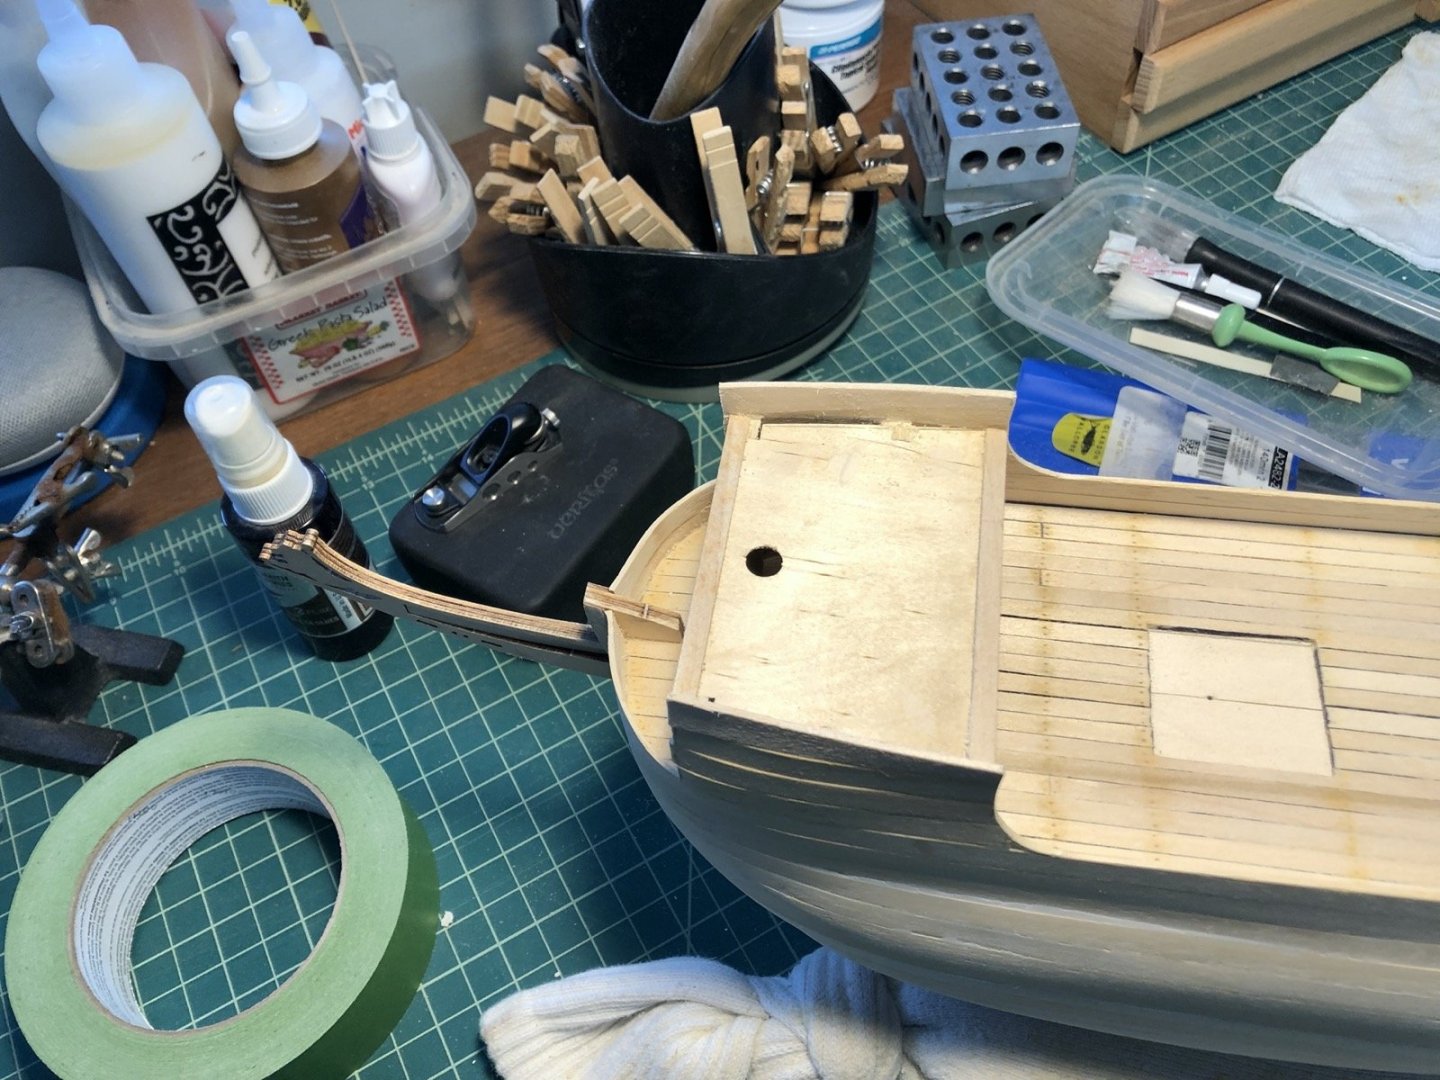
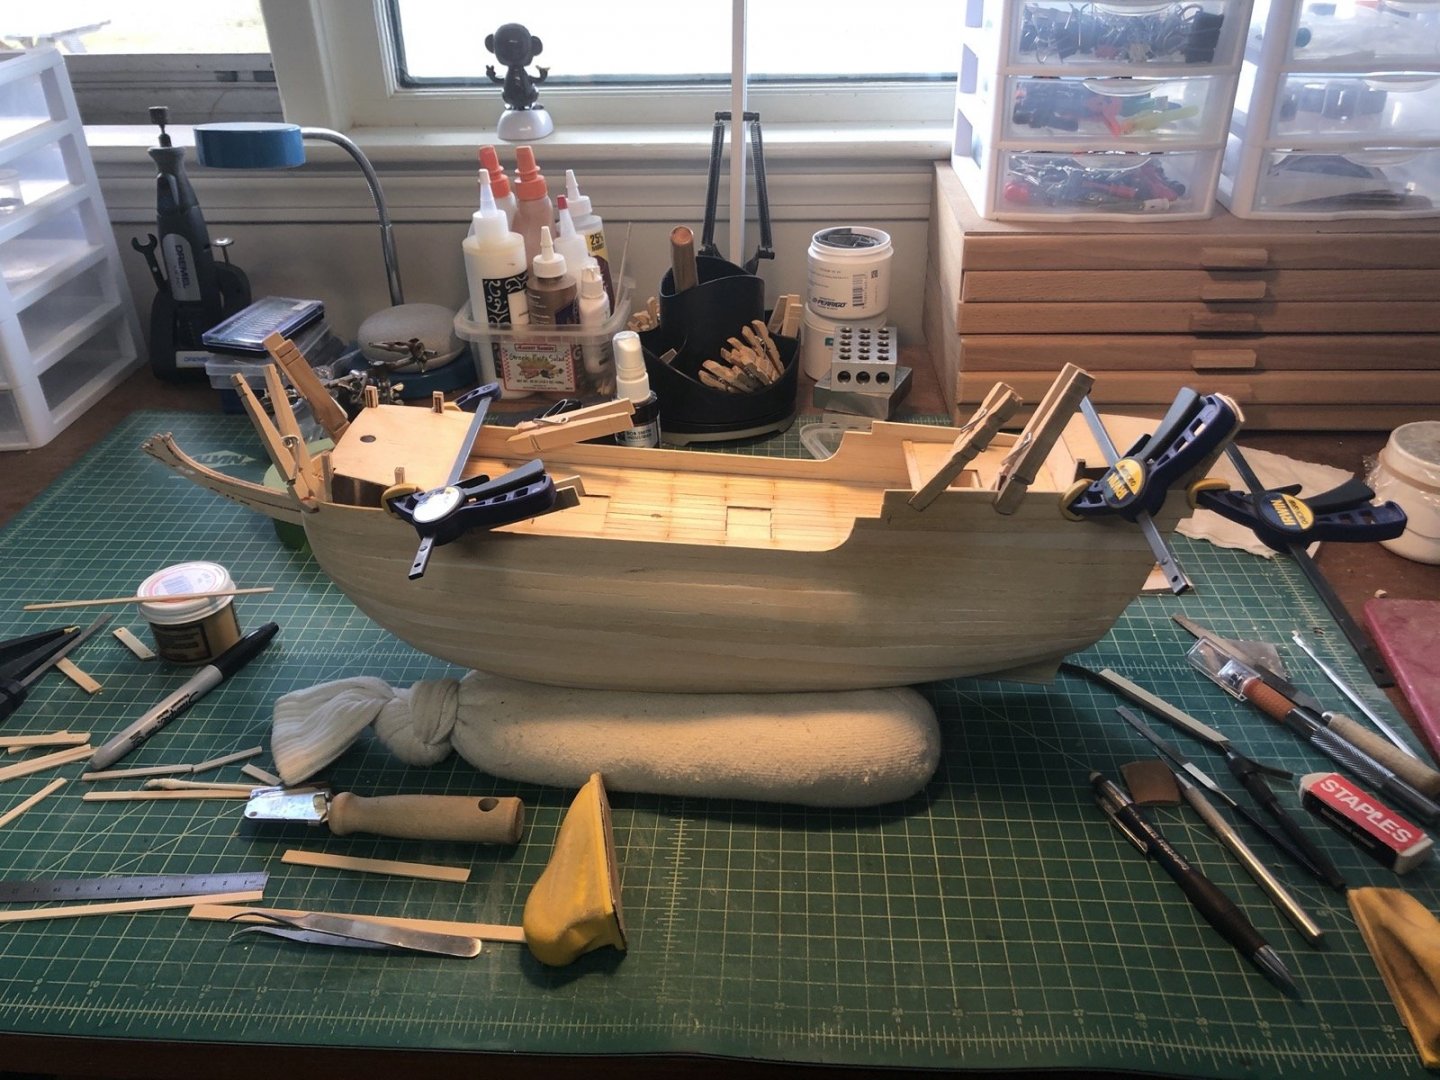
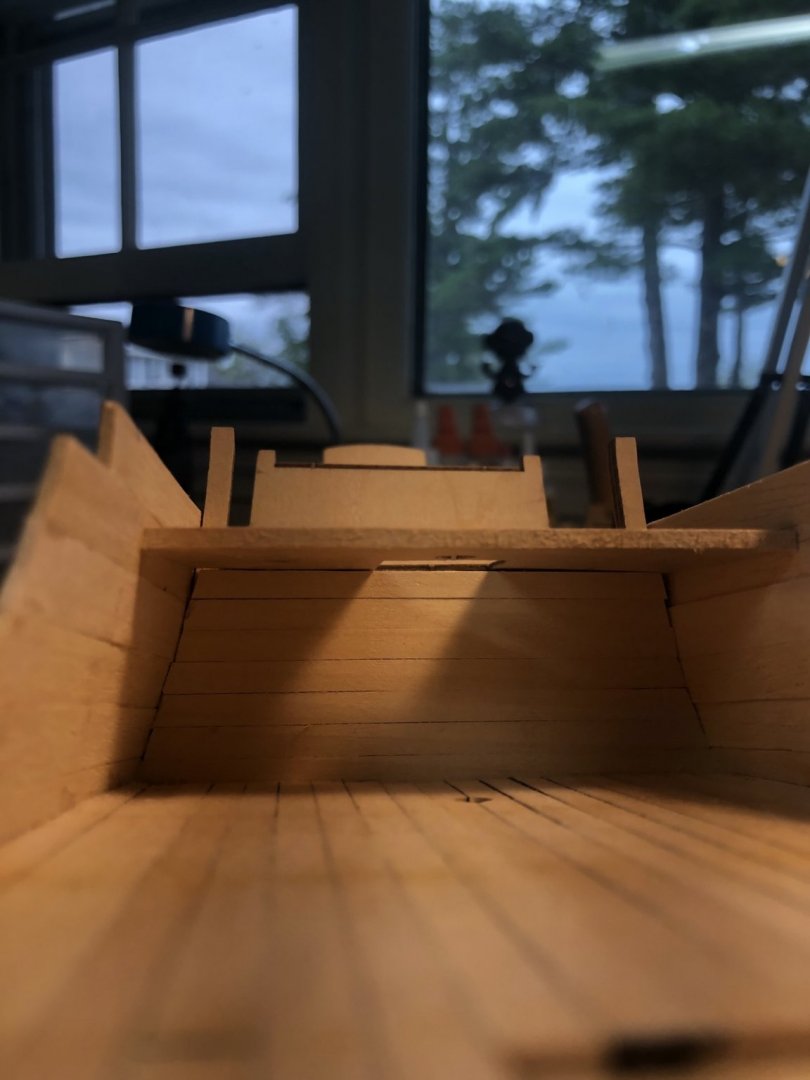
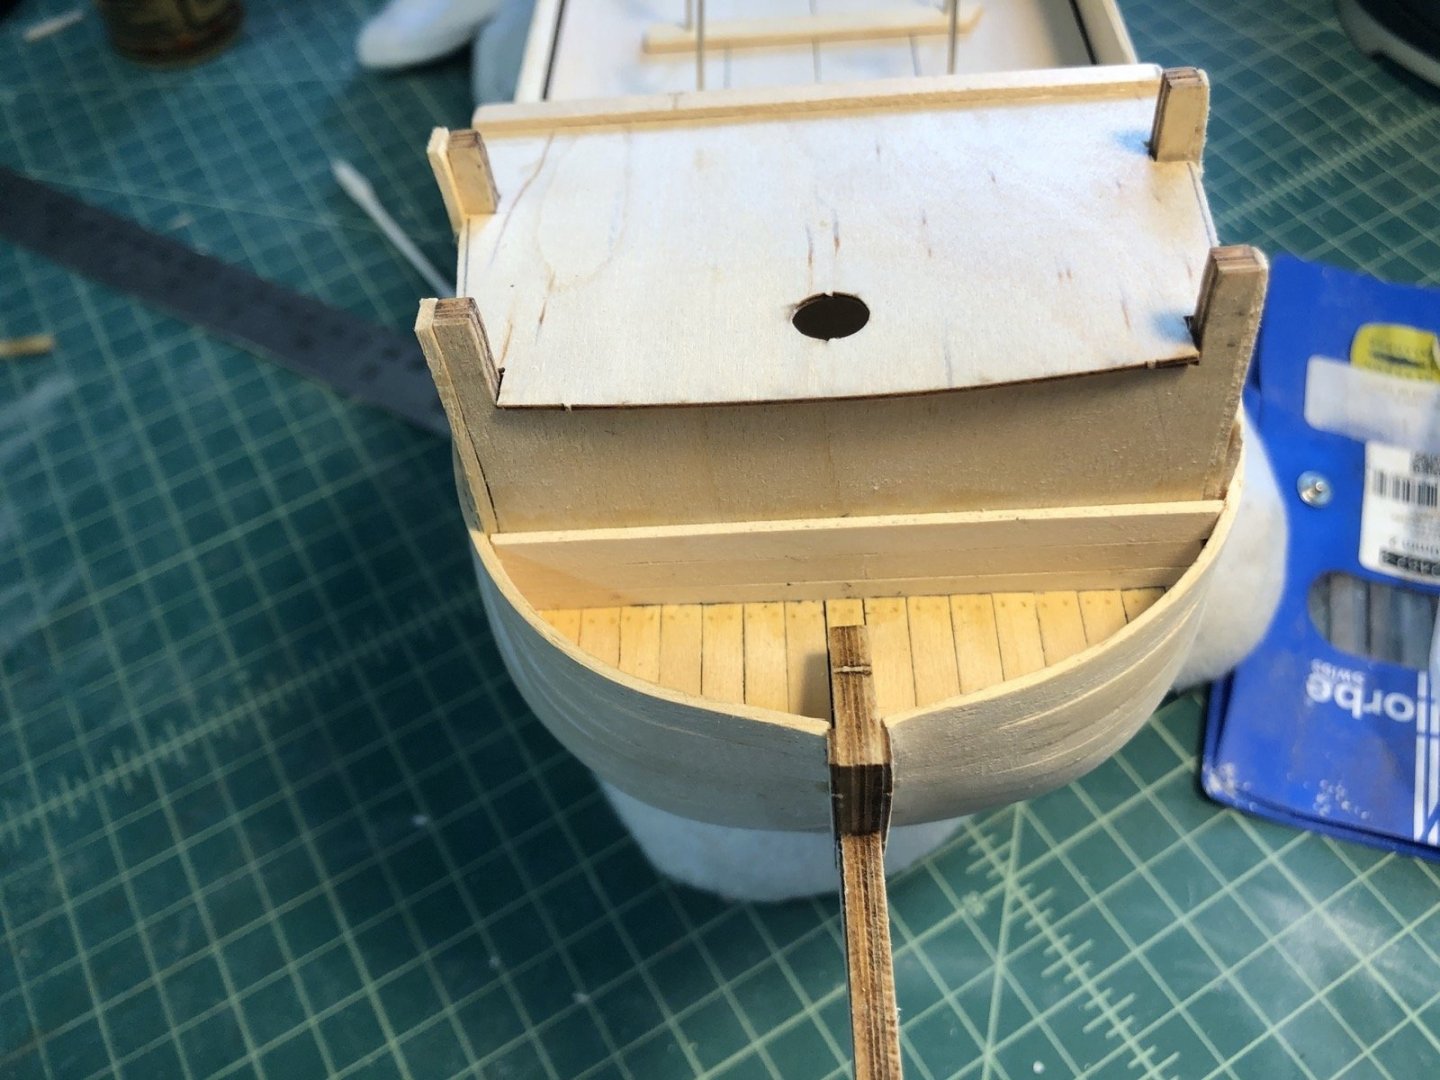
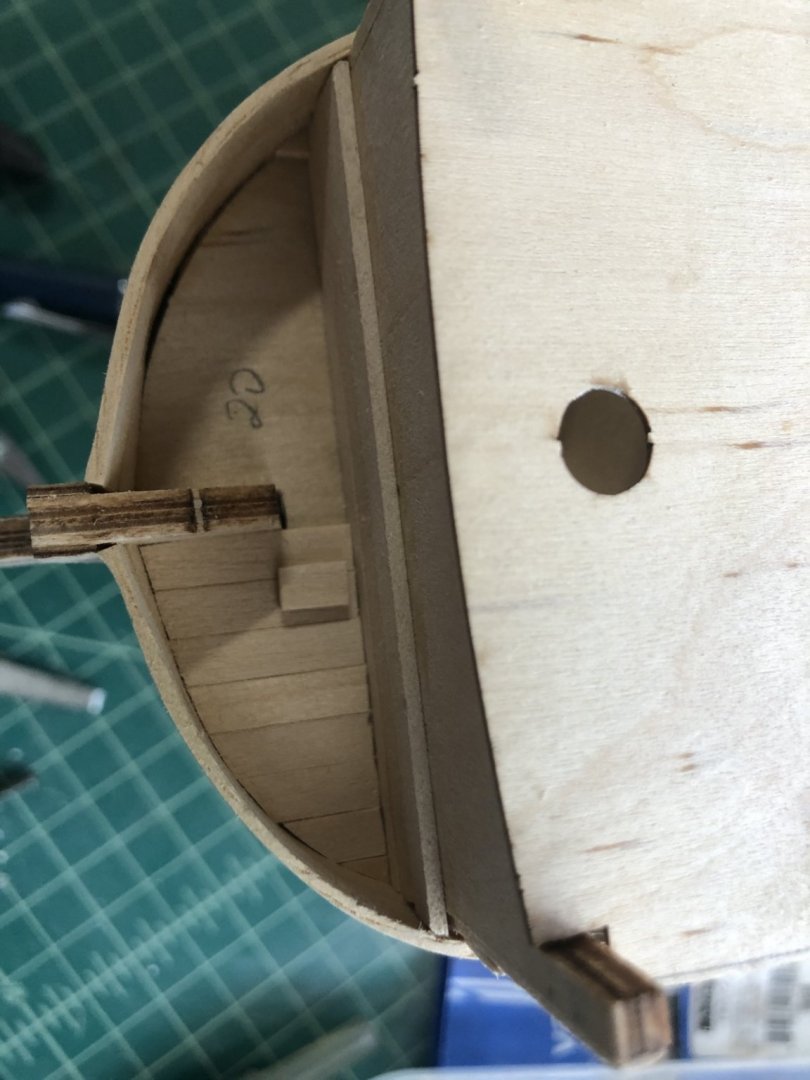
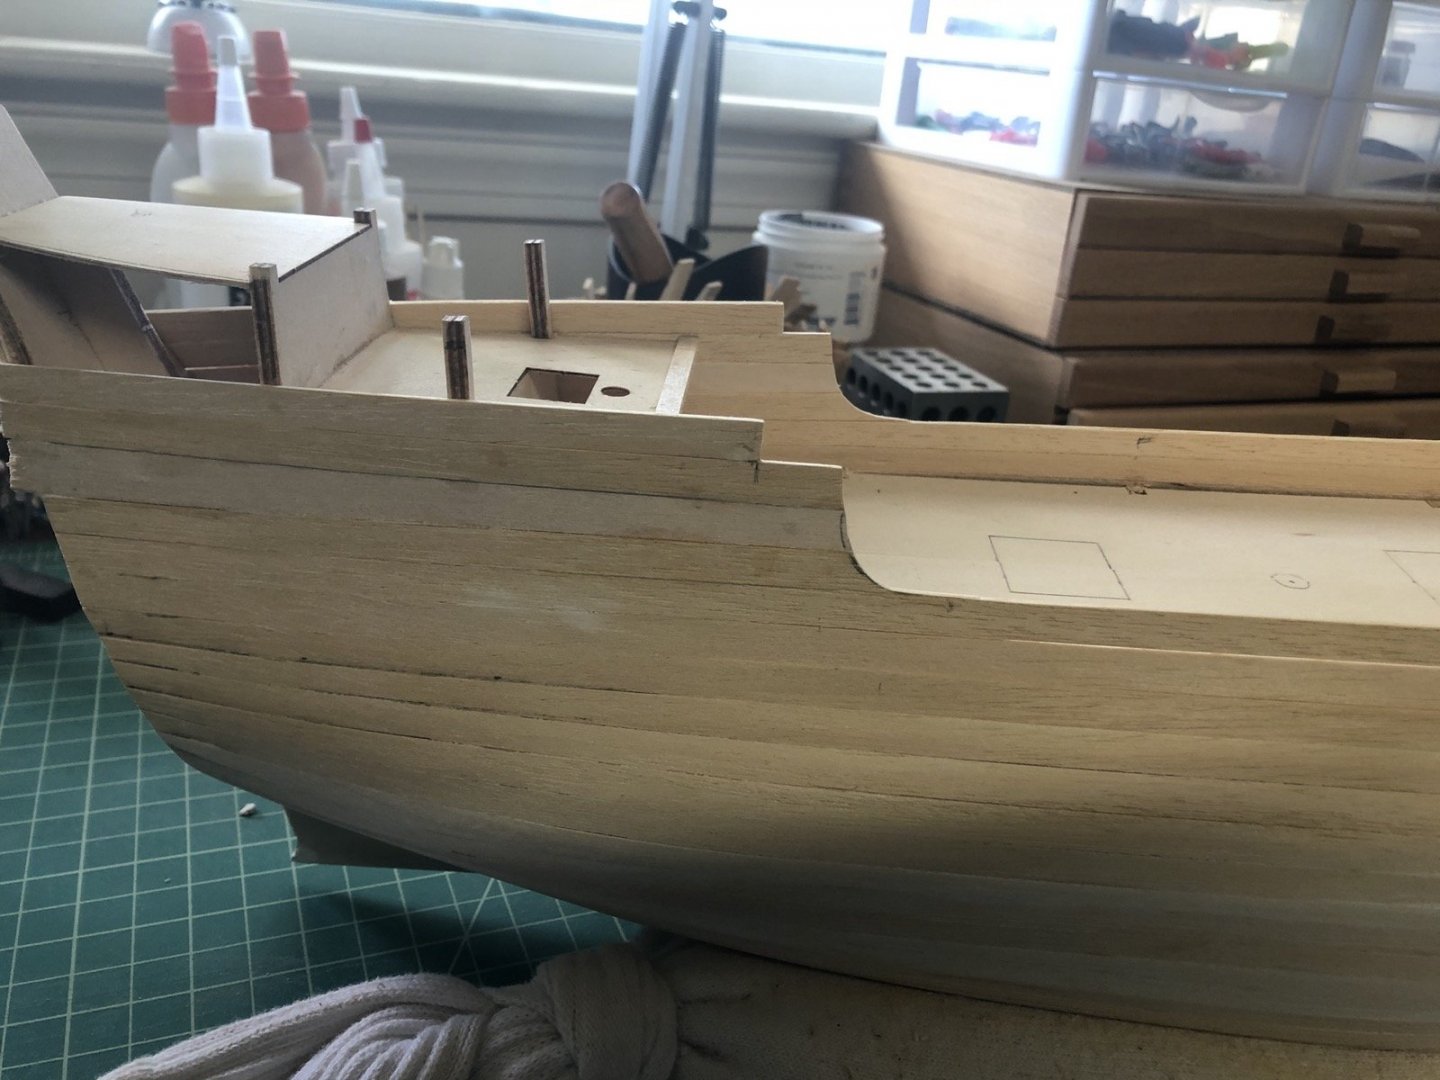
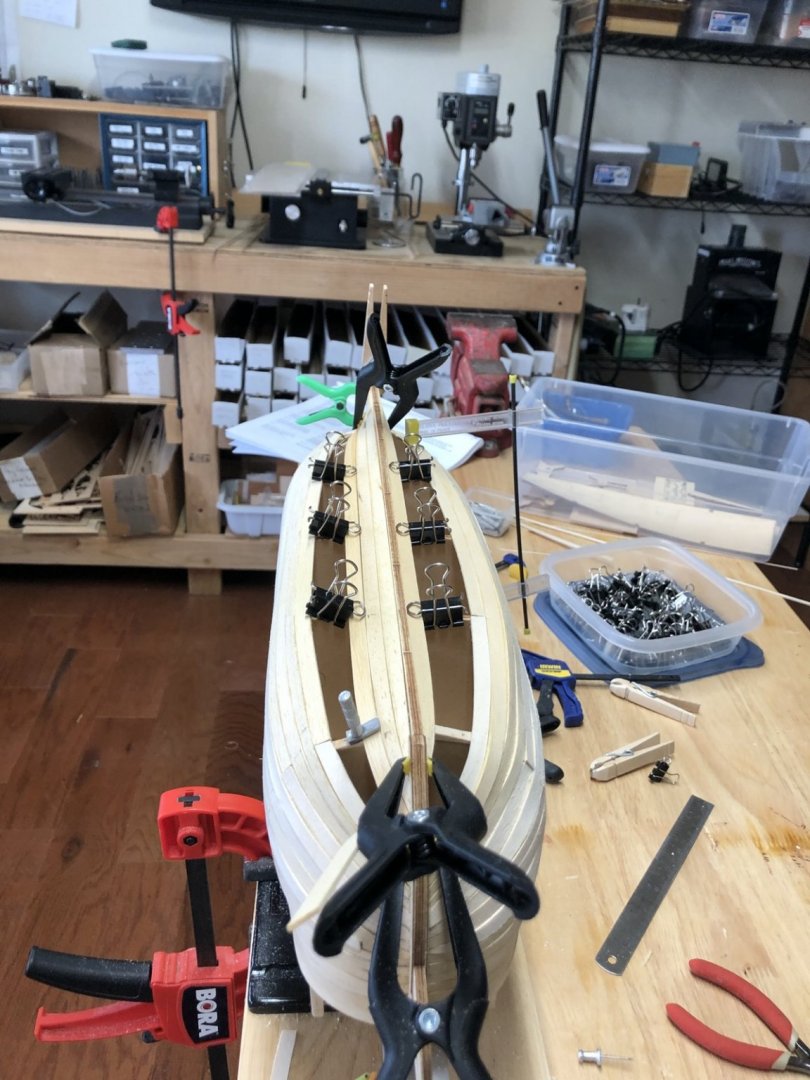
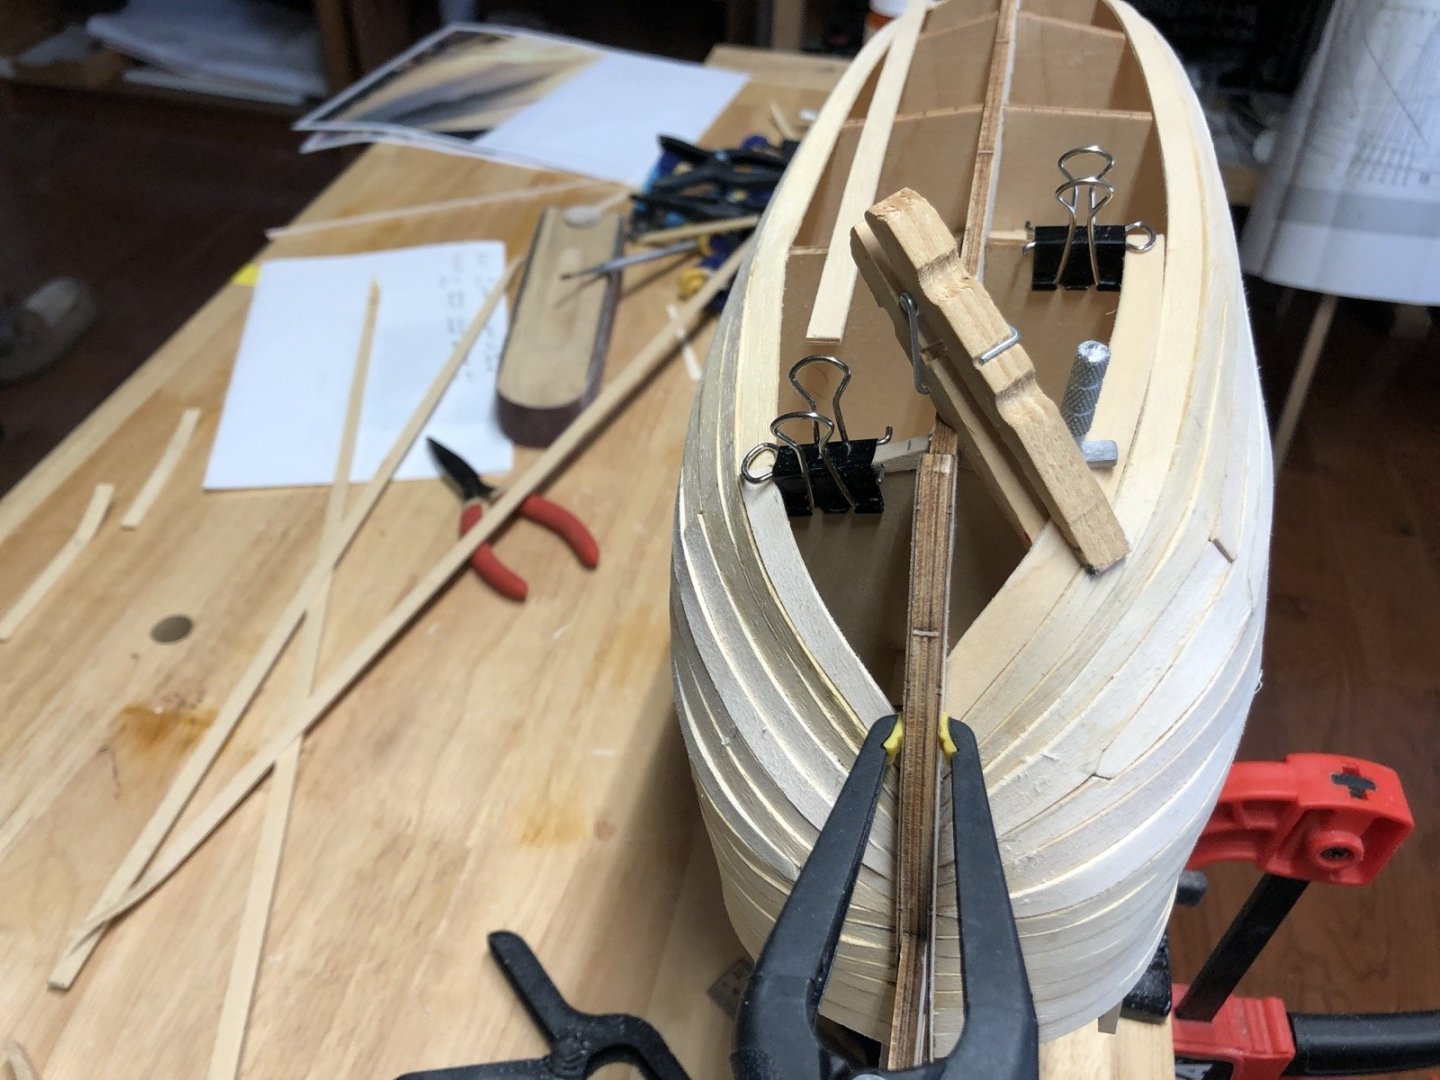
I have finished planking the two aft upper decks. I added the coaming around the whipstaff opening then planked around it. For the mast hole, I first drilled the hole in some basswood sheet, then cut out a rectangle around it that was two planks wide. After fitting it in the space, I split it down the middle and glued the two halves to the deck. This made a much better hole than trying to file it into two separate planks. I sanded the decks and added the fake treenails. I am going to make the bulwark extensions from curved strip wood. I soaked a long piece of 1/8" square stock and started bending it with a plank bender. I then curved it between two posts on the workbench and continued to heat it and dry it with a heat gun. I cut it in half then gave each piece the same treatment, bending them to a tighter radius. Here is how they came out. I will see how many of the extensions I can make out of these pieces, but if I need more I will bend another strip or two.
- 135 replies
-
- 3
-
-
- billing boats
- half moon
- (and 1 more)
-
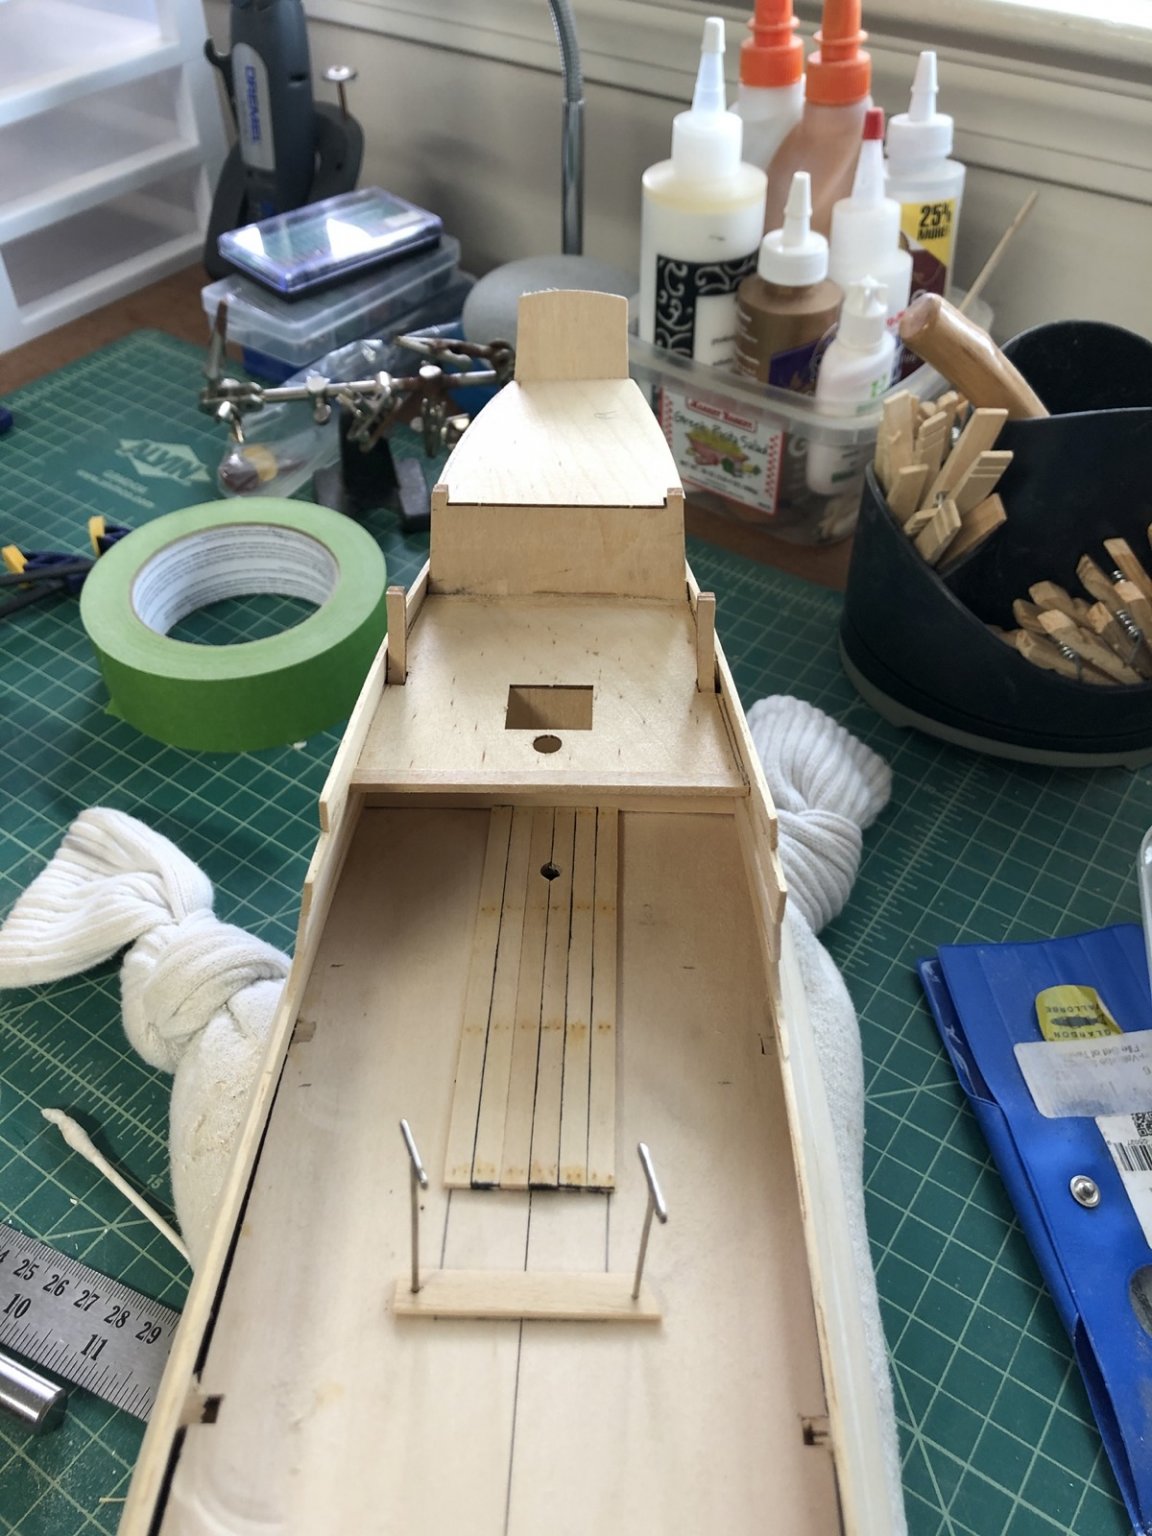
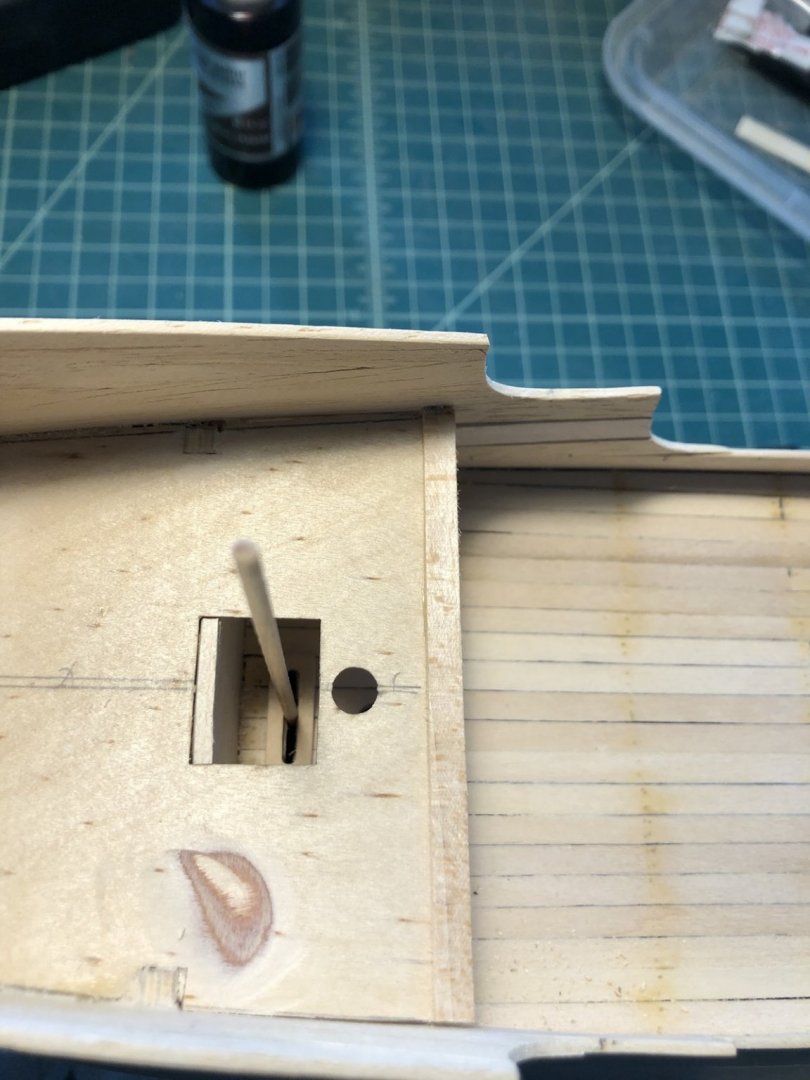
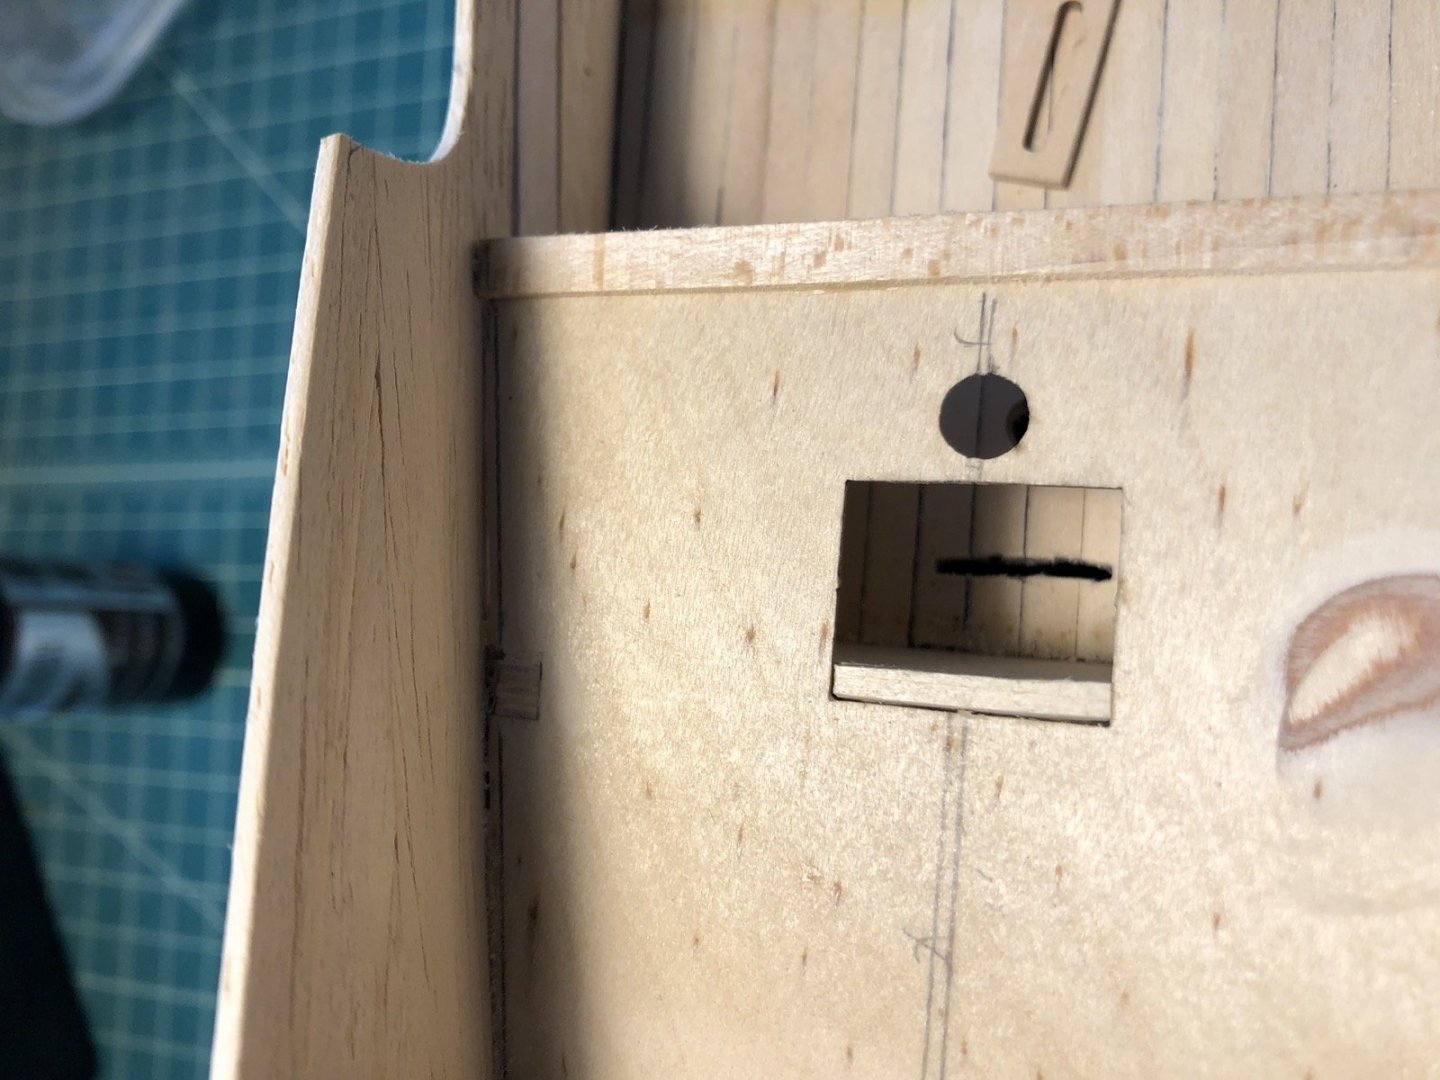
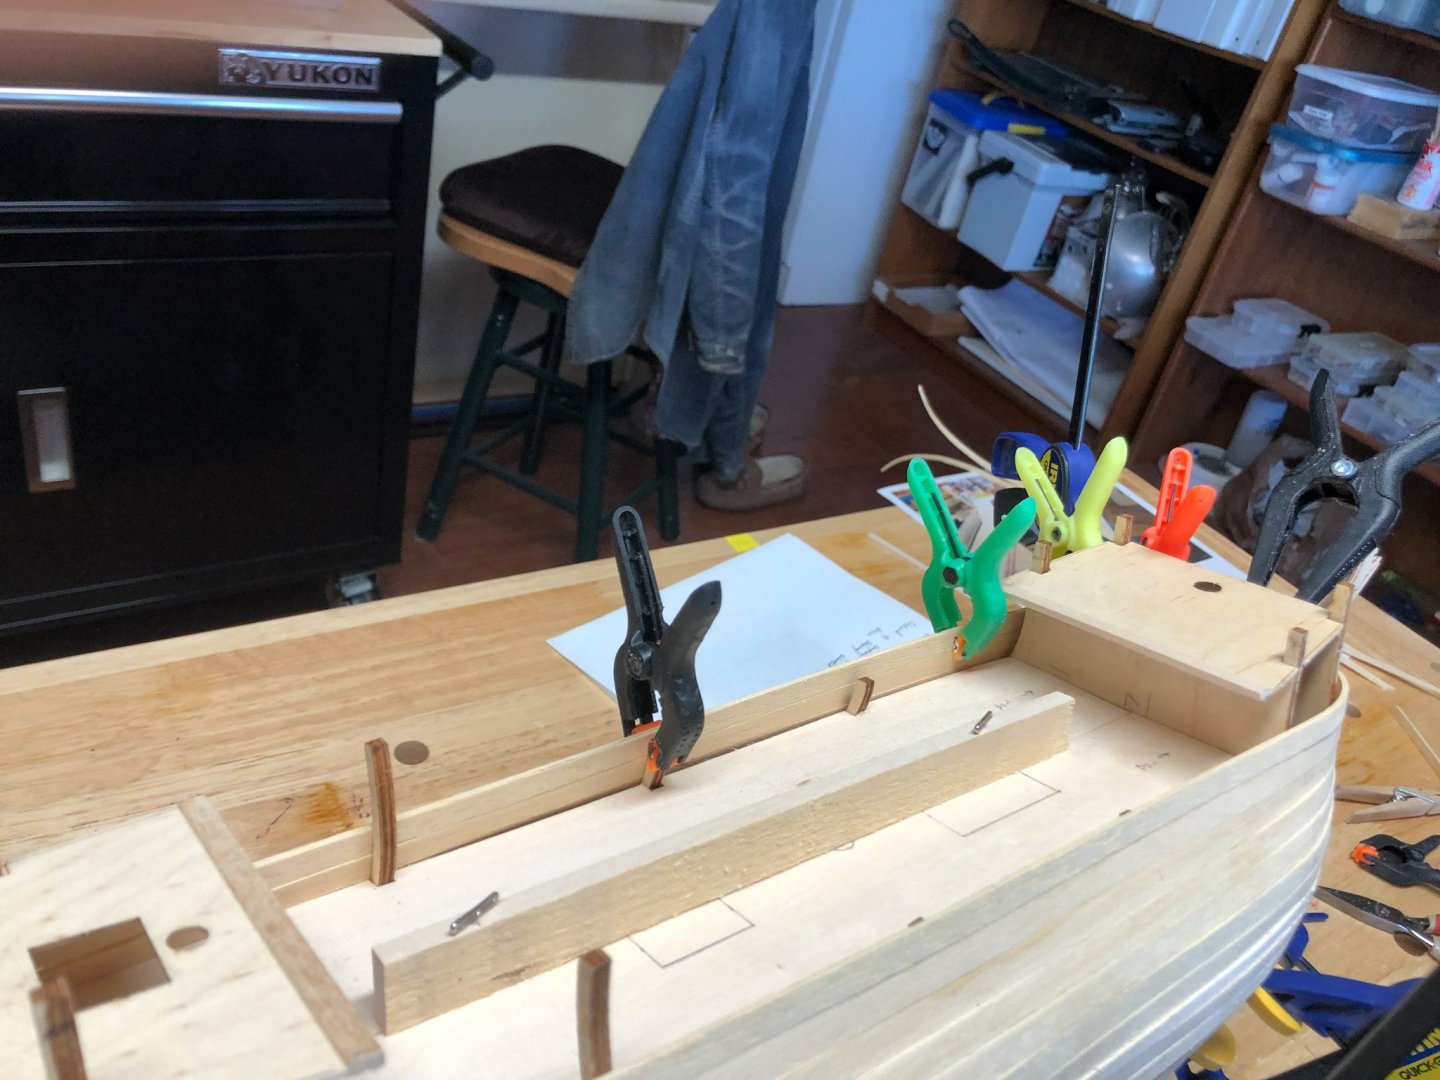
This is the area I was talking about in the last post. There is a post that comes up through the deck below, called a whipstaff, that is attached to the tiller below the main deck. I opened up a slot in the main deck for the whipstaff by drilling a series of holes and connecting them with a file. There is a trim piece that goes over the slot. I am working on the coaming that will go around the opening on the upper deck before I plank that deck. I have finished planking all the bulkheads so I need to sand and finish those up too.
- 135 replies
-
- 1
-
-
- billing boats
- half moon
- (and 1 more)
-
Jeff, give painting the trail boards a try. I was intimidated at first but is turned out to be pretty straight forward.
-
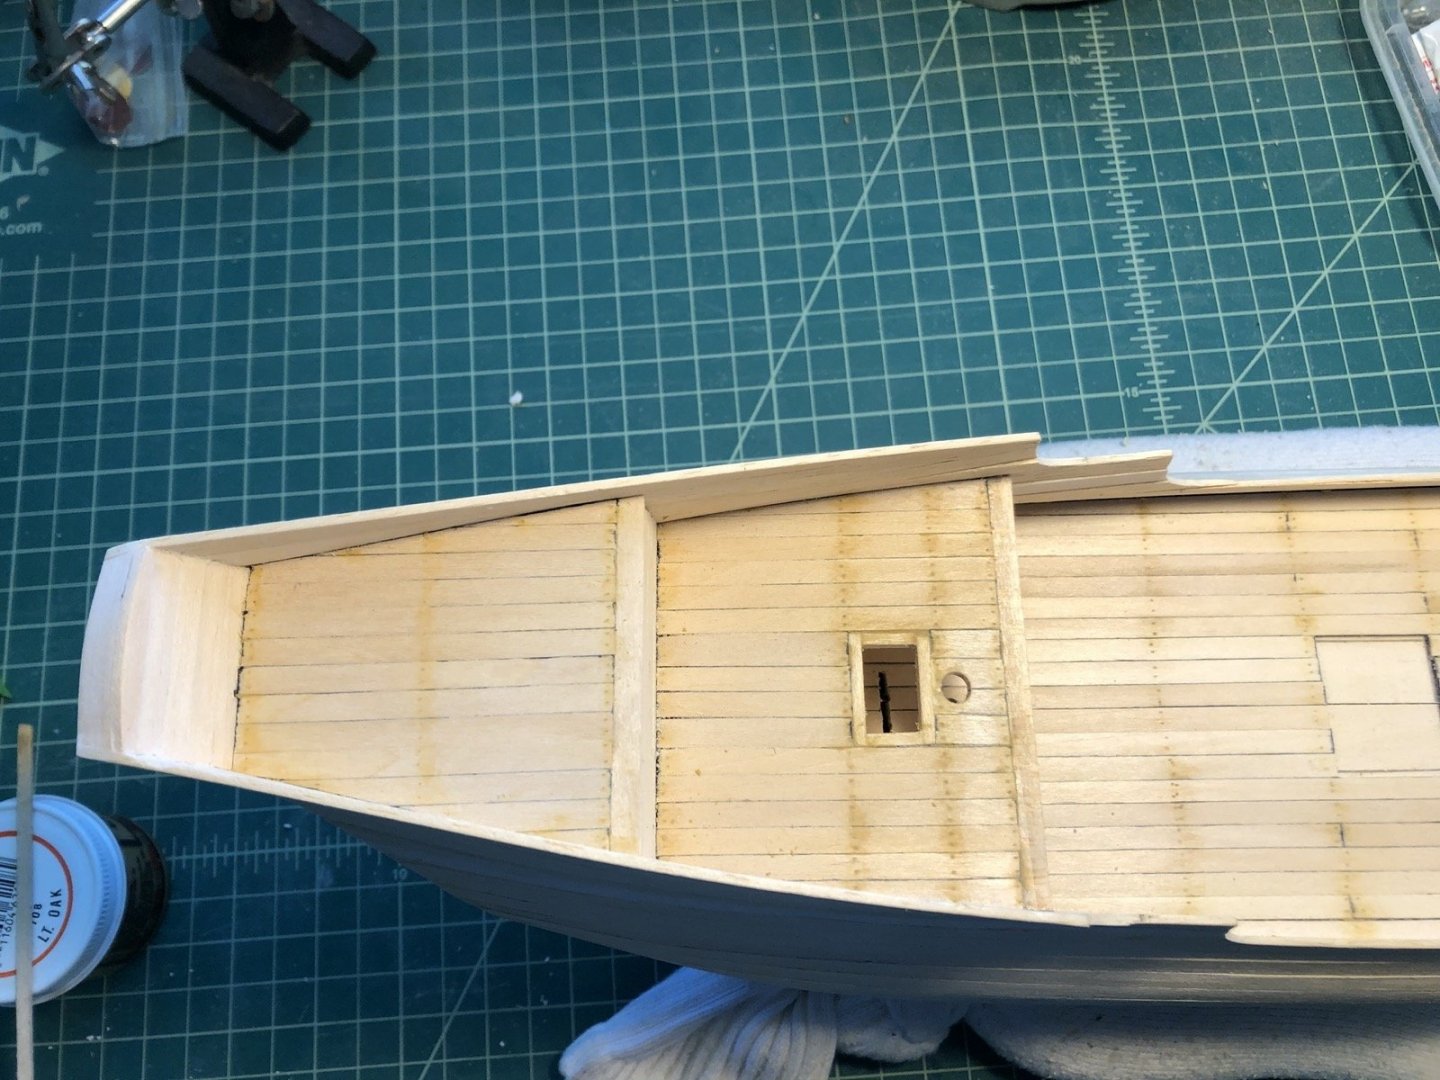
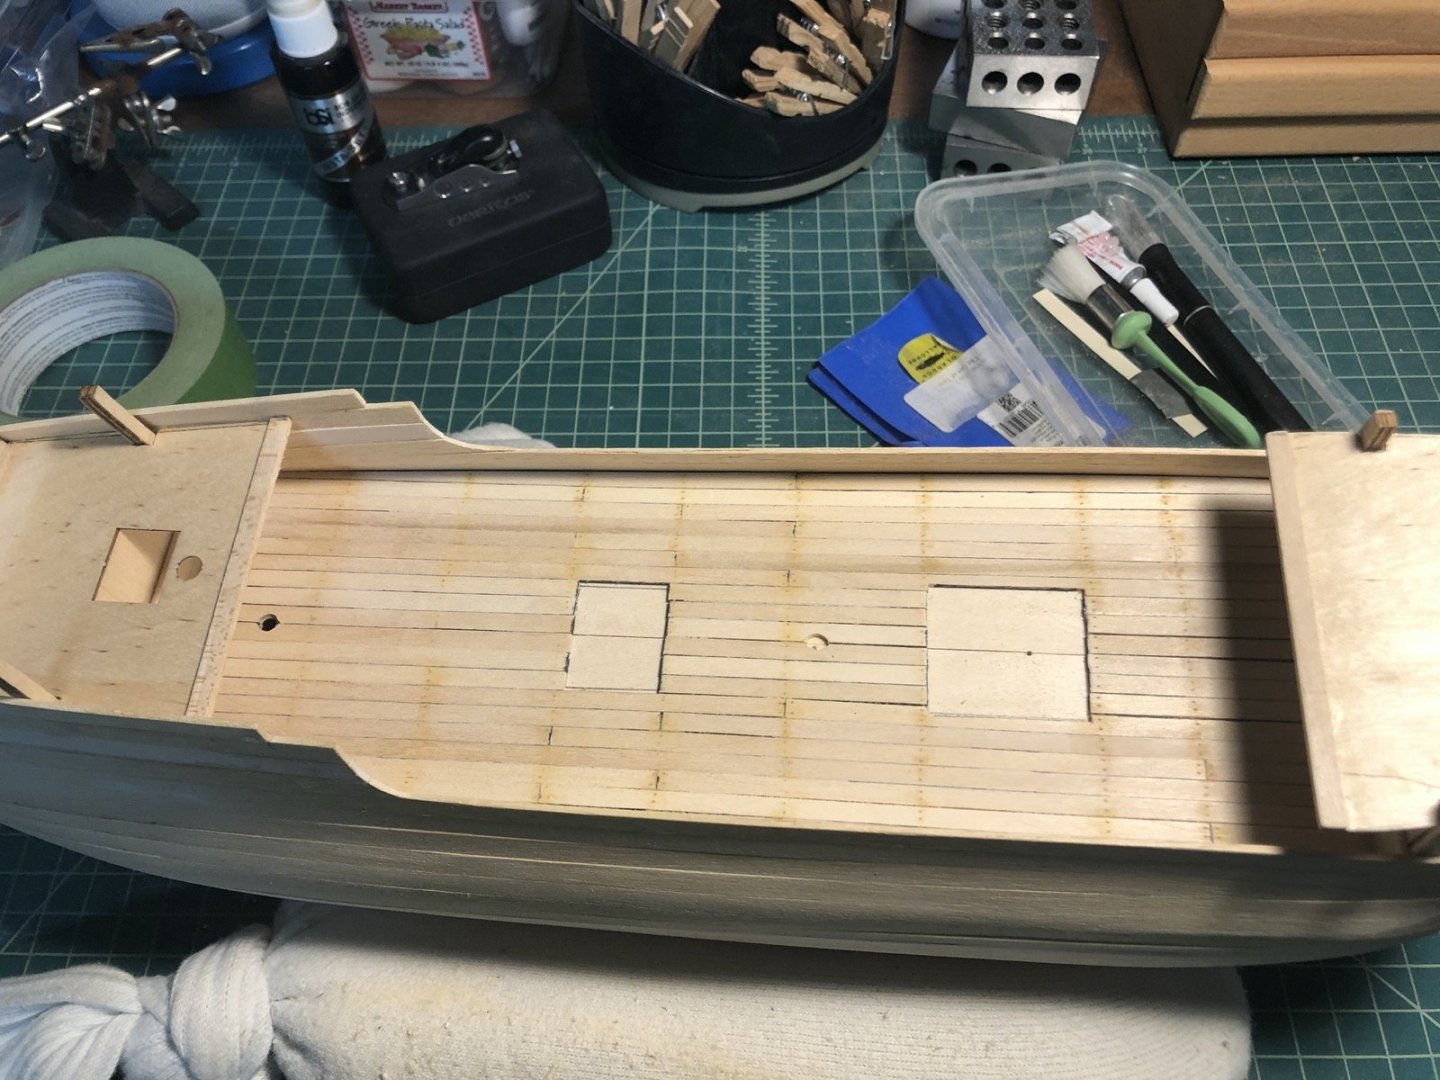
I finished planking the forecastle deck and added the fake treenails. I have the two aft decks to plank but before I do that I want to add a coaming around the opening in the first upper deck. I thought this was a hatch but the opening is for the steering column that comes up from the lower deck.
- 135 replies
-
- 3
-
-
- billing boats
- half moon
- (and 1 more)
-
I did get the idea from you Popeye. I am following your build log pretty closely for this ship.
- 135 replies
-
- 1
-
-
- billing boats
- half moon
- (and 1 more)
-
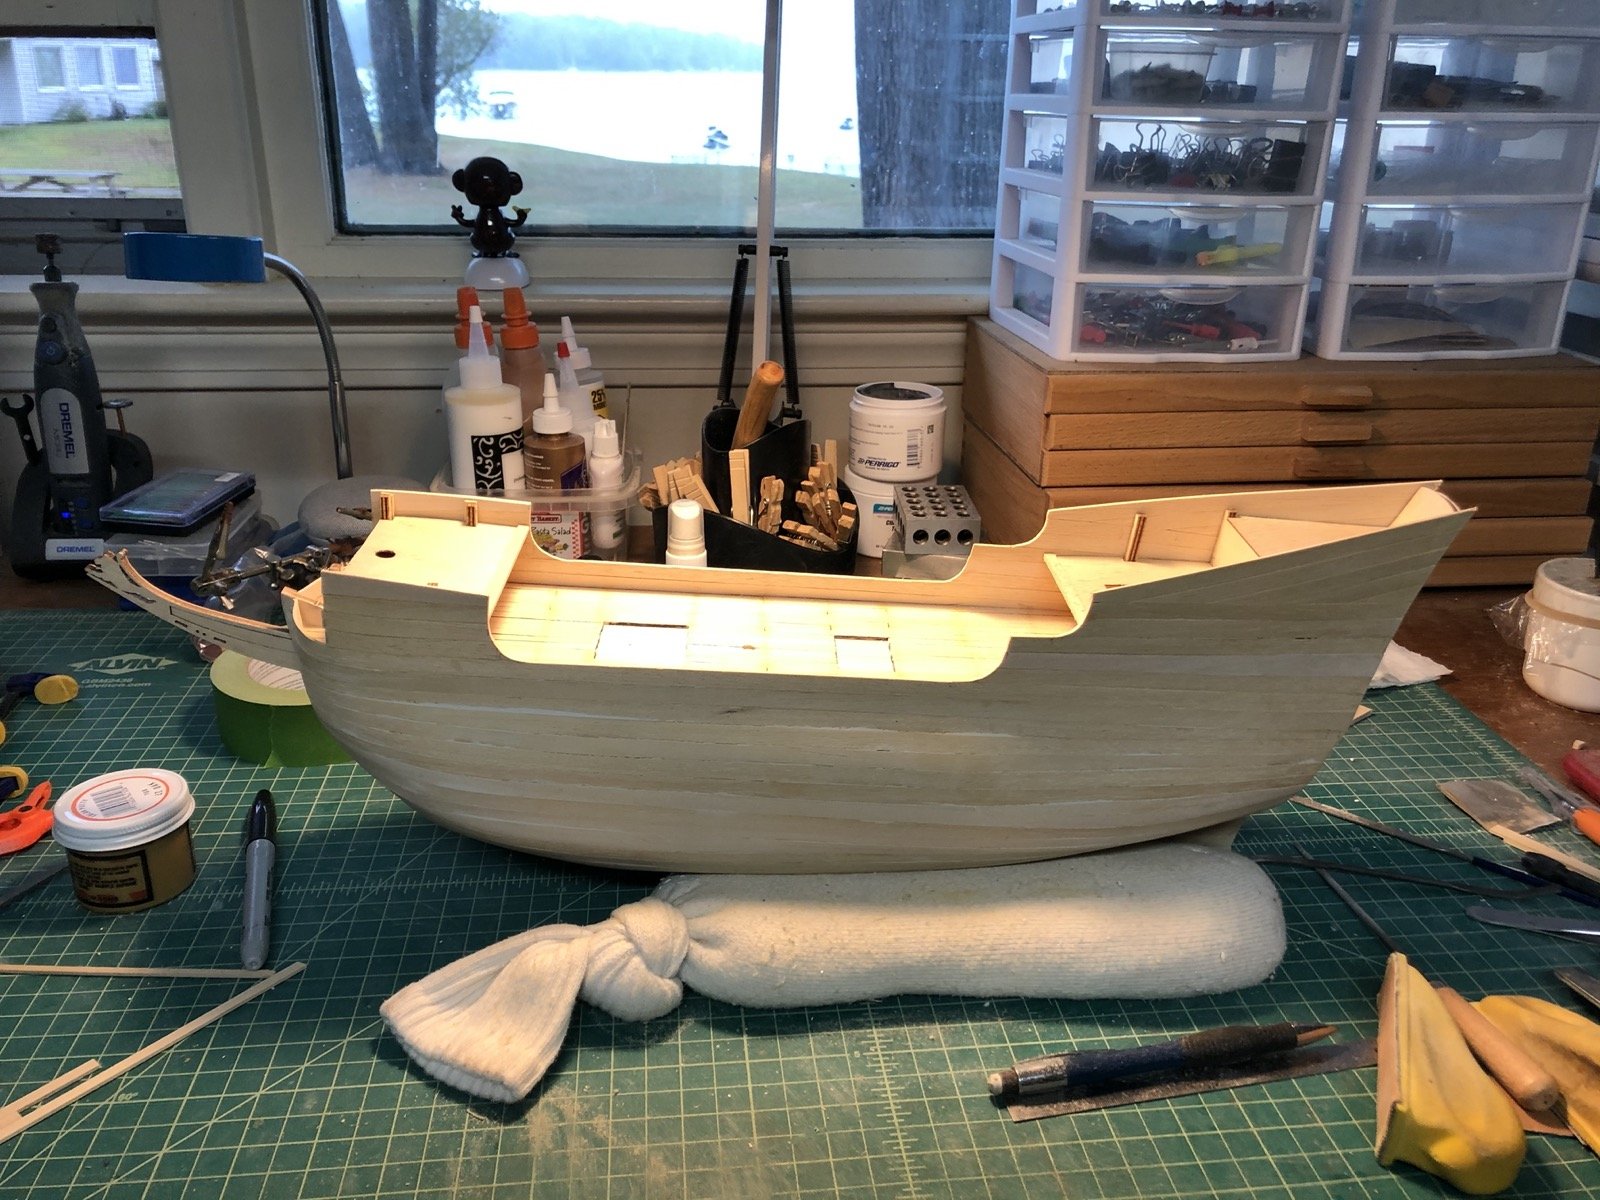
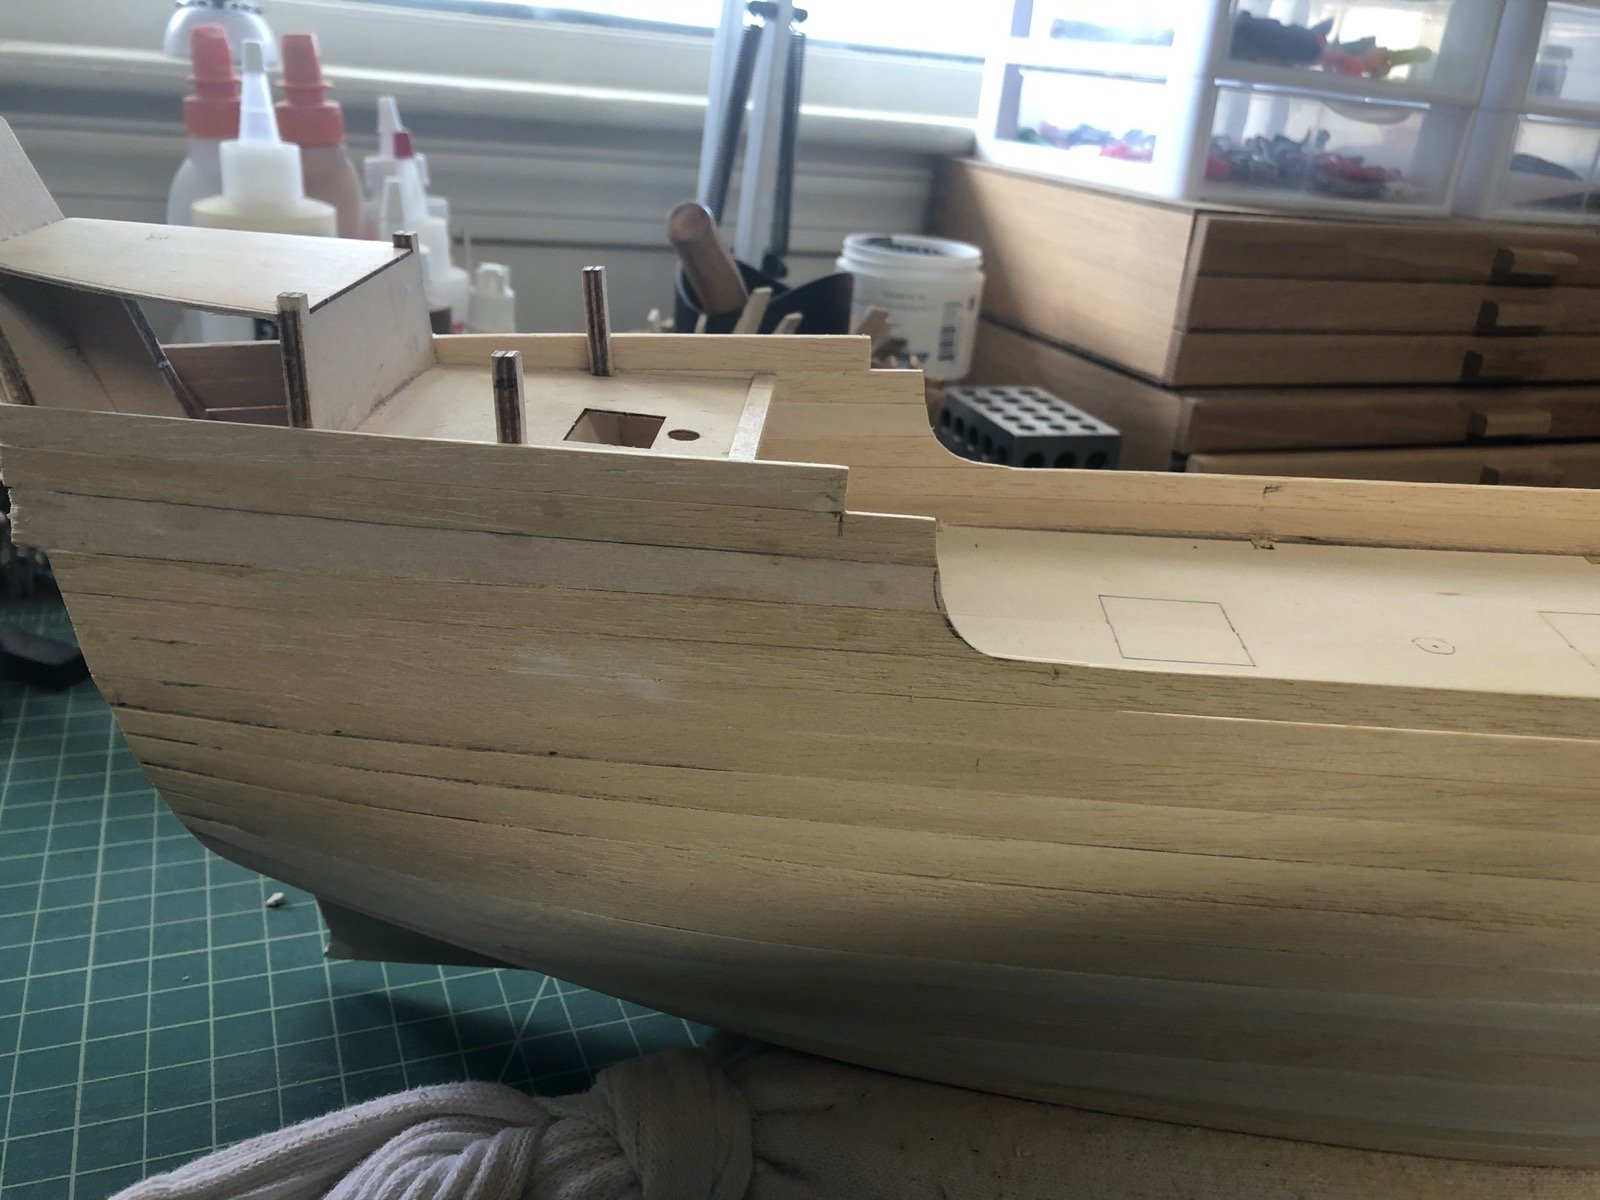
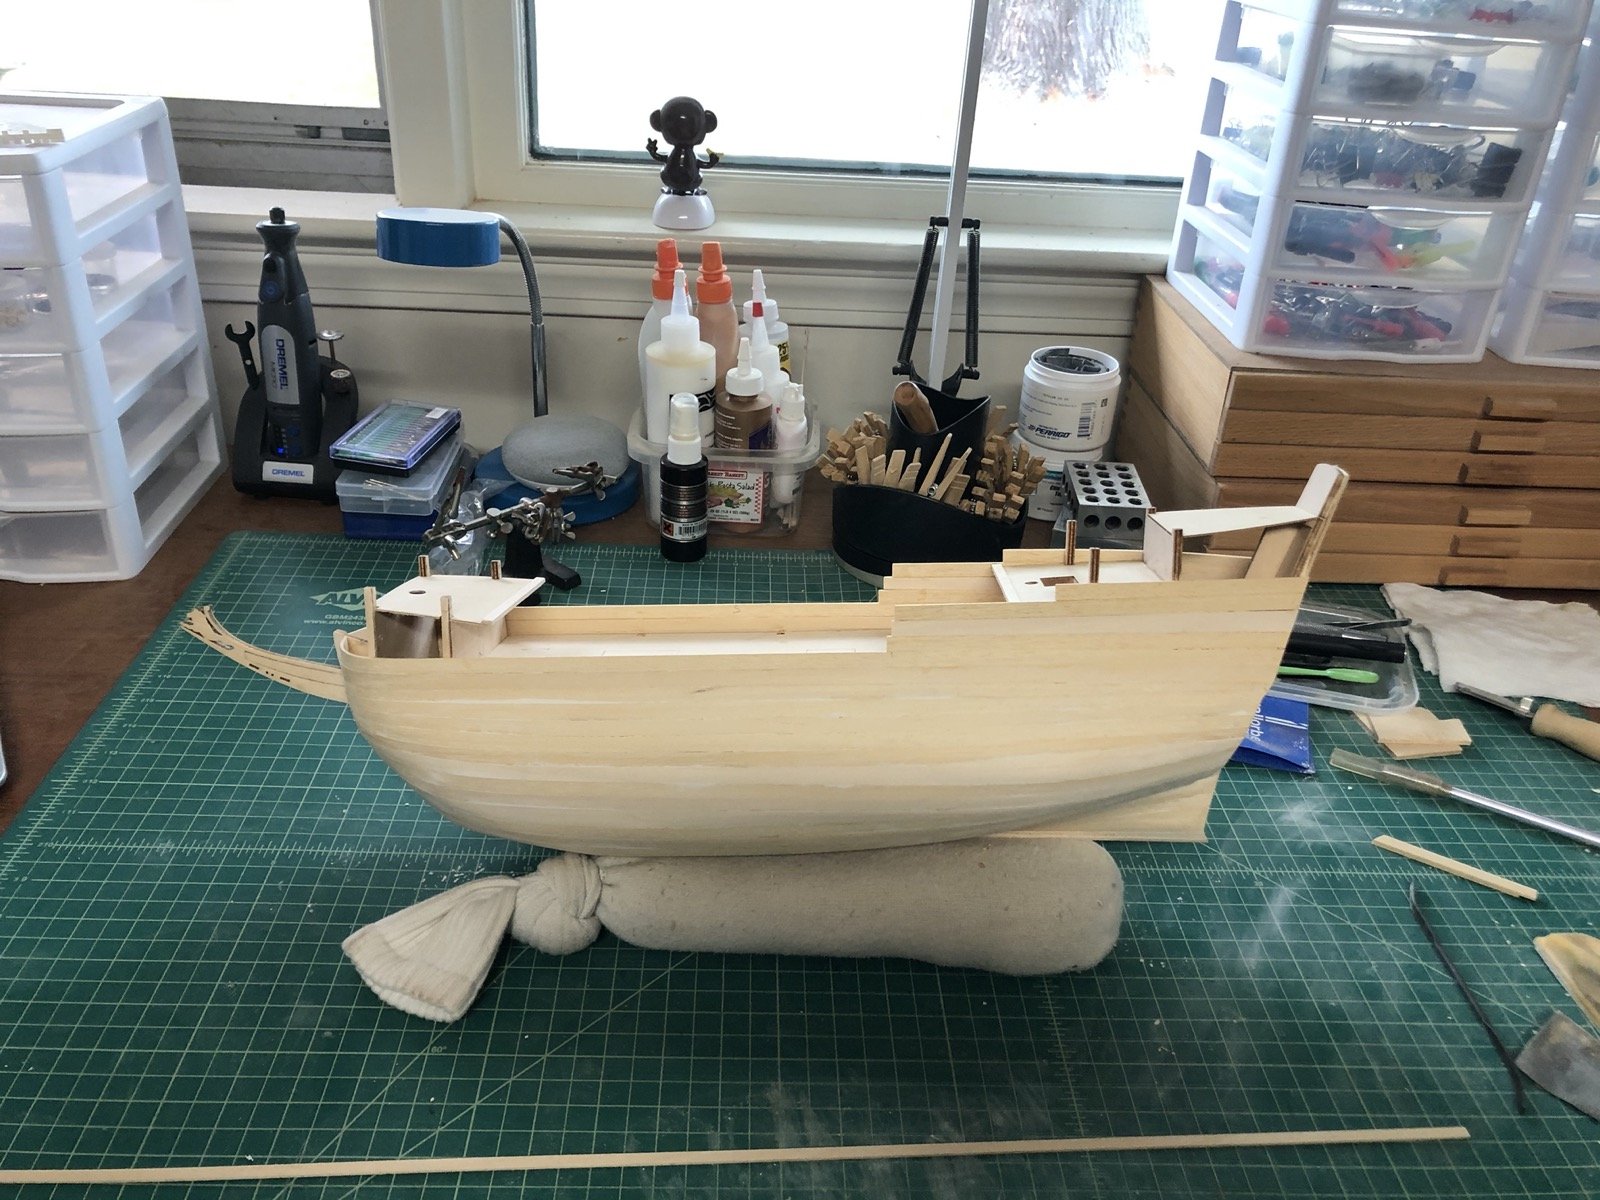
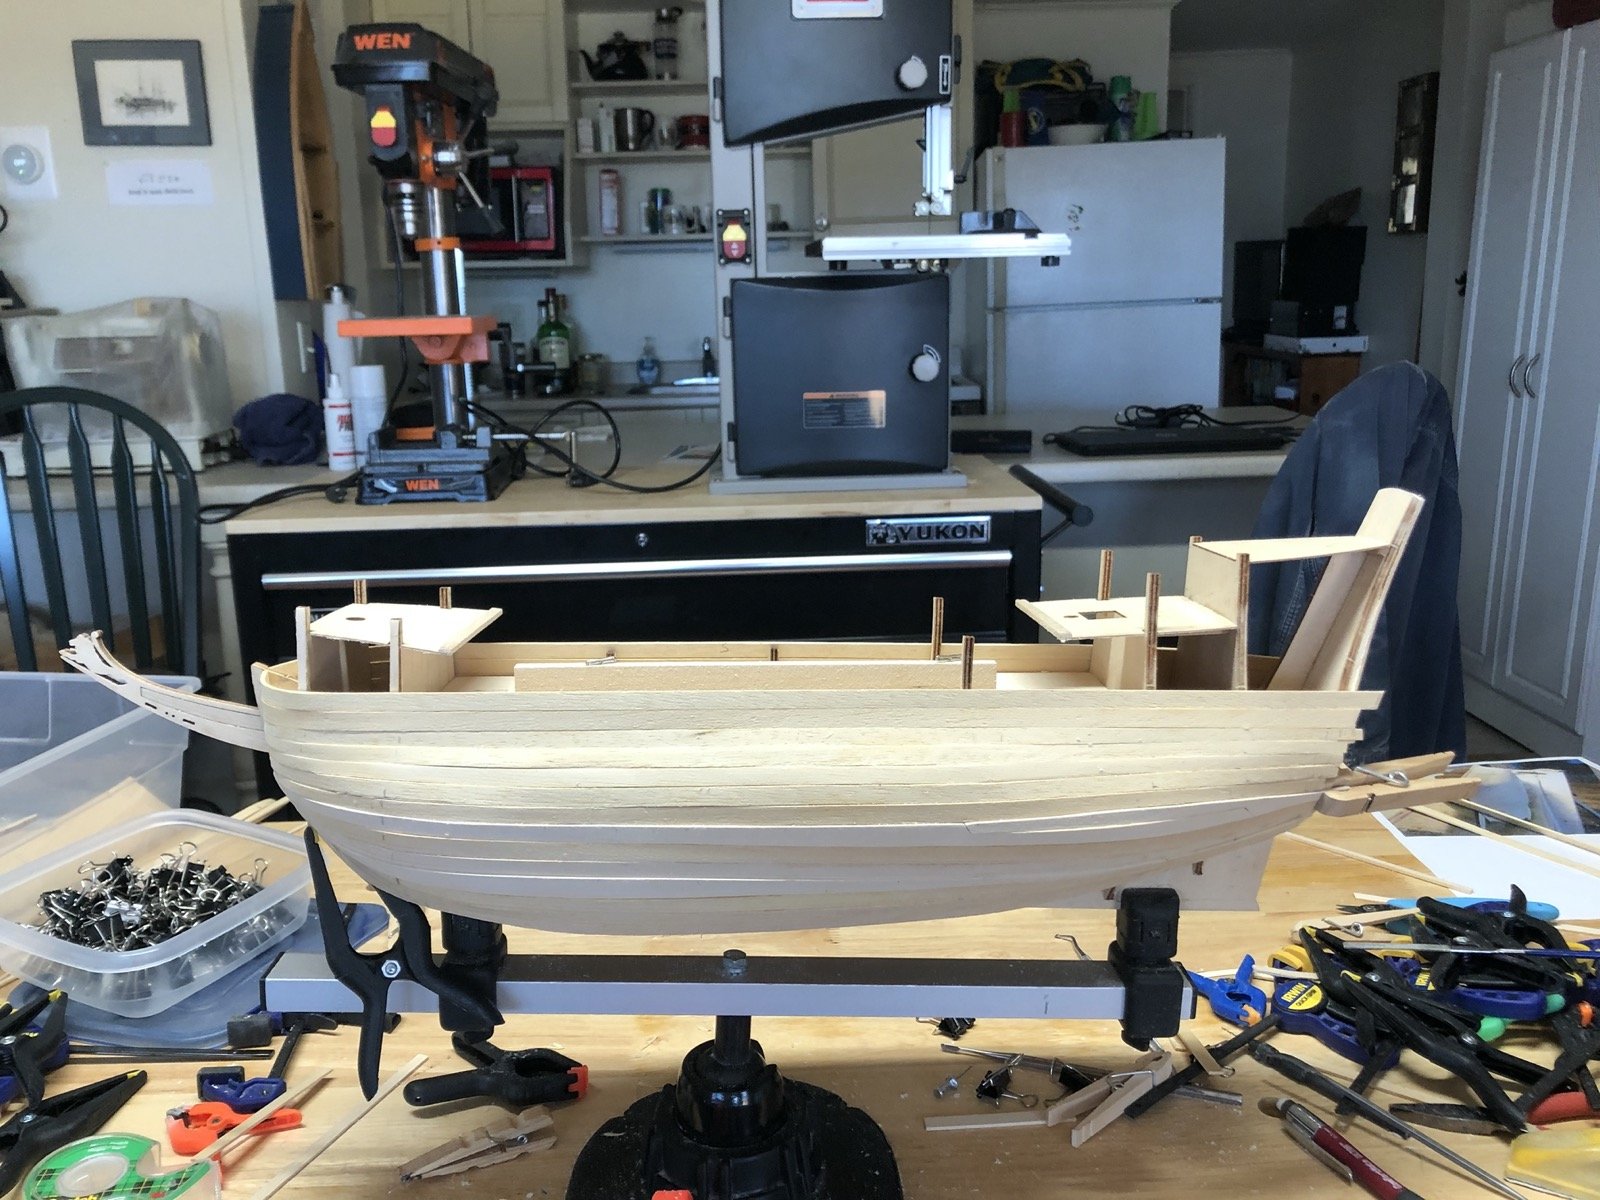
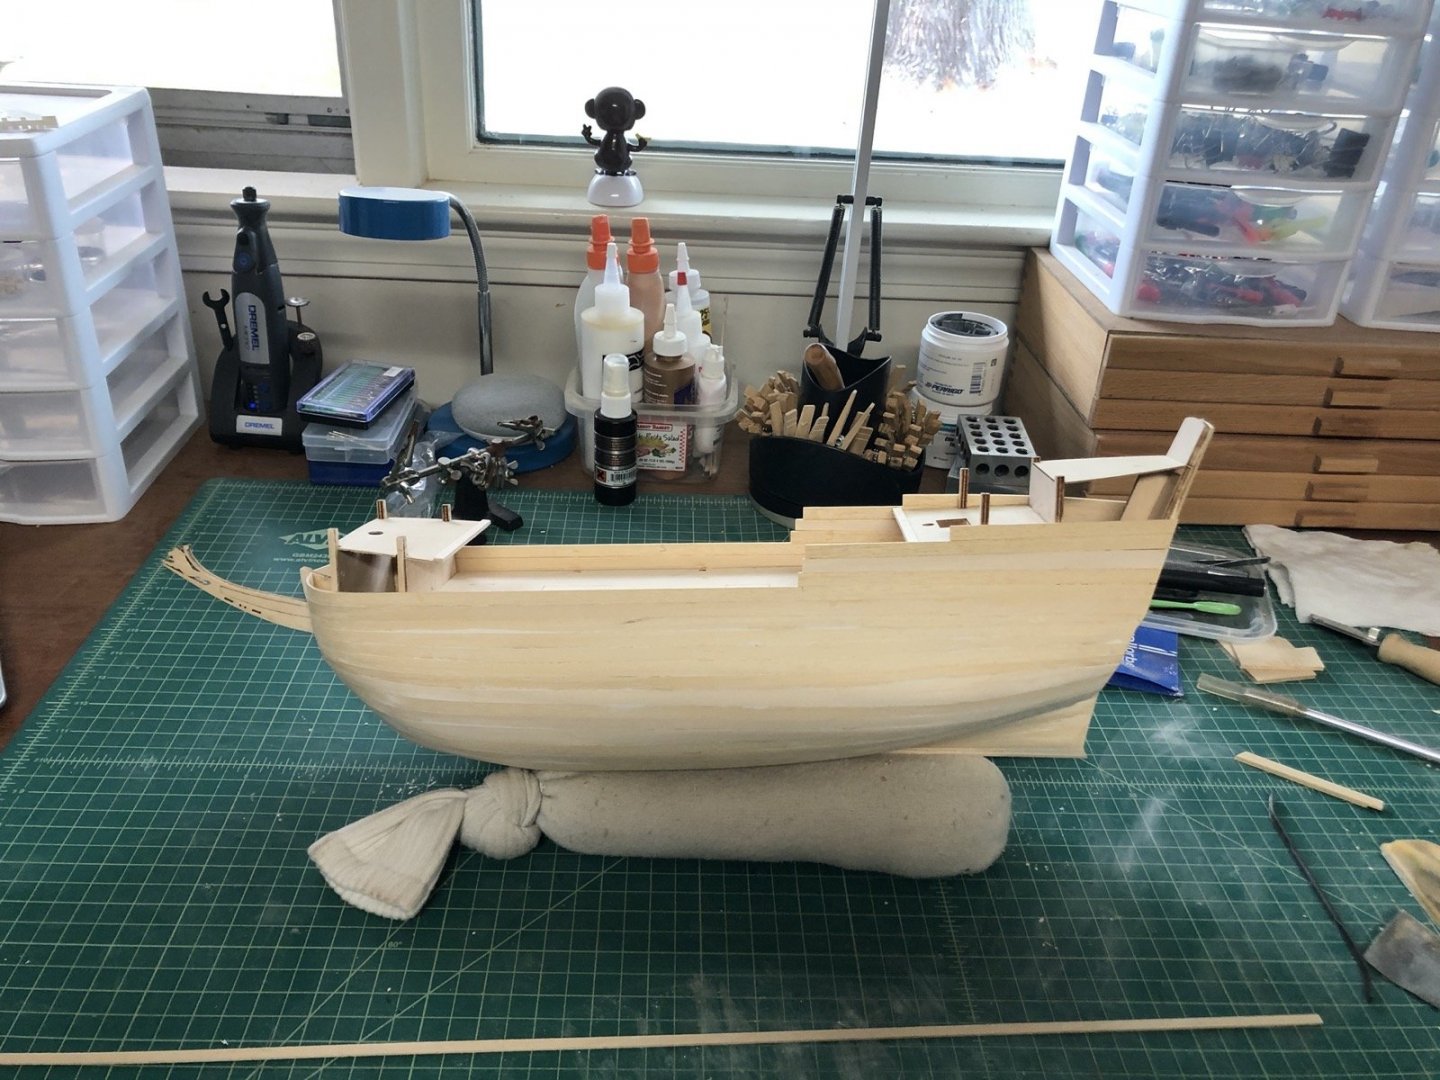
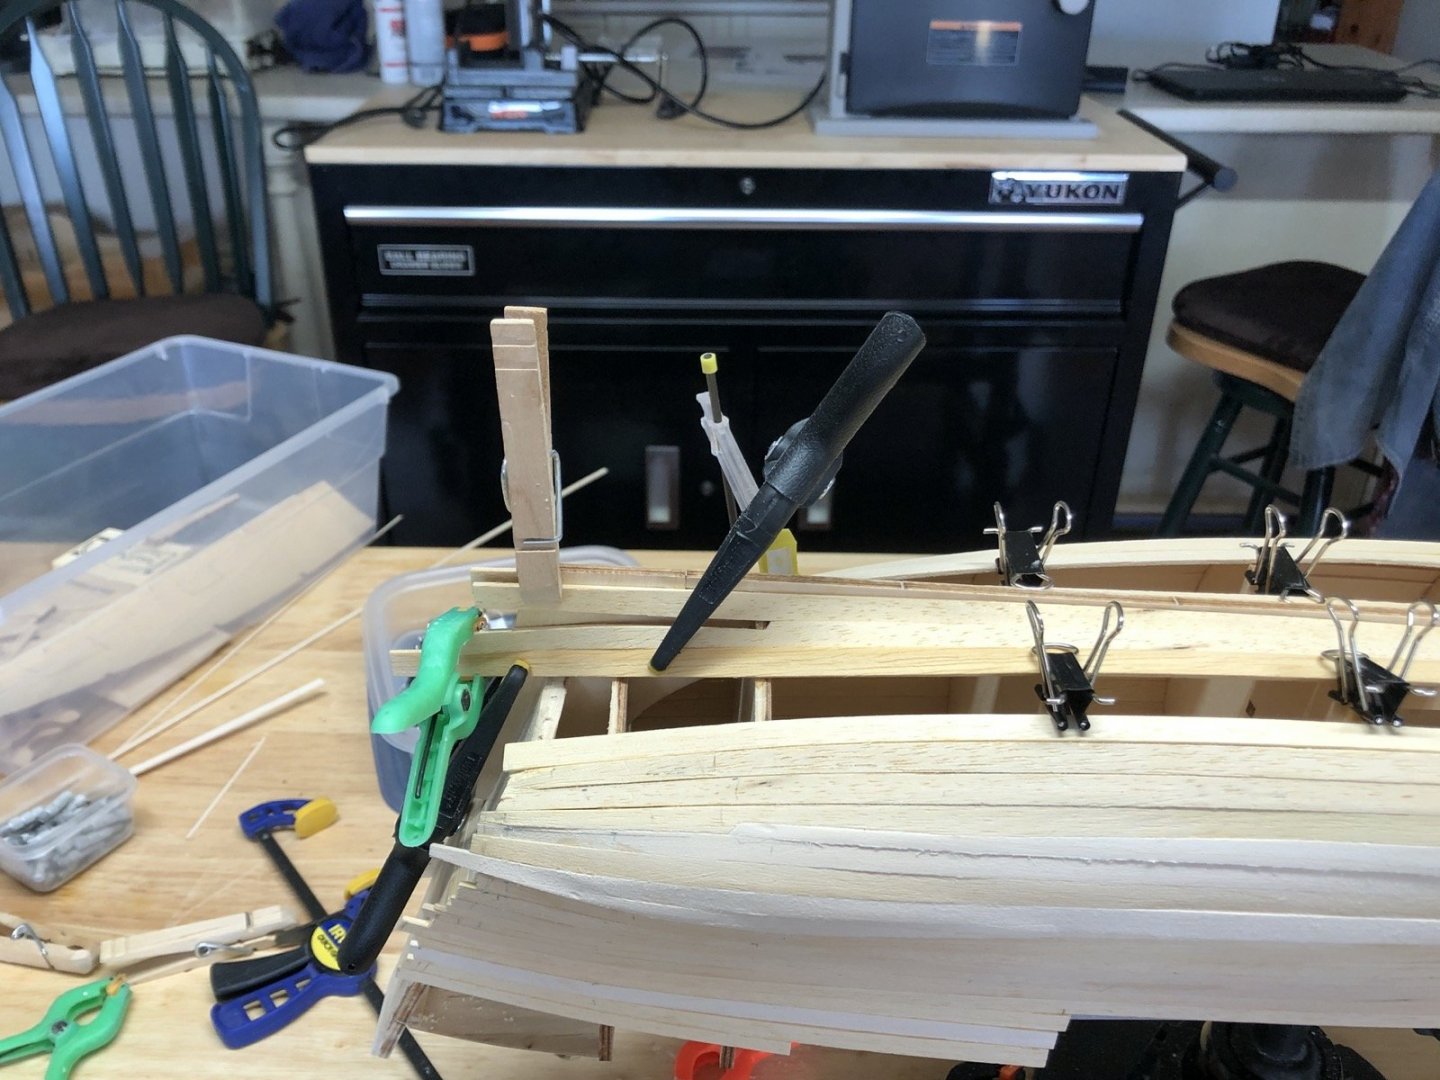
The admiral is back to work so I have more time to spend in the shop now. I finished planking the bulwarks on the fore and aft upper decks and started sanding the planks. I used a sanding drum in a Dremel tool to get the planks close to the transom then a sanding block to make them flush with the transom planks. I also used the sanding drum to cut in the other two curves in the bulwarks on each side. I am bending a thin plank to put over the top of the transom and I will sand the top bulwark plank to be flush with it. I added more planks to the fore and aft bulkheads on the forecastle and also used a cutting disk to remove the bulwark extensions. I added a cap piece to the front of the forecastle deck, so I can now plank that deck. I have started to mark out the locations of the new bulwark extensions I will add on the main deck, which will be high enough to support the rail. I will do this on the forecastle deck too, but not the aft upper decks as these don't have a rail on the Half Moon replica ship.

- 135 replies
-
- 3
-
-
- billing boats
- half moon
- (and 1 more)
-
Jim, this is a fantastic cross section you are building. I look forward to following along for the rest of the build.
-
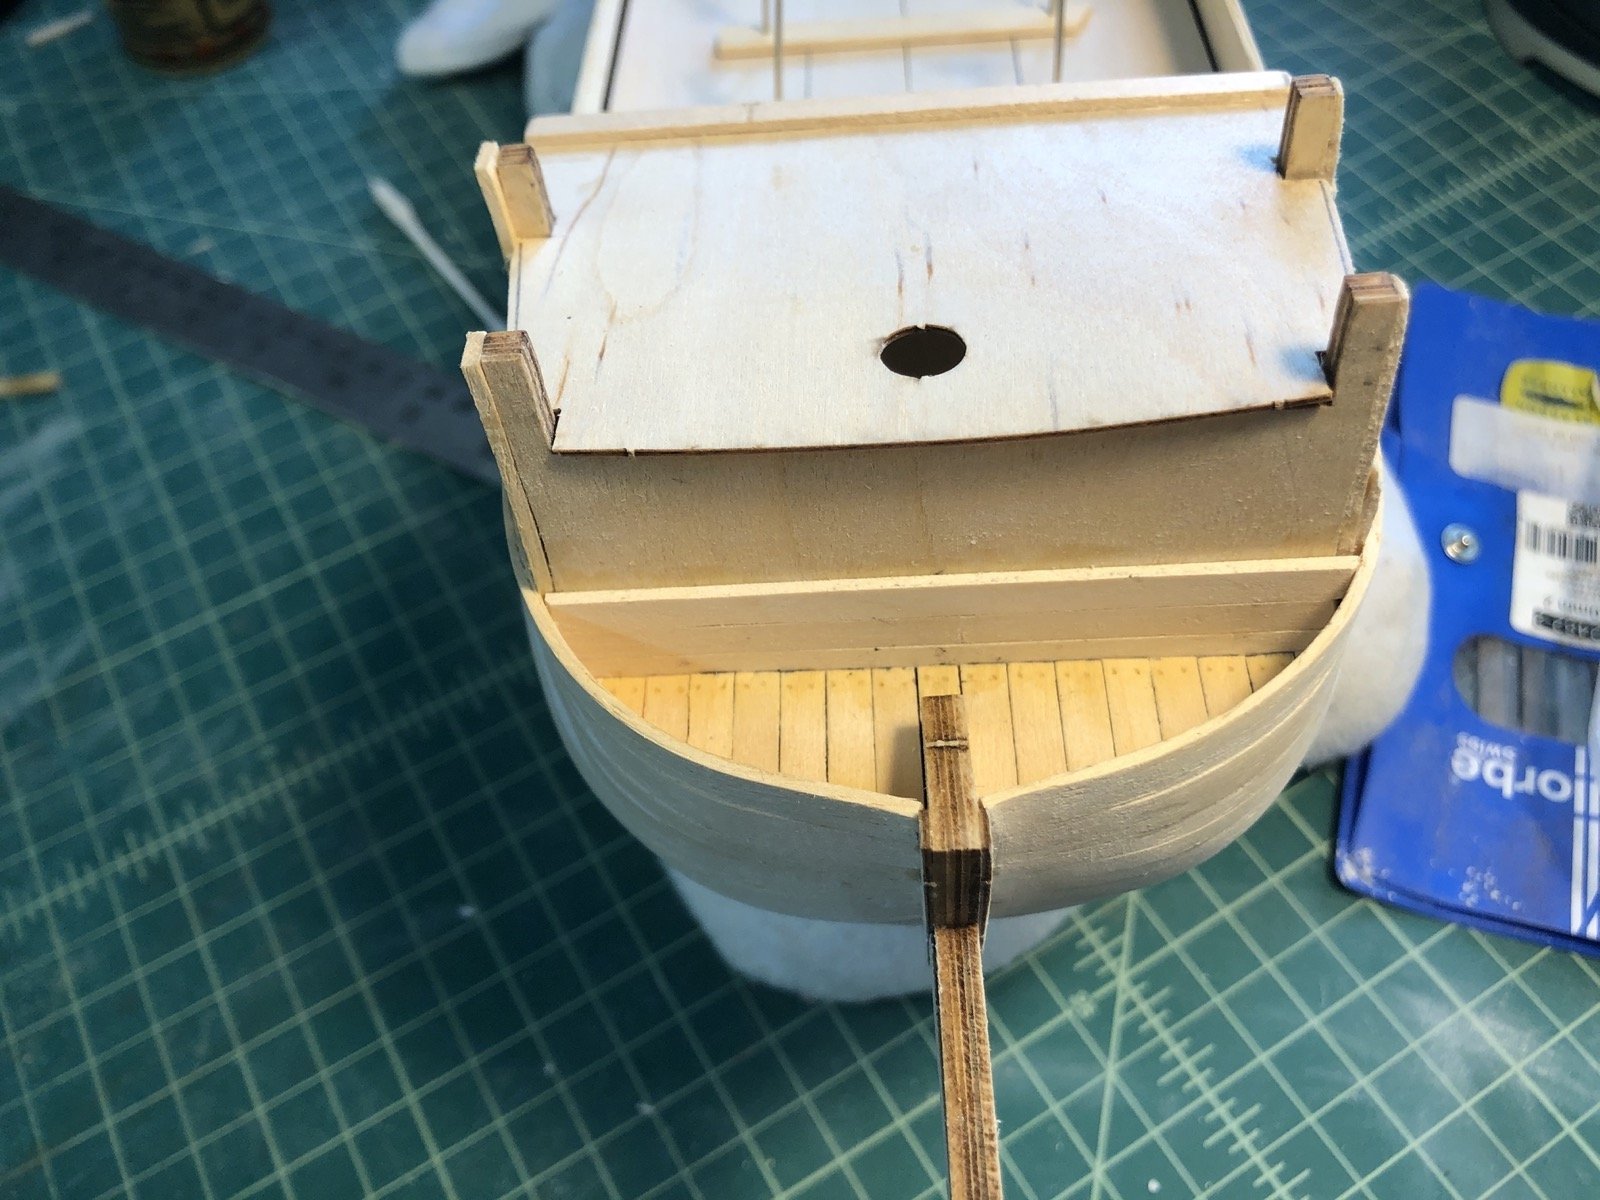
For the fore castle planking I am soaking and bending short lengths of planks to fit around the bulwark supports. I am also adding planks around the aft upper decks. I made a row of two planks, then added a diagonal plank from the top of the transom. I will fill in the open area with more diagonal planks.
- 135 replies
-
- 4
-
-
- billing boats
- half moon
- (and 1 more)
-
No worries. I hope you find one. It is a nice mill.
-
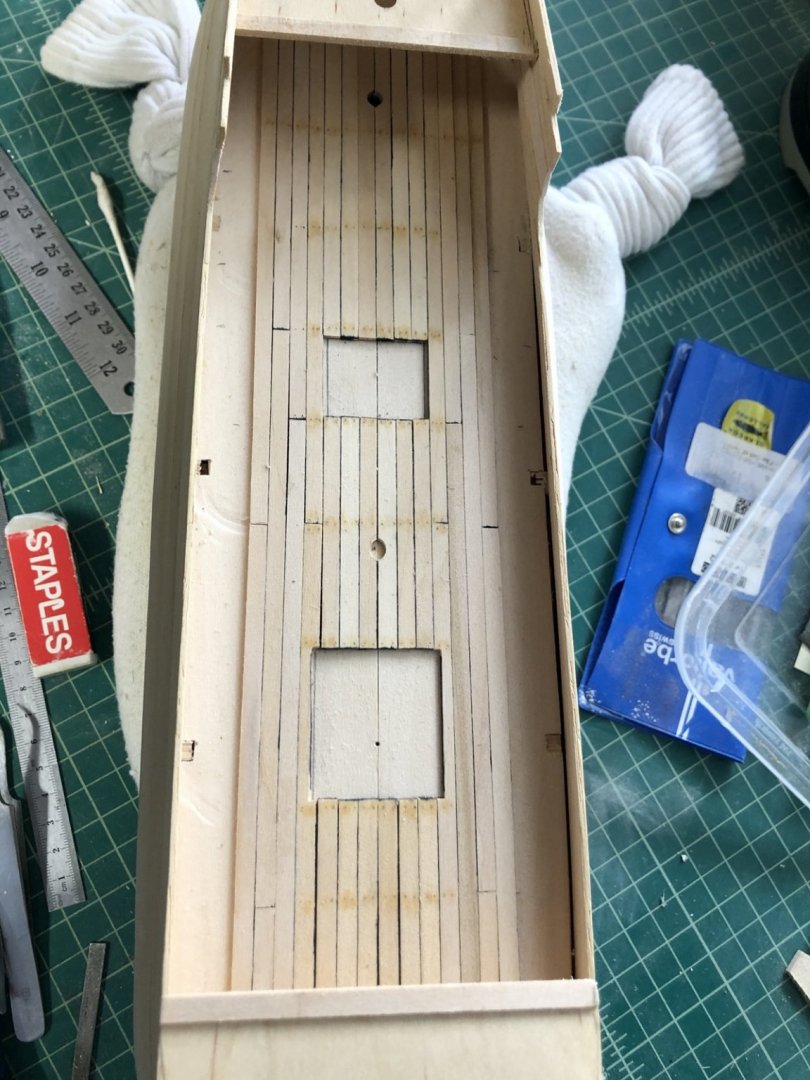
I finished planking the main deck. For the planks between the hatch openings I used tape to hold them together and also to mark the lines for the fake treenails. These were added before the planks were glued to the deck. I added some of the fake treenails to the rest of the planks before gluing them down where they were under the overhanging decks above the main deck. For the planks along the bulwarks I first cut a plank from a basswood sheet at the maximum width then trimmed it to fit the space. I did these in two pieces to make it easier with the joint following the 3 butt shift pattern of the deck. After all the planks were glued down I filled in the rest of the fake treenails. I then finished adding the planks to the rear bulwark on the main deck. Now I need to add the rest of the hull planking along both sides of the fore castle and the rear decks.


- 135 replies
-
- 3
-
-
- billing boats
- half moon
- (and 1 more)
-
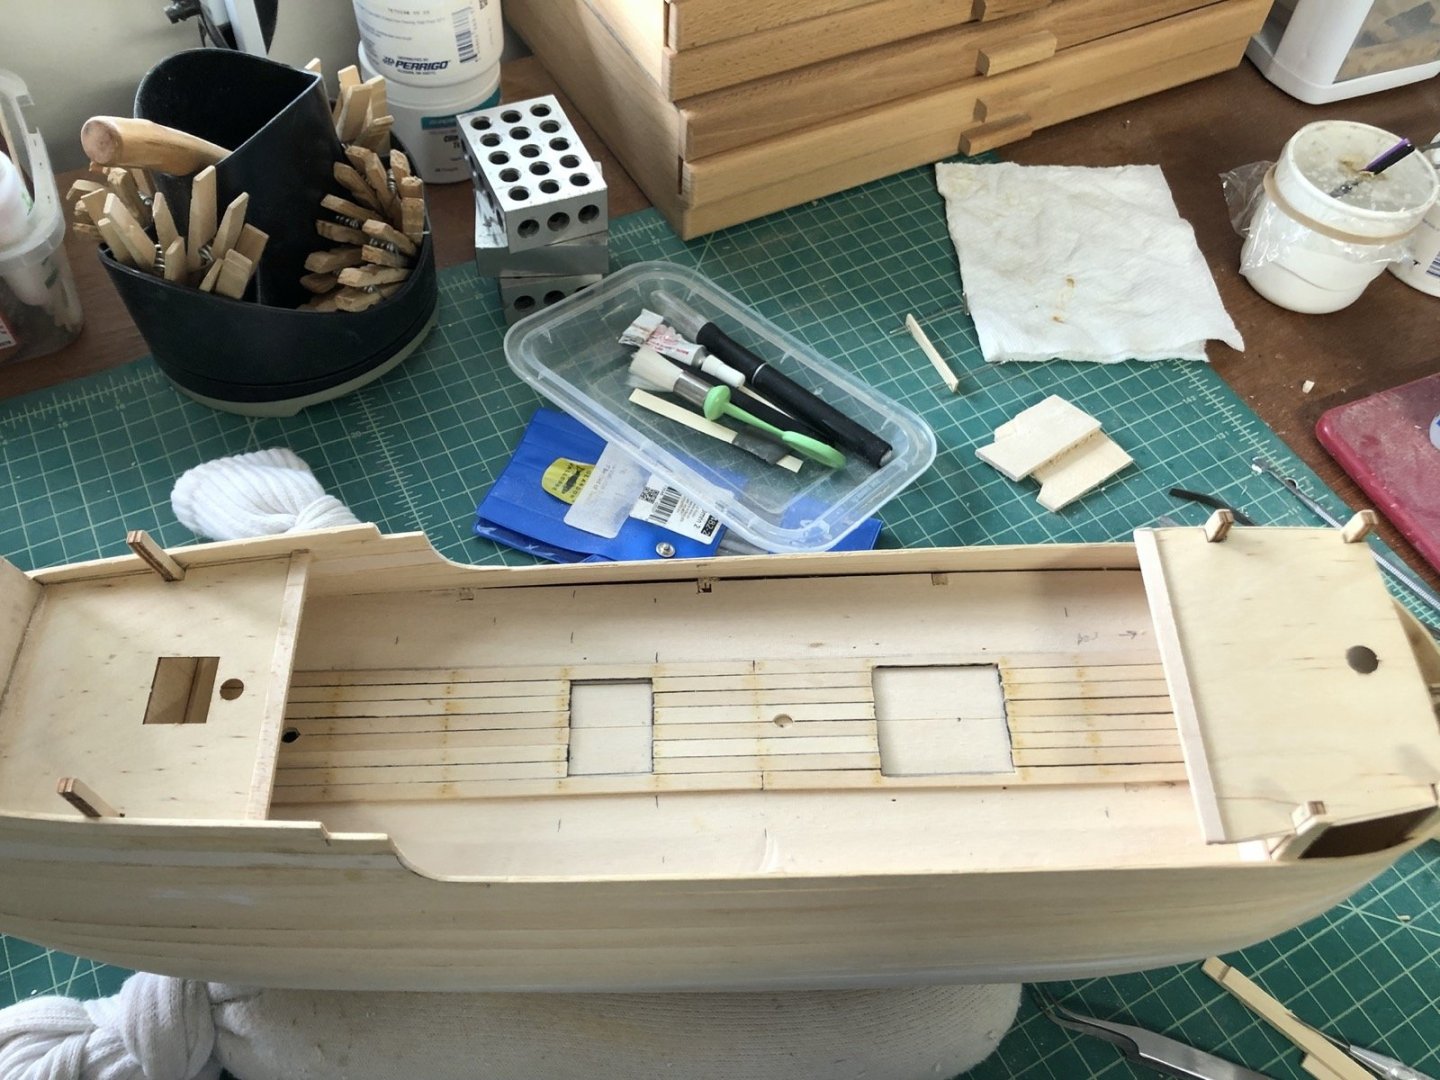
Here are the bow deck planks glued in place waiting for a coat of oak stain and WOP. I am now working on planking the main deck. I first pinned planks along the front and back edges of the deck hatches, then cut planks to fit between them. Here is the start of this. Many more planks to cut yet.
- 135 replies
-
- 3
-
-
- billing boats
- half moon
- (and 1 more)
-
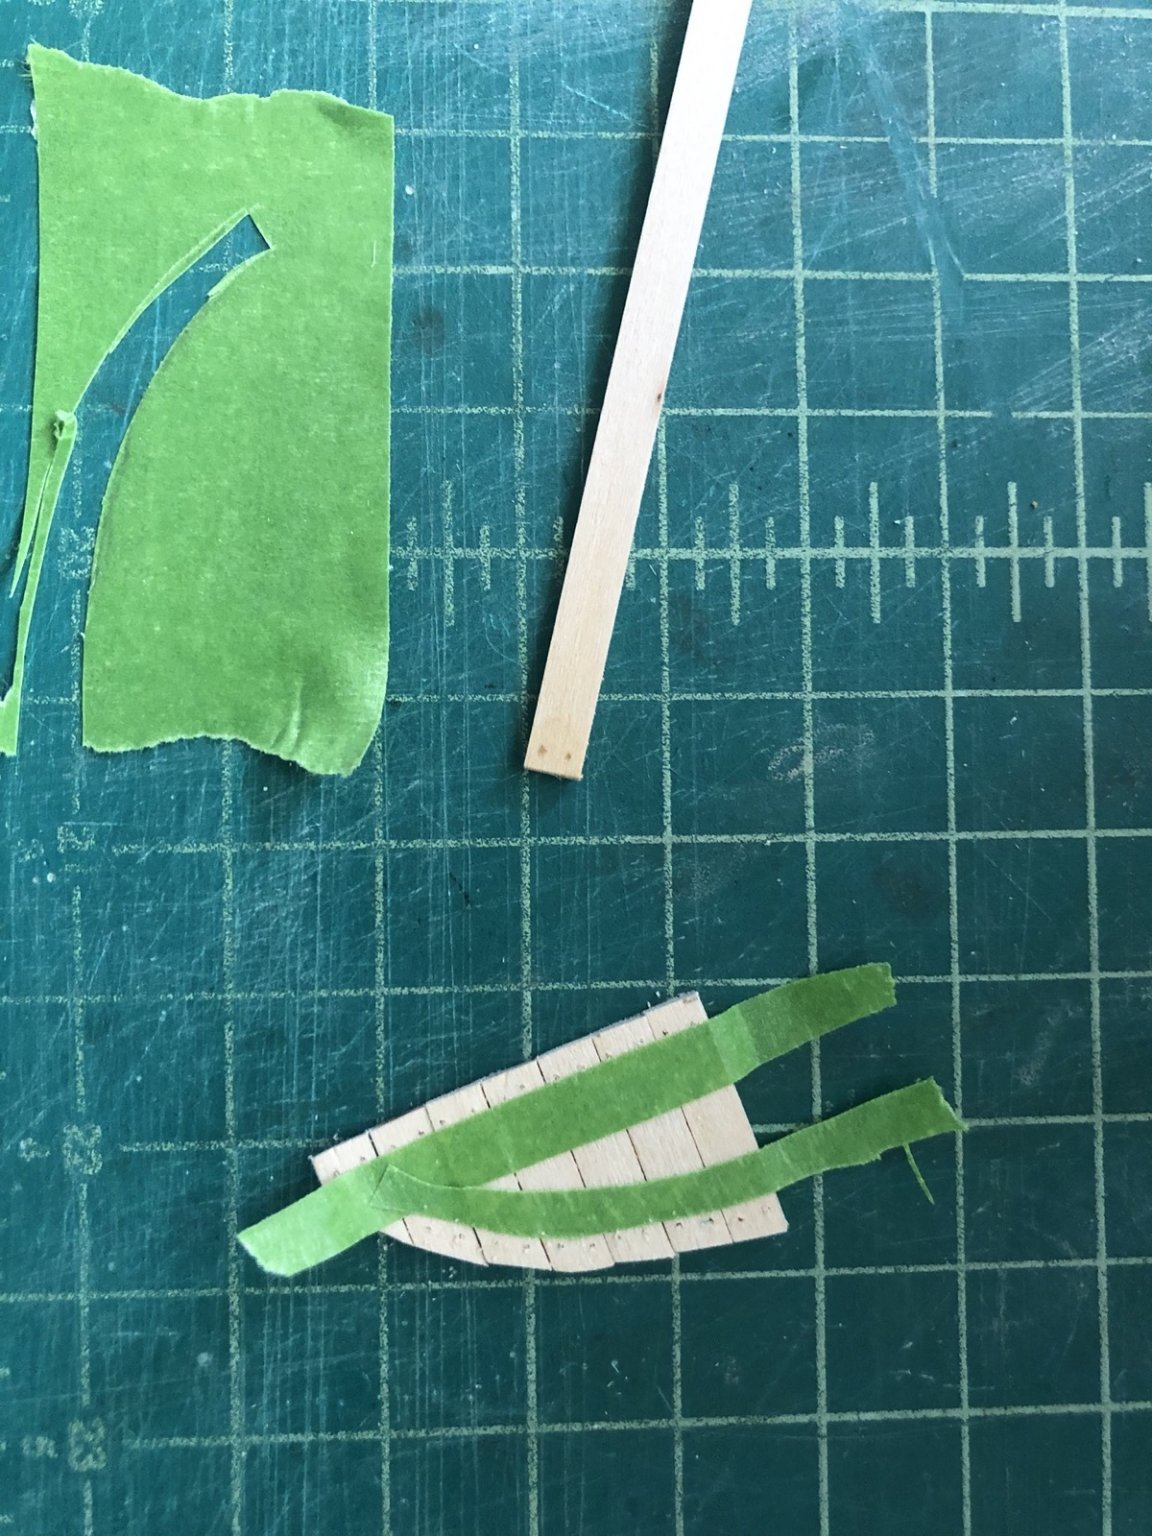
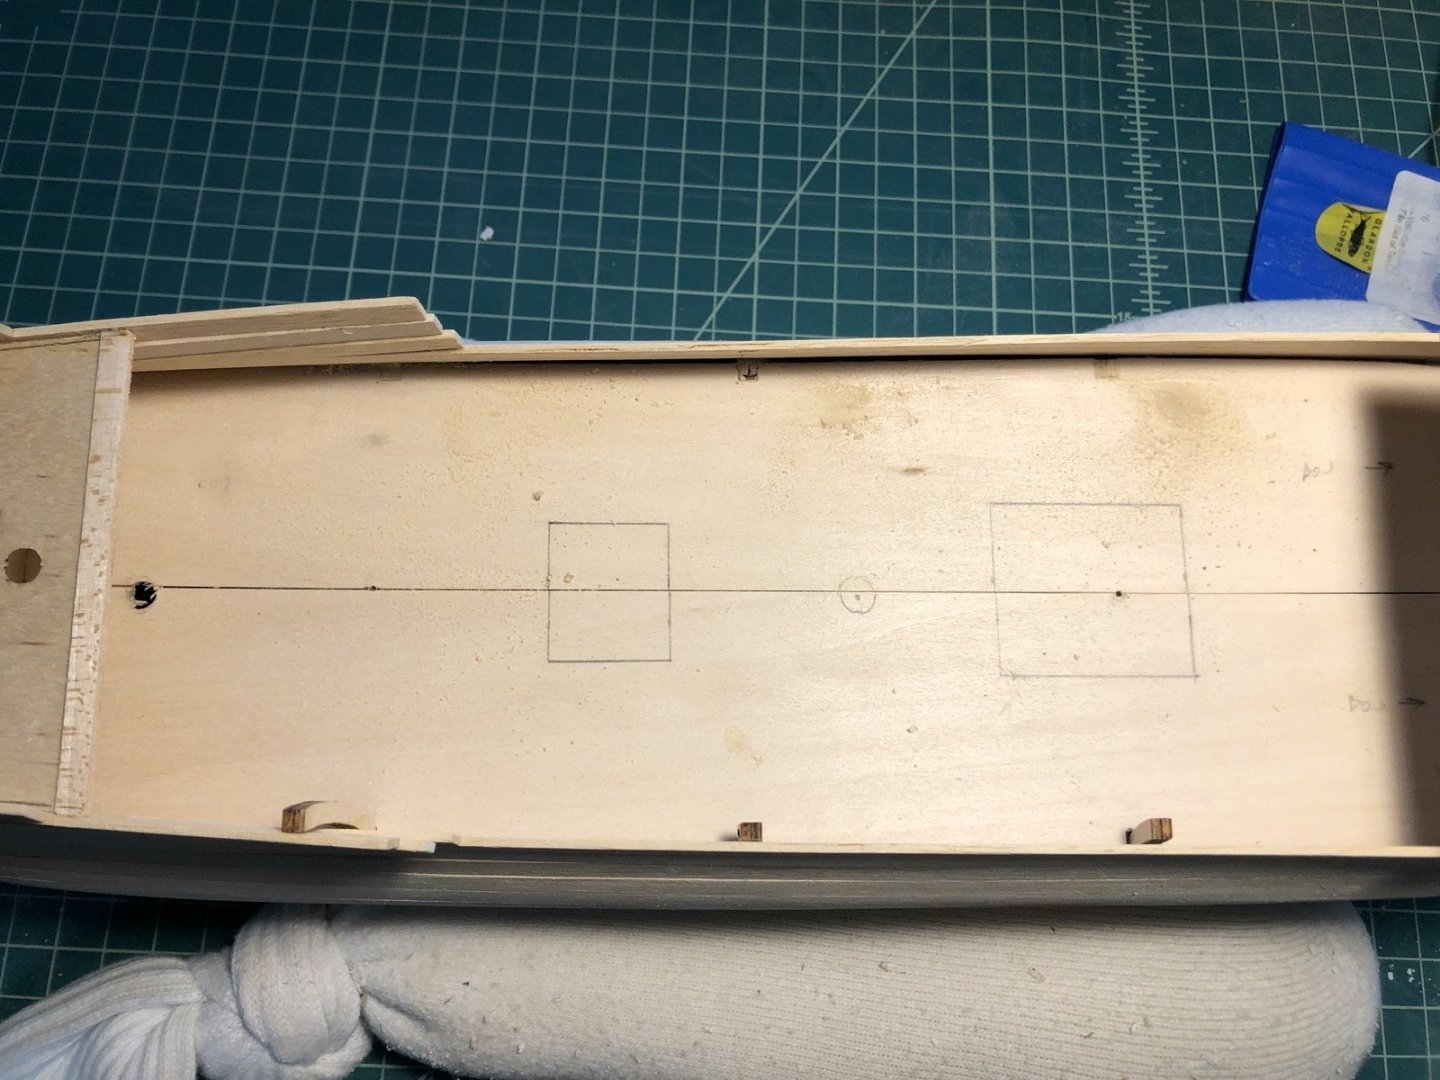
I added a few more bulwark planks at the aft end of the main deck, then cut out the first curved portion. I first marked the planks with a circle template then used the Dremel with a sanding disk to remove the excess. I will finish them up with a half round file and sandpaper. I cut deck planks for the small bow deck, then removed the starboard planks to drill holes for fake treenails. I wanted to do this with the planks off the deck because it would be harder to drill with the bulwarks in the way. I used some masking tape to hold them together and to use as a guide for drilling the holes. I traced the curve edge of the planks on the masking tape then cut out the guide strip. I drilled two holes at each end and will fill them in with oak wood putty. You can see this on the long test strip. Before I glue these in place I will mark the ends and one edge with a black Sharpie. Here are the port deck planks dry fit. After I finish gluing these all in I will do the same on the main deck.

- 135 replies
-
- 4
-
-
- billing boats
- half moon
- (and 1 more)
-
I have been working on sanding the hull planking and filling in cracks and dips with wood filler. I am not completely happy with it yet but for now I am going to move on to planking the decks and bulwarks. I will come back to the hull later to finish it off. I removed the bulwark extensions on the main deck for a couple of reasons. Firstly I want to be able to plank the deck without having to work around them, and secondly I want them higher so I can attach the rail to them. I am going to add many more extensions for the rail and the plywood extensions didn't look as nice as solid wood extensions will. I removed them by carefully cutting them near the false deck using a cutting disk in the Dremel tool. I then used a sanding disk in the Dremel to sand them down closer to the deck then I used a riffler file to file them flat to the deck. Here you can see them removed on one side. I will add about 10 new ones on each side, keeping the curve of the old ones and gluing the hull planks to them. When I added these hull planks I only glued them to each other, not to the old extensions, which made it much easier to remove them.
- 135 replies
-
- 4
-
-
- billing boats
- half moon
- (and 1 more)
-
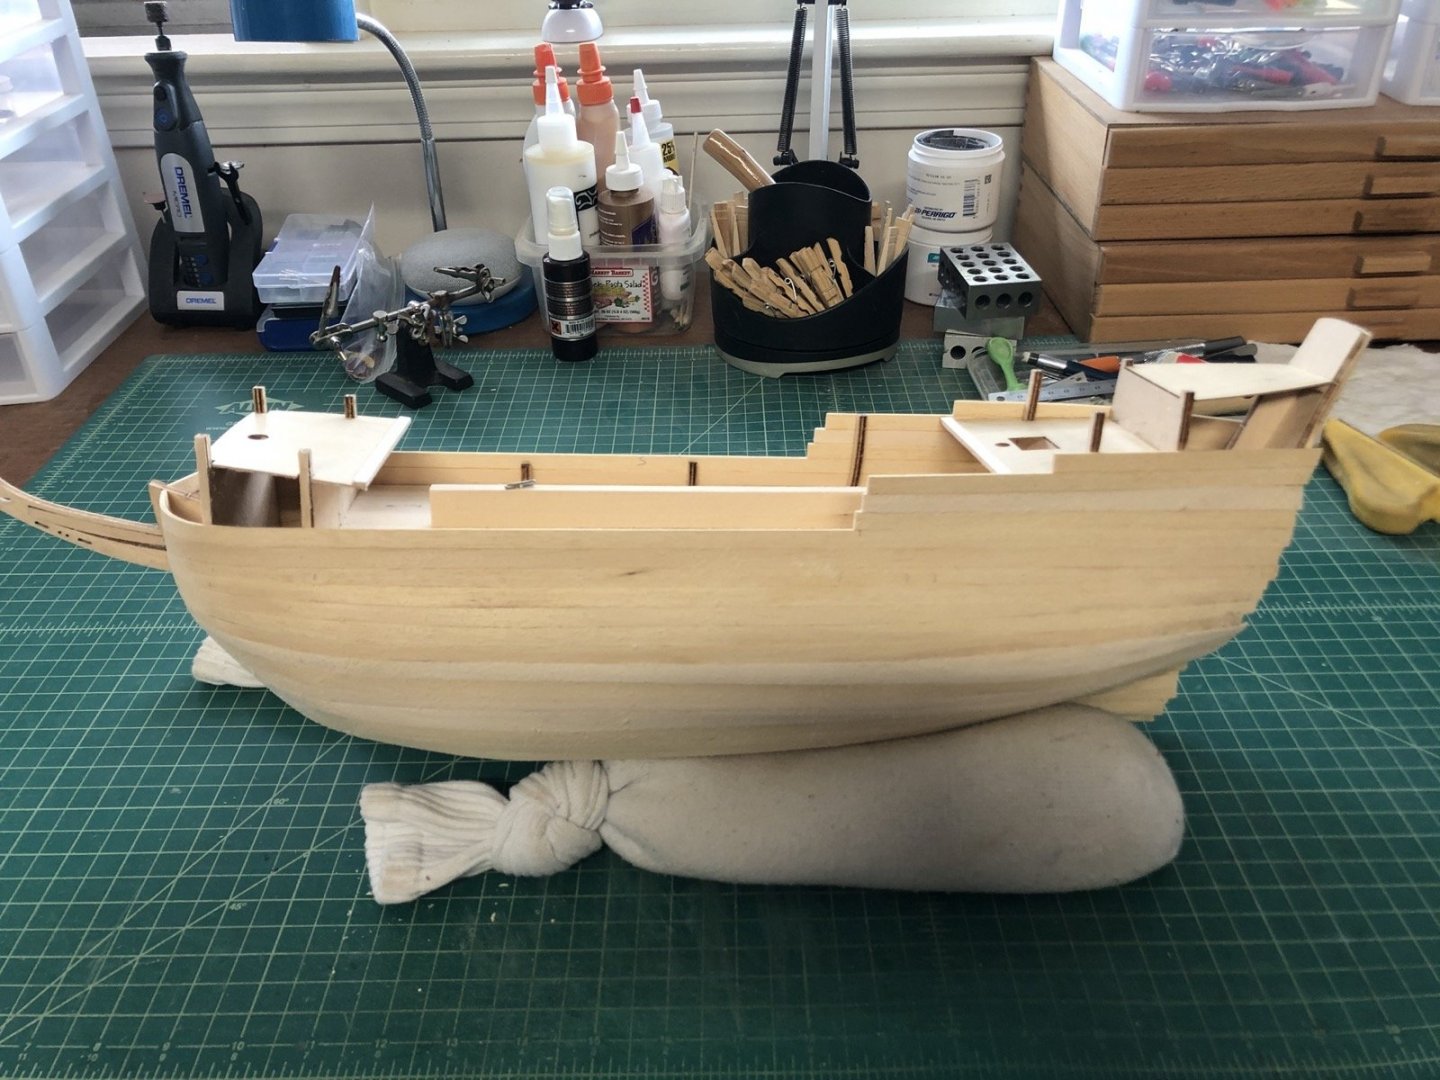
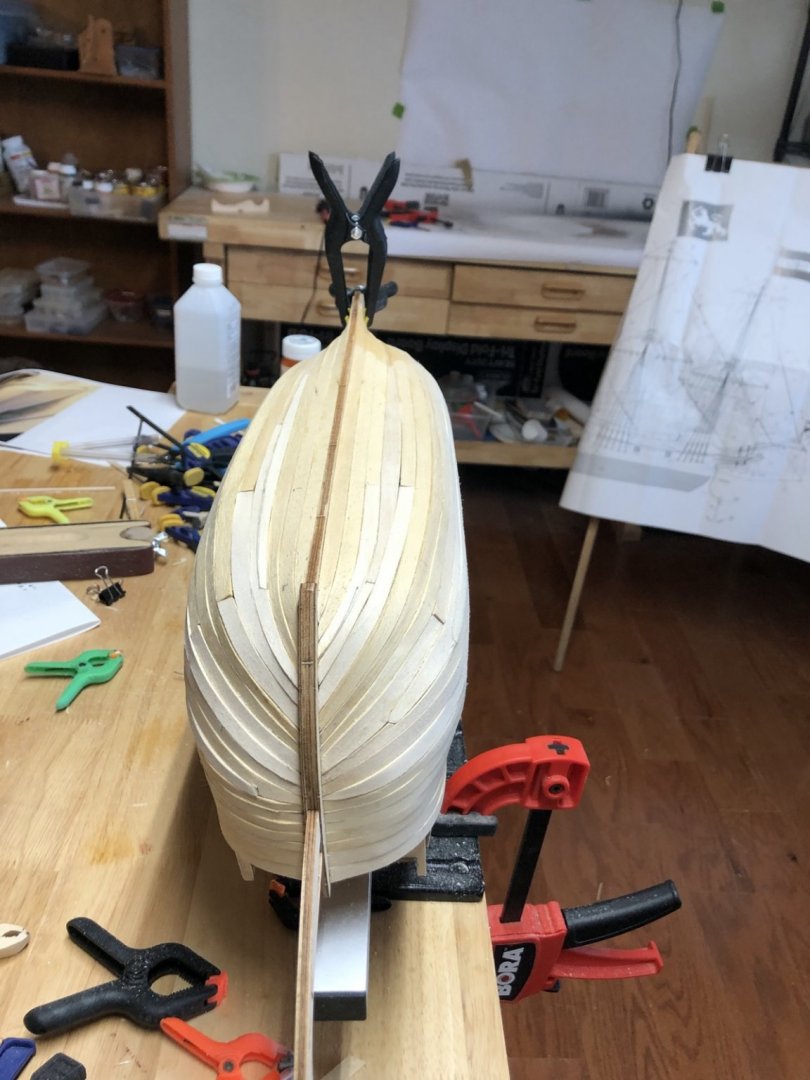
It was cool to see my Chris Craft model on the MSW Facebook page the other day. With so many great models on this site I figured they had a lot of others to choose from. I was thrilled. On the Half Moon I sanded the filler pieces into the stern post. I still have some more sanding to do but I will wait a bit on that. I wanted to cover the plywood edge along the keel and also to make the keel a bit deeper, so I glued a strip of wood onto the keel, which I will taper into the plywood after it dries. I didn't have a good way to clamp it so I brushed wood glue along the keel, leaving areas that I put medium CA on. These acted like a clamp to hold the strip down while the wood glue dried.

- 135 replies
-
- 5
-
-
- billing boats
- half moon
- (and 1 more)
-
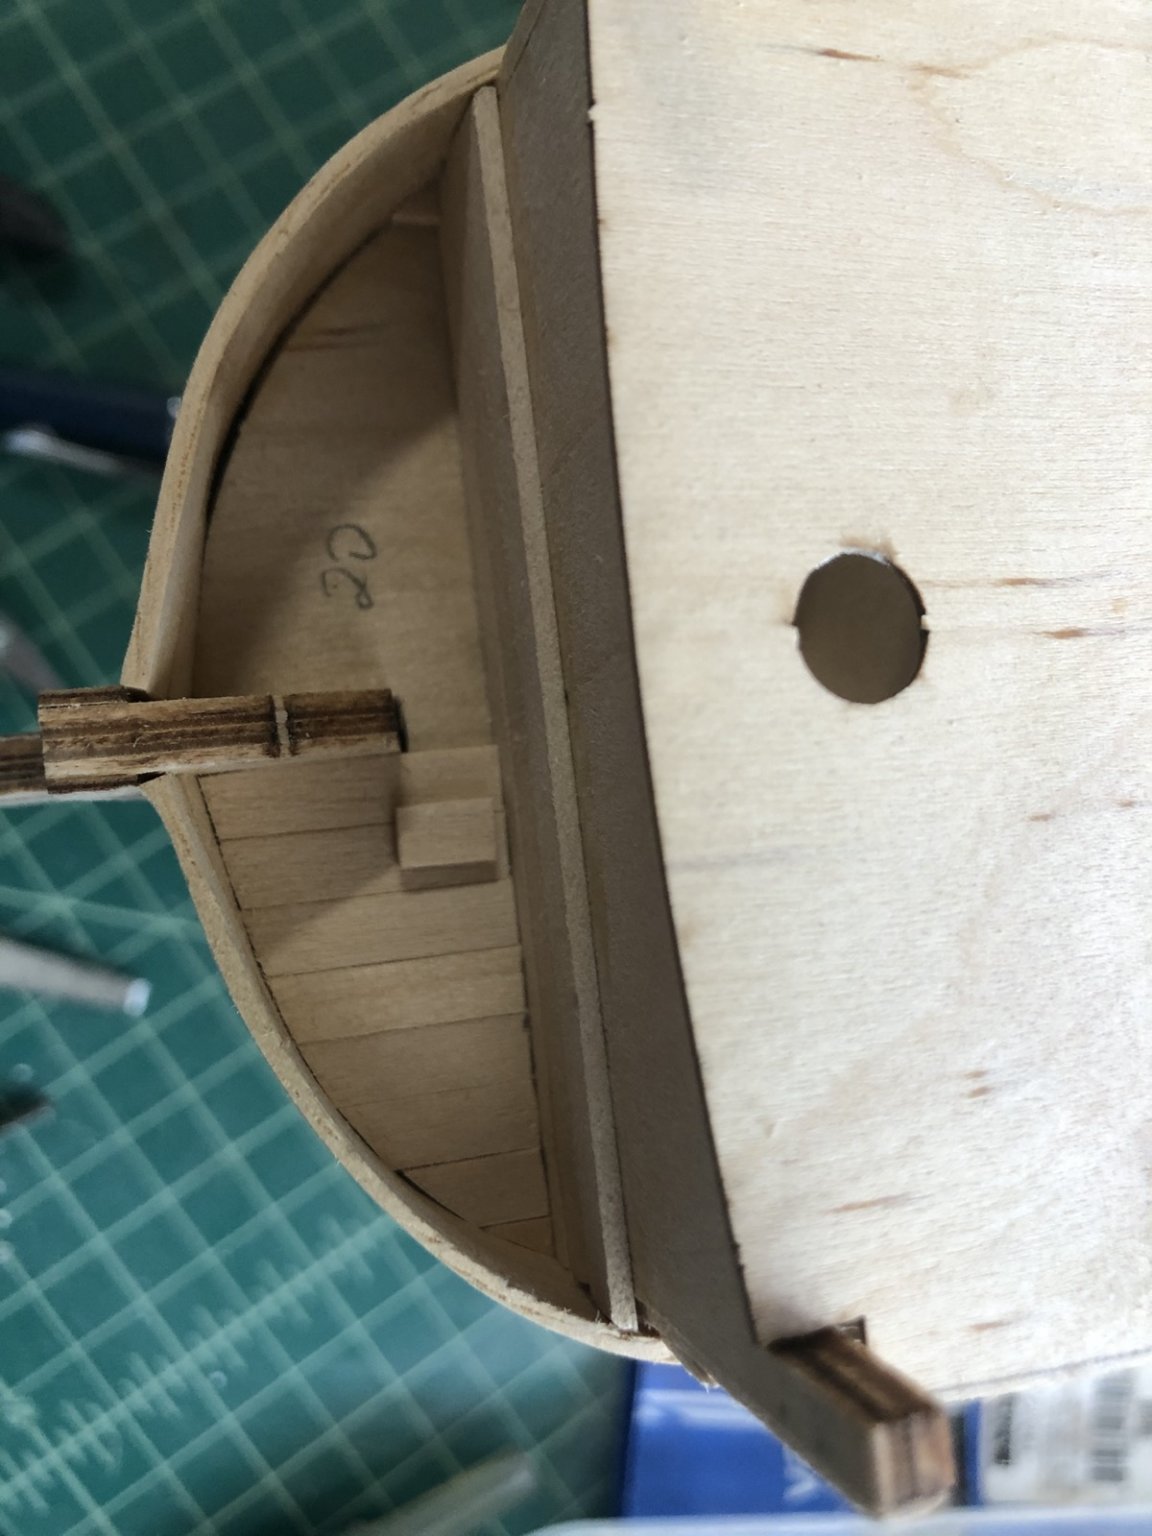
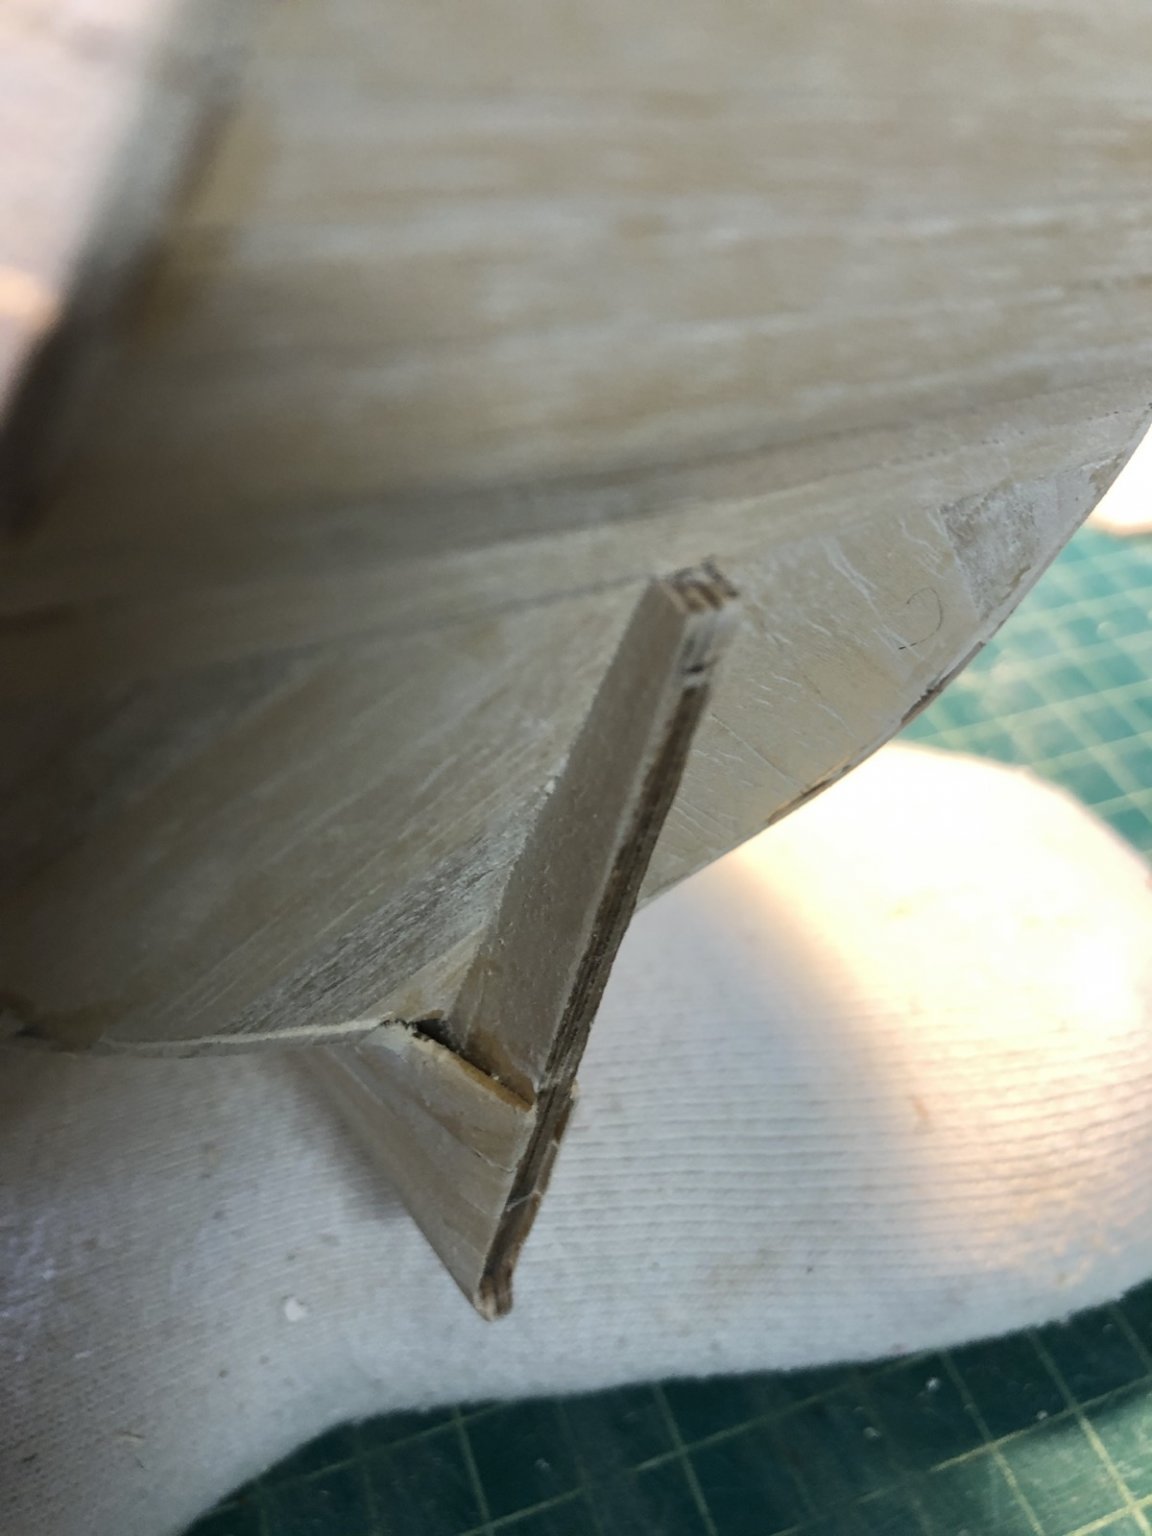
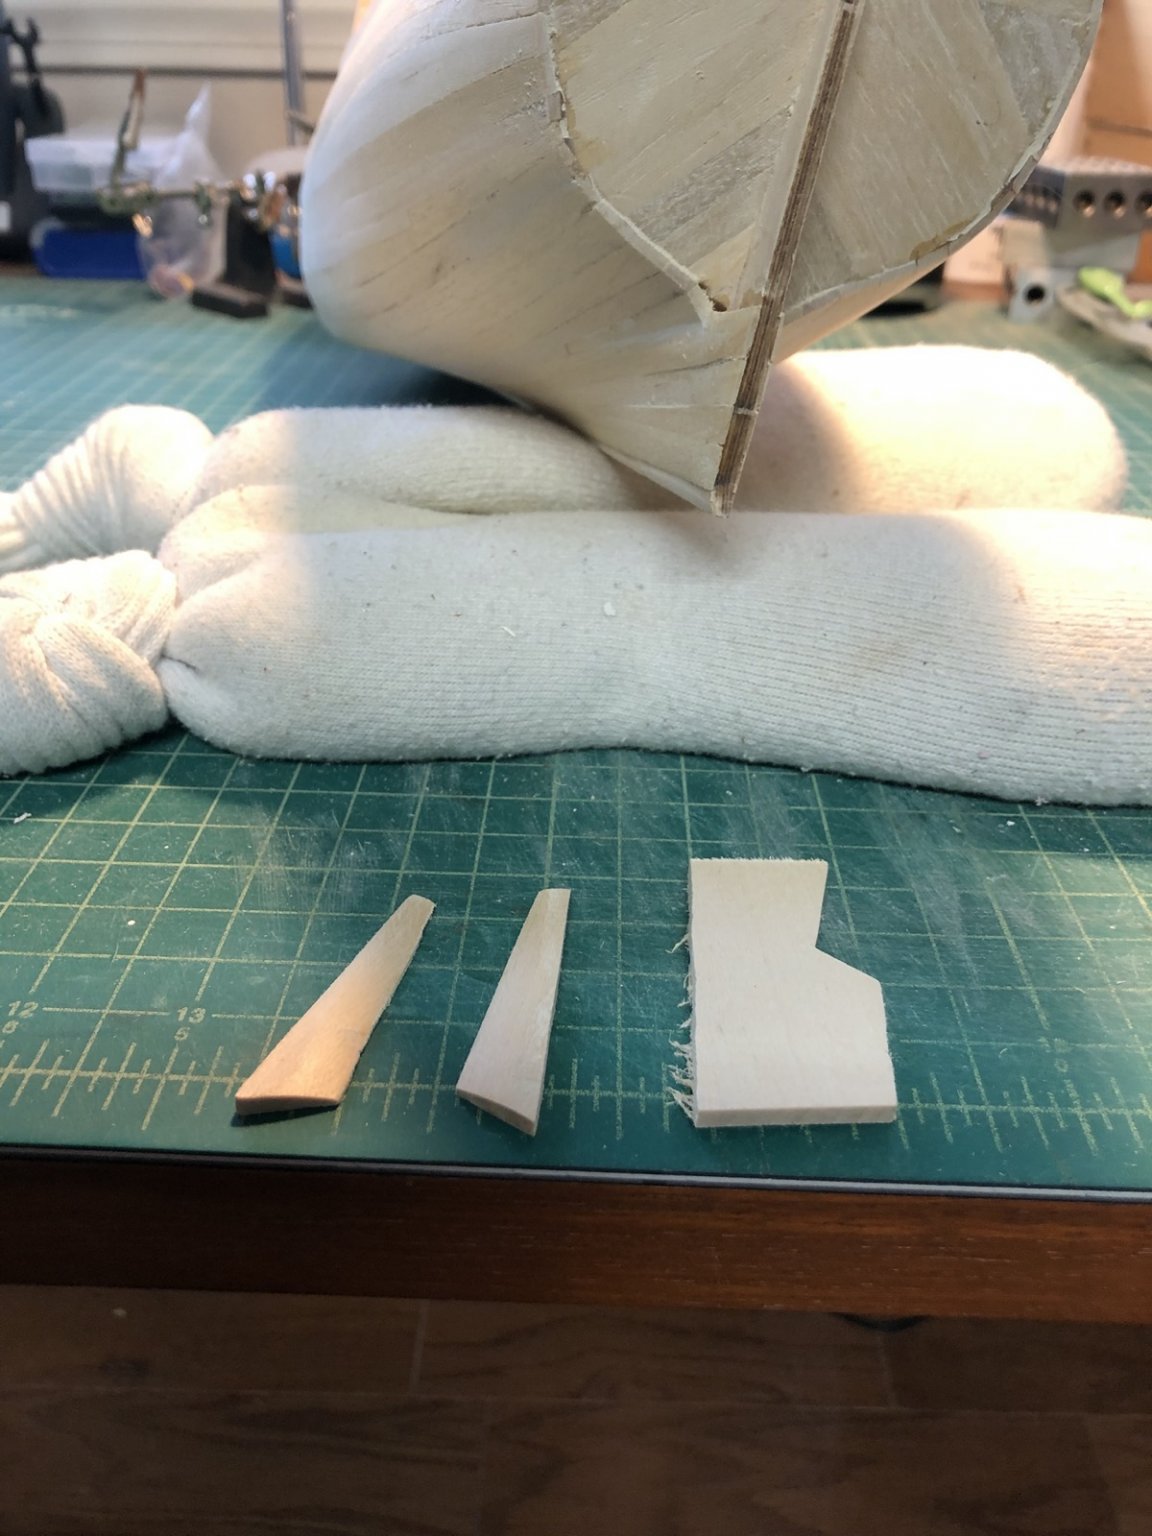
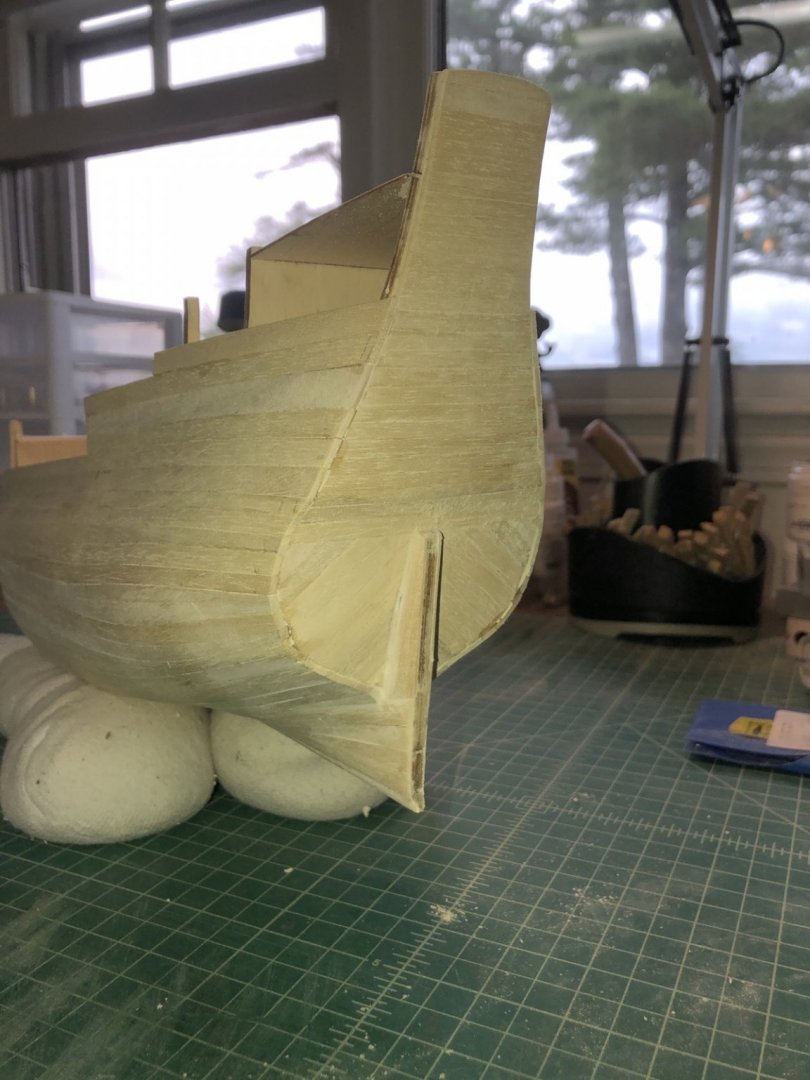
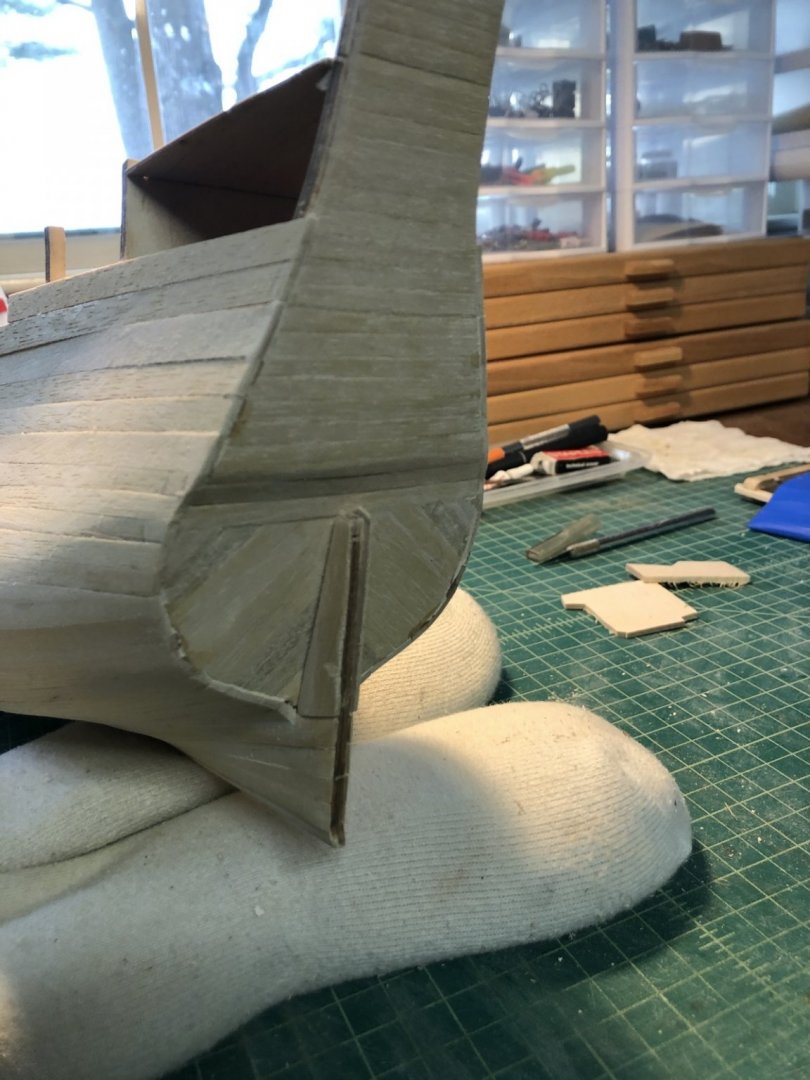
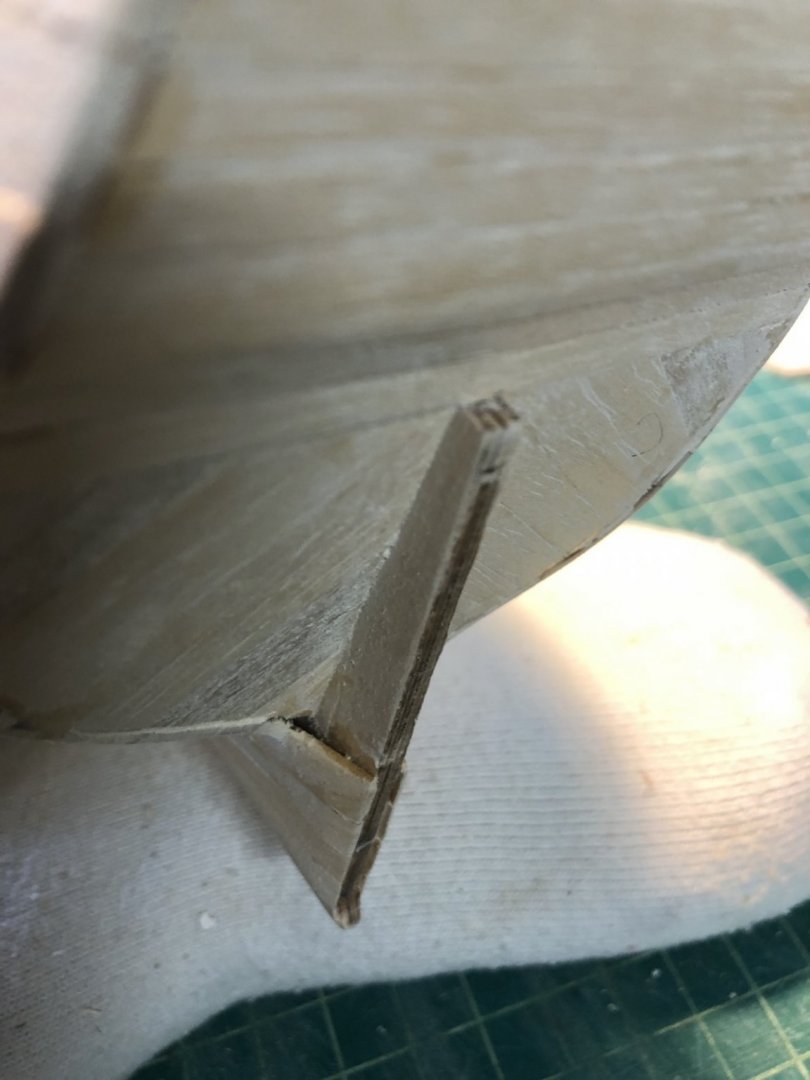
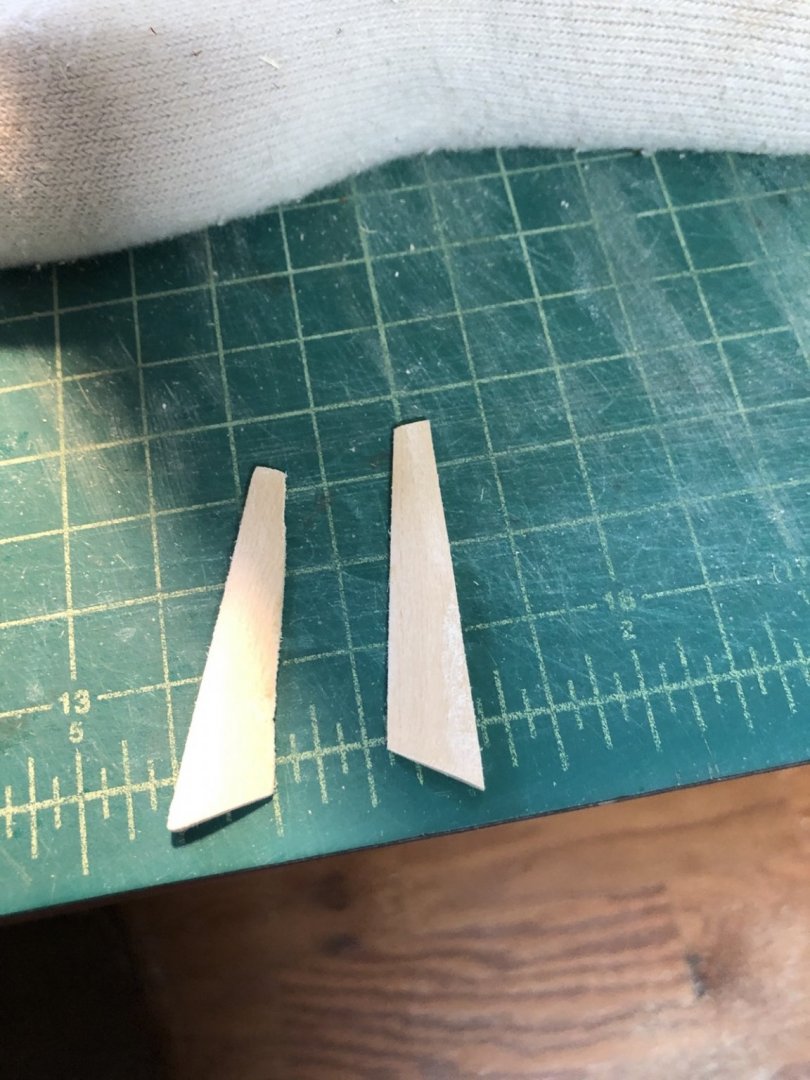
I have been sanding the planks on both sides of the hull, adding wood filler in spots as I go. I trimmed the plank ends at the transom using a sanding disk in a Dremel tool first, then finishing with sanding blocks. In doing this I opened up a hole at the transition of the planks on the deadwood and those on the transom, as you can see here. I really should have cut a rabbet on the deadwood as a continuation of the transom and ended the planks there, but I didn't. You can see in the photo above that I have tapered the planks on the deadwood so they are much thinner at the stern post. I could have added planks above these on the stern post, but I came up with a different solution. I cut two filler pieces from a thick piece of basswood sheet and fit them to each side of the stern post. I tapered them from the front to the back and from the bottom to the top and glued them on. I will use some wood filler and give them a final sanding after the glue dries to blend them in better. I still have a ways to go sanding the hull planks, but it is getting there.

- 135 replies
-
- 6
-
-
- billing boats
- half moon
- (and 1 more)
-
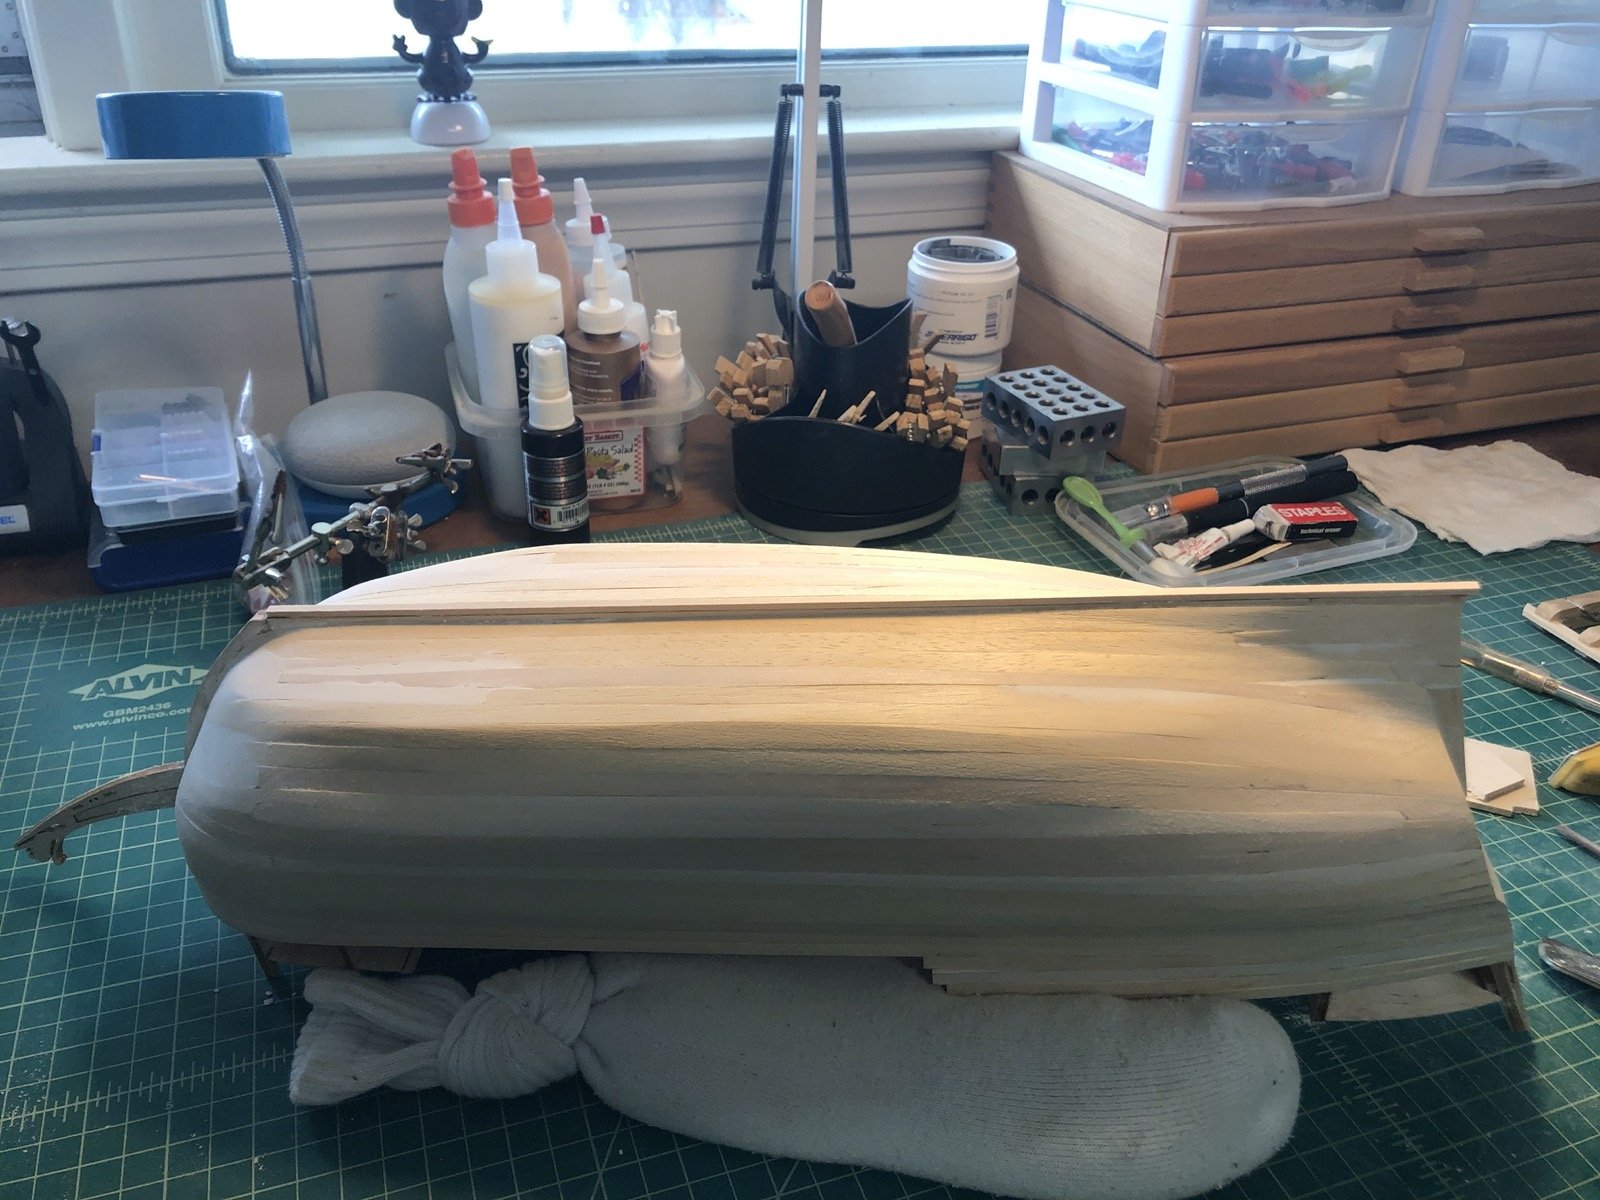
I worked on the port side planks for about half an hour this morning and this is what it looks like now. I did have to add some wood filler in a dip by the bow but so far I am pretty happy with the results. I used a sanding block with some course sandpaper, which as a rounded end so I could get into the curves more easily. I still have more to do on this side and the starboard side.
- 135 replies
-
- 6
-
-
- billing boats
- half moon
- (and 1 more)
-
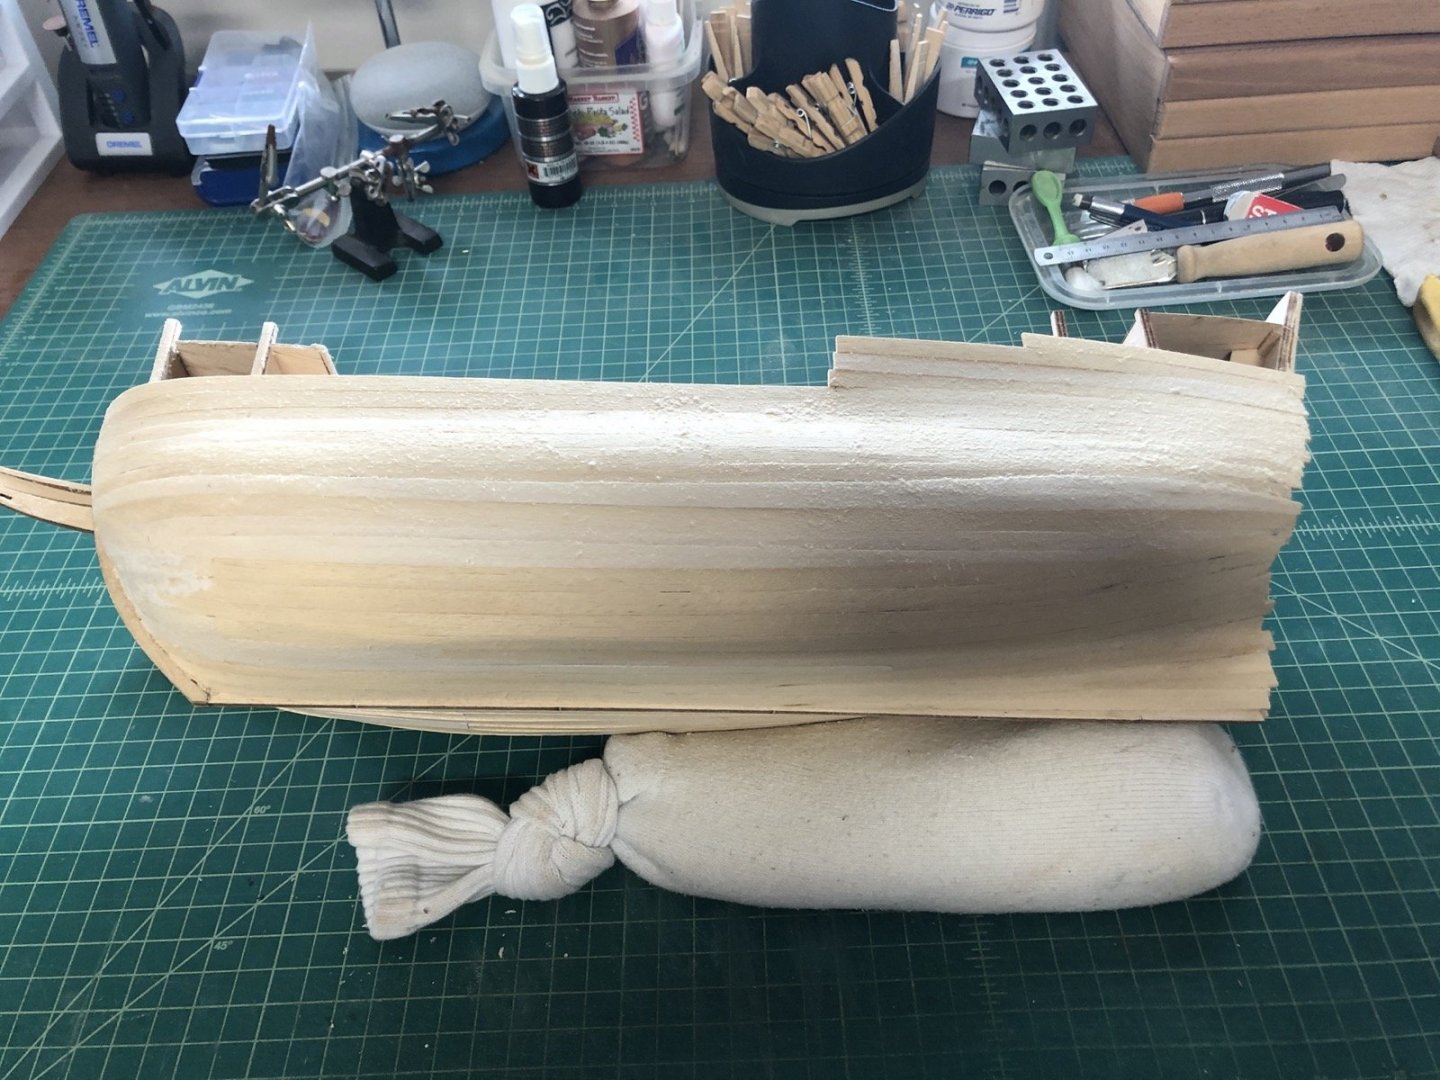
Another milestone reached - the lower hull is totally planked. I filled the remaining gaps and added two stealer planks at the stern. You can see how I used partial spieled planks at the bow to get the curve on the undersize to look half way decent. Now I have to scrape and sand the hull, with some wood filler in places, to try to get it to look good. At least the weather is right that I can do most of the sanding outside. I do have to clean up the workshop too as you can also see. I will leave the rest of the upper planking above the main rail until later, once I plank the main deck and bulkheads.
- 135 replies
-
- 4
-
-
- billing boats
- half moon
- (and 1 more)
-
I am planking from both sides of the existing gap between the keel and the chine. I have been able to bend the planks near the keel but I have been spieling the planks along the chine. Here you can see the gap I left for one of the stealers that I will be adding at the transom. I am also planking up from the main rail along the aft section of the hull.
- 135 replies
-
- 3
-
-
- billing boats
- half moon
- (and 1 more)
-
I have been working on the planking from the chine to the keel. I have been spieling planks to fit at the bow and even removed bow sections of previous planks and replaced them with spieled sections. I am going to have to add some extra plank sections at the transom but for now I am just adding full width planks from these bow sections.
- 135 replies
-
- 3
-
-
- billing boats
- half moon
- (and 1 more)
-
Thanks Popeye and Steven. Popeye, this kit has the laser cut parts and the basswood planking so I don't think it is too old. Its the first Billings kit I have done though so I am getting used to their assembly instructions. I am glad this is not my first model. A milestone of sorts - the planking is completed on both sides from the main rail to the chine. It is still pretty ugly but with lots of sanding and scraping it should be OK. This planking has been very different than other hulls I've done but I think I can move on to planking from the chine to the keel now.

- 135 replies
-
- 5
-
-
- billing boats
- half moon
- (and 1 more)
-
More planking being done but the weather here has turned fantastic so less time in the shop. I added a spieled plank to partially fill the gap and resoaked the rail plank to get a better fit.
- 135 replies
-
- 4
-
-
- billing boats
- half moon
- (and 1 more)