DONATION DRIVE - SUPPORT MSW - DO YOUR PART TO KEEP THIS GREAT FORUM GOING!
×


usedtosail
-
Posts
2,416 -
Joined
-
Last visited
Content Type
Profiles
Forums
Gallery
Events
Everything posted by usedtosail
-
 Ken, I remember having to fiddle with those corner pieces to get them to fit right. As for the AOS book, there has been a lot of criticism about it, so I am not using it too much. It may only suggest what the Constitution may have been like or it may describe a generic frigate, as I saw in one review. So, it is good for what it is but don't use it as a major reference.
 -
Greg, I understand. There are many parts of this kit, like the head frames, where I am going with the current version because it is what I have. It is not too hard bashing a kit but it is sometimes hard to keep all the changes straight. Your question actually had me second guessing myself until I looked up my notes, so I do appreciate the questions to keep me thinking straight.
- 1,350 replies
-
- 3
-

-
- constitution
- model shipways
- (and 1 more)
-
Thanks Tim. I am not out of the woods yet, as fitting the head timbers and the middle rail is proving to be quite a challenge.
- 1,350 replies
-
- 1
-
-
- constitution
- model shipways
- (and 1 more)
-
I feel your pain Scott. I broke off many of the bulwark extension on the Conny before I got it planked. One thing I did do that may help you in the future is that when I glued the extension back on, I used a wood strip like you show in the above picture to align it to the other extensions and hold it while the glue dried. This helped me keep them in alignment as they were reguled.
-
Ken, I think to make it easier on myself, most of the beams are at the same positions as the kit bulkheads. I cut them off the bulkheads but left stubs so I could attach the new beams to these stubs. Since I made the main hatch bigger than it is today, based on what I read about the 1812 version, I had to add a beam at each end of the hatch to support the hatch coaming. I got the dimension of the main hatch from the AOS Constitution book. I wouldn't say this is right but it worked for me. I also am not adding the grating over the main hatch because I read it was probably open in the 1812 era.
-
Thank you Nenad, JIm and Greg. Nenad - I love what you are doing with your Cutty, especially all the details at that small scale. Jim - me too. I think that is one of the reasons I wanted to build this model. Your Constellation is coming along nicely. Greg - am going for an Aug 1812 era version of the Conny and in Baimbridge's book A Most Fortunate Ship I found this - 21 SEP 1812 – Bridle ports cut about midway between #1 gun ports and stem. So I left them off this model, even though I had framed them before planking.
- 1,350 replies
-
- 2
-
-
- constitution
- model shipways
- (and 1 more)
-
Nice technique for the deck beams, Ken.
-
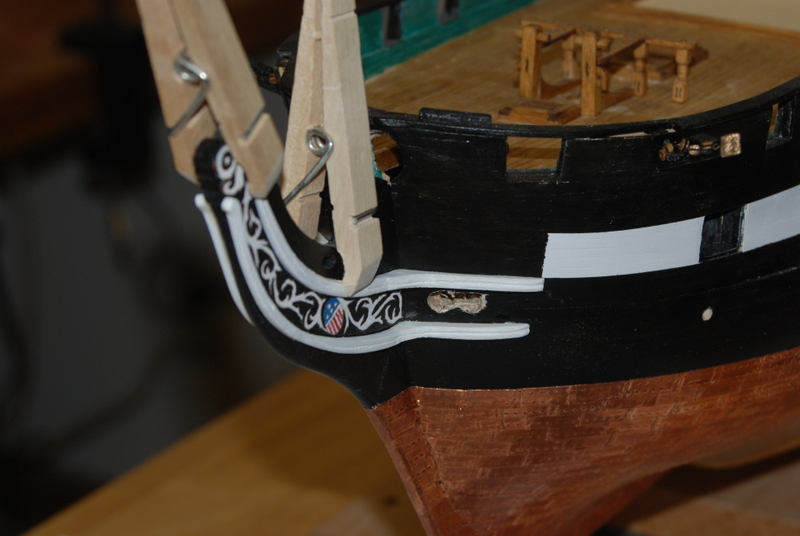
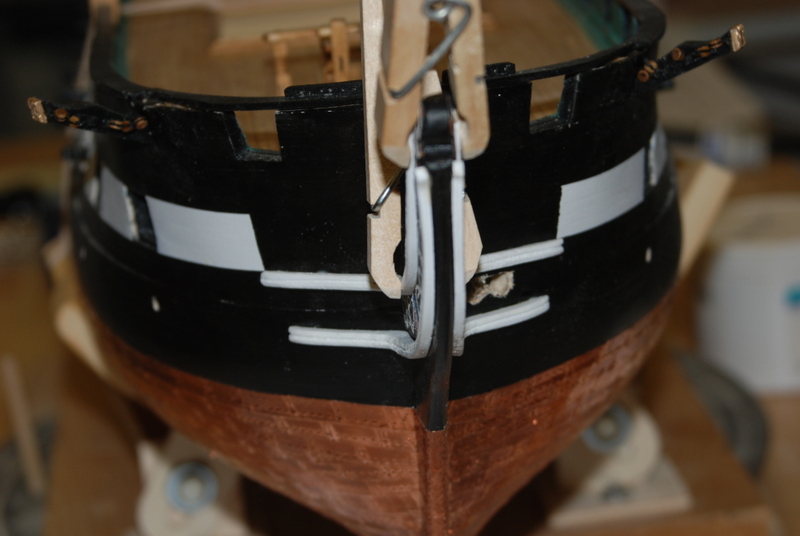
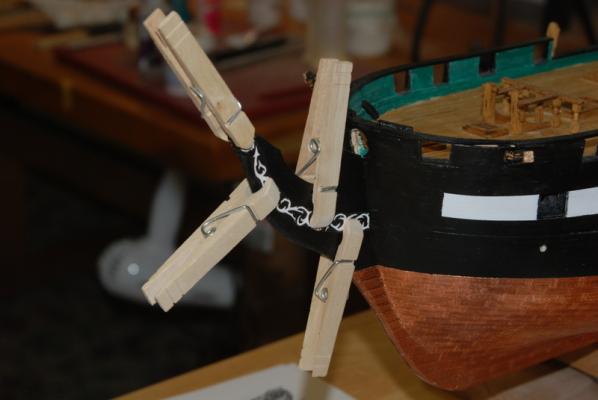
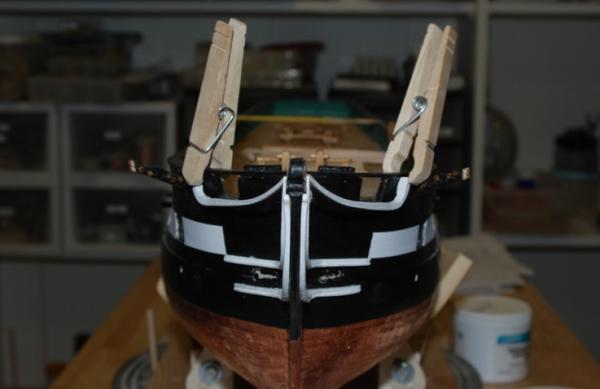
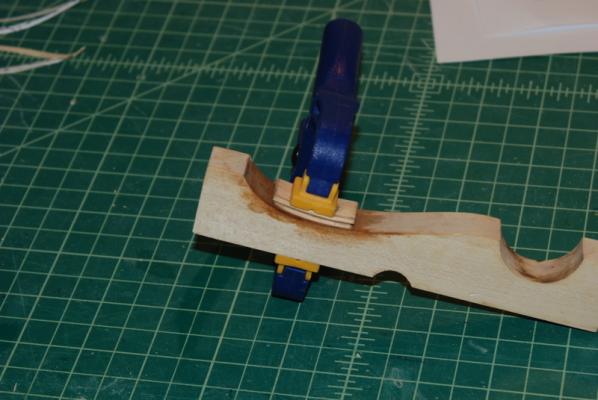
Thanks Geoff and Rich. At least all of the information is there on the plans, it is just a matter to tease it all out and visualize each part in three dimensions, like you say. I have started assembling the head rails to the hull. I started by gluing the two trail boards in place, since these set the locations of the cheek rails. I very carefully placed the clamps so I did not mess up the paint on these. I glued each cheek rail in place and clamped it with clothes pins until it dried, then glued the next one until all four were added. I used wood glue along the stem and a combination of wood glue with a few drops of CA glue along the hull, since I didn't have a good way to clamp that part of the rails. I then finished the hawse boards by fitting them between the cheek rails on the hull and thinning them down a bit. I also curved them to match the hull curvature by soaking them in water for a few minutes, then clamping them to the jig that came with my plank bender, using a piece of wood over them so the clamp wouldn't mar them. This worked really well, as I let them dry overnight and they retained the shape when I took them out of the jig. I used them as templates to drill the holes in the hull for the hawse pipes. I painted the supplied white metal hawse pipes with black paint around the outside, leaving the inside unpainted. While they were drying I attached the two middle rails to the hull. Before I attached them, I drilled a small hole through the rail where it attaches at the hull, then continued that hole into the hull. I used medium CA to glue the rails to the hull with a piece of wire in the holes to provide some additional support. Once the head timbers are added they will be more secure but I wanted more support now so they would be stable while I fitted the head timbers. After they dried, I used some clippers to snip off the wire flush with the rail. I was able to attach the hawse boards to the hull last night and used a round file to open up the holes so the hawse pipes would fit in. I will have pictures of those in the next post. I have a little paint touching up to do around the rails and the hawse boards, which I will do before I go too much further. Now it is on to the head timbers, but again the plans show these pretty well.


- 1,350 replies
-
- 10
-
-
- constitution
- model shipways
- (and 1 more)
-
Great looking sails, Tom. Makes the model really come alive.
- 212 replies
-
- 3
-
-
- constellation
- artesania latina
- (and 2 more)
-
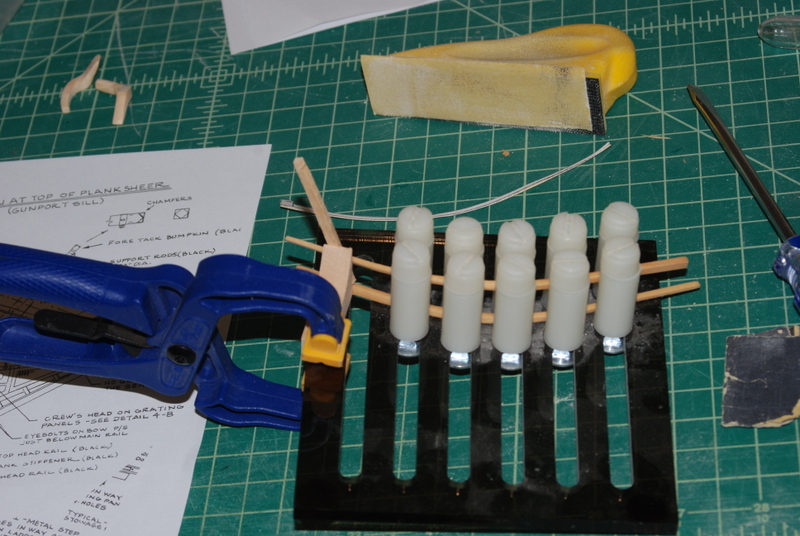
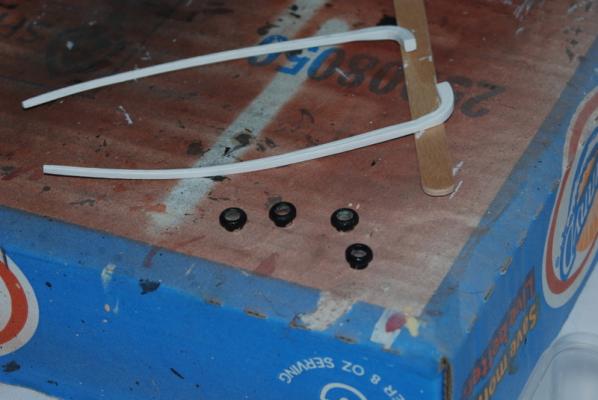
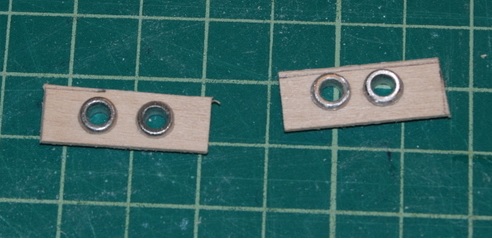
Thanks Mike and Greg, and for the likes. I find building these rails one of the hardest parts of this kit so far. First, a new tool in the mix. I found these 1.5mm carvers which work great. The V shaped chisel is perfect for carving the groove in the rails. I also picked up a straight and a skew, which should come in handy later. I finished making the top middle rails by gluing the two pieces together for each rail and sanding the joint. These now need a coat of primer and two coats of white paint. For the cheek rails, I positioned the trail boards temporarily on the stem and used them to get the lengths of the long pieces of the cheek rails right, then I joined the two pieces of each of the four cheek rails together, using wire as pins to hold the two pieces together with medium CA glue. When that dried, I sanded the joint areas and repainted the white paint around the joints. These are getting close to be ready to install. I also started making the hawse boards which will hold the hawse pipes, which are supplied as white metal pieces in this kit. I cleaned these up using small files and will paint the outsides black and leave the insides unpainted because the white metal looks like lead. I drilled two holes in each trail board while they were still part of a larger thin plywood sheet, then cut them off after filing the holes to the final diameter. I will probably remake these as I think the holes are a little too far apart, but it was good practice. Once the cheek rails are installed, I will fit these hawse boards to sit between them along the hull and drill holes into the hull for the backs of the hawse hole pieces to fit into. I think I will be drilling into the solid wood filler block so I am not sure how deep to go to make it look realistic, but I am thinking probably pretty deep. I will be masking off the trail boards during this process too because I don't want to mess those up now.

- 1,350 replies
-
- 8
-
-
- constitution
- model shipways
- (and 1 more)
-
I remember having to do something similar to the stern frames on mine, but not as much as 1/4". You should be all right with the windows though.
-
I would add a scroll saw to that list as the first power tool to buy. I just can't cut curves with anything else, hand or power.
-
Very nice planking Mike. Very complicated stuff that you look to have mastered.
-
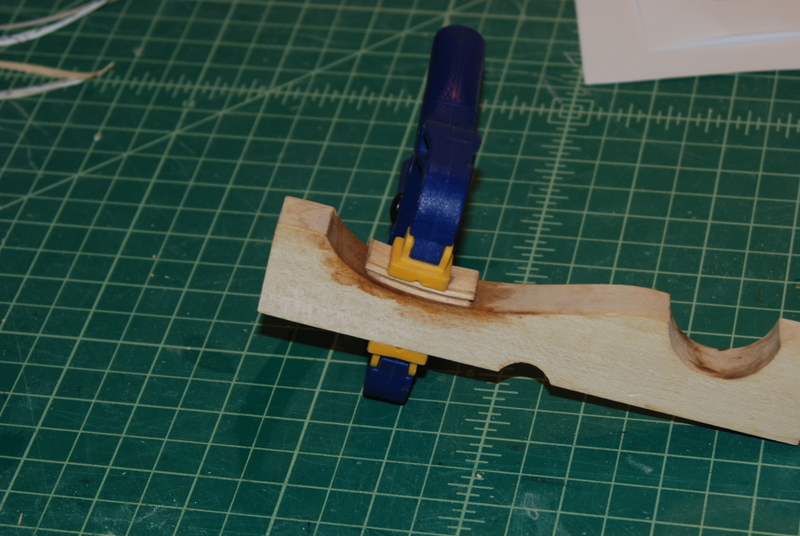
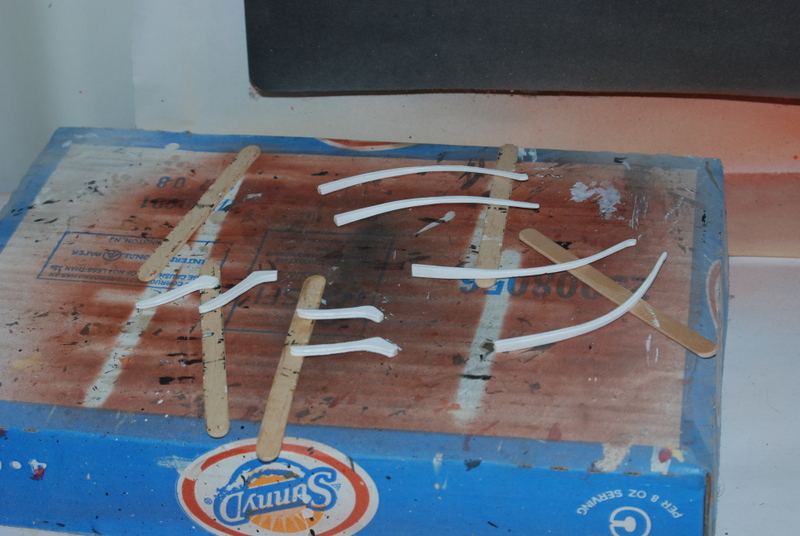
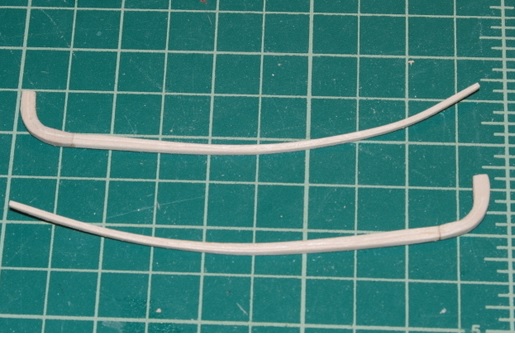
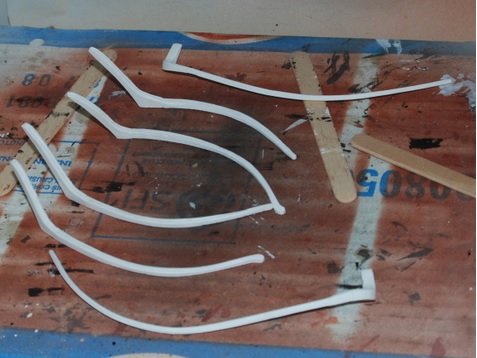
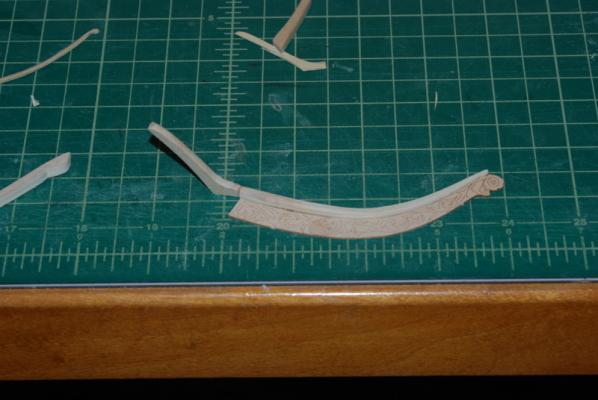
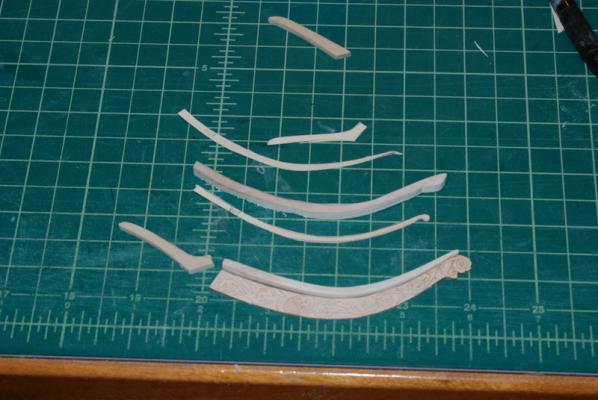
This long weekend has been great. I have had lots of time to spend in the shop, as well as with the family. I worked on the two middle head rails, making the end pieces first then the rest of the rail from some tapered stock. I had already made the end pieces for the lower of the two rails and tried bending the rest of the rail in a jig, which worked OK in one direction, but not the other. So, I resoaked the pieces and used my electric plank bender to bend them in both directions at the same time. This worked great. When they dried, I trimmed the large ends and cleaned them up, then carved the groove into the outside faces and rounded over the top and bottom edges. I then glued them to the end pieces, using a piece of wire in holes I drilled in the ends to hold them together, along with some CA glue and wood glue. When these dried, I sanded the joint down, carved the groove into the end pieces, rounded over there outside edges, and gave them a coat of primer. I made the end pieces for the upper middle rail from some sheet stock, then tapered two pieces for the rest of the rail, soaked them and bent them in two direction with the plank bender. That is where I am now.


- 1,350 replies
-
- 10
-
-
- constitution
- model shipways
- (and 1 more)
-
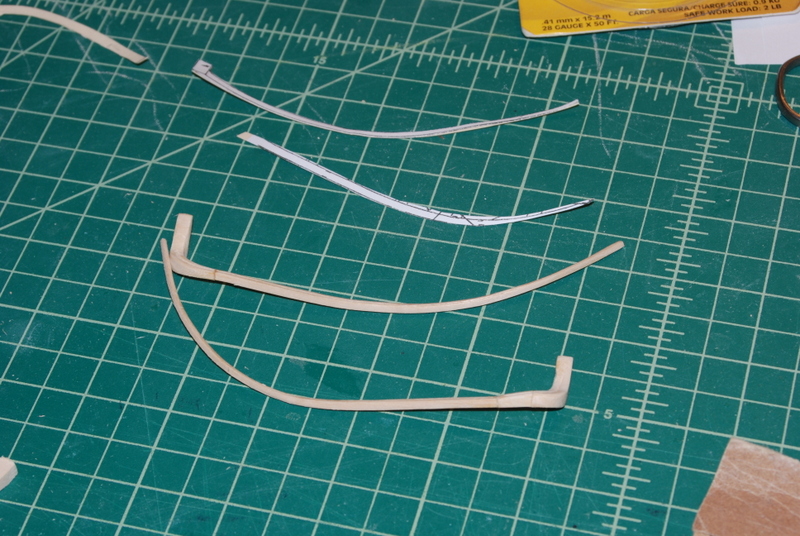
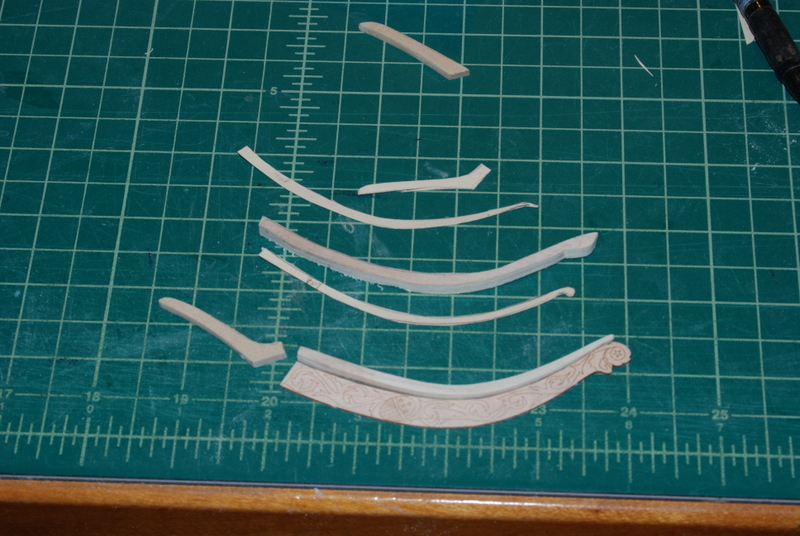
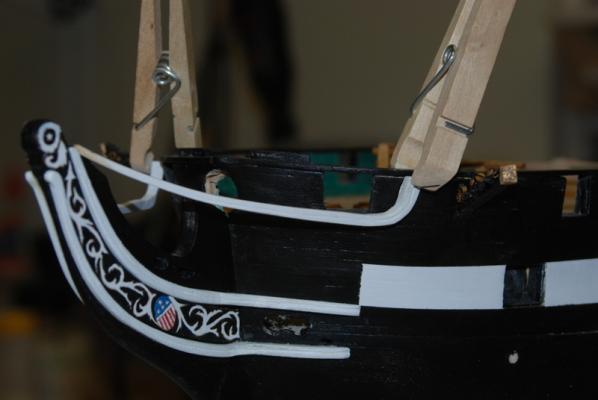
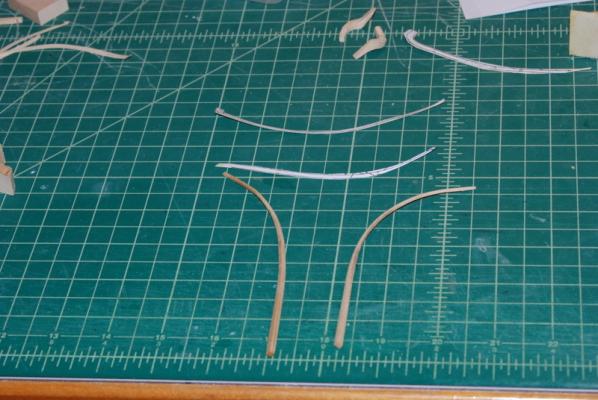
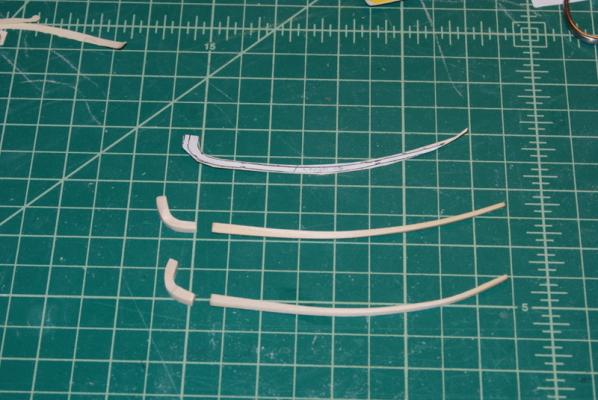
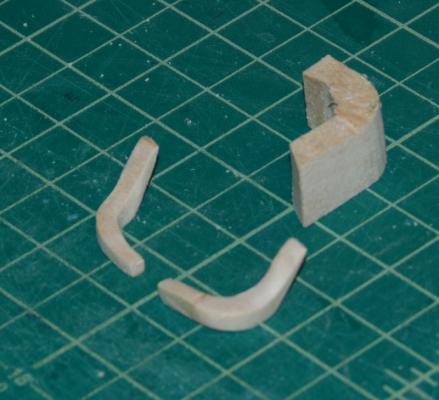
Thanks Steve, Sal, and George, and all the likes. They are much appreciated. I finished up both trail boards so they are ready to be installed with the cheek rails. I also started working on the longer head rails that fit under the cat heads. I started by making two pieces that will go under the cat heads. I did the port side first and basically started making the shape from different pieces of wood. I was able to use it as a template for the starboard side piece, which I was able to make from a single piece of wood. I may go back and remake the port side piece with the blank shown in the pictures, but this one fits really nicely so I am going to wait to see how it looks painted. I am also soaking some strips to use for the rest of these head rails. I am going to try to bend a single piece in two directions for these, but if that doesn't work I will make them from two pieces. I made some templates from the plans for these two rails to make sure I get them the right distance from the stem.

- 1,350 replies
-
- 11
-
-
- constitution
- model shipways
- (and 1 more)
-
Meters?
-
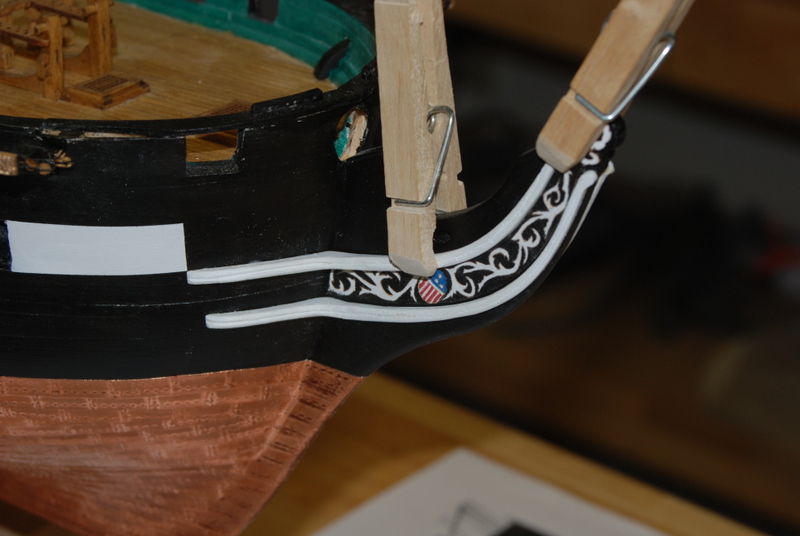
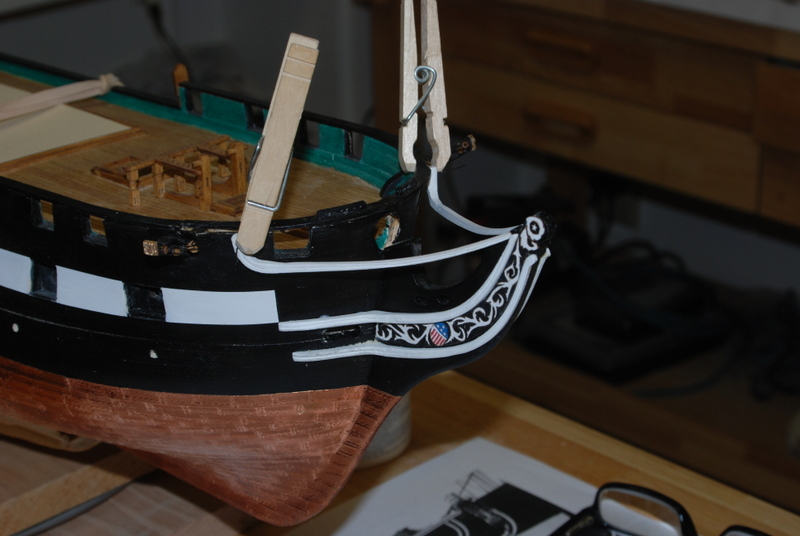
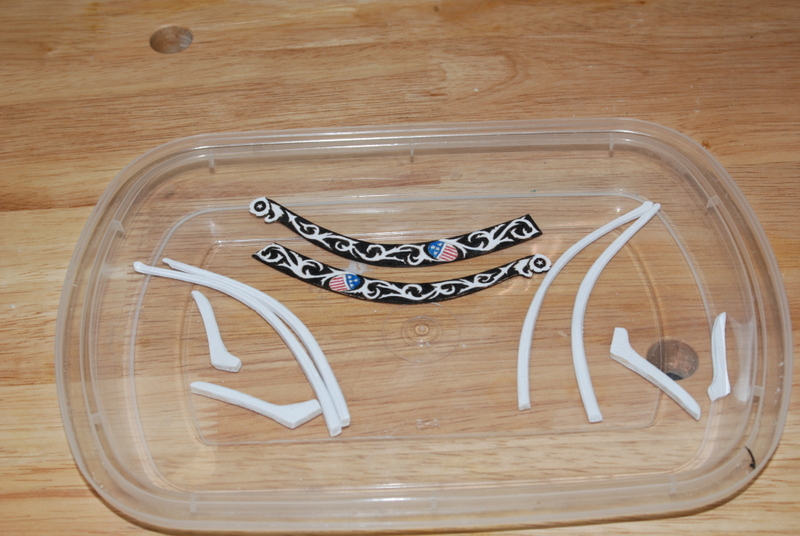
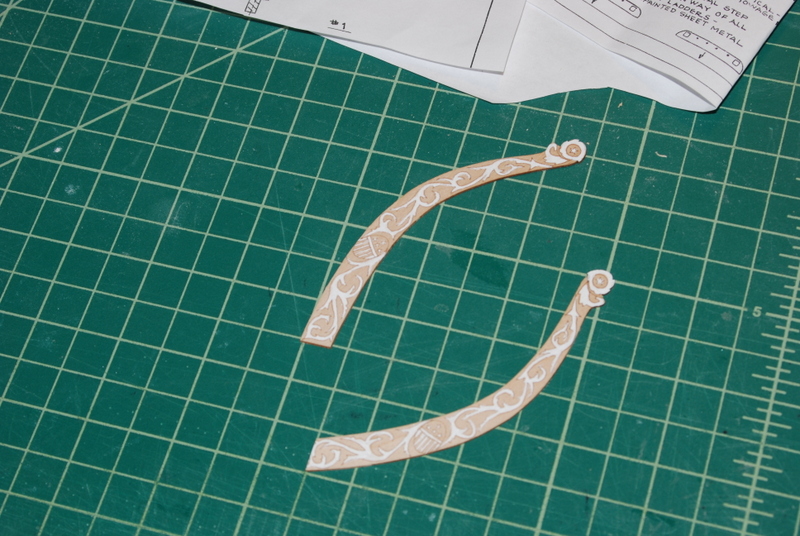
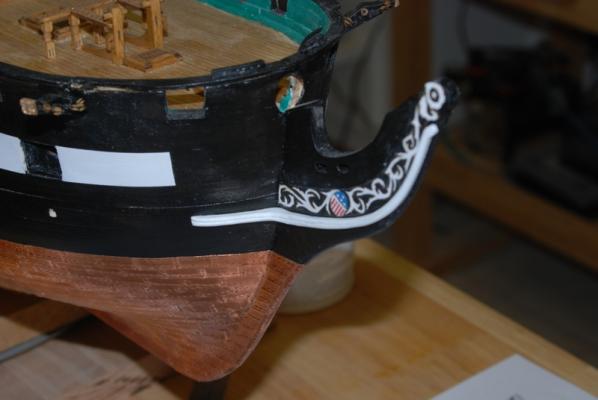
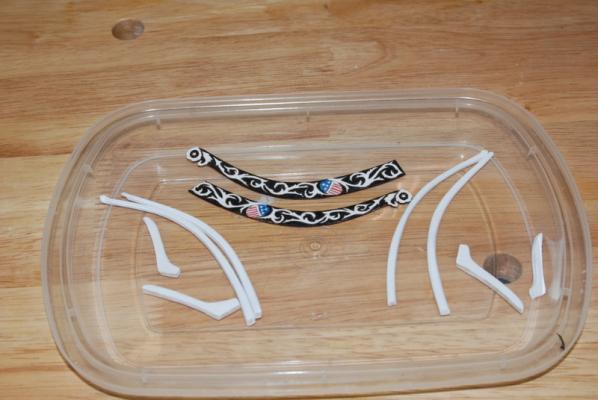
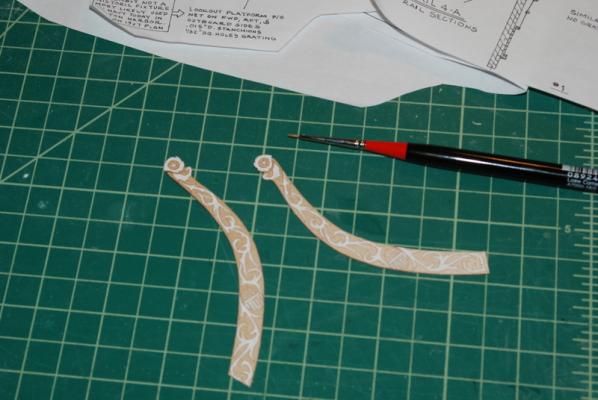
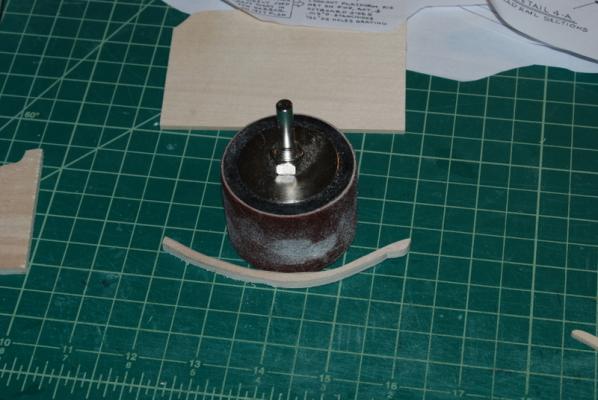
Having made all the pieces for the cheek rails, I gave them a couple of coats of white paint before final assembly on the model. I went with all white for these because I want to use the color scheme on the Hull model for the head rails. I still have to cut the long pieces to length to fit around the trail boards. It is hard to see in this picture, but I did carve a groove down the edges of all these pieces and rounded the outside edges. I would usually use a scraper to make this detail, but the long pieces change widths along their lengths so I thought that would be too hard to keep the scraper centered. So, I used an X-Acto knife to score a line down the center of the edge, then used files to open and deepen the groove, first a triangular file then a round file. What I really should have used is a small V gouge, which I do not own, so that is now on the Christmas list. Sorry for the ugly painting stand in the background. So, since I need the trail boards to install the cheek rails, it was time to try painting them. My back up plan was to cut out paper versions of the white parts and glue them on, so before I started painting I put the trail board pieces in my computer scanner and scanned them. I then used some image editing programs to get black and white versions that I could print and cut out. I could have just copied the plans too, but I thought the lines on the plans were a little too thick. Anyway, I think it was a precaution that is not going to be necessary. I started painting the trail boards by giving them a coat of thinned white paint inside the decorations. I used the smallest brush I have which is shown in the following picture. It reminded me of paint by number kits I did as a kid, but the results looked promising. Of course, this was only one half of the painting and I could deviate from the lines a bit since I could still see the lines after one coat. So I then gave the white areas a second coat. A bit more promising, so I hit the shield with some blue and red paint. I didn't really have a brush small enough to get around those tiny stars on the shield, but a toothpick worked a bit. I may repaint those stars with a brush I cut down to a few hairs. I then went for the gold and painted the starboard side trail board black sections around the other painted sections. I took my time and think it came out pretty well. I have a few areas I want to touch up and I will also give it a second coat of black, but overall I am really happy with the result so far. Now, as usual, I just have to reproduce the results on the starboard side. Happy Thanksgiving to all of you folks in the US.


- 1,350 replies
-
- 15
-
-
- constitution
- model shipways
- (and 1 more)
-
Great to see you back Geoff. The bow sprit rigging looks great so far.
-
Aw Andy, you beat me to it. I also use those pliers and they work great for me too.
-
I know the feeling Tim. It is hard to wrap my head around all the different curves and angles. The functionality somewhat escapes me too.
- 1,350 replies
-
- 2
-
-
- constitution
- model shipways
- (and 1 more)
-
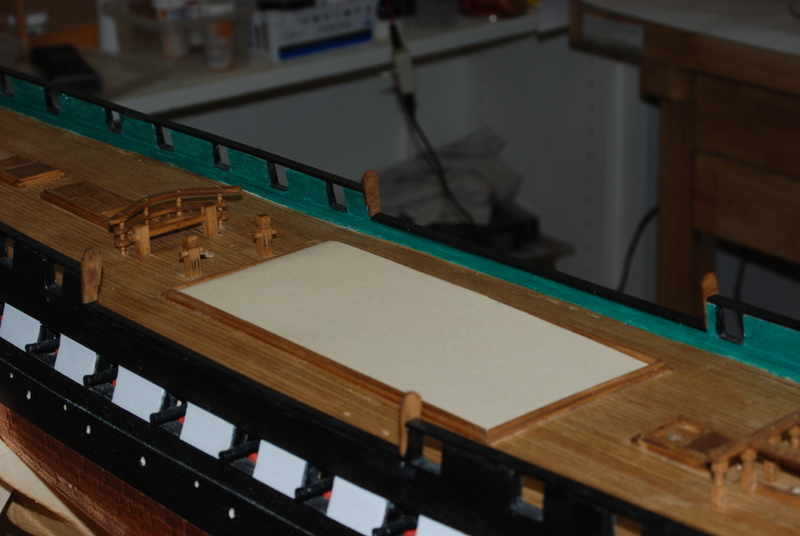
I glued the hammock boards to the bulwarks at the ends of the open waist. I won't add the small boards that go on top of the rails until I add the hammock cranes much later in the build. I finally got a start on the head details. I started with the cheek knees as suggested in the instructions. I made manilla templates of the parts that sit on the hull and the inside edge of the stem, then cut the top starboard one out of some sheet basswood. I sanded it to get a tight fit on the hull. I then made manilla templates for the two pieces that sit along the stem, but these were too flimsy, so I used the edges of the trail boards to mark the inside edges of these pieces, then the templates to mark the outside edges. I cut them both out roughly on the scroll saw, then sanded the top piece in both directions to get it close to the final shape. I used Jay (Modeler12)'s suggestion to use plywood for these pieces so they don't break while sanding, and it worked out very well. For the inside curves, I used the largest sanding drum I have, but I used it by hand instead of in the drill press. I will sand the other piece tonight and make the bottom piece that goes along the hull, then repeat on the port side.

- 1,350 replies
-
- 7
-
-
- constitution
- model shipways
- (and 1 more)
-
That is some fine work you are doing Sal. She looks great.
- 659 replies
-
- 5
-
-
- syren
- model shipways
- (and 1 more)
-
Hi Greg. Thanks for all the likes. For the decking planks, I gave the planks an initial sanding before installing them. I actually sanded the full length supplied wood strips before cutting off the lengths I needed. I made sure the sides were sanded smooth and straight, and gave the tops and bottoms just a rough sanding. Then I sanded the tops flat after they were all installed.
- 1,350 replies
-
- 2
-
-
- constitution
- model shipways
- (and 1 more)
-
Thank you Nenad. I love what you are doing on your Cutty Sark, especially at that small scale.
- 1,350 replies
-
- 1
-
-
- constitution
- model shipways
- (and 1 more)
-
Greg, I was worried about that too, but I have received some really good advise by doing it. And it is a great feeling knowing that folks like yourself find it useful. I am sure you are doing a great job.
- 1,350 replies
-
- 4
-
-
- constitution
- model shipways
- (and 1 more)