-
Posts
2,421 -
Joined
-
Last visited
Content Type
Profiles
Forums
Gallery
Events
Everything posted by usedtosail
-

Cutty Sark by NenadM
usedtosail replied to NenadM's topic in - Build logs for subjects built 1851 - 1900
Looks great Nenad. Keep talking to yourself.- 4,152 replies
-
- cutty sark
- tehnodidakta
-
(and 1 more)
Tagged with:
-
Jay, I am both glad to have been of help but also I feel bad for stirring up so much trouble for you. Crack on though using the current ship as reference and you will have a great cross section. Your redos will be well worth it. BTW, I just passed along the link that I received from someone else on this site. That is one of the things that is great about MSW, knowledge like this just keeps getting passed along as needed.
- 572 replies
-
- constitution
- frigate
-
(and 1 more)
Tagged with:
-
You can also go to the Google maps page and look at the stove from different angles: https://www.google.com/maps/@42.372429,-71.056398,3a,75y,320.17h,95.15t/data=!3m7!1e1!3m5!1s6yRcVEMl1hYAAAQZLBJ9aQ!2e0!3e2!7i13312!8i6656
- 572 replies
-
- constitution
- frigate
-
(and 1 more)
Tagged with:
-
Thanks for the heads up Bob. One of the reasons I haven't gone yet is that Salem is one of those places that is a b***h to get in and out of, any time of year. But you are right about the summer and October. Early Fall might just work fine.
- 1,354 replies
-
- constitution
- model shipways
-
(and 1 more)
Tagged with:
-
Yep, that is perfect Dan. Thank you very much. And for once, I don't have to remake something.
- 1,354 replies
-
- constitution
- model shipways
-
(and 1 more)
Tagged with:
-
No further work needed. Those two middle images show what I was looking for, which is how I made the fore pin rail. Thanks a bunch. You know, the irony is that I live about 5 miles from the Peabody museum but have never been in it. I have been meaning to go for ever and have just never gotten around to it.
- 1,354 replies
-
- constitution
- model shipways
-
(and 1 more)
Tagged with:
-
Dan, yes that at least looks similar to what I made. Do any of those pictures have the rail at the fore mast? That is the one I am not sure of.
- 1,354 replies
-
- constitution
- model shipways
-
(and 1 more)
Tagged with:
-
Thanks JS. I am going one further than pins - I have added wooden strips that will support the deck planks and will drill holes for the posts in these support pieces, glue in the rail to the supports, then plank around the posts. I was concerned that even with pins these small posts might pull out.
- 1,354 replies
-
- constitution
- model shipways
-
(and 1 more)
Tagged with:
-
Thanks Tim, Dan, George, and Jay, and the likes. Jay, the plans I am using show the rail in relation to the main mast, so I can locate it from that. Of course, if the main mast location has moved since 1812 it won't be exactly right. One more shot of the rail after some more work. I sanded the two lower rails so they are thinner now and match better. I also sanded down the tops of the posts so they are almost flush with the top rail. I didn't want to break anything so I stopped sanding when I got close. I also installed the sheaves between the two bottom rails. I used a strip of wood that I ran through the table saw on both sides to make a groove, then cut off squares and used a thin file to continue the groove around to the other two sides, to simulate a round piece between two square pieces. This picture is actually a little too close to see them clearly. I don't think I'll be running any lines through these as they are kind of fragile and the holes are pretty small. I can now stain the fore and main pin rails, mount what I can and get ready to plank the spar deck. There is a support for the spencer mast at the mizzen that I need to make too. I can leave the spider rail for the mizzen until I make that mast since it does not attach to the deck.
- 1,354 replies
-
- constitution
- model shipways
-
(and 1 more)
Tagged with:
-
My problem with plastic has always been getting glue where it isn't supposed to be. Much harder to deal with than cleaning glue off wood, I think. But hten again, it has been probably 45 years since I built a plastic model
-
For marking the shroud locations on the card, I just mark the tops and bottom position of each shroud, then remove the card and use a straight edge on the bench to make straight lines between the two marks for each shroud.
-
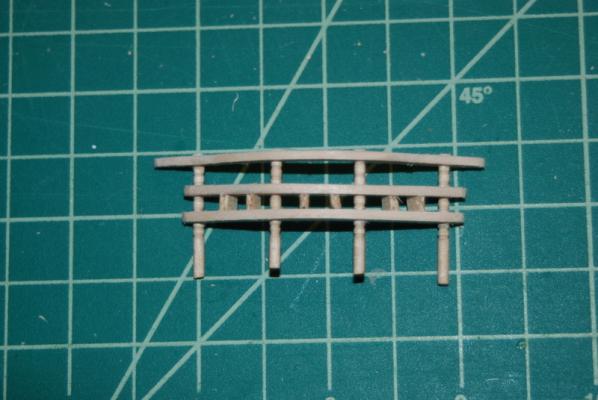
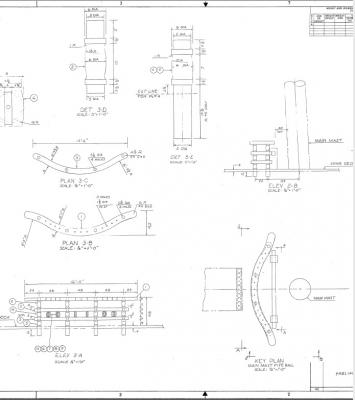
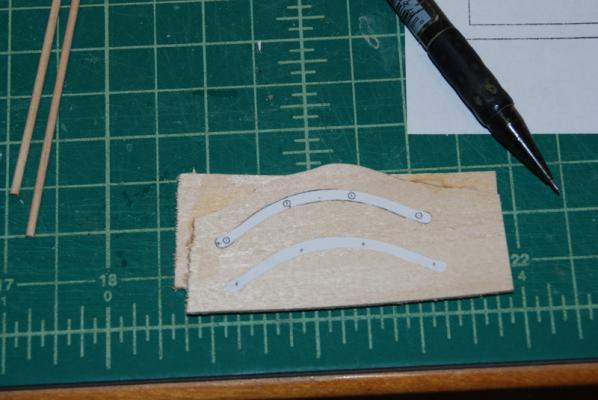
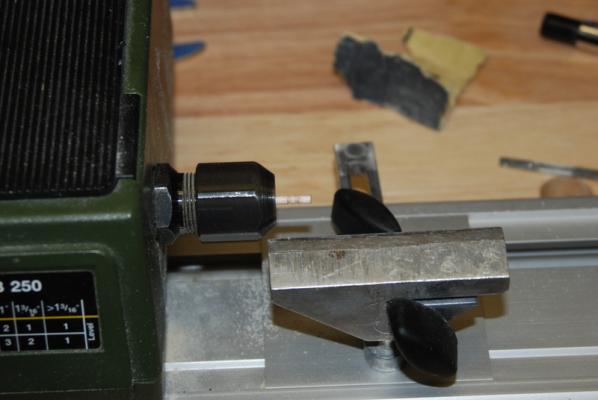
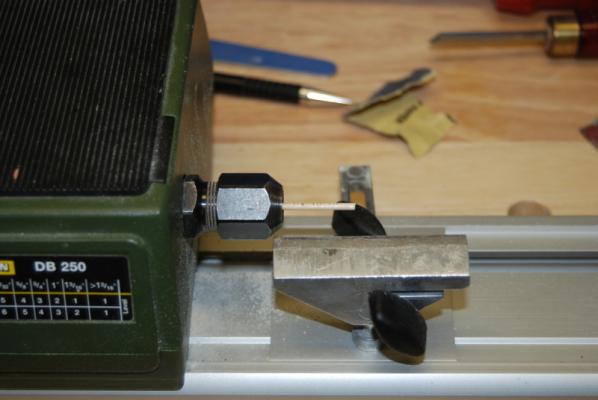
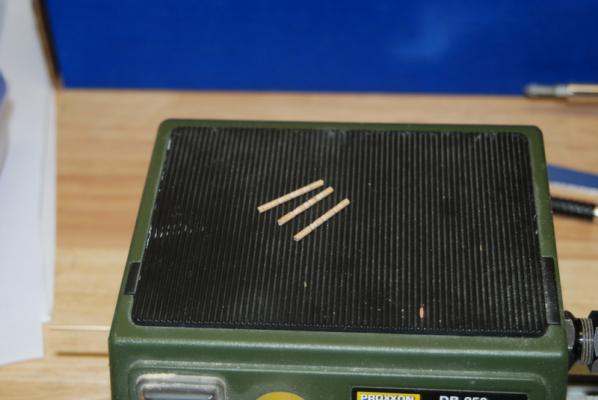
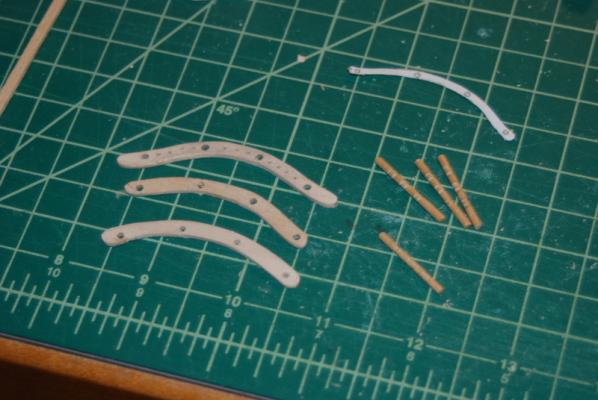
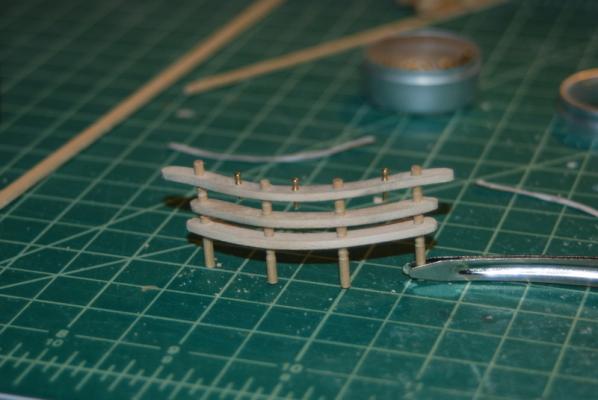
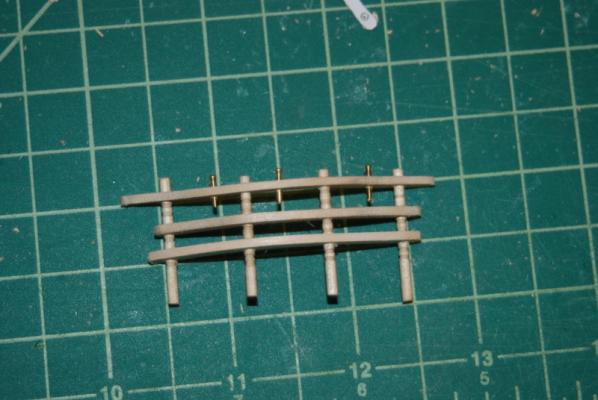
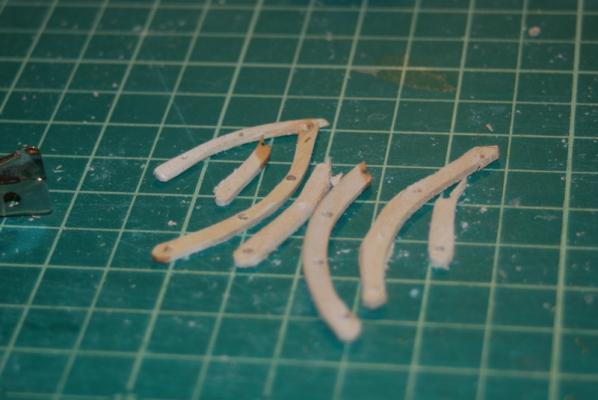
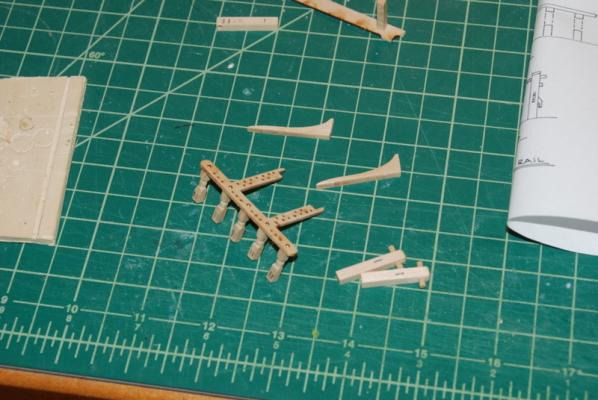
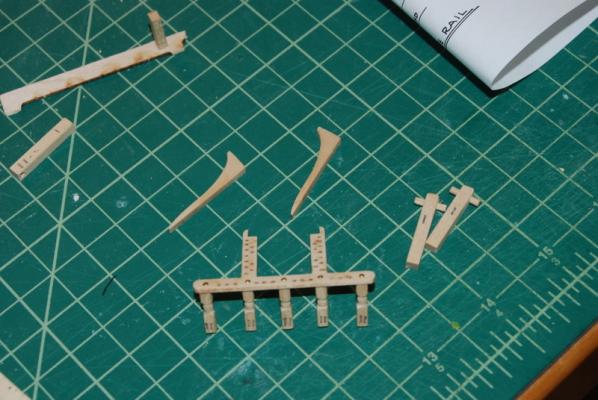
I have been working on the U shaped main pin rail, which is a deviation from the kit supplied rails. I am using plans from the Constitution CD for this rail, which makes it easier to fabricate the pieces, at least. This U shaped rail is a distinctive feature of the Constitution over the other frigates of the time, so I really wanted to include it. I used the supplied rail for around the fore mast, only because I have no information on how it might have been different in 1812. I am also going to be adding the spider rail on the mizzen mast instead of the supplied rail, for the same reason as the U shaped rail. The Revell plastic kit includes these details, but the ME kit is the modern ship so does not have them. I started by cutting the three rail pieces. I copied the plans and cut out templates for the rail pieces, which I glued to what I thought was 1/16" birch plywood because I knew these pieces would be prone to split. For the two lower rails, I glued two sheets together so I could cut them out and shape them at the same time. I then soaked these in alcohol to separate them, which worked great. I used sandpaper and a rounded file to get the final shapes after cutting the rough shapes on the scroll saw. I then made the posts to hold these rail pieces. Here I deviated from the plans some. For instance, the plans show three separate sections for each post, with each section between the rails and sharing the holes in the rail. At this scale, I was pretty sure there was no way this would be both strong and straight. So, I made the posts as one piece, with the rounded parts the same diameter as the rest of the post, instead of larger as shown on the plans. It would not have been possible to slip the rails onto the posts if they were larger. I also used a thinner piece of dowel for the posts than shown because there is almost no wood left on the rails on either side of the holes if I used the larger sized dowel, as you can see on the above template. I made the posts on the lathe by marking off the round sections and using s diamond file on edge to round them, then some fine sandpaper to clean them up. I moved the dowel for each section so I was always working close to the chuck, to avoid breaking the dowel while turning it. It was now time to drill the holes for the posts in the rails. I first drilled the four holes in the top rail, using the template as a guide. I then used the top rail itself as a guide for the holes in the bottom two rails. At this point I realized I was not working with plywood, because both of the bottom pieces split. The holes were still rather large for these pieces too. So, I decided to make the lower pieces a bit more like the top piece with more wood around the holes. I traced the top rail onto the plywood then shortened the ends and cut them out individually on the scroll saw this time. I sanded them down a bit and drilled the holes, and was successful on one of the them. I had to remake the second, and again it split, although this time it was while dry fitting it to a post. For the final and successful try I traced the shape onto the wood, drilled the holes and made sure the poles slid in easily, then cut it out and shaped it. Here are the pieces, although the bottom piece was the last one that split. You can see the hole on the left is too close to the edge. By drilling the holes before cutting out the last piece, I could adjust the edge slightly to make sure the hole was centered more accurately. I also drilled the holes for the belaying pins in the top rail, then dry fit the rails and posts. I am pretty happy with the look so far. I am going to try to glue them up without taking them apart again, but we will see. I even added a few belaying pins to see how they would look. I had to shorten them by about a 1/32" to make sure I could fit a piece of line under them. And for full disclosure, here is the bone pile of broken rails. I still have a bit of work to do on this piece after gluing. I have to sand down the tops of the posts to be flush with the top rail, and even up the bottoms of the posts. I think I am going to drill post sized holes in the support pieces before I plank the deck and glue these posts into the support pieces, then plank around them. Otherwise I would have to glue these thin posts to the decking, and even with some wire through the deck for extra support I think it will be too fragile later on when rigging. There are also six sheaves between the two bottom rails shown on the plans, which I am attempting to reproduce. They are a bit small, but I have some prototypes made that may work. Of course, I will let you know if they work or not.
- 1,354 replies
-
- constitution
- model shipways
-
(and 1 more)
Tagged with:
-

ROYAL CAROLINE 1749 by Doris - 1:40 - CARD
usedtosail replied to DORIS's topic in - Build logs for subjects built 1501 - 1750
Doris, what a truly inspiring work the Royal Caroline is. And thank you for sharing the views into your other wonderful models on display. I could spend hours in that room.- 883 replies
-
- royal caroline
- ship of the line
-
(and 1 more)
Tagged with:
-
Thank you all for the comments and the likes. Thomas - I like your assortment of sanding sticks. I have a few of those but don't use them as much as I should. JParsley - Welcome and thank you, but what fun would that be for you? You are doing a great job on your Constellation. The Conny would be a fine next model for you. Dan - Nice to meet you and thank you. I agree with your assessment of the Conny history. It has been fun interpreting the various sources available. My son just graduated from UMass Lowell, but is staying an extra year to get his Masters degree. We have been spending a lot of time there since he has been living there. Tim, George, and Rich - thanks for your continued encouragement.
- 1,354 replies
-
- constitution
- model shipways
-
(and 1 more)
Tagged with:
-
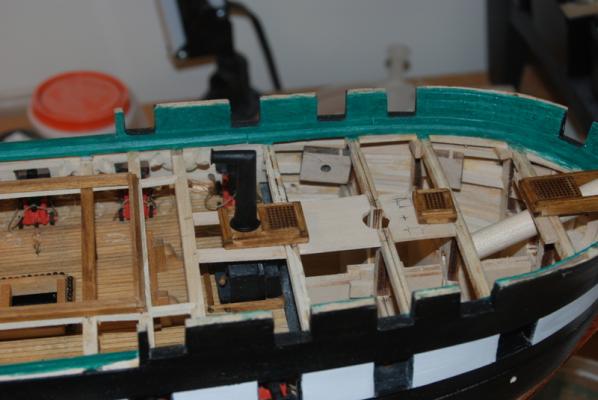
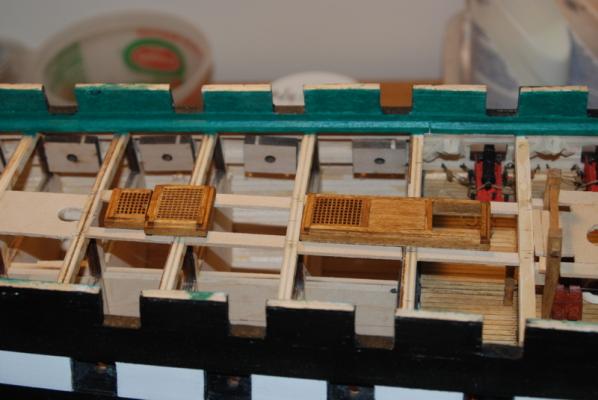
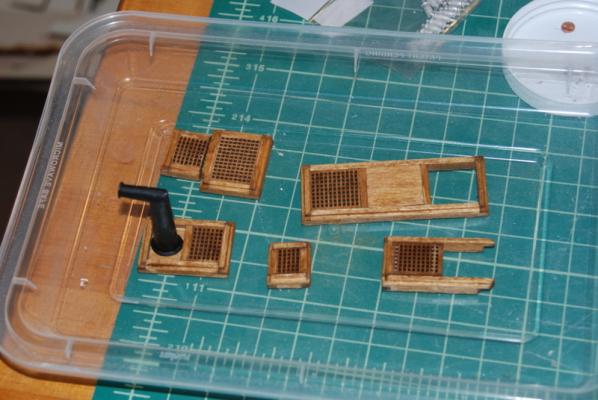
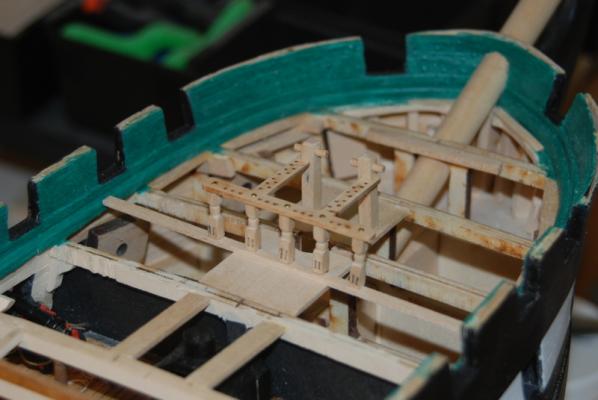
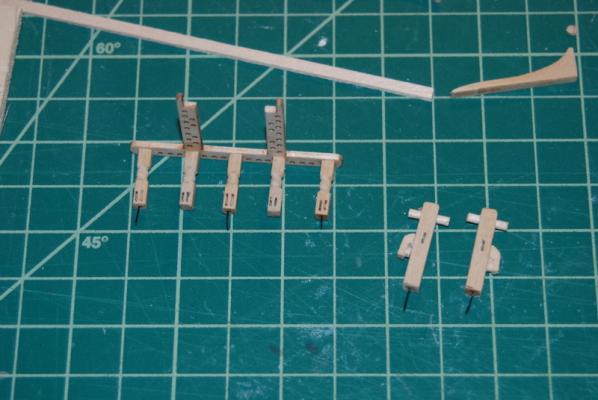
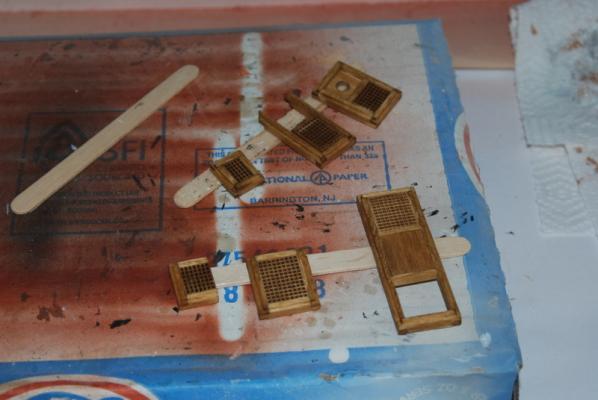
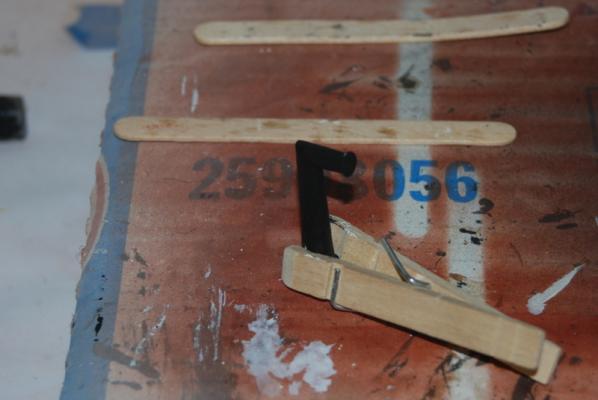
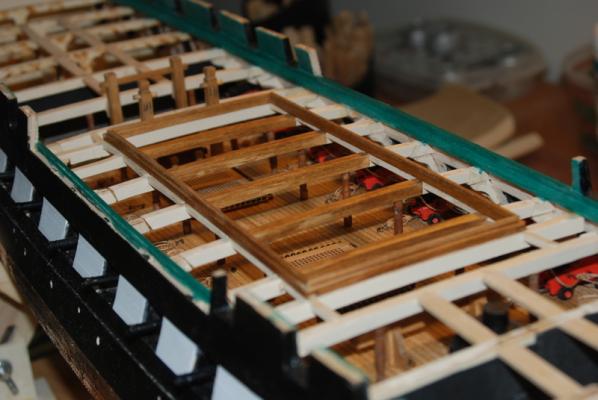
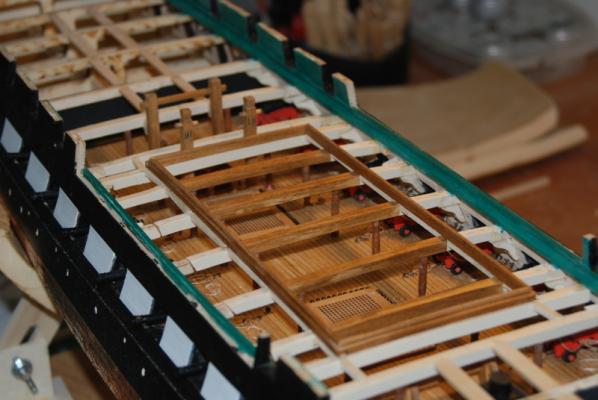
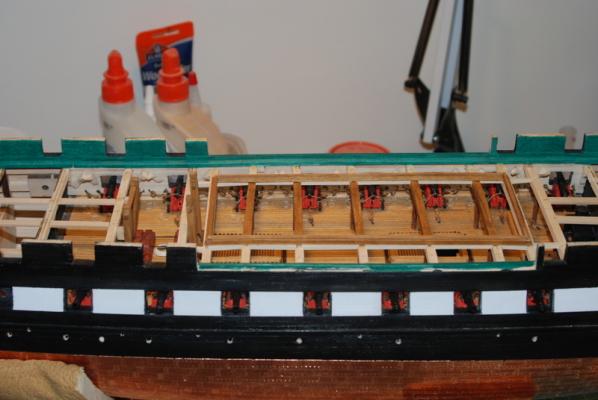
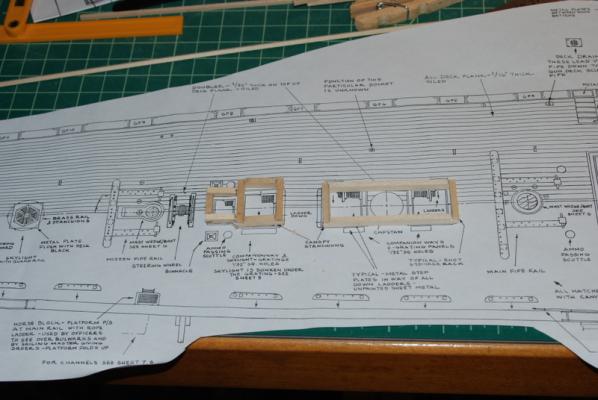
I finished up the hatch coamings, giving them a second coat of oak stain, which evened the color out some more. Here is how they came out, along with the kit supplied smoke stack. I then test fit them to the supports I added previously. I have to make the supports for the rear one a little closer together as it is balanced right on the edge. Next up was the fore mast pin rail. I am using the kit supplied rail which has a lot of holes in it for belaying pins. I am not going to fill all the holes with pins, though. I thought that I would end up making my own rail, as this one looked kind of flimsy, but it stayed together through all the sanding and handling, so it gets to be used. I made the five supports for the rail on the lathe, using square stock which I rounded in the center. I then used the drill press to drill the holes for the simulated sheaves. I could only get two sets of sheaves on each support instead of the three shown on the plans, but at least there is something there. To attach the rail to the supports, I wanted some sort of mechanical connection because the last thing I want to have happen is for the rail to come loose during rigging. I thought of pins but then saw these nails with a nice small head, so I experimented with drilling holes through the rail and into the support for the rails. You can see the pieces I experimented with in the top of the last picture. This looked pretty sturdy even without any glue, but my method was to drill the five holes in the rail, making sure they were centered in each area of the rail, then drill holes in the tops of the supports, but not for the full length of the nail. I then put wood glue on the top of the supports and CA on the nail shafts and placed them together, then gently tapped the nails home with a small hammer. I am hoping to be able to cover the nail heads with rope coils, or at least a little brown paint to blend them in. But the important part is that the rail is very well connected now to the supports. I had previously made the bitts for the fore rail when I made them for the main rail, but they did not work out for the fore rail, as the sheaves were right where the fore rail attaches to them. So, I made two more using the plans from the kit, with a single sheave in the middle. Here they are dry fit with the rail. I used wire in the bottom of these through holes in the support around the mast to hold them in place. These will be planked around when I do the planking, but the rail supports will sit on the planking. I did add wire to the two outer supports and the middle support to help attach these to the deck when I get to that point. I then made an attempt at the snatch blocks on either side of the bitts. These are a bit too thick, I think, so I will try thinning them down in place after the glue dries or rebuild these thinner. No work in the workshop over the holiday weekend, but I will be back at it next week.
- 1,354 replies
-
- constitution
- model shipways
-
(and 1 more)
Tagged with:
-

Brig Eagle by robnbill - 1:48
usedtosail replied to robnbill's topic in - Build logs for subjects built 1801 - 1850
She is looking absolutely great, Bill. I love those details too. -
I bought a pair a few years ago and use them occasionally when I have to reach into an area to cut a line. I think they work really well. The holes are a little small but I have small fingers so they are comfortable for me. They are a little pricey though.
-

Cutty Sark by NenadM
usedtosail replied to NenadM's topic in - Build logs for subjects built 1851 - 1900
Nice job on the catheads.- 4,152 replies
-
- cutty sark
- tehnodidakta
-
(and 1 more)
Tagged with:
-
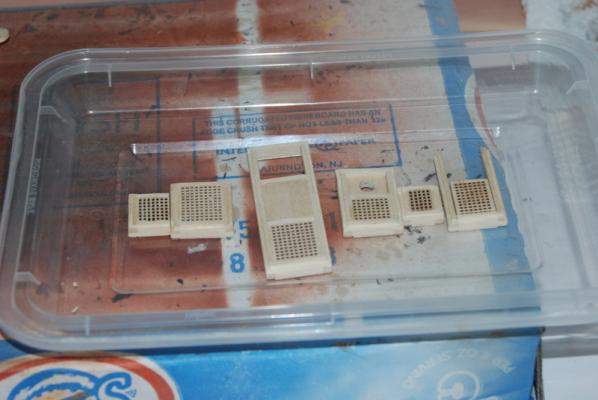
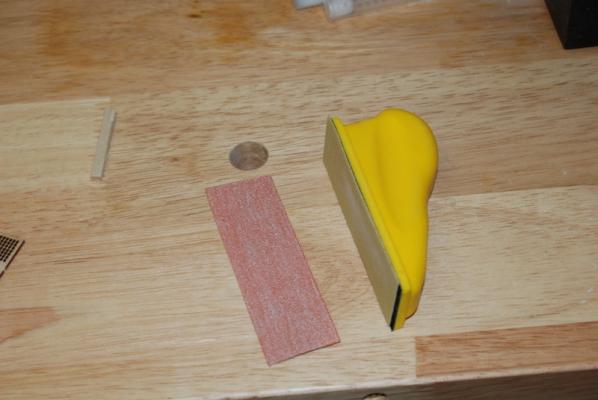
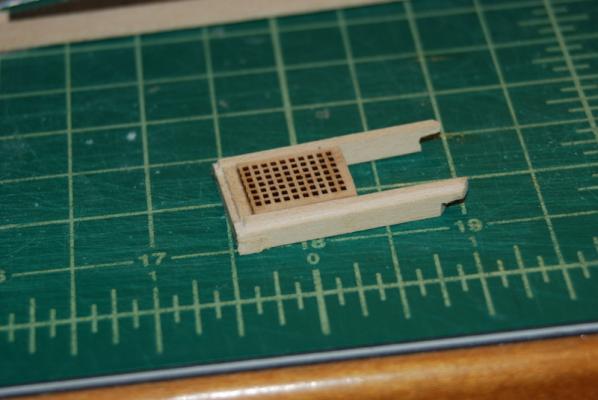
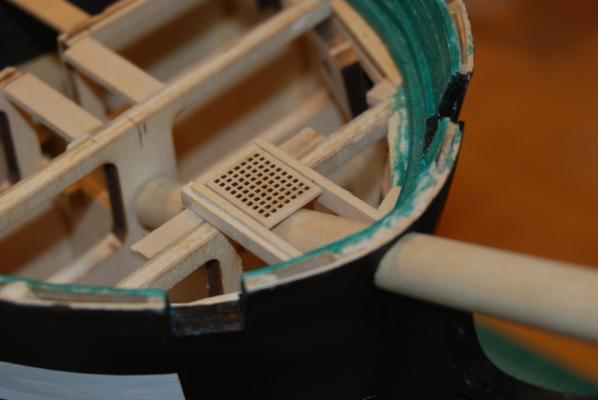
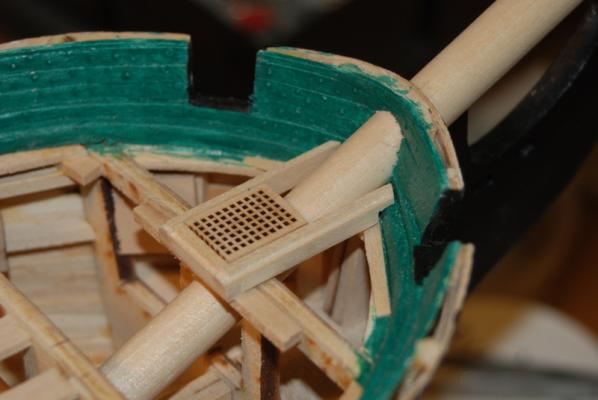
Thanks to George and Steve for the encouragement, and the likes. They all mean a lot. I finished building all the remaining hatch coamings for the spar deck, using the supplied gratings. There is a good side to those gratings where the holes are nice and square, whereas the other side is not so good. Of course, the first few grates I installed I put in the wrong way and had to replace them later. Luckily I had a lot of grating material to work with since I did not use it for the main hatch. And here they are after the first coat of oak stain. I was going to use some Pre-Stain on them before I stained them but my Pre-Stain had about 1/4 inch of what looked like foam rubber on top of it, so I didn't want to risk using it. They did come out a bit blotchy so I am hoping a second coat will help, maybe with some sanding before. One of those coamings includes the platform for the galley smoke stack. I cleaned up the supplied metal stack with some files and sand paper. I was not sure if it would come out well because the metal had some pitting on it, but after priming and a first coat of weathered black paint, I am liking it. Finally for today, I wanted to show off my new favorite sanding tool. I found this in a hardware store in New Hampshire. it has hook and loop on the block and the paper and comes with three grades of paper, so I can change paper instantly. The true sander also was used quite a bit in making the coamings, especially to keep the edges of the grates and other wood filler pieces square.
- 1,354 replies
-
- constitution
- model shipways
-
(and 1 more)
Tagged with:
-
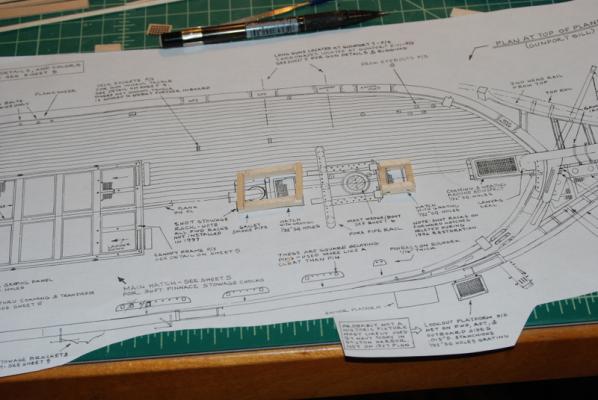
George, you must be chomping at the bit to get started. I can't wait to follow along. So you are going for the as launched look? That should look really nice. More progress on the spar deck furniture. First off, here is the completed main hatch coaming. i like how it came out. I have been working on the other hatch coamings and started with the one around the bow sprit. I decided to go with the grating on it and here is how it came out. I have a little more sanding to do on it before staining it. I used a 1/8" end mill bit in the drill press to cut the groove around the top. Once this was set up, it worked really well. I have left it set up so I can do all of the hatch coamings in the same style. I used a small round file in the groove to give it a more rounded profile. I cut out the individual pieces for those other coamings and used the same set up in the table saw for all of them to cut the lap joints. These pieces are just laying on each other for now. I still have to clean up the lap joints and glue them together. Most of these will have gratings on them, but the first hatch behind the main mast will be open with a ladder running down to the gun deck. This opening is over the part of the gun deck that I added, so it will provide another view port into the gun deck. It was almost as if I planned it that way (but I didn't; just got lucky) A few chores and Father's Day activities this weekend, but should have some quality time in the shop too. Happy Father's Day to all you Dad's out there.
- 1,354 replies
-
- constitution
- model shipways
-
(and 1 more)
Tagged with:
-

Micro-Mark MicroLux LaserKnife 2525 – A Review
usedtosail replied to mtaylor's topic in Modeling tools and Workshop Equipment
Mark, I am glad you got the machine so it is useable for you. I would have given up much sooner. E&T- a library that has a laser cutter? Now that is full service! -
Well, since I wasn't around for MSW 1.0, I will certainly enjoy this build, as I have your previous builds on MSW 2.0
- 127 replies
-
- dragon class
- yacht
-
(and 1 more)
Tagged with:
-
Ok, now I get it. I did use some of that model's transom design, as you may have noticed, but certainly not all those windows. Five was hard enough. Yep, I am trying for 1812 version, so anything you can find helps a lot, even if I at least know how mine differs from known information. Thanks to all.
- 1,354 replies
-
- constitution
- model shipways
-
(and 1 more)
Tagged with:
About us
Modelshipworld - Advancing Ship Modeling through Research
SSL Secured
Your security is important for us so this Website is SSL-Secured
NRG Mailing Address
Nautical Research Guild
237 South Lincoln Street
Westmont IL, 60559-1917
Model Ship World ® and the MSW logo are Registered Trademarks, and belong to the Nautical Research Guild (United States Patent and Trademark Office: No. 6,929,264 & No. 6,929,274, registered Dec. 20, 2022)
Helpful Links
About the NRG
If you enjoy building ship models that are historically accurate as well as beautiful, then The Nautical Research Guild (NRG) is just right for you.
The Guild is a non-profit educational organization whose mission is to “Advance Ship Modeling Through Research”. We provide support to our members in their efforts to raise the quality of their model ships.
The Nautical Research Guild has published our world-renowned quarterly magazine, The Nautical Research Journal, since 1955. The pages of the Journal are full of articles by accomplished ship modelers who show you how they create those exquisite details on their models, and by maritime historians who show you the correct details to build. The Journal is available in both print and digital editions. Go to the NRG web site (www.thenrg.org) to download a complimentary digital copy of the Journal. The NRG also publishes plan sets, books and compilations of back issues of the Journal and the former Ships in Scale and Model Ship Builder magazines.


