HOLIDAY DONATION DRIVE - SUPPORT MSW - DO YOUR PART TO KEEP THIS GREAT FORUM GOING! (Only 51 donations so far out of 49,000 members - C'mon guys!)
×


usedtosail
-
Posts
2,407 -
Joined
-
Last visited
Content Type
Profiles
Forums
Gallery
Events
Everything posted by usedtosail
-
 Wow, that is impressive. The rigging looks great.
- 1,756 replies
-
- 1
-

-
- constitution
- constructo
- (and 1 more)
-
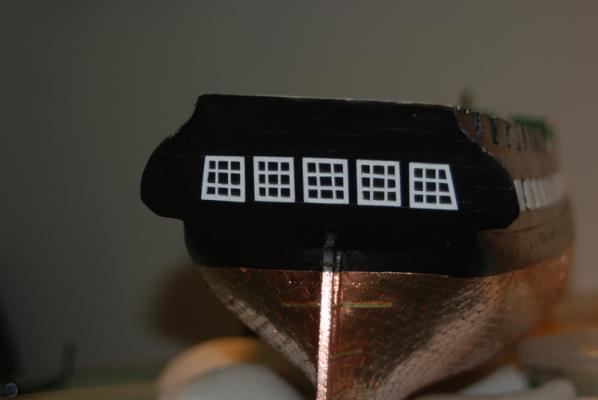
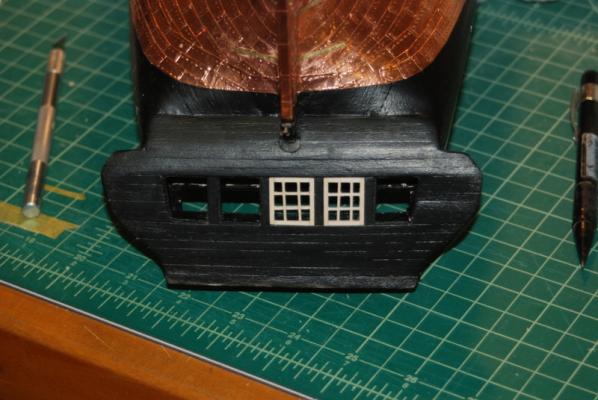
Just a small update from the weekend's activities. To add the large arches to the transom, I first glued a copy of the transom plan to some manilla folder, then cut it out along the top arch to use as a template. I taped this to the transom, then glued down the trim piece, starting at the middle and working outward. When I had most of it glued down, I removed the template and cut the ends to fit into the side trim. When this was dry, I cut the template back to the lower arch and did the same thing for that trim piece. I then made up the columns that I put along and between the windows. These were made from three separate pieces of wood that I primed and painted white. The two end piece were cut and the inside corners rounded off with a sanding block. The thinner center pieces were scored with a razor blade scraper before I painted them. I glued the end pieces on first, then cut the middle pieces to fit tight to them. I have primed and painted the eagle, including the shield, but forgot to take a picture of it. I have also started working with the Sculpey to create the stars and figures. So far, I think I can get that technique to work.

- 1,350 replies
-
- 13
-
-
- constitution
- model shipways
- (and 1 more)
-
Thanks for all the likes. Patrick, Sal, and Wes, thank you too. and I am really enjoying following your builds as well. I have learned much from them all. Wes, your build was an inspiration to get me to build the Constitution.
- 1,350 replies
-
- 1
-
-
- constitution
- model shipways
- (and 1 more)
-
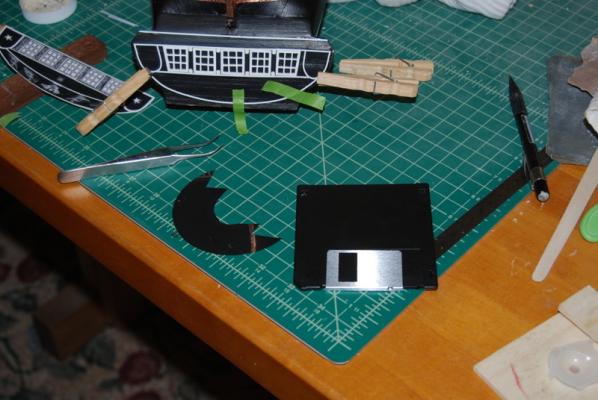
Here is something I picked up on this site for making window glass. First off, I have to apologize to the modeler who came up with this. I saw it on this site but can't remember from whom. Dig around behind your computer tables and look for these old "floppy" disks. If you crack them open, the disk itself is a black plastic, that makes great windows. It is opaque, so if like me you have nothing behind the windows to show, it does a great job of hiding the emptiness. It is very thin so it doesn't take up much space in the openings, and it cuts very easily with a scalpel or X-Acto knife. Plus, it is shiny so it looks like glass. And, it doesn't fog from CA glue like acetate does.
- 396 replies
-
- 6
-
-
- Idea
- Bright Idea
- (and 1 more)
-
Looking great, Patrick.
-
Thanks again, J. This looks like a straight forward procedure. I just wanted to make sure I had all the supplies I would need, but it is no problem getting them separately.
- 1,350 replies
-
- 1
-
-
- constitution
- model shipways
- (and 1 more)
-
Thanks J. I will try that if the dry transfer doesn't work out. What decaling kit did you use? Your Rattlesnake looks great. I have to spend some time going through your log.
- 1,350 replies
-
- 1
-
-
- constitution
- model shipways
- (and 1 more)
-
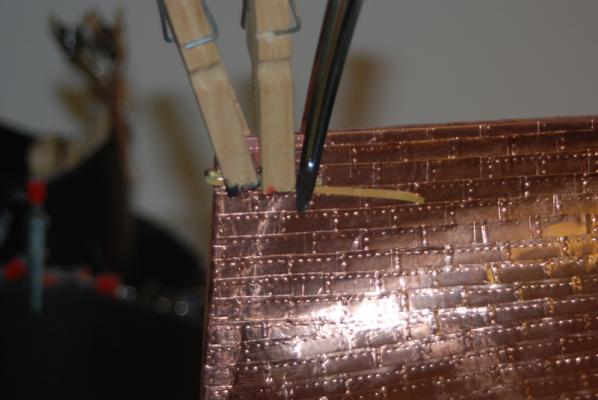
What about the guy (and it WASN'T me) who used his own urine to weather his copper plates.
-
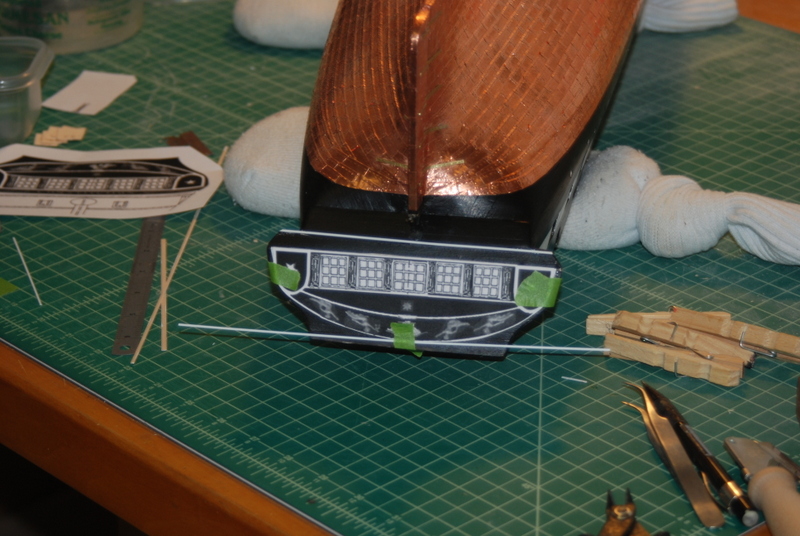
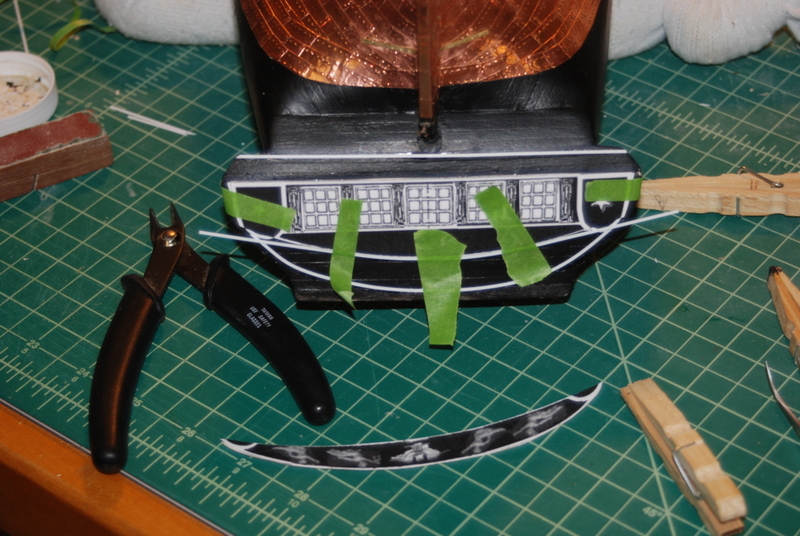
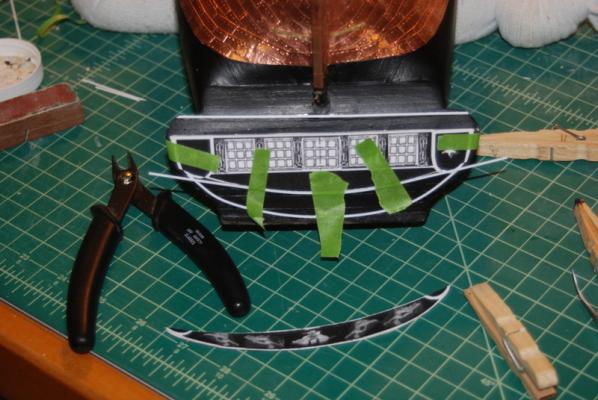
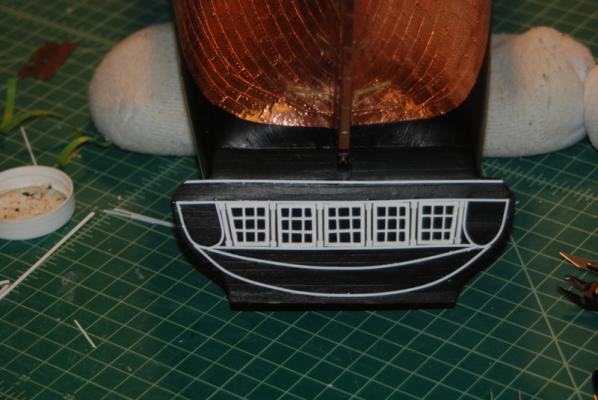
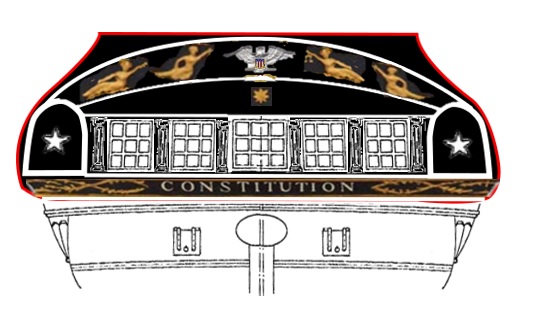
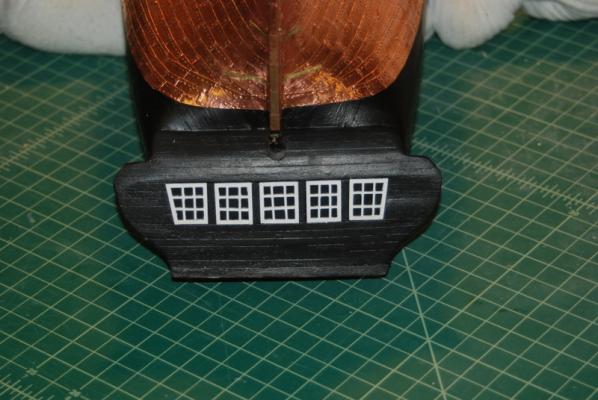
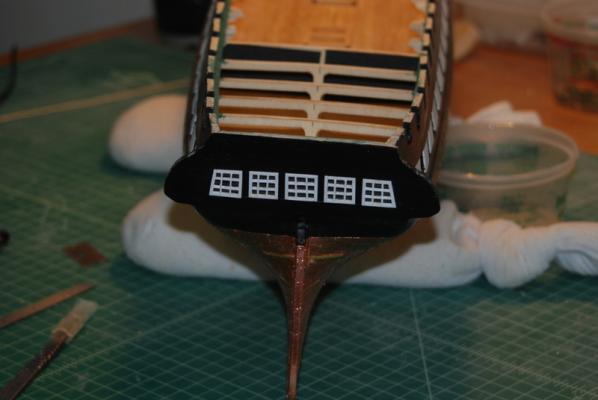
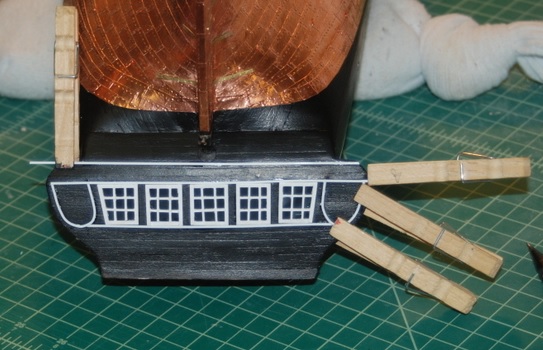
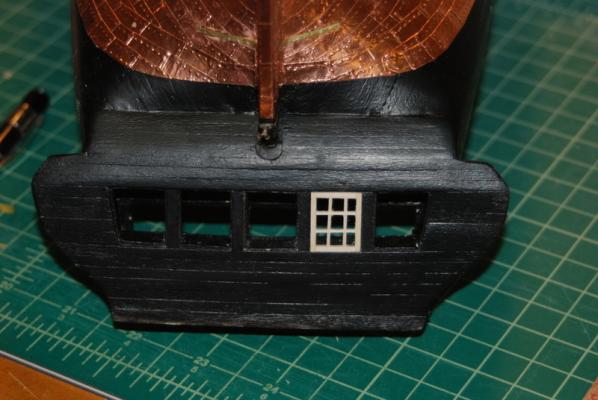
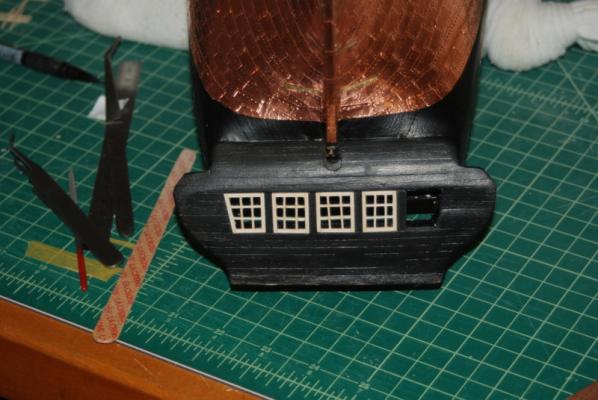
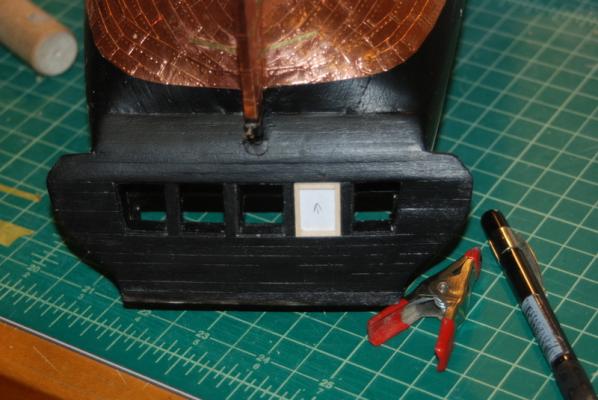
Good morning all. Work on the transom continues. By the way, I am adding the transom details now because I think it is easier to work on the transom with the hull upside down. When the transom is finished, I will work on the quarter galleries, but I am not sure if the hull needs to be upside down for them. They are next to make sure they flow into the transom correctly. Then I will be turning the hull right side up and rigging the guns on the gun deck. After that step, I will be very reluctant to turn the hull upside down again. I looked at the supplied eagle stern decoration that came with the kit and decided I like it, so I have incorporated it into the transom design. Here is what I envision for the transom. The figures and stars I will try to make out of Sculpey. If that doesn't work, I don't have a back up plan yet. For the name, I will make a thin board that I will paint black, then use white dry transfer lettering for the name. If that proves too problematic, I will try printing out the name and gluing it to the board. We will see. BTW, I used the computer equivalent of cutting small bits of paper designs out and gluing them together to get the final design. It works for me but it sure doesn't stand up to graphic design standards. I gave the window frames a few coats of thinned white paint. For the backing I would usually use clear acetate which I glue on with Hypo cement to prevent fogging. In another build log, and I really can't remember who's (so I apologize now if you are reading this log), to open up an old floppy disk and use the black, shiny material inside. This stuff is great. It blocks the view of the interior, which is good because there is none at the stern, is shiny to look like glass, and doesn't fog with CA glue. I cut oversize pieces of this material and glued them to the back of the window frames, then used a scalpel to trim the edges. It is thin enough so that it hardly pushed the frames out of the openings, so I could leave it go all the way to the edges of the window frames. I then glued the window frames into the openings, again using CA. And for the Captain, here is how it looks right side up at this point. I then started adding some of the trim strips. I am using white styrene strips for the trim, as others have done on their Connie builds. This stuff works great. I had to make two pretty extreme bends for trim behind the quarter galleries, so I used some push pins on a piece of balsa wood. I carefully bent the strips making sure the center was flush to the board, then gently heated the strips with a hair dryer until I could tell they where pliable, then let them cool overnight. When I removed them from the board, they held their shape nicely. One had a bit of a point at the top, so I put it back into the jig and reheated it to get the point out. The first strip I glued on was across the bottom of the windows. I started at the middle and worked out toward the edges, gluing in sections. I wanted to make sure the strip was tight to the bottom of the window frames. I was happy to see this still came out to be a straight line. I then had to glue those two bent strips to the transom. I first put a strip of masking tape on the transom to mark the tops of these arches, then glued the top of each arch, holding the strip while the glue dried so that they stayed flush to the transom. I then worked on each side of the arch, making sure they were at the right angles and tried to keep both sides of the transom the same. I left the ends long while gluing then trimmed them to the lower strip when the glue dried. I then added the strip across the tops of the windows. I cut one end to flow into the arch, but left the other end long while gluing. I also added the strip under the name. I still have to trim the ends of a few of these strips but you can see what they look like so far. One observation I have using styrene is that you really have to wait for the CA to dry, as it seems to take longer than it does on wood for some reason. The styrene does present a nice crisp edge, though, and it is very easy to bend.
- 1,350 replies
-
- 11
-
-
- constitution
- model shipways
- (and 1 more)
-
Thanks everyone. Steve, I wish I had the precision for these to be interchangeable but alas they are not. Each one was custom built to the size of the specific opening. I'll get a picture of them right side up so you can leave your laptop on the table
- 1,350 replies
-
- 2
-
-
- constitution
- model shipways
- (and 1 more)
-
Good advise George. This is not an easy model to build. That said, we will help you as much as we can.
-
I don't know what the control block is. The piece you show is the transom filler piece. See post http://modelshipworld.com/index.php/topic/5003-uss-constitution-by-usedtosail-model-shipways/?p=158328 in my build log where I shape this piece from templates made from the plans.
-
Thanks Tim. That gluing jig I got from Micro Mark a few years ago, which I find really useful. At first I was not too thrilled with it becuase the magnets are a pain to use, but then I started using the Lego blocks with it which made a huge difference.
- 1,350 replies
-
- 1
-
-
- constitution
- model shipways
- (and 1 more)
-
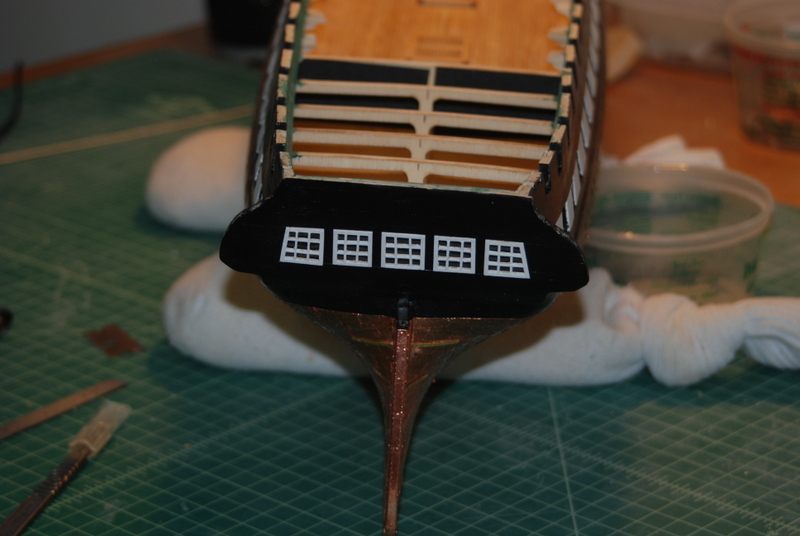
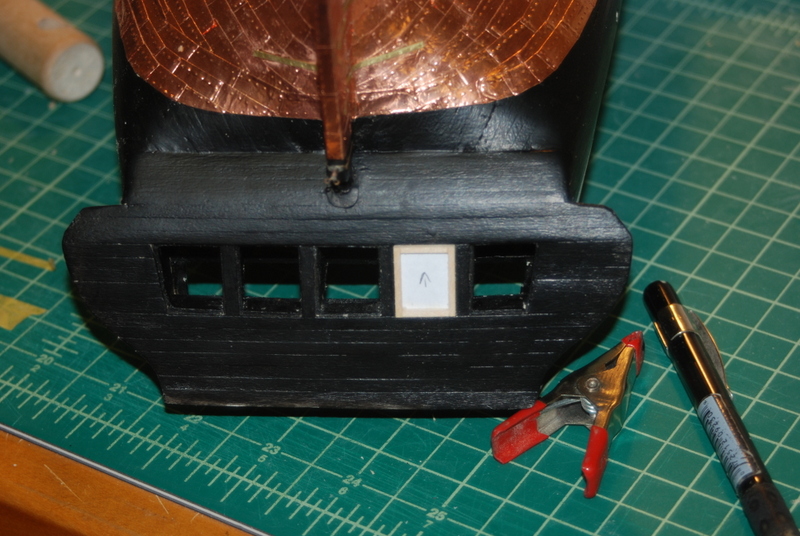
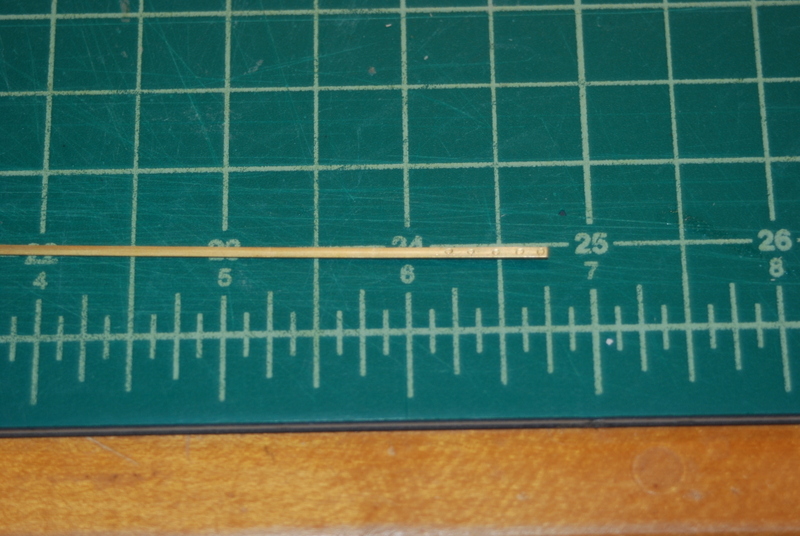
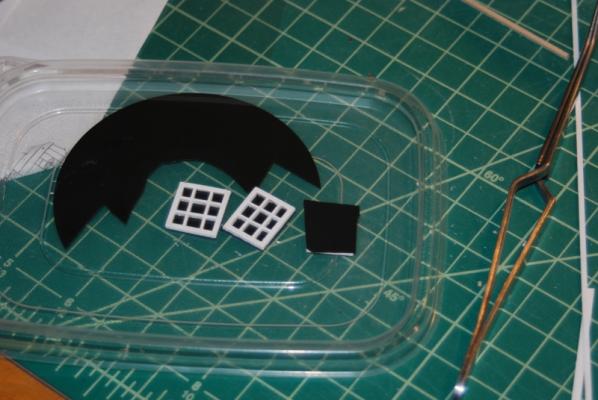
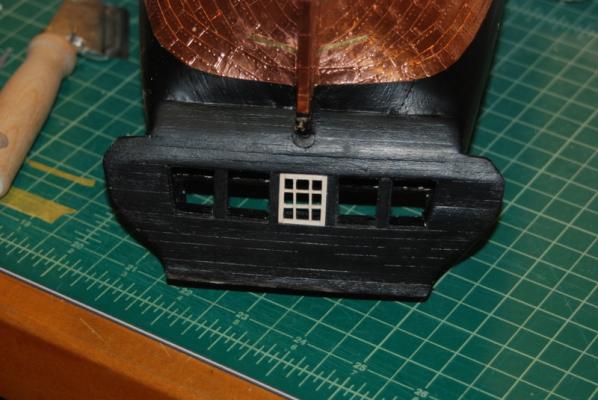
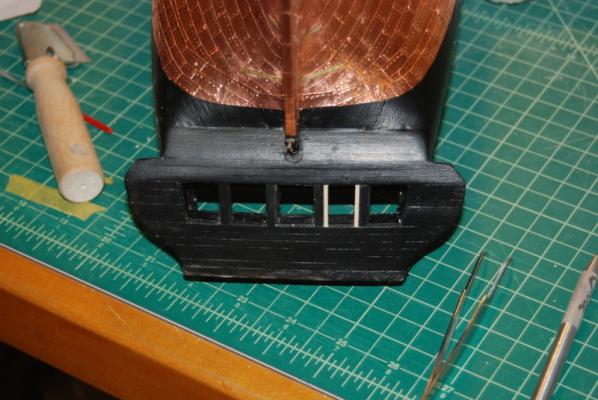
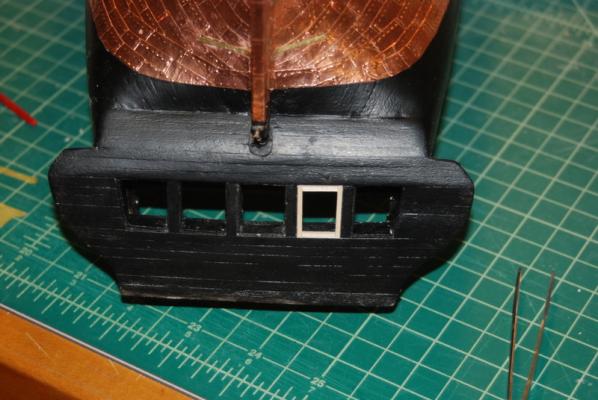
Here is the remade mullion of the correct size: I trimmed the ends off the mullions and fit it into the window opening, then glued it in. After it dried, I removed the paper from the back of the window, which was easy because it was only glued to the outer frame and I could scrape off any excess glue with an X-Acto knife. I then sanded the front and back by sliding the window over a sheet of sand paper, medium on both sides and fine on the front. And here it is in the opening: Here is the first window I made: And the rest so far: I am finishing up the last window now. I am going to paint these white to match the white trim that I will be putting on the transom. I am pretty please with how these came out, as I have had trouble making similar pieces in the past. The paper backing was the trick for me for these, so I figured I'd share the technique.
- 1,350 replies
-
- 12
-
-
- constitution
- model shipways
- (and 1 more)
-
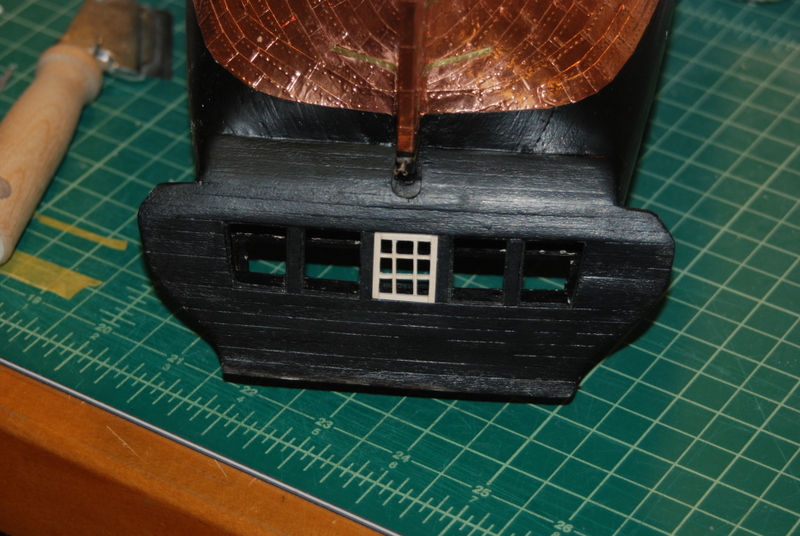
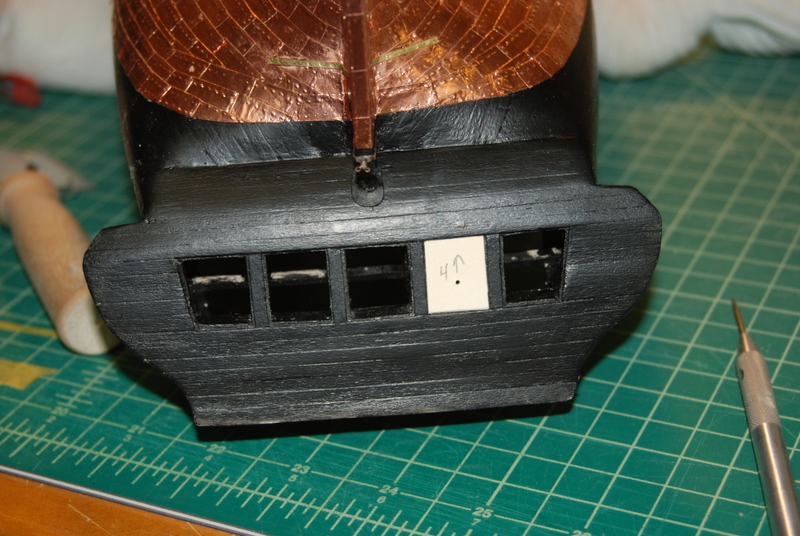
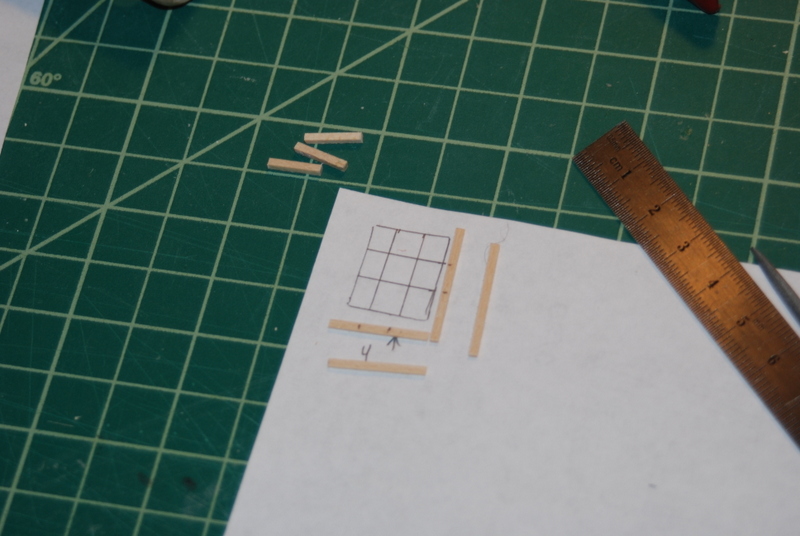
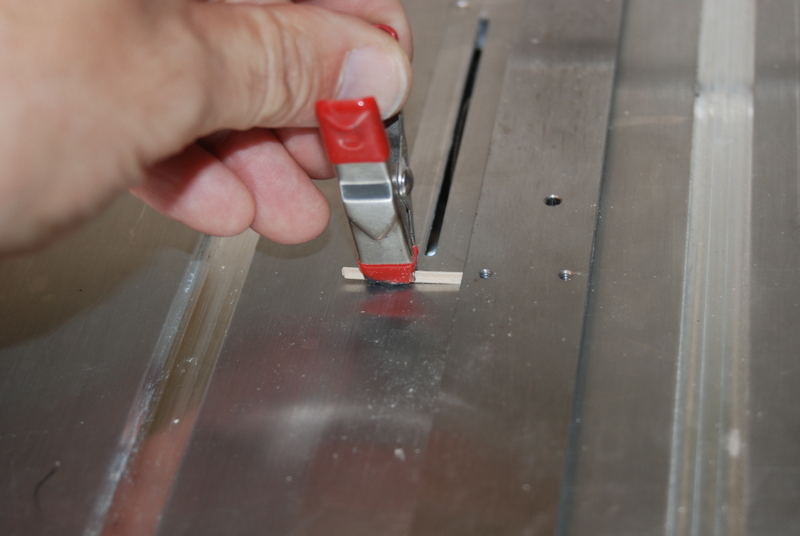
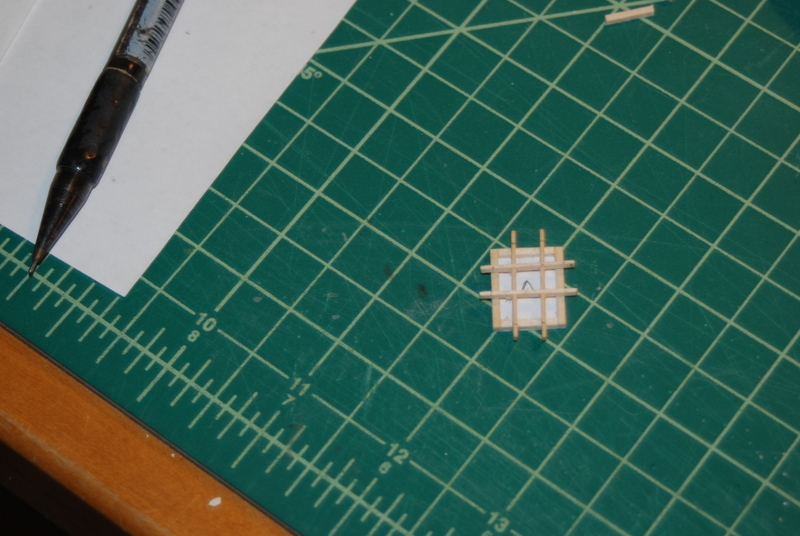
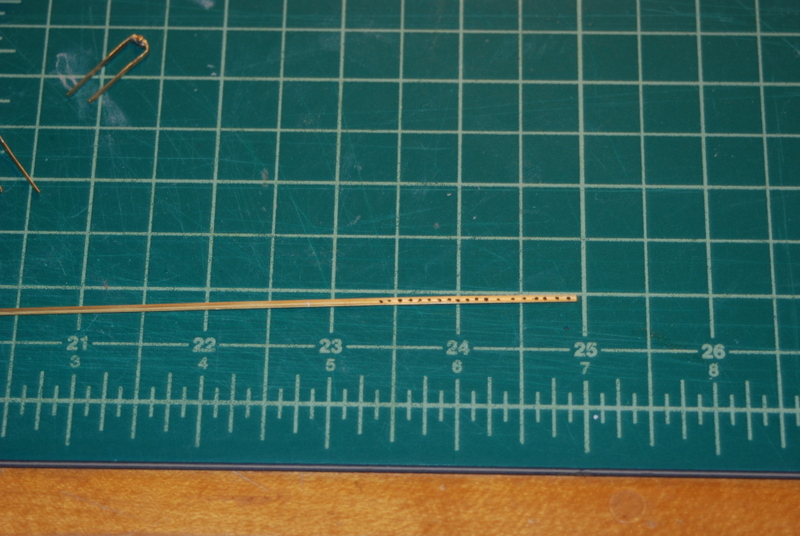
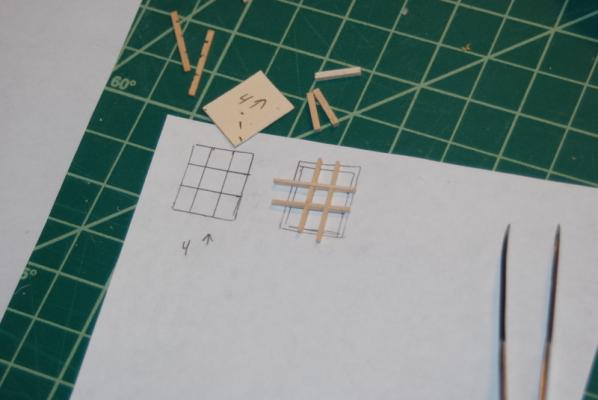
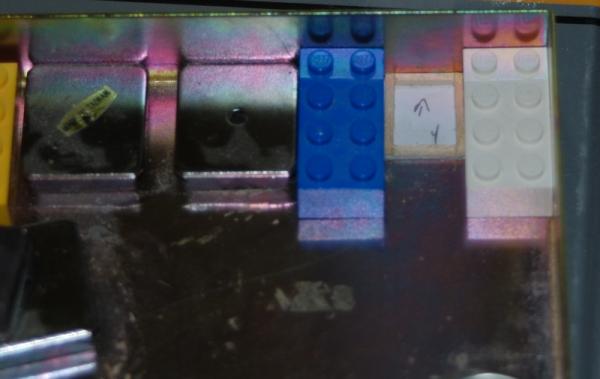
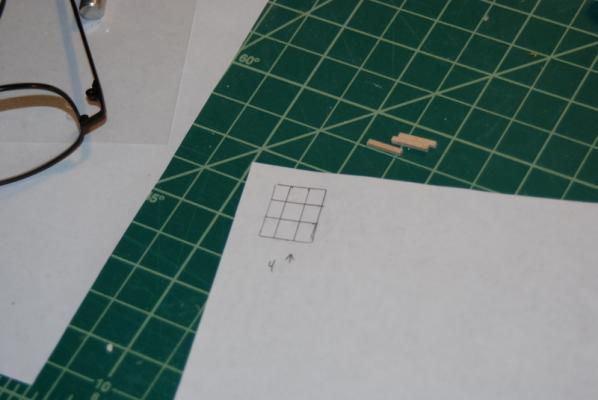
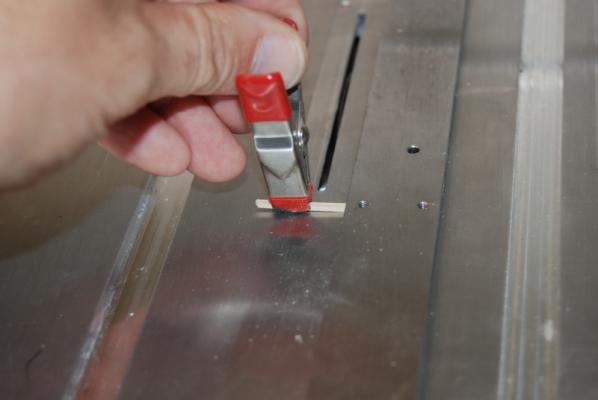
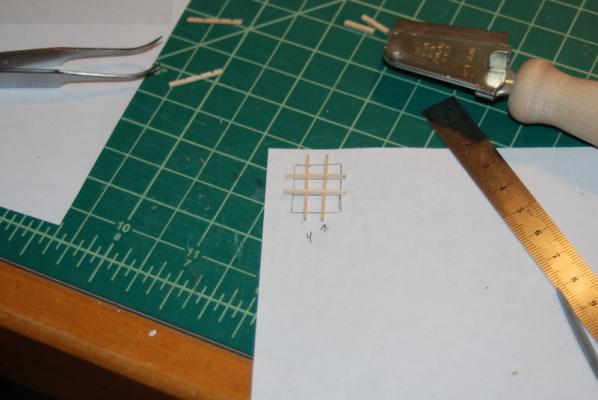
Thanks guys. Luckily Captain it was only five pintles and gudgeons. The sixth strap is just on the rudder itself so it was breeze to install. Onto the transom. I started by making the window frames and mullions (I think that is what the inner frames are called?). I decided to make the outer frames from 1/16" square wood, as I knew I would have problems using 1/32". I did use 1/32 by 1/16" for the mullions though. I hope the outer frames don't look too thick. I took pictures through the whole process to document how I made them which I will provide here. Since I am completely going away from the plans for the transom, I started by making manila templates of each window opening. I made sure that these were a good fit and did not leave gaps in the openings. I then cut the four outer frames and fit them into the window opening. I then traced the template onto a piece of paper and cut it out to use as a plan for the window. I cut the top flush with the top edge so that I could push this up to the edge of the metal tray that I used to glue these up. This tray comes with magnets to hold parts while gluing and a lip all the way around to push parts up to. I like to use Lego pieces in the tray because they have nicer square edges than the magnets. I removed the outer frame pieces from the opening and put them in the tray on top of the plan. I then glued each piece to the next and to the paper itself. This helped me get the frames square and held them together better for the next steps. While that was drying, I made the mullions. I first traced the template of the window opening onto a piece of paper and divided the sides into thirds. (I bet a bunch of you are screaming at this point - Tom stop! That isn't right!). I then transferred those positions to four pieces of wood for the inner frames. For the first window. I filed notches half way through the strips at those locations, so that they would fit together like a grating. For the rest of the windows, I got brave and used the Brynes saw with a slitting disk to make the notches, which turned out to be a much better way to go. I am using that saw more and more now that I can see what it can do. I used a metal clip as a holder for the strips and held two at a time, which ensured that the notches would be the same for both pieces. I set the fence the correct distance from the blade and made sure the two ends were even to run along the fence. I also made sure the strips were flat to the saw table and not the clip riding on the table. OK, here is how it came out after gluing them together. I put that aside to dry and took the outer frame off the gluing jig, trimmed the excess paper from edges, and fit it to the opening. I had to do a little sanding of the edges to get a nice fit, but this is where the paper backing really helped hold it together as I sanded. And here it is in the opening. And here is where all you guys screaming above were waiting for. I went to fit the mullions to the outer frame and said _ Oh s**t ! I forgot to allow for the outer frame when dividing the window opening into thirds. So, I added the size of the outer frames to the paper and then divided the remaining area into thirds and remade the mullions. Now, this would not be so bad, except I did the same thing on the second window! Duh! Continued in the next post...


- 1,350 replies
-
- 12
-
-
- constitution
- model shipways
- (and 1 more)
-
Yes, you could probably work with that. From that last picture, make sure the bottom of the bulkheads make a nice line too. The middle rear ones seem liek they may be too high and not in a nice line. If you added a rabbet at the keel, make sure the bulkheads, except maybe the last one, all end on the rabbet.
-
My advice would be to take some isopropyl alcohol and loosen the glue, then take the bulkheads off and start again. Any discrepancies at this point will be major problems later on. You can get the first chapter of Bob Hunt's practicum for the Constitution at his web site for free. It has some good information about how to make sure the bulkheads are correct before installing.
-
Looks like a fine start. You can bevel those bulkheads some before you glue them on, if you want. You should at least take off the laser char before installing them as it will be harder later.
-
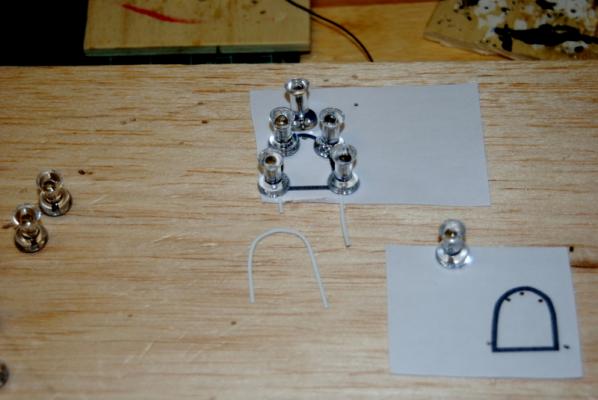
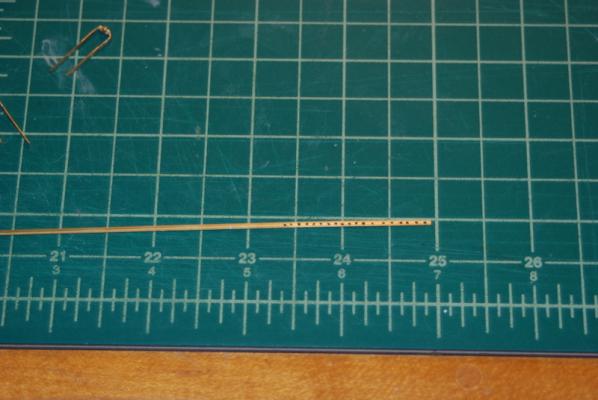
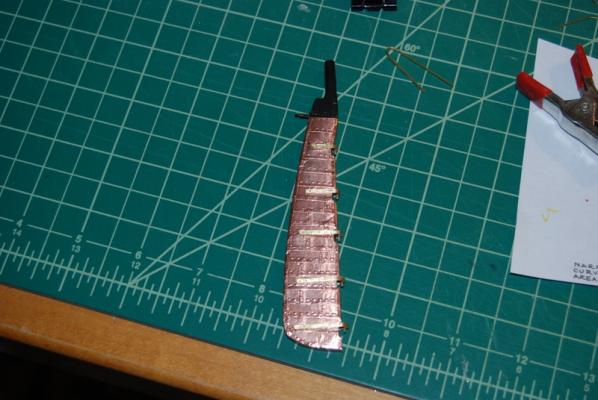
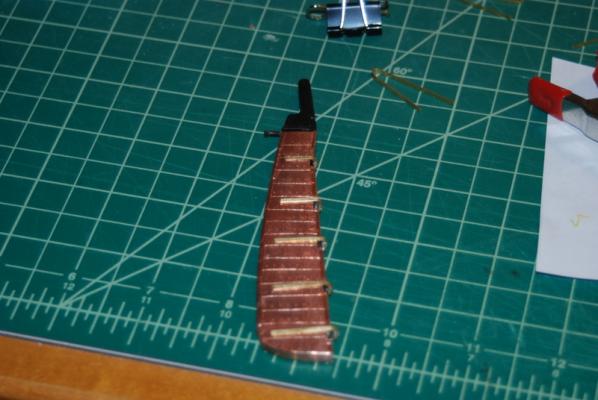
Tim - I like your idea of using Styrene too. I think that should work nicely. Thanks everyone for the likes. I did complete the rudder, for now, and attached it to the hull. I am going to wait to install the rudder chains until later so I don't catch anything on them while I am working on the transom. Here are a couple of tests for simulating the bolt heads in the pintles and gudgeons. I tried dots of black paint and dots of CA. I ended up going with the CA after all, as it really did have the look I was going after - subtle but there. The black was much too pronounced to me. Here is the competed rudder with the pintles glued on and the simulated bolt heads added. I used medium CA to glue the pintles on and in a few of them I had to go back later and add more glue to get the ends to stay down. I found that I could use thin CA with a narrow tube on the bottle, and get just enough on the edge of the pintle to wick into the joint. I used metal binder clips as clamps for the pintles. Then it was time to add the gudgeons. I added these one at a time from the bottom up, since the bottom three where pretty much straight, not crazy bent like the top two. I used the rudder to get them at the right height and angle, but I had to make sure that I could get the pintle to fit over the gudgeon with both the rudder and gedgeon held at the same angle as on the ship, otherwise I would not be able to remove the rudder after gluing each one on. Getting the top two gudgeons to fit nicely took a while and they are not exactly right, but I can live with them. These were especially hard because there is no good way to clamp them, so I mostly just did each side separately and held them with some piece of wood by hand until the (medium) CA dried. You can see in the picture below that I used a thin strip of masking tape to mark the height and angle of the gudgeon before I glued it on so that when I applied the glue I could get it in roughly the right place and still have time to place the rudder in this gudgeon and the previously added gudgeons to get the final location. A couple of times I had to go back and reapply the glue because I didn't get the rudder in place in time. And here is the final result, with the CA spots to simulate the bolt heads on the gudgeons and chain iron too. What is hard to see in these pictures is that I also added a piece of manila folder that I cut to fit over the rudder hole in the counter with a hole in it for the rudder post, to simulate a rudder coat. I slipped this over the rudder post before the rudder was installed and then slid it to the counter and glued it on with white glue, then painted it black. It covered the odd size rudder hole nicely. I tried other things to make the rudder coat out of, like foil and even Sculpey, but I liked the simple look of the folder material the best. Now it is time to work on the transom, so framing the windows will be next.

- 1,350 replies
-
- 10
-
-
- constitution
- model shipways
- (and 1 more)
-
Another beautiful theory killed by an ugly fact. Thanks Mark for setting me straight. Sjors, she looks magnificent whichever way the chimney is shown.
- 1,616 replies
-
- 3
-
-
- caldercraft
- agamemnon
- (and 1 more)
-
Thanks George, Nenad, Tim, and Captain Steve. Humm, that sounds like an interesting idea, Captain Steve. I may try that out. I was hoping to avoid drilling tiny holes in the brass, but I may have to try. I did try just putting spots of black paint on the brass strip last night, but I am not satisfied with that look.
- 1,350 replies
-
- 1
-
-
- constitution
- model shipways
- (and 1 more)