HOLIDAY DONATION DRIVE - SUPPORT MSW - DO YOUR PART TO KEEP THIS GREAT FORUM GOING! (Only 13 donations so far - C'mon guys!)
×


fnkershner
-
Posts
1,595 -
Joined
-
Last visited
Content Type
Profiles
Forums
Gallery
Events
Everything posted by fnkershner
-
Ok Sports fans! its been a long a patient week. But every time I passed the bench this past week. I would pause and install a bulkhead. On my way to work and on my way home, often also just before bed. So here is the result - A few comments - Since the transom is exposed. I think I will make that out of boxwood using the sheet provided by Jeff. I am interested in methods others have used to fair the bow blocks. These are tiny suckers! If you look closely at the Macro picture below at the bow you will see that the glue is still drying on the final bulkhead.
-
I suggest you taper the edge of the plank that will be glued to the previous plank. Here is my reasoning. when you go to lay the next plank having a smooth straight line on the previous plank will help ensure there are no gaps. It also gives you a easier reference line for the next plank. So if you are planking from the deck down you want to taper the top of the plank.
-
Jason - Yes this is the same kit. but they no longer offer it.
-
The fillers pieces are called Stealers. and yes this is fairly common near the stern. the stealer often begins at approx. 1/2 the width of a plank and widens towards the stern to a full width.
-
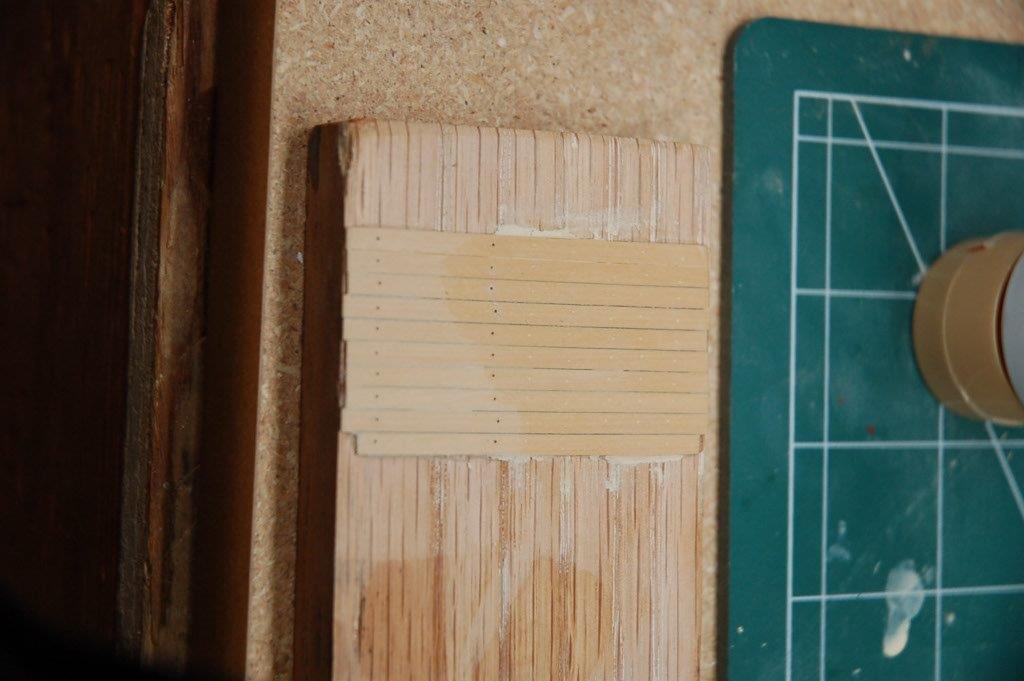
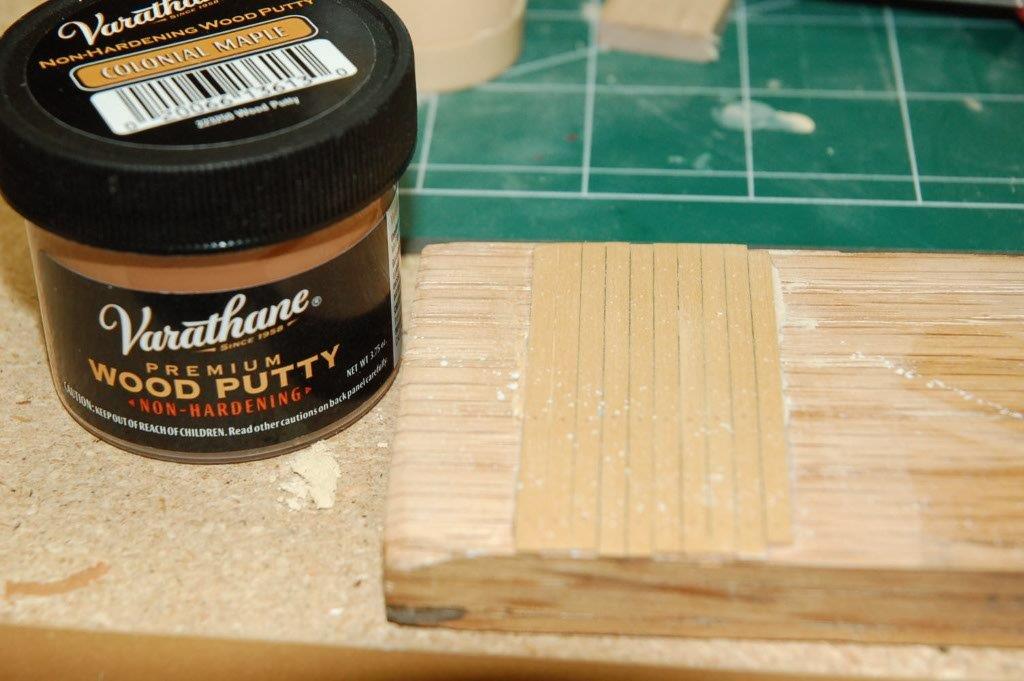
Joe - I am not quite to the point of doing on a full model. But I will tell you what I have done. Step 1. I took extra deck planking and created a sample section of deck on a scrap piece of wood. Complete with caulking etc. Step 2. I used a #78 drill and drilled the holes. Step 3. I took a small amount of paste, of a similar product to the one you mention, that I got at the local hardware. And rubbed into the holes. Step 4. I made sure there was no residue Step 5. I covered with a coat of wipe on poly.

- 302 replies
-
- 1
-

-
- granado
- caldercraft
- (and 1 more)
-
Augie - I know that you and I speak American which has some similarity to English. But Grant I am sure he speaks Aussie which is by itself altogether different.
- 2,191 replies
-
- 1
-
-
- confederacy
- Model Shipways
- (and 1 more)
-
Joe - Alistair beat me to it. I was going to suggest you try the drill and fill method. You have such a wide choice of colors to try and it is much simpler than the toothpicks.
- 302 replies
-
- 1
-
-
- granado
- caldercraft
- (and 1 more)
-
Kevin - It may be comical to see me giving planking advice. Since it is not one of my best skills. But let me give it a try. From the blow up of your pictures I can see that it looks like you have done ok so far on your planking. So I will leave what you have and go from there. If you look at your plans you will see a big no no in planking. There are quite a few planks that do not make it all the way to the bow and terminate at the bluff bow. This should be avoided. I would go ahead and divide the bulkheads into planking bands and then into individual planks. once you have done this on each bulkhead then you can step back and decide what needs adjustments or not. at that point it might be necessary to remove some of the planks already laid. but hold off until you get to that point.
-
So Mike please share your solution. How did you make sure they were aligned with the keel? Ie the center of the bulkhead aligned with the keel?
-
Ok its been a great day in the shipyard today, made lots of progress. I finished shaping the false keel, and the Boxwood stem. I also made the boxwood keel and joined all three pieces together. Everything is glued now and while I am waiting for it to dry, I am preparing the bulkheads. I also discovered something surprising - My ship vice has a slight curve in it! only when I clamp down on the keel but...!!! I supposed it would not show on larger models but I ripped that out quickly and the longboat will not go there. So a question to those of you more experienced. I assume I need to mark the centerline on the bulkheads. got a suggest solution? (Harvey I should have listened more closely)
-
I will send you pictures so you don't have to waste postage until we are sure it is what you want.
-
Considering that today is the 70th anniversary of D day. For anyone living in the DC area you should go to the capital mall on Memorial weekend. I know it will be crowded and a bit of a hassle but I think it is worth it for at least one visit. On the trip I describe above. We spent a 4 day weekend at the end of our vacation doing the tourist thing in DC. The most impressive part of it was Rolling Thunder. 80,000 Motorcycles paraded 5 abreast from the pentagon to the capital. All in honor of those who have Died for our country.
- 97 replies
-
- 1
-
-
- macedonian
- frigate
- (and 2 more)
-
There was when I was there. 2 yrs ago My wife and I spent 2 weeks staying with friends in that area. We went to St. Michaels quite a bit. There were several classes of racing going on almost every day. We were there at the end of May. For me it was a wonderful vacation. I got the see the Robert's collection in the new hall at the academy, I spent several days sailing on a full size boat, And I was at St. Michaels.
- 97 replies
-
- 1
-
-
- macedonian
- frigate
- (and 2 more)
-
That is a great museum. They also have lots of R/C activity there.
- 97 replies
-
- 1
-
-
- macedonian
- frigate
- (and 2 more)
-
If you think that would suit you. I have quite a collection to share.
-
Wow that is a tough question. Personally I usually wax my line to get rid of the fuzz. Chuck sells some scale model rope that is very authentic in scale and look. but I am afraid it will not suit you purpose here.
-
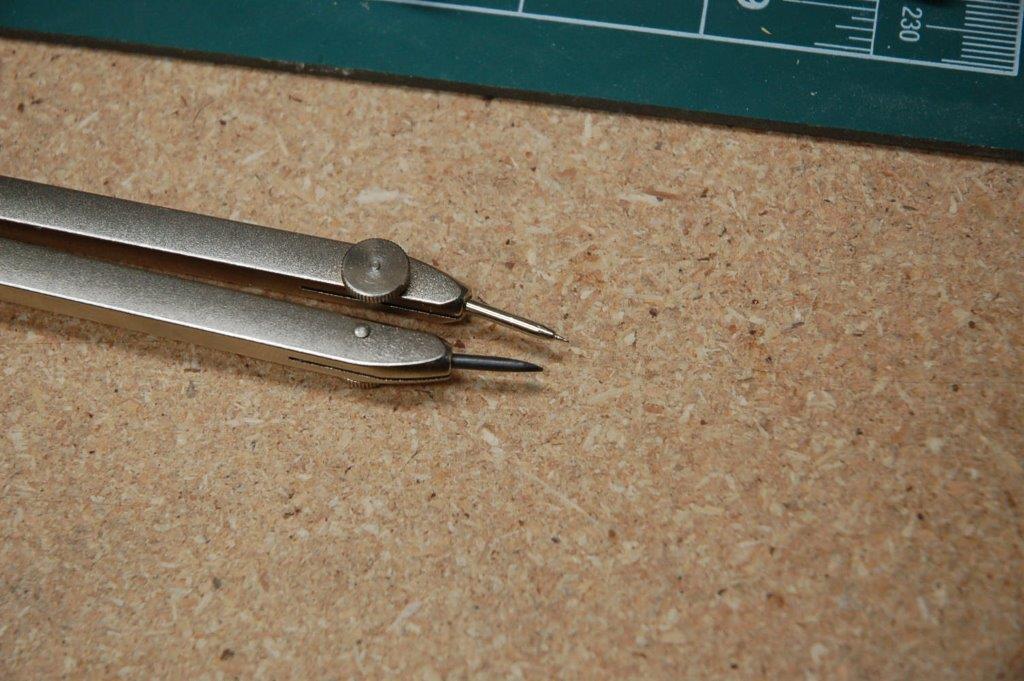
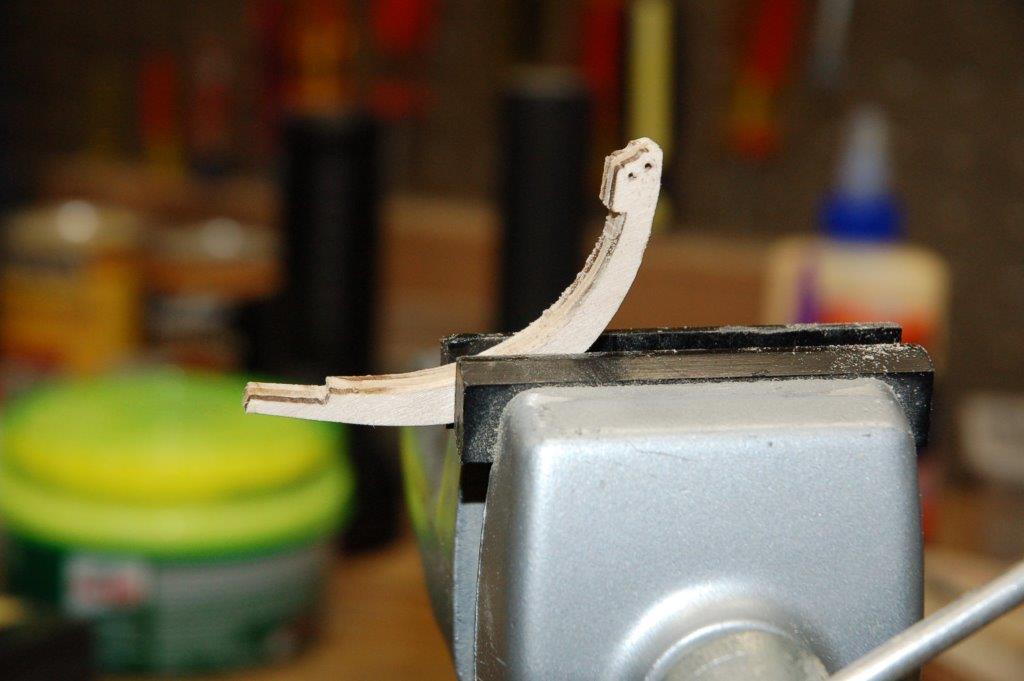
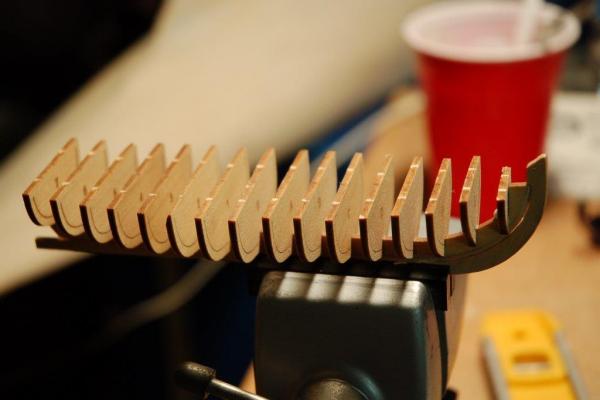
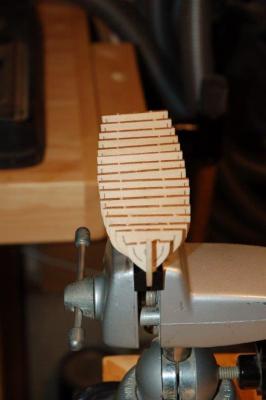
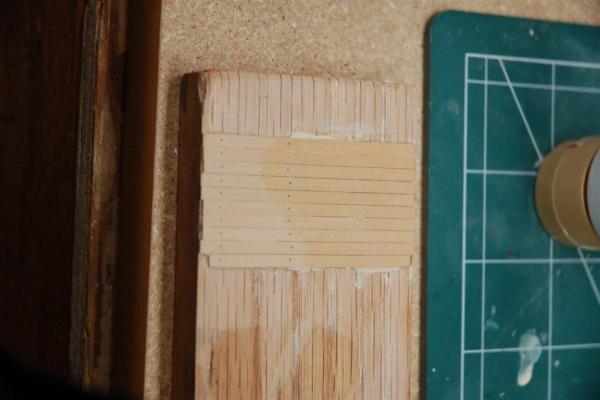
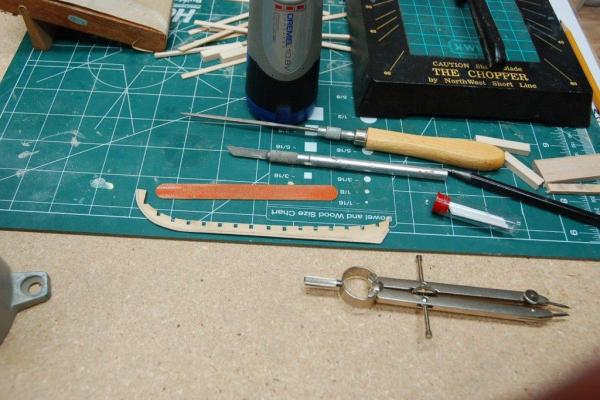
With much thanks to Mike and a few Duh moments I thought I would share my efforts to make my boxwood stem and shape the Rabbit on my false keel. First the false keel. And I would be remiss in not giving credit to Harvey here. I took a draftsman's compass. sharpened the graphite point and extended the metal tip just a bit. I then set the width of the 2 points to be just shy of 1/16 of an inch. I then used this to draw I line on both sides of the false keel that followed the curve of the keel from one end to the other. This gave me a line to follow when sanding. In the 2nd picture you will also see some of the tools I used for the Boxwood stem. For the stem I did a rough cut from the boxwood sheet. I then clamped the rough piece between the 2 basswood stems. Thank you Chuck for the pair of stems. and then I clamped all 3 pieces carefully lined up in my trusty Panamax vice. And then used my Dremel with a sanding wheel to bring it down until everything was the same. Thank you Mike. I don't know why I didn't remember the Dremel. I also used the Dremel to drill the holes. Lastly I used a #13 blade in my Xacto knife to cut the scarf joint. For those who don't know the #13 is the same as the #11 except it has saw teeth. I finally some micro files to clean everything up. Oh and I used the admiral's nail file for some of the sanding. (don't tell her!) The final picture here is a macro shot of the Stem. I can see it still needs a bit more sanding. blowing up macro sure shows what is still needed. the best part of this is that as long as there was some laser char on the basswood stems I knew I hadn't sanded to much.


-
Ray - I like the detail of your deck furniture. Did you do your own gratings? If so can you a bit more detail. Somewhere I have the instructions on how to cut your own gratings, but I need to get the scale right. I also do not like the gratings or the plans for my kit. All I can use from that is the scale of 1:48. I know I am doing a different model. but you have given me some great ideas.
-
Mike - This time are you using Boxwood?
-
Pops - I almost never anneal any of my metal parts. I haven't found the need too. Now sometimes if I am creating them from scratch yes.
-
US Brig Syren 1803 by danri - Scale 1:64
fnkershner replied to danri's topic in - Build logs for subjects built 1801 - 1850
Dan - I just found your log. this is wonderful work. I look forward to following along. -
Well for the first false keel I broke off the front end with a little too vigorous sanding. I could have fixed it with some careful gluing but I decided to use the guarantee and get another one. In the 2nd case I accidentally closed the lid on the box for my kit with the keel and bulkhead assembly inside. It broke in 3 places. Its a great opportunity to refine my skills.
-
Mike - I know I am jumping back a bit. But can go spend a bit more detail on the shaping of your Boxwood Stem. it looks almost perfect. If you are falloing my log you will see that I broke my boxwood stem and I broke my false keel. So while I am waiting for my replacement keel I am taking my time to cut a new stem. this time I am going to try for a better scarf joint.
-
Wow! very clean and nice job!
-
What material did you use?