HOLIDAY DONATION DRIVE - SUPPORT MSW - DO YOUR PART TO KEEP THIS GREAT FORUM GOING! (Only 13 donations so far - C'mon guys!)
×

the learner
-
Posts
757 -
Joined
-
Last visited
Content Type
Profiles
Forums
Gallery
Events
Everything posted by the learner
-
 Try Doublecad XT it has 3D capabilities, I think they are up to version 5 or 6 now but Its free to download. I have version 3 but still learning to use it! http://www.doublecad.com/
 -
I would, but you are right most people would not see it but if this model is fully rigged is it possible that is there any thing attached to the bollard head that might pull it off. I will have to do a little research on the subject
-
Fantastic bit of research, I have read through you blog twice now and am amazed at what you are finding. I have seen the model and pictures of the Earbus and Terror on the NMM several times but had little thought to their history.
- 346 replies
-
- 1
-

-
- terror
- polar exploration
- (and 2 more)
-
Welcome aboard! Great start! I too like your height/framing jig.
-
Well perhaps its not 100% accurate but it certainly helps! I will have to take a closer look at the drawings and take some more accurate measurements. As for the void it will not show so if I rebuild the fore cant deadwood or anouther build I will make sure that my work is more accurate. If the bollard timbers are suspose to be longer I will recut to allow for the additional meat and length. Thanks
-
Unusual build method! looks great, I like how you are leaving one side open for viewing adds a lot to the quality of the model Go Peggy Sue
-
I see you have a few kits stacking up under your workbench and I love that Mahogany flooring! The quarterbadge redo looks very good!
- 63 replies
-
- 2
-
-
- pegasus
- swan class
- (and 1 more)
-
It appears that it will fair well once you start planking, good results!
-
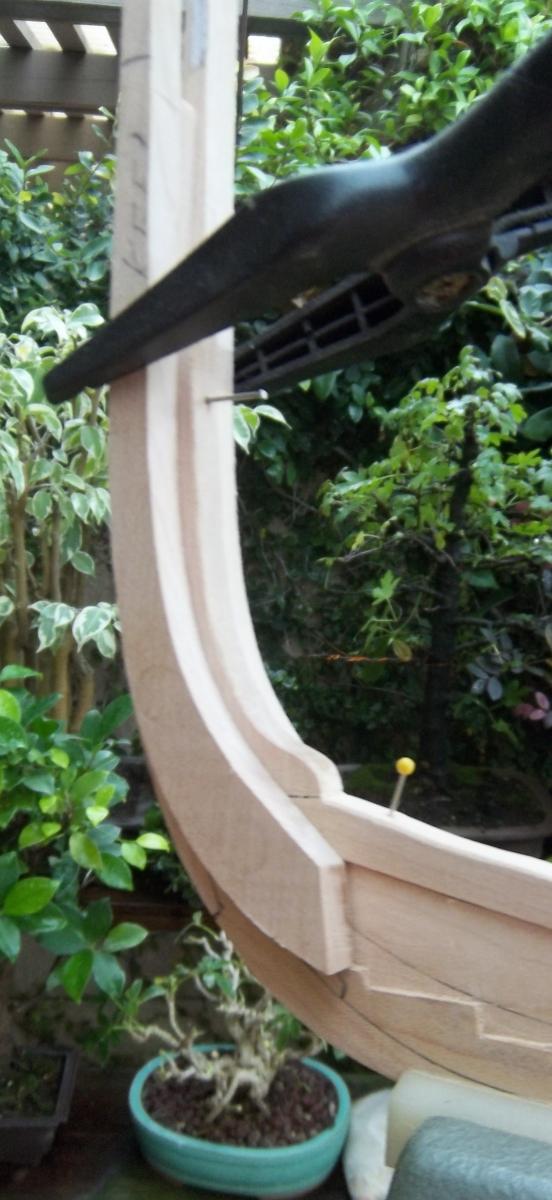
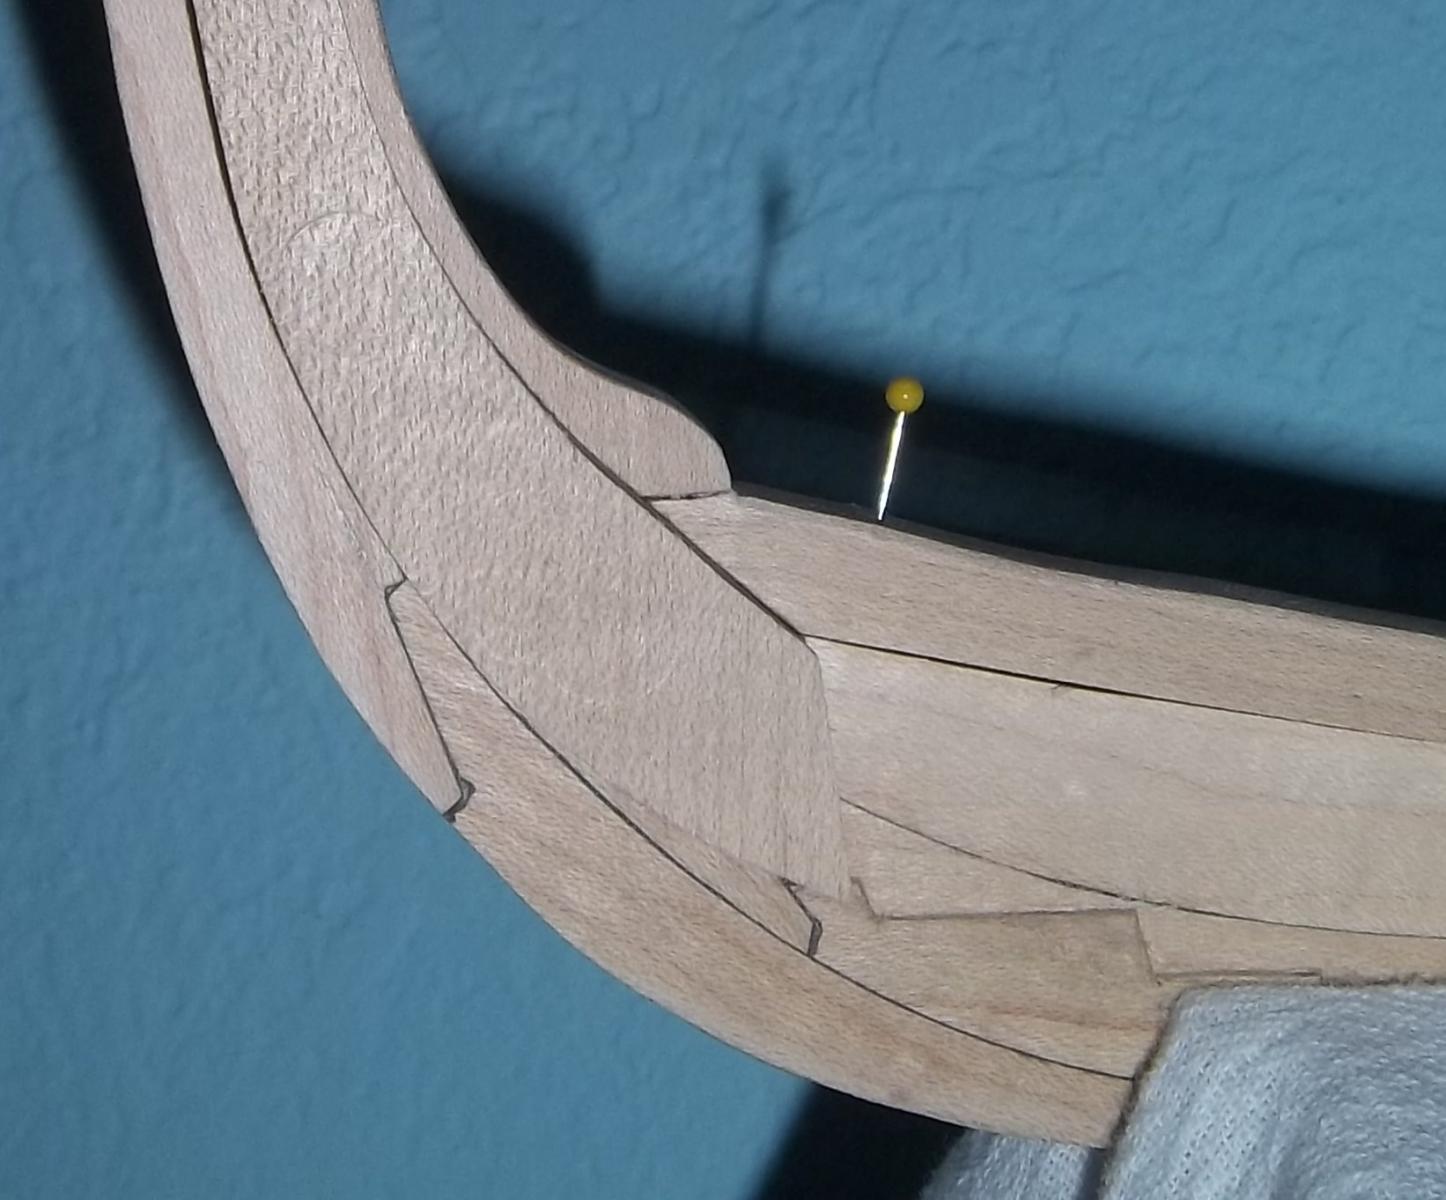
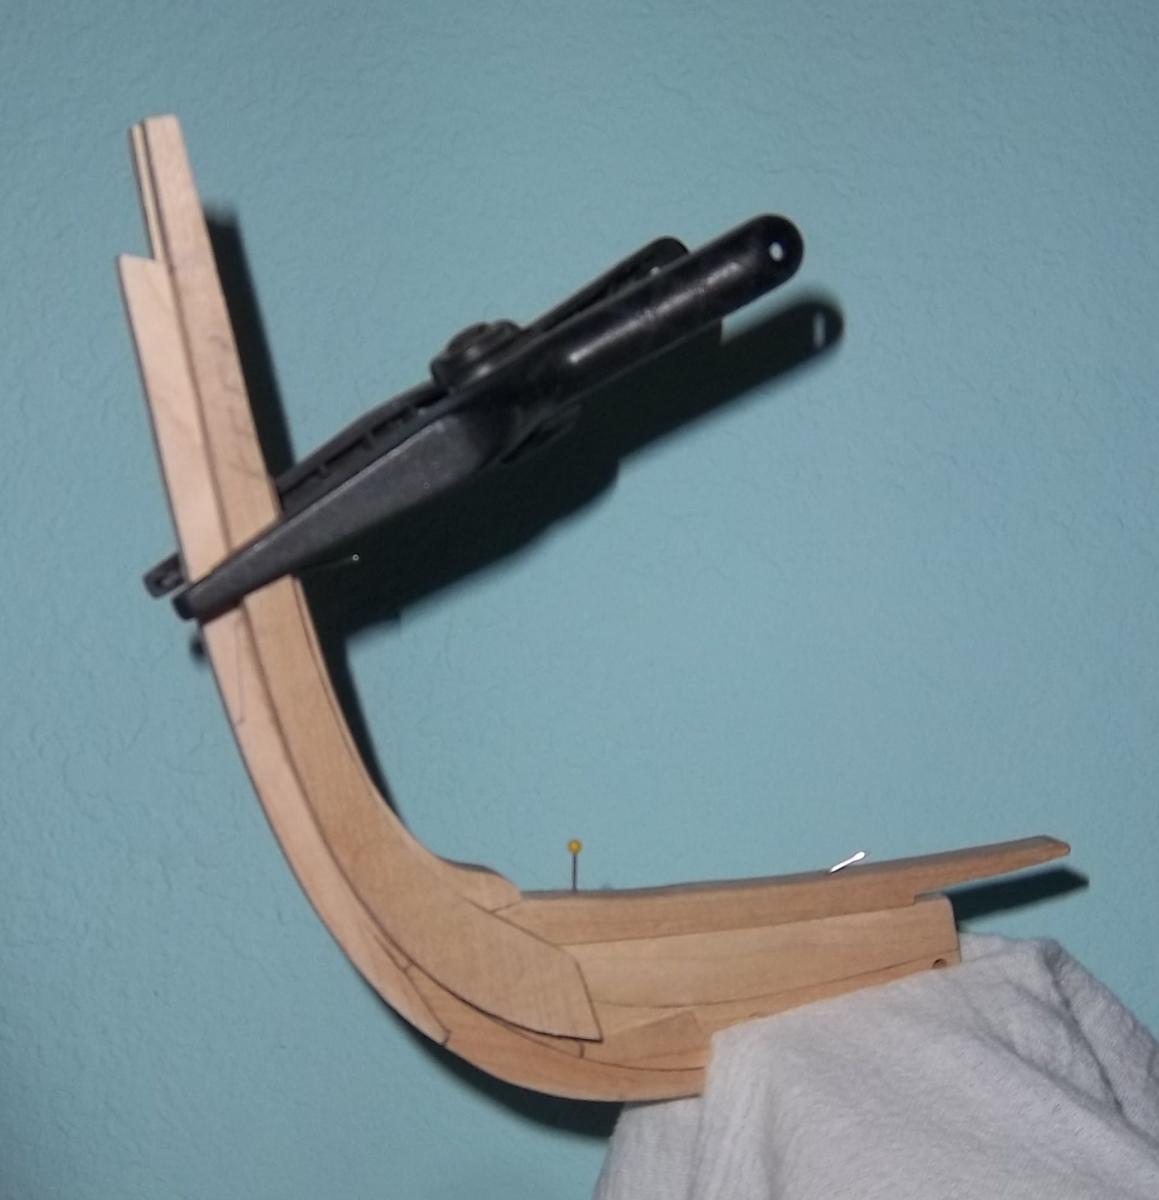
Ok so at 22.8 mm I have the bollard piece set in place. A little clearer picture. So my question, does this look appropiate? as you can see I have a void under the bollard piece! do I just ignore this or do I have the wrong shape in the deadwood piece? My measurement was the same also using Adobe PDF but the drawing does not really show the shape of the bollard head at this point! should I just guess at what the shape is at this point using others drawing or pictures? There is a good picture in the Niad build I could use Bollard size.pdf


-
Gary your build is looking fantastic! I like the work on the capstans, thanks for showing the process
-
57/64th Ok I will try that and see where it lies. I have yet cut the rabbit on the stem because I was unsure of the shape it this area. Tell me about the drawing you are making the measurements from? Thanks, Guy
-
Has any one attached the first two bollard pieces to the stem? There is not enough information on the plans set to answer this question. I have been prusing my other sources,IE books and the best I have came up with is Admiralty Vol I but there are a lot of diffrences to not be able to exactly determin how I would attach and shapt these pieces and they are important to line up the other hawse pieces correctly. Do I line up the bollard piece with the grove for the planking and what is the height of the top above the stem? I hope these questions make sense!
-
I have much to learn! Perhaps we will learn from each other.
-
Do the hair pins provide enough pressure to hold the work?
-
Thanks Ed! I look forward to the final completion (in the case), Volume 2 and your future builds. Fantastic job!
-
Juergen, I just found your build while perusing EdT's build of the HMS Naiad. Your work is very professional and clean, good job! I will definitely be watching this build through to the end. However, I cannot wait until you complete the Leopard and return to the Triton build. I am just in the throes of starting my build of the Triton.
-
Wow! yes I did not realize that and had gone back and printed up a new A sheet but just now looked at it and I see that the fourth futtock is indeed missing. it should not be much of a problem to draw up some new pieces.. Good catch!
-
Fantastic base/slipway I like! Can you show us a profile of the base trim?
-
Hi! welcome back. look foward to watching your build
-
Great start! perhaps you can get the minnie you to work 24/7 as he needs no sleep or food! <chuckle>
-
I am still here...working on frames!
-
Looking fantastic! Vol I on the way
-
Ron, I came across your build while doing some google searches for the Brig Niagara. Your build is well done and the model is well built, very professional and not a lot of use of fancy tools. kuddoes to Lunberyard! I will definately come back to see the finished model
-
The 6tpi blade cuts smoother but increases the cut time however the the thickness sander time is decreased
-
Fantastic video this is now on my bucket list of places to visit before I kick the bucket!!! HU HA