HOLIDAY DONATION DRIVE - SUPPORT MSW - DO YOUR PART TO KEEP THIS GREAT FORUM GOING! (Only 72 donations so far out of 49,000 members - Can we at least get 100? C'mon guys!)
×
.JPG.ca33079f5815b861e67b9c2cccd37982.JPG)

Blue Ensign
-
Posts
4,564 -
Joined
-
Last visited
Content Type
Profiles
Forums
Gallery
Events
Everything posted by Blue Ensign
-
 That's a very good idea Ian, and your Cheerful looks in splendid shape. Regards, B.E.
- 574 replies
-
- 4
-

-
- cheerful
- Syren Ship Model Company
- (and 1 more)
-
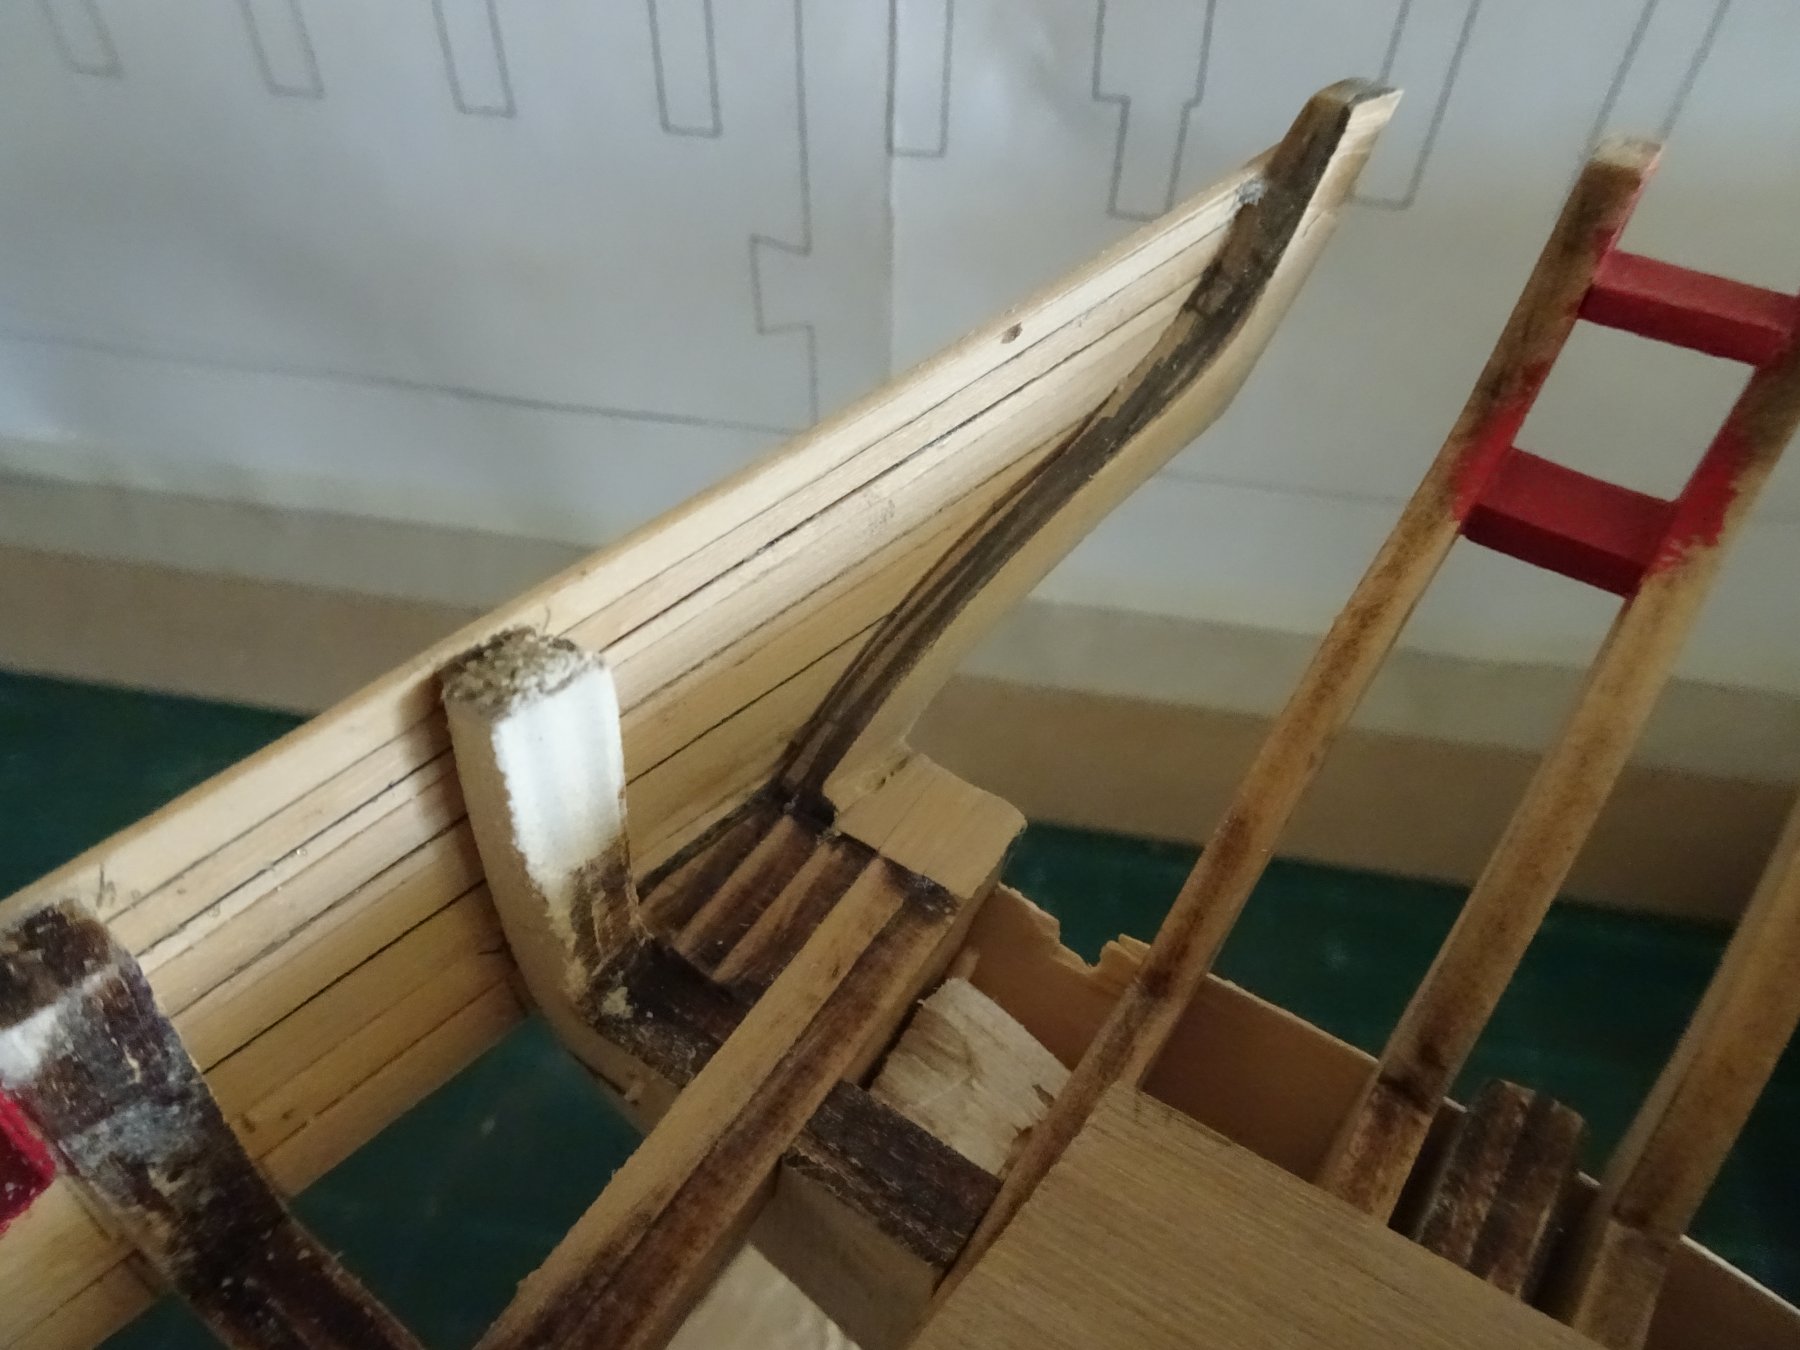
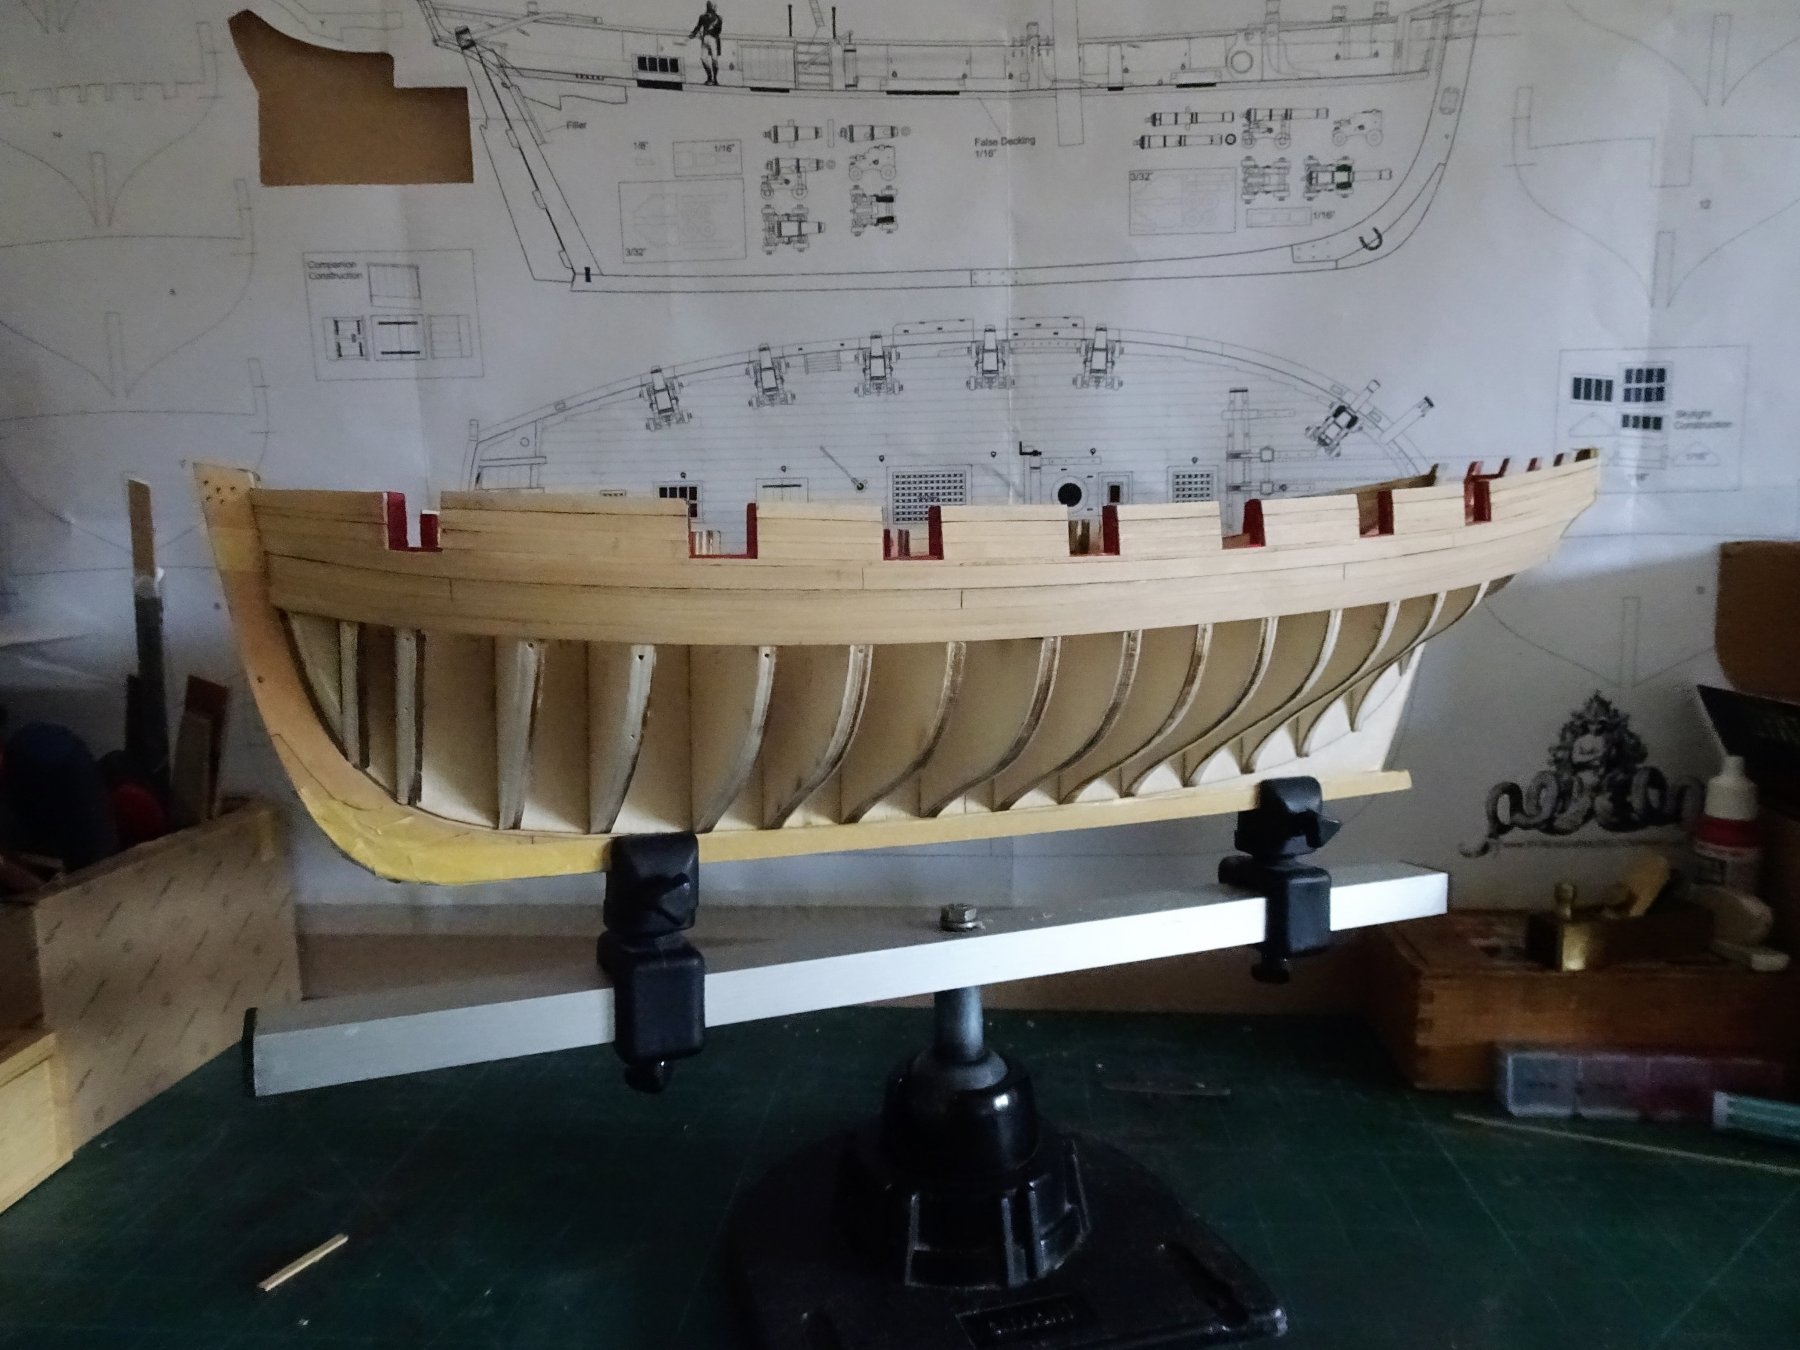
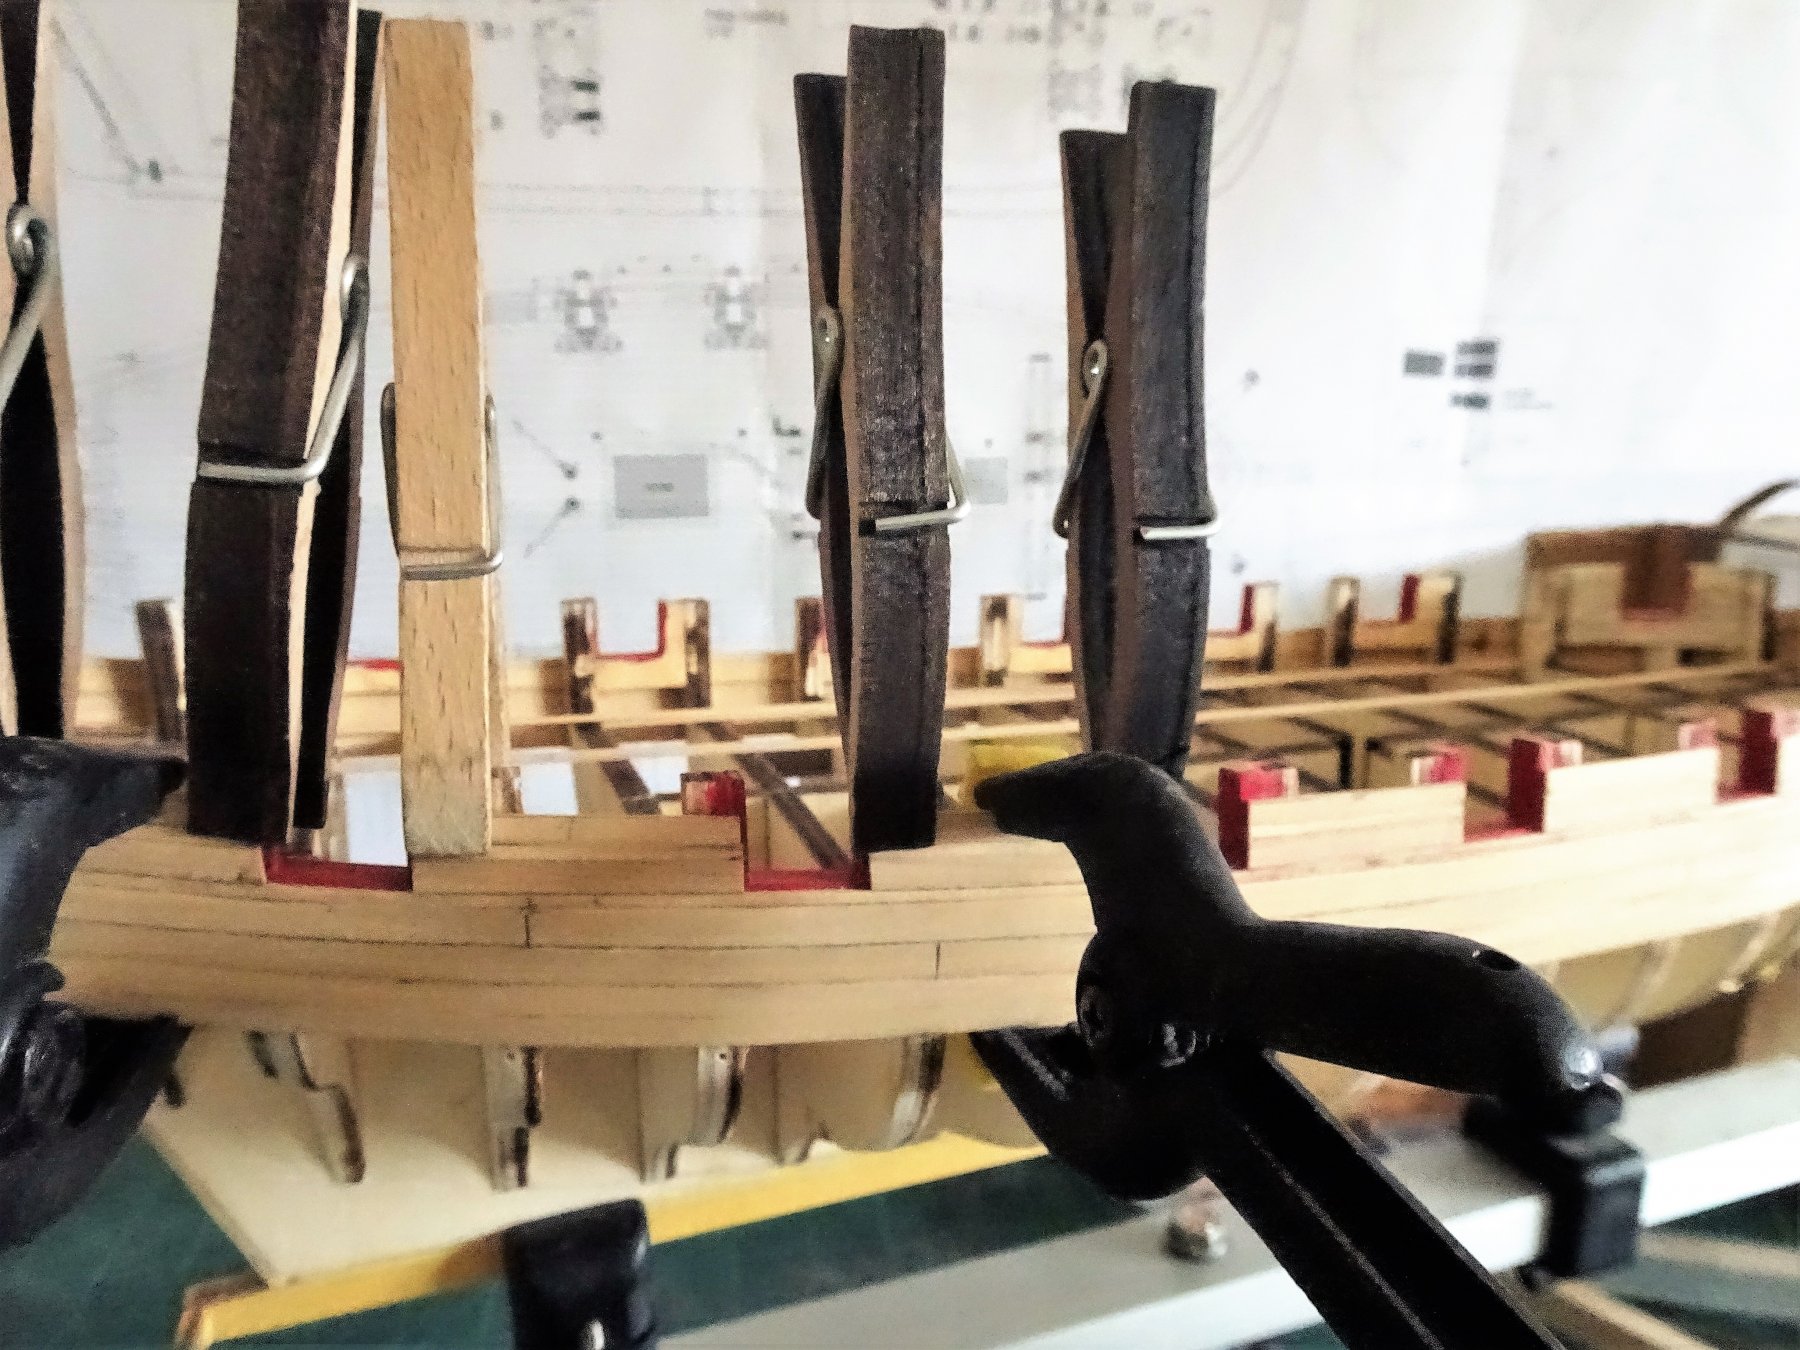
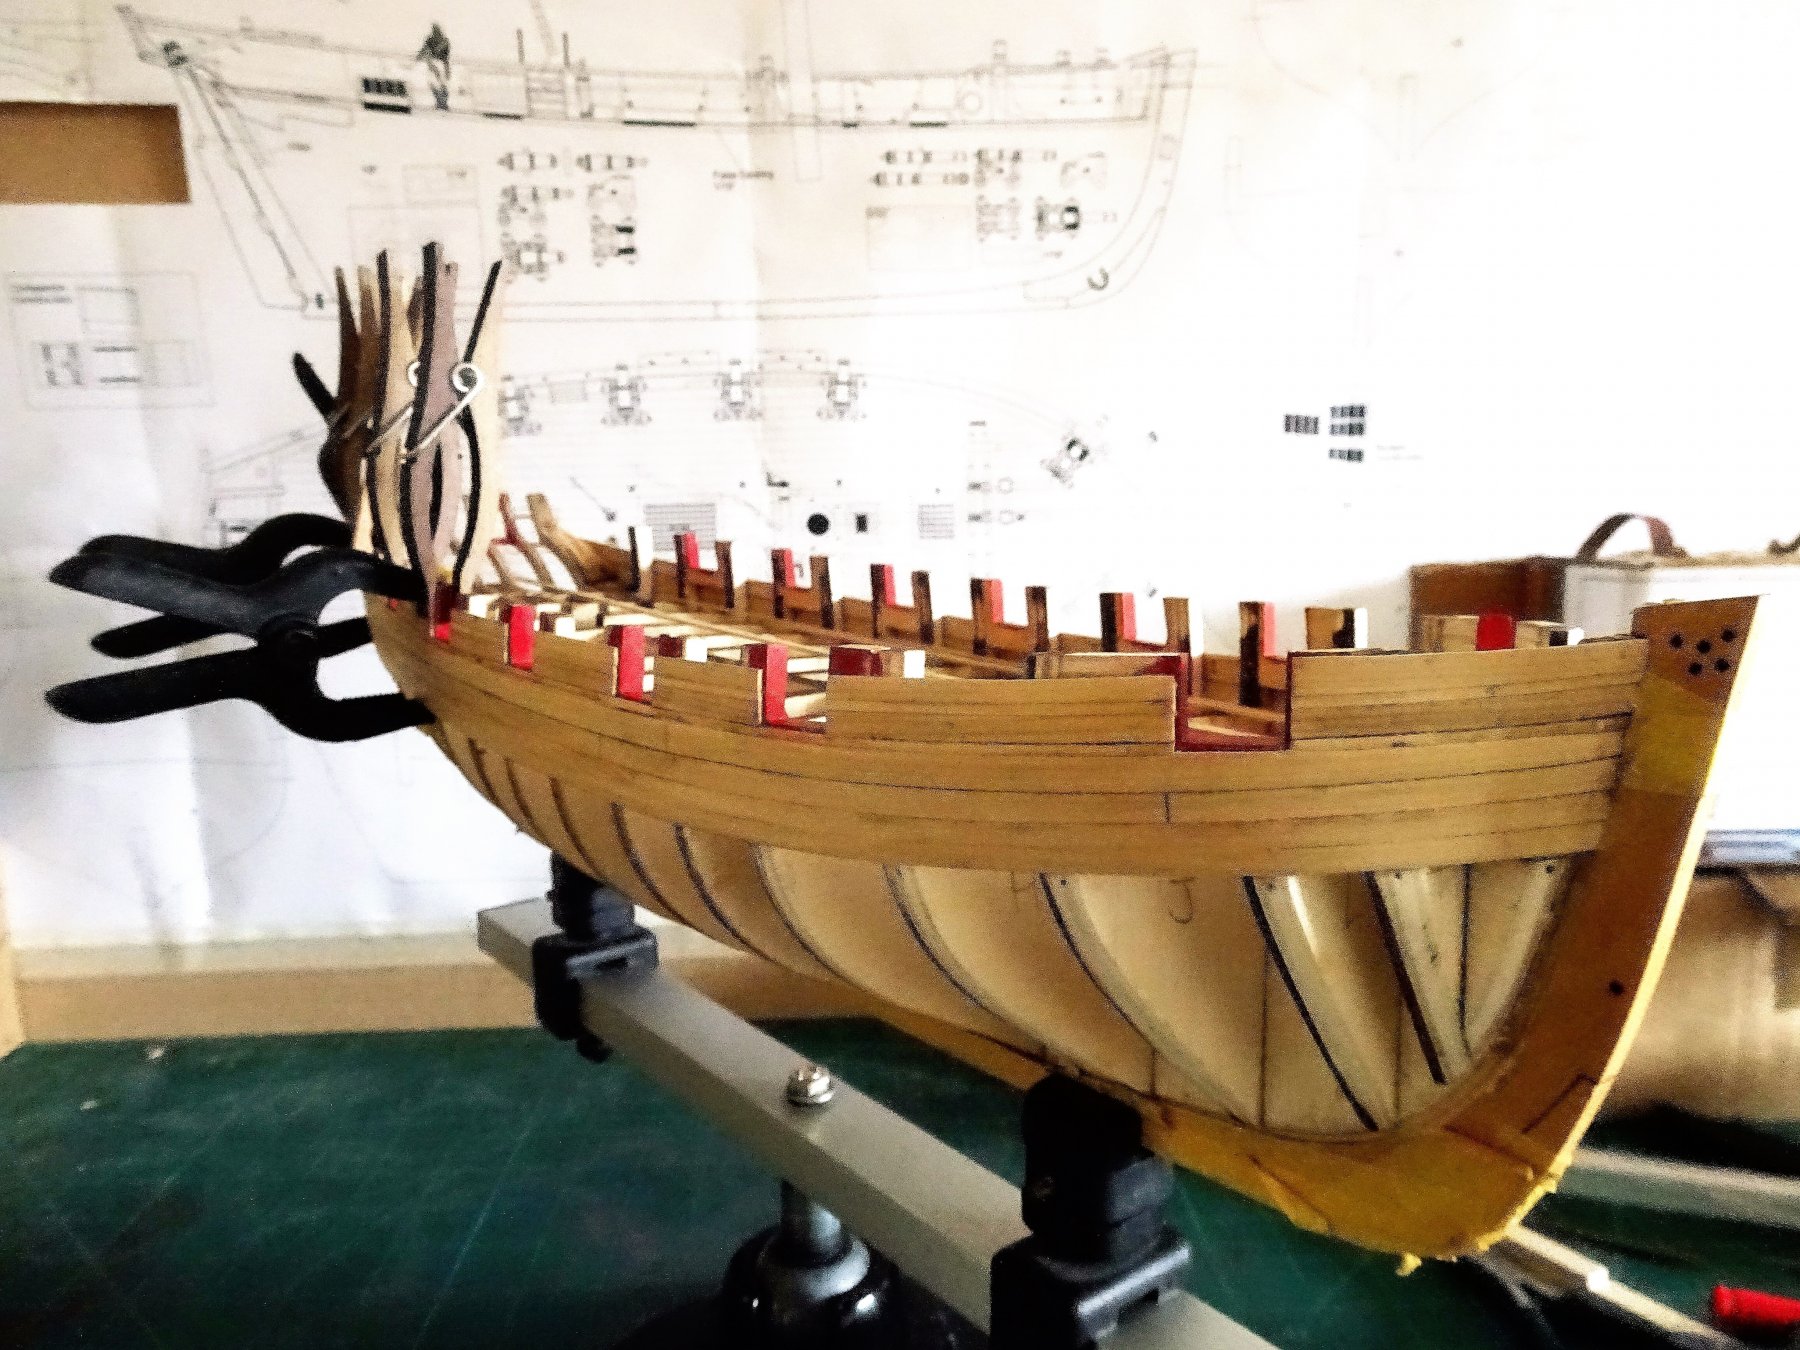
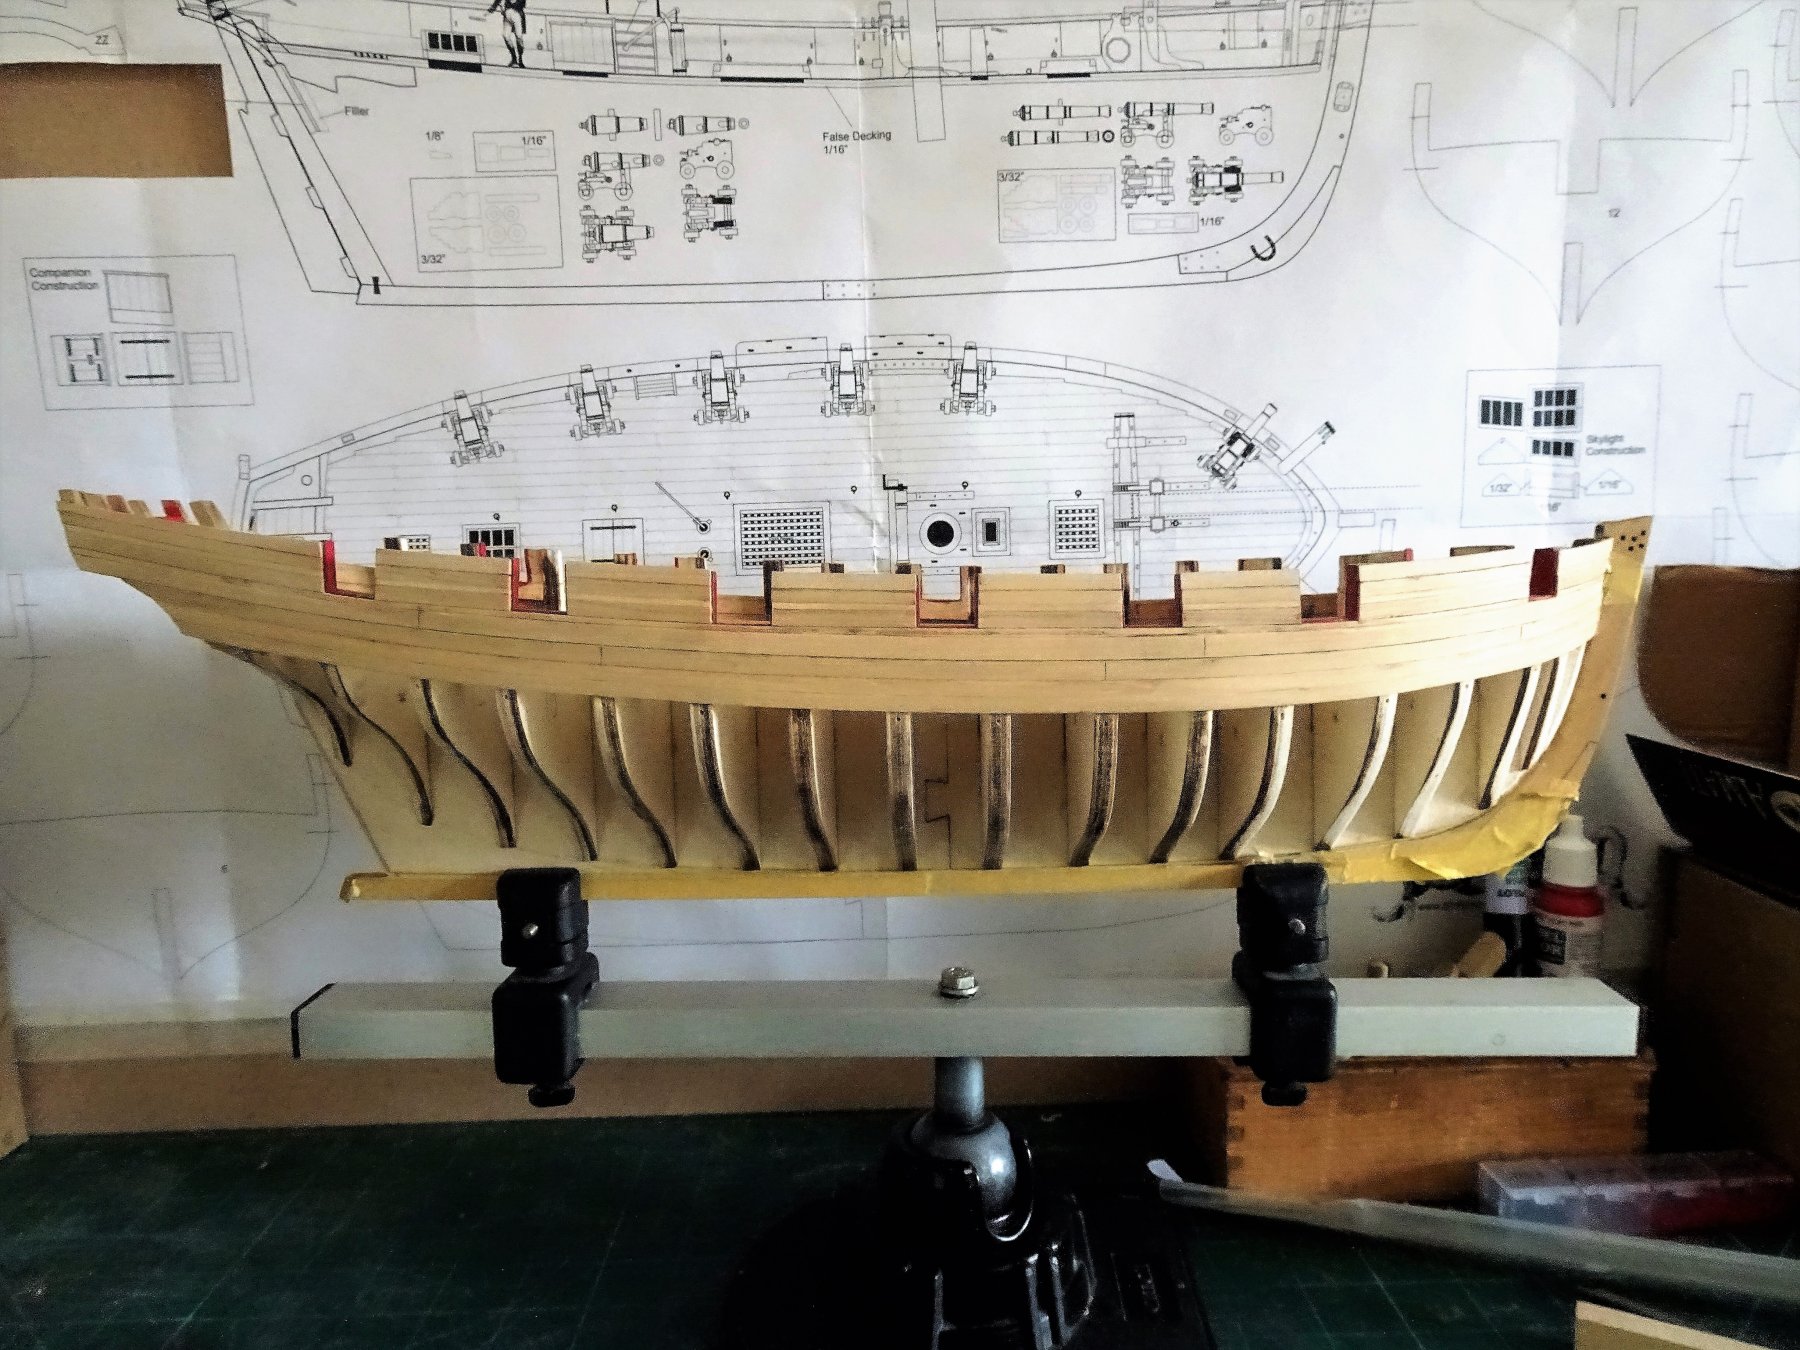
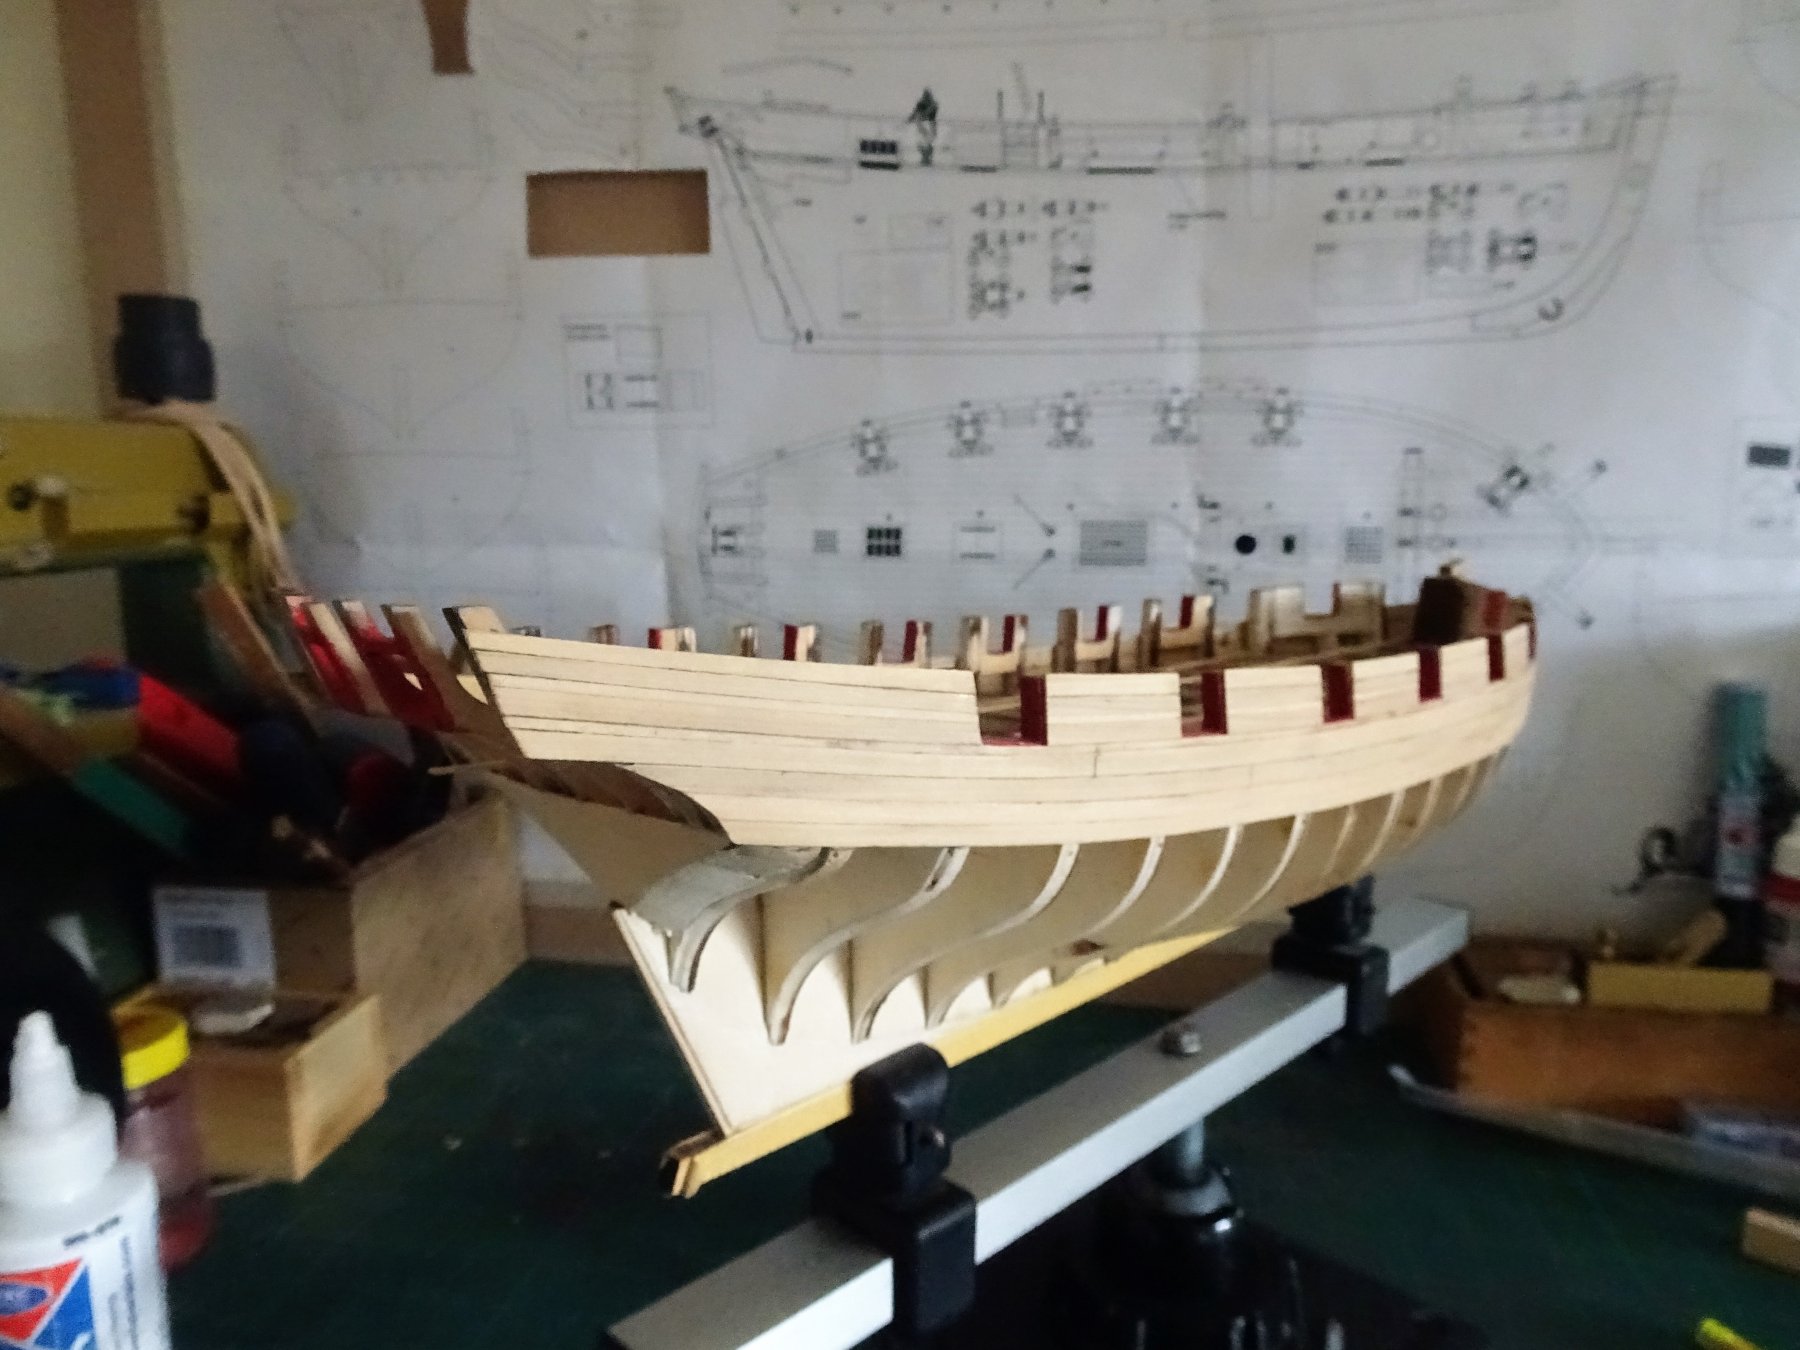
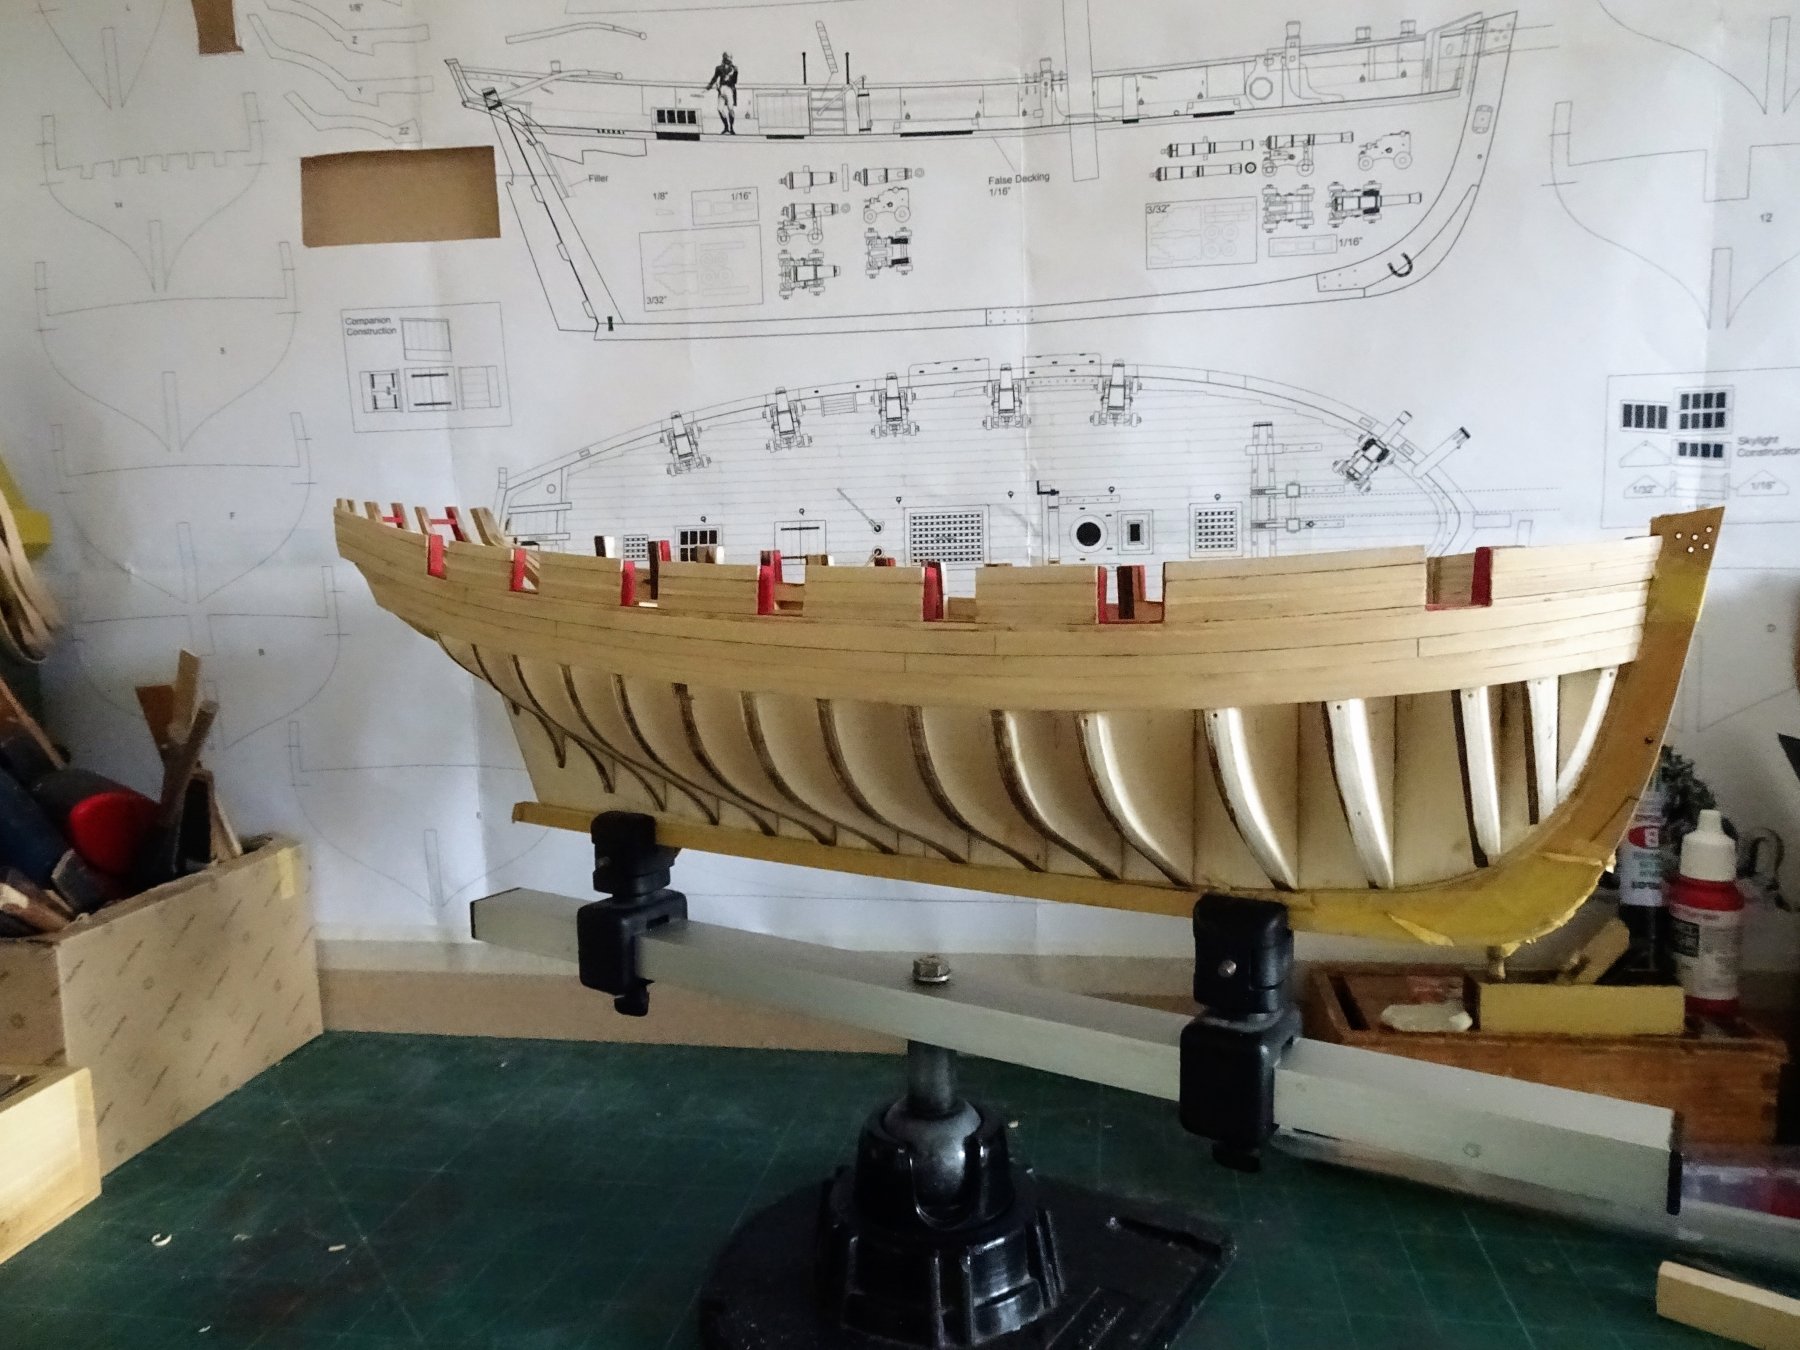
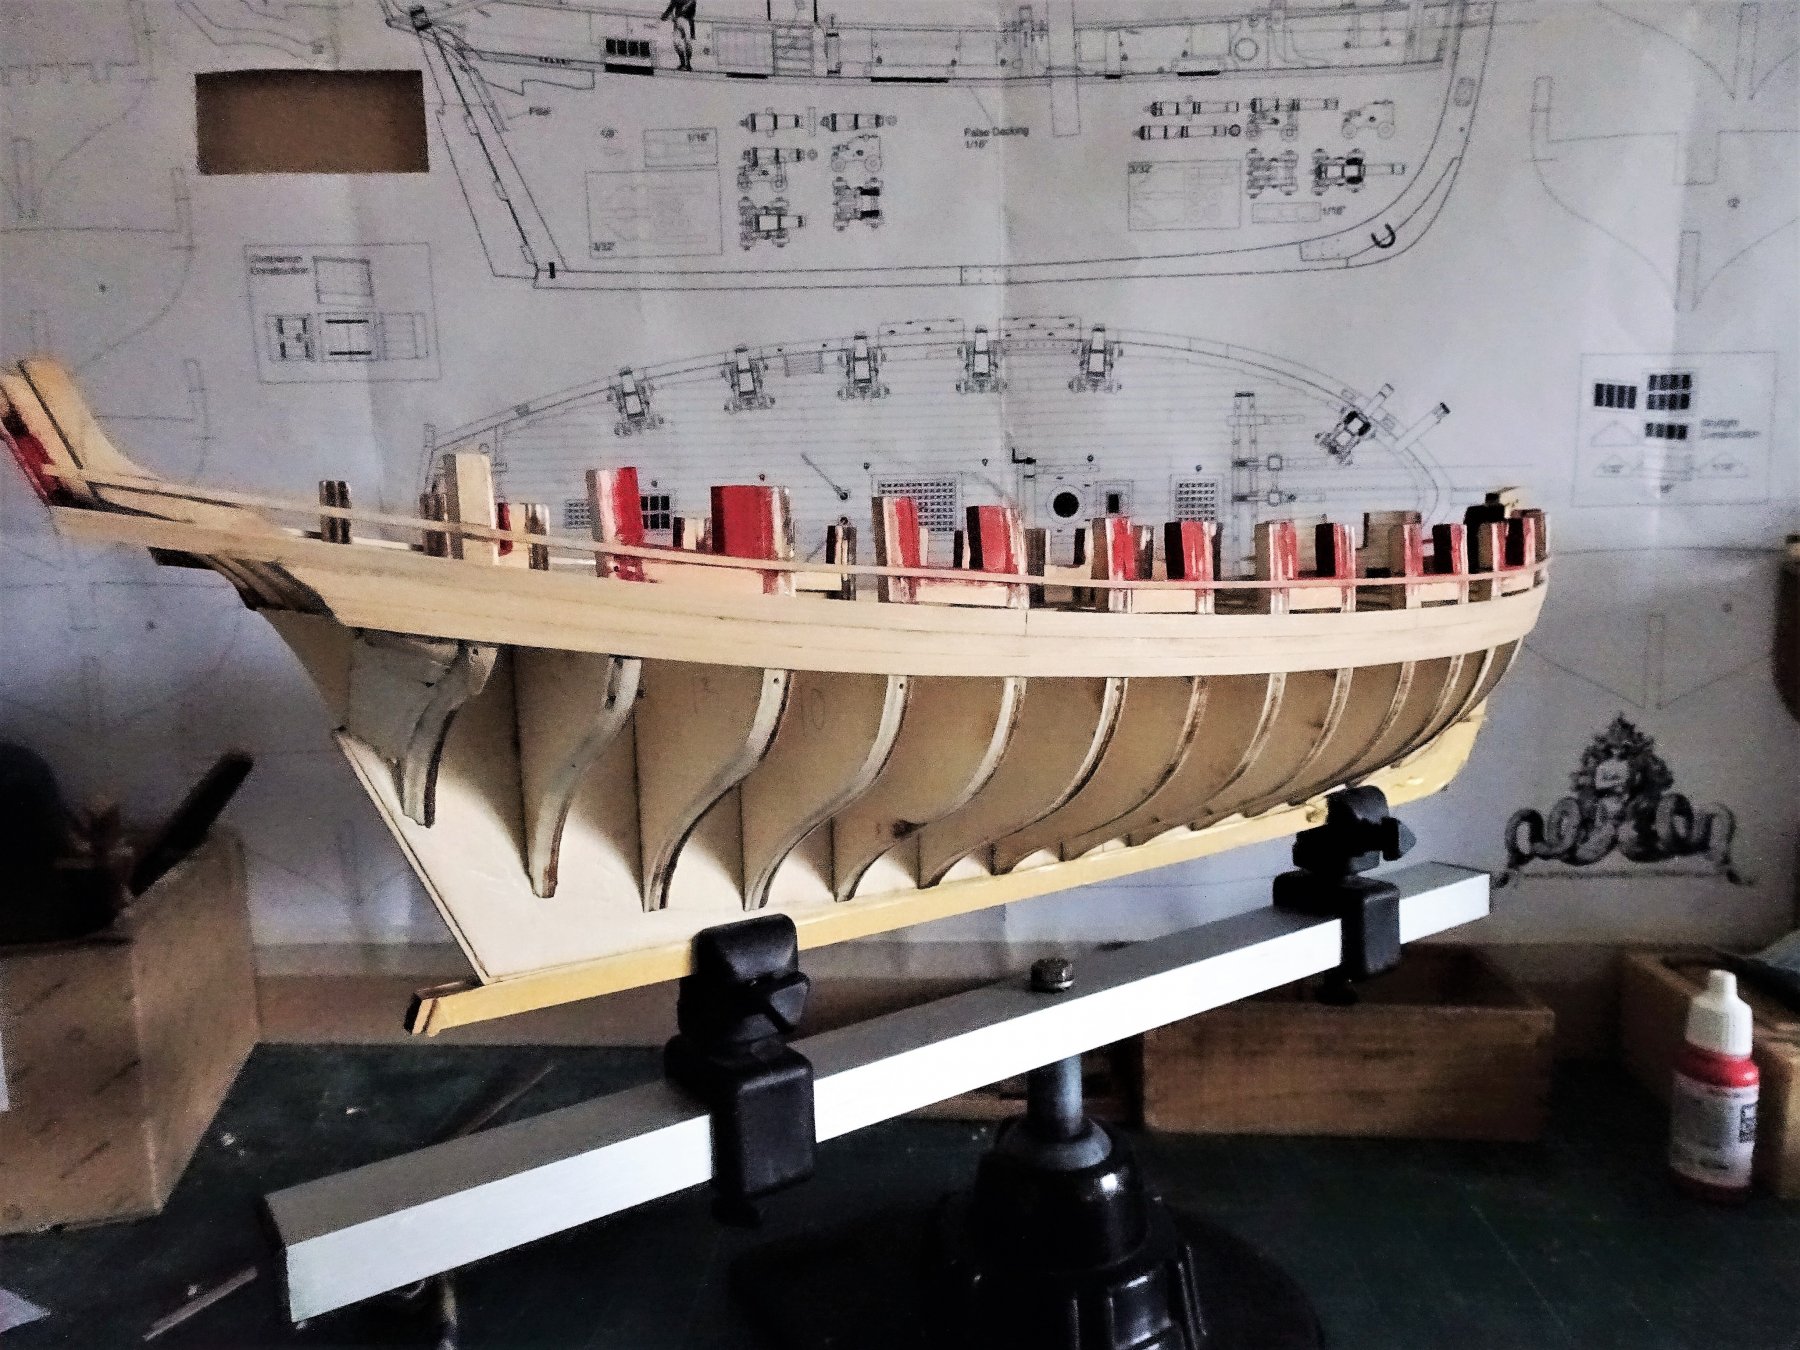
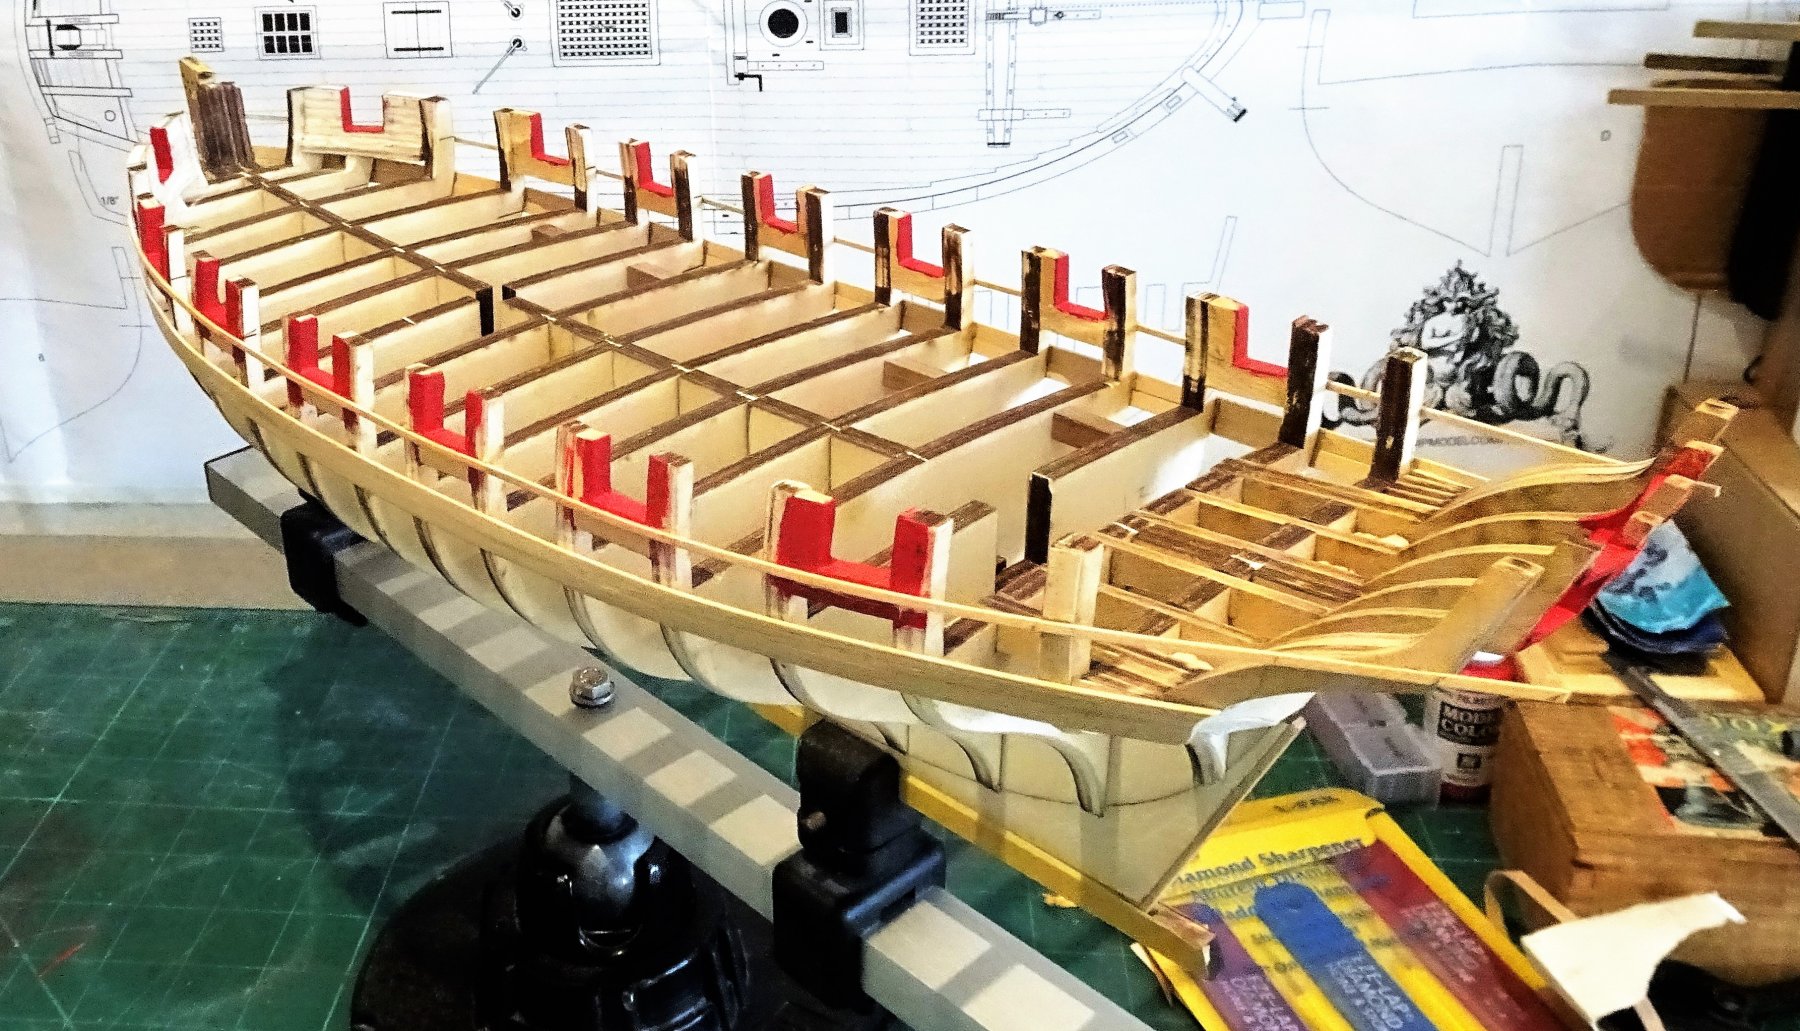
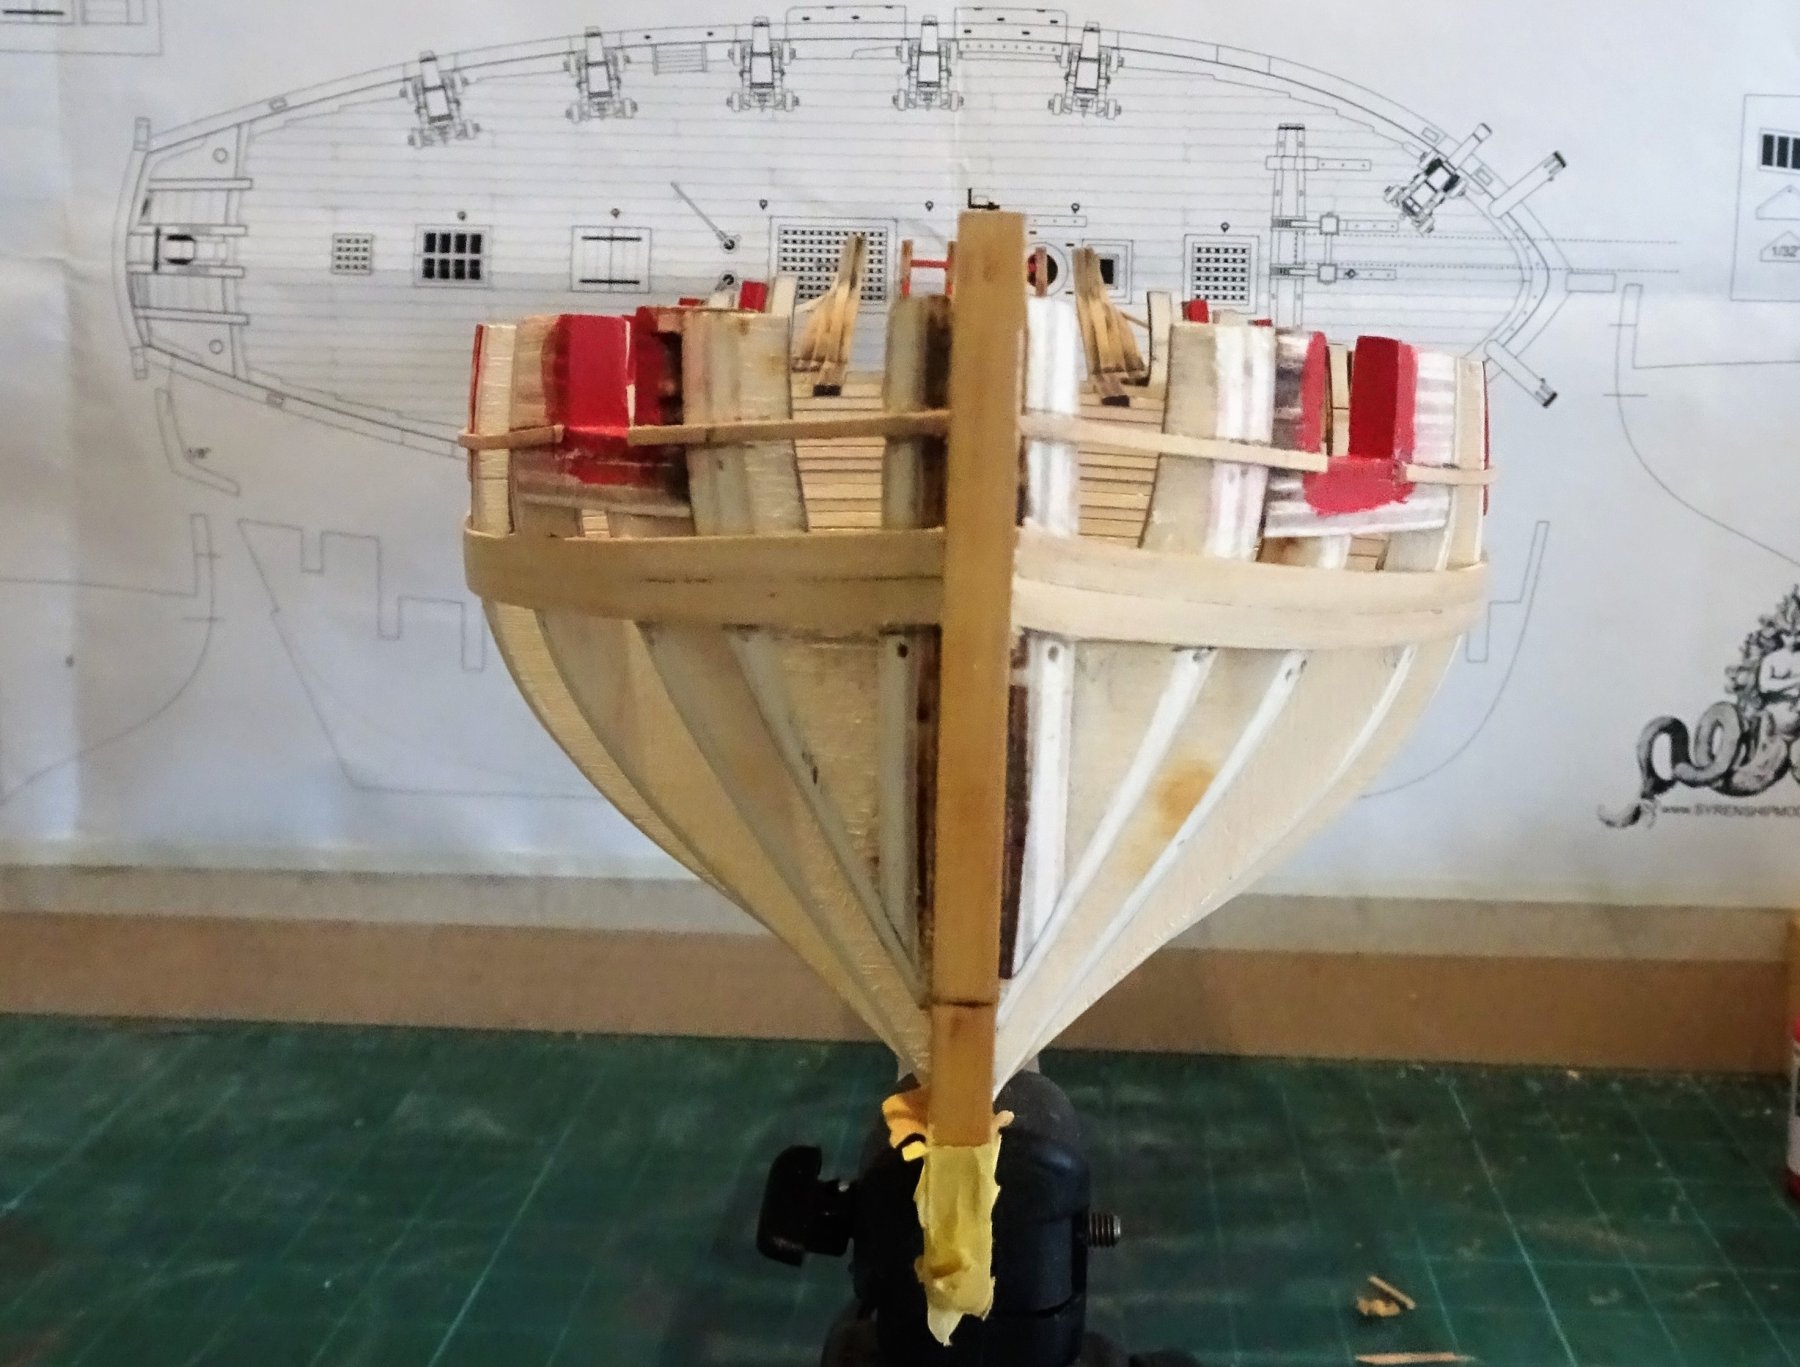
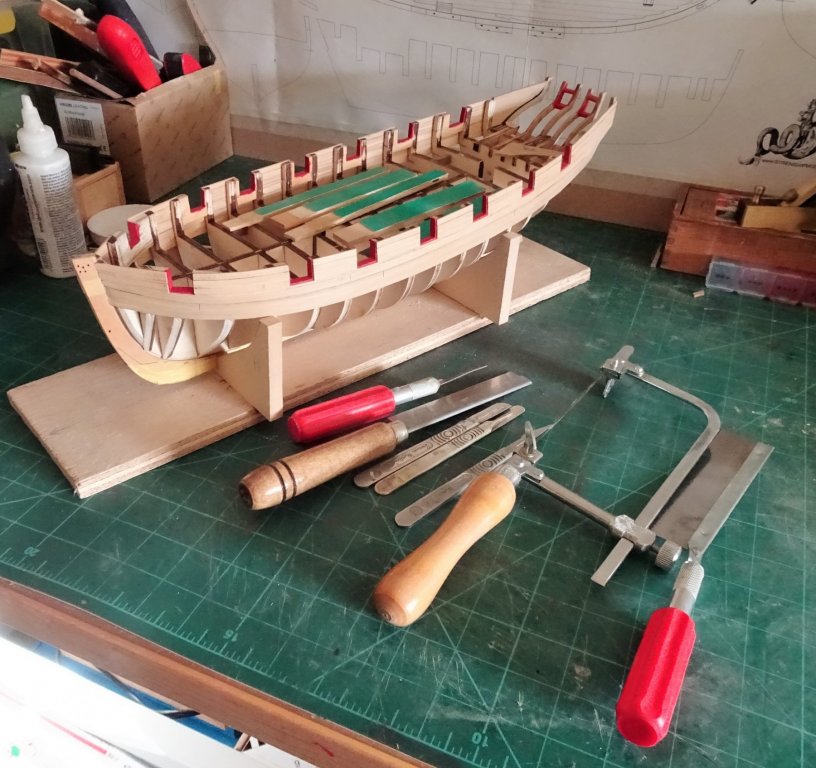
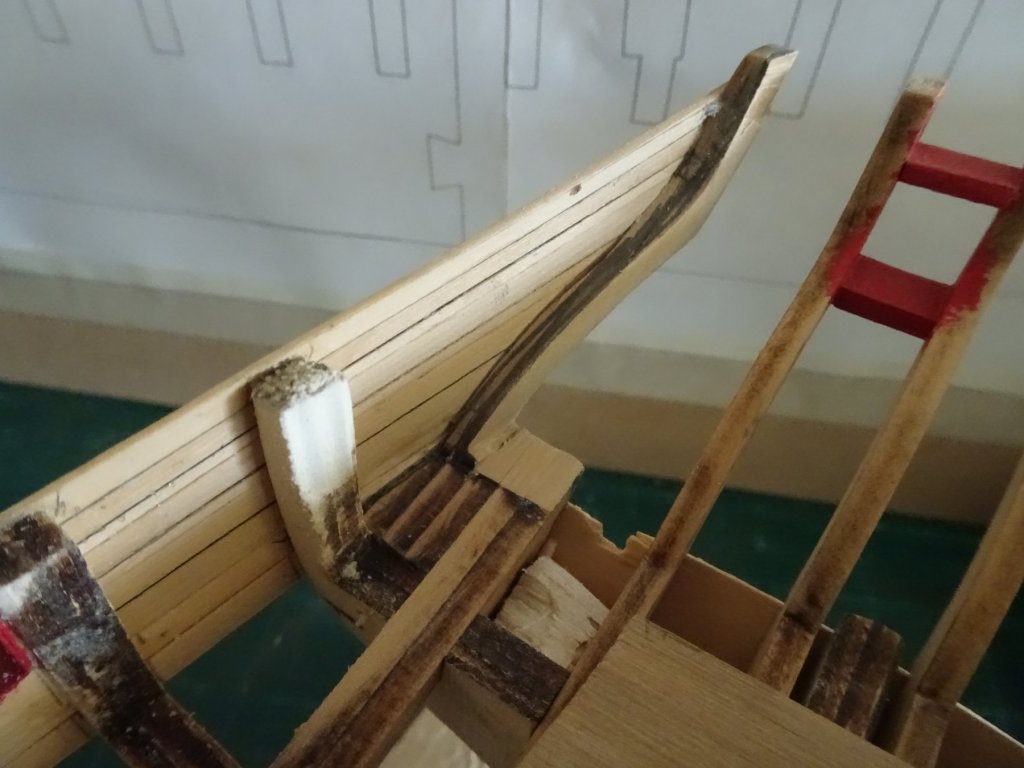
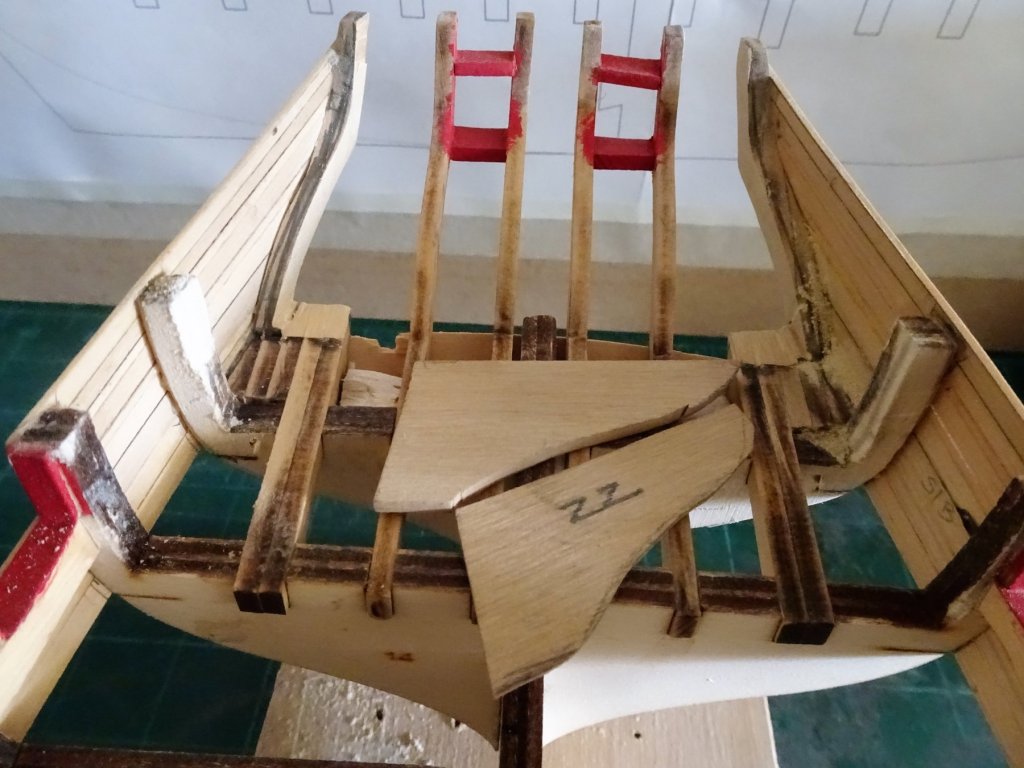
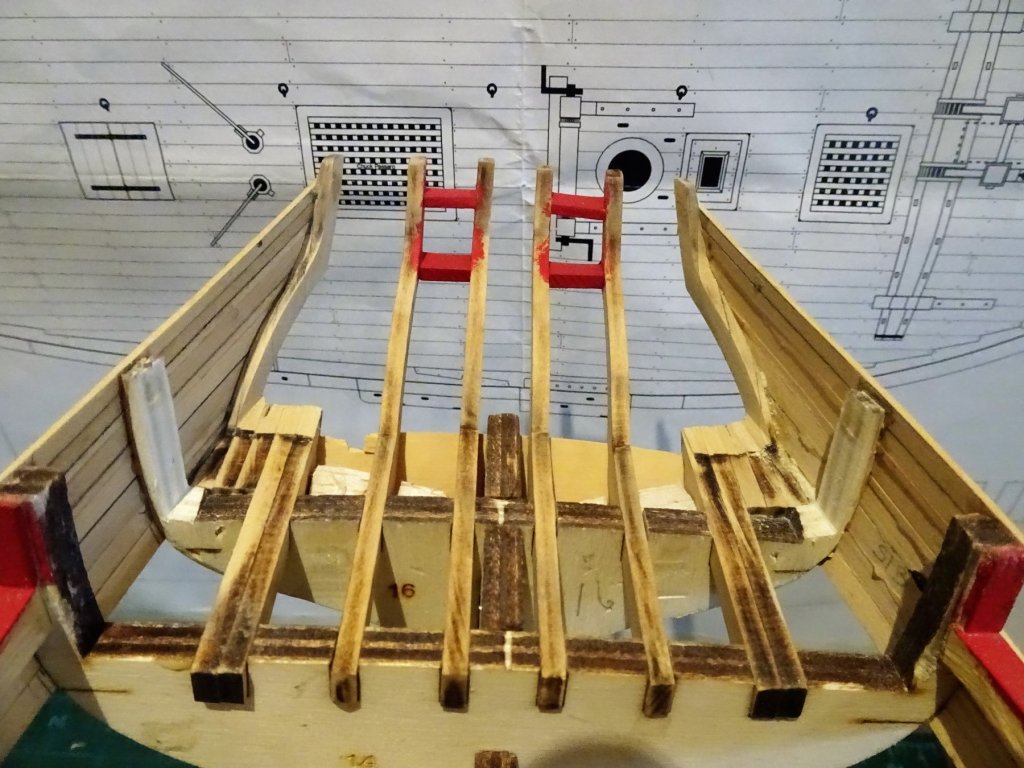
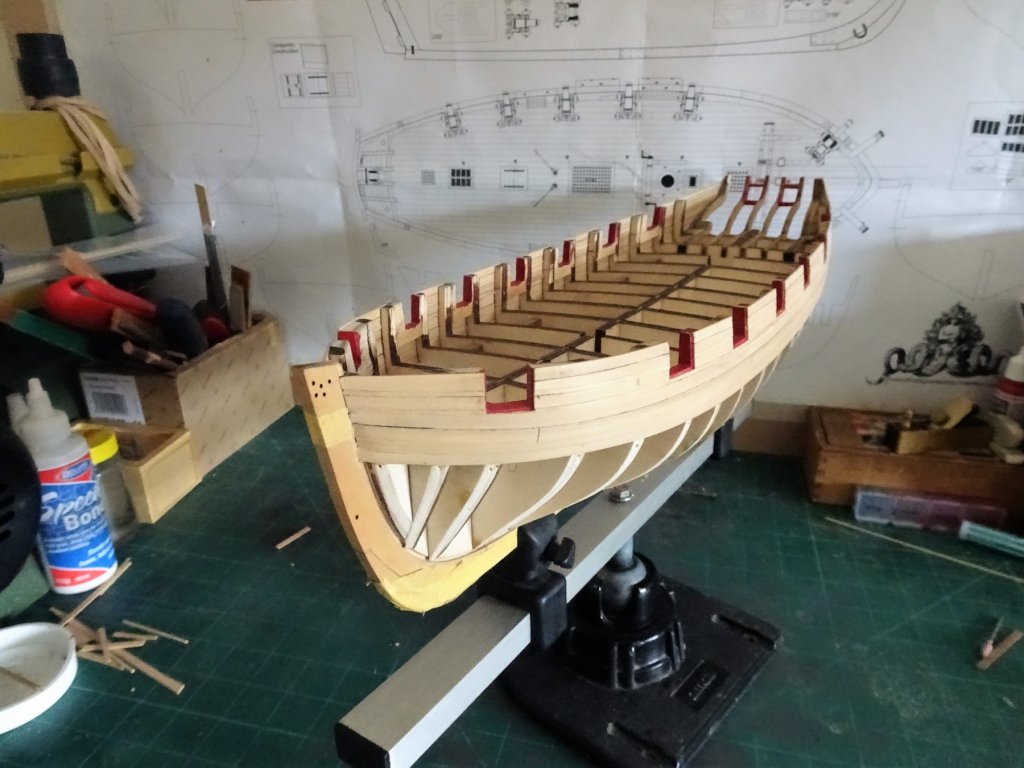
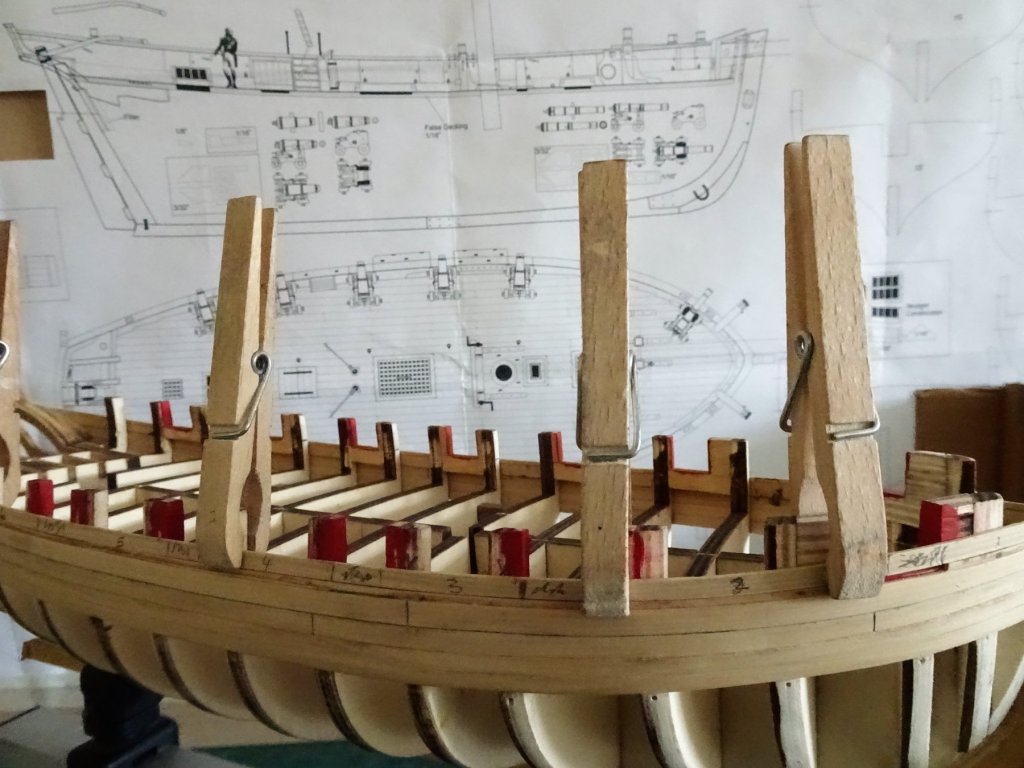
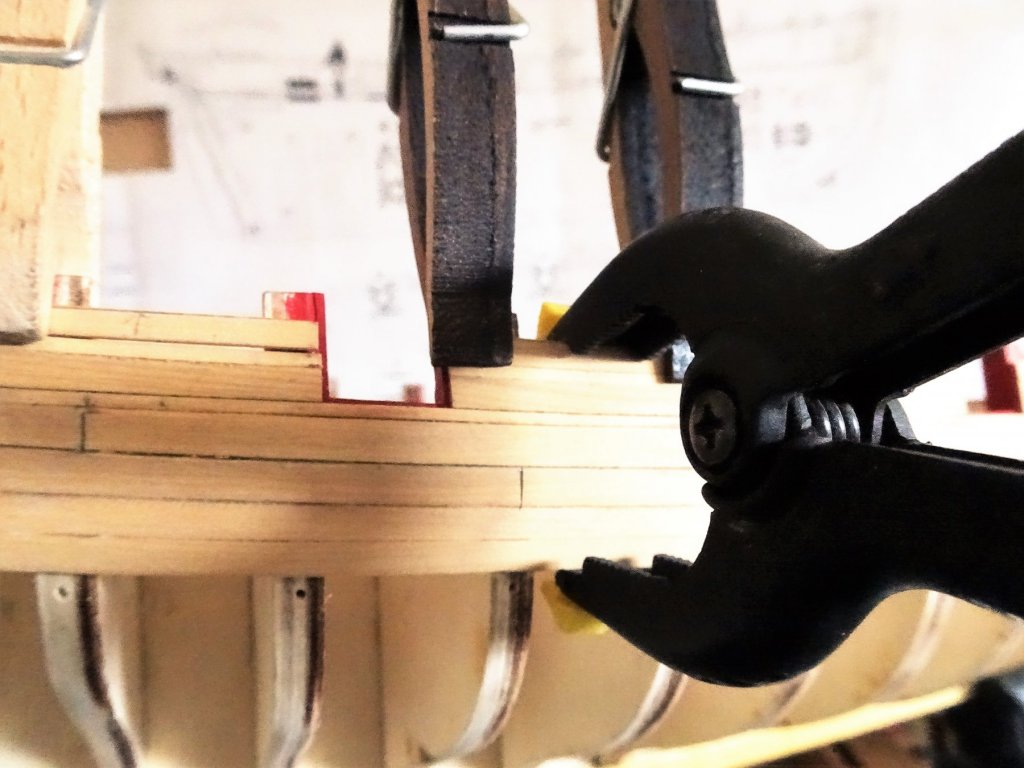
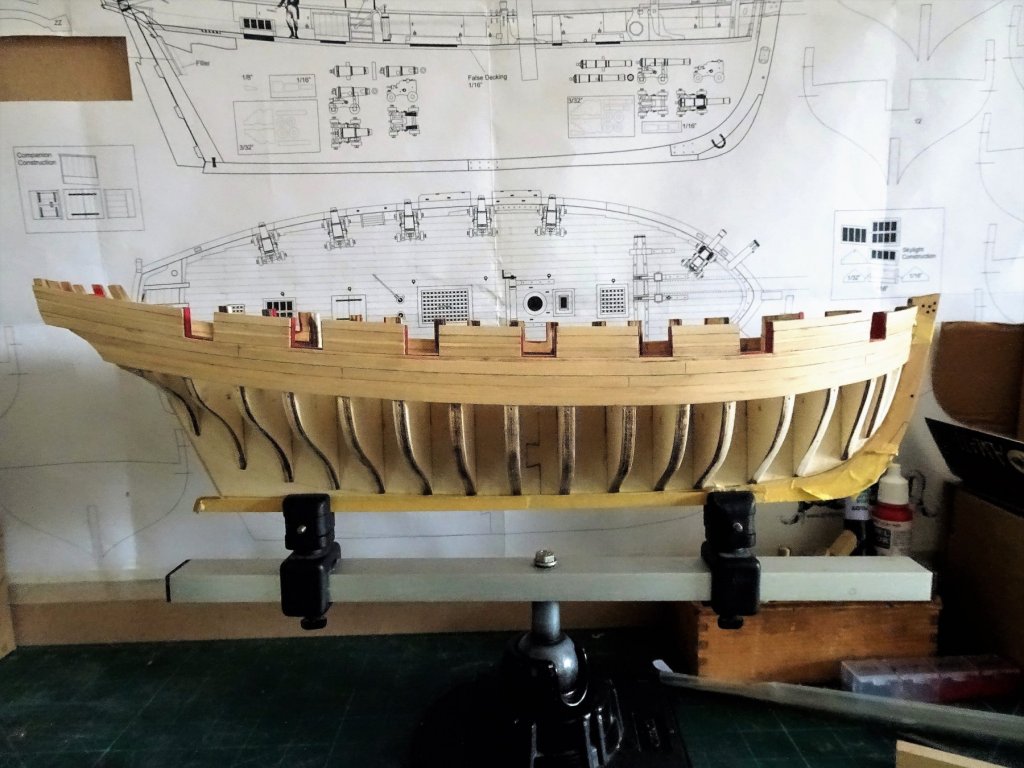
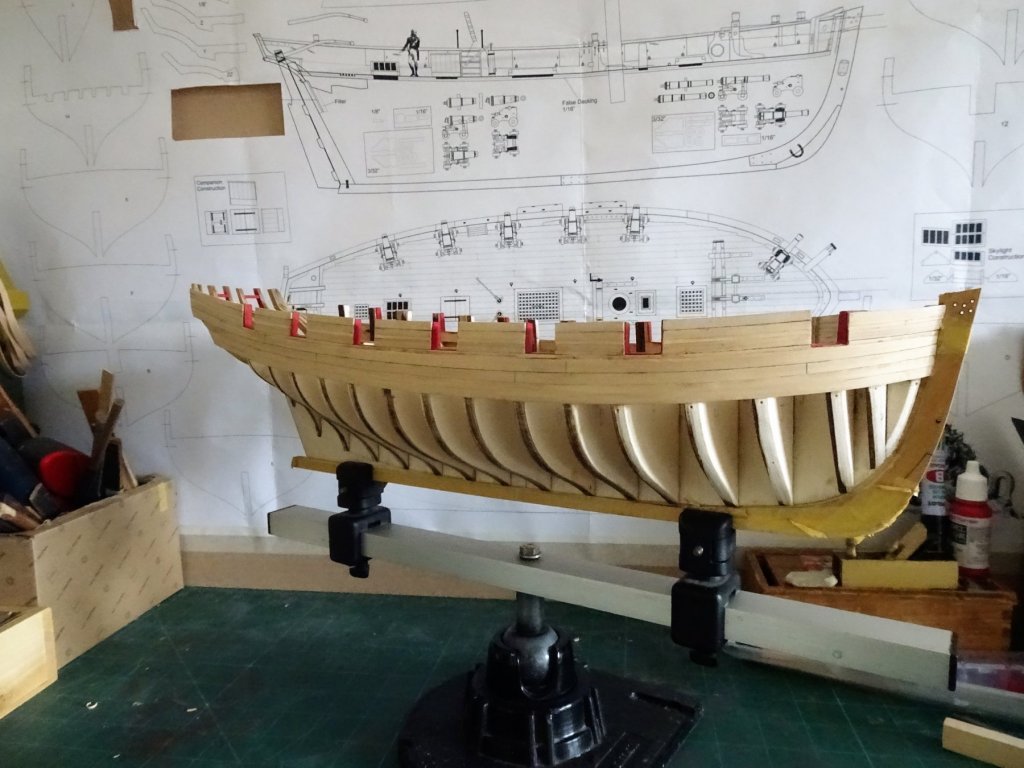
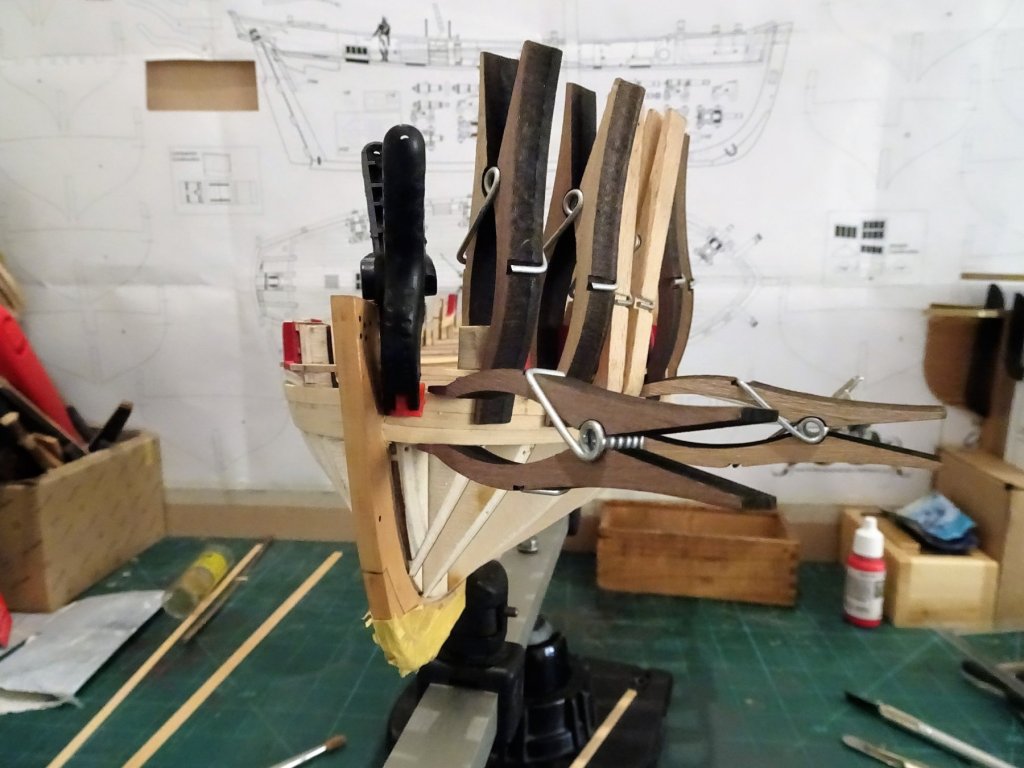
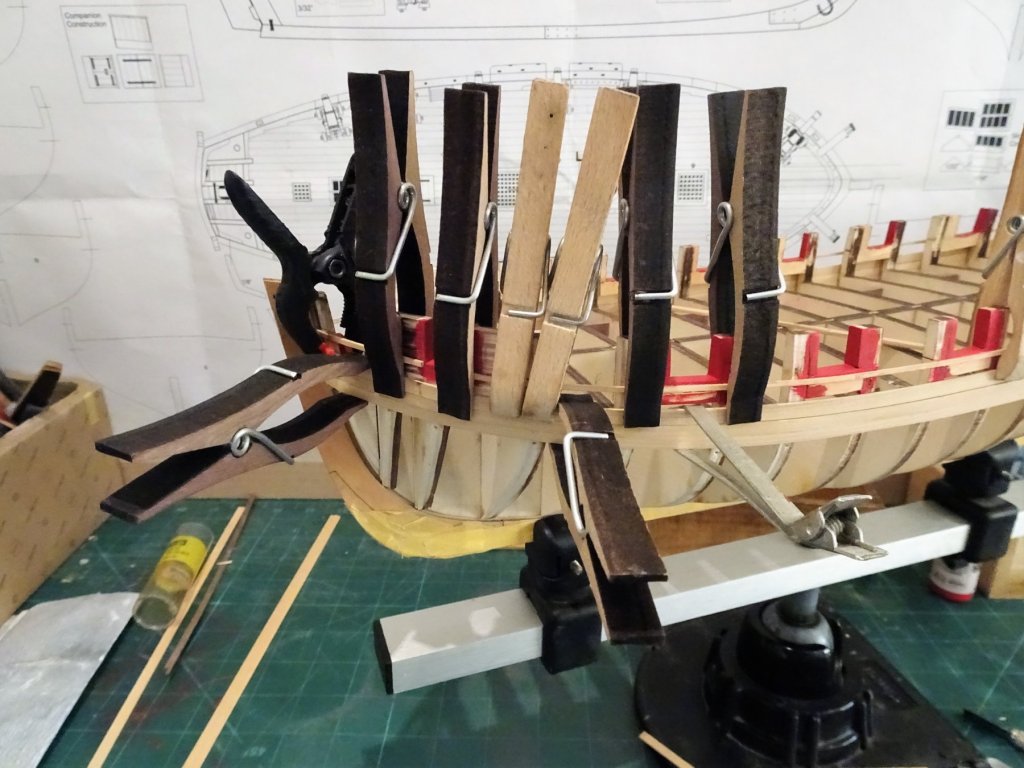
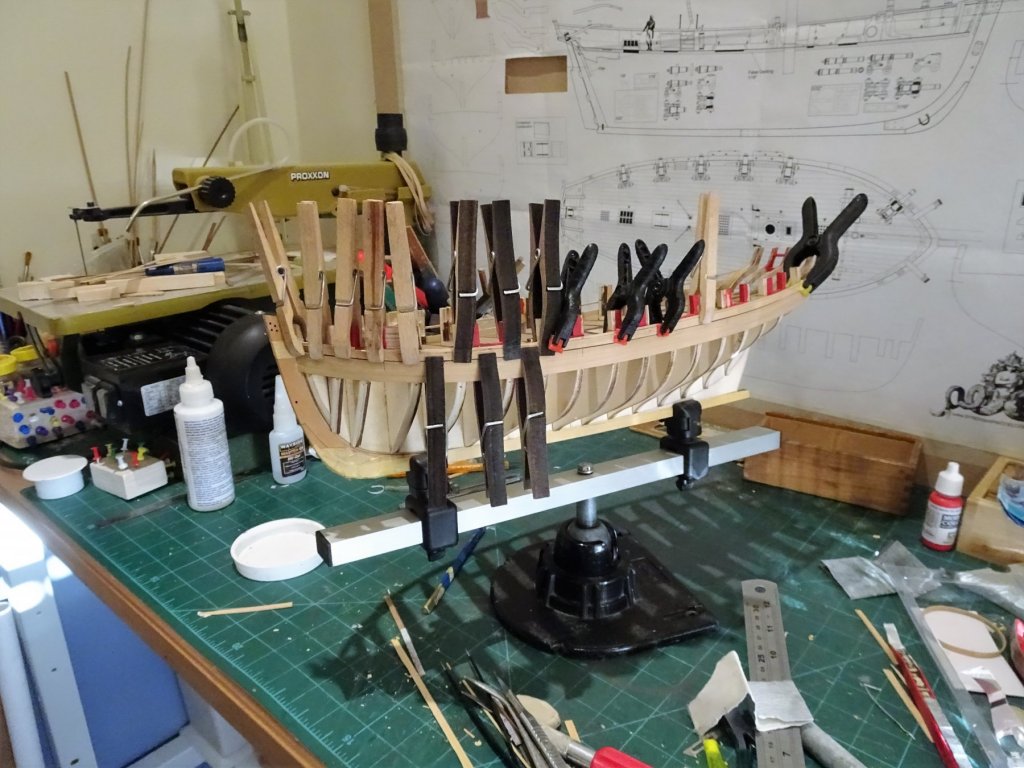
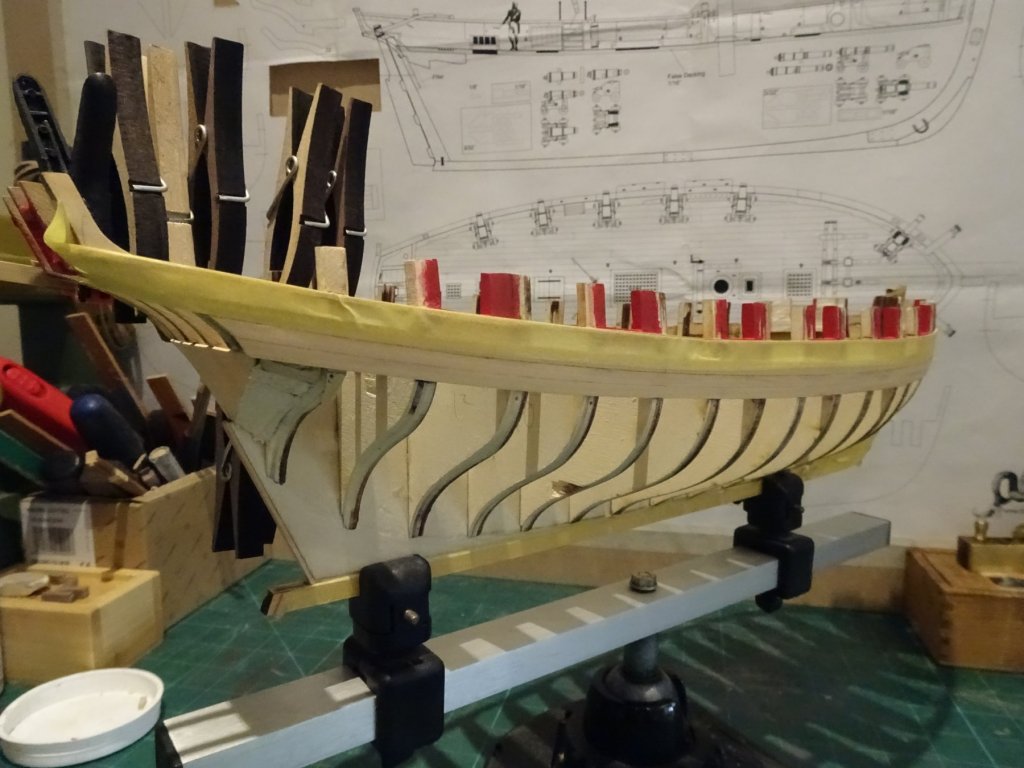
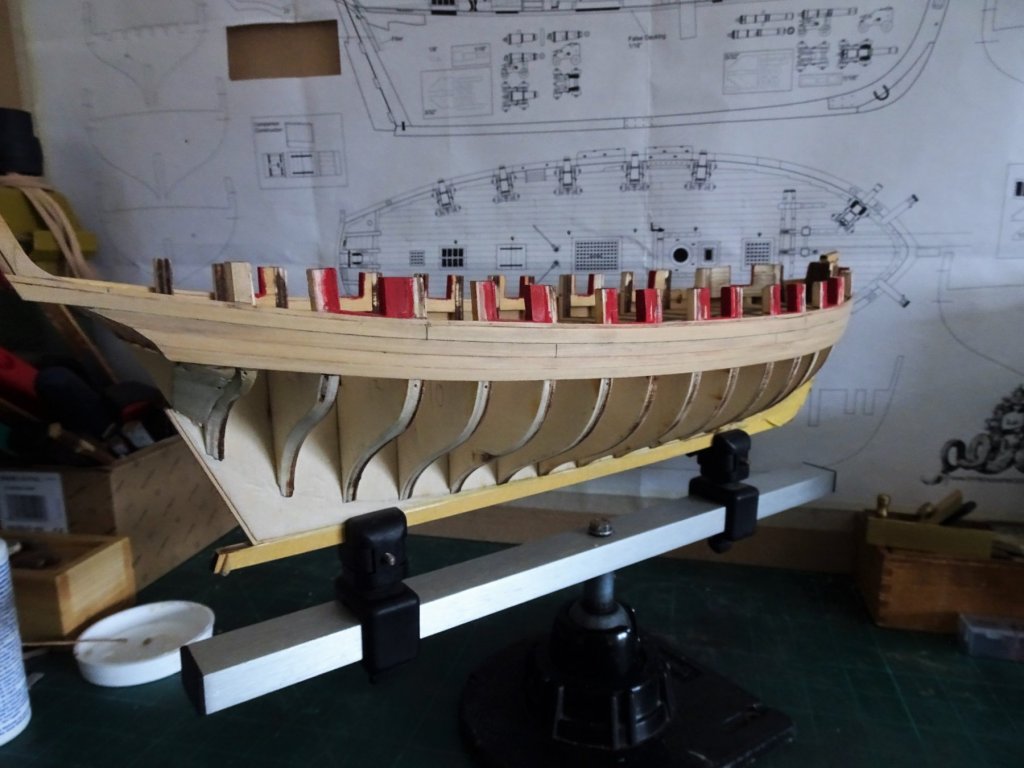
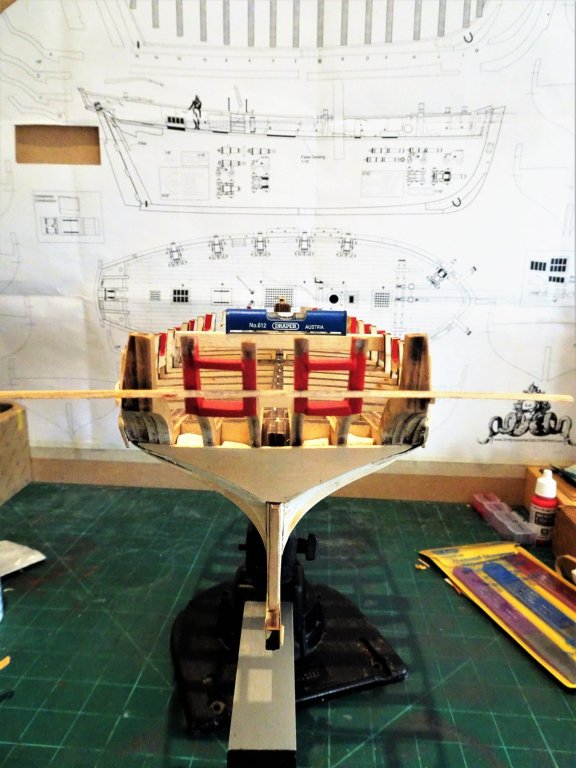
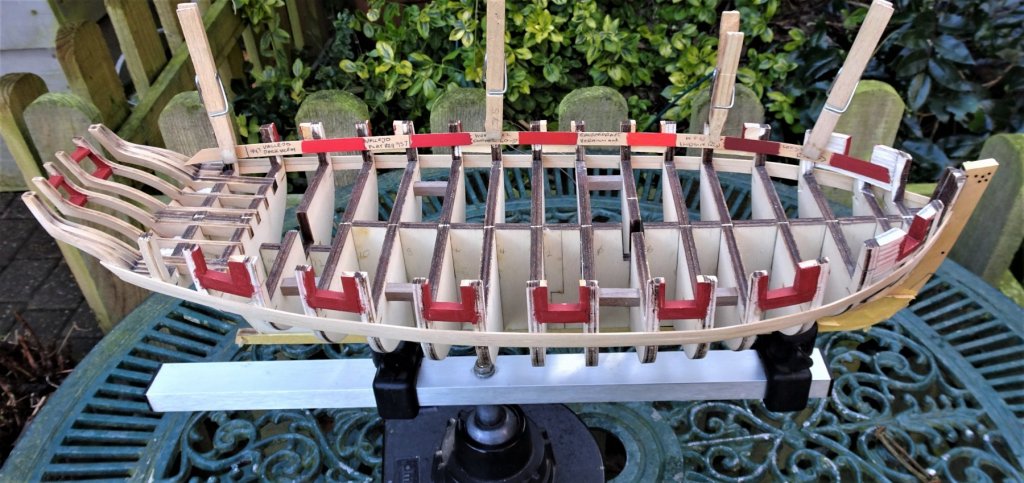
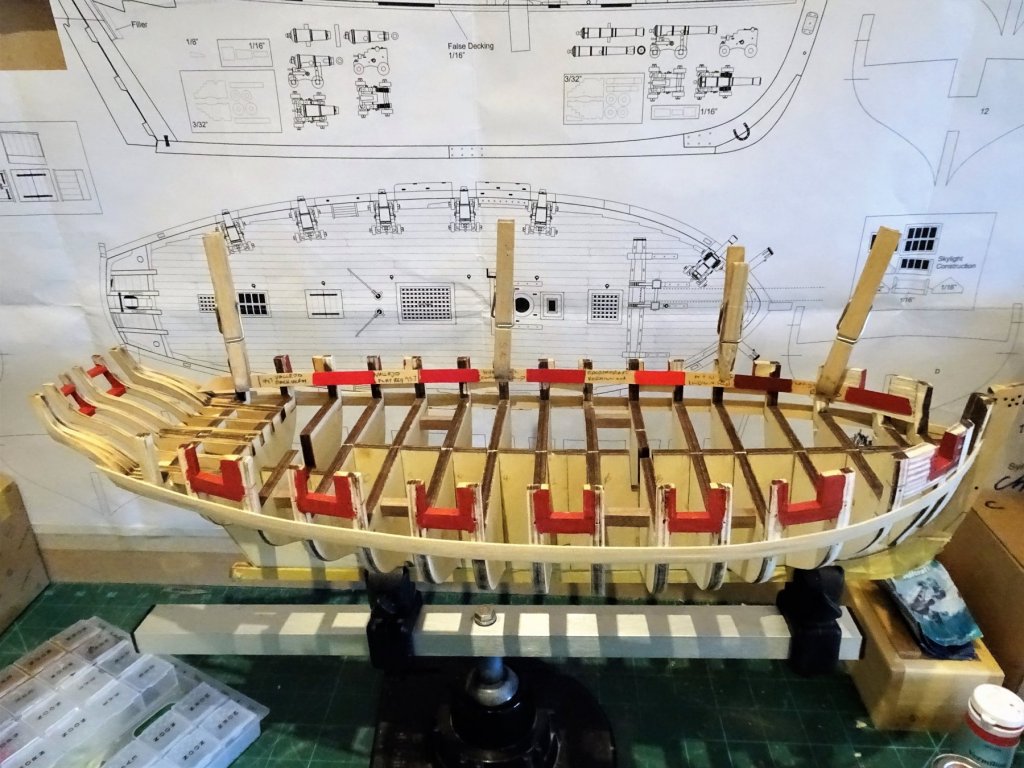
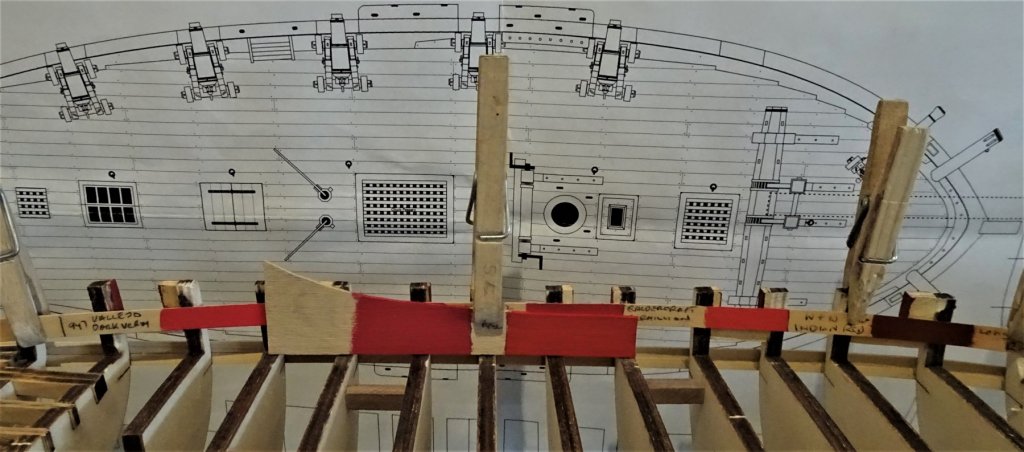
Cheers Guys, @ Jason - I noted that Bob used that method in his Cheerful build, and a very nice job he did. Somehow, for no clearly defined reason I can offer, I felt more comfortable planking as I went along. Post 19 Reducing the outer stern frames.(zz) I approached this job with not a little trepidation, no change there, I always feel edgy in the early stages of a build. 6773 I made 3mm and 1.5mm thick shields to protect the planking and provide guides for the reduction of the frames. 6771 I was reluctant to use my mini rotary tool lest a slip did some serious damage particularly to those fragile stern frames. I used a combination of mini saw blades, scalpels and sanding sticks to gradually reduce the outer frames. 6772 Slow progress but less risky, still a way to go yet. 6834 I also thought it easier to sand down the aftermost bulkhead frame extensions at this point whilst I had access between the stern frames. 6829 1/16th" (1.6mm) seems a very fine depth to thin the frames to, here they are at 1.9mm and I'm getting close to my level of confidence. 6827 Boards temporarily glued to assess the look of the bulwark thickness. I think I can go a little further but not very much. I now need to consider the planking of the stern. B.E. 15/03/2018


- 574 replies
-
- 14
-
-
- cheerful
- Syren Ship Model Company
- (and 1 more)
-
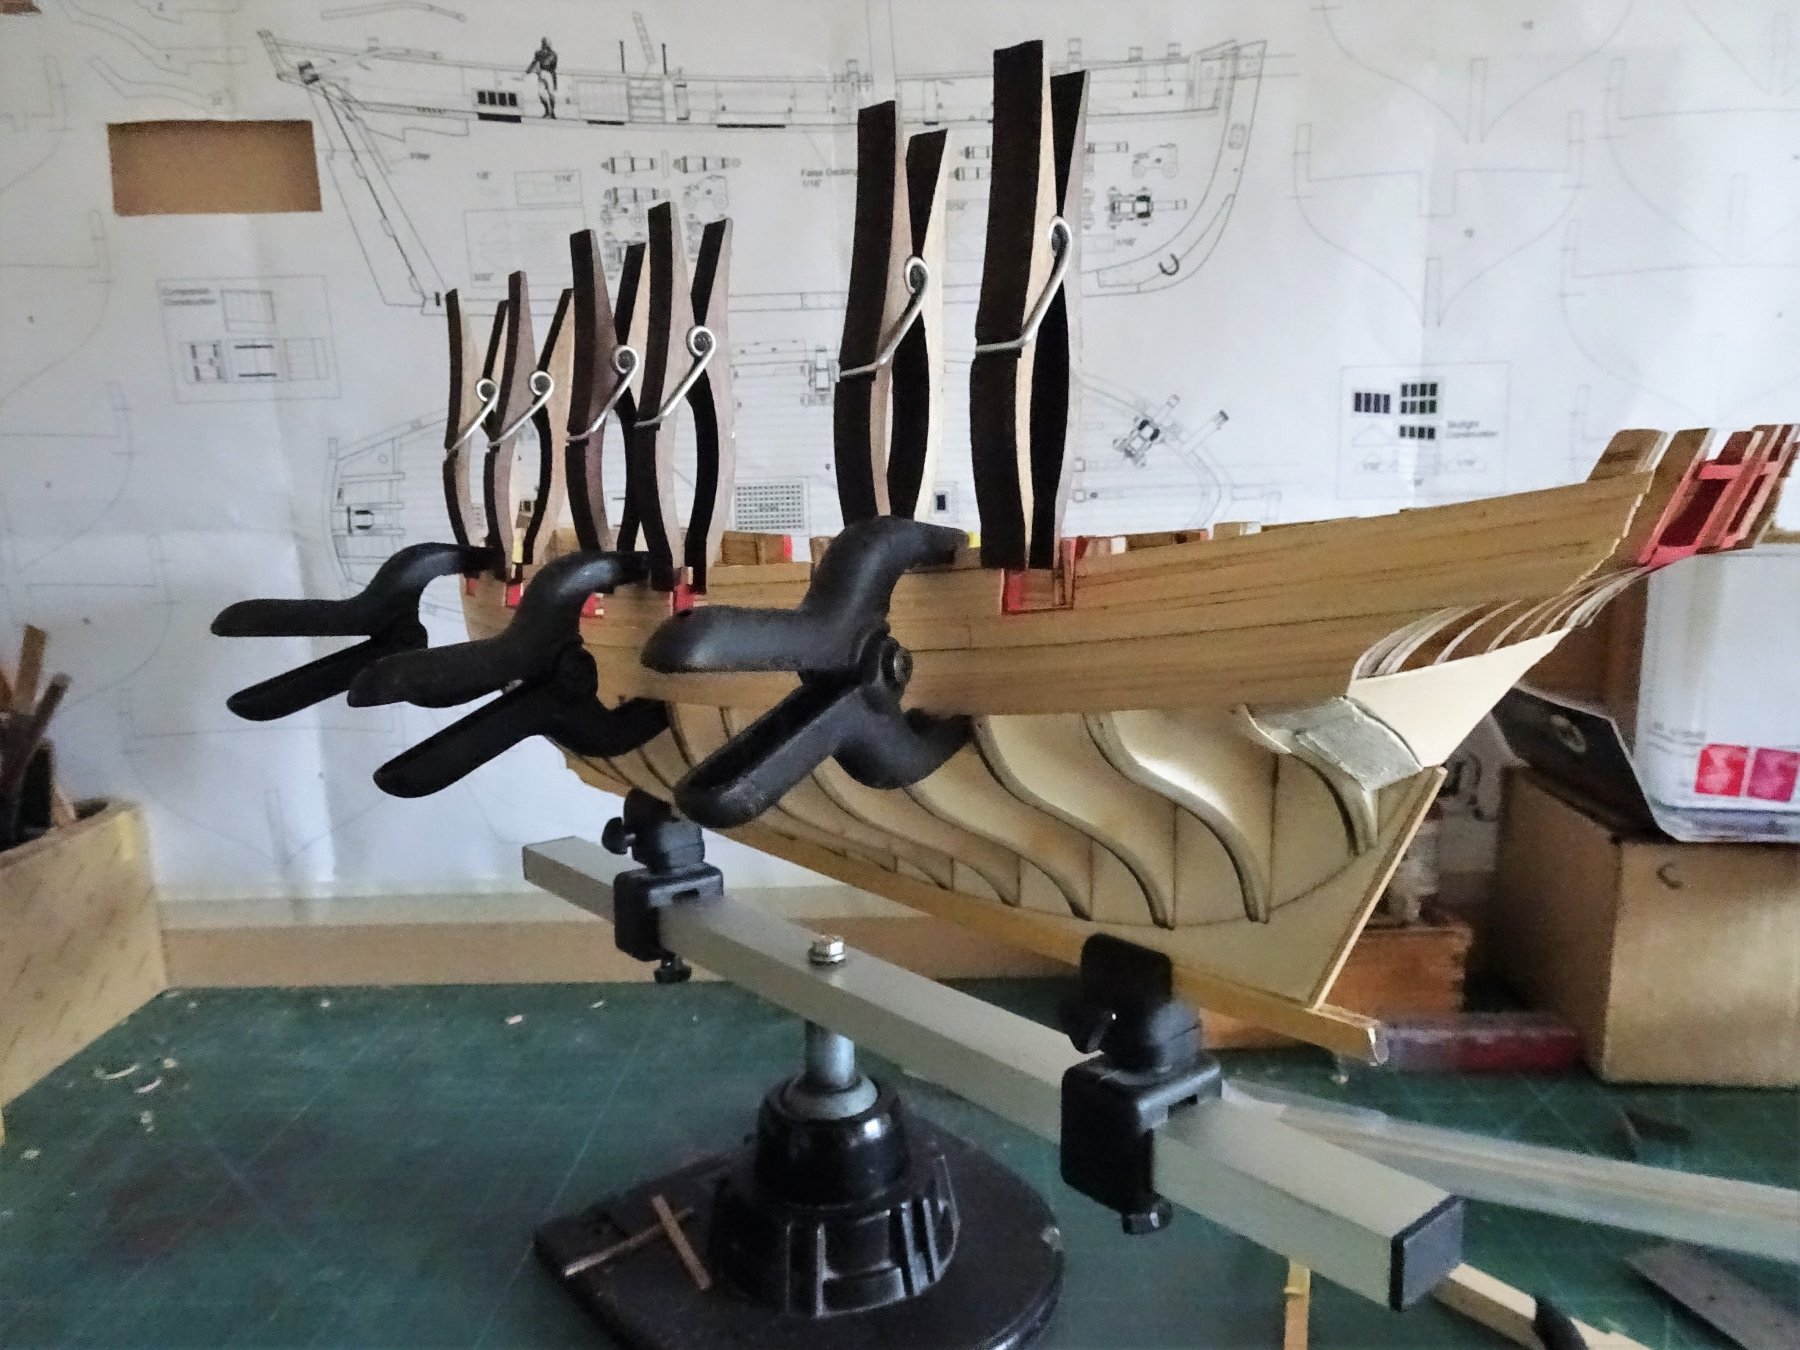
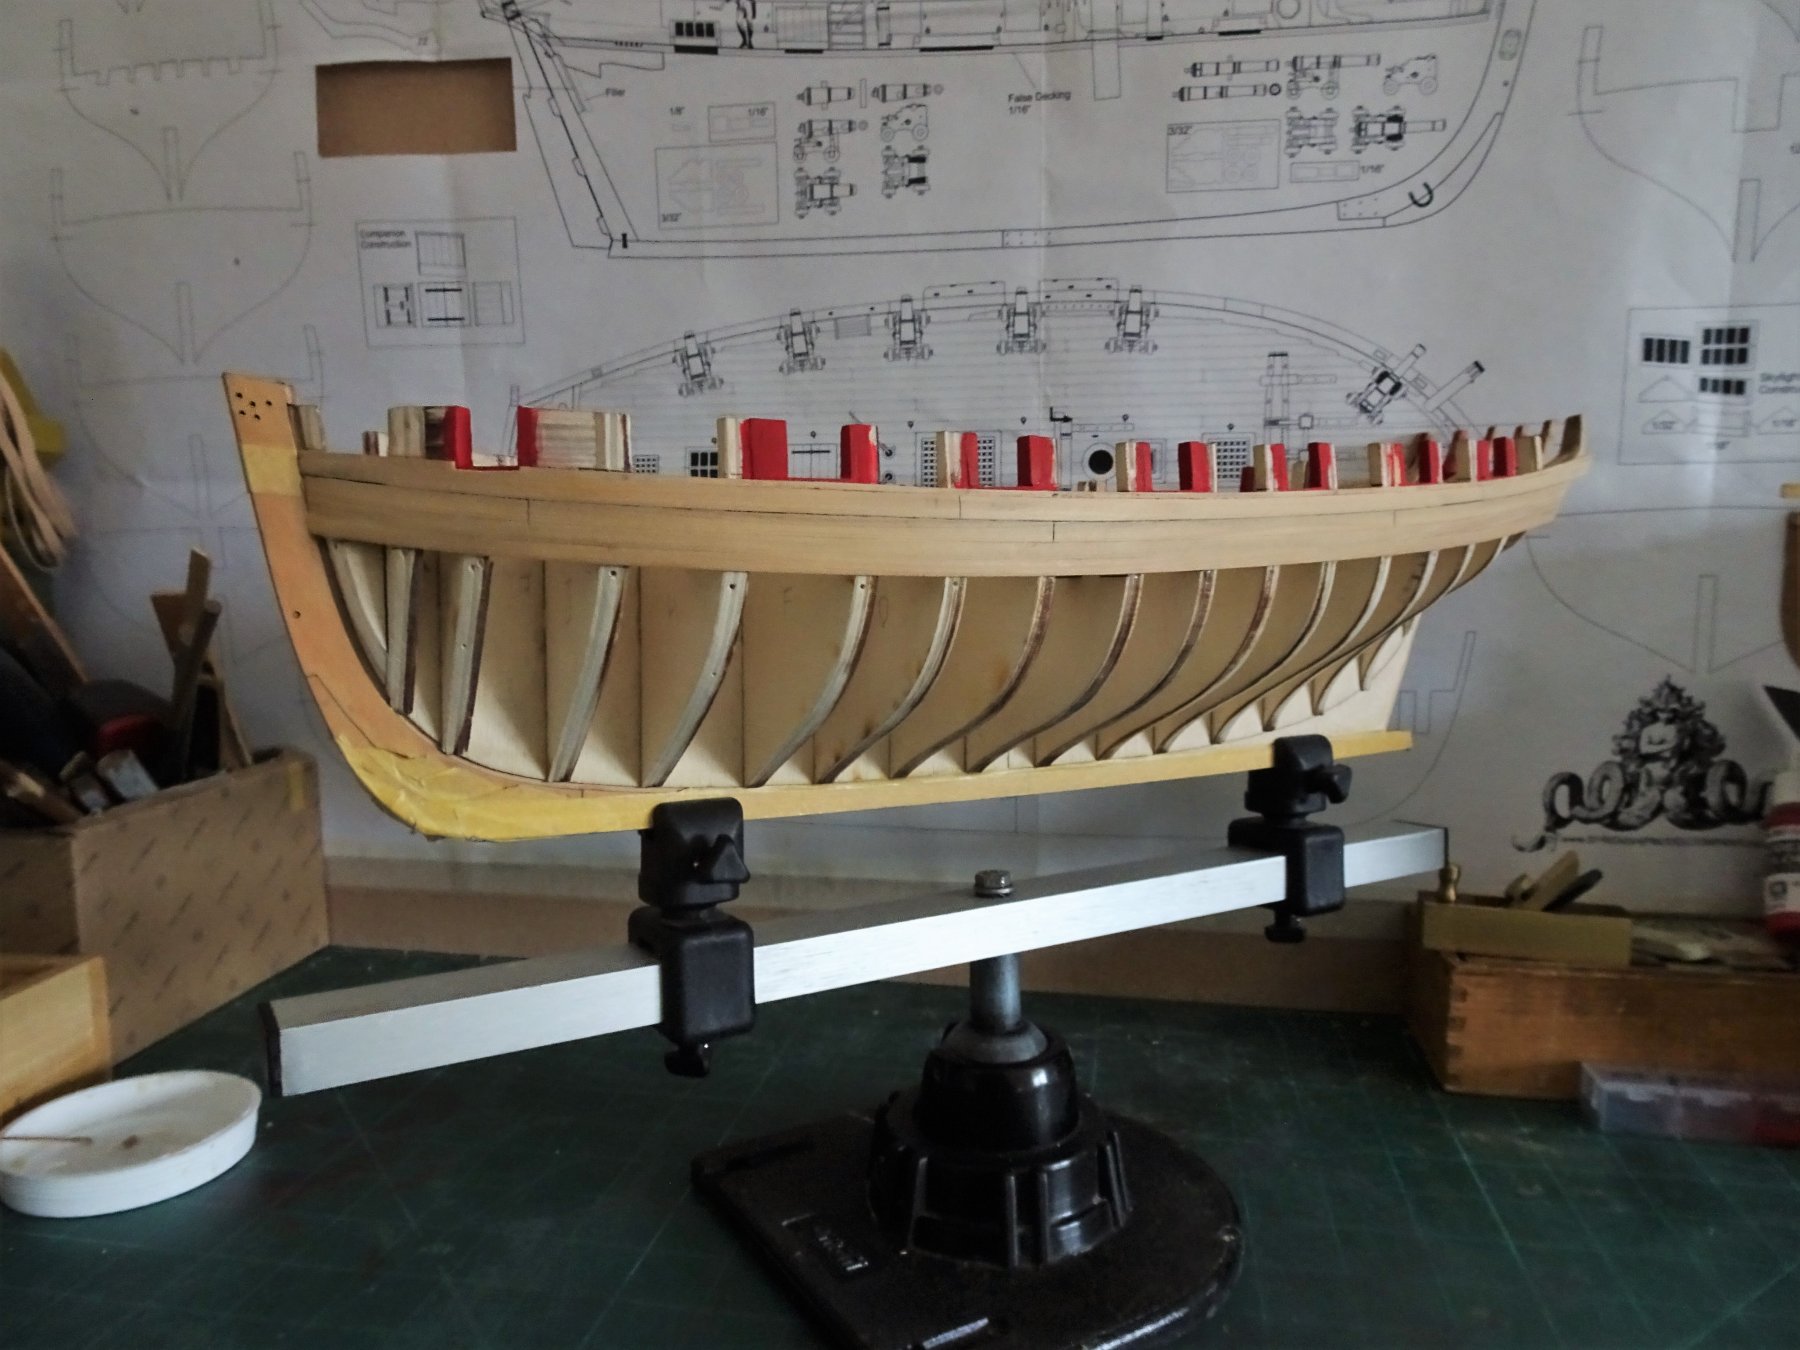
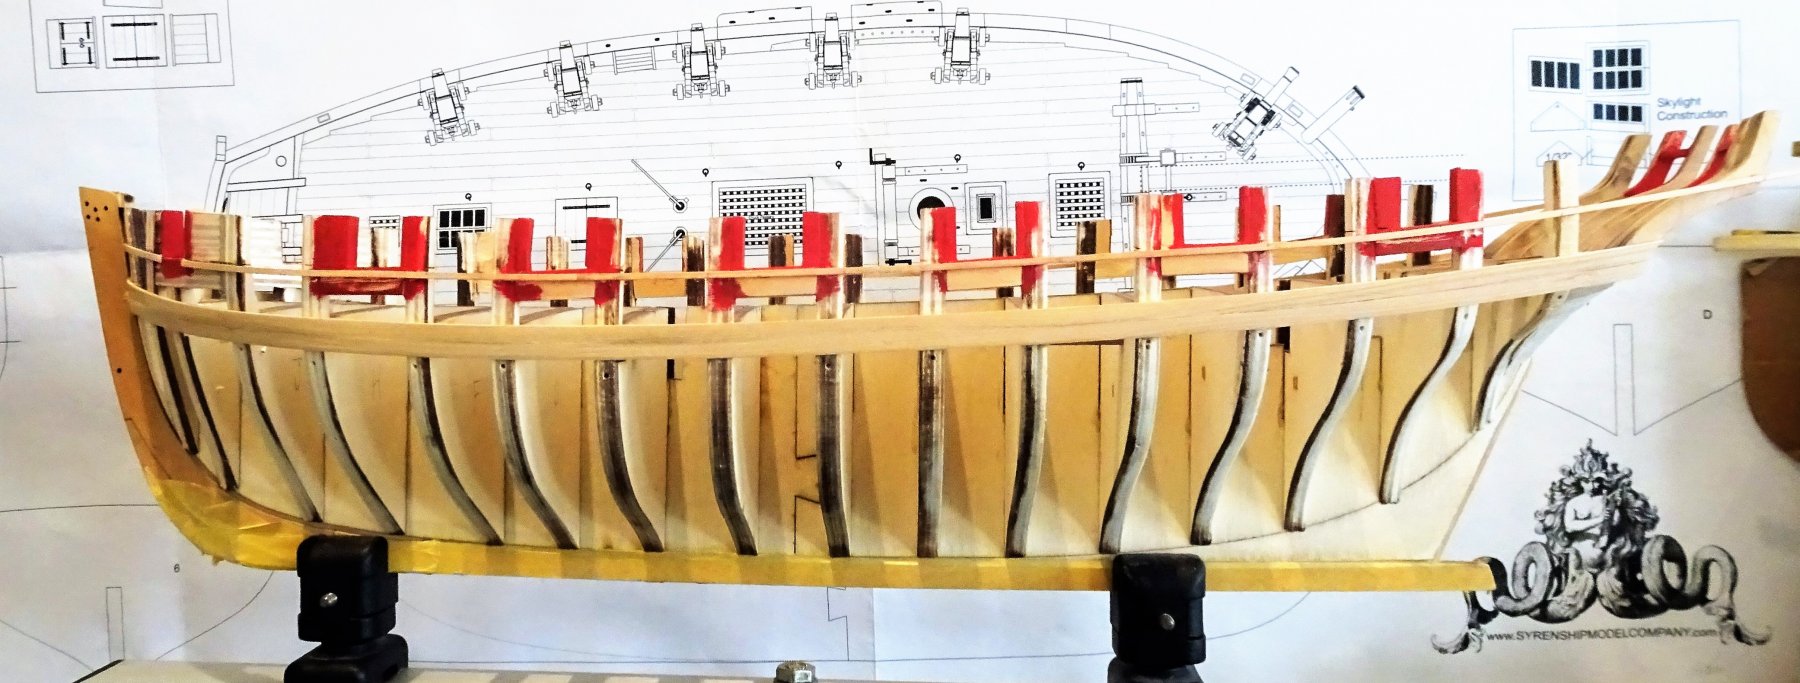
Post 18 Completion of Topside planking Planking between the ports is now completed, looking a little rough but hopefully scraping and sanding will rectify the appearance. 6744 6763 6766 I think I will wait until the stern area is planked before doing any serious cleaning up along the hull. Onto the stern. B.E. 13/03/2018


- 574 replies
-
- 16
-
-
- cheerful
- Syren Ship Model Company
- (and 1 more)
-
To my eye Martin it does look that there is too much curvature at the bottom of the Main rail, does it follow the curvature as shown on the plan? This is such a critical area that can make or break a build, and I also had more than one attempt at not only the Main Rail, but the Eking Rail as well. I seem to recall spending a lot of time with the rails blu-tacked to the head fretting over the levels and relationship to the other parts. It's a frustrating business to get the rail fined down to a nice taper only to have it break when you're 99.9% there. You will get there Martin just got to stick with it. ps I joined the feckless retired 13 years ago, and haven't looked back for a moment. B.E.
-
Cheers Rusty, that’s reassuring to note. B.E.
- 574 replies
-
- 2
-
-
- cheerful
- Syren Ship Model Company
- (and 1 more)
-
Thank you, Mike, Kurt, and Ian. @ Kurt - trialling is always a good idea but I tend to favour the boxwood sawdust/ pva mix for filling between the strakes.
- 574 replies
-
- 2
-
-
- cheerful
- Syren Ship Model Company
- (and 1 more)
-
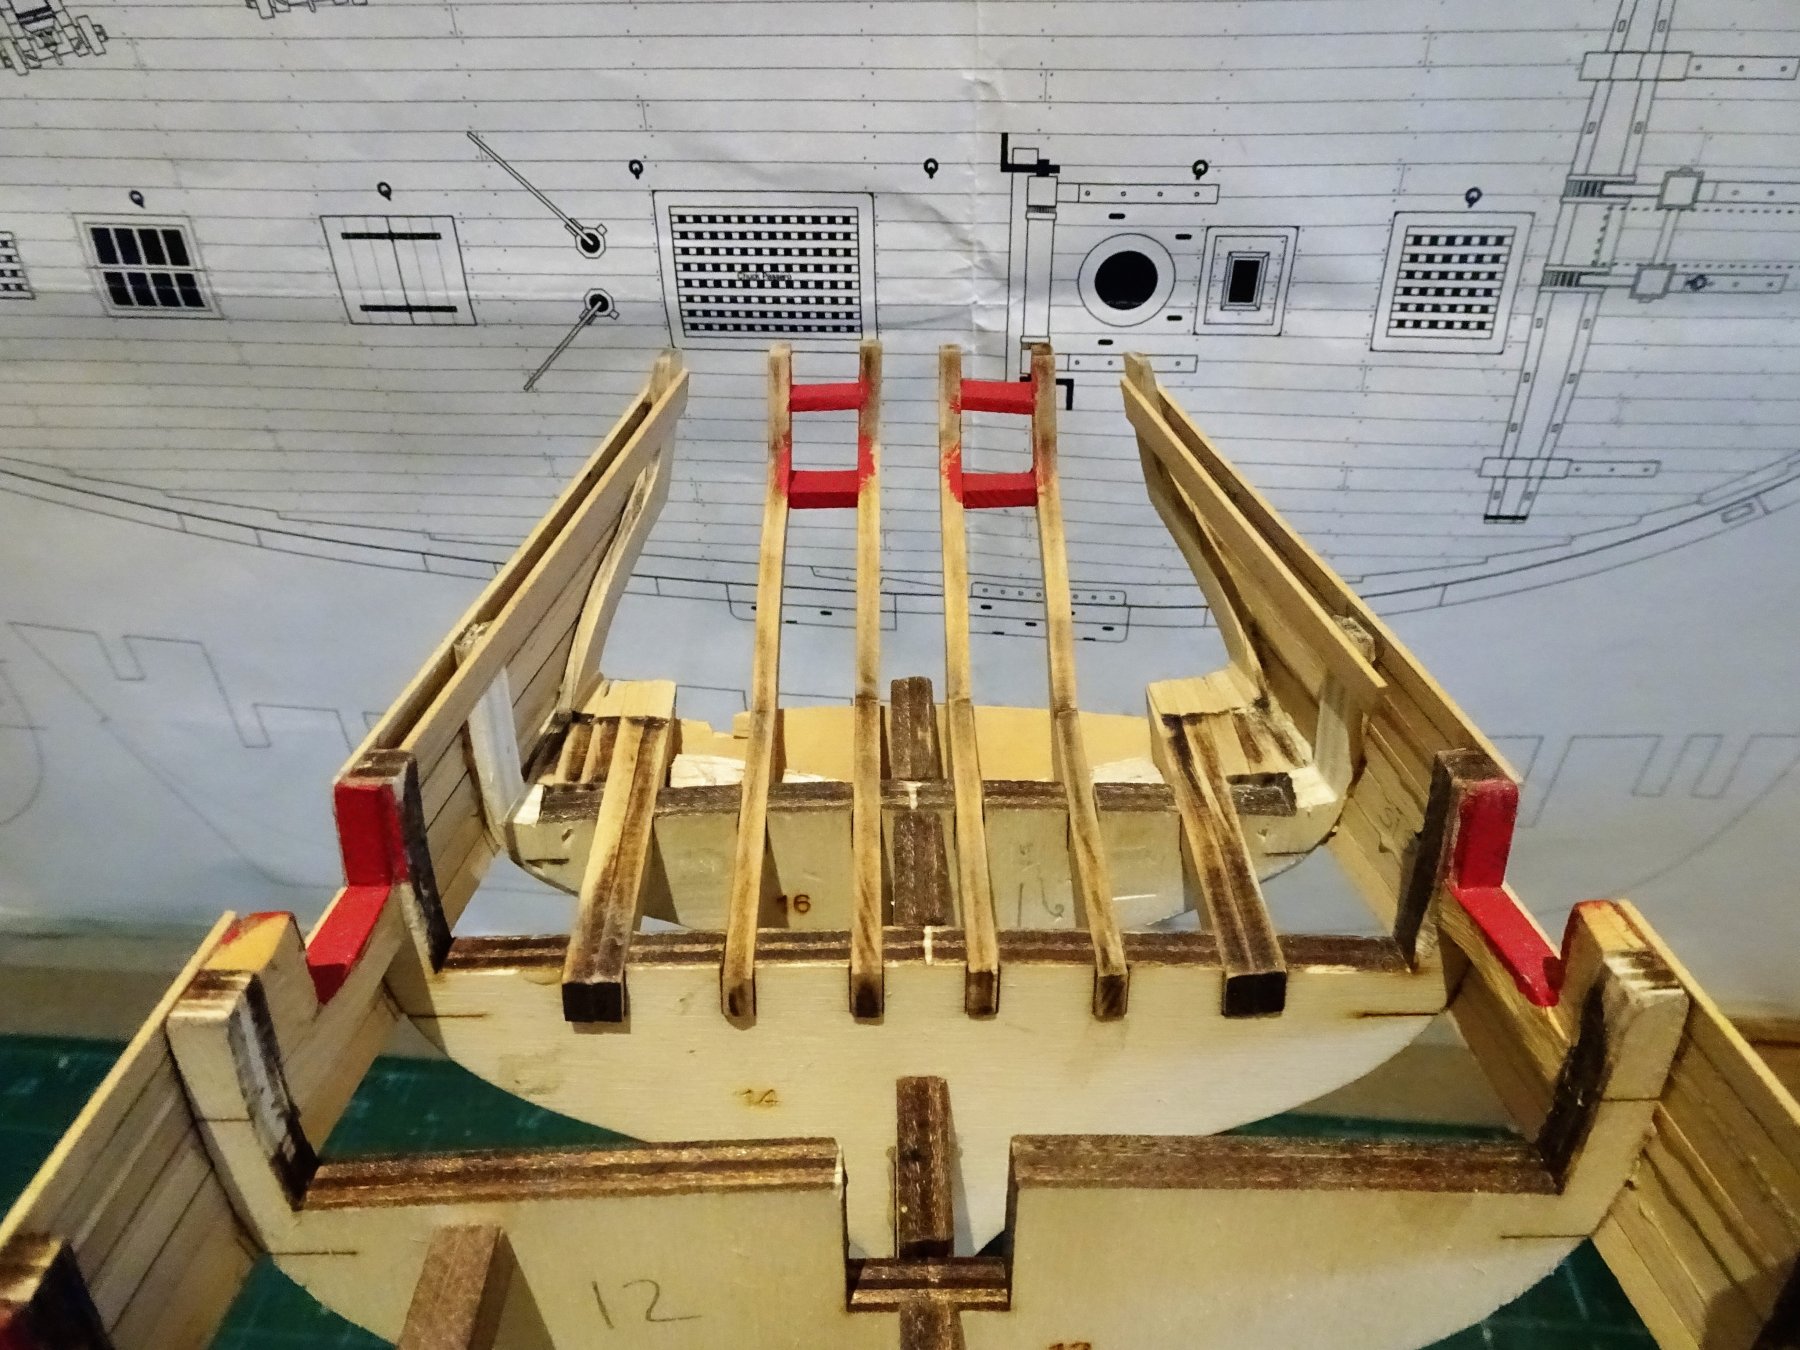
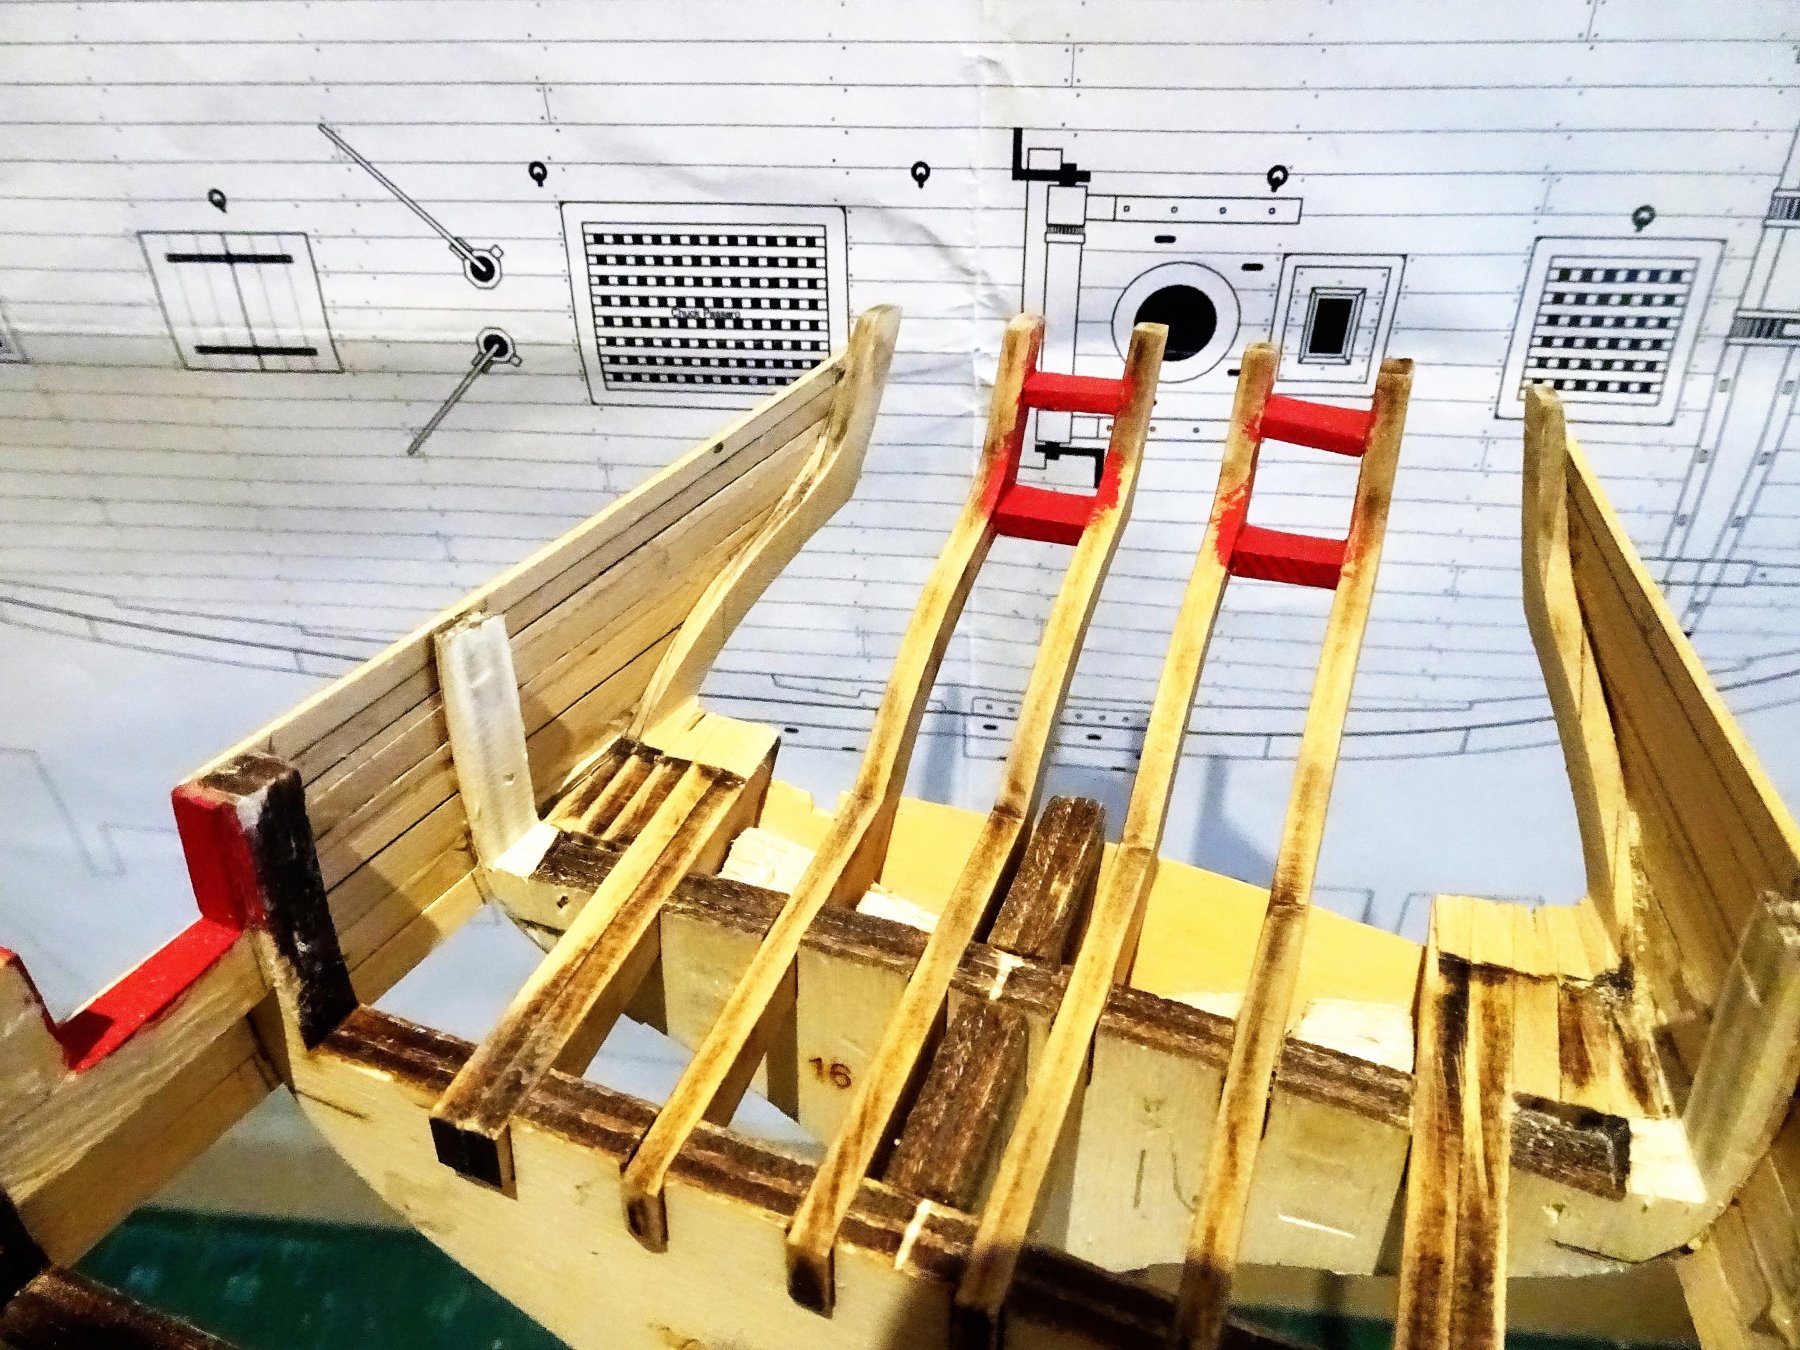
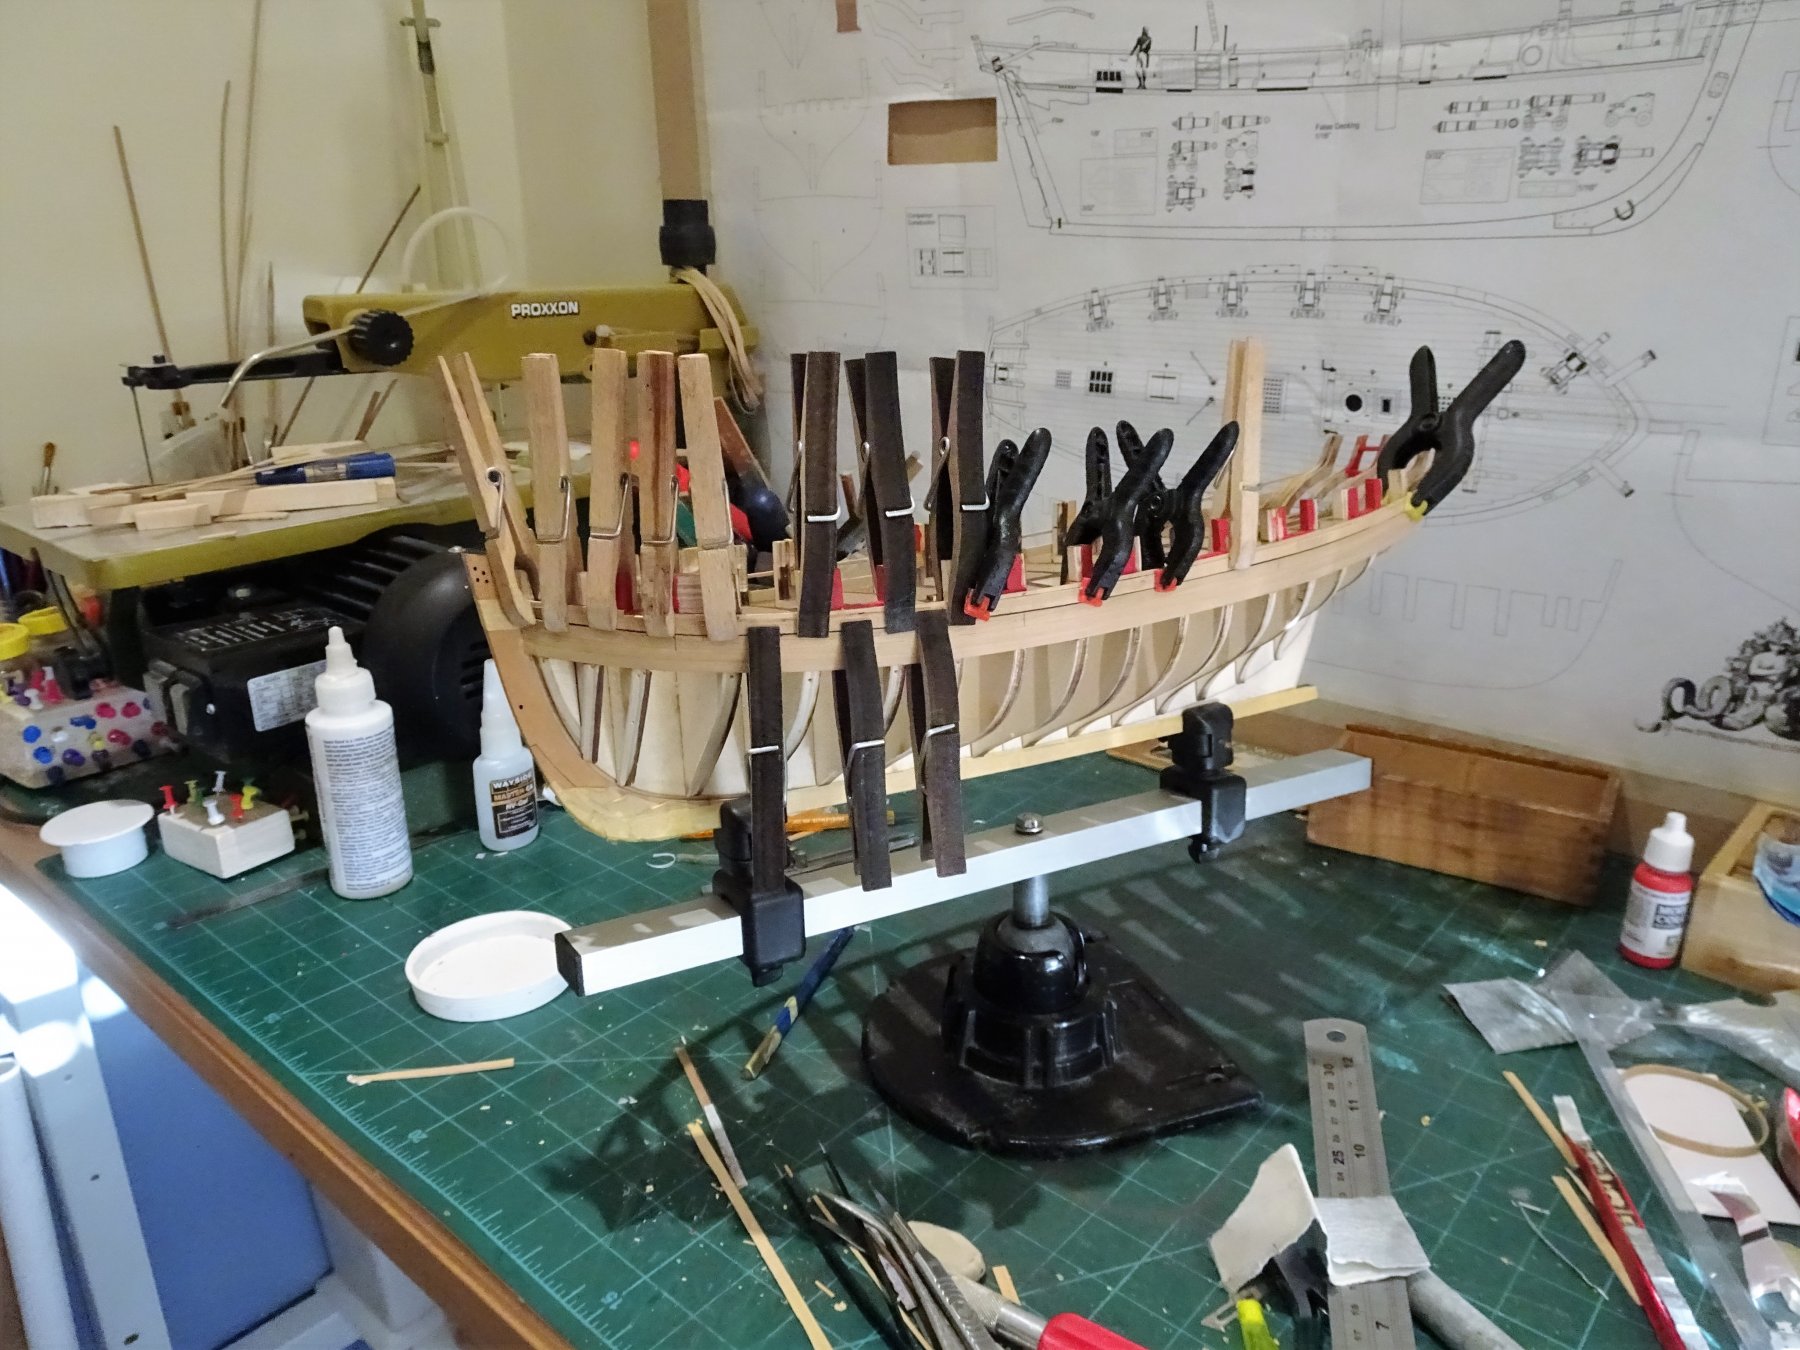
Post 17 Planking between the ports. I have scratched my head over the best approach (for me) to tackle this job. The problem seems to be getting a constant narrow line each side of the ports to form the rebate, and getting the plank ends angled correctly given the slight sheer of the moulding rail against which the first plank must adhere. To begin the process I wetted and heat treated a full length of 5/32nd strip along the hull to impart the curve. 6640 The section between each port was then marked on the plank, and the laborious process of cutting and fitting began. 6648 Each section was cut roughly to size, clamped into place and given the heat treatment again. 6650 The ends were then cut using a scalpel, and pva'd into place. I found this to be slow and testy work. 6649 Getting there. 6656 6651 Starboard side completed, or rather planked; there is a lot of tweaking and cleaning up to do. One area that caused me some confusion was fitting the last two strakes aft of the last port running up to the stern post. 6654 These were both tapered in accordance with the instructions and to the plan dimensions, but unlike Chuck's photo's in the relevant section,(Chapter 3, page3) the last strake did not run to the top of the outer stern frame. Into panic mode, fingers crossed the outer strakes are reduced in height to form the transom curve, otherwise I'm in trouble. Onto the Port side. B.E. 06/03/2018


- 574 replies
-
- 14
-
-
- cheerful
- Syren Ship Model Company
- (and 1 more)
-
Thank you Thomas and Martin. 'Lovely little thing' is a relative term for me at the moment. This is my least favourite part of a build Martin, always looks untidy to me, made worse by looking at Chuck's build photo's, they really should carry a warning 'Looking at these photo's can seriously damage your build confidence' Hopefully once it's all been sanded I'll feel happier about it. Not heard much from the prairie of late, hope you and yours are ok and that you are making some progress on Fly. Regards, B.E.
- 574 replies
-
- 3
-
-
- cheerful
- Syren Ship Model Company
- (and 1 more)
-
I intend to follow Chuck's example and 'false' treenail the hull using a contrasting filler. B.E.
- 574 replies
-
- 1
-
-
- cheerful
- Syren Ship Model Company
- (and 1 more)
-
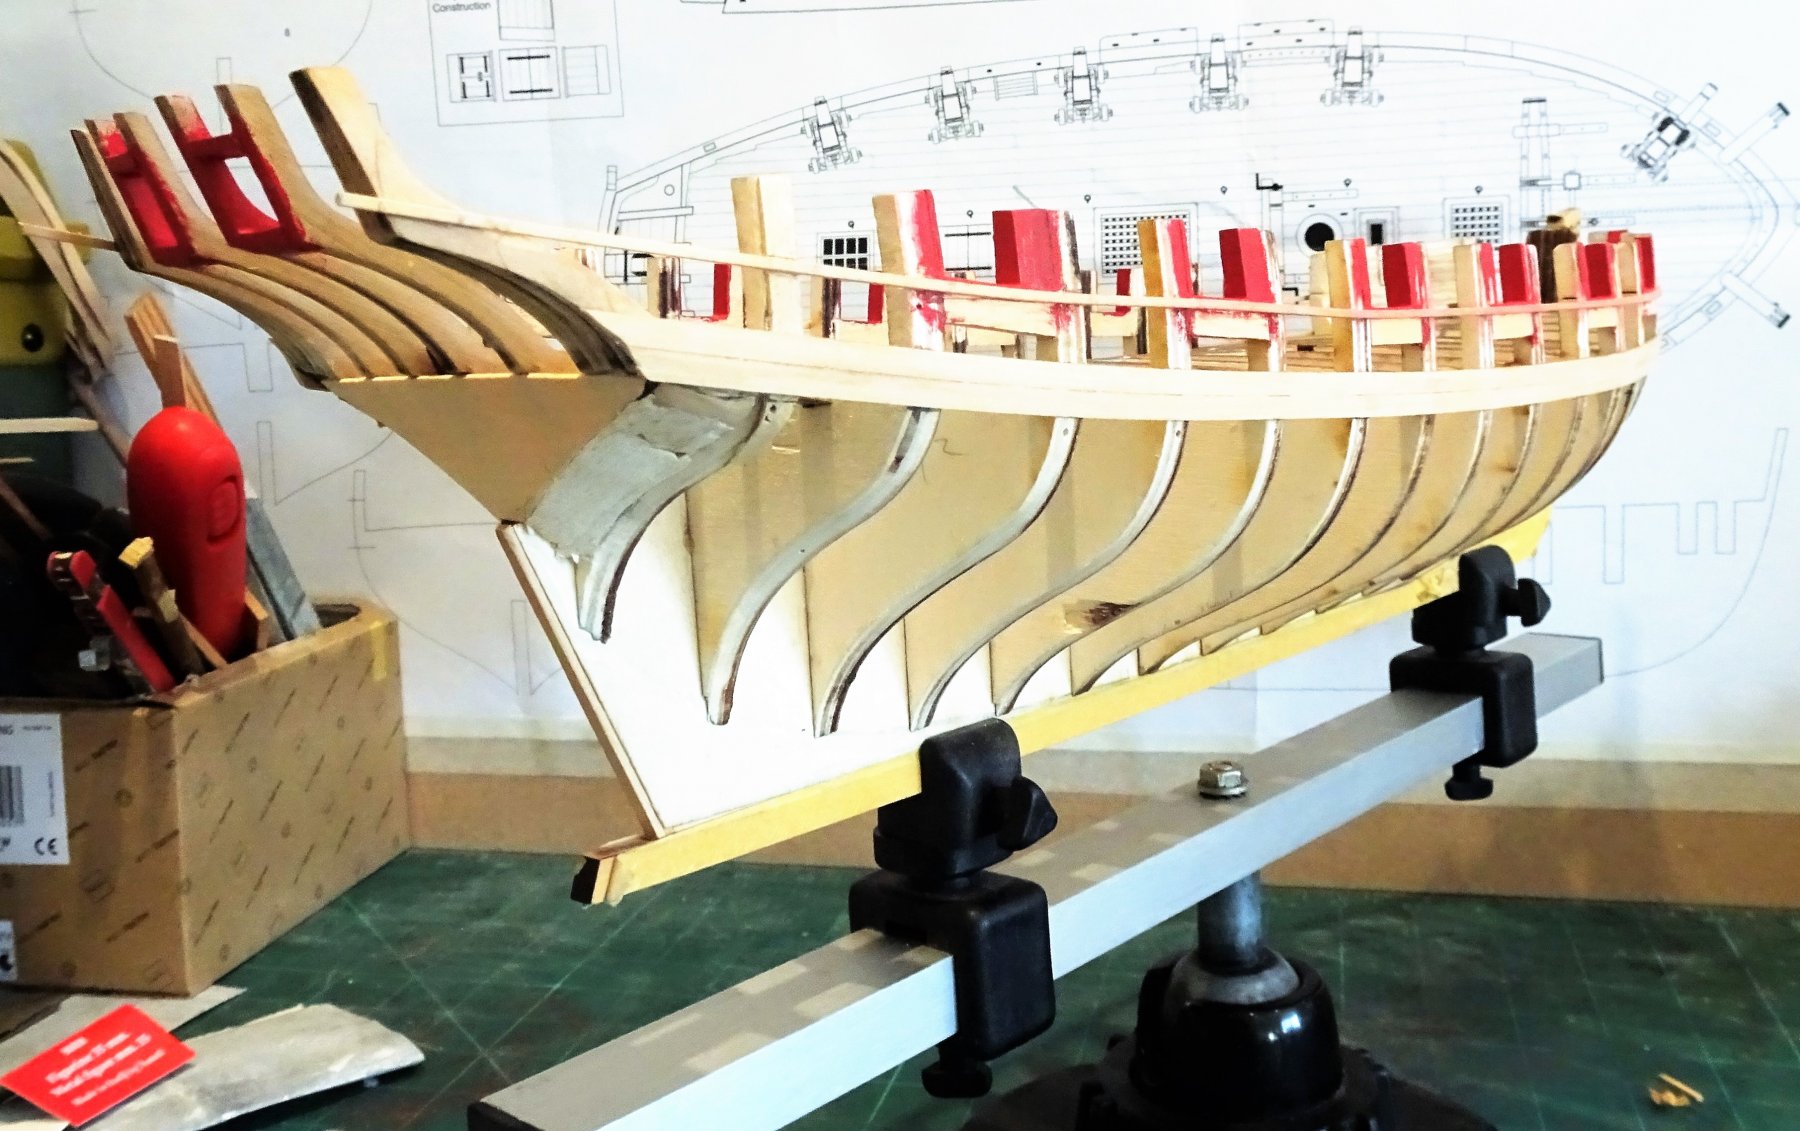
Thank you Ken, Post 16 Planking above the Wale The first plank above the wale is done using 3/16"wide x 3/64" thick strip.(4.7625mm x 1.2mm) There is a taper required both fore and aft on the first plank to even out the widths with the second plank. I started my fore taper just aft of the second port, and the aft taper just past the third port from aft. These were quite shallow tapers. With the tapers done I clamped the first plank in place and gave it the heat treatment to impart a little curve memory around the bow. Trialling the fit some tweaking was required to get the strip to lie flush to the rail, a couple of high/low spots on the bulkheads. 5582 5581 It was then a question of gluing progressively along the hull clamping it both to the bulkheads and the Wale. I initially glued to the first six bulkheads, then worked aft at three at a time. 5627 5630 I fitted the lower strip on both sides before moving on. Note: Looking at photo's of Chuck's prototype build there are three butt joints along the first plank. 1 just aft of the first port a 2nd just aft of port 3, and a third just forward of port 6. Strangely on the plans (Plan 1) only two butt joints are shown? I didn't cut the planks into scale lengths, but replicated the 'joint' with a shallow micro saw cut, and then marked it with a pencil lead. The second plank above the wale was done using 7/32" wide by 3/64" thick strip (5.56mm x1.2mm) This strake to fill in up to the moulding rail required some fettlin' with tapers both fore and aft. 6078 I used Tamiya 10mm tape to give me a template along the hull for the shape of the upper plank which gave me the rough top line of the plank beneath the moulding rail. It was then a question of using a scalpel blade to pare the strake down progressively to fit. As it turned out it was more of a spile than a simple taper. I use a Pilot broad chisel waterproof marker to represent the tar line between planks. 5752 Fixing the upper strake in place. 6369 Got a little fettlin' to do around the fore port sill line. Moving on now to working out a strategy for the planking between the ports. B.E 02/03/2018


- 574 replies
-
- 25
-
-
- cheerful
- Syren Ship Model Company
- (and 1 more)
-
Congratulations Mihai, a very nice result, and a great collection of completion photo's; she looks splendid in place on your shelf. Your choice of black for the Topsides is historically correct as black was the 'official' colour for British Navy. Regards, B.E.
- 64 replies
-
- 1
-
-
- pegasus
- victory models
- (and 1 more)
-
Looking good Steve, I found I was constantly touching up the inboard paintwork, and you’ve got the mouldings to apply yet Nice job on the port side capping rail.
- 190 replies
-
- 2
-
-
- pinnace
- model shipways
- (and 1 more)
-
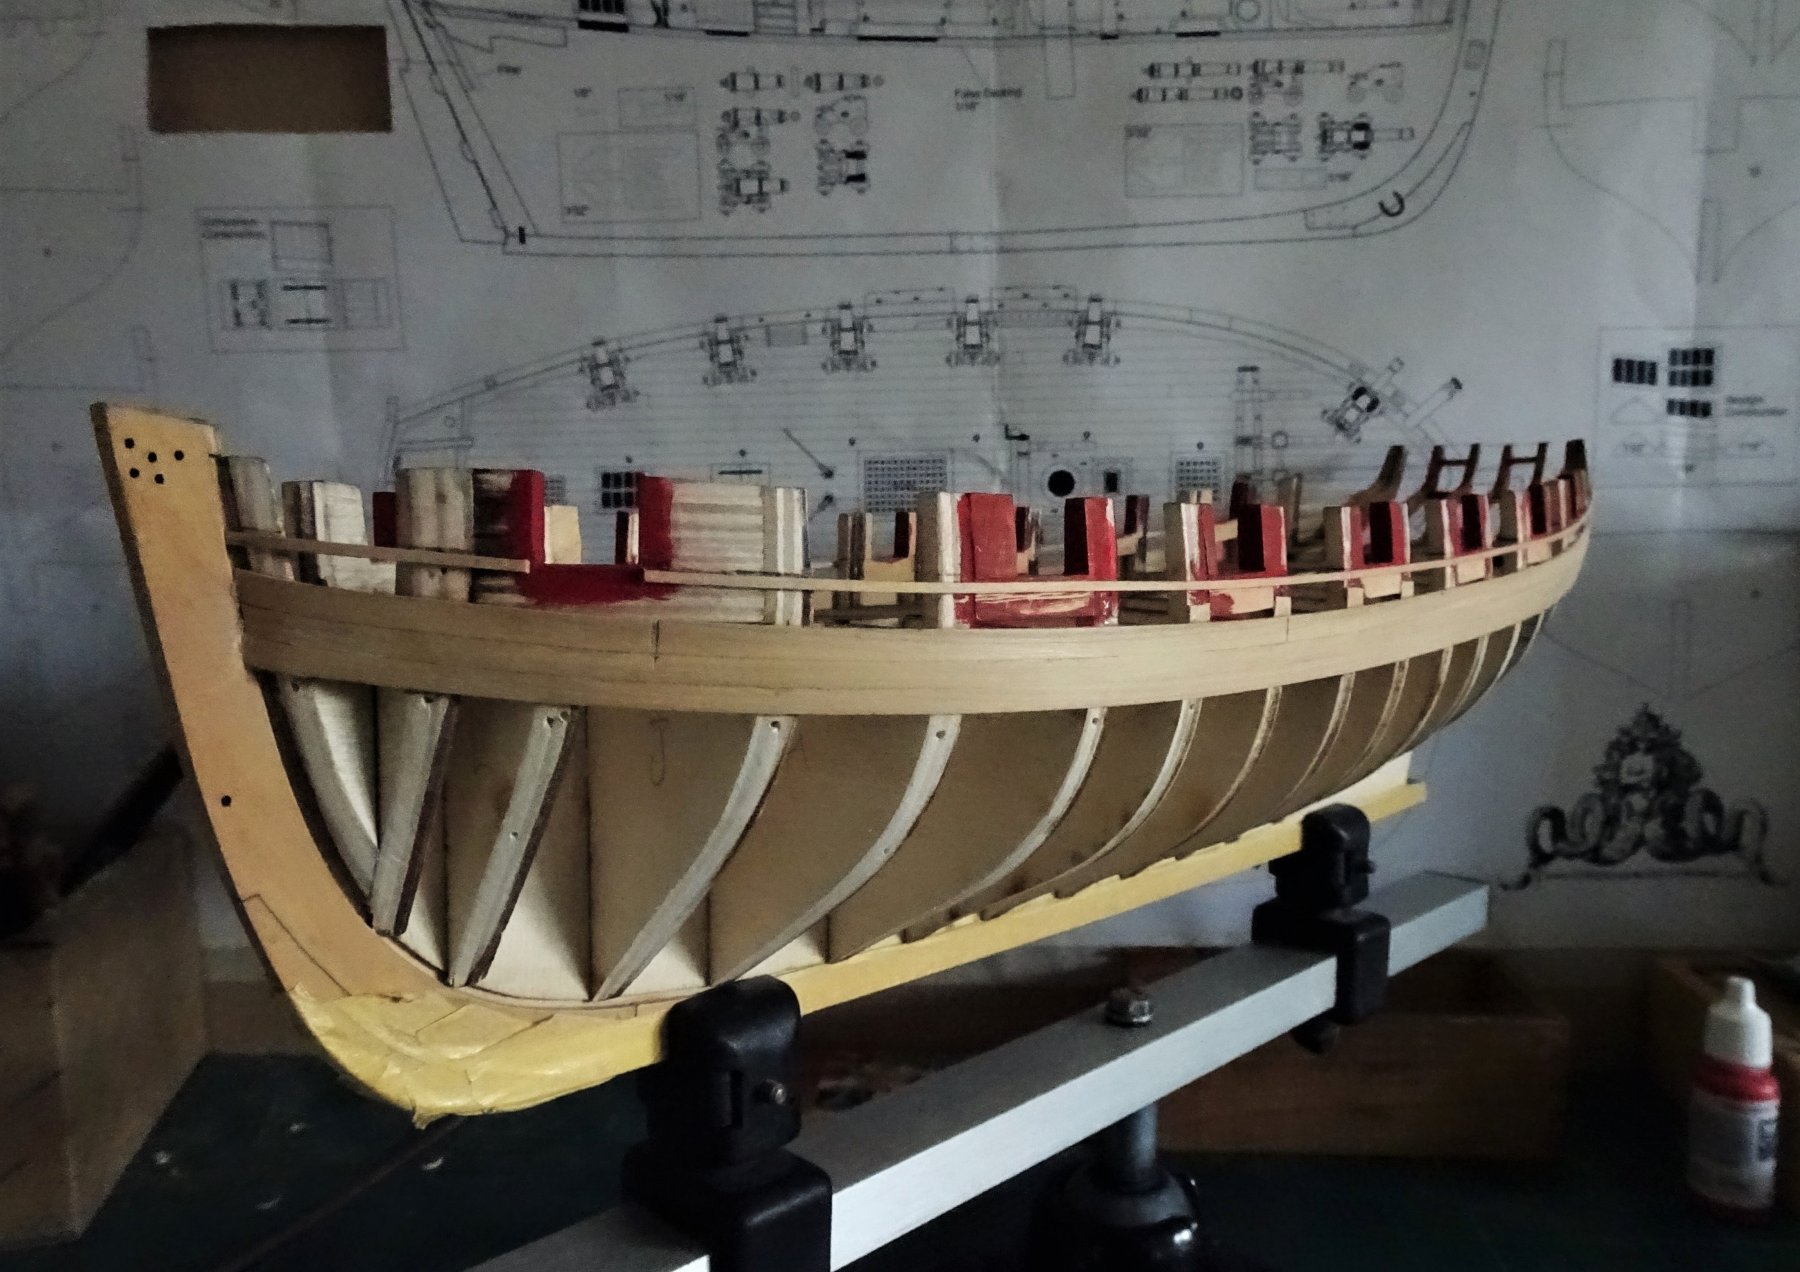
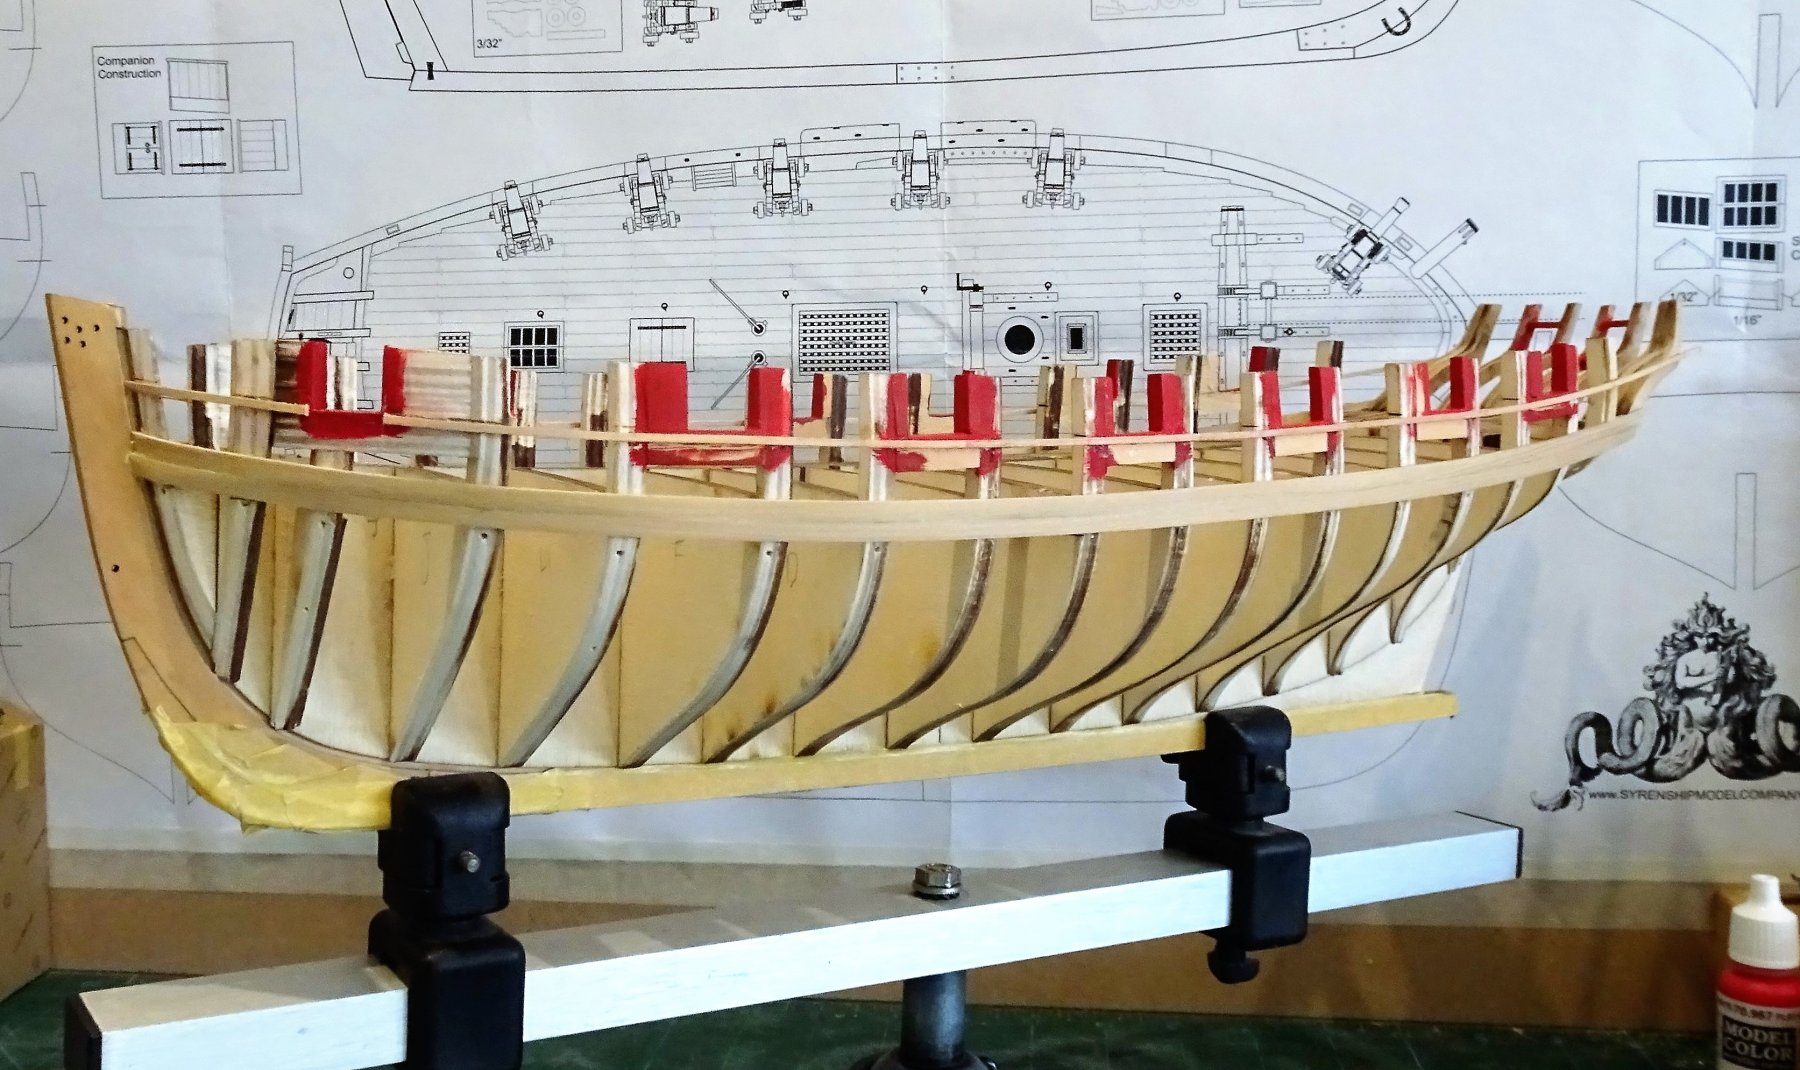
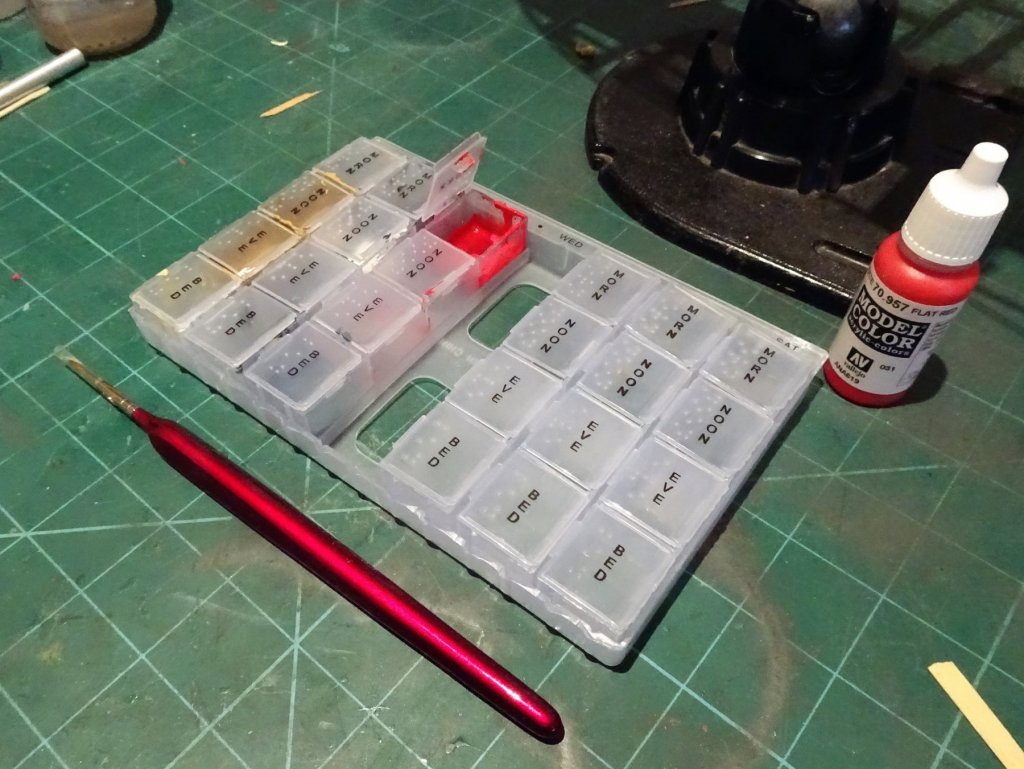
Post 15 Preparing for planking The ports have now been painted, A tip for those who may not have thought of it; those little pill organiser boxes you can get from the chemists make very nice paint mixing boxes. 5383 Very useful using Vallejo paint where small quantities and some dilution is required. The lid keeps the paint useable for a while and dust free. Fixing the moulding strip below the ports is next up. The requirement is that the rail should lay 1/64" below the sill. That's (0.397mm) the thickness of a fine pencil lead! I was far from sure I could get that close without it looking more like error than intention. I think I will have to gauge this by eye,with 0.5mm about as close as I can practically get and to give a clearly defined rebate. Starting on the Starboard side I positioned the moulding at the centre port of the hull having marked the point along from the Bow rabbet, and fixed it in position using pva and many clamps. However once it was done I could see one or two bulges at port sill level where my fairing was not quite enough, so off it came again along the area of the hull affected. This is quite easy to do with pva, a slight wetting and away it comes. I much prefer to use pva for the woodwork than ca which tends to make the wood brittle, and mark it. Acetone is also required to remove ca. much less friendly than water. After two or three goes I eventually got a look I could live with although I have not taken it as close as 1/64". 5423 5425 5415 I was keen that the mouldings appeared level on each side, and fortunately this appears to be the case. 5422 5426 5429 The first planking above the wale now beckons. B.E. 20/02/2018


- 574 replies
-
- 14
-
-
- cheerful
- Syren Ship Model Company
- (and 1 more)
-
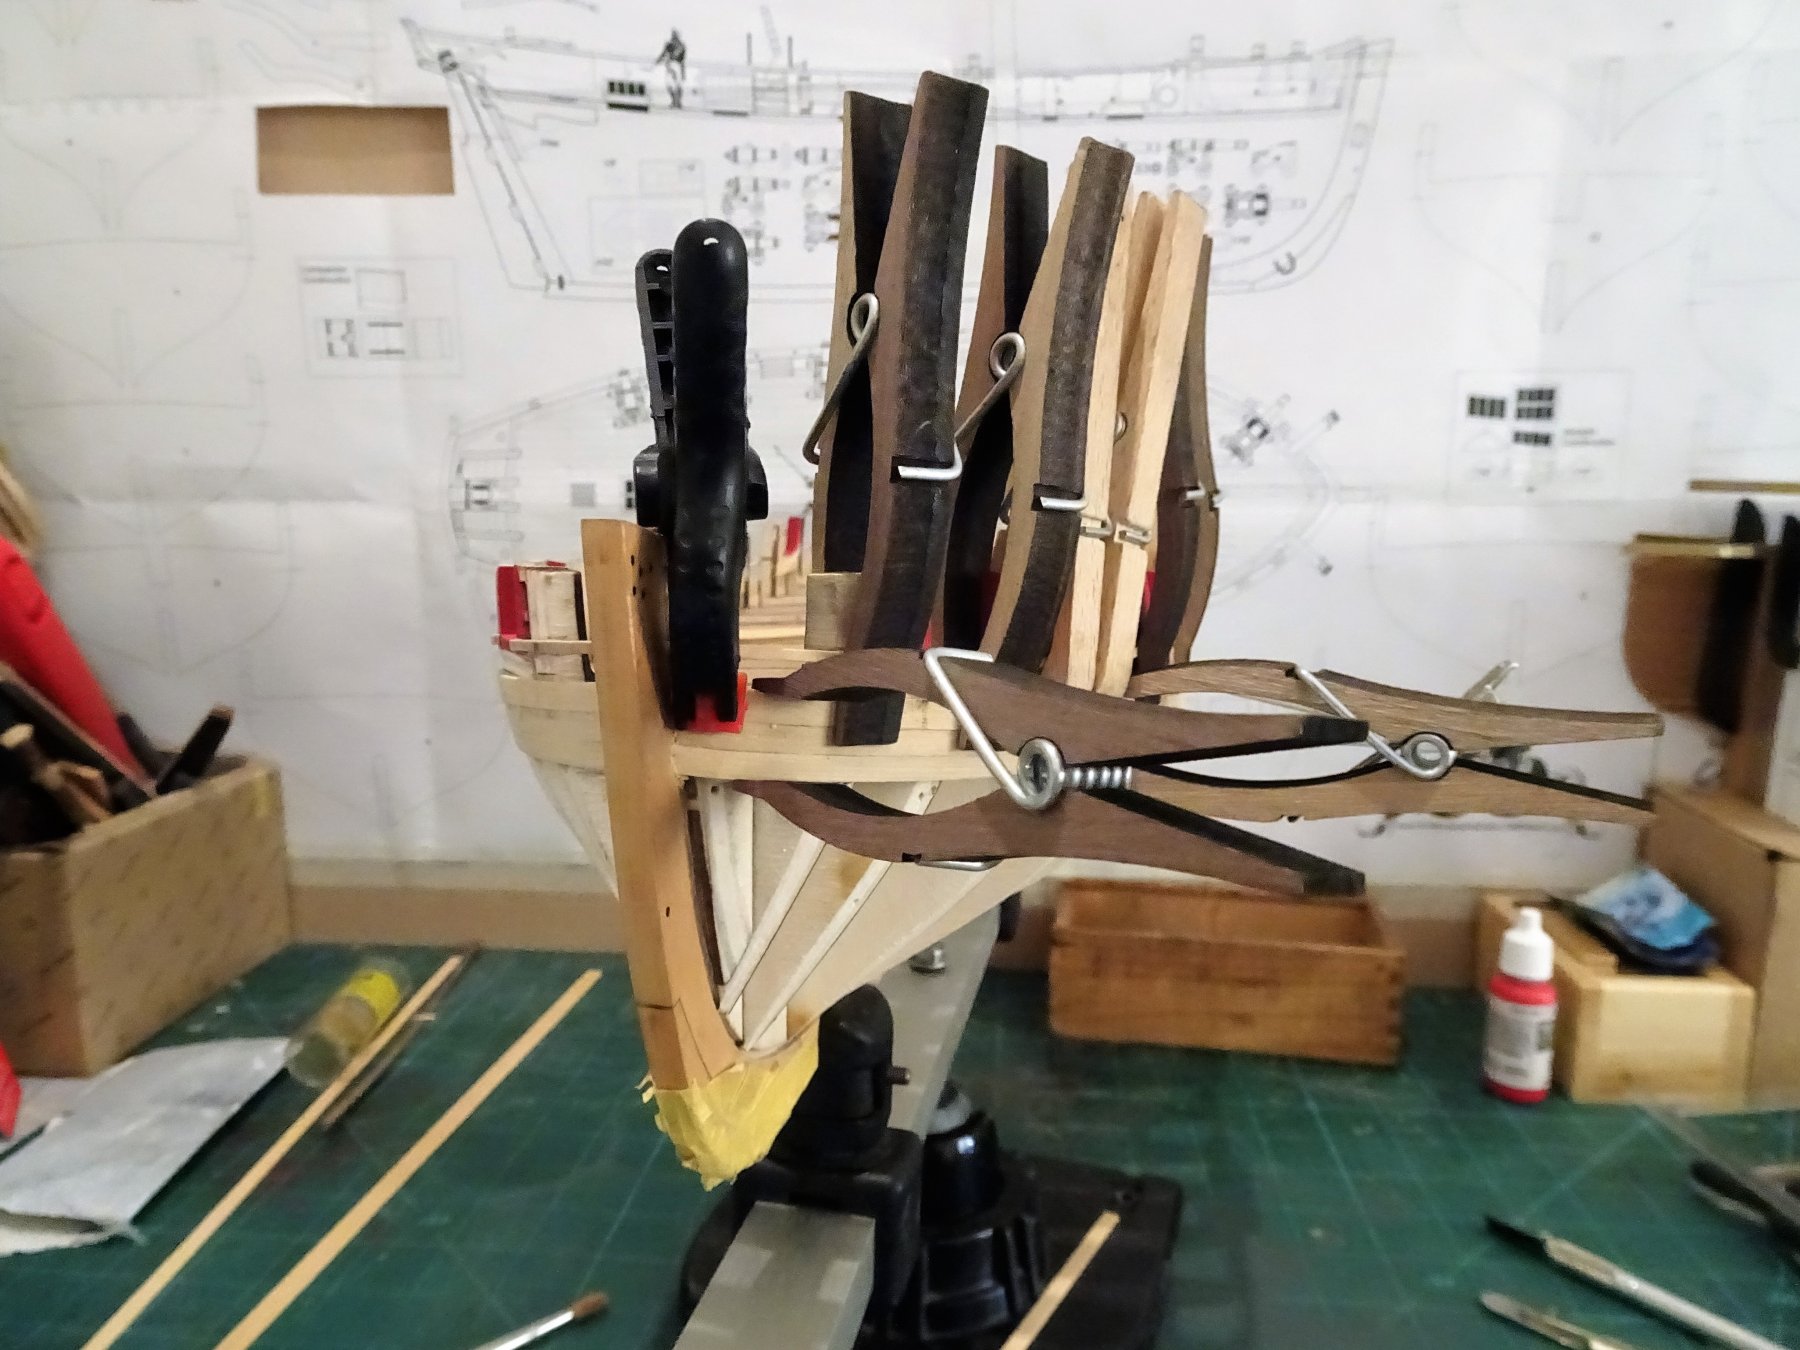
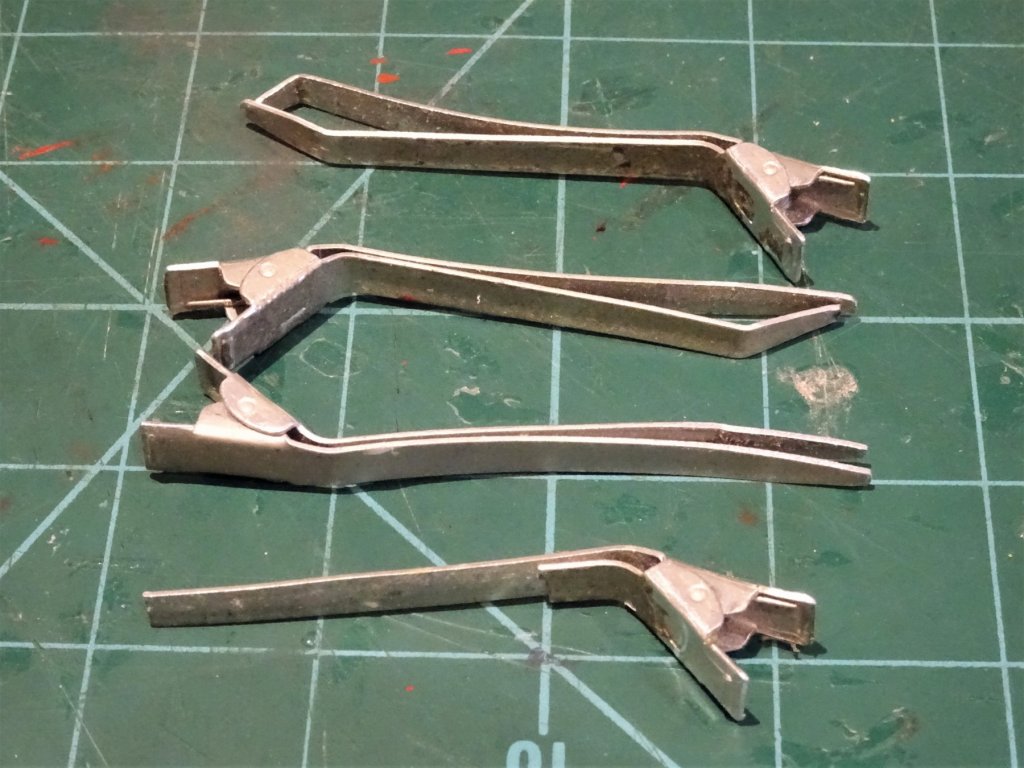
Hi Ken, I think it was Danny who alerted me to their use in his Vulture log and I'm reliably informed that the technical description is Hairdressers Sectioning clips, they are readily available on places like Amazon or e-bay, but I think my wife got them for me in a local shop. What is good about them is they don't apply too much pressure and can be bent and modified to suit particular holding jobs in awkward places. Cheers, B.E.
- 156 replies
-
- 3
-
-
- pinnace
- model shipways
- (and 1 more)
-
Sign of a good modeller to remove and restart Kurt, but personally I don't favour using ca for planking, it's high quality pva for me. (Non waterproof type of course.) You really should start a log Kurt detailing the trials and tribulations of a Cheerful build, I'm sure the membership would find it useful. B.E.
- 574 replies
-
- 3
-
-
- cheerful
- Syren Ship Model Company
- (and 1 more)
-
Heller's Le GLorieux: Copper Sheathed Hull?
Blue Ensign replied to Kriegmeister's topic in Plastic model kits
Thank you Thunder. B.E. -
Thank you Erik, I have been using your excellent build as a reference work, and I think it was your log that alerted me to the Vallejo paints. The flat red does give a nice tone and finish that looks right for the build, and I was able to download some very useful articles on how to hand brush with Vallejo paint. look forward to seeing your build restart. B.E.
- 574 replies
-
- 4
-
-
- cheerful
- Syren Ship Model Company
- (and 1 more)
-
Cheers Guys, that's a nice clear shot of your planking Kurt, you should start a build log to give us all the benefit of your progress. B.E.
- 574 replies
-
- 3
-
-
- cheerful
- Syren Ship Model Company
- (and 1 more)
-
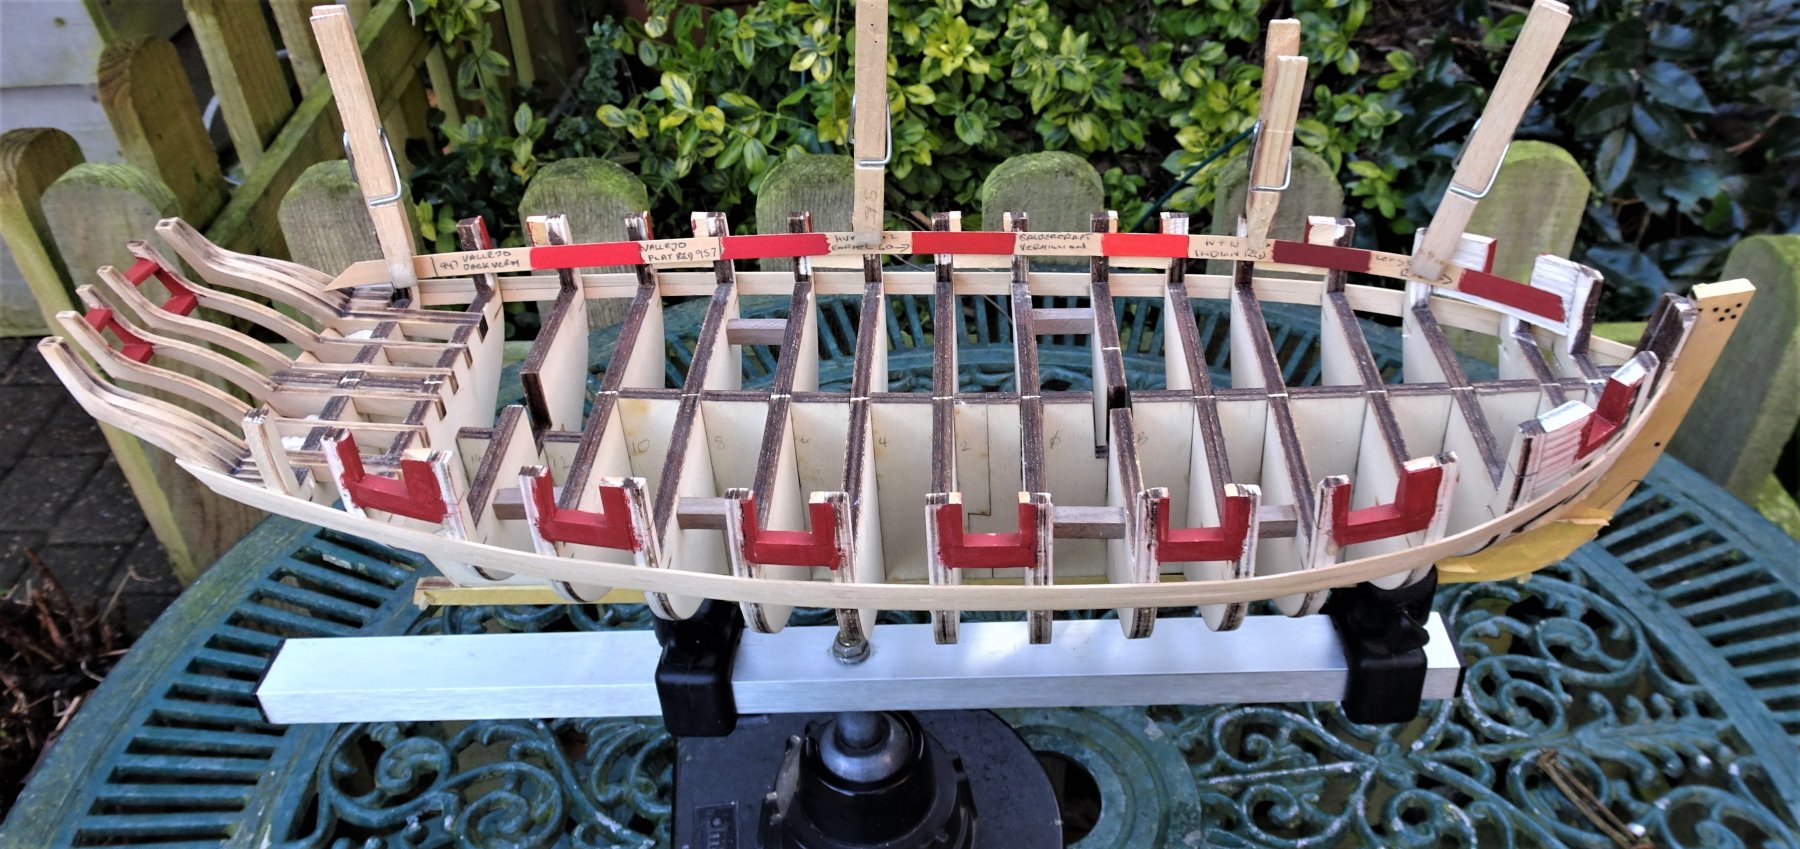
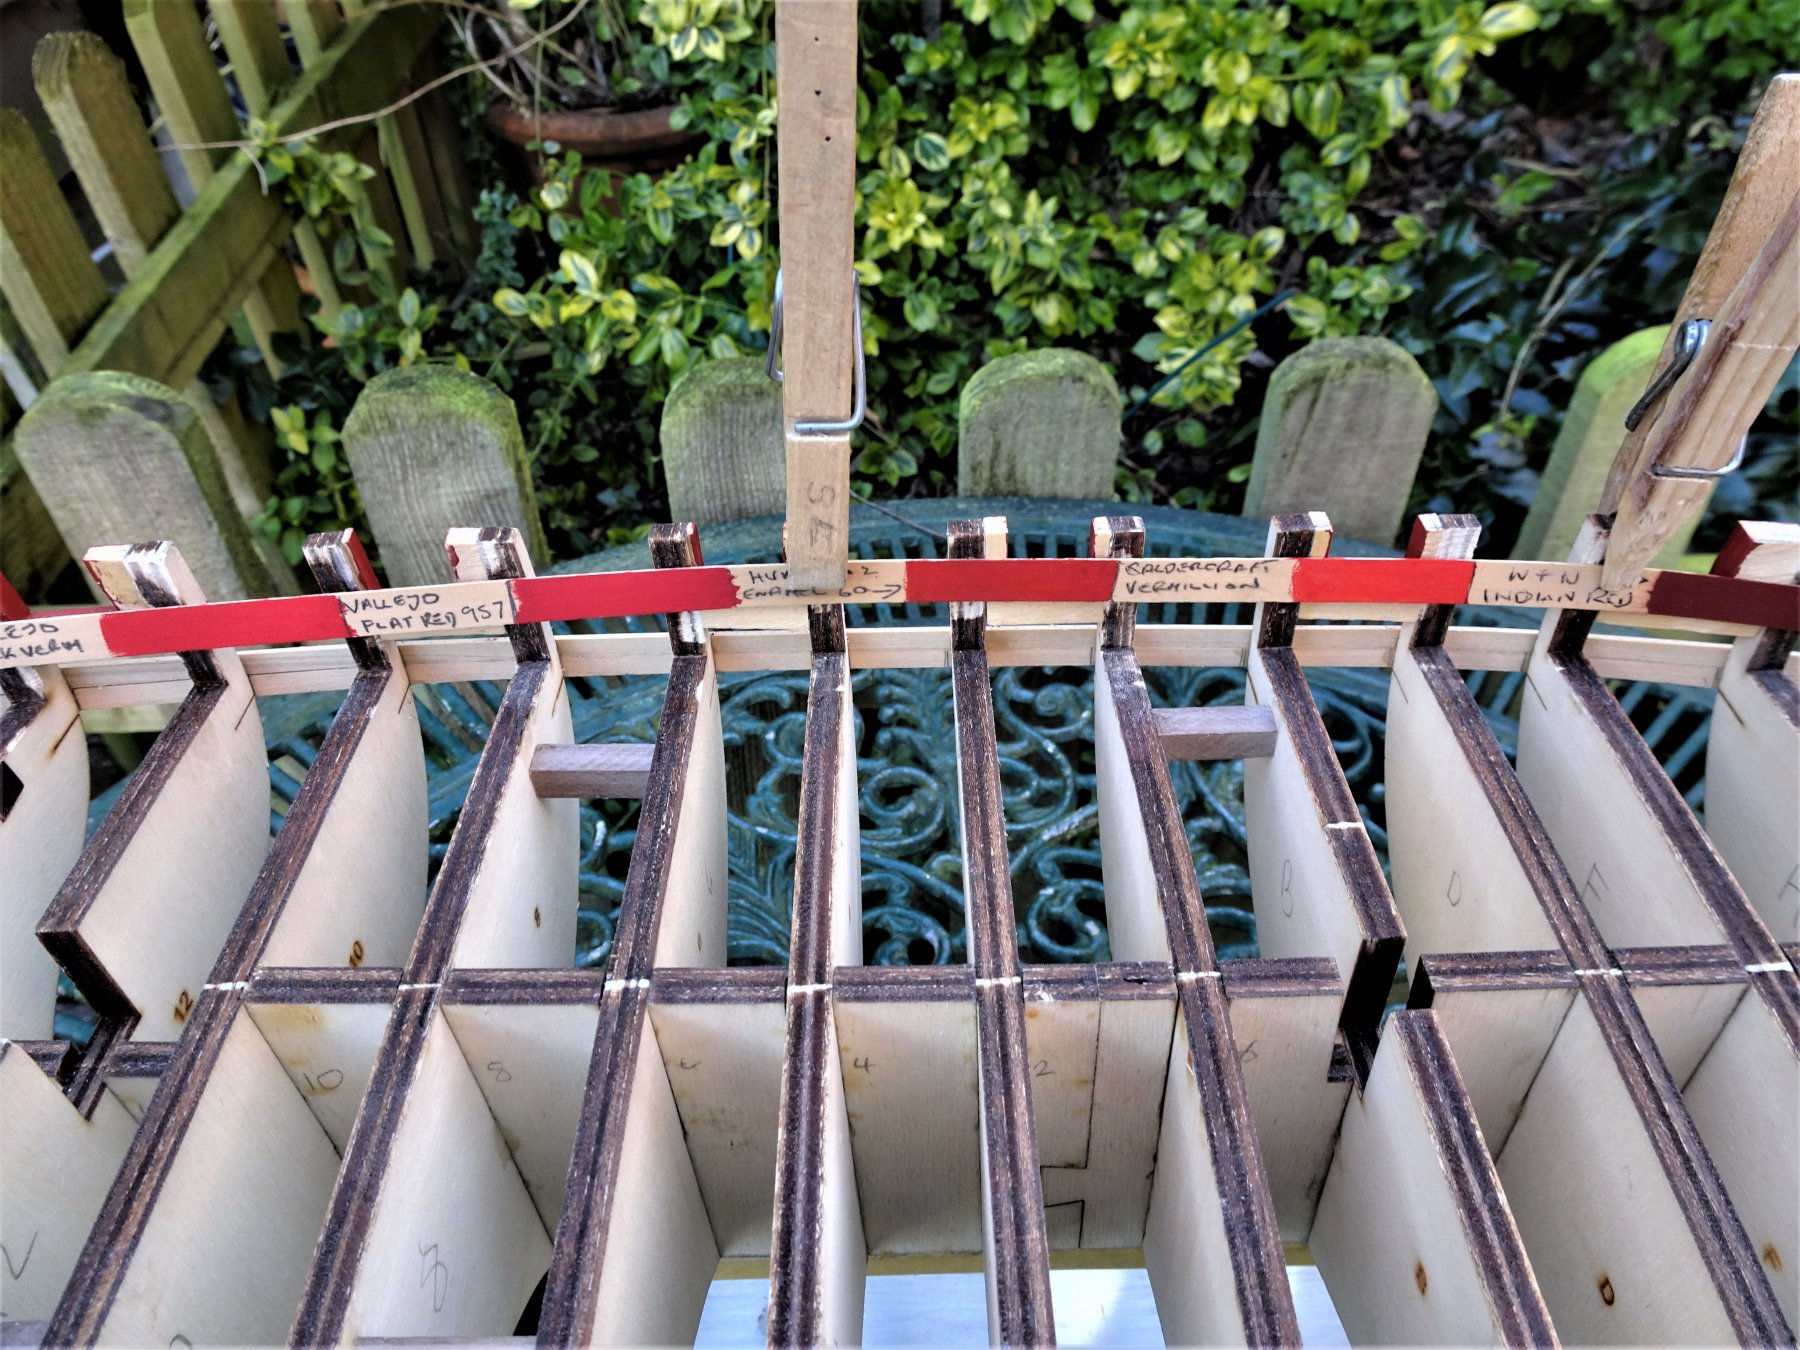
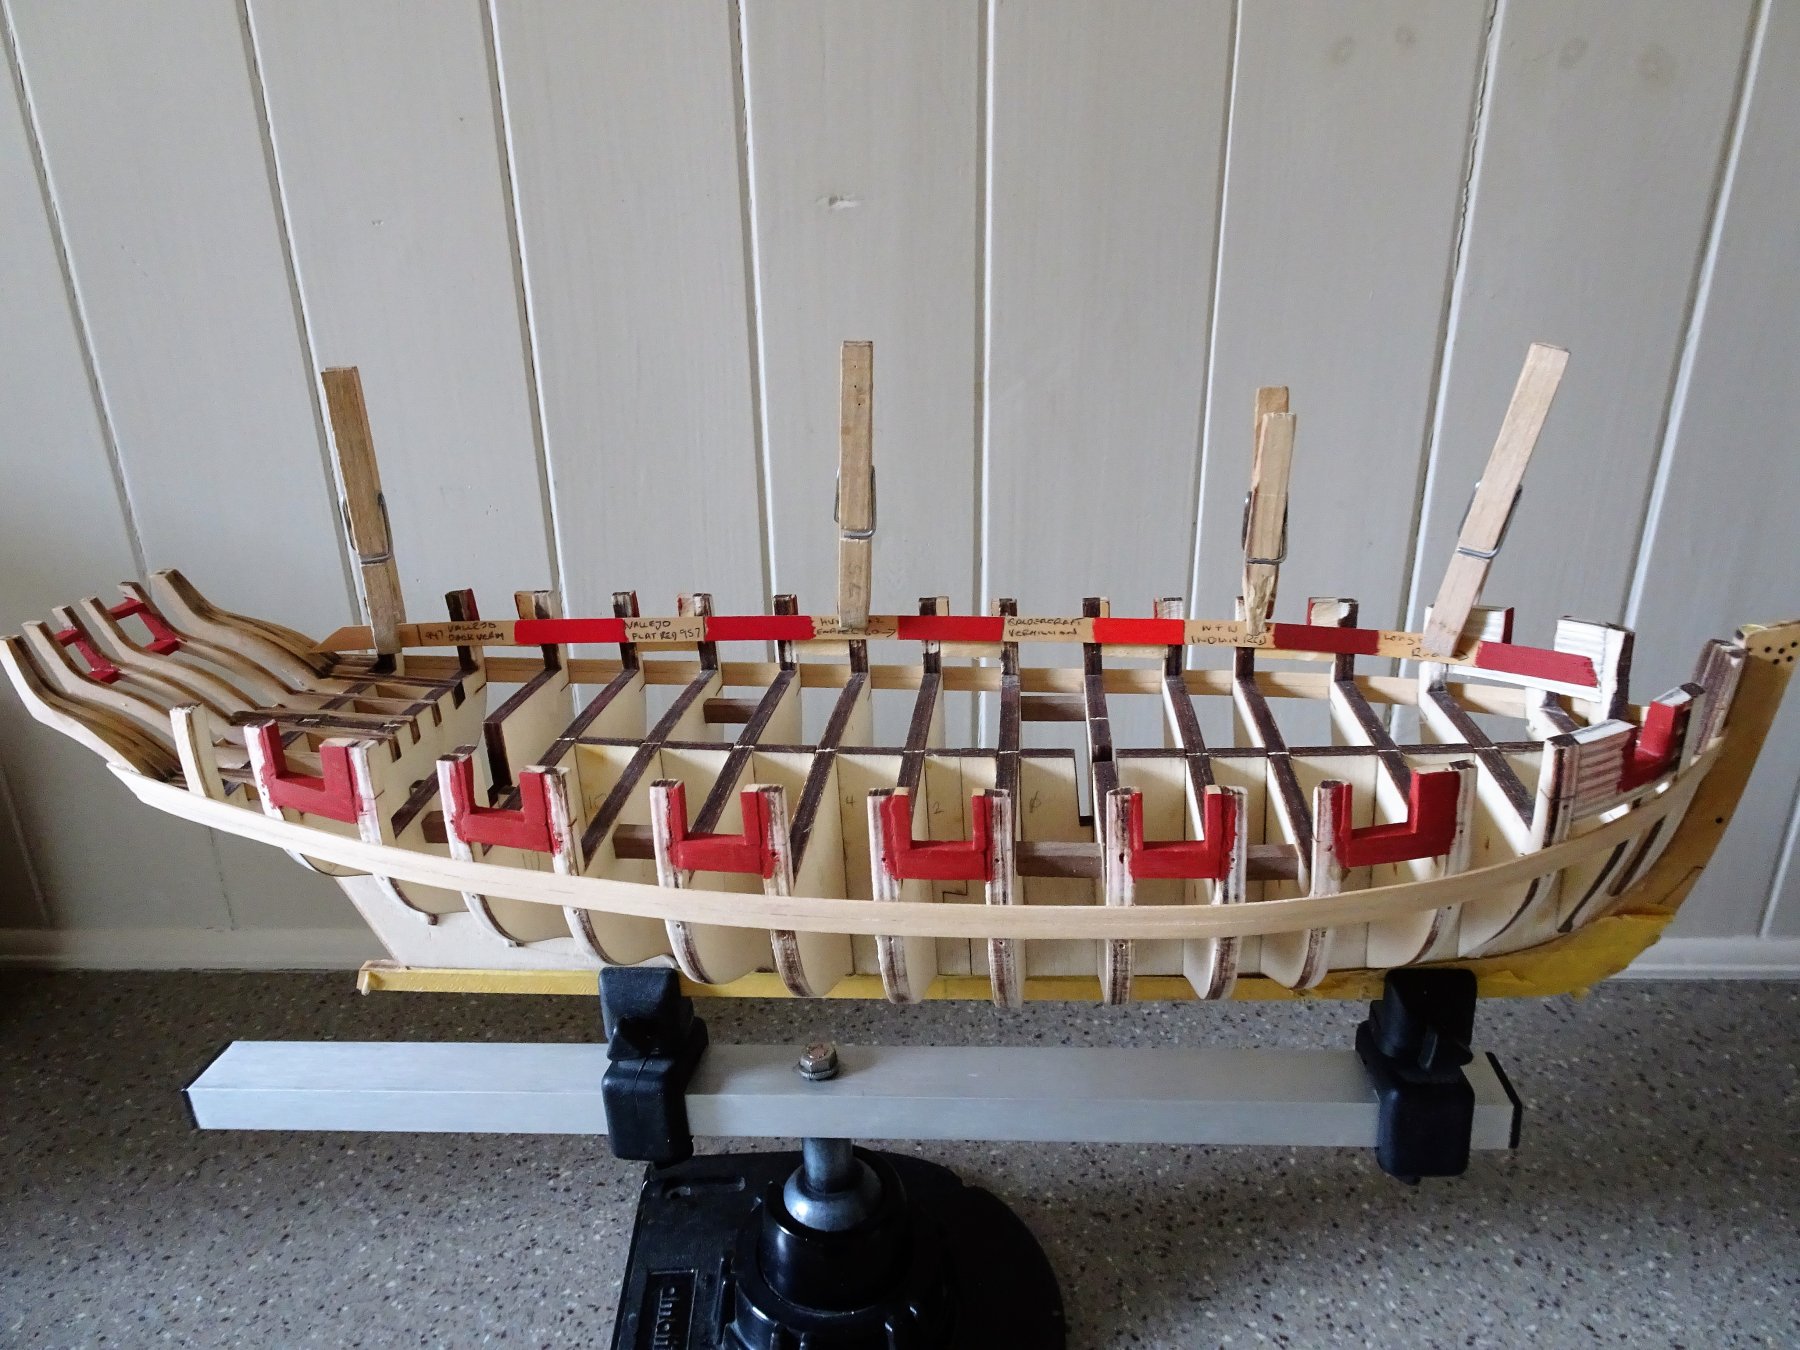
Post 14 Deciding on the paint colour There is a fair amount of paint on this build, more so than my previous builds, so I was concerned to get a shade that both suited my eye but reflected the more subdued tones of the early 19th c. I had mixed paints for the Pinnace and Long boat builds that gave a brighter shade than the Admiralty brand Red Ochre (as I used on Pegasus) but I was hoping to find a ready mixed paint that suited. I am not too fussed about whether the paint is enamel(as with Humbrol) or water based. The paints I am trialling are: Humbrol 14ml Matt Scarlet enamel paint # 60 Caldercroft Admiralty water based Vermillion Vallejo 031 17ml Flat Red Acrylic Paint # 957 Vallejo 029 17ml Dark Vermillion Acrylic Paint # 947 Windsor and Newton Indian Red oils. I made up paint samples on a Boxwood strip for comparison purposes. 5202 Taken outside, bright daylight. 5204 outside close -up 5216 indoors natural light 5218 Indoors natural light/warm white leds. The W&N oil was too dark and has the disadvantage of taking a long time to dry. The Admiralty Vermillion, and Vallejo Dark Vermillion were too bright and altogether the wrong shade of red. The choice came down to Vallejo Acrylic Flat Red and Humbrol matt scarlet enamel. 5219 Vallejo on the left, Humbrol on the right. Colour of course comes down to individual perception, varying light, and monitor differences, but on balance I have decided to go with the Vallejo acrylic flat red. It is slightly darker than the Humbrol and has the advantage of quicker drying and water clean up. It feels better to me, and small amounts can be delivered into a pot for use. I can now proceed. B.E. 15/02/2018


- 574 replies
-
- 20
-
-
- cheerful
- Syren Ship Model Company
- (and 1 more)
-
Thanks for the info Dave, I will look him up, it’s always good to find a European supplier. Metric sizes are fine, I do all my modelling in metric measurement. B. E.
- 574 replies
-
- 3
-
-
- cheerful
- Syren Ship Model Company
- (and 1 more)
-
A very pretty model beautifully done Bob. I love the look of her with more than a nod to an Admiralty style build. Well done! B.E.
- 682 replies
-
- 5
-
-
- halifax
- lumberyard
- (and 1 more)
-
Heller's Le GLorieux: Copper Sheathed Hull?
Blue Ensign replied to Kriegmeister's topic in Plastic model kits
The definitive authority on the French Seventy-four is Jean Boudriot. He notes in his four volume work The Seventy-four gun ship that in 1780 sheathing was far from being in general use in the French Navy and lists only seven frigates having been coppered as at 31 January 1780. Regarding Ships-of-the-line he comments that the navy remained cautious even tho' a number of them will be coppered shortly. Glorieux was rebuilt in 1777, and was lost in September 1782, following capture. Apparently the French were surprised at the speed of the coppered British fleet which gives some credence that the French fleet was not coppered. We also know that De Grasse's fleet was off Yorktown in September 1781, before sailing to the Caribbean, so post 1780 there would have been a very short window to copper Glorieux On balance I think perhaps that she was not coppered, but whatever you decide nobody will gainsay you. Good luck with your project. B.E. -
Thanks,Paul, druxey, and diablo, for your kind words, much appreciated. B.E.
-
Hi Dave, I did have a quick look for 1.5mm ply in the UK, but nothing immediately came up. I suppose the advantage of Lime wood / Basswood is that it’s easy to cut. Best wishes for a successful op in March and a speedy return to your build. Regards, B.E.
- 574 replies
-
- 1
-
-
- cheerful
- Syren Ship Model Company
- (and 1 more)
-
Although I have to work in metric, our materials are now mostly sold in metric, I still think in imperial. Weights in particular I visualise in imperial, and I also still convert petrol in litres to gallons in my head as I’m filling the car up. Old habits die hard. Maybe we’ll convert back when we leave th E.U. - but I’m not holding my breath. B.E.
- 574 replies
-
- 2
-
-
- cheerful
- Syren Ship Model Company
- (and 1 more)