
HOLIDAY DONATION DRIVE - SUPPORT MSW - DO YOUR PART TO KEEP THIS GREAT FORUM GOING! (Only 75 donations so far out of 49,000 members - C'mon guys!)
×
.JPG.ca33079f5815b861e67b9c2cccd37982.JPG)

Blue Ensign
-
Posts
4,565 -
Joined
-
Last visited
Content Type
Profiles
Forums
Gallery
Events
Everything posted by Blue Ensign
-
 Well done Dave, cutters make such attractive models, and yours is a fine example. B.E.
- 362 replies
-
- 1
-

-
- Amati
- Lady Nelson
- (and 2 more)
-
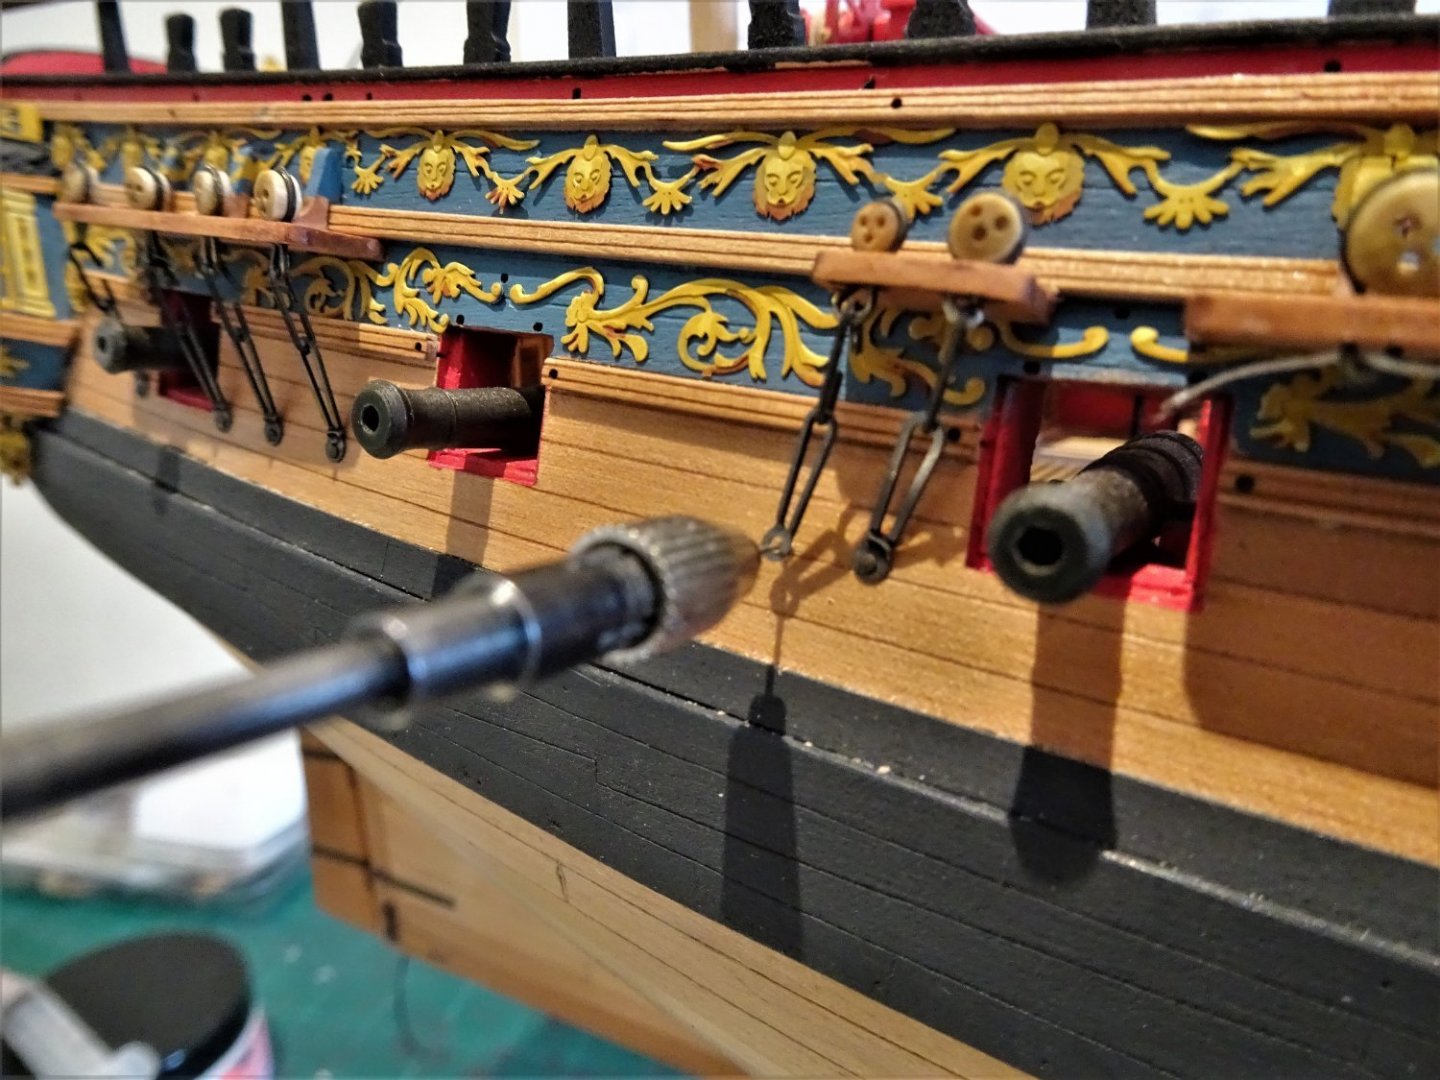
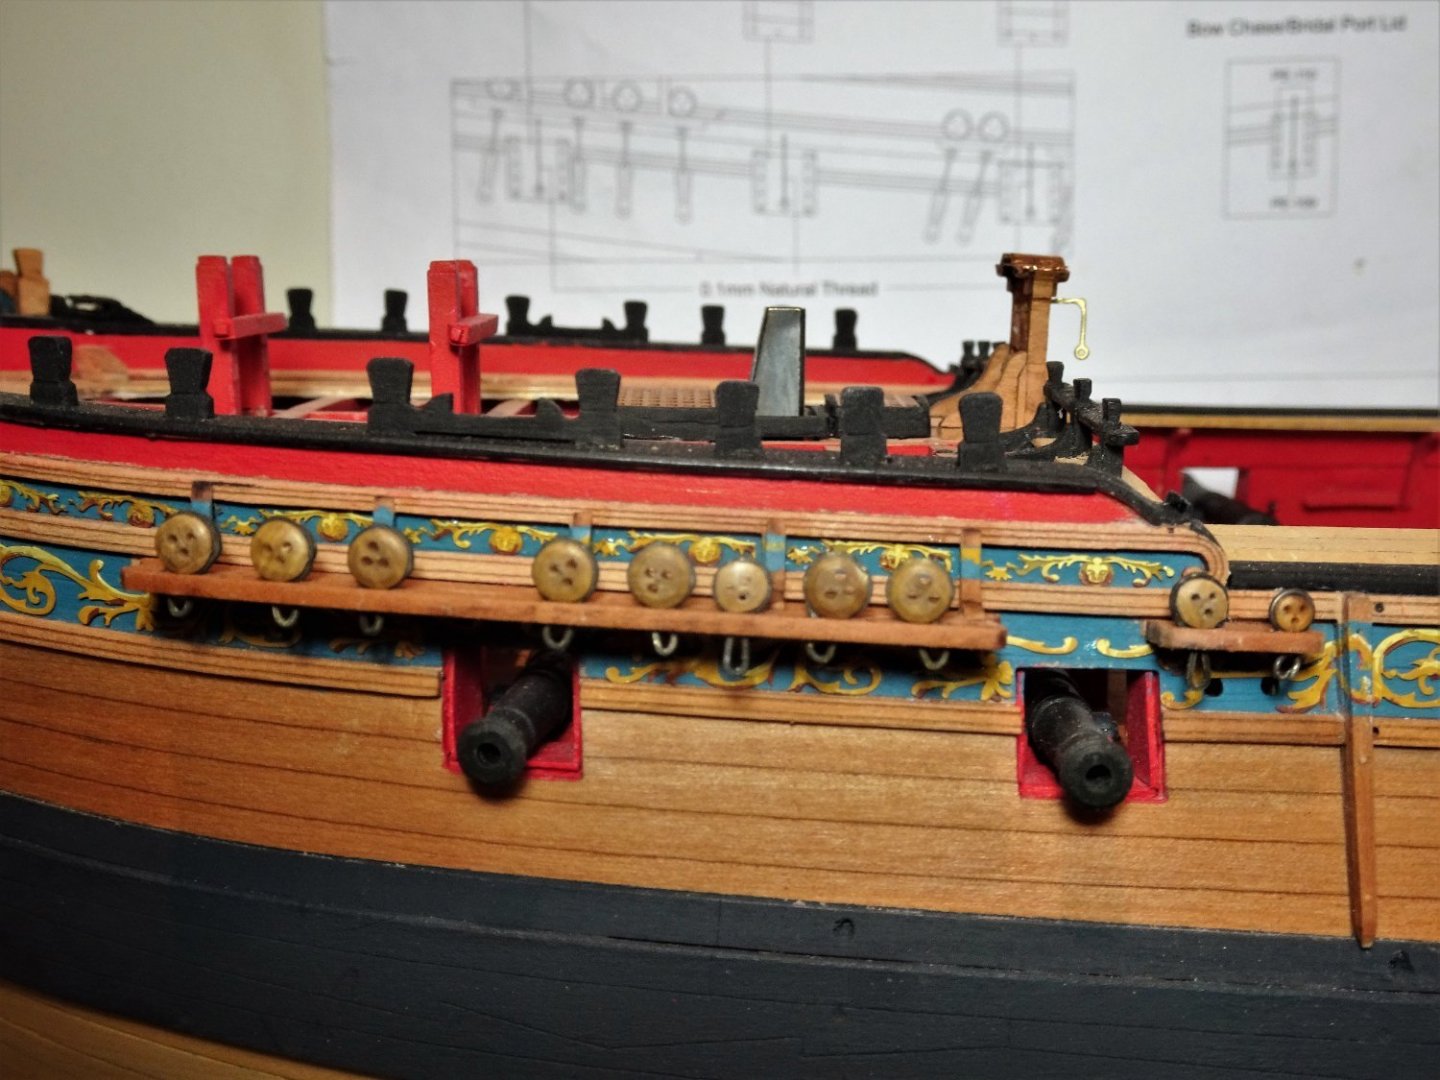
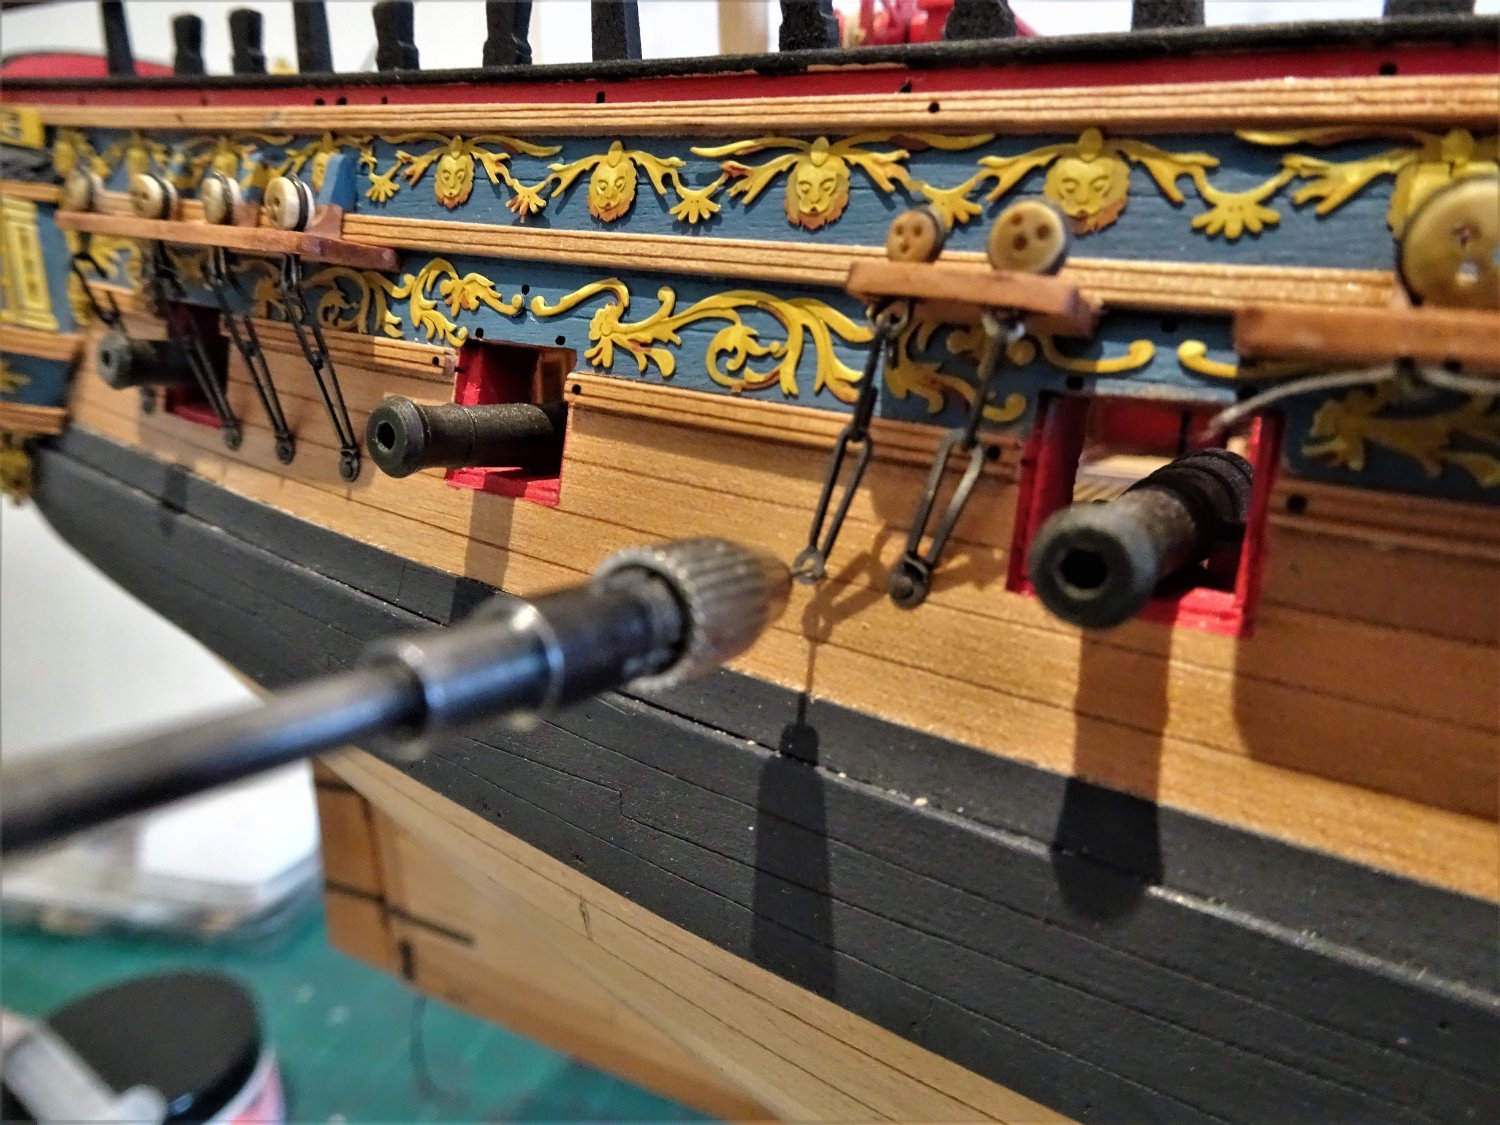
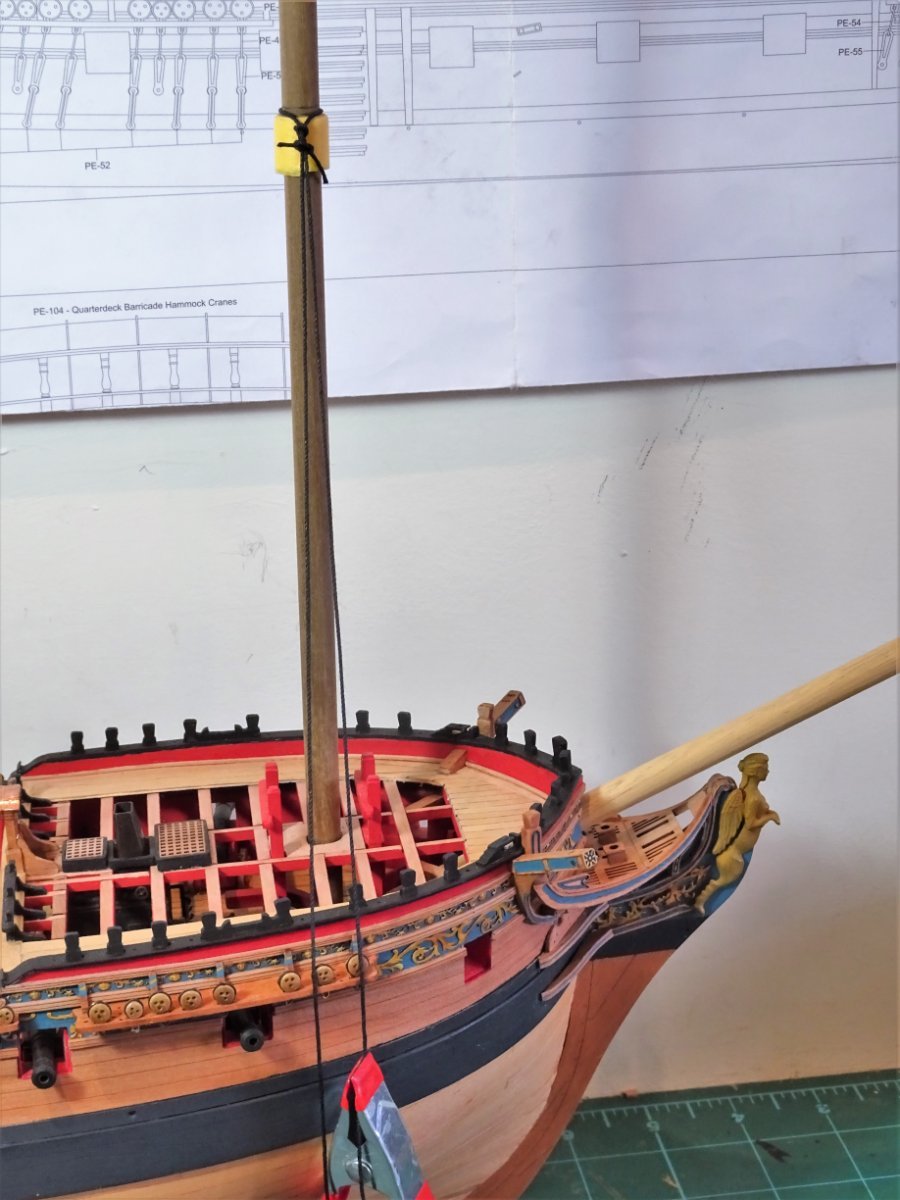
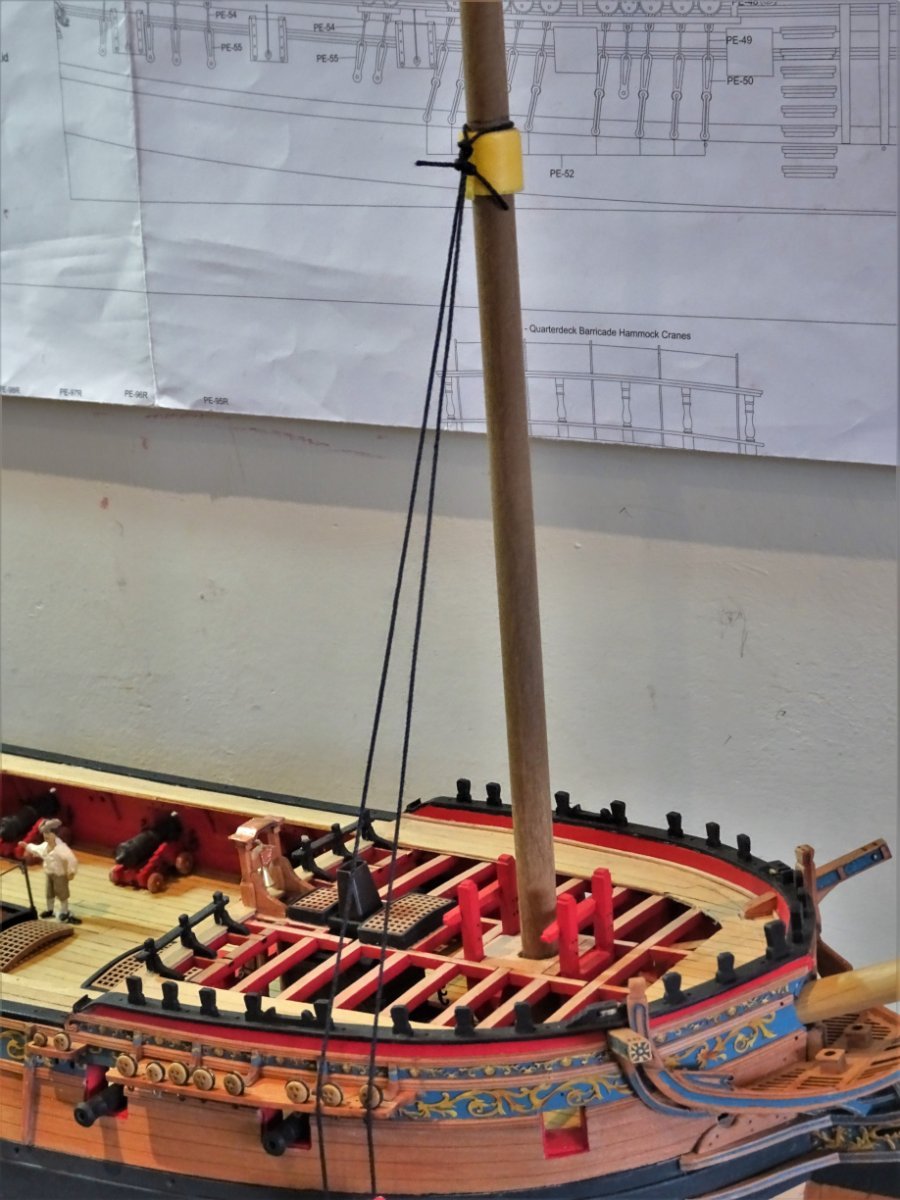
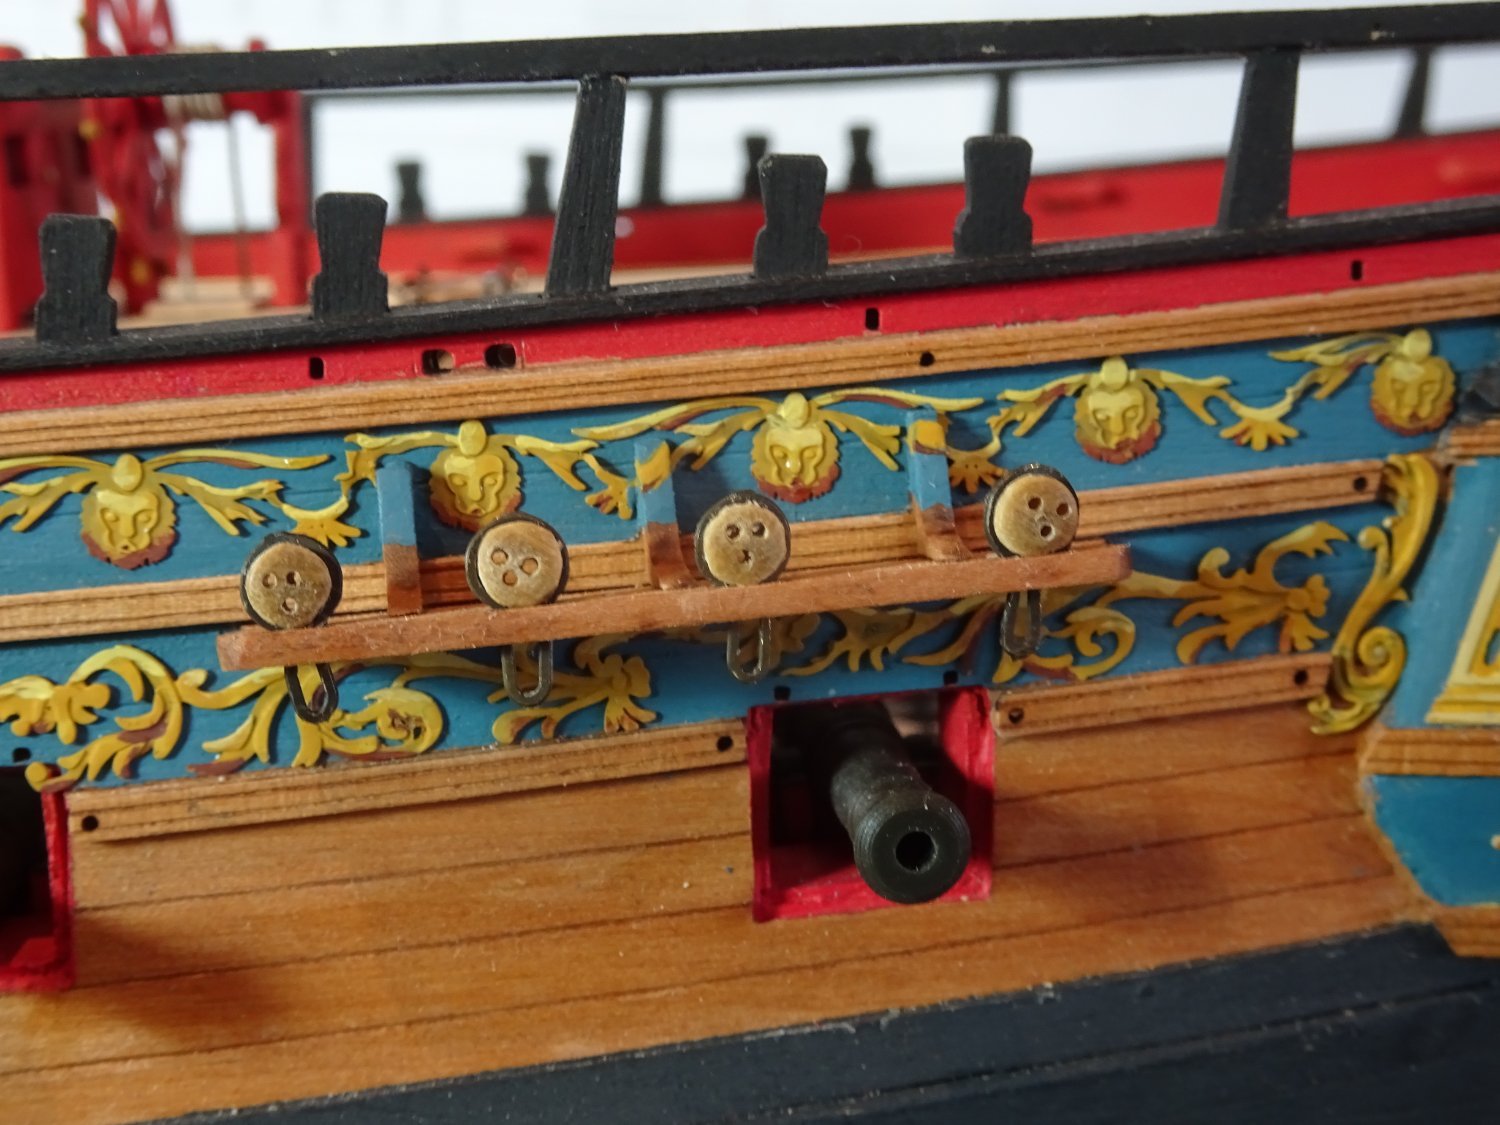
Post One Hundred and Thirty five Fitting the chains There is a fold line on the Lower chain link which allows it to sit flush with the hull. Against this the top of the preventer plate is bolted, and you will note that this too has a slight rebate in the top end where it joins the lower link chain. I needed to check them carefully before fitting as the blackening reduces the clarity of these features. Fitting the preventer plates raised a question in my mind. The kit arrangement appears to have them with a gap between the hull and where they bolt to the Black strake at their lower end. My understanding is that these should be flush with the hull at all points and were cranked slightly to fit over the Black strake. Careful pressing of a hard edge just above the strake produces this effect. On Sphinx the bottom fixing of the preventer plates (PE51/PE52) run along the top-line of the wale, which provides a useful fitting guide and the lower link (PE50) joins this at the top end. In reality the middle links (PE49) varied in length as appropriate to each deadeye fitting, the preventer plates and lower chain links remaining constant. I am prepared to make replacement middle links if required using 0.5 mm ø brass wire which is scale to the 1¼”ø iron applicable. My approach; The lower chain and middle link are brought together thro’ the deadeye loop and trial fitted for line -up against the preventer plate top hole with the plate in the desired position. The preventer plates are then fixed with a bolt thro’ the bottom fixing. The shroud line is used to mark the position. Once satisfied, the pin is driven thro’ to secure both preventer plate and lower chain at the upper end. Fitting these things is a tiresome business made more so by my Amati keel clamp having developed the alarming habit of lurching violently in one direction or other without warning. I suspect that the ball and cup which allow it to rotate have worn like an old hip joint after many years of use. Time was taken out for a bit of remedial surgery. 7351 It took most of a day to fit one side of the Fore channel, and fortunately fiddling with the middle link proved unnecessary. 7340 7342 The backstay and Mizen chains are much simpler to fit having no preventer plates to consider. Every thing was going so well until I came to the Main Channels. Here a combination of preventer plate PE52, lower chain PE 50, and Middle link PE49 just simply would not fit. 7345 7344 I tried various combinations of middle and lower links combined with the preventer plates all to no avail. No one else has mentioned issues with this and I am at a loss to understand where things have gone awry. My options appear to be; Fix the preventer plate lower fixing on the wale, which does not accord with the plan - I don't fancy this option. Scratch make smaller middle chains, which I have a feeling may look too small. Ask Chris if he will supply me with a set of the smaller PE51 preventer plates as used on the fore channels. These do seem to match the fit. I will play around further but I think option 3 may prevail. B.E. 29/06/2022


- 857 replies
-
- 15
-
-
- Sphinx
- Vanguard Models
- (and 1 more)
-
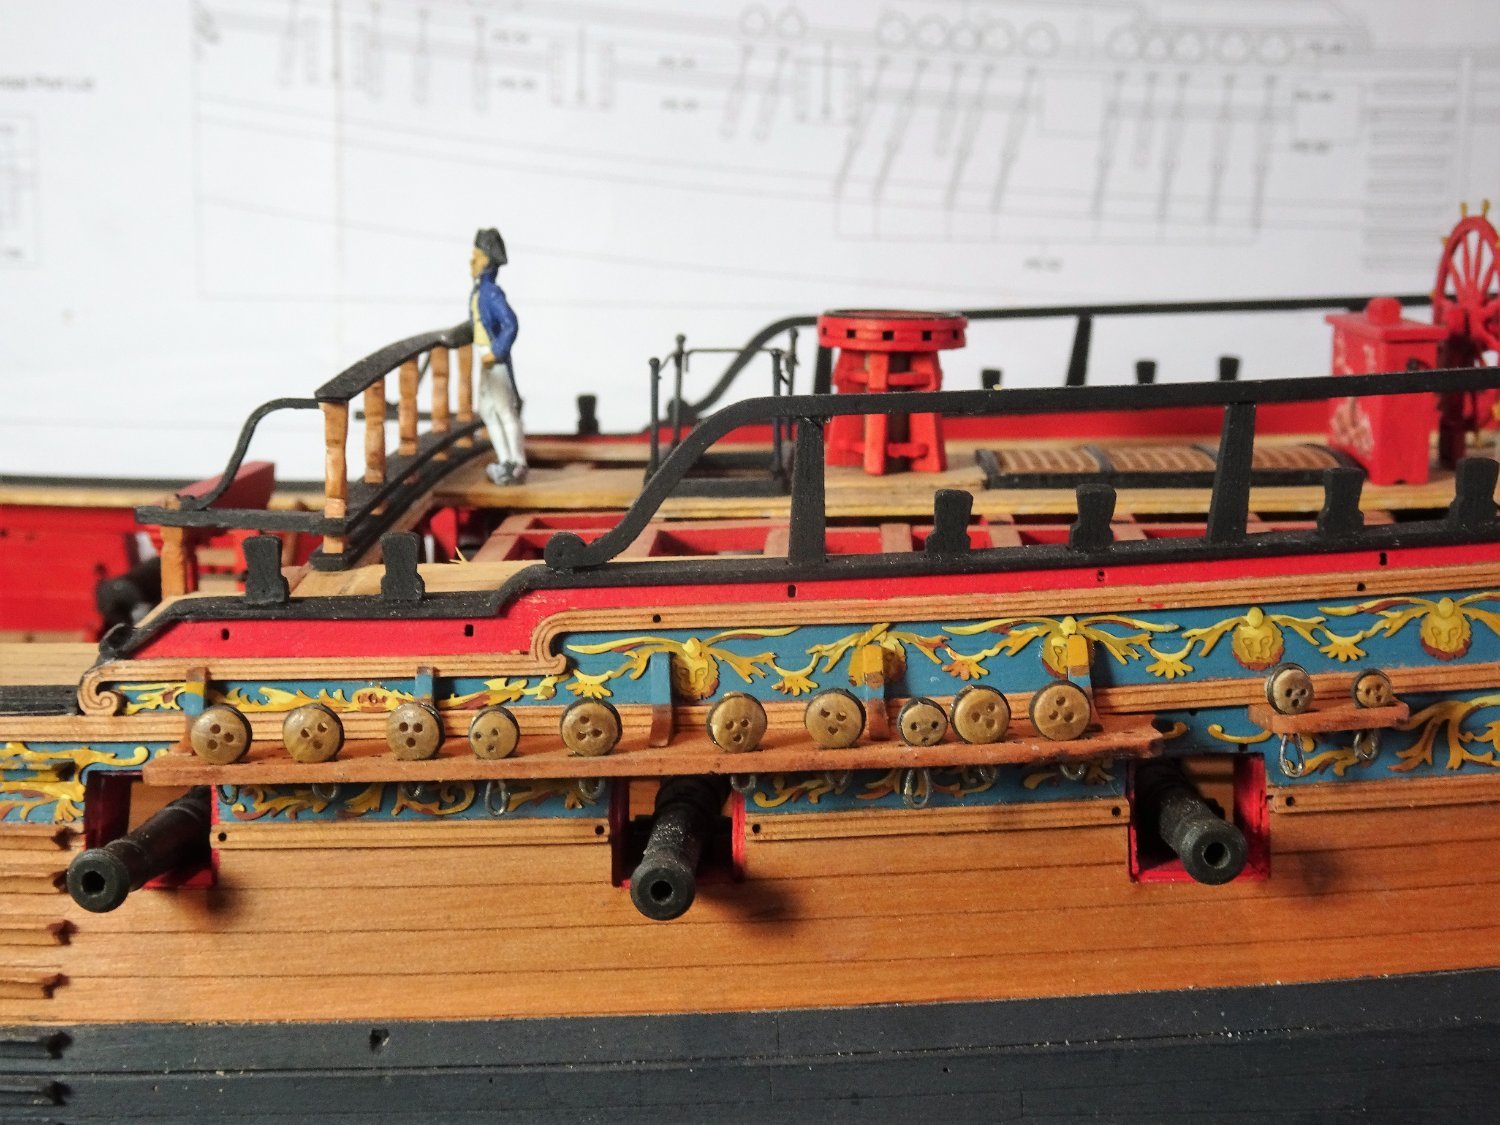
Very nice work Chris, the Hornblower figure looks a great addition to the range.👍 I am still hoping you will take pity on us Sphinx builders and provide a suitable deck figure for scale comparison. I would envisage a uniform of the 1774 issue - back vented frock coat with turned back lapels and cuffs, white breeches and waistcoat, topped with a Tri-corn hat. There are excellent examples in the book Dressed to kill by Amy Miller, (published by the NMM) which covers the uniform development from 1748 - 1857. Hint, hint. B.E.
- 488 replies
-
- 8
-
-
- Indefatigable
- Vanguard Models
- (and 1 more)
-
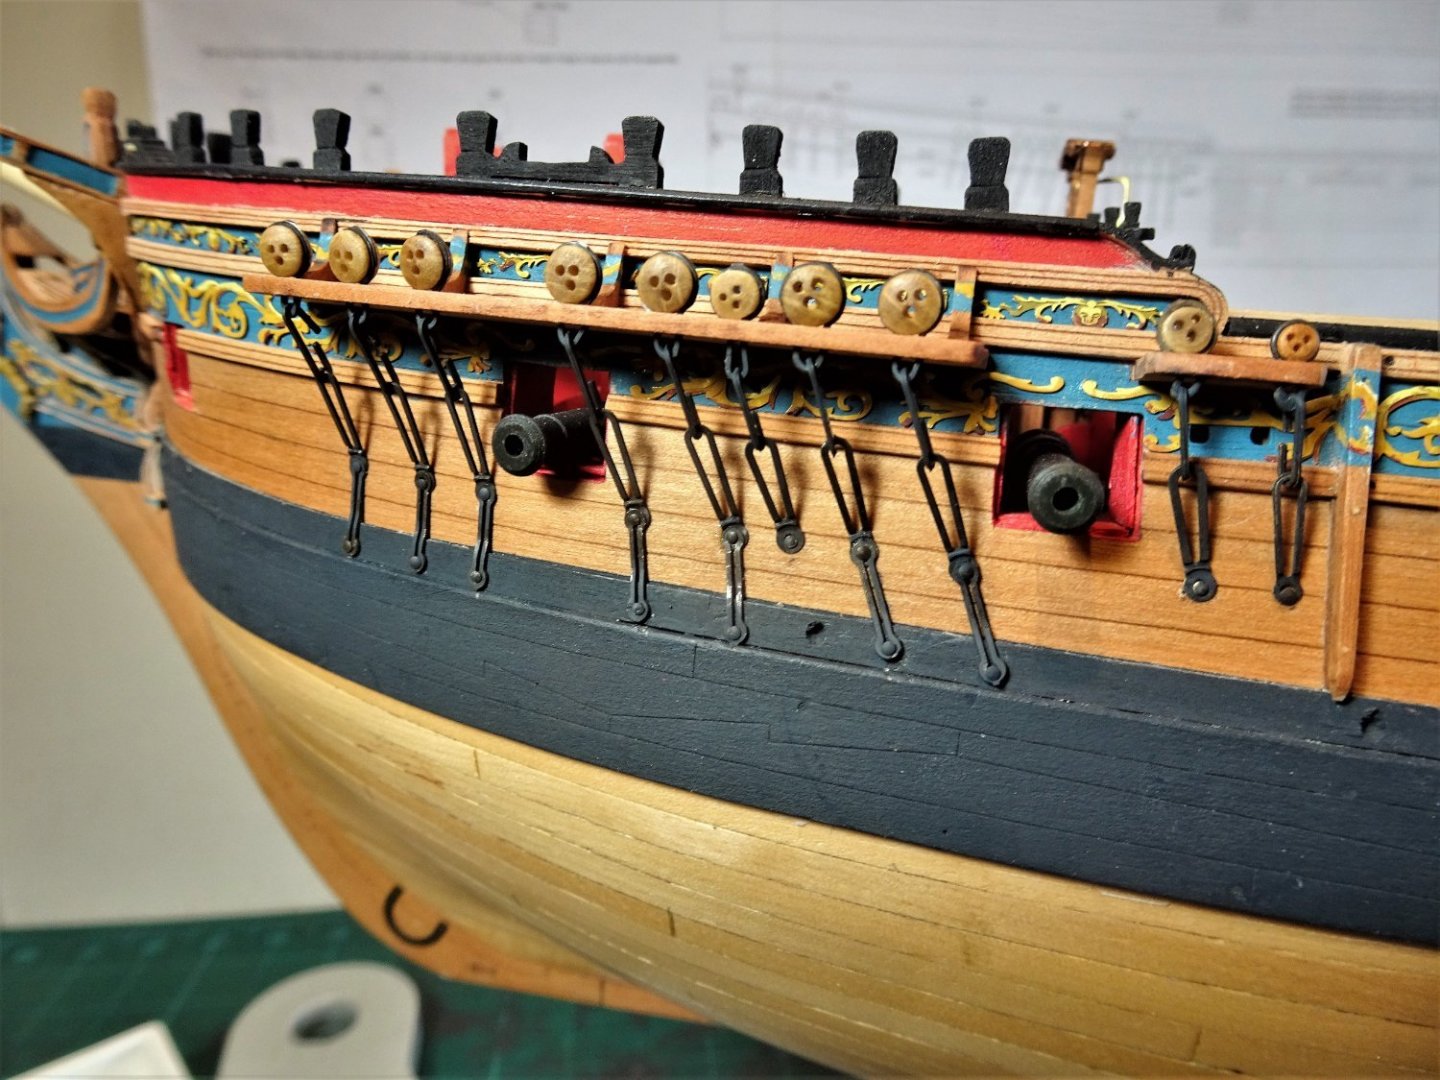
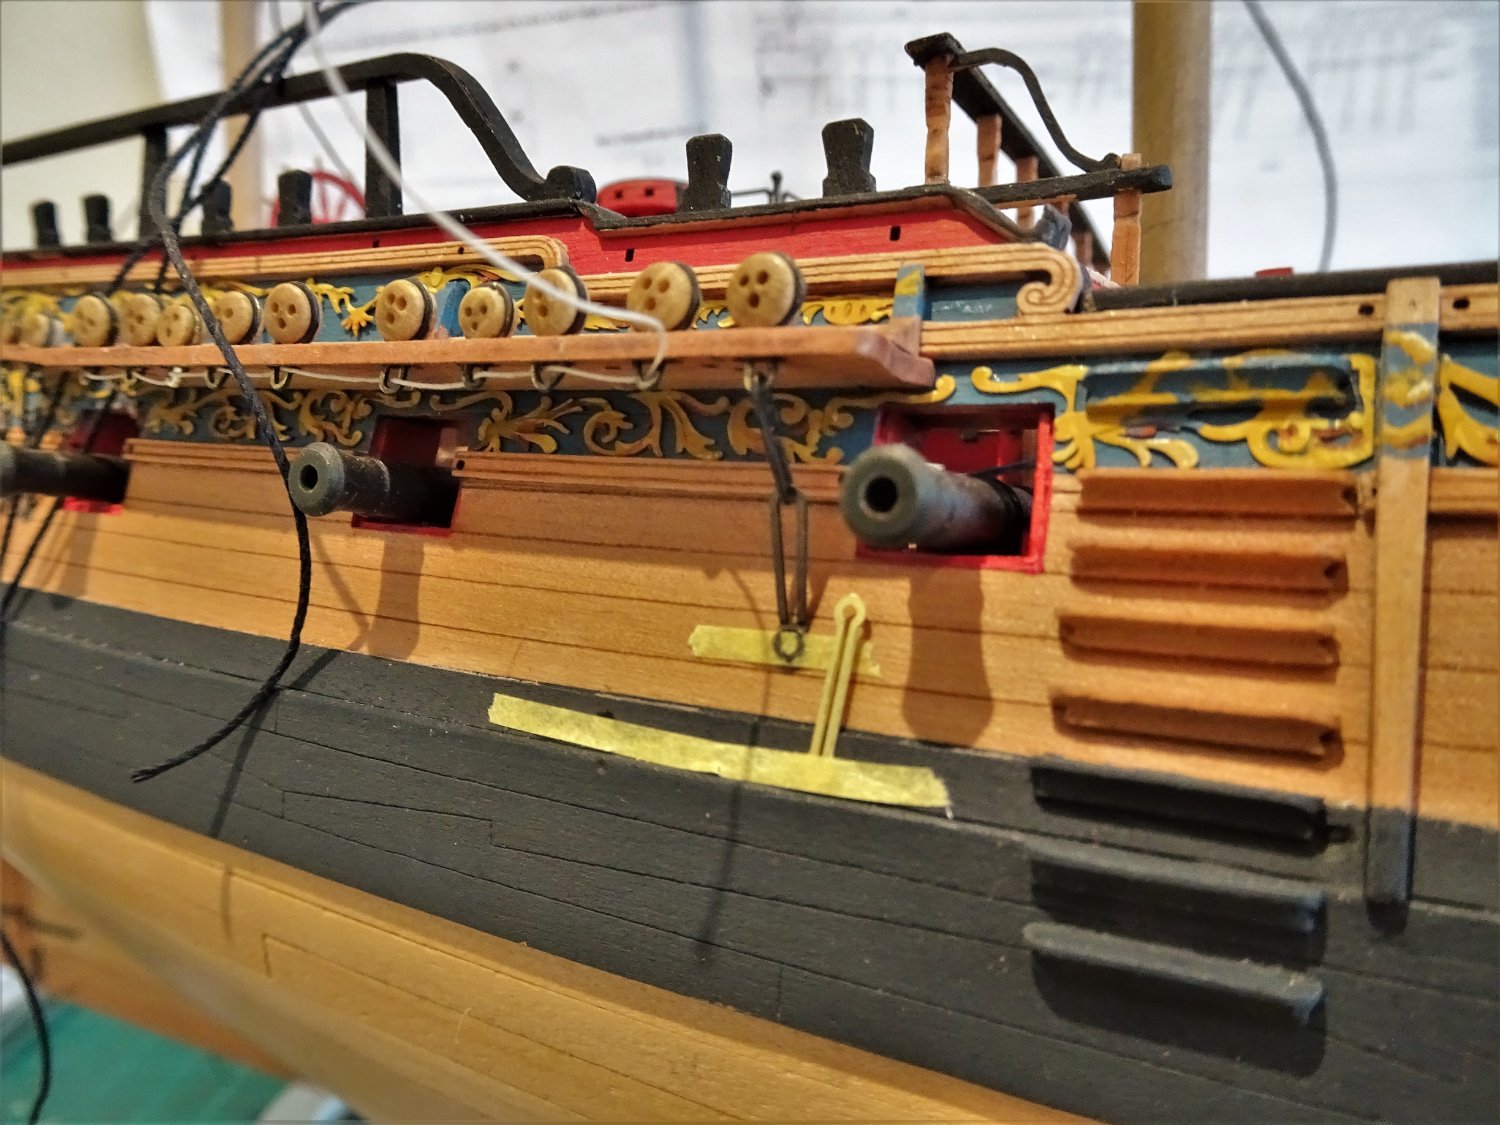
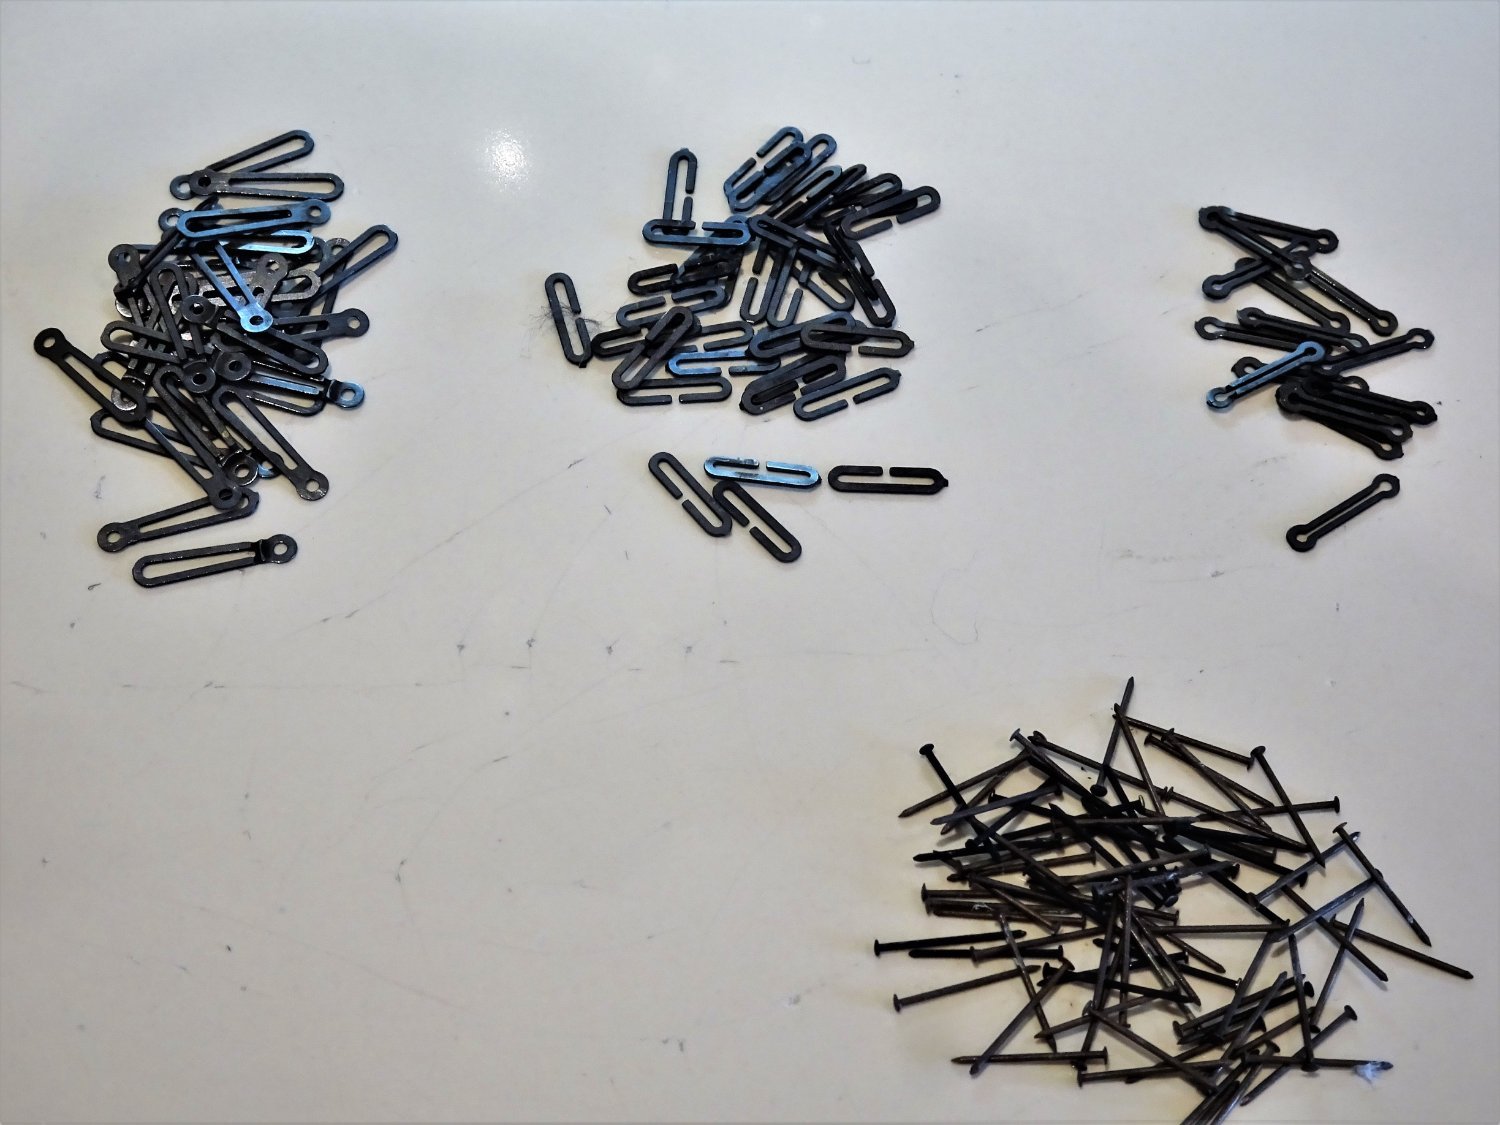
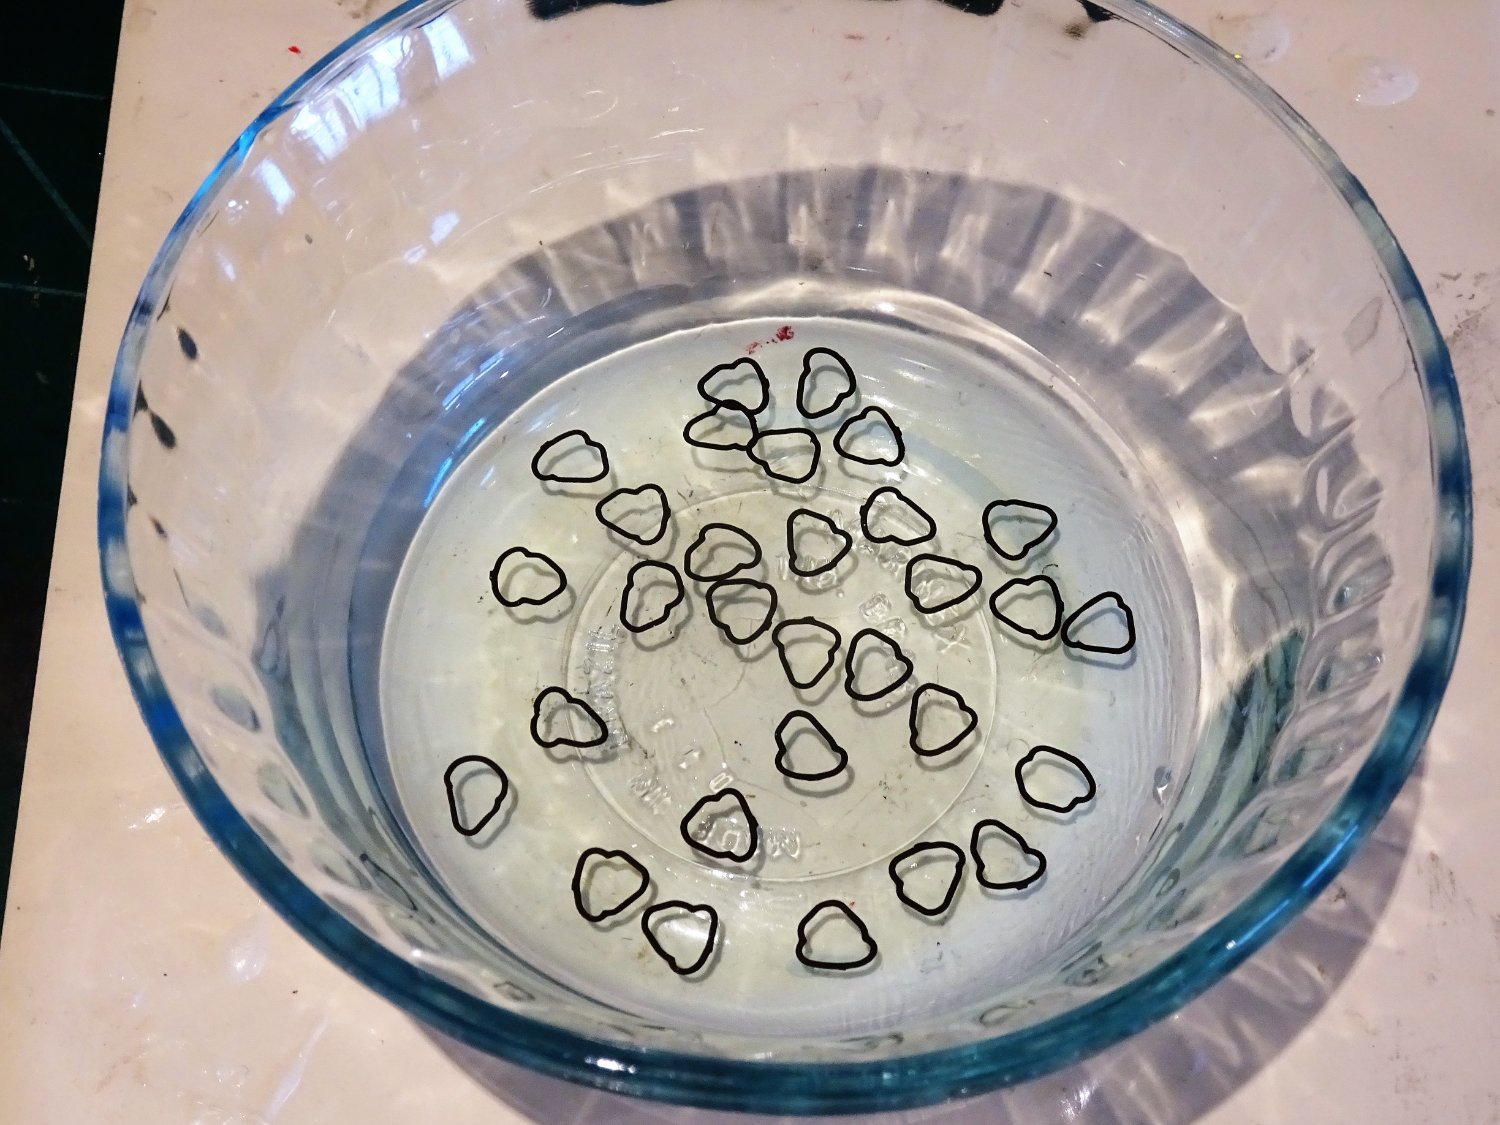
Thanks Ron, I can think of quite a few more superb beaches in Wales it’s my near local playground. Talking of standing stones, on my return I spent an inordinate amount of time trying to download the Starz play app to my TV so I can watch Outlander series 5 & 6, I could have advanced Sphinx a fair bit in the same time, but got there in the end. Post One Hundred and Thirty four Chains and Plates These are all chemically blackened before fitting, a tiresome business with the various stages of cleaning these multiple small parts, but infinitely better than having to make your own. 7325 Once blackened each piece is buffed using a cotton bud to remove the excess blackening. To aid getting the angles right for the Preventer plates along the hull, dowels equivalent to the lower mast lengths at the bolsters are used. 7327 Temporary lines to represent the shrouds were rigged to give the angle for the Preventer plates. 7328 It is a tricky business fitting the preventer plates so that they all line up along the hull and at the correct angles. I expect that adjustment to some of the uppermost links may be required to achieve this. So, my work for the week ahead is set out, what joy! B.E. 26/06/2022


- 857 replies
-
- 22
-
-
- Sphinx
- Vanguard Models
- (and 1 more)
-
Nice shots of the channels and deadeye rigging Ron, I like the realistic look, can barely tell it's a model. B.E.
- 542 replies
-
- 1
-
-
- Sphinx
- Vanguard Models
- (and 3 more)
-
Didn't quite get away from ships during my absence. Rising from the sand, like a sea dragon, the remains of the barque Helvetia wrecked on Rhossili beach in 1887. After 135 years I wonder how much longer before the bow timbers are fully lost to view. B.E. 24/06/2022


- 857 replies
-
- 15
-
-
- Sphinx
- Vanguard Models
- (and 1 more)
-
Looking very sharp, - well done👍 B.E.
-
Nice job on the rat lines Ron, I’m with you on the ‘eyeballing’ method, I found a pattern behind the shrouds got in the way of my clove hitching. B.E.
- 542 replies
-
- 1
-
-
- Sphinx
- Vanguard Models
- (and 3 more)
-
Nice taut lines Rusty, I think you've mastered the Crowsfeet malarkey. 👍 B.E.
- 201 replies
-
- 2
-
-
- Duchess of Kingston
- Vanguard Models
- (and 1 more)
-
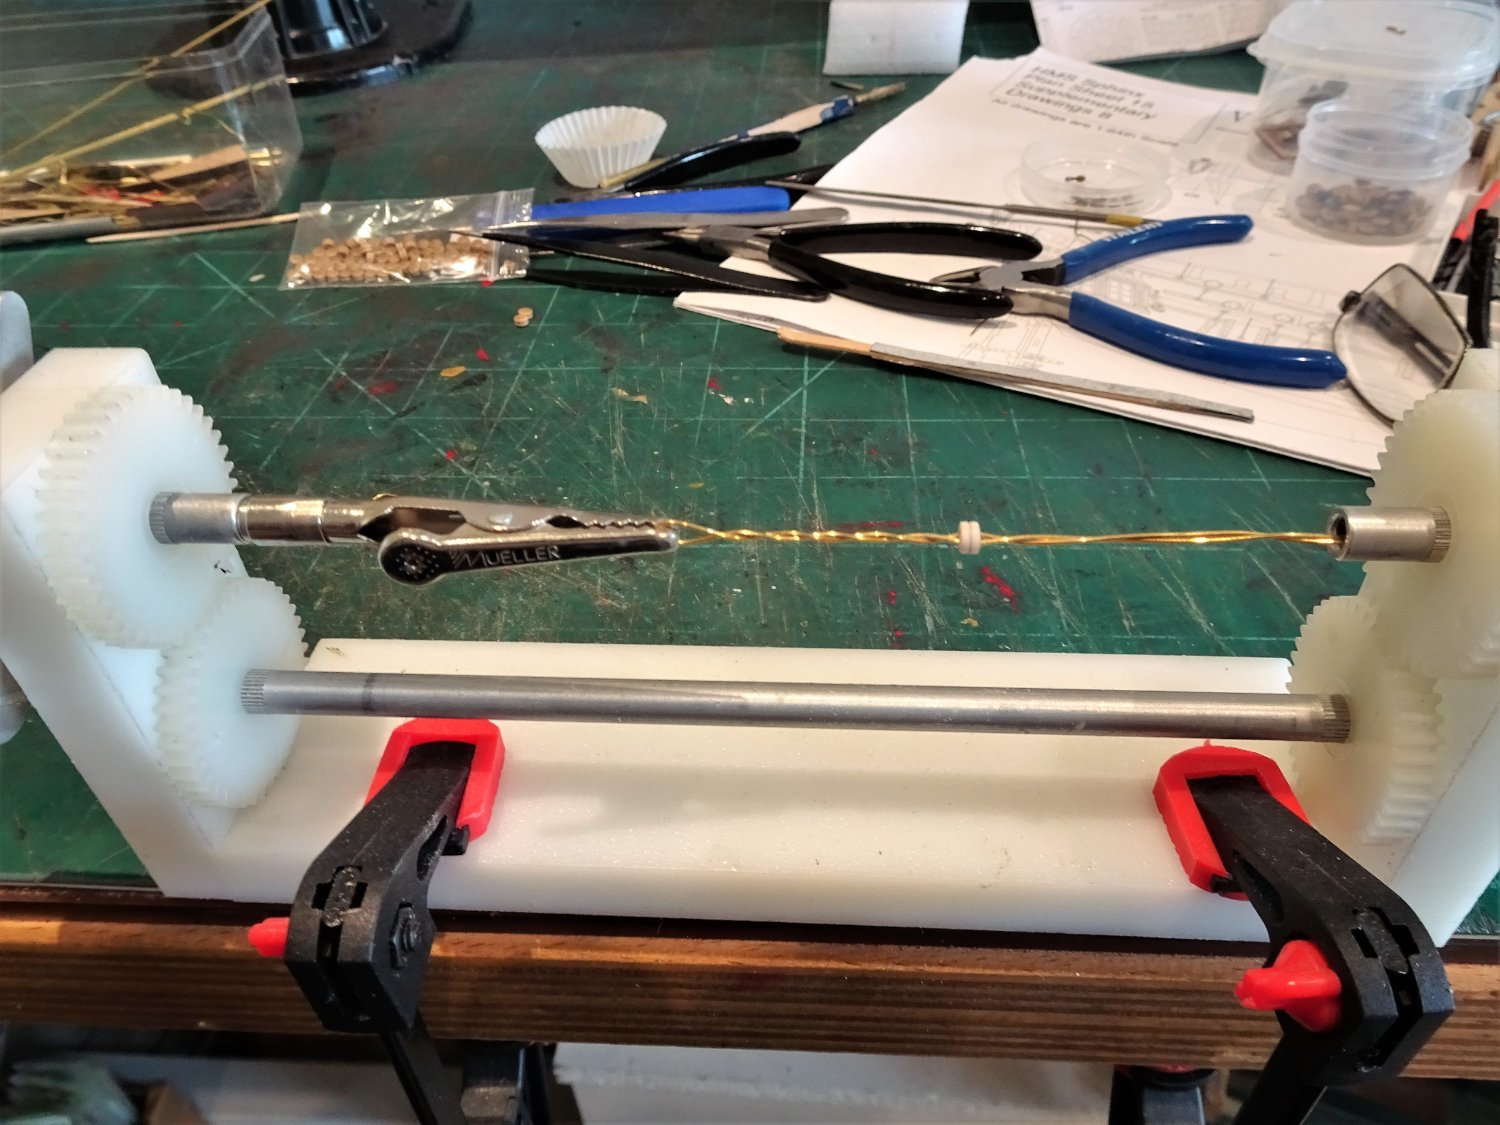
Post One hundred and thirty three Channel deadeyes re-visited With extra supplies received I have re-checked the deadeyes for misplaced holes, replaced some, and re-made others. With these standard deadeyes there is an outboard face usually better finished than the inboard face, and even if the holes are ok from outboard quite often they are out of line on the inboard side. For the Topmast backstays and Mizen shrouds I have re-made the deadeyes using the kit 3mm + stock deadeyes which have been reduced in circumference. 07273 To this end my serving machine was brought into use in an attempt to reduce the size uniformly. Threaded on a taut wire thro the holes, a sanding stick was held against the deadeye whilst turning, it seemed to do the trick. I reduced the circ to the level of the groove and then re-grooved. Some of the strops also needed reducing in size. Finally w-o-p was applied to the surface of the Deadeyes. 07303 Despite all this extra work I prefer the more scale appearance of the now three deadeye sizes along the channels. 07304(2) 07306(2) 07308 The shipyard is closing now for a week whilst we enjoy the pleasures of the Gower Peninsula. Sphinx is secured beneath her protective cover for the duration. B.E. 18/06/2022


.thumb.JPG.81da33774703352d11eb8e37faaa5e10.JPG)
.thumb.JPG.cb154a75f4a643e77f916c076584f6dc.JPG)
.thumb.JPG.5bc579f7f81f2d13358613880b953ae4.JPG)
- 857 replies
-
- 29
-
-
- Sphinx
- Vanguard Models
- (and 1 more)
-
Mine came out exactly the same, altho’ I didn’t use the kit provided Capping rails, Rough tree rails, or swivel posts. I also replaced the lower counter pieces and crutches but this didn’t affect the set up. It is a puzzlement as the sheer line on the model looks as per the kit drawings and photo’s, but I think that on the profile drawings the crutches may be mistaken for the transom giving the impression that the Rough tree rail runs below the top line level of the Transom. The look on the model didn’t strike my eye as odd so I didn’t change the arrangement. I will be interested to see how your revised rail layout looks. Regards, B.E.
- 562 replies
-
- 3
-
-
- vanguard models
- alert
- (and 2 more)
-
Thank you Oldsalt, I'm not in the right mind-set to tackle those brackets yet, but it's a job that can be deferred. Cheers, B.E.
- 857 replies
-
- 2
-
-
- Sphinx
- Vanguard Models
- (and 1 more)
-
Very nice Chris, but I think we of the small but beautiful Sphinx set also deserve our Captain. How about Captain Anthony Hunt, first commander of Sphinx, who took her to war in the Americas in 1776? Even your humble fishers have a skipper. B.E.
- 488 replies
-
- 9
-
-
- Indefatigable
- Vanguard Models
- (and 1 more)
-
That's a clean cut figure Chris, nice sharp detailing even down to the buckles on his shoes. Is he modelled on you? B.E.
- 488 replies
-
- 8
-
-

-
- Indefatigable
- Vanguard Models
- (and 1 more)
-
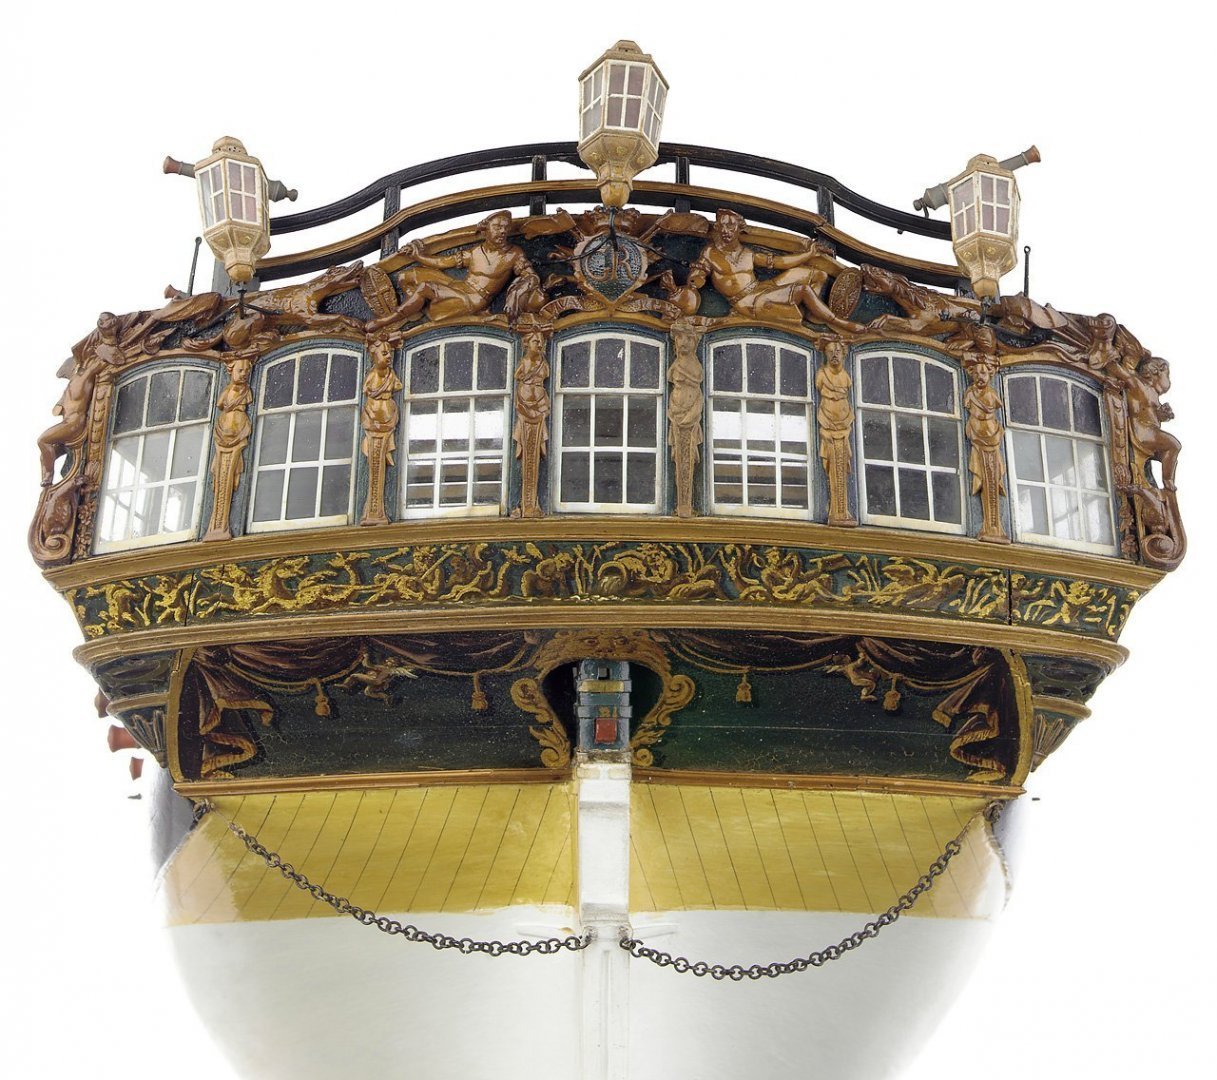
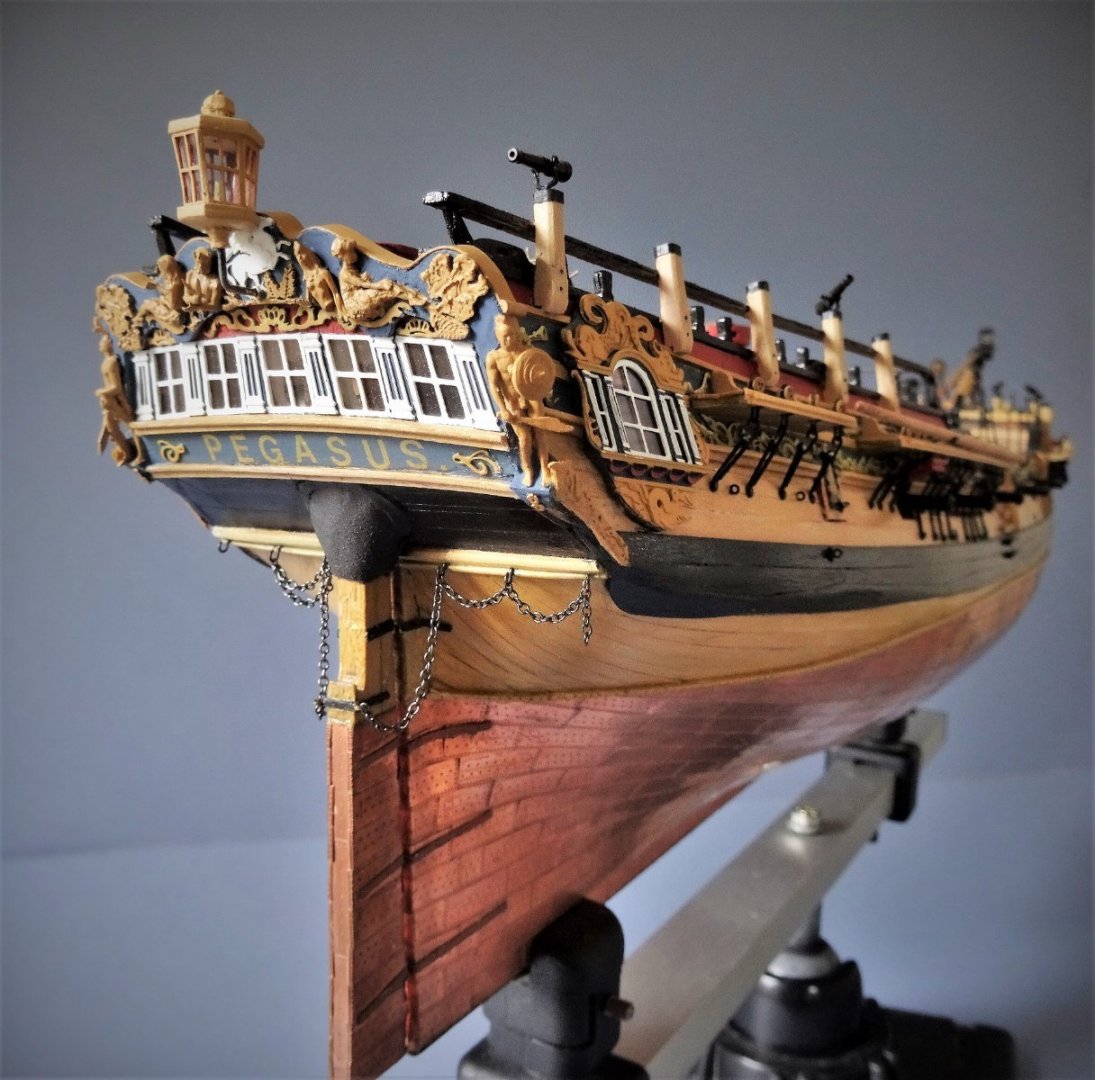
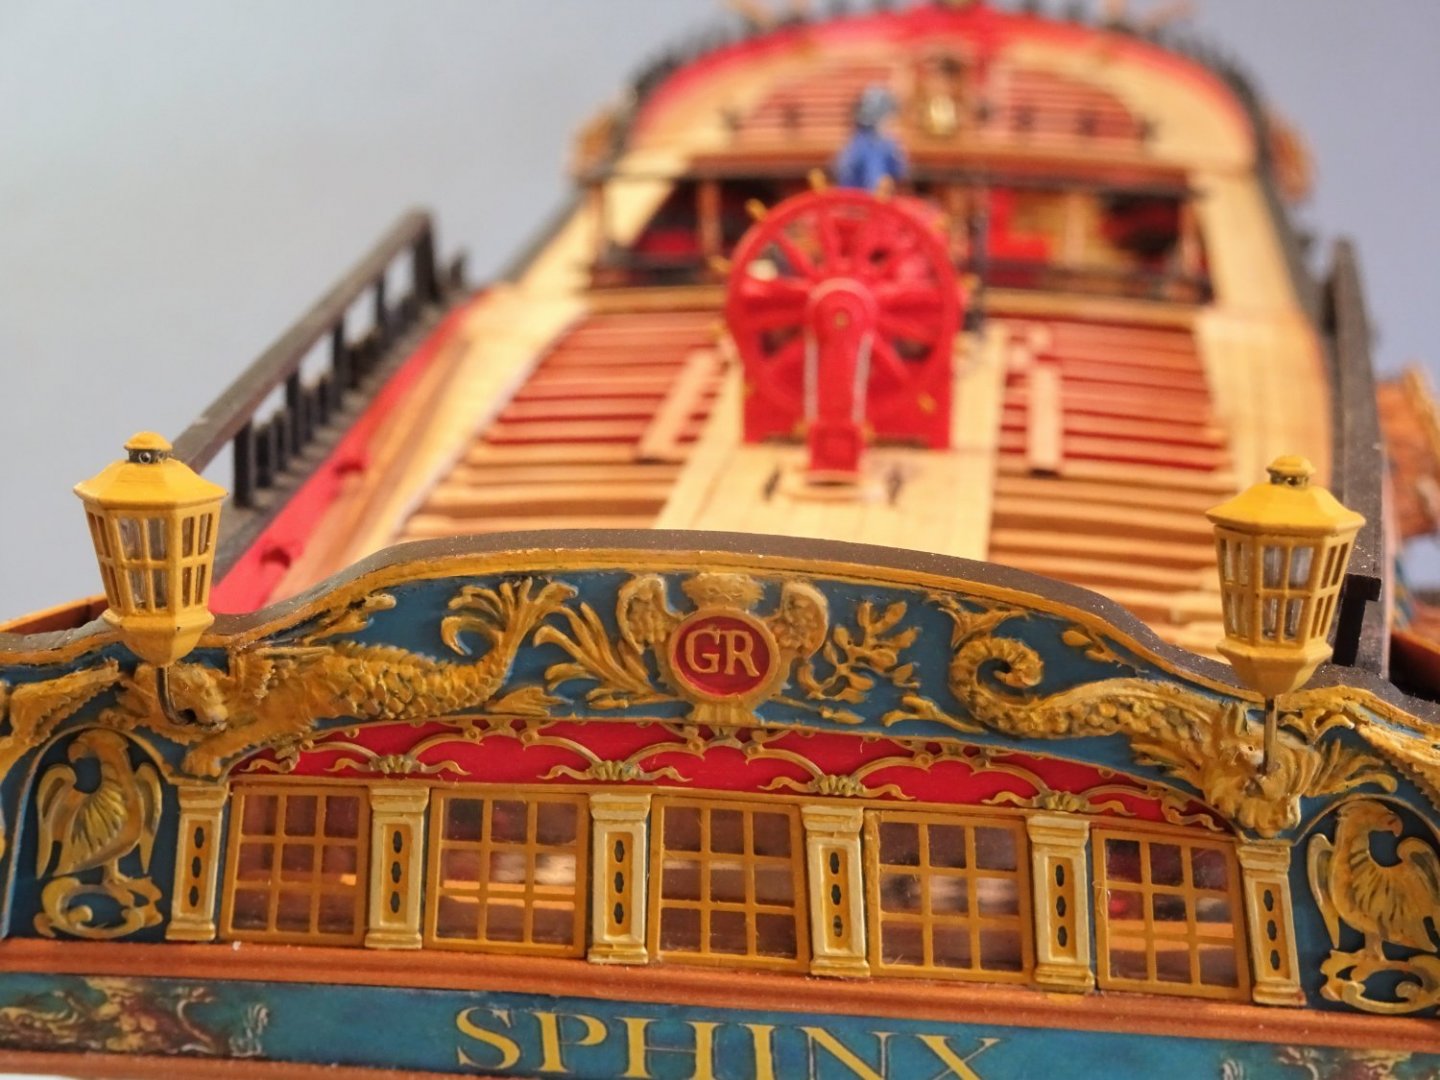
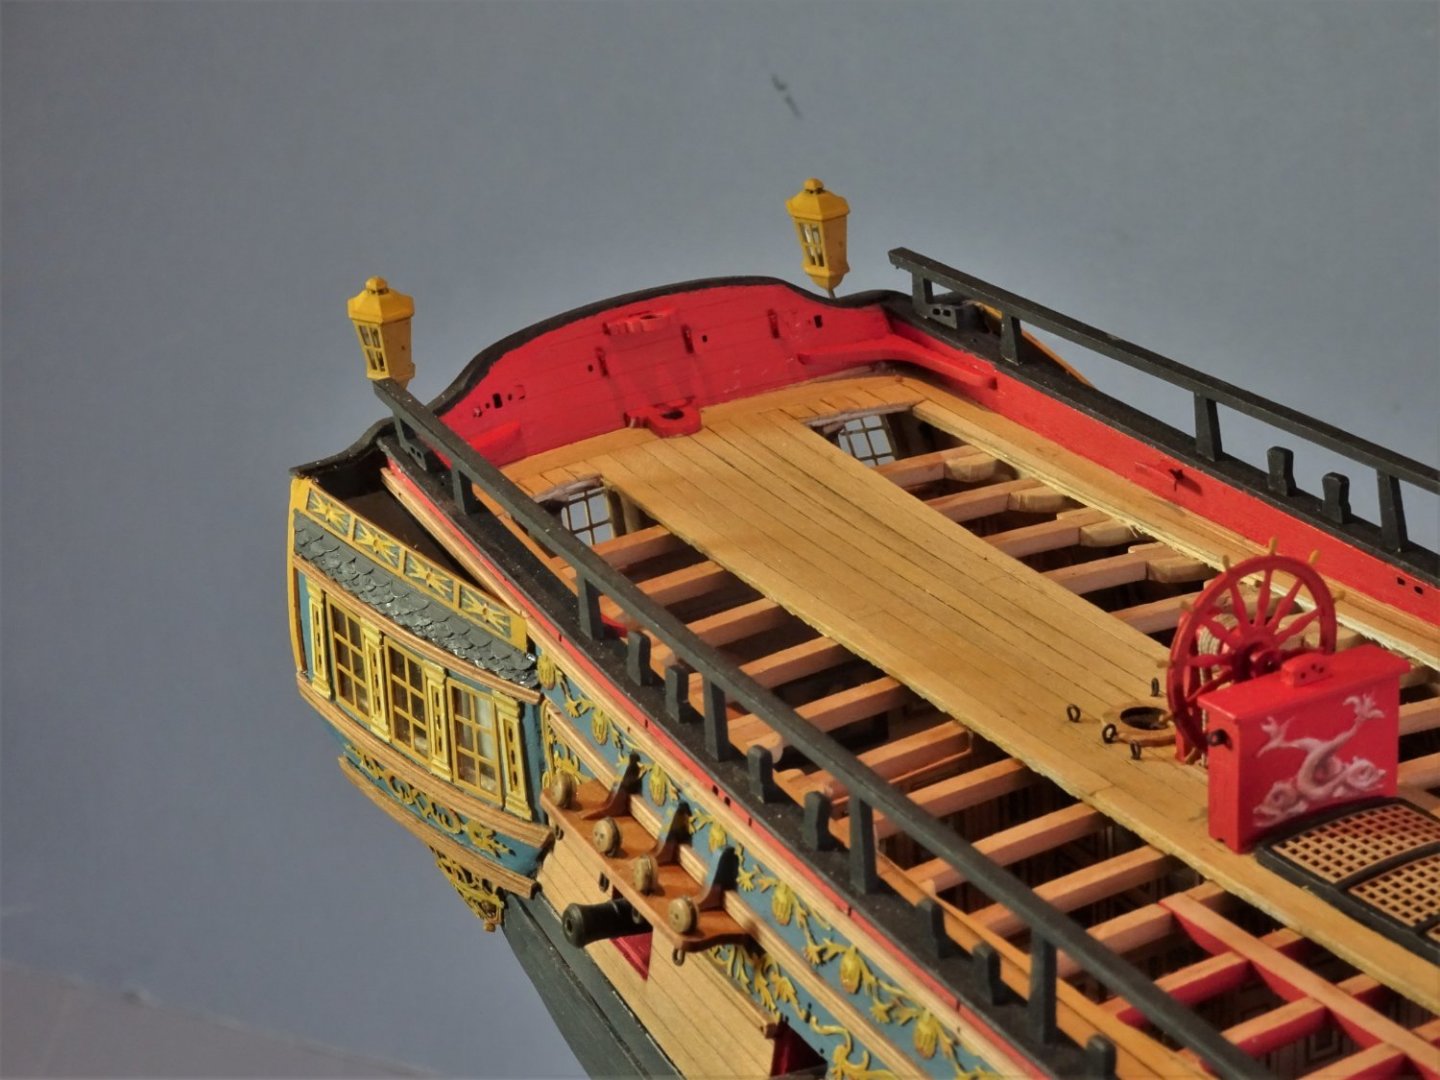
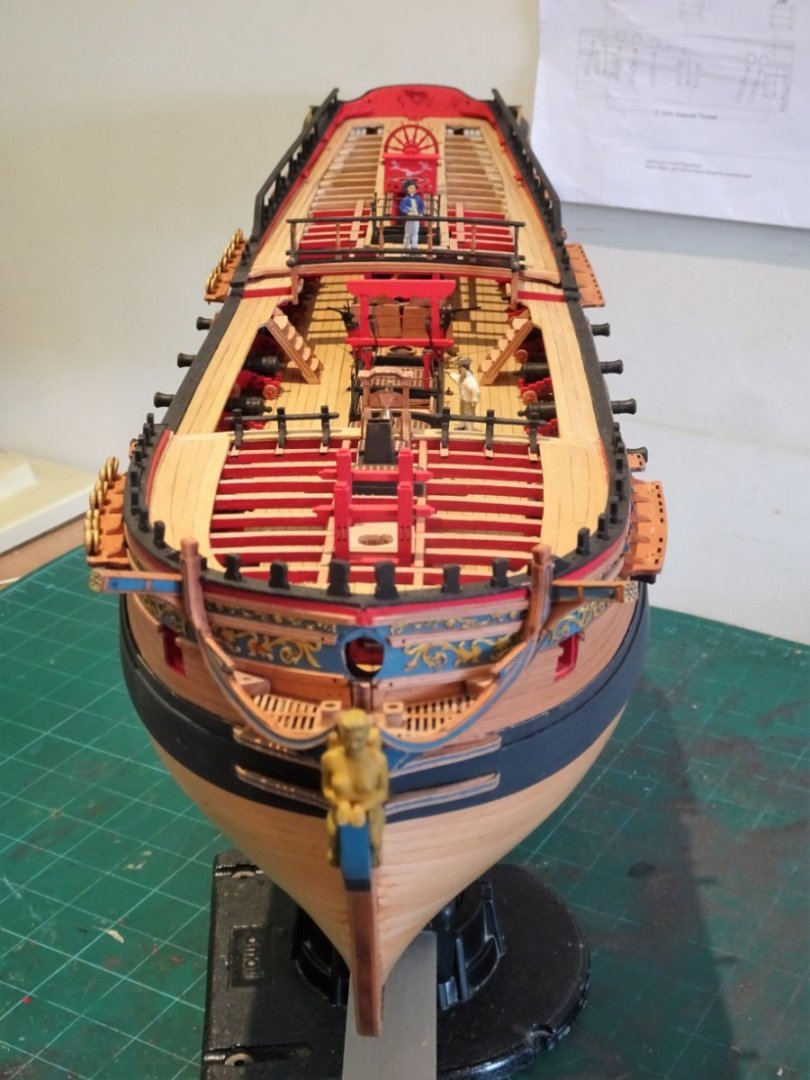
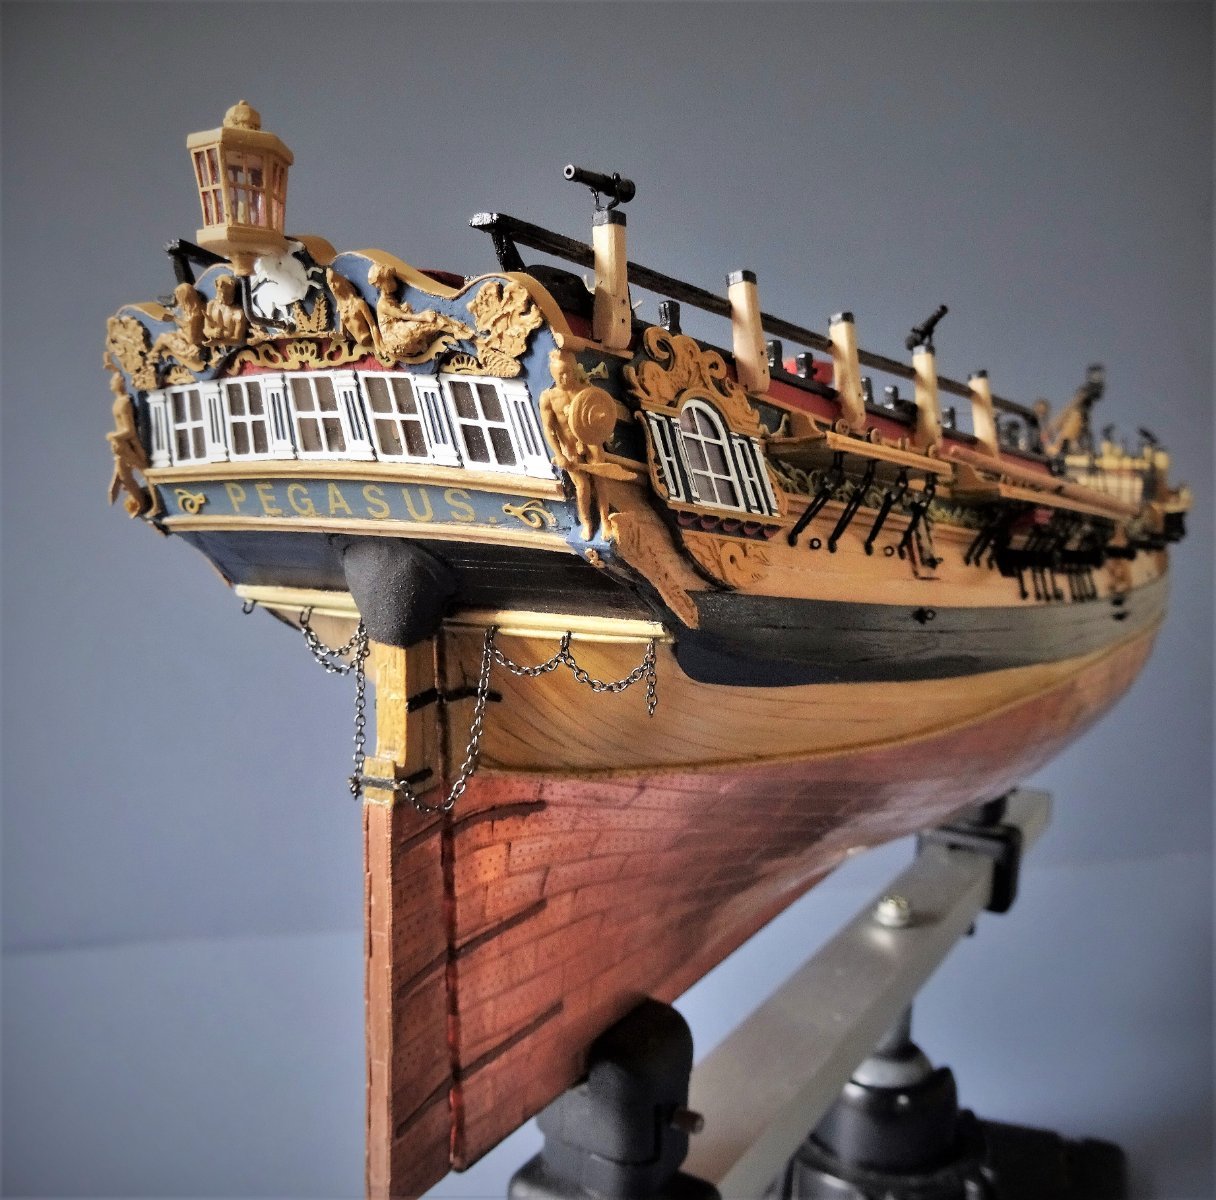
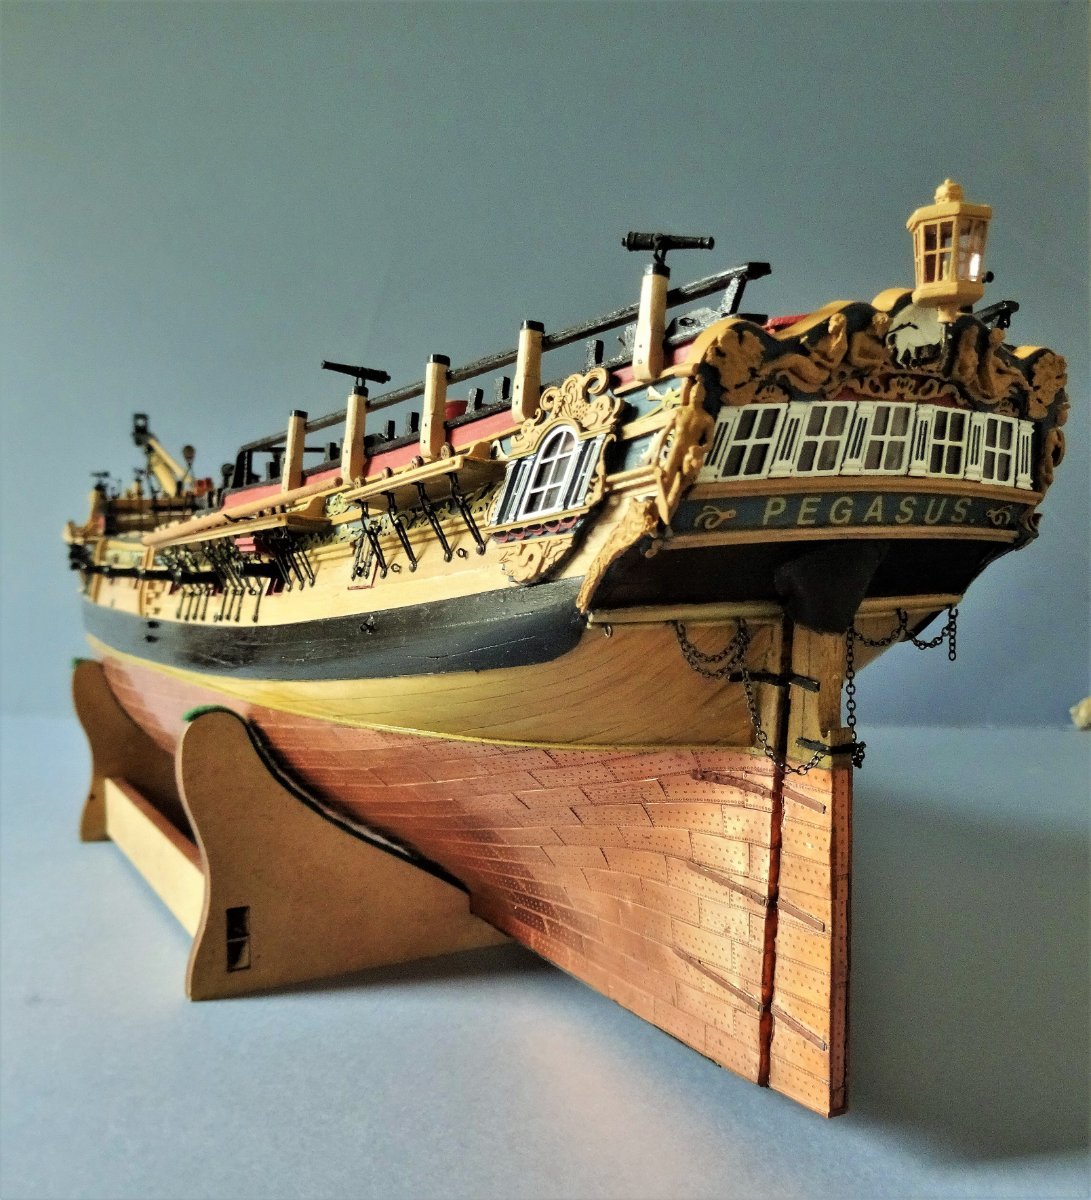
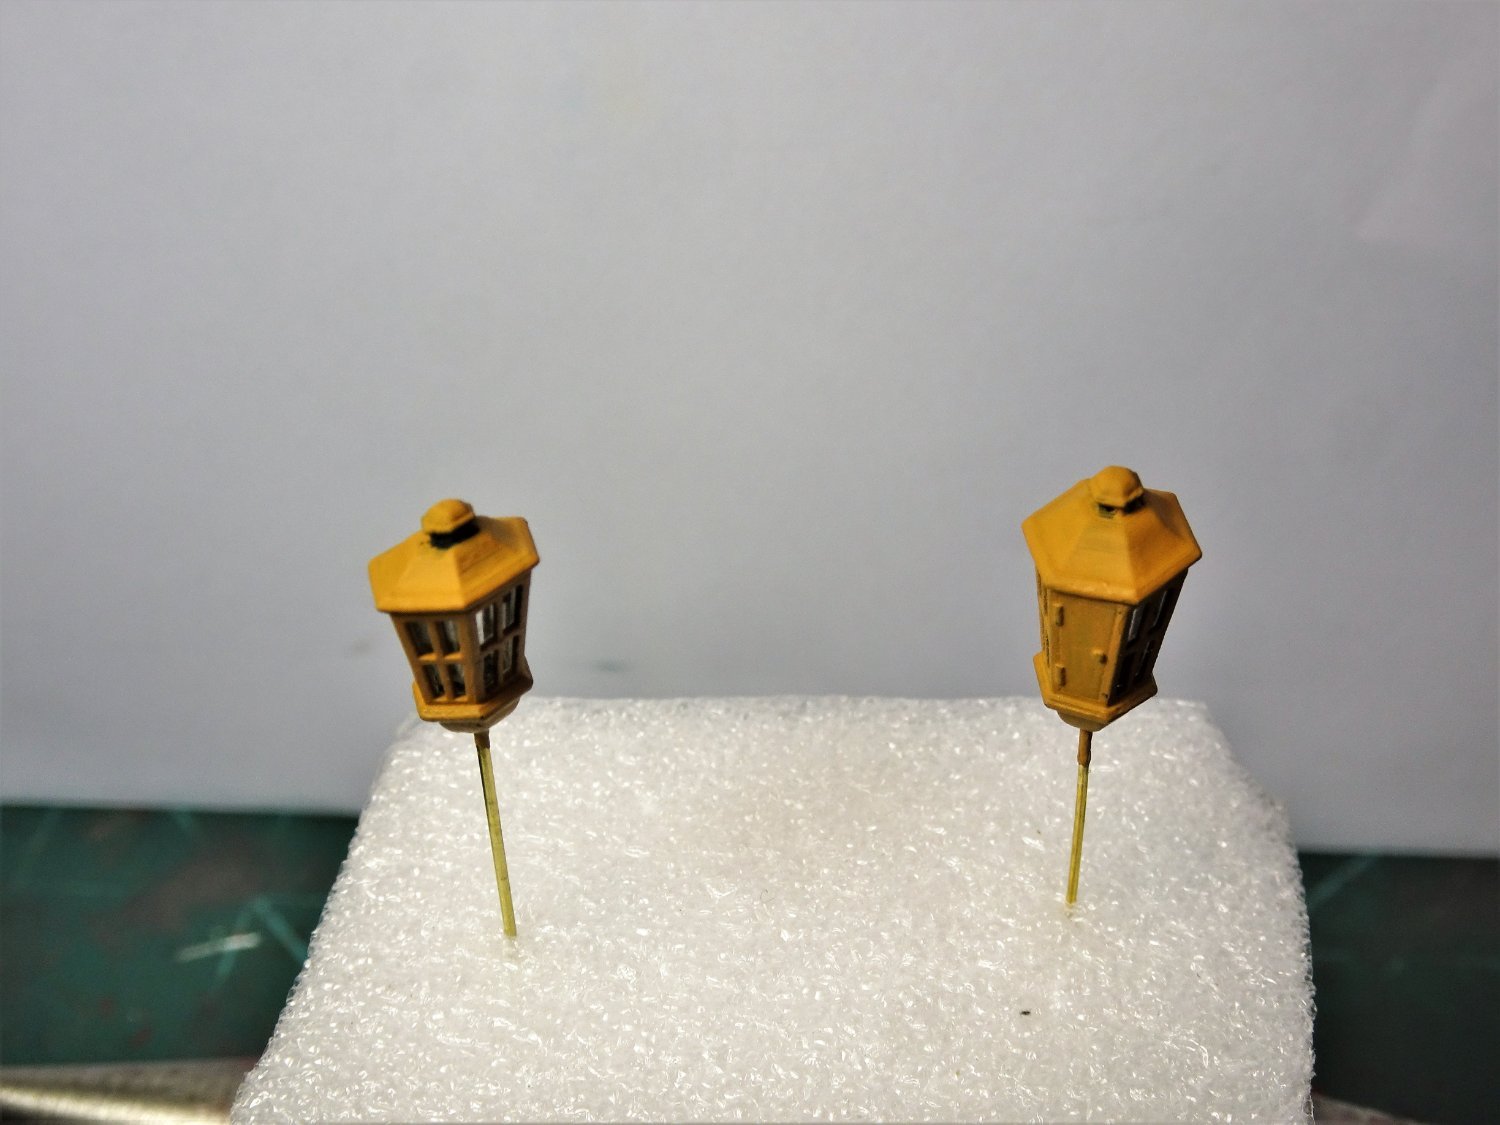
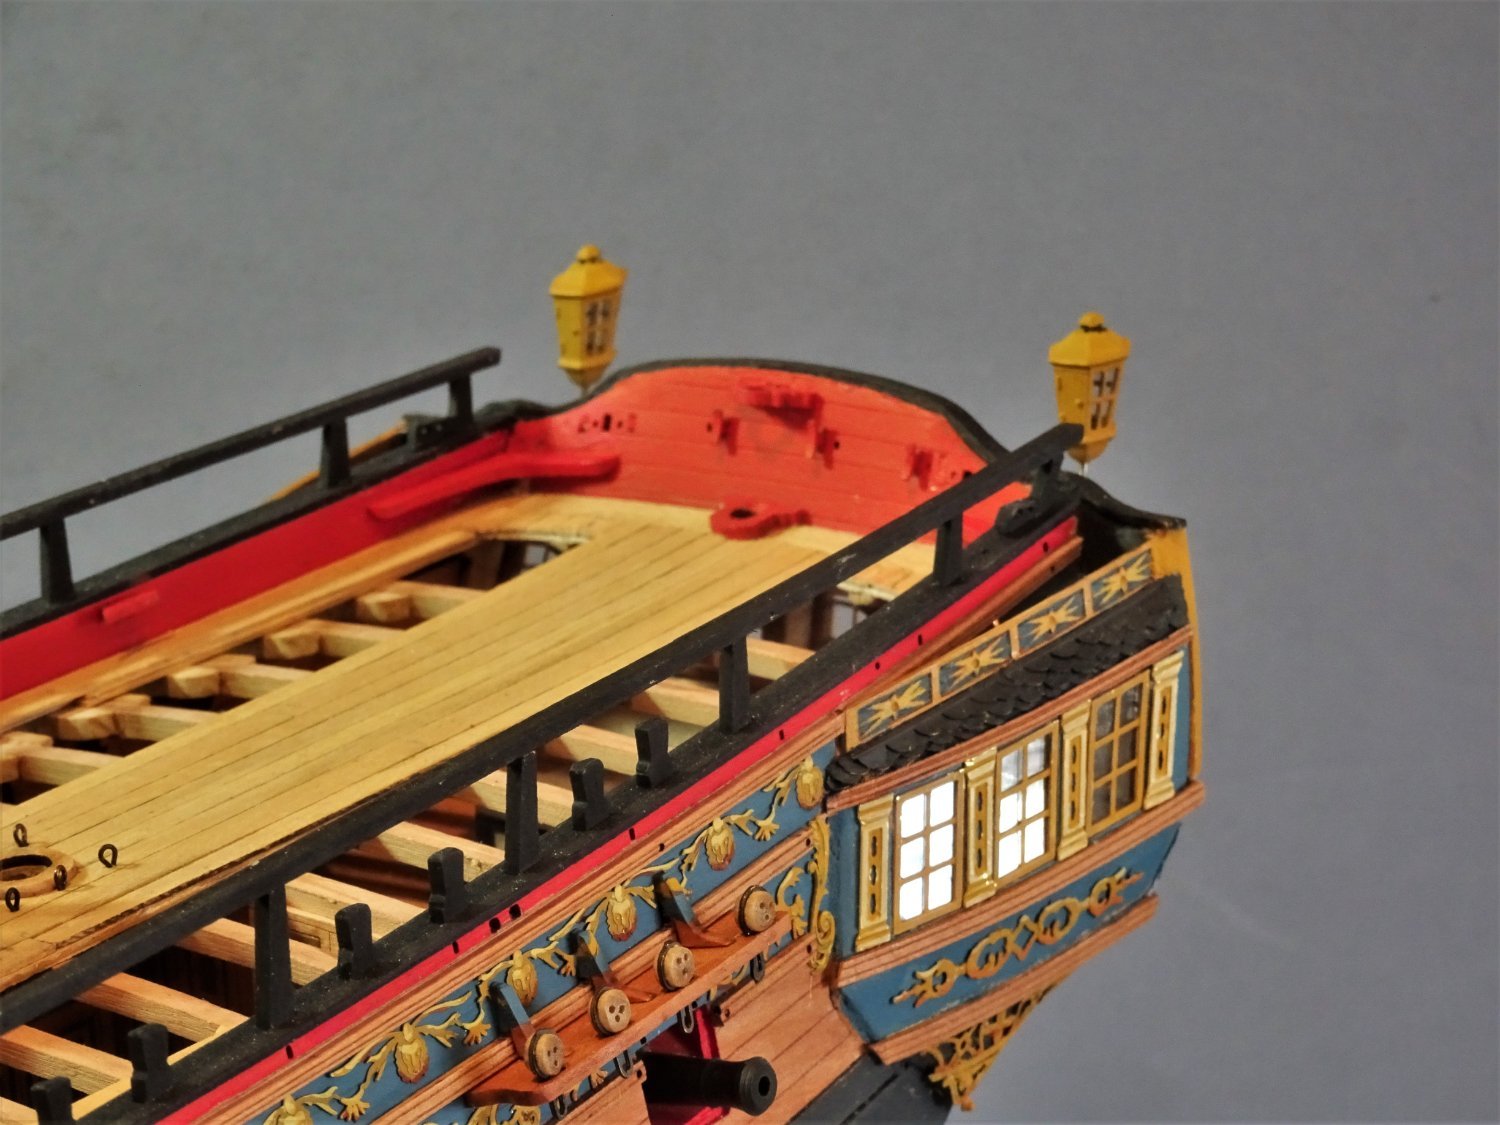
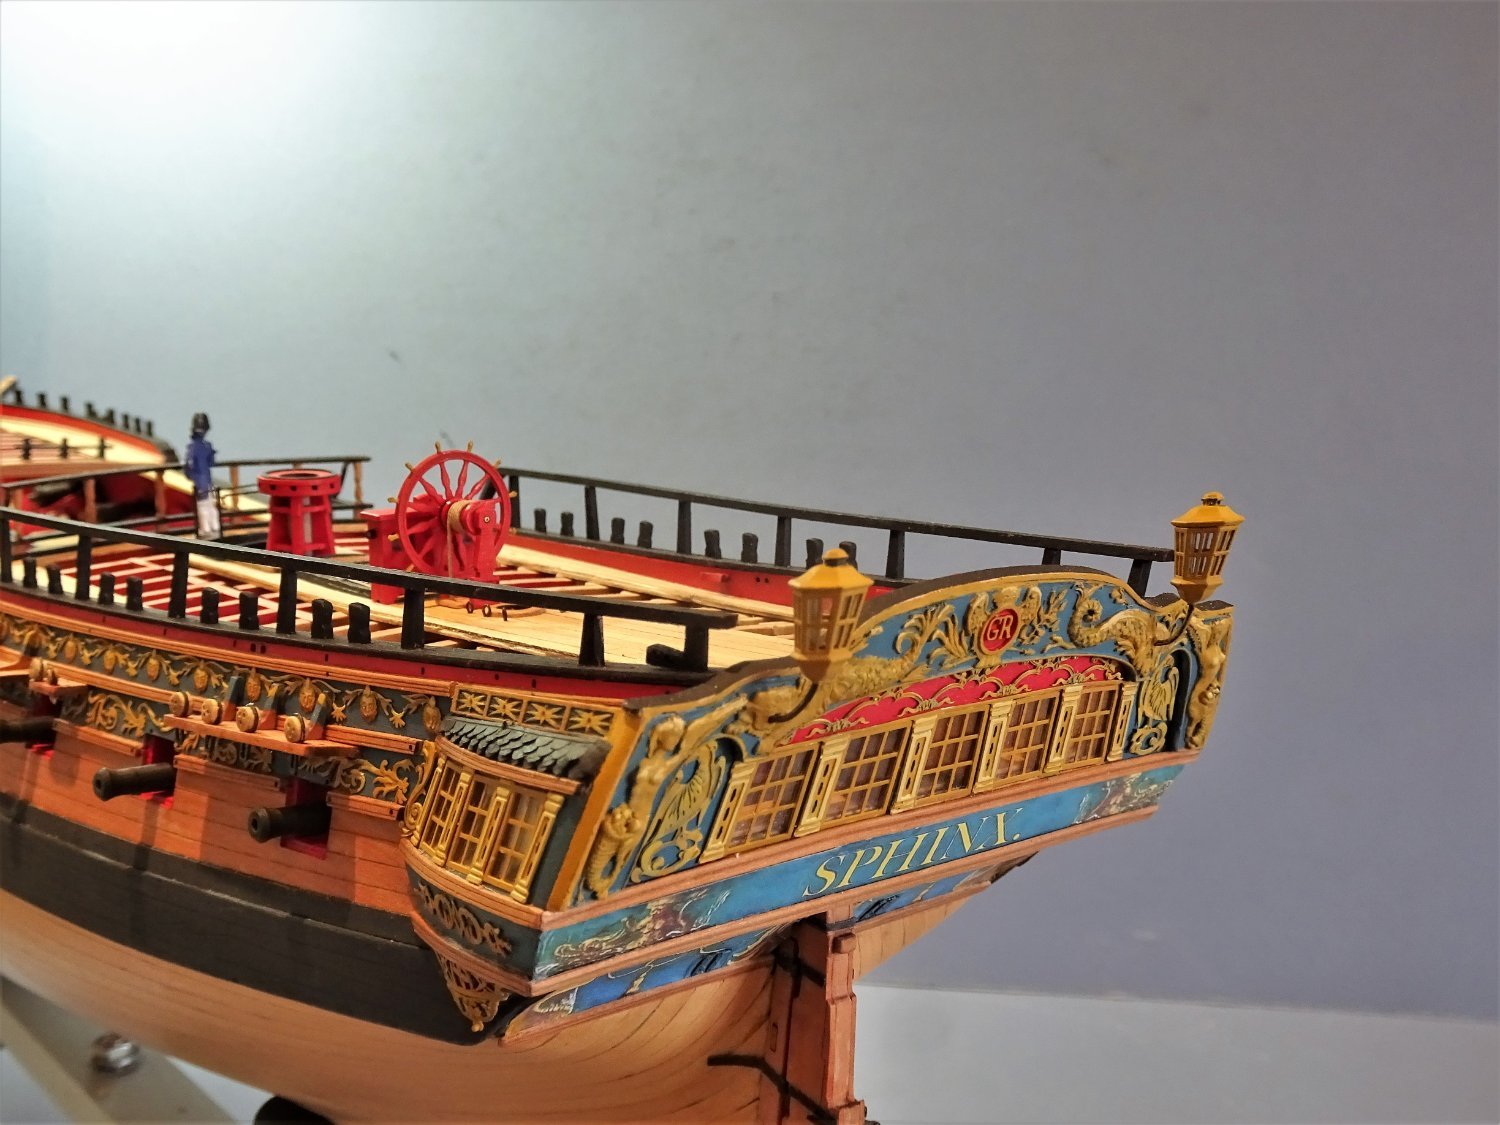
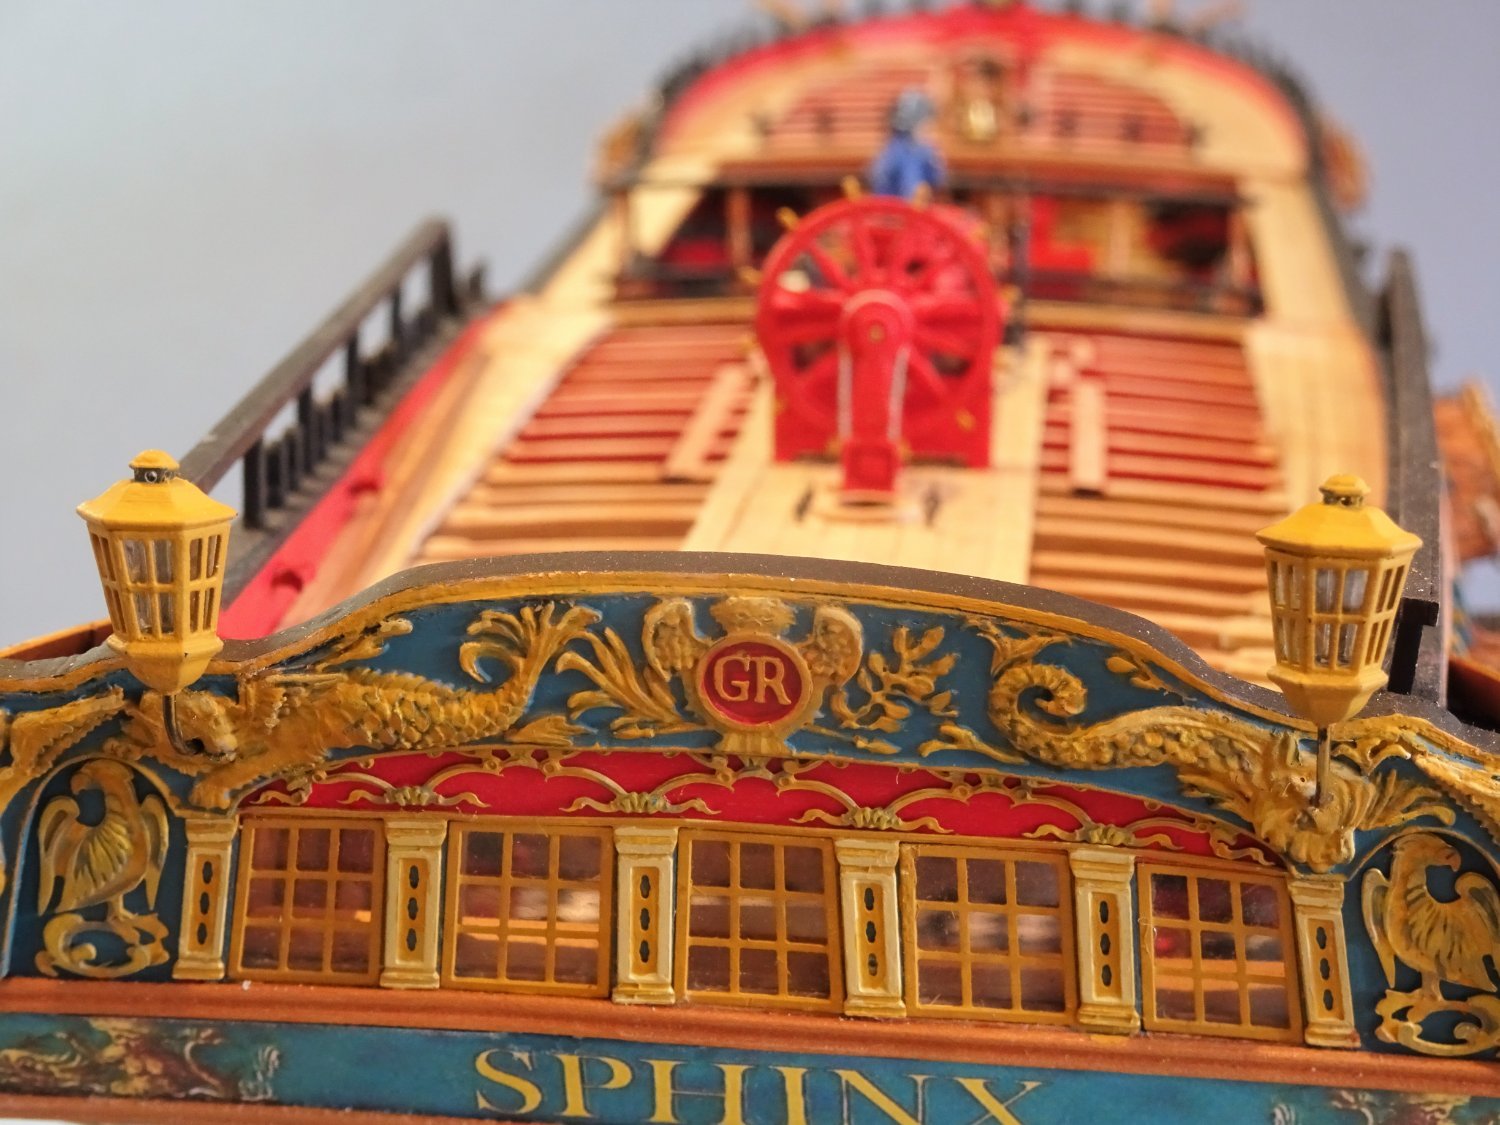
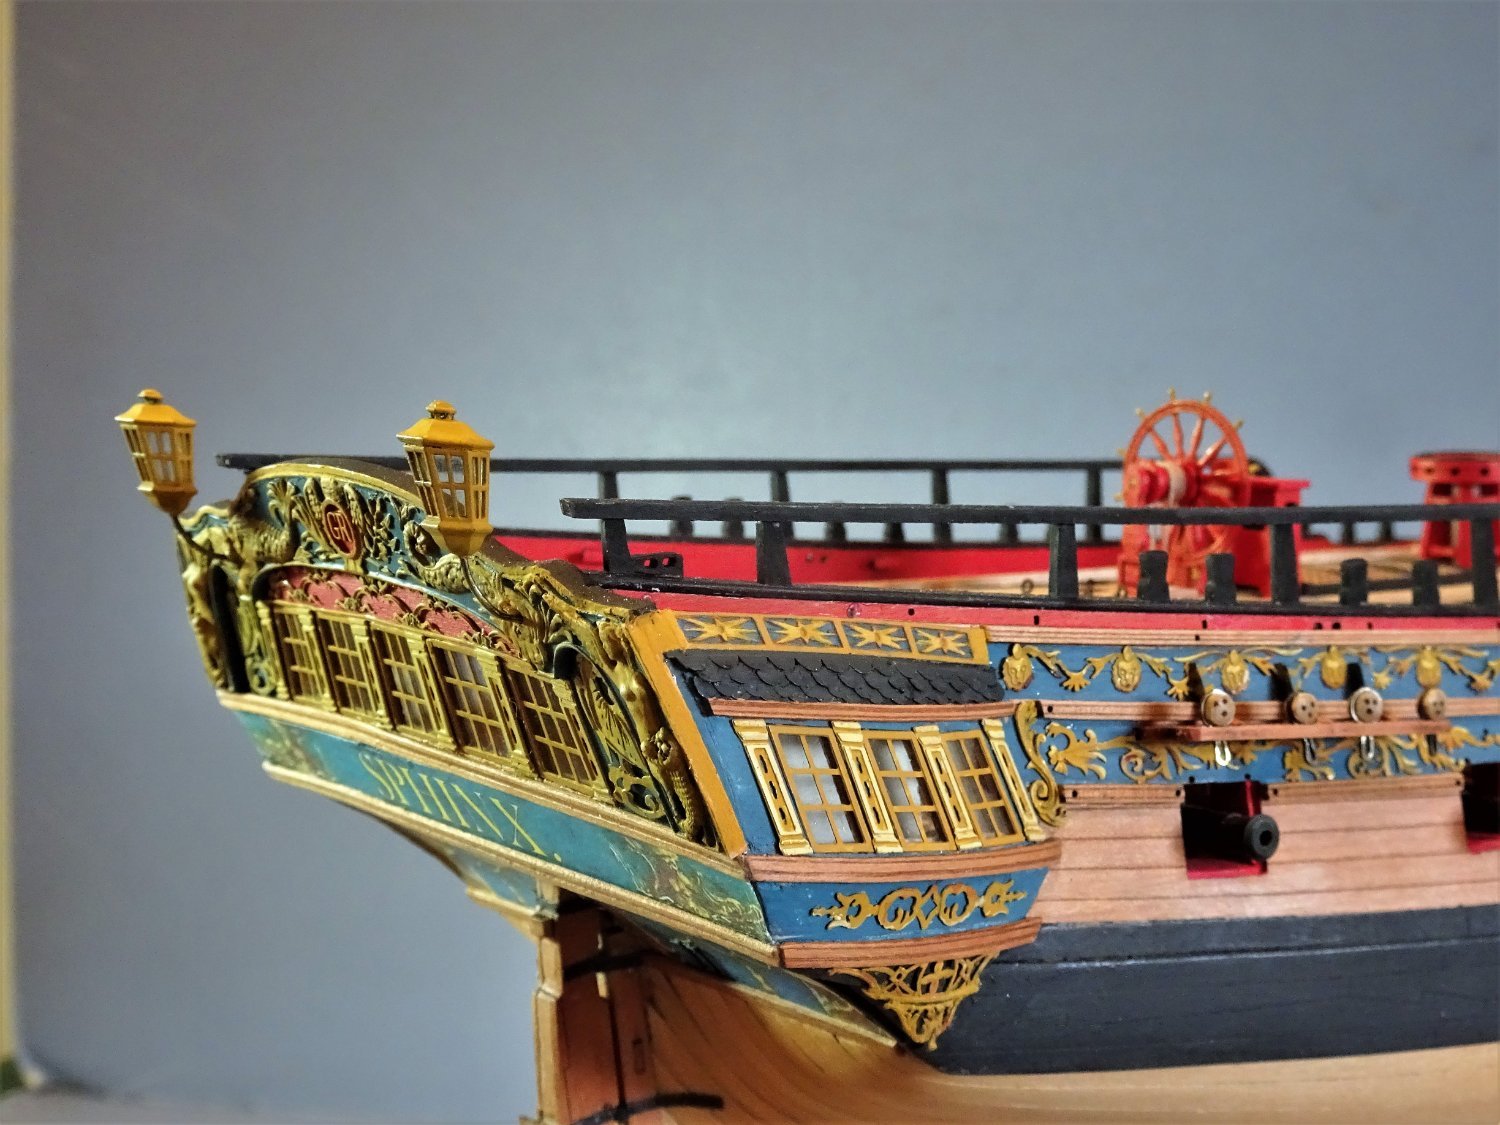
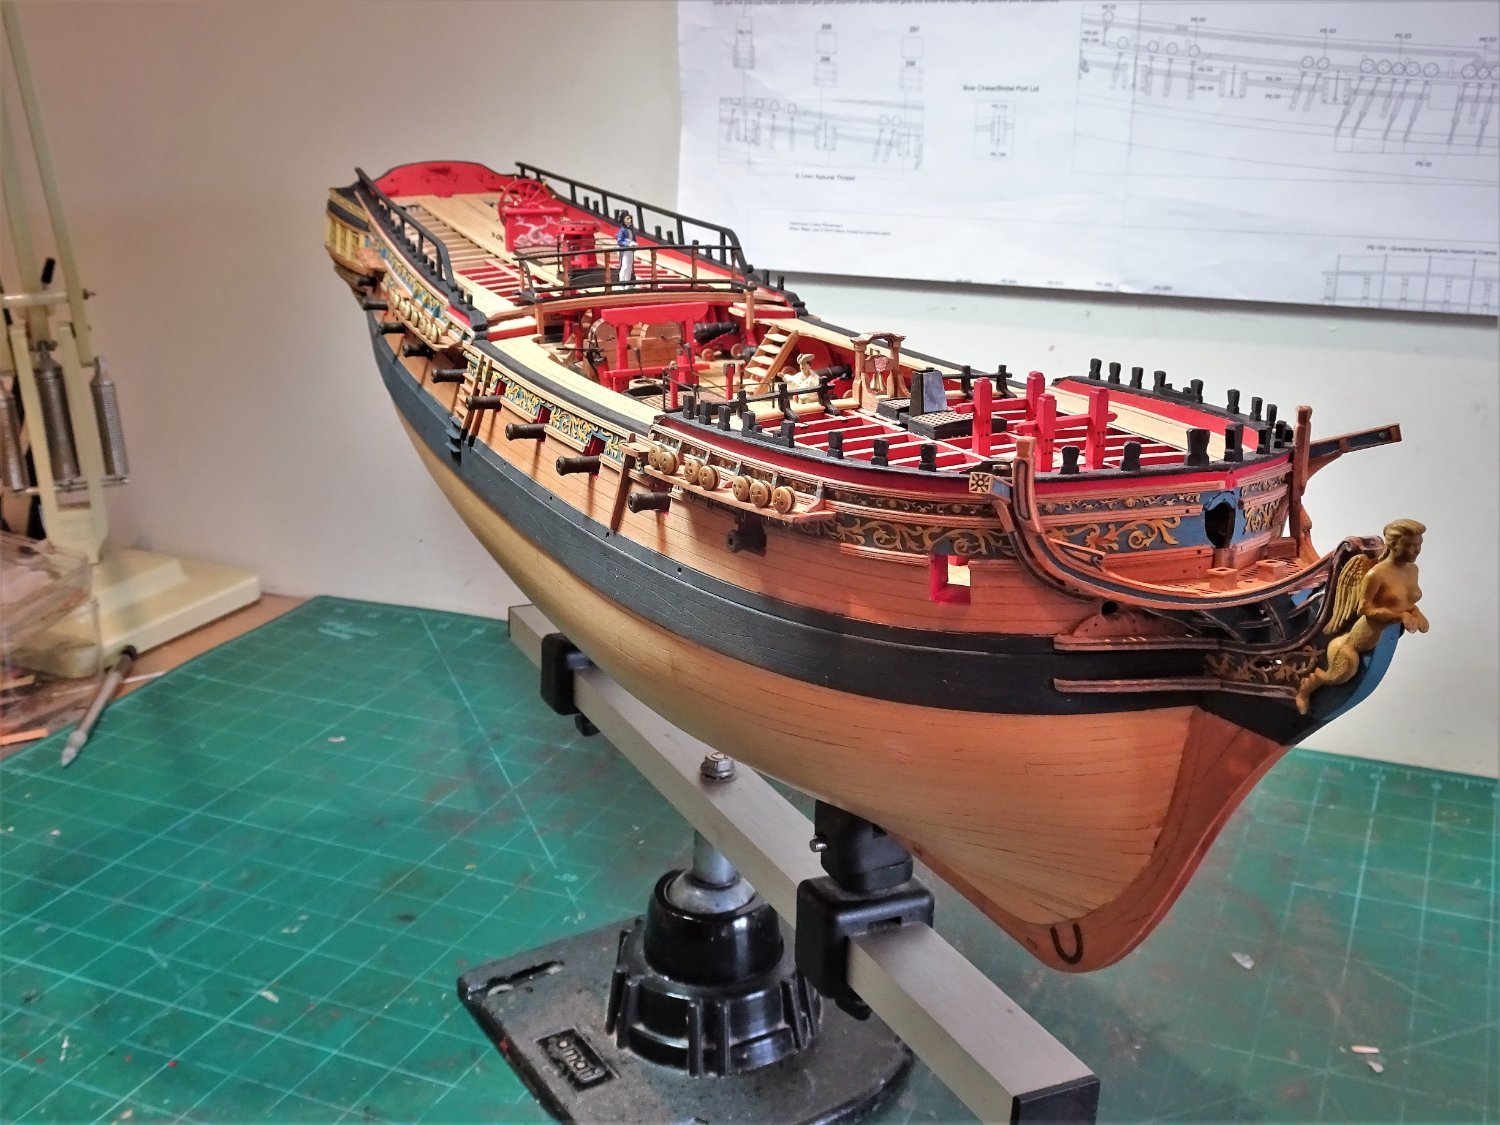
Post One Hundred and Thirty two Looking at lanterns I have found very little written about the subject of fitting and use of lanterns except that on larger ships and Flagships three seems to have been the norm during the 18th century. 1804 seems to have been a significant date regarding number of lanterns; when only 1st rates were to have three, except when lesser ships were used as Flagships. This of course begs the question of whether a fair range of ships already had three but only lit two unless serving as a Flagship. Contemporary models across the same rates show a mix in the number of lanterns displayed, and many Navy board style models don’t include them. Personally I think a nice central lantern looks good on models. 01812 01819 I’m obviously biased but I love the look of this Syren lantern on Pegasus. This set of three on the contemporary Amazon model have a nicely balanced look. The two lantern arrangement as shown in the AotS book Pandora and used on Sphinx is not the most pleasing to my eye, I think it looks as if something is missing. Aesthetically I prefer the look of either one or three. However, if the use of lanterns was to help following ships of a squadron or convoy to keep on station at night then at least two lanterns would better allow ships to gauge the line based on the gap between the two lights, and the arrangement makes sense. I could legitimately leave off the lanterns on my build, but it would be a shame not to use Chris’s splendid little examples. The kit lanterns are beautifully made 3d printed items that do require painting before assembly, don’t forget to clean before painting. I decided to paint the lanterns Vallejo Ochre Brown overall. A temporary wire was inserted into the base to handle during painting and assembly. 7277 I found the clear acetate inserts needed a shave off the top to allow the roof to sit down properly on the body. It is quite a feat that the tiny vents have been designed into the roof of the lanterns, and are visible to even my less than good eyes. 7280 7289 In addition to the (supplied) central ‘iron’ support bracket, lanterns would also have supporting wires to help with stability. 7290 With the lanterns in place I can see that additional straps from beneath the lantern body to the Tafferal capping rail would be appropriate. 7282 7285 7287 Now that I’ve fitted them I’m warming to the look, which surprised me somewhat. I’ll now have a think about fitting supporting wires attached to tiny eyelets in the Taffarel capping. My only reservation being that it may look too fussy on a Navy Board Style model. B.E. 14/06/2022


- 857 replies
-
- 22
-
-

-
- Sphinx
- Vanguard Models
- (and 1 more)
-
Thank you Marc, perhaps something has rubbed off on me after looking at your wonderful Soleil build. I am pleased with the frieze work outcome, the fine etch design created by Chris, facilitates the 'painted on' look even from fairly close viewing. Regards. B.E.
- 857 replies
-
- 3
-
-
- Sphinx
- Vanguard Models
- (and 1 more)
-
Nor me Glenn, obviously. Thank you Allan, I have that drawing; a stupid question no doubt, but how do you infer that there are ten spokes from that side on view of the wheel that only shows the vertical spokes top and bottom. You realise what you've done, I will forever be spoke counting now on every model I see,😉 B.E.
- 857 replies
-
- 2
-
-
-
- Sphinx
- Vanguard Models
- (and 1 more)
-
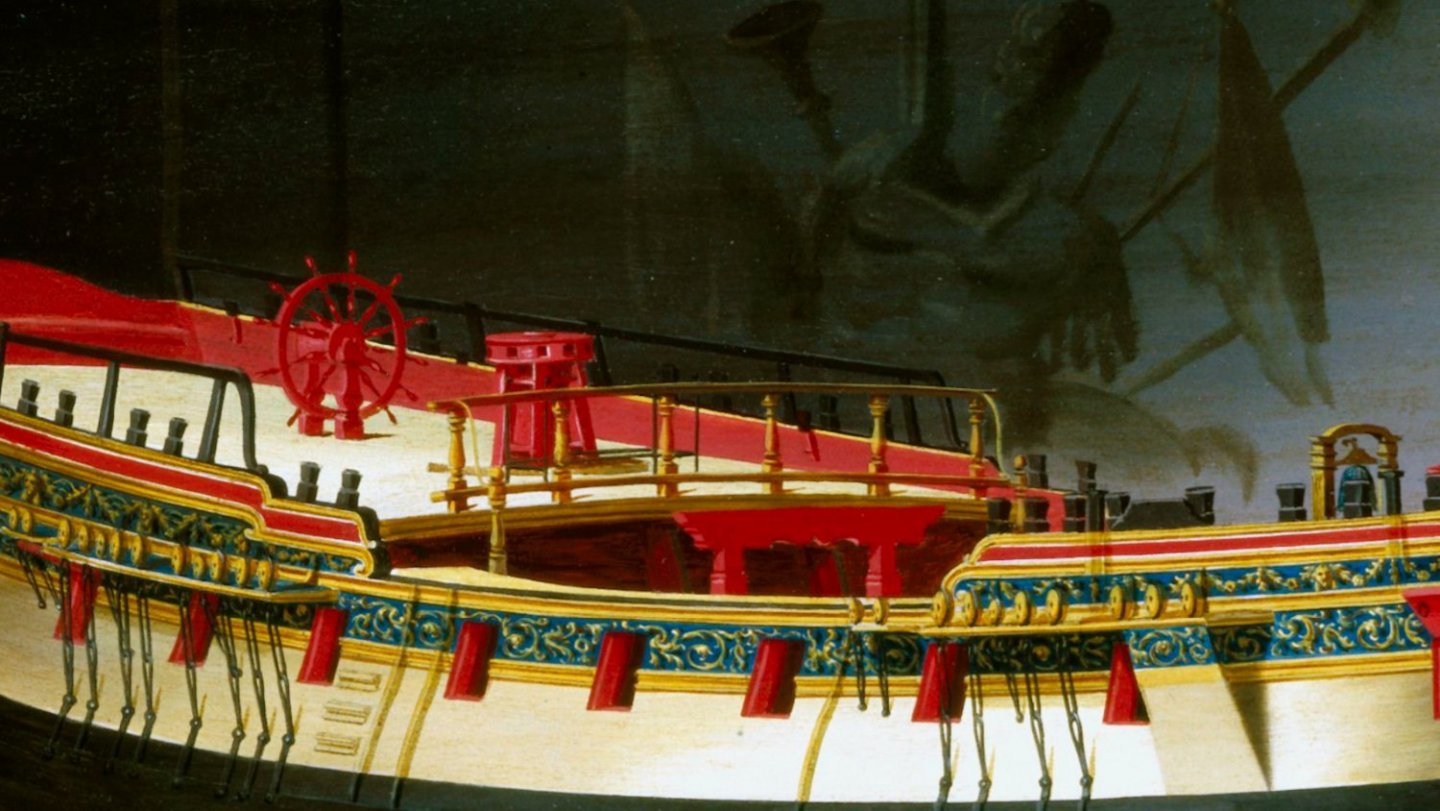
Thanks Allan, An excellent spot, you know I hadn't noticed, probably too wrapped up in thinking how nice it looked.🤔 My immediate thought was that Chris had taken the design from the AotS Pandora book, but no, that has only ten spokes. My second thought was to check the Joseph Marshall painting of Sphynx on which I am basing my version, and indeed there are twelve spokes to the wheel, not that I had previously counted them. He has also shown twelve spokes on his paintings of Kingfisher and Enterprize. On the 4th rate Portland he shows eight spokes on each of the double wheels. So that's my get out of jail card, I was only following the man who was there! Cheers, B.E.
- 857 replies
-
- 10
-
-
- Sphinx
- Vanguard Models
- (and 1 more)
-
There was nothing wrong with the original kit supplied deadeyes, it was just the scale I was concerned about. The replacement 4mm and 2.5mm deadeyes were ok but I should have ordered a few more to take the rejects into account. They will look ok before I fix them into place. Cheers, B.E.
- 857 replies
-
- 4
-
-
- Sphinx
- Vanguard Models
- (and 1 more)
-
Post One Hundred and Thirty-one A question of Deadeyes. For my particular build only the Deadeyes for the lower shrouds and Backstays are required on the Channels. For ships of 20 - 22 guns Steel indicates Deadeye sizes 11”ø (Fore & Main shrouds) = 4.36mm at scale. 7”ø (Mizen shrouds) = 2.8mm at scale. 7”ø were also used for the Fore & Main Topmast Backstays. The stools abaft the Channels take the deadeyes for the Topmast (7”) and T’gallant mast (5”) standing backstays. The Mizen backstays are secured to the hull aft of the Channel. The kit provided items are of a pale Walnut colour, they look very similar to standard Amati deadeyes. They are nominally of 5mm and 3mm ø but are closer to 5.3mm and 3.8mm = 13.4” / 9.8” equivalent full sized deadeyes. Of the 5mm deadeyes; out of 67 provided, (9) were 5.17; (40) were 5.26; and (17) were 5.38mm. A touch of deva ju here, I had to tweak the deadeye sizes on my Pegasus build for a better scale look. I took a punt at ordering 2.5mm and 4mm deadeyes from Vanguard which I thought with the usual variances would come close to actual scale sizes. As I had hoped the 4mm deadeyes came out at 4.36mm and the 2.5mm deadeyes at 2.8mm, spot on for scale. The question then remains what to do about the T’gallant stay deadeyes of 5” = 2mm ø fitted to the stools. The following photos are for size comparison only, some of the deadeyes don’t meet muster as to hole positions and will have to be replaced. 7269 This photo shows a kit 5mm shroud deadeye compared to the 4mm size. 7264 The oversized kit 3mm deadeyes were reduced in circumference as shown here on the Mizen stool. 7265 7266 As on the Fore and Main channels above, the modified 3mm deadeyes give a good visual difference to the shroud deadeyes. 7270 The 2.5mm deadeyes are used for the T’gallant standing backstays on the stool, and again show a clear difference to the Topmast deadeye. At 1:64 scale these 2.5mm deadeyes are still a little oversized but are about the smallest size for practical use. Changing the Deadeye sizes does create an issue with the provided strops. 7259 I did have some Amati aftermarket strops which I used for the 4mm deadeyes, shown here being blackened having been opened up for fitting. It was necessary to make replacement strops out of 0.5mm ø brass wire for the smaller deadeyes. 7273(3) The Deadeyes and strops will now need fettlin’ before I move onto the chains and preventer plates. B.E. 11/06/2022


.thumb.JPG.c7172d47929f4a1b2bf8edddceb393bc.JPG)
- 857 replies
-
- 19
-
-
- Sphinx
- Vanguard Models
- (and 1 more)
-
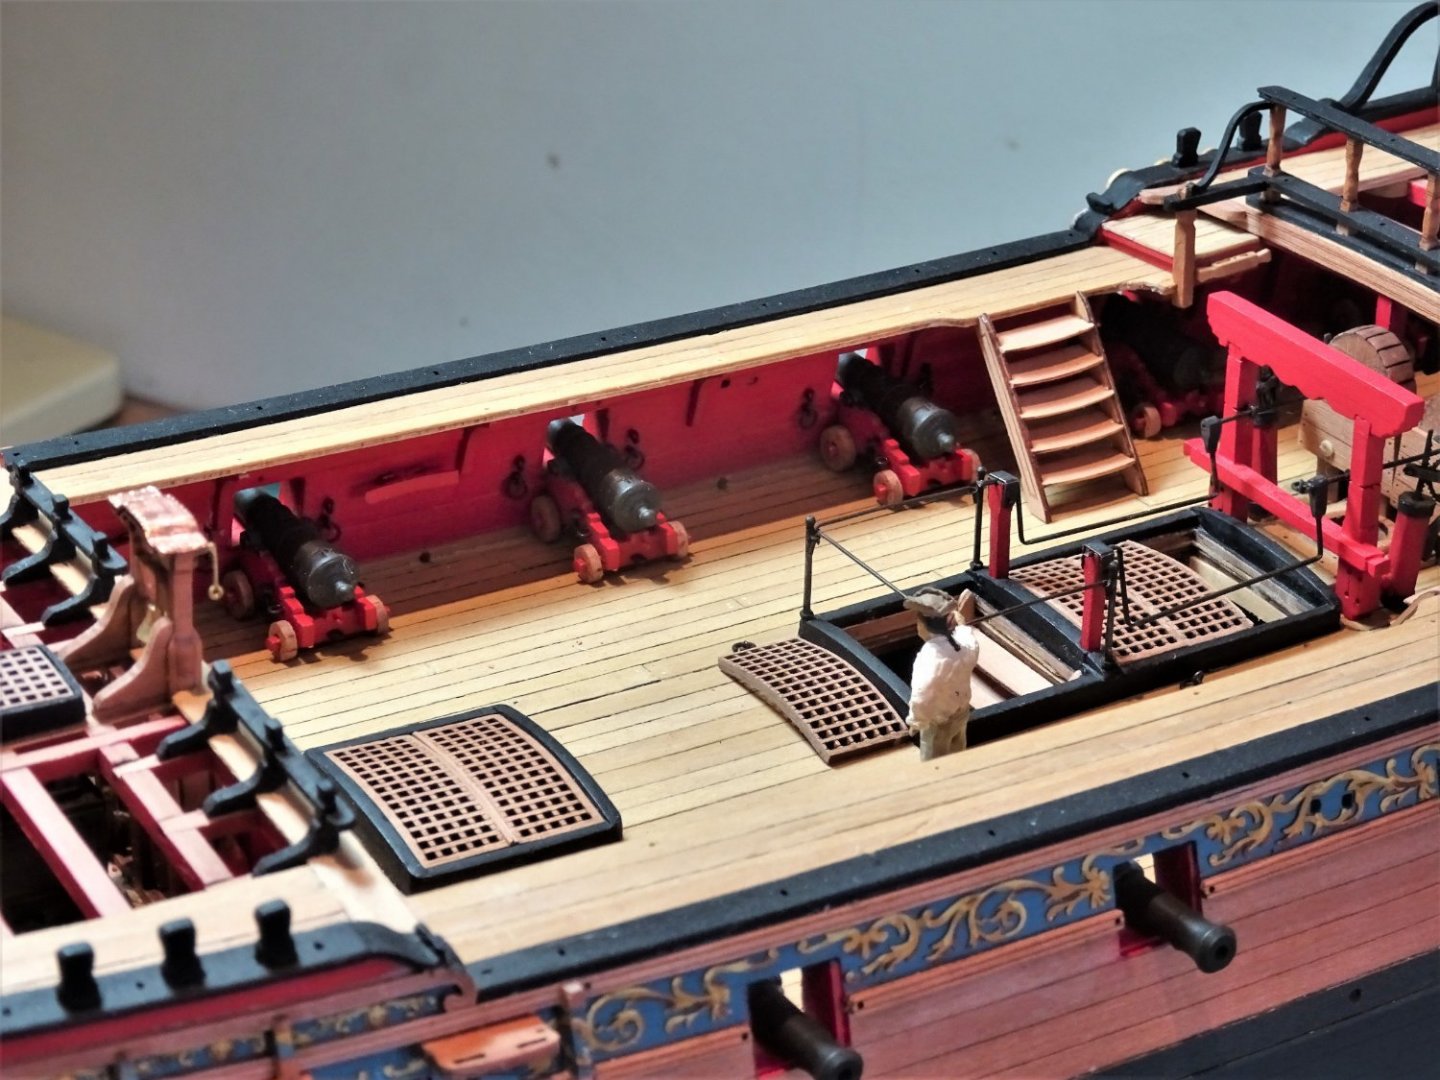
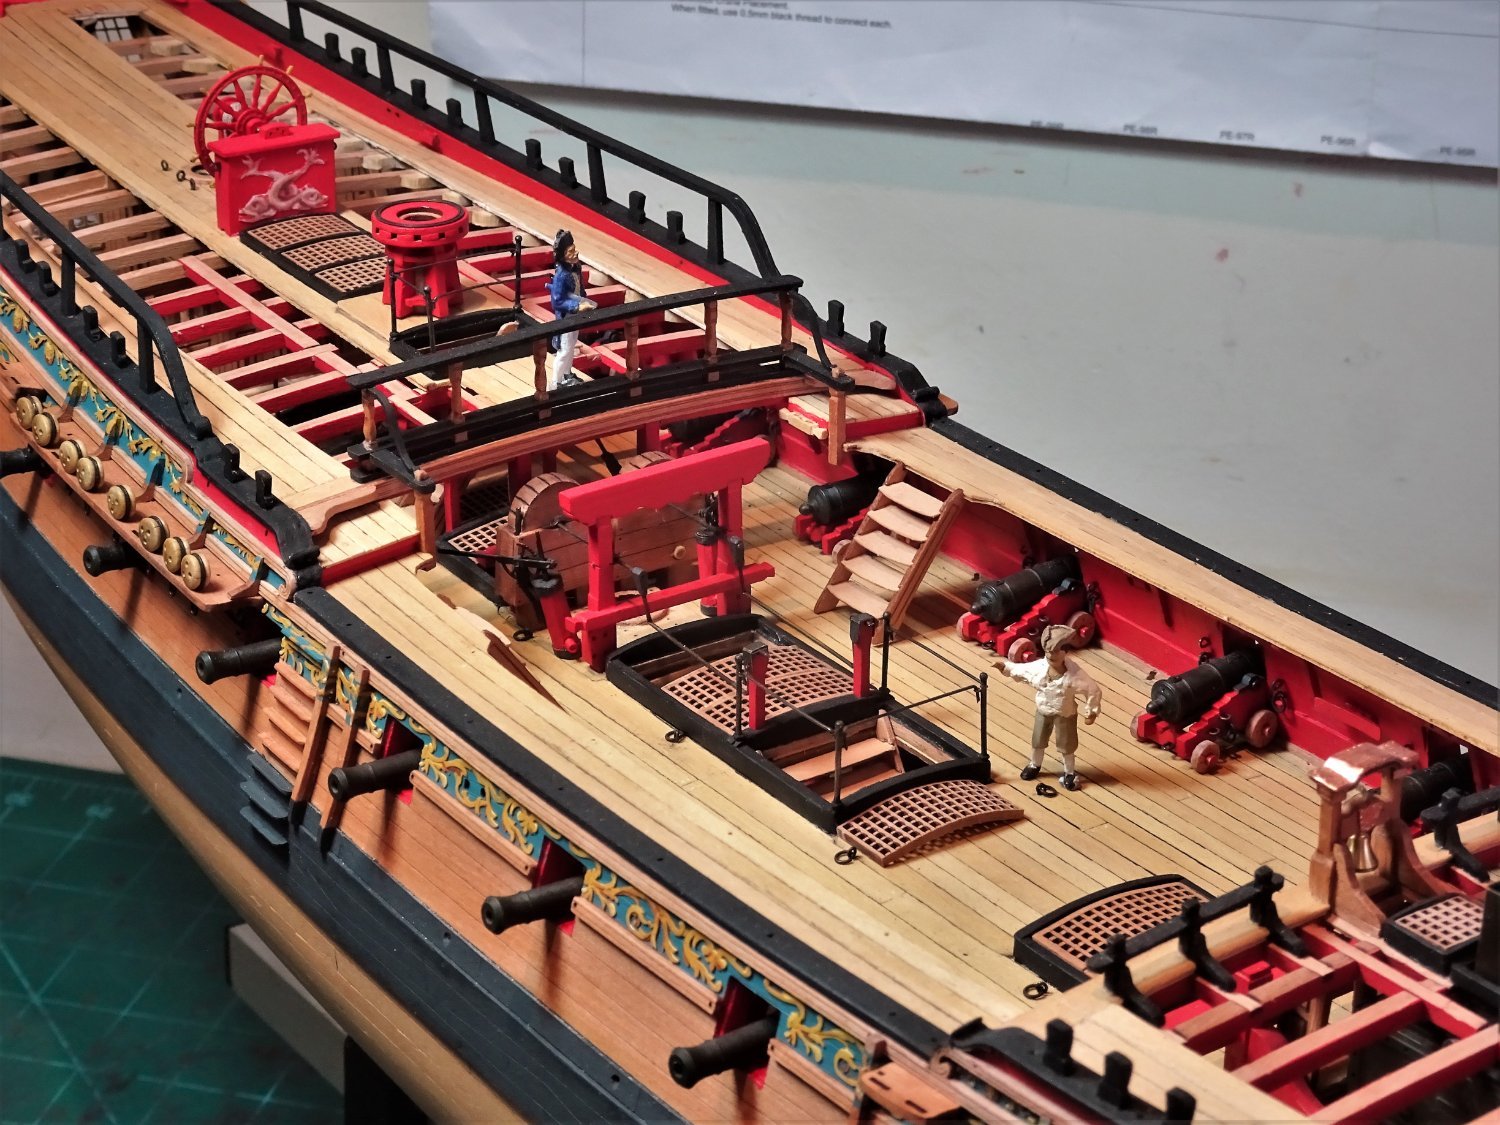
Post One Hundred and Thirty Ordnance complement completed. With fresh supplies received I can complete the remaining six waist guns. 02739(2) Amati fine copper pins and 2mm ø brass rings are used for the carriage iron works. 07242(2) 07243(2) A sort of milestone when all the guns are completed. 07248 07250 No gun rigging on this model, I’m following the Navy Board style. 07252 These are awkward guns to secure to the deck as their construction doesn’t lend itself to pinning. I use small dabs of pva on the wheels. 07256 Getting there! 07251 07257 I will be returning to the channels in my next post. B.E. 09/06/2022
.thumb.JPG.942ceef8a28fbd62e493ee967e483f24.JPG)
.thumb.JPG.0d8e0a368e49a14b1681ff7177d14aa1.JPG)
.thumb.JPG.e5f3131b22eb2f1e19bf8205148d2bff.JPG)


- 857 replies
-
- 22
-
-
-
- Sphinx
- Vanguard Models
- (and 1 more)
-
Thank you Bob and Andrew, I also have a selection of make-up brushes donated by Mrs W, and I use a large soft paint brush to run along the rigging lines, yards, and the deck. A lot of deck fittings are not fixed on my models, and are removed for cleaning. I also use cotton buds for difficult areas. My two largest uncased models - Norske love and a Flower Class Corvette are yet to do, but I'm still working up the enthusiasm to start.🙄 Cheers, B.E.
- 857 replies
-
- 3
-
-
- Sphinx
- Vanguard Models
- (and 1 more)
-
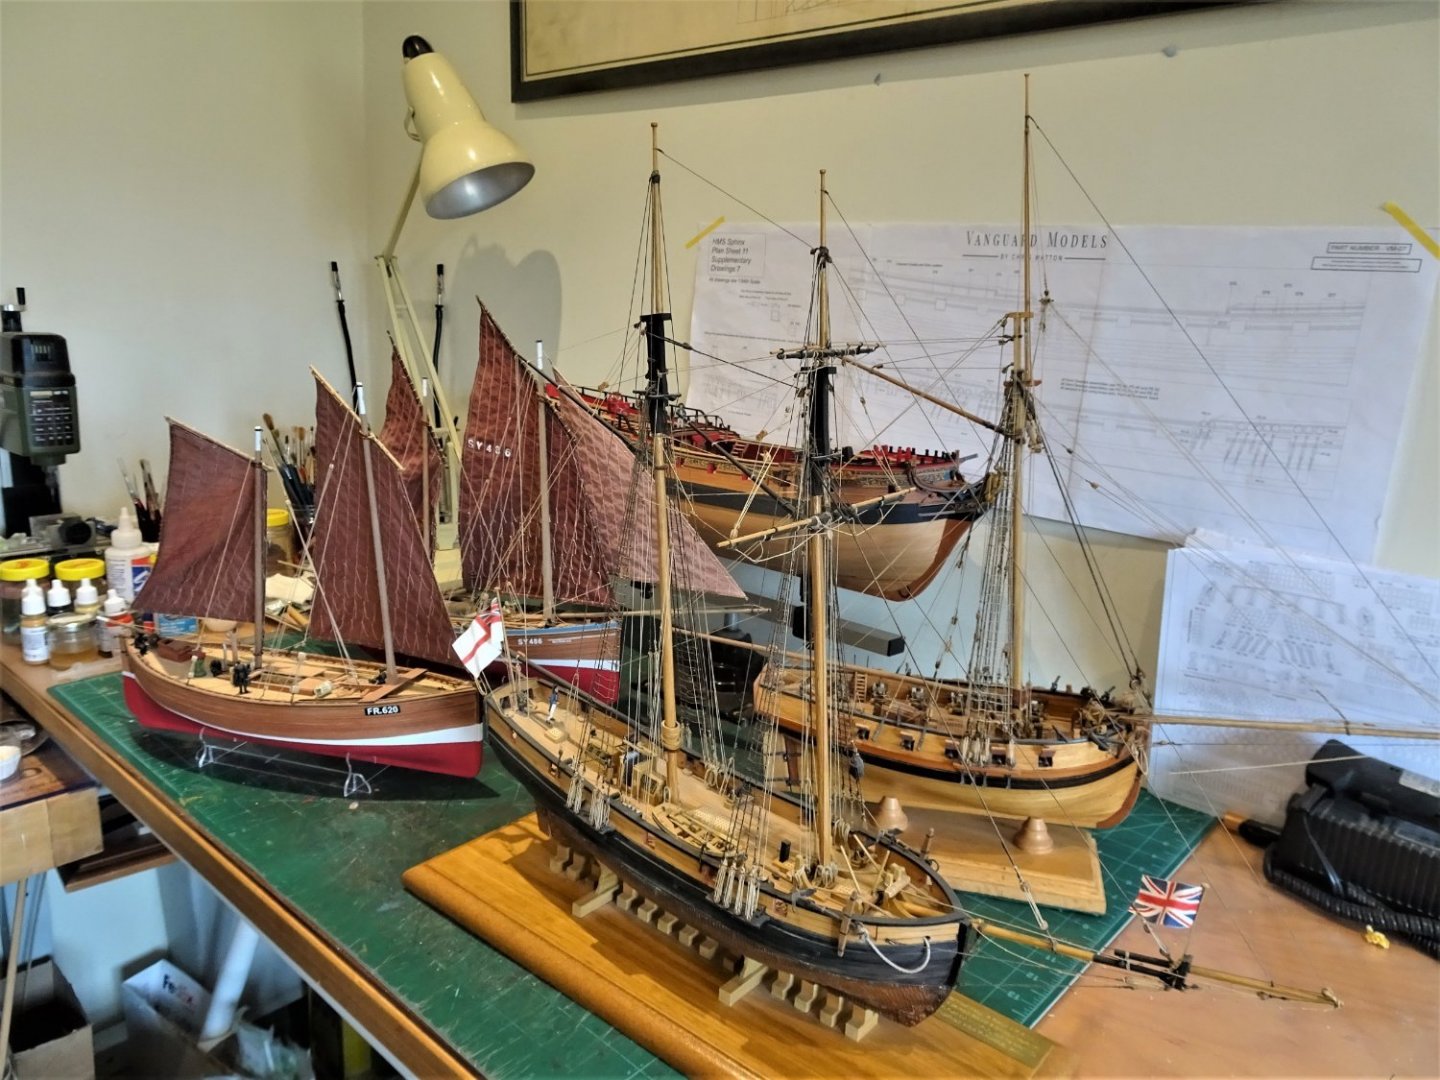
A slight diversion Work is temporarily stopped on Sphinx while I await fresh supplies. Not a job I look forwards to, but an opportunity to attend to a long overdue cleaning session of my uncased collection. 7229 The models are assembled from around the house. 7232(2) These particular models cover a span of some thirty years. English Cutter (Mamoli) 1990 HMS Pickle ( Caldercraft) 2010 Fifie (Vanguard) 2020 Muirneag (Zulu) ( Vanguard)2020 At least Mrs W who’s currently out golfing, will be pleased when she returns, she likes my models but is always on my case to clean them. B.E. 07/06/2022
.thumb.JPG.0586f707f7a4c35f81ff7e9a8644bdc4.JPG)
- 857 replies
-
- 19
-
-
-
- Sphinx
- Vanguard Models
- (and 1 more)
-
Nicely done Richard, a sweet little model. Are you going to display it on a waterline setting? B.E.


.JPG.dee9a27595e42754c3c2bb811a89bb7a.JPG)
.JPG.29e5b9e49c039f4e0bd66fb825c3ee73.JPG)
.JPG.f244a240438187e79458bd9c7a23b42f.JPG)


.JPG.ae79587a3d4ca1d282ff39204111cc0c.JPG)
.JPG.1112dcf5cd5d4dadf50f3c86a9ca1ff0.JPG)
.JPG.f6e766ec97aca5dac44c062ba27021c0.JPG)
.JPG.562098cea5ef9a1f9baeb2dab66b32bb.JPG)


.JPG.f6612ddb965aa40ea13955cf53eba533.JPG)