.JPG.ca33079f5815b861e67b9c2cccd37982.JPG)

Blue Ensign
-
Posts
4,576 -
Joined
-
Last visited
Content Type
Profiles
Forums
Gallery
Events
Everything posted by Blue Ensign
-
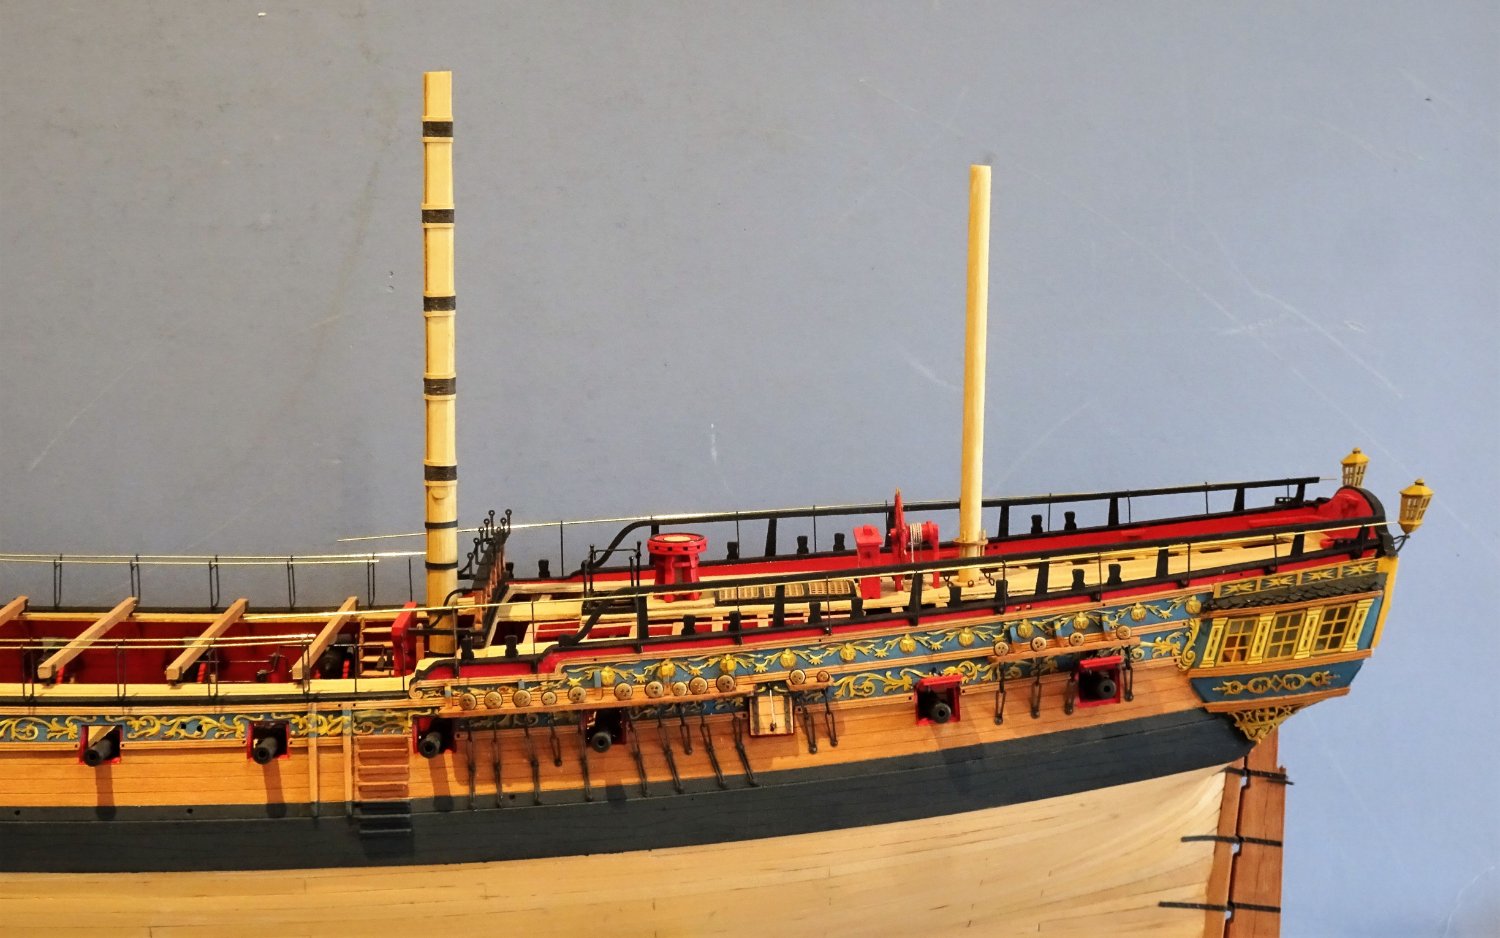
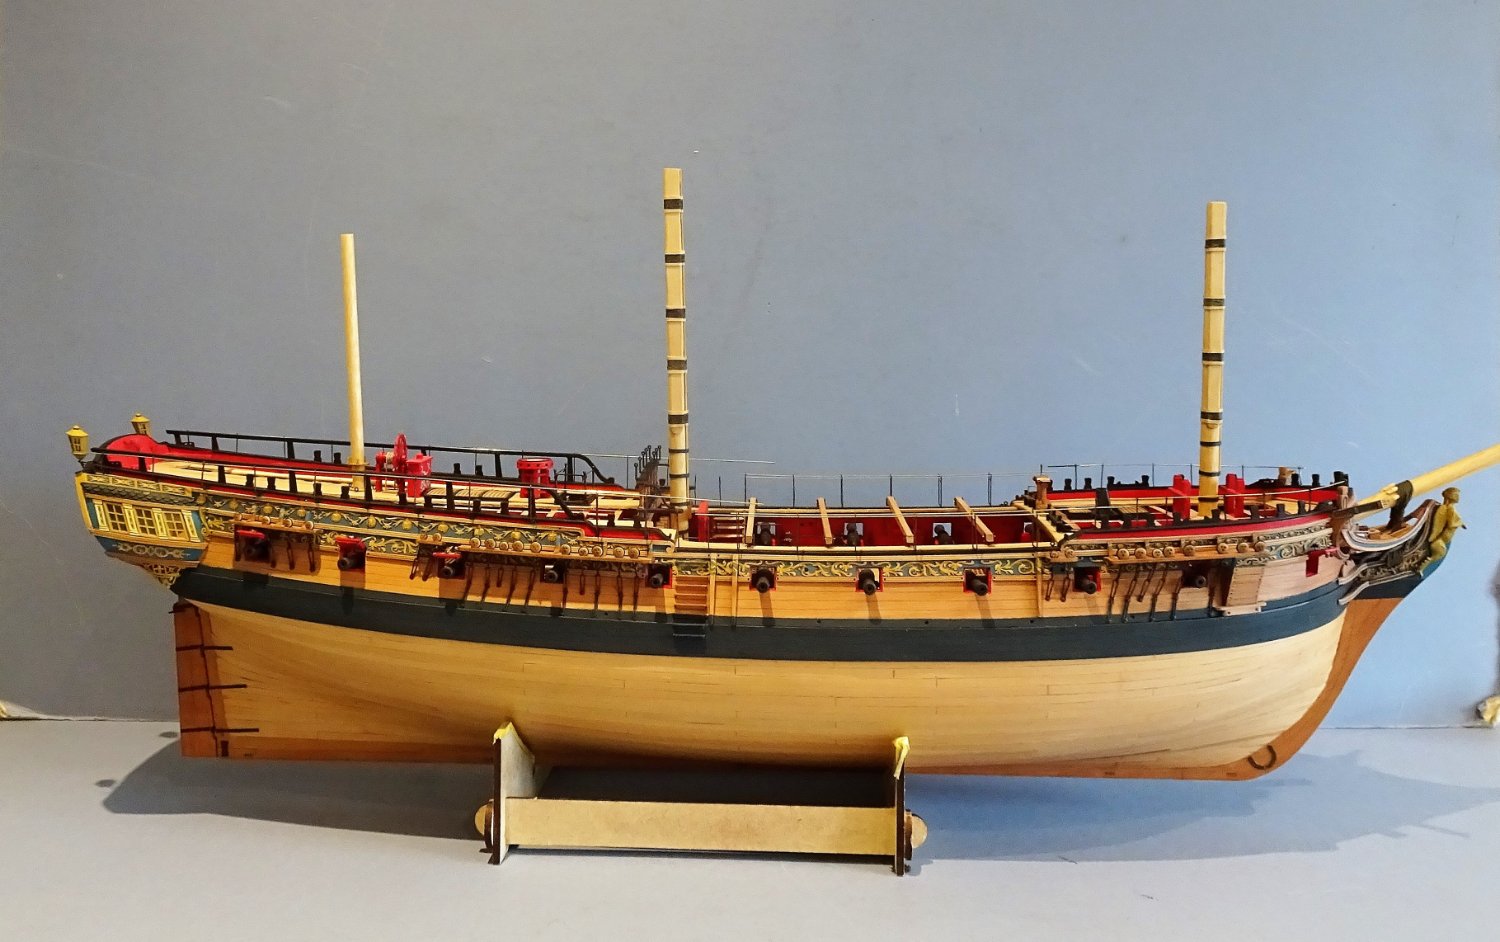
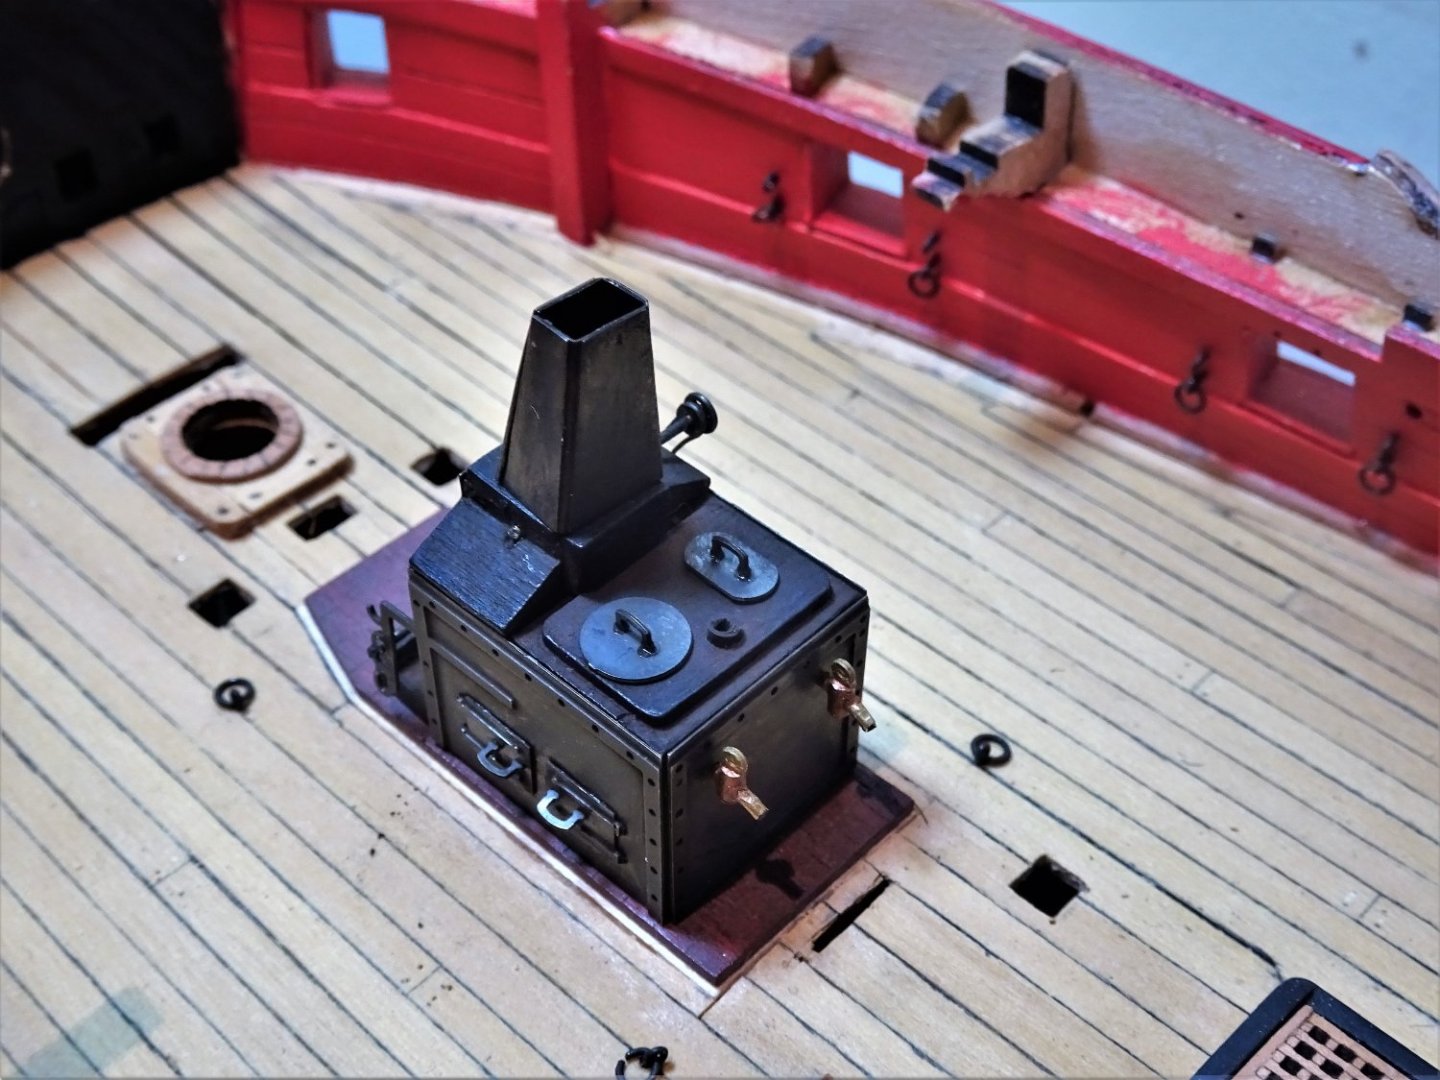
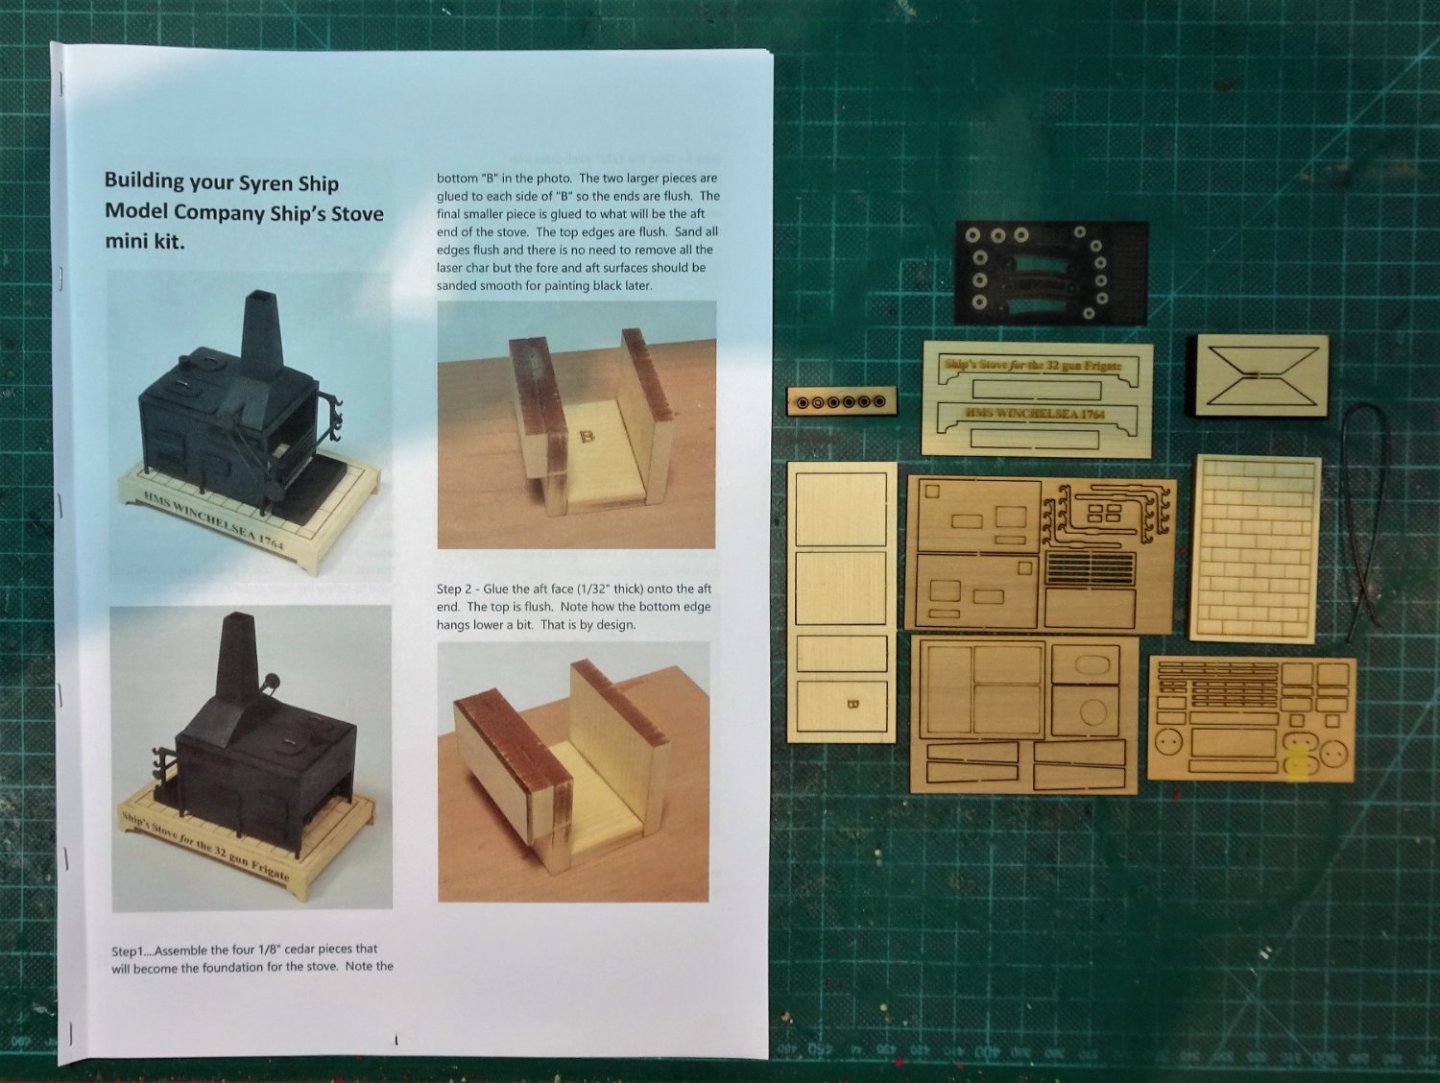
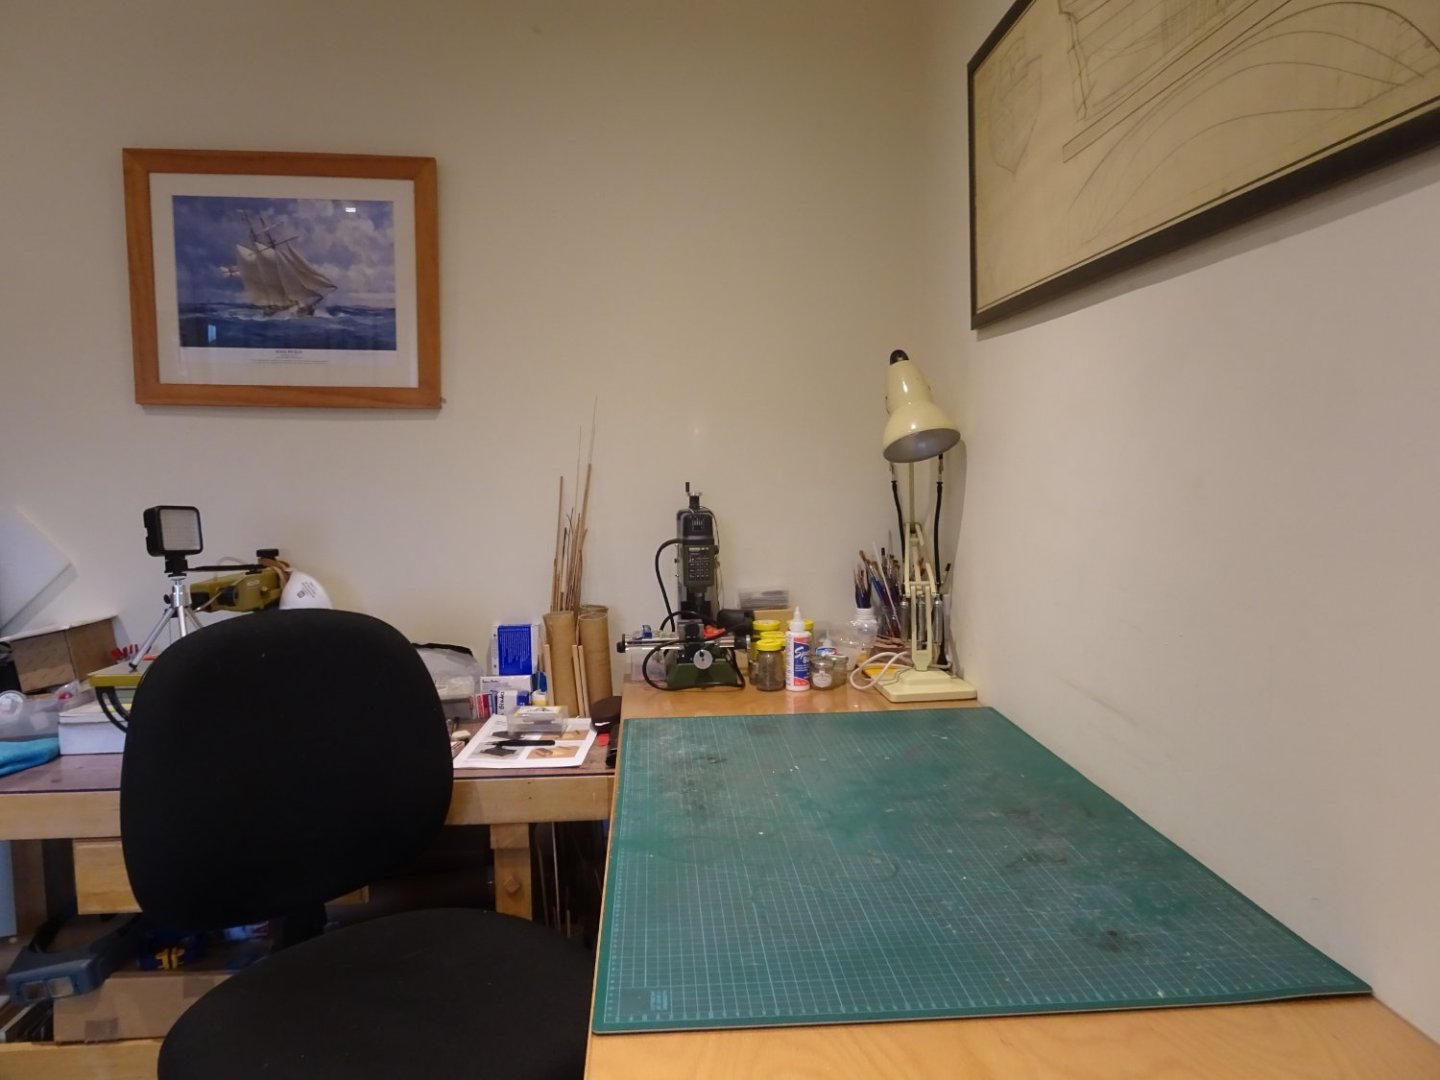
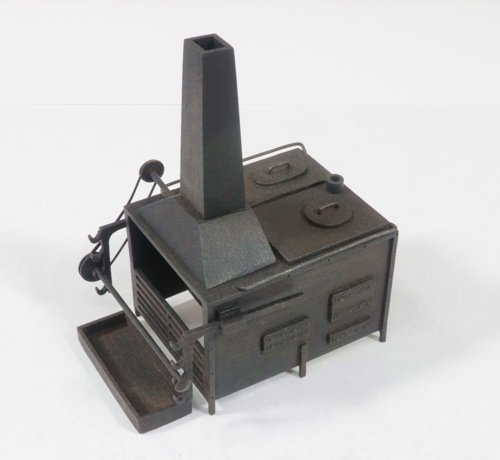
 8818 This is a rare sight in my office and not one that can stand for long. When I started Sphinx I had the idea of including in the display case a larger model of the Galley Stove. I did the same with the Double Capstan, where I had previously made the 1:48 scale Syren model (ex-Winchelsea) There is a very nice stove included with the Sphinx kit. 6240 6226(2) but of course, it is largely hidden beneath the Foc’sle deck. For this display stove I am again using a 1:48 scale kit from Syren also ex Winchelsea. This is an all-wooden kit, no brass etch involved, and the main challenge will be turning wood into iron using weathering powders. So, the trick is to turn this…. 8814 … into this Chuck’s stove If I can achieve a finish close to that produced by Chuck, I will be well satisfied. The stove for Winchelsea is designed to fit beneath the Foc’sle deck and detail has been simplified as much of it would be hidden from view. My version will stand as a model open to full view and therefore added detail will be required. The proposed additions will consist of: Lifting rings Side rails Back plates for open hearth Drain cocks- brass (1mm) Fire grate Pot arm And maybe a few other things that come to mind as I progress the build. B.E. 22/10/2022
.thumb.JPG.cbc93c68bbd54f23245970218824d7f0.JPG)
- 27 replies
-
- 10
-

-
- galley stove
- Syren Ship Model Company
- (and 1 more)
-
I would have concerns about using lime wood for decking. If it’s anything like the hull planking strips it would be too soft to get a good scraped finish and subject to dinks. There is also the question of even colouring if a slightly darker colour was required. I have no experience of Alder. I’ve never really been a fan of the pre-engraved decks because the shadowing always catches my eye, altho’ I did use it on the lower deck of Sphinx as it wouldn’t be seen. It is an aggravating situation for you Chris, but you can’t carry on wasting money on unsuitable material. I will continue to use 0.6mm Boxwood strip in multiple widths from Original Marquetry, Bristol, both for hull and deck planking. I do hope you resolve the issue. B.E.
-
He looks like he’s dancing a horn pipe, or maybe a spot of highland dancing. I’m sure he will continue to give good service, in good company with Captain Ahab with a nicely turned whale bone leg. B.E.
- 542 replies
-
- 3
-
-
- Sphinx
- Vanguard Models
- (and 3 more)
-
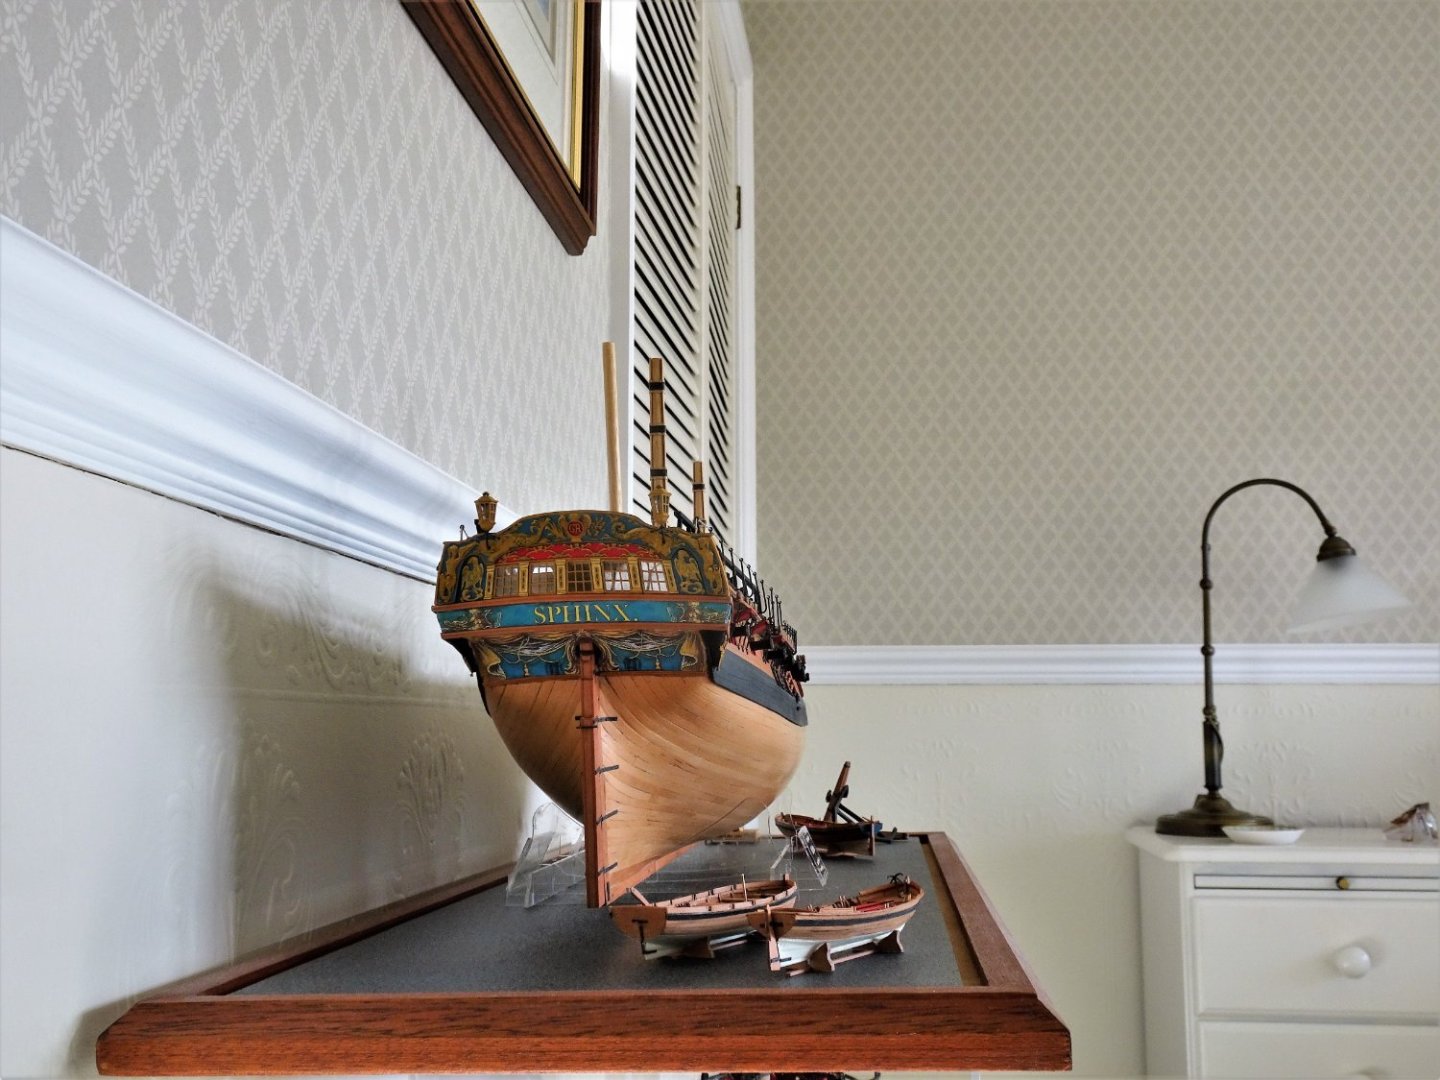
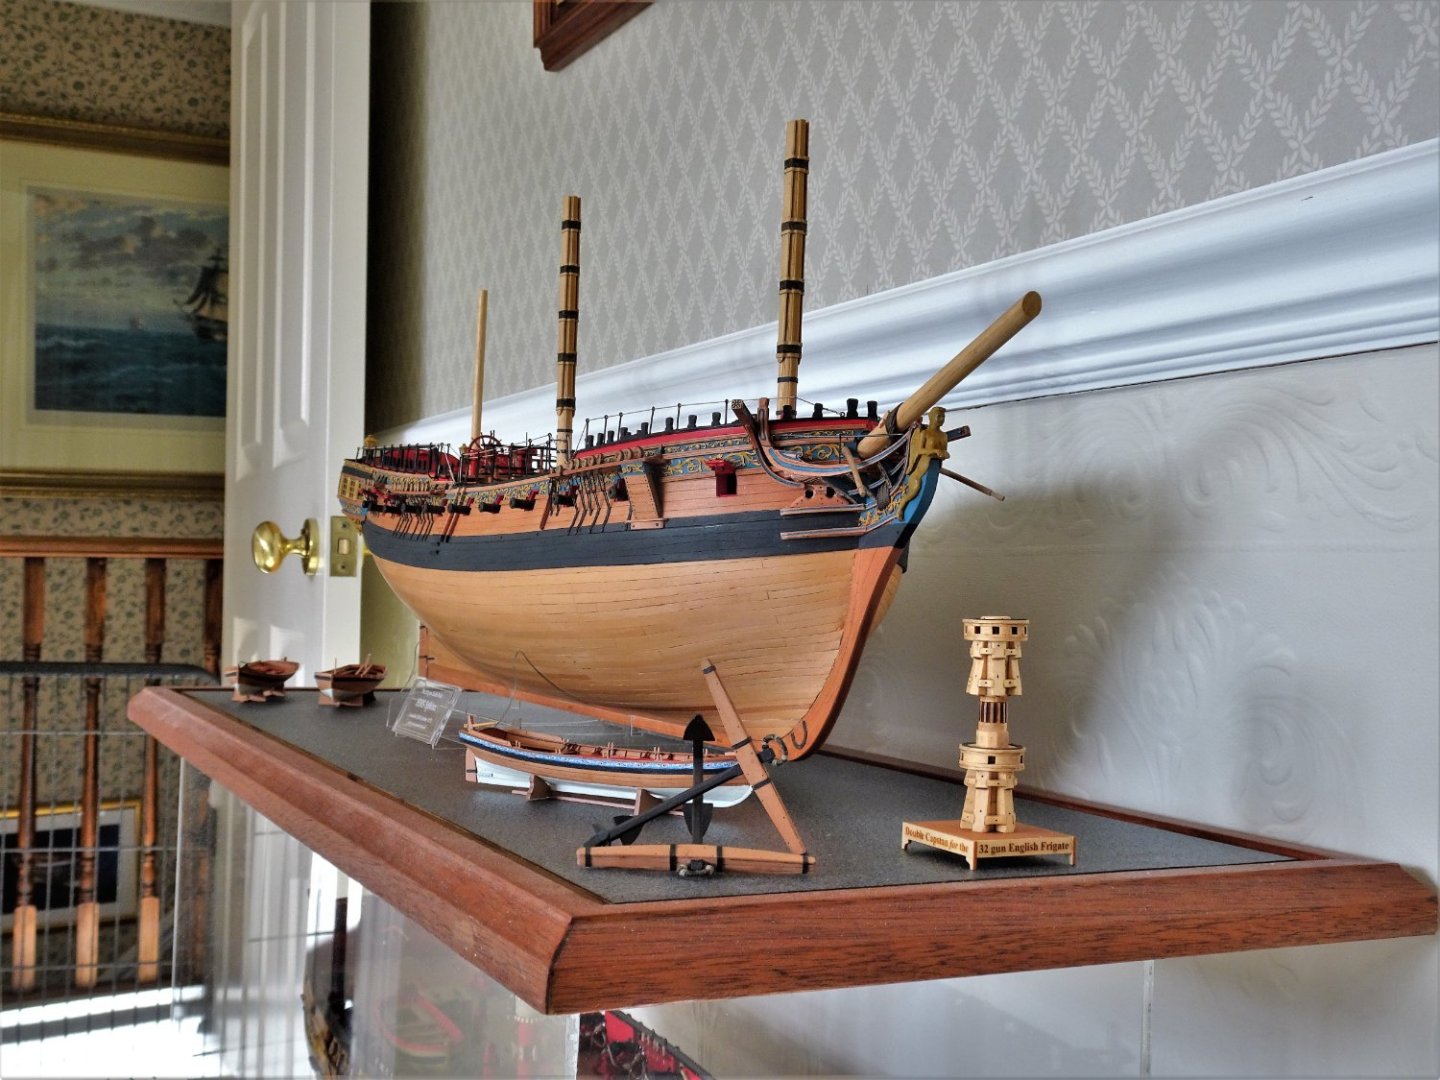
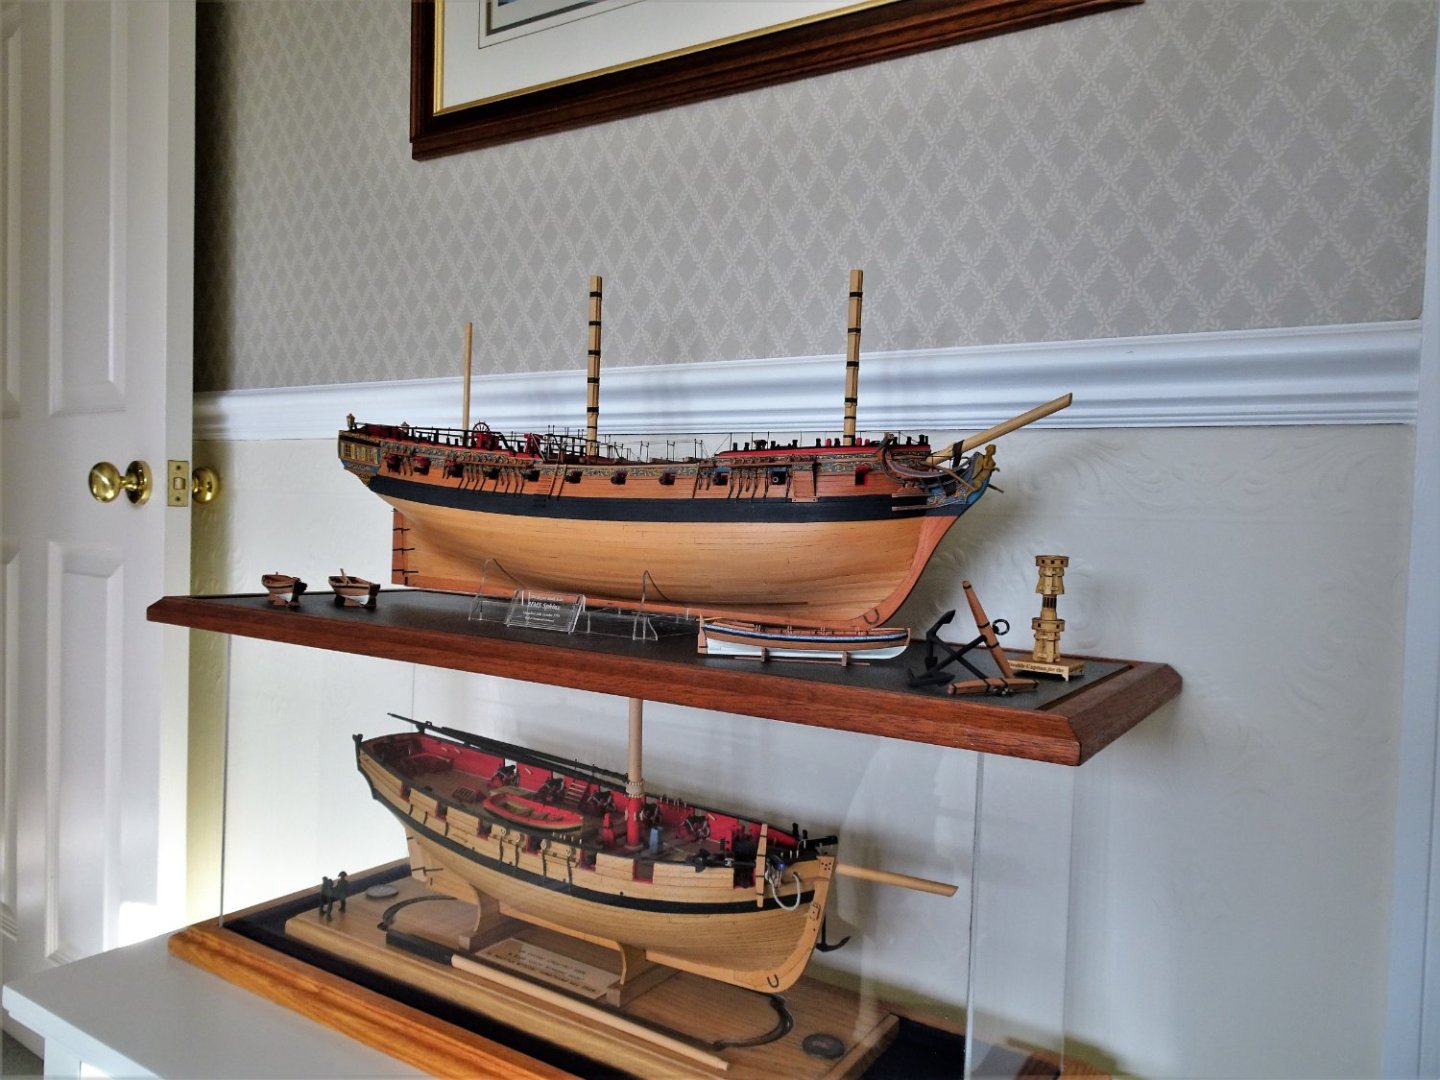
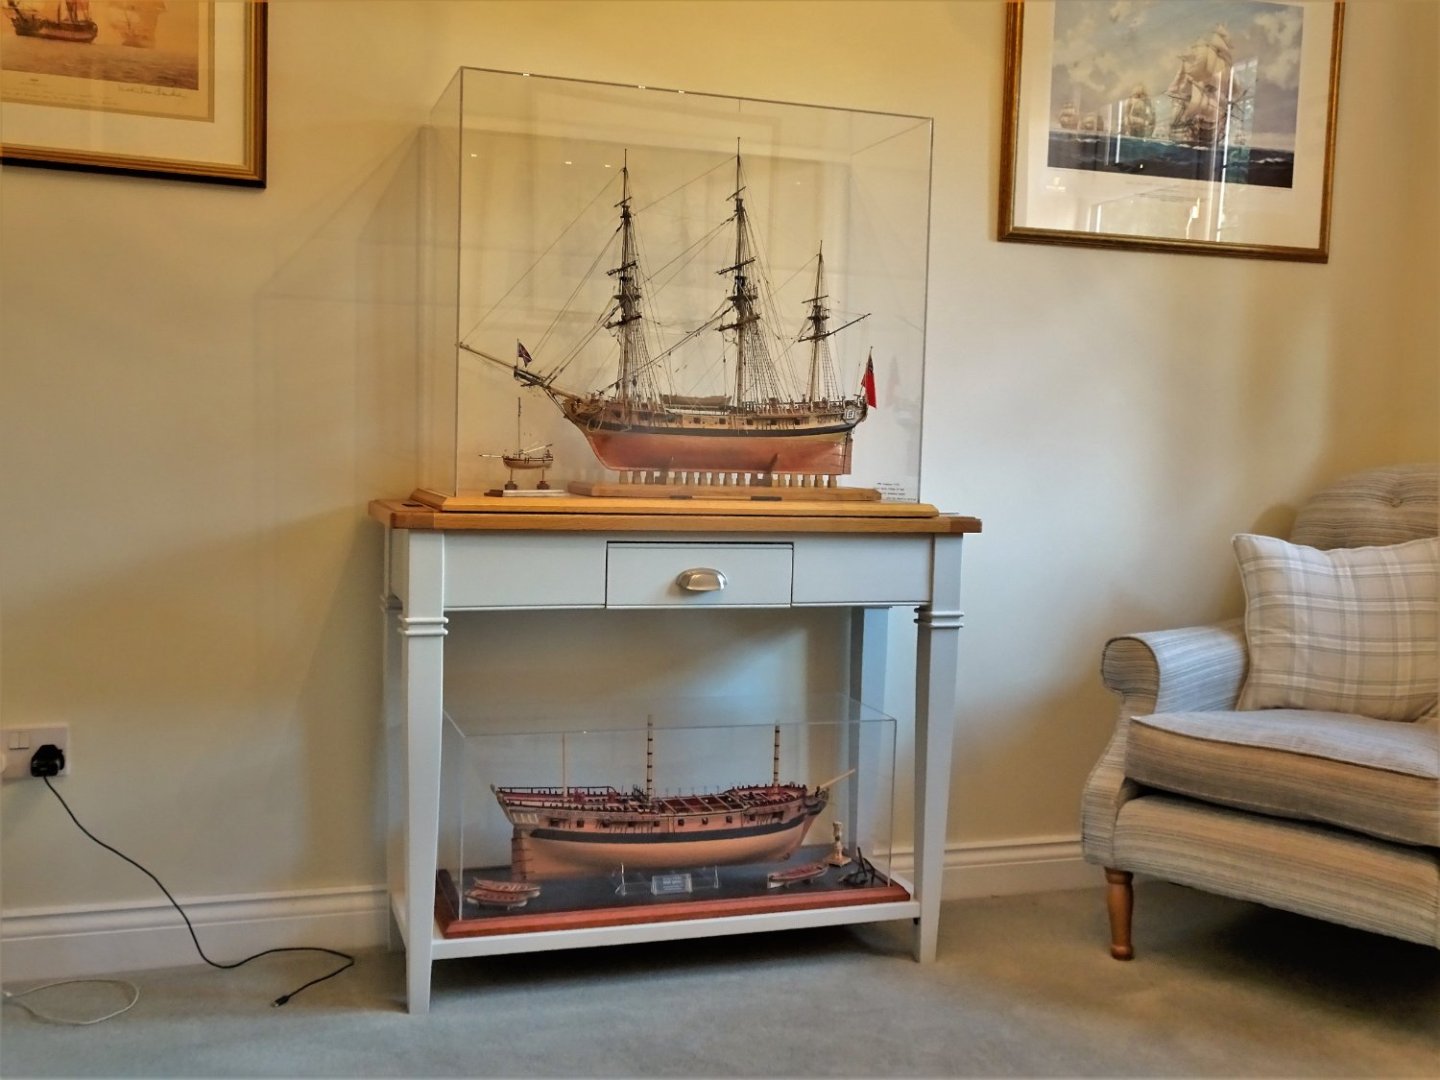
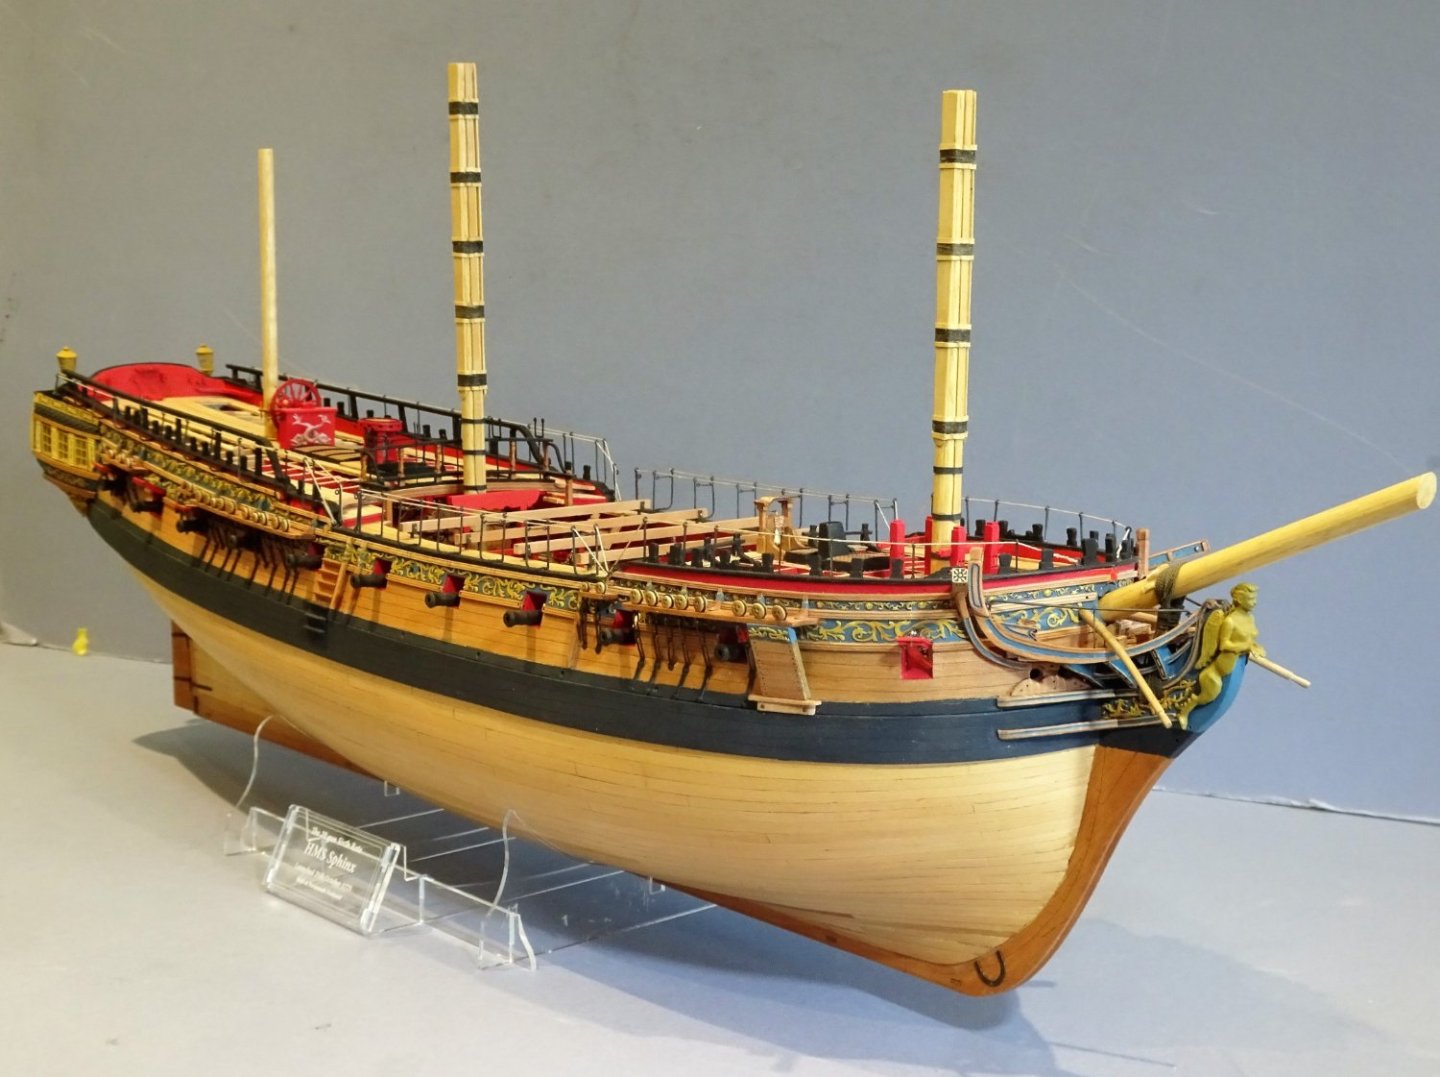
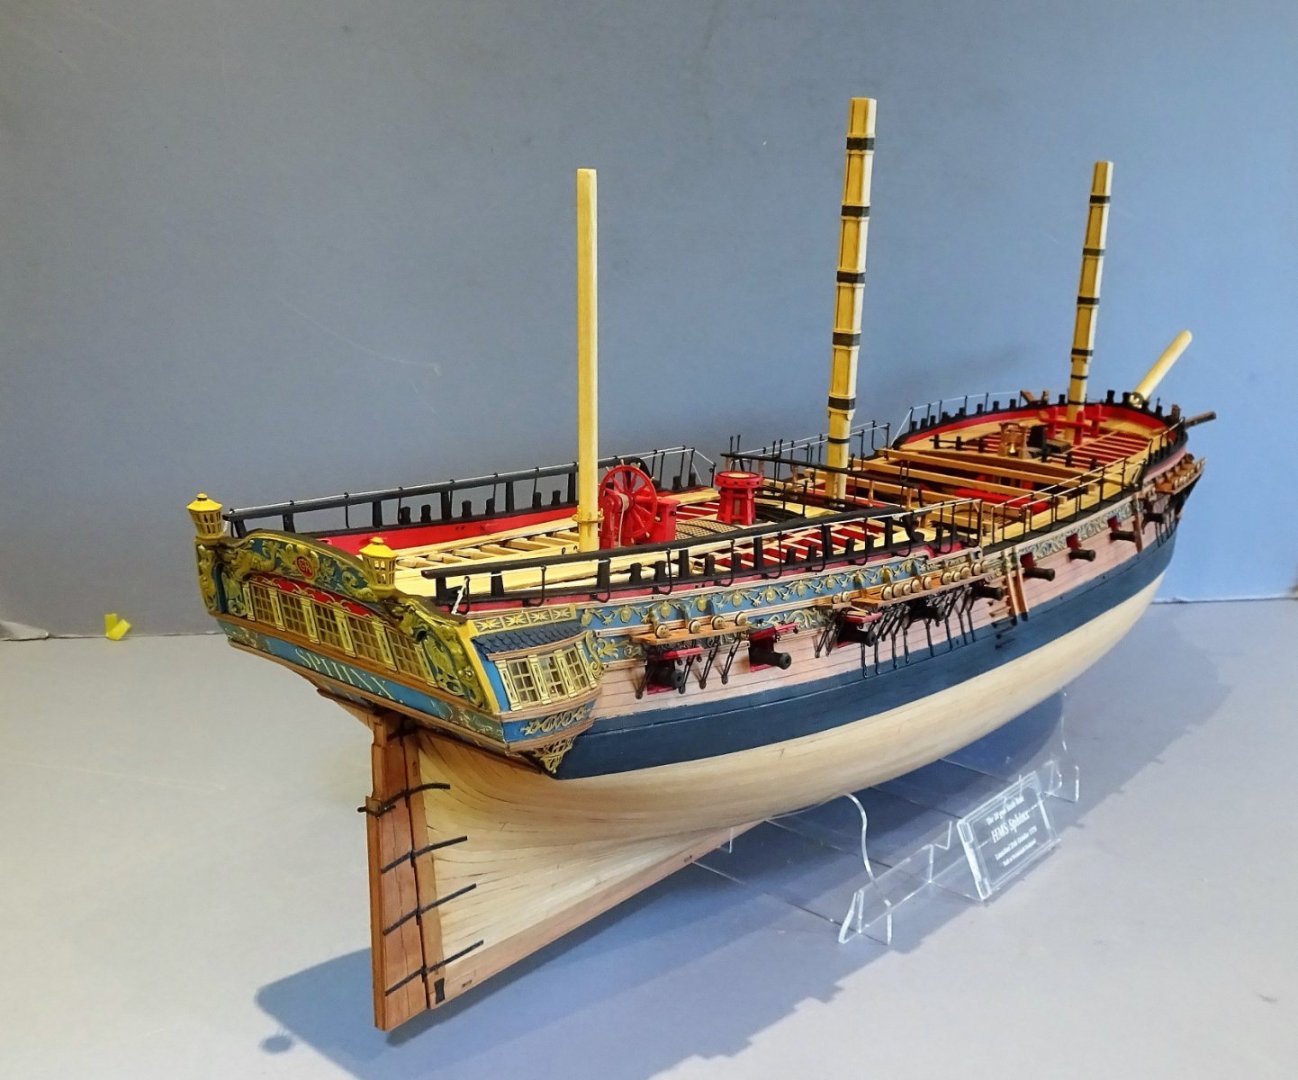
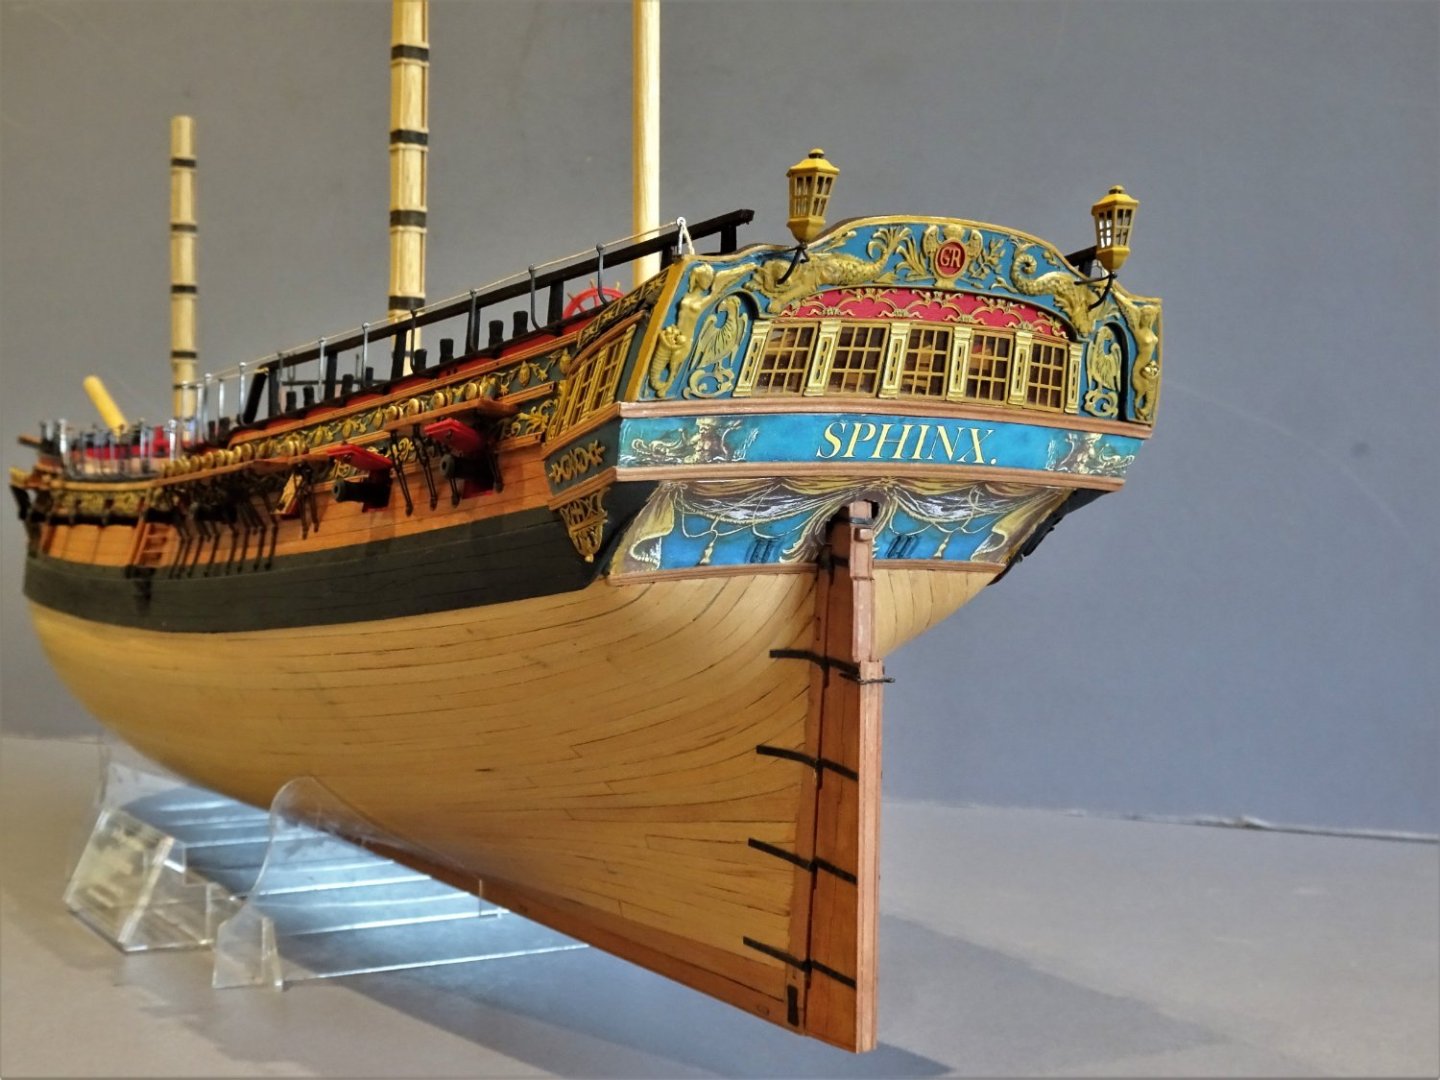
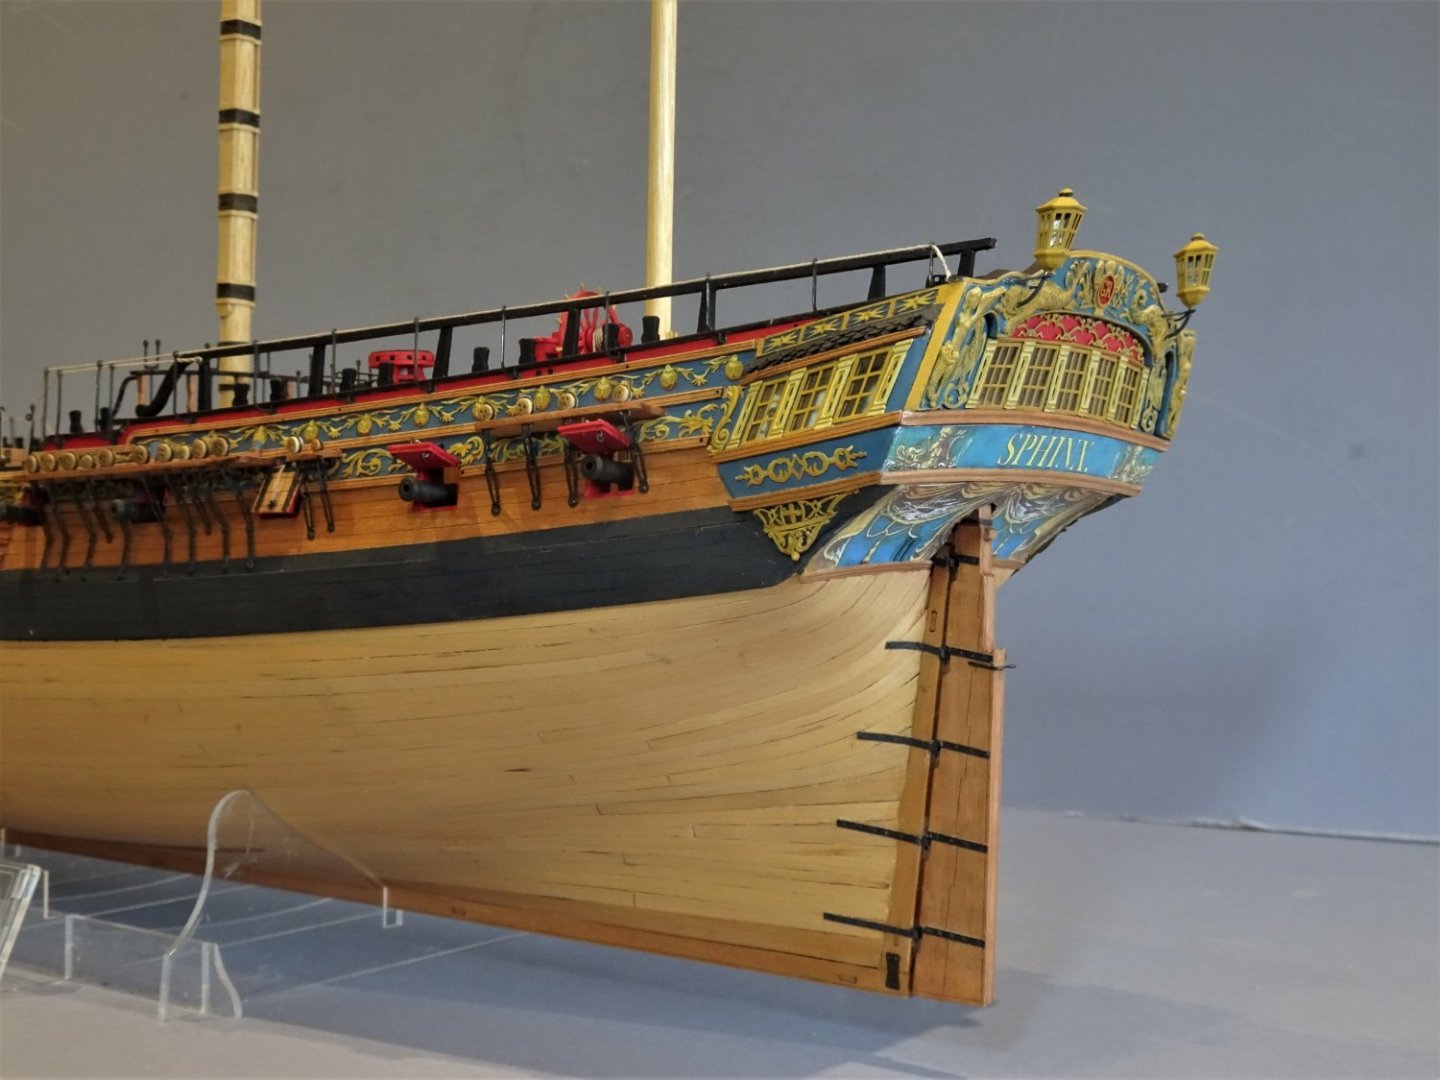
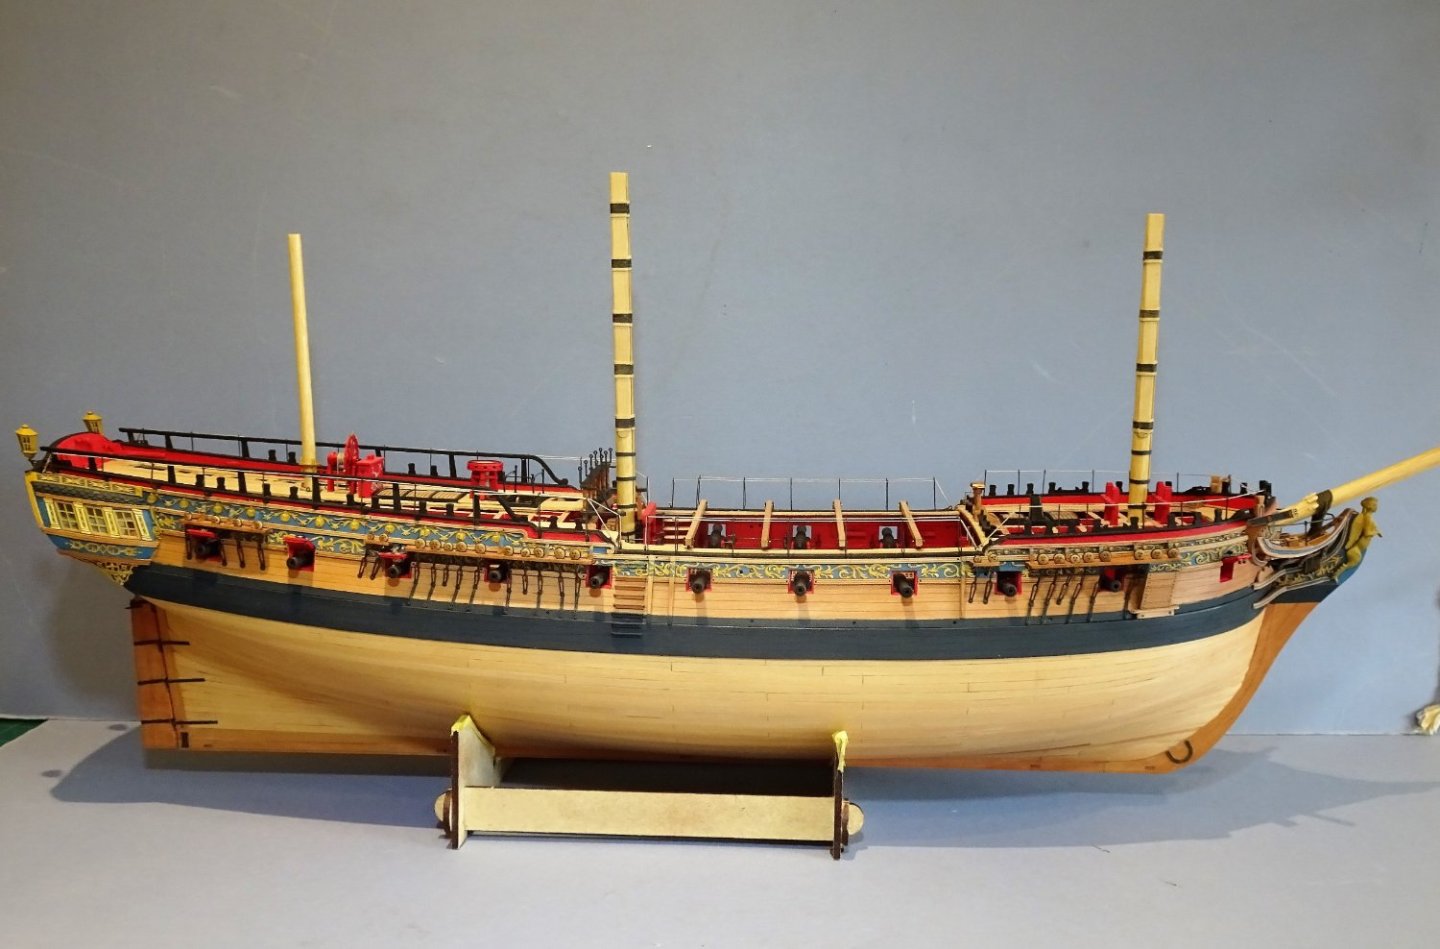
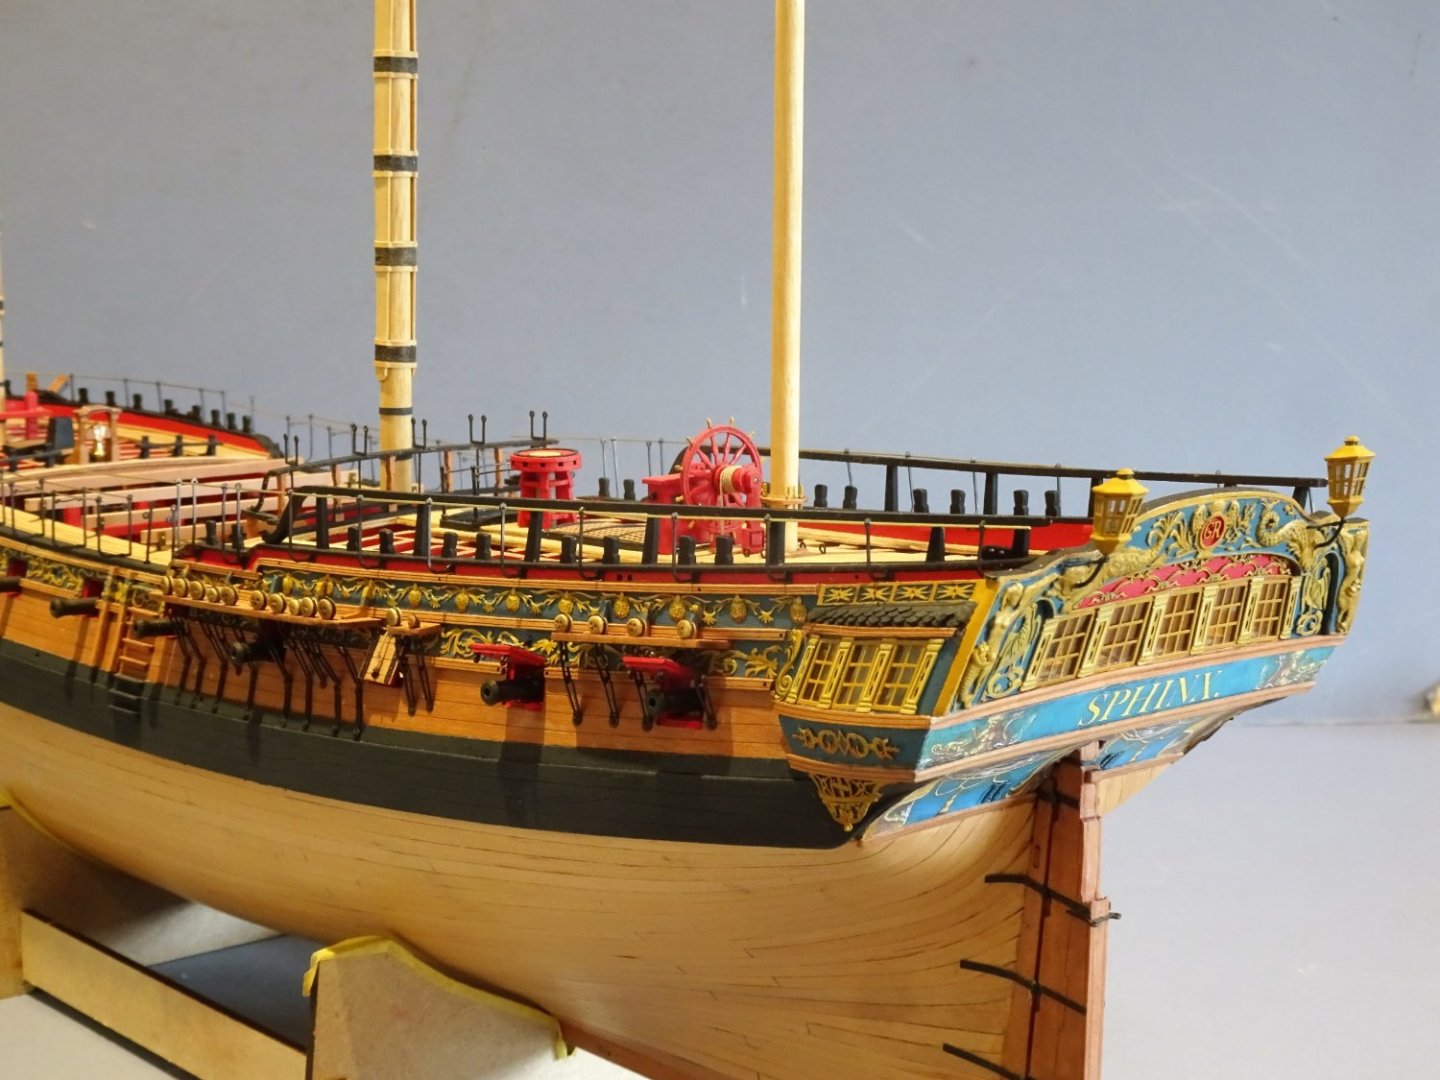
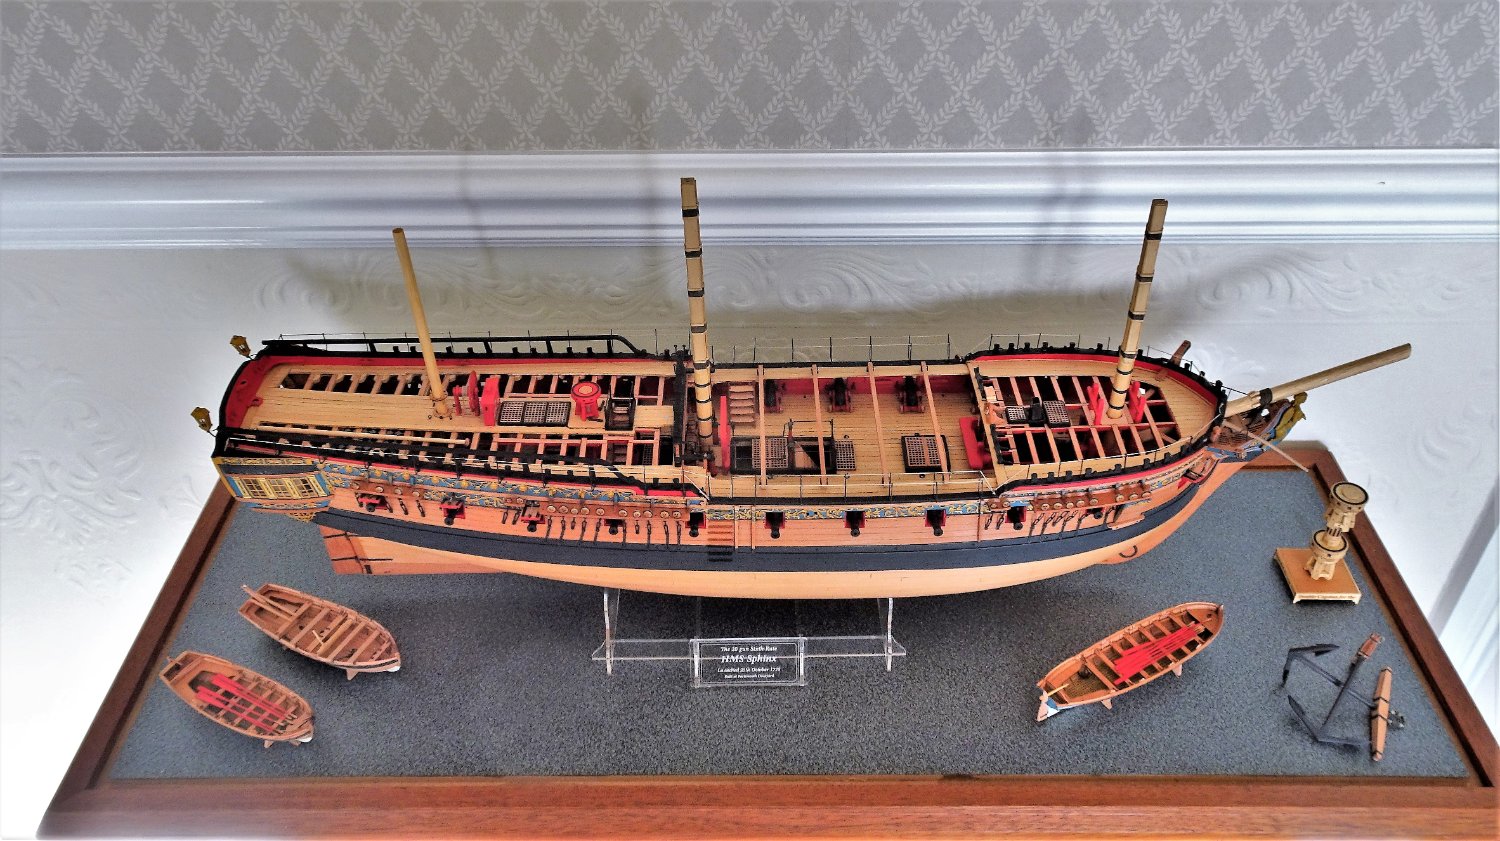
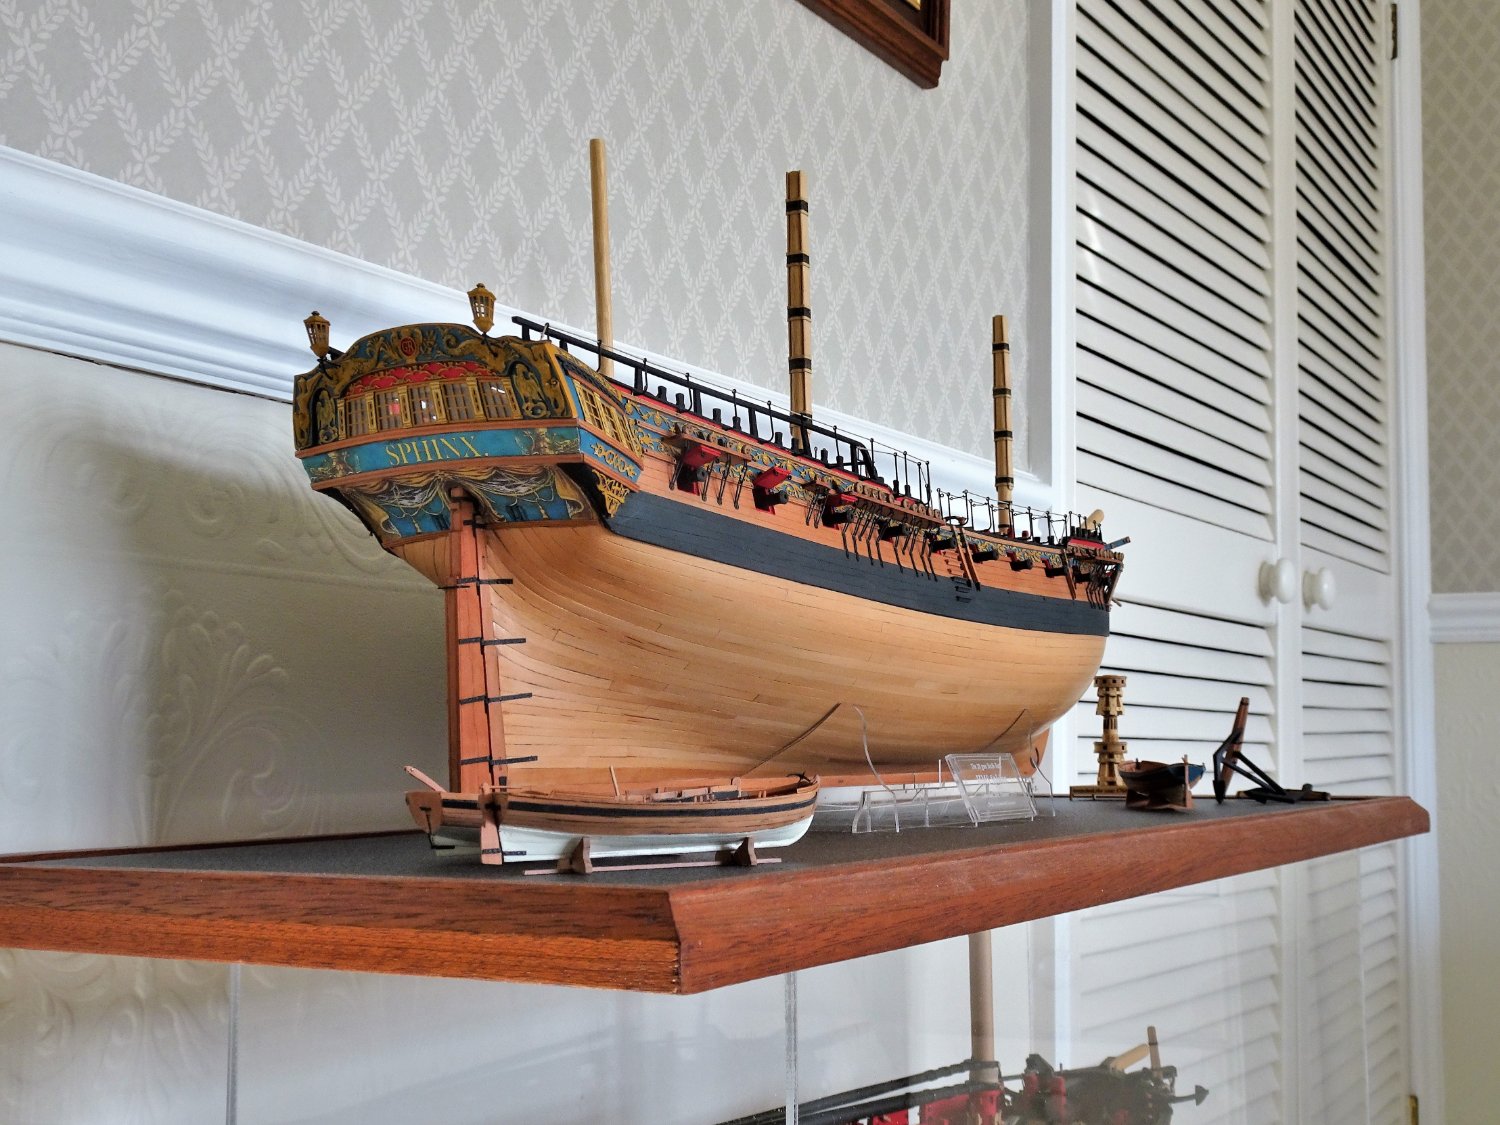
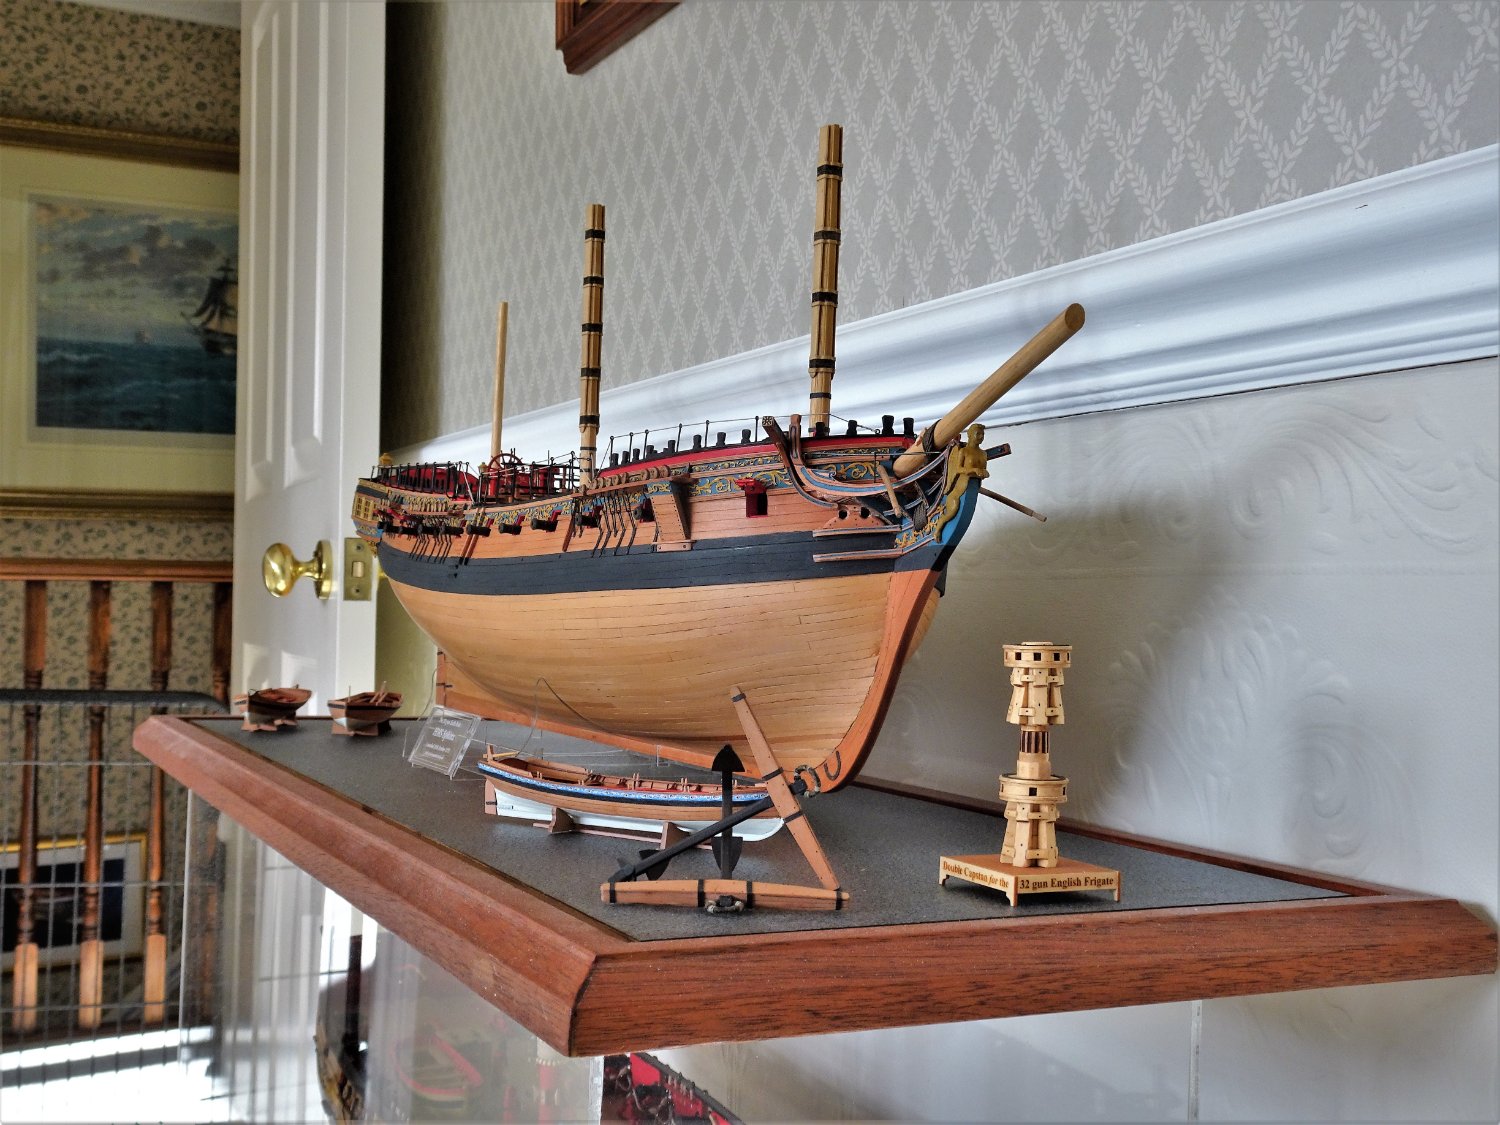
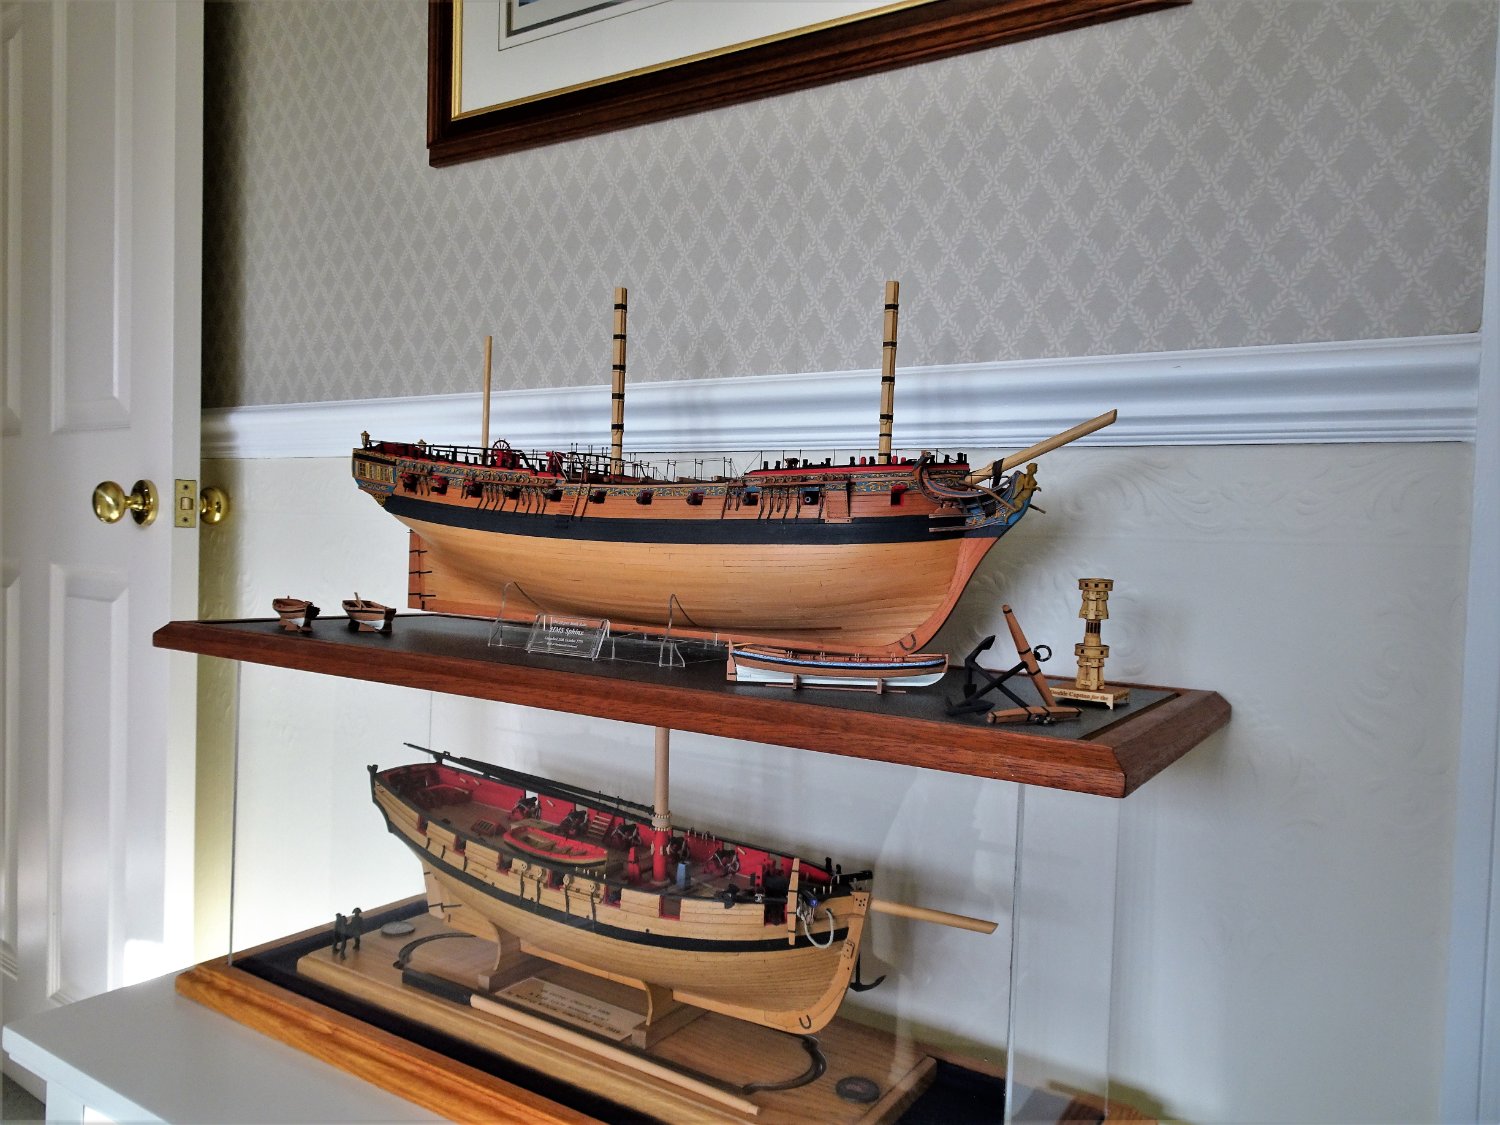
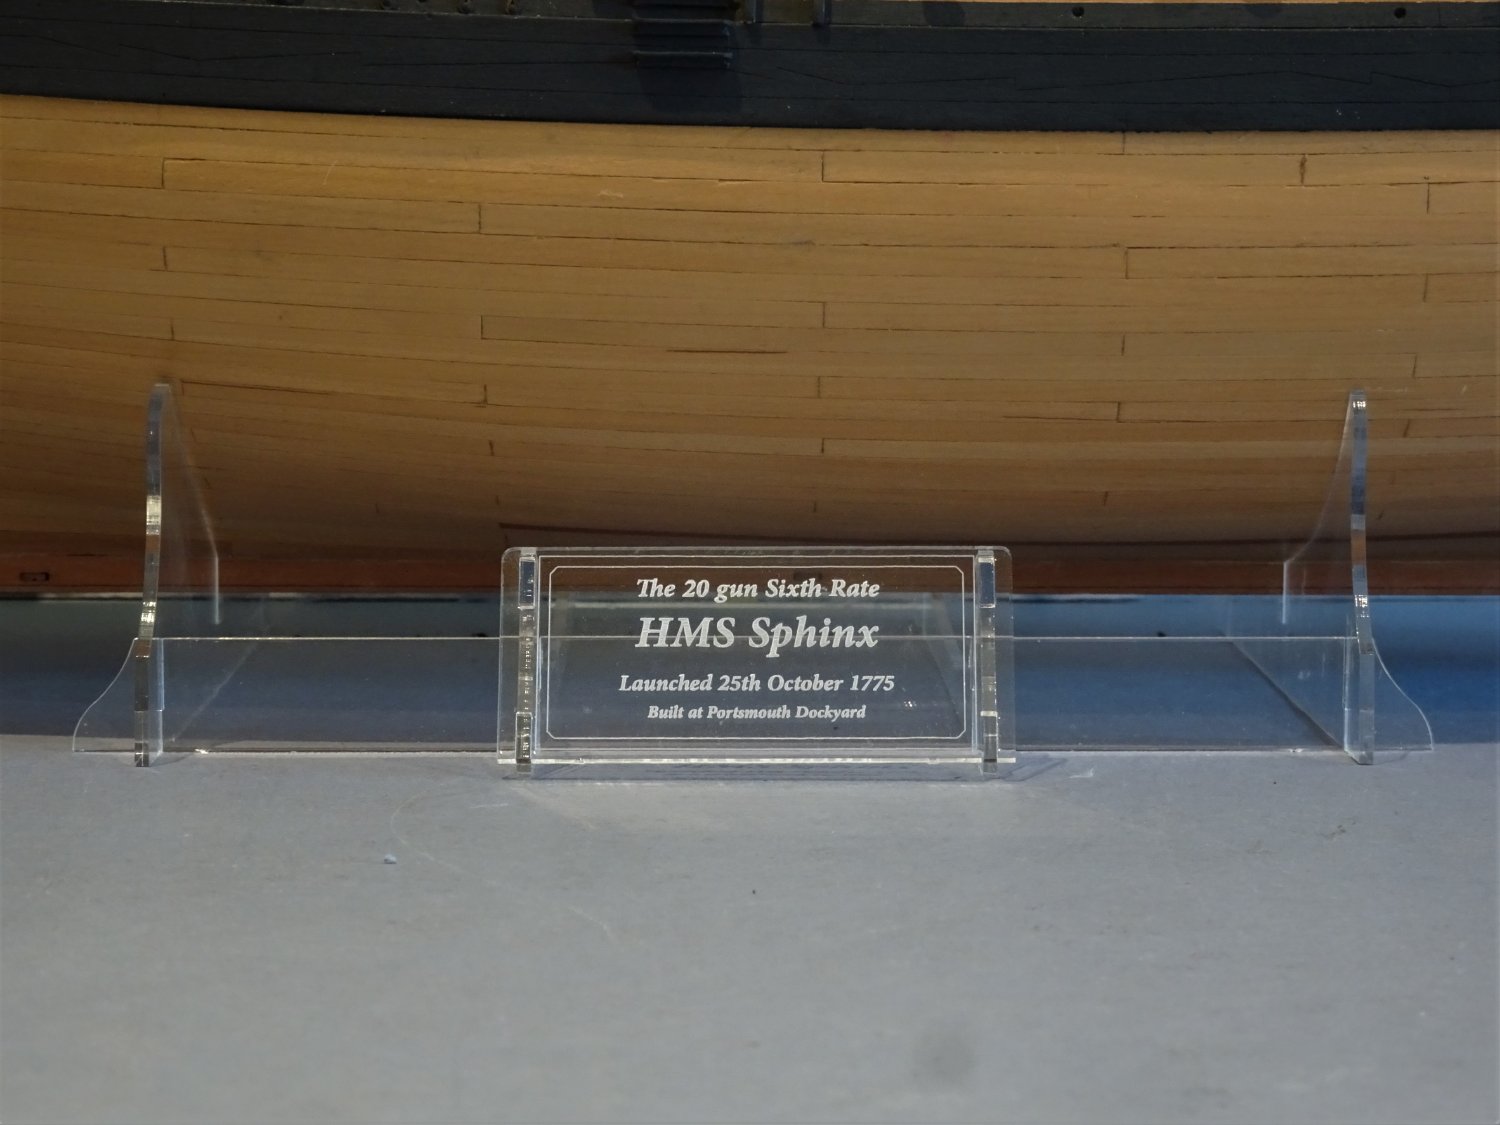
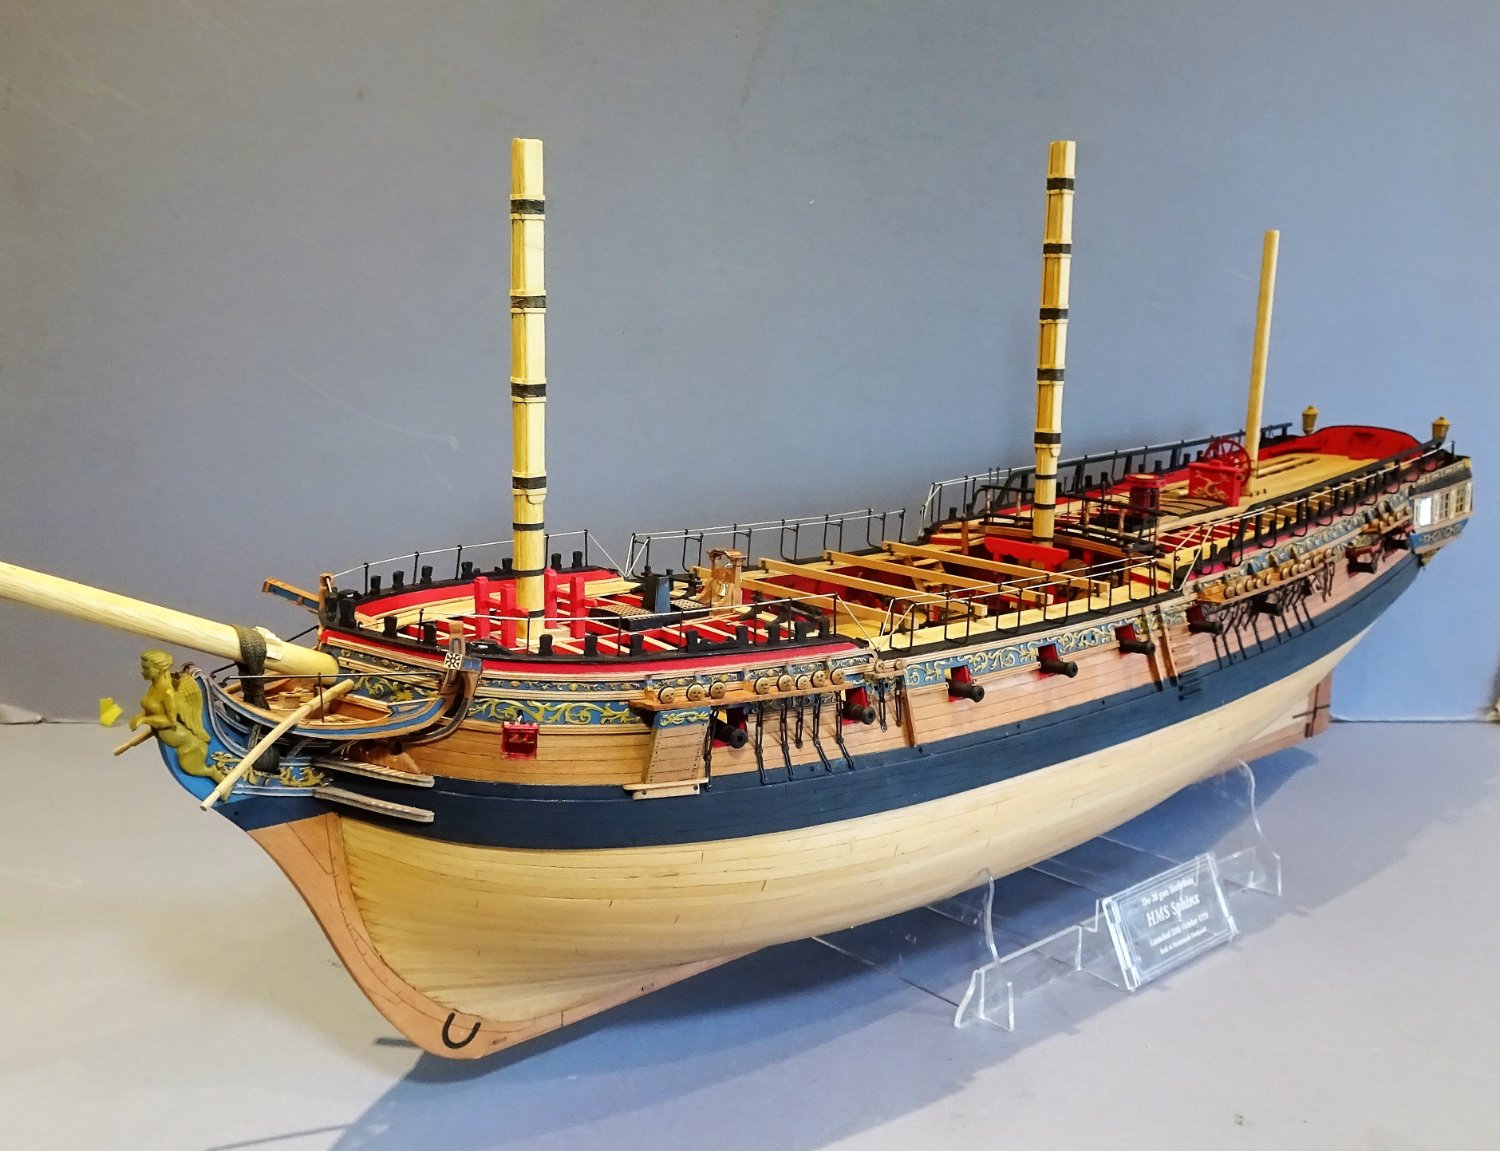
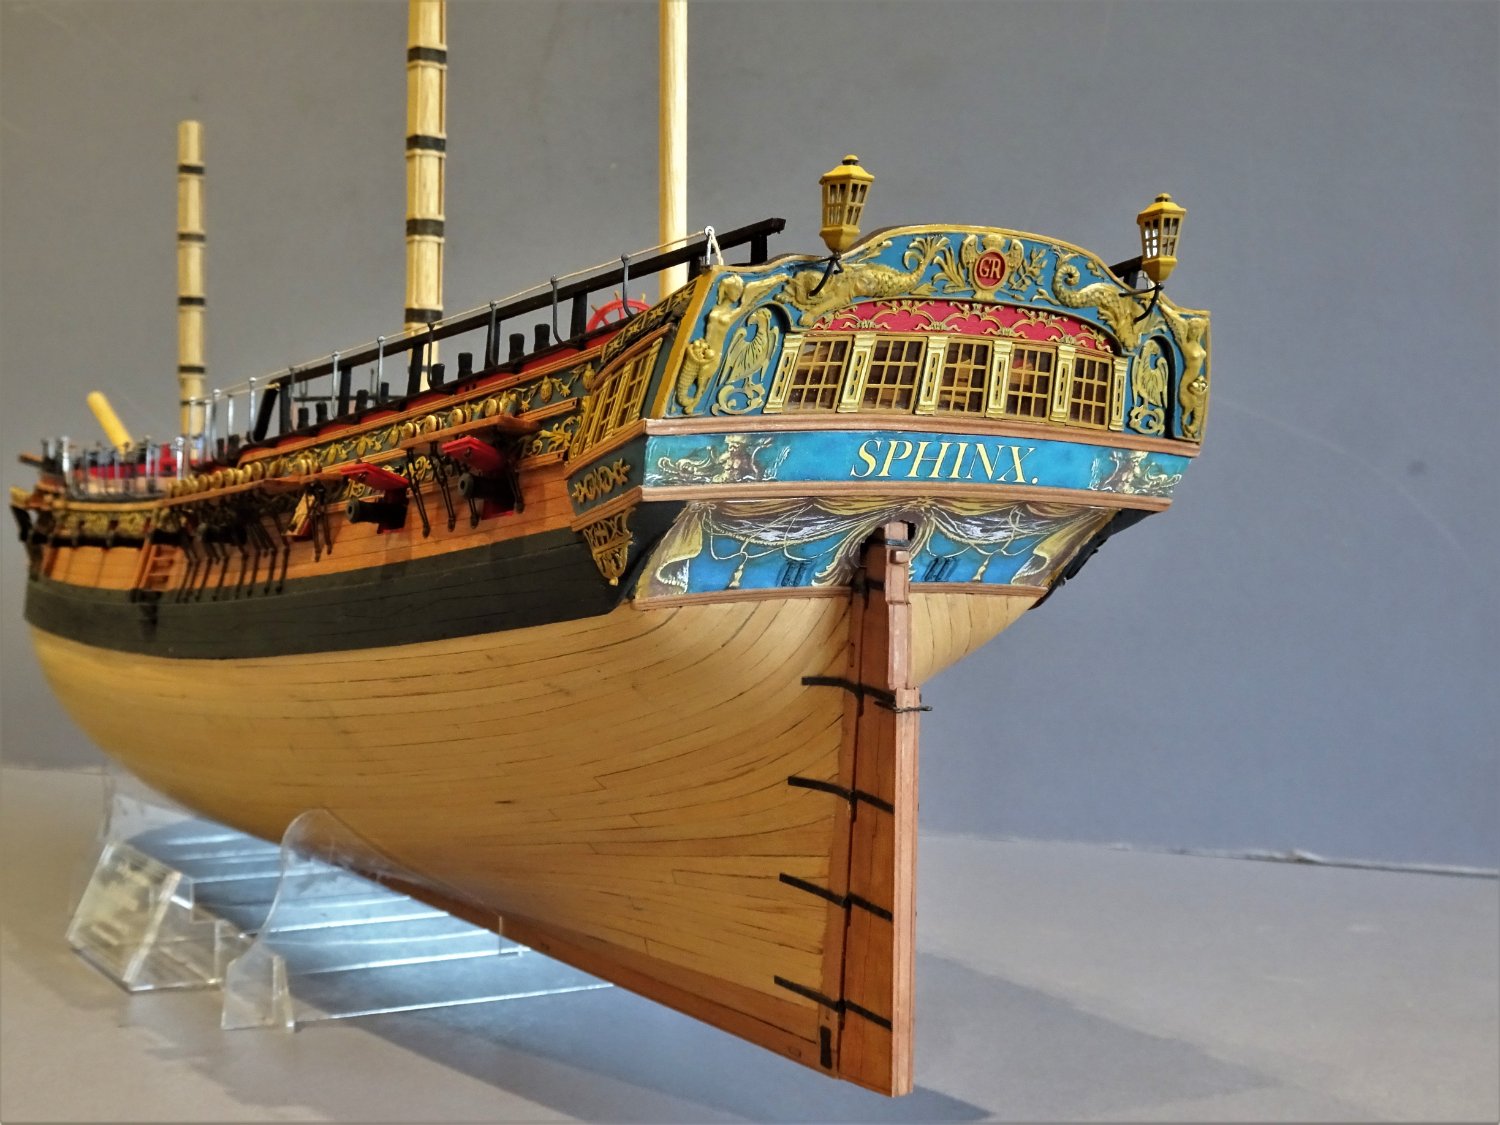
Post One hundred and Seventy-three A question of display I thought about making a support arrangement of keel blocks supplemented by small cradles much in the way that I did for Pegasus. (below) It is quite a time-consuming set-up and has implications for Sphinx where the display case height is already fixed. 5408 Fortunately, I rather like the clear acrylic stands provided by Chris, they are nicely designed, unobtrusive, and fulfil the purpose. 8794 The engraved nameplate for Sphinx I like very much. How to display the other items within the case is also on my mind but having made them I certainly don’t want to omit the three ships boats. 8777 At present Sphinx sits atop Cheerful purely for convenience but this won’t be the final display location. 8768 I could play around endlessly with positioning the other items within the case, but this is fairly pleasing on my eye, and Life is simply too short. 8775 The case also provides a convenient home to display Syren’s splendid little Double Capstan model. 8773 8774 8761(2) Cover on time…. 8800 This is where Sphinx will be displayed at least for the present. Not ideal as the low level means clear viewing of her highly decorative stern is tricky. Not that it matters as I’m not open to the public, and I know what it’s like.😉 8808 By pure good fortune the base slips neatly between the legs of the Console table currently displaying Pegasus. It is perhaps appropriate that the two ships are displayed together, both being sixth rates of the same era. The models also share a common heritage, both being designed by the talented Mr Watton, altho’ with a good number of years in-between. It was partly that I already had a fully masted and rigged Sixth rate that I didn’t feel too badly about consigning the kit masting and rigging elements to the spares box. This is not quite the end of my Sphinx journey as I now have to move onto compiling a pictorial build record book as I have done with all my builds. I will return with something considerably smaller for my next project. Regards, B.E. 14/10/2022
.thumb.JPG.955f8aaa36d05bb1cd395f68d3c703b3.JPG)


- 857 replies
-
- 30
-
-

-

-
- Sphinx
- Vanguard Models
- (and 1 more)
-
Beautifully detailed Nils, as we have come to expect from your unique subjects. There is always something new to spot when the photos are re-visited, love the kettle on the stove. Well done. B.E.
-
Re: The Ensigns. Altho’ the Ensigns are not always worn at sea, I like to show them, but the Commissioning pennant is always worn at the Main T’gallant head. I don’t think the Union flag is usually worn at the Jackstaff when at sea, and unless a model is displayed ‘bare stick’ I would leave it off. Nice work on the crew figures Ron, they look convincing. You may already have them but there is a nice little paperback book by Osprey publishing called ‘Nelson’s Sailors’ detailing the clothing of sailors, and companion books Nelson’s Midshipmen and Officers, and Nelson’s Navy. Modestly priced and readily available on Amazon. I see that the two crew figures you show are taken from the artwork in the Nelson’s Sailors book, and very nicely done. B.E.
- 542 replies
-
- 3
-
-
- Sphinx
- Vanguard Models
- (and 3 more)
-
Great stuff Jason, beautiful crisp work. 👍 B.E.
-
Cheers Guys, much appreciated, and thank you for following along. Regards, B.E.
- 857 replies
-
- 5
-
-
- Sphinx
- Vanguard Models
- (and 1 more)
-
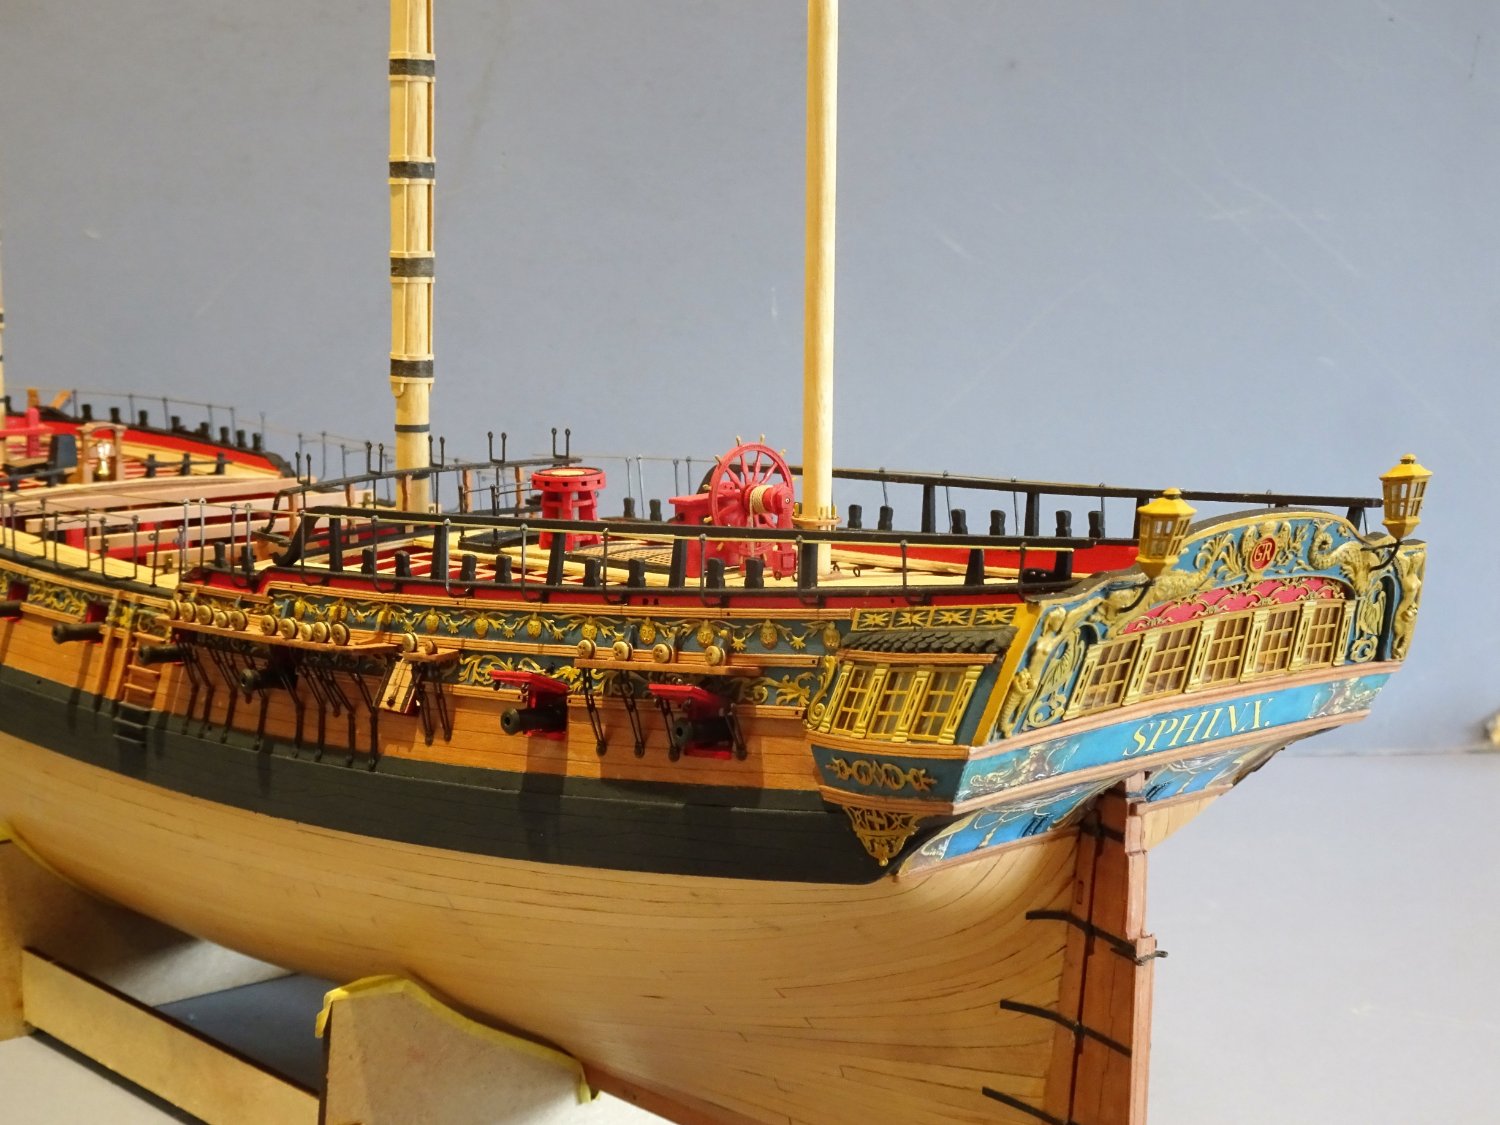
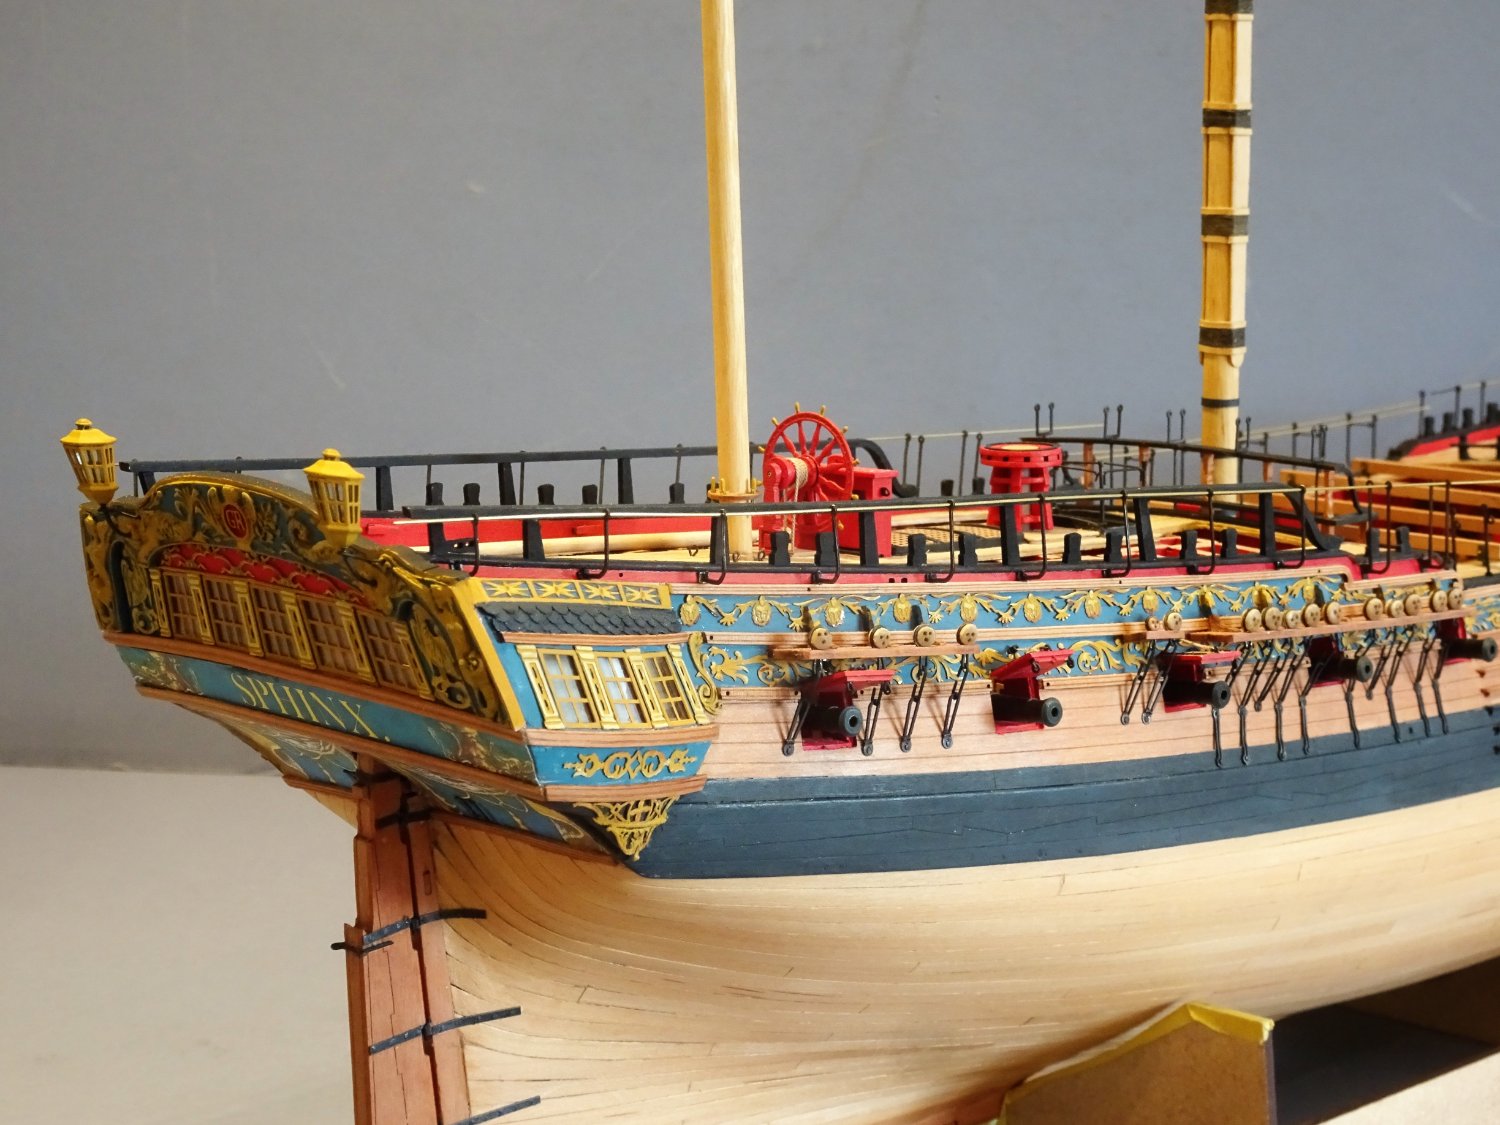
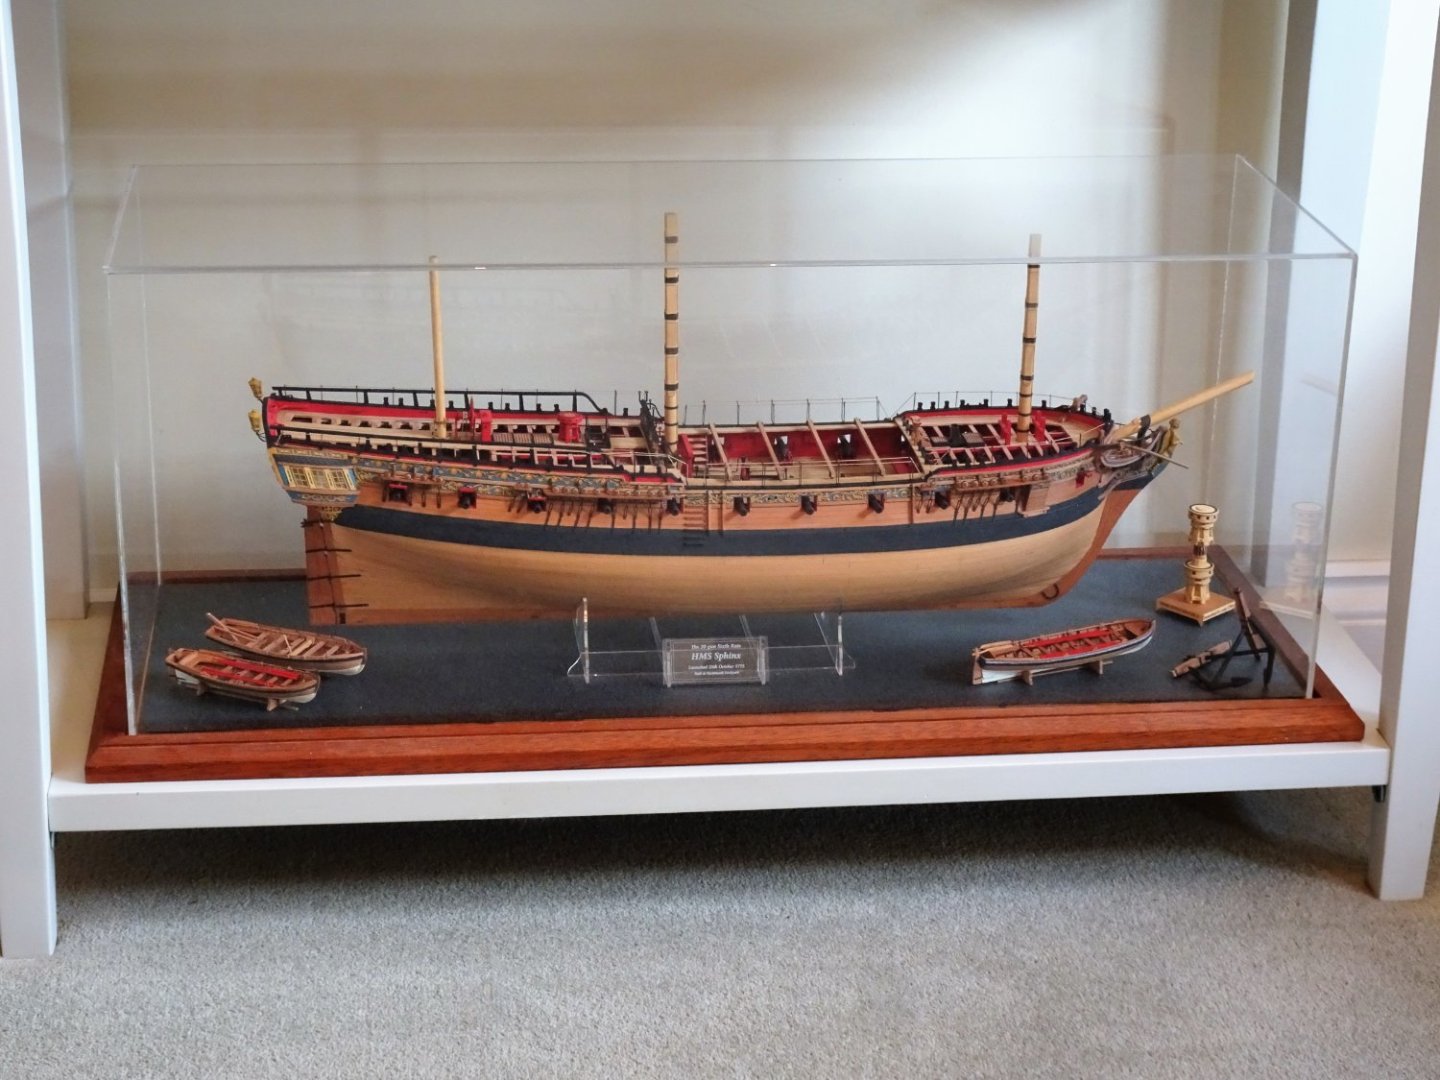
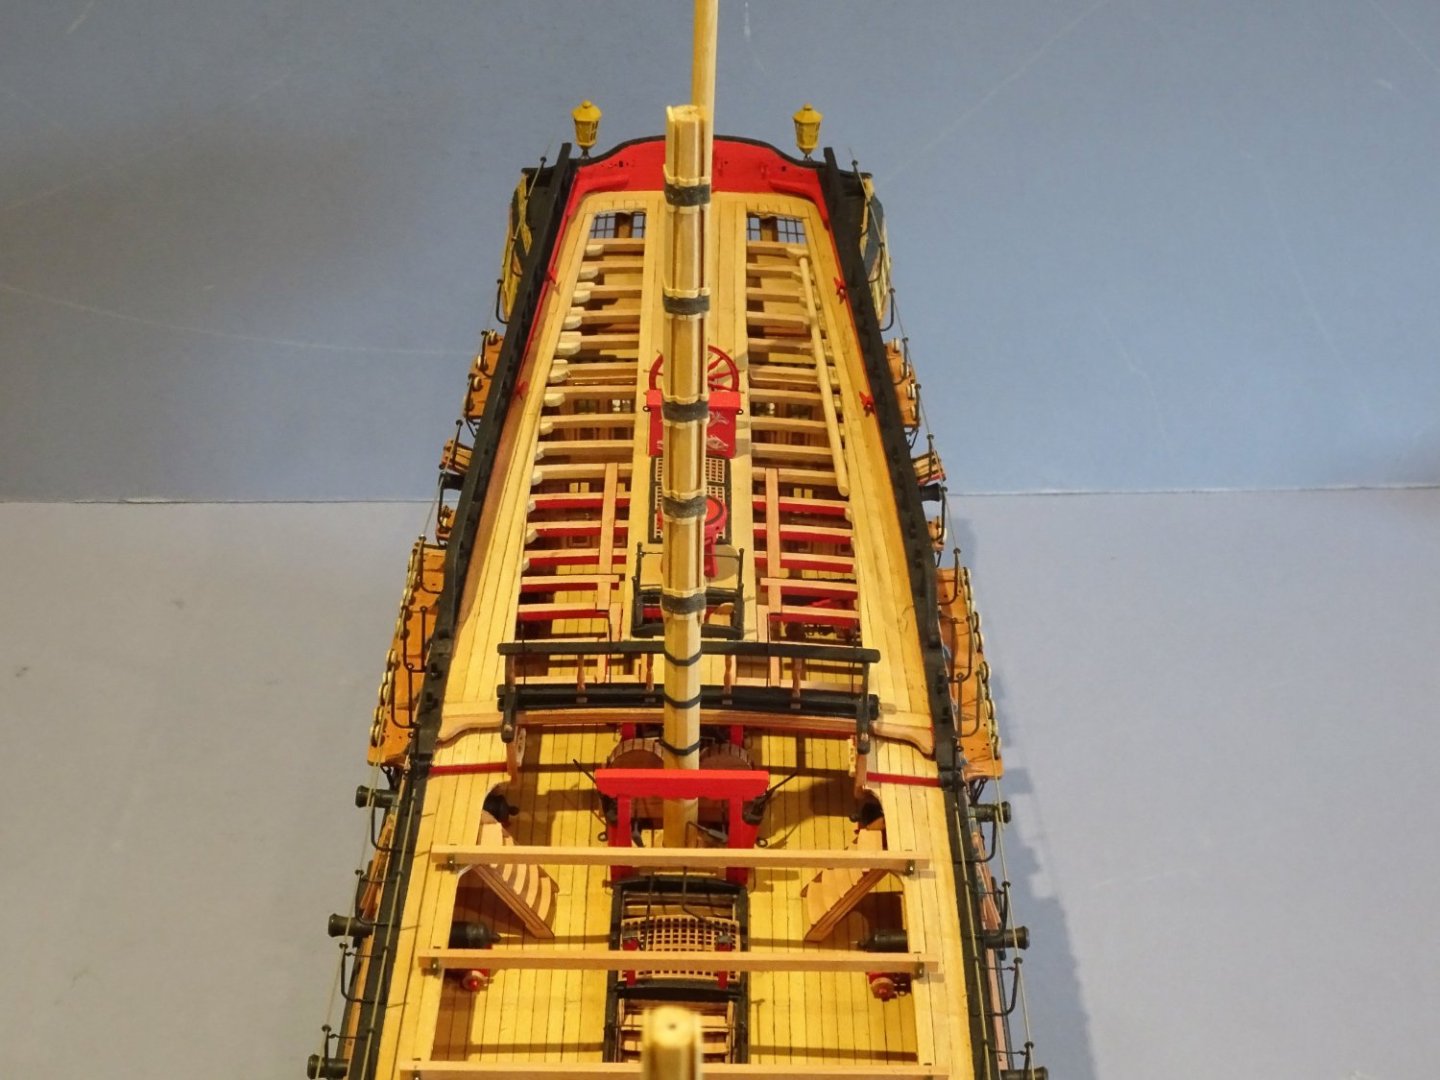
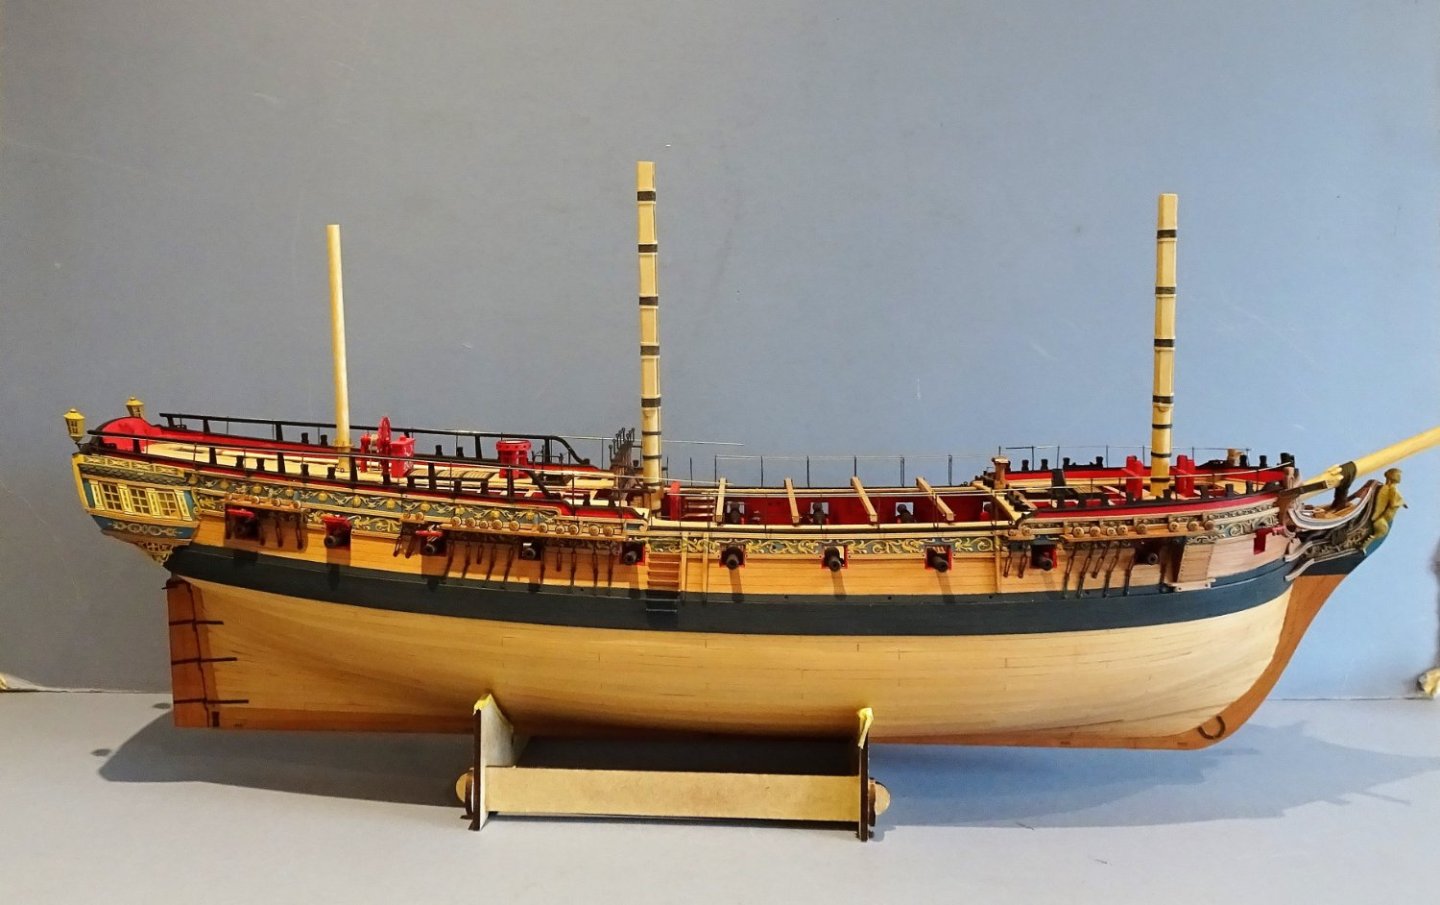
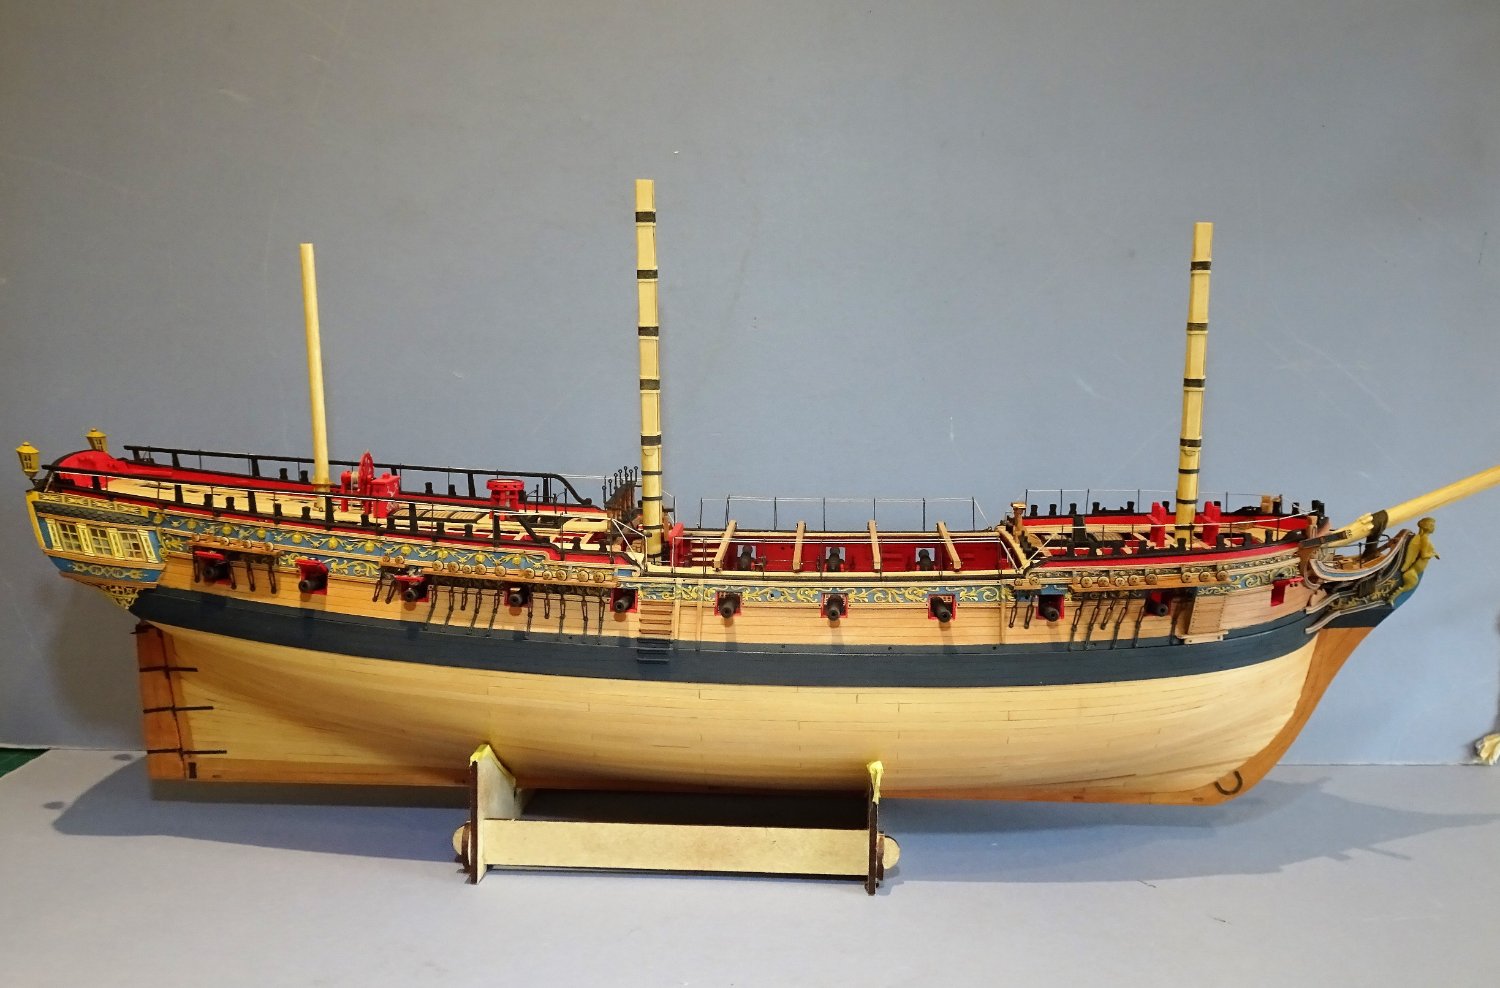
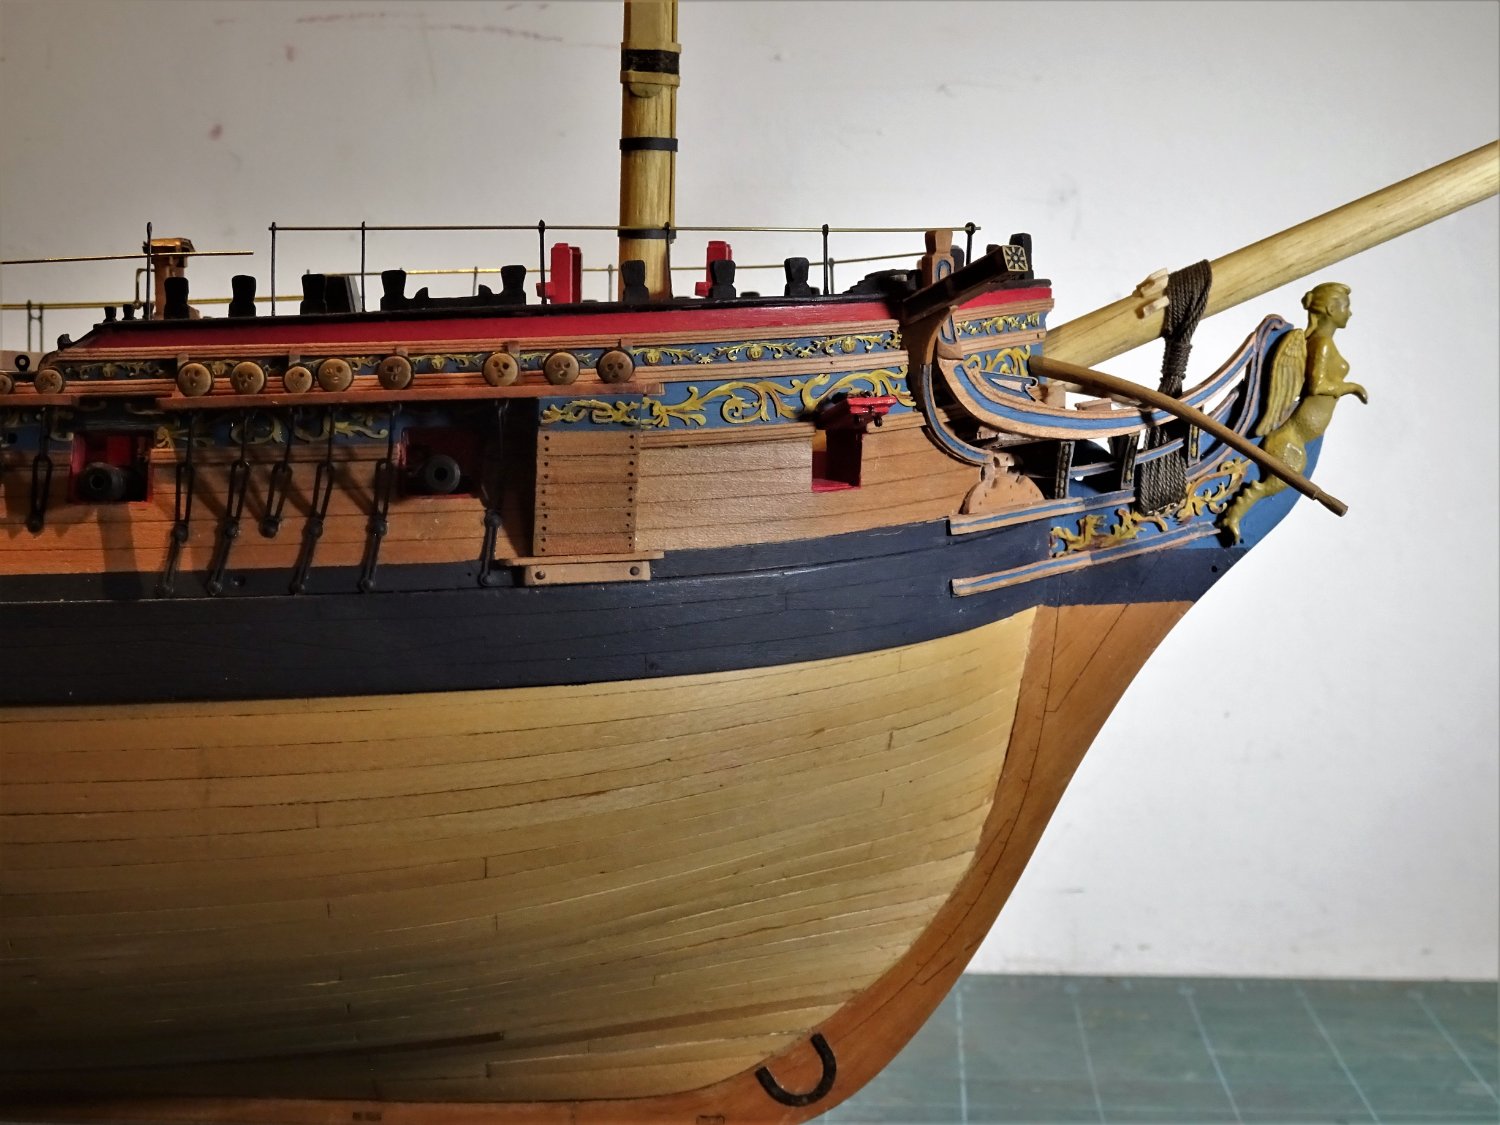
Post One hundred and Seventy-two Completion So, after fourteen months of fairly consistent work I have to declare Sphinx finished, but of course this does not include the masting and rigging element that would have taken at least another twelve months. 8792 For the purposes of the shoot, I have added the instantly detachable Boomkins. Strangely they don’t Jarr on my eye as they did a post or two back. 8778 8783 8782 8795 8797 8780(3) Thoughts about the Sphinx kit I have thoroughly enjoyed building Sphinx and it offers significant kit design improvements over my previous build of the small frigate, Pegasus, back in 2010. It produces a fine model as an oob build and provides options for the more experienced builder to apply tweaks where kit simplifications can be improved. In the case of Sphinx these have mainly related to the internal Quarter gallery and great cabin areas, which have been addressed by Chris in his latest development of the frigate Indefatigable. There have been concerns expressed that the Sphinx kit has too many pre- made parts such as the outer planking and Wale patterns, but this is no assembly by numbers project, great care is necessary to produce the finish that this kit deserves. The use of some resin components allows for finer detail, and the very fine brass etch decoration is pretty close to ‘painted on’ The design of this kit includes a complete lower deck with main fittings, and if fore and aft lower platforms are added there is a view thro’ the hatches from the upper deck directly down to the hold. Not many kits offer this level of detail below the upper deck level. The provision of scale deck beams for the Quarter deck and Foc’sle was one of the reasons that attracted me to the kit providing the option to make a ‘Navy Board ‘style model. I did have to make my own Lodging knees, but this is also something Chris has addressed in his latest design. I have to thank Chris for providing the makings to build Sphinx, and for the ongoing support in providing additional and replacement parts. His service is second to none. I am also grateful to Jim Hatch for his pathfinder work in constructing the prototype and providing many helpful photos along the way. I also thank Chuck Passaro of Syren who has assisted me with the decorative panels on Sphinx, and whose wonderful model of Winchelsea has provided much inspiration and ideas adopted on my own build. Finally, I would like to thank all those MSW members who have supported me throughout this build, providing encouragement and advice. Regards, B.E. Ps I now need to work out how to display Sphinx within the case and decide where to put it.🤔

.thumb.JPG.5b747fb787ff280c6a216424891428de.JPG)
- 857 replies
-
- 45
-
-
-
-
- Sphinx
- Vanguard Models
- (and 1 more)
-
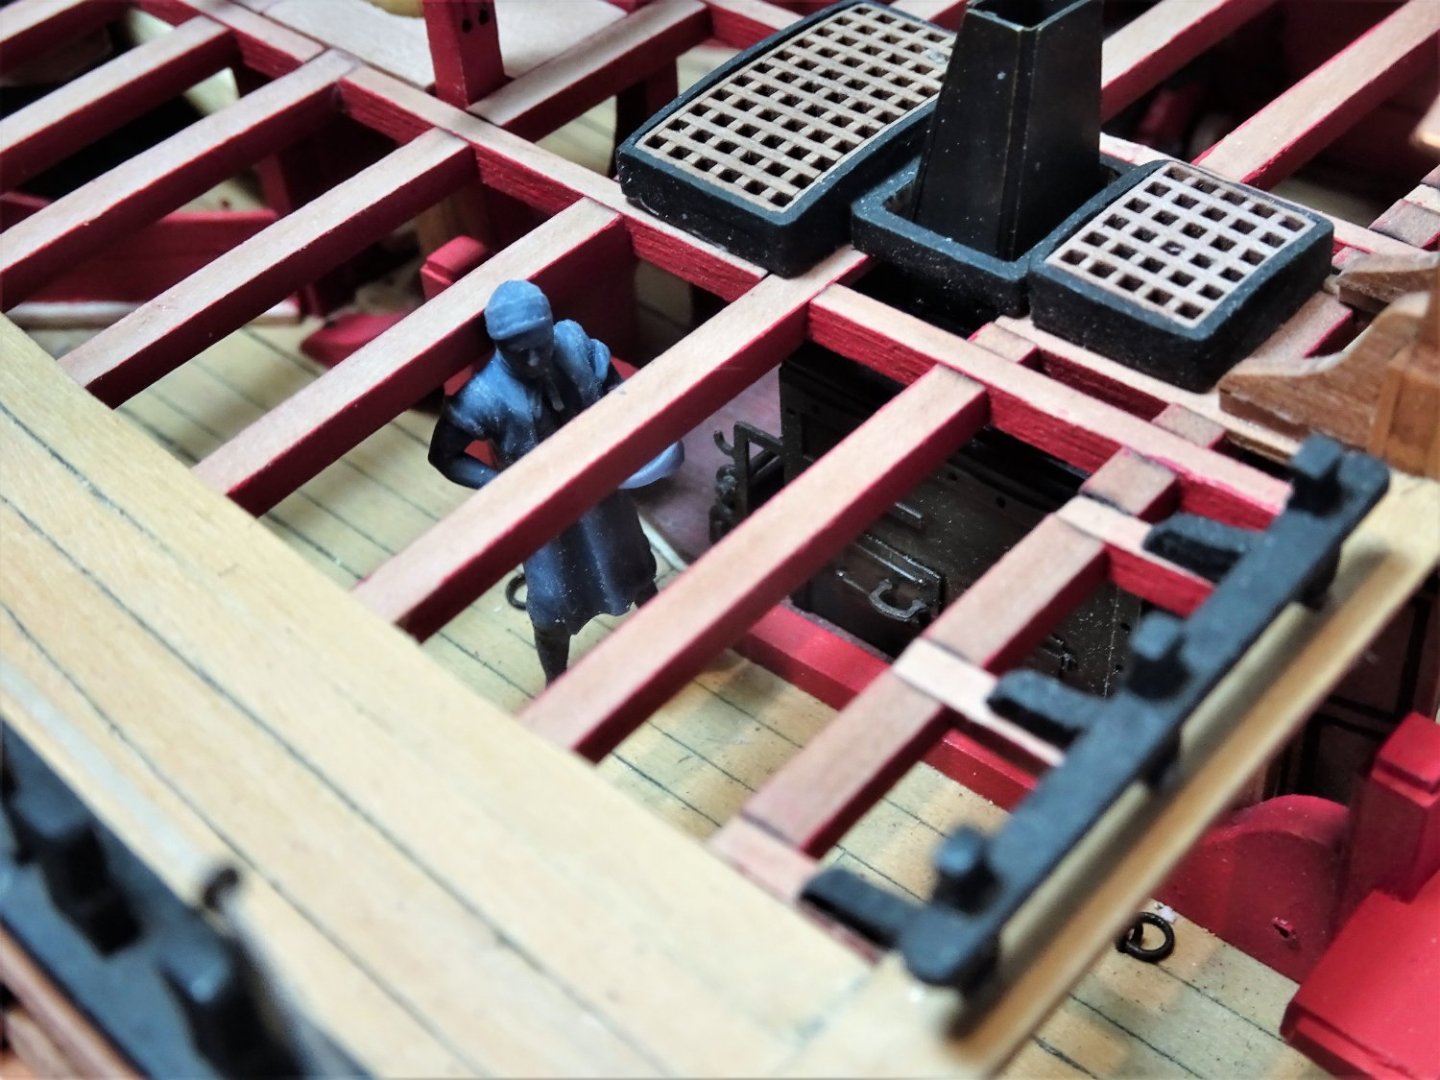
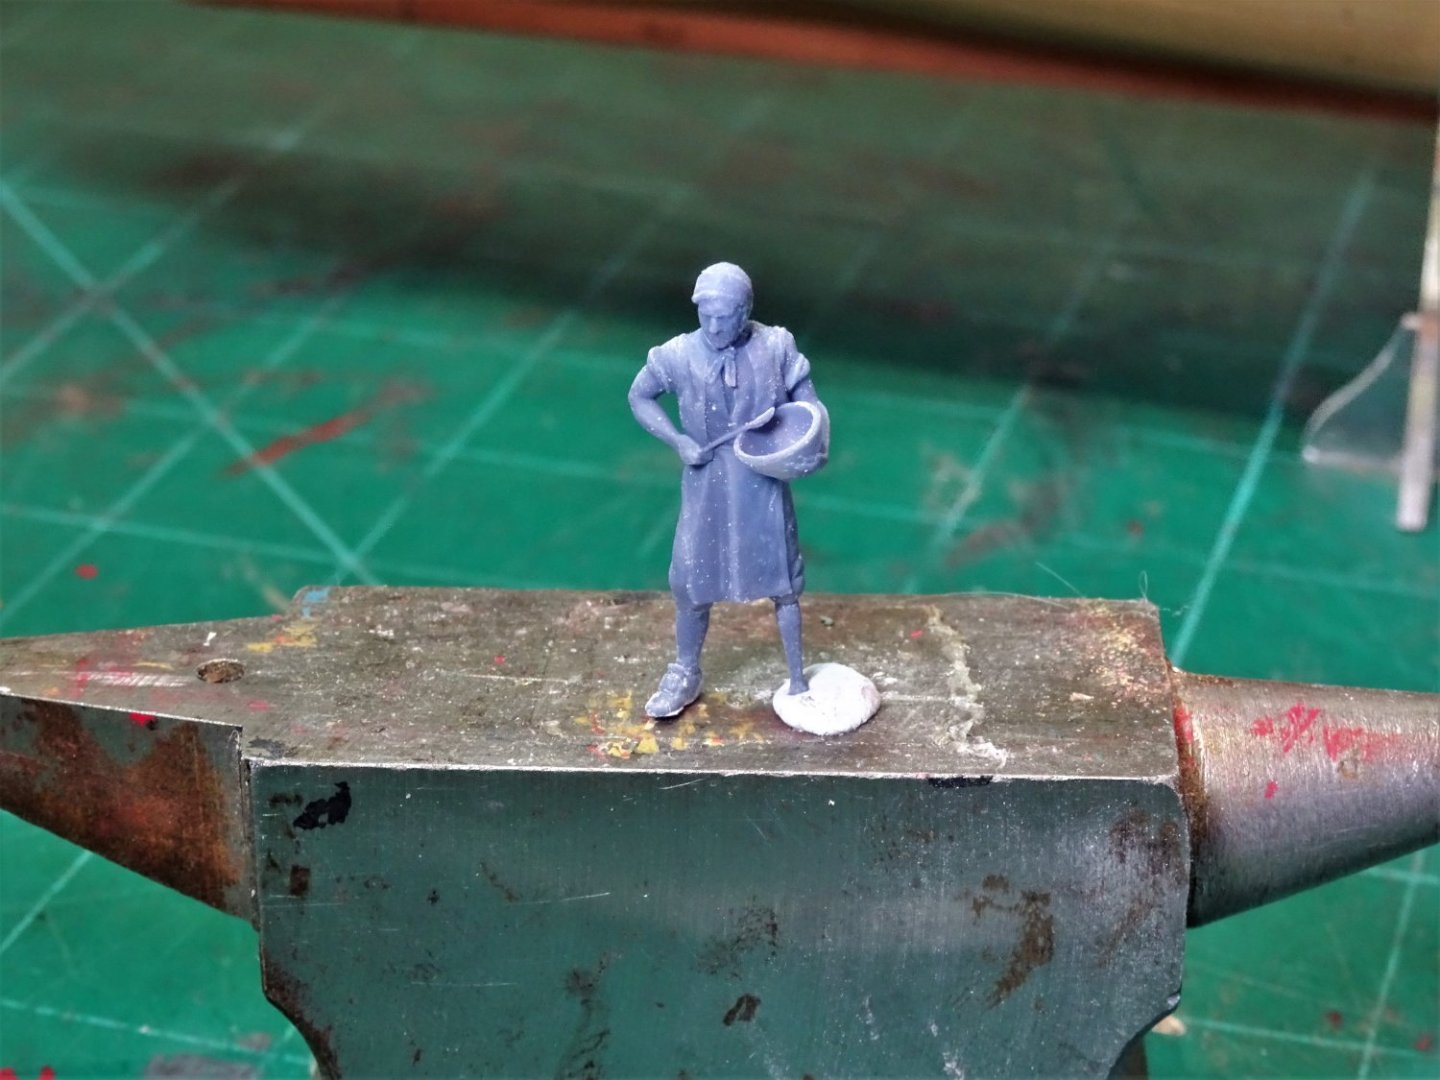
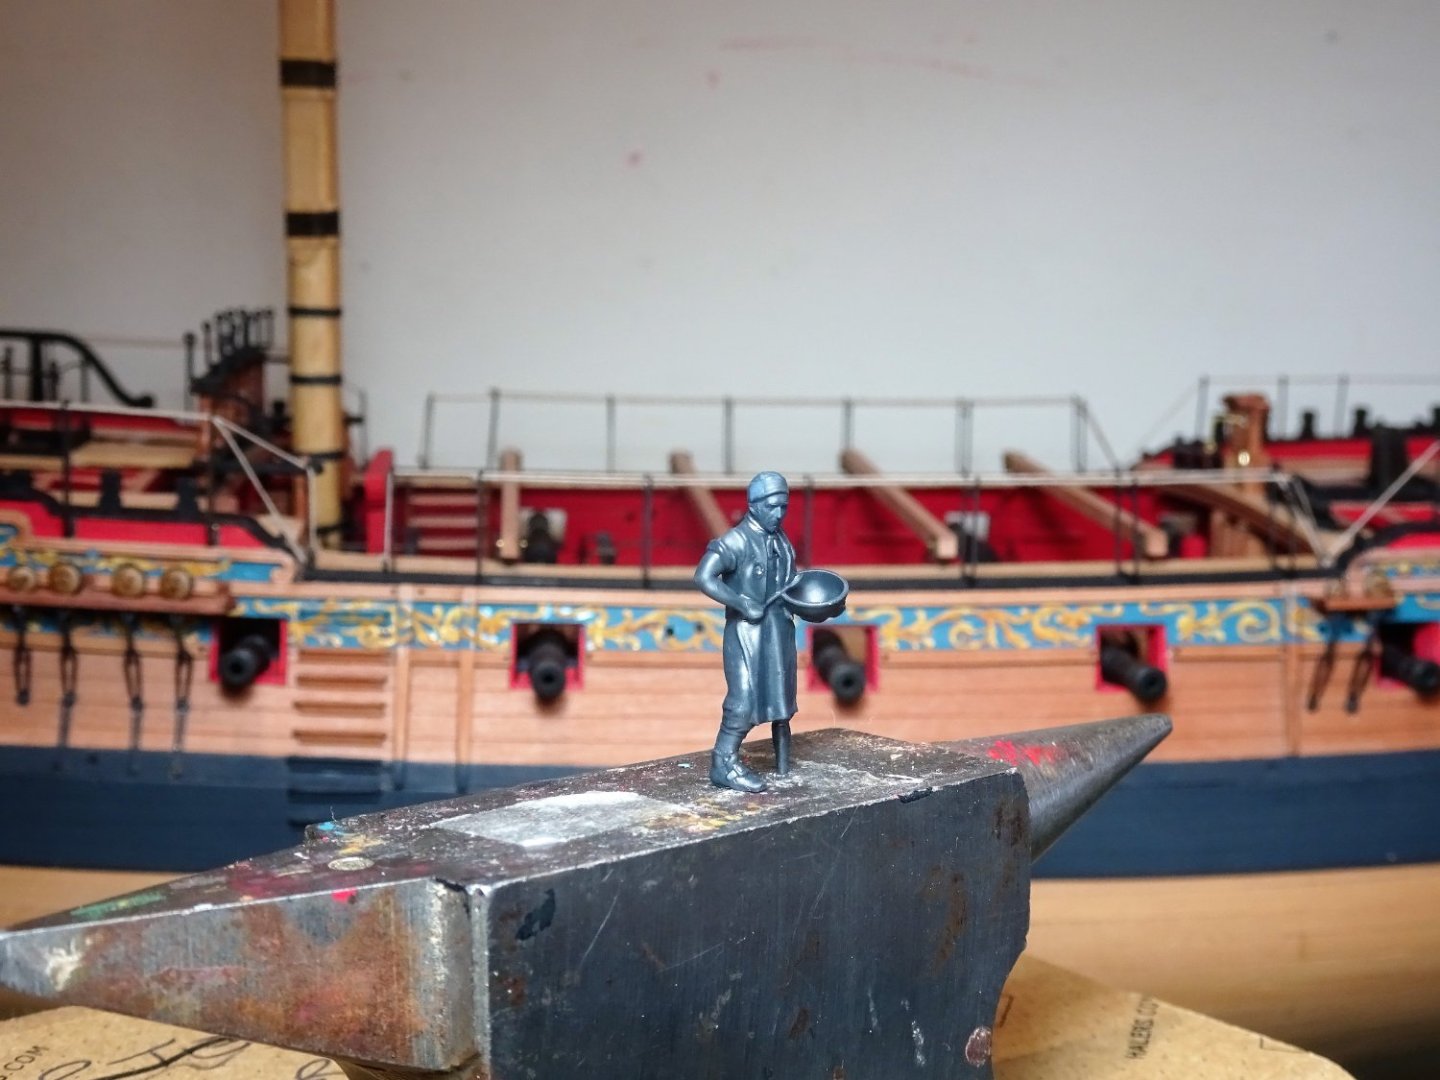
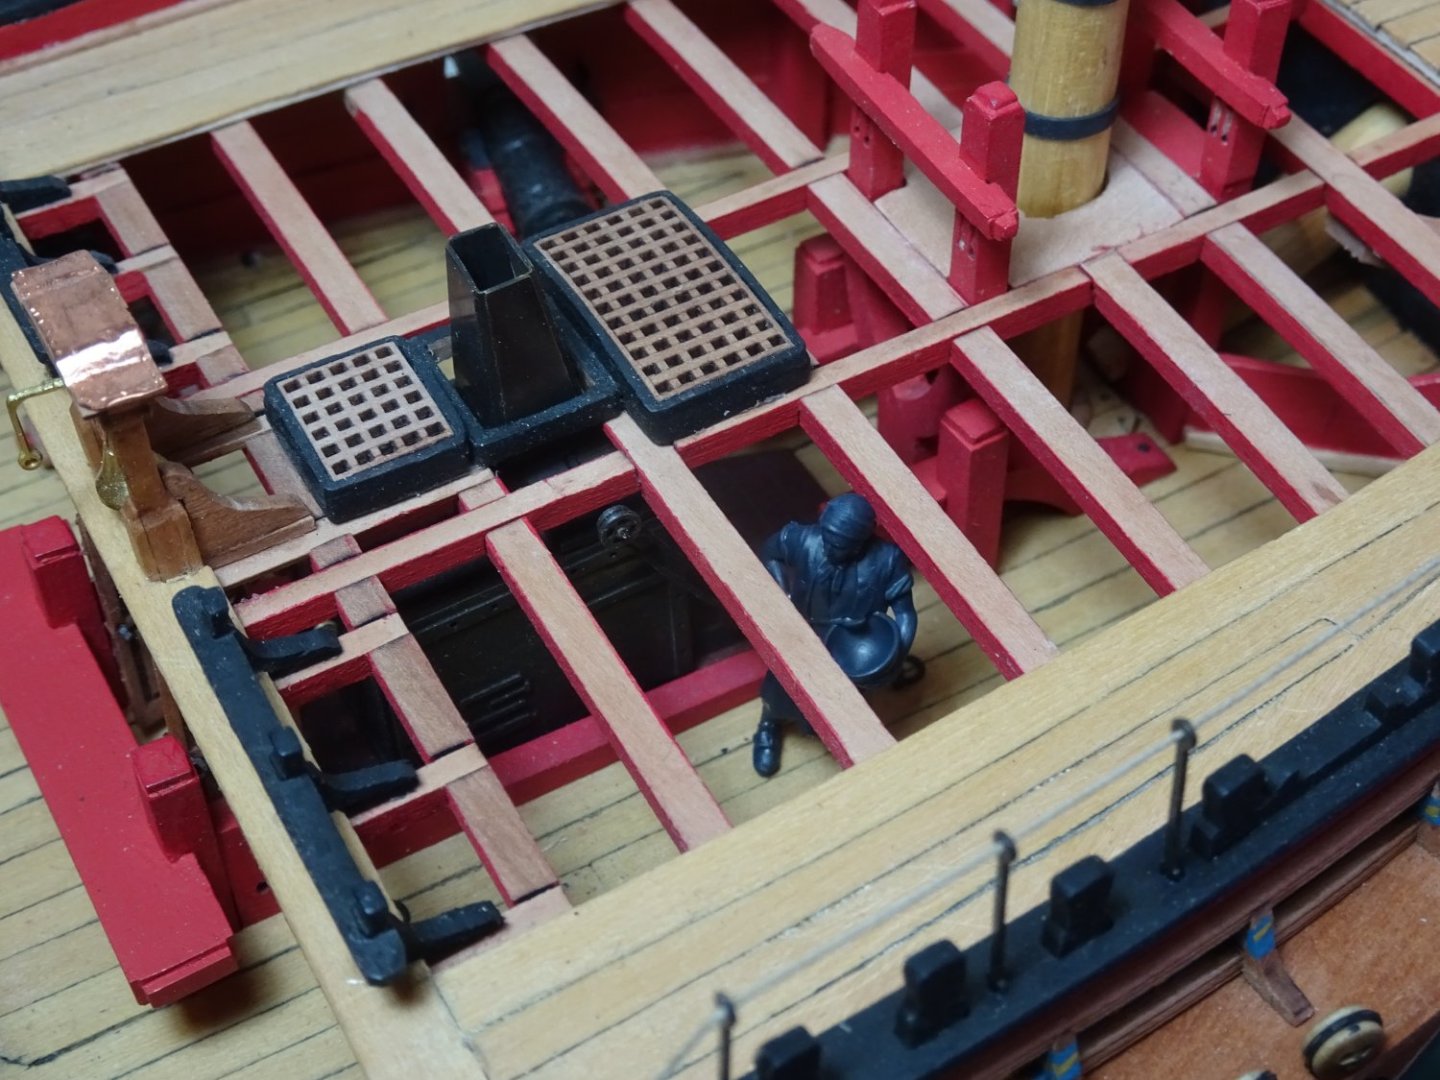
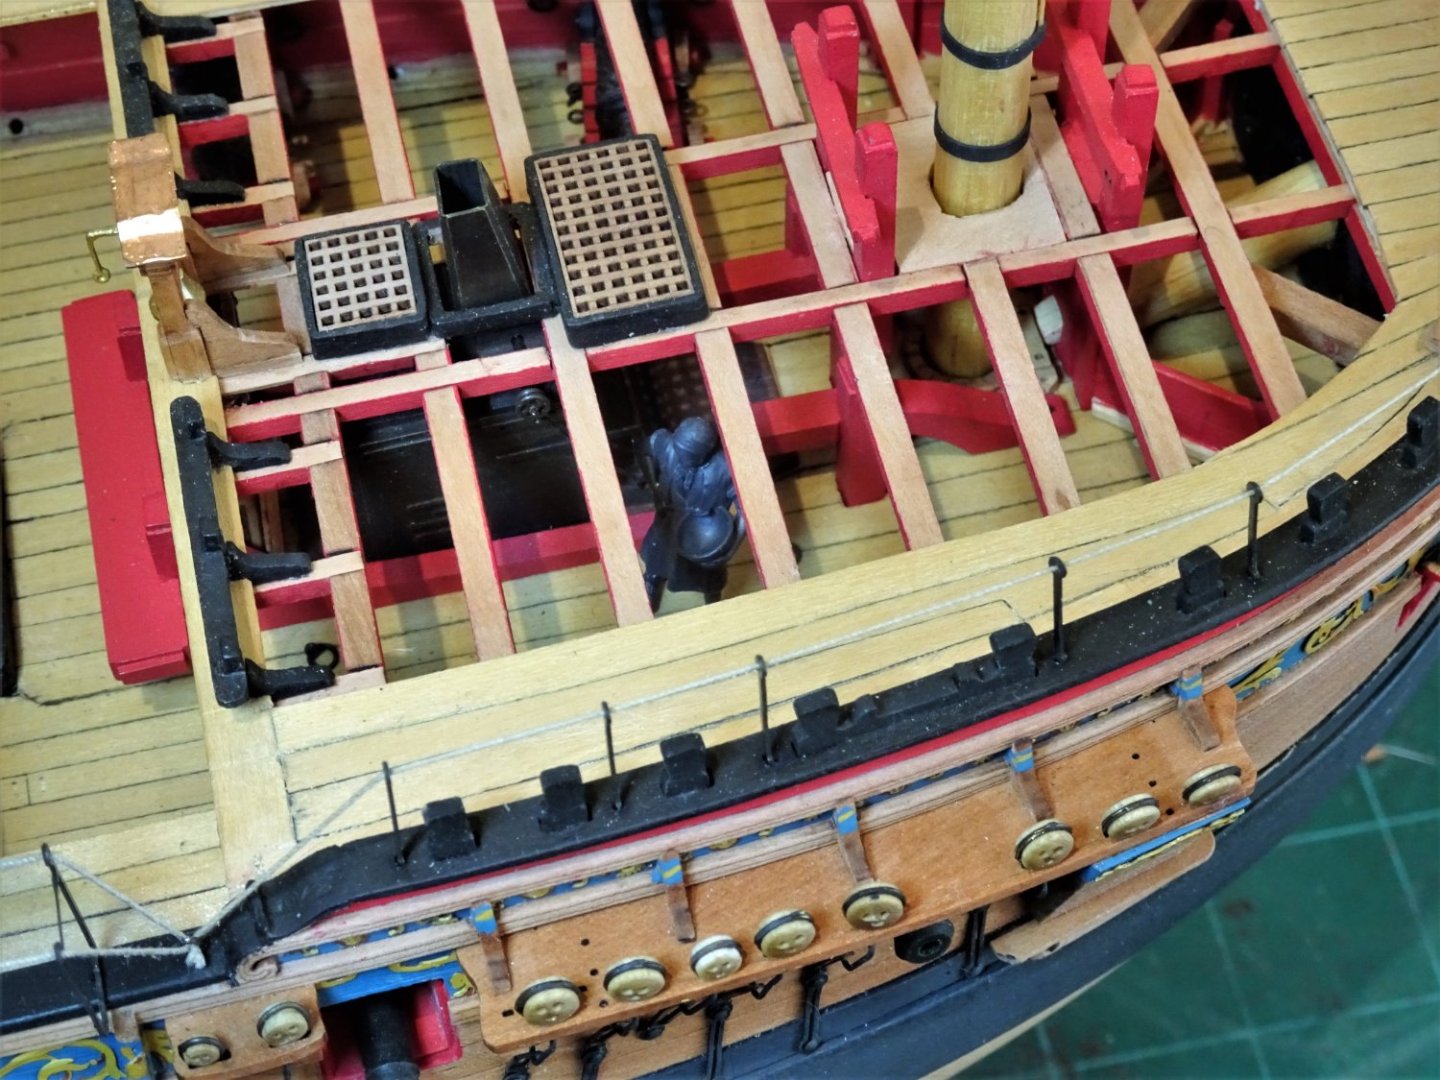
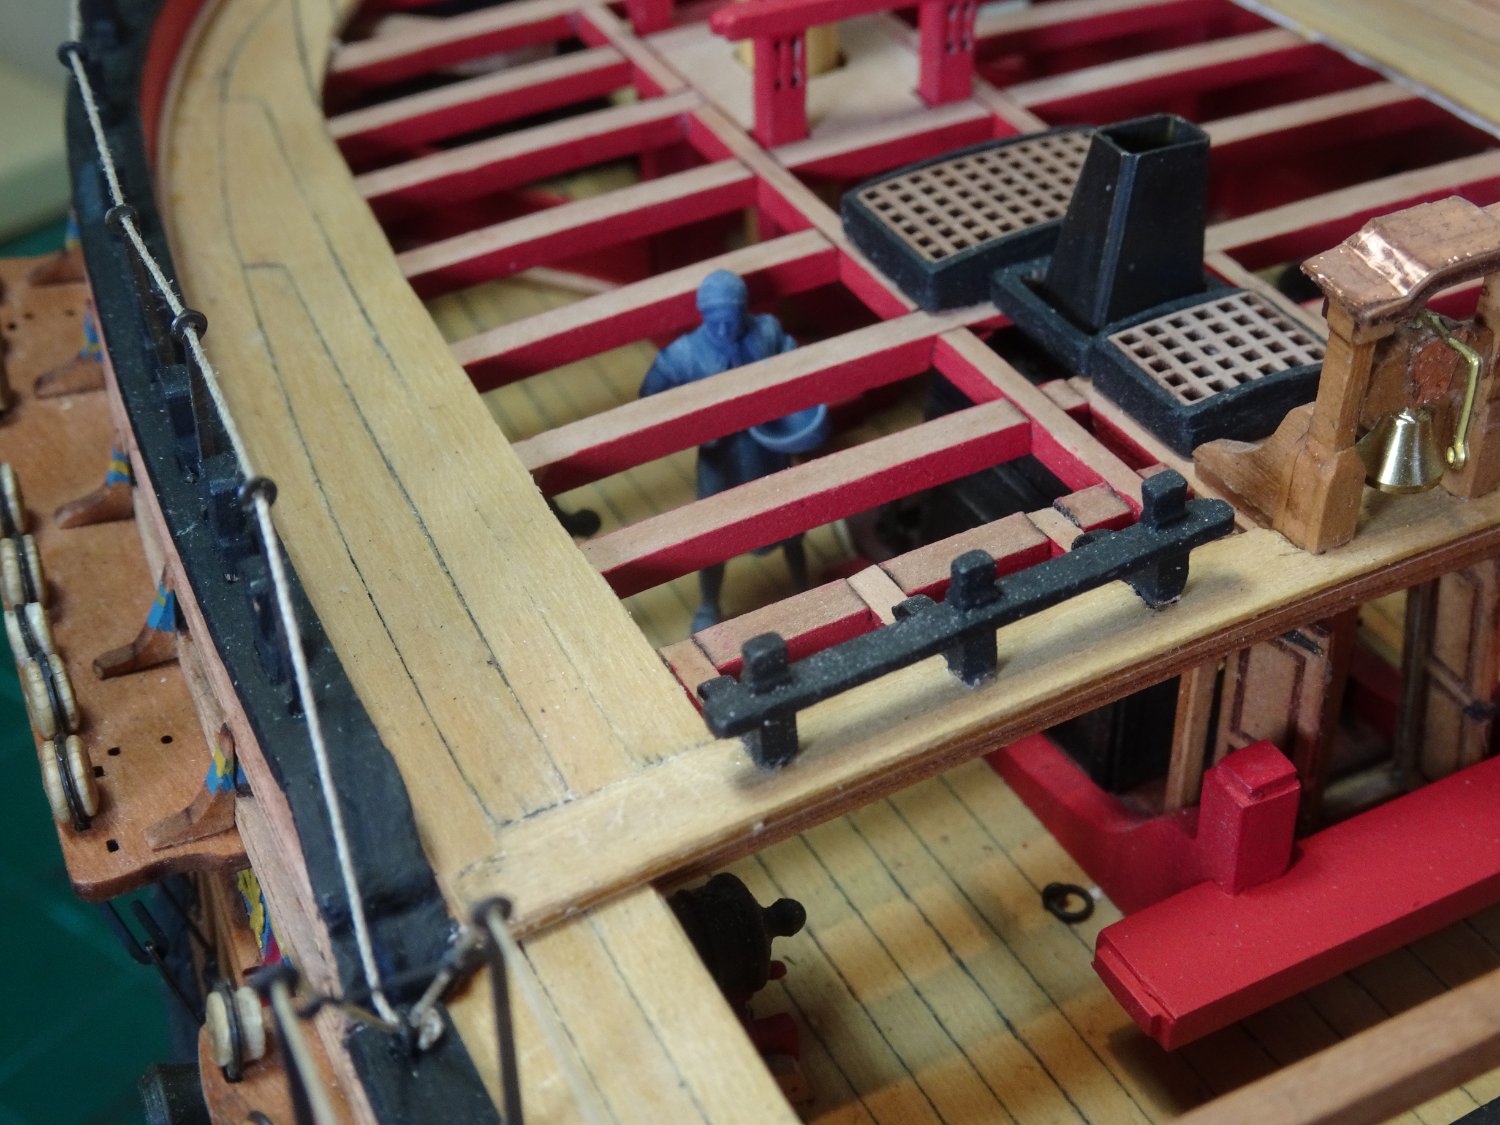
Thank you, Ron, and Glenn, and for the supportive 'likes' Post One hundred and seventy-one The trouble with cooks. In a moment of whimsey I thought I would discreetly add the ships cook standing by the galley stove. 8737 The base was removed to give a free standing figure, and a very fine fellow is he. Sadly the 1:64 scale figure stands at 28.5mm which equates to a tad shy of 6 feet tall. 8736 He’s going to have an uncomfortable time at the galley without developing a distinct stoop. 8734 It’s not a good look with his head sticking above the deck beams, and a visit to the ships surgeon and carpenter may be in the offing. A quick foot ectomy and a reshaped peg leg may solve the issue and may not look too obvious with the angles invoved. Worth bearing in mind tho’ if you’re thinking of adding the figures to your build. B.E. 10/10/2022 Postscript 8739 Surgery complete Surprisingly he doesn’t look out of proportion, the long apron helps. 8749 8756 He looks a lot better for scale, viewing between the beams. Job done. B.E.

- 857 replies
-
- 22
-
-
-
- Sphinx
- Vanguard Models
- (and 1 more)
-
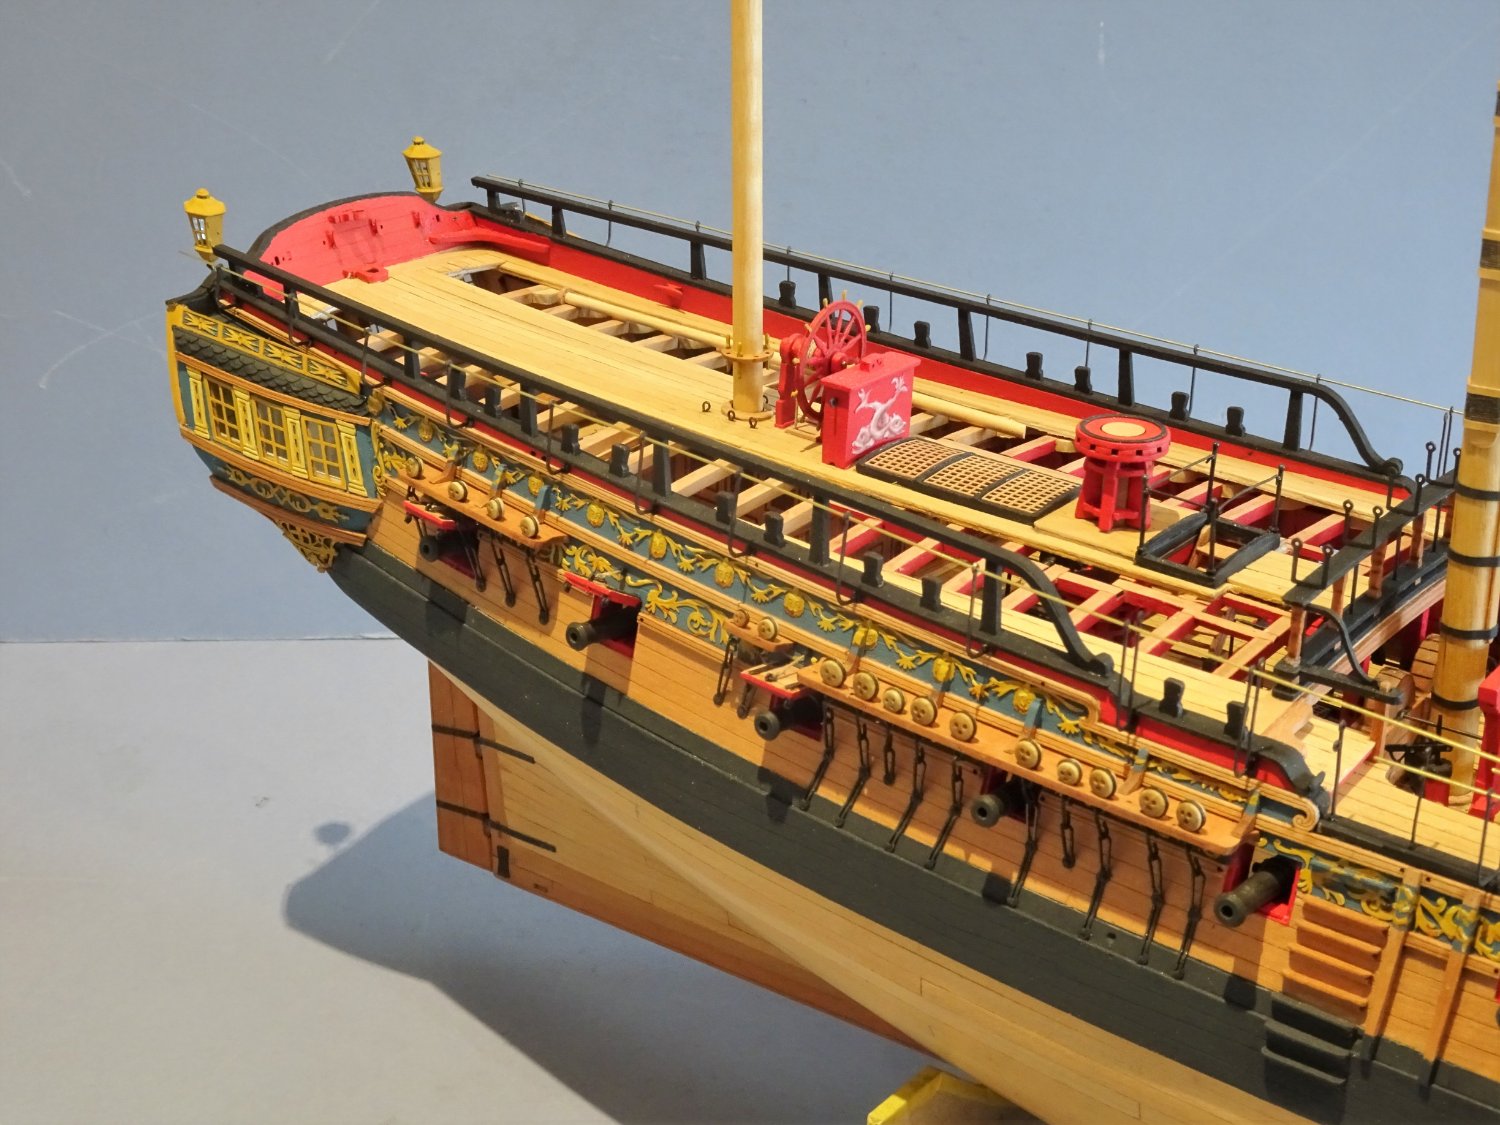
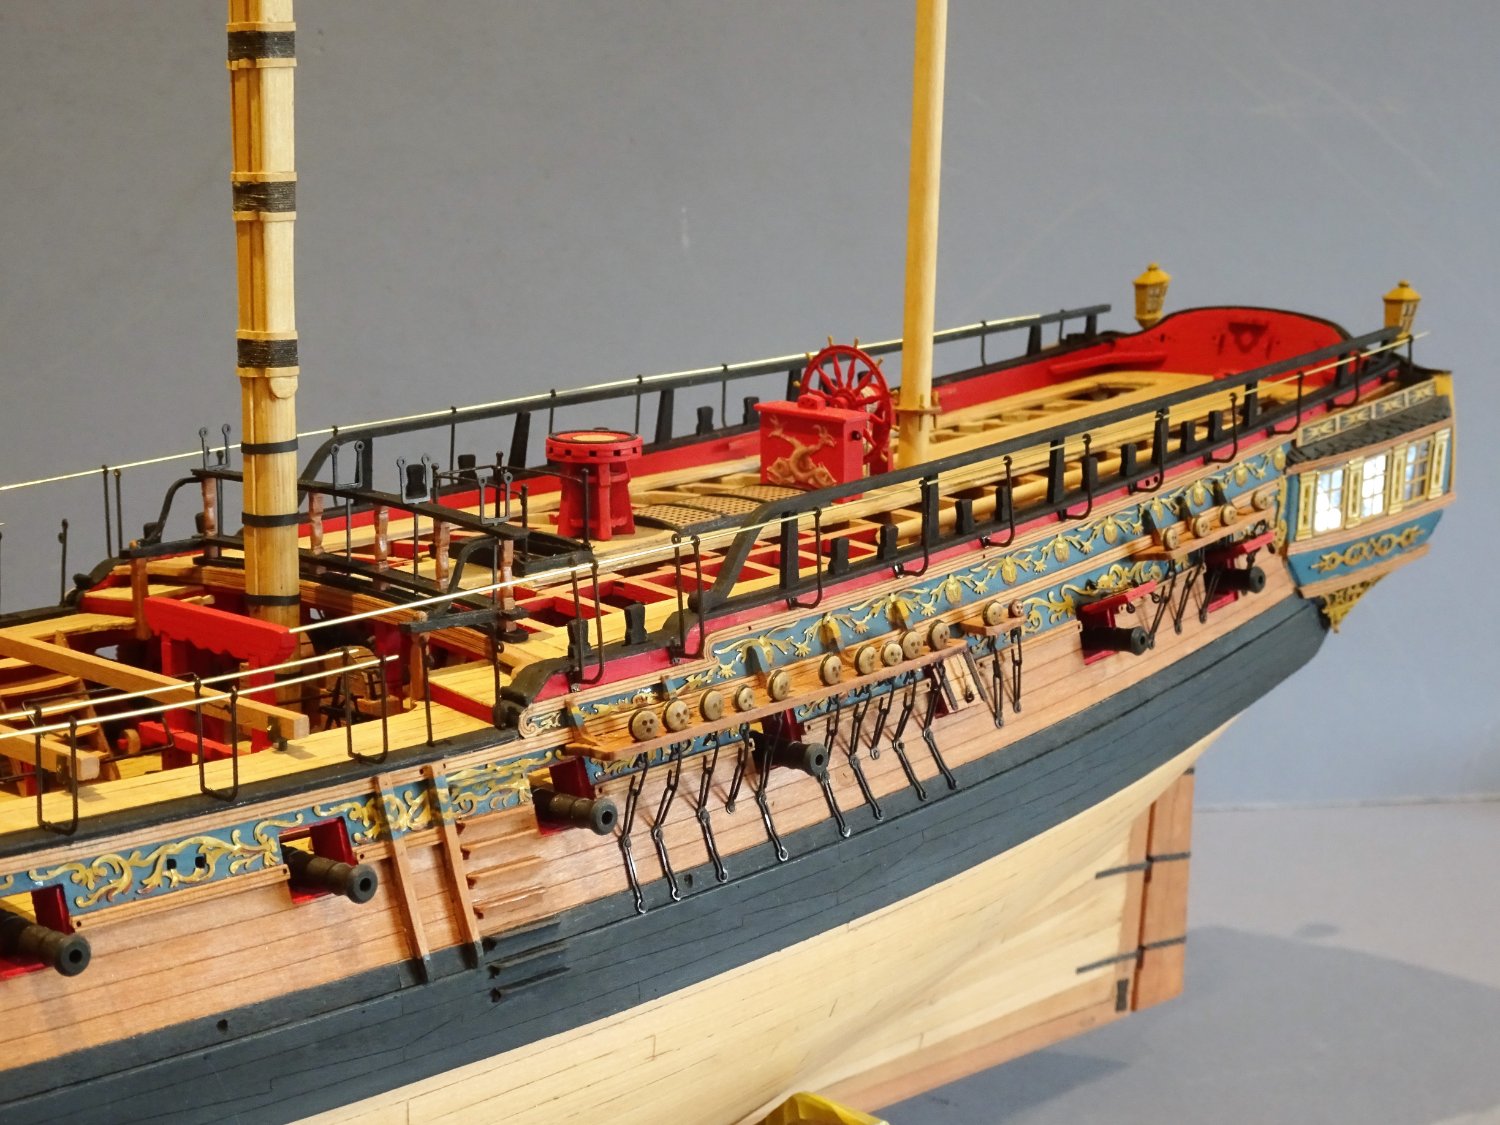
Thank you, Ron and Jesse, @Ron - I just love your description of the cranes, such an image it conjures up. 😄 Post One hundred and seventy. Final fettlin’ I have now reached the stage of tidying up bits and pieces, and re-checking to see if I’ve missed anything. The Upper Capstan pawls are one item; I found the teardrop shaped kit versions a little unconvincing and were replaced. 8728 I followed the arrangement in the ffm Vol11 as I did with my Pegasus build. Another decision to be made is whether to add the passing ropes thro’ the guard stanchions and cranes or leave them unadorned. I doubt I will be able to look at the cranes in the same light again after Ron’s (hollowneck) apposite remark black prickly bits randomly popping out of her hull, an image I have some agreement with, but will probably not get out of my mind’s eye. I used 0.31mm ø Syren line to check the effect. I needed additional eyebolts to take some of the seizings. 8705 I added an eyebolt and secured the aft end of the quarter crane rope using false splices as the neatest option. 8709 Securing the Foc’sle passing ropes. 8726 The two double cranes at the break of the Quarterdeck are still a puzzlement, there doesn’t seem a sensible way to finish off the passing ropes on the inboard side or a clear indication of how and where they extend to. The Pandora book drawings seem to show a line secured to the Quarter rail; the kit instructions seem to pass over this awkward little detail. 8713 Fixing of the double crane ropes. 8715 8714 A small eyebolt is fitted to the Quarter rail timberhead to secure the inner crane passing rope. The above photos show how I finally decided to tackle the passing ropes in this area, which is my best guestimate, but I offer no guarantee of authenticity. 8712 The Foc’sle end is less problematic. 8731 8722 8720(2) 8725(2) 8723 I think on balance the model looks better with passing ropes in place, so they will remain. I’m also finding lots of little areas needing paint touch-ins, a process that will probably continue for a while. Then there’s the dust.🙄 B.E. 09/10/2022 Night of the Hunters Moon 🌕


.thumb.JPG.f1c7d167b6204da5e4a7afc873c2af2b.JPG)
.thumb.JPG.1b3c70a210054ca75437e4079e9dea38.JPG)
.thumb.JPG.adec0719c00549814a0df45632695858.JPG)


- 857 replies
-
- 32
-
-
-
- Sphinx
- Vanguard Models
- (and 1 more)
-
Nice work on the pillars Jesse, there is a view of one pair thro' the main ladderway, but the main thing is you know they are there. The stern frame modification is a bit of a scary one, but they look so much more authentic. Builders of Chris's new Indefatigable kit will benefit from a stern and Quarter gallery upgrade that reflects the proper arrangement. B.E.
-
She looks beautiful Chuck, a worthy successor to those 18th c models. Your build is a fine example to follow and I have used your Winnie build as a guide to my own efforts on Sphinx . Congratulations on a job very well done, your artistry is much to be admired. B.E.
- 1,784 replies
-
- 9
-
-
- winchelsea
- Syren Ship Model Company
- (and 1 more)
-
Hi Ron, The brass rods have now been removed and I'm going to see how I like her with passing ropes fitted. I love your macro rigging shots they convey the complex nature of a sailing ship rigging beautifully. As far as the Fore tack is concerned, a miss is as good as a mile,👍 and it look fine to my eye. B.E.
- 857 replies
-
- 3
-
-
- Sphinx
- Vanguard Models
- (and 1 more)
-
That's exactly how Kit quarter gallery fittings ought to be, would've saved me a load of work on Sphinx. You lucky investors in Chris's Indy. 👍 B.E.
- 488 replies
-
- 7
-
-
- Indefatigable
- Vanguard Models
- (and 1 more)
-
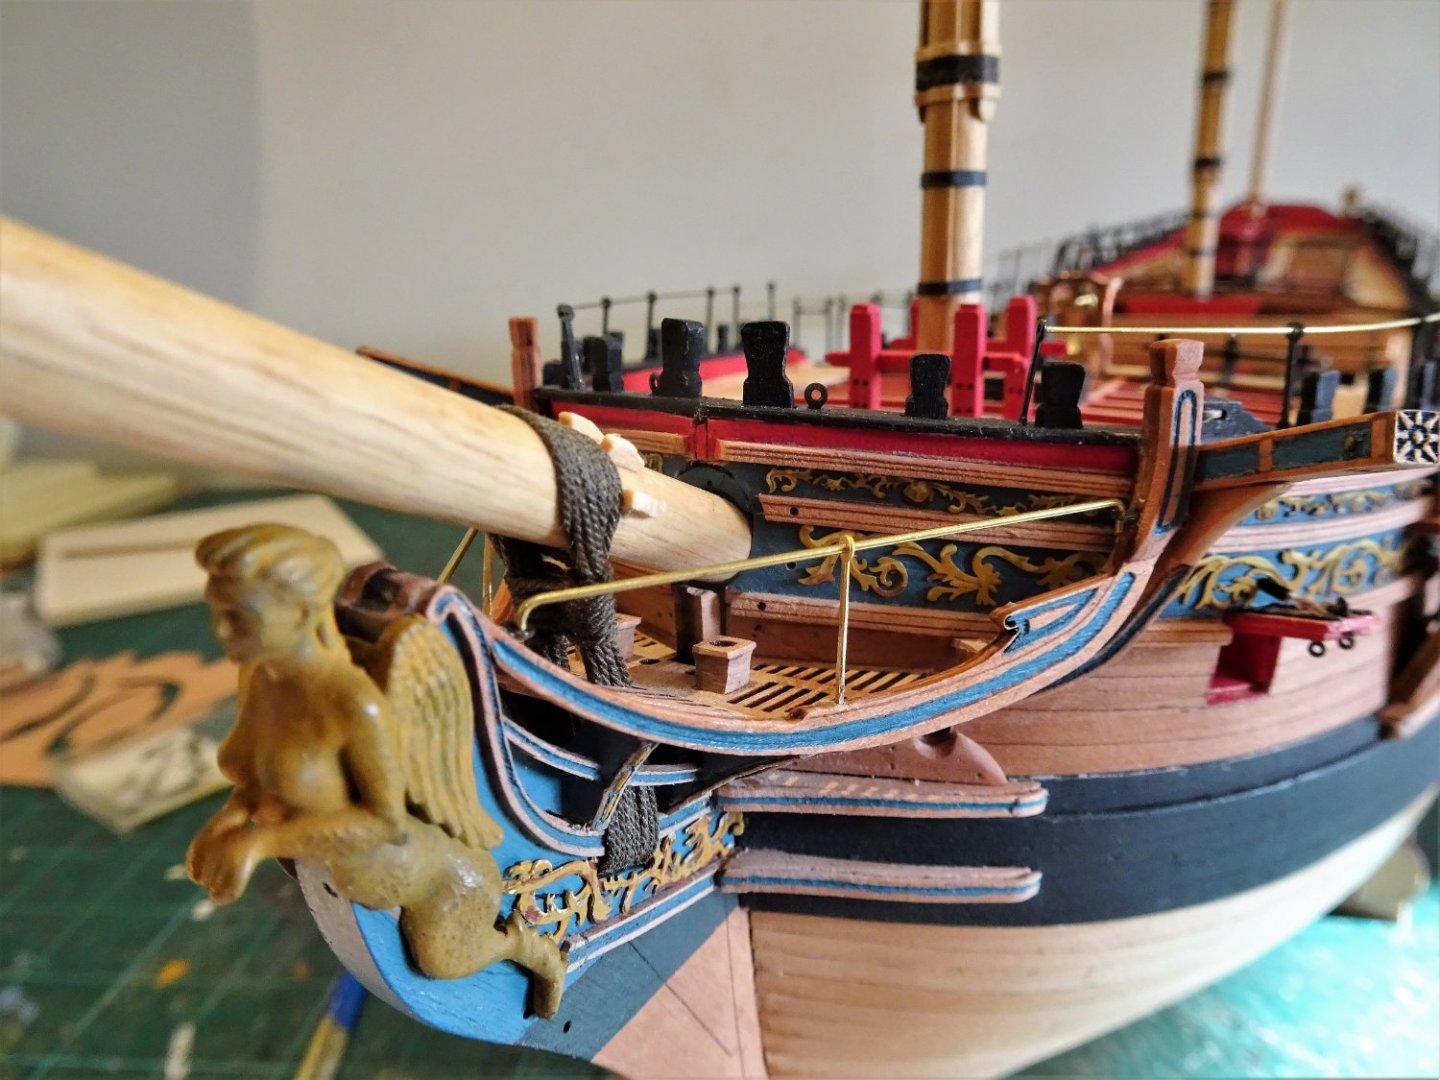
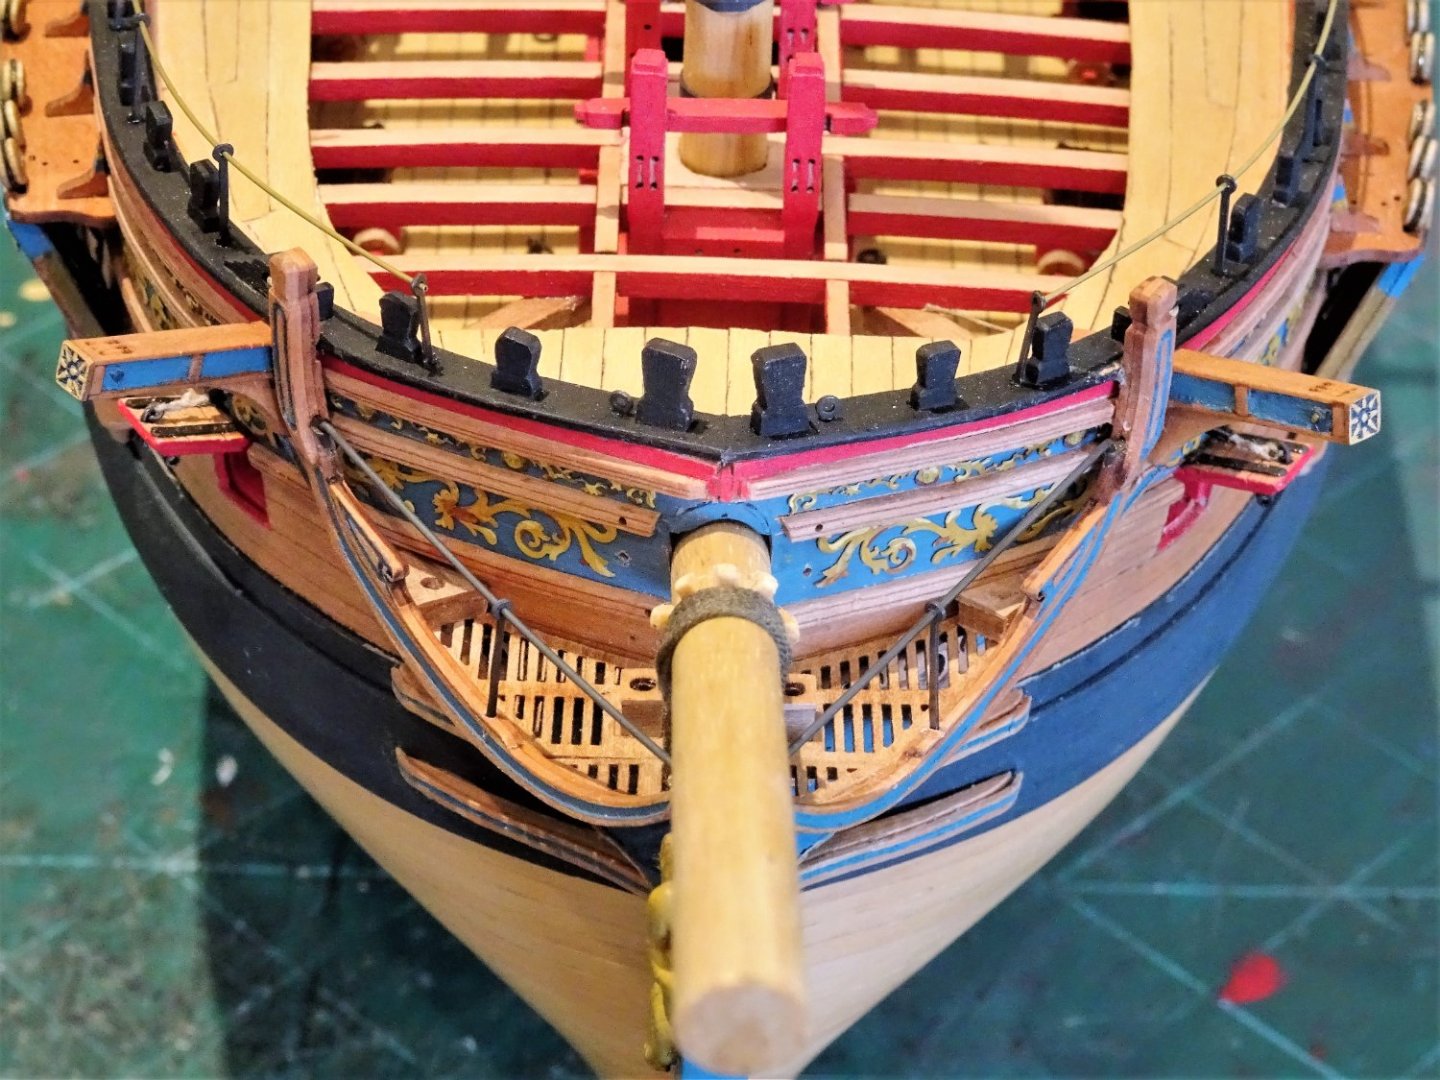
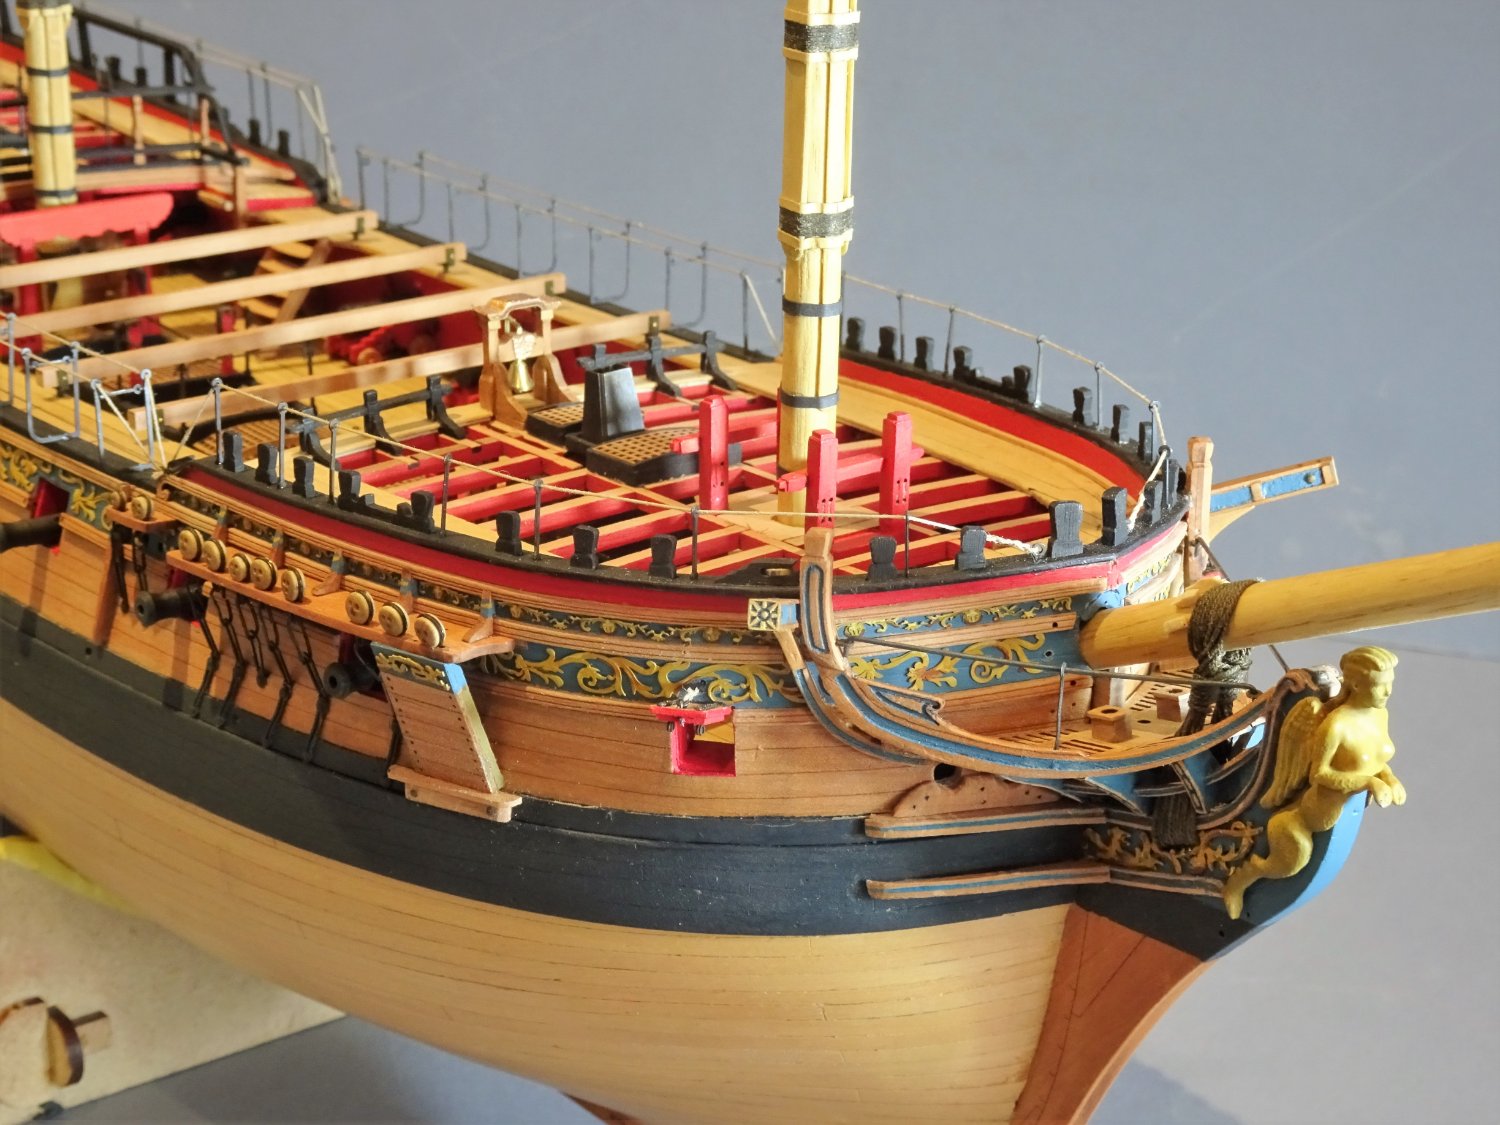
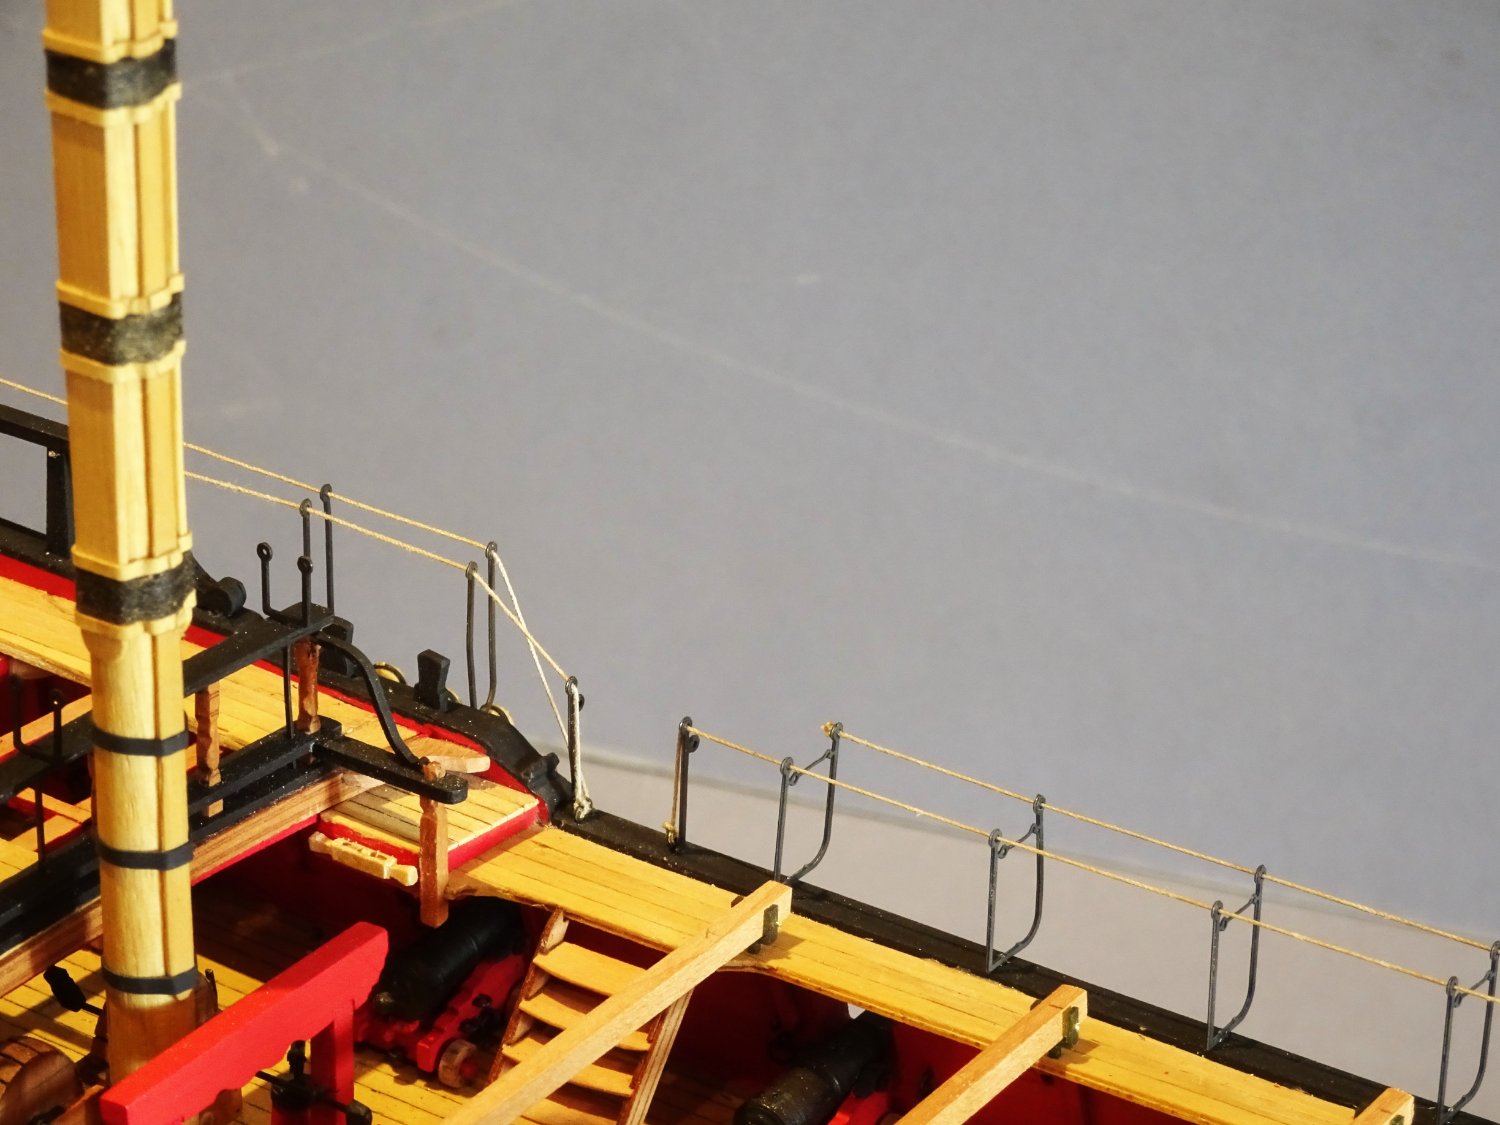
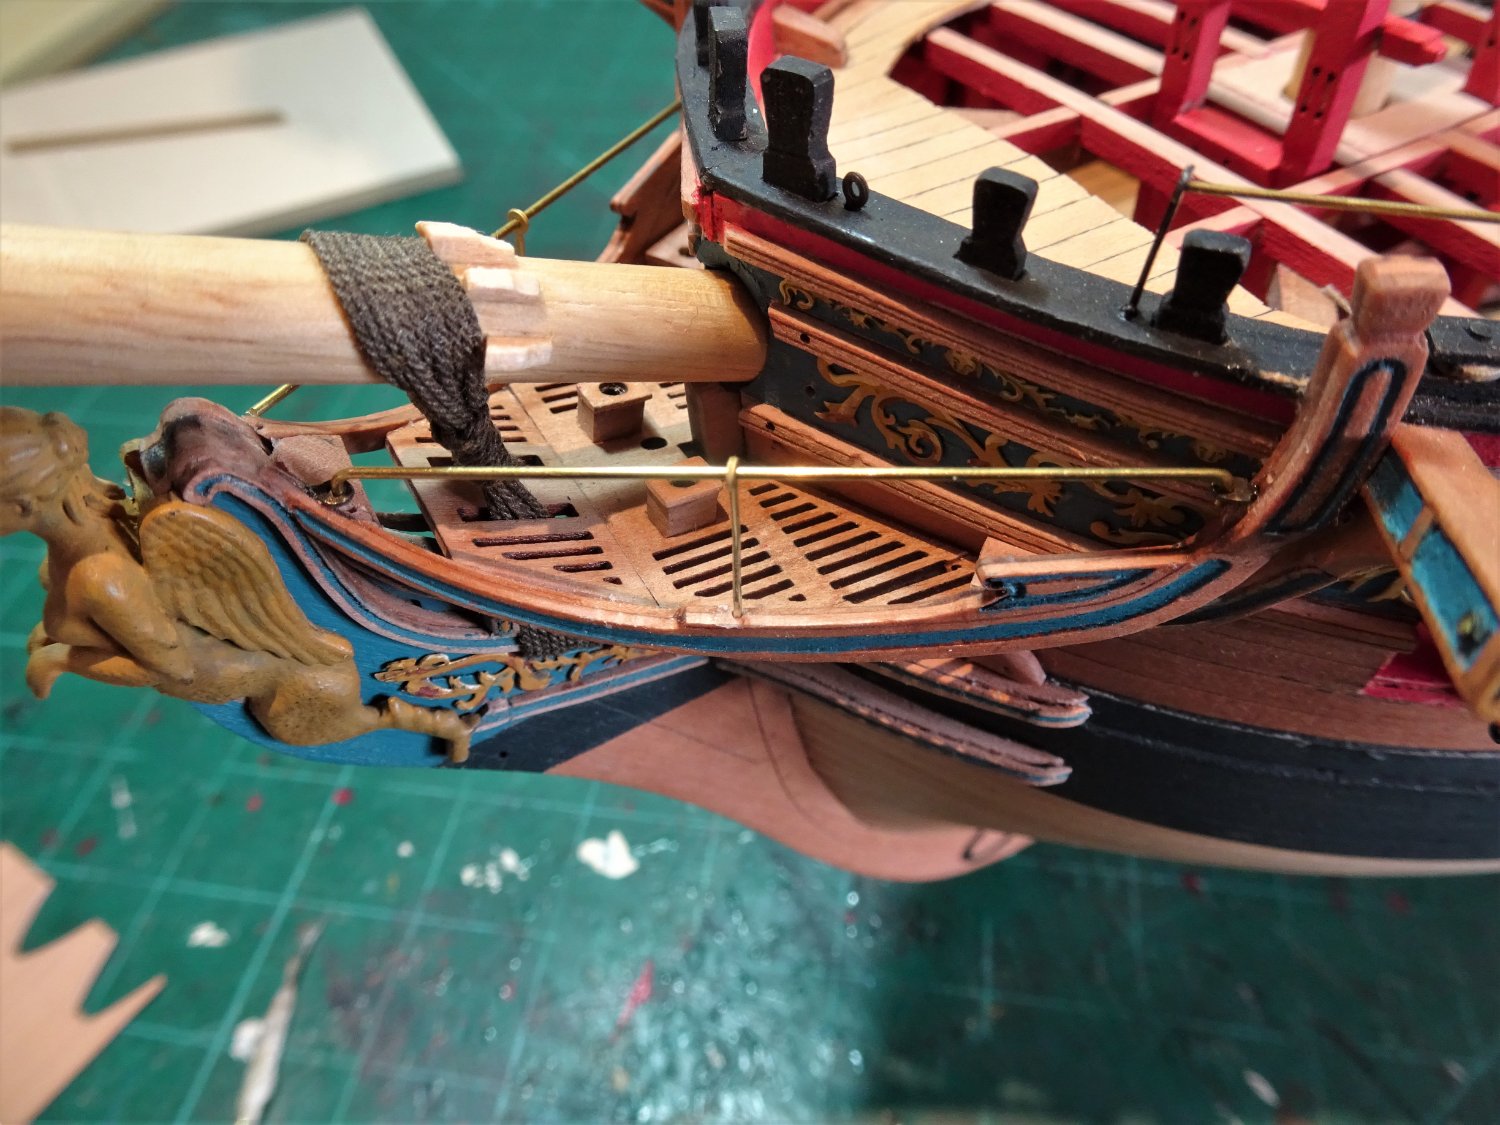
Post One hundred and Sixty-nine. Berthing Rails One feature missing from the kit are the Berthing rails that span the head to act as a safety rail. It is supported by an iron stanchion positioned midway, and hooks into eyebolts either end of the Main rails. In a working situation netting would be suspended from the Berthing rail. It is a little tricky getting the eyebolts set at the right height to suit the stanchion but is a fairly easy modification to make. I am using 0.7mm ø brass wire for the rails, a couple of modified kit stanchions, and small kit eyebolts. 8672 The first task is to gauge the run of the rail to determine the height of the stanchion and fix the height of the eyebolts. 8680 With the stanchion height determined the eyebolts are fixed and the rail cut to size to fit. 8676 Cleaning the brass is the next task followed by chemical blackening. 8687 8685 8692 8684 Unlike the Boomkins I quite like the rails in position, perhaps because they are a match for the cranes and other stanchions. B.E. 06/10/2022


- 857 replies
-
- 27
-
-
-
- Sphinx
- Vanguard Models
- (and 1 more)
-
That’s about it in a nutshell Marc, succinctly put.👍 B.E.
- 857 replies
-
- 4
-
-
- Sphinx
- Vanguard Models
- (and 1 more)
-
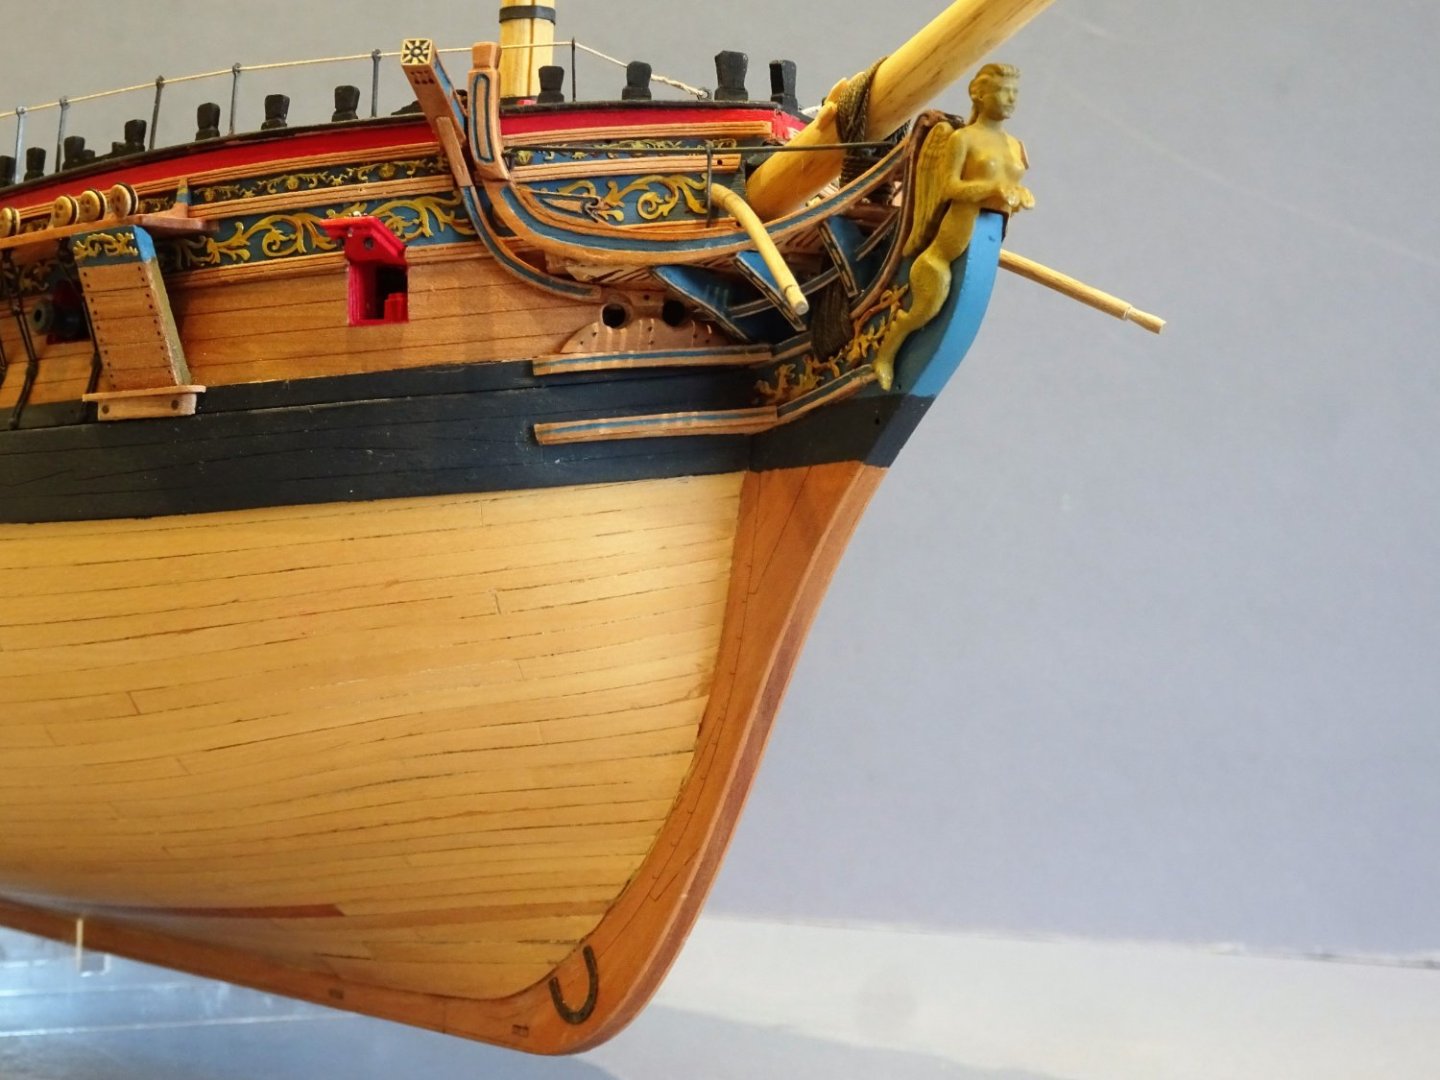
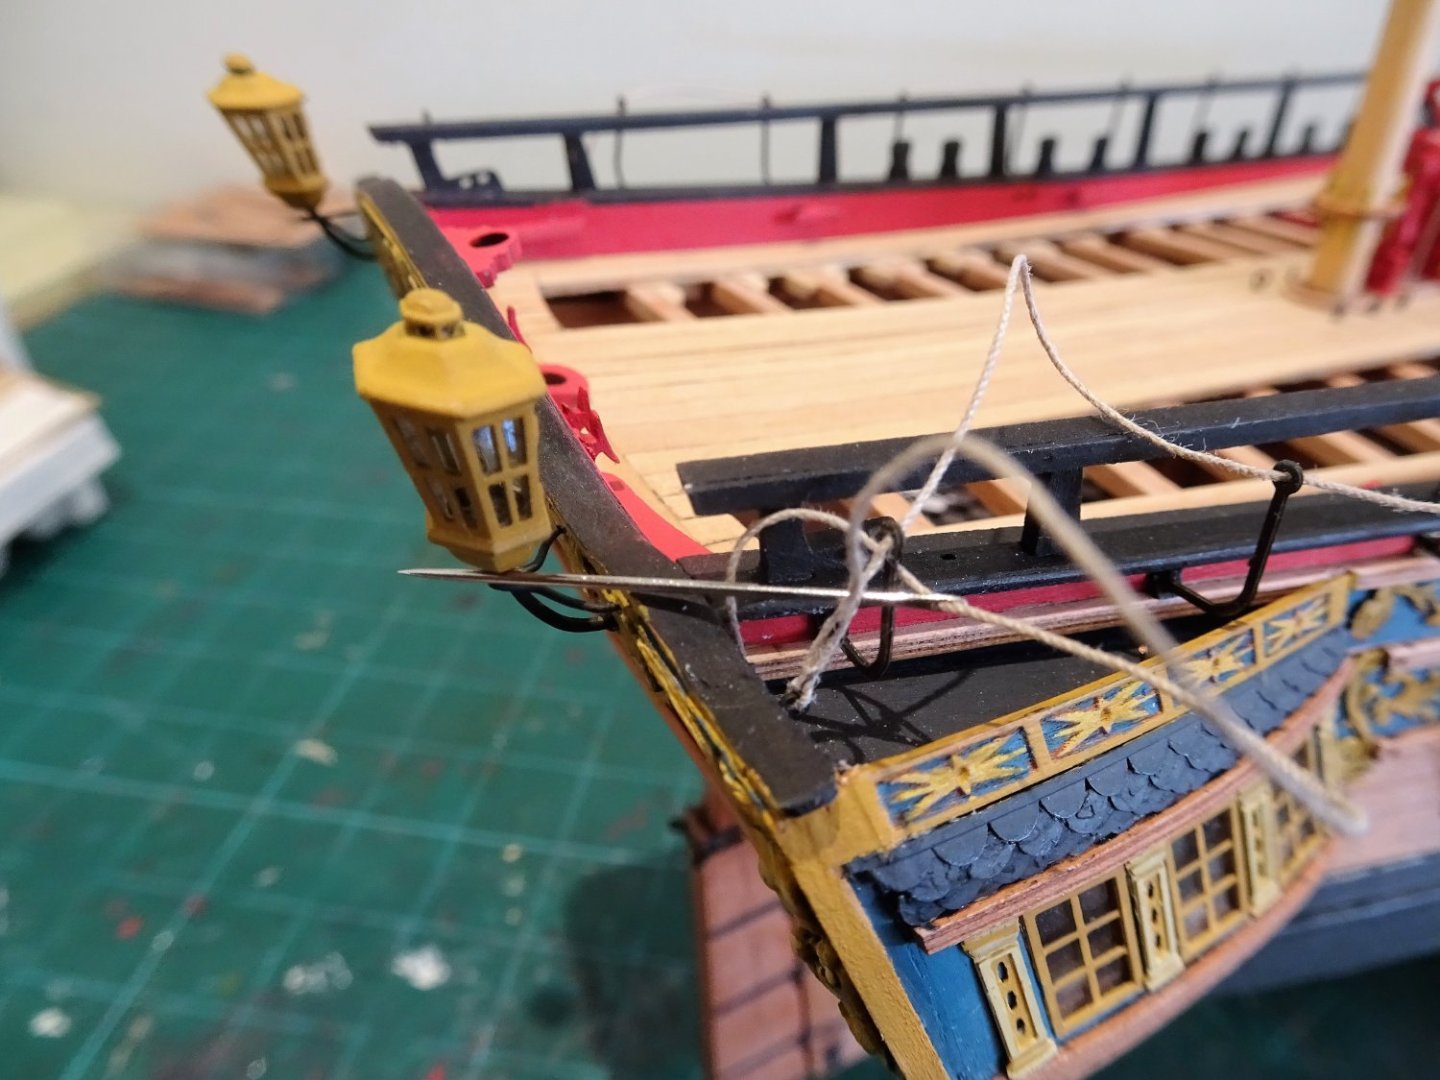
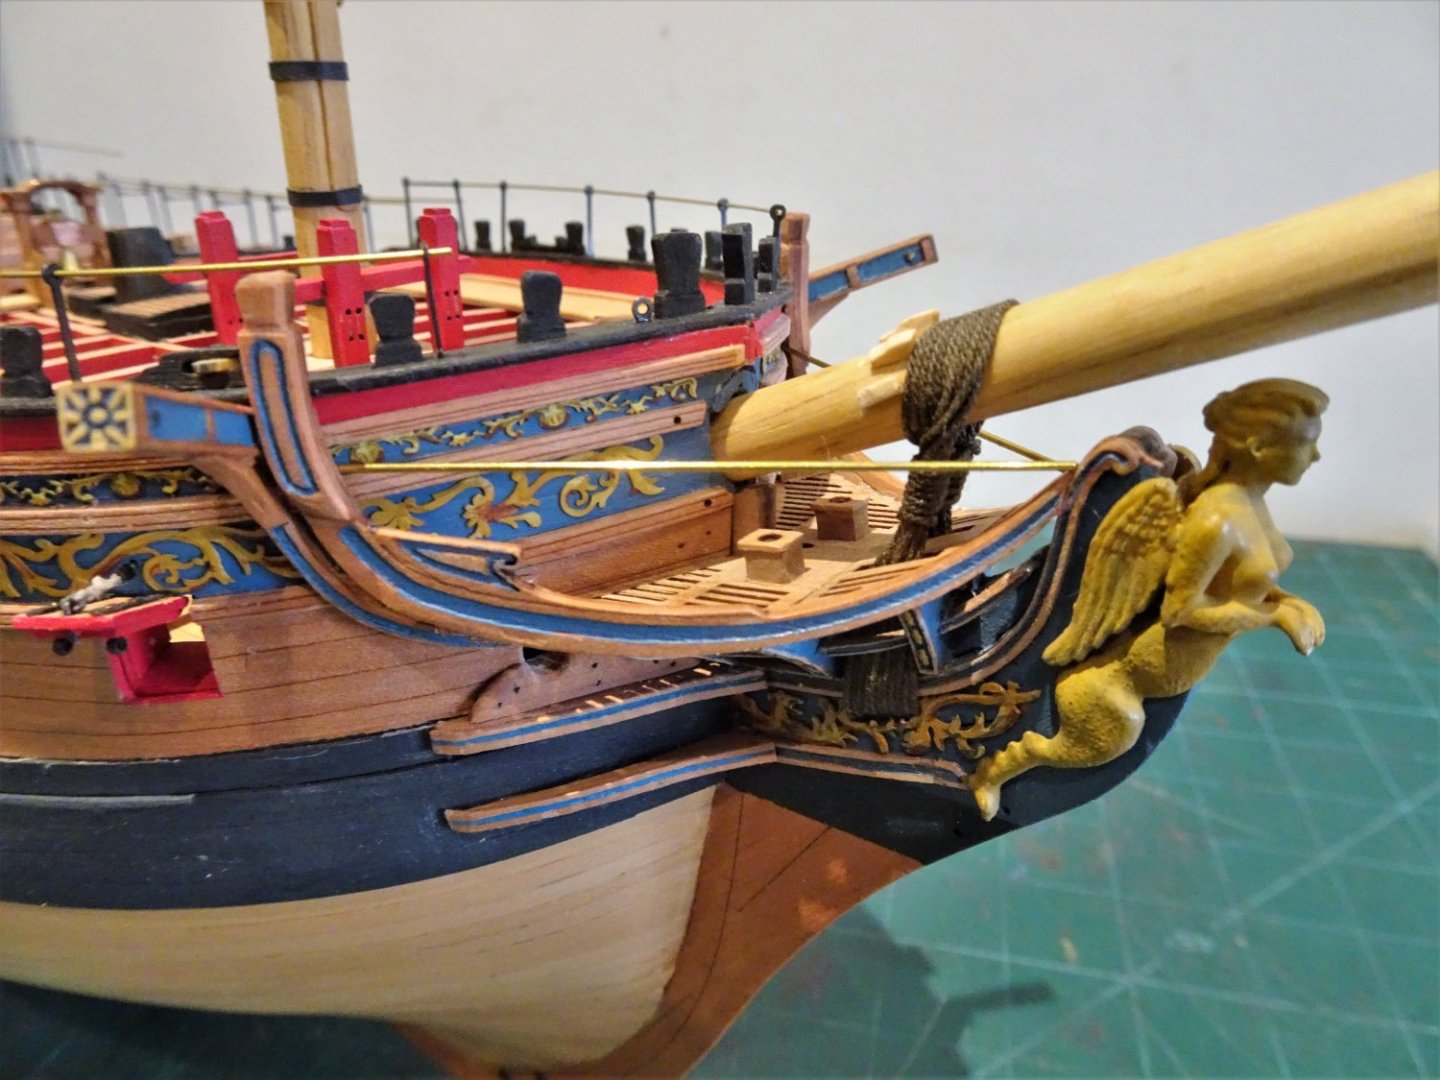
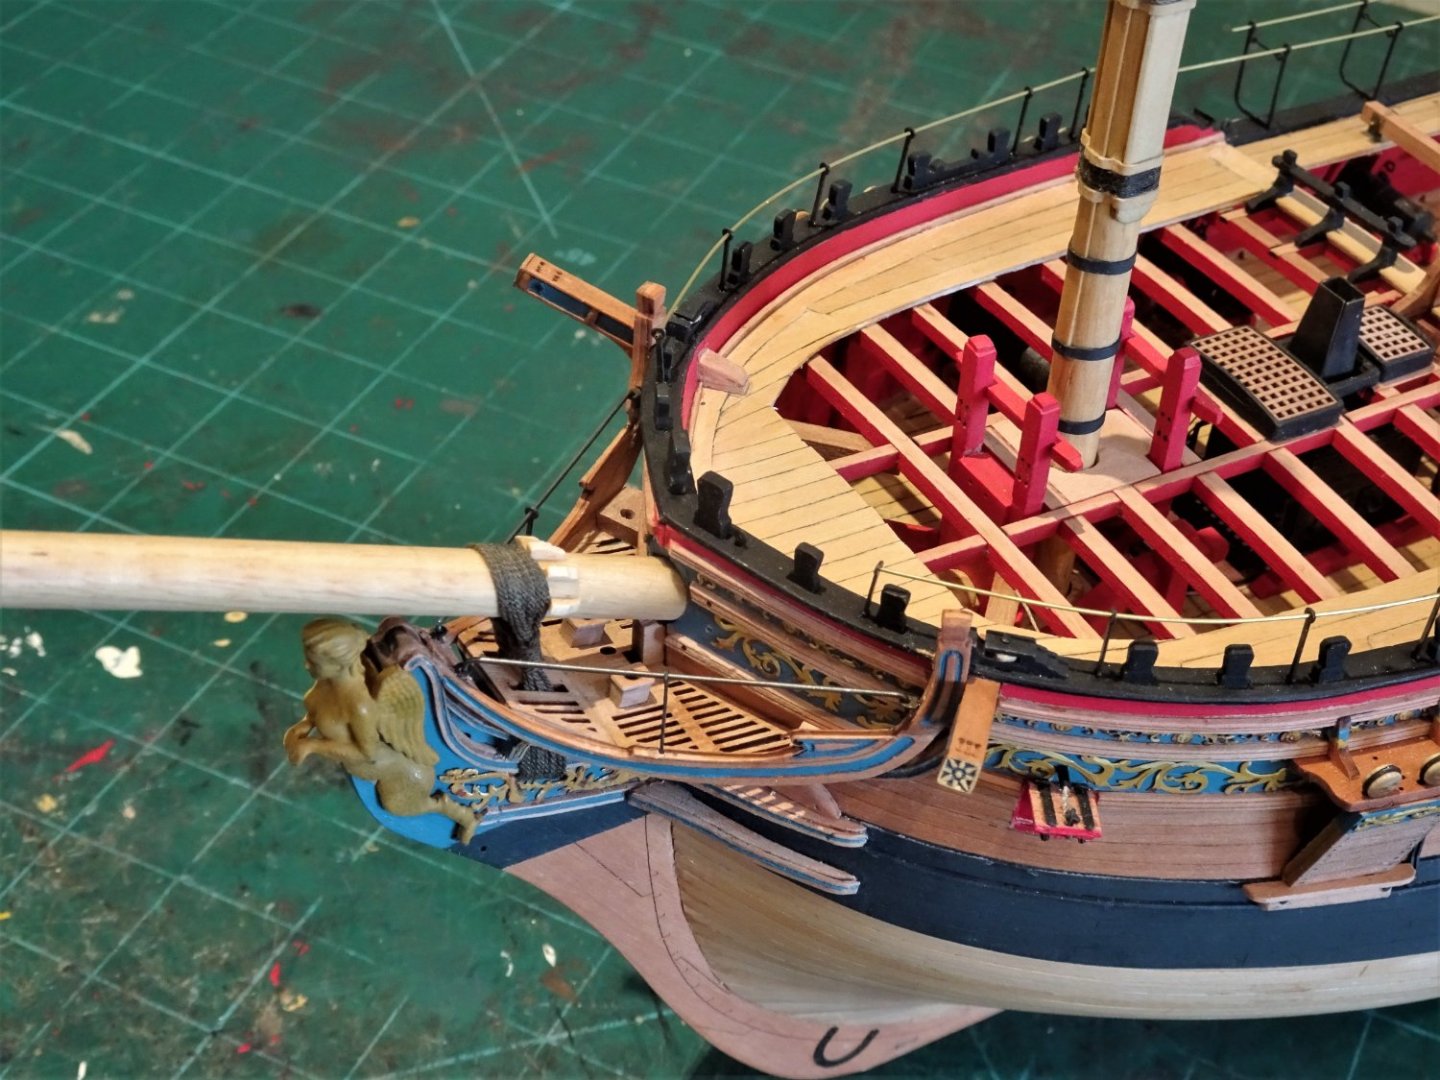
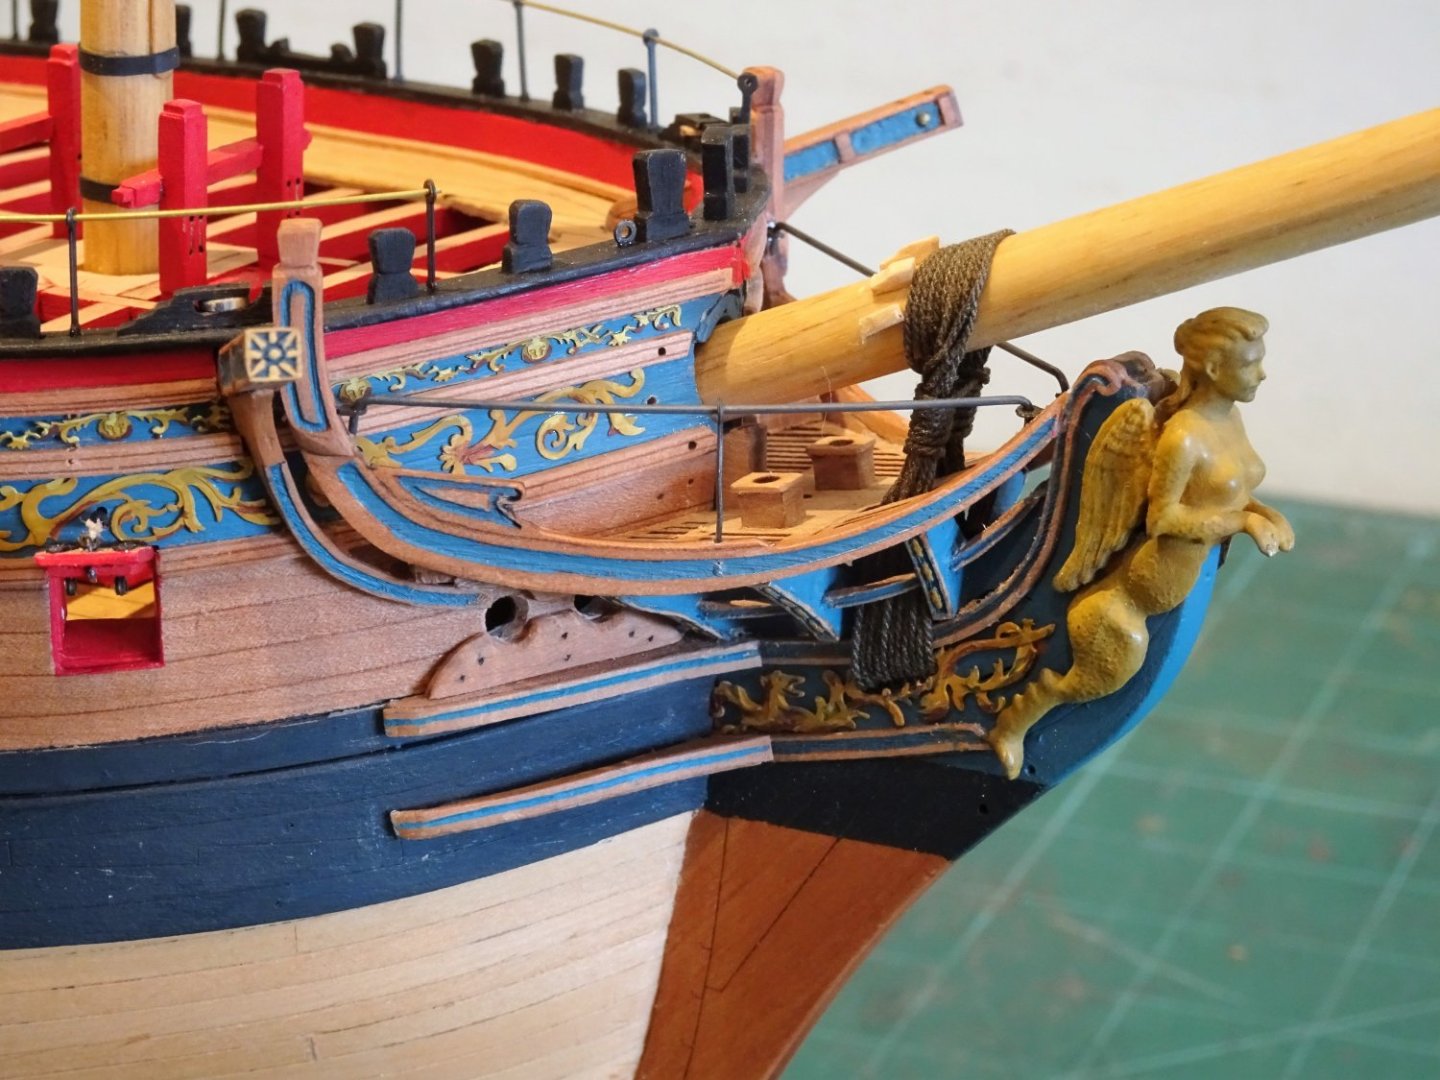
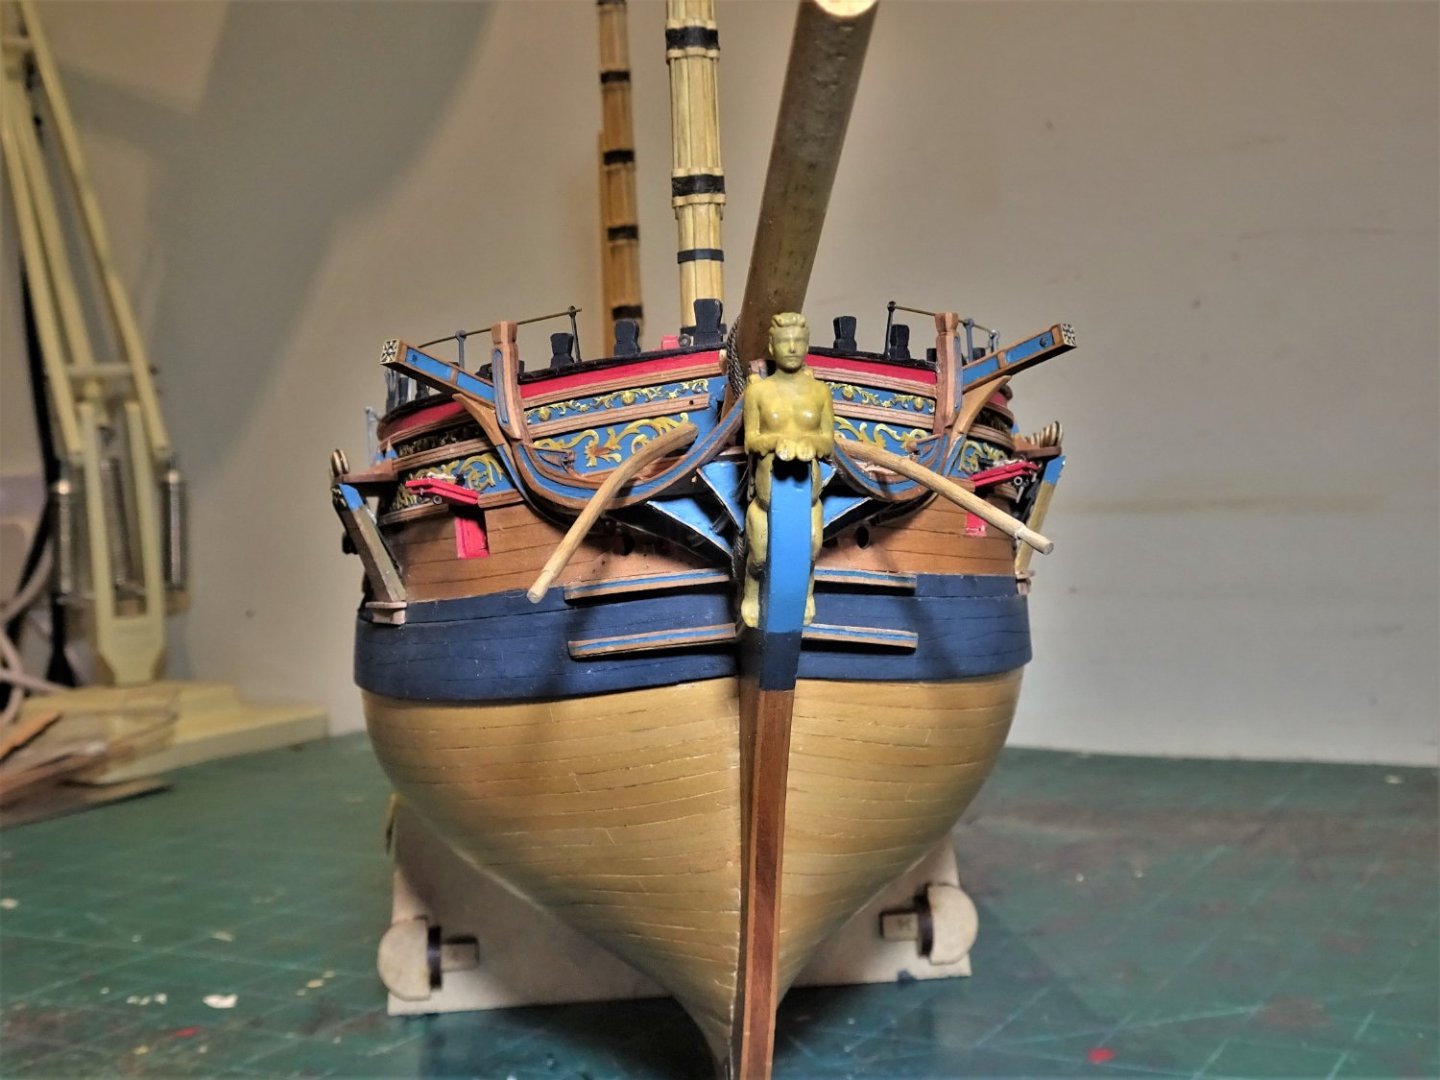
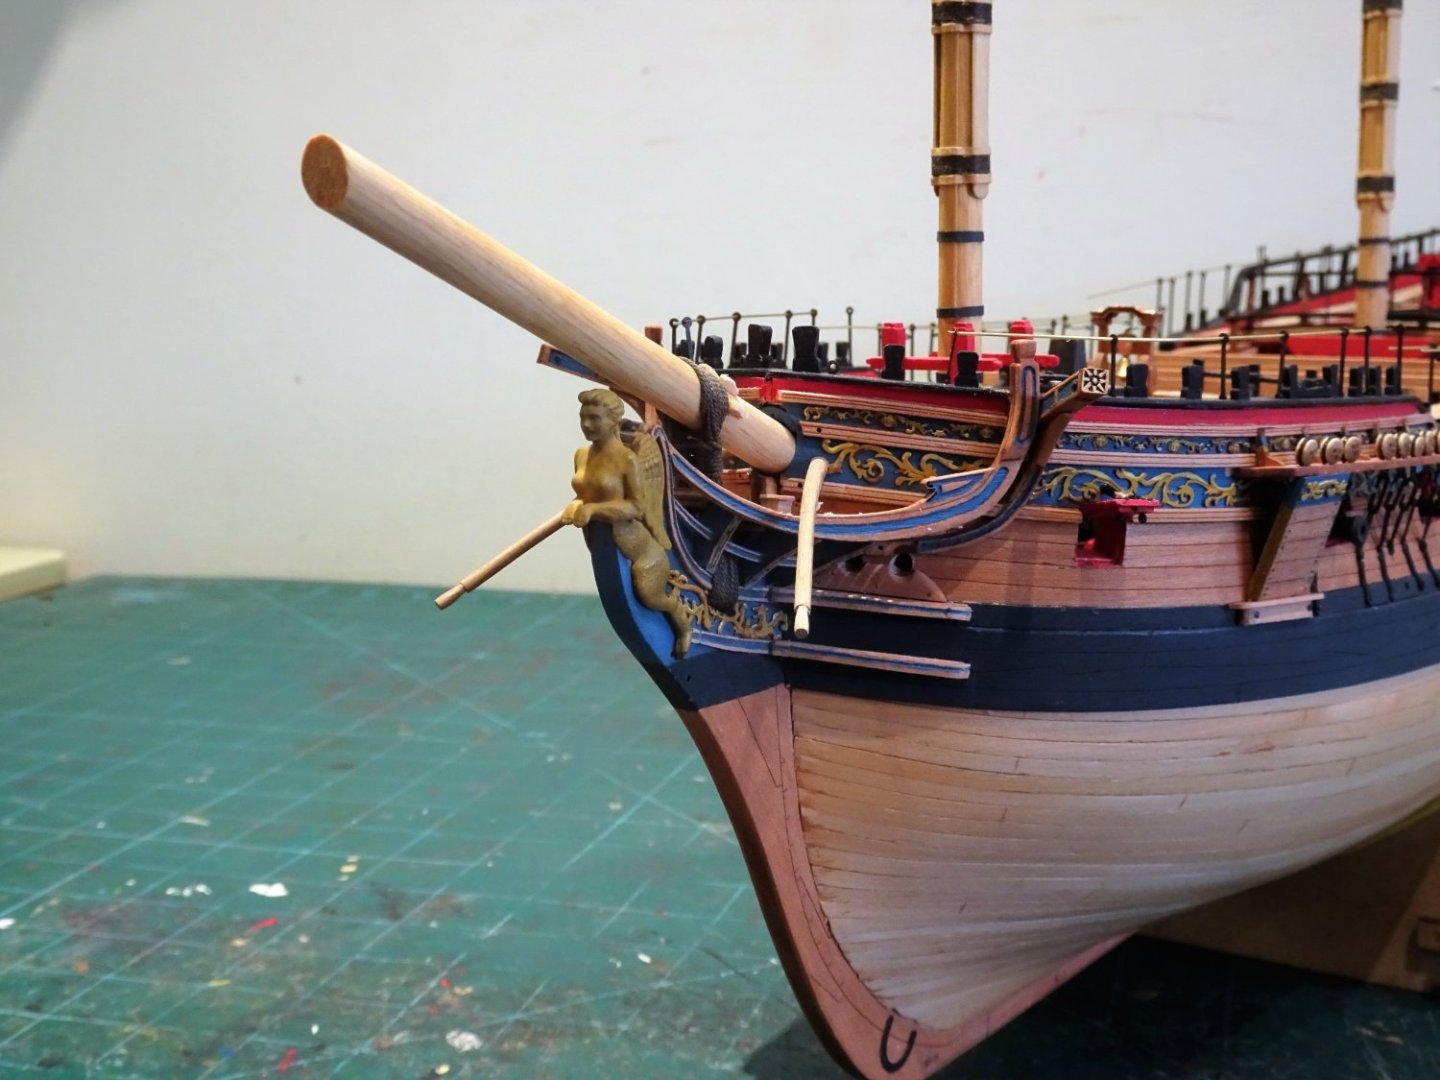
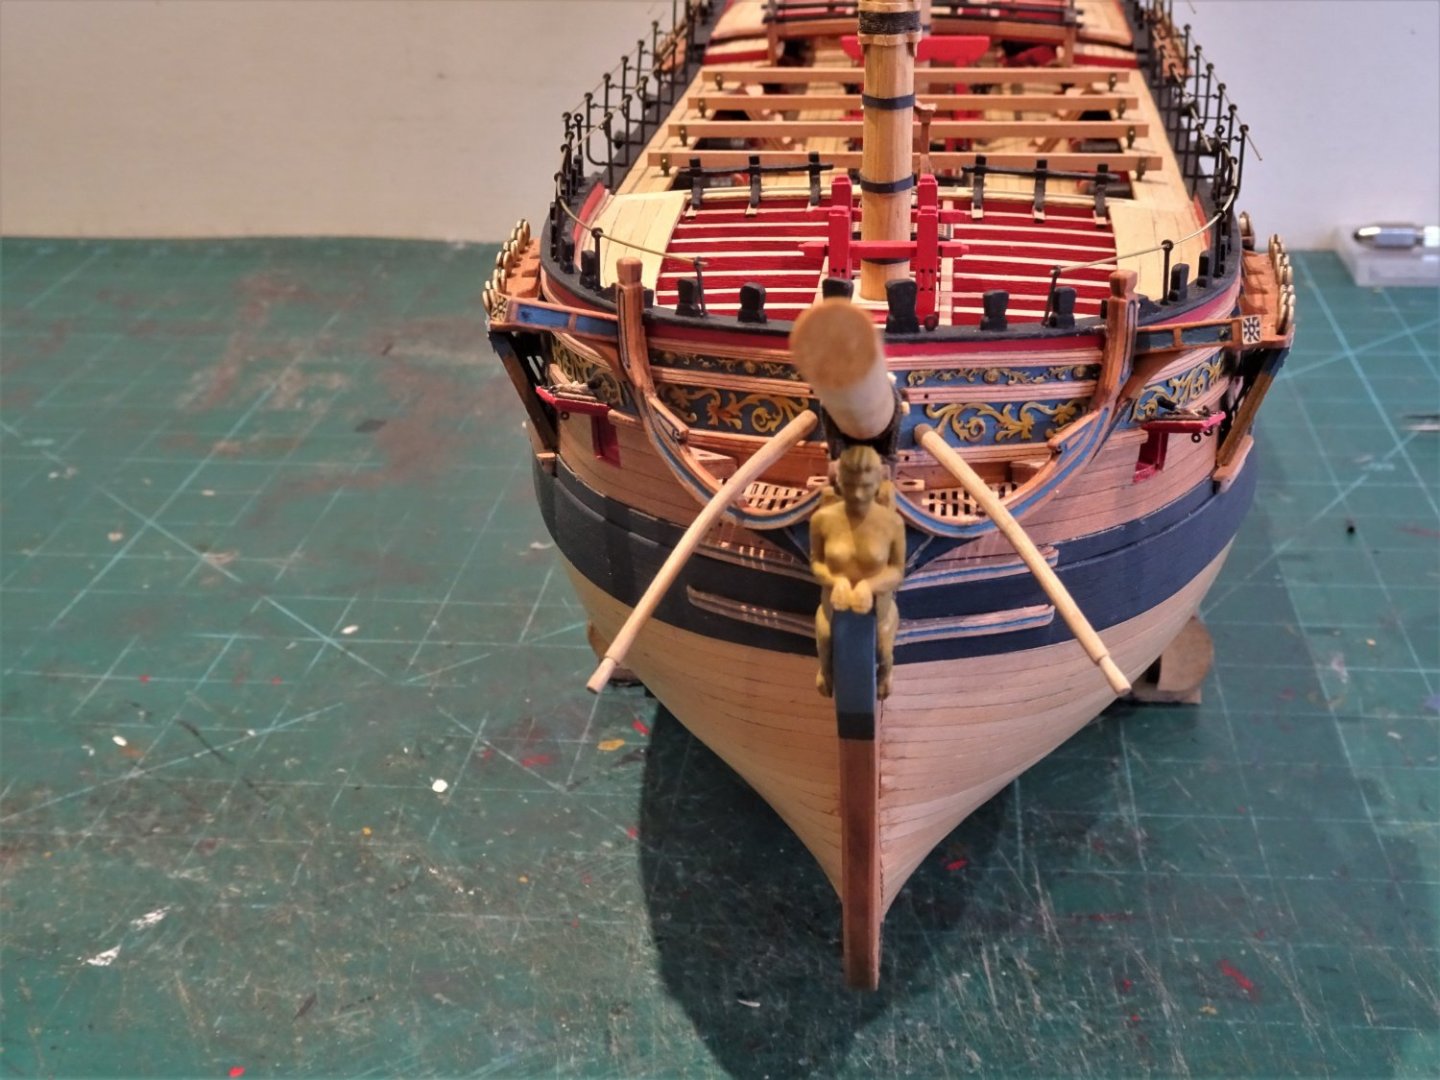
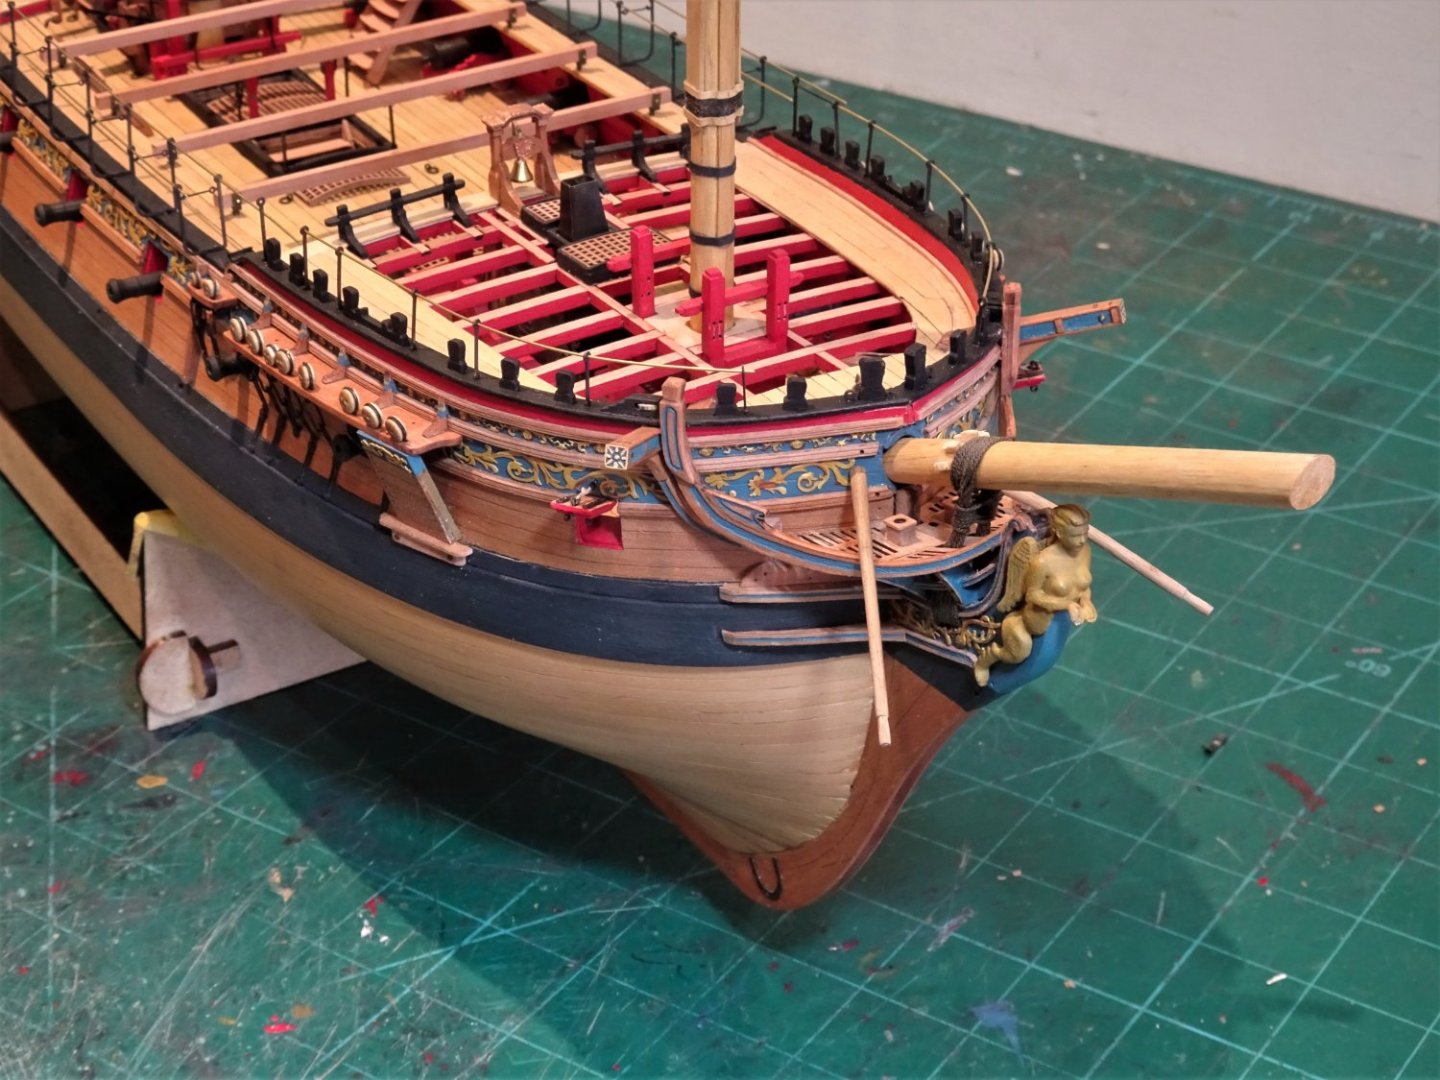
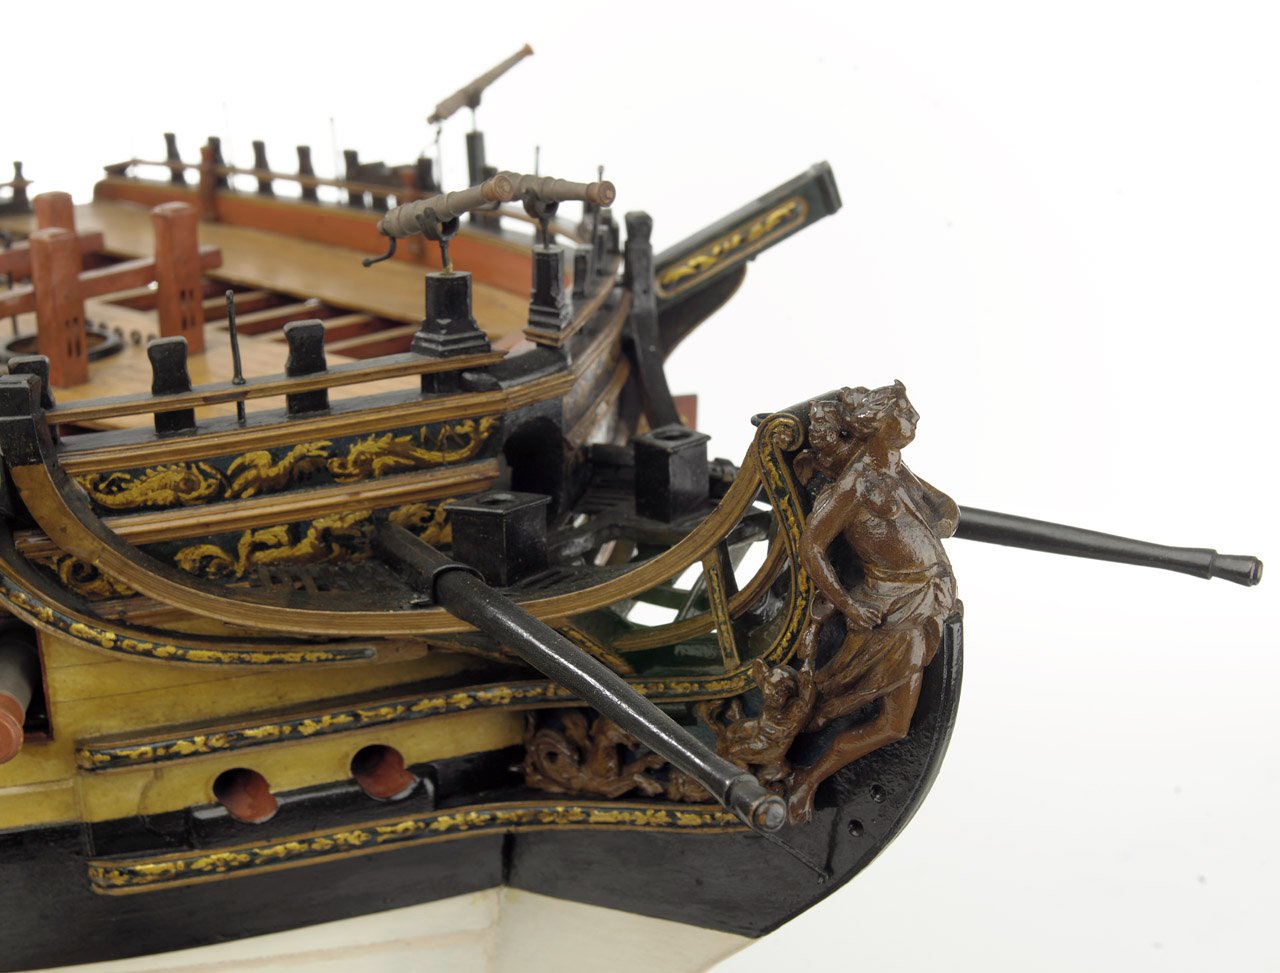
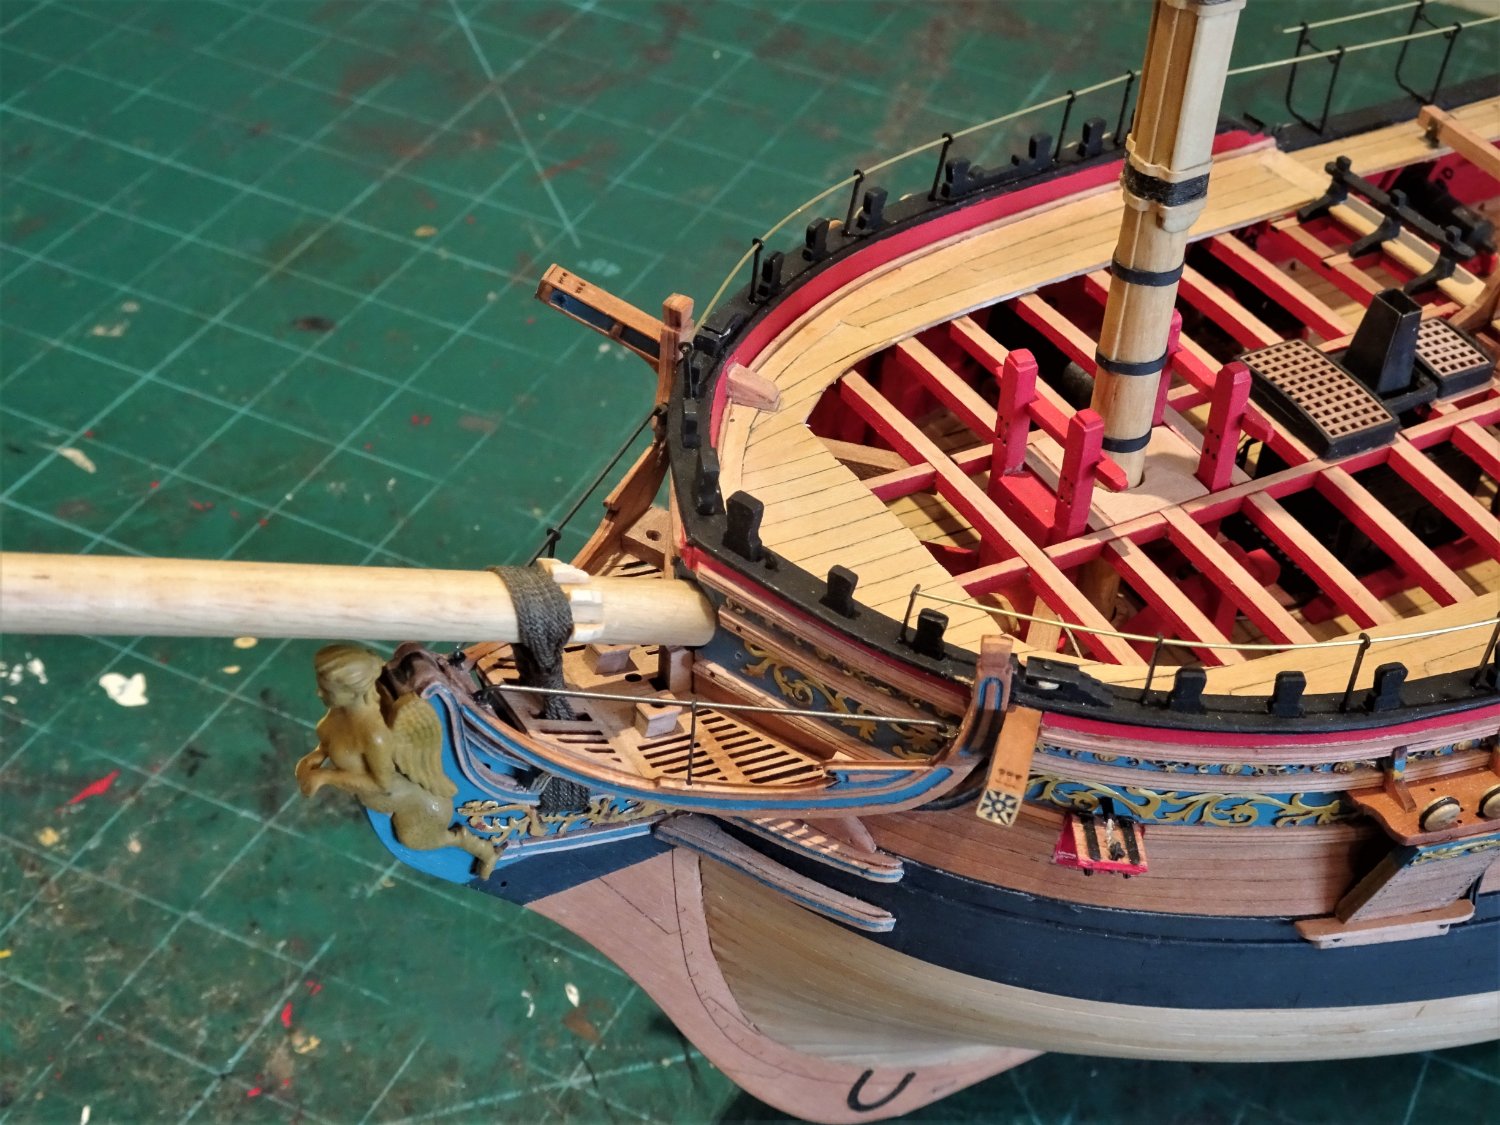
Post One hundred and Sixty-eight. A question of Boomkins I have been thinking about the finishing requirements for the headworks. The most obvious items as yet to be fitted are the Boomkins, pointing outwards and downwards to take the Fore tacks. The contemporary Amazon model has them in place, but most ‘Navy Board’ style models don’t. I have concerns that these not particularly attractive spars will detract from the graceful headworks of Sphinx. The only way to find out is to make up the Boomkins. 8669(2) The Boomkins as presented in the kit are straight, but I decided to add a degree of downward curve beyond the headrails. This was applicable up to around 1780, but my main purpose is purely one of aesthetics, adding a little more grace to these utilitarian spars. The kit version has a scale length of 9’ 7” (46mm) giving an outboard length of around 5’ 6” It looked a little short to my eye. 8646 The Pandora book plans indicate an overall length of 13’ (61.9mm) with an outboard length of 8’ 9” Pegasus has Boomkins with an overall length of 11’4” Lees refers to the earliest booms protruding outboard by around six feet but longer by around 1733. The acid test is really whether the Fore tack has fair running once all the other lines running inboard are in place. This won’t be of relevance on this build, but the subject tasked my mind a fair bit during my Pegasus build. I finally settled on a Boomkin length of 54mm which looked best to my eye. The Boomkins are made using 3mm ø walnut dowel, I selected a colour on the paler spectrum of walnut. The boom tapers to 2mm at the shoulder that retains the strop of the shoulder block that serves the Fore Tack. The shoulder is 3mm long. 8658 The angle of the Boomkins is positioned to line up with that of the Foreyard when braced sharply. (Lees) 8664 8656 8648 8655 To my eye they do detract from the grace of the headworks so skilfully replicated by Chris Watton, and I won’t include them on my display. On a masted and rigged version, they would of course be a necessary requirement. I will next see if the Berthing rails make the cut. B.E. 05/10/2022


.thumb.JPG.68c8331ded615821458c67d7da8c5665.JPG)
- 857 replies
-
- 23
-
-
- Sphinx
- Vanguard Models
- (and 1 more)
-
Quite a journey you've had with this kit Glenn, and she does look impressive. Well done. B.E.
- 476 replies
-
- 2
-
-
- sphinx
- vanguard models
- (and 1 more)
-
The relationship between the bridle port and the others Is fixed as they are pre-cut on the pattern. The rail runs between the ports, above midway height, does your tape need a little tweaking? There seems to be two options: Run the rail smoothly along the hull letting it cross the Bridle port where it does. Remove the planking in the area of the Bridle port, and infill to adjust the shape before re-planking. In this case the width of the Bridle port could be made slightly narrower, as was the actual case. I think it more important that the rail looks to have a smooth sweep along the hull. B.E.
-
Thank you Sir, for your kind words, but if anything has been nicked from the Science Museum, it’s nowt to do wi me governor😉 B.E.
- 857 replies
-
- 4
-
-
- Sphinx
- Vanguard Models
- (and 1 more)
-
Hi Ron, did you have any issues with the fair run of the Fore Tack from the Boomkins to the clue of the foresail? B.E.
- 542 replies
-
- 1
-
-
- Sphinx
- Vanguard Models
- (and 3 more)
-
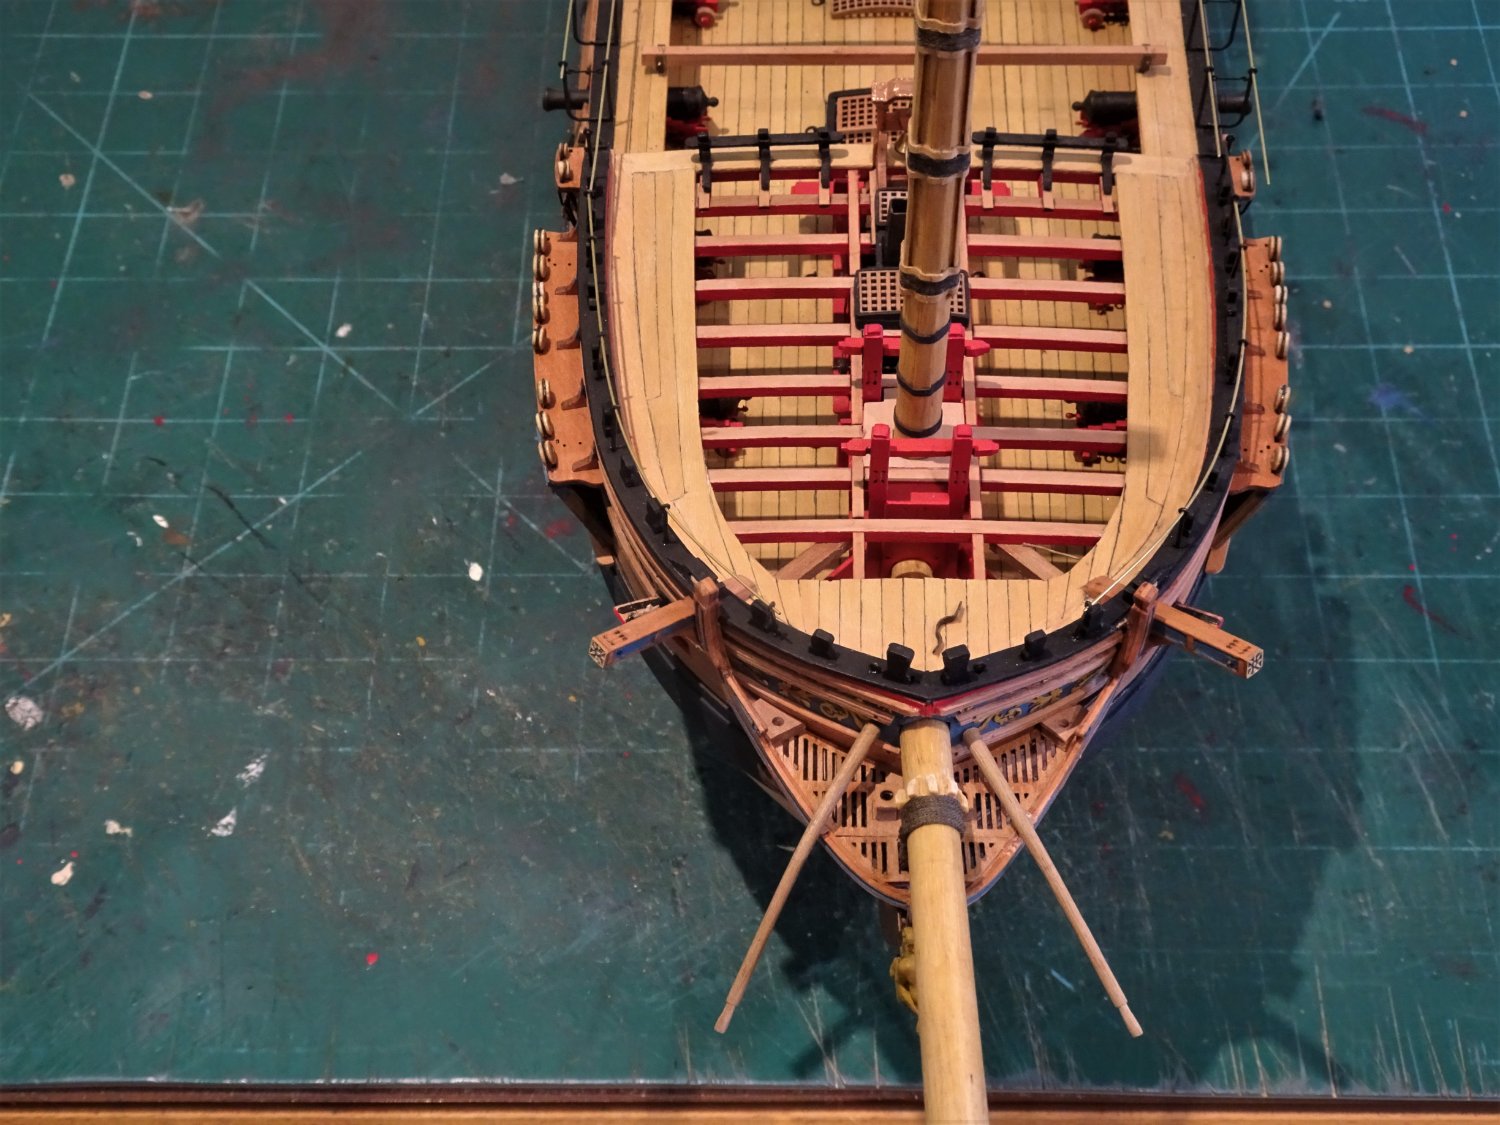
With expected action all those panels and furniture would be removed to the hold, or even put in ships boats that would be towed behind. In the age of sail you would normally have hours before action was engaged, giving plenty of time to ready the ship. B.E.
- 488 replies
-
- 10
-
-
- Indefatigable
- Vanguard Models
- (and 1 more)
-
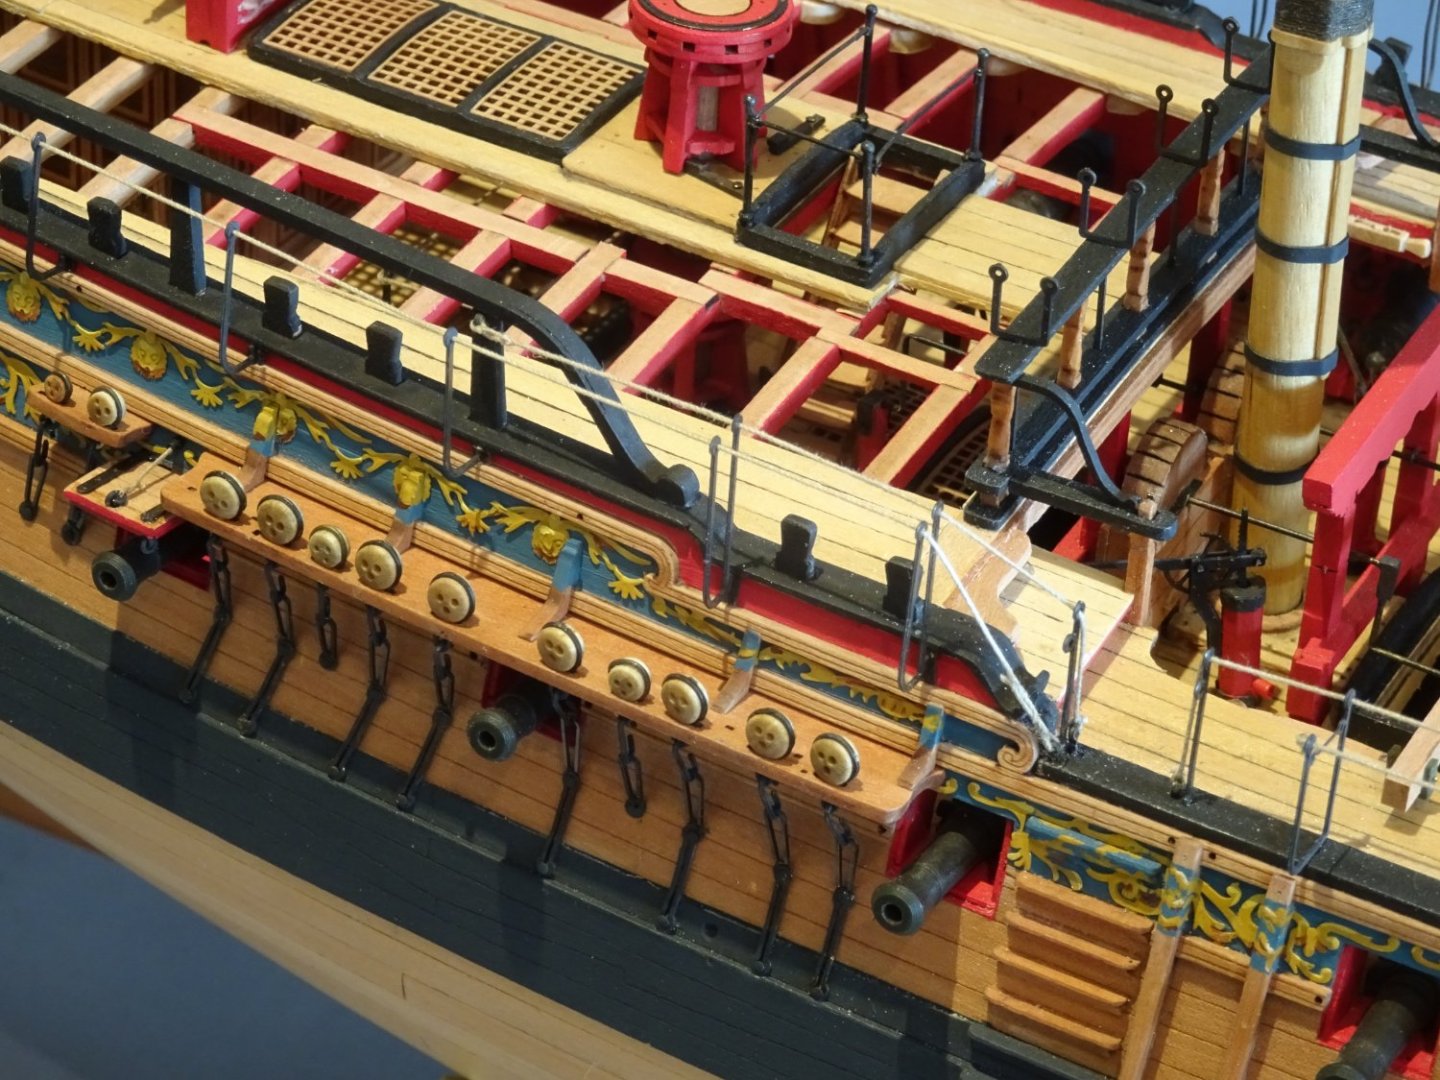
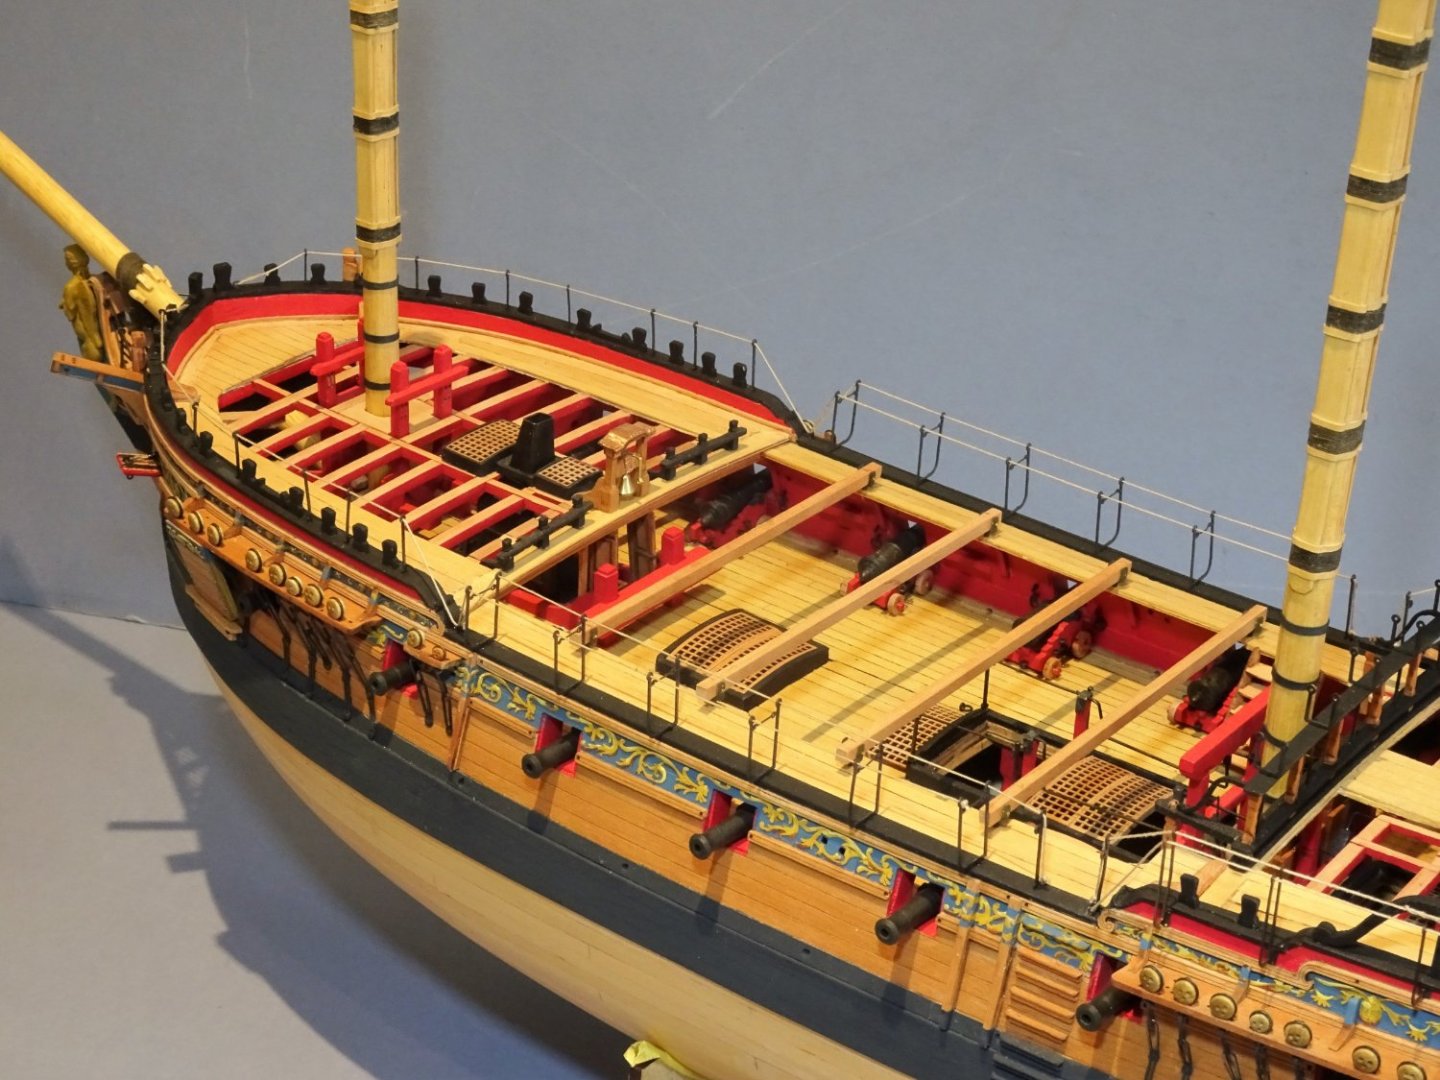
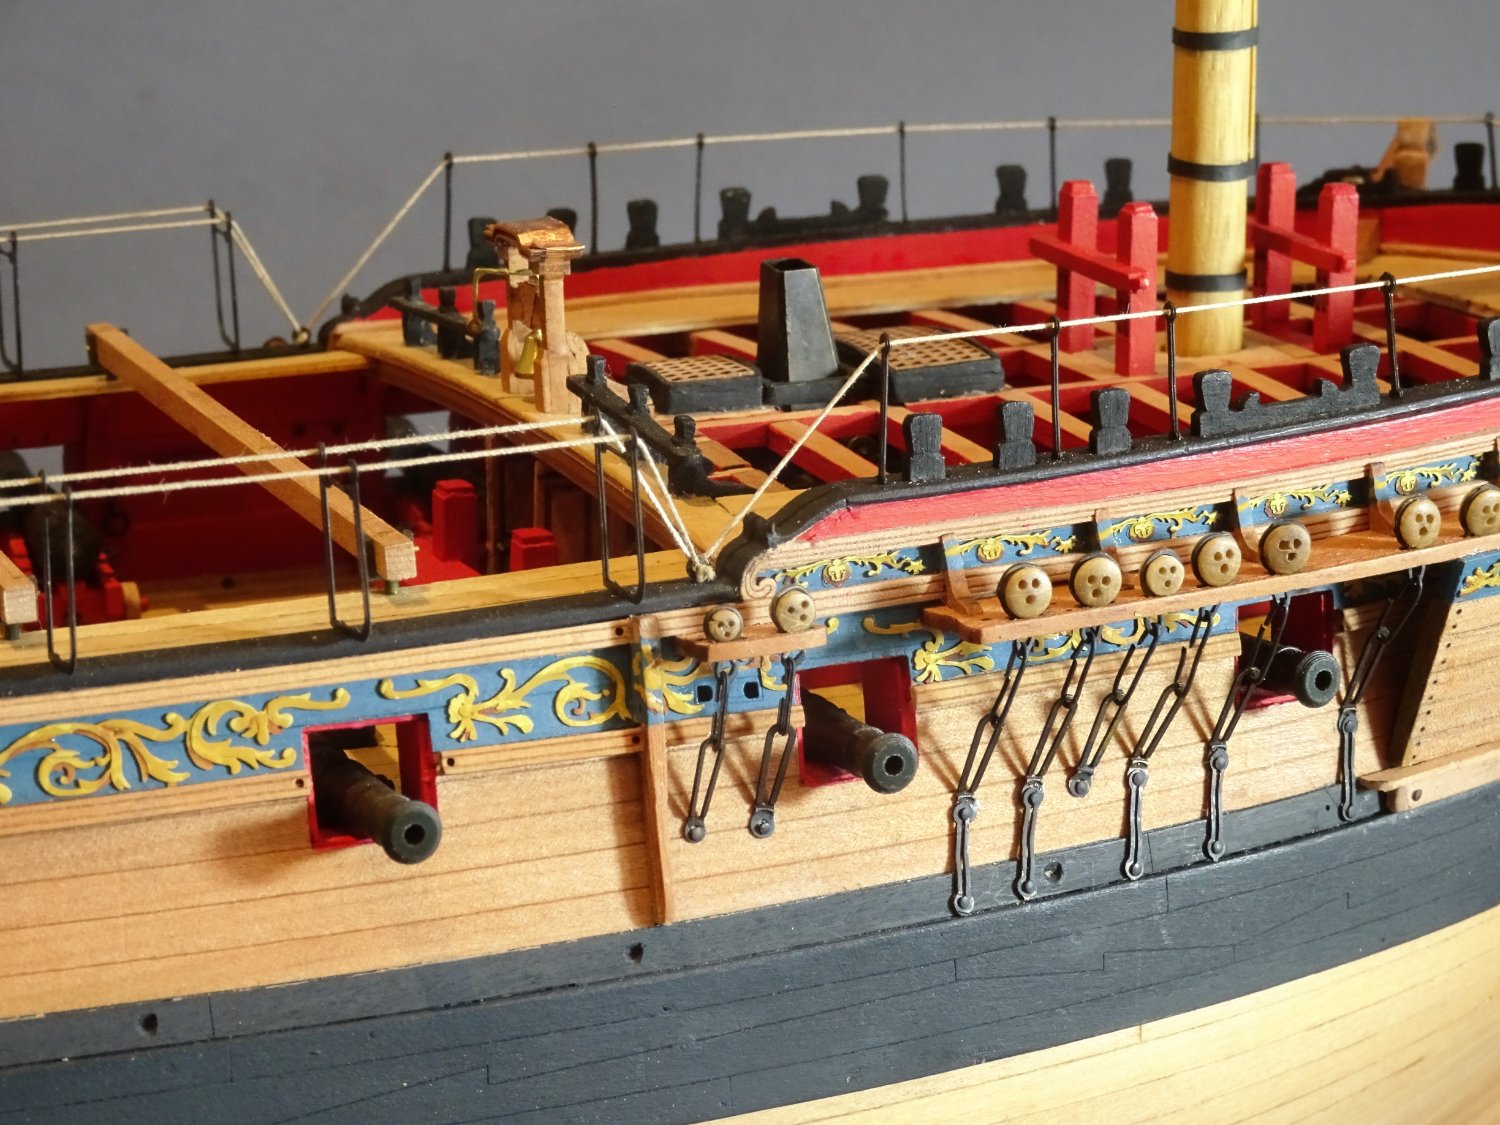
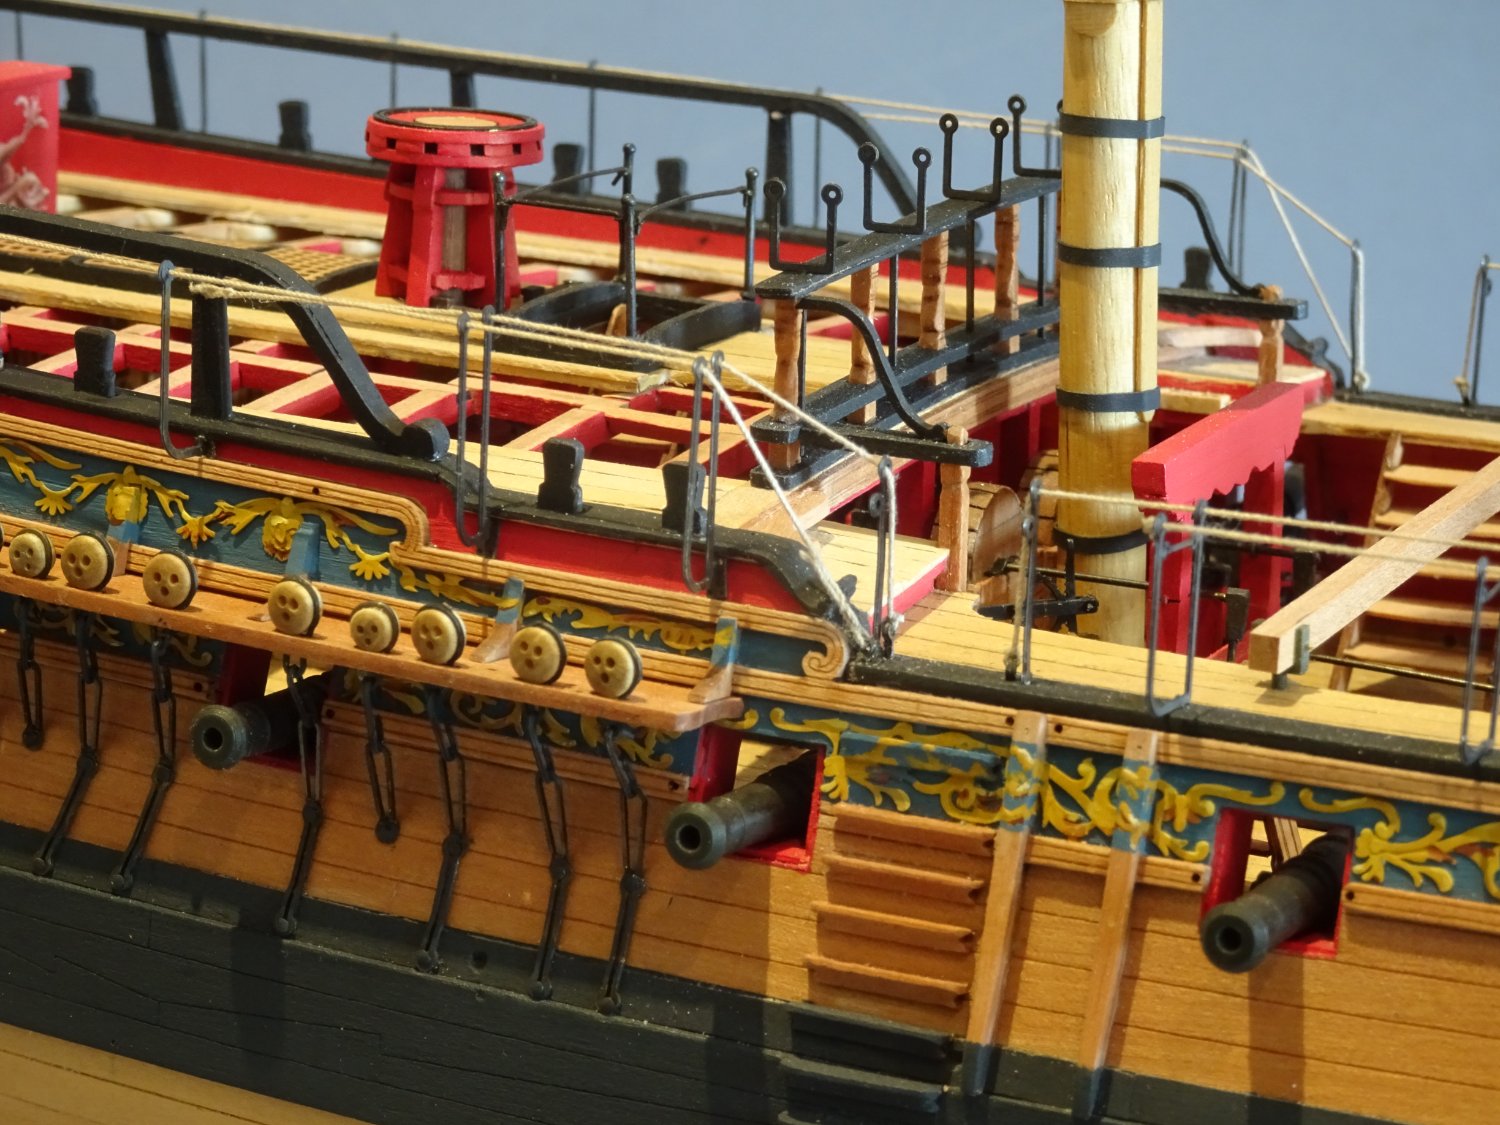
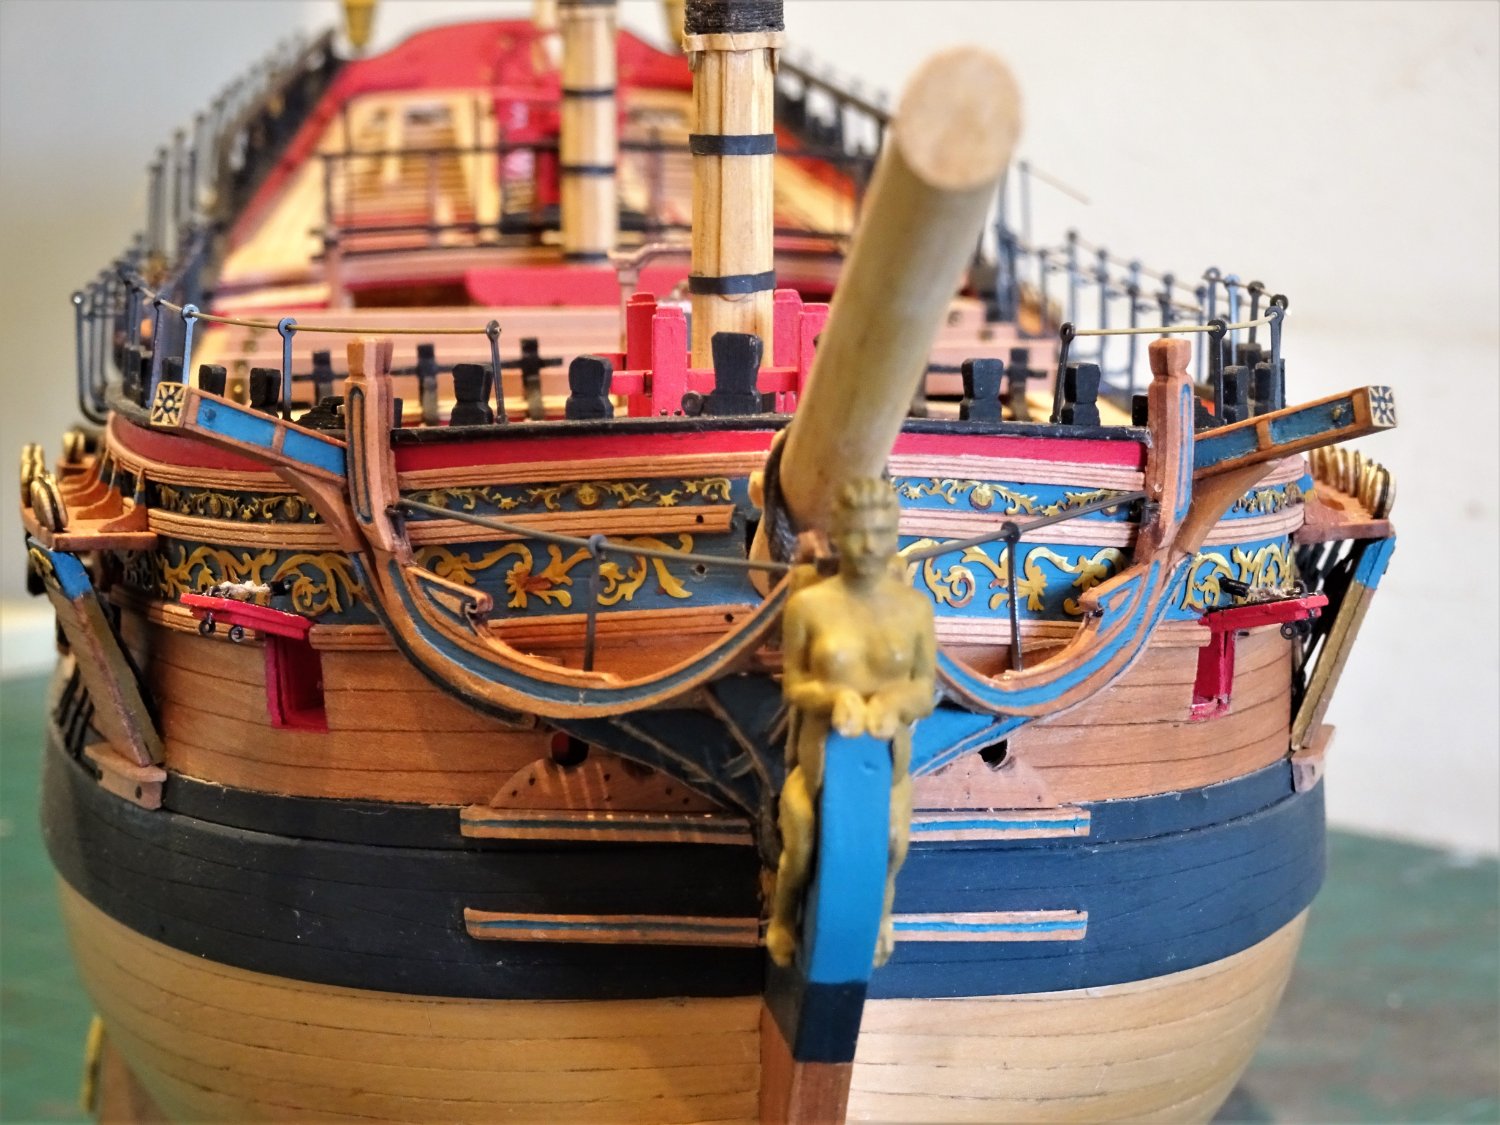
Post One hundred and Sixty-seven. More on Cranes Having pondered on the subject of the Quarter cranes for a few days, I have finally decided to fit them. 8630 I do like to see iron work on ship models, and they do not obscure or detract from the decorative topsides which was my main concern. 8635 8629 I have included the micro back plates, but they are the very devil’s invention for handling and filing to fit. 8620 Several of them pinged away into the ether never to be seen again, but faux plates are easily replicated using thin black card, and the difference cannot be detected. 8615 As with the other cranes thin brass wire is threaded thro’ the eyes to help maintain position. 8621 Even with short nubs the cranes held well using a smear of ca to attach to the hull. 8614(2) 8628 Looks a little like a forest of cranes in these macro shots, but foreshortening gives something of a false impression. 8612(2) 8631 A little more enhancement to the Headworks now. B.E. 02/10/2022
.thumb.JPG.8864cf5b05732eb64a692e13c80bac99.JPG)
.thumb.JPG.f8202cad37677f876a0e225d69e0de1a.JPG)


- 857 replies
-
- 26
-
-
-
- Sphinx
- Vanguard Models
- (and 1 more)
.JPG.161c64cbabad6b3dda05c1f07fba85fd.JPG)


.JPG.9f9c92d7f134f644dfe9d148949b4def.JPG)


.JPG.ad8f37da62dfa88dbfeff46ff829df5c.JPG)


.JPG.53cf4172915304f4b87bc3334c82146c.JPG)
.JPG.67bc29ceaf42ba337edc3dabfd3c09b3.JPG)
.JPG.fd7478c3b39b5d5e2674d9142a6a2d89.JPG)


.JPG.1b6383cedc35beed05e1c7b76bdca6de.JPG)
.JPG.5a678f22ad7ab755b87051f68e45e6fc.JPG)
.JPG.49cc717e3bd159bbe894325e720983a0.JPG)