.JPG.ca33079f5815b861e67b9c2cccd37982.JPG)

Blue Ensign
-
Posts
4,572 -
Joined
-
Last visited
Content Type
Profiles
Forums
Gallery
Events
Everything posted by Blue Ensign
-
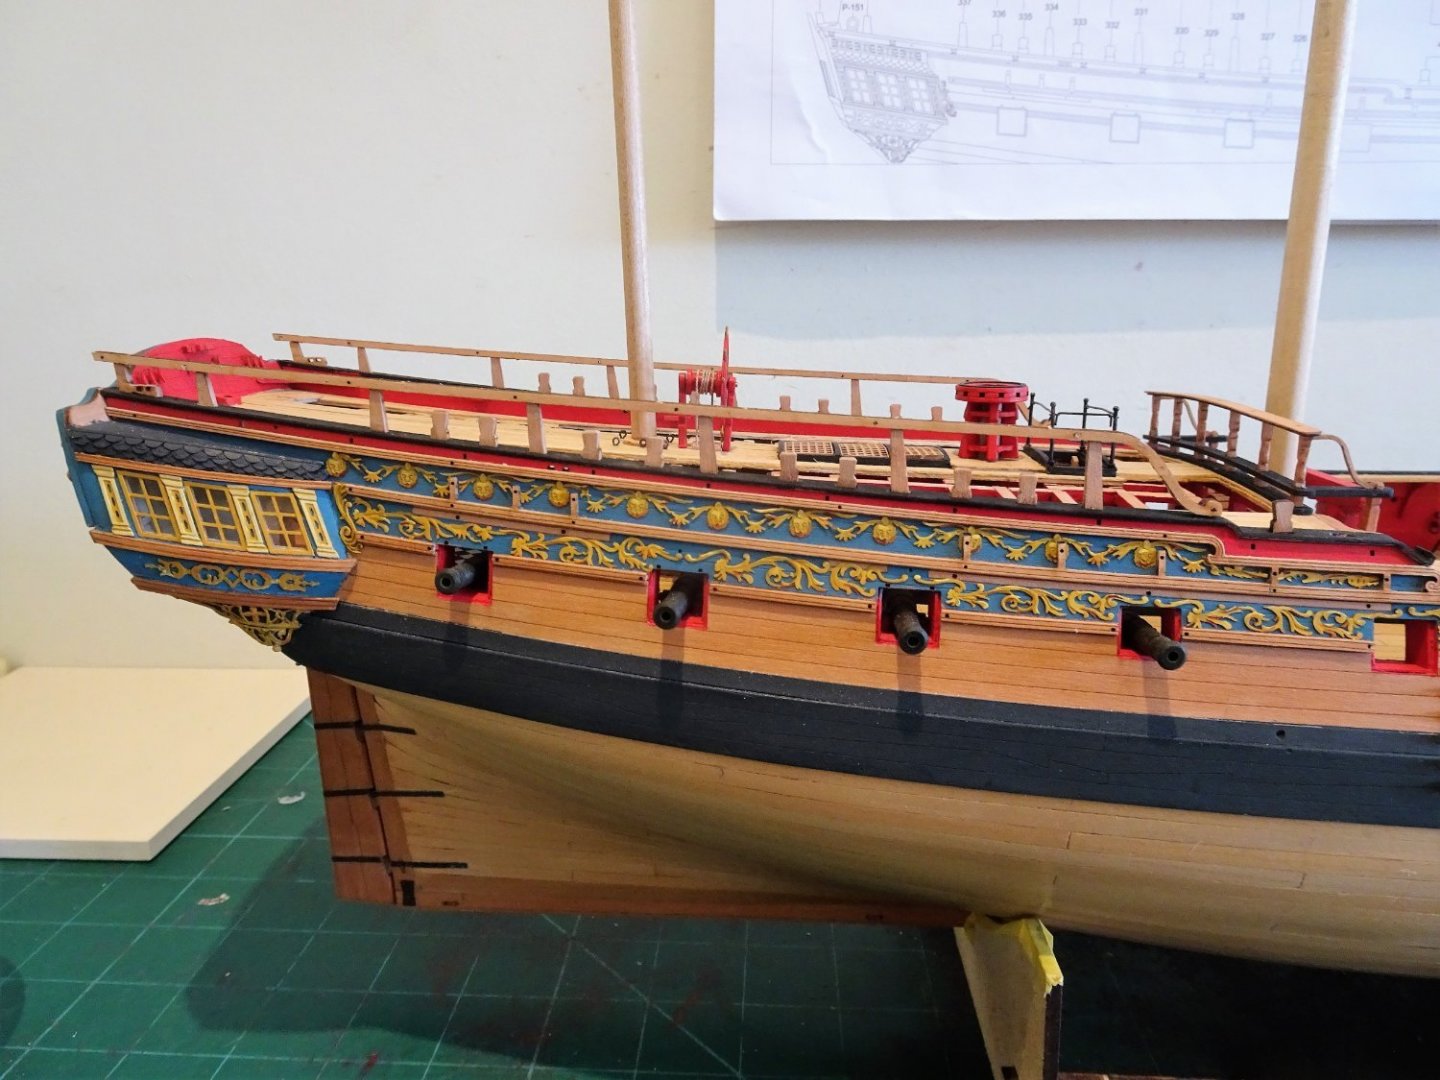
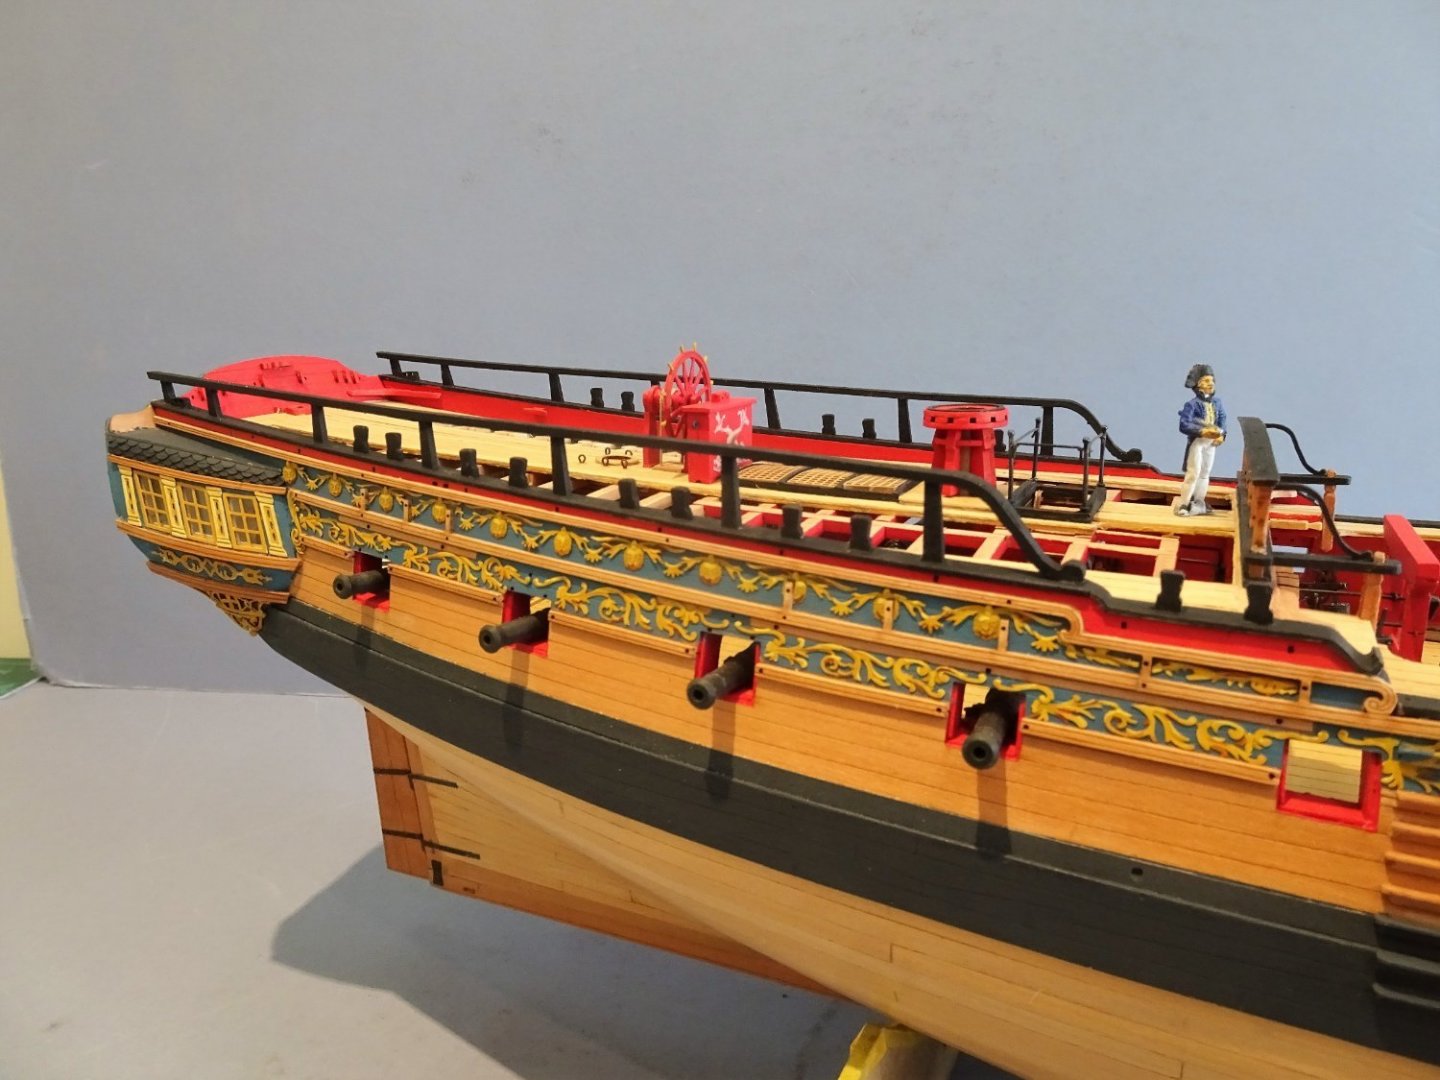
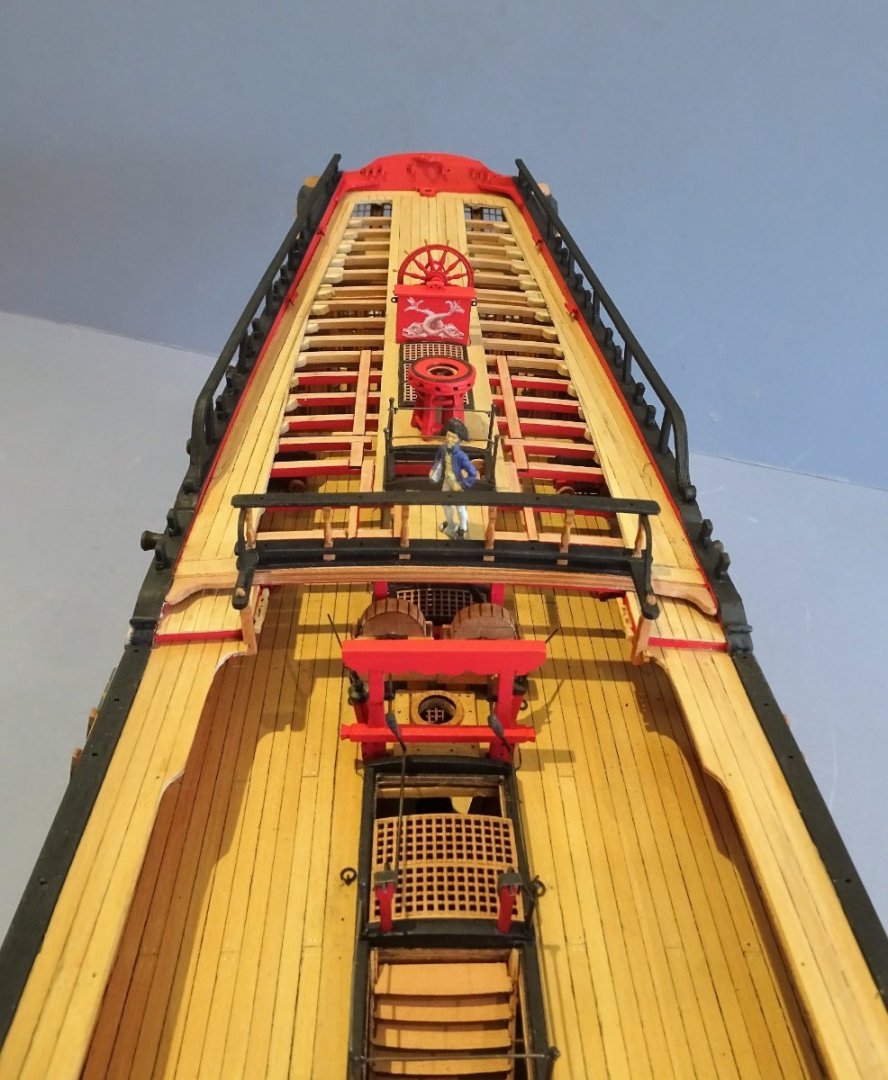
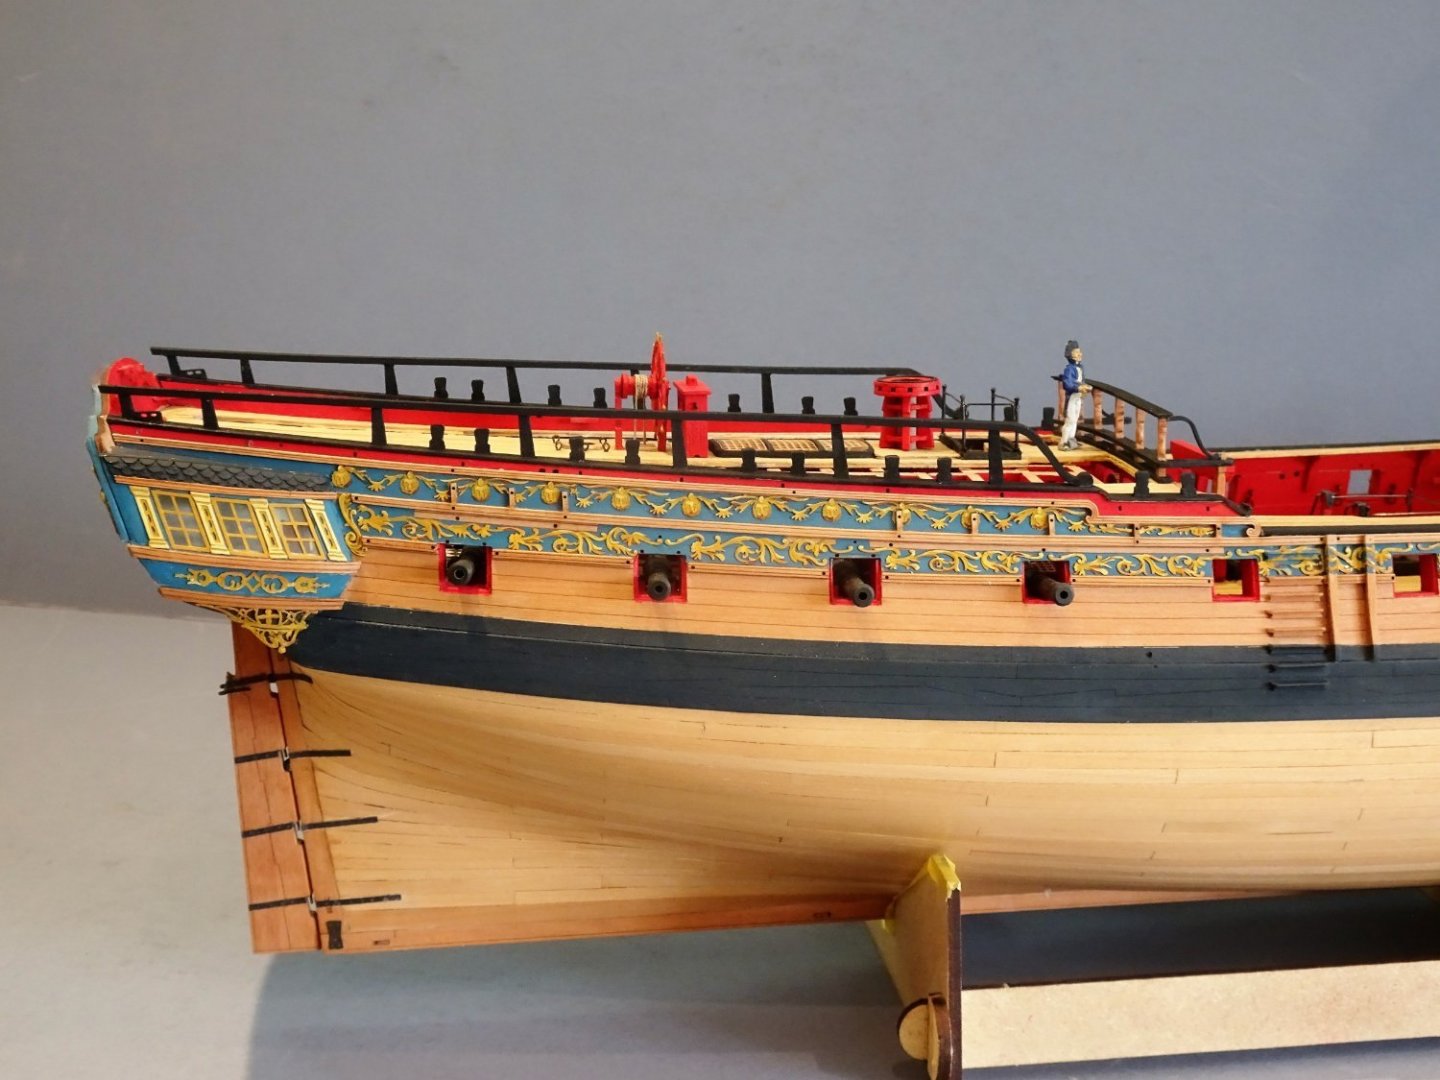
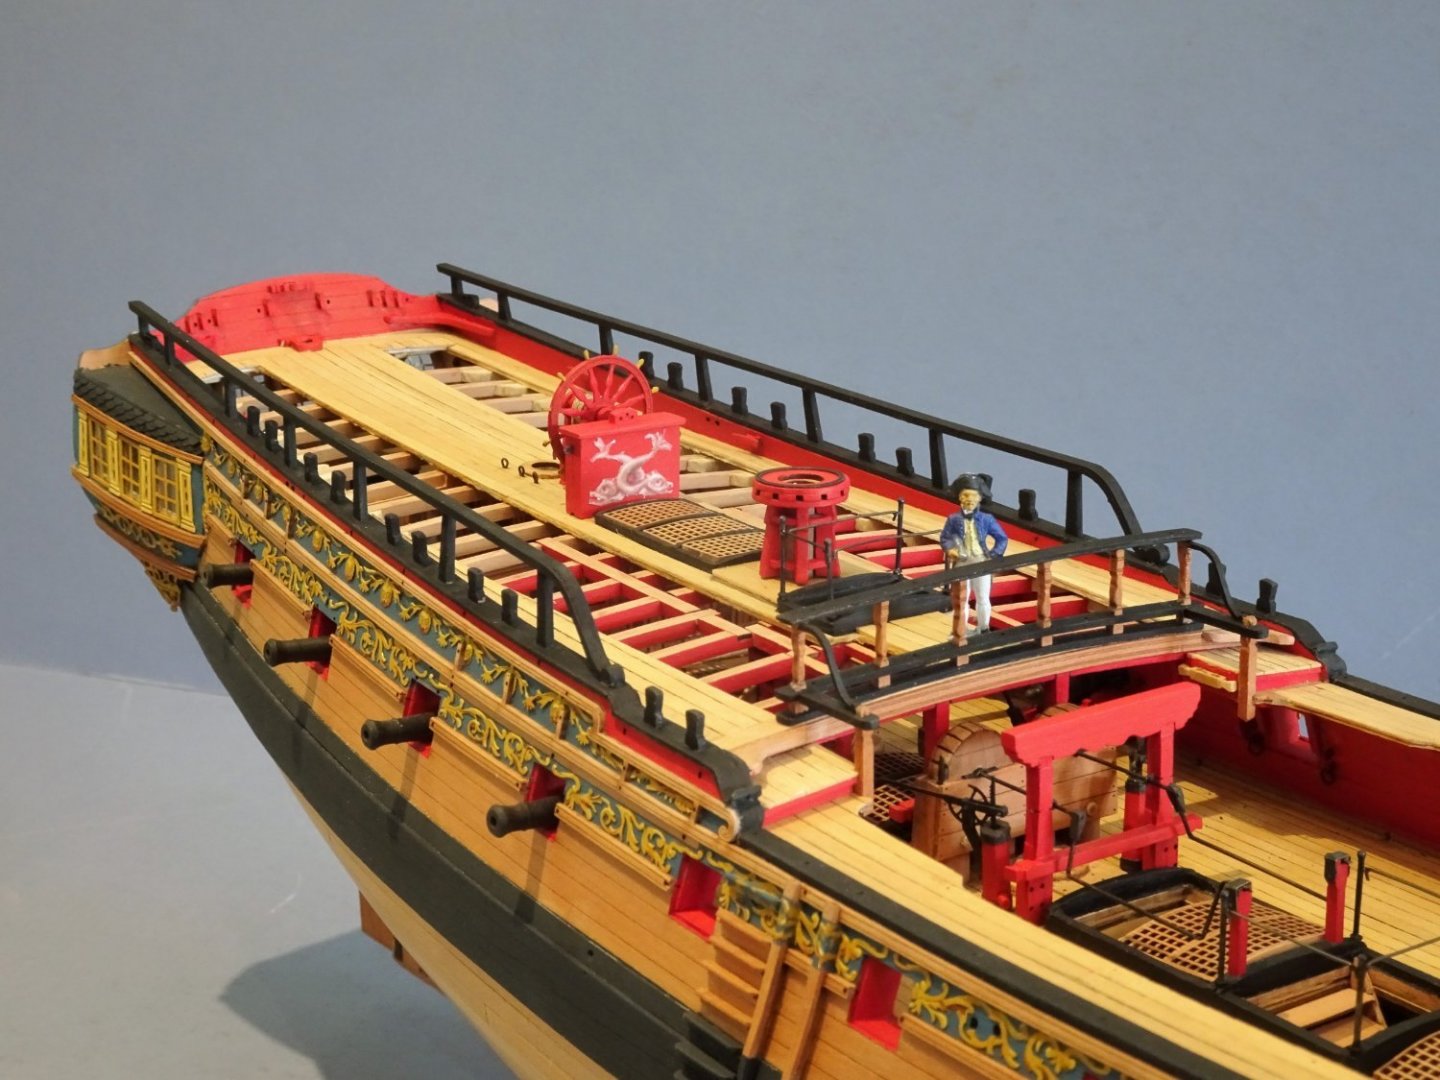
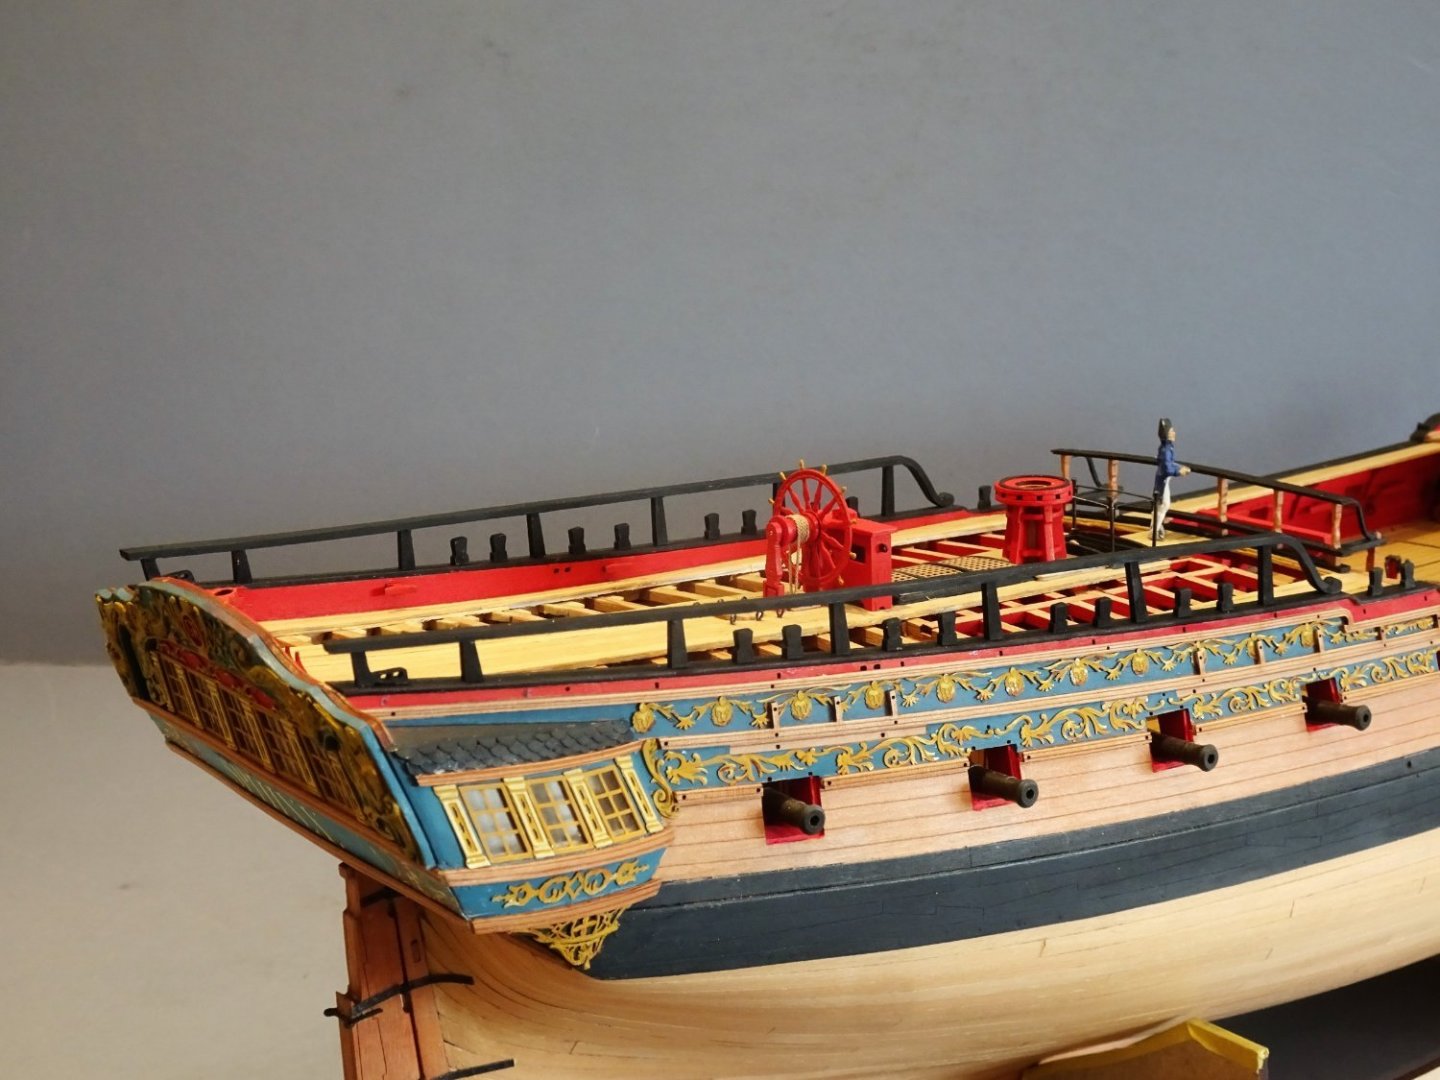
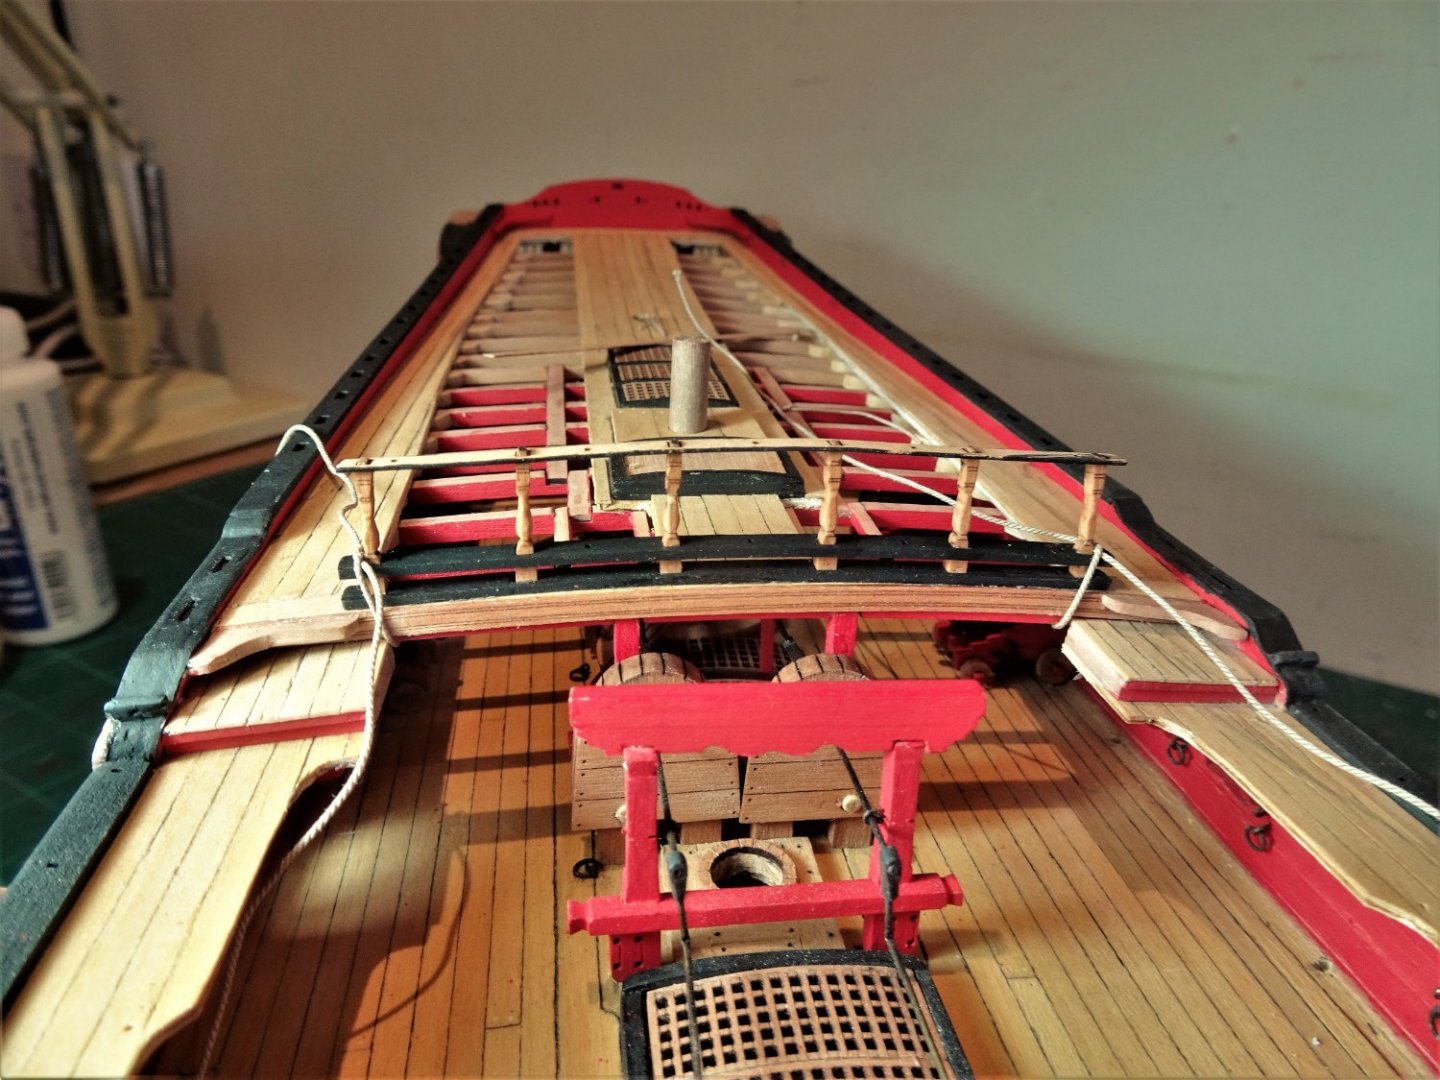
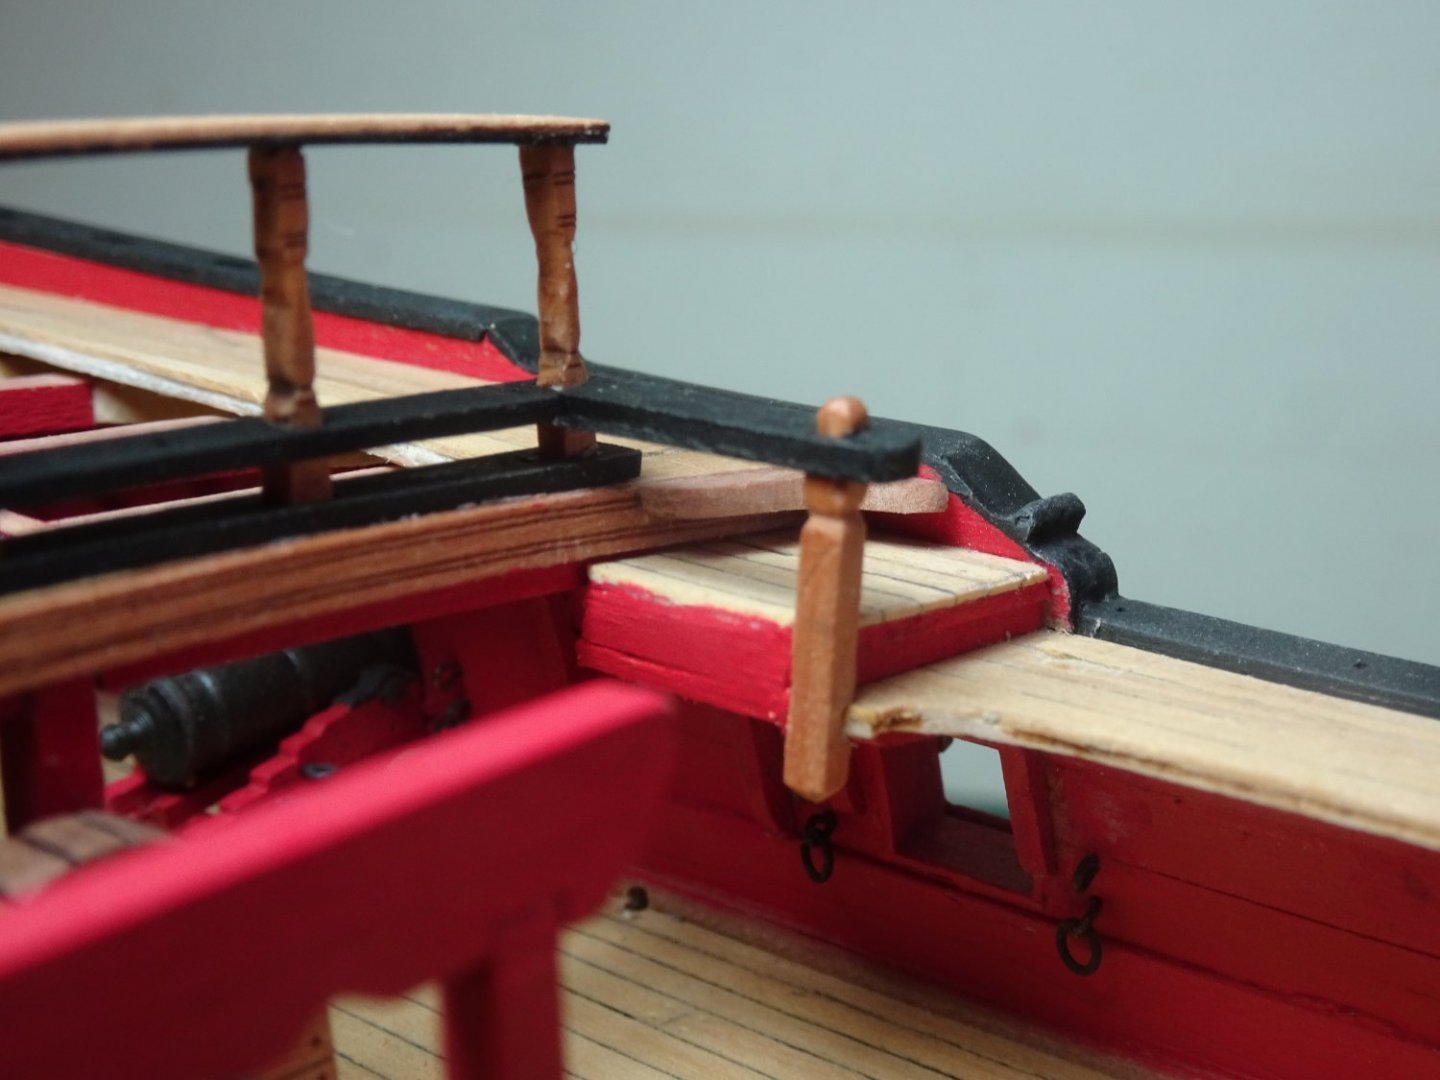
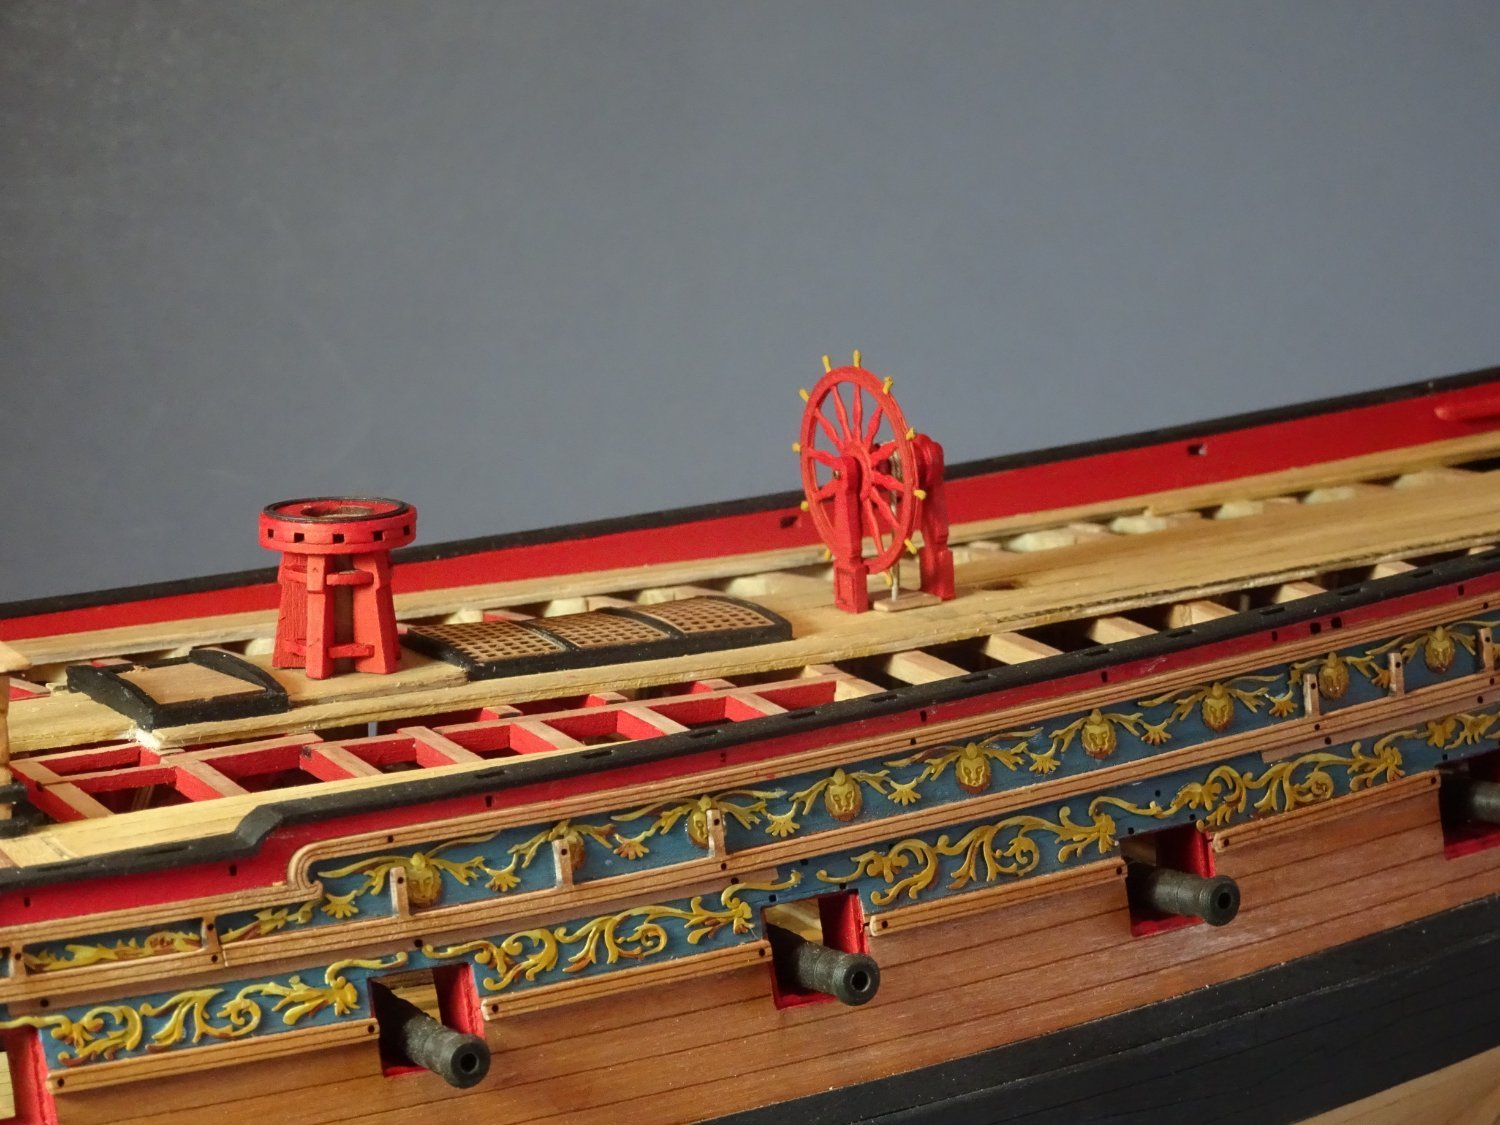
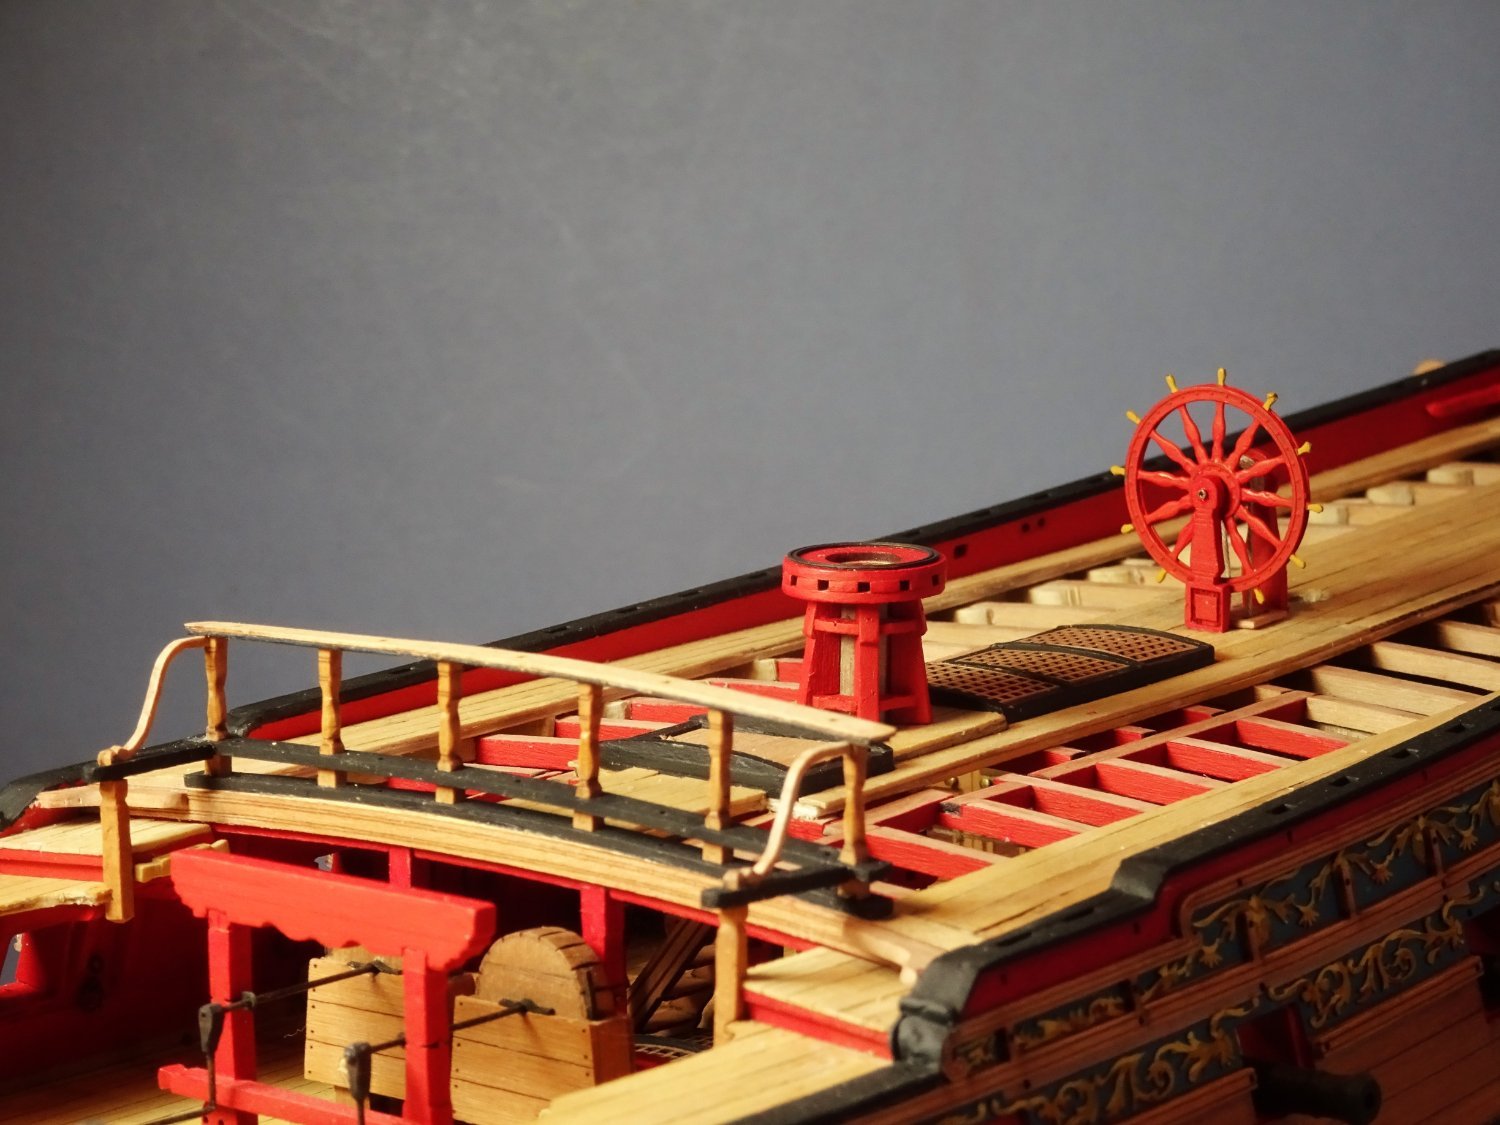
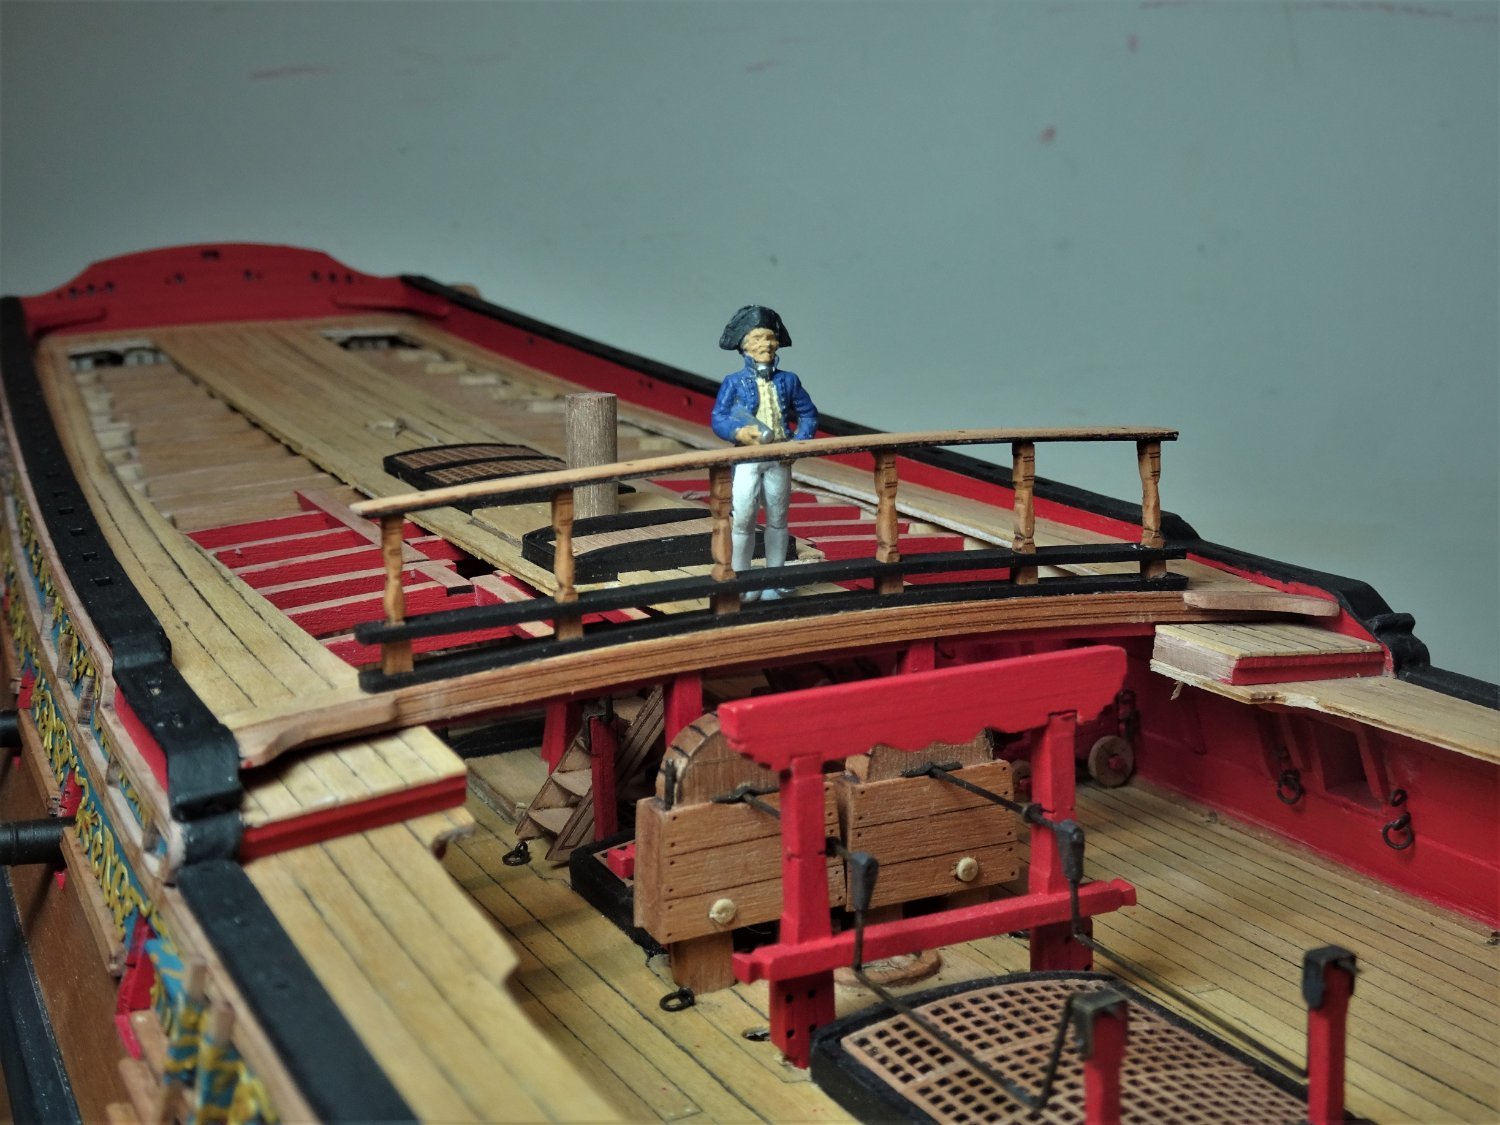
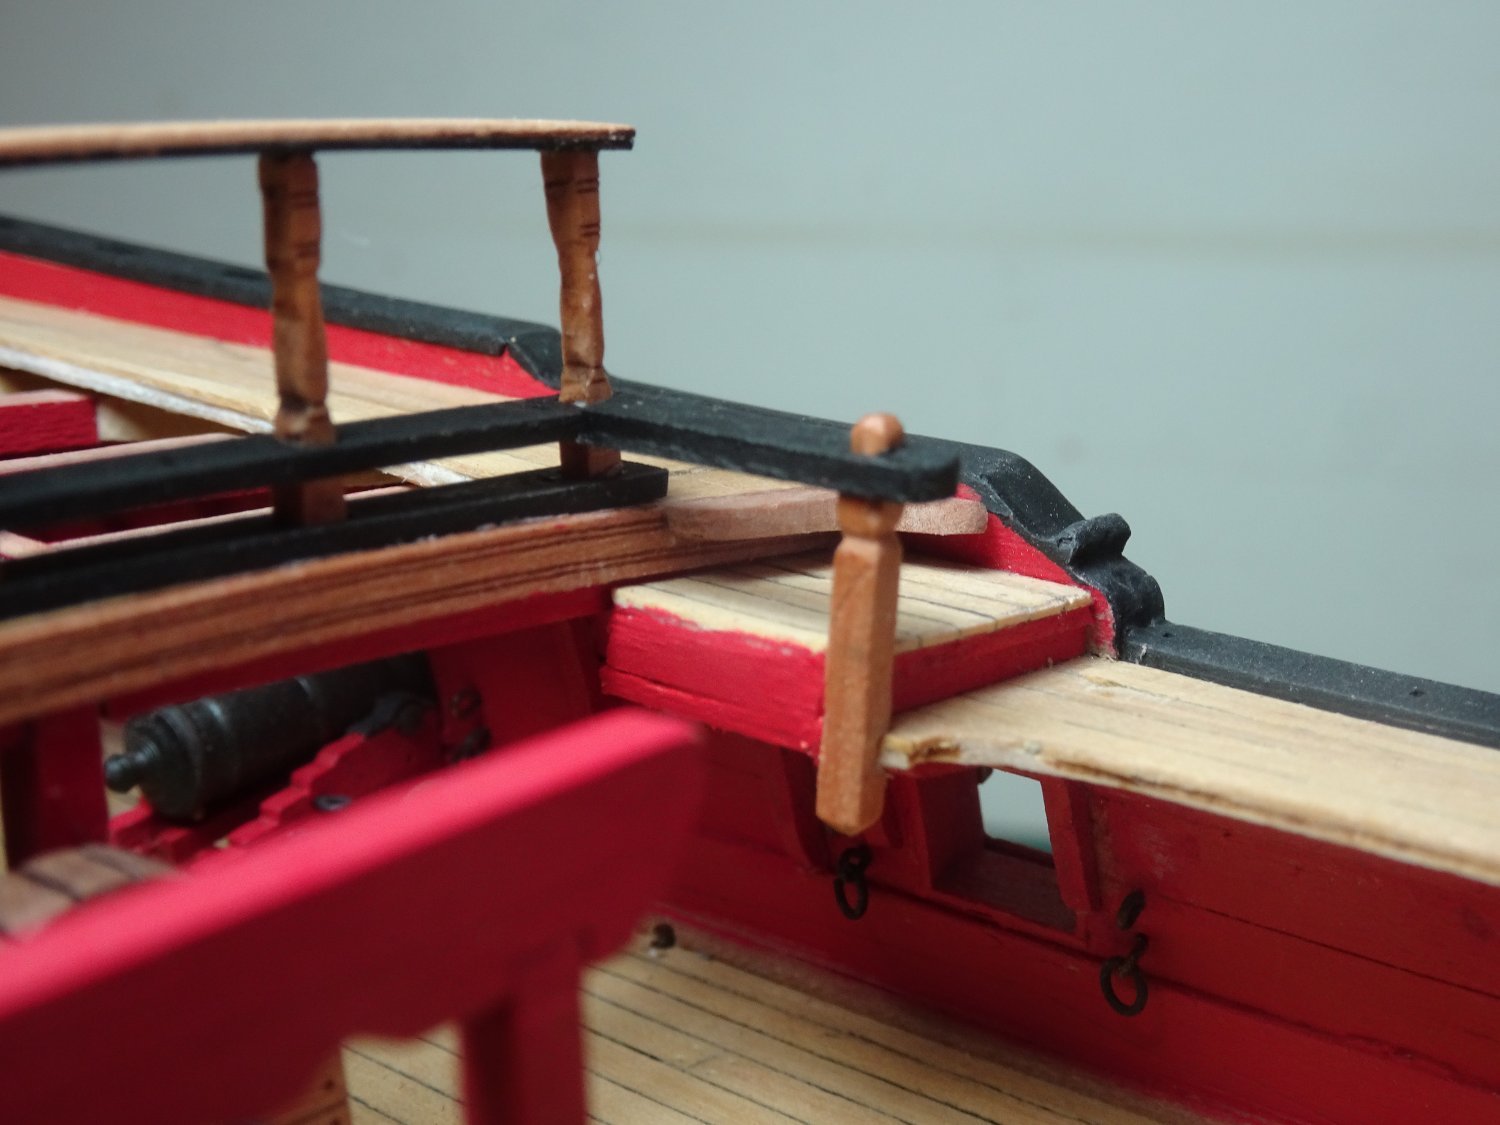
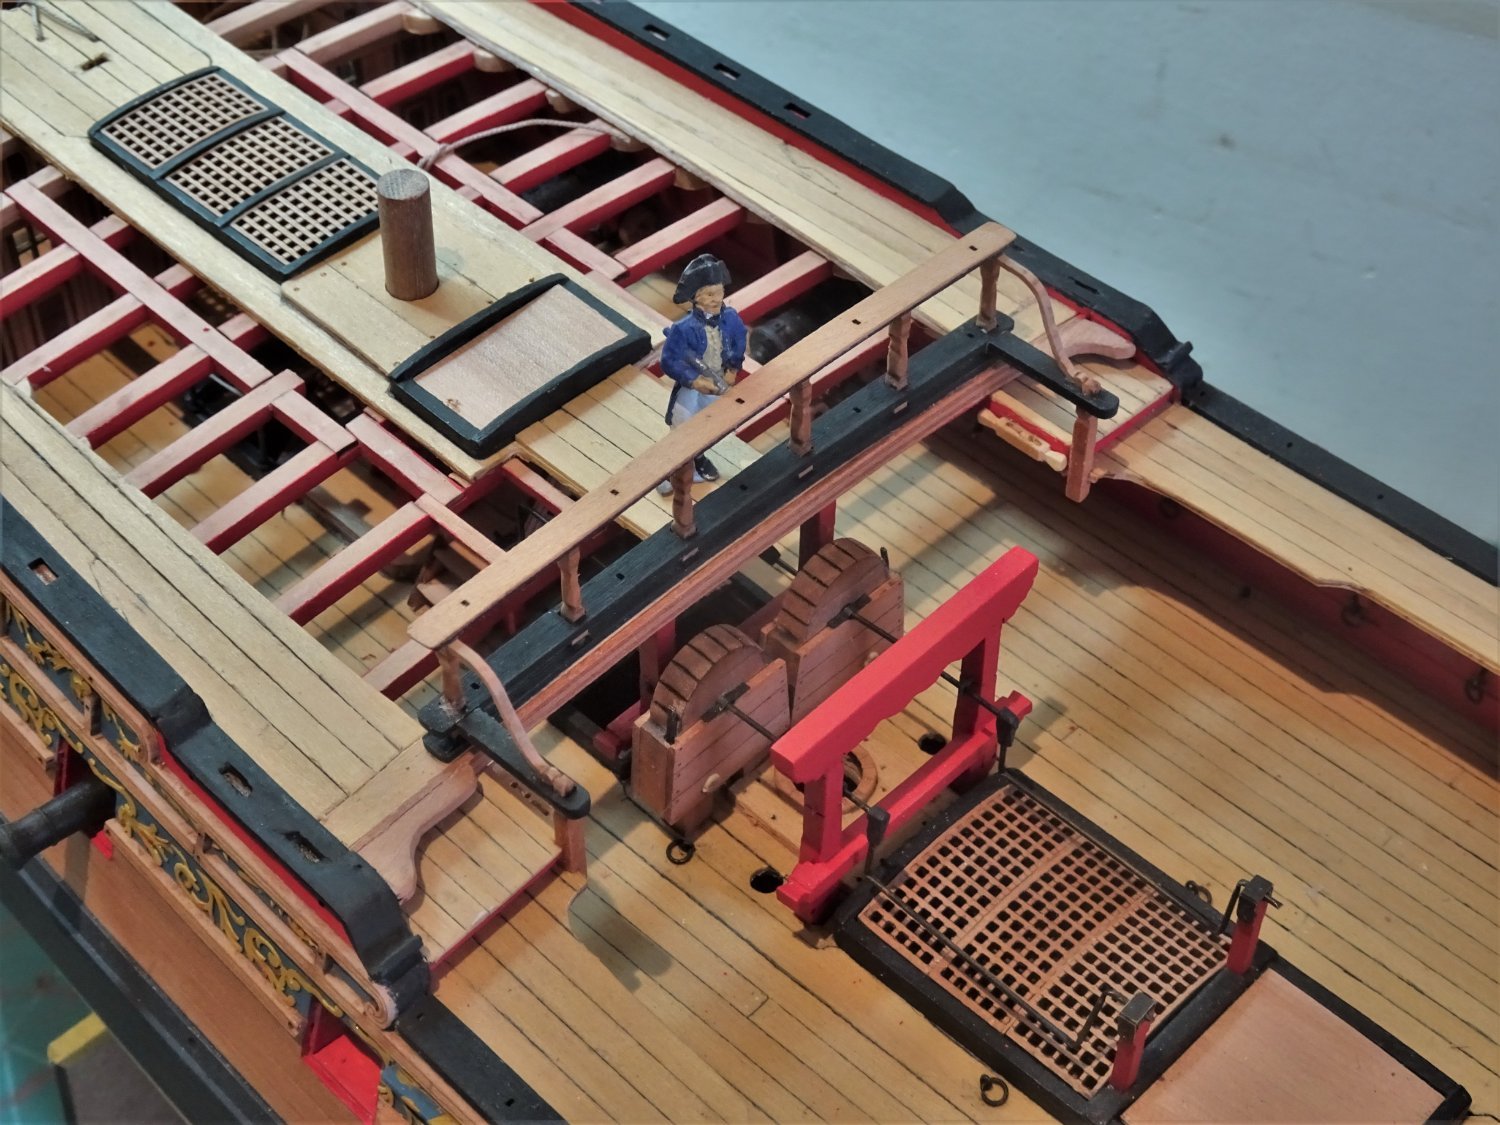
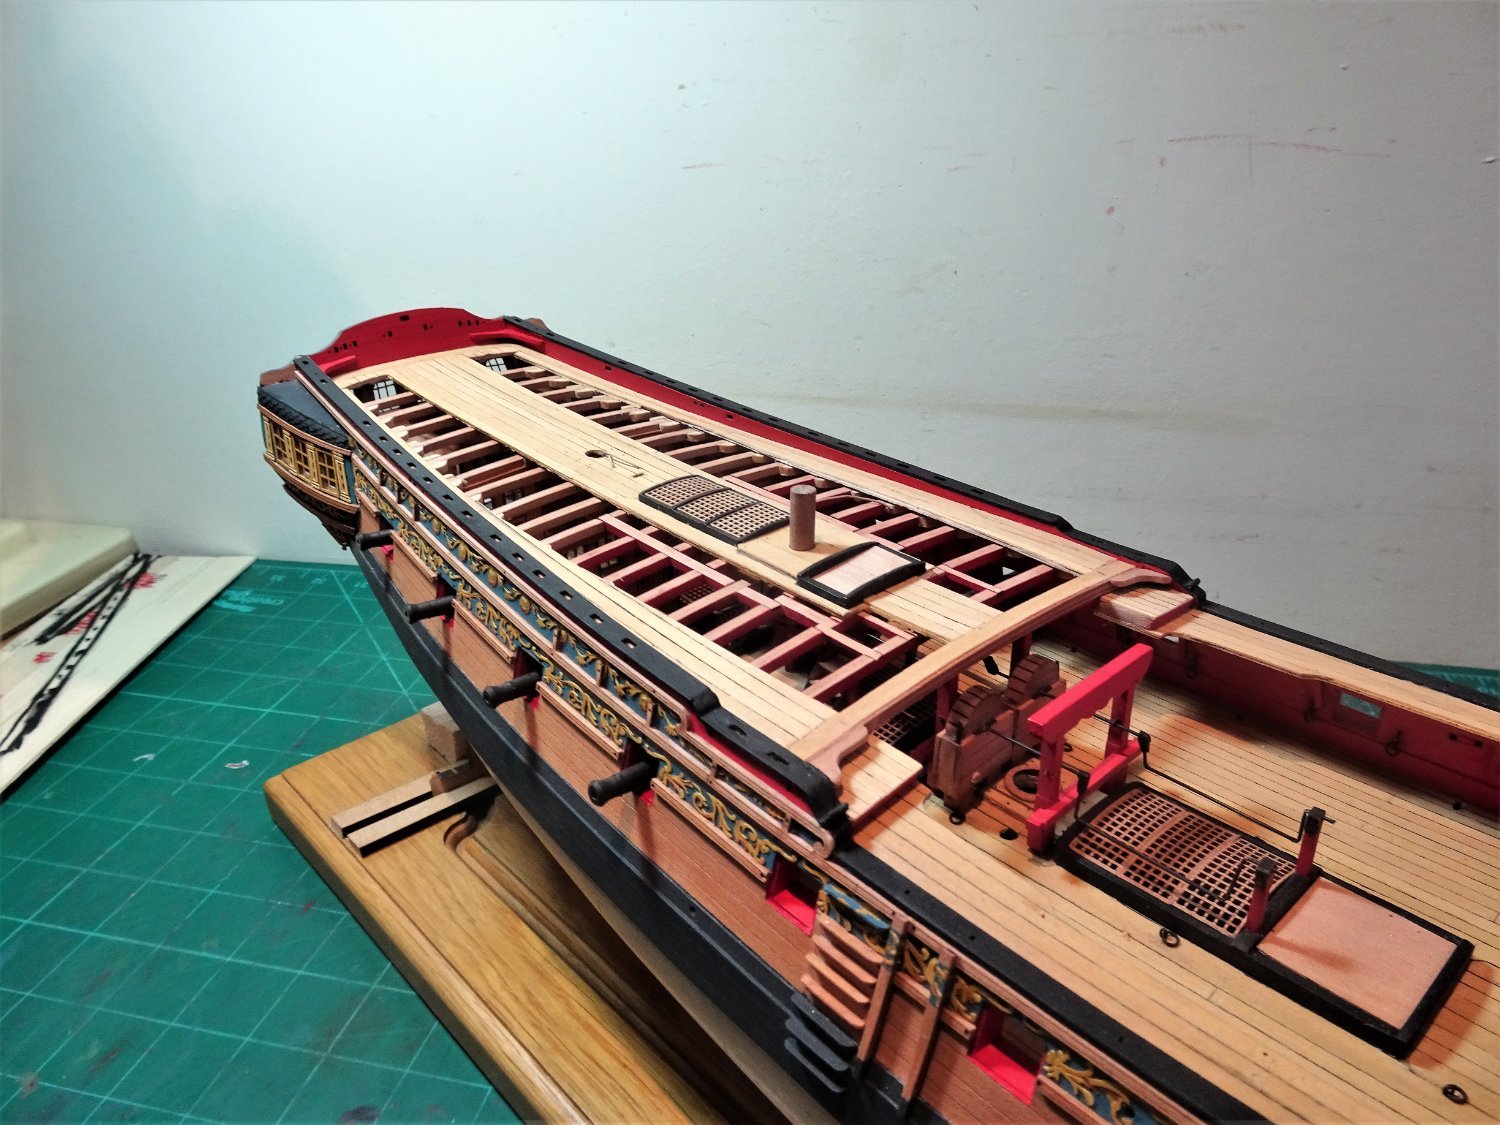
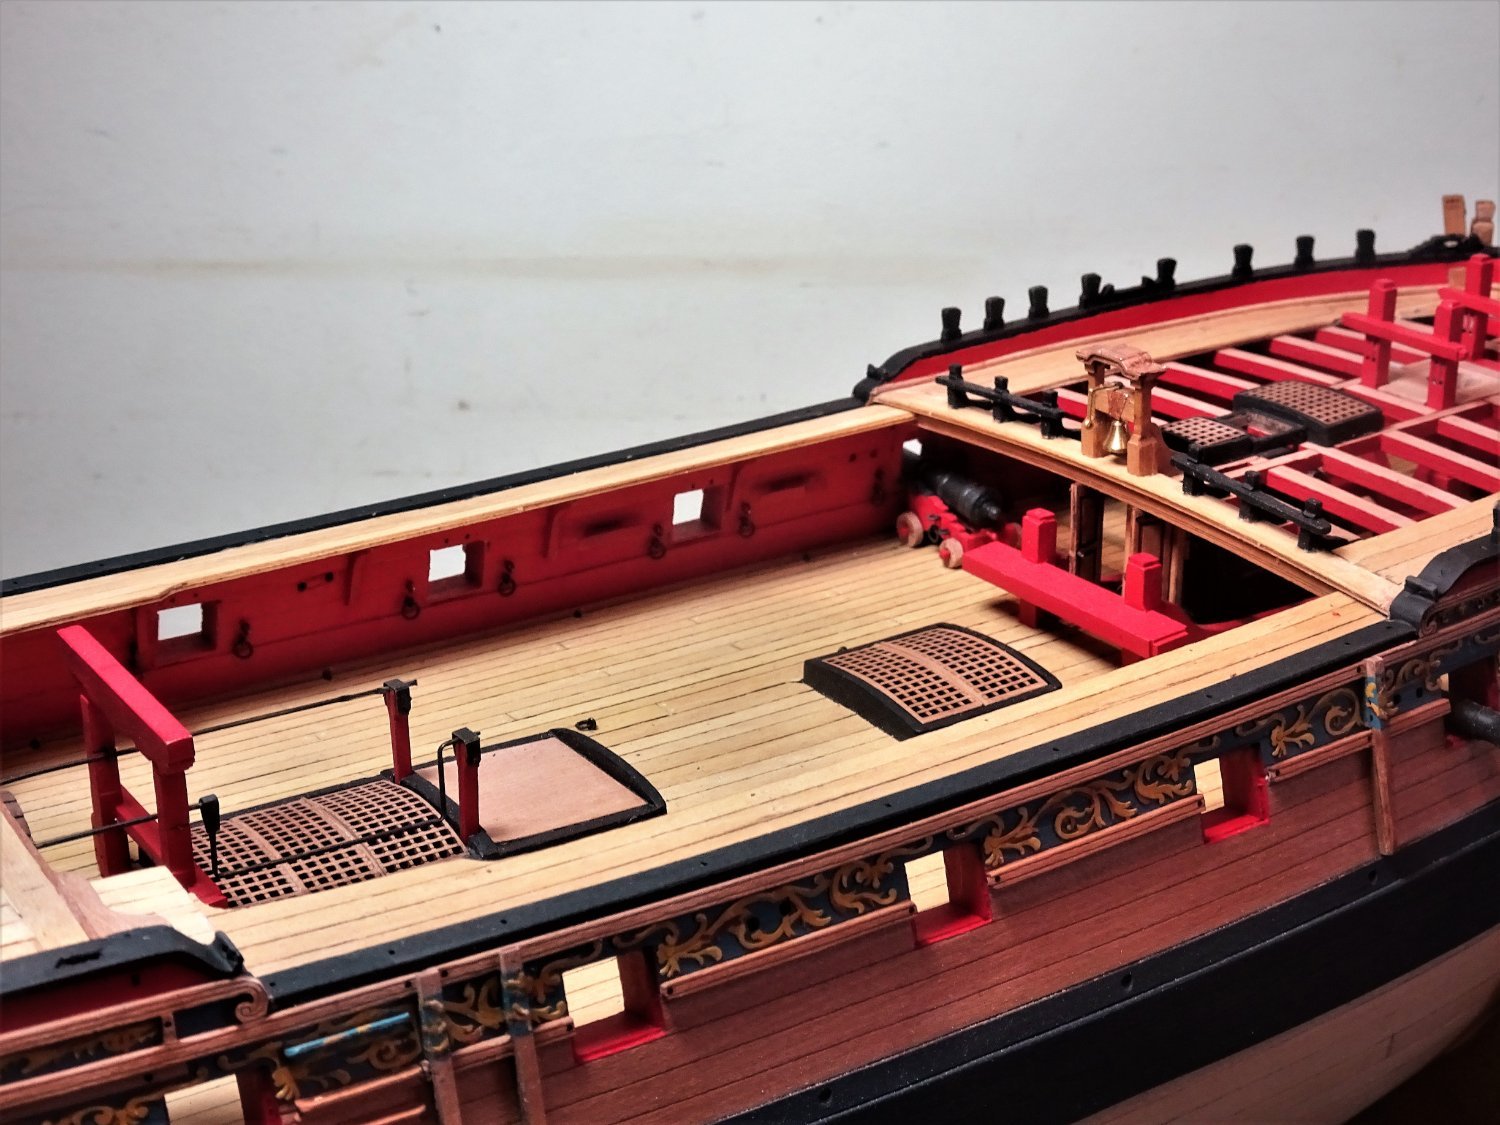
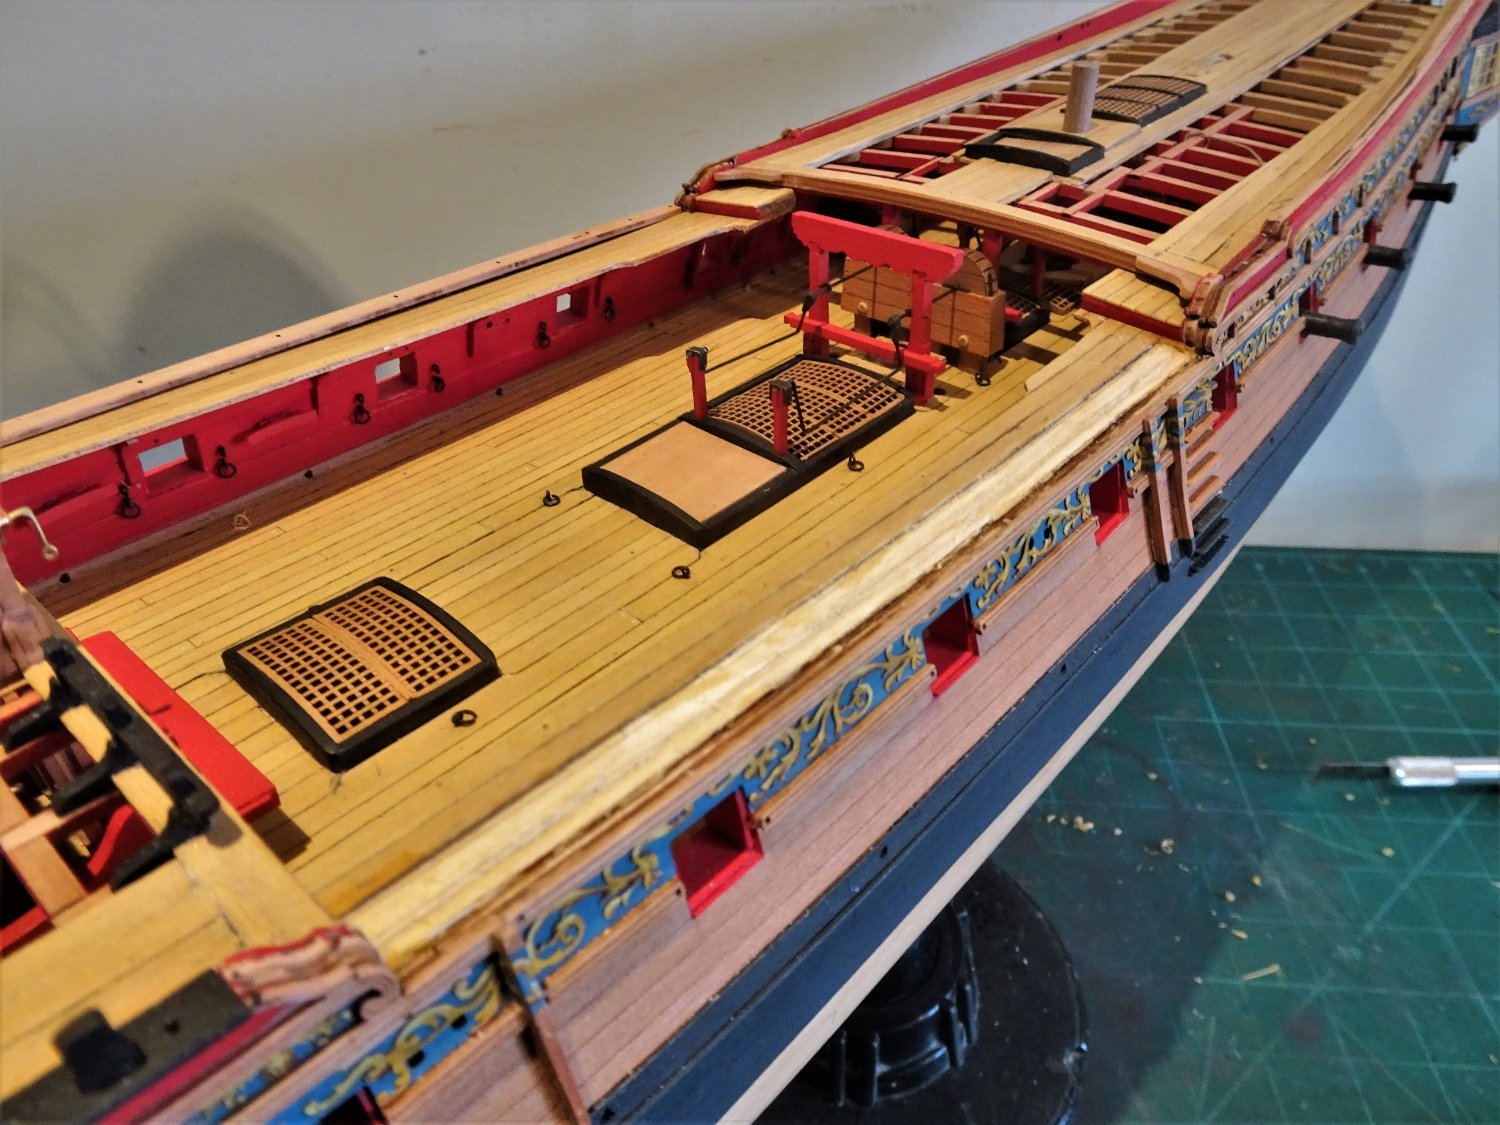
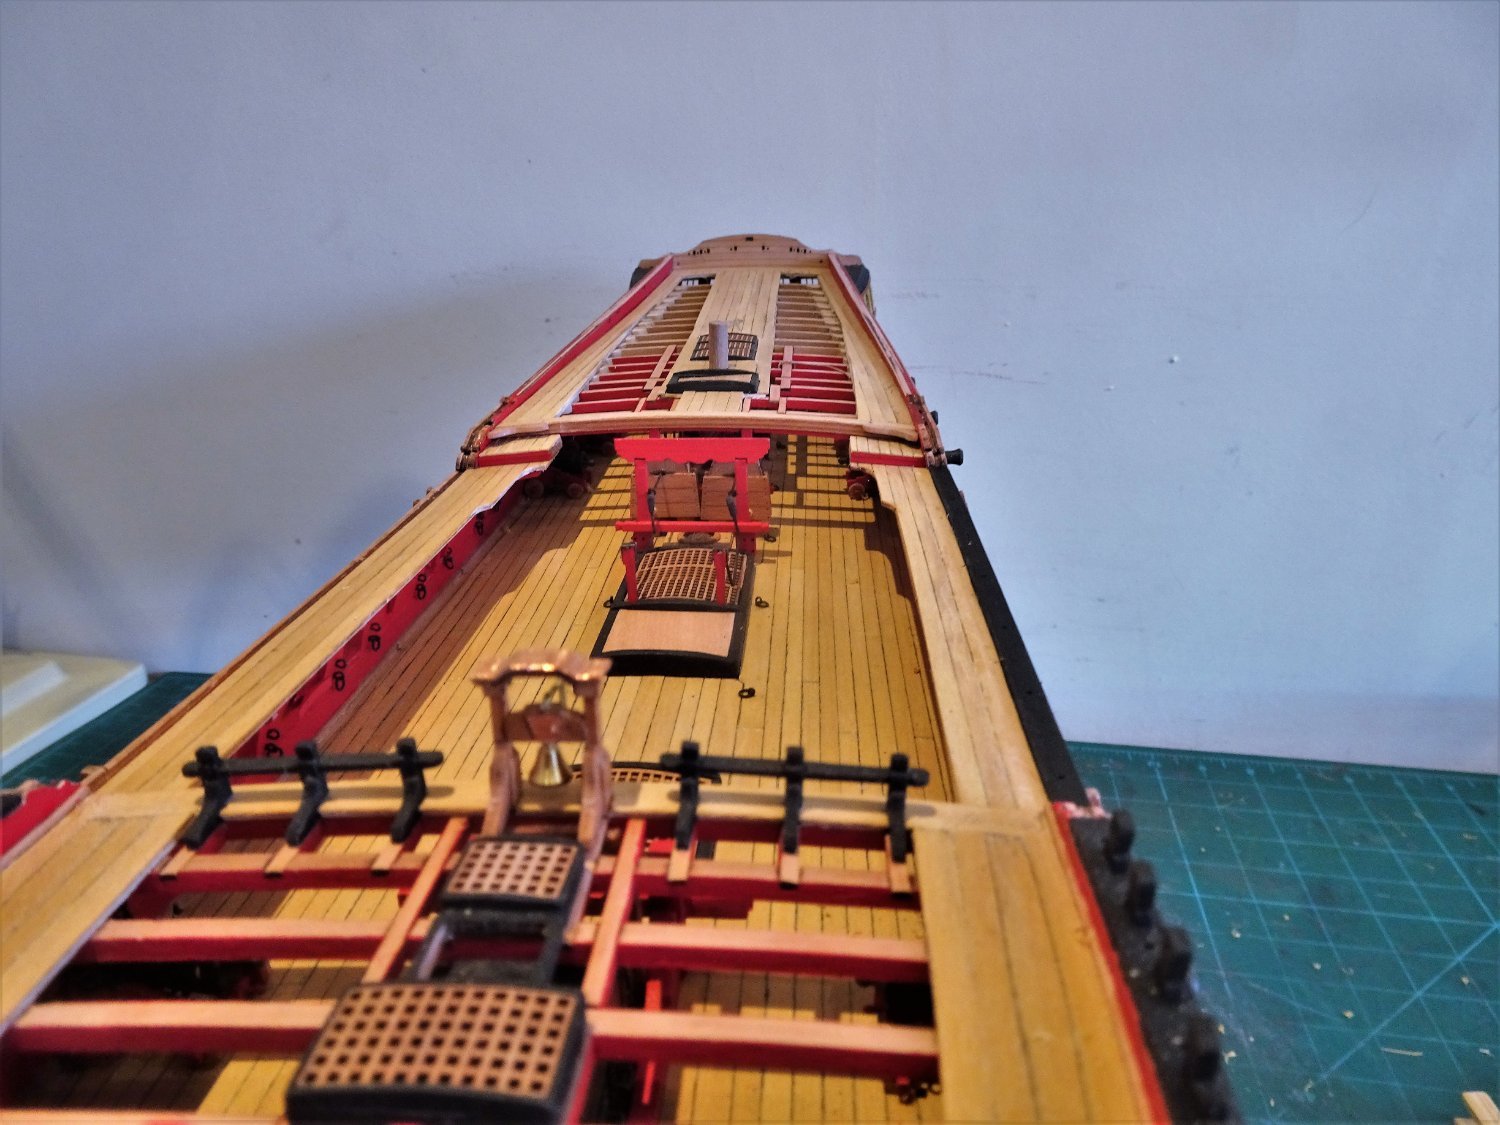
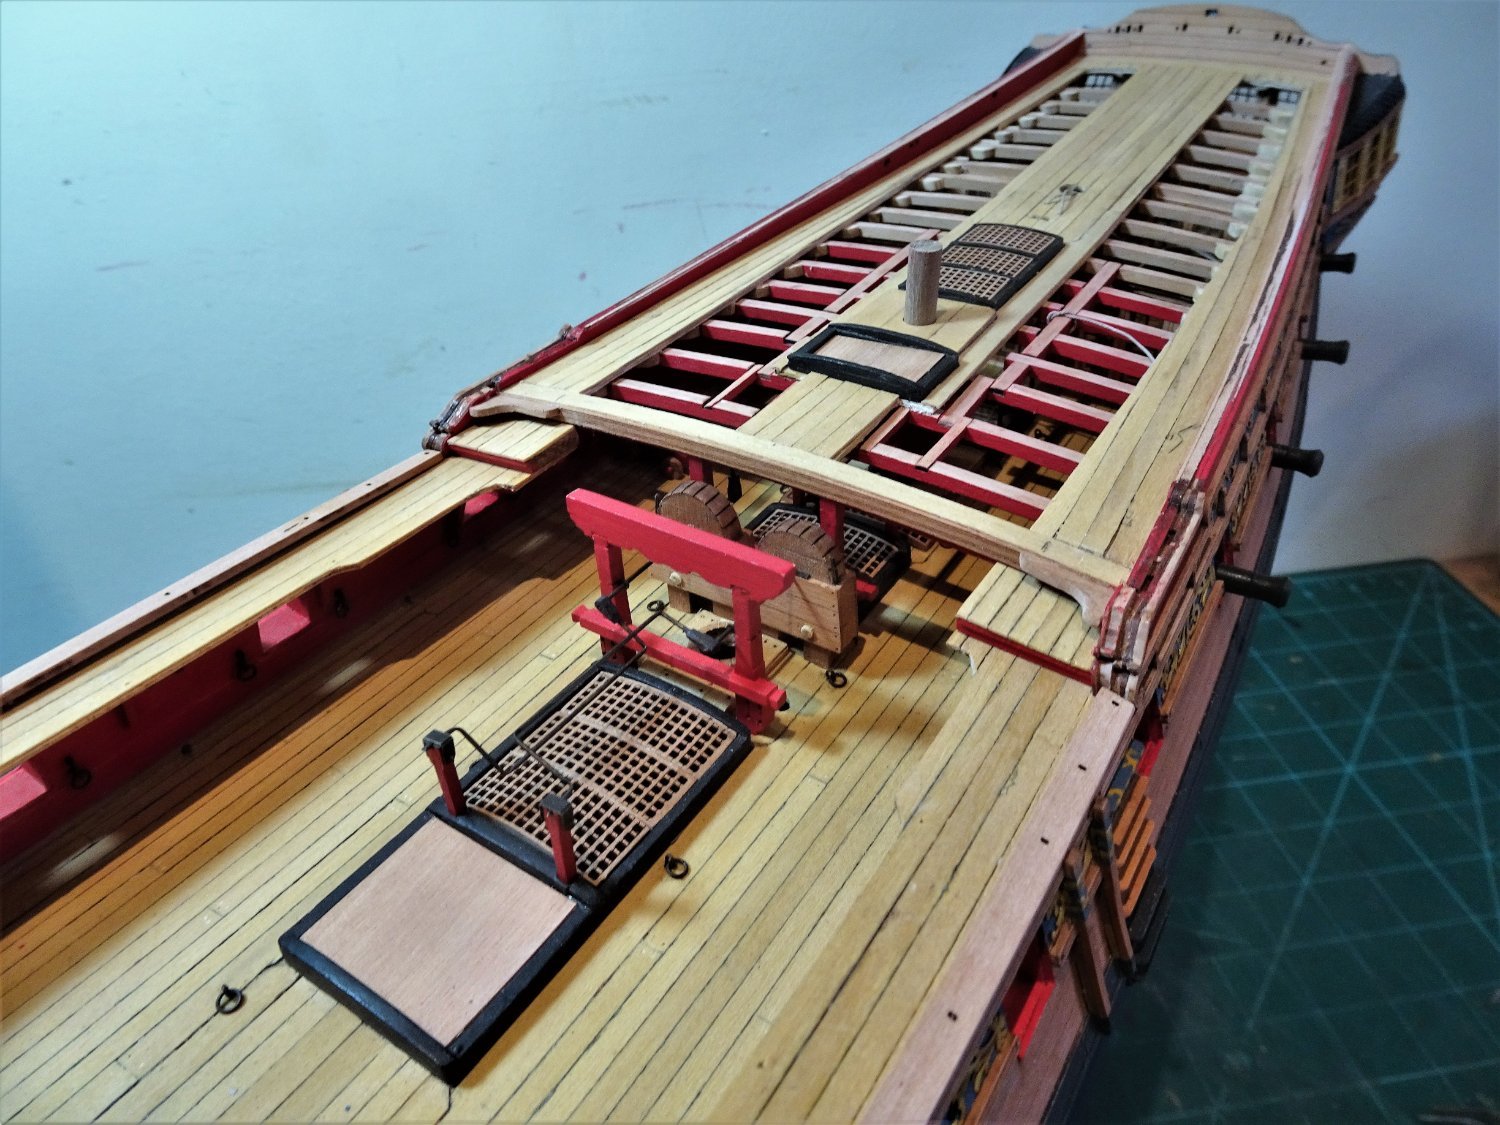
 Thank you Nils. Post One Hundred and Twenty-five Quarterdeck rails A slight dilemma The kit shows six extended timberheads used to support the fife main rails along the Quarterdeck; this accords with the Admiralty drawings dated 1775. The Marshall painting however shows three of those supports (the 3rd,4th ,& 5th) looking suspiciously like swivel gun mounts. The rounded tops extending above the rails and the faint lines of the posts can be made out. I was surprised by the absence of swivel posts when I first saw the kit, they were almost de rigueur on ships of this period. After consideration I decided that discretion is the better part of kit bashing, and will follow the Adm plan. Firstly the timberheads. These are all position specific so not getting them mixed up during sanding and shaping is important. Working from aft I removed each pair sequentially and cleaned and fitted them before moving onto the next. The rail (Fife / Rough-tree/ Quarter. All names given to the rather elegant rail that runs along the bulwarks from stern to the break of the Quarter deck. One of the things I like about this kit is the fineness of the Quarter rails. No re-making as I had to do with the over-sized rails on Pegasus. These ones are a three piece lamination, but are long and delicate items that require careful handling. I gave them only a minimal sanding as they are to be painted. 7085 These shots show the Quarter rail just resting on the supports, a testament to the accuracy of the slot cutting on the underside. One of the kit fittings along the gunwale is PE151 described as a boom ring, this sits just forward of the Main Brace sheave. This features on the contemporary Amazon model and also on the Pandora drawings. However, in those vessels the Main Brace sheave is placed below the gunwale, with the ring atop. I’m not entirely sure what these rings were for but I’ll take a punt that they were used to pass a horizontal boom through either side to attach emergency steering gear to. They do not appear on the Sphinx Adm. plans or the Marshall painting, so I’ll omit them, but for those not overly concerned with such minutiae they do add a little more interest to the model, particularly if you wish to jury rig the rudder. Another major milestone along the way, there is not much left to do on the Quarterdeck. 7094 7089 7091 7104 7105 7106(2) Sphinx is such a pretty little Frigate, a good choice for Chris to have added to his line-up. 7095(2) 7101(2) With the rails in place Sphinx is really starting to look to be nearing completion, but I reckon I have a few months work yet to enjoy. I now have eight nine-pounders to make-up to complete the ordnance, not one of my favourite jobs. Cheers, B.E. 28/05/2022
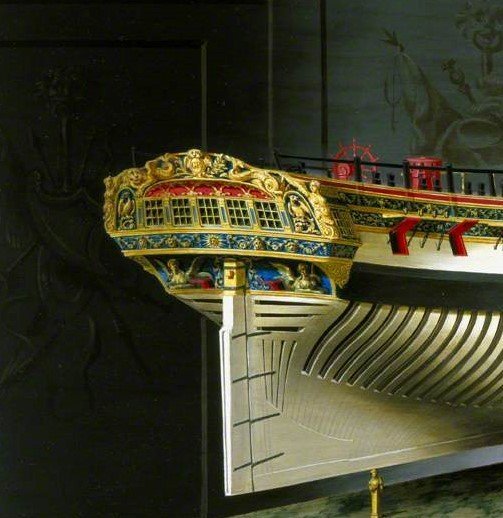
.thumb.JPG.ad43dc4302e9b4647f1533cb47aec83e.JPG)
.thumb.JPG.6c7de9ac88c96a053c78186e2bf87788.JPG)
.thumb.JPG.06ae79121a91b89b86772d9fcb6f64b7.JPG)
- 857 replies
-
- 28
-

-

-
- Sphinx
- Vanguard Models
- (and 1 more)
-
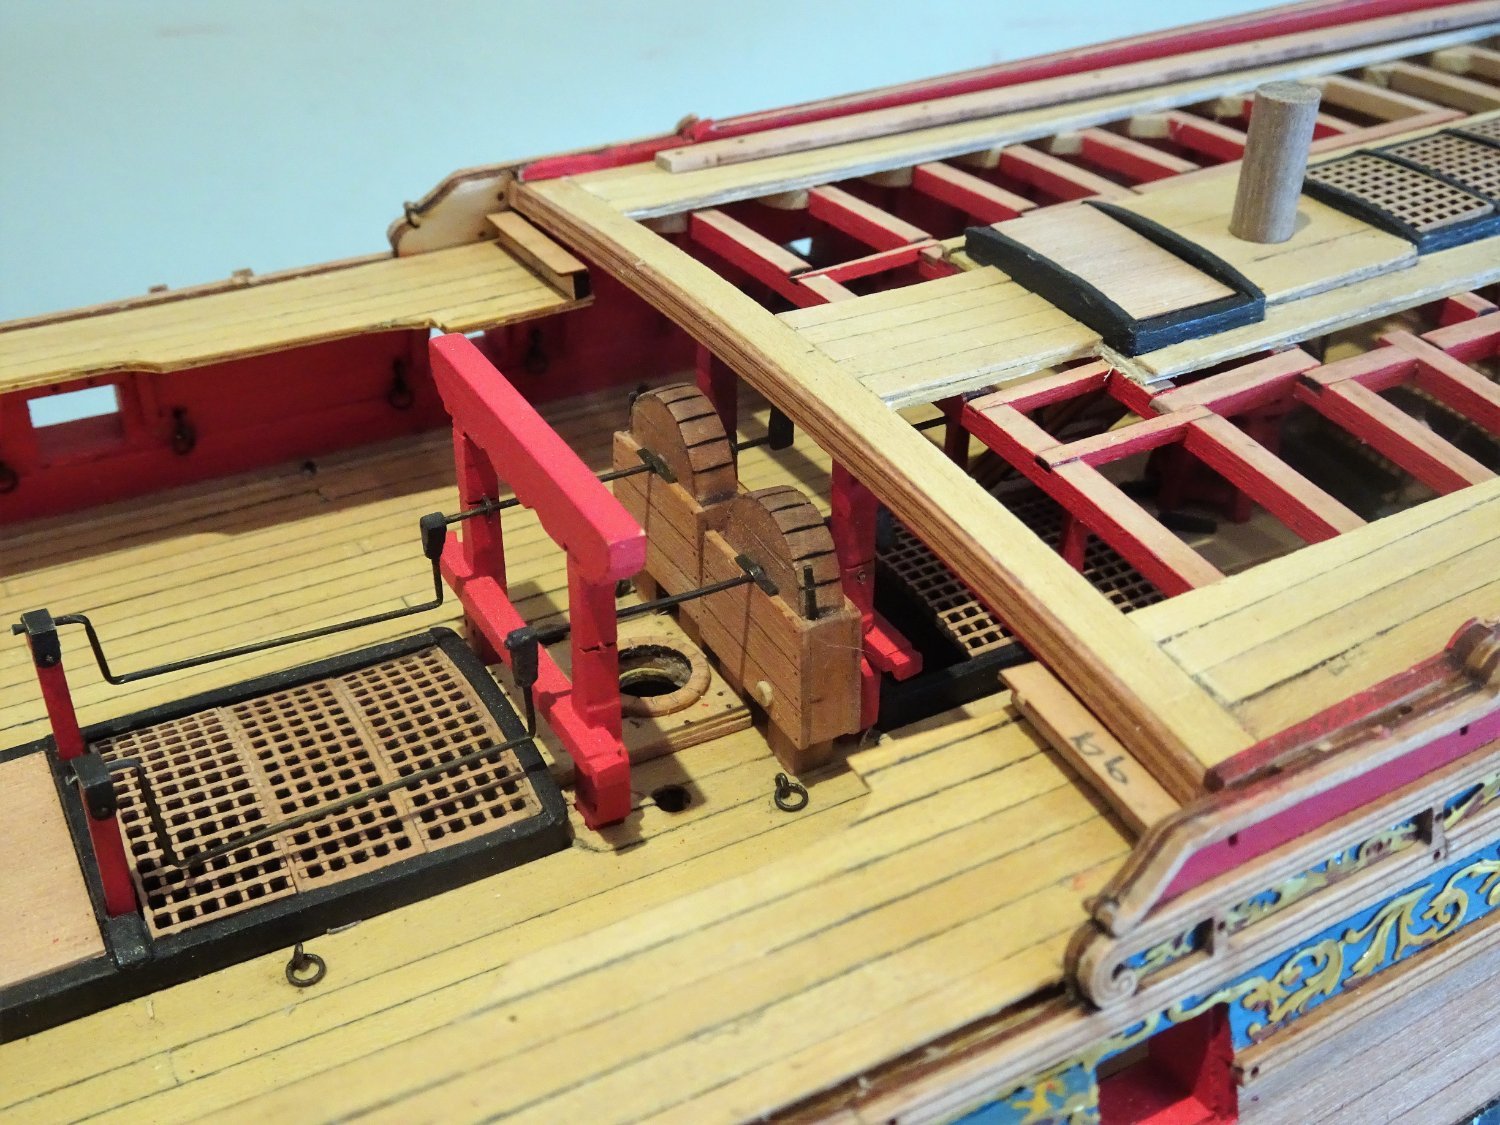
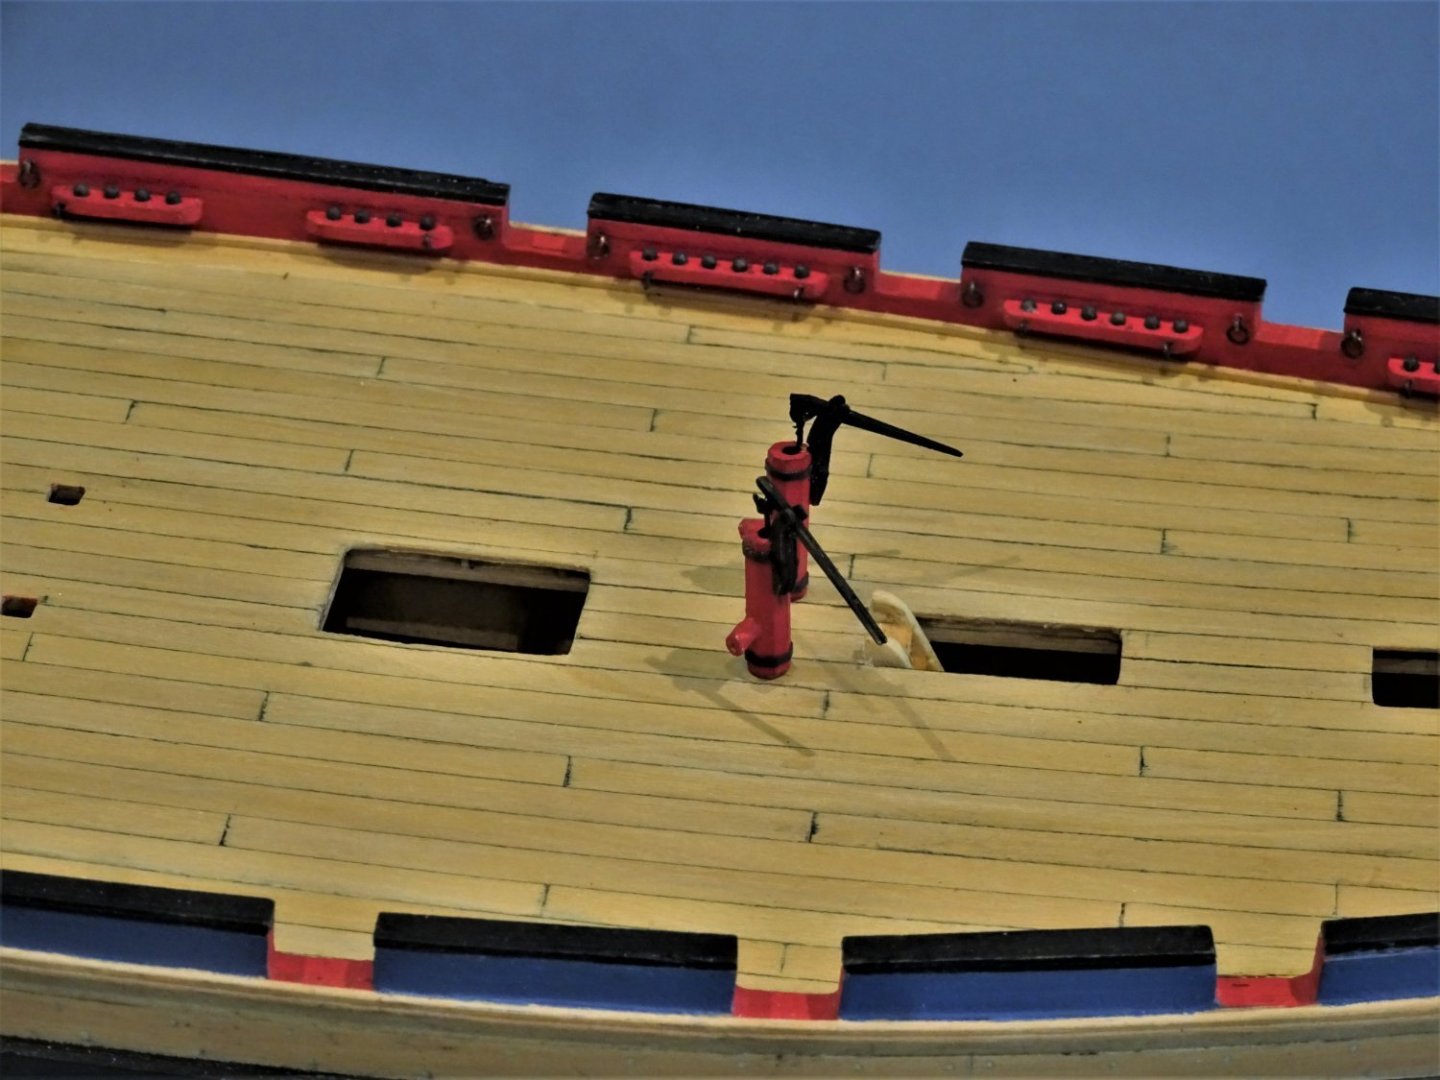
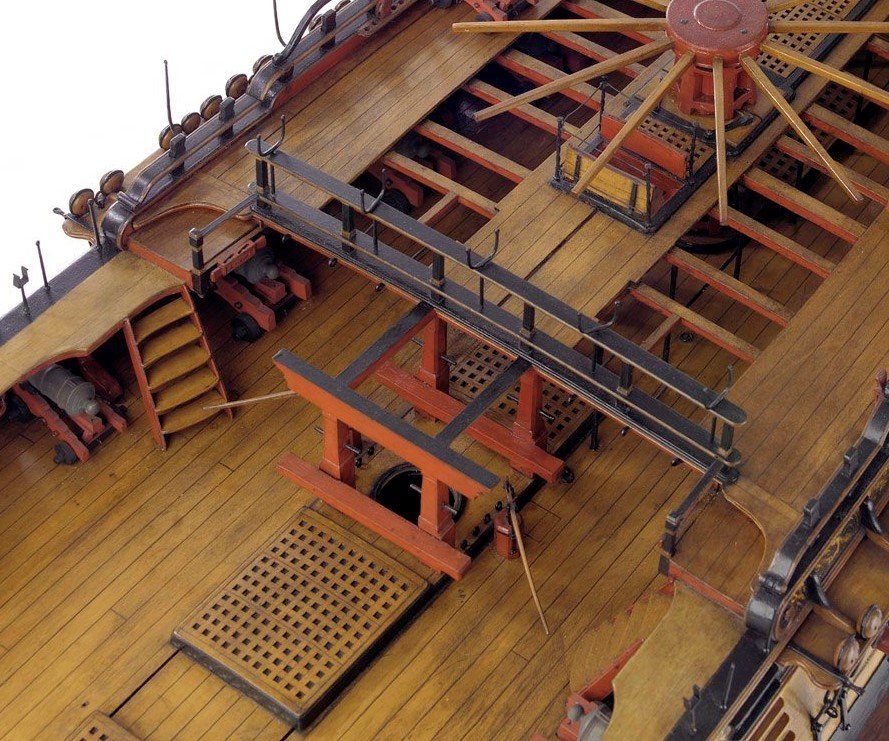
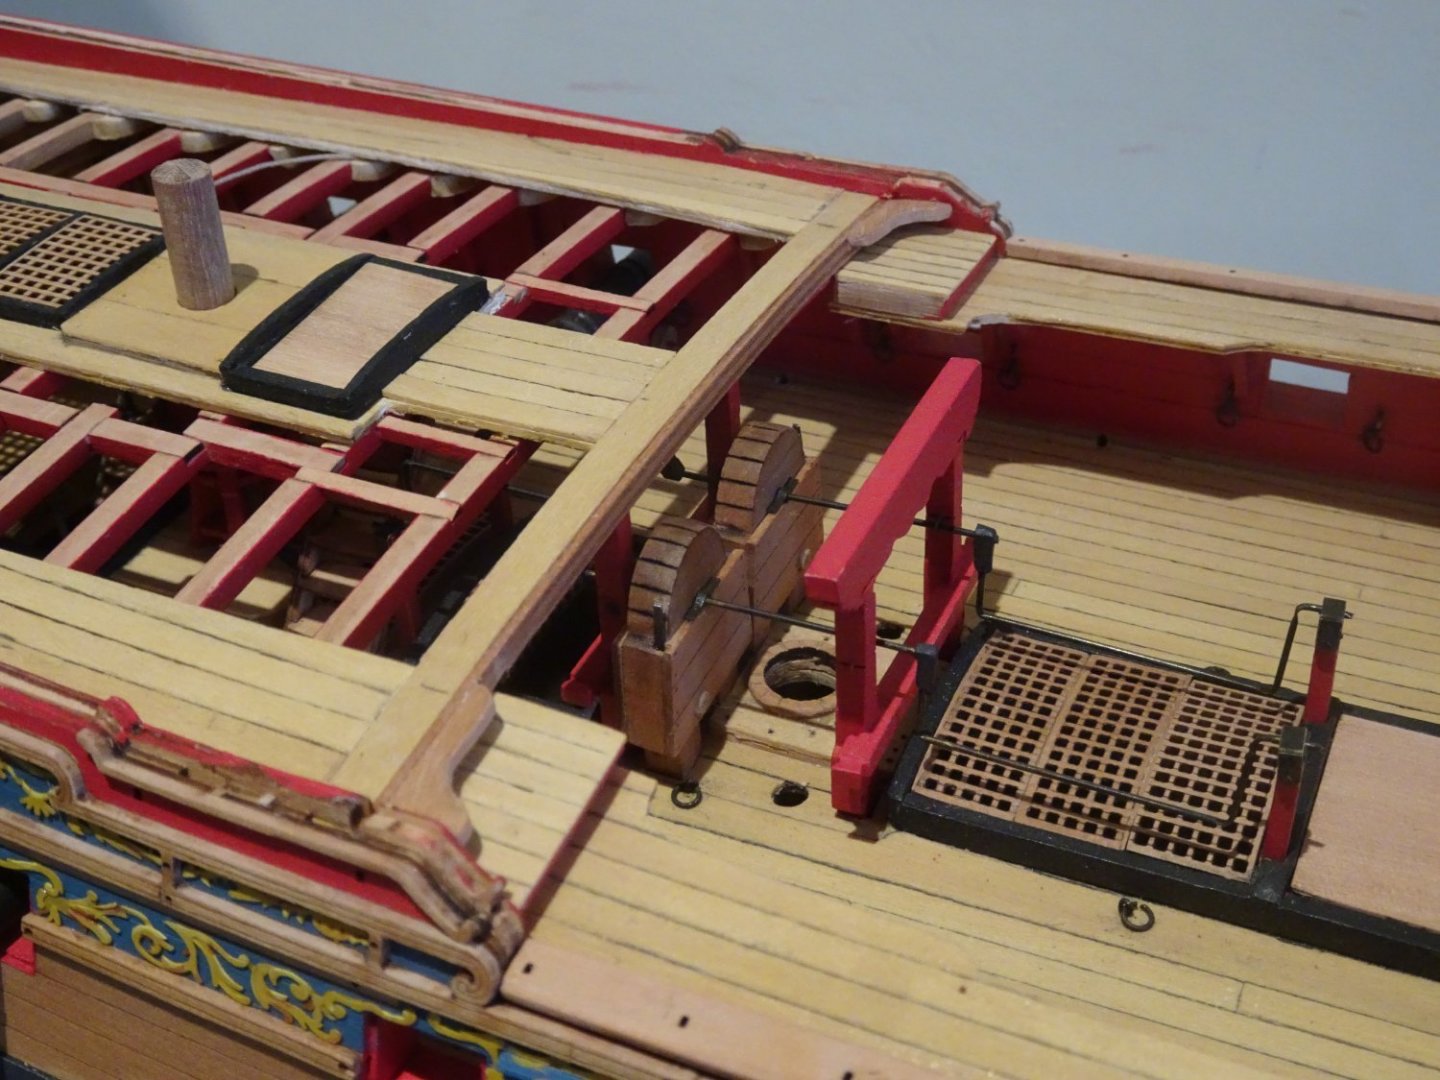
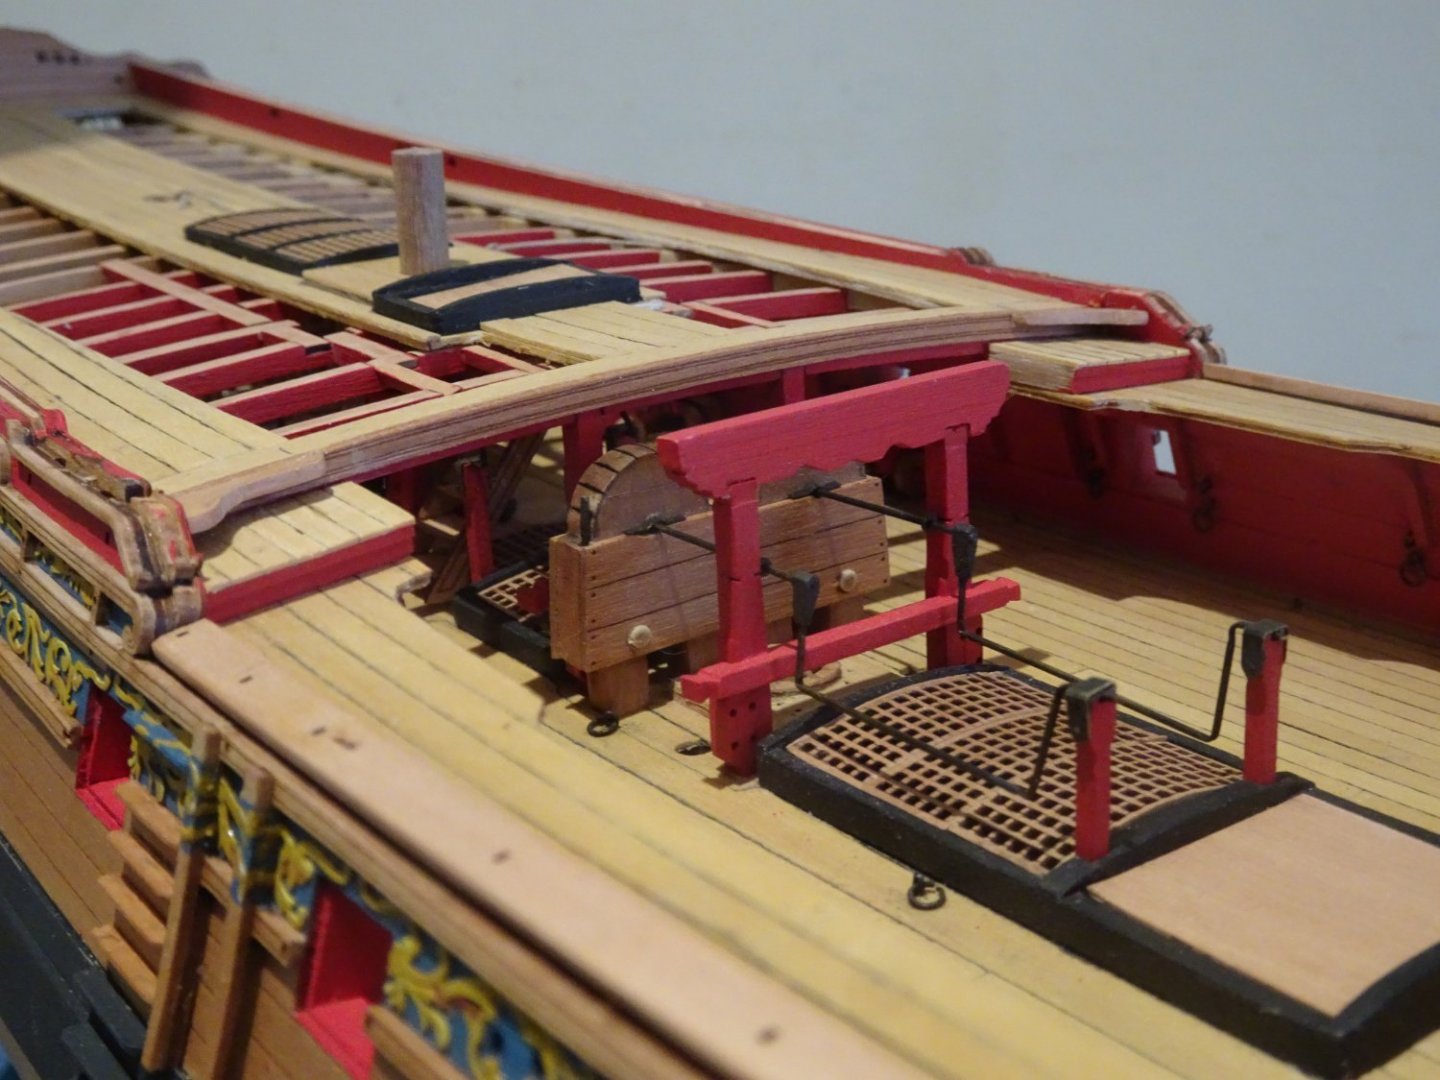
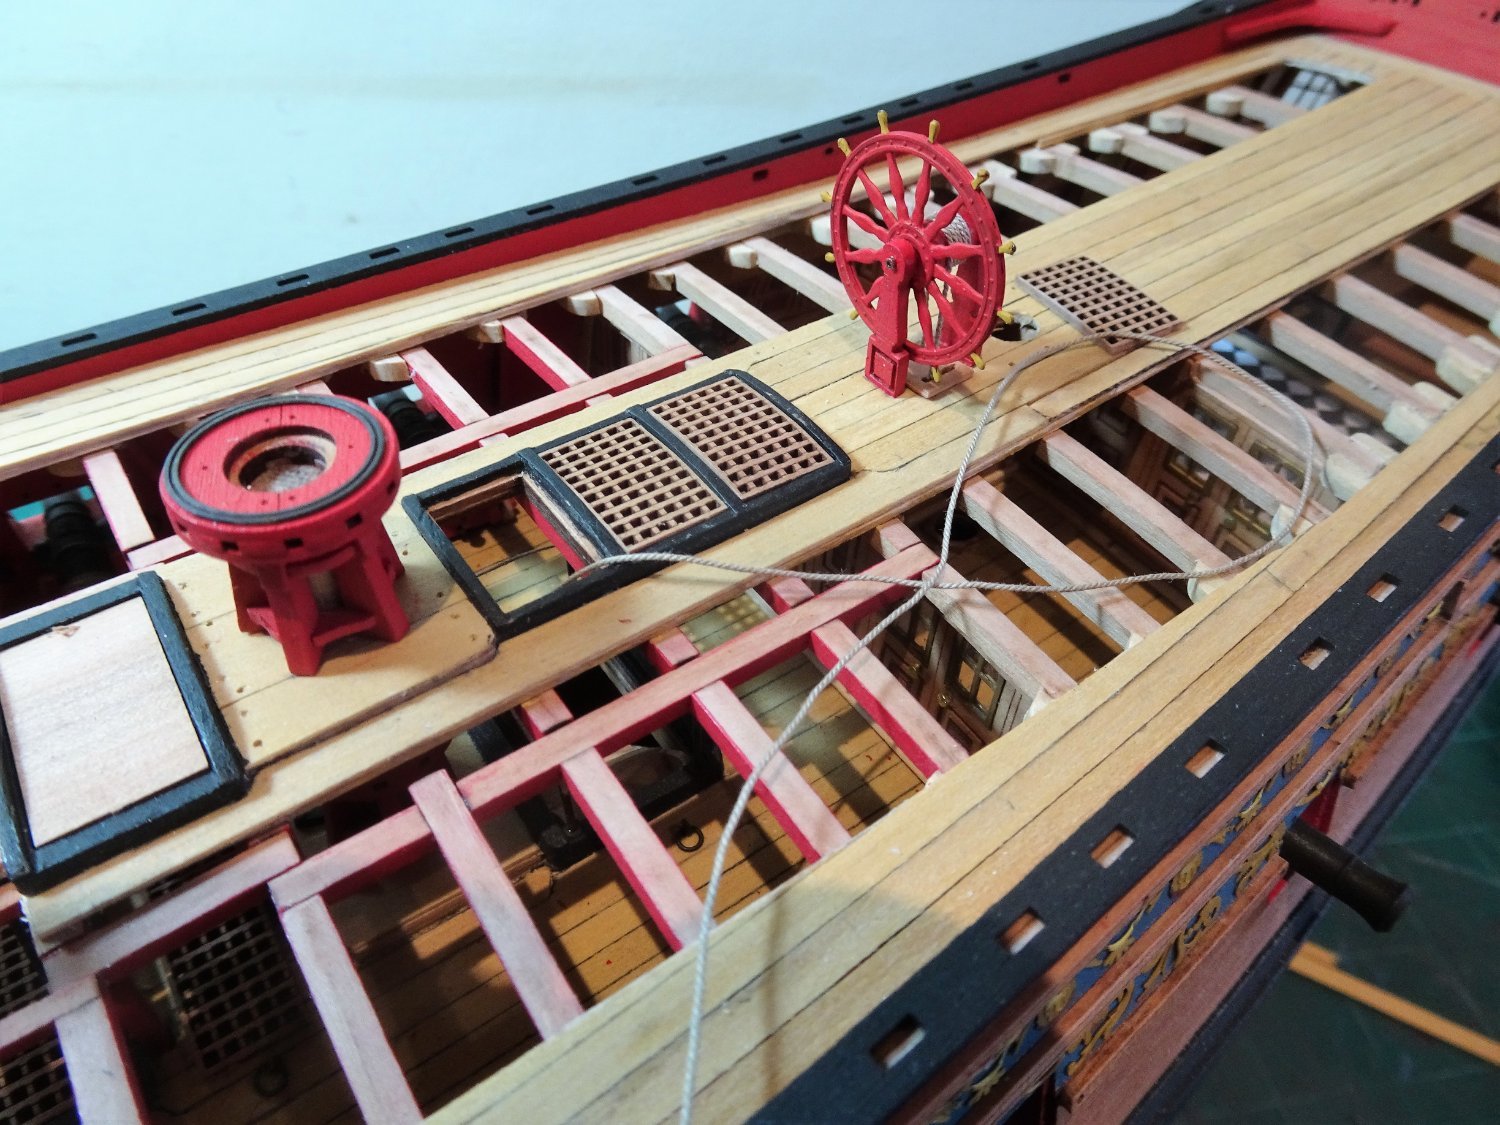
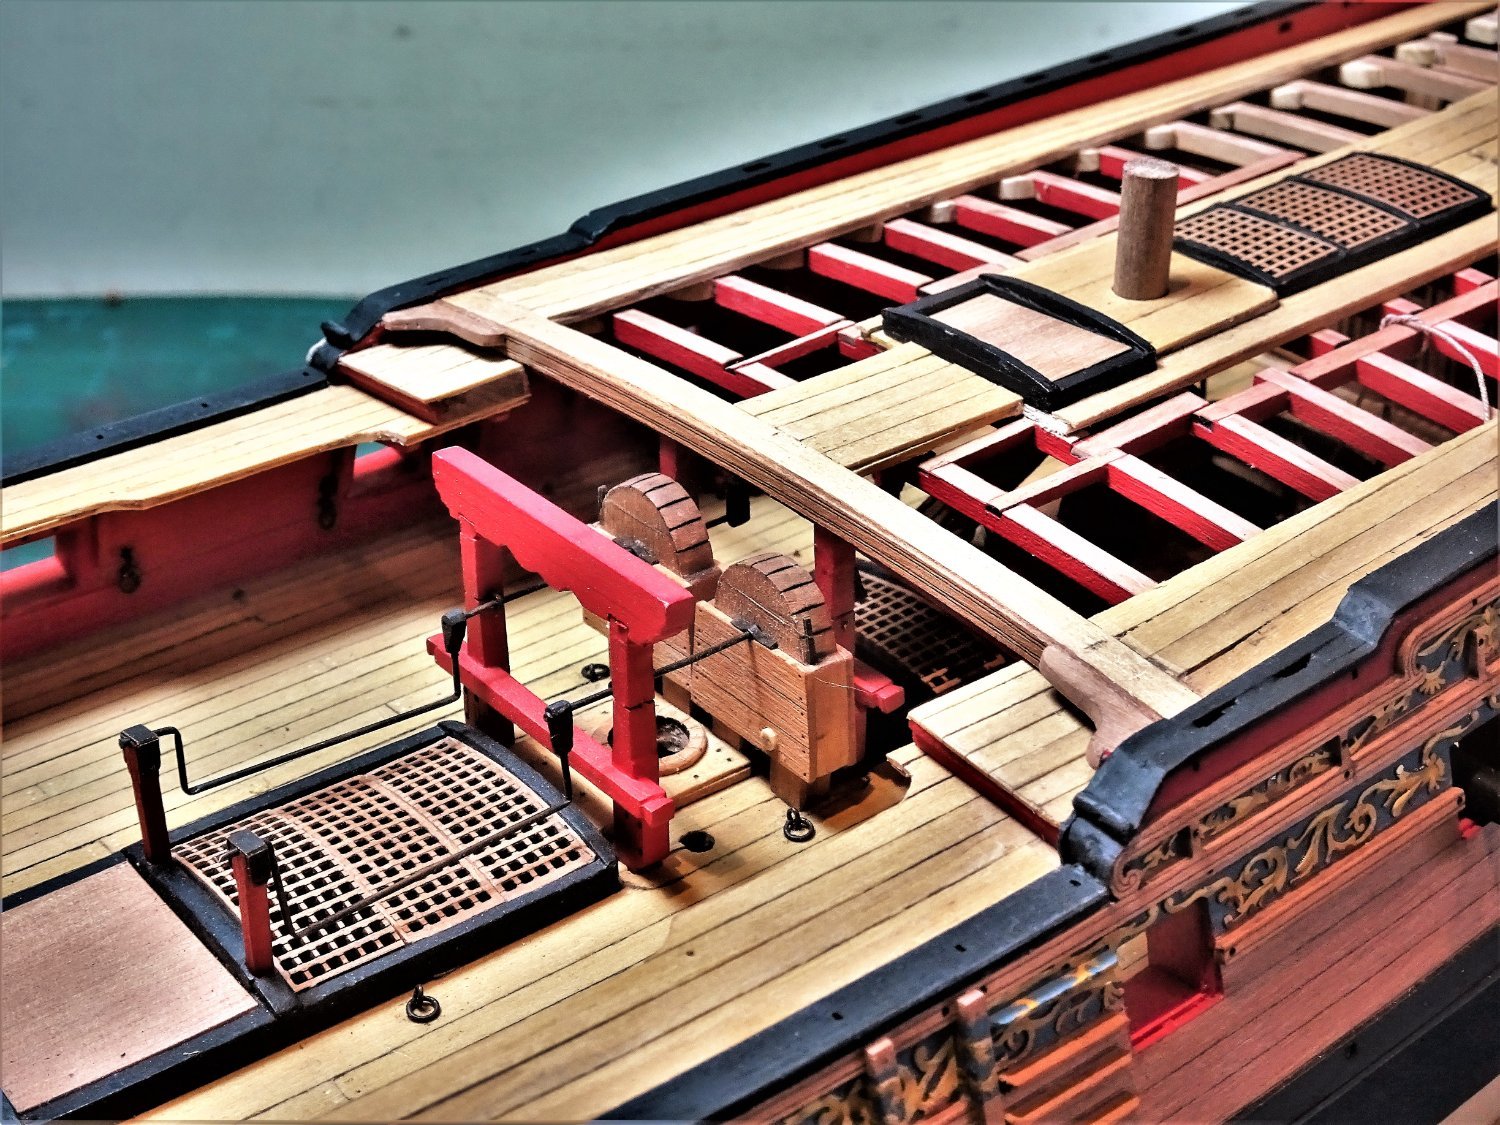
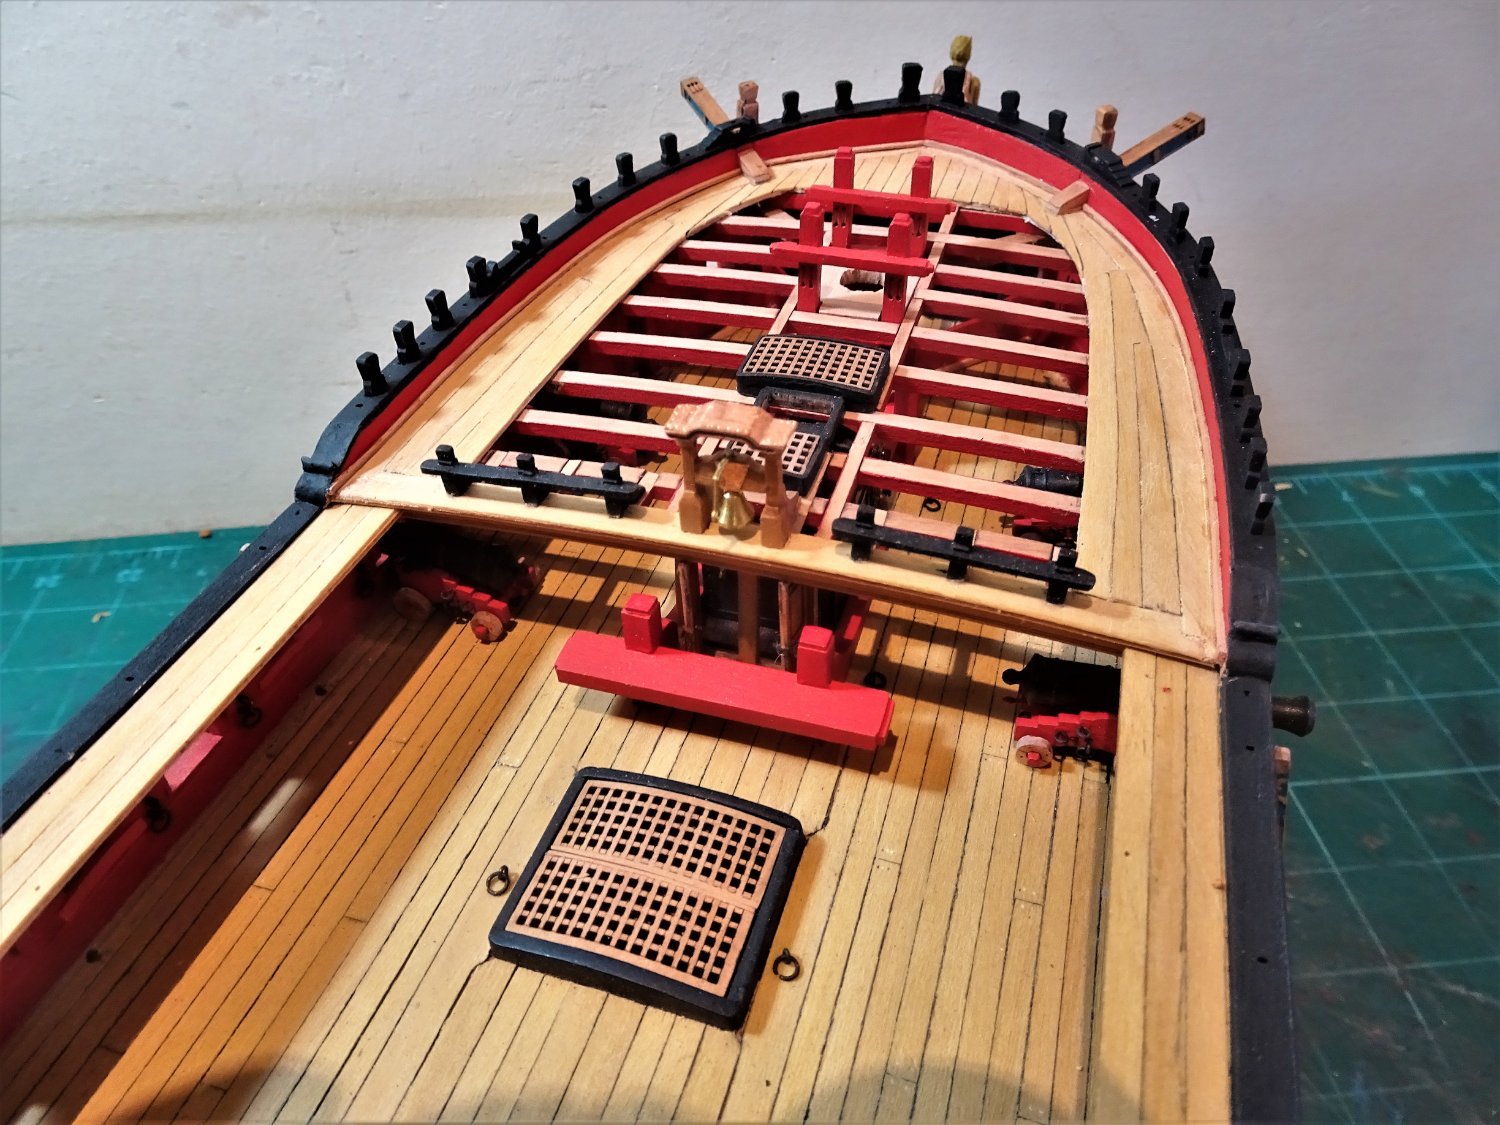
Post One Hundred and Twenty-four Pumps These are the Elm tree pumps either side of the Mainmast One of the errors on many kit models is that the pumps are shown sitting vertically on the deck. In practice the long tubes of the pump were inclined from the deck down to the bilge near the keel. The kit version is made using Walnut dowel but this feature can be enhanced for authenticity by using square stock and making the shape octagonal which was the usual form. 7062(2) The kit does provide a very nice etched pump mechanism to sit atop the tube, notwithstanding that it looks more 19th century than 18th to my eye. The design has been taken from drawings in the AotS book on Pandora, which is the only one in the series that seem to have this style. I did find a reference to brakes being fitted with quadrants in 1789, but I have not seen such a type represented on contemporary models. 007 3471 The simpler form of pump as fitted to Pegasus and Alert, above, is I think more period appropriate. Still the kit version is too pretty to discard, that is unless the pedant in me overwhelms the appeal to my eye. This is a fiddly item to assemble, certainly with fat slightly arthritic fingers. Ca is used to assemble the frame which has implications for the blackening process. Thorough cleaning is essential prior to the chemical blackening of the mechanism to remove all traces of ca. The first blackening reveals any residual ca stains which can then be addressed. 7064(2) The detail is impressive, Chris has to be congratulated on producing this, look at the teeth on the ratchet, this is tiny stuff. 7077(2) The octagonal shape of the pump can be seen here. A final touch is to add the discharge pipe at the lower end of the pump and include a representation of the iron hoops around the top and bottom. 7081(2) 7078 It is a pity that such nice little items will mostly be hidden, even on a Navy board style model such as mine. B.E. 26/05/22

.thumb.JPG.23c97134c014897f57094cfd27acb2f5.JPG)
.thumb.JPG.facebf70c06b4dc90129360e8afeef89.JPG)
.thumb.JPG.951c95d9fff22b5e6715c48ba7f55b5e.JPG)
.thumb.JPG.7b8be1f674ff8540a22cbd166bc109cb.JPG)
- 857 replies
-
- 19
-
-
-
- Sphinx
- Vanguard Models
- (and 1 more)
-
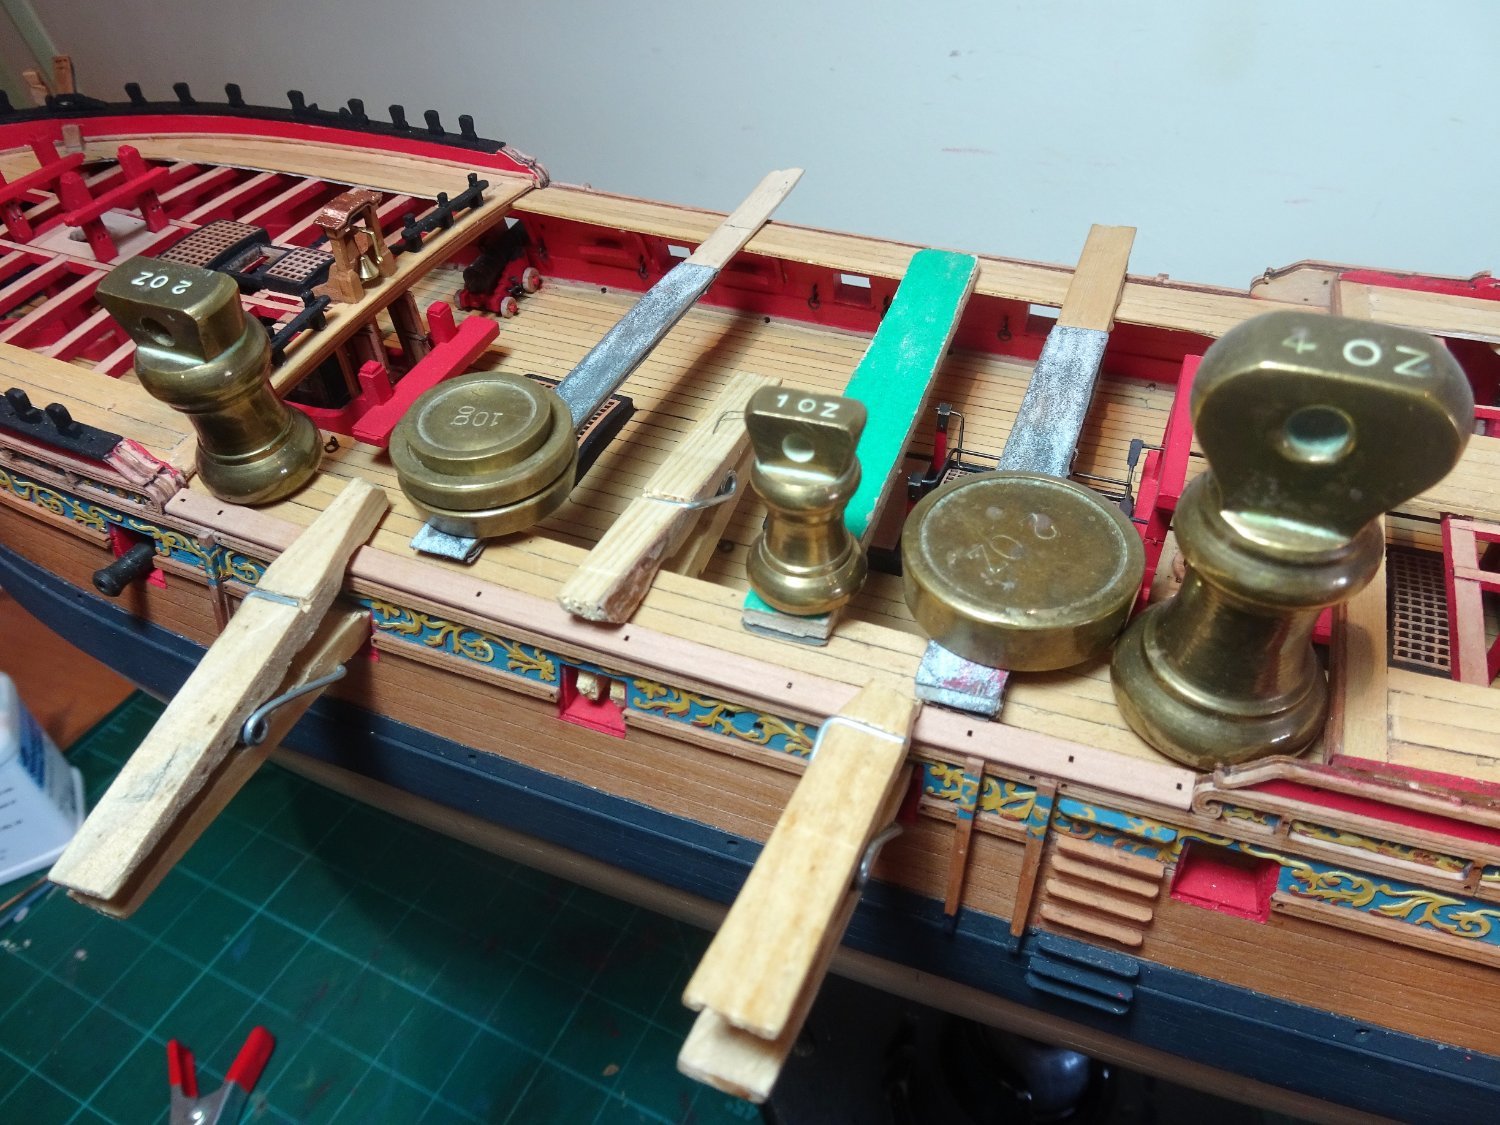
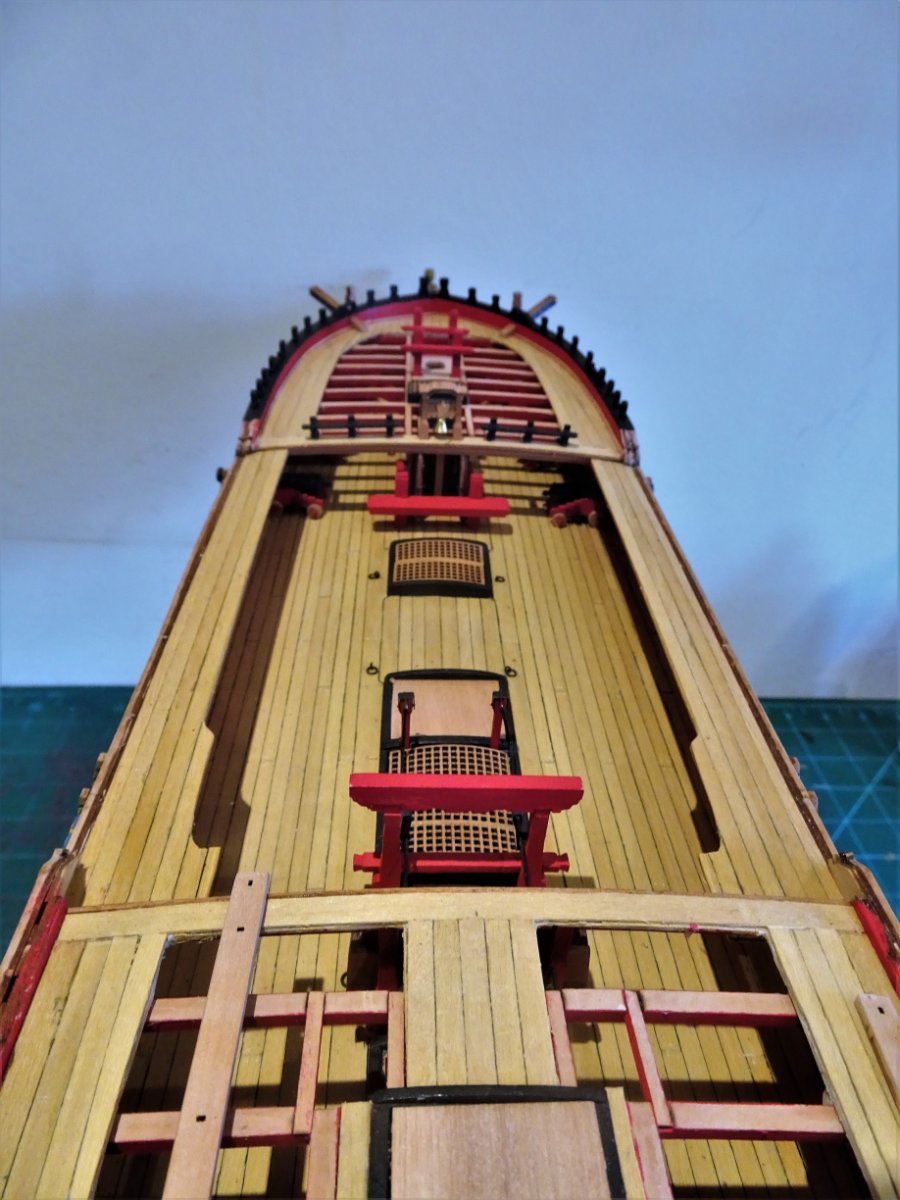
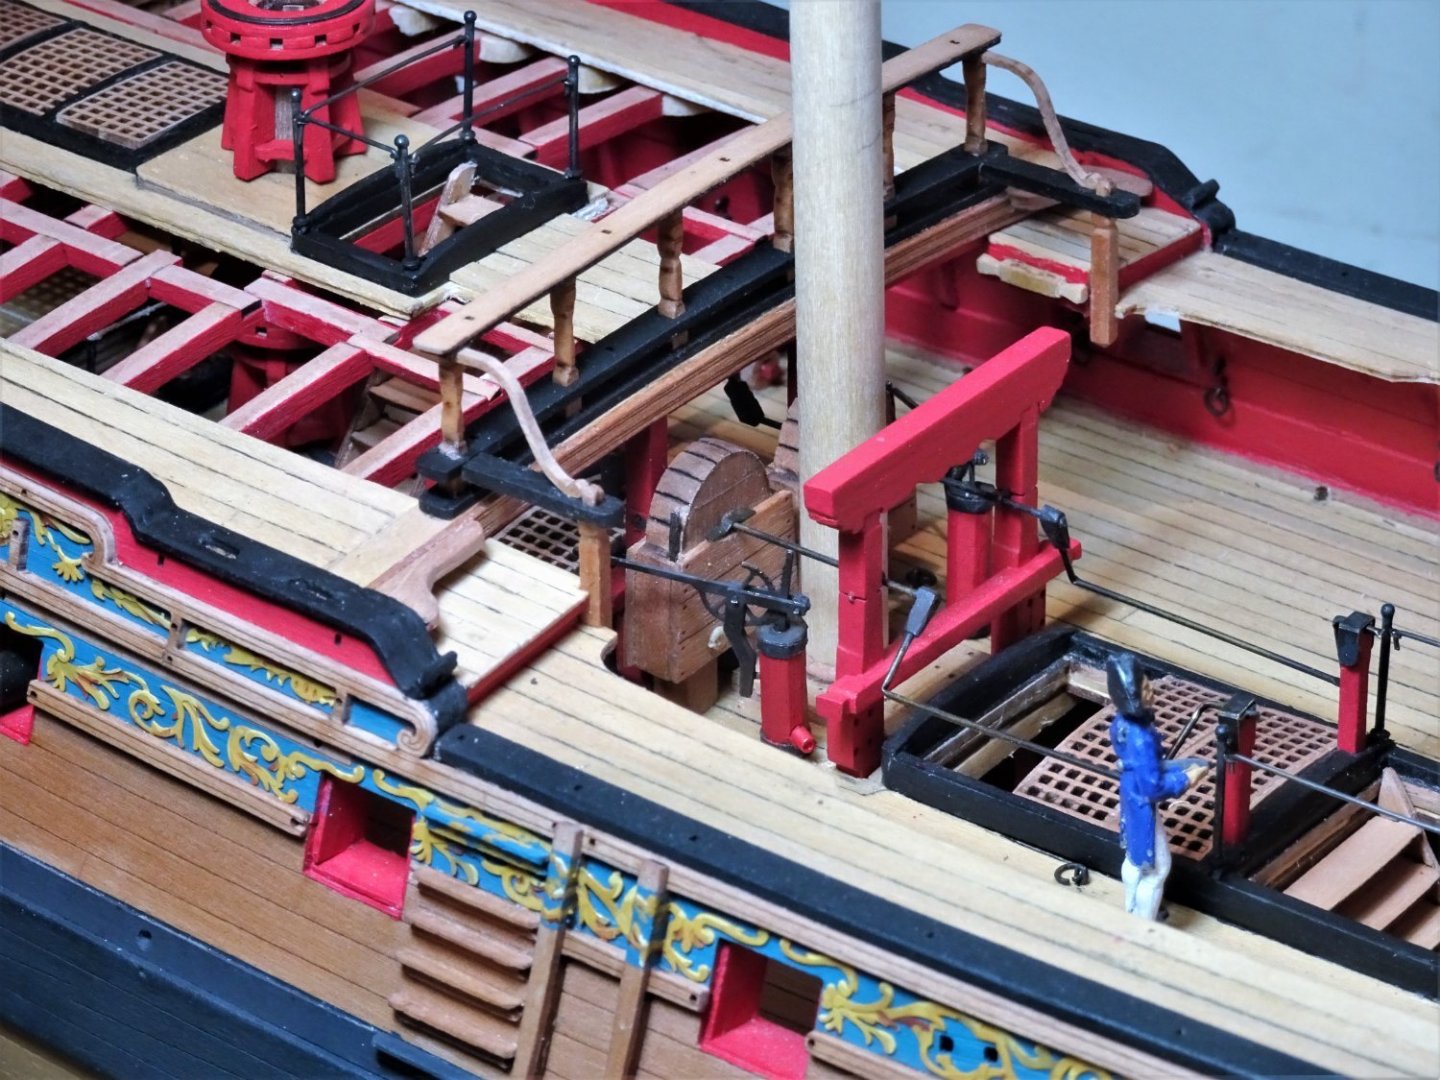
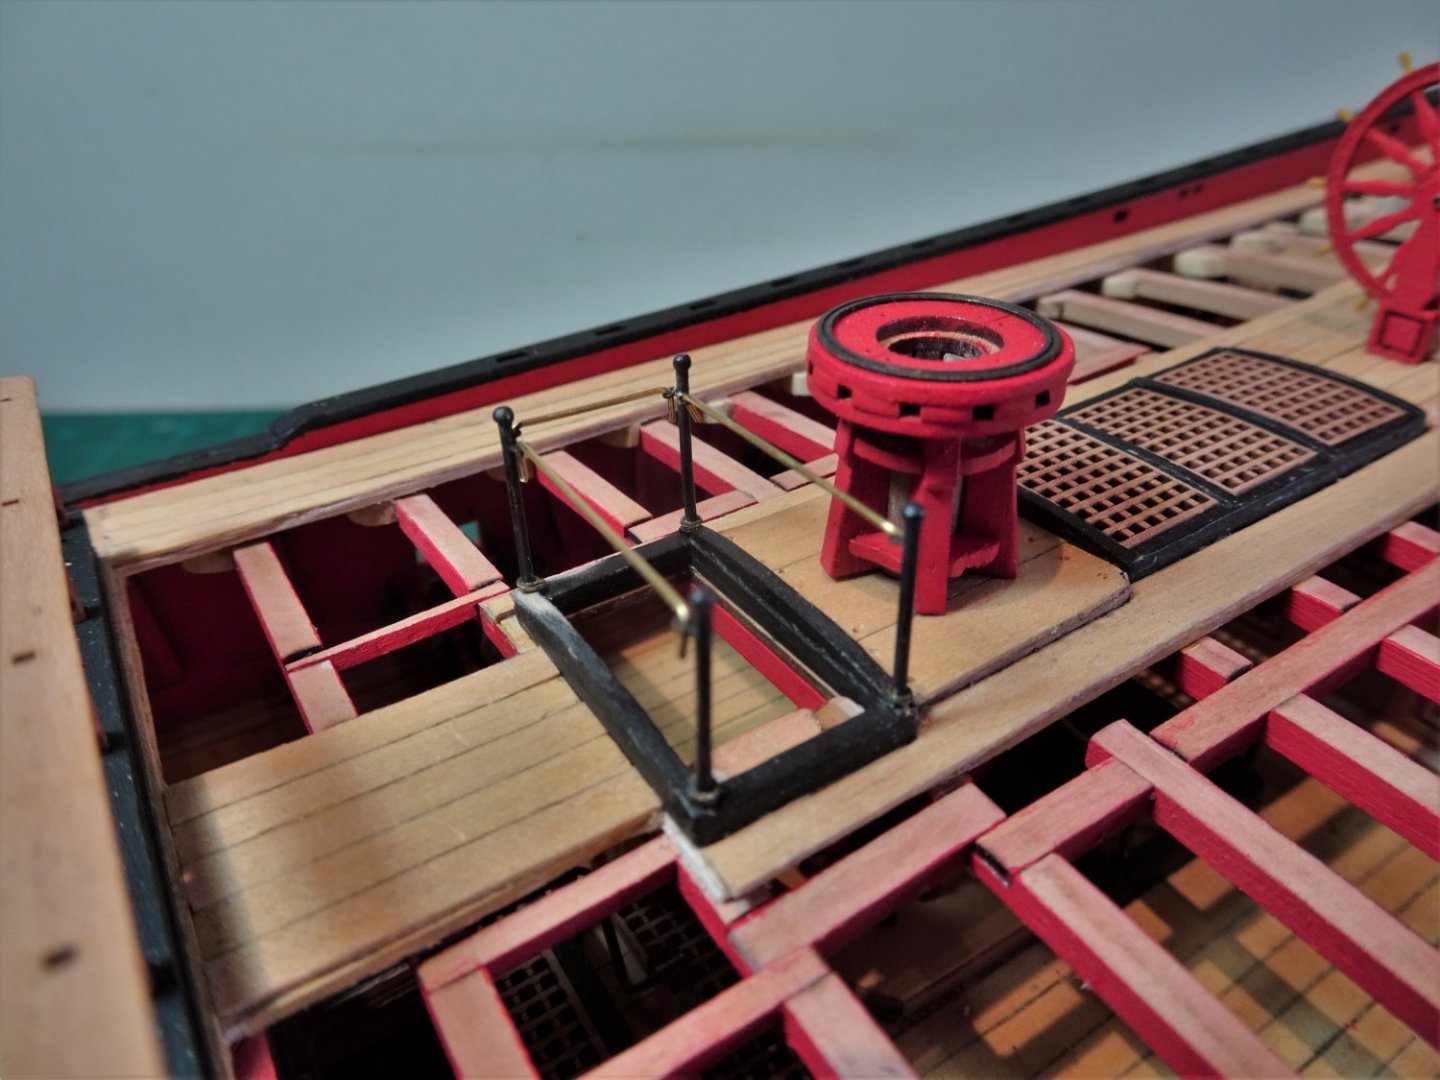
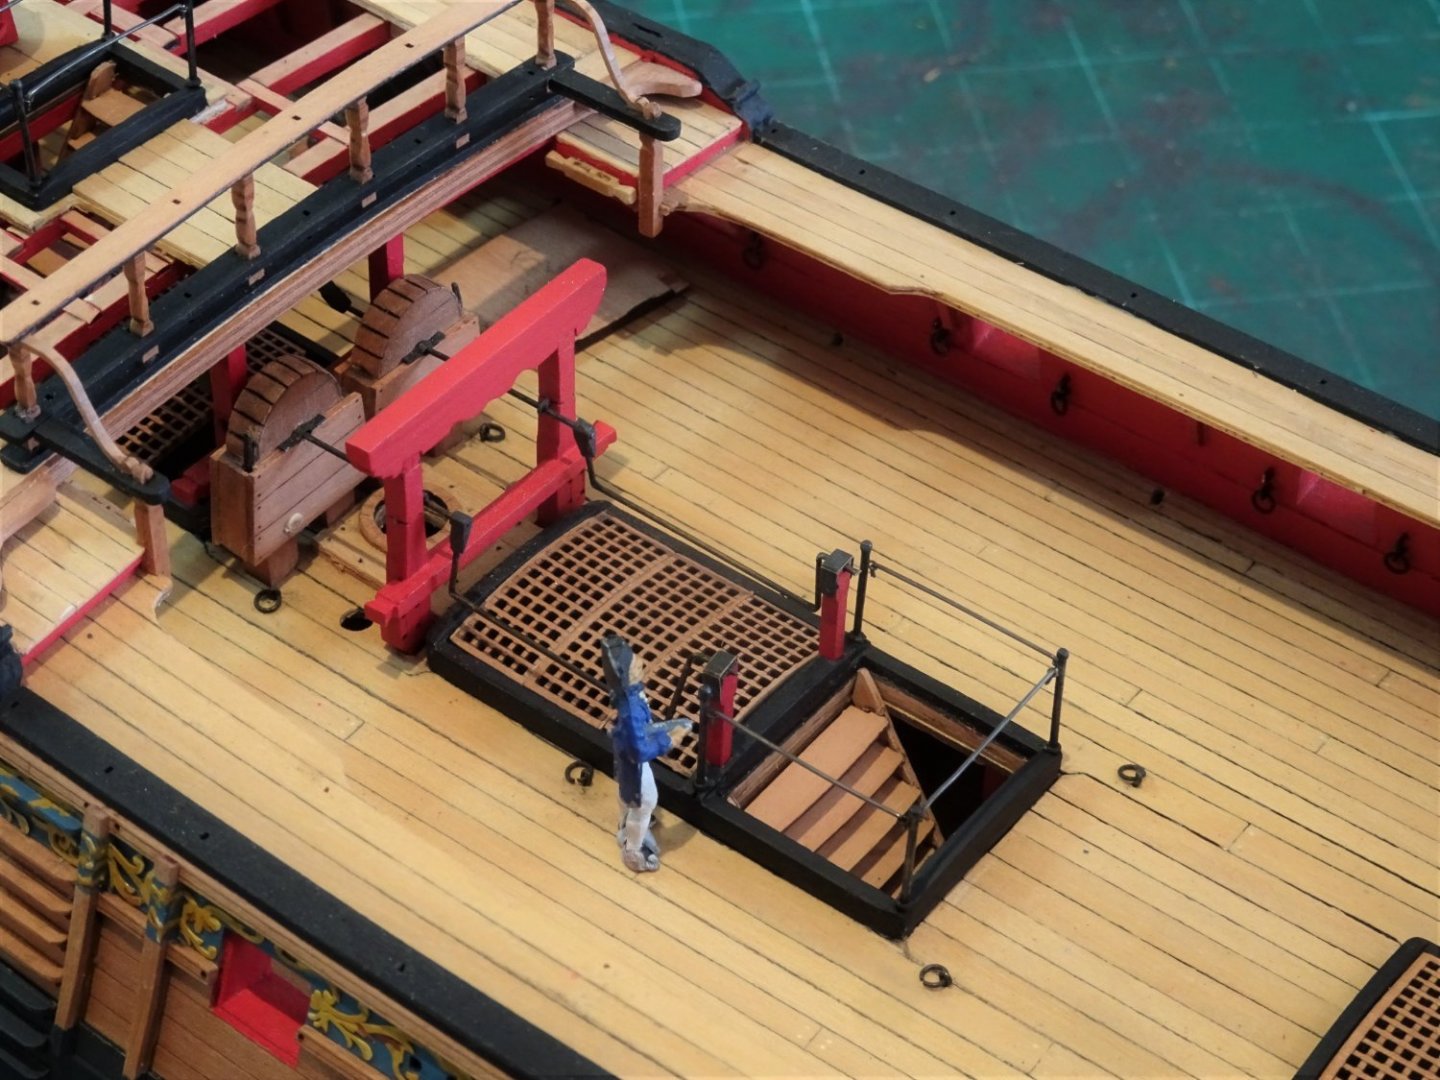
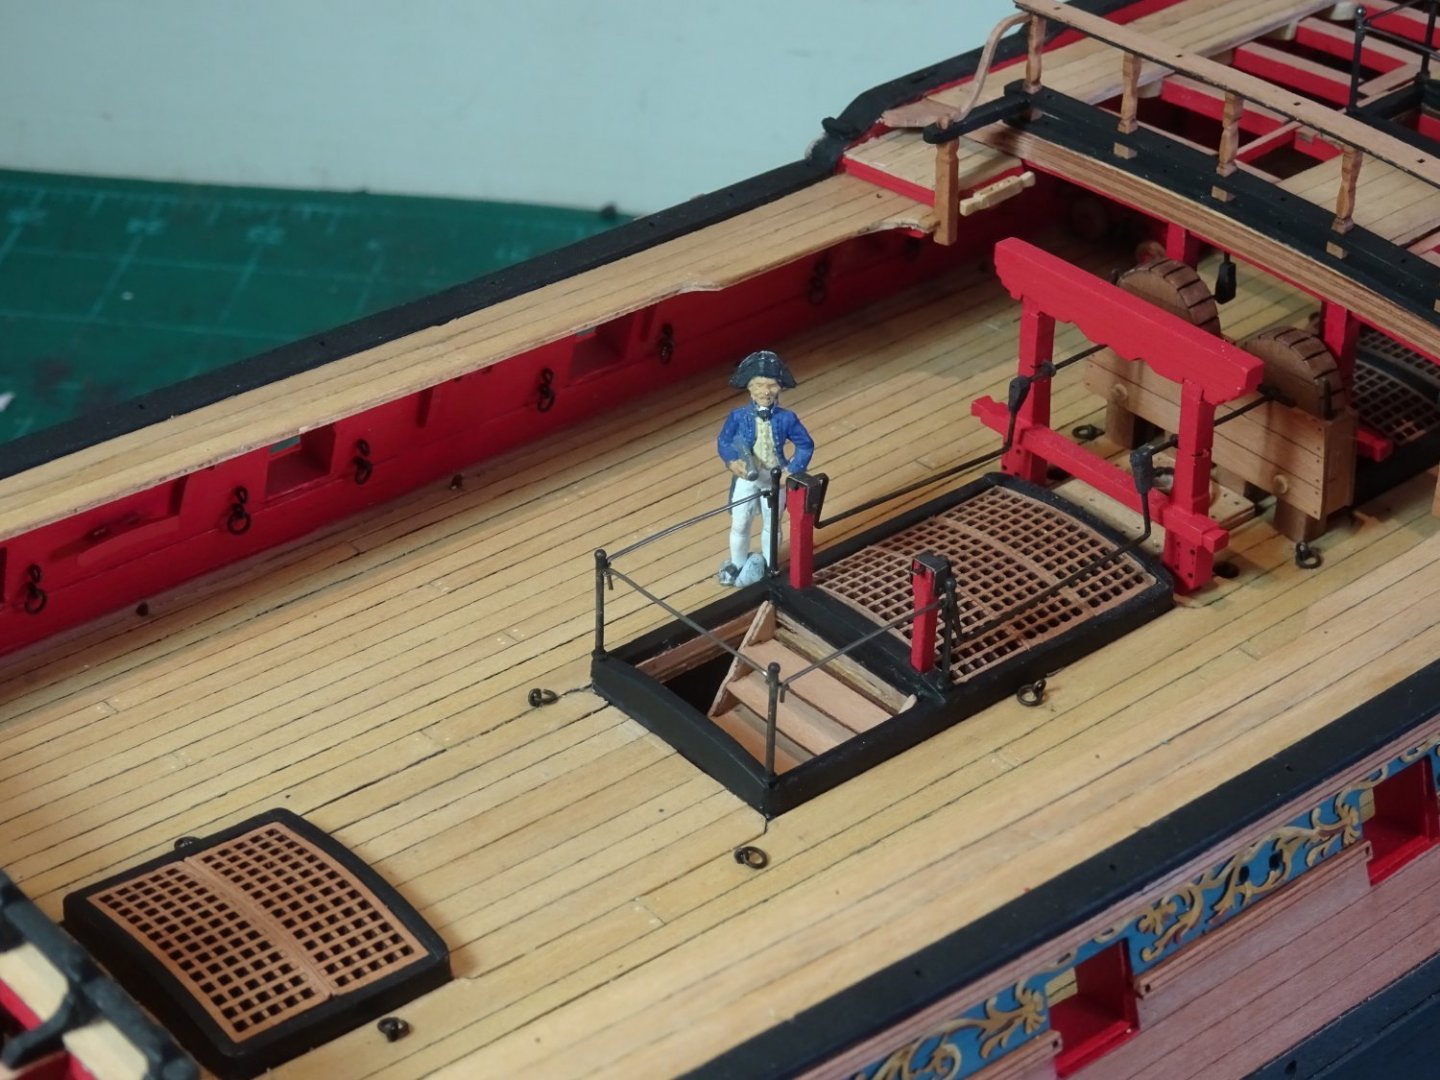
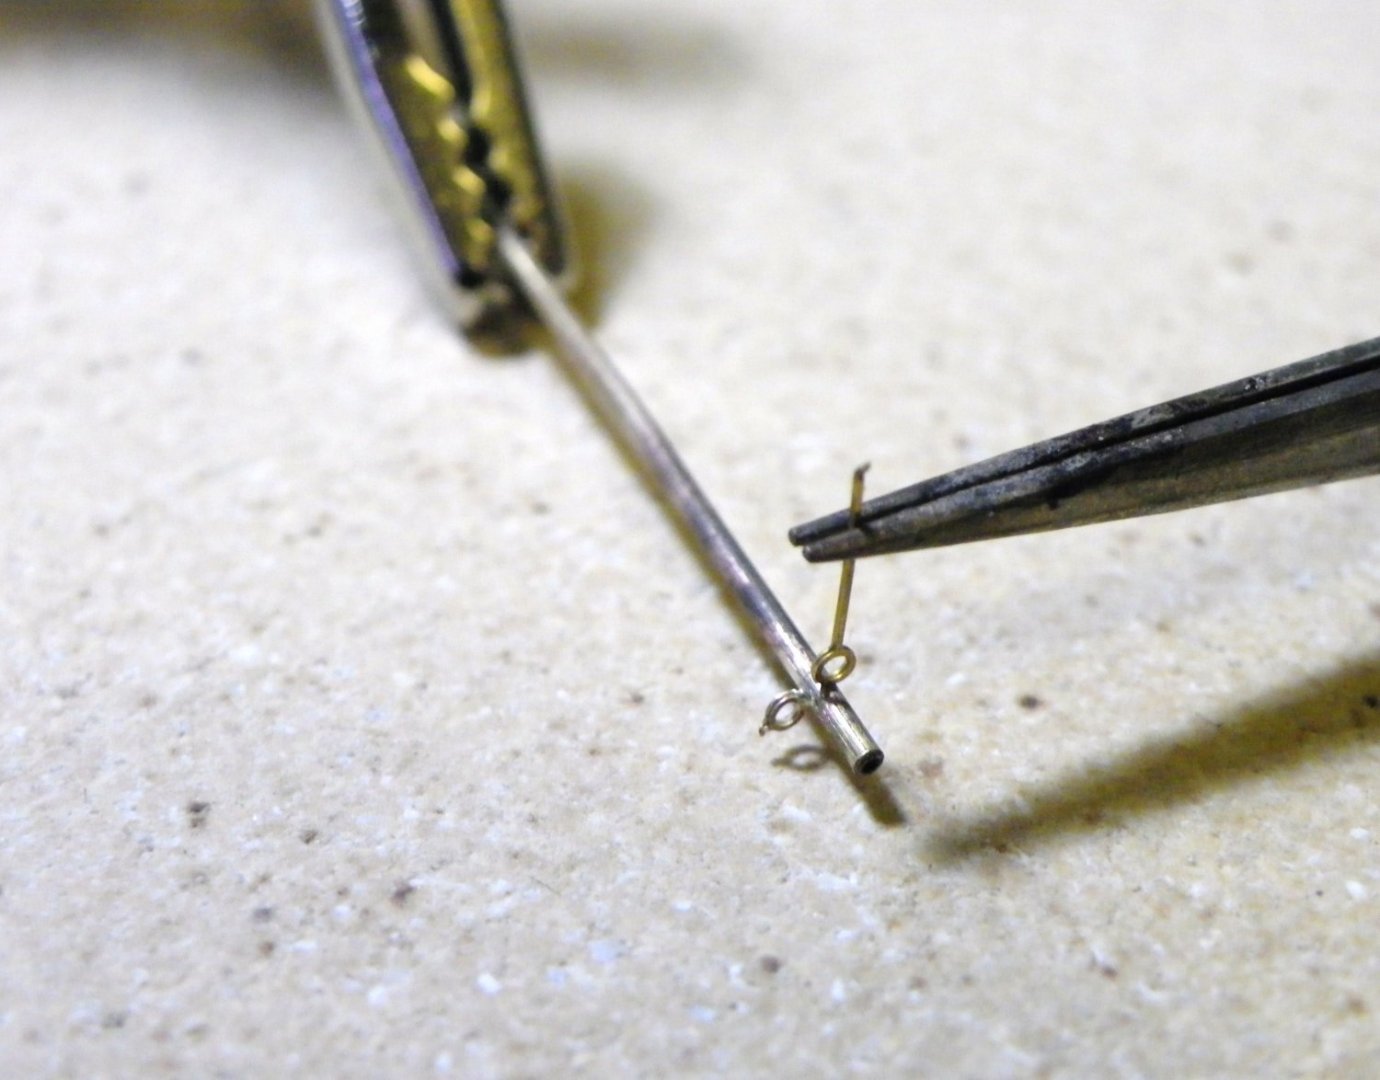
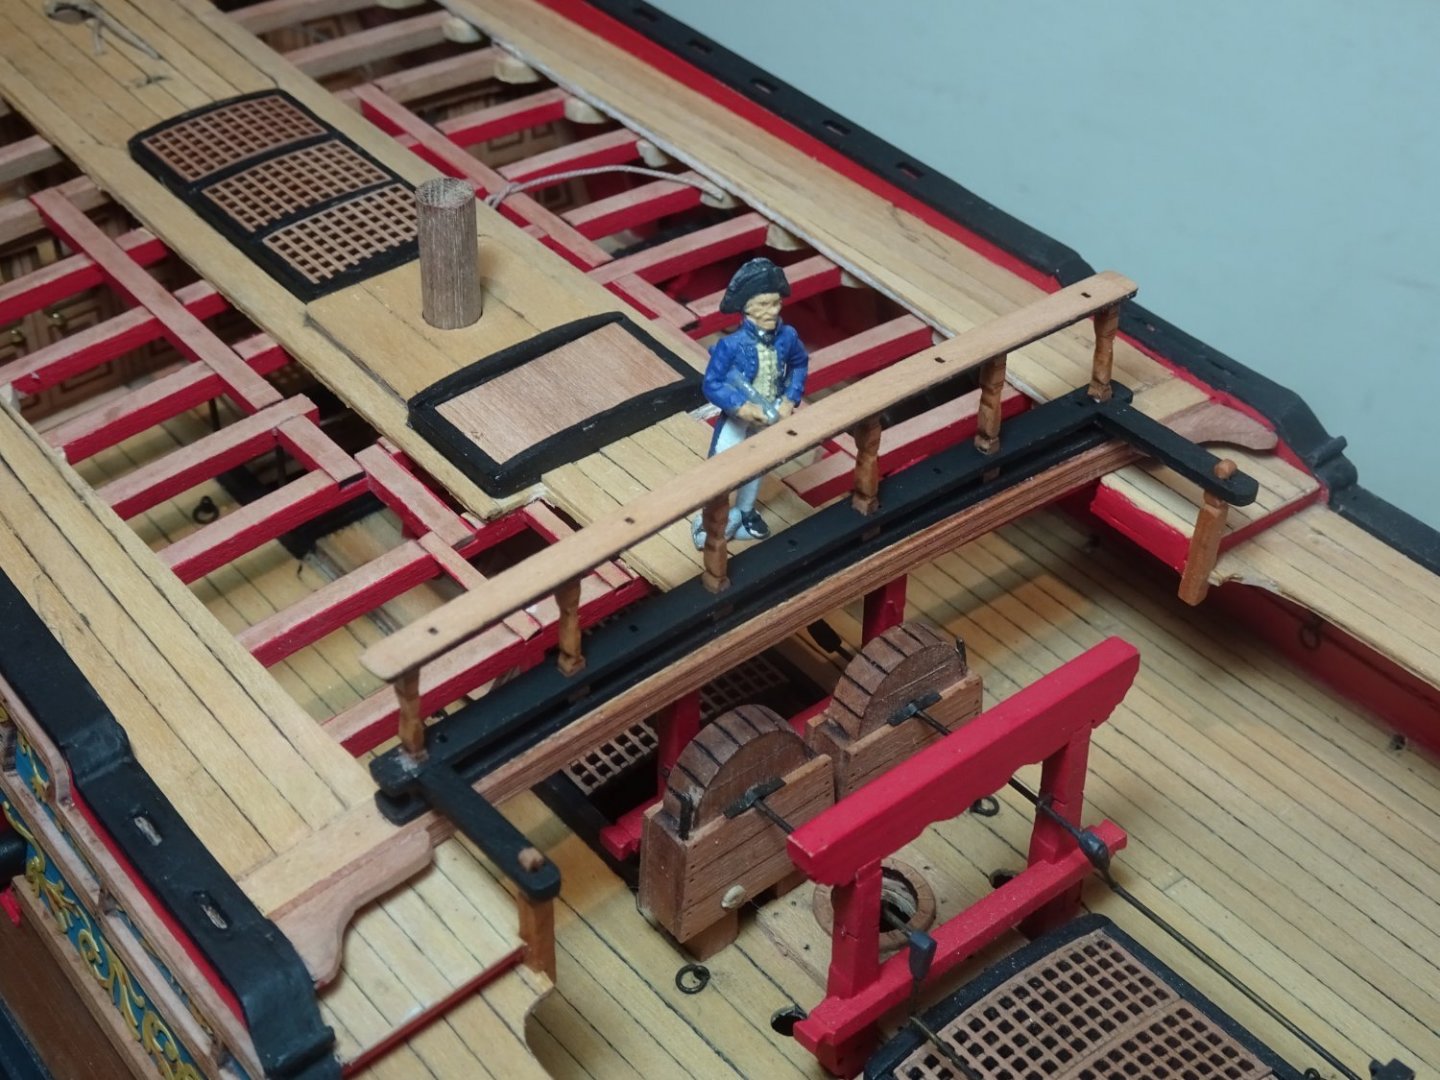
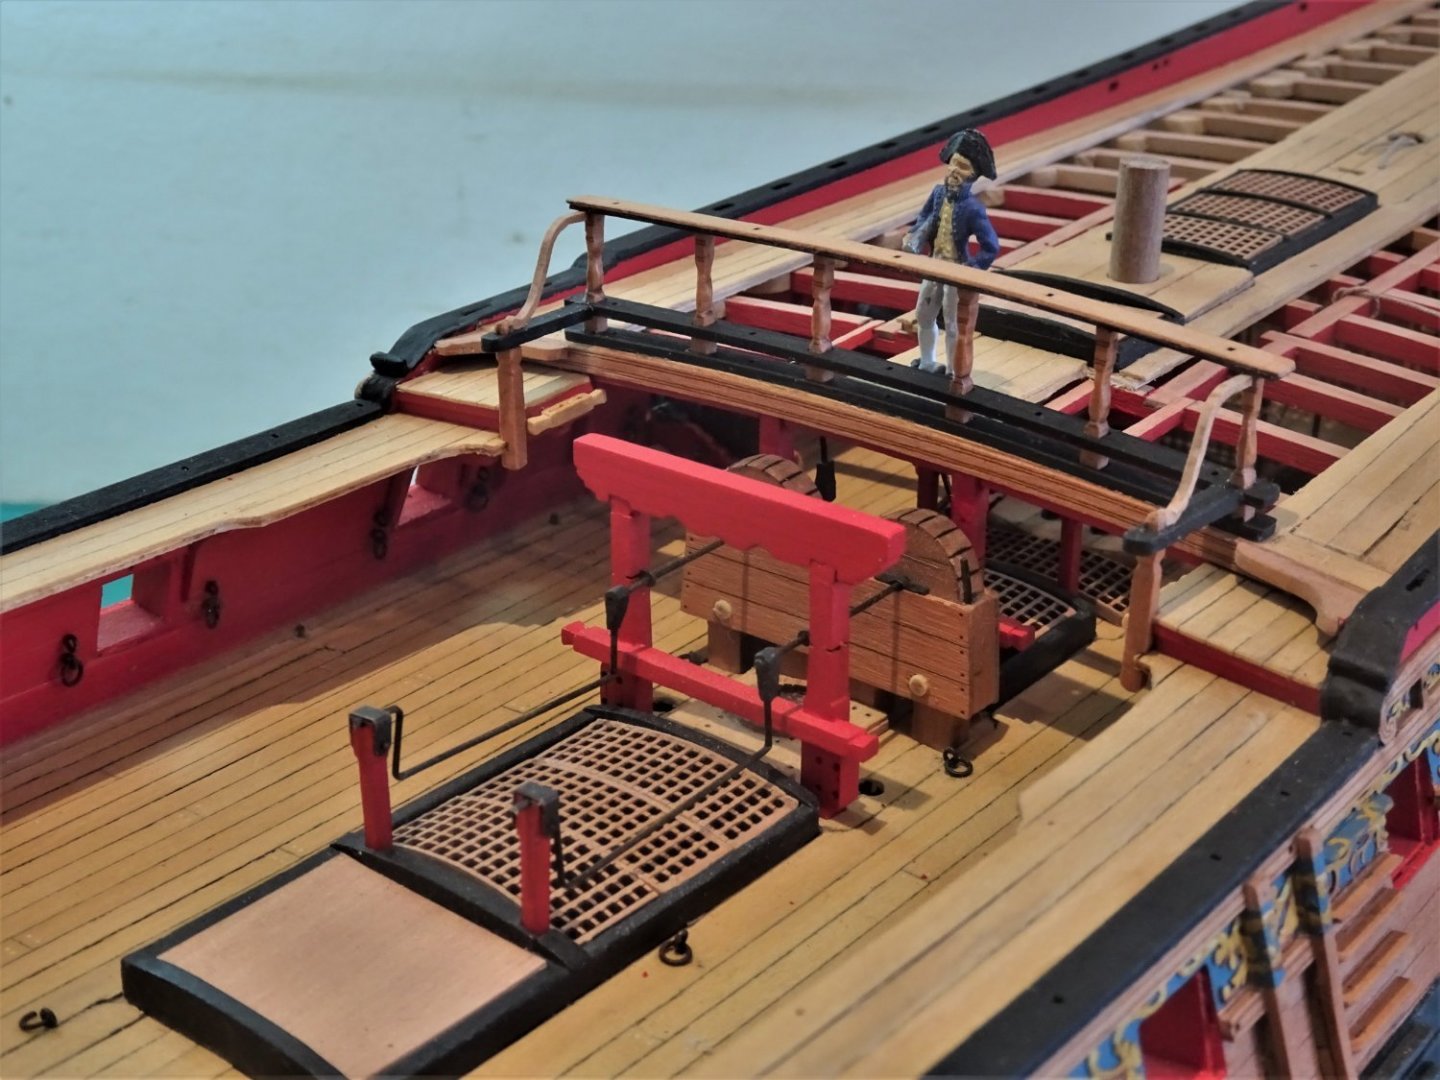
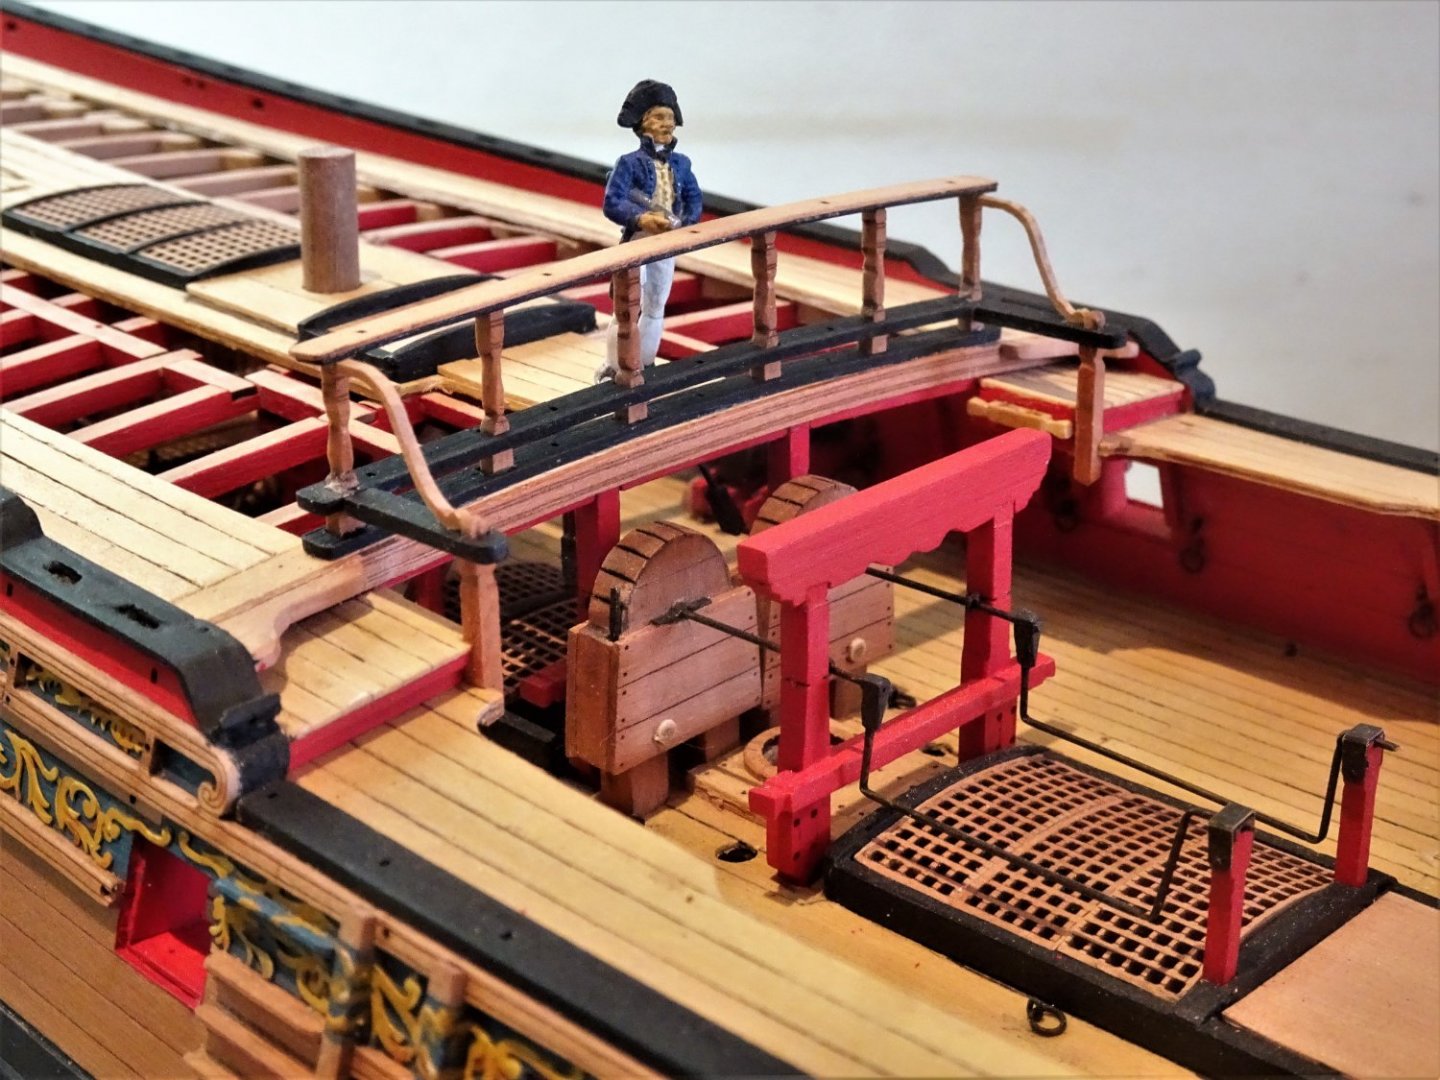
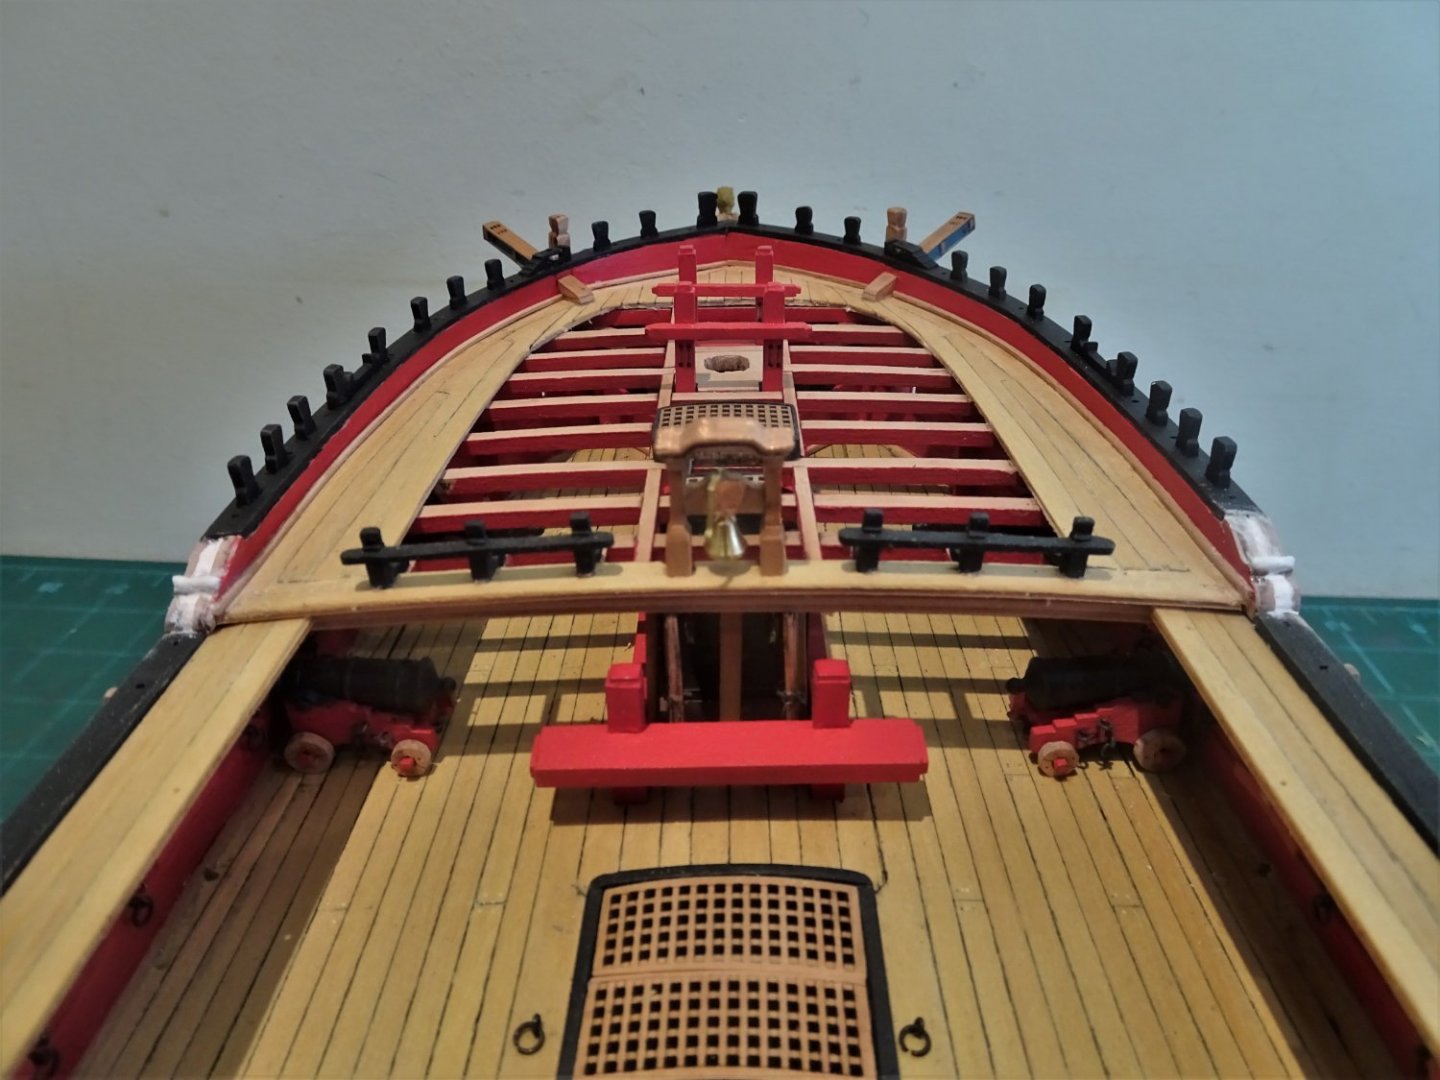
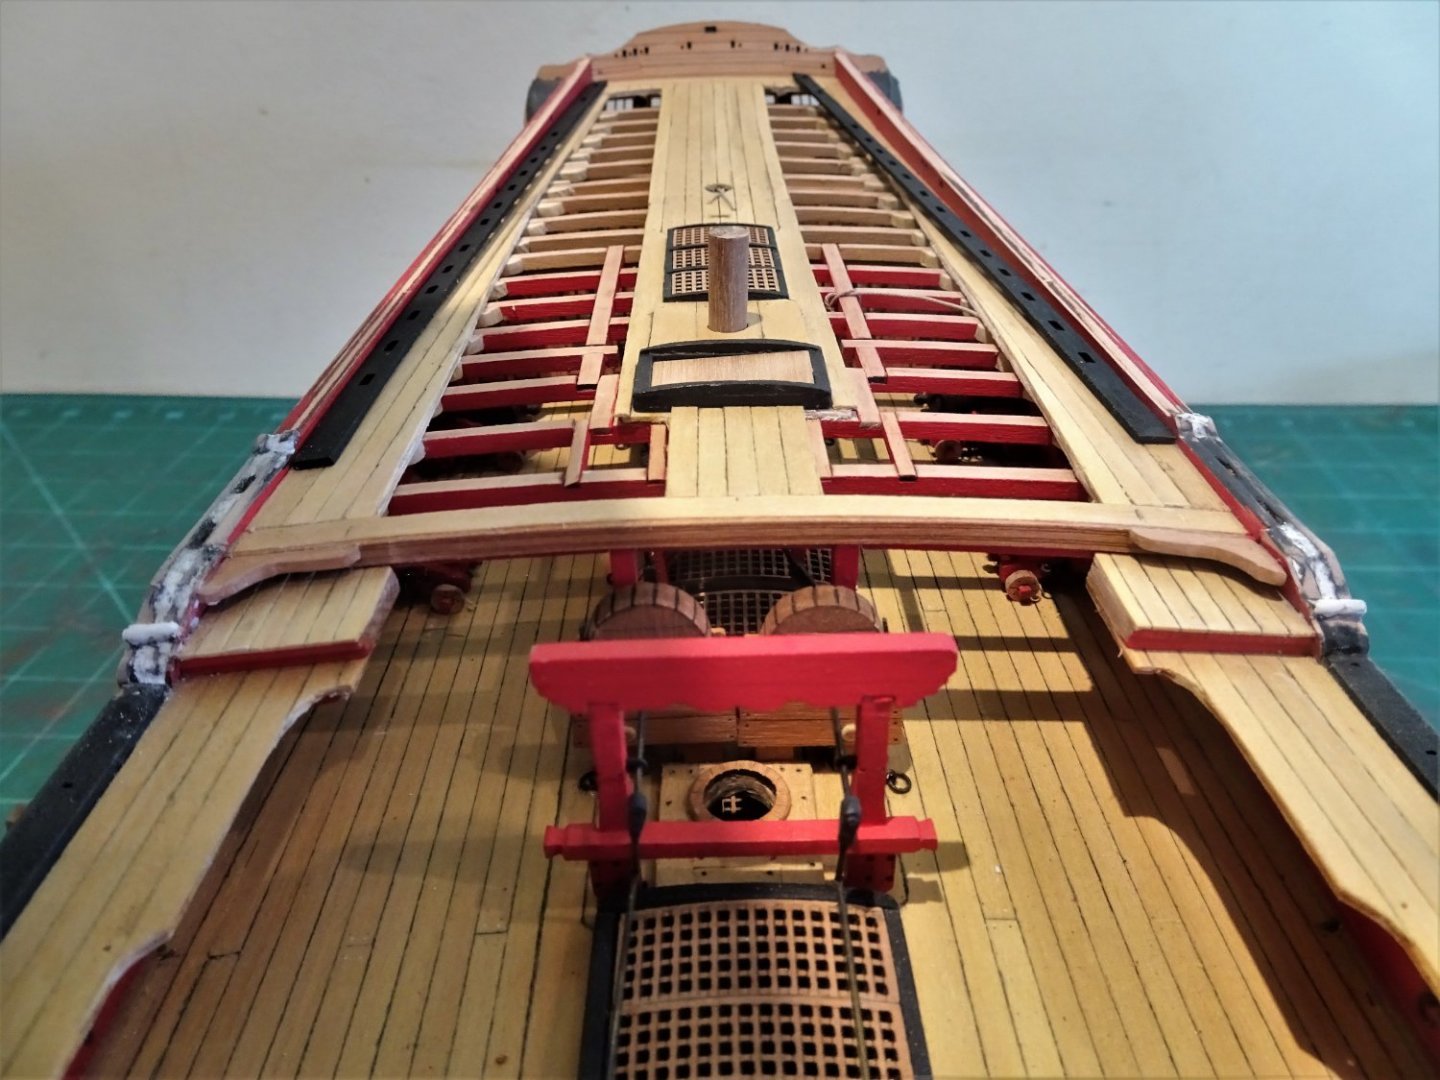
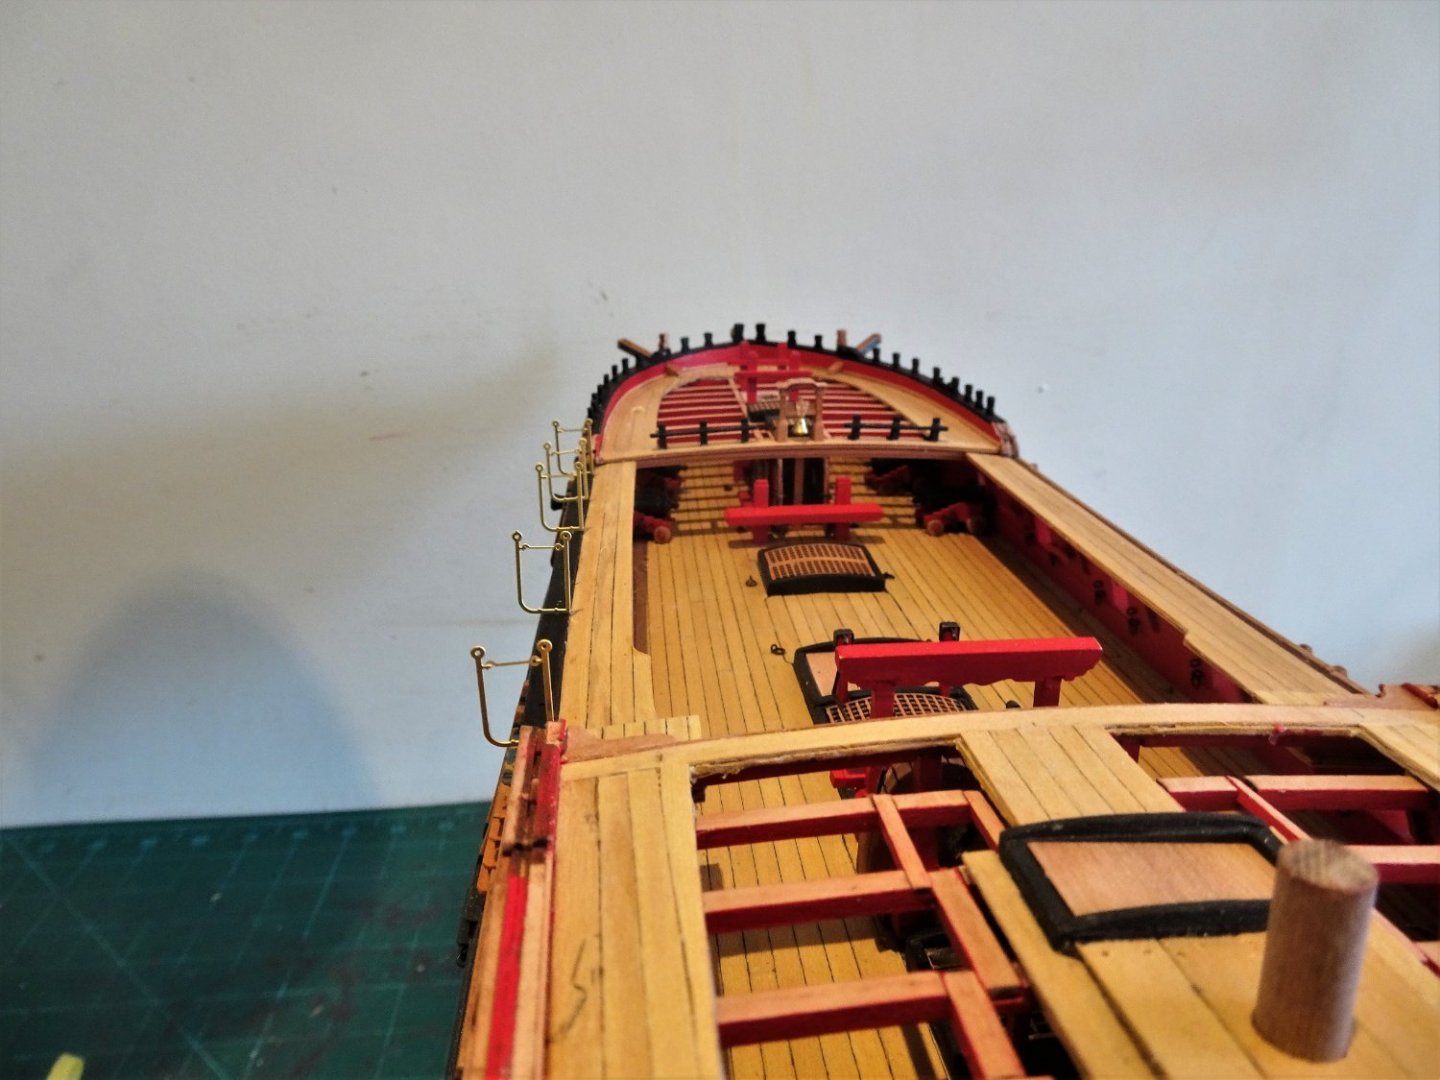
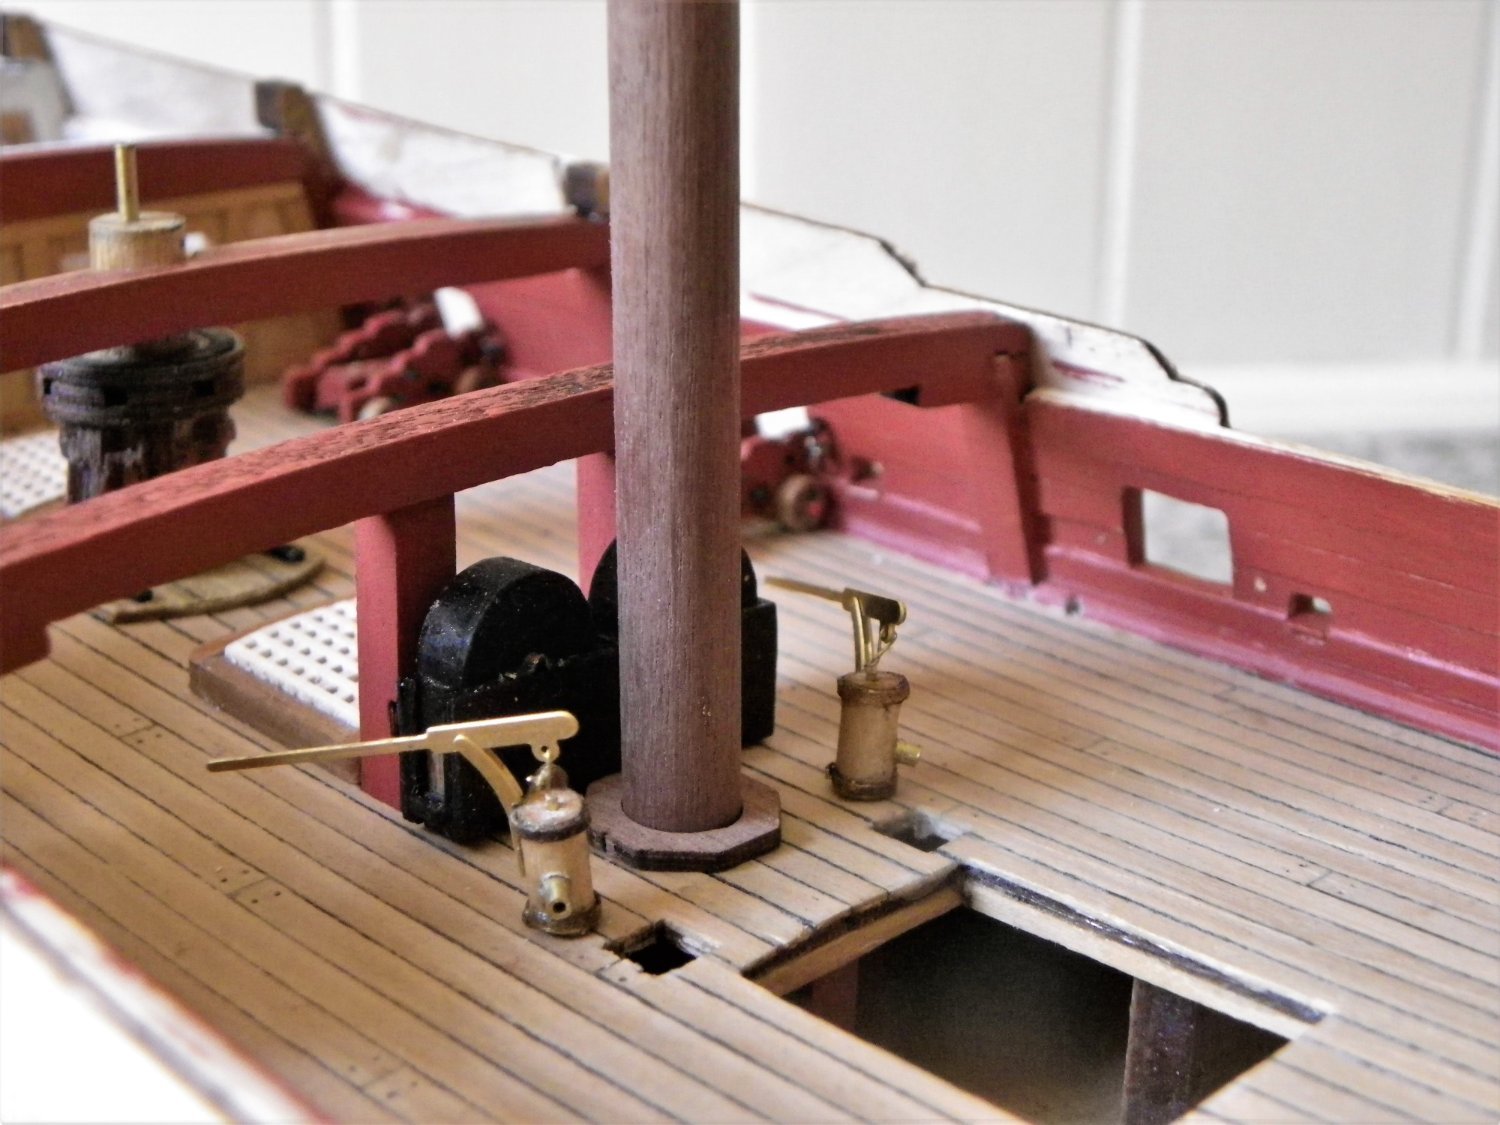
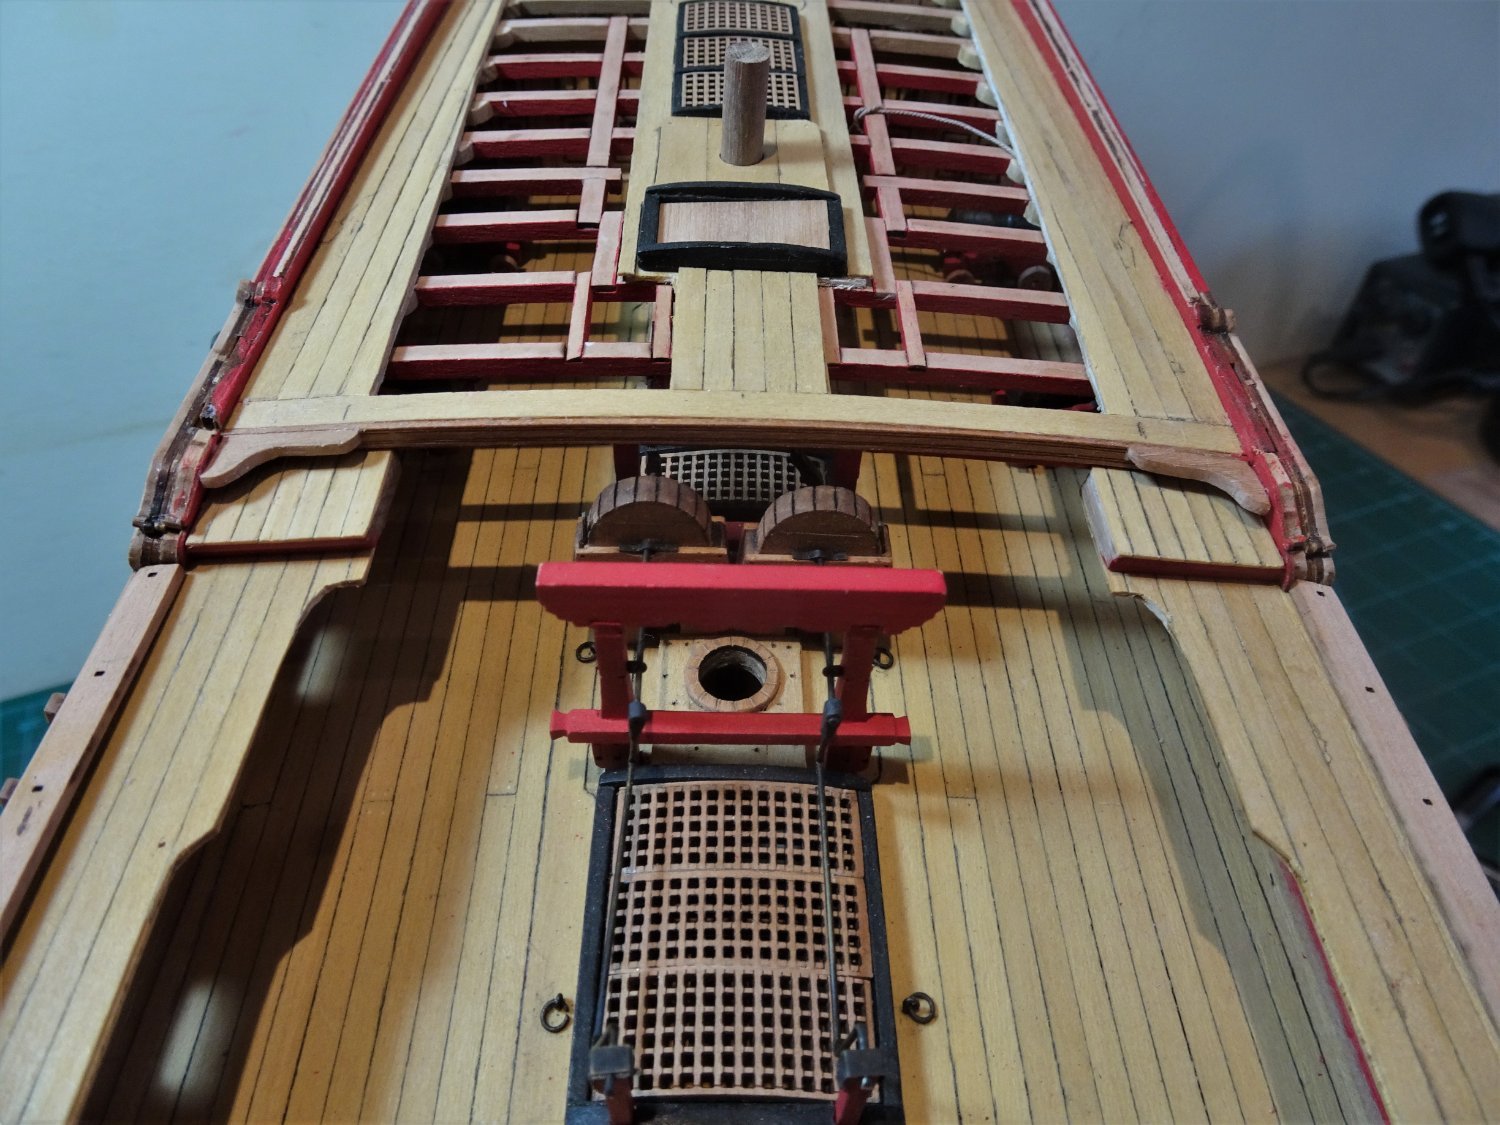
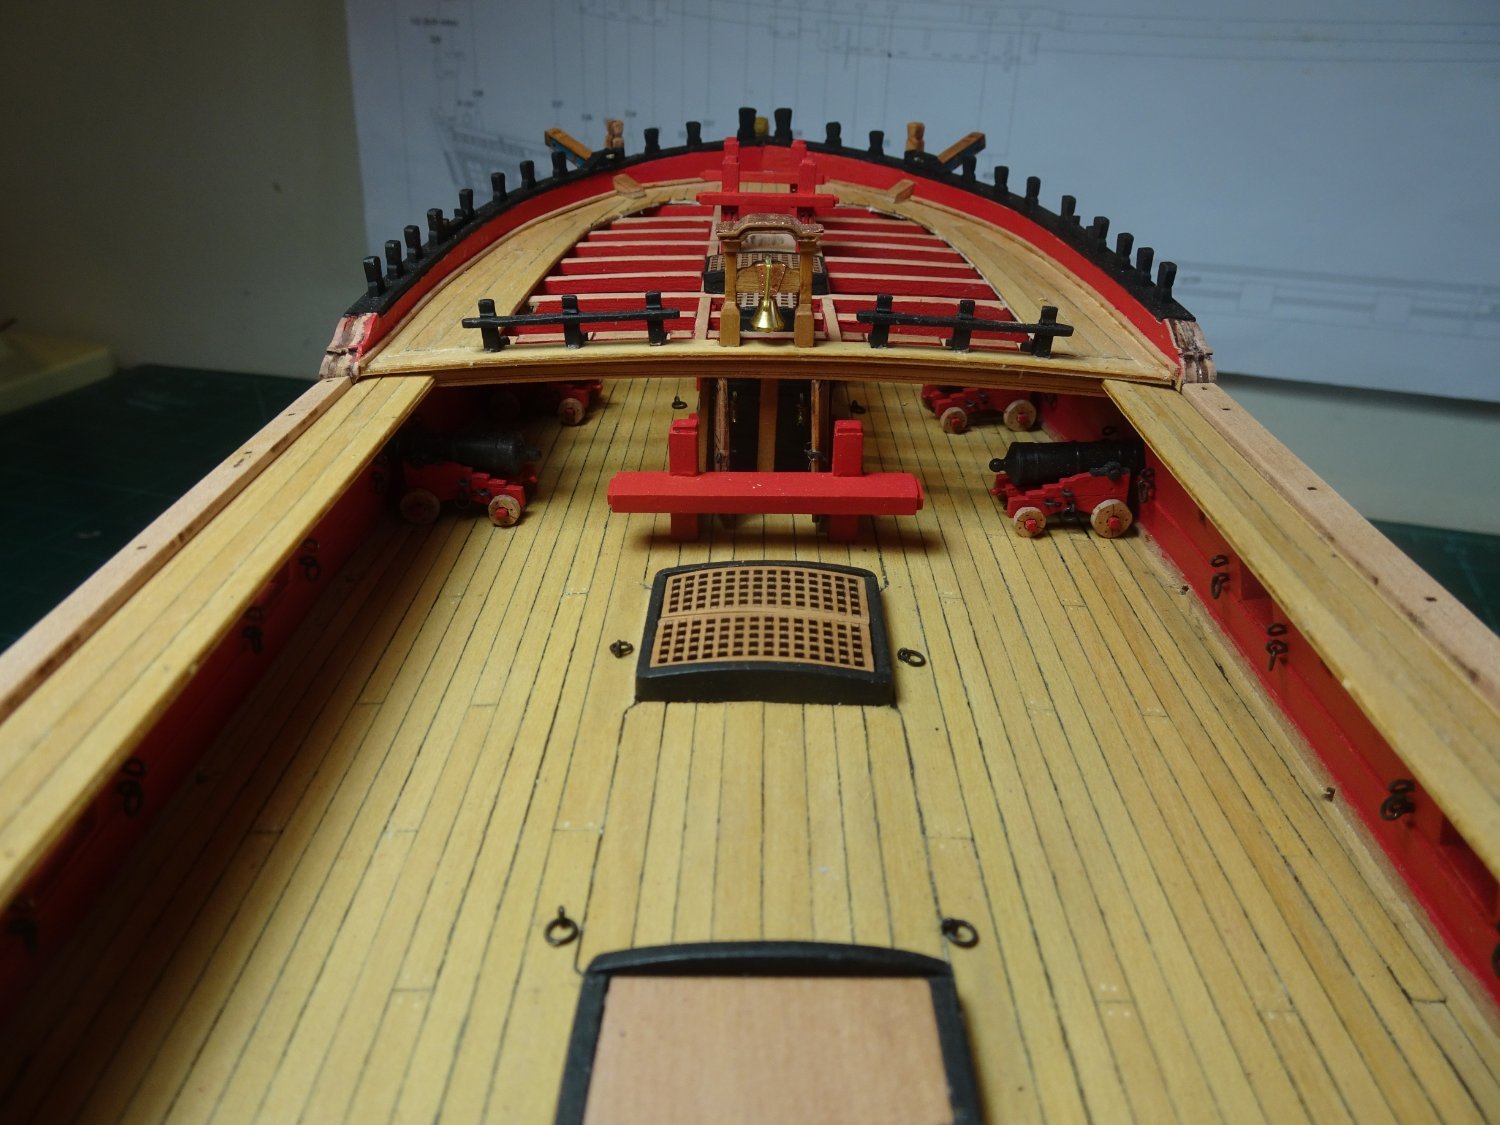
Thank you James, bug, and Rusty, and for the 'likes' @ Chris - do stop it - you torment me Sir,😉 Post One Hundred and Twenty-three ‘Elf n safety considerations – Guard rails The ladderway stanchions are represented by brass etched posts with an eye, thro’ which line is threaded. For this particular function the kit style is a bit of a simplification so I look for alternatives. I can just about make out what appear to be iron stanchions around the Q’deck ladderway on the Marshall Sphinx painting, so iron stanchions it will be. The stanchions do need to be removeable as particularly with the Quarterdeck ladderway operation of the Upper Capstan is a consideration. I note on the Amazon model that hinged covers for the hatchway are also in place, presumably to allow for foot passage when working the capstan, as well as weather considerations. For the stanchions I am going to use the same system I adopted for Pegasus, which was based on the detail in the fffm Vol 11. The makings involve having donor stanchions, the ones I use are 0.9mm ø with a 1.3mm finial. For the rings 0.3mm eyelets, (Caldercraft) are used, and 0.5mm ø brass rod for the rails. A spot of silver soldering is required to bring it all together. Silver solder paste in two melt points 690º and 671º is required. Full details of the procedure can be found in my Pegasus log (page 4 – post 91) 002 The biggest part of silver soldering is setting up the parts. 6989(2) The second is the cleaning up afterwards. 7018 Trial fitting the rails before blackening. 7050 Meanwhile on the Upper deck Capt. Grimm is no doubt thinking, ‘What lubberly idiot designed the main ladderway access to open onto the Main hatchway, between the stanchions for the pump handles, which then have to be negotiated for access to the Upper deck.’ 7044 I understand that he did tentatively raise the issue with the Dockyard Superintendent, but was given short shrift, who was he to question the work of the renowned Naval Architect Mr John Williams. It is perhaps not unsurprising that Capt. Grimm does not appear on the list of commissioned Captains of Sphinx, but at least he avoided the ignominy of being taken by the French. Lets hope a general ‘all hands on deck’ isn’t signalled at the same time an urgent need to man the pumps is required. 7047 7040 7045 7033 These are fiddly little beggars to fit but best done before the Quarterdeck rails are fitted. 7057(2) B.E. 24/05/2022
.thumb.JPG.3709909b7211ecb3b202e1bcecb62eed.JPG)


.thumb.JPG.11d8333b314a4829950f0d08b6ca6567.JPG)
- 857 replies
-
- 23
-
-
- Sphinx
- Vanguard Models
- (and 1 more)
-
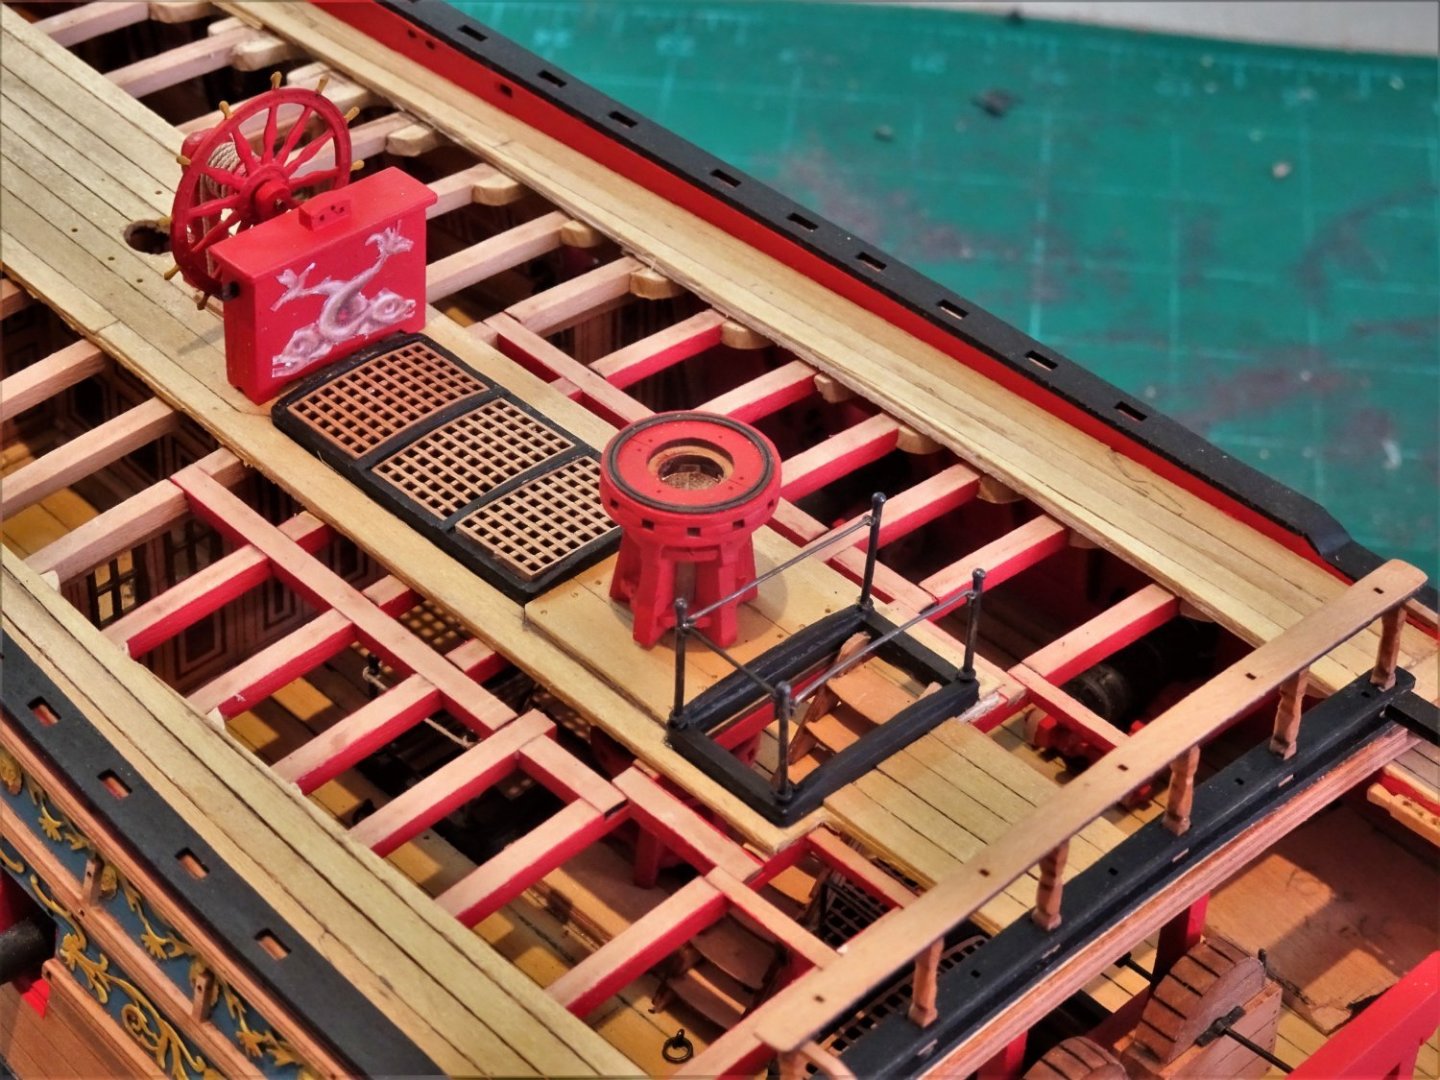
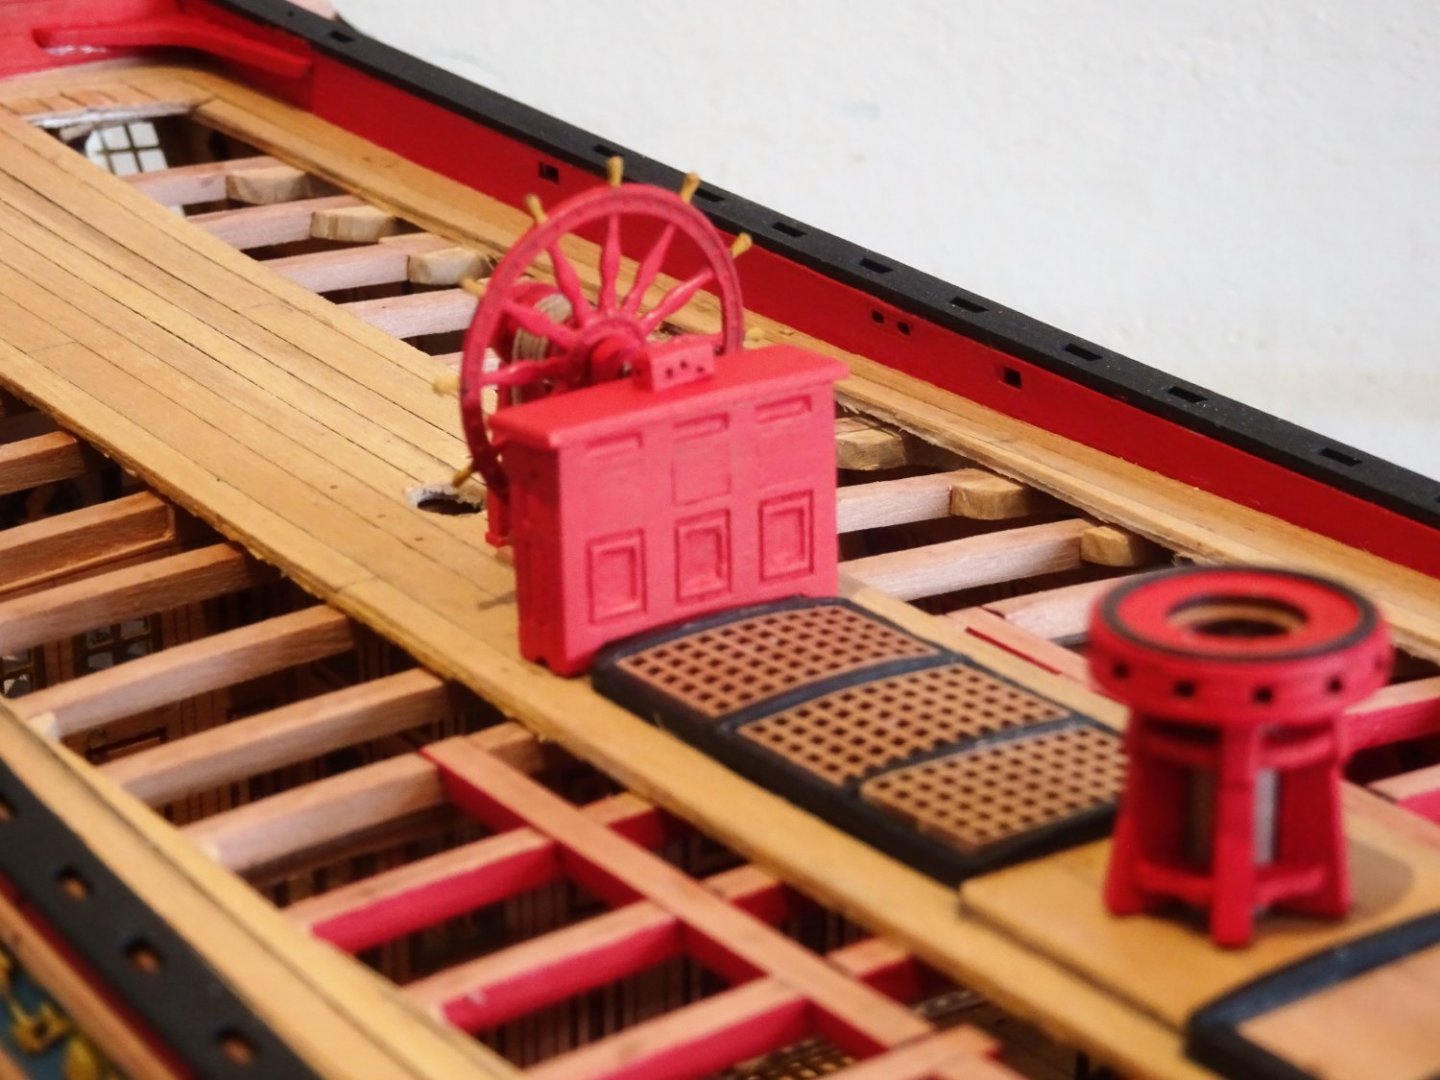
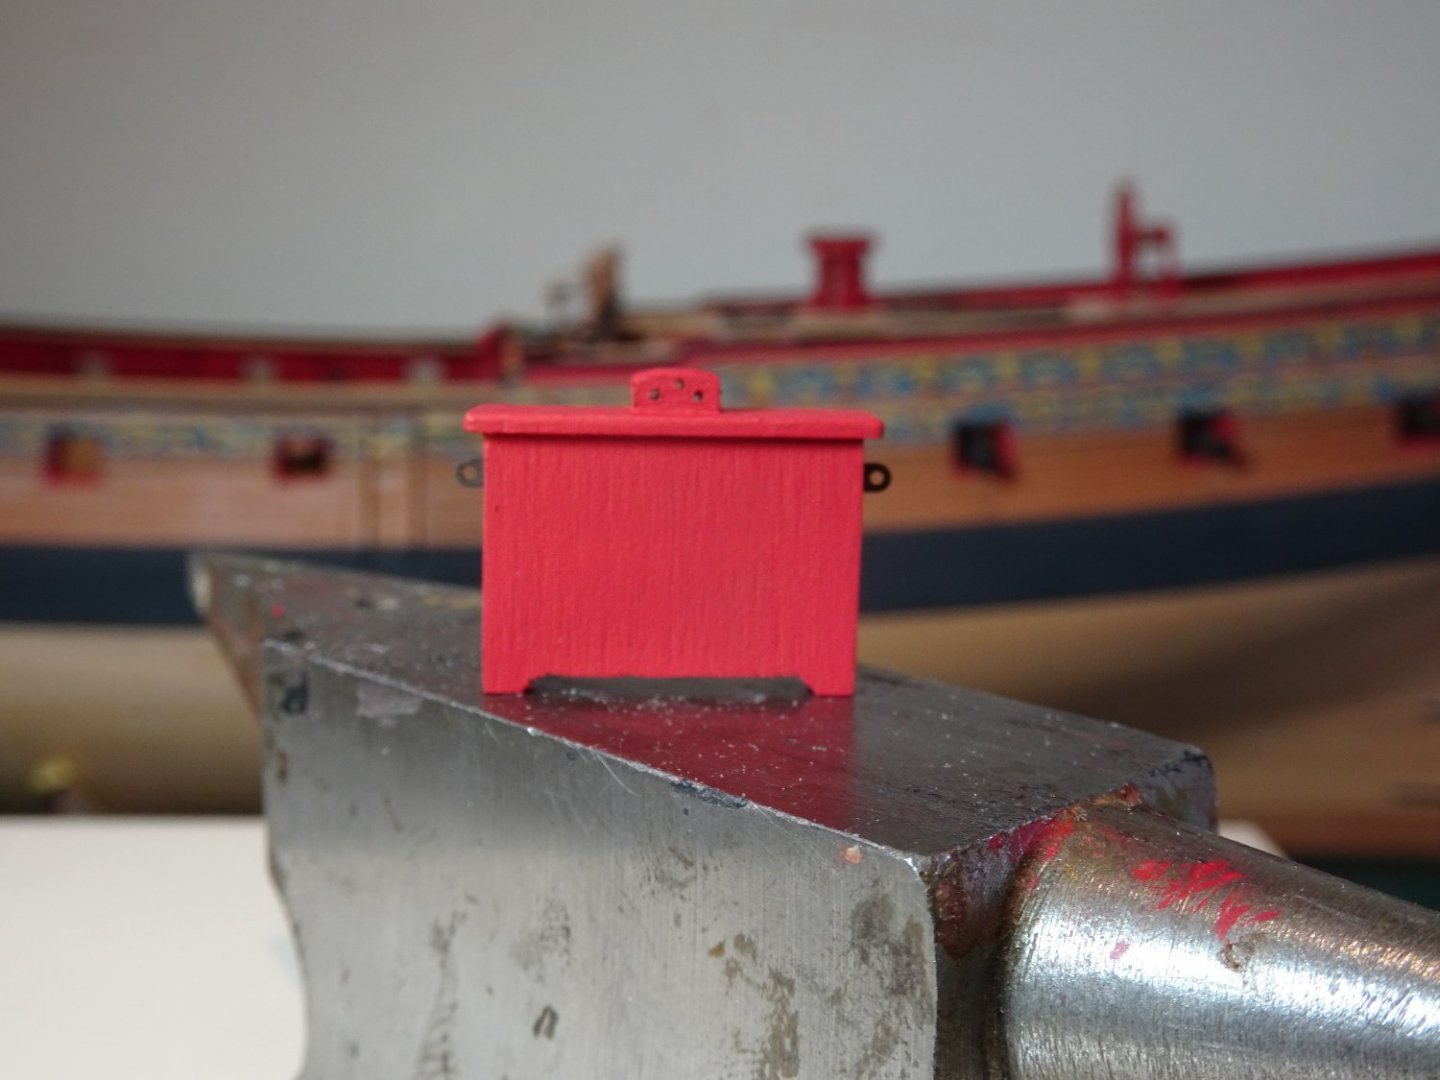
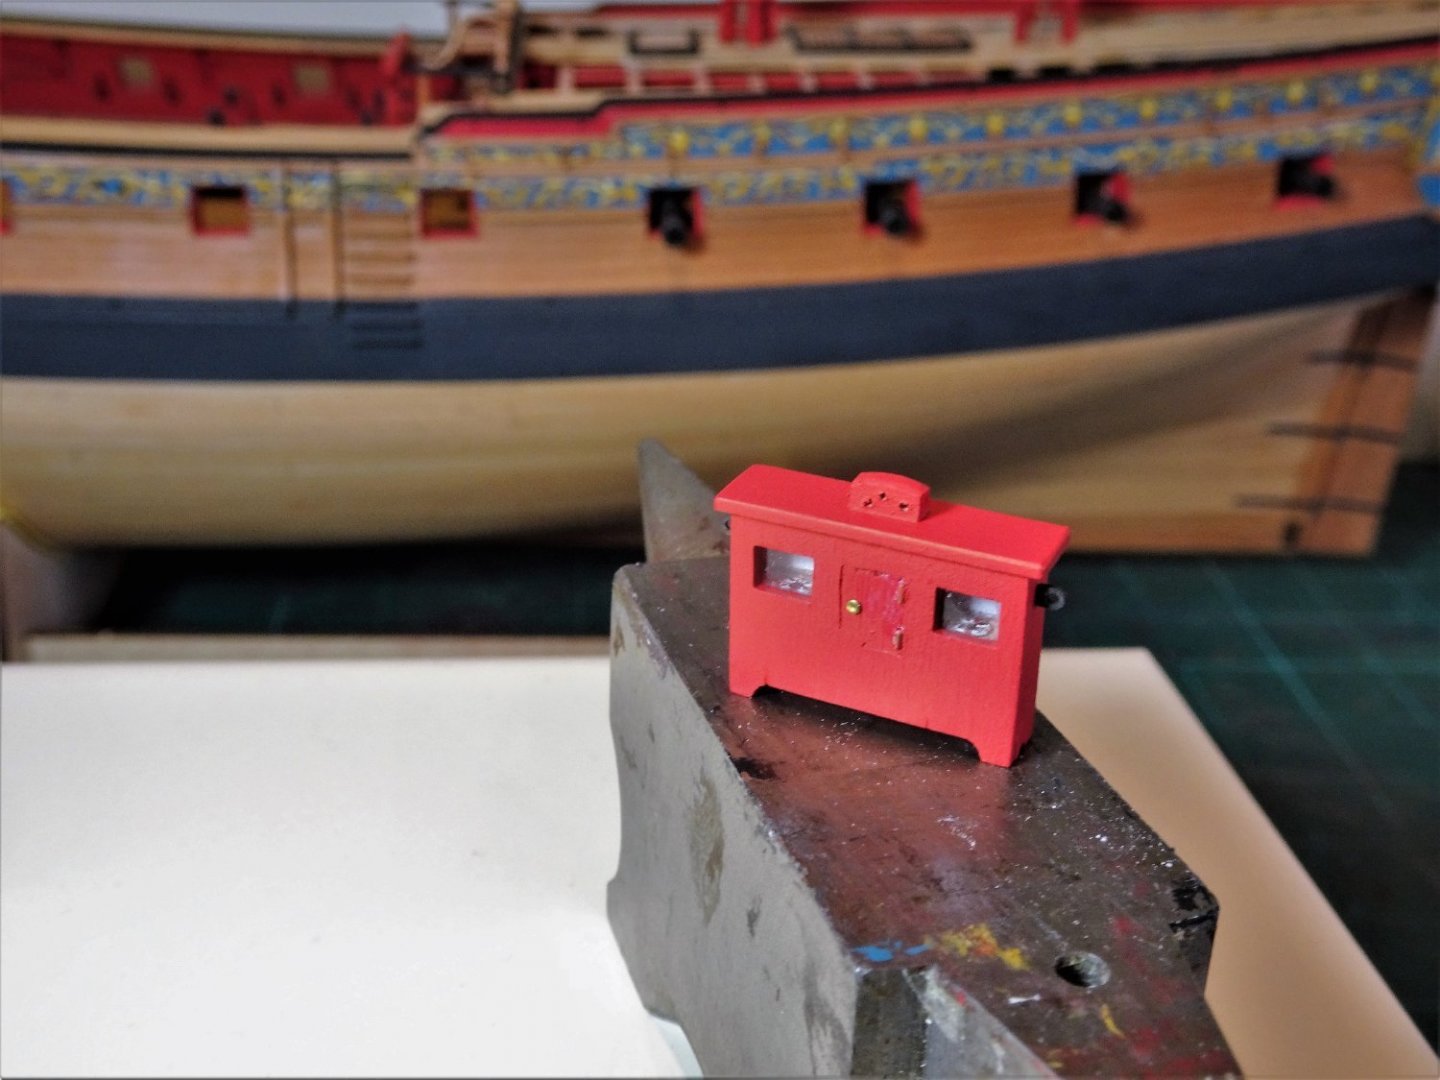
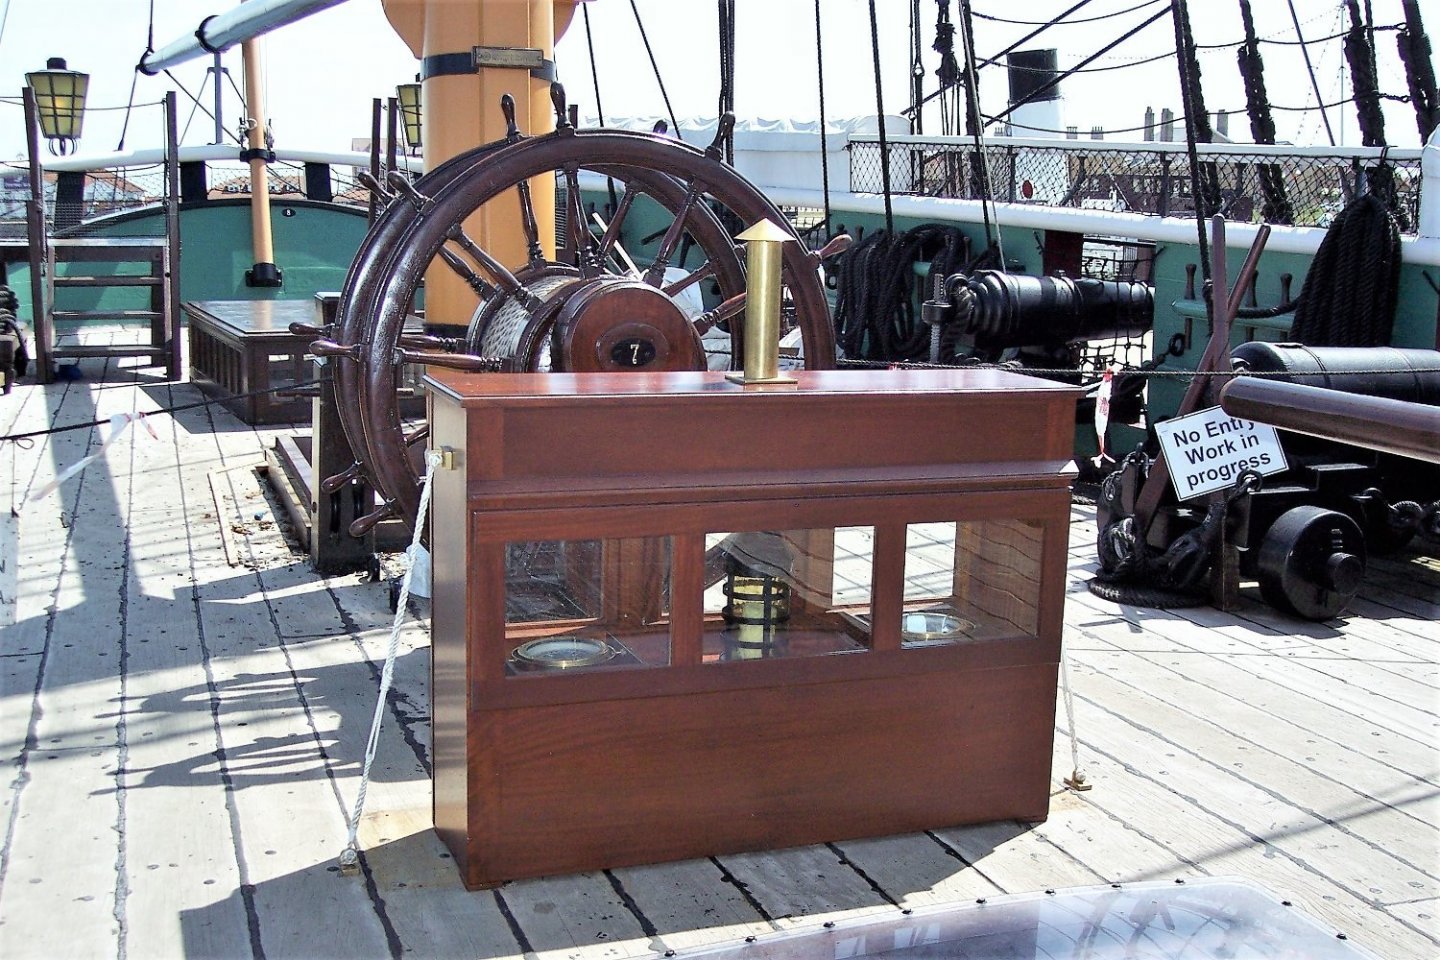
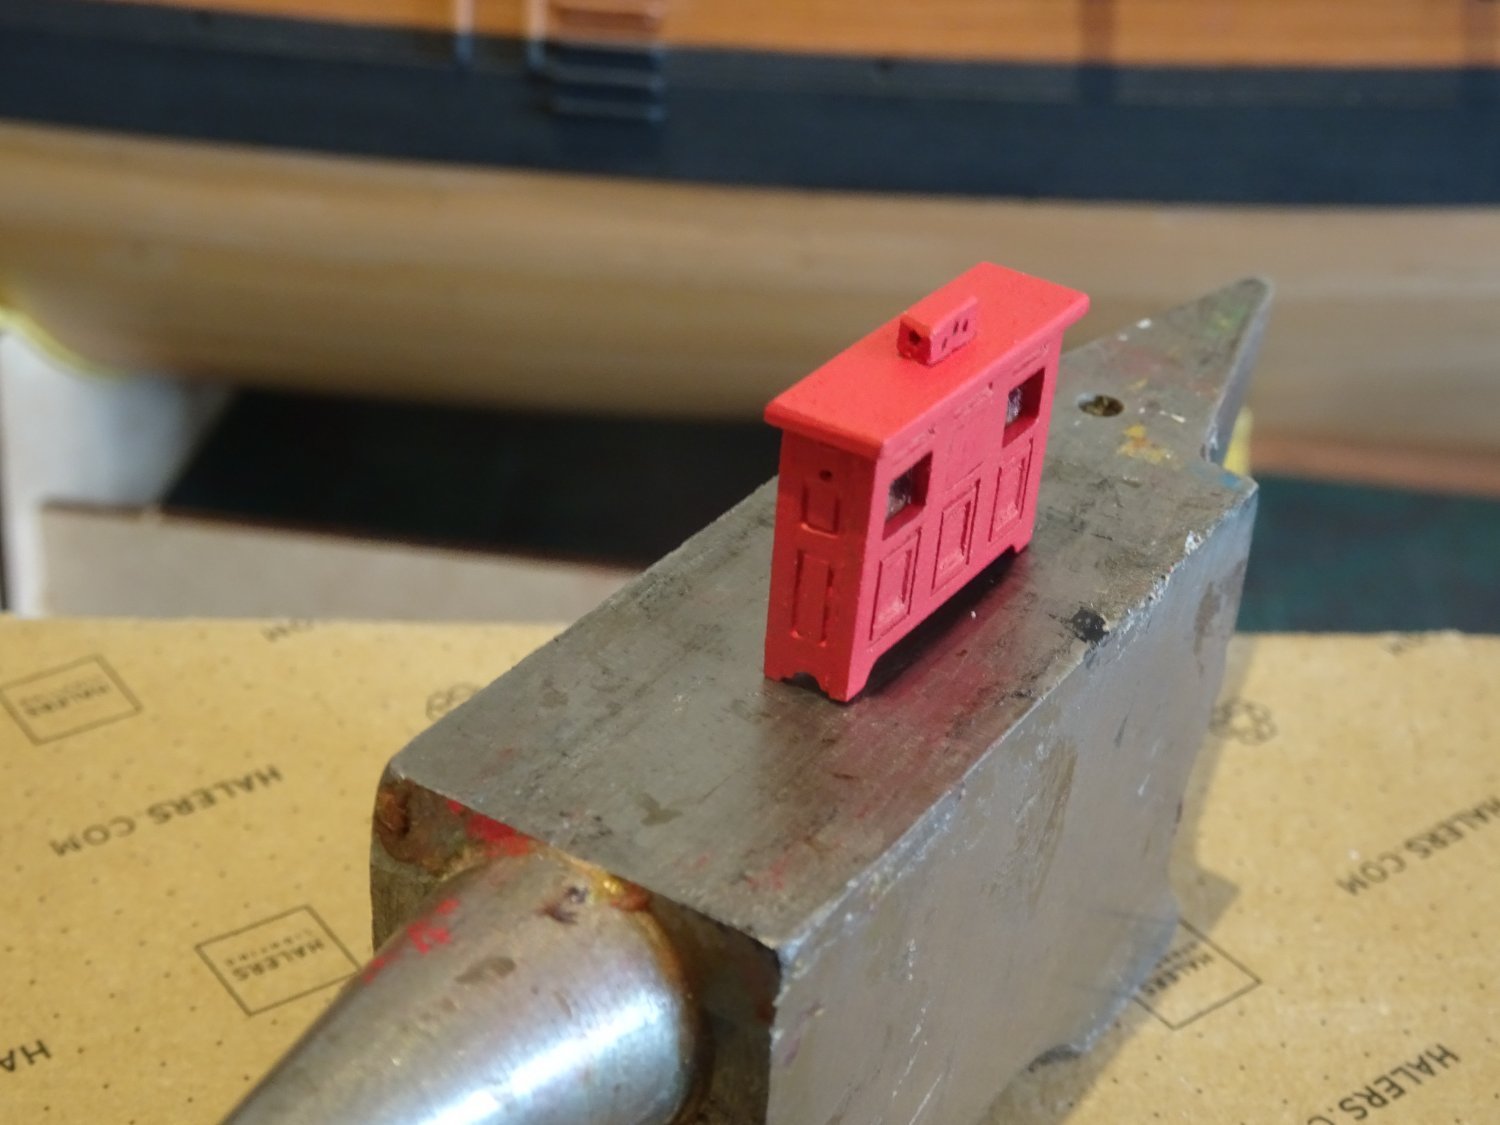
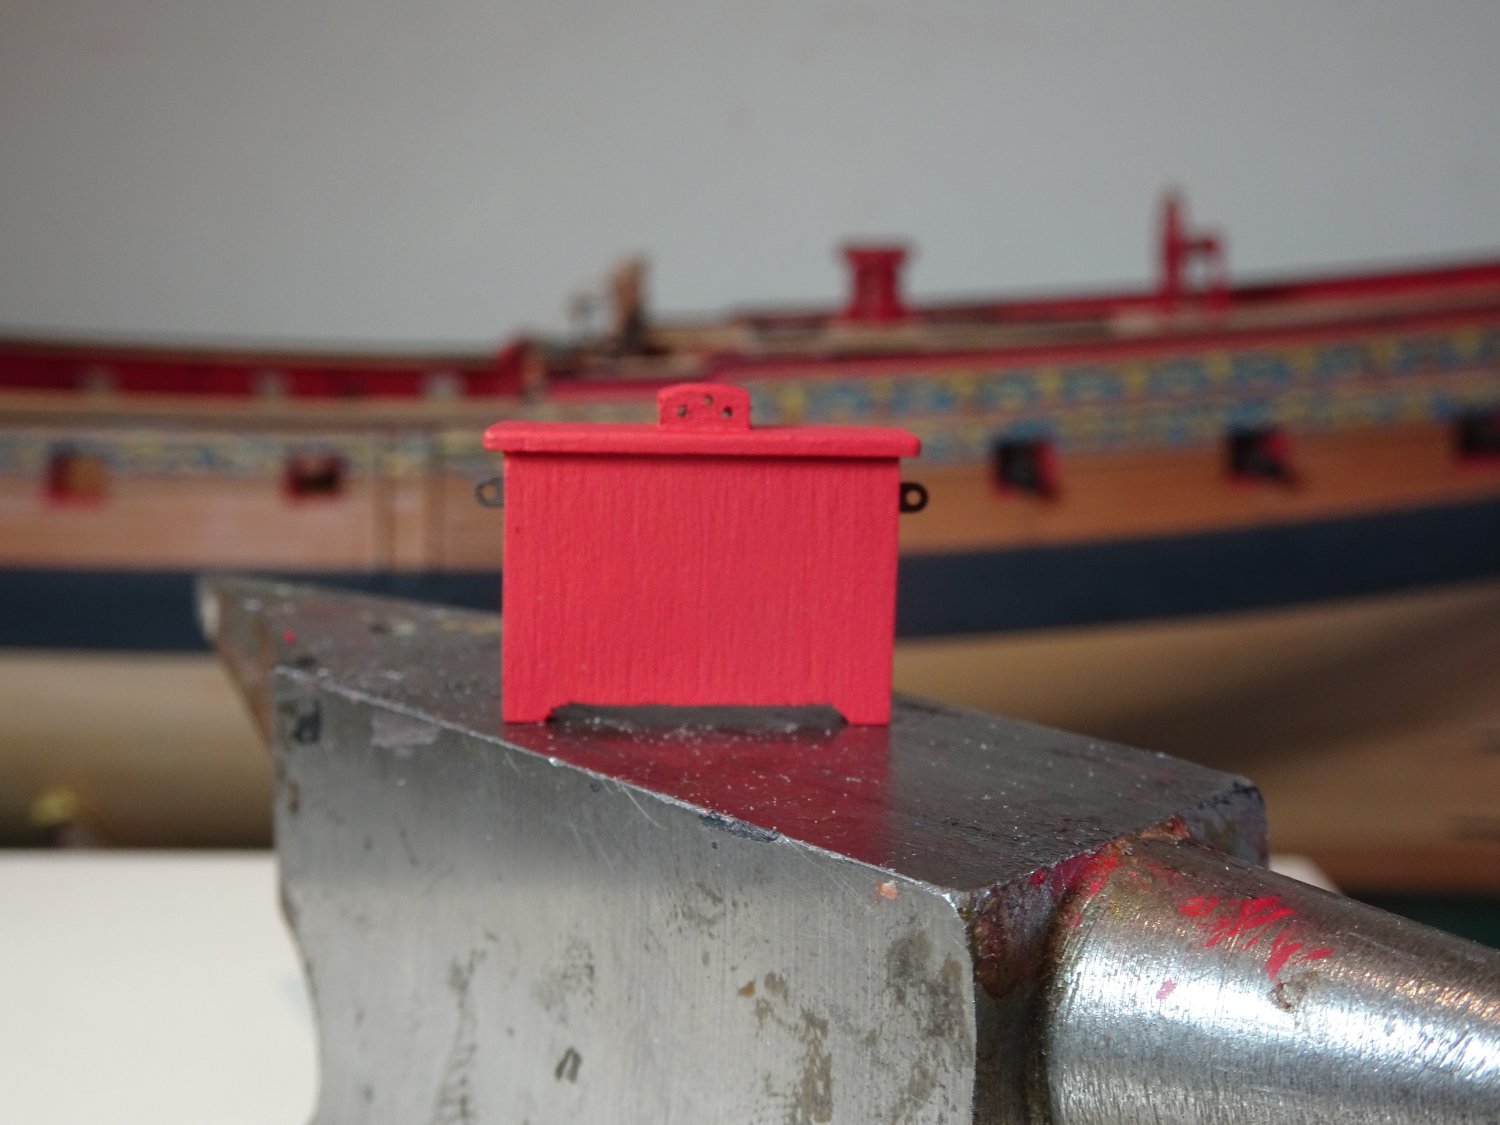
Post One Hundred and Twenty-two Quarterdeck fittings – The Binnacle These are not often shown on contemporary models, the Amazon model is a fairly rare exception. I am undecided at present whether I will include it, but that’s no reason not to make one up. The kit offering is quite a detailed construction with brass etched representations of the compass within the glazed compartments, and complete with a fine brass chimney. The style is of the type as fitted to HMS Victory and indicated in the drawings of the Pandora AotS book. But… there’s always a but, to my eye the Victory style doesn’t sit well on Sphinx, it seems somehow out of period, and I think a simpler affair, similar to that fitted on Pegasus is called for. I was tempted by the more elaborate version shown on the Amazon model and reproduced on Chuck’s Winnie model (above). It does look wonderful, but again I thought it a little too fancy for a sixth rate. 115 Trincomalee Binnacle. The versions on Victory and also Trincomalee are of the same type with glazing both sides of the binnacle cabinet. Amazon model Binnacle. The contemporary Amazon model Binnacle only has lights facing the Helmsman. I had a look at the French version shown in Boudroit's epic tome The Seventy-four gun ship. Here the binnacle cabinet is fully enclosed using vertical sliding doors and with only an angled and lidded viewing compartment for the Helmsman. For my purposes I think the provided kit item can still be used but toned down to a simpler form. A tale of two Binnacles I seem to have ended up with two Binnacle sets so I can have two bites at the cherry. Version one. The kit item has inset panels defined by char which present a problem if the the Binnacle is to be painted. It is the very devil to clean off the char and smooth these small square panels, less necessary if the item is to be simply varnished. 6939 6953 Here I blocked off the the open lights of the fore side using small square infills, as with the central light on the aft side. The chimney was dispensed with and replaced by a wooden vent atop the Binnacle. When I exposed the completed item to the harsh macro eye, to say I was displeased with my efforts is a gross understatement. It is far too destressing for public view, and the above photos are as close as I dare let the camera get. Version one will not stand. Version Two 6970 On this version I chose to replace the fore side of the Binnacle with a plain wooden board, without the lights, and reverse the other parts to have the panel decoration inside. 6972 The central (light) compartment on the aft side was converted into a solid door. The central light compartment is closed from view to the Helmsman to avoid glare which may compromise night vision. 6978 This option made painting a much easier prospect and improves the chances of getting a better finish. 6981 6976 The final task is to apply a suitable motif design to the forward face. 6985 I trialled several but settled on the Amazon design as created by Chuck for his Winchelsea. 6986 Needs a little fettlin’ around the edges to blend in. After a weekend working on the Binnacle I’m still not sure whether to include it on the model, it does mask the forward view of the wheel. Moving on…. B.E. 23/05/2022

- 857 replies
-
- 23
-
-
- Sphinx
- Vanguard Models
- (and 1 more)
-
hollowneck said Note: the tiny P/E oarlocks are reversed from the photos shown in the instruction manual; I believe these were intended to be mounted in the manner I've shown here, two pieces, facing inward to form a metal "U" in which the oar would rest. The brass P/E pieces to form these are a quite clever way to depict these miniscule details, and crucial to present an accurate representation of a ship's boat. "The Devil's in the details, right Captain 'P'"? Hi Ron, I don't think you are correct in your assumption. The small extensions are support pieces (usually of wood) to the pins that fit thro' the small support wedges. Slightly different to 'U' shaped oarlocks of the later period. Still, yours is a hybrid, but I wouldn't want other readers to think that was the norm. Regards, B.E.
- 542 replies
-
- 3
-
-
- Sphinx
- Vanguard Models
- (and 3 more)
-
Your hybrid turned out very nicely Ron, I think you’re right to only show one boat on the skids, such a shame to hide all that upper deck detail. B.E.
- 542 replies
-
- 1
-
-
- Sphinx
- Vanguard Models
- (and 3 more)
-
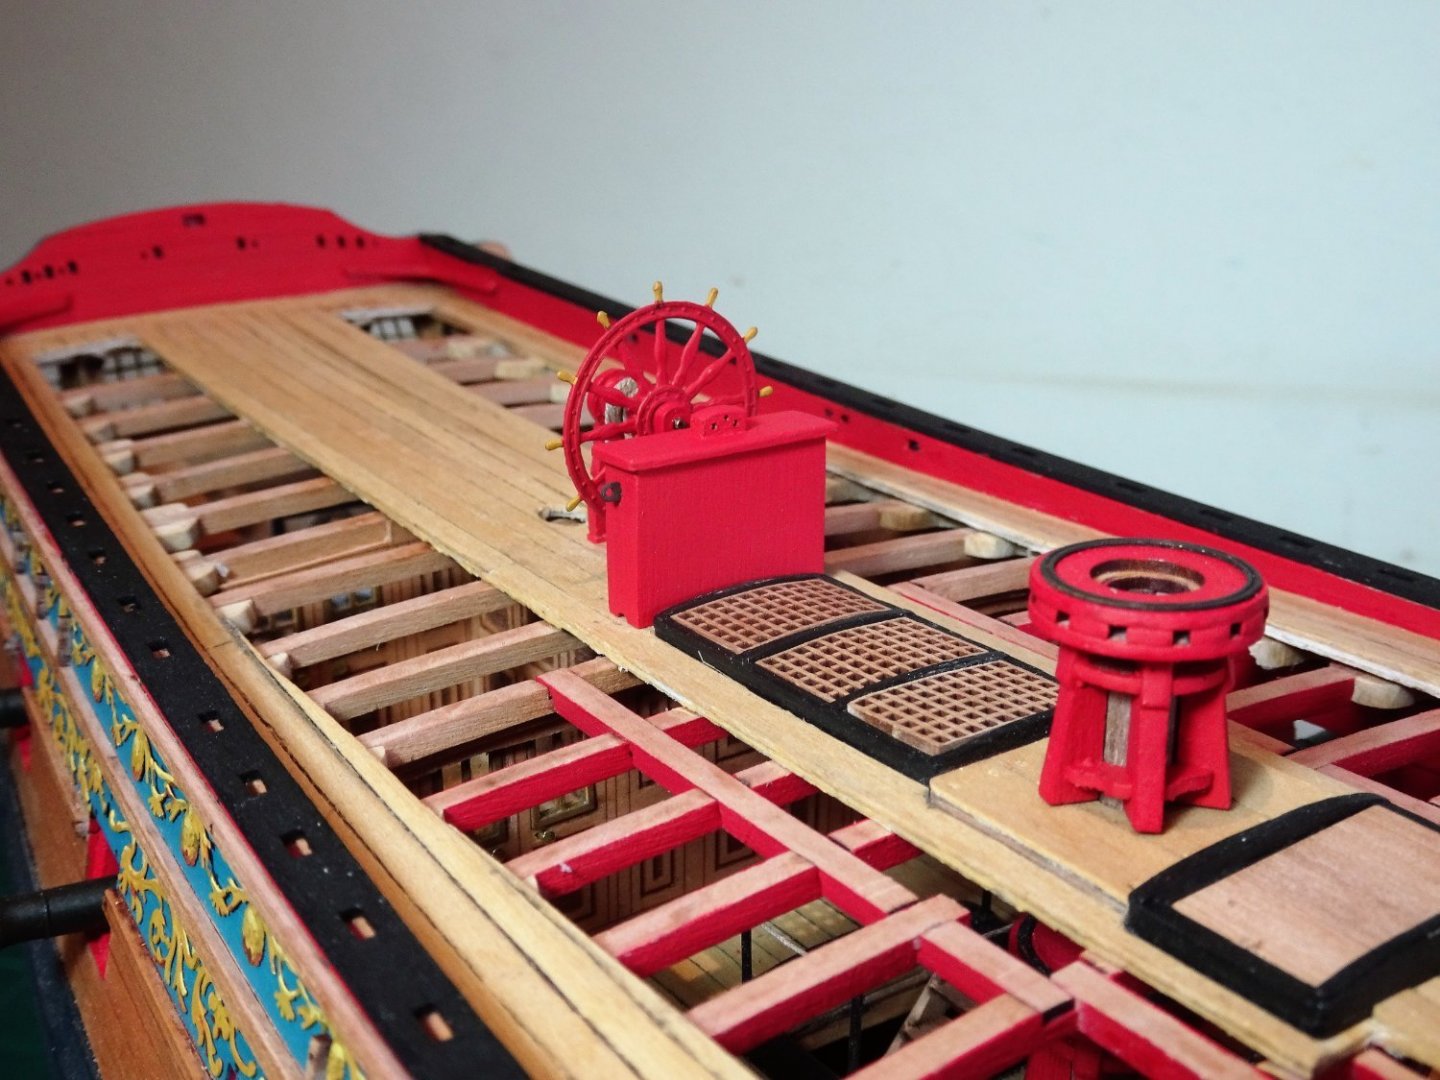
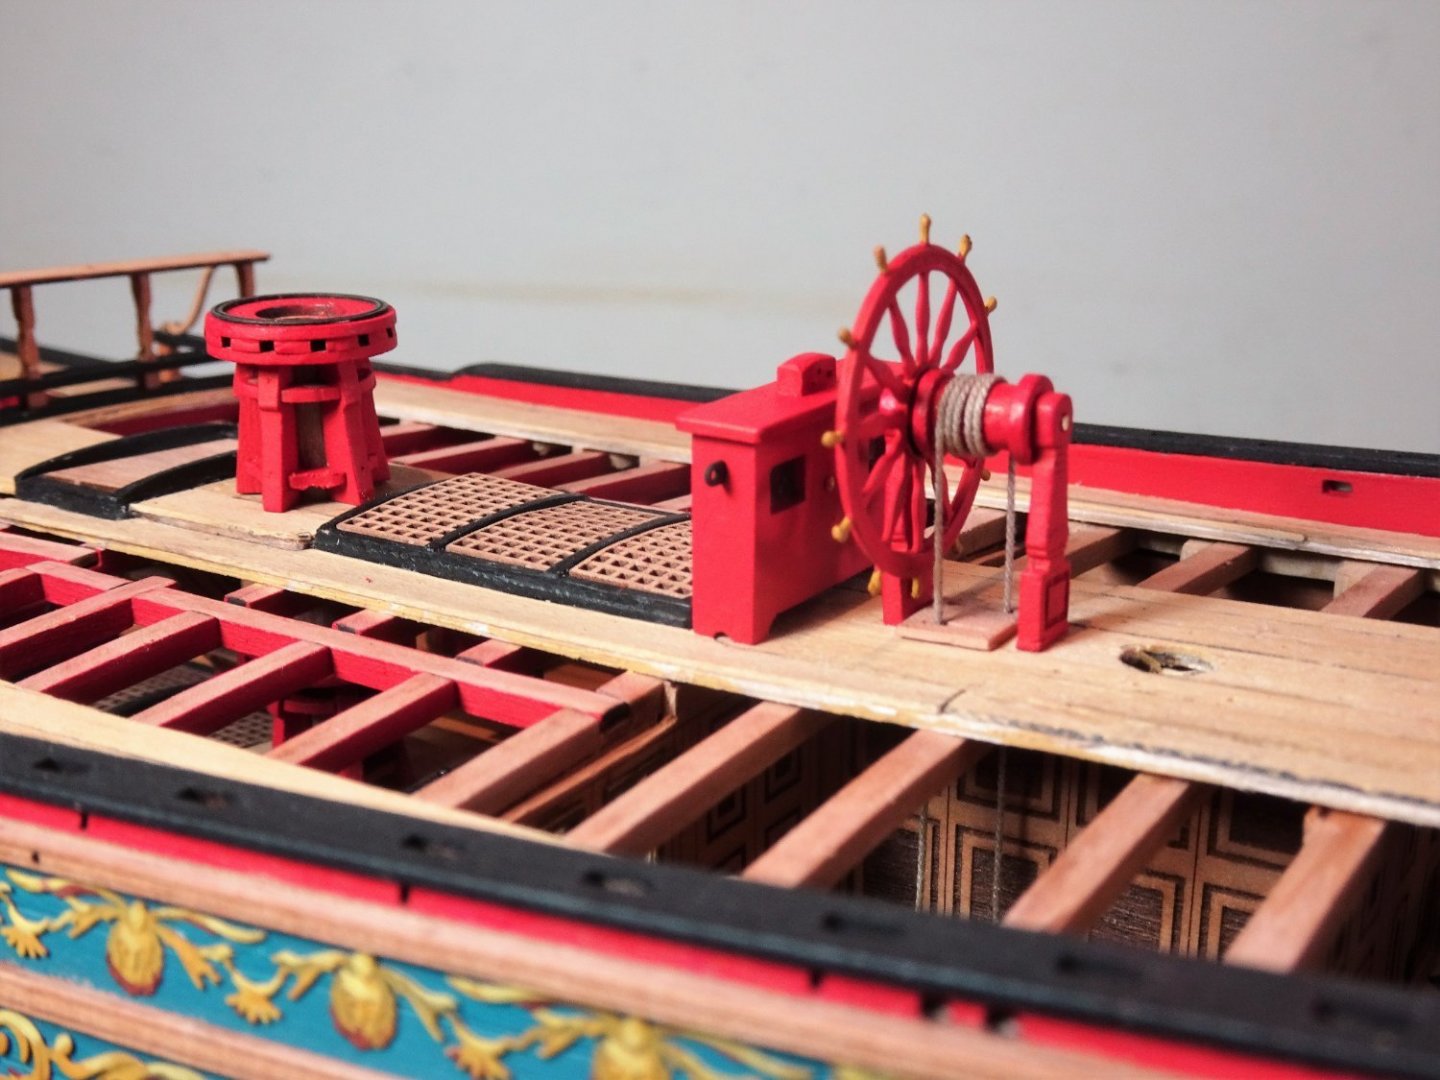
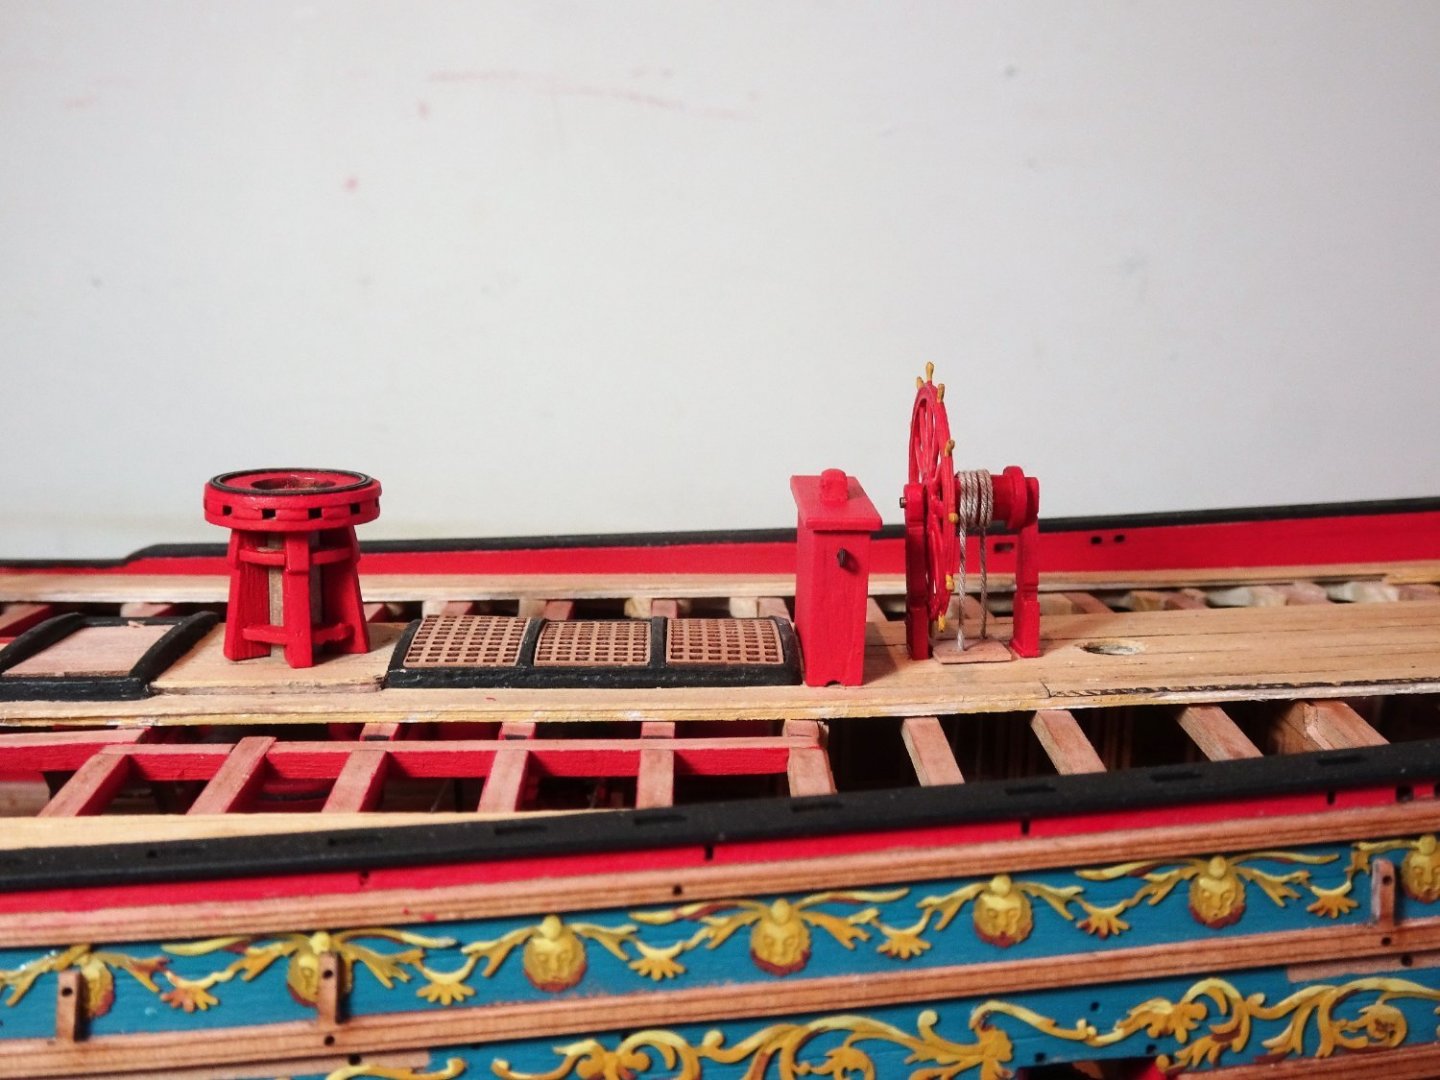
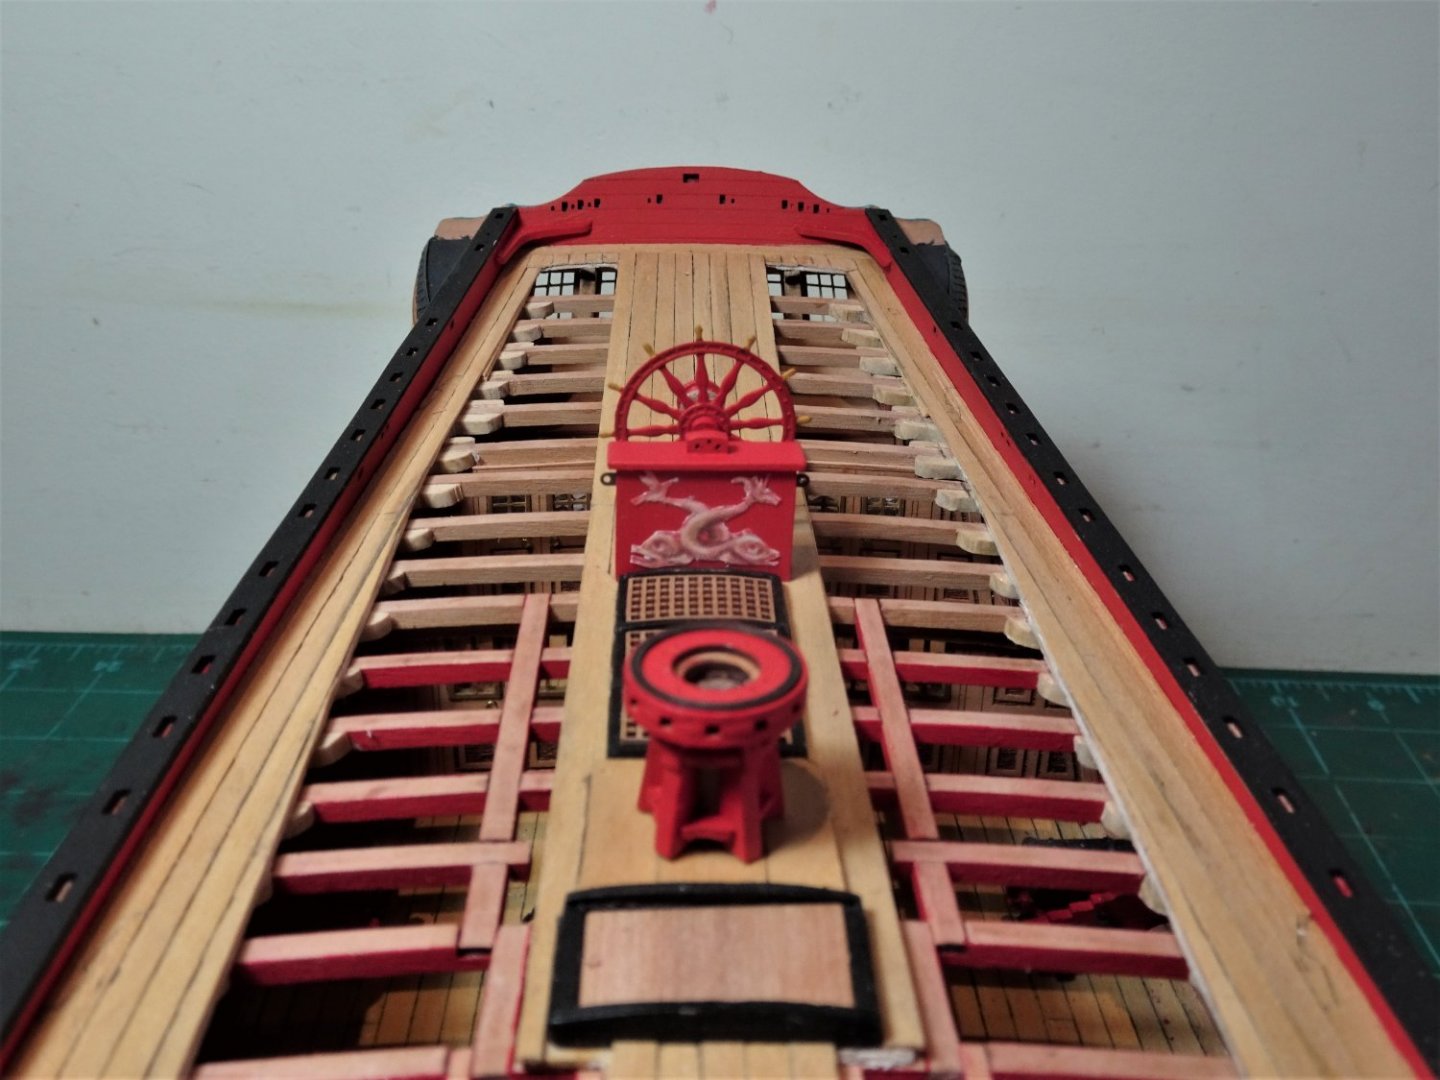
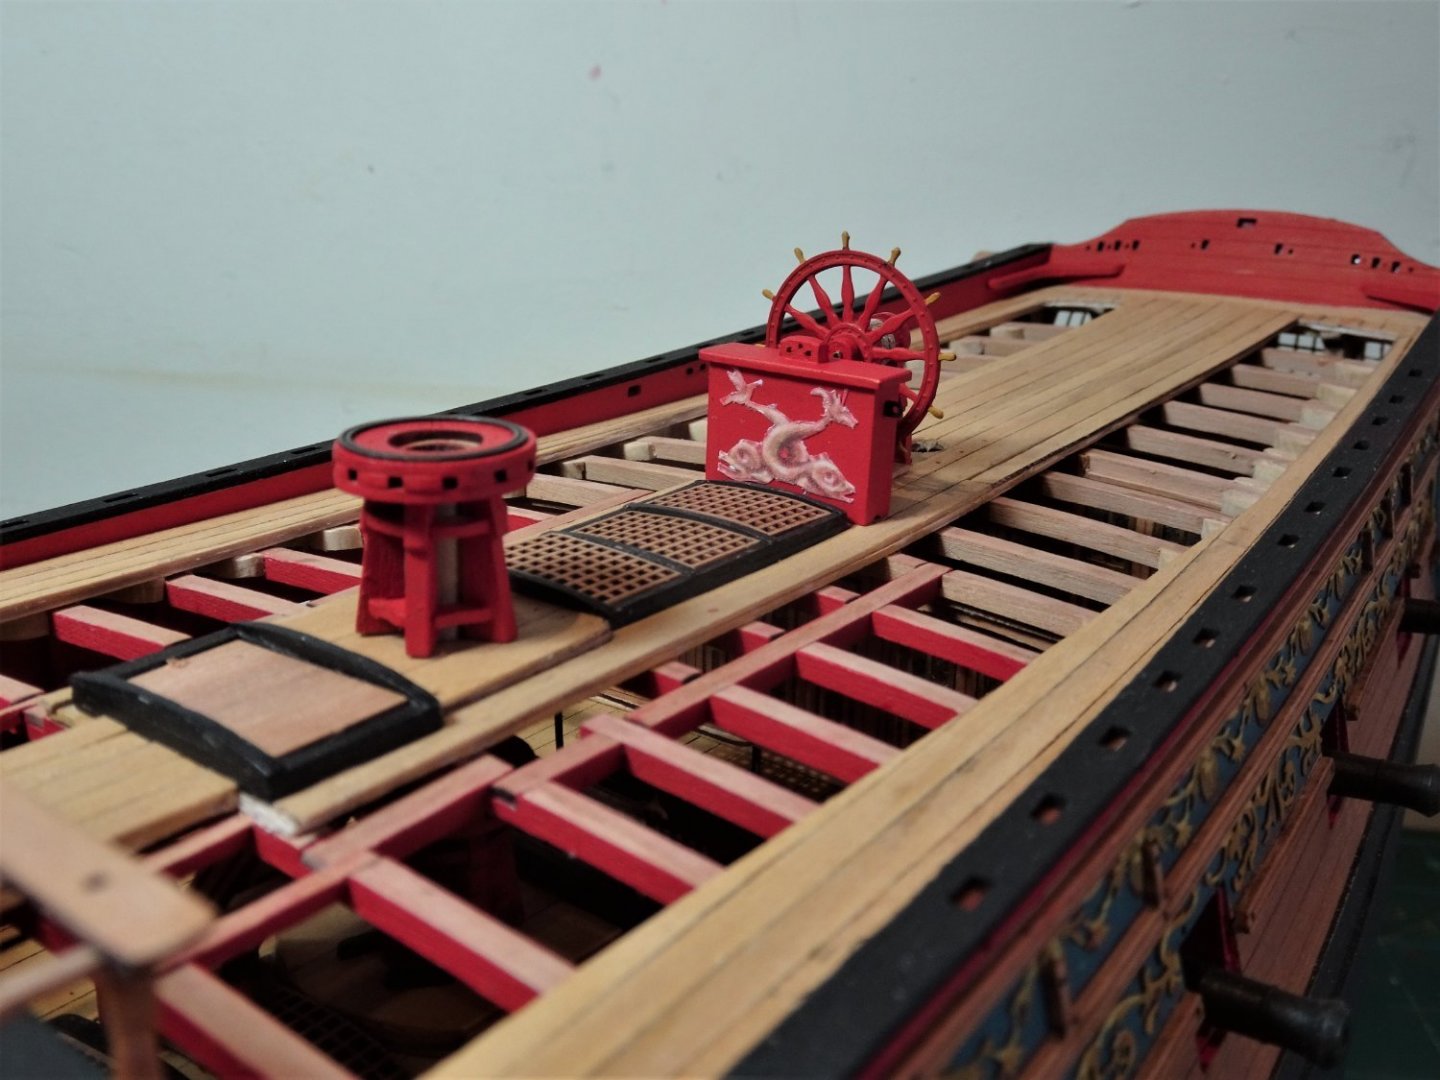
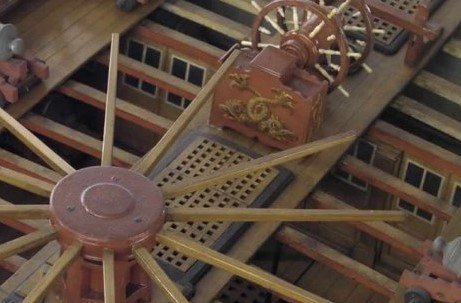
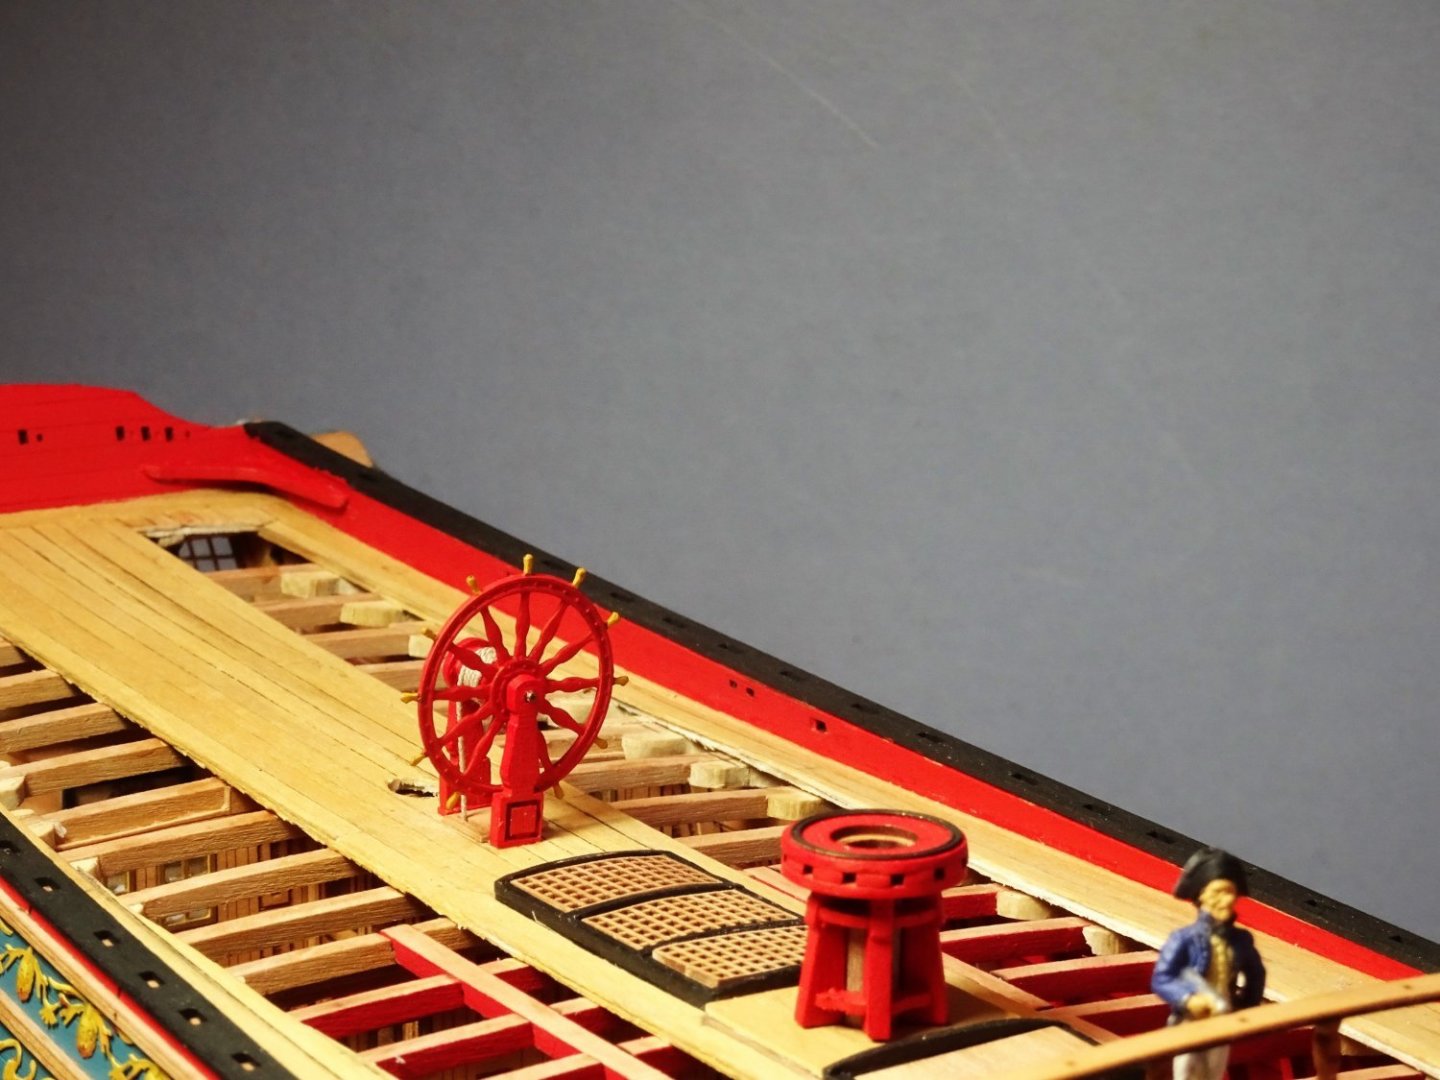
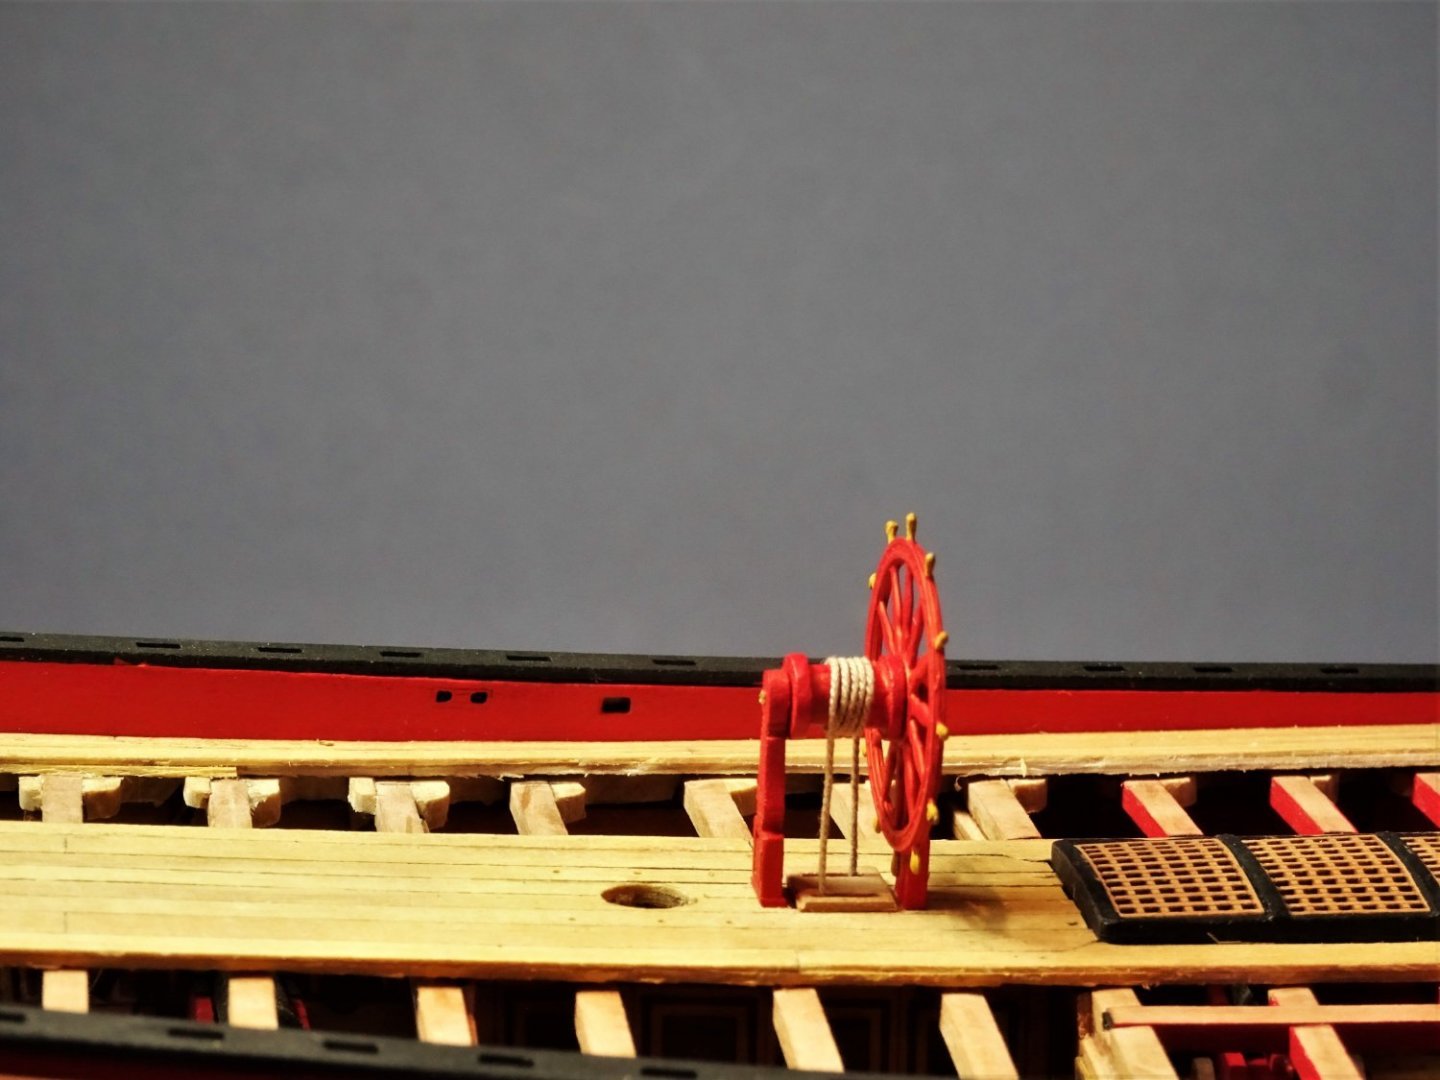
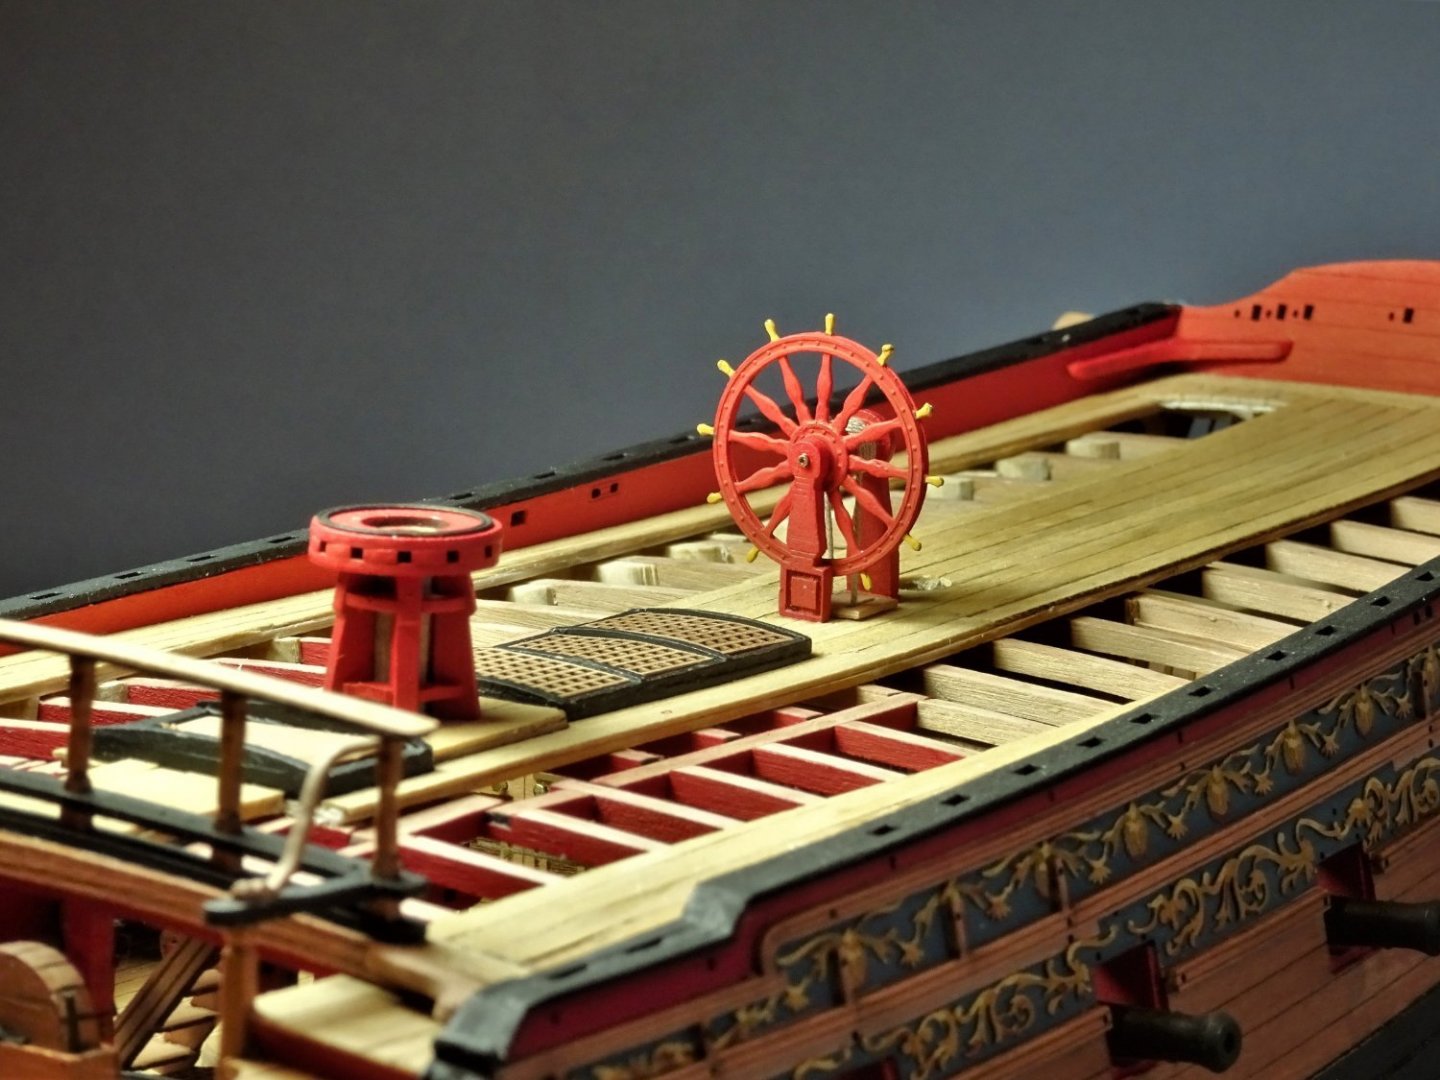
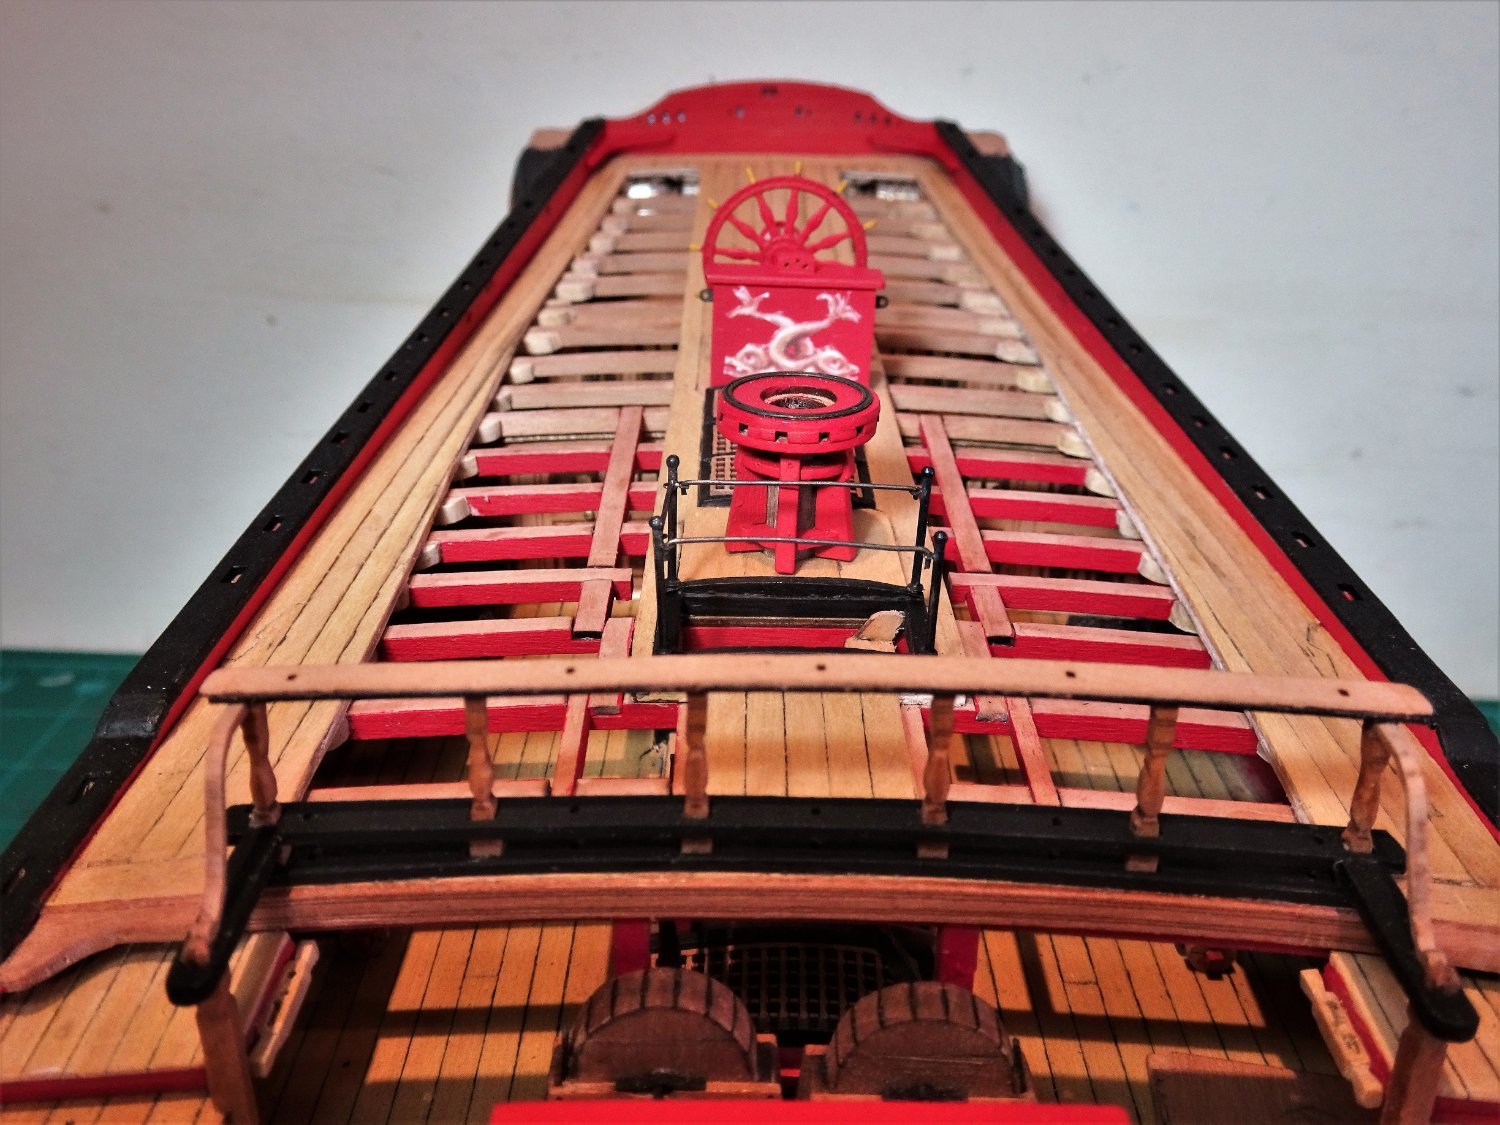
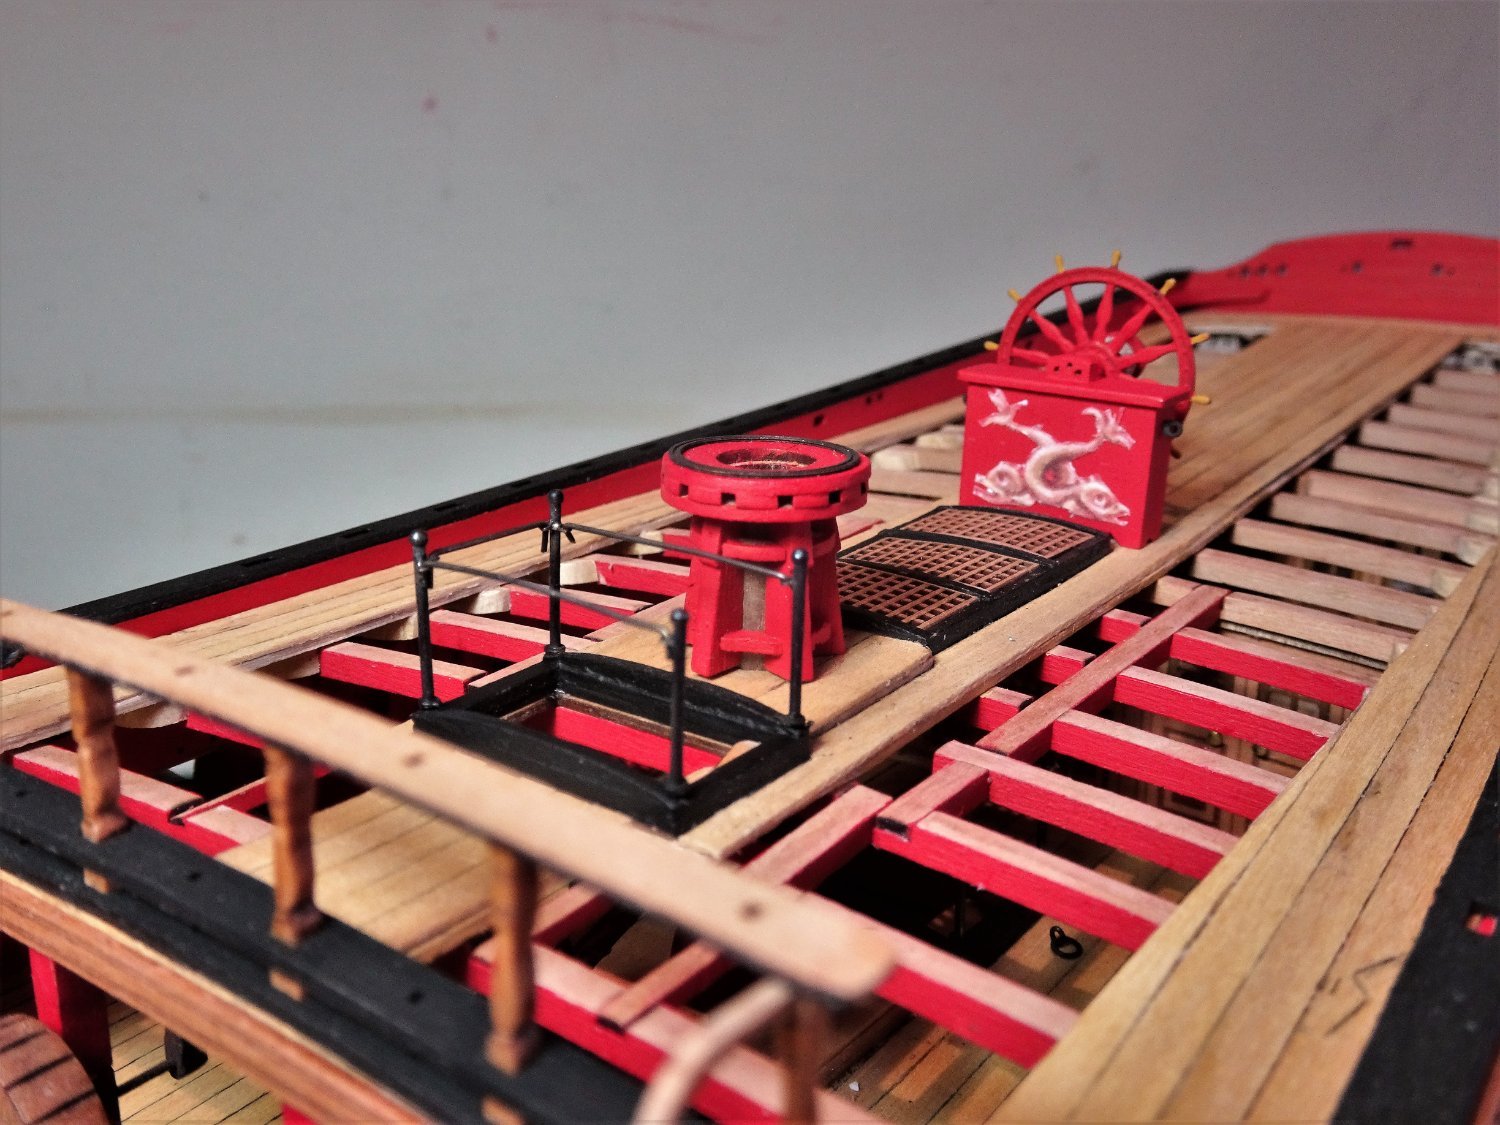
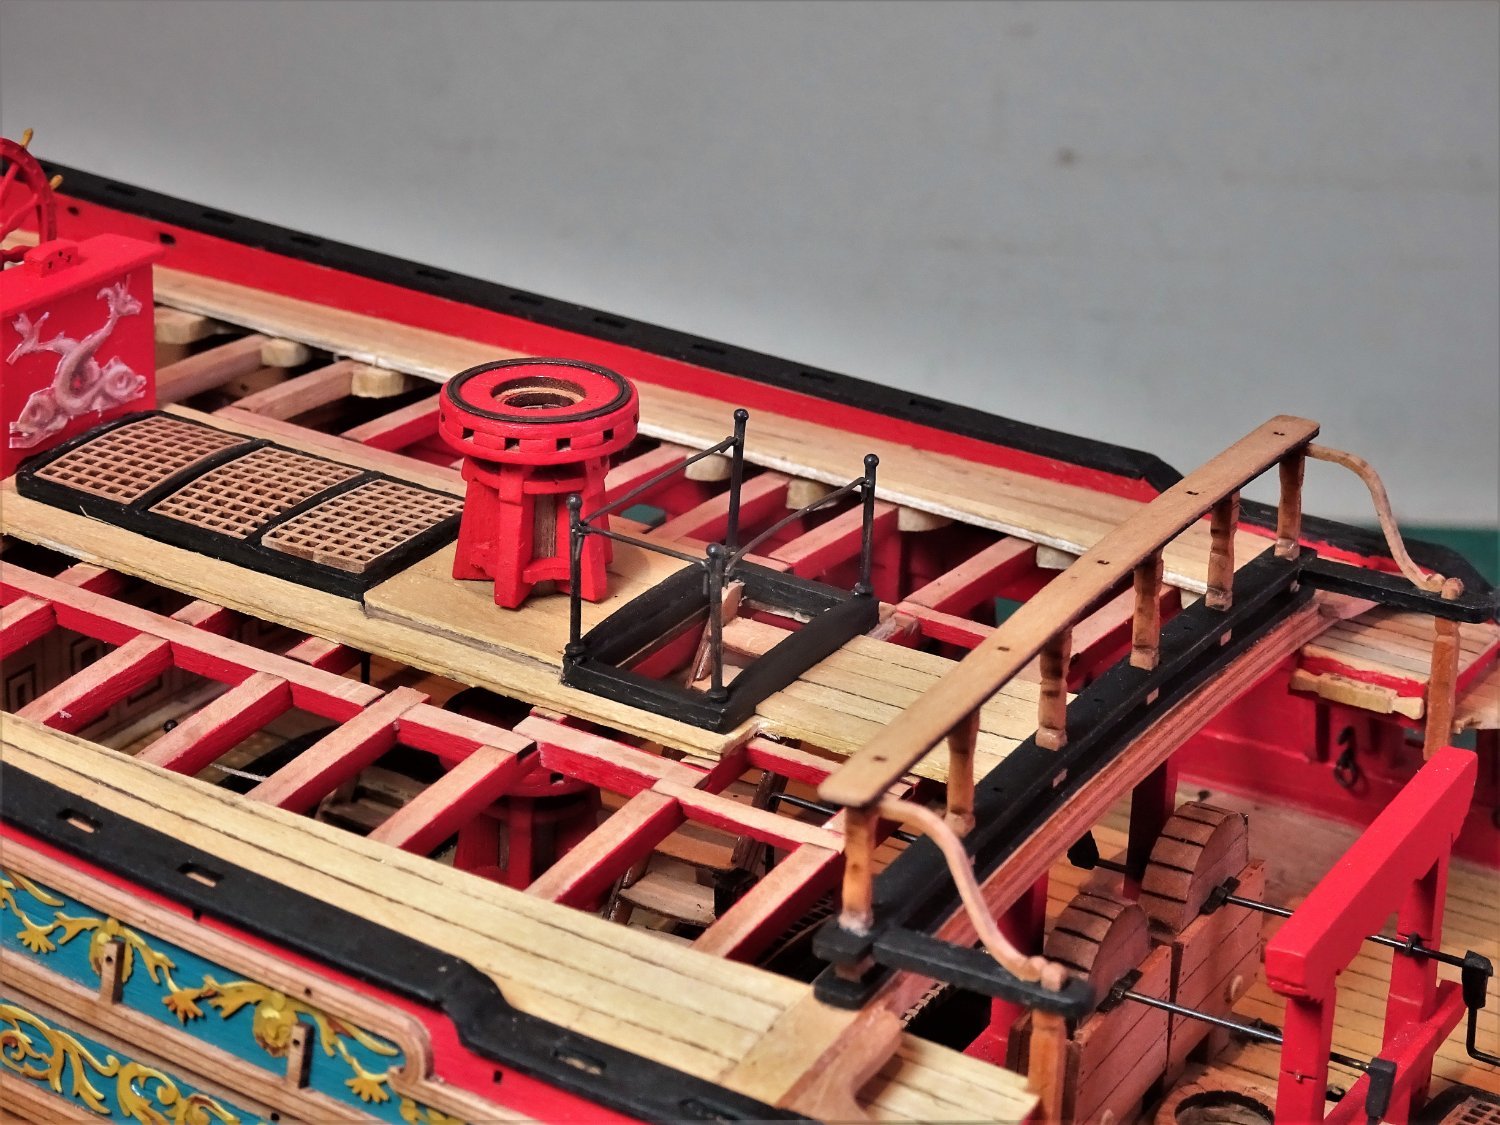
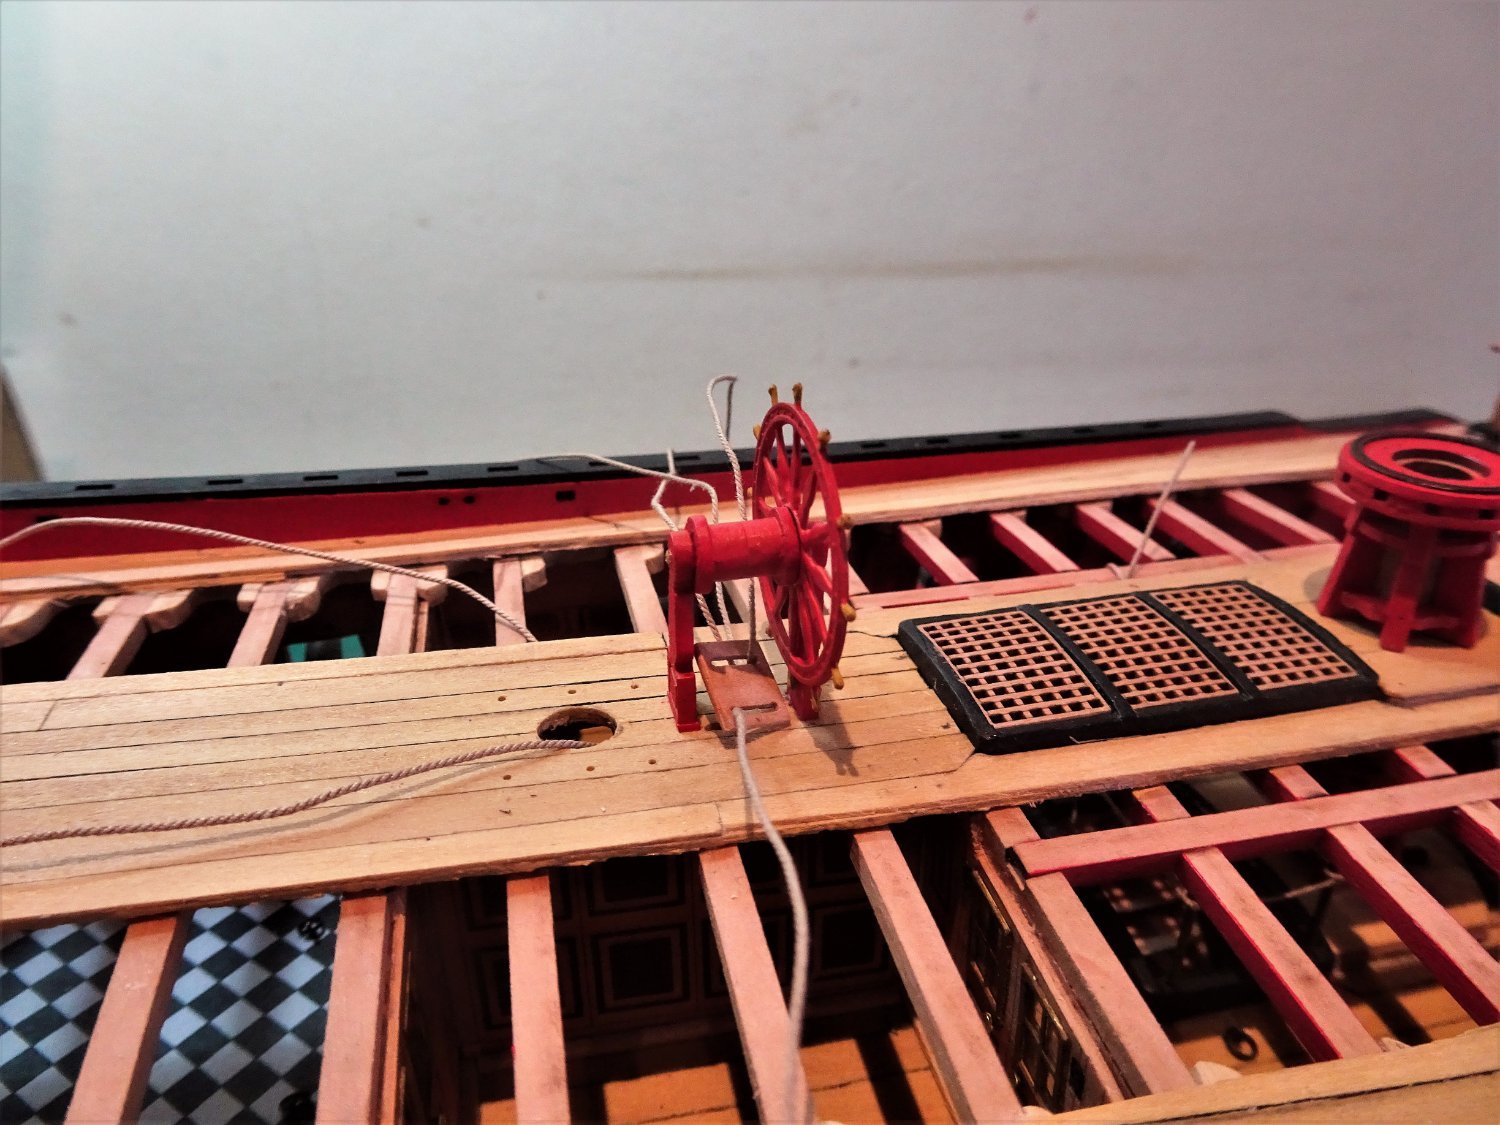
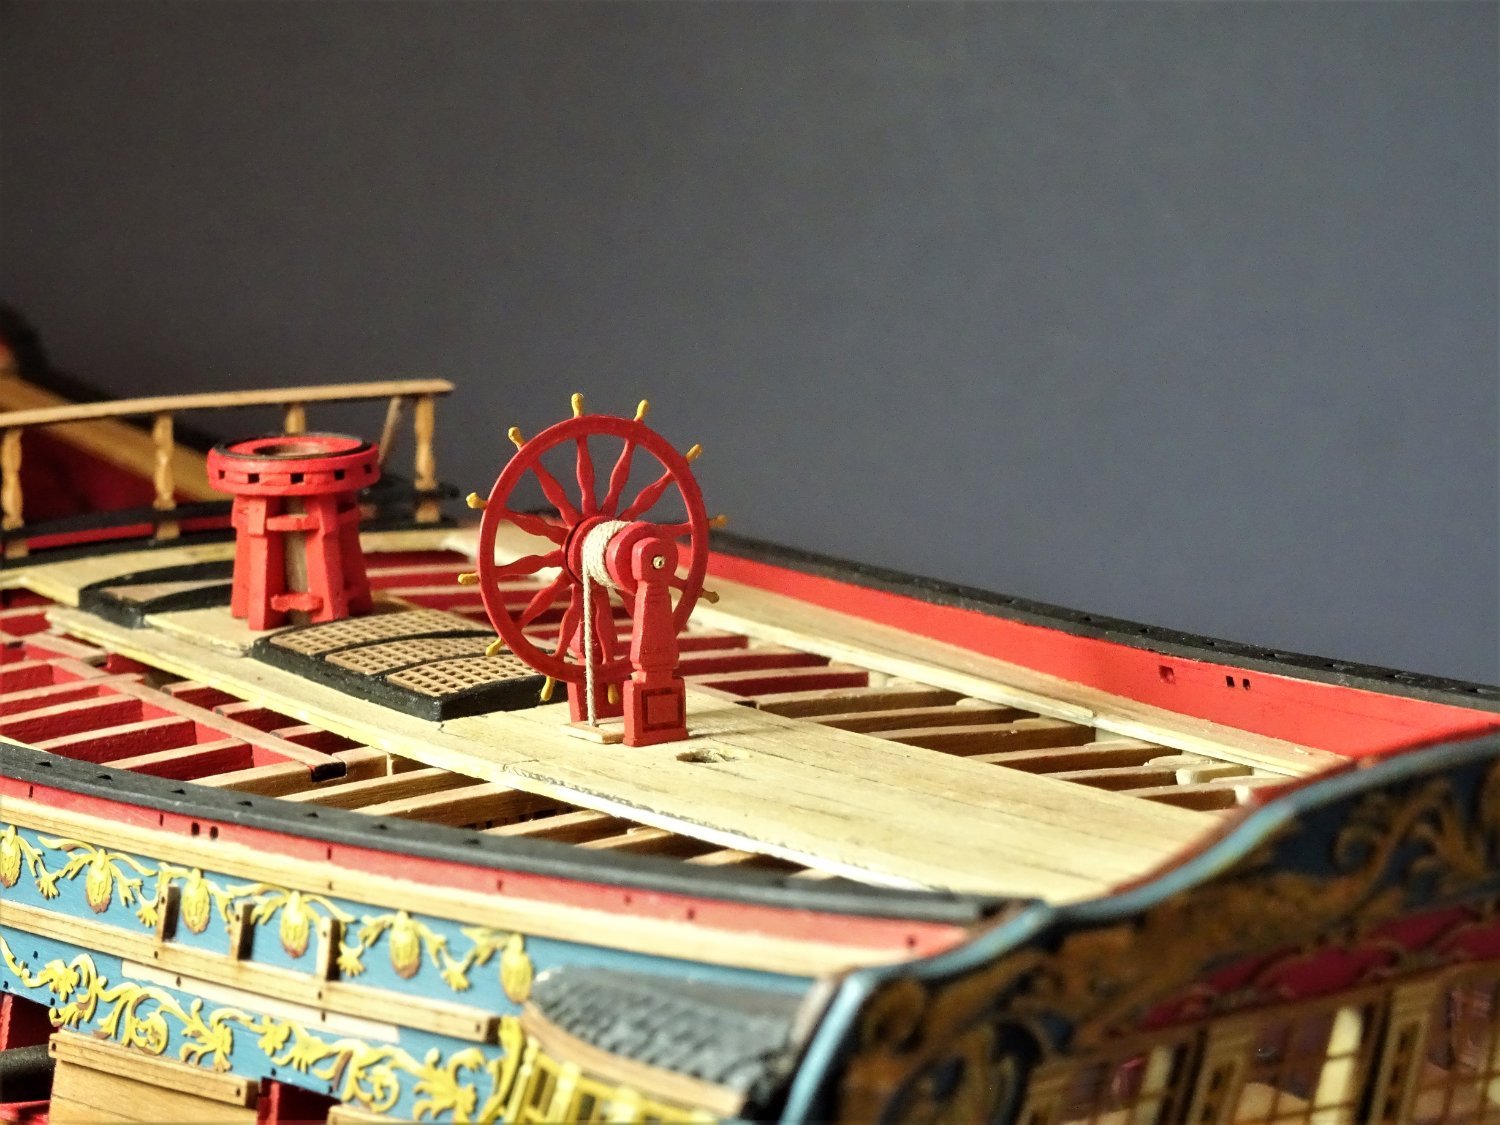
Post One Hundred and Twenty-one Quarterdeck fittings I start with the ships wheel I quite like the look of the wheel, even given its flat etched profile. 6928 I was torn between a white or Red colour scheme, I liked both, but settled on Red in the end because that is the colour indicated on the Marshall painting, and there is no other white paint on the model. To prepare the Brass etched wheel I chemically blackened it to provide some bite for the paint. 6926 After initial thinned coats were applied, undiluted paint was used to beef up the spoke profile. The spokes outside of the rim were painted using Ochre Brown. Standards 6916 I did note a slight misalignment of the engraved panel work on the standards, seemed to be off centre. I don’t know if this a poor example on my kit, but hopefully it won’t be too obvious with the Binnacle afore it and the Mizen behind. Before securing the forward standard I added a thin sleeve between the standard and the wheel, otherwise the wheel would bind against the standard. At the point the Upper deck was fitted, way back, I had secured the tiller rope so that they may be rigged should I decide to do so. Two separate lines were placed below the Upper deck, one fixed on the Port side, the other running on the Starboard side, and temporarily tied off. With the Wheel assembly in place rigging the tiller lines can be done. 6919 Starting on the forward Port side an odd number of turns were taken around the drum I chose five as being appropriate, a nail being secured thro’ the centre turn into the top of the drum. It is a fallacy that the rope runs were fully expended along the length of the drum. With the turns completed the Port line is spliced to the Starboard line and gently teased thro’ the deck slots. 6915 The running end of the Starboard line which emerges thro’ the aft ladderway of the Upper deck is then used to pull the now joined lines taut. This is the tricky part hoping that the spliced line doesn’t part below decks. A spot of glue is applied to the line where it passes thro’ the deck in the Coach. 6911 Before passing thro’ the Quarterdeck the lines pass thro’ a device called a Sliding foot which for model purposes was fitted on the lines before they passed around the drum. There is some work left do on these but they needed to be fitted at this point. 6924 6925 Adding the wheel makes a big difference to the look of the model, and I am pleased that this is a good match to the Marshall painting. 6931(2) 6935(2) 6936(2) These photos mark the tenth month of this build, and there’s a fair way to go yet. I will next look at the Binnacle. B.E. 20/05/2022


.thumb.JPG.342dbc577844c88ad2c246fdb9b99334.JPG)
.thumb.JPG.00f39a73960eeaced670cc87c9e5e487.JPG)
.thumb.JPG.134105e17eb6c0d0002f147f3fbb6532.JPG)
- 857 replies
-
- 29
-
-
-
- Sphinx
- Vanguard Models
- (and 1 more)
-
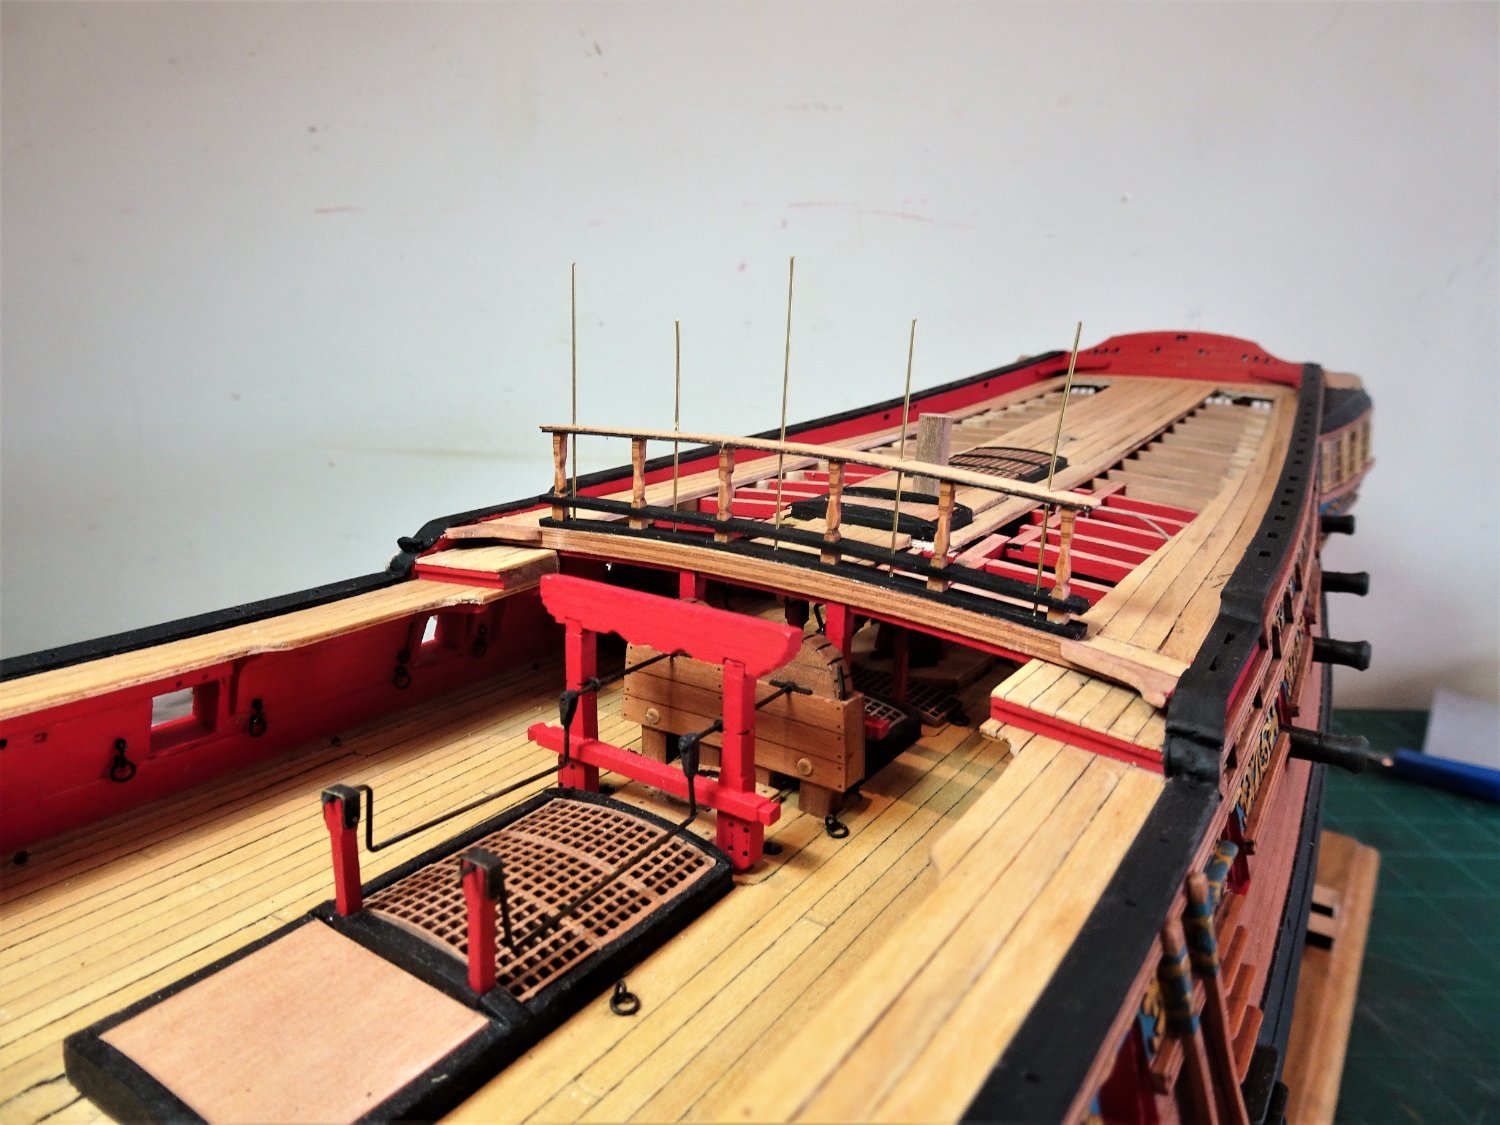
Post One Hundred and Twenty Quarterdeck Breast rail This is a nicely designed assembly with parts that slot together with a good fit. The main job is the finishing of the Balusters which the blurb indicates need shaping to form a roundness. No easy task this as the area to work on is very small, and the rectangular profile of the Balusters doesn’t lend itself for uniform rounding. In retrospect I think it may be better to clean up the Baluster and leave it as is rather than try to apply a round to the bulbous section. 6868(2) Even char removal has risks of changing the profile so a very light touch is required I have decided to leave the Balusters bright as indicated on the Marshall painting, but the two lower rails will be blackened to match the bulwark rails. 6855 The middle rail I heat treated to match the camber and used line to secure the ends until the glue set. 6860 I don’t think I will be fitting the hammock cranes to the rail. I wasn’t too keen the way the Balusters turned out and I was tempted to rip them out but that would probably have wrecked the rails as well. The saving grace is that other than at macro level they don’t really impact on the eye. (well my eyes anyway.) 6871 Capt. Grim tries out the rail for scale, undecided whether to paint the rail or leave bright, but I can defer that decision until the Quarterdeck rails are in place. The kit provided Newel posts were replaced with ones that better suited the Gangway modification. They were made from some 2x2mm Pear square stock. 6883 The Newel posts were on and off the model a dozen times as I kept perceiving one or the other was out of plumb. Deffo out of plumb in this shot. 6882 Eventually they satisfied my eye and the rail could be fitted. 6892 The final part is the delicate scrolled Handrail. 6890 Very careful handling is required with these pieces during char cleaning, but Chris has provided two spares should mishaps occur. I note on the Amazon model that Cavel blocks have been fitted forward of the Quarterdeck on the inboard edges of the Gangway step. 6894 I decided to add these to Sphinx. I’ll leave this area for now and and look at the Binnacle and ships wheel. B.E. 18/05/2022

.thumb.JPG.7a45eeffbee0dc3325556f1dda57e722.JPG)


- 857 replies
-
- 23
-
-
-
- Sphinx
- Vanguard Models
- (and 1 more)
-
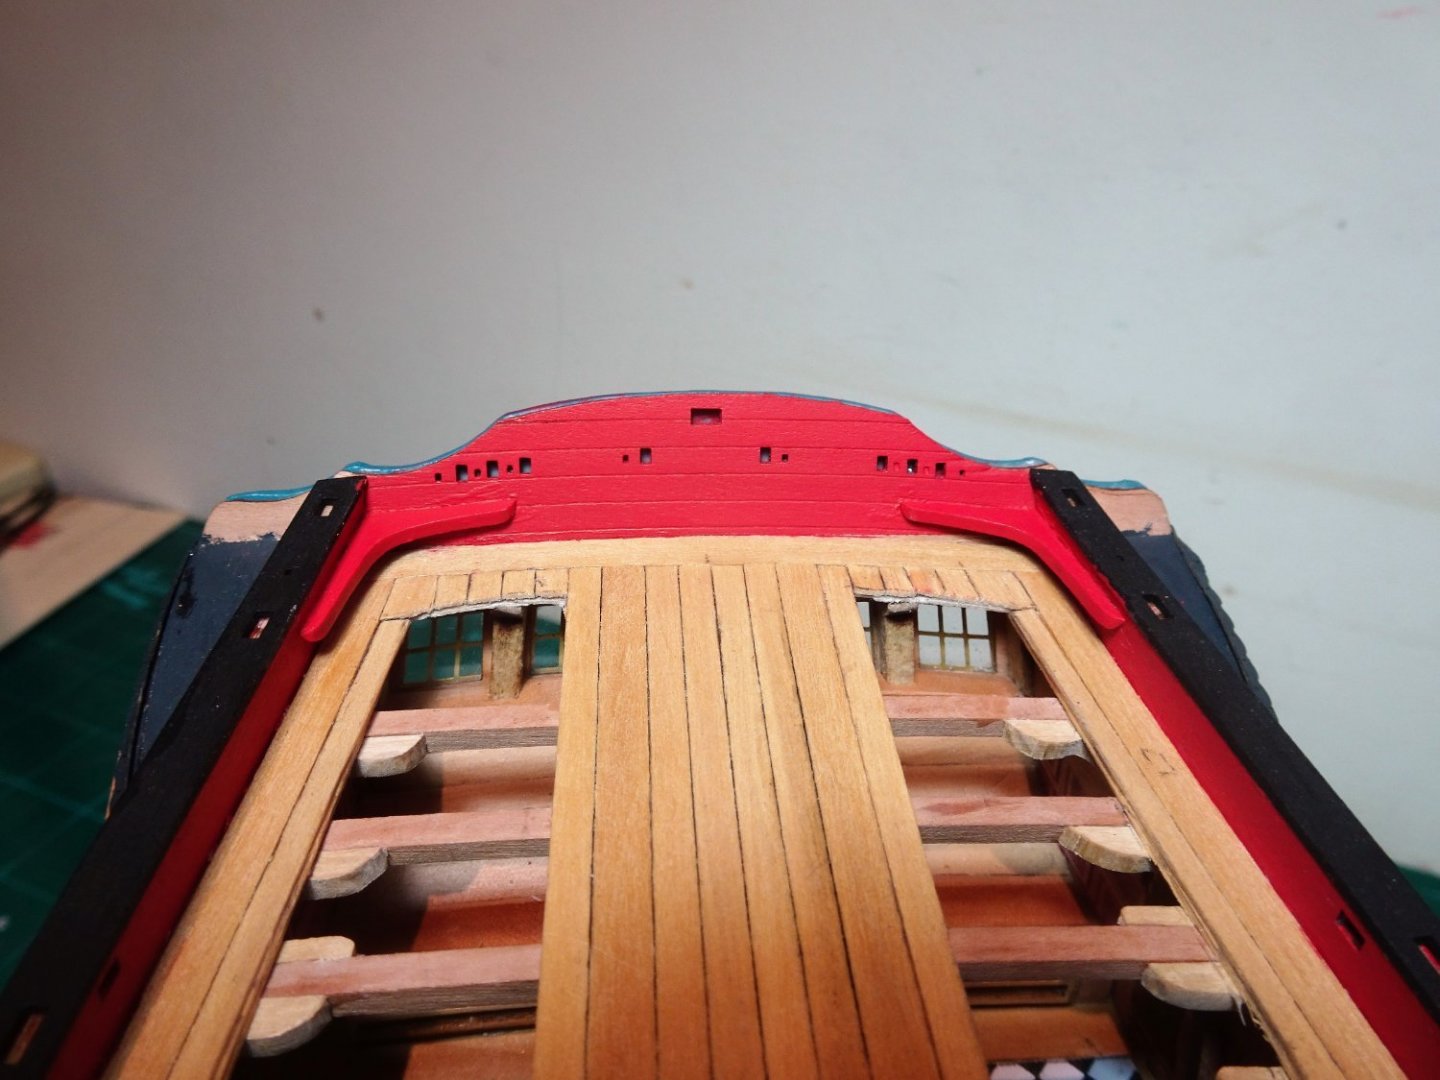
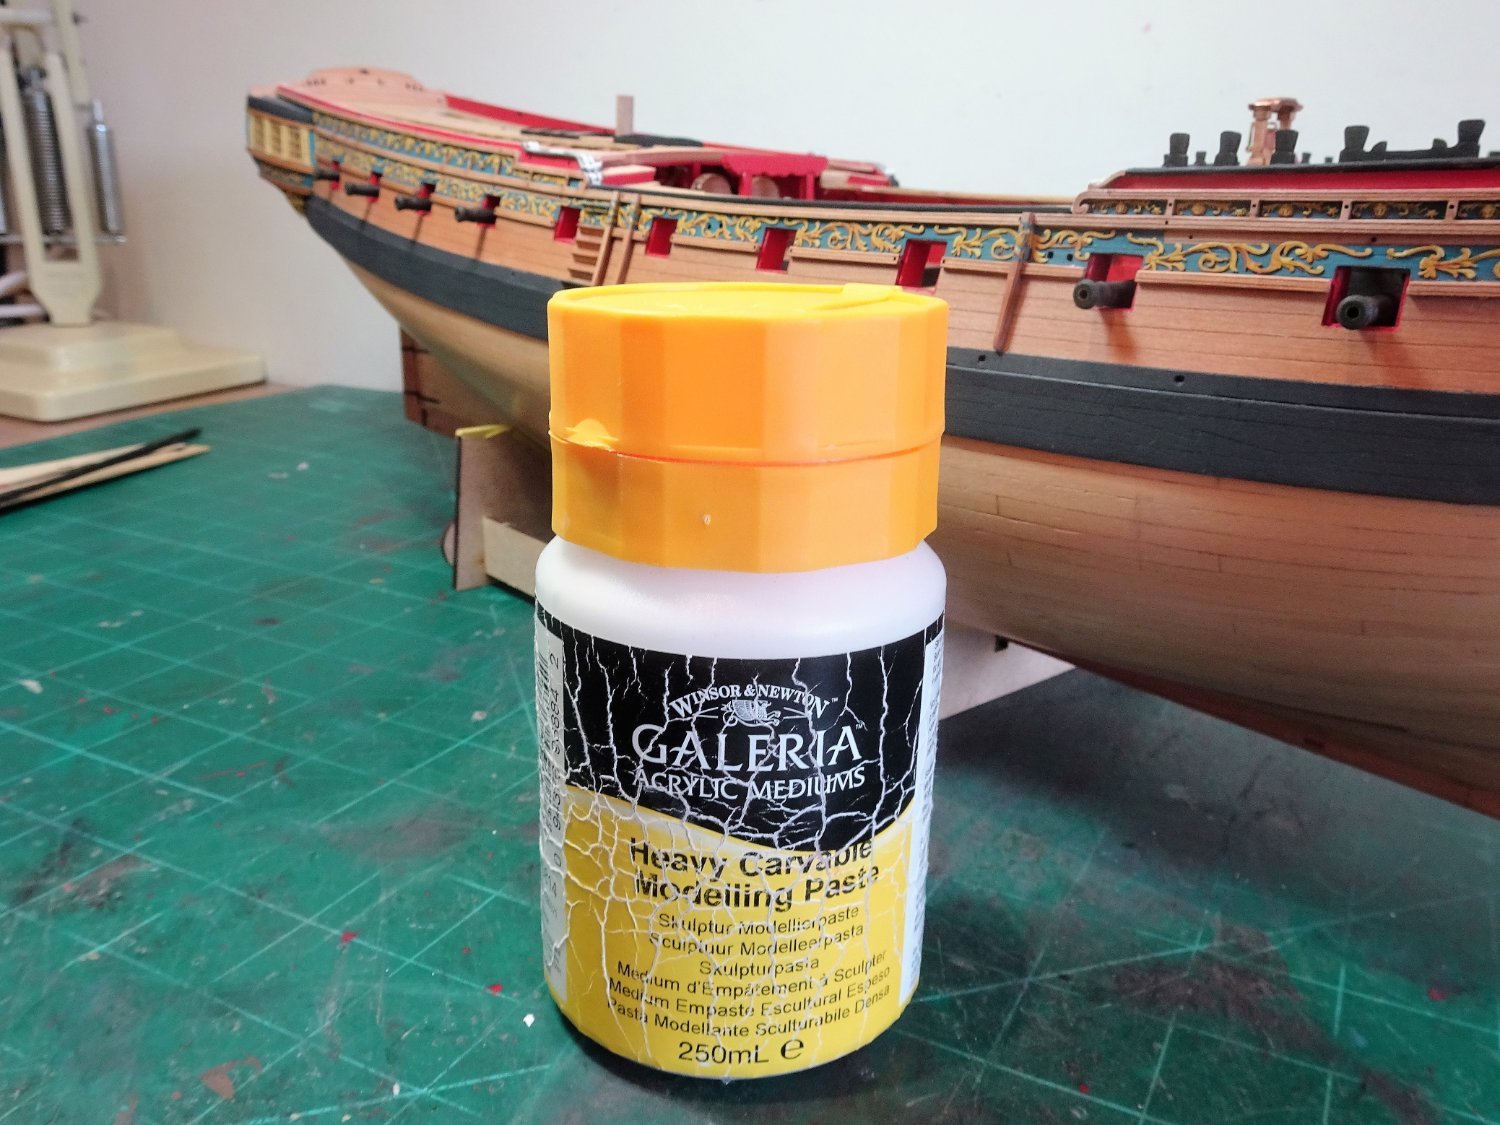
Post One Hundred and Nineteen Fun with volutes. With the rails completed between the Foc’sle and Qtr Deck I turn my attention to the volutes either end. Not too impressed with my own fixing of these decorative features, they look like a lot of fettlin’ is required, all down to me no doubt despite Chris’s best efforts. Made up of four laminations fitted at differing times I clearly failed to get the alignment spot on. Fortunately these are to be painted which at least allows rectification to be made with some extra work. 6826 The Foc’sle volutes are easier to fettle than those of the Q’deck. 6827 Filling along this Quarterdeck section was also required to produce a smooth surface matching the Gunwale strips, the aim is to mask the lamination lines. 6819 I used Winsor and Newton modelling paste to fill any gaps and beef up the volutes. 6848 6843 6842 With that done I can fix the Q’deck gunwales in place. As with those of the Foc’sle I kept the inner edge flush with the bulwark and applied a slight round to the outer edge. 6836 There is a lot of re-touching of the paintwork not only of the Gunwales but the inner bulwarks and Topsides. 6850 The transom knees are now fitted having applied a coat of red to the Transom, and the gluing surface then scraped away. 6837 I found these knees the very devil to fit; even with chamfering the fit was poor and I found it necessary to fill the join along the Transom edge. 6851(2) The Breast rails beckon. B.E. 15/05/22


.thumb.JPG.2b3f165265ecc168f1172d0d28d9c997.JPG)
- 857 replies
-
- 20
-
-
-
- Sphinx
- Vanguard Models
- (and 1 more)
-
Not quite sure about how you have got the lanyard, the photo appears to show the line running over the deadeye strop and down again. The running end after feeding thro' all the deadeye holes in the right order should feed up and thro' the deadeye strop from the rear, and then be secured around the running end of the shroud. Fortunately I'm spared the pleasure of rigging deadeyes on my build, but when I do I'm never in a hurry to permanently secure the Lanyards, I leave it as long as possible before trimming the ends. B.E.
- 476 replies
-
- 1
-
-
- sphinx
- vanguard models
- (and 1 more)
-
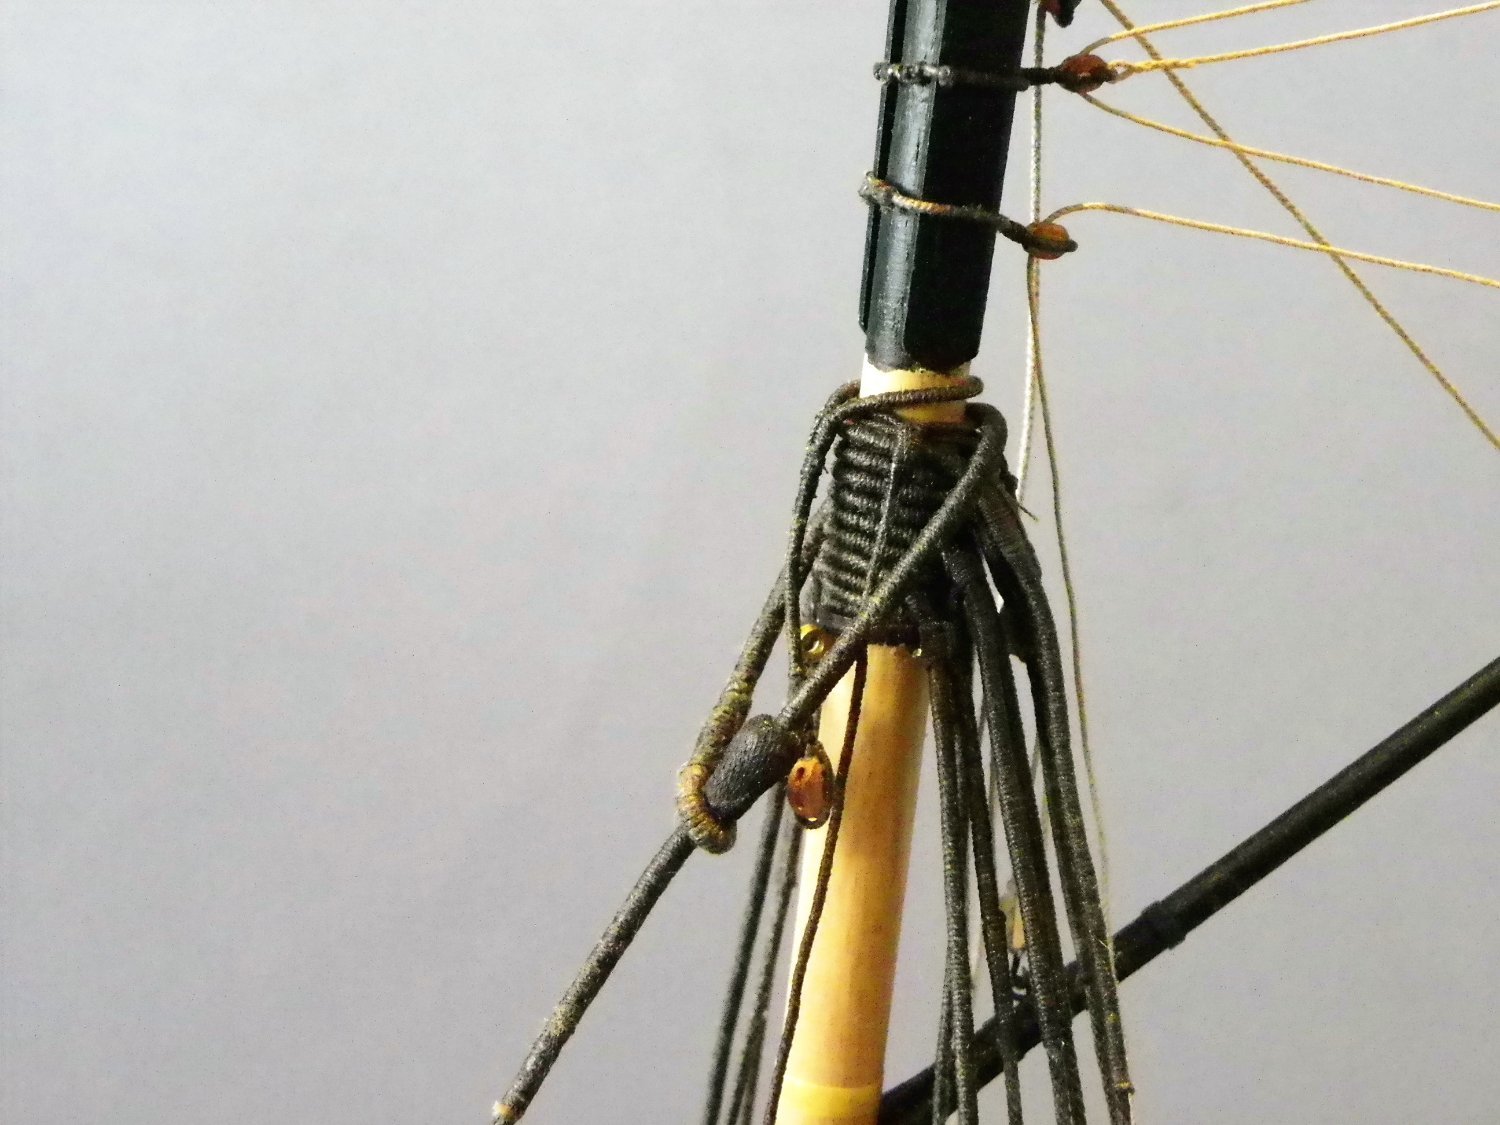
According to Steel, the lanyards for the Fore and Main masts are 4" circ = 0.5mm dia at scale. For the Mizen 21/2" = 0.3mm dia. if you're using the kit provided line I would try 0.5mm and 0.25mm for the lower shrouds. The shroud lanyards are taken thro' the loop from aft where the shroud crosses the deadeye, and is then expended around the shroud several times and is seized to the shroud upright end. The two seizings that secure the shroud end are fitted above, The top one a little closer to the end than you have it. I can't provide you with any reference links as at present I'm away from home in Monmouthshire. B.E.
- 476 replies
-
- 1
-
-
- sphinx
- vanguard models
- (and 1 more)
-
Removing the shrouds seems quite drastic to me, can you not remove the seizings and the lanyards and adjust? It was the lanyards between the deadeyes that I was querying as to line size? B.E.
- 476 replies
-
- 1
-
-
- sphinx
- vanguard models
- (and 1 more)
-
Hi Glenn, What size line are you using for the Shroud lanyards, it looks a little thin to my eye. B.E.
- 476 replies
-
- 1
-
-
- sphinx
- vanguard models
- (and 1 more)
-
I think that just about sums it up James,👍 B.E.
-
Post One Hundred and Eighteen Re-visiting the waist rails Having received a gypsy’s warning from Ron (Hollowneck) about possible issues with the level of the rail and fit of the Hammock cranes, I looked again hard at this area. The camber of the outside plank of the gangway does cause the rail to angle outboard which will have an effect on the crane angles. Nothing for it but a little de-construction. 6801 Fortunately because I have individually planked the boards I can remove the outer plank, and level the surface of the underdeck. Had I been using the kit engraved boards I would not have been able to adopt this approach and would have to have fiddled with the inboard underside of the capping rails to achieve the same affect. Best advice follow the kit instructions on this aspect. 6803 The next plank inboard is also removed and replaced with one scribed to meet the inboard side of the capping rail, as per the kit instructions. 6809 The Capping rail now sits level. 6806 6805 Tricky to get the Hammock Cranes to sit vertically without glue but I think they are going to be ok. Annoyed at my lack of foresight in this matter that has cost me several hours work, but at least with wooden models there is little that can't be re-visited. Just the starboard side to do now and then I can move on. B.E 07/05/22


- 857 replies
-
- 19
-
-
- Sphinx
- Vanguard Models
- (and 1 more)
-
Thank you, Bob, Stephen, and Ron. @ Ron - There should be a camber in the Gang boards to match the decks. The capping rails are only loosely in place in the photos but I will take extra care when I come to glue them to address any issues. The thought just struck me that perhaps that's why the blurb says to trim the boards to run alongside the capping rails rather than under them.🤔 Having aroused my curiosity I will simply have to test the cranes prior to gluing the rails. 🙂 Cheers, B.E.
- 857 replies
-
- 3
-
-
- Sphinx
- Vanguard Models
- (and 1 more)
-
Post One Hundred and Seventeen. Trouble with steps. Not over keen with the block of wood steps provided in the kit I looked around for a more period appropriate version. The arrangement on the Amazon (5th Rate 1773) looks about right, and not that difficult to replicate. It looks like John McKay used the same arrangement in his AotS book on Pandora, presumably taken from the contemporary Amazon model. Firstly the QD front drift rails patterns need to be fitted, remembering to bevel the underside to match the camber. 6790 All that is needed to modify the steps is a piece of 3mm Pearwood, loads of it available in the used frets, and a knee between the bulwark and the Qtr deck breast beam. These were fashioned from some 1.5mm fret. 6792 Too early to fit at this stage but the Newel post will be fitted at the same time as the QD rail. I suspect I will have to fashion a new Newel post when the time comes. 6797 The platform was faced with Boxwood strip, but of a narrower width than the main planking. 6798 The inner face of the Gangway will tidied up when the Newel is fitted. Back to Gunwales next. B.E. 06/05/22


- 857 replies
-
- 23
-
-
-
- Sphinx
- Vanguard Models
- (and 1 more)
-
Thanks Chris, on Sphinx it was the solid middle gallery pattern that gave me trouble, effectively blocking the gallery at mid height and preventing the installation of the seat of ease. I seem to recall from somewhere that only one gallery (Portside) was fitted with a seat of ease, the other being used for storage of the Captains gear, or even used as small office if big enough. B.E.
-
Does that mean the Qtr Galleries will be properly structured, with the option of having the doors open, allowing light to filter thro' from the Great cabin? This improves the look of the galleries no end in my opinion. B.E.
-
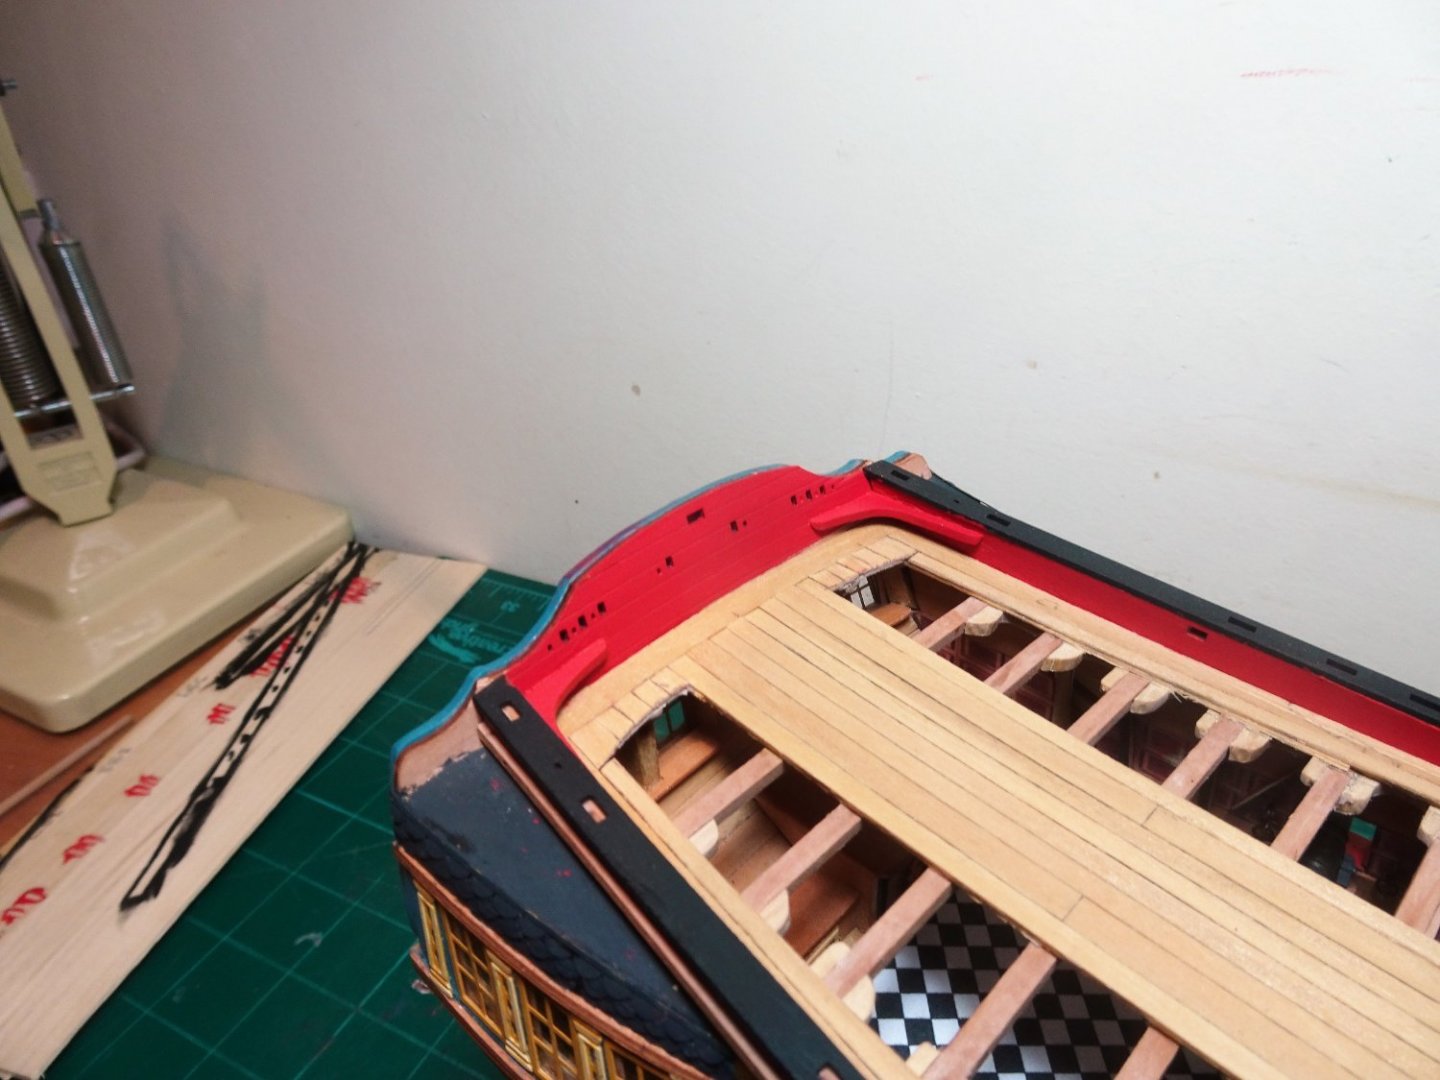
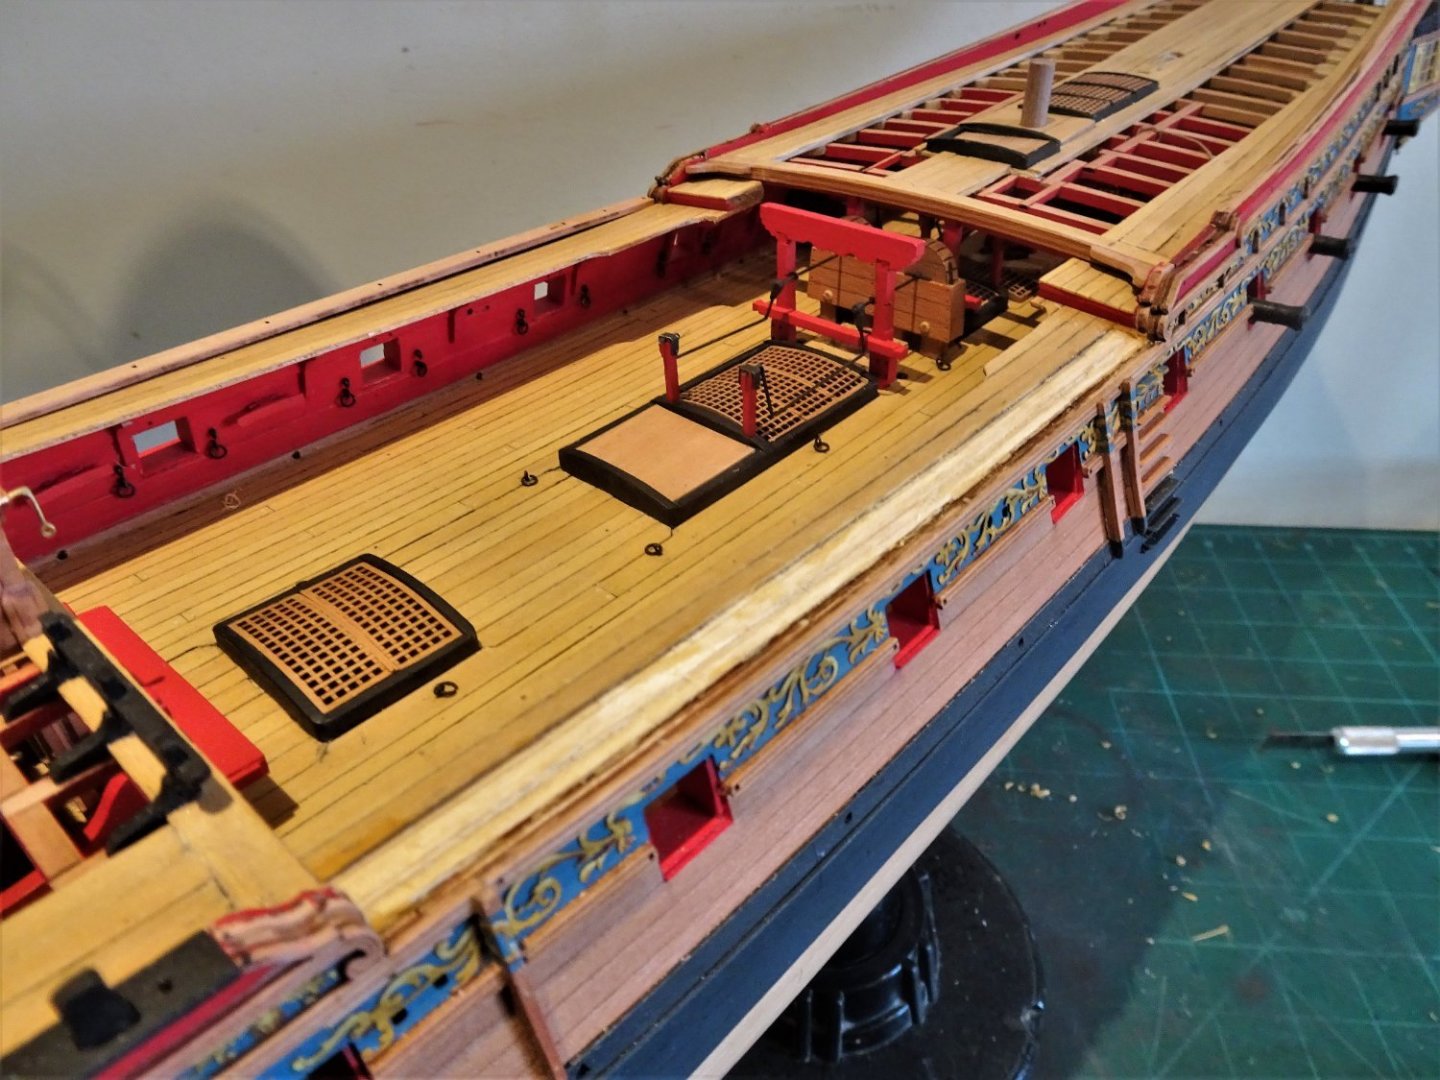
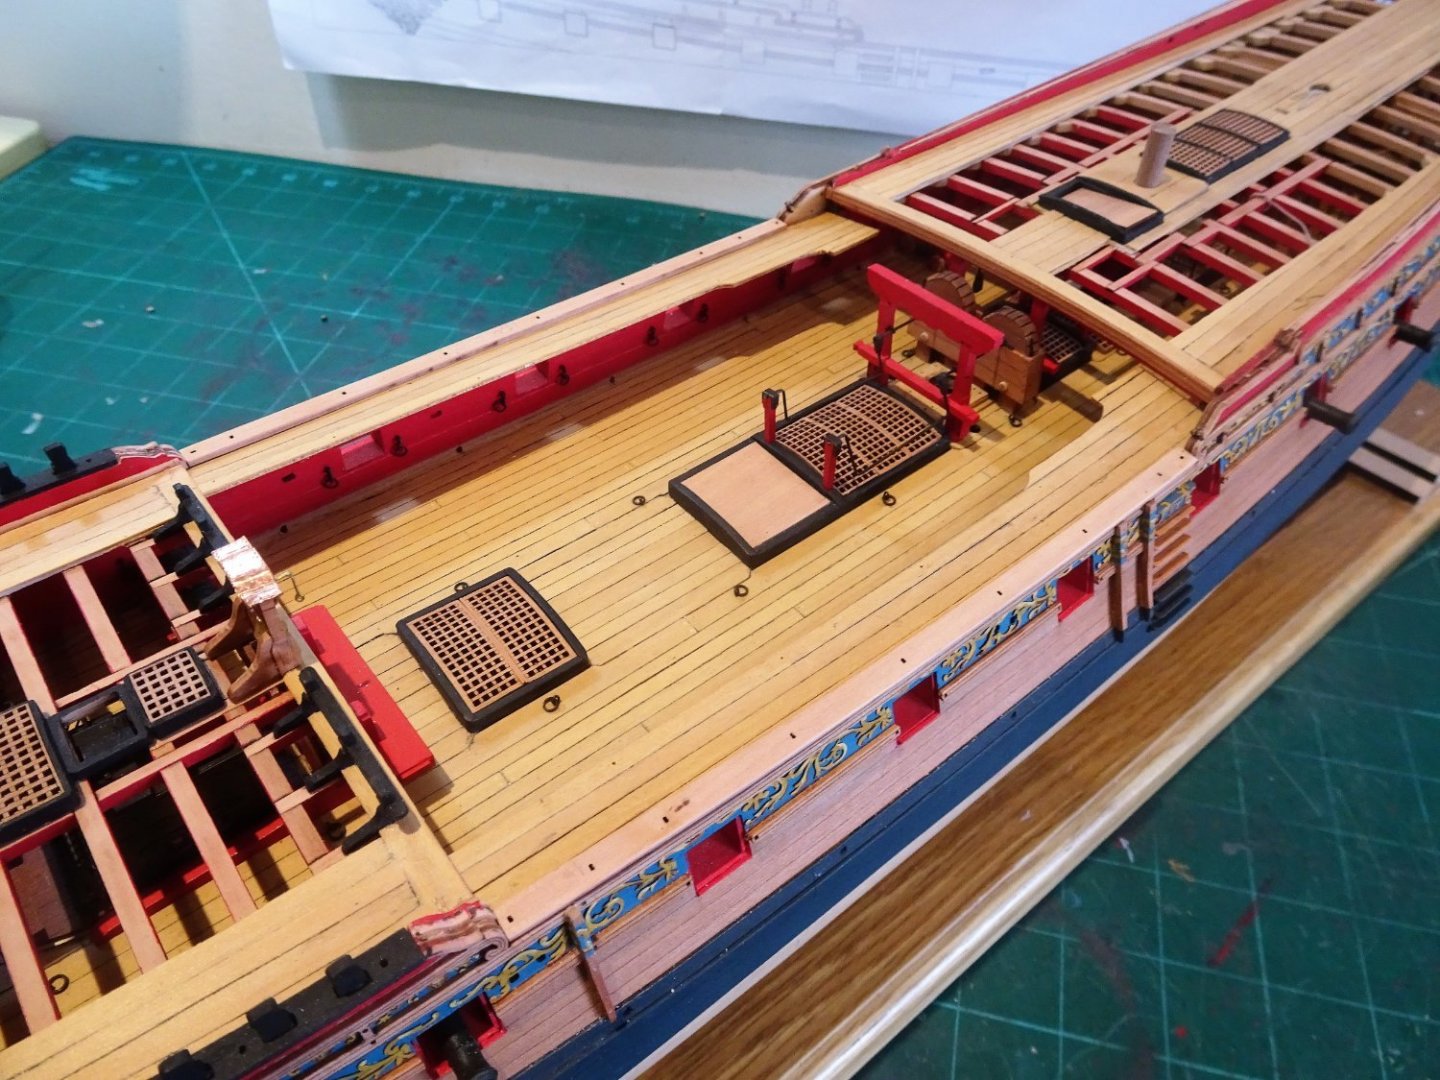
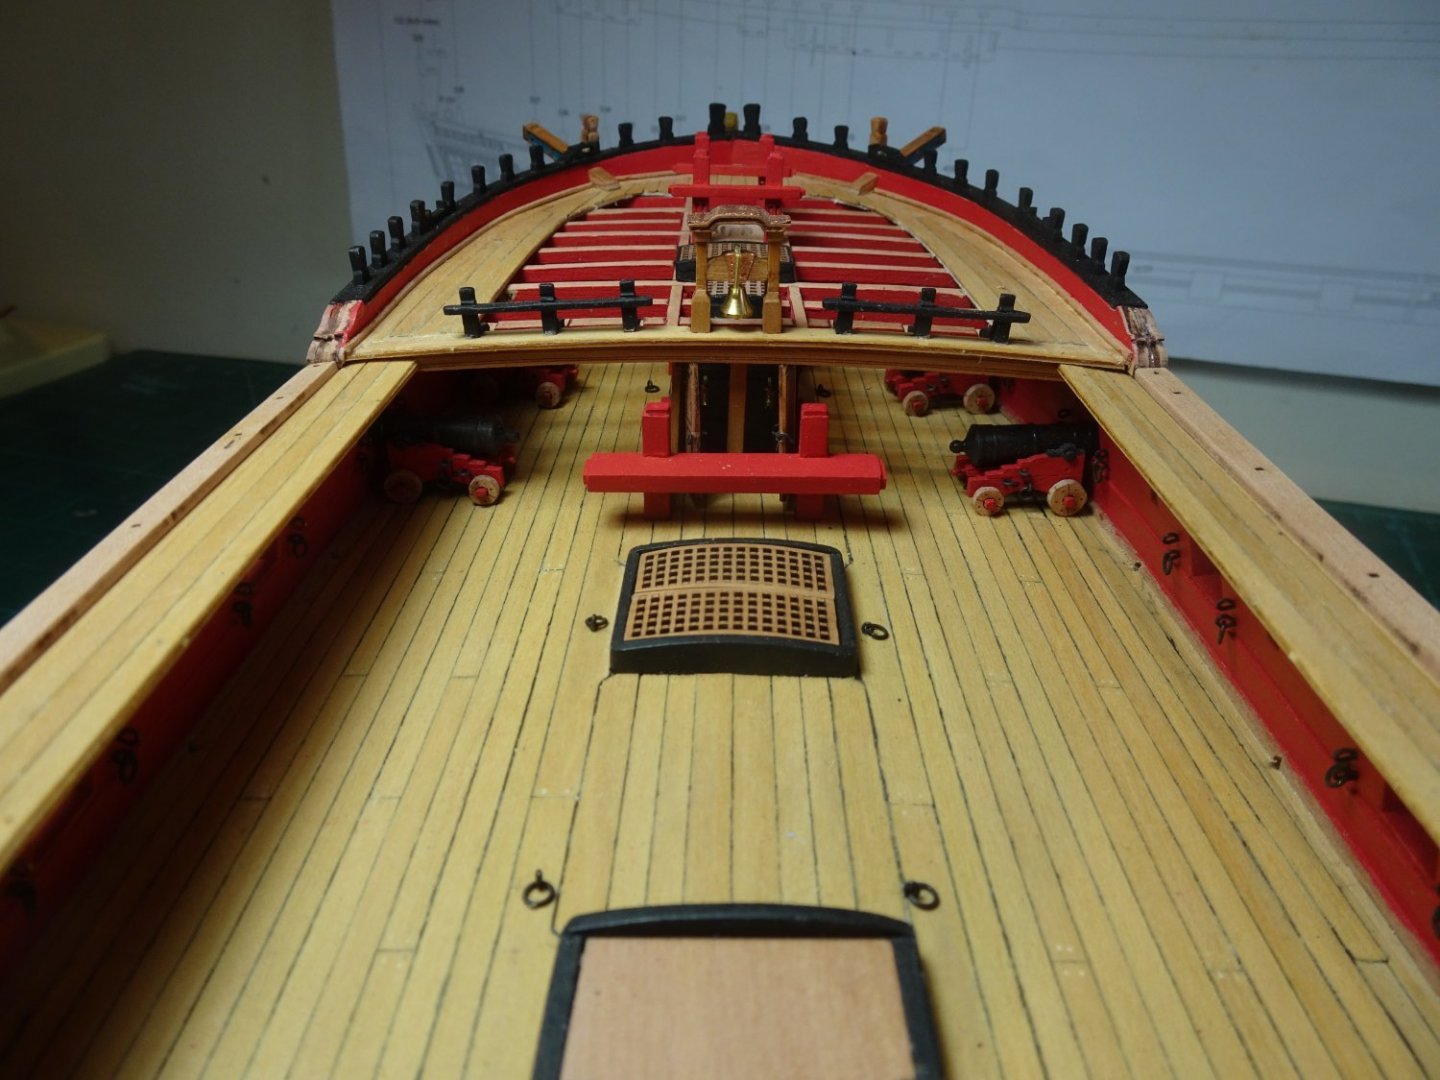
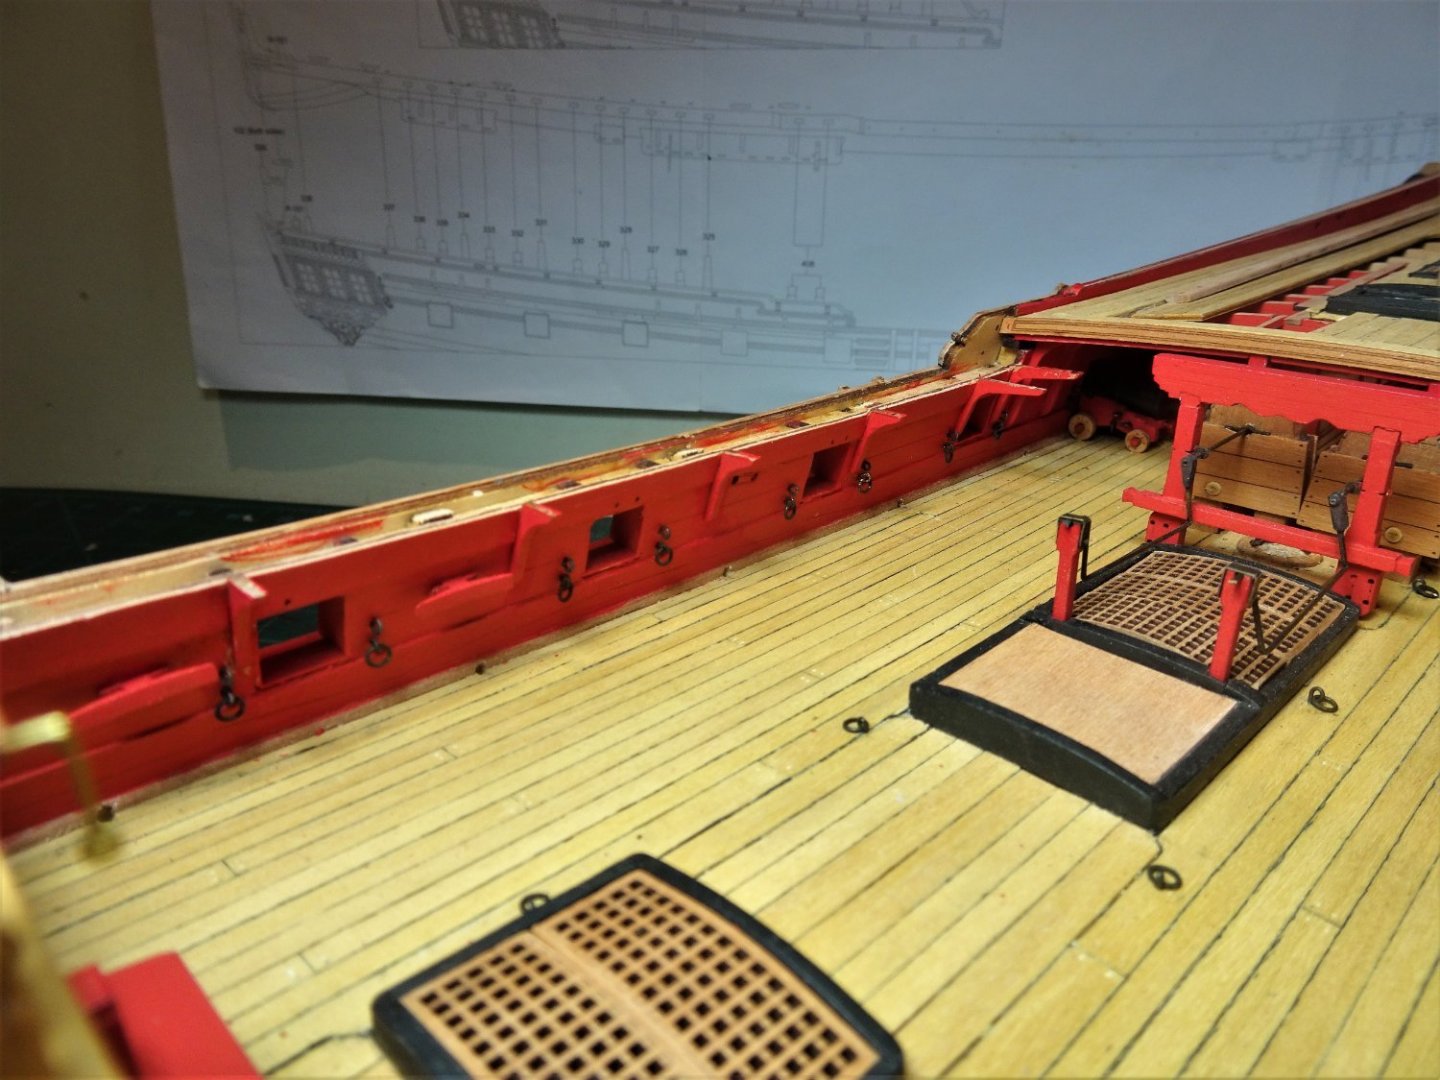
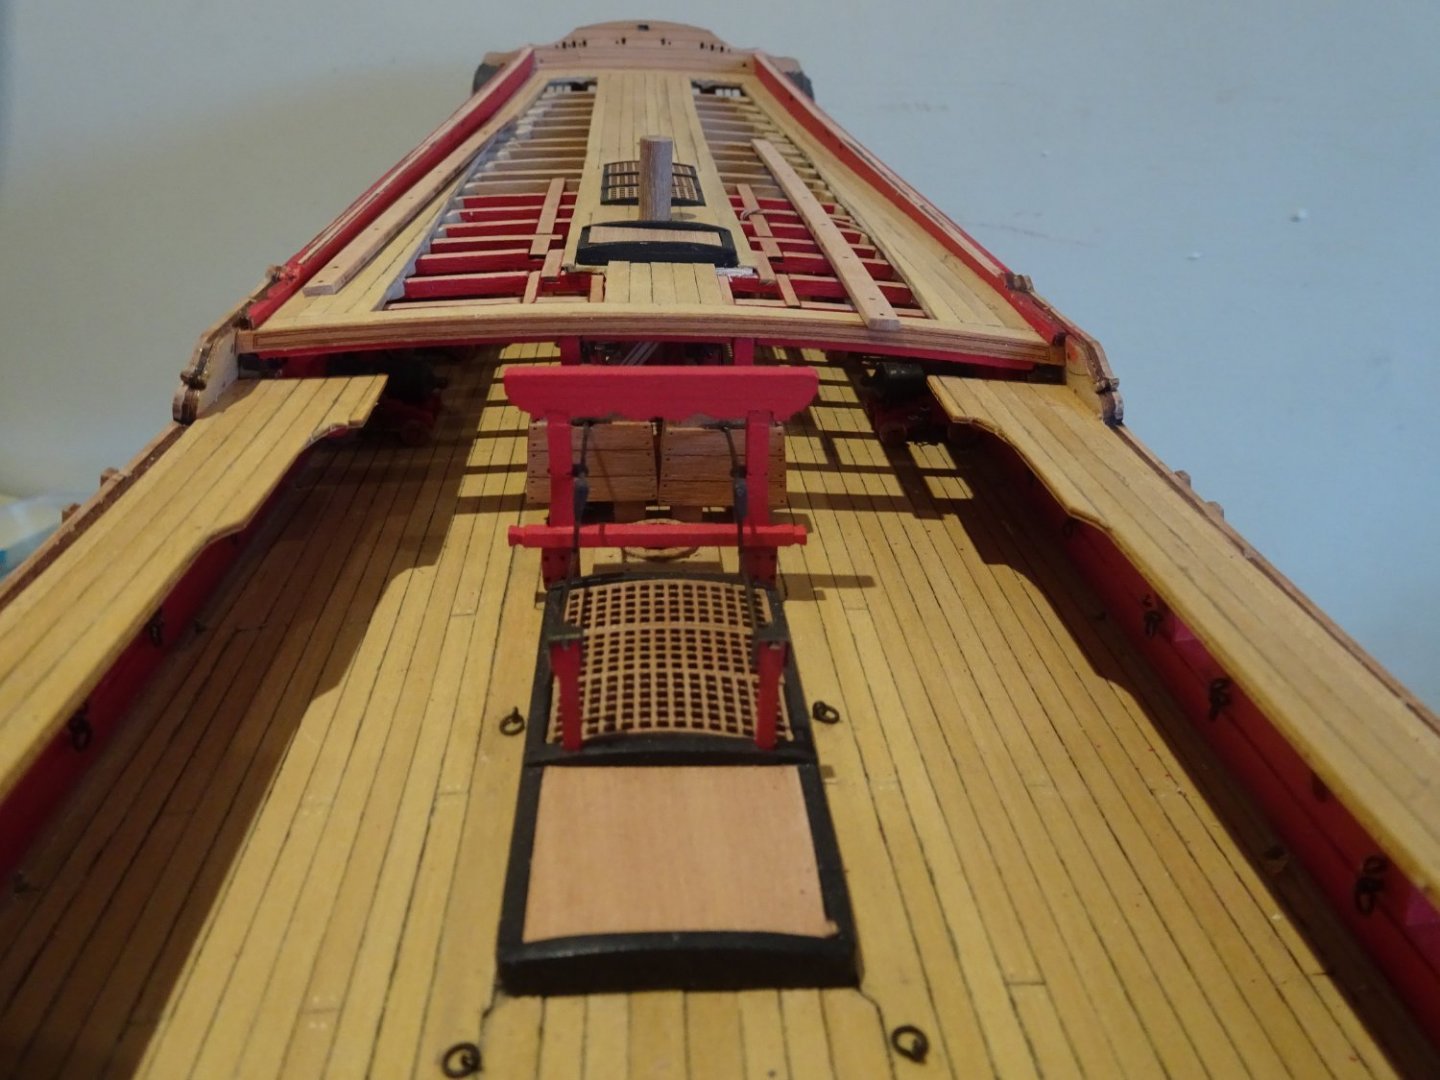
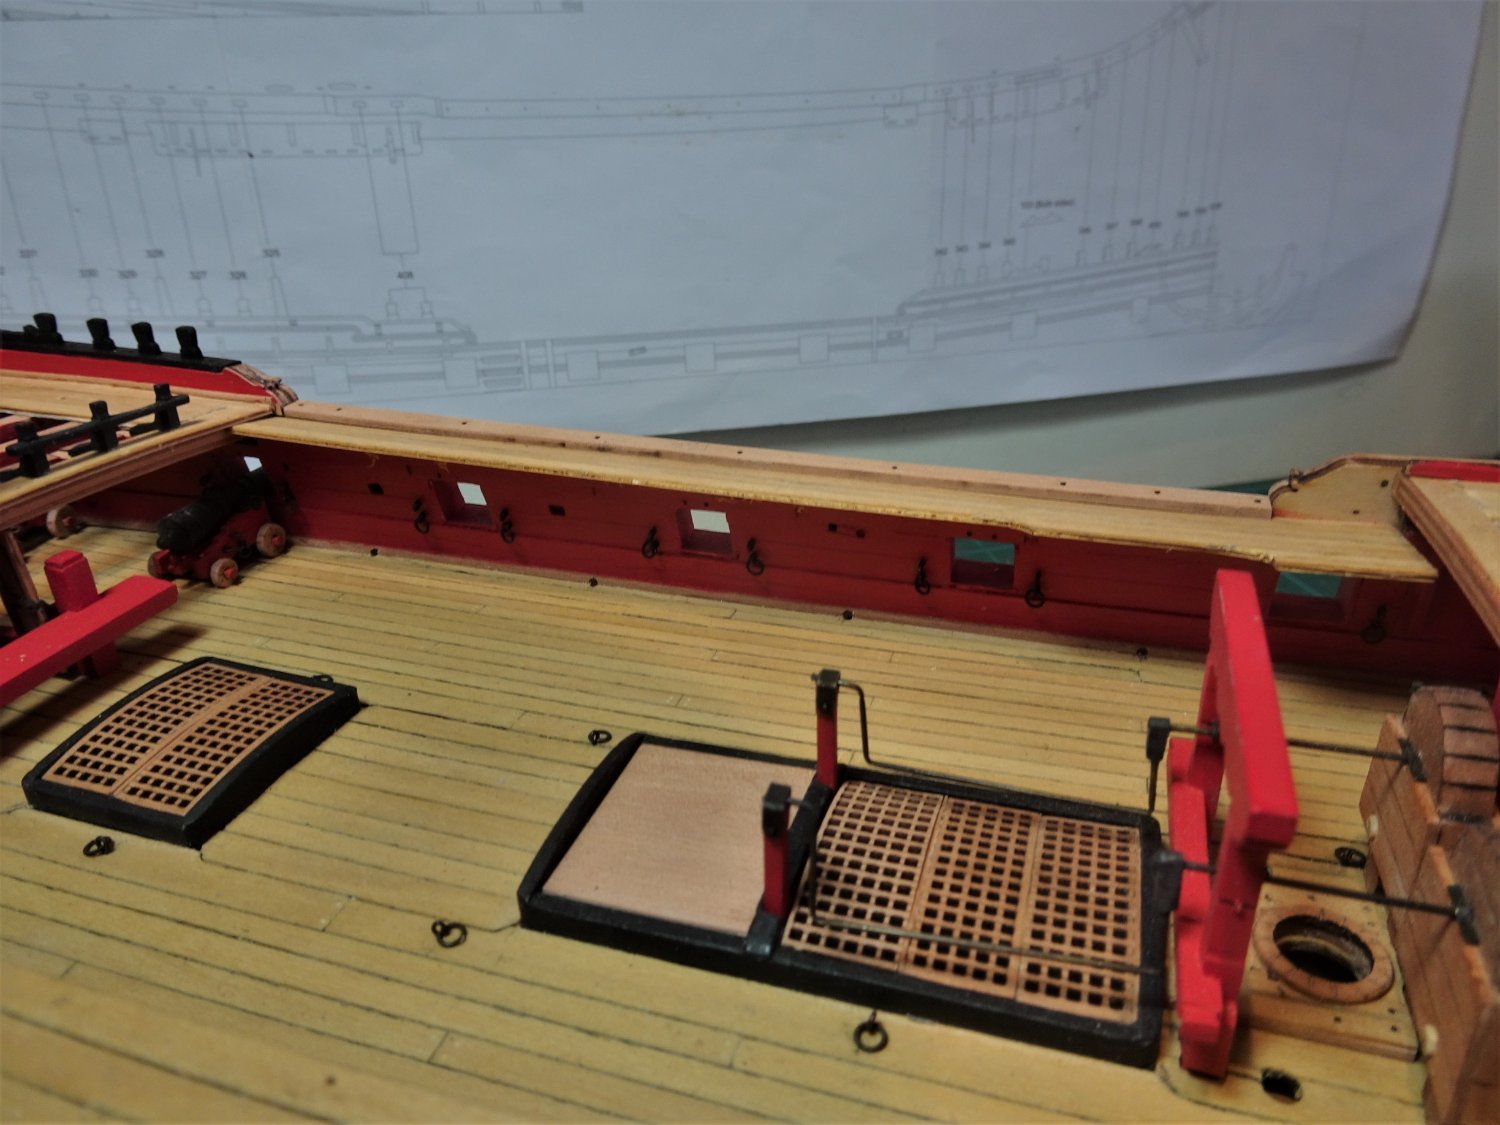
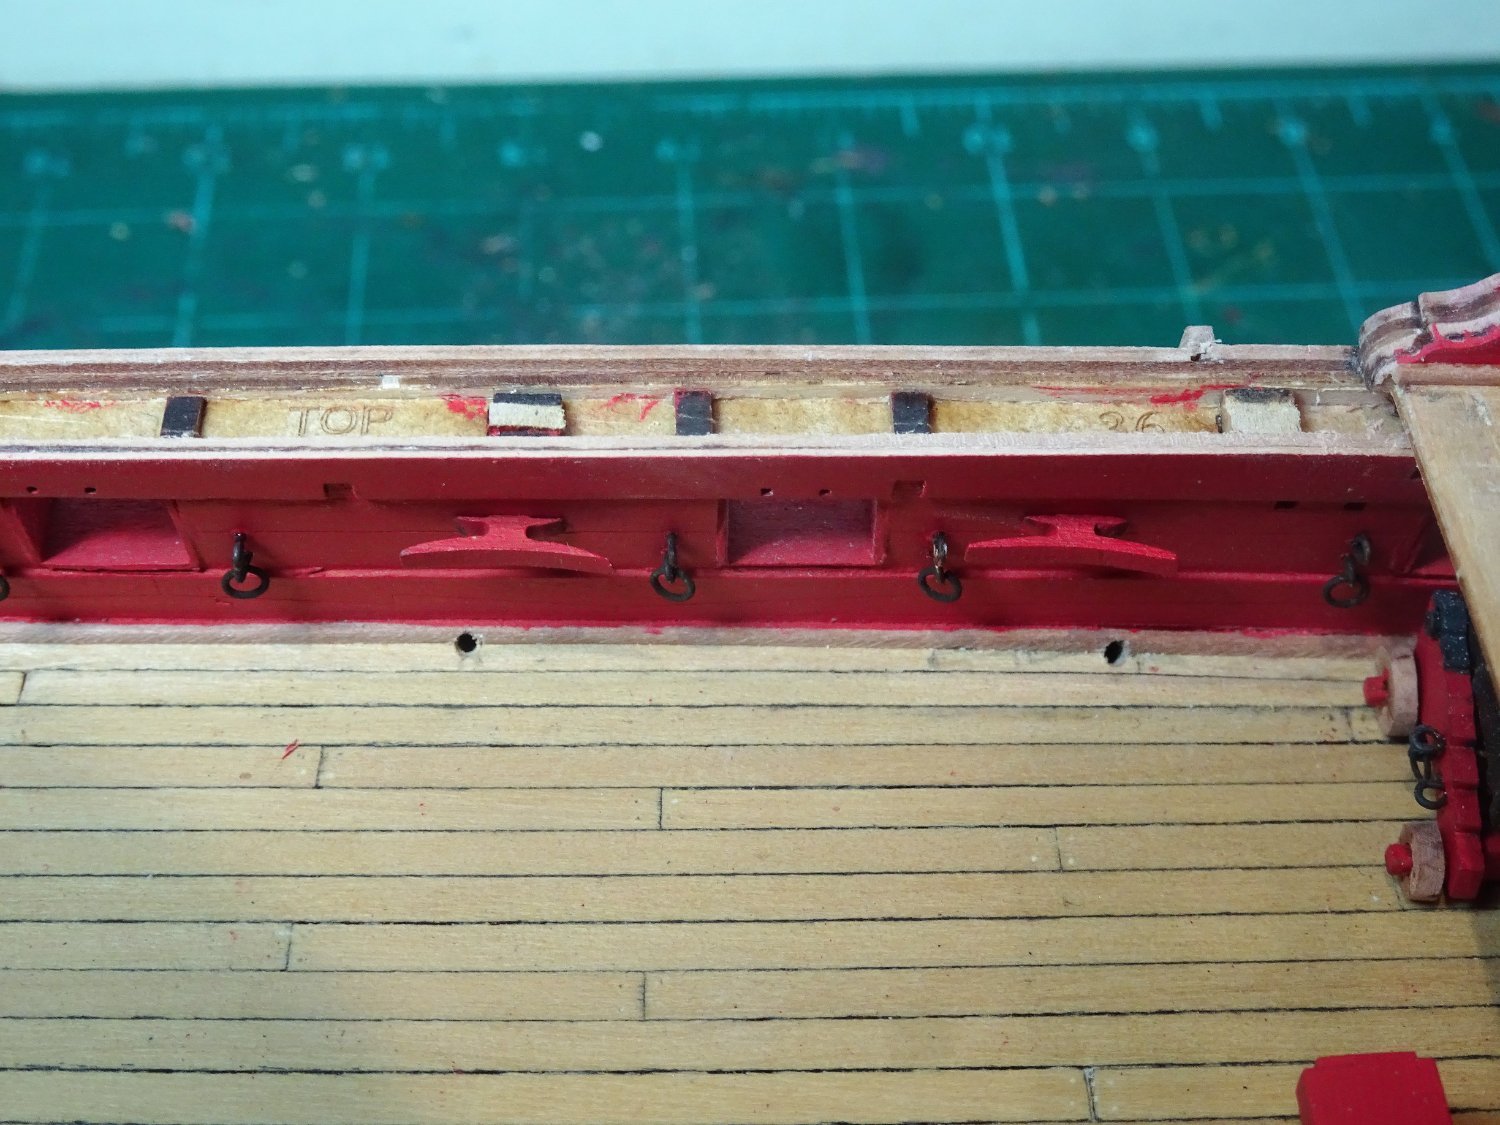
POST One Hundred and Sixteen Working along the waist Waist Gunwales These need to be considered in conjunction with the Gang boards that run between Quarterdeck and Foc’sle. On my build the gangway boards will be separately fitted to match the decking and follow the imprinted deck pattern. 6742(2) Fortunately the combined depth of the kit deck pattern plus gangway pattern is the same as the deck pattern plus individual planking. 6762 Before I start there are two large cleats to fit along bulwark, the aft one for the fore braces, and the forward one for the Main course tacks. Fortunately I won’t be troubled by the dubious pleasure of belaying these lines beneath the Gangboards and between the guns. Fitting these gangboards is a tricky business, I seem to say that a lot in my log, but that’s because it’s true at least in my case. 6745 *The Gangboards should slide beneath the qtr deck and Foc’sle Breast beams and butt against the outer bulwark. The Starboard side fitted better than the Port side, but both needed tweaking to reduce the inner bulwark height a tad so when the capping rail was put into place it slips over and cleanly down on the gangboards. *See footnote at end of post 6751 *On my build I found no reason to trim the gangboards on their outer edge as indicated in the blurb. *See footnote at end of post. 6755 There is a lot of ‘on and off’ the model dry fitting. This is not a process to rush. 6748 *Once happy with the dry fit work can continue. The best advice I can give is scrape the inner bulwark top until the gangboard outer edge sits flush with the outer bulwark, and the capping rail (gunwale) slips over the top into position without gaps. *See Footnote at end of post. The knees are position specific, so it’s a good idea not to mix them up during the necessary char cleaning and painting. 6763(2) I use double sided tape a lot to keep things in order. Fitting the knees is an interesting little exercise which involves marring the previously painted bulwarks to improve adhesion. The knees fit neatly into the slots pre cut in the deck clamps and a pot of water and a fine brush is handy to remove pva overspill. Not too onerous a job, knee 391 adjacent to the Qtr deck proved the most tricky. I found using bent nosed tweezers helped with alignment. With the knees in place the main worry is will they hold during the gangboard fitting. 6769 I found it necessary to tweak the tops of the knees a little to allow the gangboards to sit down, but the sanding process at least pressure tested the bond with the sides. (one came away) 6772 The gangboards glued into place, no easy way to go back at this point. 6776 6774 It is useful at this point to check how the step from the Qtr deck to the Gangway performs. In the kit the risers are represented by 2 x 3mm rectangular Pear strip(438) and 0.6mm treads (99) 6782 I’m feeling a little underwhelmed about the look of the step which to my eye lacks both style and practicality, I don’t think they will pass muster. I’ll terminate this section while I’ll ponder on how I can improve the look. I do have some ideas floating around my head. B.E. 05/05/22 *Footnote: I have had cause to revise my opinion about the fitting of the capping rail and Gangways. To keep the Capping rail level particularly if you are using the pre-etched planking pattern I think the Manual instructions 549- 553 should be followed. If the Capping rail is fitted over the Gangway boards as I originally did the camber will be followed and will throw the Hammock cranes out of vertical. Thanks to Ron (Hollowneck) for pointing out this issue. B.E. 07/05/22
.thumb.JPG.ee00b627e70621f981f32fc504d6ba16.JPG)


.thumb.JPG.993fea1e2b46d424b56d9df9d945db8c.JPG)


- 857 replies
-
- 23
-
-
-
- Sphinx
- Vanguard Models
- (and 1 more)
-
Great comparison shot with Sphinx, my younger self would have gone for Indy in a heartbeat, but where’s an old man to put such a beast in a house already full of ship models. I think you will have a winner on your hands Chris, I look forward to seeing her develop. B.E.
-
I agree with your assessment James, the Pearwood I ordered for my Sphinx build is of excellent quality, the transaction as smooth as the timber, and HobbyMill is now my supplier of choice. It's good to have a European supplier of quality timber. B.E.
-
Hello Ron, Rather than clutter up your log if you care to look at my Pegasus log (link below) and go to Page 6 Post #171 covering the Main stay, there are full details with photos of how I made the mouses. There are also details on my Cutter Alert log page 8 post #223 Hope this helps. Regards, B.E.
- 542 replies
-
- 2
-
-
- Sphinx
- Vanguard Models
- (and 3 more)
-
She's looking impressive Ron, and those crowsfeet are a great improvement. I do agree with Druxey those mouses could use a little fettlin'. I make mine out of styrene tubing covered with netting from ladies tights which gives the woven look. Example from my Alert build. I will be interested to see your boat completed, I assume it is the Yawl you are including on the deck. Regards, B.E. ps. On second thoughts re-doing the mouses would involve re-rigging the the stays, but as Druxey says they would sit atop the shrouds in the usual fashion, but maybe an adjustment too far for you.

- 542 replies
-
- 5
-
-
- Sphinx
- Vanguard Models
- (and 3 more)
-
Thank you Marc, I like to help where I can. B.E.


.JPG.c9dac6c0cd1ca07f617347004bc310dd.JPG)
.JPG.b915c2a86885d771590b1fd8fd8d9477.JPG)


.JPG.d4d647a5538b102733e203e9e5b93742.JPG)

.JPG.995822590f48292438cf205069712ff9.JPG)
.JPG.3265867d9b04776d885c6c710f6d6167.JPG)
.JPG.4d8b271099dced6f6903c19be88ed624.JPG)

.JPG.511dbbd052189313eda8bc5d5f2f9f14.JPG)
.JPG.ca40474b049cad444428c723bc9e2cc6.JPG)


.JPG.43cd0113a9f918745a5a7ed554236af2.JPG)


.JPG.34ddd52e3b1be4210cbe91eee4171316.JPG)
.JPG.ef0721dedc9ce227092e0aa9cb12dd89.JPG)
.JPG.277cc362bab76a9ed2235b686236f6e0.JPG)

.JPG.cc6c72a5cf76839ce796448e20dabb33.JPG)


.JPG.a2feaed9b9d8cdce056174f84078d130.JPG)


.JPG.8698cda7c2339e4d8b32bcfe5d544739.JPG)


.JPG.cf90ca1be986d80e848d4eb14690f0a5.JPG)