Chuck Seiler
-
Posts
1,878 -
Joined
-
Last visited
Content Type
Profiles
Forums
Gallery
Events
Everything posted by Chuck Seiler
-
I believe ZHL is on the list of banned kits due to piracy practices.
-
 Another outstanding episode! I love your plank bender. A bit large, but you can use it to heat the shop in the winter. 😁 It is interesting that you install the garboard strake last. Isn't that unusual? I can't argue with your results. Keep up the great work.
- 156 replies
-
- 1
-

-
- marisstella
- marisstella model ship kits
- (and 4 more)
-
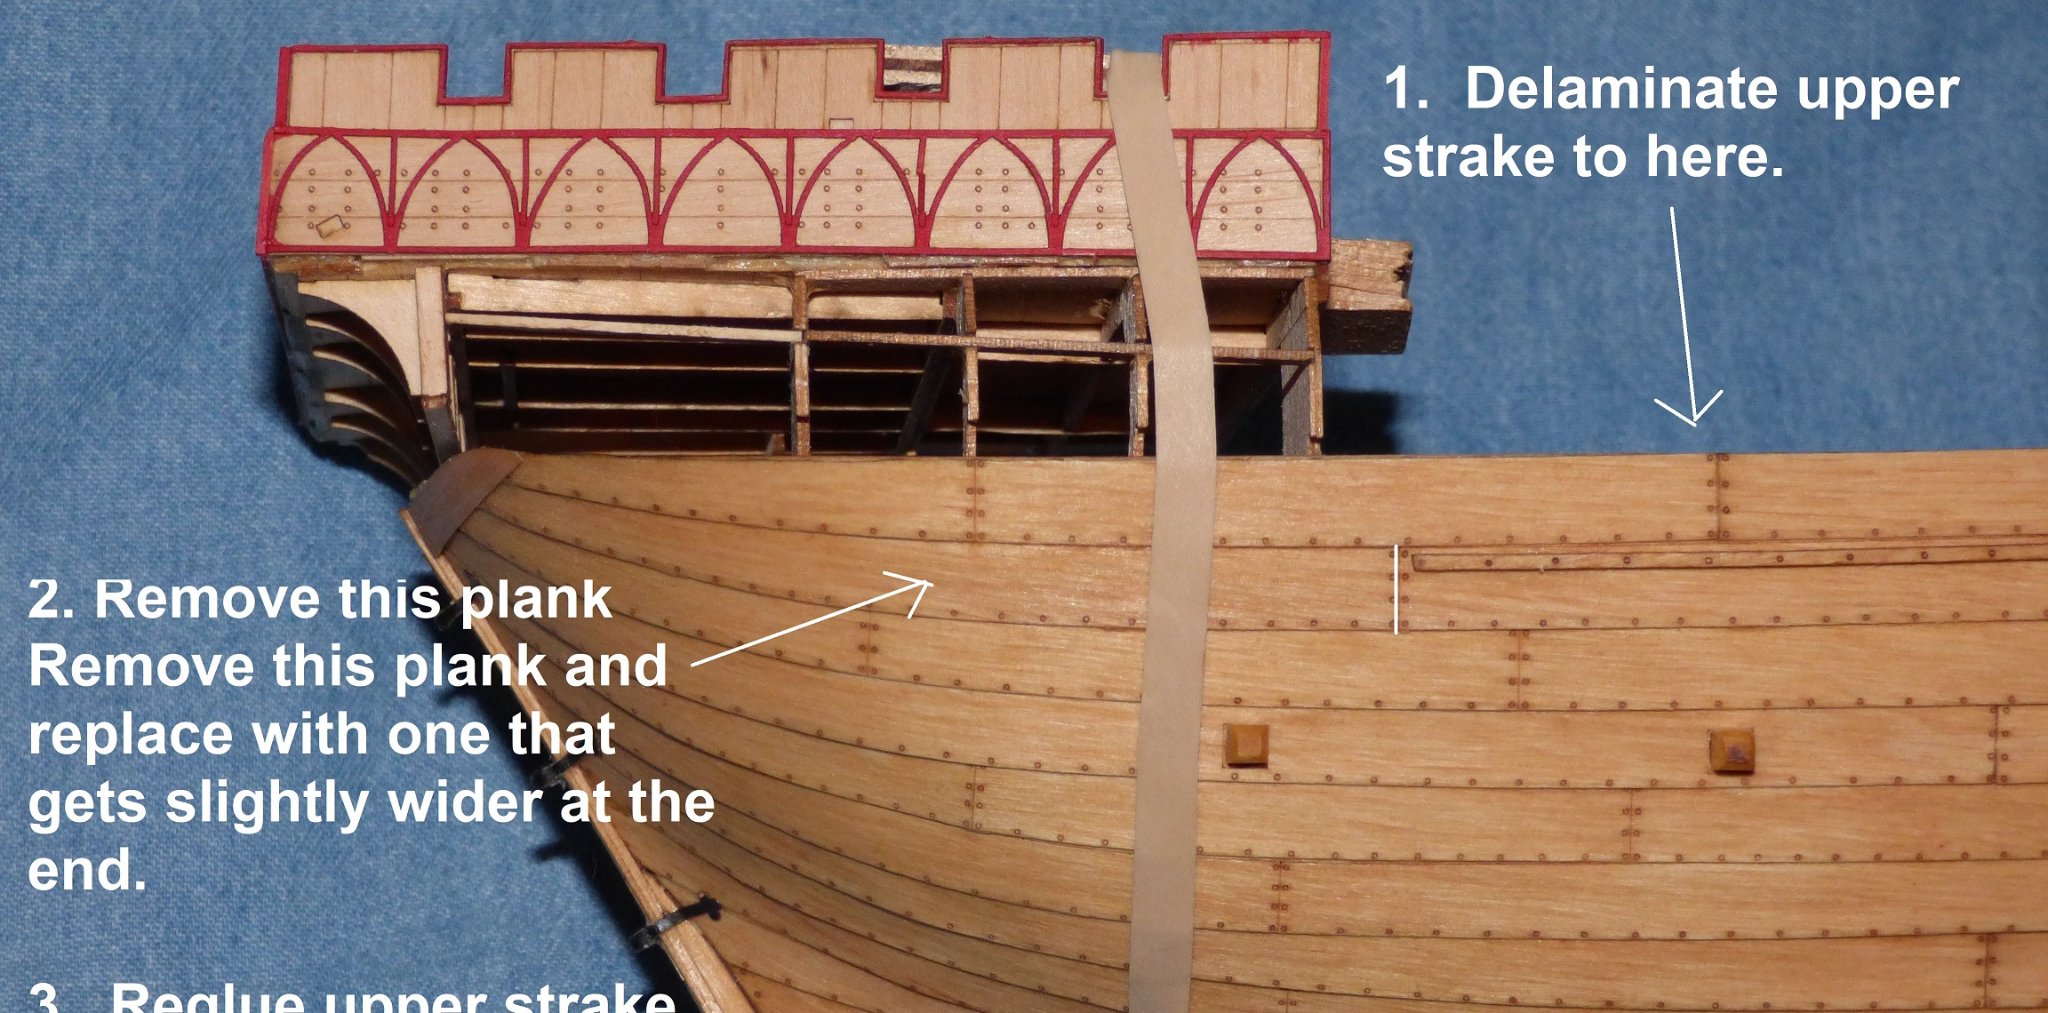
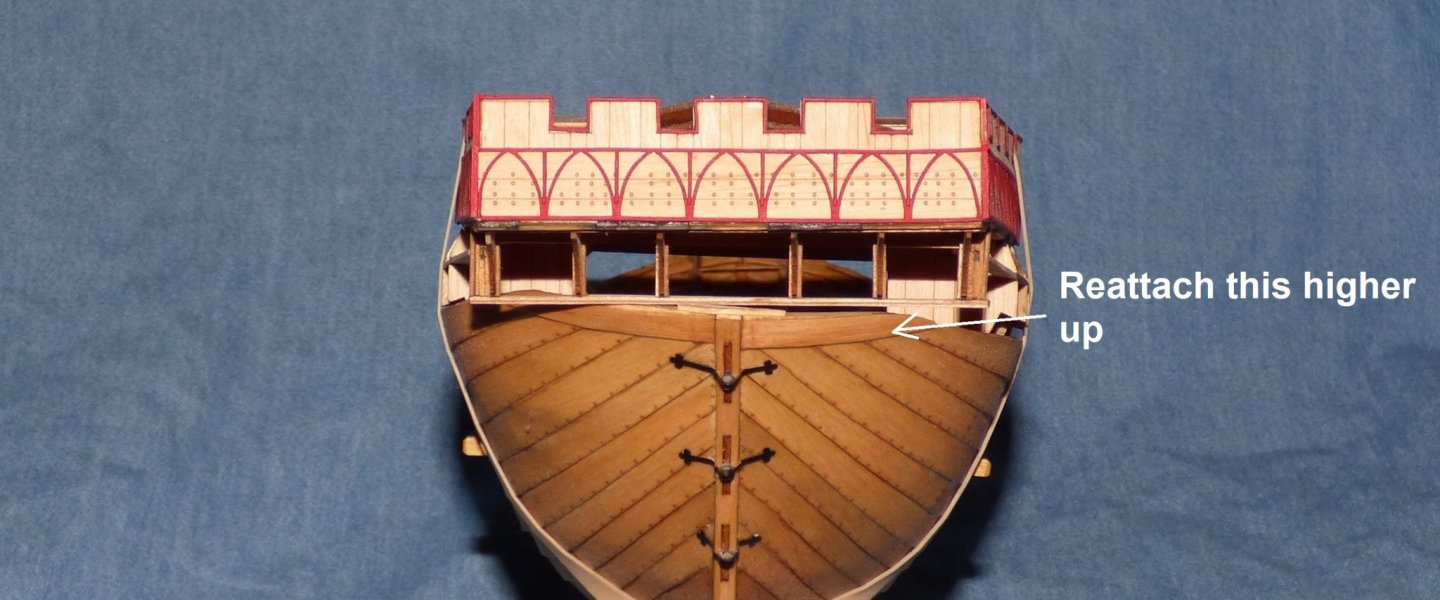
With the full under-carriage in place it does not look quite as bad. The side is still a problem but the stern (which is pretty much exposed) is closer than I thought. I can work with it. I was contemplating minor surgery. The top 4 strakes are not tied into the sternpost so it would not be a complete teardown. There are some underplank supports that would have to be dealt with, but that will be, for the most part, unseen so any damage will not be a big deal. Option 1 would be to use isopropyl alcohol to unglue and peel back the upper strake to the point indicated. Strake #2 would be unglued as well, except the rear-most plank would be removed and replaced with one that gets gradually wider towards the end. Strake 1 would then be glued back in place. One downside would be a new twist to strake 1. This may end up being unacceptable. Option 2 would be the same except to replace strake 1 with a wider version, connecting it so there is no twist. This has the benefit of requiring less of a flair at the end. Both of these will result in new, unstained, planking being added. It will probably result in the loss of uniformity of color when stained. Option 3 is to manipulate the stern castle planking so as to cover the gap, but be uniform on both sides. Bend to fit/paint to match. Regardless of the option, I will need to figure some way to fix or hide the gap in the stern.

- 130 replies
-
- 6
-
-
- wütender hund
- hanseatic
- (and 2 more)
-
I have had time to think about it...even had dreams (the mind trying to solve the problem). I am sure nobody here has EVER had that happen. 😁 Along with these thoughts and your inputs I came up with a few options. I wanted to complete the undercarriage and re-test fit to see exactly where I stood before proceeding. Test fit complete. Pics and discussion to follow.
- 130 replies
-
- 2
-
-
- wütender hund
- hanseatic
- (and 2 more)
-
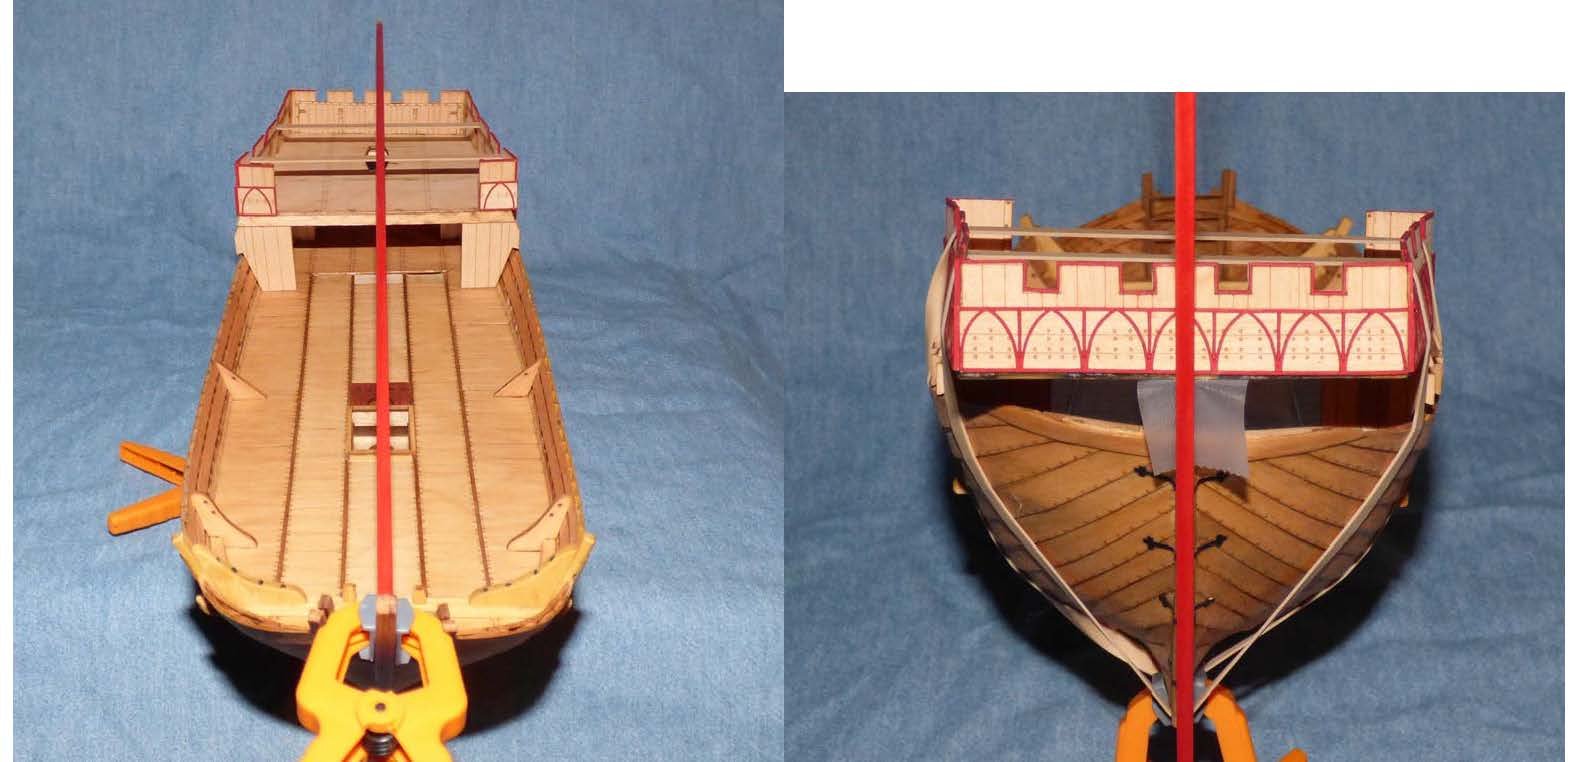
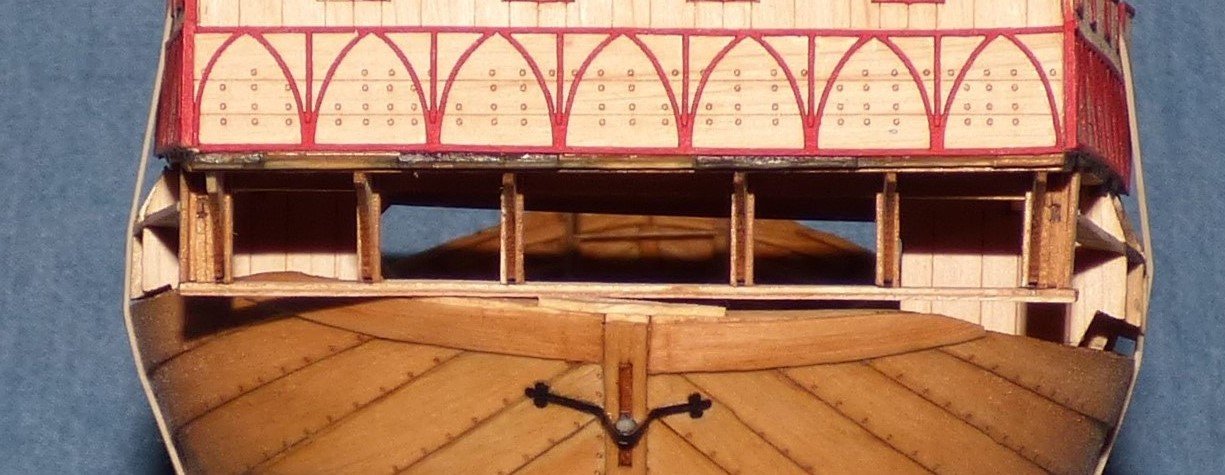
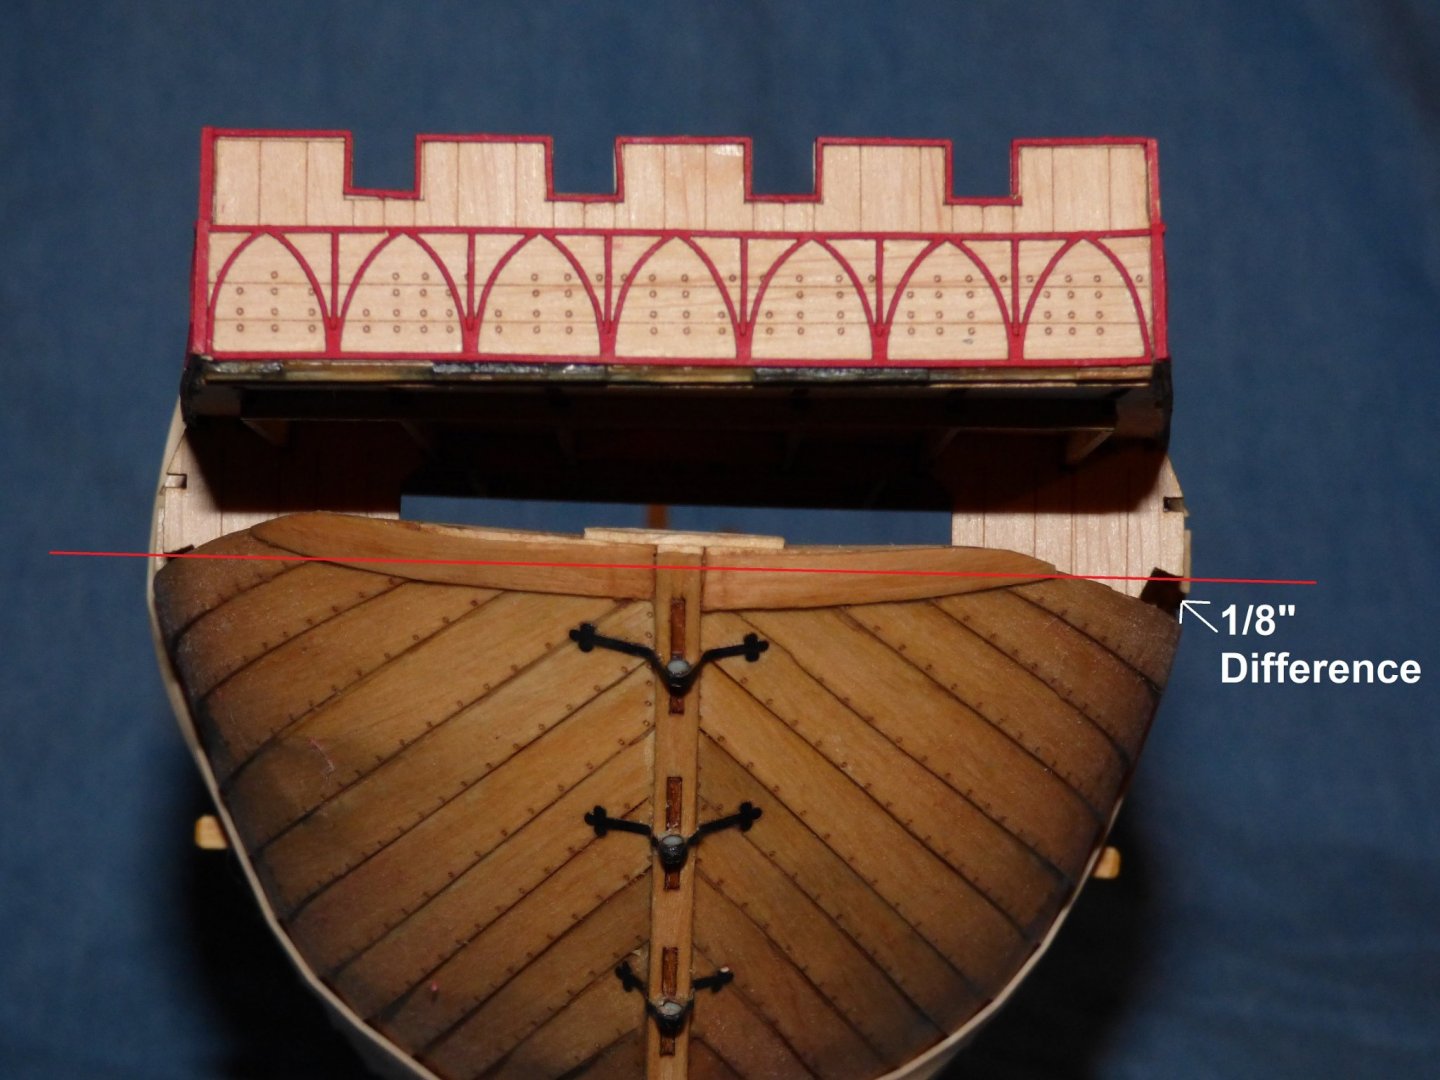
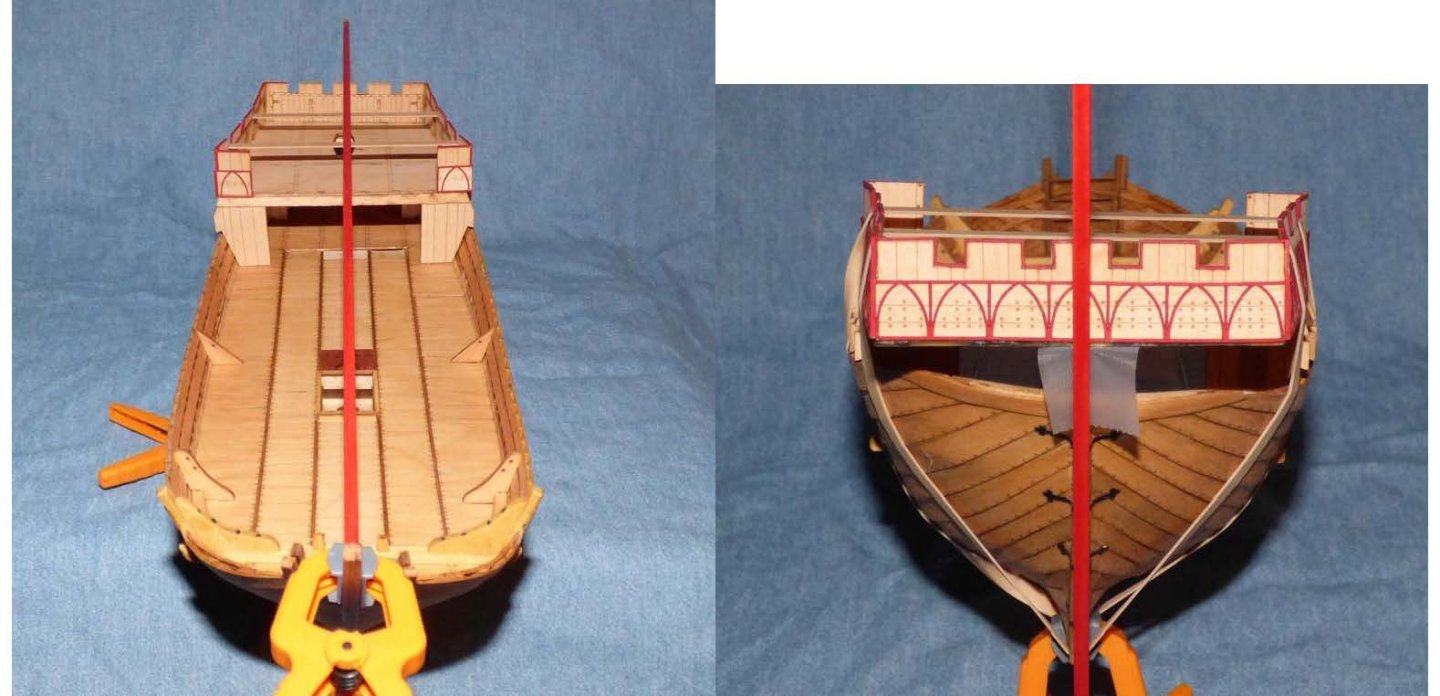
DANG!!!!!!!!! I am 2/3 of the way thru the under-carriage for the stern castle and wanted to test fit to see if all was lining up and to see if I could get it to lay flat. I was able to get it to lay flat and all 4 tabs fit into the appropriate slot. YAAAHOOOO. However, looking from the stern it appears uneven. DANG!!!! Something must be wrong with the castle. There is about a 1/8" difference between the top of the gun'l from port and starboard. DANG!!! I measured all 4 stations, bottom to top of castle, on both side. Both sides matched up I ran a plumb along the center of the deck, from the bow-sprit-thingy in the bow to the aftmost part of the castle. The castle is centered. I then ran a vertical plum using the bow sprit and sternpost as guides. The castle is centered. My conclusion is that despite reasonably closely hitting all the marks in the planking proces, I missed the mark by 1/8 inch. Short of pulling all the planking apart, I need to figure a way to resolve the issue. Any thoughts?
- 130 replies
-
- 6
-

-
-
- wütender hund
- hanseatic
- (and 2 more)
-
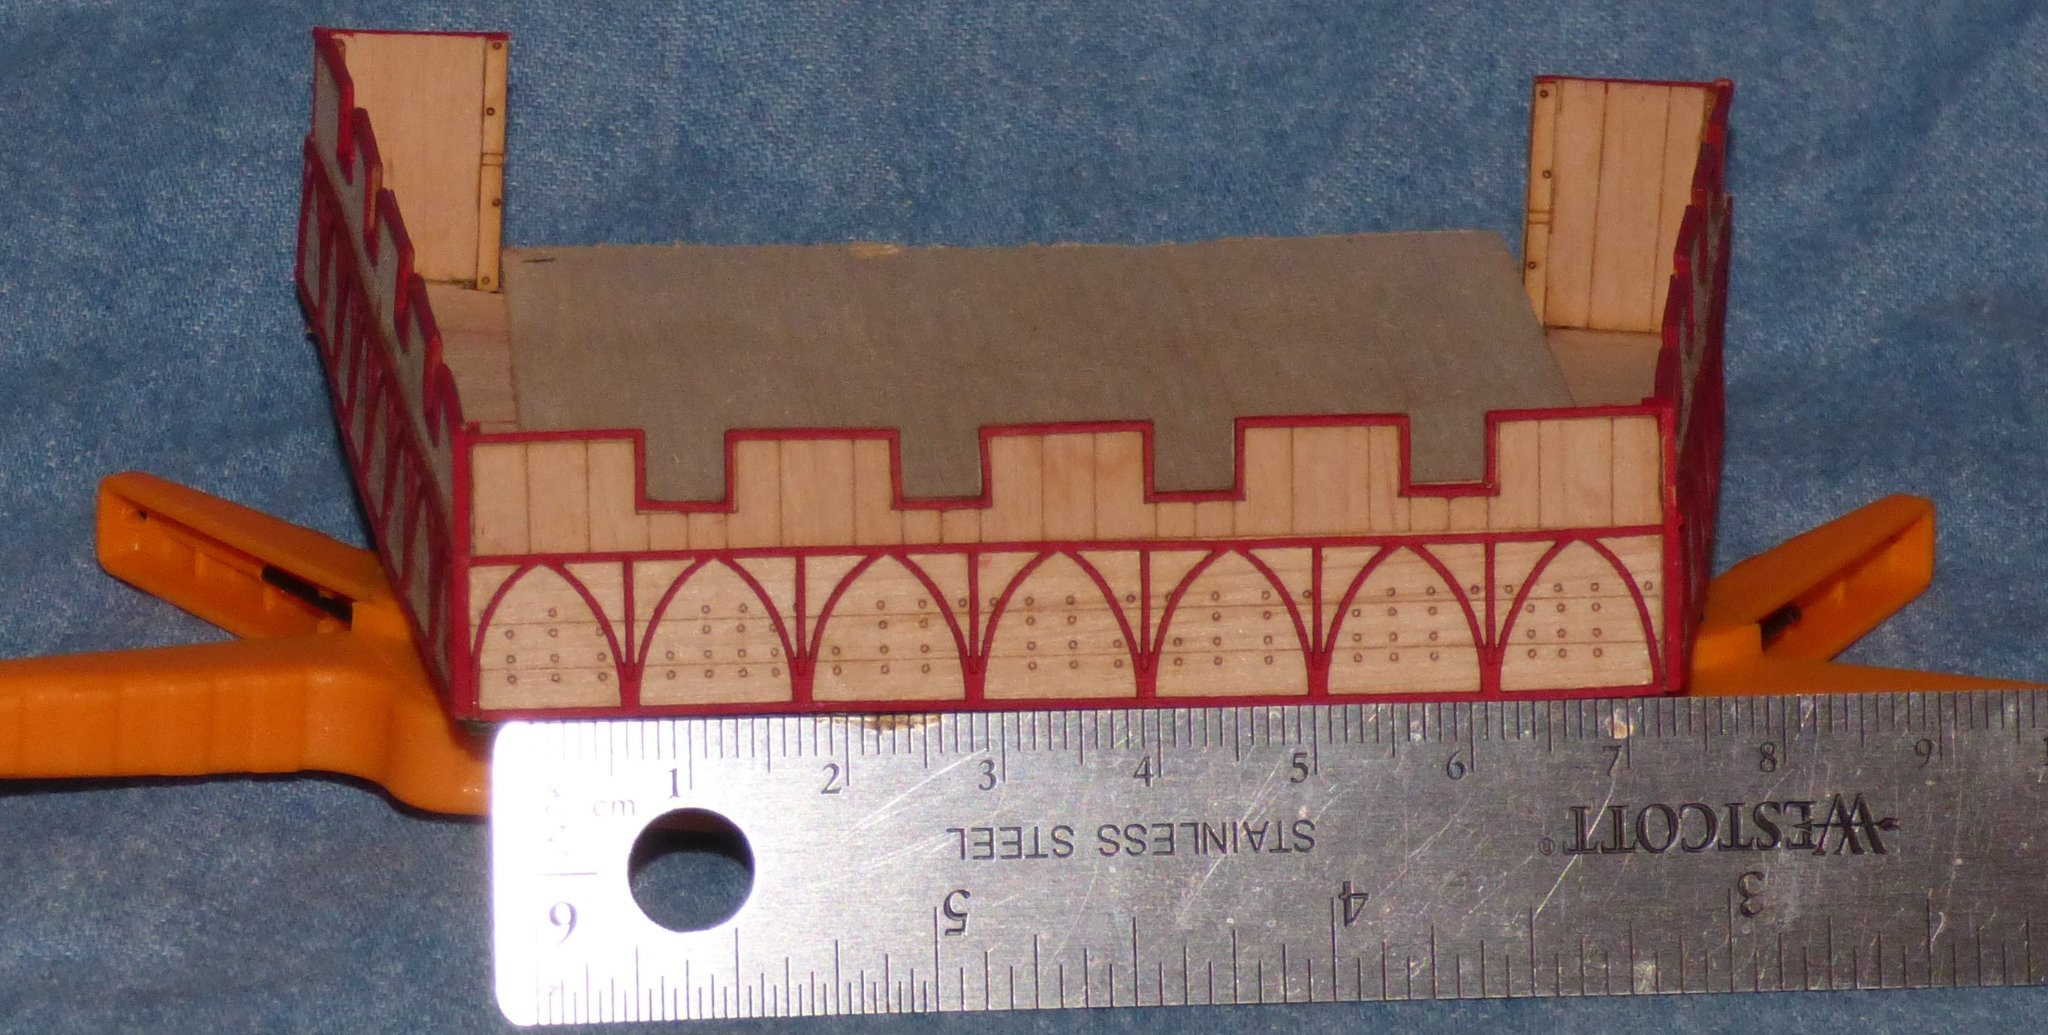
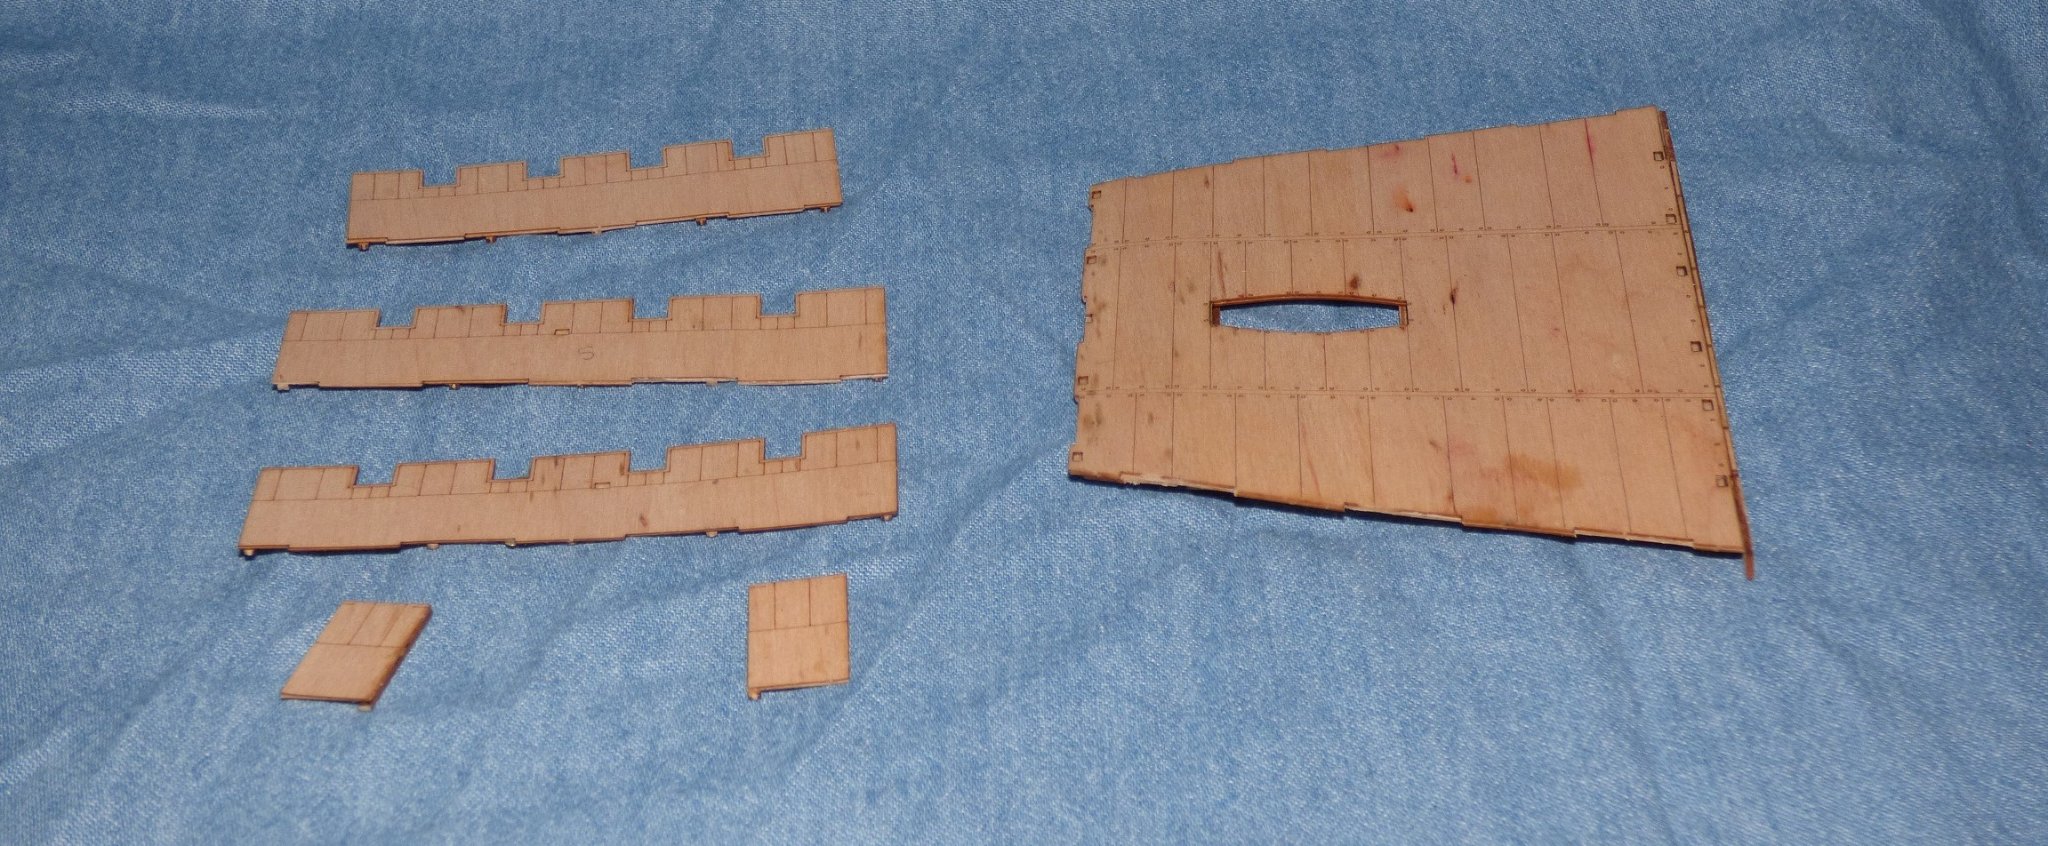
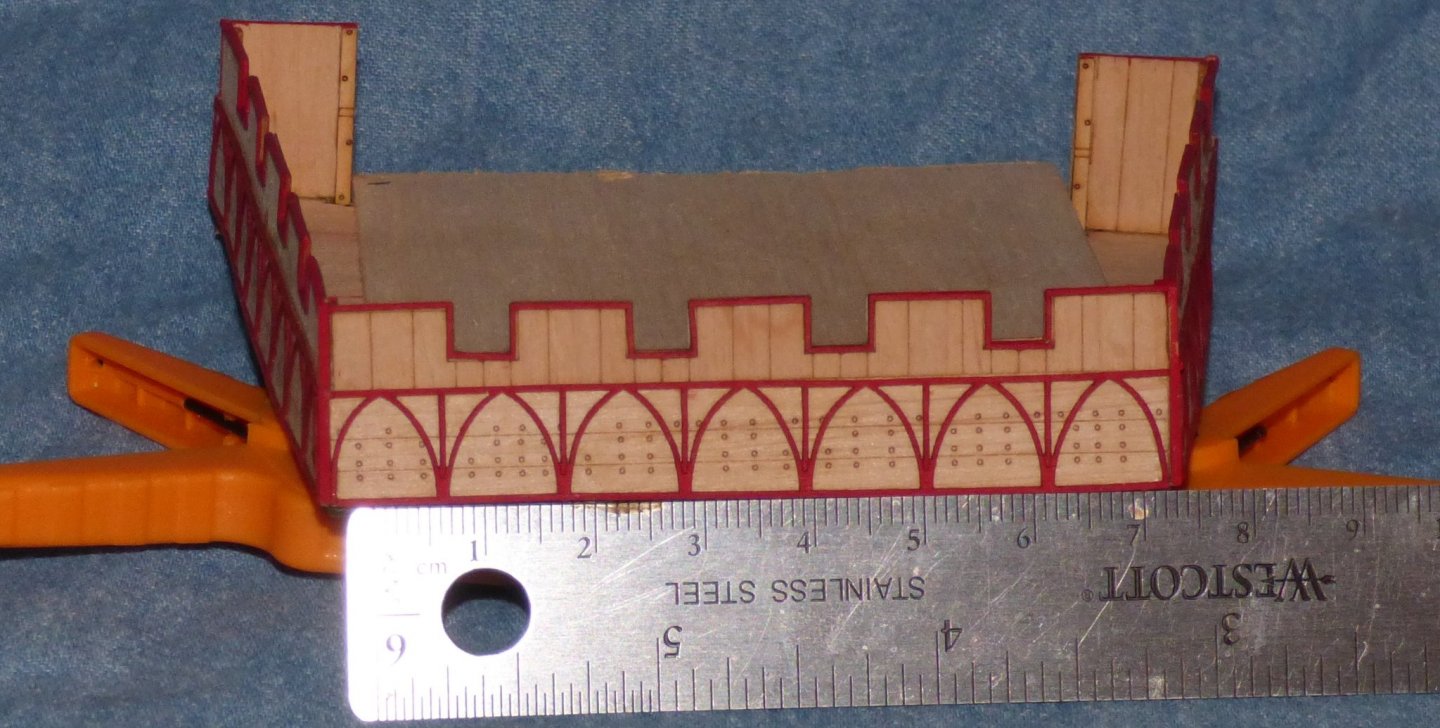
The decorative moulding on the stern castle is complete. You can see by the included ruler how thin this stuff is. Perhaps 1mm...and cross grain along half of it. I chose to paint the parts on the part tree, before removal. This turned out to be a good choice. It strengthened the part and prevents smudging of the red color onto the rest of the castle. The next step is to build the under carriage of the stern castle. We'll see how that goes.
- 130 replies
-
- 8
-
-
- wütender hund
- hanseatic
- (and 2 more)
-
I probably will. I have Chuck's Rope Rocket, but have not managed to make any rope yet. I will be using conservator's wax to keep down the fuzzies.
- 175 replies
-
- 1
-
-
- hanse kogge
- shipyard
- (and 1 more)
-
Clare, Coming together nicely. The shrouds look great-no twist.
- 175 replies
-
- 1
-
-
- hanse kogge
- shipyard
- (and 1 more)
-
That's what duct tape is for. 😁 Makes sense. why did that practice stop?
- 130 replies
-
- 2
-
-
- wütender hund
- hanseatic
- (and 2 more)
-
That is how I read it as well. It seems to be more difficult than it needs to be, but I guess they did it that way for a reason.
- 130 replies
-
- 2
-
-
- wütender hund
- hanseatic
- (and 2 more)
-
Excellent, thanks. If I am not mistaken, the Almere wreck is early 15th century; slightly later than my cog, but in the same ballpark. The stropping appears to start off exterior to the block on the bottom side, then transitions to internal about 2/3 of the way up, then out though the top. Am I seeing that correctly?
- 130 replies
-
- 4
-
-
- wütender hund
- hanseatic
- (and 2 more)
-
I agree. Even the simplest planking can lead to problems if the is still "spring" in the plank and needs to be clamped down.
-
IIRC spiling is not a big problem with PHILADELPHIA. The structure and form of the hull is such that very little tapering is required. Much of this is due to the nature of the ship itself. A bunch of these were slapped together over a couple months in the middle of nowhere. They had plenty of wood due the a captured mill, but shipwrights were pretty scarce. They had plenty of plain old carpenters and folks who built lake bateauxs.
-
Good luck. I will continue to watch.
-
Hmmm. Hadn't thought of that. I was thinking the kit supplied blocks didn't look quite right. Perhaps it is because I am so used to seeing 18th century blocks. I guess I need to look at some of Louie da Fly's olde tyme cog paintings and re-evaluate.
- 130 replies
-
- 3
-
-
- wütender hund
- hanseatic
- (and 2 more)
-
Clare, They came with the same built-up/laminated blocks as the card version except wood. I am swapping out with SYREN blocks.
- 130 replies
-
- 1
-
-
- wütender hund
- hanseatic
- (and 2 more)
-
Looking good! I had/am having similar issues with using card stock that you noted in your opening post. I will experiment with soaking the parts in varnish. I am not familiar with nitro based varnish.
-
Blame the cat.
-
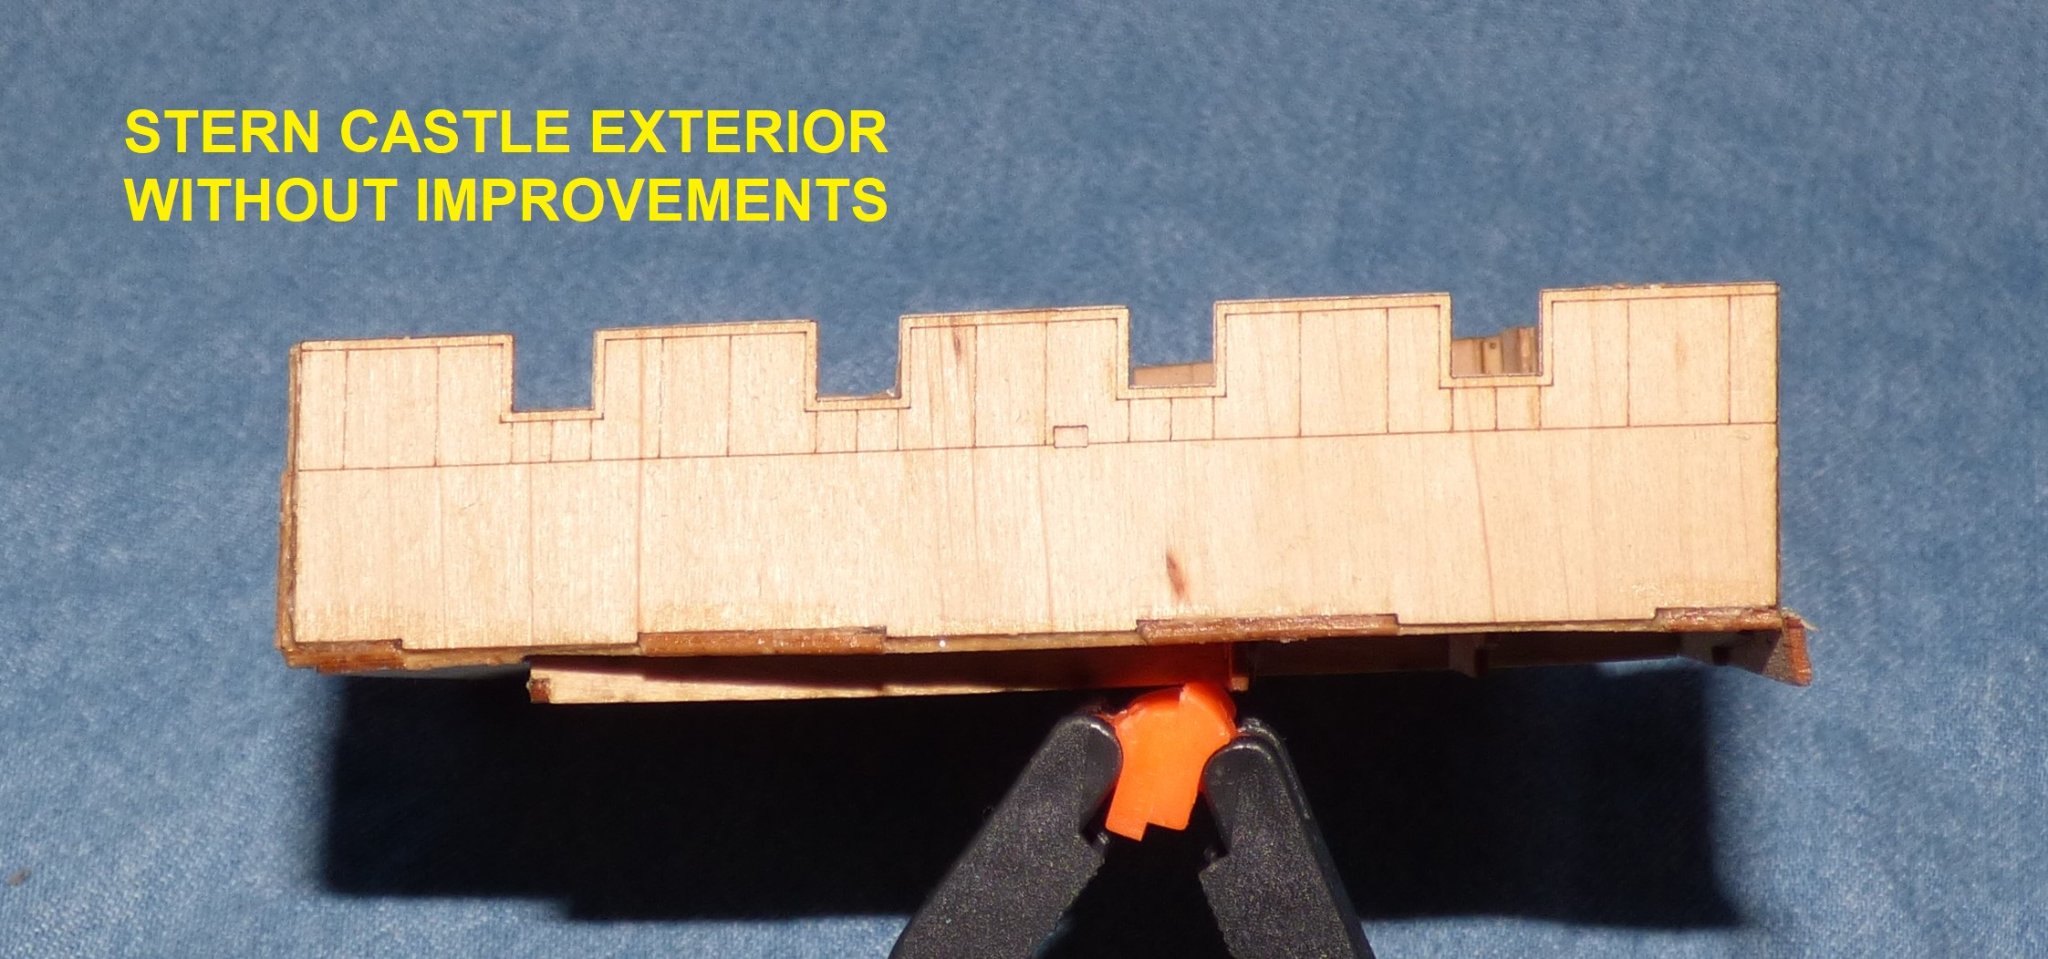
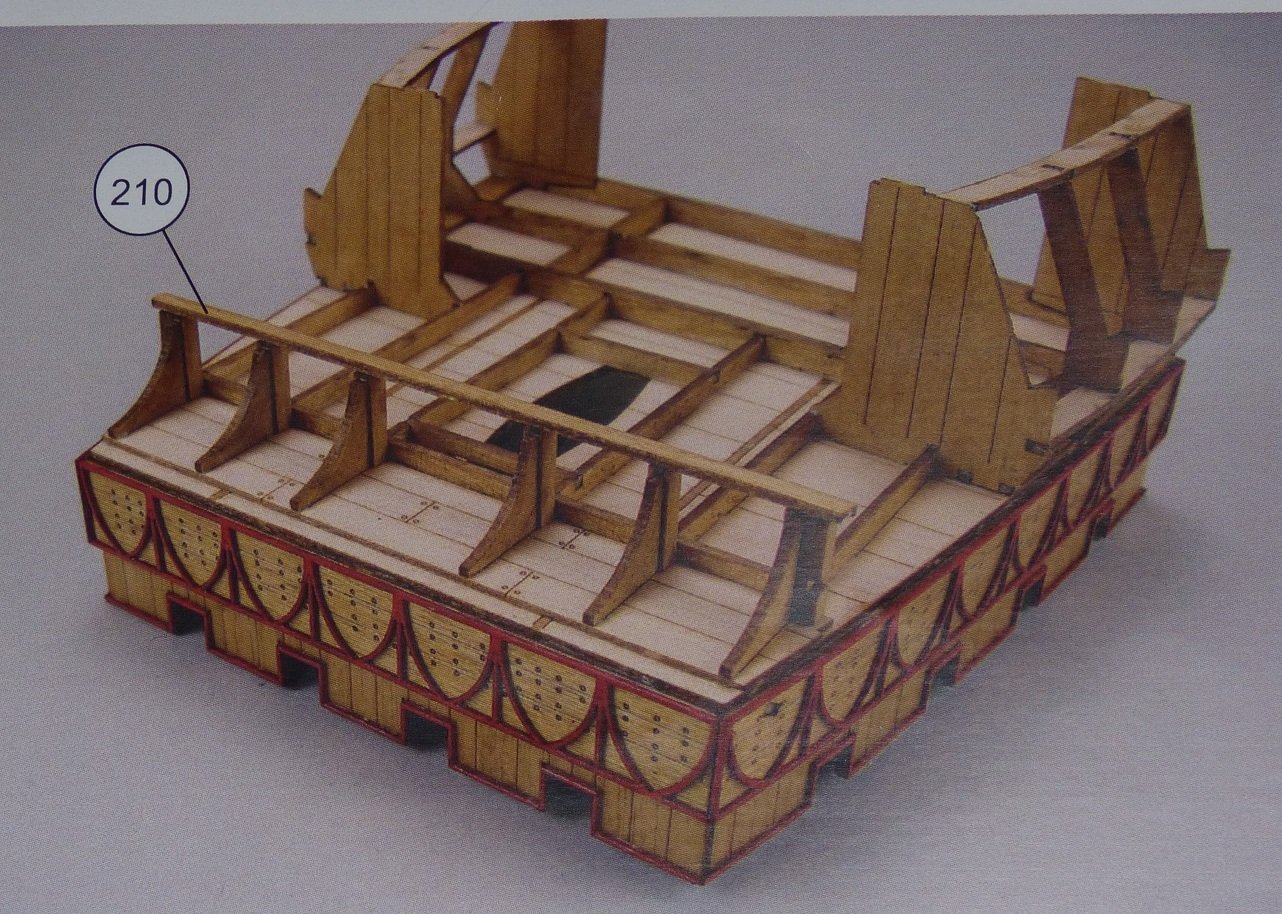
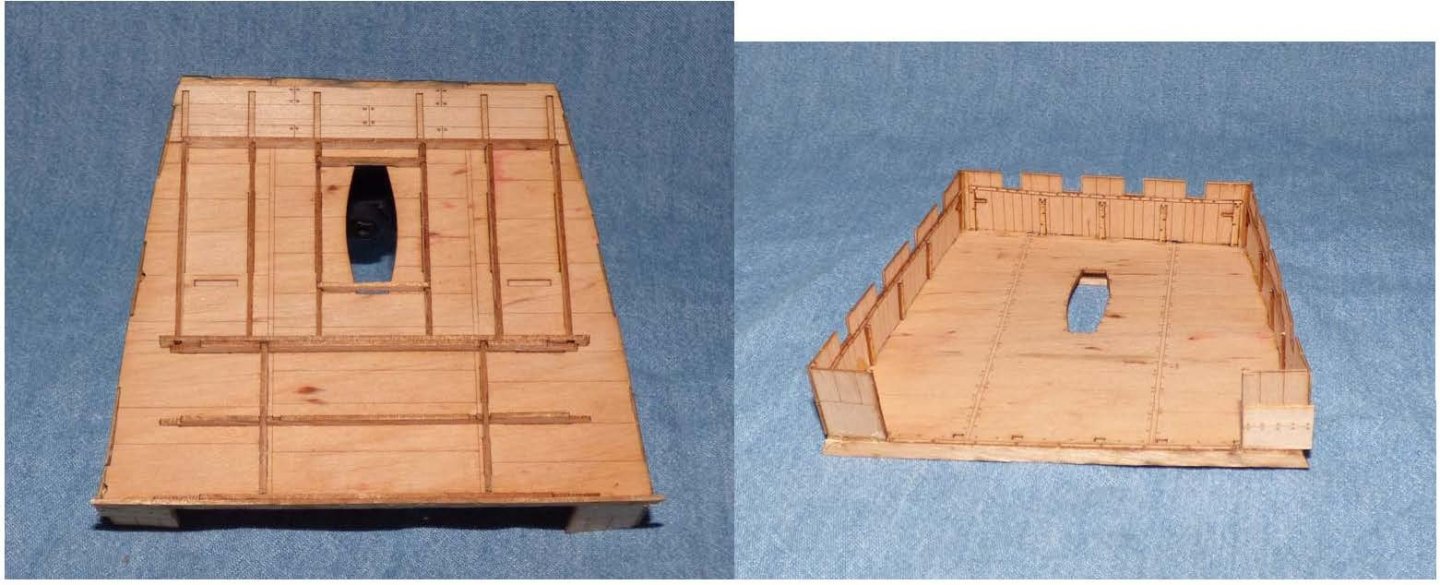
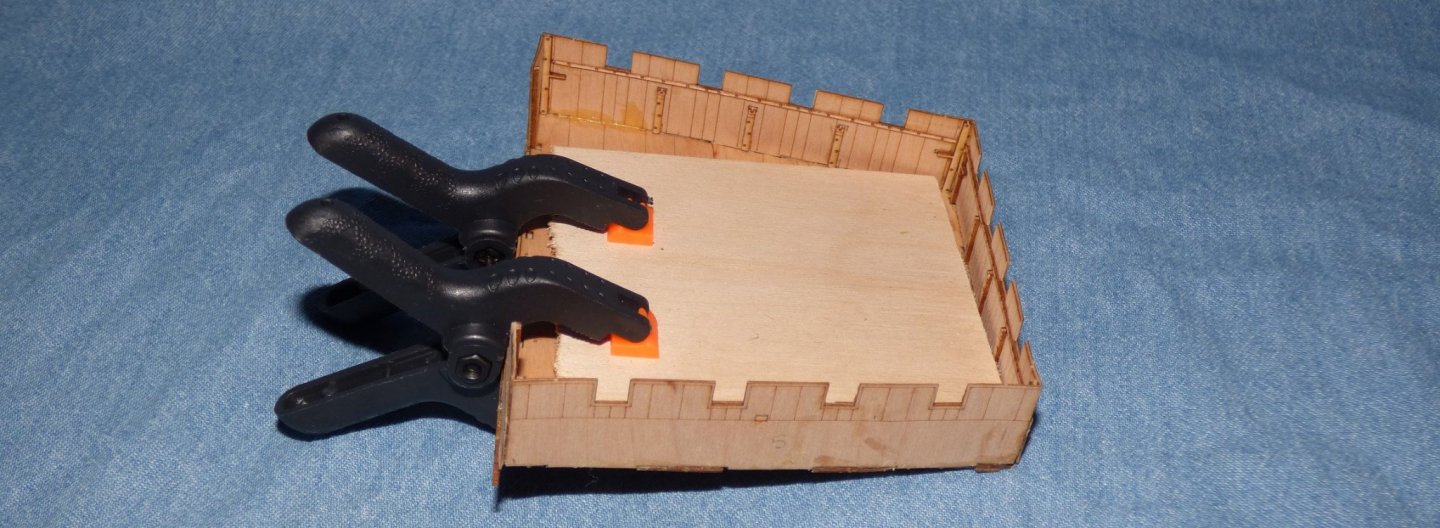
Cog has been stained. Nothing exciting...same as before except a little darker. While I was waiting for glue and stain to dry over the last week, I started working on the stern castle. The first part consists of a base, 3 complete sides and 1 partial side. The base has a bunch of under-deck structure designed to make it stronger. Unfortunately after everything was in place the base structure started to warp. I tried to straighten it out by misting it and placing a heavy object on it. Once dry, it was straight, but a half hour later was warped again. I was hoping the addition of the sides, which also have strengthening internal supports, would solve the problem. It did, but only slightly. I clamped a solid piece of wood to the inside of the structure to keep it stable while building. Exterior of the structure before improvements are added. This includes exterior bracing panels and decoration. Exterior bracing panels added. As you can see, the warping still exists. I think this will be an issue until I 'bolt' the whole structure to the deck. Next step, decorations and more interior structure.


- 130 replies
-
- 5
-
-
- wütender hund
- hanseatic
- (and 2 more)
-
Die Kogge Von Bremen by kentyler
Chuck Seiler replied to kentyler's topic in - Subjects built Up to and including 1500 AD
Ken, What news? The cog world awaits news of your progress. -
Are the reef points just knotted at one end and glued on? What glue did you use?
- 175 replies
-
- 1
-
-
- hanse kogge
- shipyard
- (and 1 more)
-
Retired and ready to build my first model!
Chuck Seiler replied to lraymo's topic in New member Introductions
Be careful what you wish for. -
Many thanks. You/Chris warned about not installing the tiller before adding the superstructure. I will heed this warning as well. I am using Weldbond to attach the straps/hinges but I am not sure how secure they will be.
- 130 replies
-
- 1
-
-
- wütender hund
- hanseatic
- (and 2 more)