


Chuck Seiler
-
Posts
1,878 -
Joined
-
Last visited
Content Type
Profiles
Forums
Gallery
Events
Everything posted by Chuck Seiler
-
 I tried to insert just the link, but the whole video loaded. If you click on it just right, you will find various clips of the HARRALD FAIRHAIR at sea.
 -
From one cog-man to another, well done!!! and good luck with your new build. WOOD: I have used cherry for internal framing in the past. It is strong and works well. FRAMES: Attached is a link to the building of the Viking longship HARRALD FAIRHAIR. You may have already seen it. While the longship and cog are not the same, construction appears to be similar. Perhaps it will give you some ideas. Reminder: on a cog the first three strakes (garboard plus 2) are NOT clinker, they are caravel. I look forward to your progress.
-
Doesn't beeswax have some acidity?
-
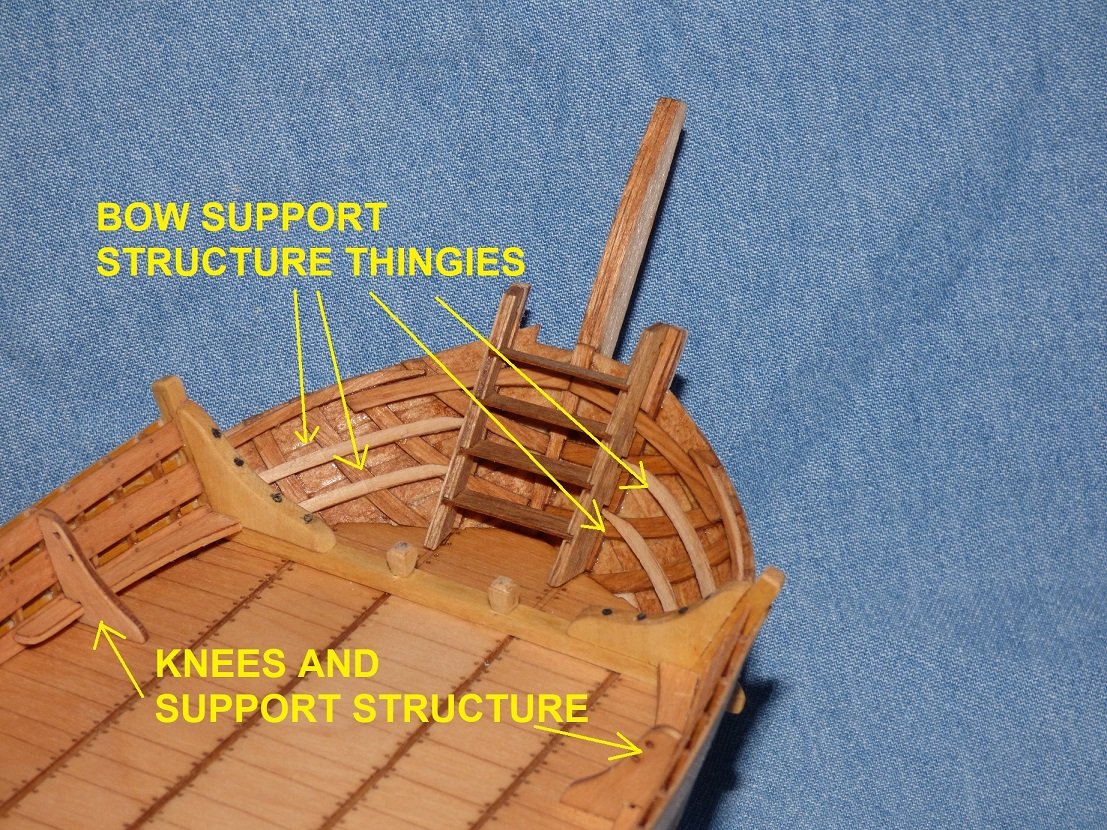
Clare, No, the support structures were there. I was just curious as to why we were adding them AFTER the ladder. Once I made the ladder, however, and saw the notches I figured it out.
- 130 replies
-
- 2
-

-
- wütender hund
- hanseatic
- (and 2 more)
-
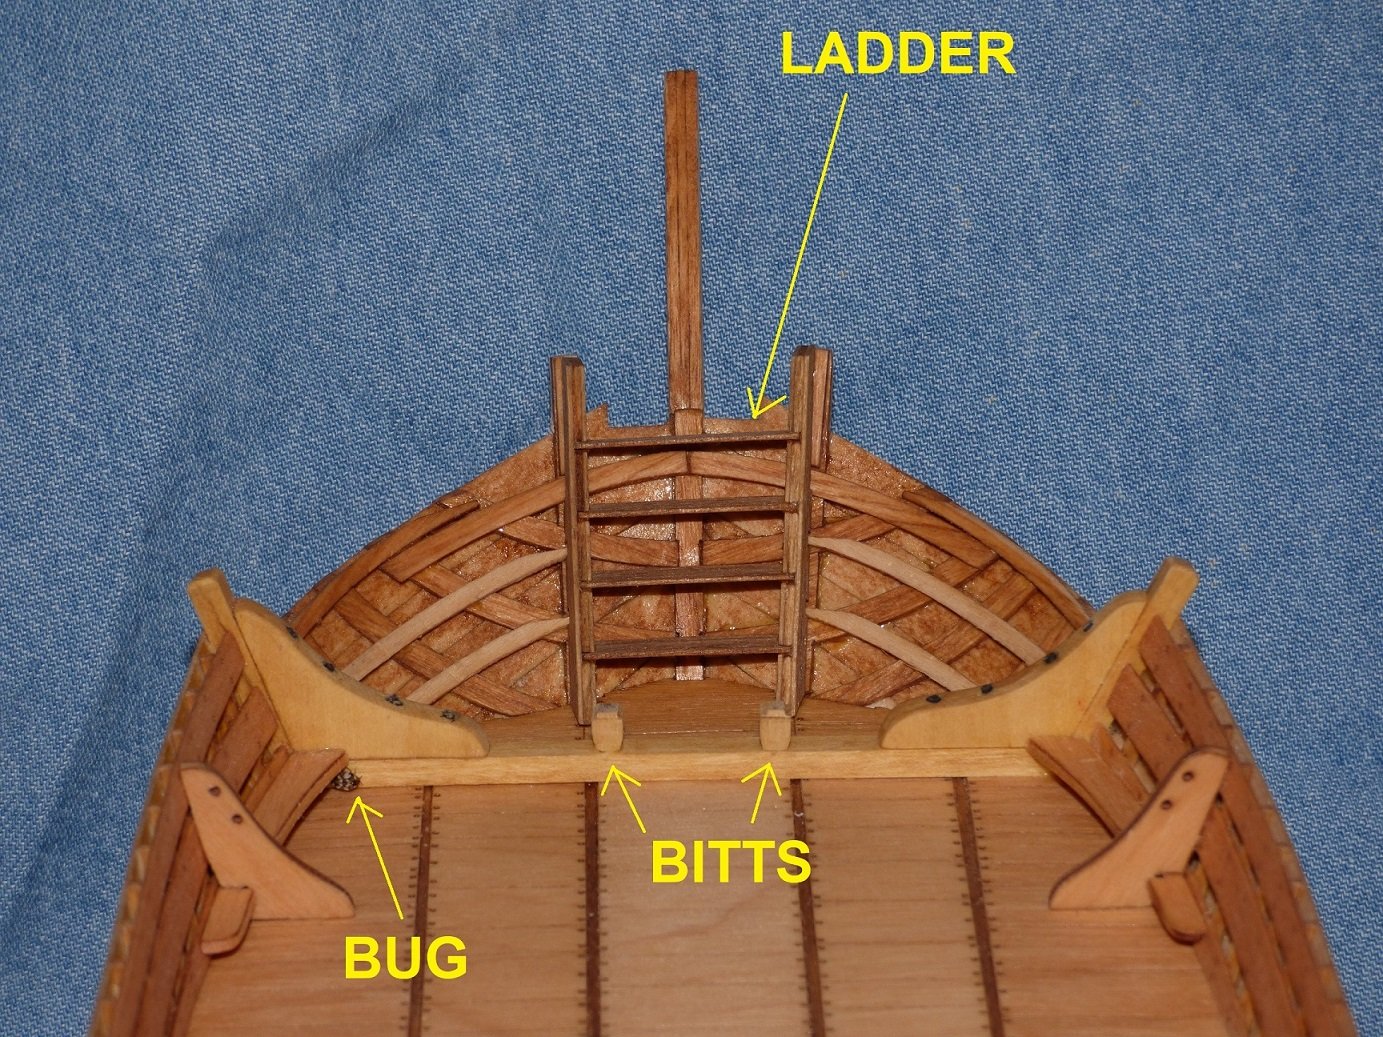
Progress continues. finishing up small parts of the bow area. Got photobombed by a bug who got onto the model before I starting photographing. Clare---I found you missing parts. I did not like the laminated bitts so I made my own. Next step. Add gudgeons to the stern, then stain the exterior hull. ...ooops, I have to stain the bow support thingies as well.
- 130 replies
-
- 6
-
-
- wütender hund
- hanseatic
- (and 2 more)
-
Retired and ready to build my first model!
Chuck Seiler replied to lraymo's topic in New member Introductions
...as with all things. 😗 Sometimes I venture off the beaten path and do step 5 before step 3, later to find out why 3 is before 5. With that in mind using wood glue rather than CA (super glue) and have some rubbing alcohol at the ready. This can be used to unglue a mistake (or as I like to call it, a learning experience) so you can give it another go. -
I just run the line thru my thumb and forefinger 3 o4 4 times to work the wax into the material.
-
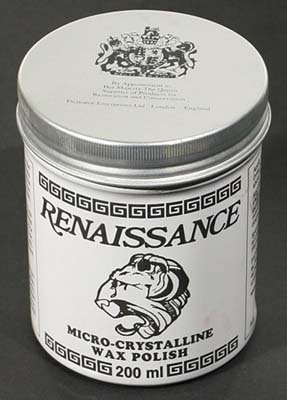
To wax or not to wax is an interesting area of discussion. If you DO decide to wax, I would recommend against using beeswax. Too acid. I use conservator's wax which is acid free. Below is what I use, but there are many kinds.
-
New to the community and wooden models
Chuck Seiler replied to Harland Wolff's topic in New member Introductions
Welcome aboard!!! Don't worry about doing well... that comes with practice. Patience is definitely a requirement. Eyesight is fixed with magnification. POLARIS appears to be a good starter kit with simple hull, simple rigging. I am not sure how good instructions are, but build logs will help. As an aside, you have a good model club (Rocky Mountain Shipwrights) in Denver to help you with your new hobby. I know at least 1 member is on this list. Good luck, have fun and whatever ANYBODY tells you, you can never have too many clamps. -
Clare, What did you use to make the holes at top/bottom of the sail? They look larger/more crisp than a normal pin hole.
- 175 replies
-
- 1
-
-
- hanse kogge
- shipyard
- (and 1 more)
-
I thought the same myself. There had to be an easier, more efficient and stronger way to do this in real life. ...or was it a single bigass pine tree?
- 175 replies
-
- 2
-
-
- hanse kogge
- shipyard
- (and 1 more)
-
Those were in the double secret encrypted instructions. Your mast looks good. I built mine while waiting for parts to dry...stained it with golden oak. Overall, looking good!!!
- 175 replies
-
- 3
-
-
- hanse kogge
- shipyard
- (and 1 more)
-
2021 NRG CONFERENCE
Chuck Seiler replied to kurtvd19's topic in NAUTICAL RESEARCH GUILD - News & Information
I received this from the NRG earlier today: 😢 2021 CONFERENCE CANCELLED The Board has made the difficult decision to cancel the 2021 Conference. Many of our previous attendees are senior citizens or have high risk factors for contracting COVID-19. Therefore, the Board has concluded that many members will still be reluctant to travel to attend the event this Fall. We have been in contact with the Channel Islands Maritime Museum and are hopeful that we will be able to hold the 2022 Conference there. -
Both links take me to the home page, regardless whether I click on the link or cut and paste into browser. Tried both Explorer and Firefox.
-
Making Knees
Chuck Seiler replied to Don Case's topic in Building, Framing, Planking and plating a ships hull and deck
I think it is important to note that a knee is essentially a triangle with 2 sides affixed to a solid location. Given that (as noted by several above) a model knee is under much less stress than an actual knee, grain direction is not as important. Plan accordingly. I recently made a couple knees from Alaskan Yellow Cedar for my cog. They turned out quite well. Grain ran parallel to one edge, making it easy to manufacture.
-
DOH! I think I had one or two instances where the parts were mislabelled in that the part that was supposed to go on one side was labelled for the other. My other problem is that small parts will drop off the sheet as part of handling. Sometimes I will find it at the bottom of the box, sometimes I won't. I have gotten to the point where, if I find a part ABOUT to fall off, I will take it off and put it in a small box for later use.
- 175 replies
-
- 4
-
-
- hanse kogge
- shipyard
- (and 1 more)
-
Oh boy!!! Another cog model!!!! Yes, the laminating of the small parts are a major pain. Even with the large parts I don't seem to get them aligned correctly, but am usually able to fix it (sand). The beam ends were a lamination too far. I am still grinding away with the small stuff on deck but need to decide which way I want to go with the super structure. I originally wanted to make the wood version into a traditional Bremen Cog but am now tending towards the "as designed" Wutender Hund version. I am looking forward to seeing your progress as well.
- 130 replies
-
- 1
-
-
- wütender hund
- hanseatic
- (and 2 more)
-
Differences between U-505 and U-534
Chuck Seiler replied to Street fighter's topic in Plastic model kits
The other difference is that U505 is currently in Chicago and U534 is not. It's in England. -
Of course not...you are a ship modeller. I am happy that I was able to provide inspiration. After all, it was you and Chris Coyle that inspired me. One might wonder why you would not install the hatch coming and cover earlier on. I found it very handy as a hold-place when installing the very delicate upper planking areas. Just sayin'
- 175 replies
-
- 3
-
-
- hanse kogge
- shipyard
- (and 1 more)
-
17th century English merchant flags
Chuck Seiler replied to Louie da fly's topic in Nautical/Naval History
BERLIN as a first model? Wow, good luck with that! -
I am really liking the wood version. The parts are much crisper and forgiving.
- 130 replies
-
- 1
-
-
- wütender hund
- hanseatic
- (and 2 more)
-
17th century English merchant flags
Chuck Seiler replied to Louie da fly's topic in Nautical/Naval History
Interesting. I had a couple come over in 83, one in 84 and a few dribbs after that. Where did your friend's come from/go to? -
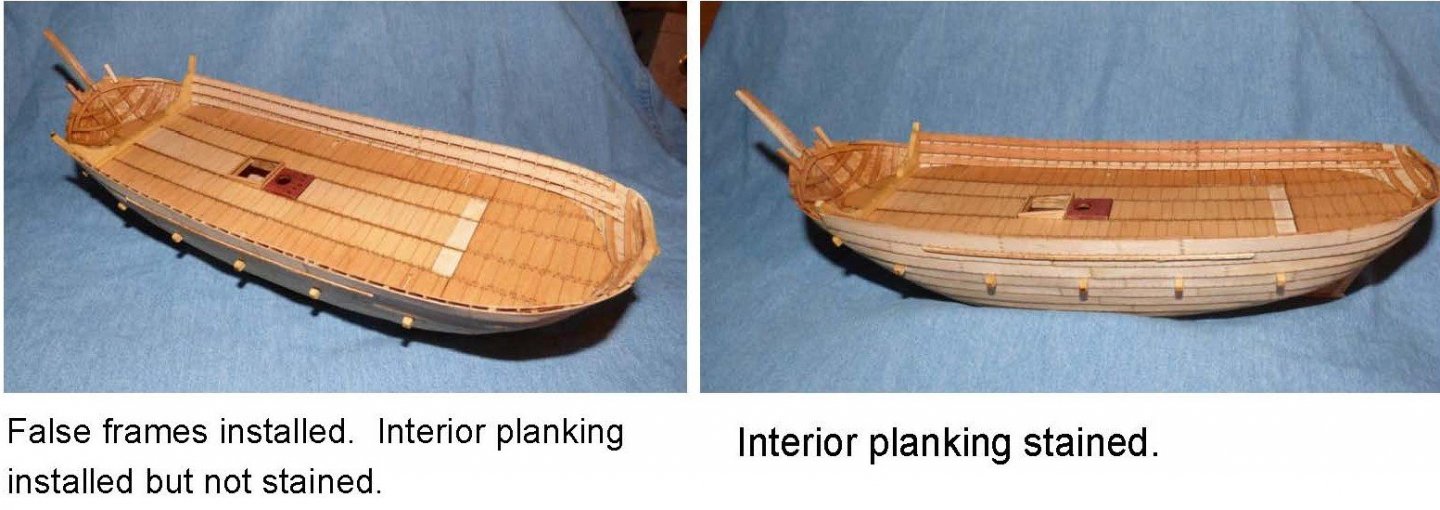
Much progress made. All the false frames have been installed and the interior planking also installed. I was concerned with staining under the interior planking. As you can see there are gaps between the strakes and you can see underneath. The back side of the planks are not the same material as the front and do not take stain well. One side I attempted to stain and the other I painted. The interior planking took stain well. I used 2 coats of Natural and 2 of Golden Pecan. I will probably use the same for the exterior planking. Should I apply Poly Wipe On or will it goober up the finish (the stain being oil based)? Center deck planking has been added and stained as well. Hatch coaming added. I am now at the same point of construction as I am with Cardy Dog.
- 130 replies
-
- 5
-
-
- wütender hund
- hanseatic
- (and 2 more)
-
17th century English merchant flags
Chuck Seiler replied to Louie da fly's topic in Nautical/Naval History
Would this also be true of a ship carrying colonists from London to Philadelphia in 1683? I suppose, after all, it IS a merchant ship. -
I have experimented with ink. The closest color I prefer is with Higgins Sepia. Unfortunately this is not waterproof so I treated it with conservator's wax. I don't know how long it will remain colorfast...I guess we will see. My alternative is Dr. Ph. Martin archival Sepia India Ink. It claims to be waterproof and permanent. I don't like the color as much as Higgins, but I believe it is acceptable.


