


Chuck Seiler
-
Posts
1,876 -
Joined
-
Last visited
Content Type
Profiles
Forums
Gallery
Events
Everything posted by Chuck Seiler
-
 Woooooo hooooo! I made it! I'm in. Which one of those is mine? Seriously, thought....great job Chuck. We appreciate the effort. I hope to do you proud.
 -
I agree with Jim, except the water based gave more of a splotchy finished didn't care for it at all. I have an old can of oil based gloss. Many have recommended the satin. When I tried to find here in California, I was unable to find oil based satin, so I got water based. Tried it on my Queen Anne Barge. You see my thoughts above. I reverted to the oil gloss. I had i discussion with another member (Claire I believe) at the NRG Conference who suggested that I might not be able to get oil based in Cali....so I stopped on my way out of Nevada and got some. Don't tell Guv'ner Brown. Go with the oil.
-
To combine the thought of the 2 previous posts....getting familiar with the bend and twist of each TYPE wood. Some woods bend and twist very easily, whereas if you do that with other, more brittle wood, they snap or split.
-
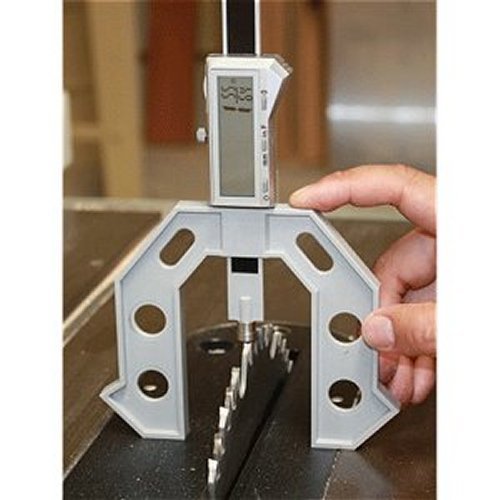
I am looking forward to getting started so I can try using a method Kurt VanDam suggested during one of the NRG Conference technical sessions. Using an iGaging multi-use huzzywutchet (purchased for a mere $19 on Amazon) I plan to measure the thickness of the piece to be joined, cut it in half to determine the depth of the cut. "What is so new about that?" you might ask. I will then use the huzzywutchet to set my Byrnes-saw blade to the correct height and mill away. (Don't tell Kurt I might be doing this free-hand.) I will try it out on a test piece first.
-
I dunno. Alaskan Yellow Cedar (AYC) is great for planking, small deck furniture and structural for small models but I am not sure I would want to use it for something the size Brian is envisioning.
-
Brian, It depends on how badly you want the keel to be boxwood. If the answer is “absolutely” I would get a ¼” thick sheet from either Crown or Syren and slice off a few 3/8” pieces for the keel. You are also going to need ¼ inch thick for the sternpost and stem assembly. Its a bit pricey ($15) but you will have a decent piece of boxwood leftover that you can use later...and box is only going to get MORE expensive. Option B is “other”, but not basswood. After working with cherry in the Queen Anne Barge, I find I really like that wood. Also much less expensive. Darker though. Chuck
-
So, you HAVE seen my Queen Anne Barge buildlog. The rubber bands seemed like a good idea at the time.
-
....particularly with new posters. I have had that happen before where nobody posts (because it gets lost in the shuffle), then people find it and comment...and it gets posted for others to see. Never give up. Never surrender. Post often instead of single long posts.
- 87 replies
-
- 6
-

-
- scottish maid
- artesania latina
- (and 1 more)
-
It looks like Doug is first out of the gate (not counting Chuck or Stuntflyer Mike). Great progress so far!!!!
-
Don't be embarrassed. It's a learning experience. If ONLY pull off one or two planks on any given model I am pretty happy.
-
Yo Mike, Welcome back! It is good to see Aggie back in the blocks. I missed you in Vegas. I was lost without my dinner partner.
- 150 replies
-
- 2
-
-
- agamemnon
- caldercraft
- (and 1 more)
-
As we wait for the MLB to come available, I recommend you review Chuck's MLB buildlog (posted at the bottom of the topic). This is particularly true for anybody who has not read it yet and/or has not built the Queen Anne Barge. There are a lot of little tips to; keep from losing parts; to keep your frames true and the keep the frames from wobbling around in the build board.
-
How was the 2018 Conference?
Chuck Seiler replied to VinceMcCullough's topic in NAUTICAL RESEARCH GUILD - News & Information
Oh! My misunderstanding then. I thought she said it was unique to Sherline, but if it works on others, outstanding. -
How was the 2018 Conference?
Chuck Seiler replied to VinceMcCullough's topic in NAUTICAL RESEARCH GUILD - News & Information
Unfortunately I think that feature (internal live center) will only work on the Sherline lathe. -
Yep. Here I am, waiting for my longboat to come in. I wanted to get my sweep in the water for this one, but will hold off until the second batch. I want to get more progress on my QAB and don't want to hog short-supply Medways. However I do want to get started soon. This will be fun!.

-
Before you start hull planking I recommend you check out Dubz's build log. He ran into some issues where the plans did not match the instructions, or something like that. I don't recall exactly what it was,but it resulted in having to remove all planking and start anew. You should be able to locate that portion of the build...IIRC there was alot of wailing and rending of garments.
-
Nice mermaid! I think I saw her in a bar in Vegas.
-
Ab, I just bought your book on 17th century Dutch mechants. I plan on building a pinas. Your models and photos will be an inspiration and treasure trove of information.
-
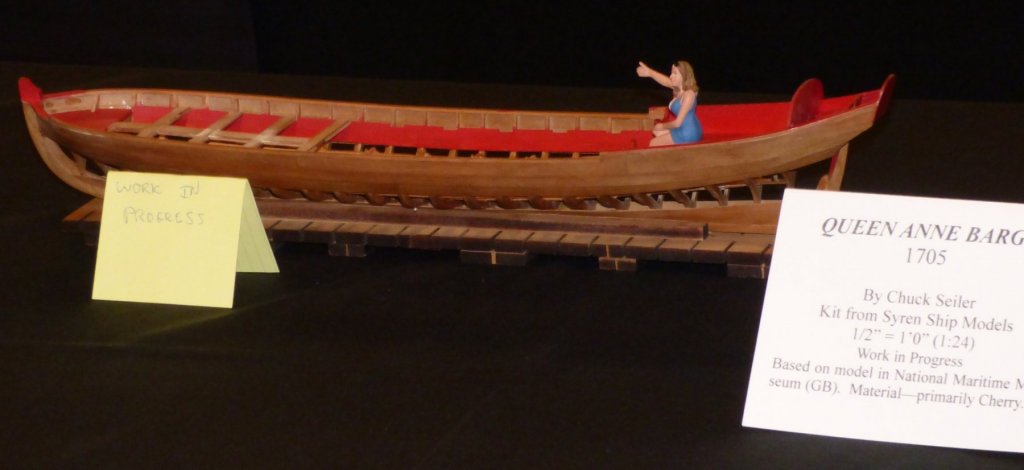
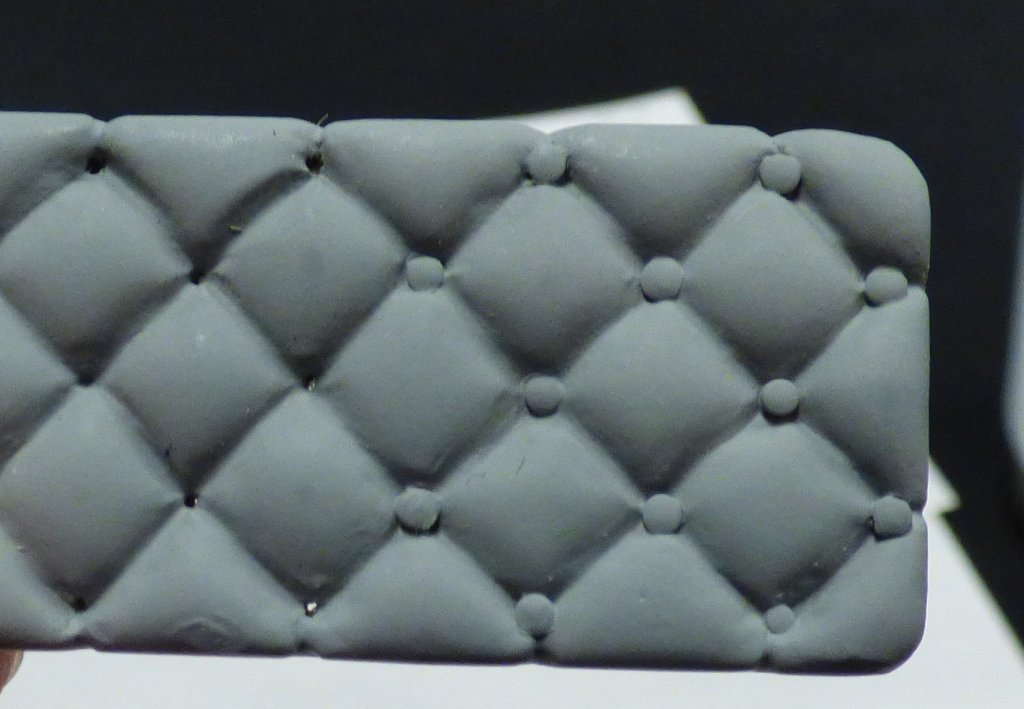
With Cap't Steve starting his QAB build log, I wanted to take this opportunity to show some progress. It has been about 3 weeks since I posted, but I assure you work has continued. Progress, to date, was unveiled at the NRG conference in Vegas. One of the round table-workshop sessions convinced me that the barge needs upholstered seating. As you can see from photo #1, the Queen agrees.
-
Drill and peg before it breaks.
-
Aaron, Heh heh! Been there, done that. Once I glued the part back on I drilled a small hole down through the top, size 76 or smaller drill bit. I then inserted and glued a bamboo peg into the hole...even at that size bamboo is relatively strong. I "turned" it down on my dremel and sand paper. I don't recall if my longboat is linked to my signature, but I think I cover this in my build log.
-
So, those of us going to the conference, then meandering around the Southwest for a week and may not have access to the interweb....can we reserve a spot in line now?


