


Moonbug
-
Posts
948 -
Joined
-
Last visited
Content Type
Profiles
Forums
Gallery
Events
Posts posted by Moonbug
-
-
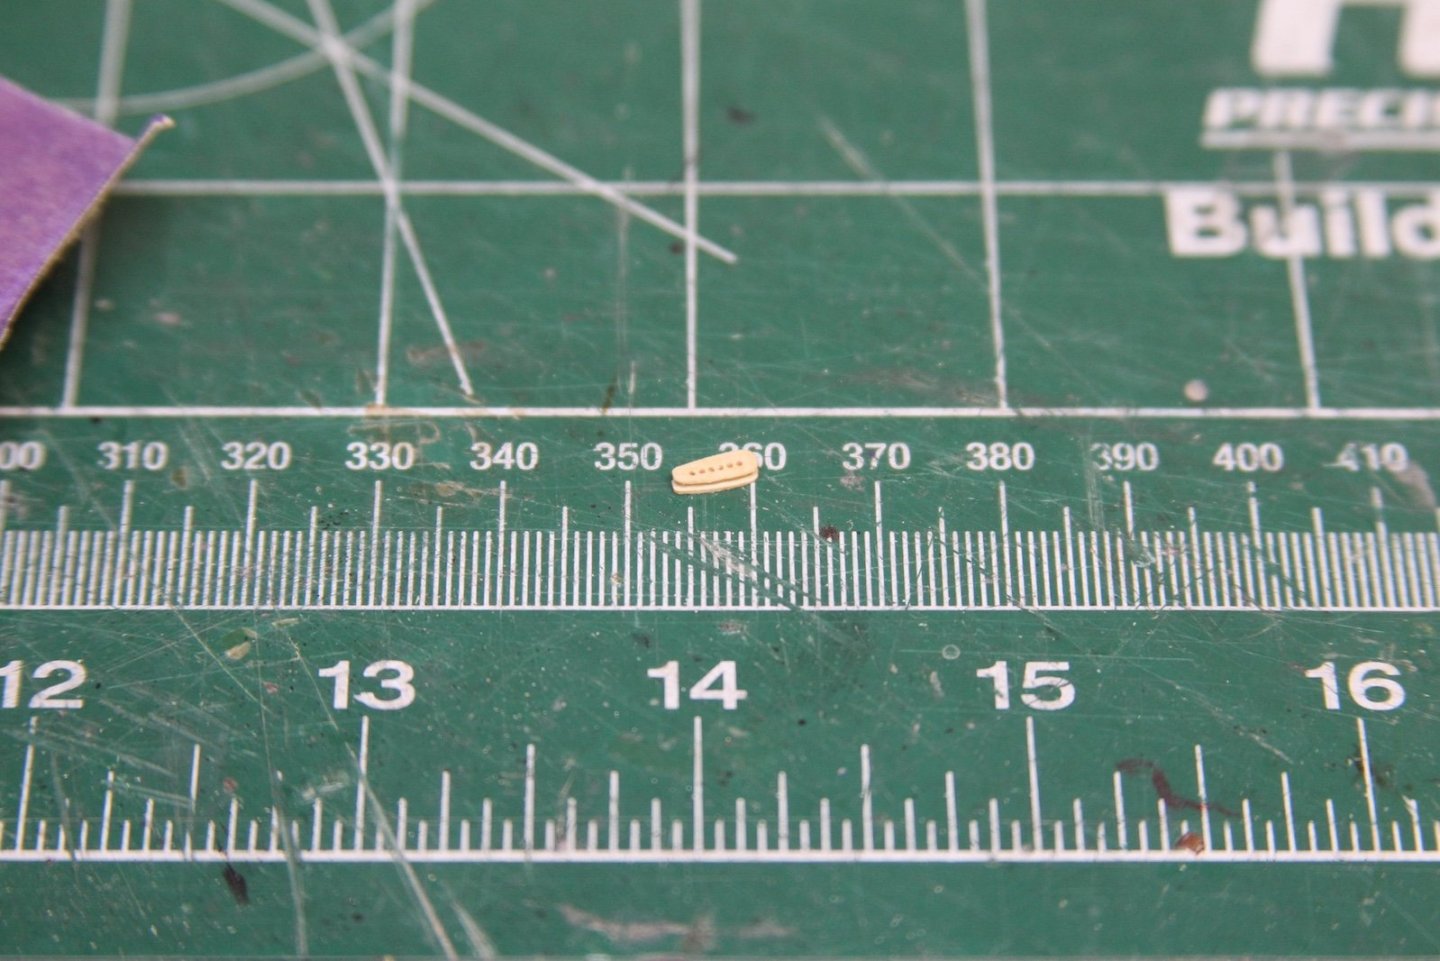
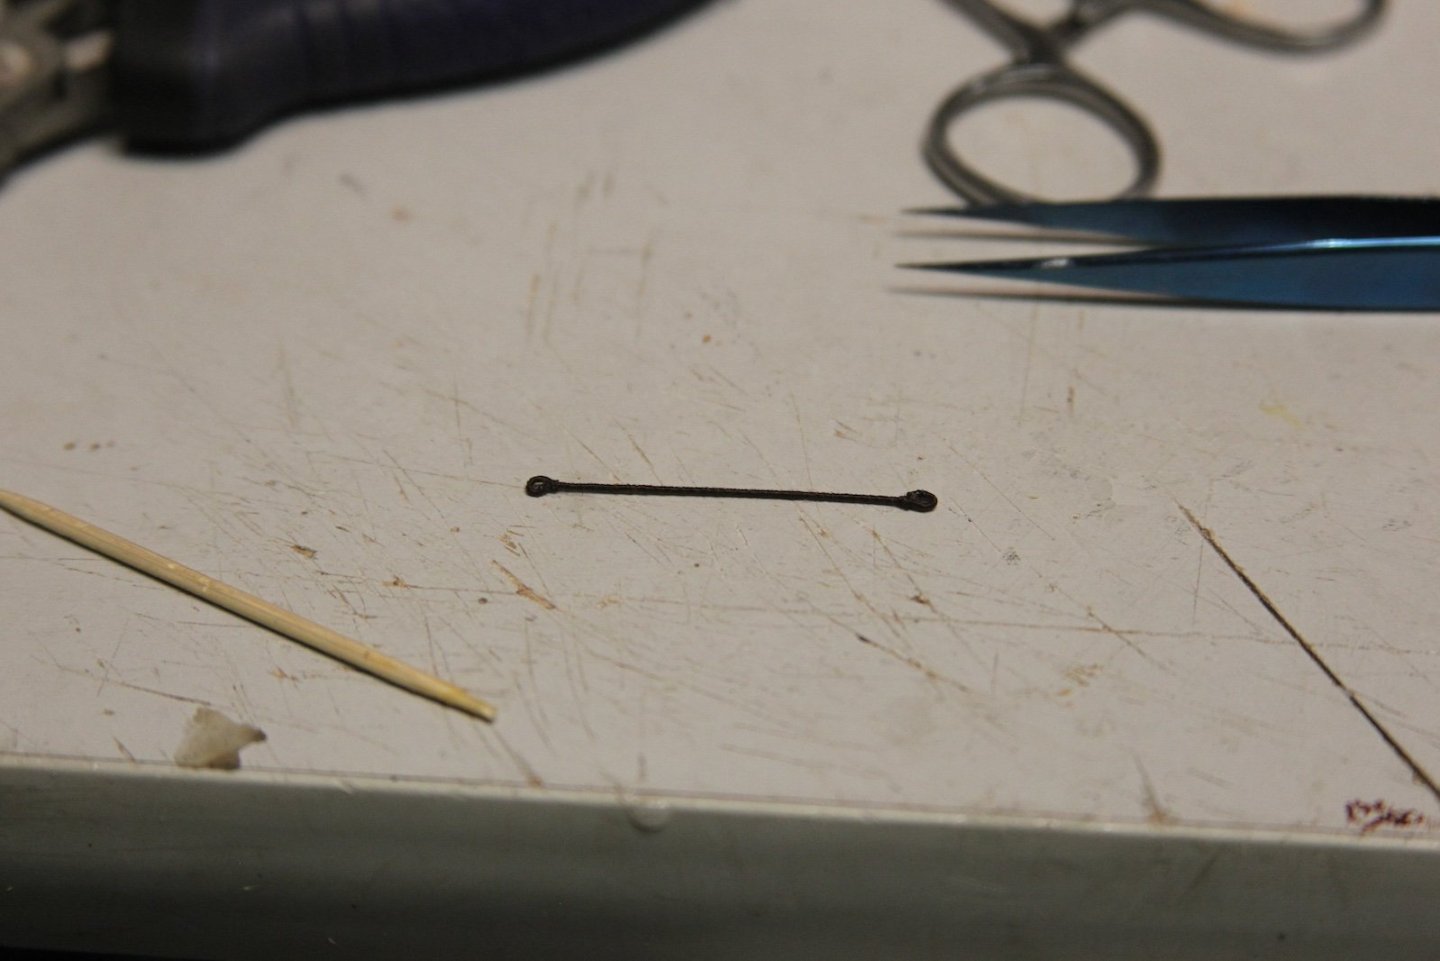
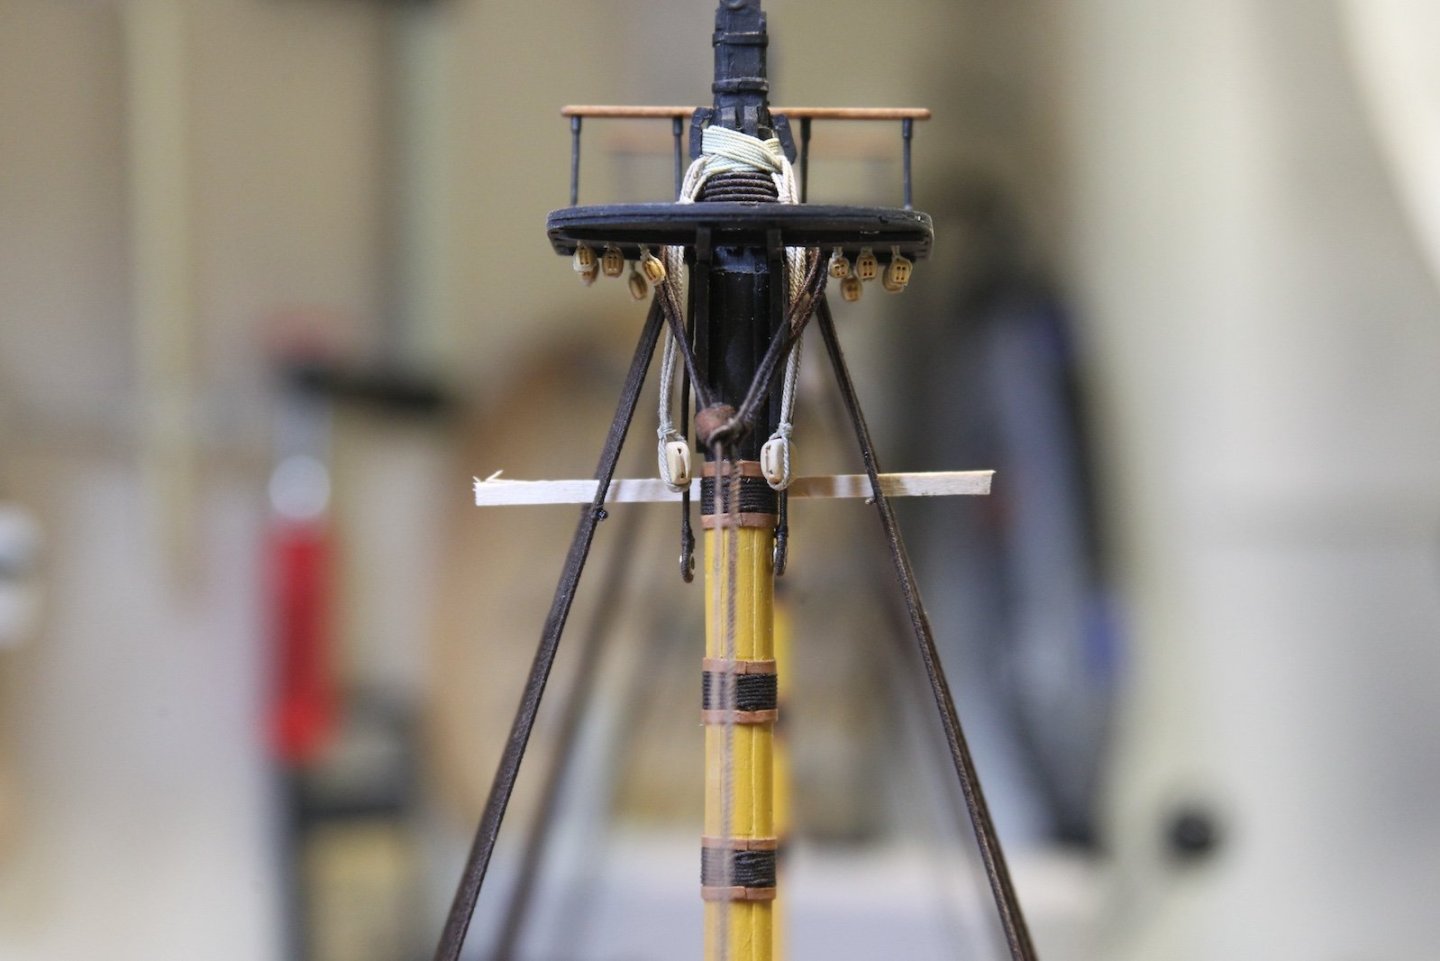
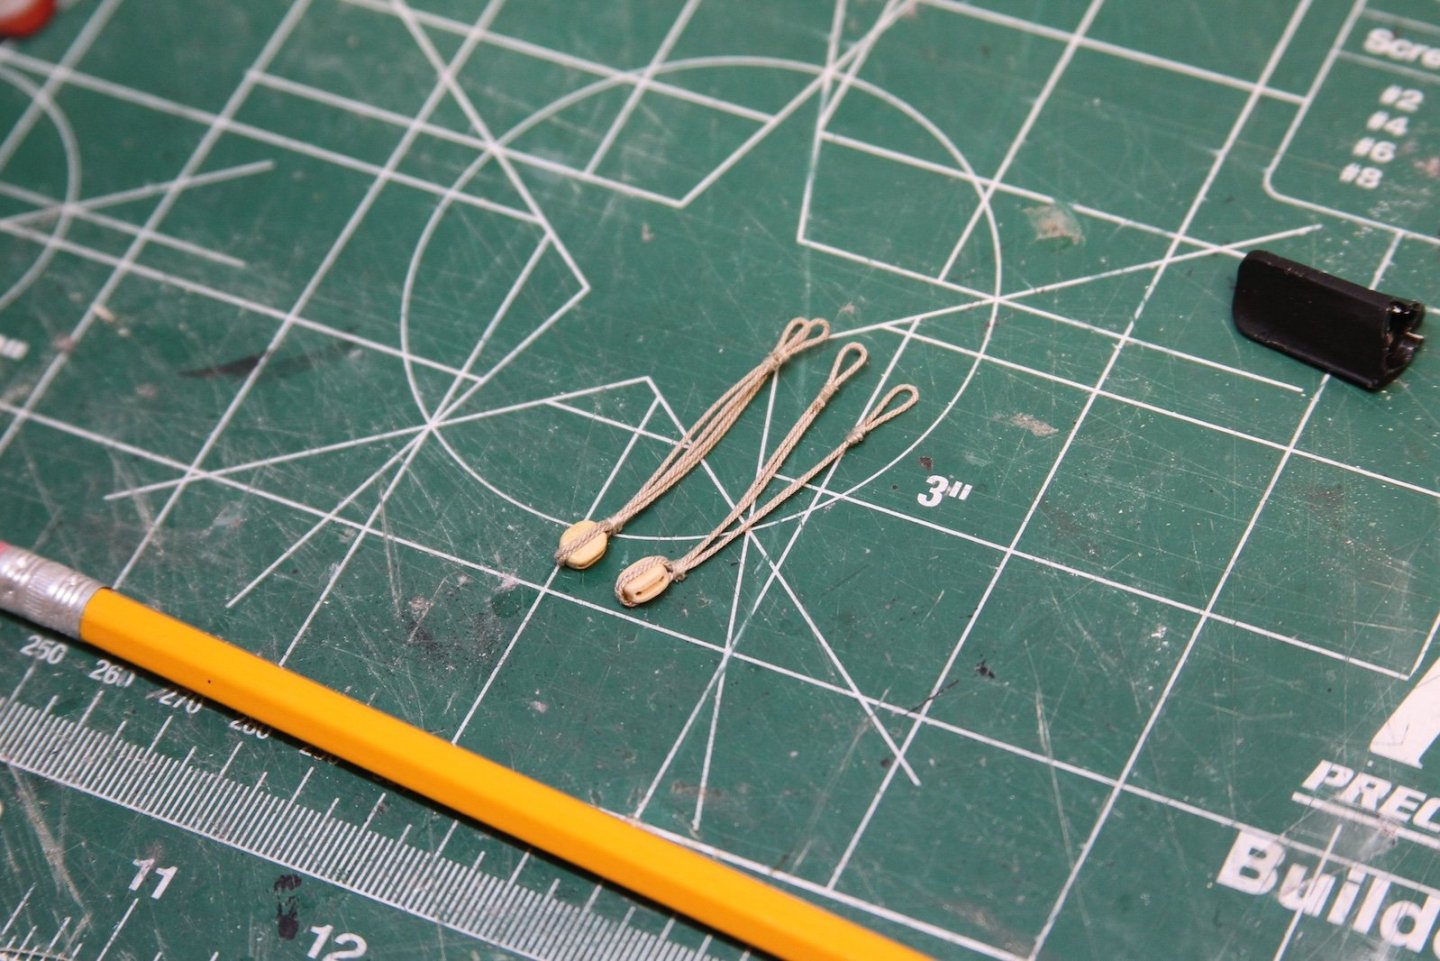
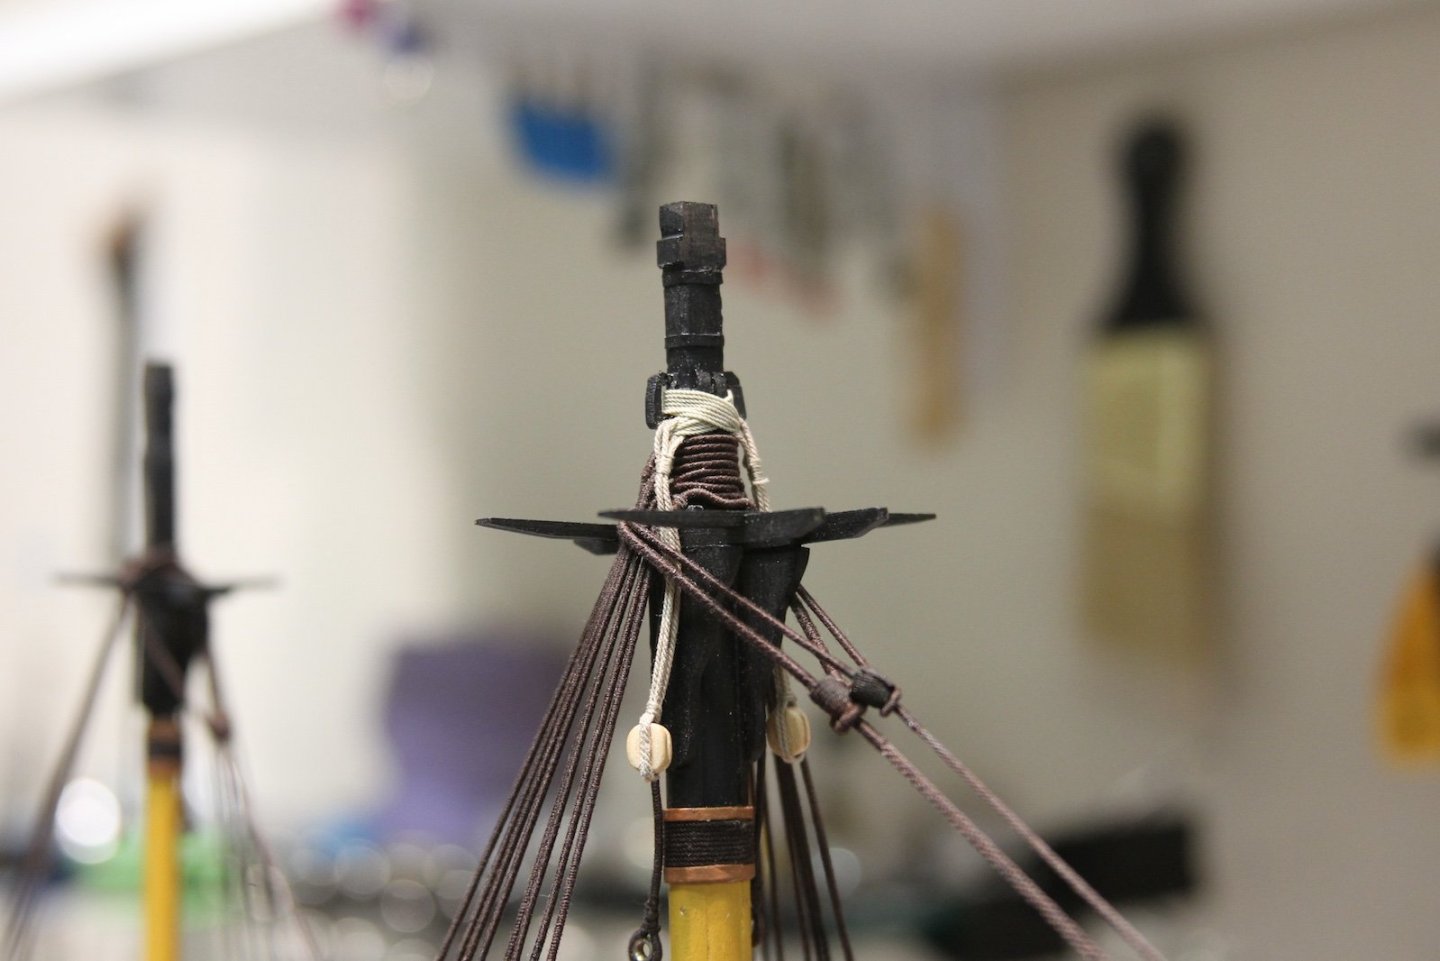
Before the upper shrouds can be rigged, the upper burton pedants have to be laid over the mast heads. The upper burton pendants are done basically the same as the lower ones with a couple of exceptions - they're only on the main and fore masts and they're a bit smaller. So instead of using the little nuts I shaved down for the lowers, I used a brass tube notched, cut, and sanded. The line is listed as 3", so I'm using .35mm served it's length and then tied with eyes around the thimbles.


- mtbediz, Thukydides, Barbossa and 2 others
-
 5
5
-
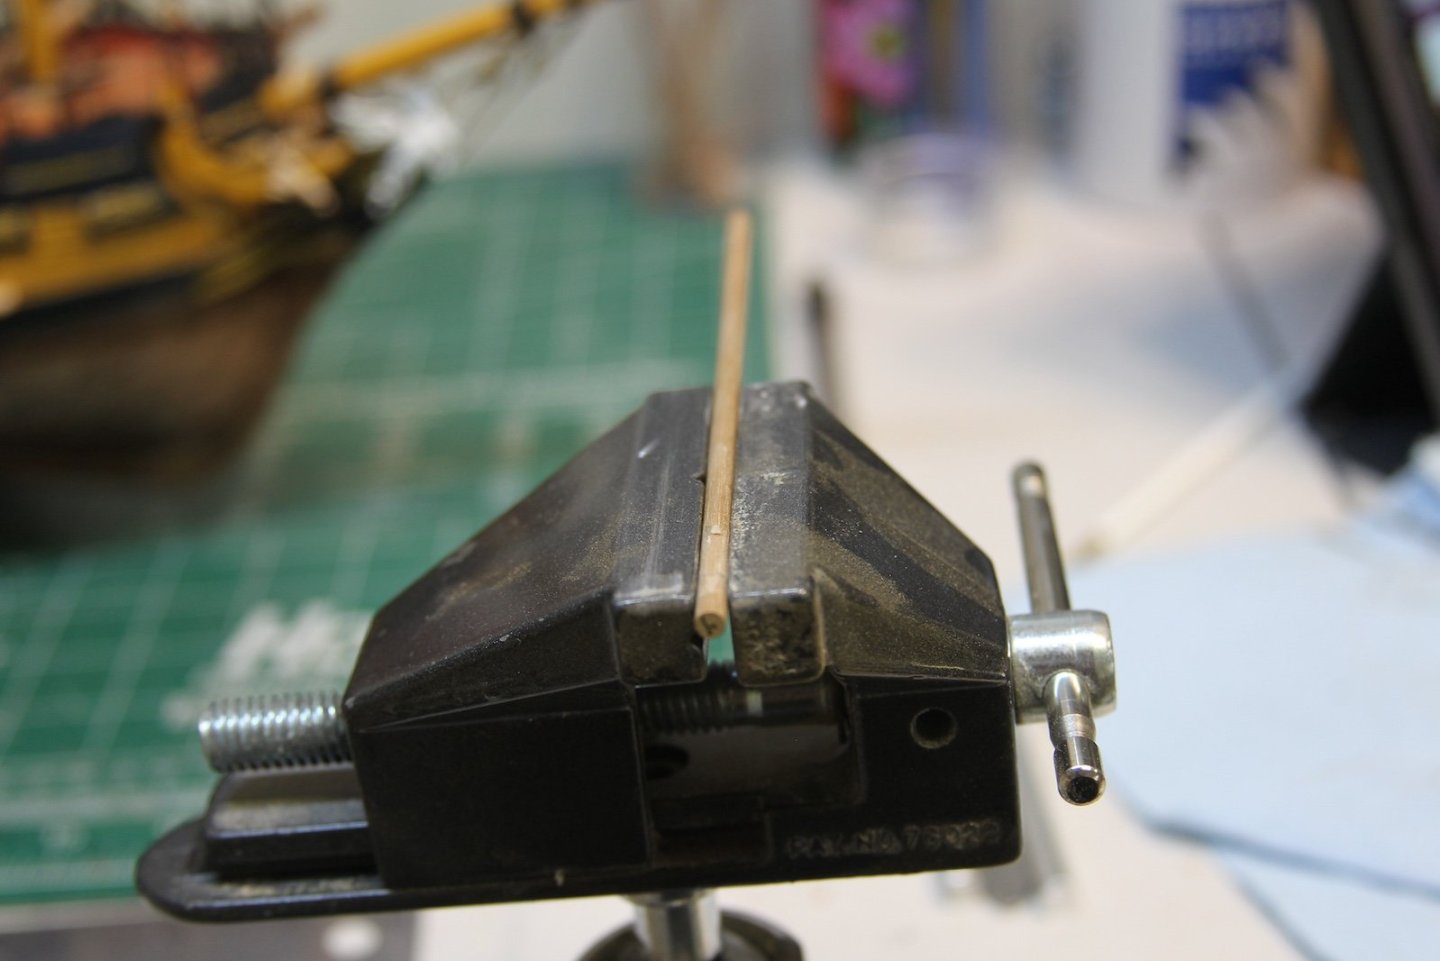
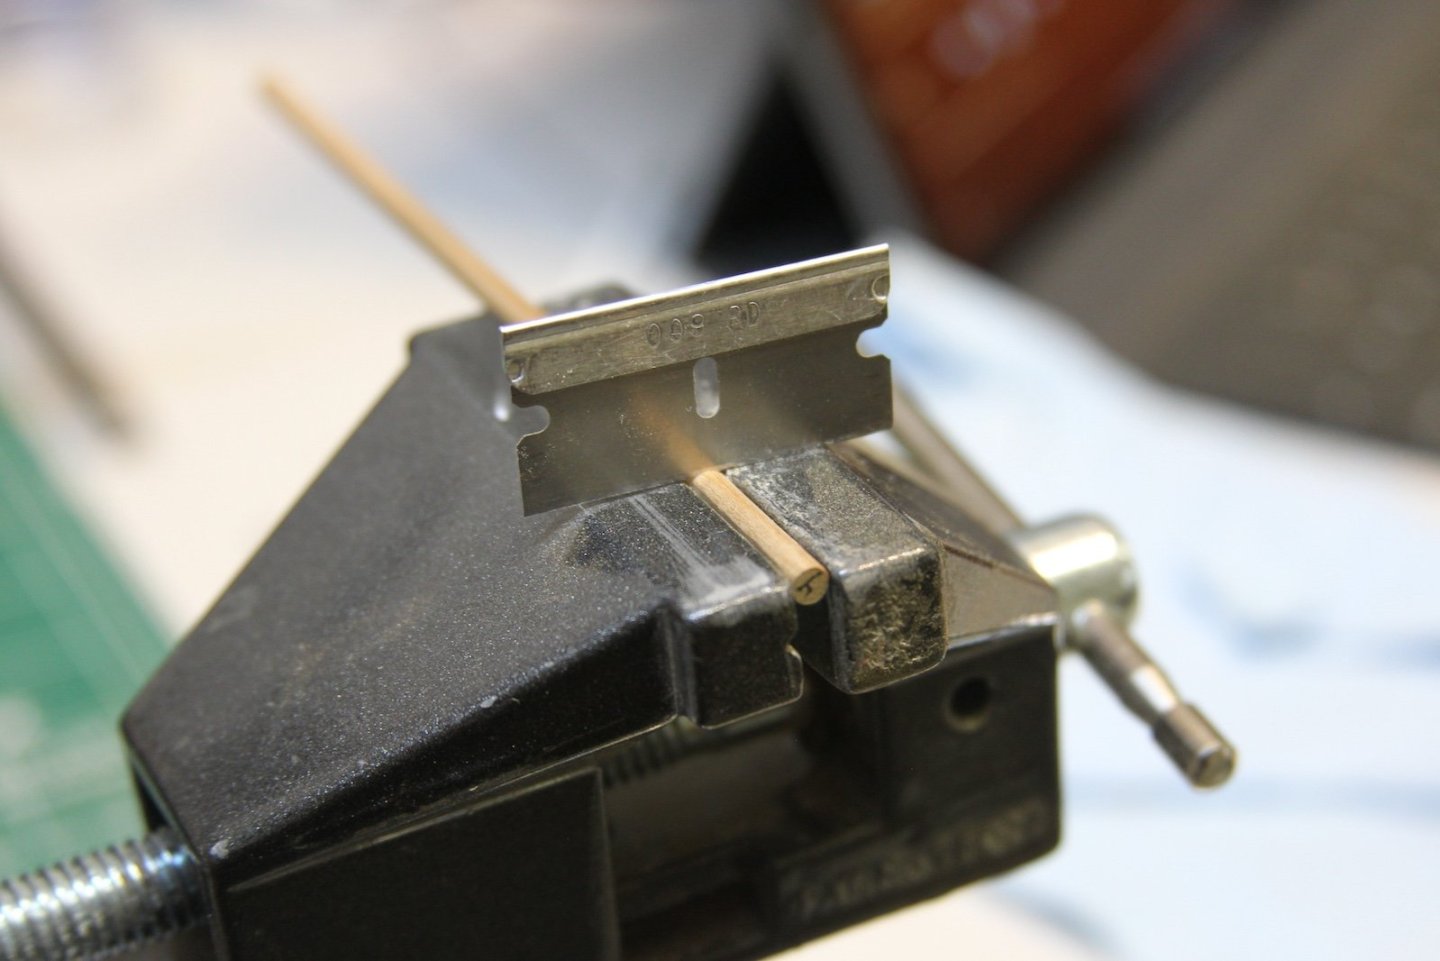
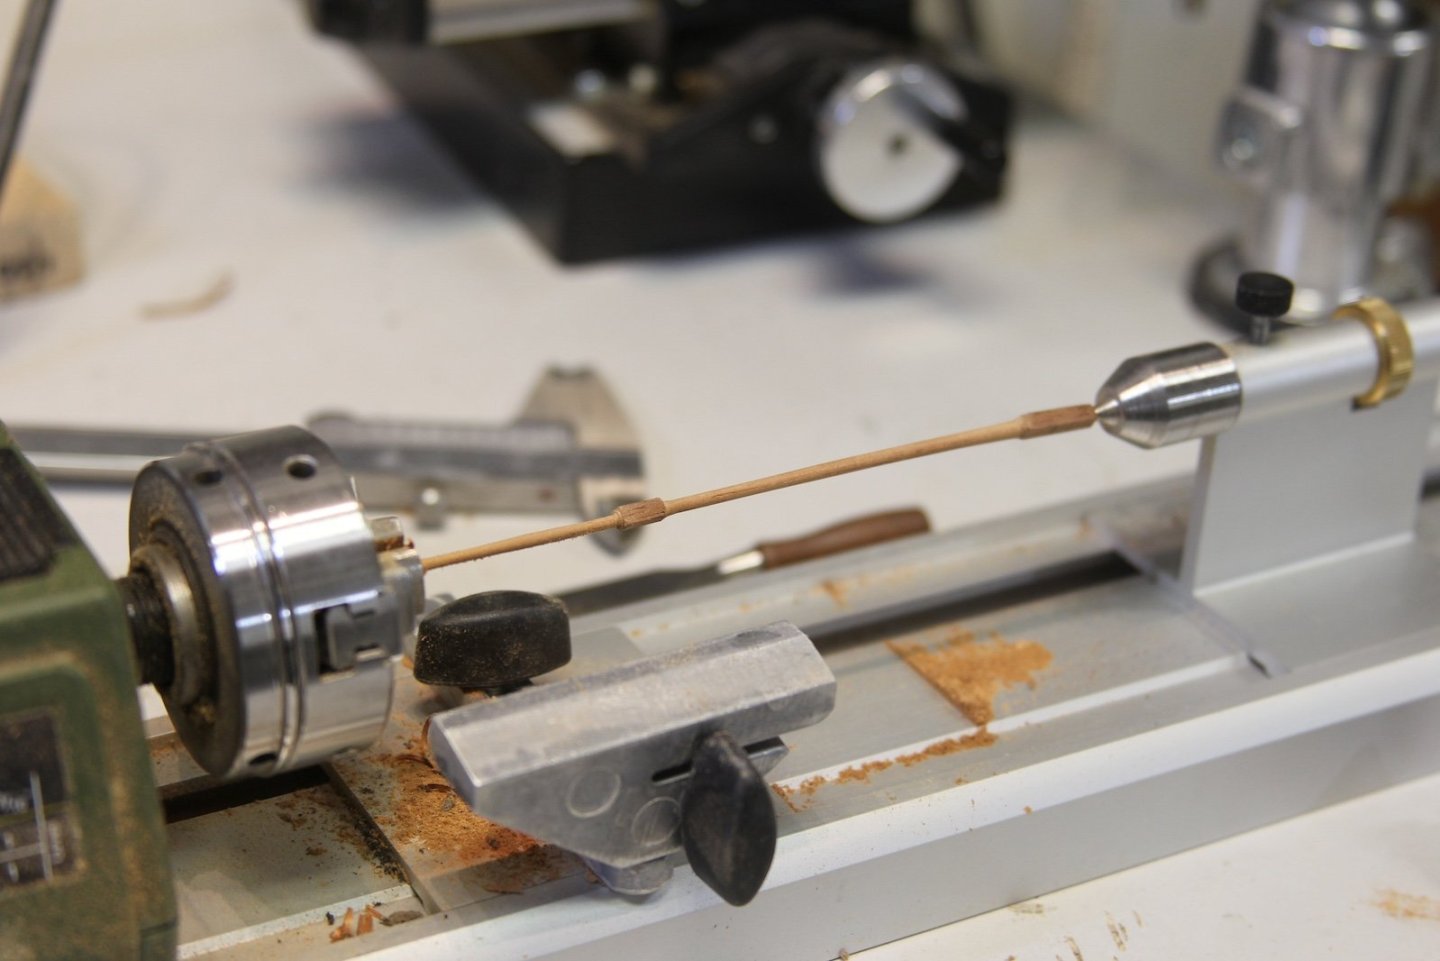
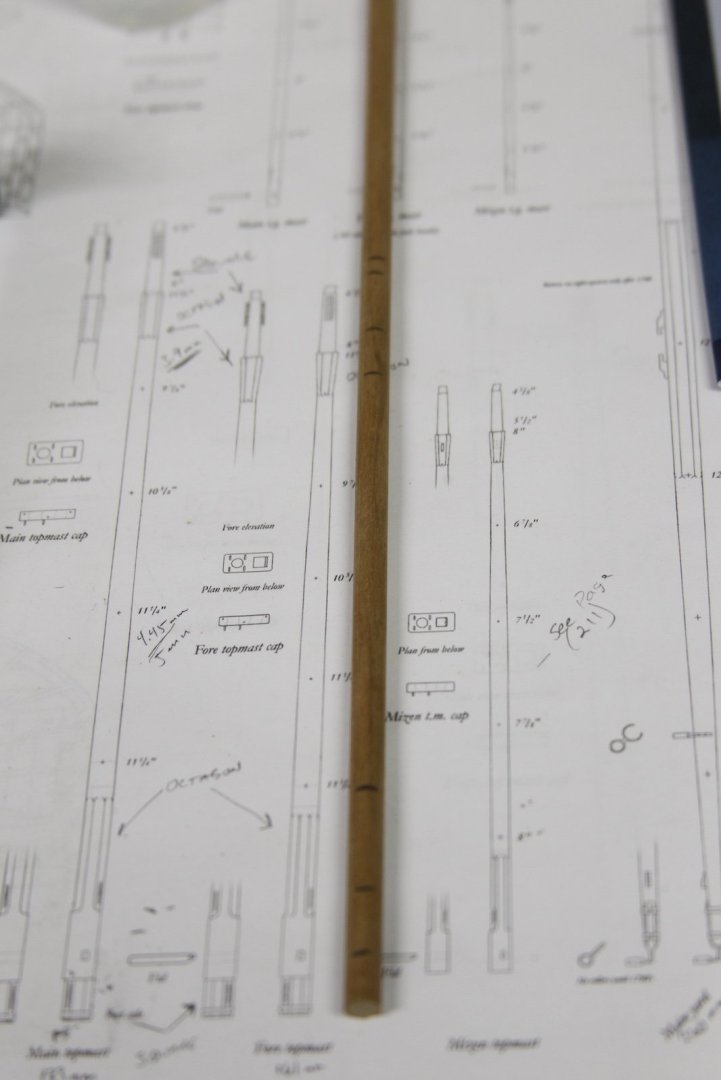
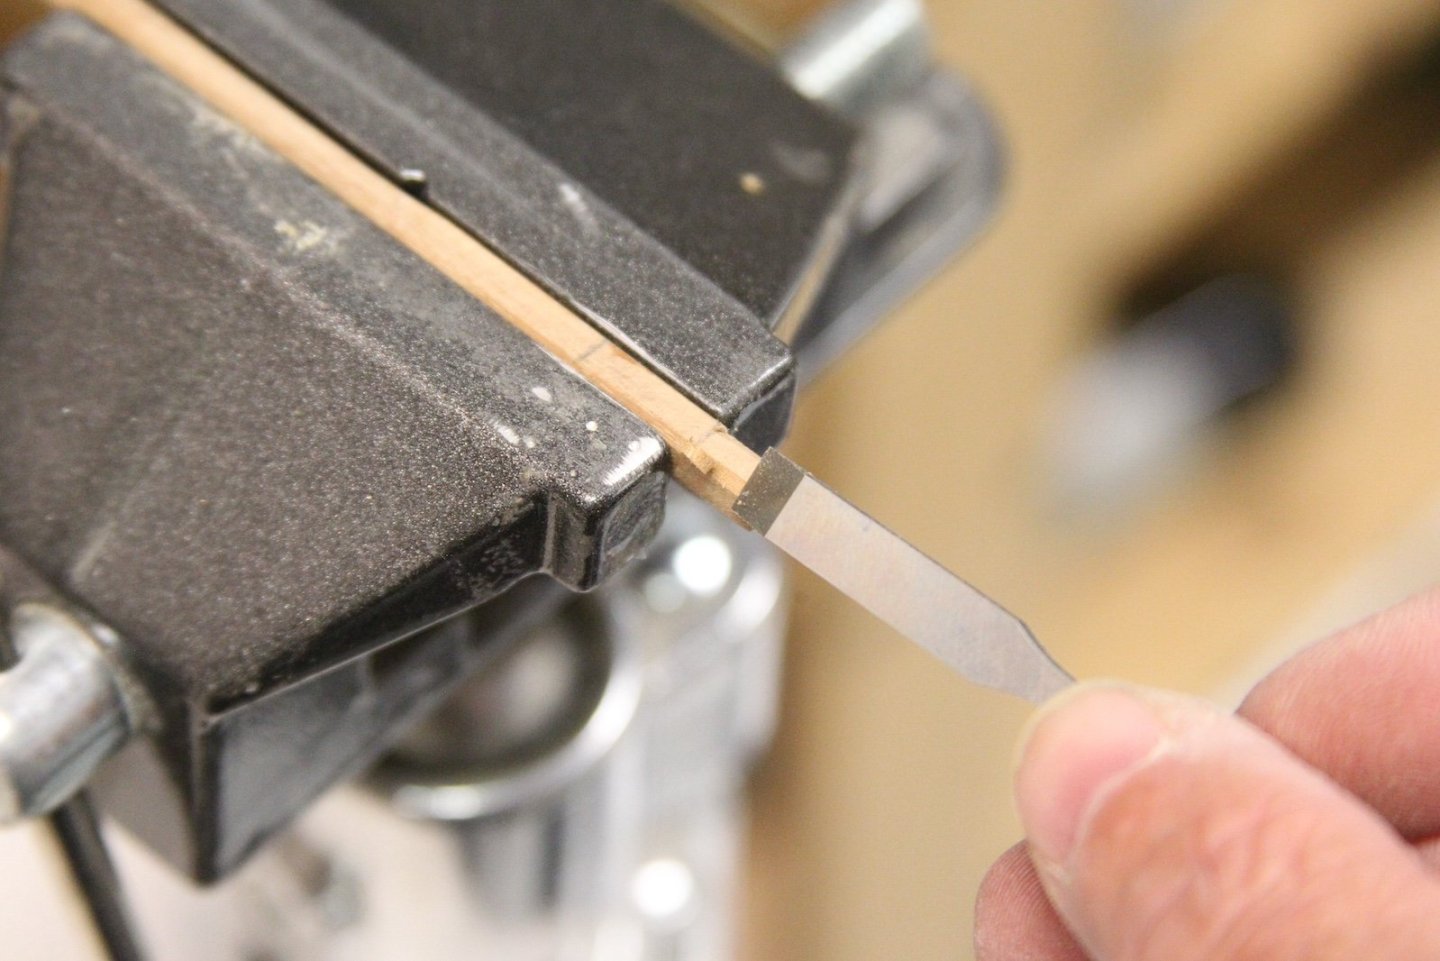
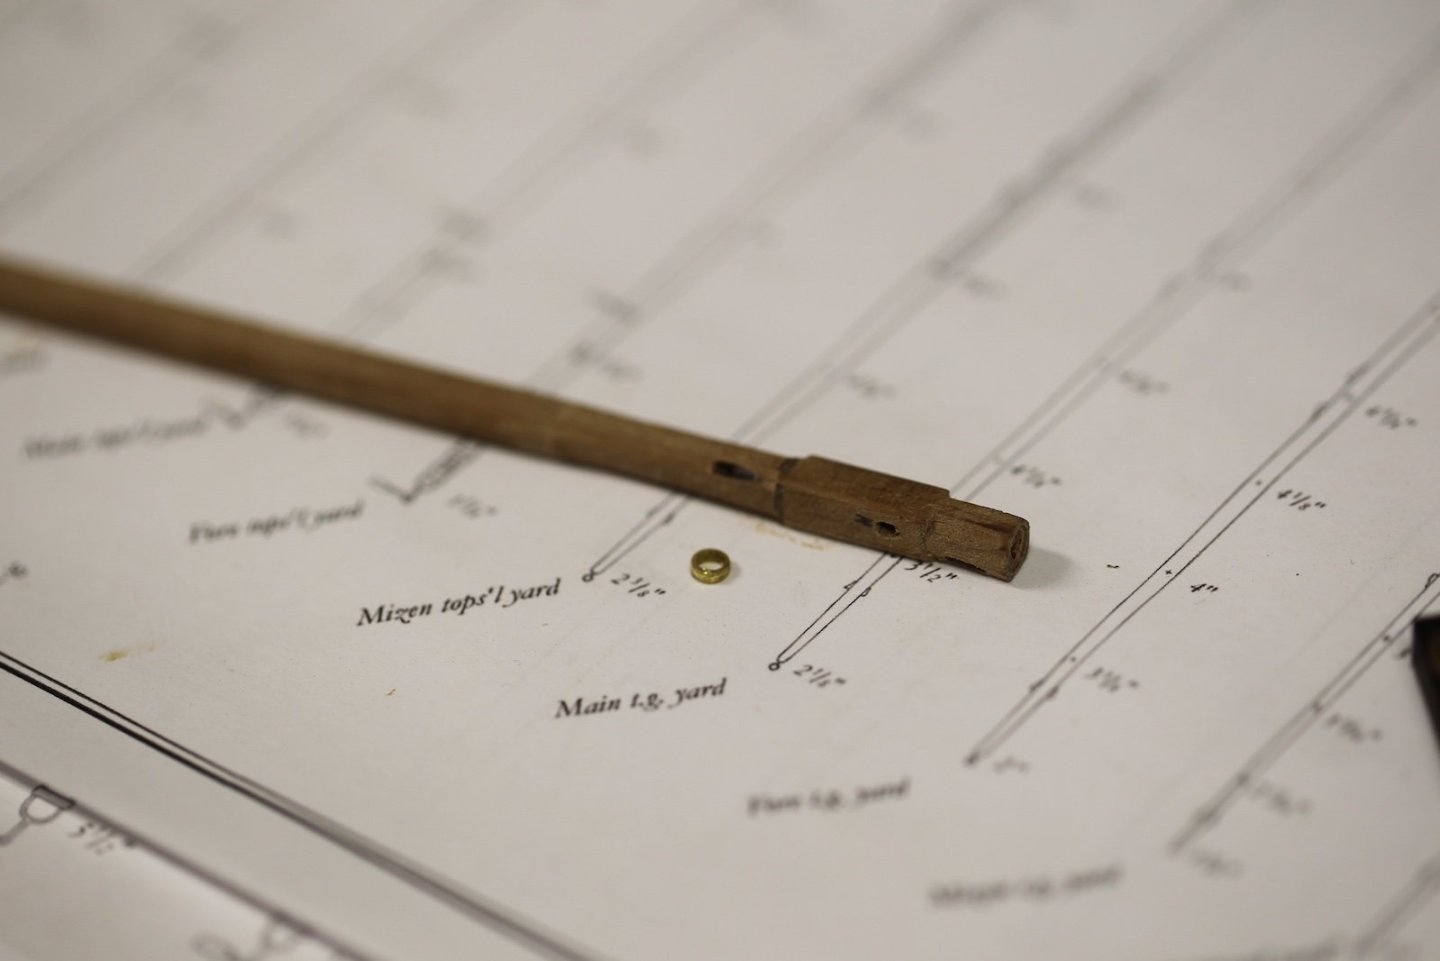
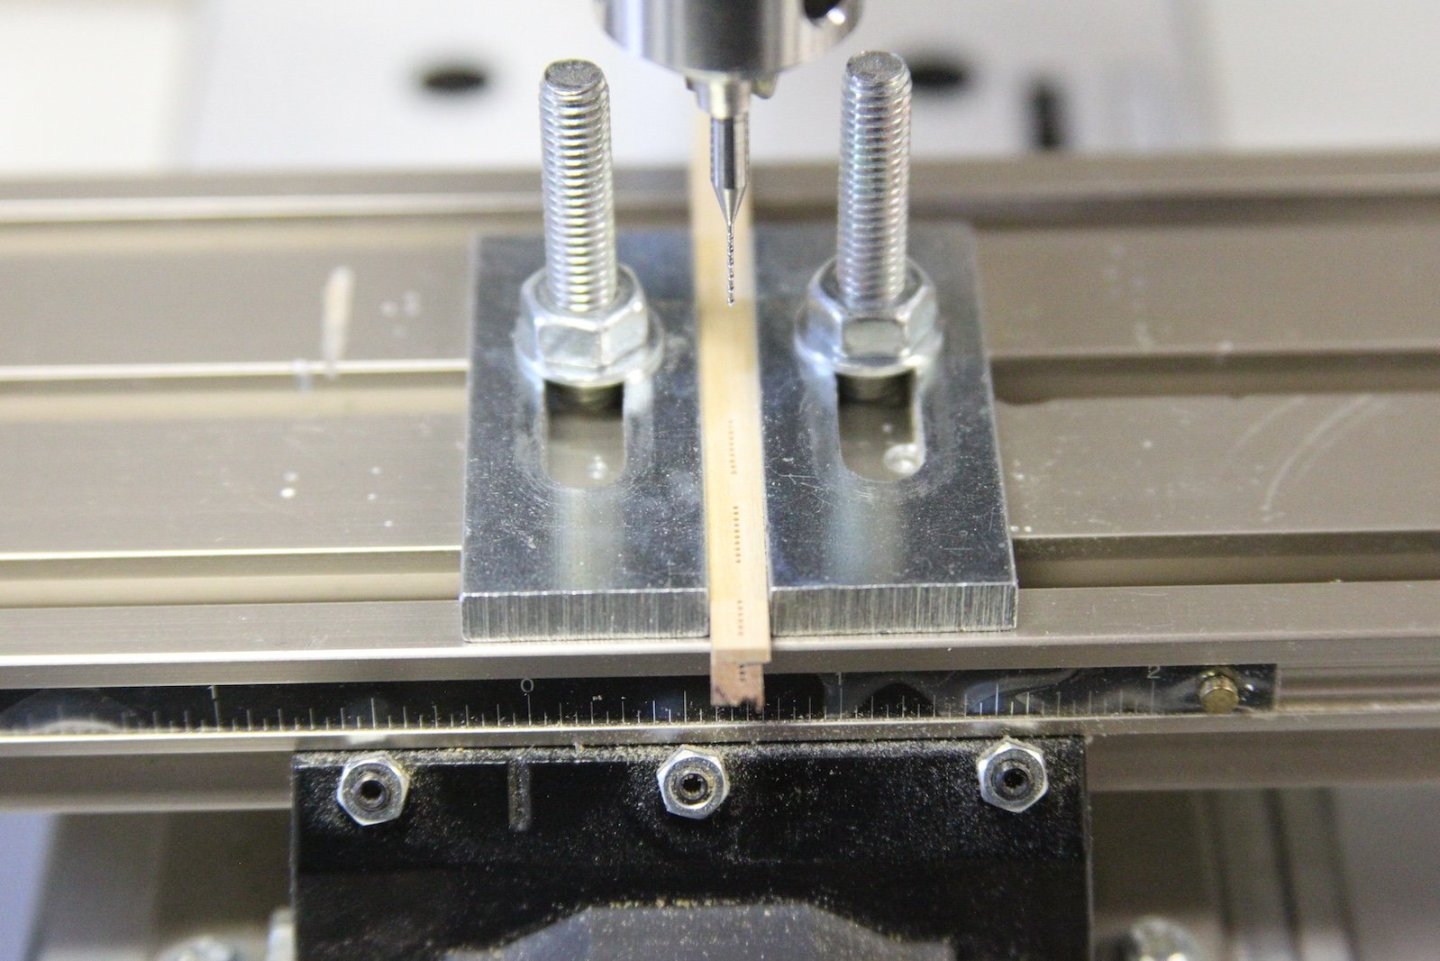
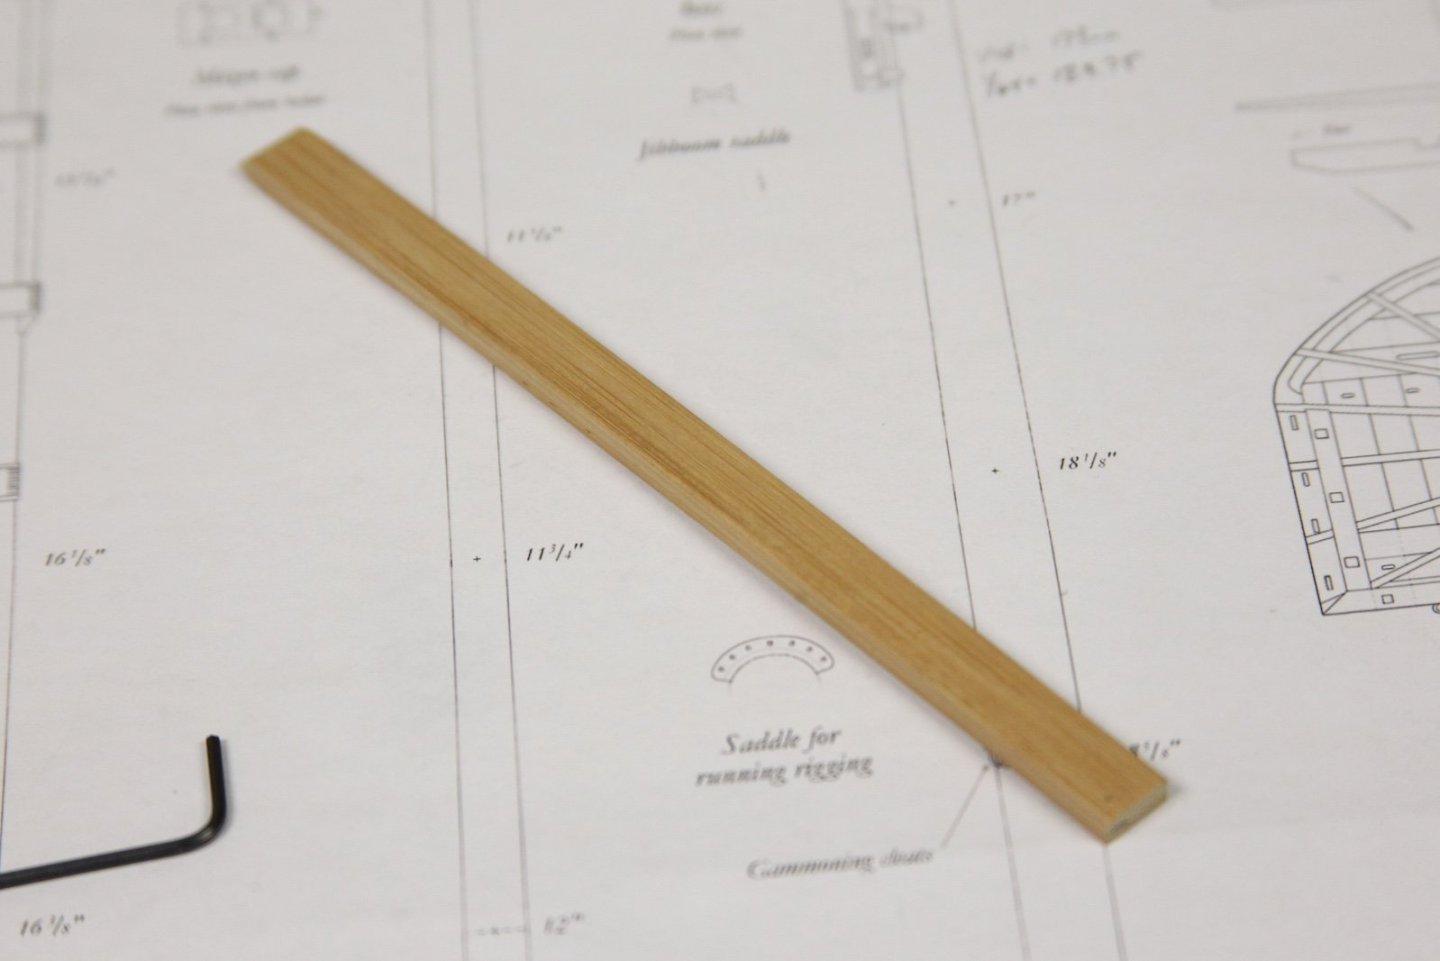
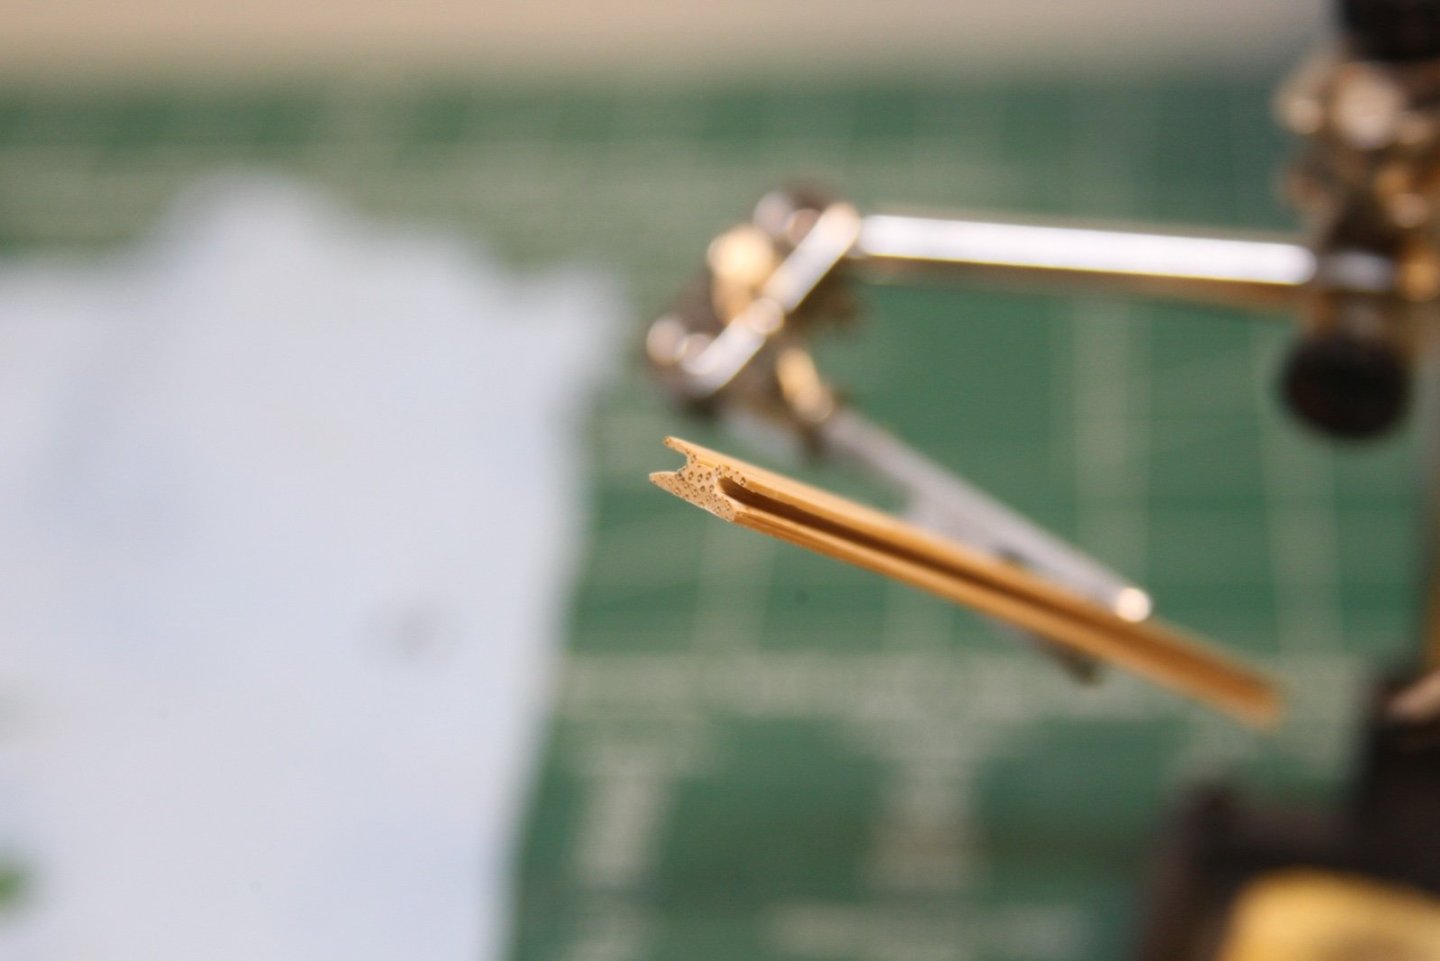
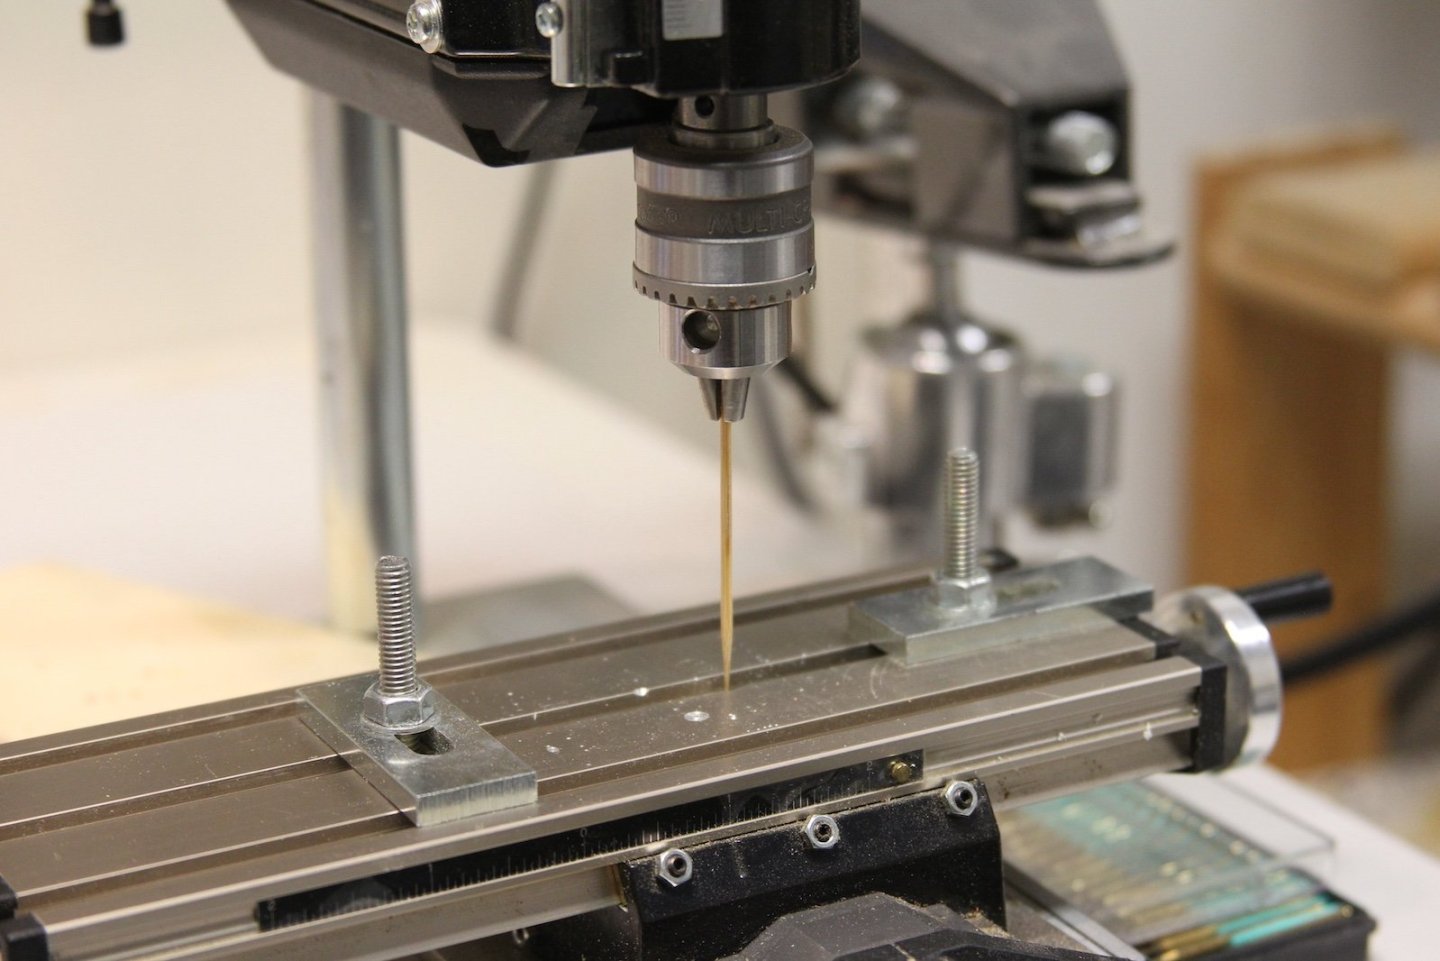
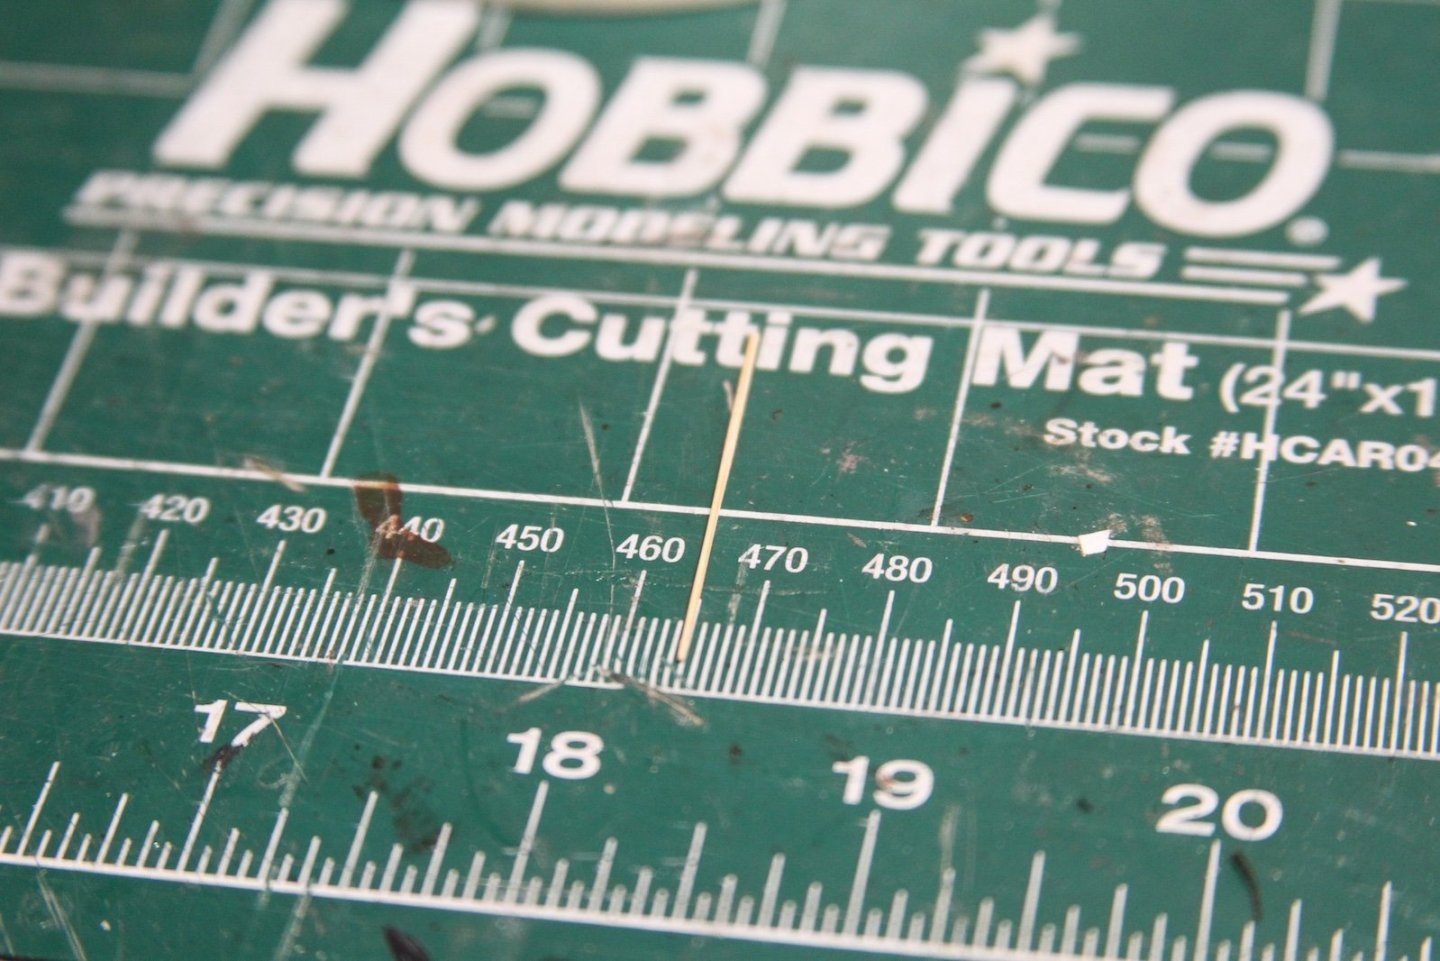
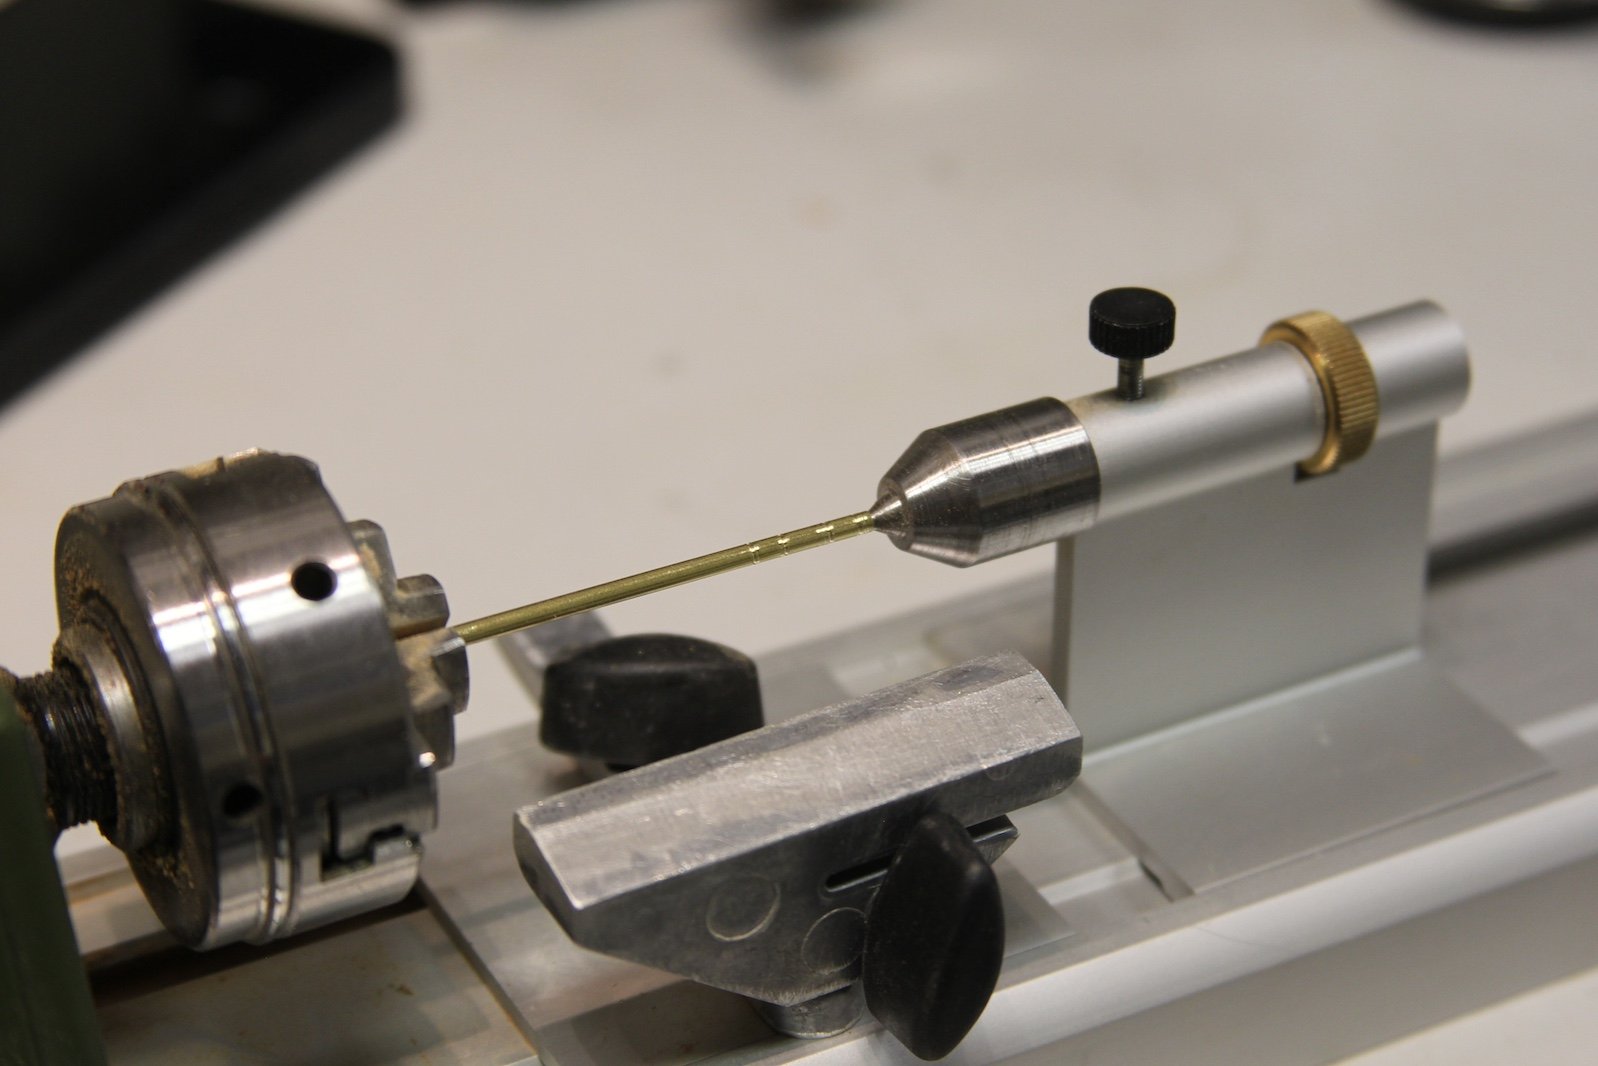
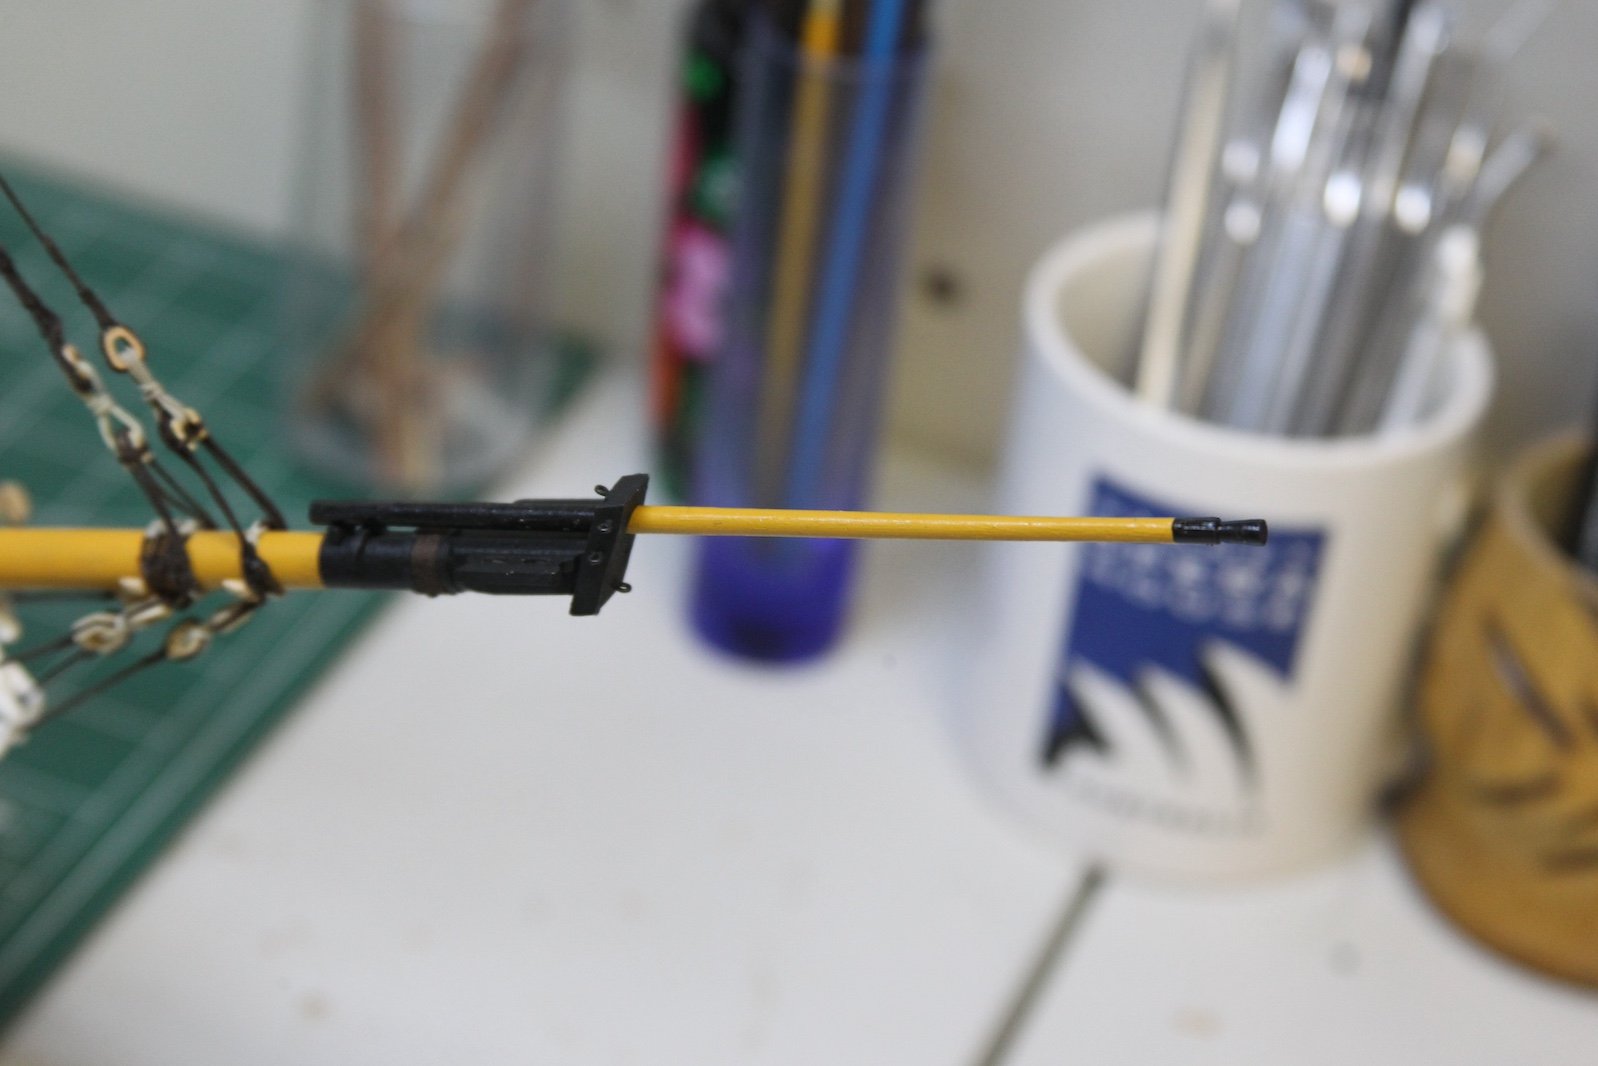
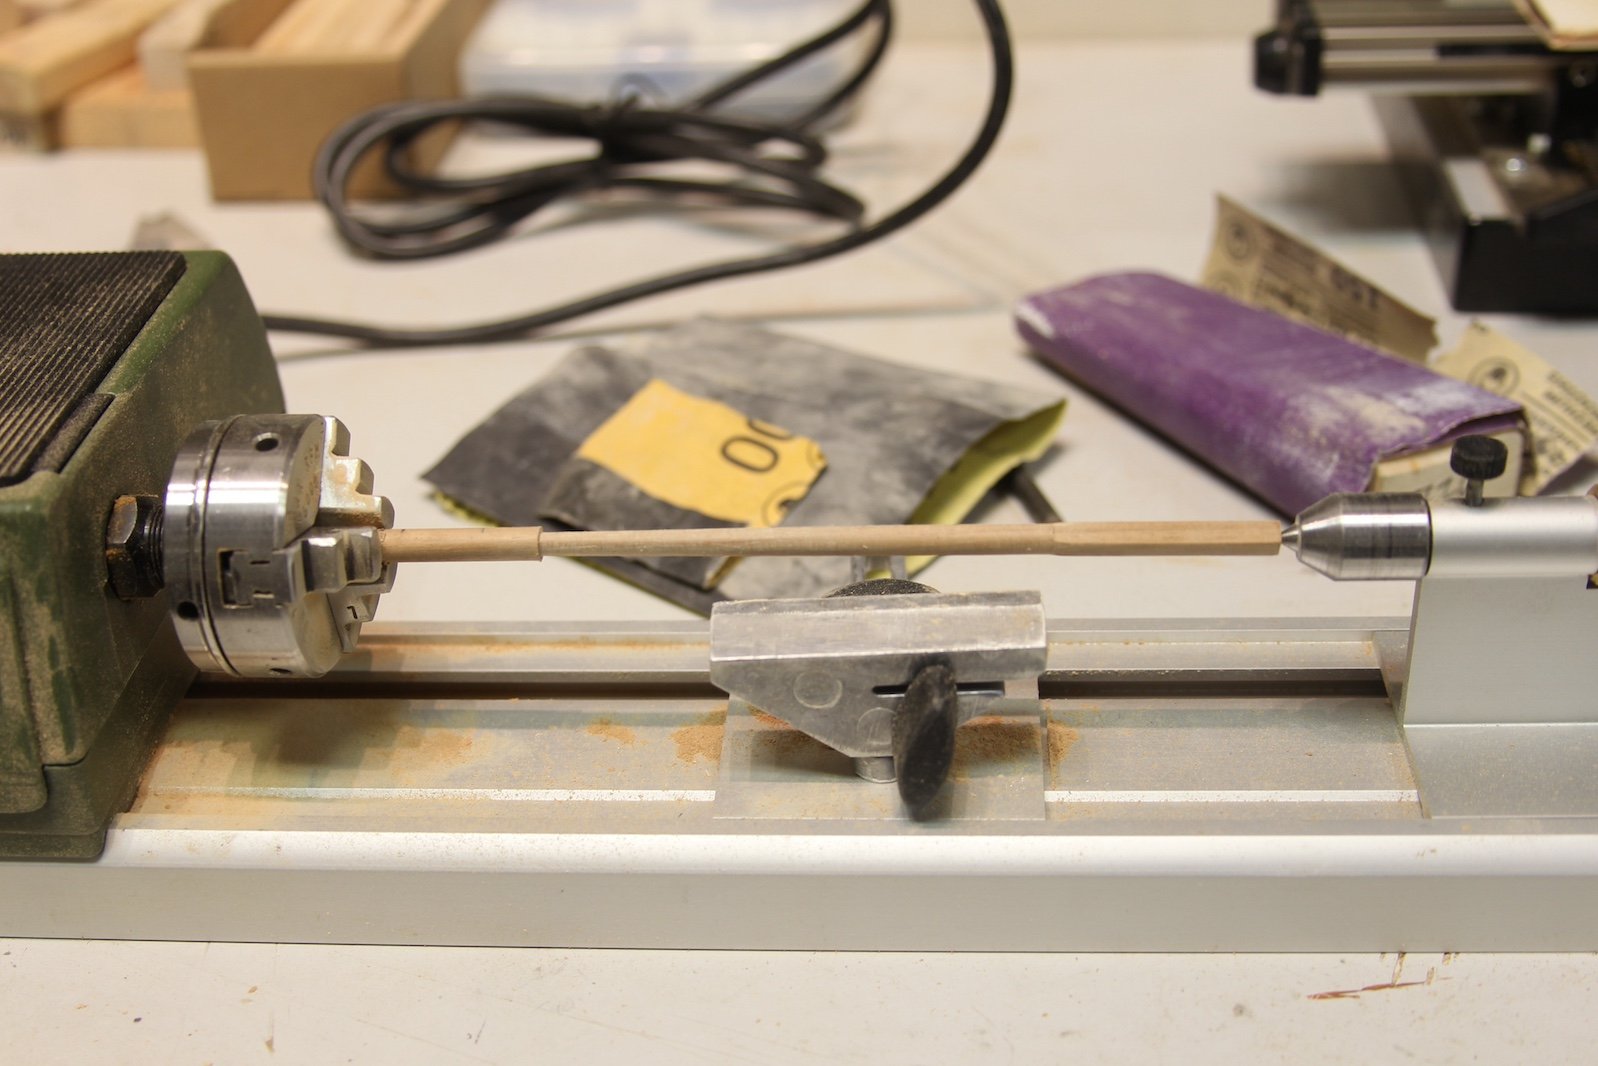
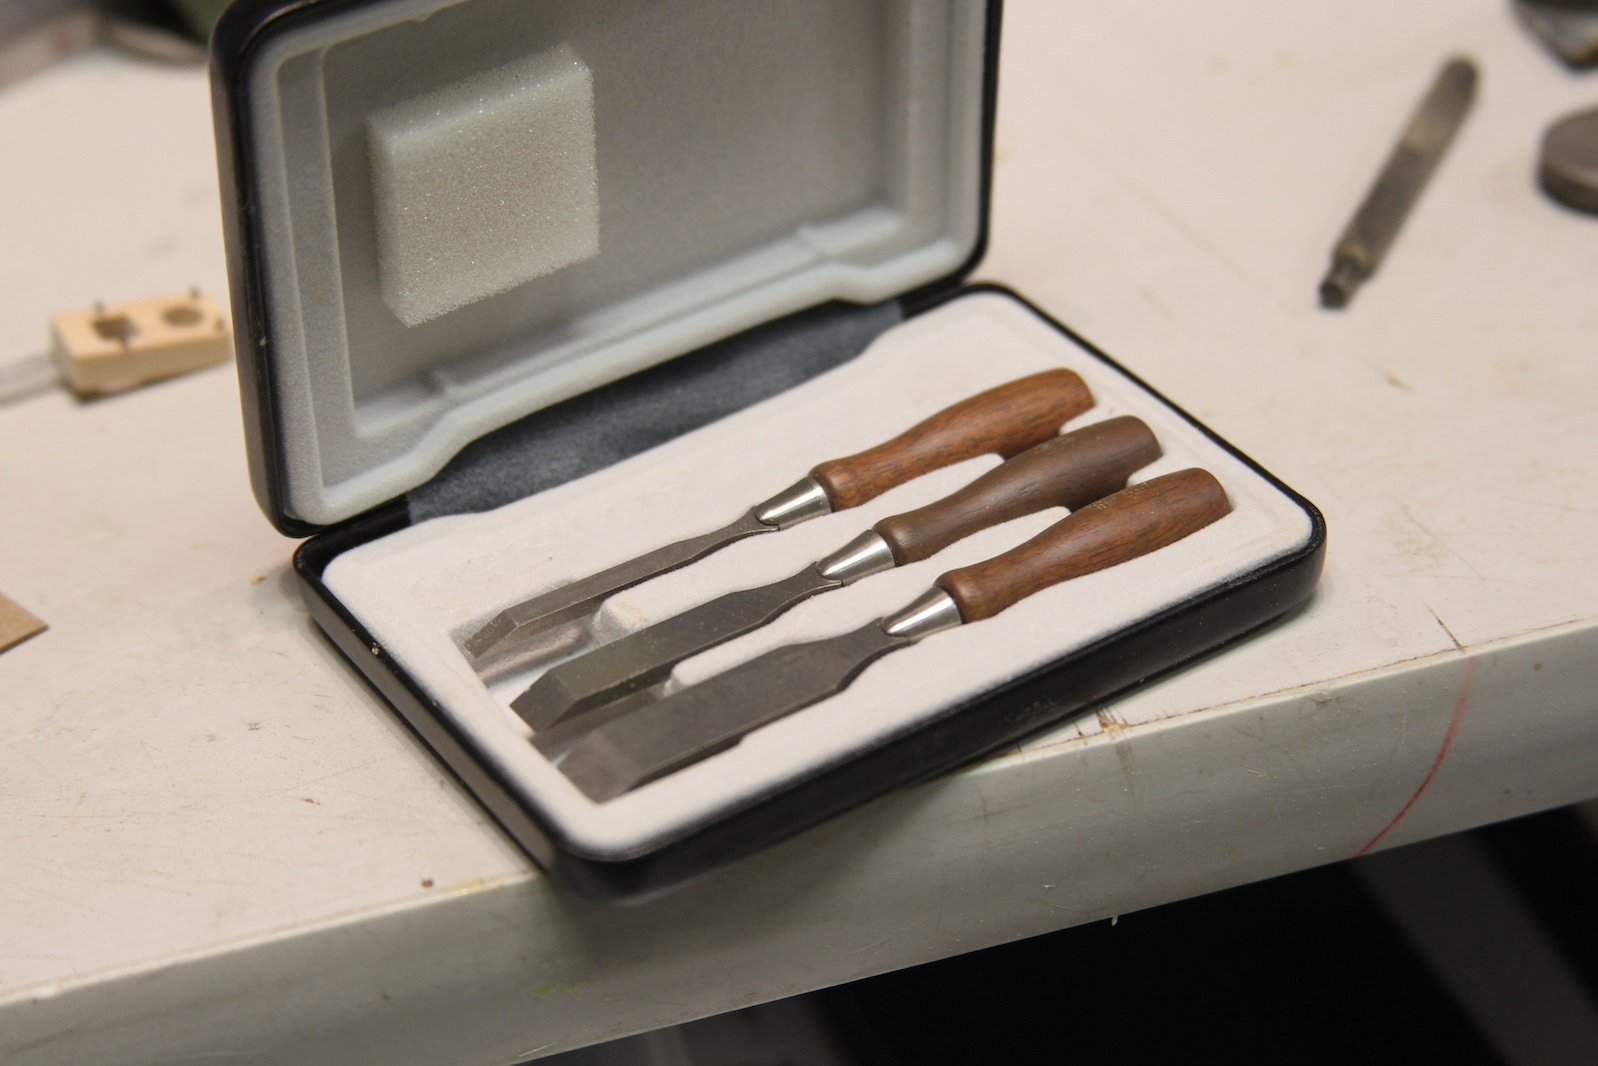
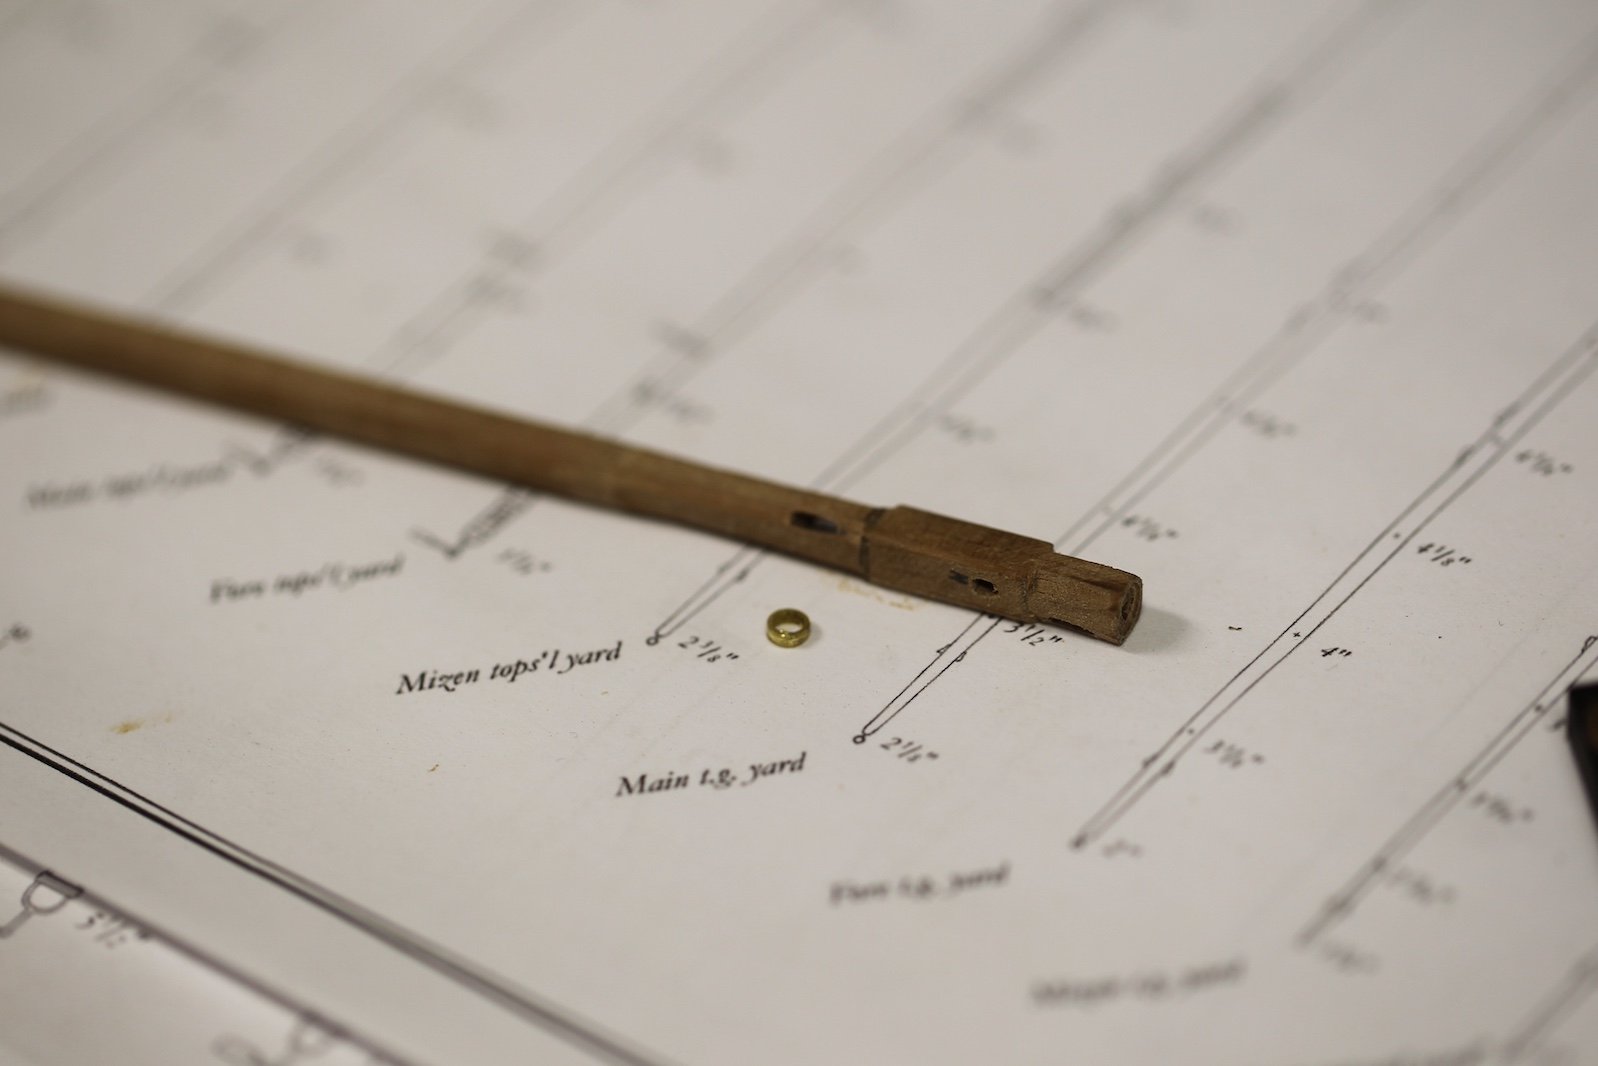
The Jibboom is pretty straight forward, though a little delicate at 2mm toward the tip. I started with a 4mm diameter dowel and shaved an octagon into the base as I'd done with the other masts. This time however, I documented a little closer how I do it. I mark the dowel and put it in the vise, then I cut the mark with a razor to prevent myself from shaving off too much wood. Then I use the mini chisel to shave a sliver at a time until I get the flat portion I need. I rotate the dowel to do four opposite sides, then shave off the remaining corners to create the octagon. Finally, I touch it up with the hand held miniature sander.

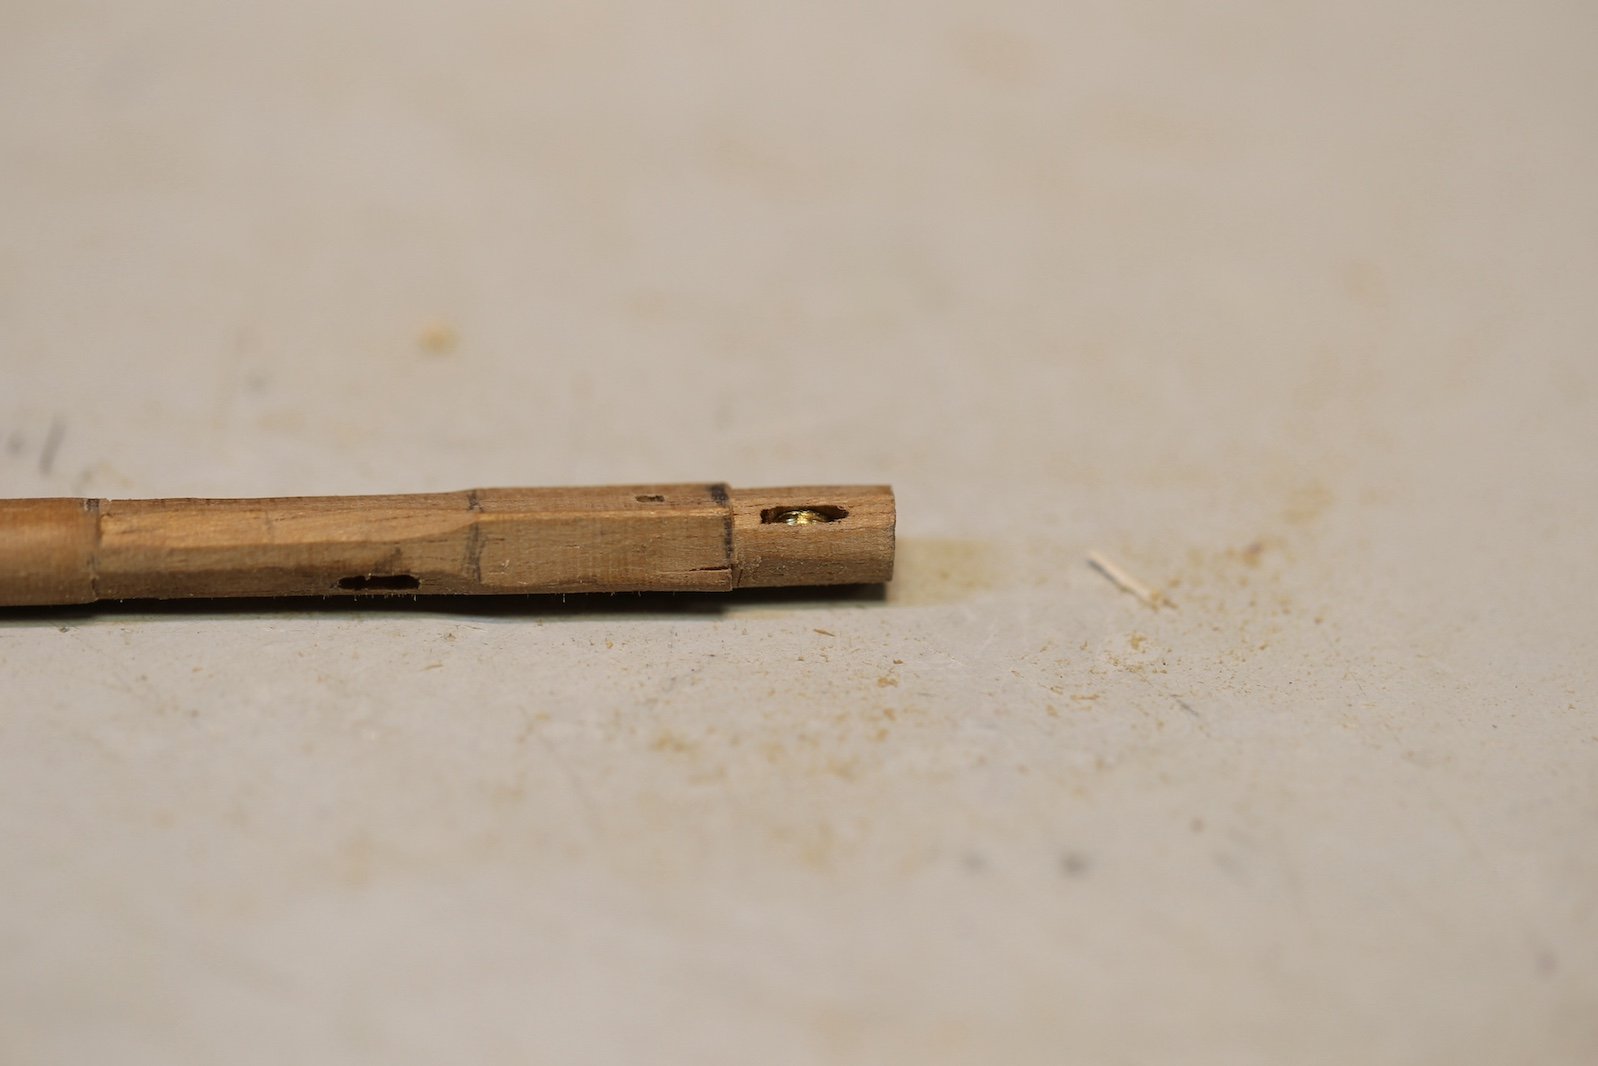
As I mentioned, the walnut is pretty soft, so this still comes out as "octagon-esque" and not as clean as it would with boxwood or something similar - but not terrible in my estimation. After the chiseling it goes into the lathe for shaping and sizing. The shoulder is cut and shaped on the outboard end. Once removed from the lathe the two sheaves are simulated (one at the base the other near the shoulder) with two holes drilled and a notch cut between the holes. Finally, it's given a couple coats of paint and wipe on poly.

I've dry fit the jibboom to make sure it fits, looks good etc. I won't mount and rig it permanently until I absolutely need to of course, as the jibboom remains the number one snagging hazard on the ship during rigging.
-
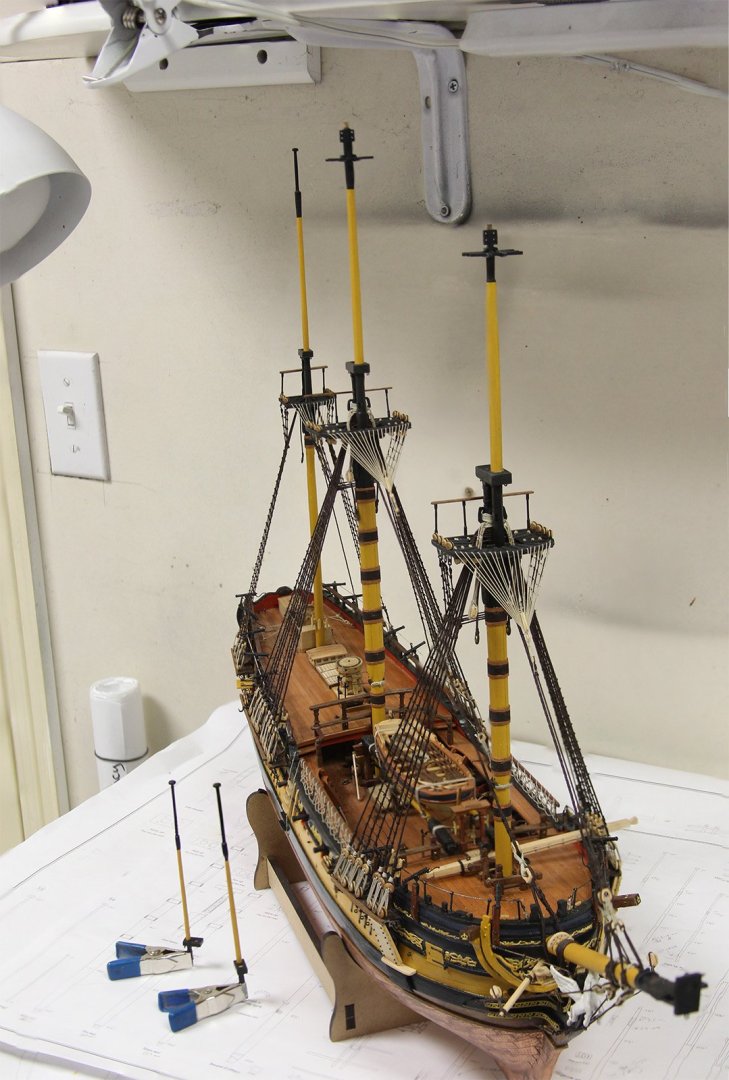
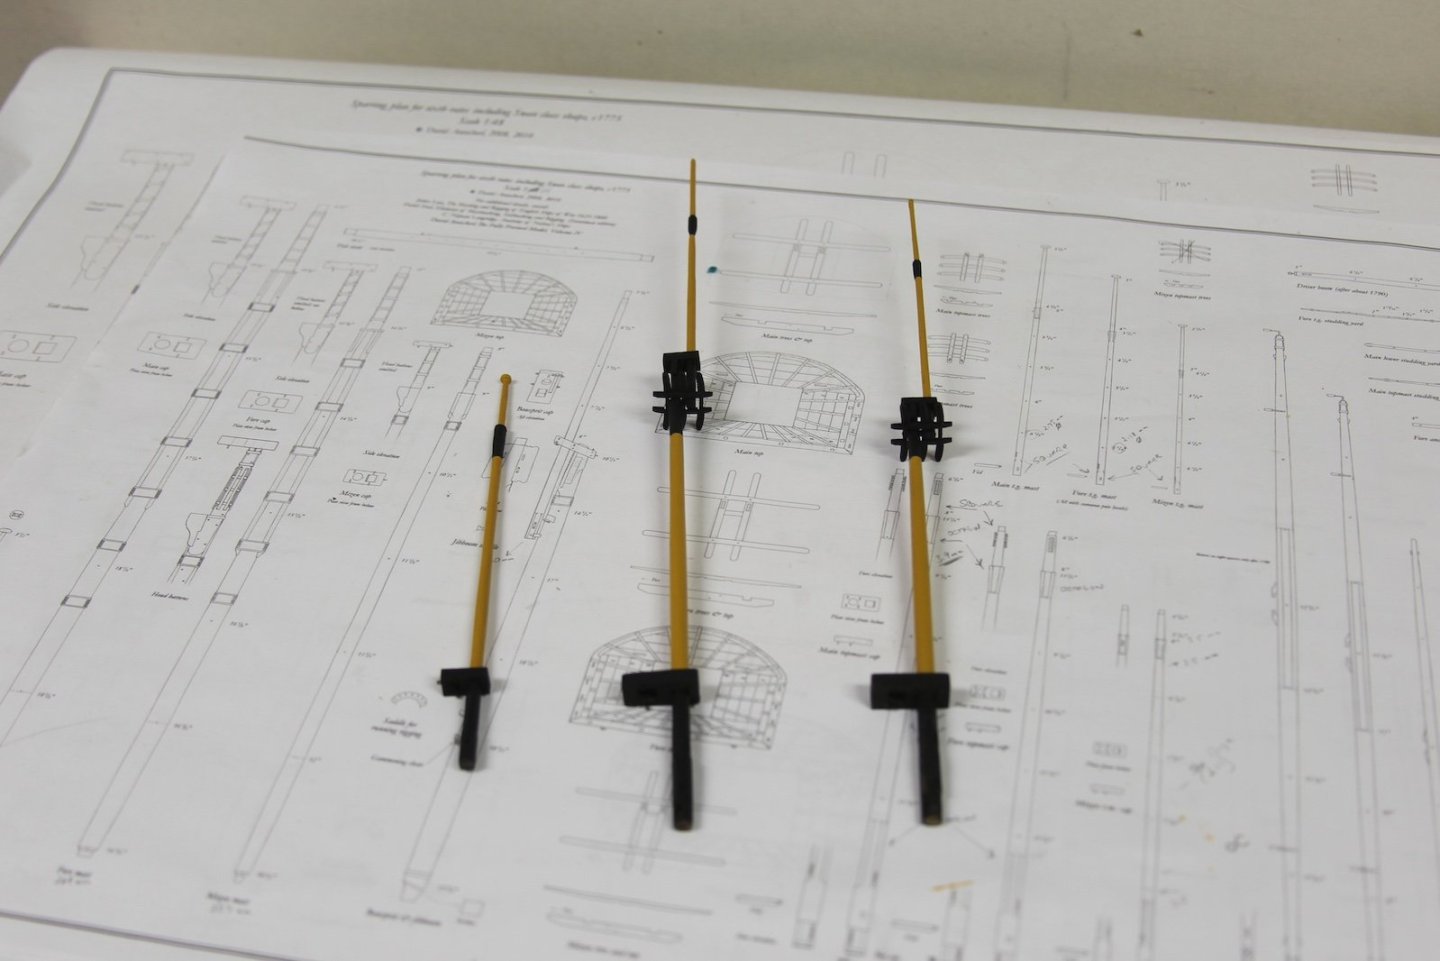
Just a couple of shots of the upper masts repainted (the mizzen top at least) and fitted in place with the fids.
- Dave_E, wvdhee, Blue Ensign and 1 other
-
4
-
Although the t'gallant masts are a bit less complicated to craft in terms of shape, they are QUITE small in terms of diameter at this scale and very, very delicate. Once again, this is where I wish I had more boxwood with which to work. I did however start out with square strips with these, as that technique is ultimately easier.
All of the fids are made from a brass strip shaped on my belt sander. I only drilled holes in the two larger fids, as the smaller ones are just too small to accommodate holes that no one is ever likely to see.

With all the masts (except the Jib boom) constructed, they are painted. I am most likely going to change the paint scheme to match TFFM and have the most upper parts of the masts (including the caps) all black from the hounds on up.
-
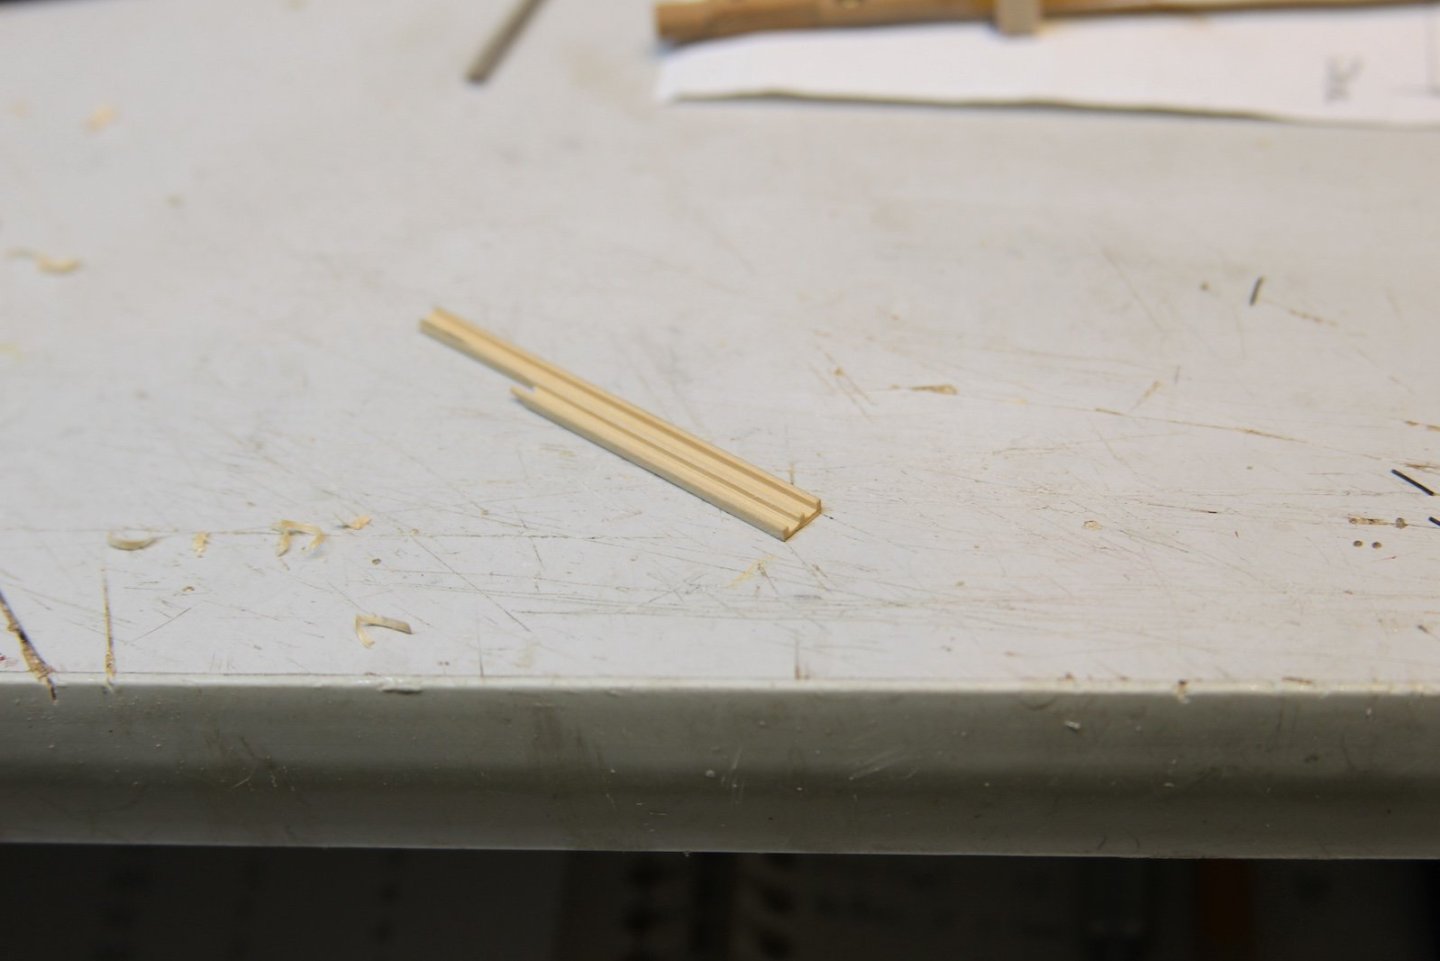
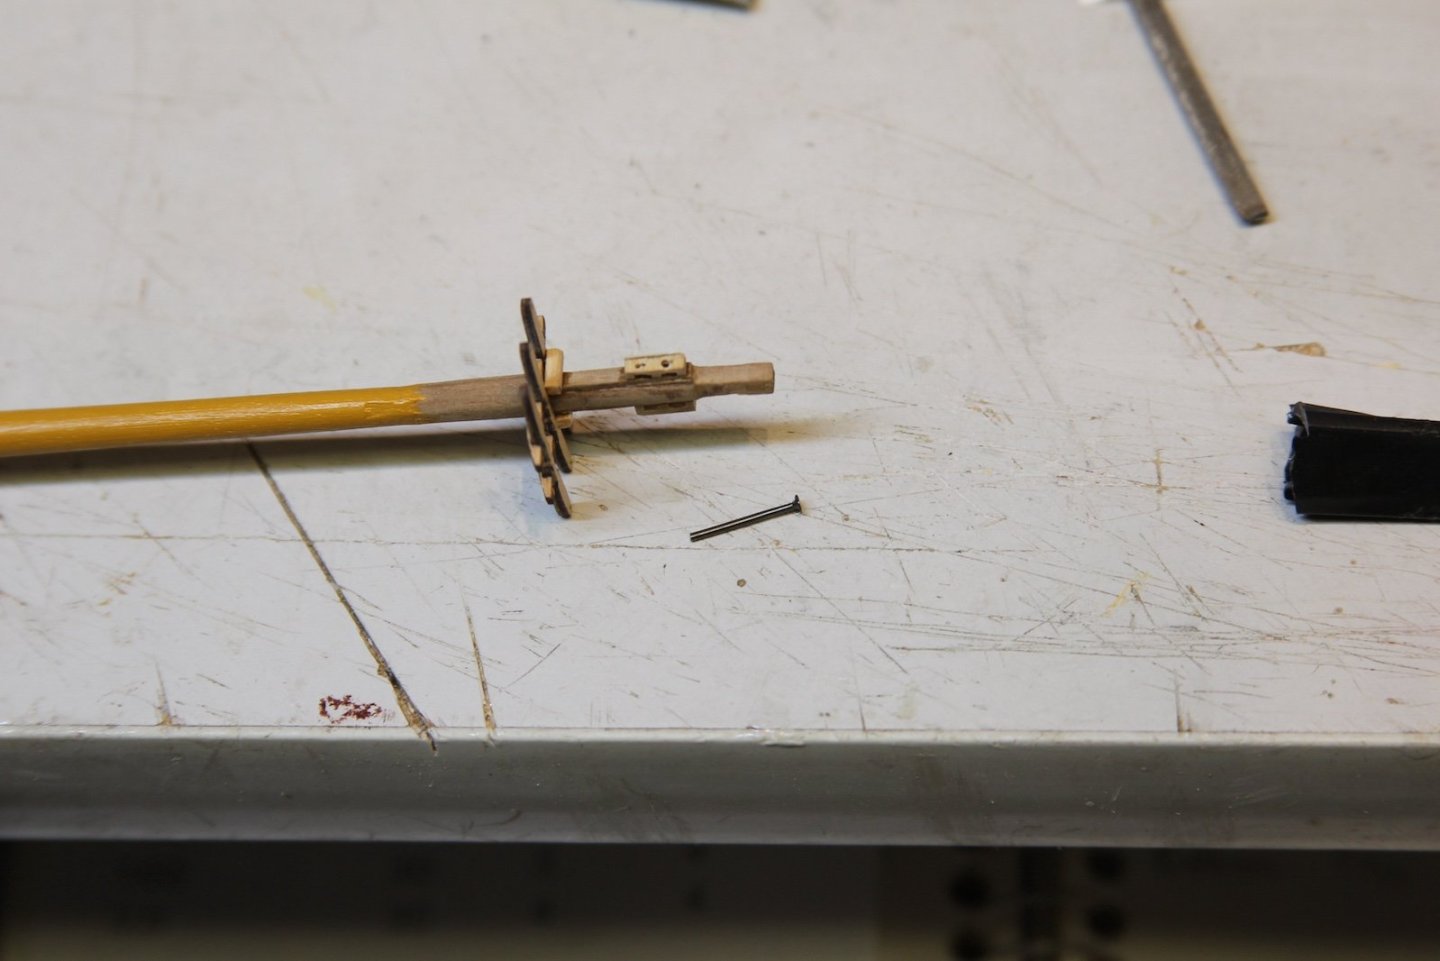
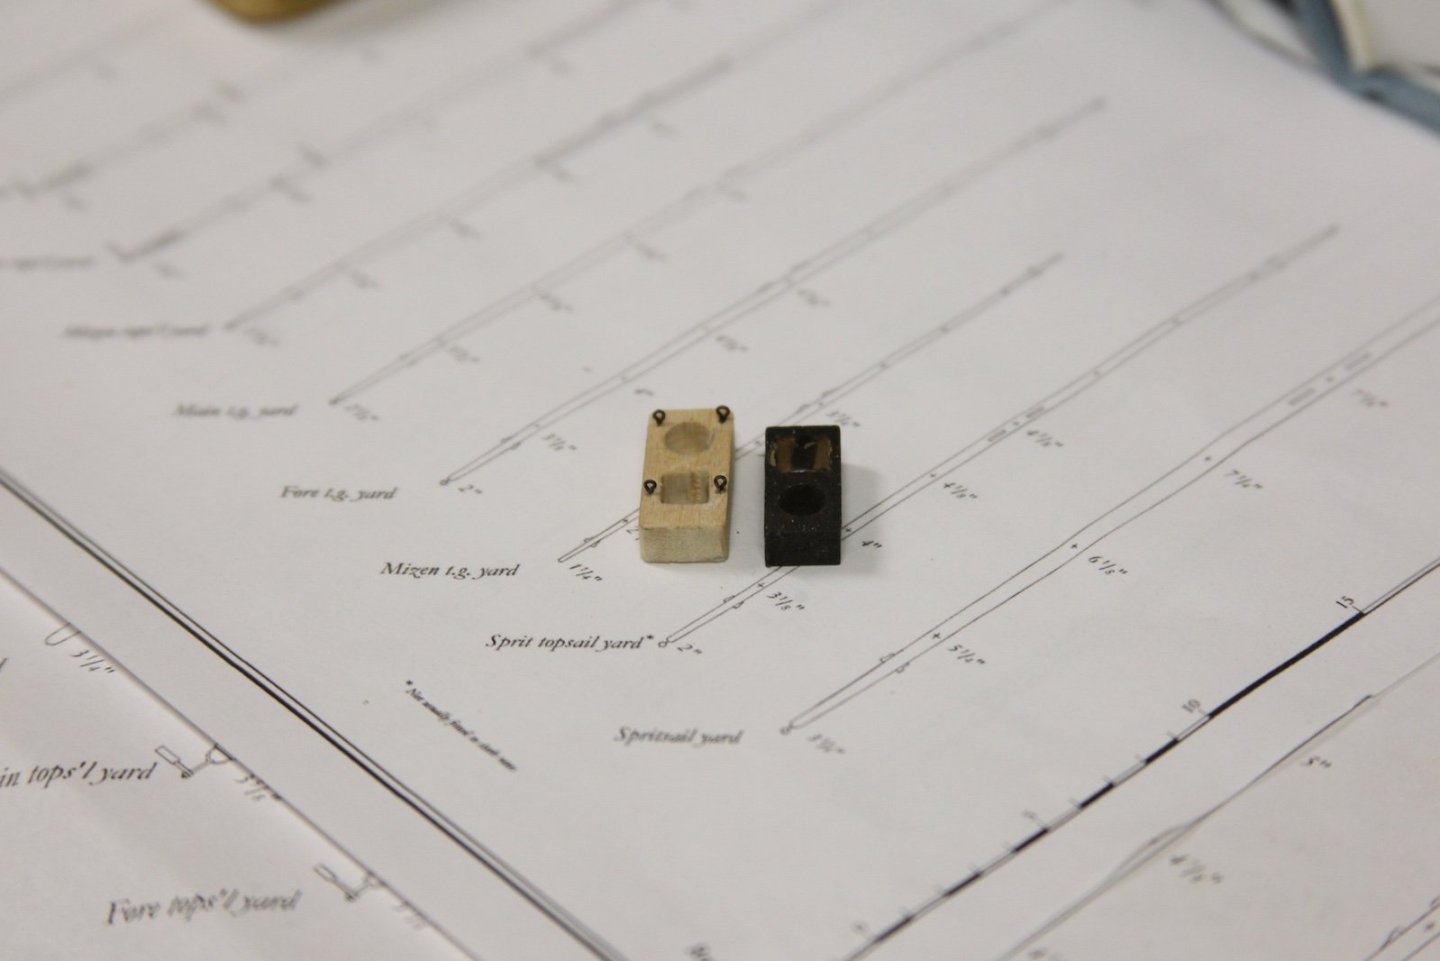
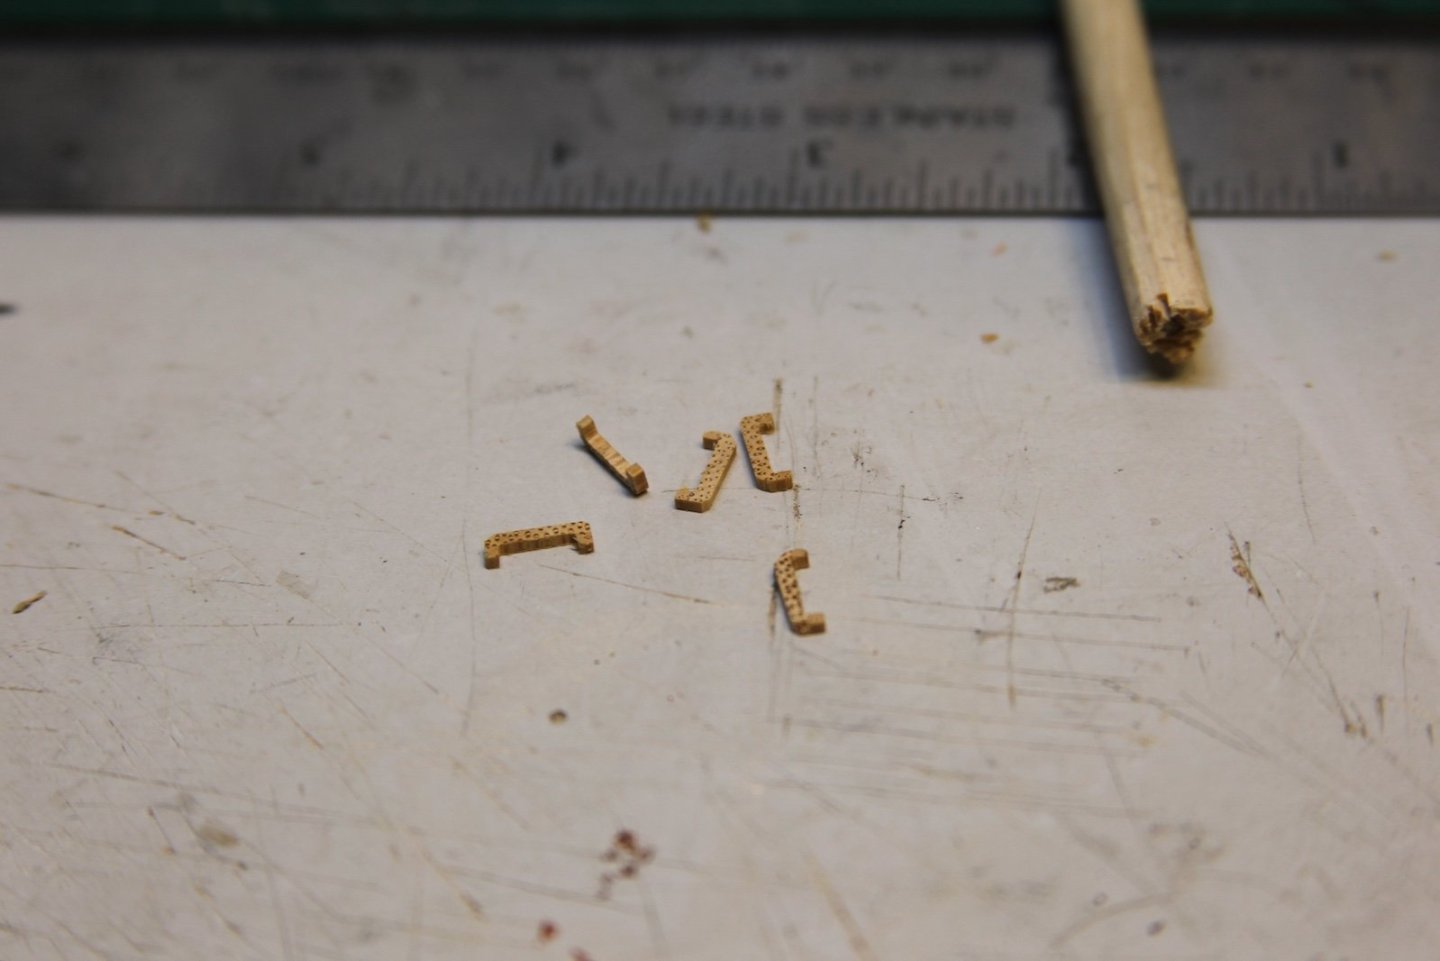
The cheek blocks on the upper masts are so small that they definitely need to be made from boxwood, as nothing else I have will lend itself to this level of sanding and shaping. First, I took a 1 mm by 2mm strip of boxwood and put it on my Byrnes saw with a slightly thicker black adjusted all the way to do some milling. I cut a couple of notches in the strip, then sliced off 1.5 mm strips to create the cheek blocks. The sheaves are made from thicker pins / nails cut off at 2.5mm lengths. Holes are drilled in the sides of the cheeks and the sheaves are slid into the holes. I did mount these sheaves a little lower in the cheek block slots instead of the center to make sure I have enough room to feed a line when it becomes necessary.

-
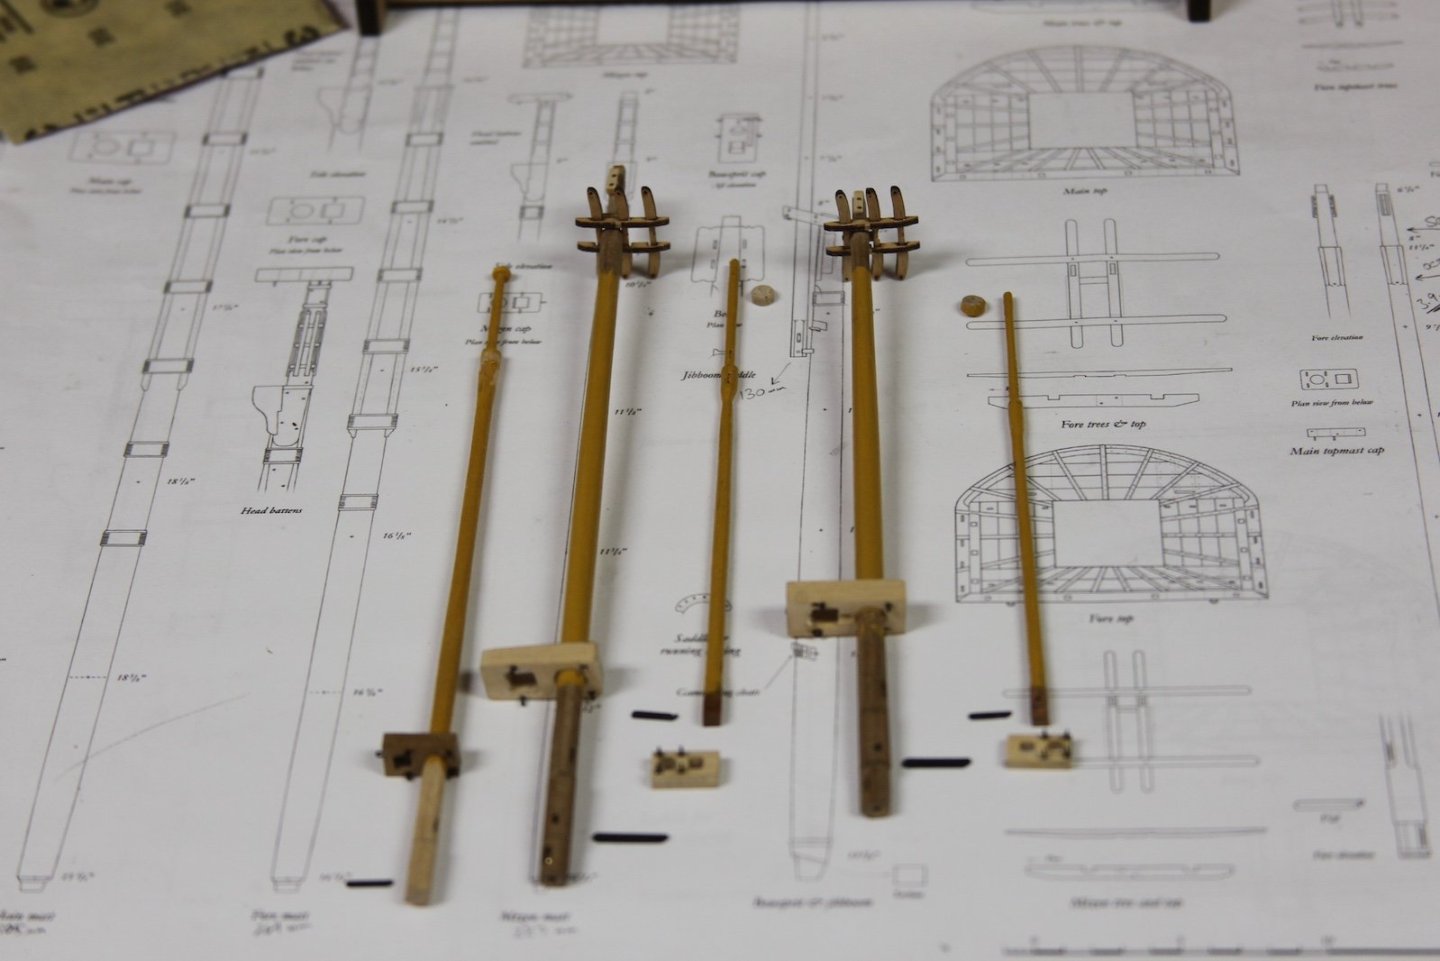
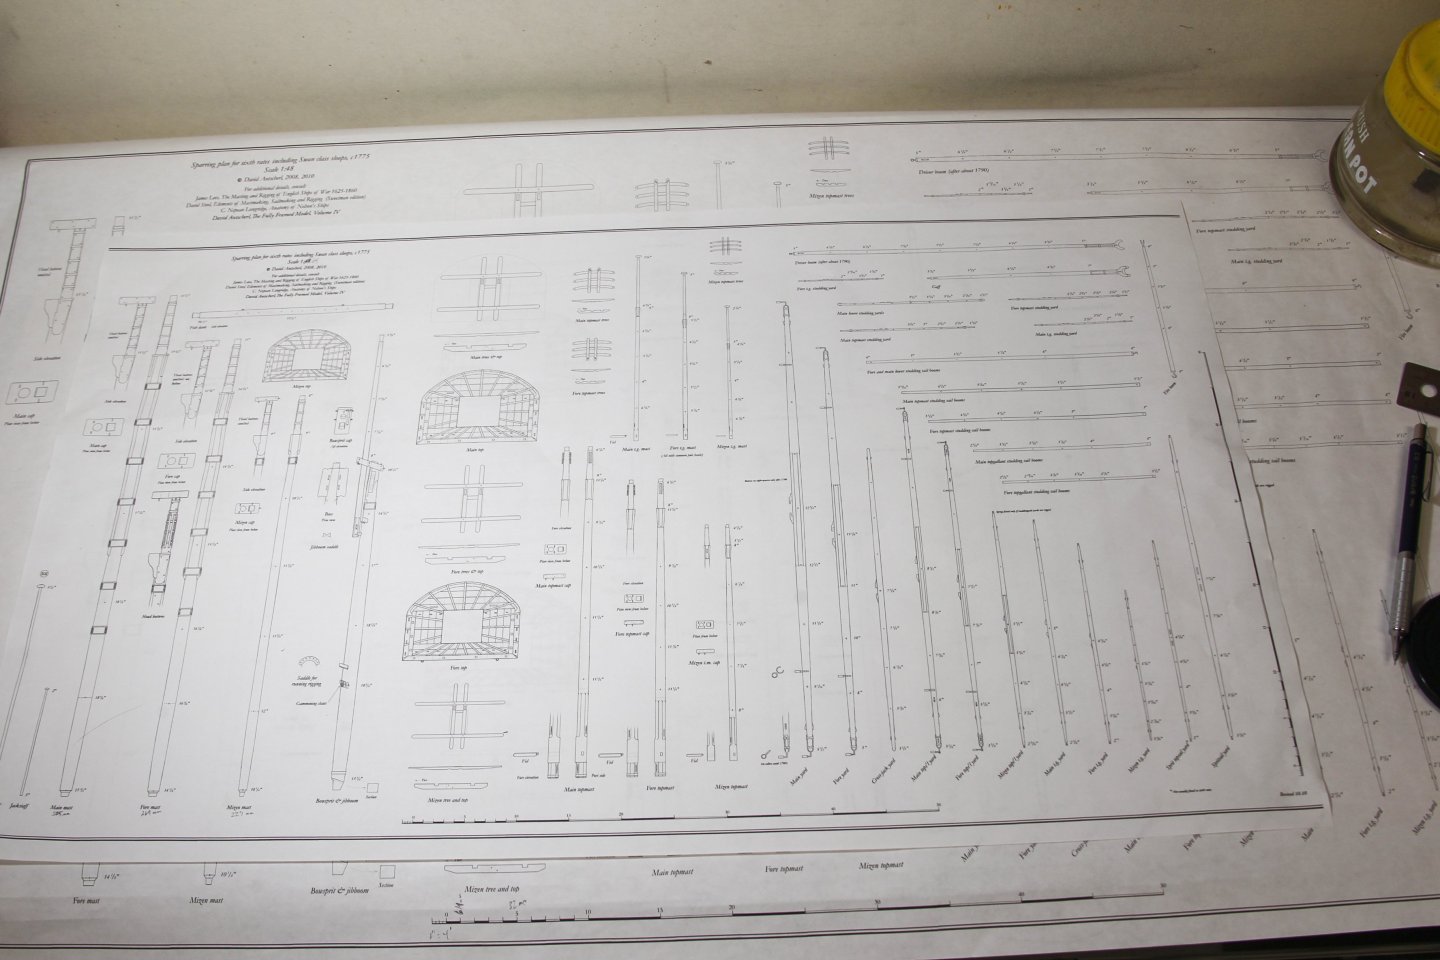
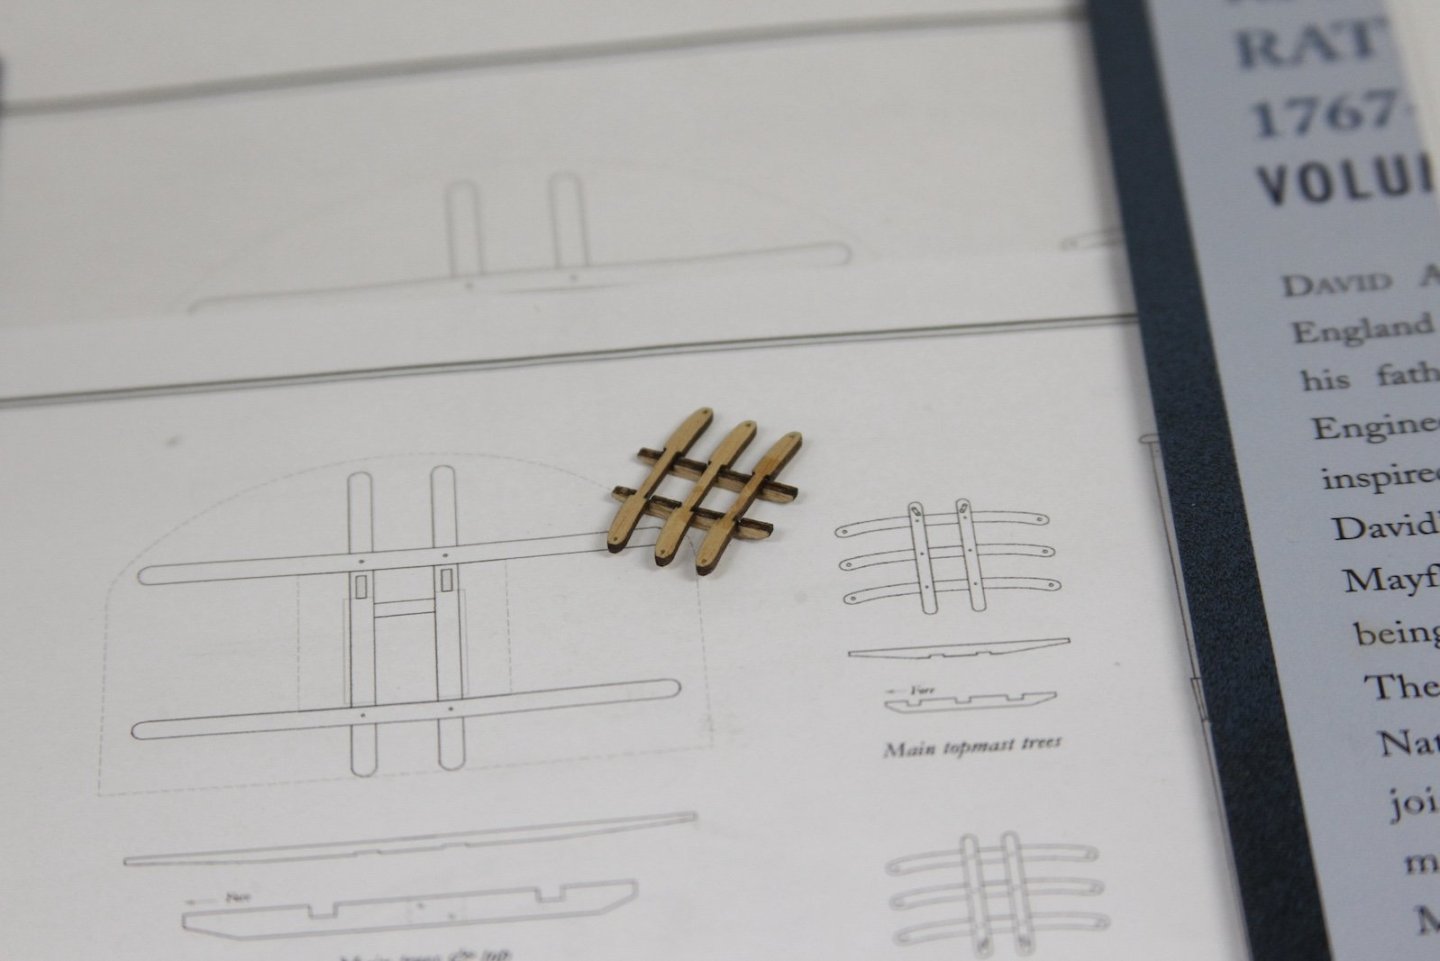
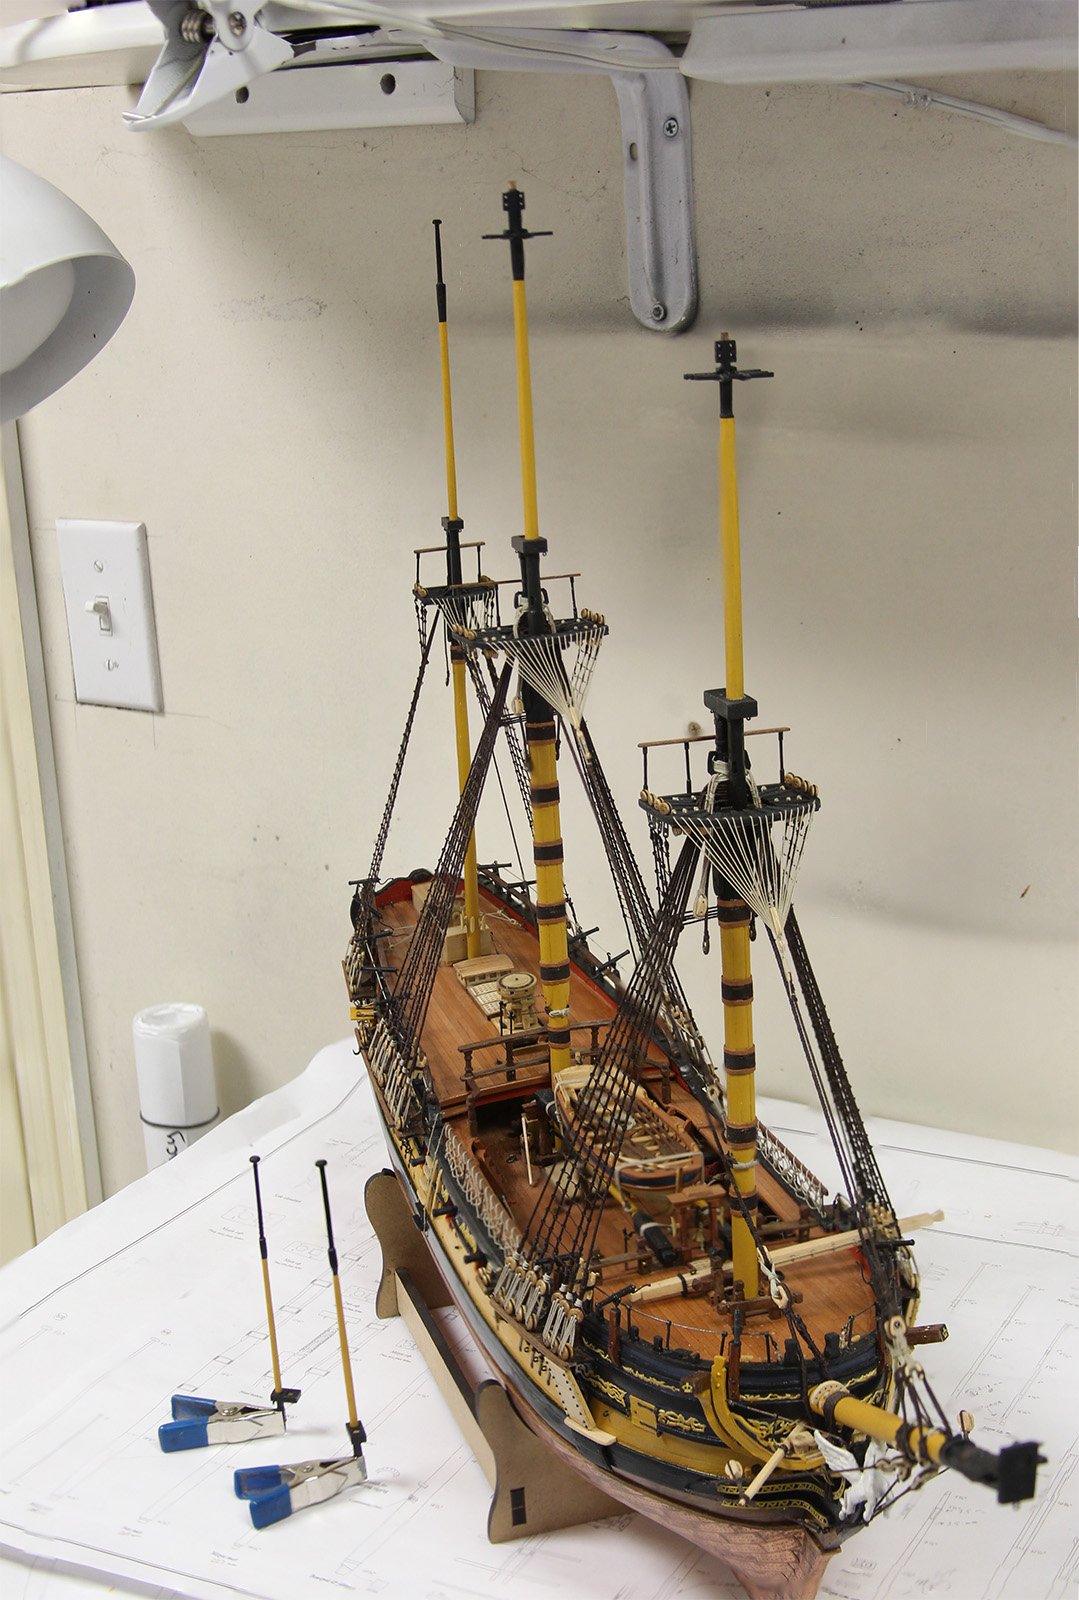
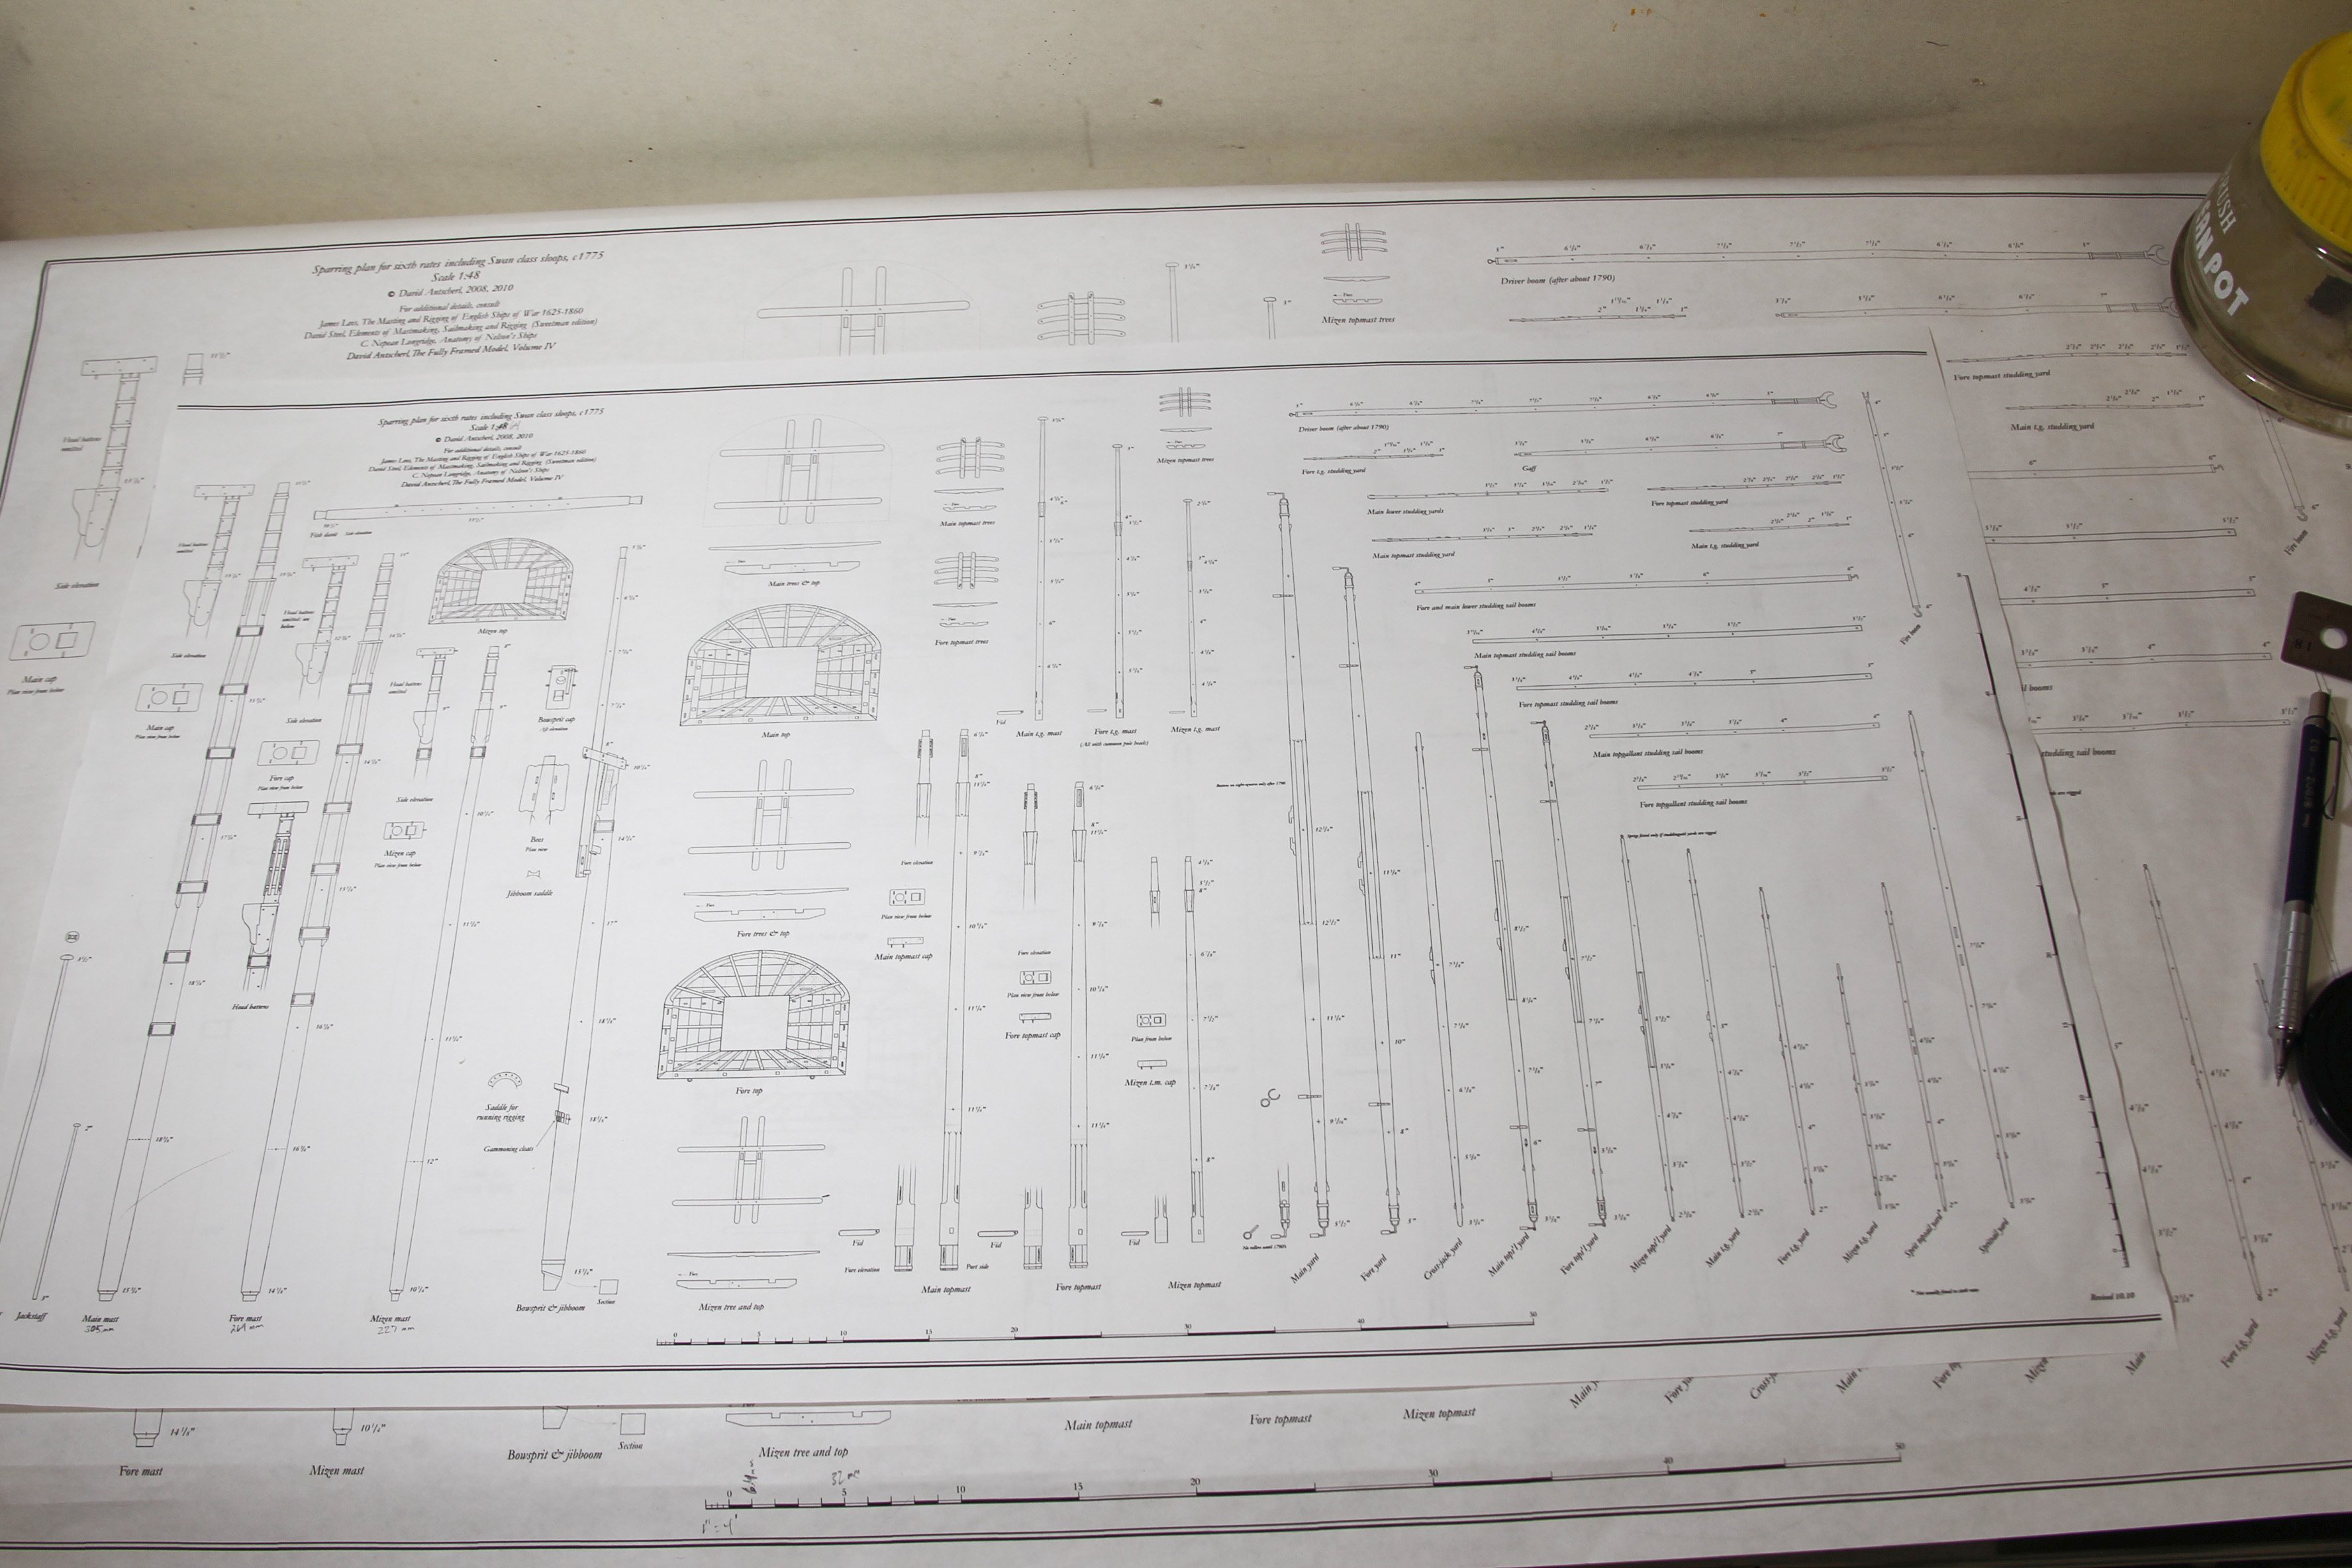
It has been a few days since I've posted, but that doesn't mean I haven't been hard at work int he shipyard. I started the topmast journey so I could get the upper standing rigging underway. Not long before I went on my hiatus, I'd done the extra top masts that are mounted on the deck as practice - back in post #255. The problem was, that had been such a time ago that I'd forgotten much. The good news - I kept decent notes. I have also since then printed my Swan reference for the masts, yards, and spars. The one on top is resized from 1:48 to 1:64. One point of learning for me - as we all know, I've been following Dan Vadas' vulture - which has three t'gallant masts. However, other Pegasus builds and swan builds only have two t'gallant masts with the mizzen only having top mast. My reference schematic from TFFM have three laid out. It took me a while to find the addendum note in TFFM that explains the third t'gallant mast on Swan class ships didn't occur until the 1790's. So my 1776 version will only have two.
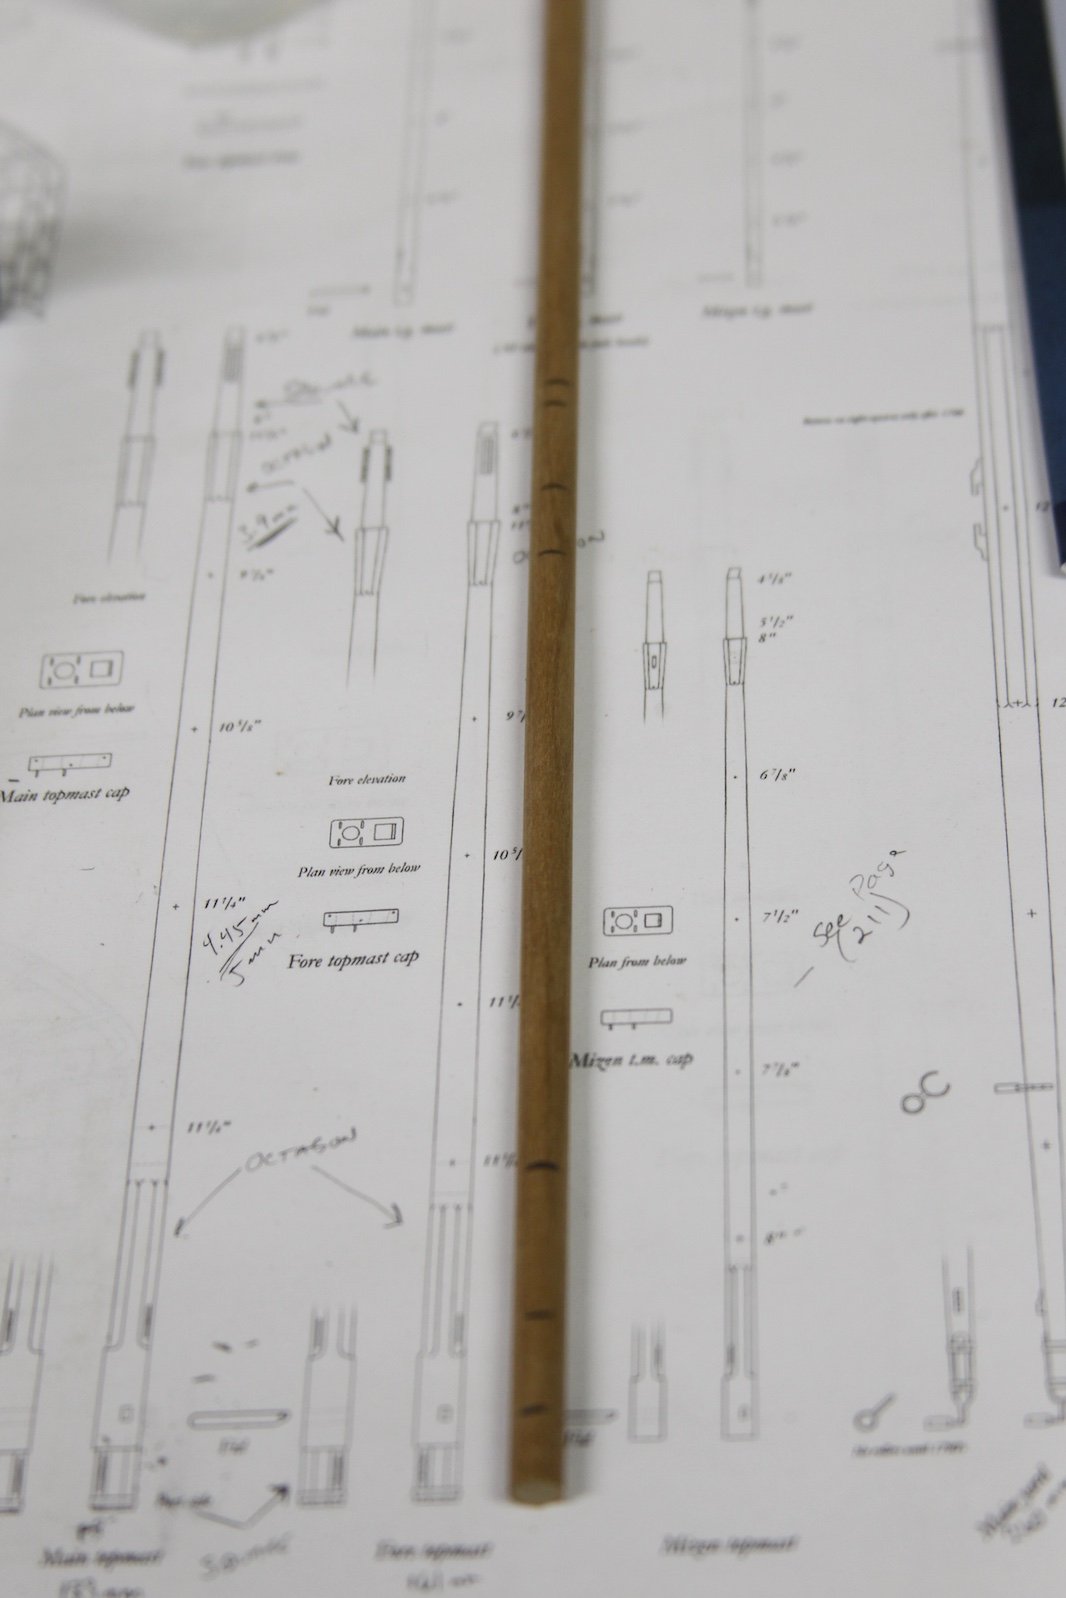
Some minor adjustments were made to my "practice" masts and a fair amount of math was done then I hit the lathe. For the Fore and Main top masts I decided to go with a larger diameter round mast and square off the bottom and shape rather than start with a square. This is done for a couple of reasons - but mostly because I have a limited supply of lumber, and a VERY limited supply of the harder woods such as boxwood, etc. So I am using the dowels that come with the kit - good quality, but definitely softer.

As you can see above (and remembering my practice run), the top masts are broken down into several sections starting with an octagonal section, squaring off where the fids are located, moving into octagonal again, then rounding and tapering toward the top. Another octagonal section will house the upper crosstrees and trestles, then taper round again. Making these sections is quite difficult in my opinion. After trying various cutting and sanding techniques, I ended up using my new mini veritas chisels to create the octagonal sections. Even so - because of the softness of the wood - I'm going to call these "octagonal-esque." The silver lining as this will all be painted black and so my lack of precision will be obscured a bit.

All all of the top masts and t'gallant masts contain a number of sheaves. As we know, sheeves and this scale are really, really difficult to pull off. I can still manage to construct the lower sheaves for the top masts in the way that I did those on the hull and bulwarks, but all the smaller sheaves are simulated by drilling a couple holes and carving out a 'sheave like' notch. For the 'real' sheaves, I drill out the holes and patiently adjust with my smallest pin file. The sheave itself is a cut off piece of round brass notched, sanded down, and slid into the slot.

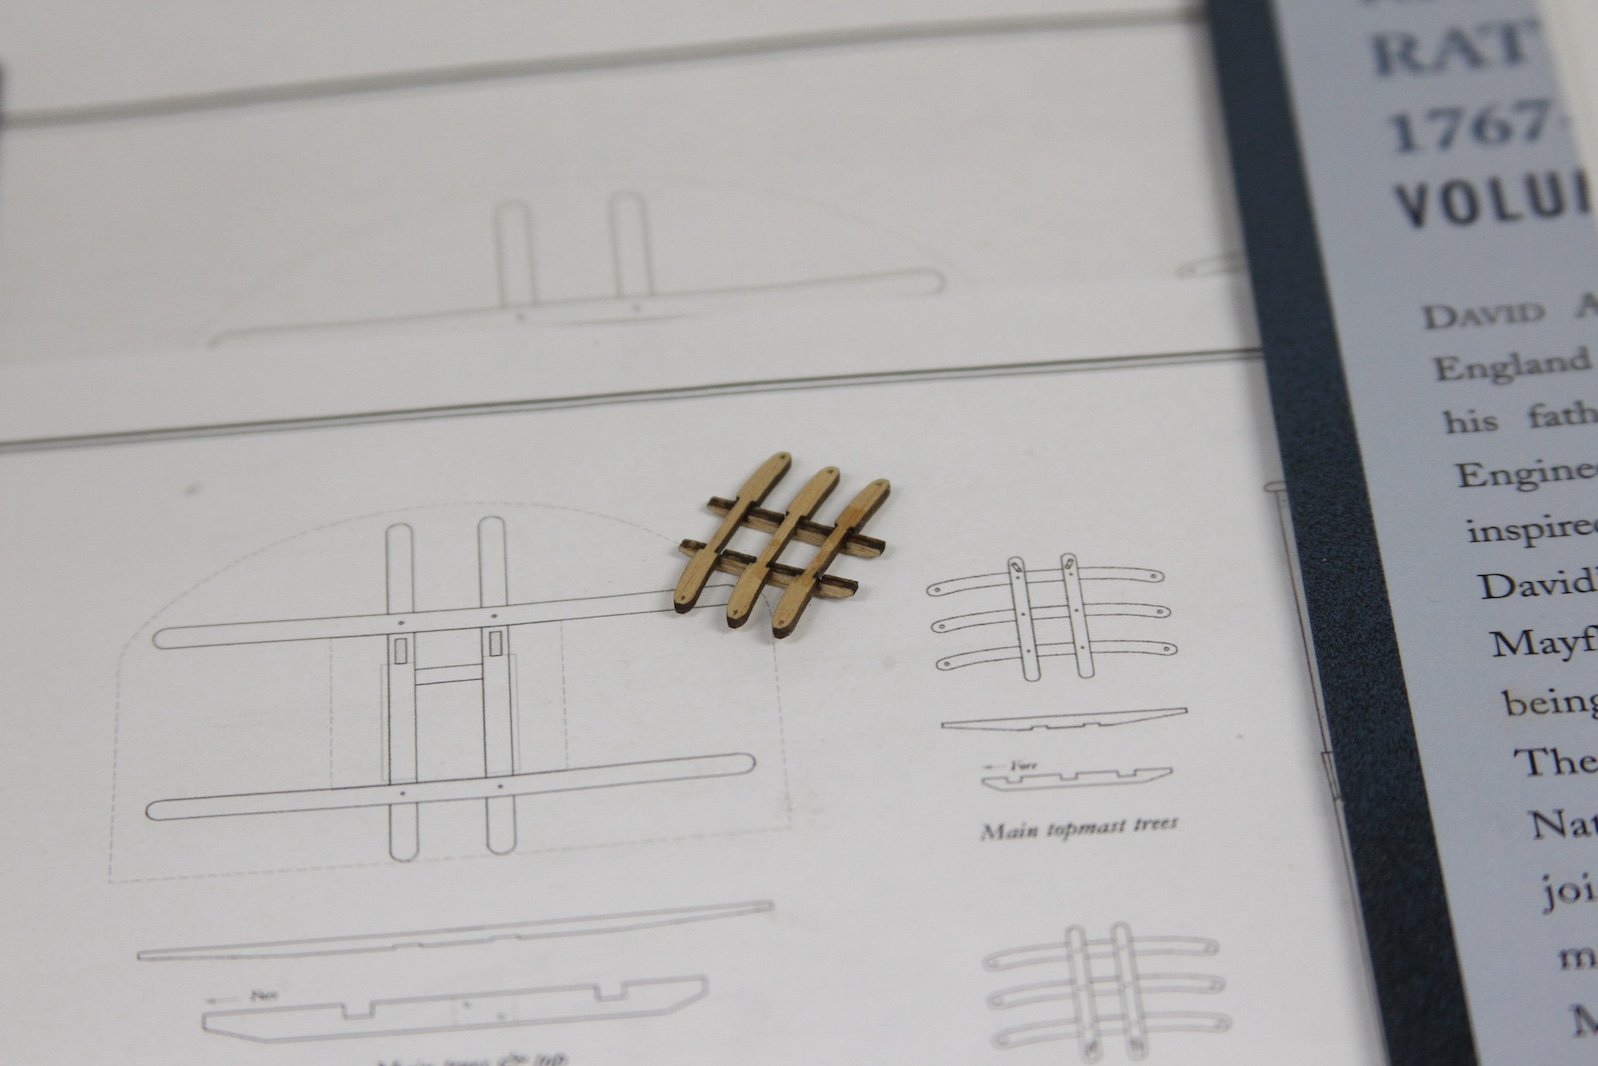
The crosstrees and trestles are from the kit. A smidge oversized, but definitely doable. Especially since, once again, this will all be painted black. The mast caps all did need to be redone because the kit versions do not accommodate room for the eye bolts, etc.
-
Thanks Bob and Christian. And you're absolutely correct of course Christian about walnut and most 'kit wood' - I keep a little container with all my bits of boxwood no matter how small. You never know when you're going to need a scrap for something. But I've found that the drill bits one uses are just as crucial. I've found my micro "MA Ford twisted" bits to be invaluable. A bit more expensive than most, but second to none in ability to make very very small and still very clean holes.
-
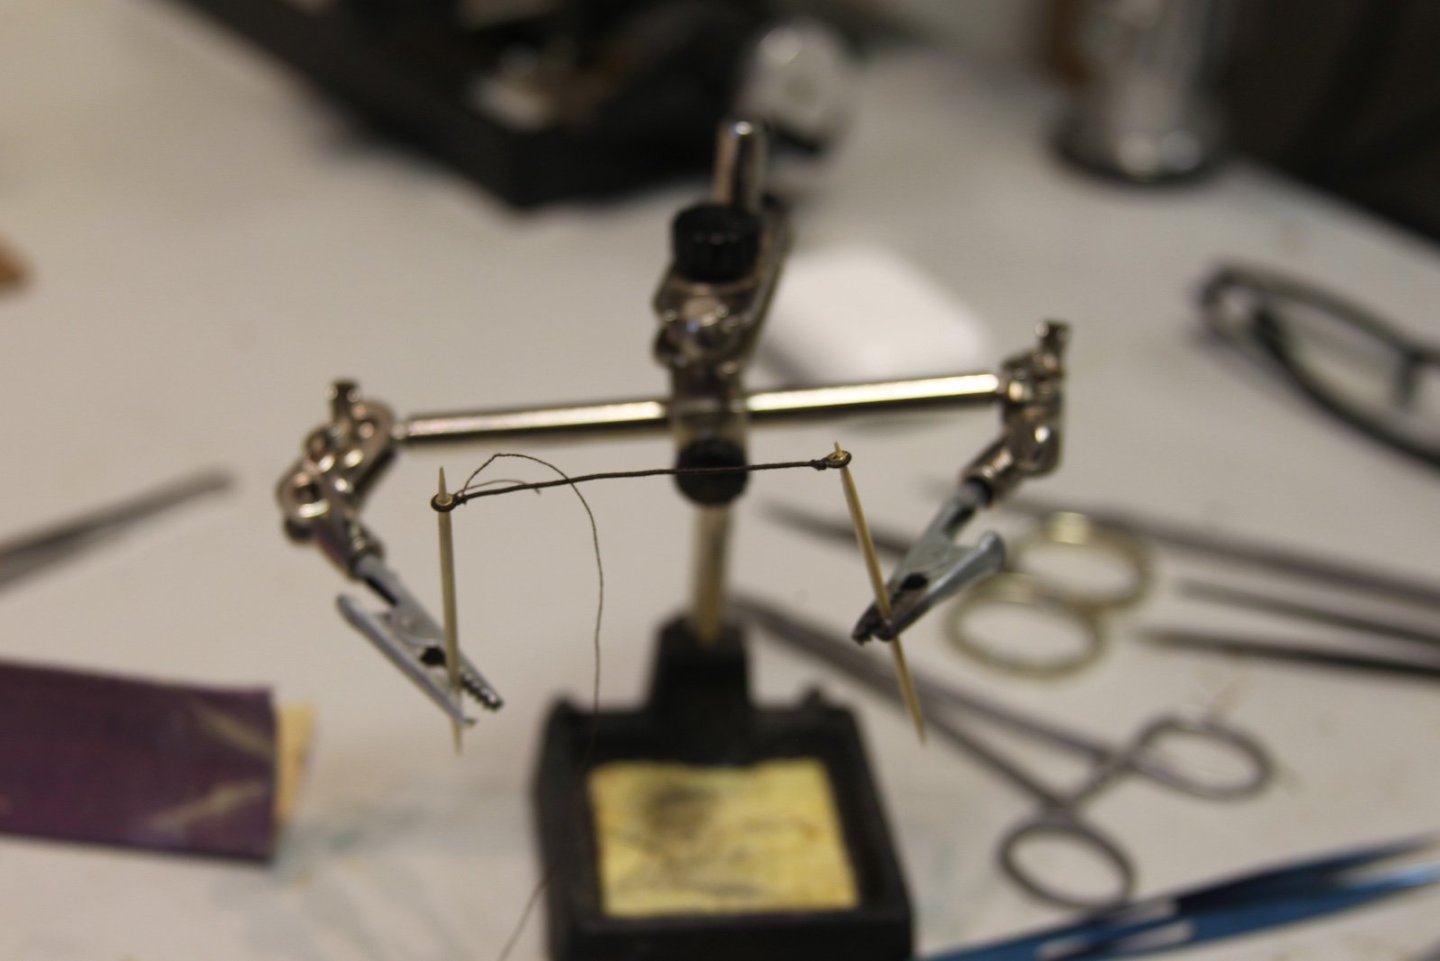
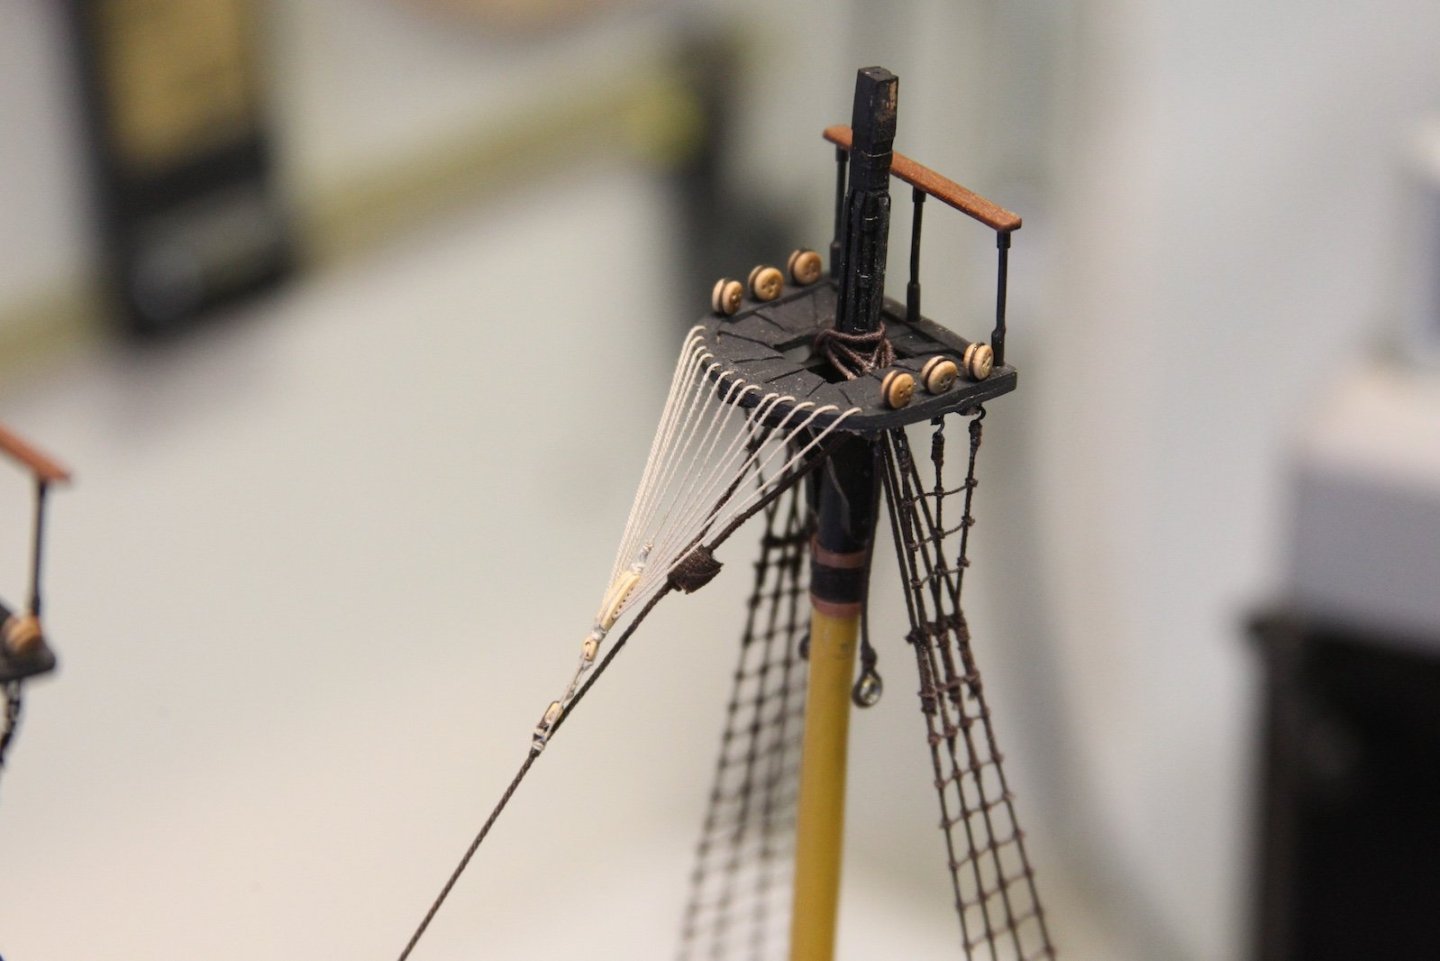
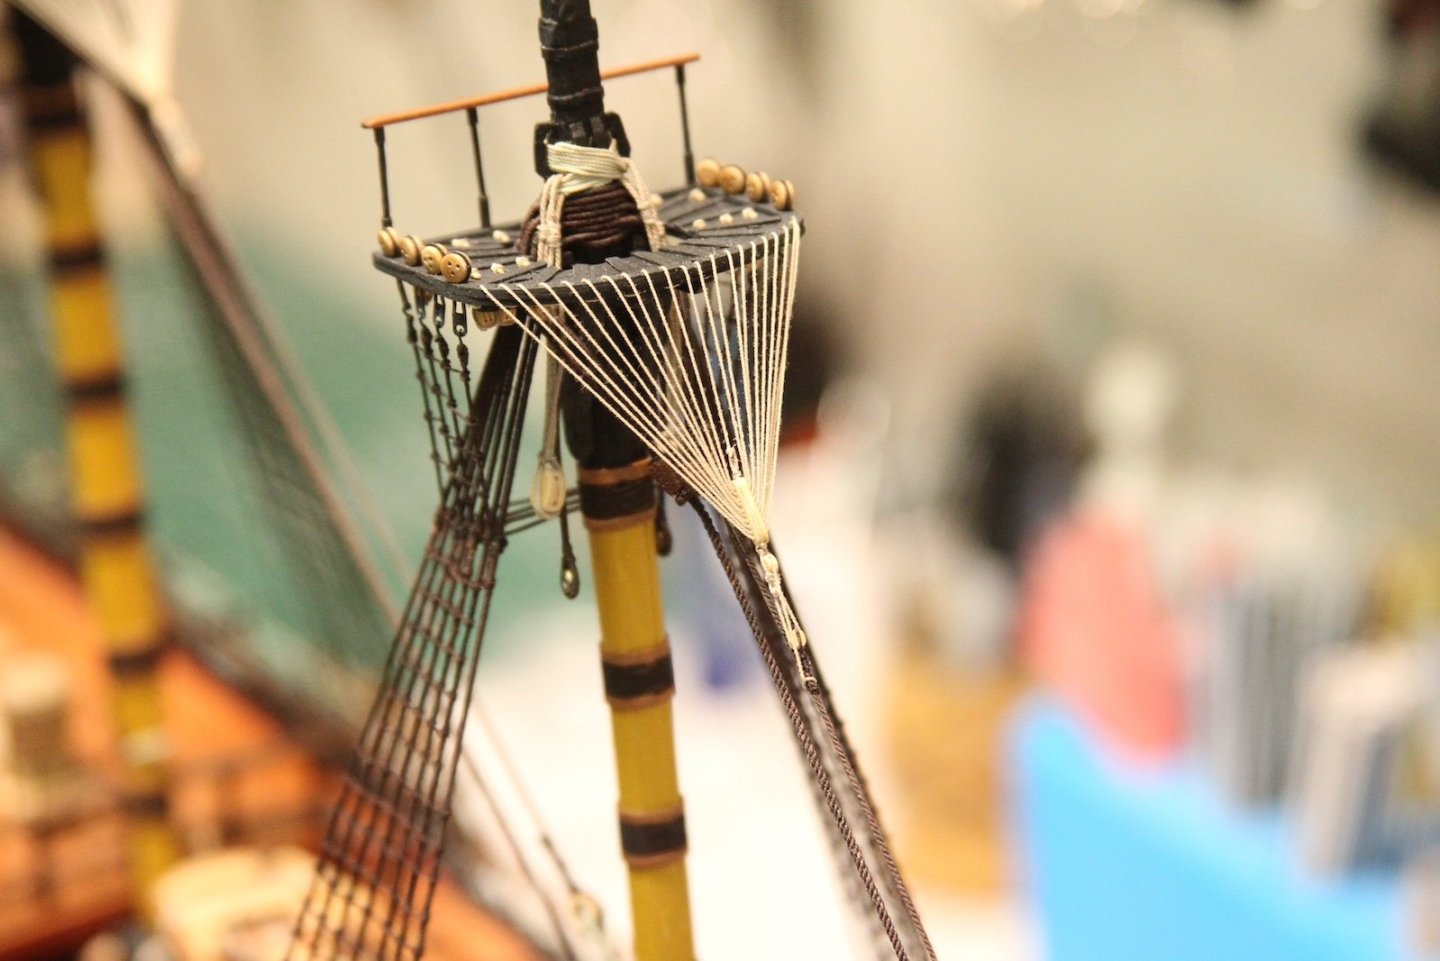
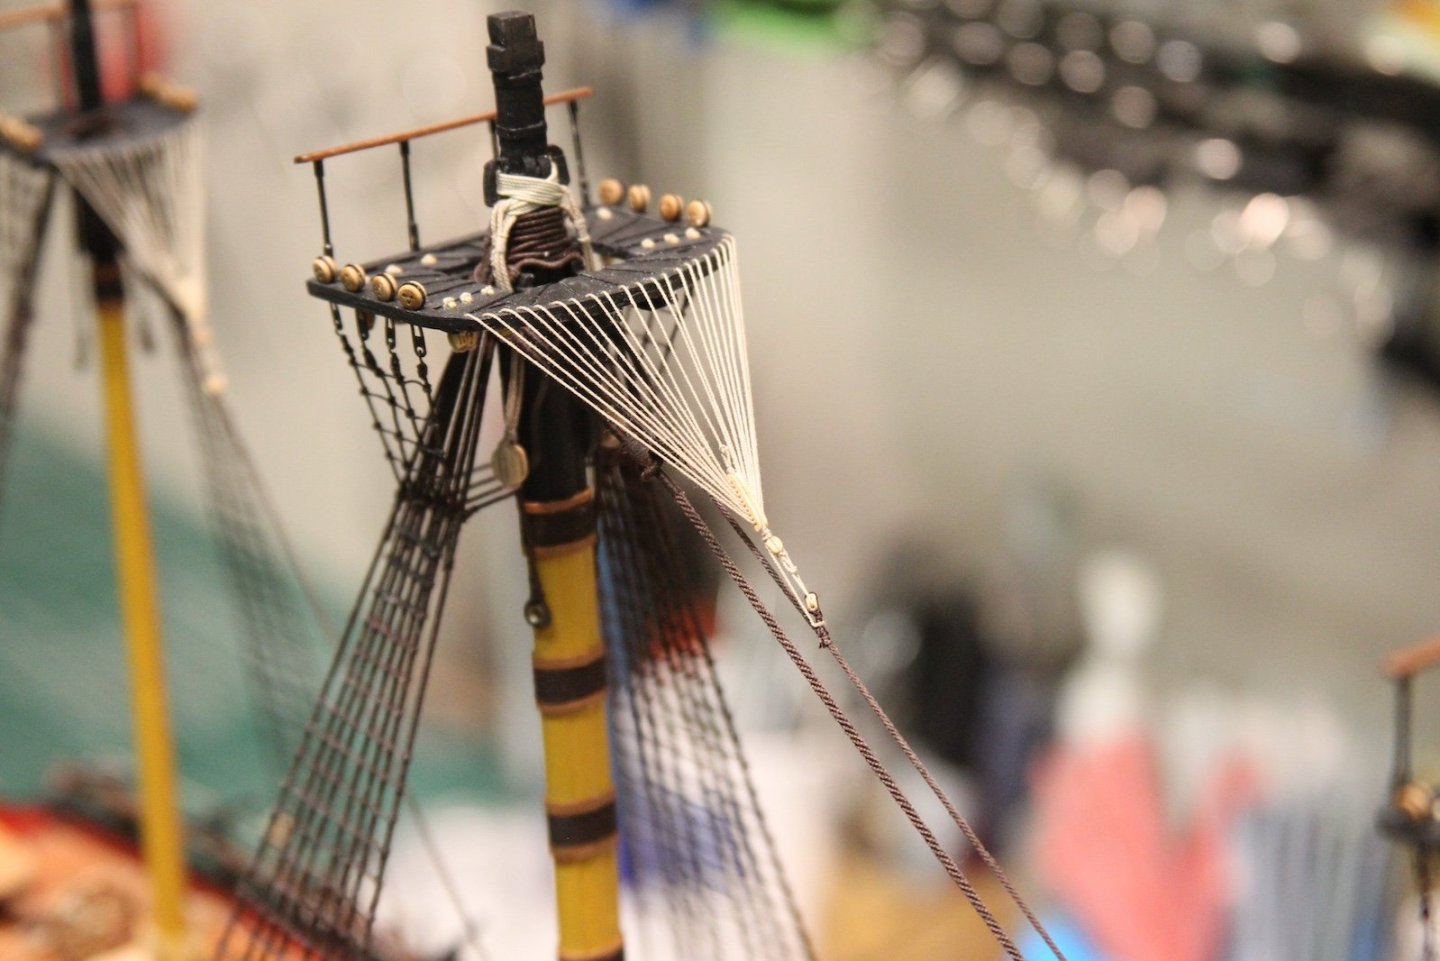
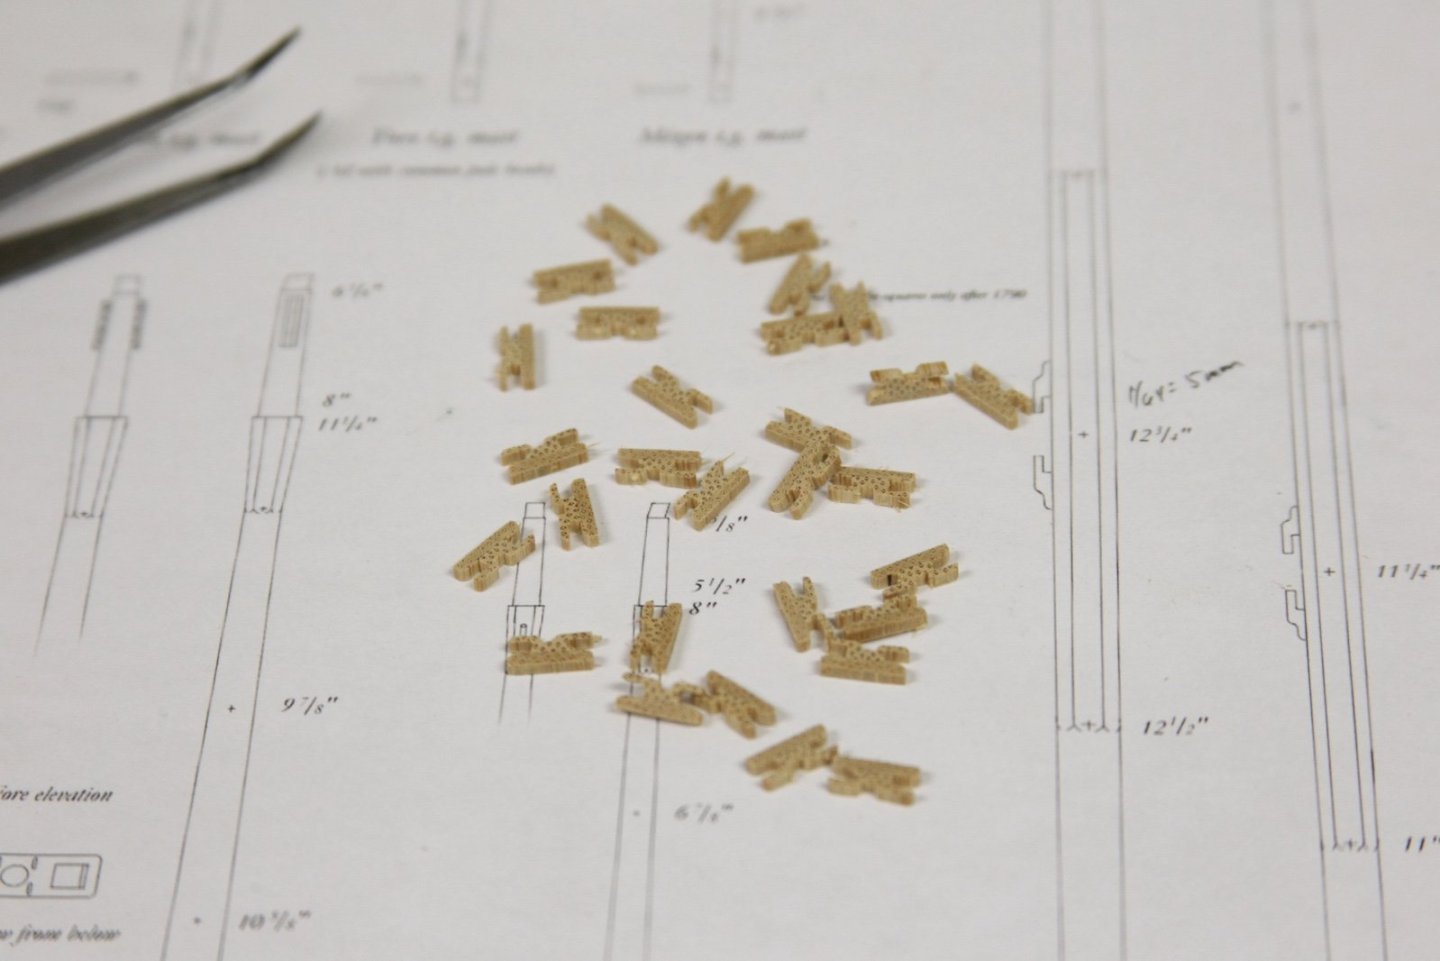
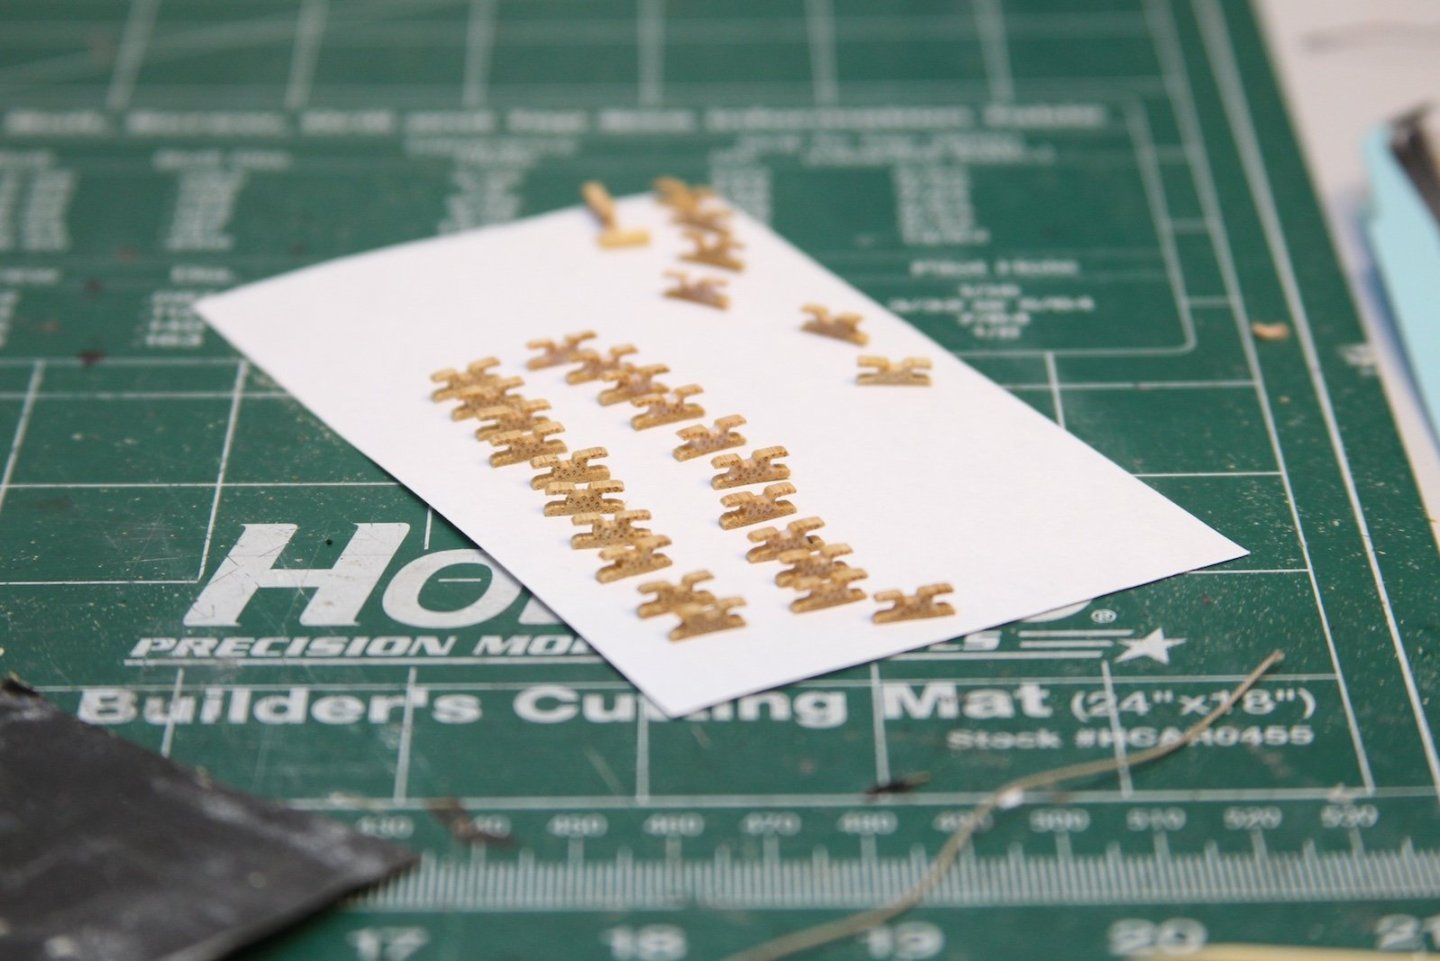
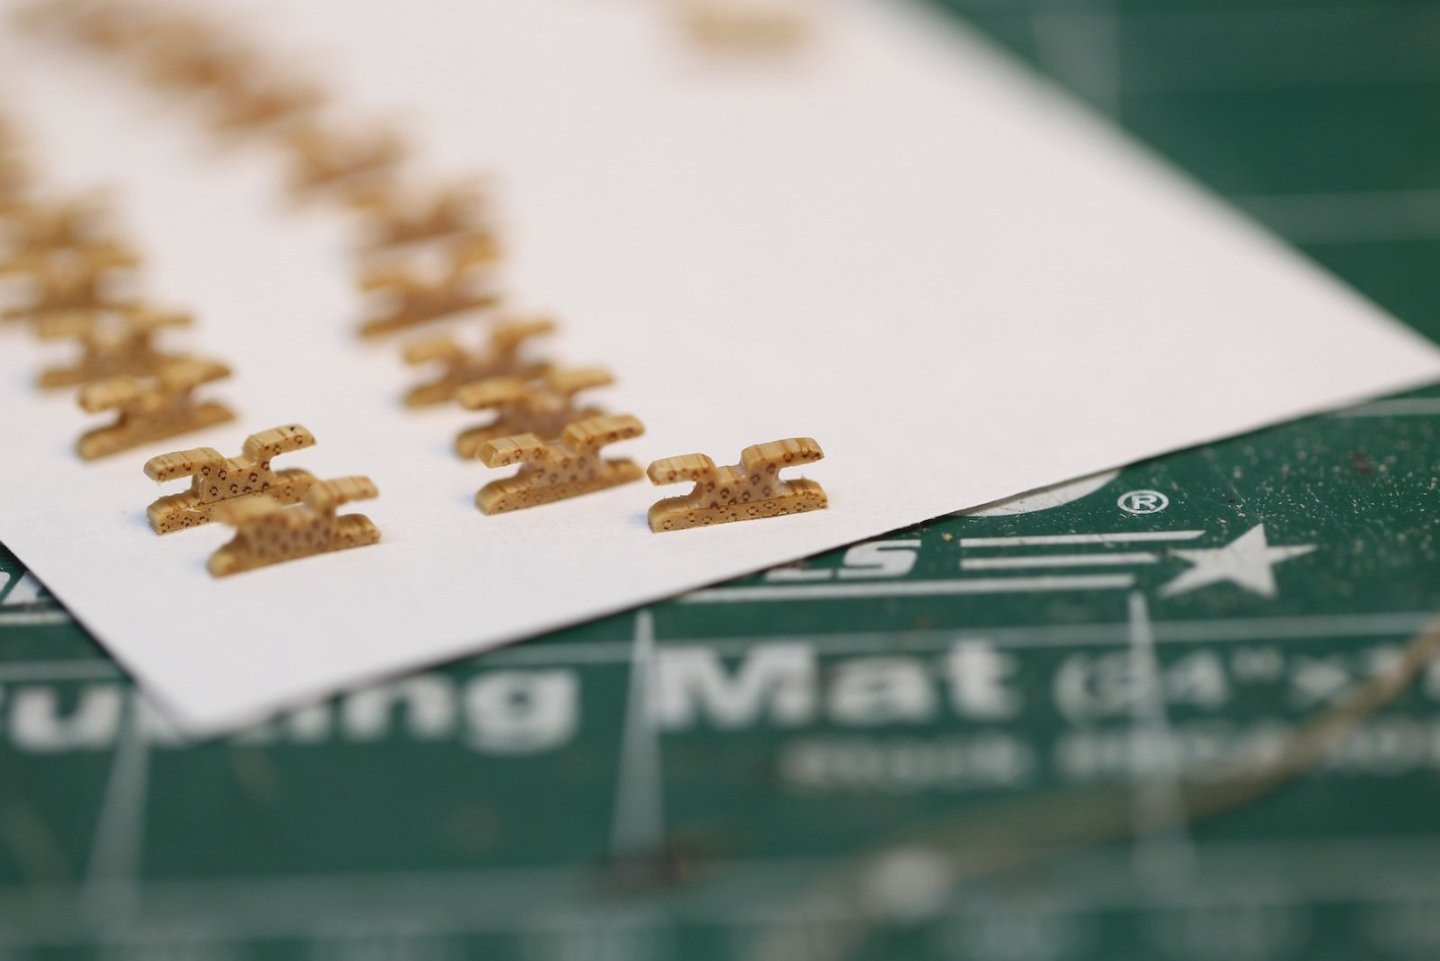
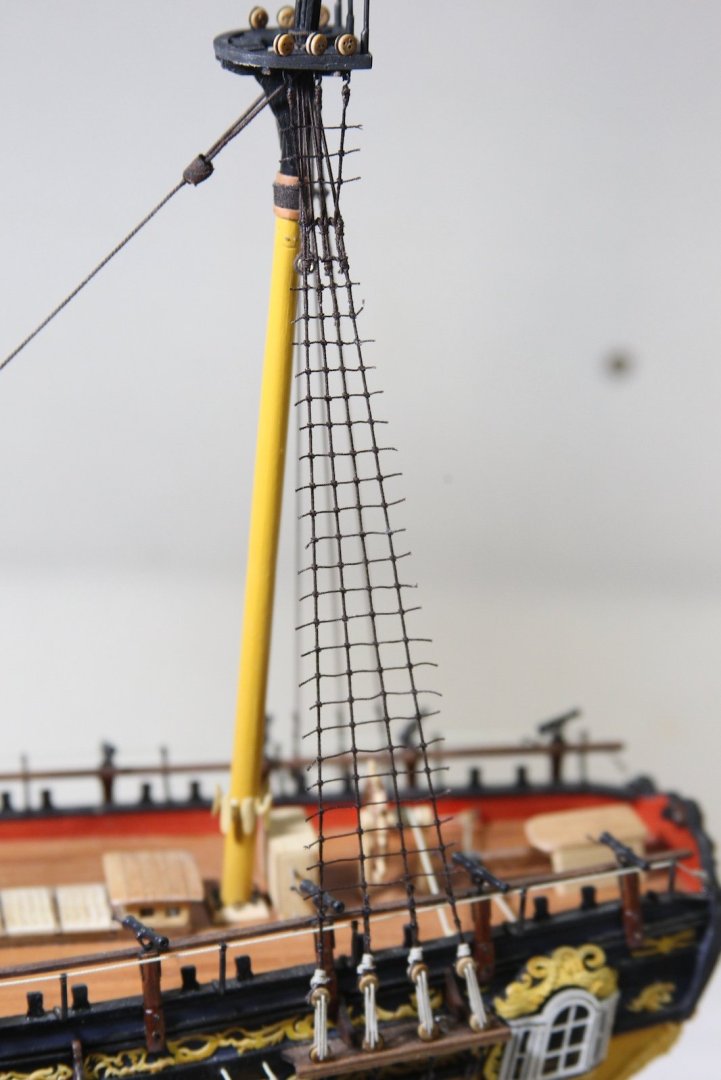
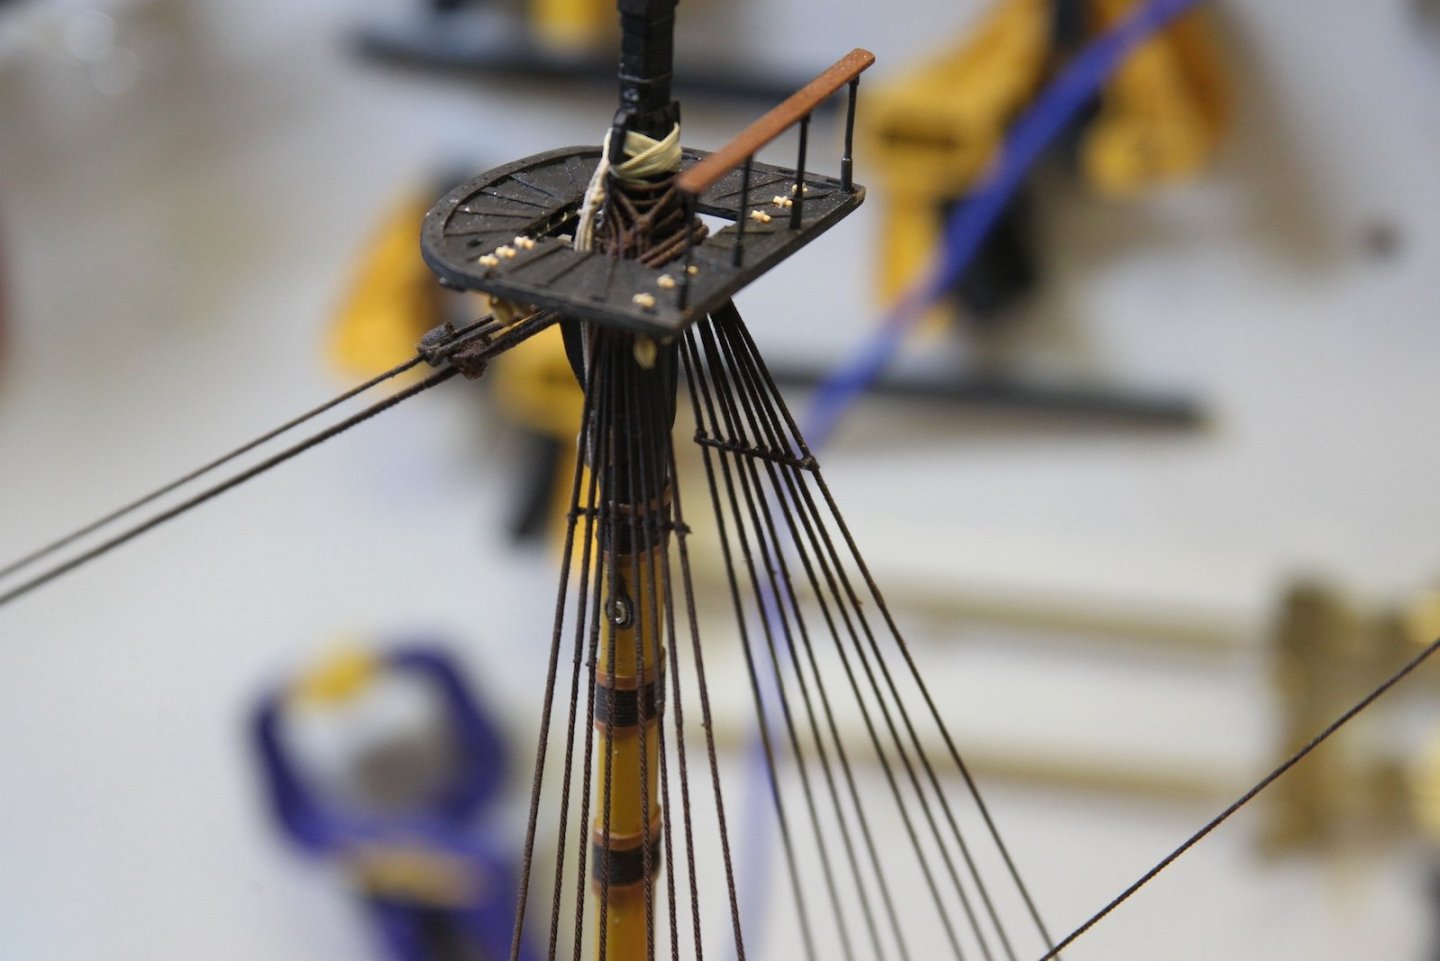
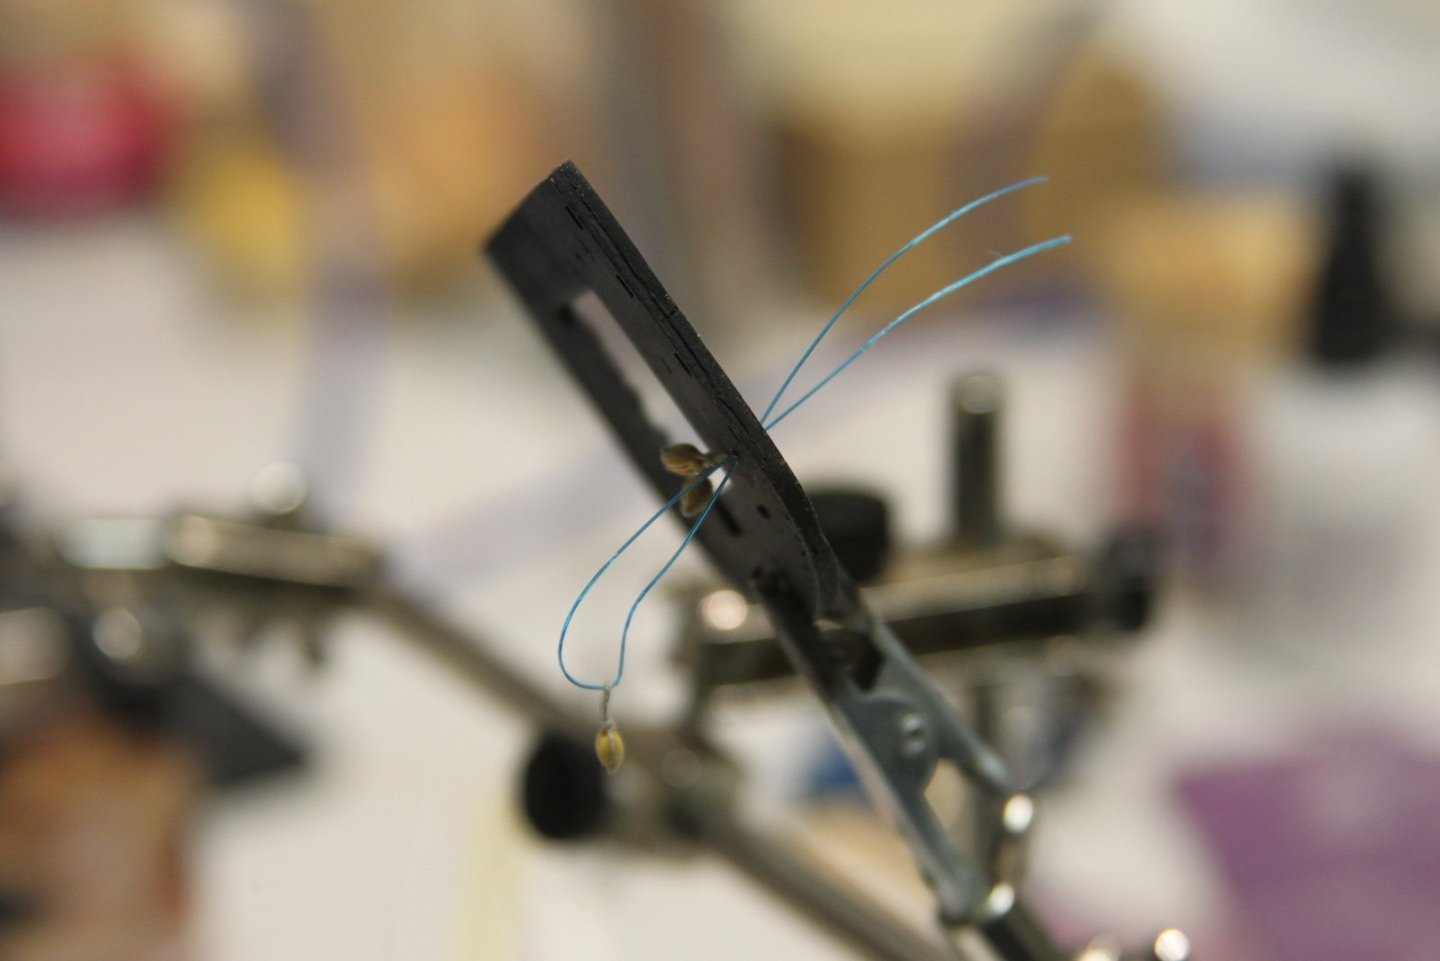
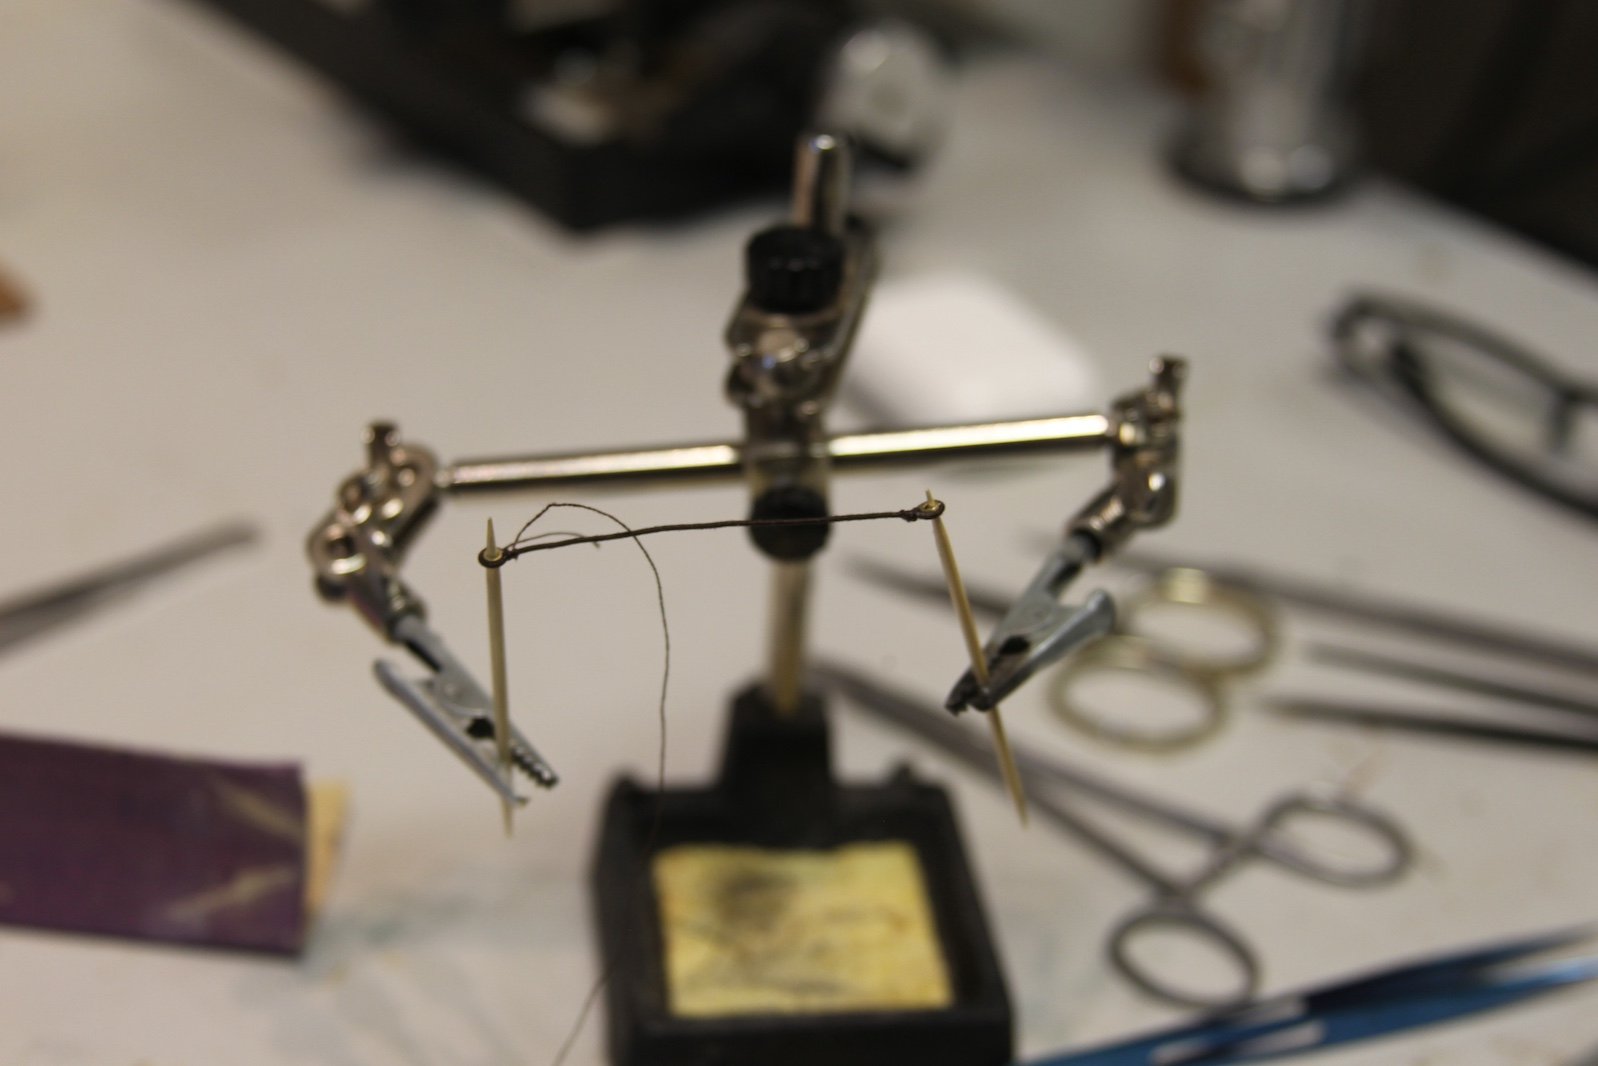
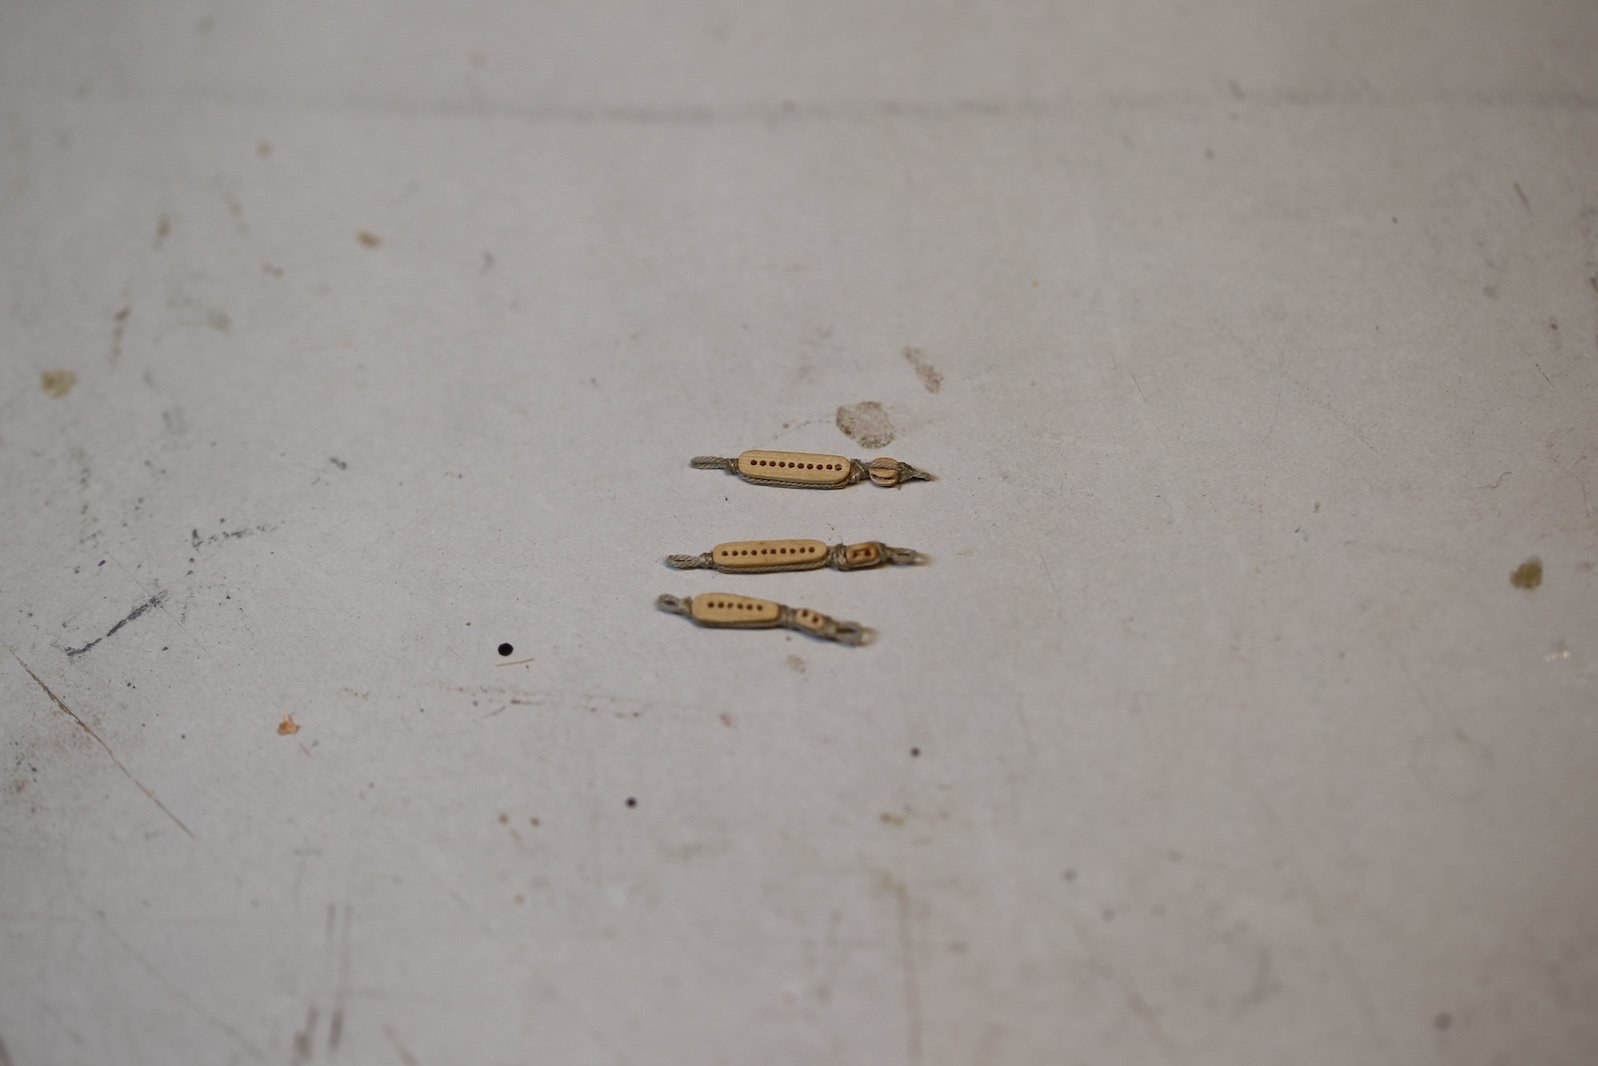
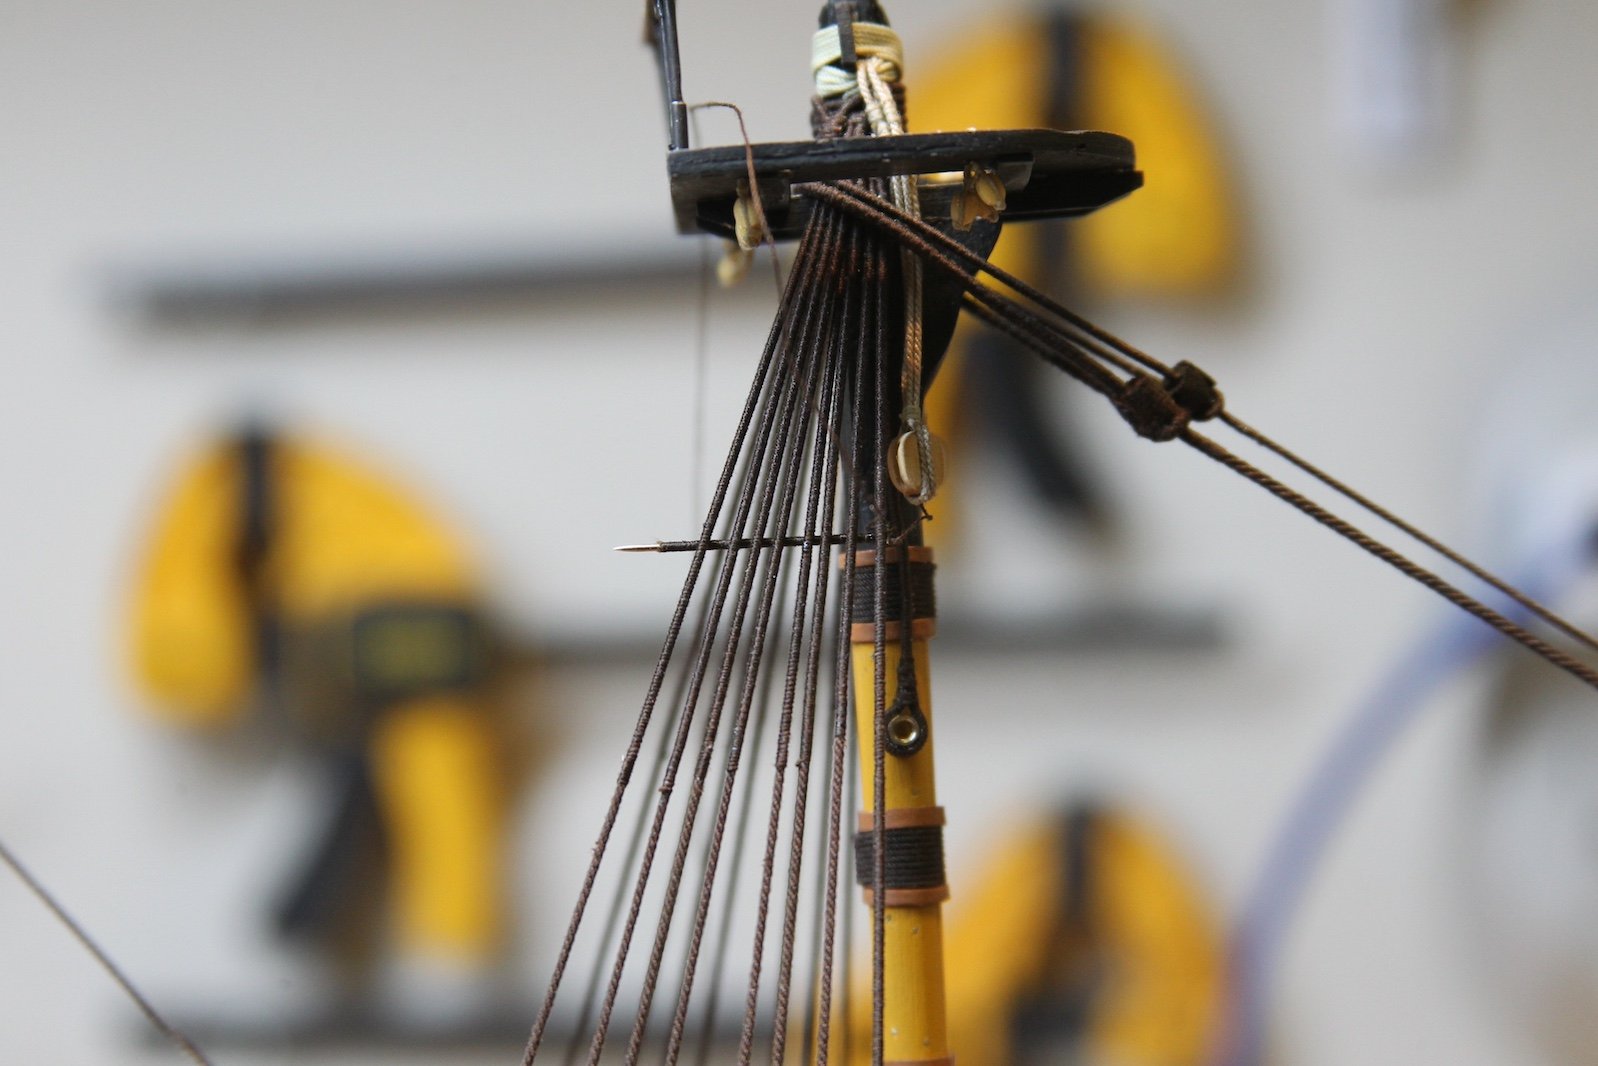
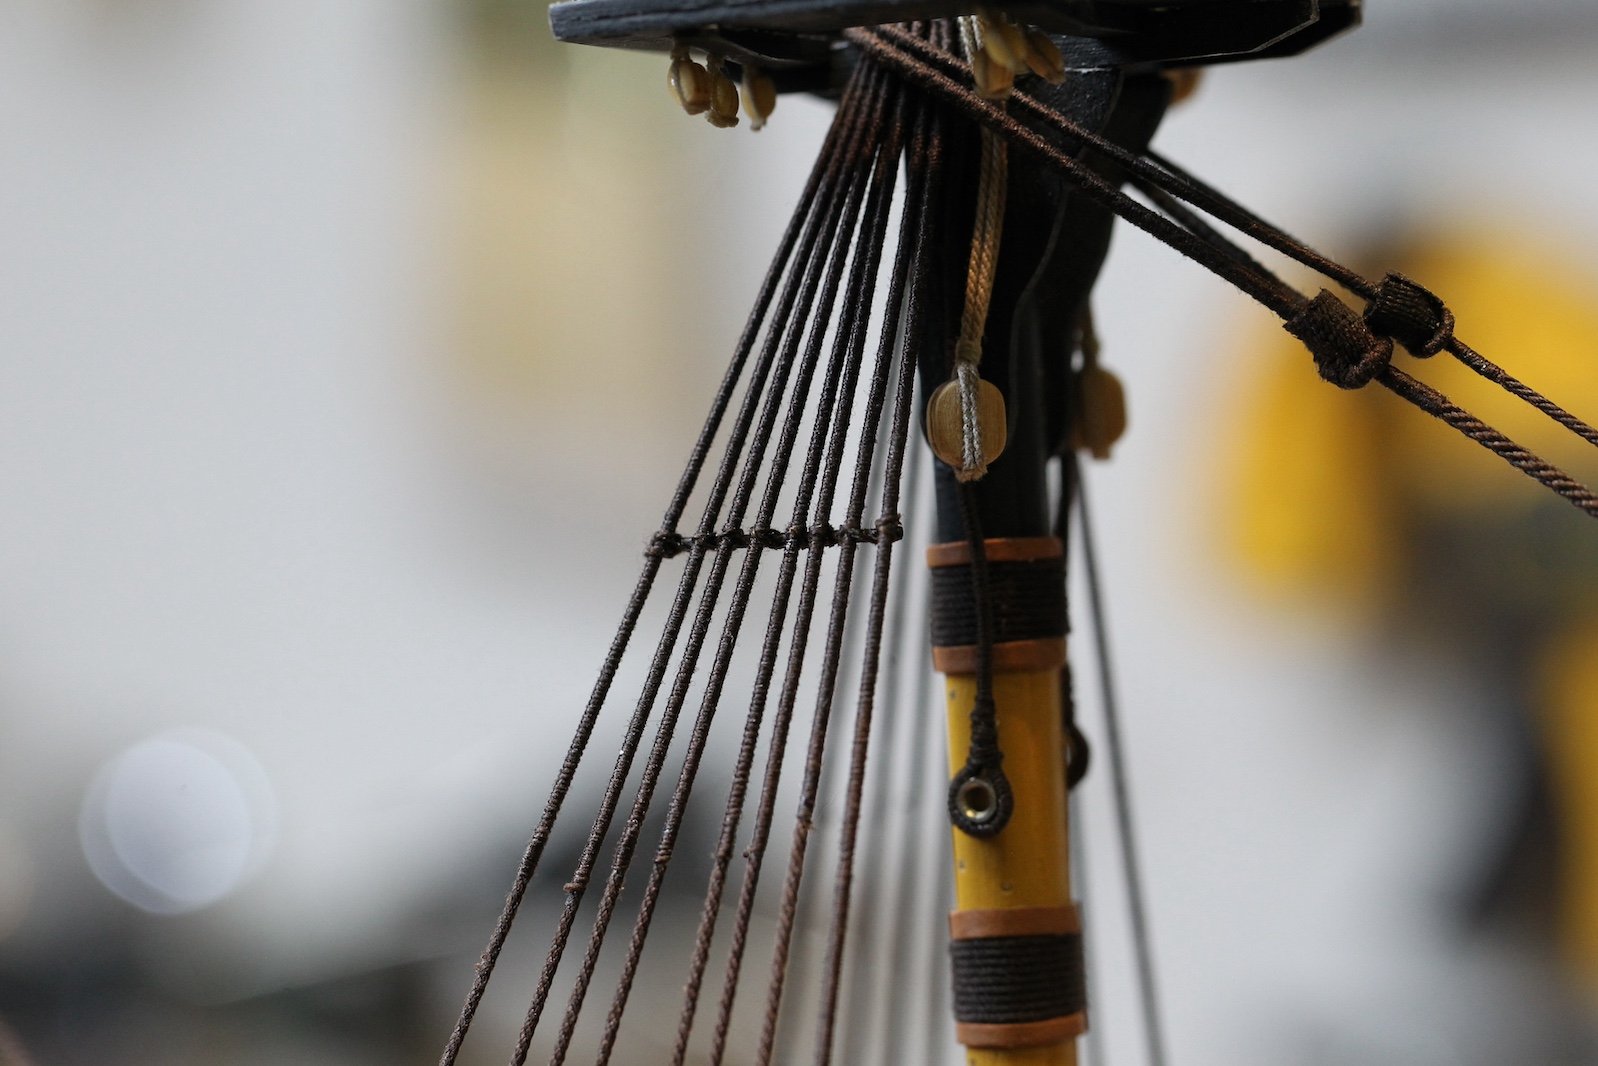
The euphroes and crows feet ended up being way more finicky than I anticipated. Yikes. First of all, they're pretty darn small at the 1/64 scale. The fore and main are supposed to be just over 6mm at scale with the mizzen at a little less than 5mm. I quickly determined that I wasn't going to be able to do that and get the holes I needed drilled, so instead I went about creating the euphroes the other way around. Boxwood is a must for these parts as they are very small and delicate. I drilled the smallest diameter holes I could get, as close as feasible, and let the overall length of the euphroes determine themselves. Six holes for the mizzen, 10 holes for the fore and main. The mizzen ended up at about 7mm, and the fore and main at about 10mm.

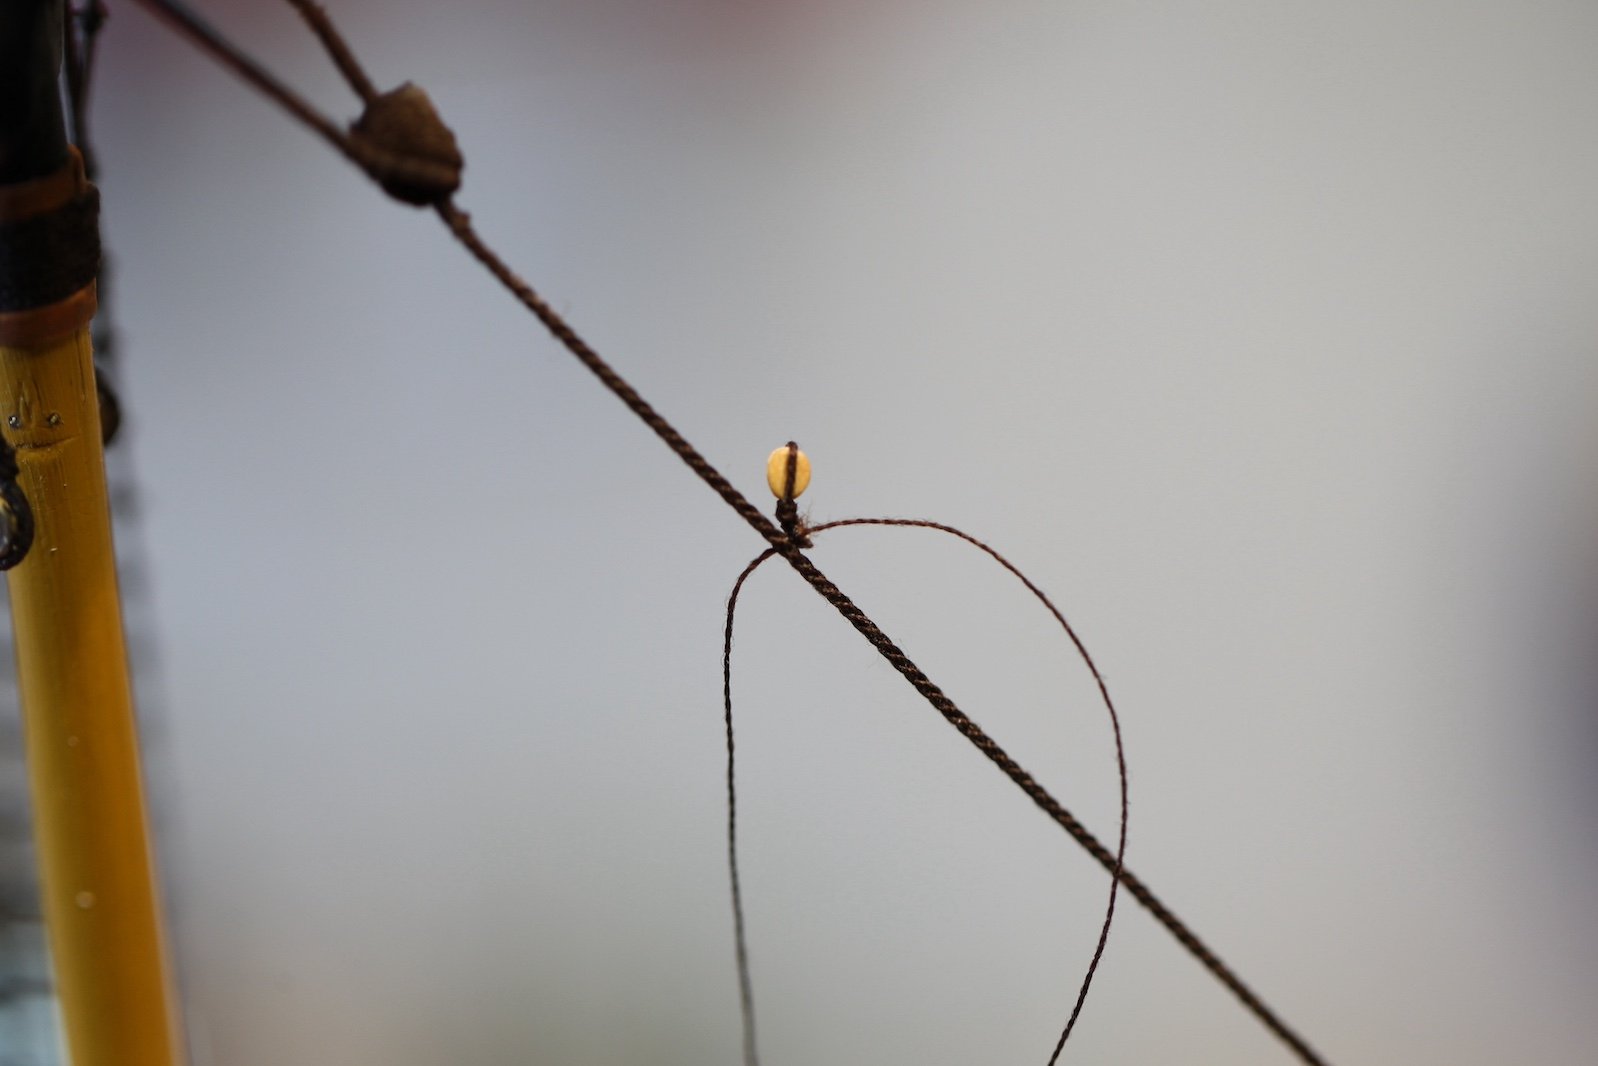
The edges were cut using my thinnest pin file to make room for the serving. An eye is served, then the euphroe wrapped, then a 3mm block, then another eye. The block-end of the euphroes are seized to the stays for each mast. I started with the idea of serving it by feeding a line through the stay and wrapping it. This is how I did the mizzen. But this ended up not being the best method.

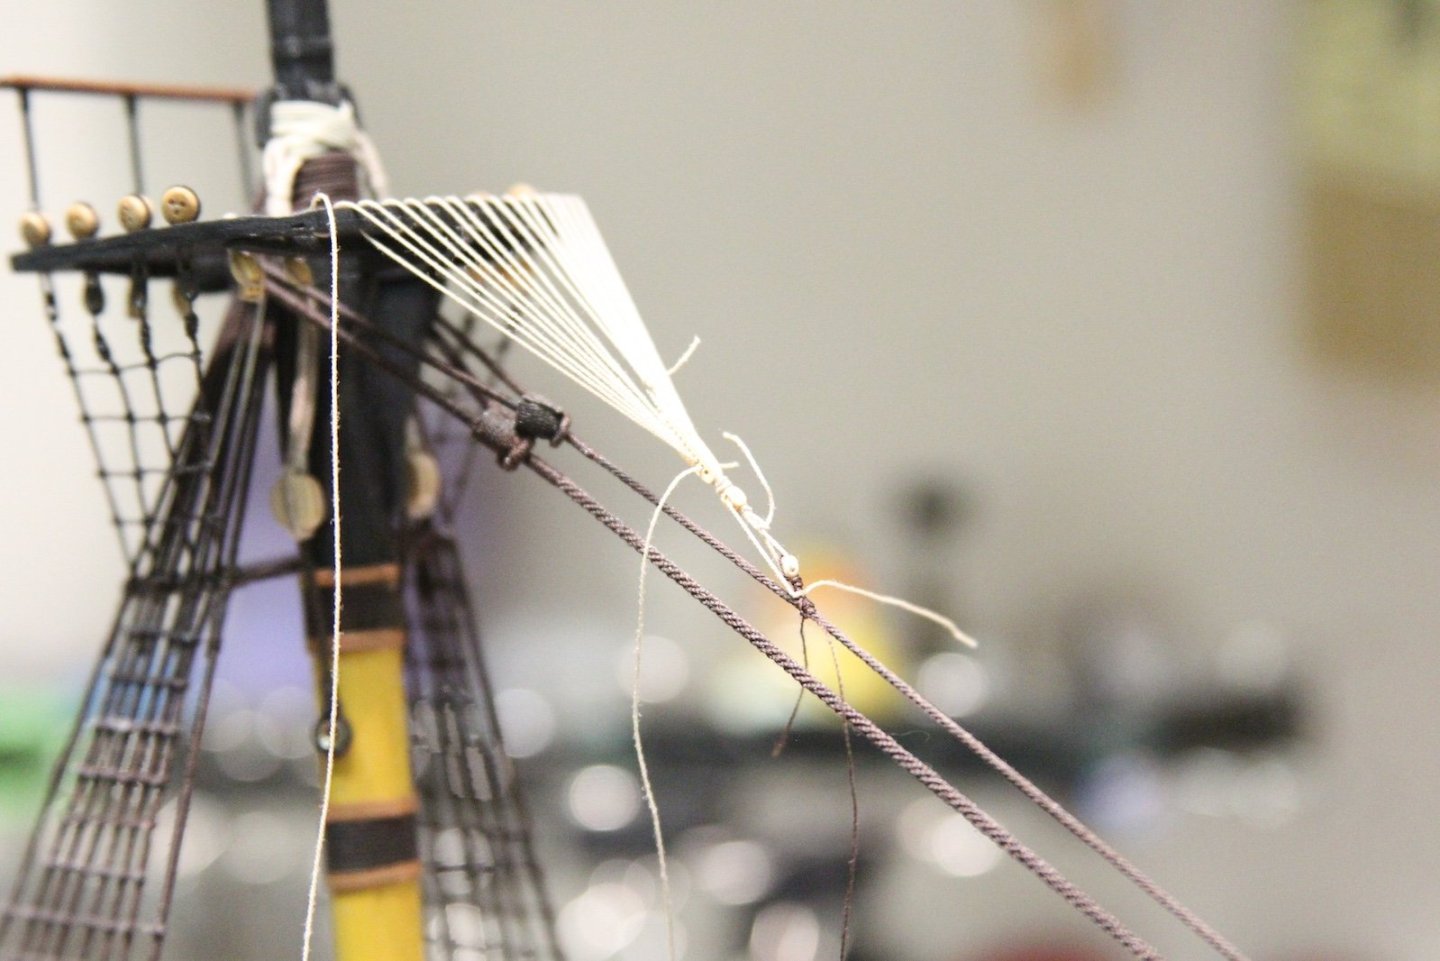
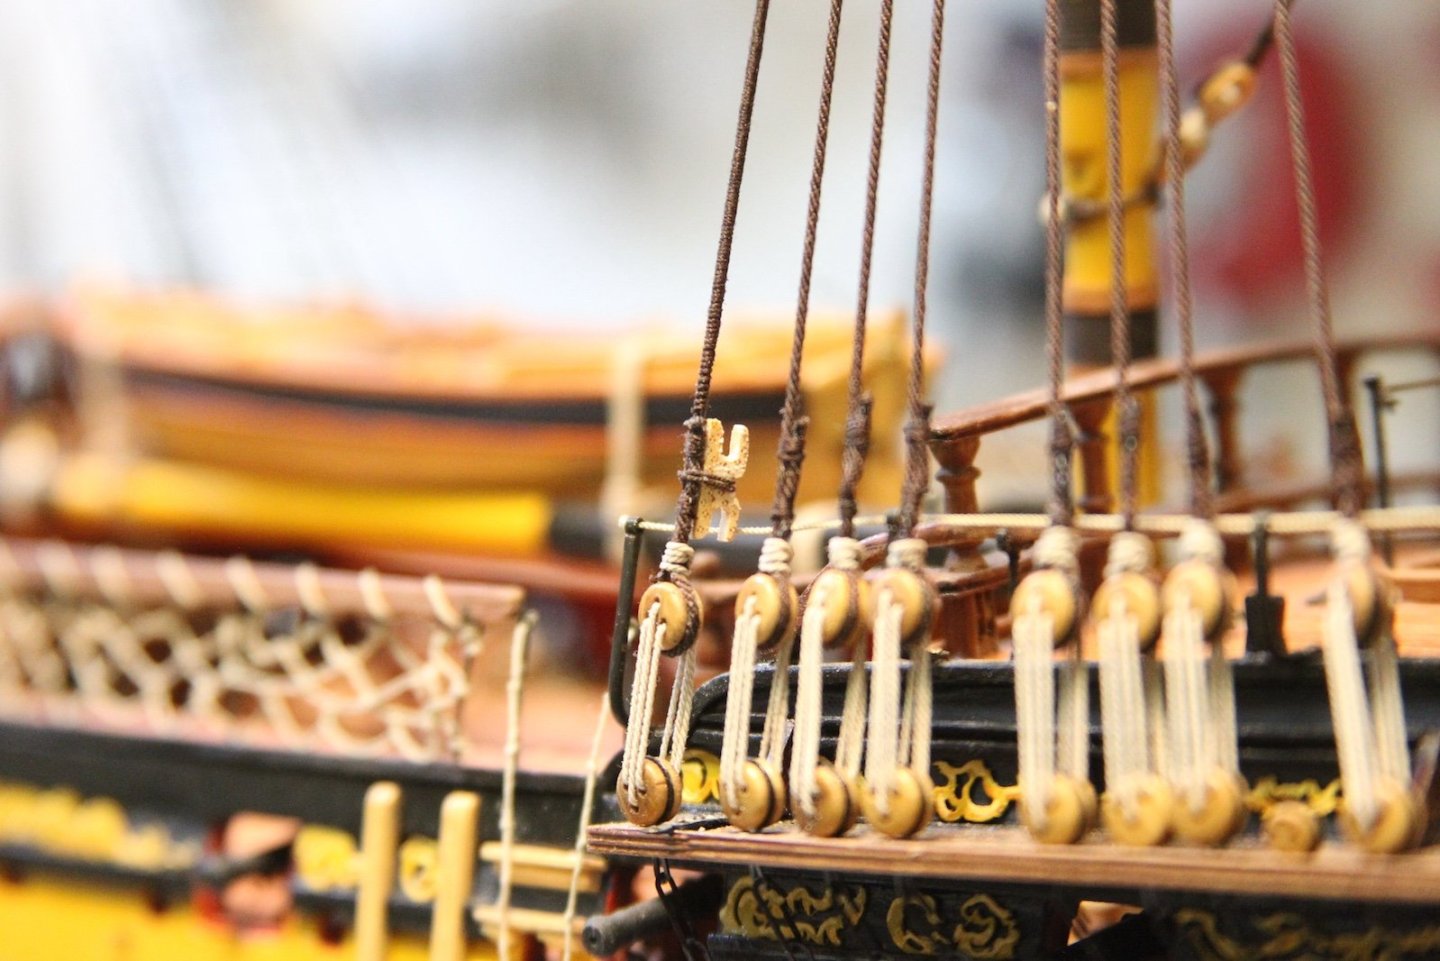
The reason is because of how difficult it is to maintain the tension on the crows feet balanced with the euphroes. If you tighten the crow's feet too much, it pulls on the stay until it is out of place. If you keep too much tension on the stay, when you loosen it, all the crows feet relax and are askew. I hung a clip off of the stay to keep it reasonably taught for the mizzen until I could rove all the crows through. Which, in itself, is not an easy task without snagging just about every fitting on the ship.
Finally getting a balance took several tries and much adjusting. What I decided to do with the other masts, was to keep every seizing and knot loose until the crow's feet were roved through - then I could tighten the blocks and each component individually until tension was maintain and the stays were not distorted. Once again, using a clip to loosely hang off the stay was helpful, but being able to adjust the block that is seized along the stay was most beneficial.
Using this method - it didn't take quite as long to get a decent result on the main and foremasts.
-
-
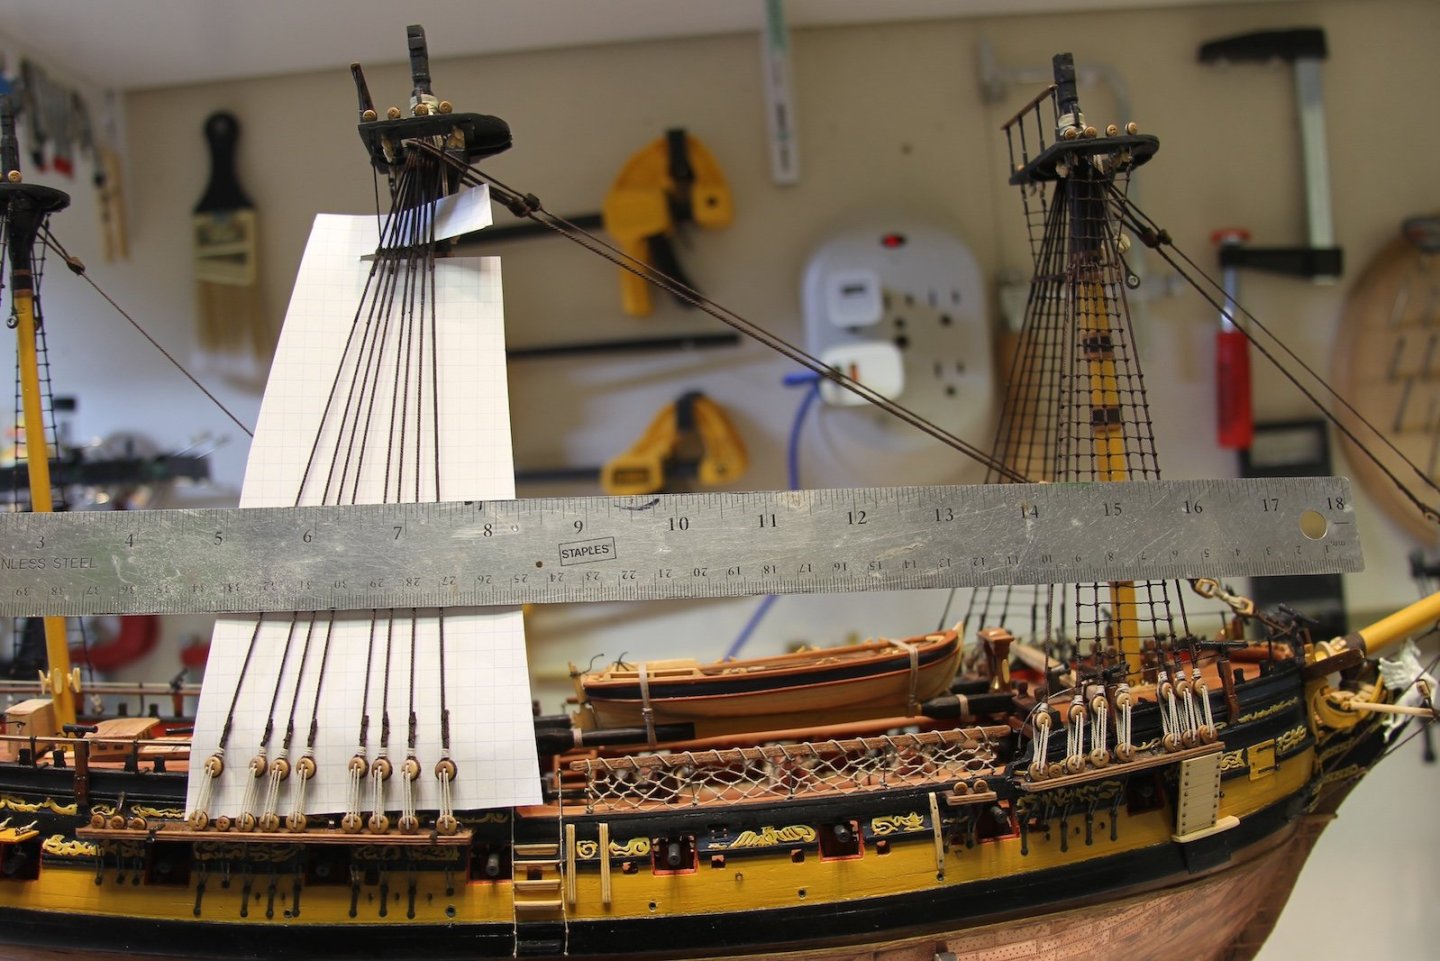
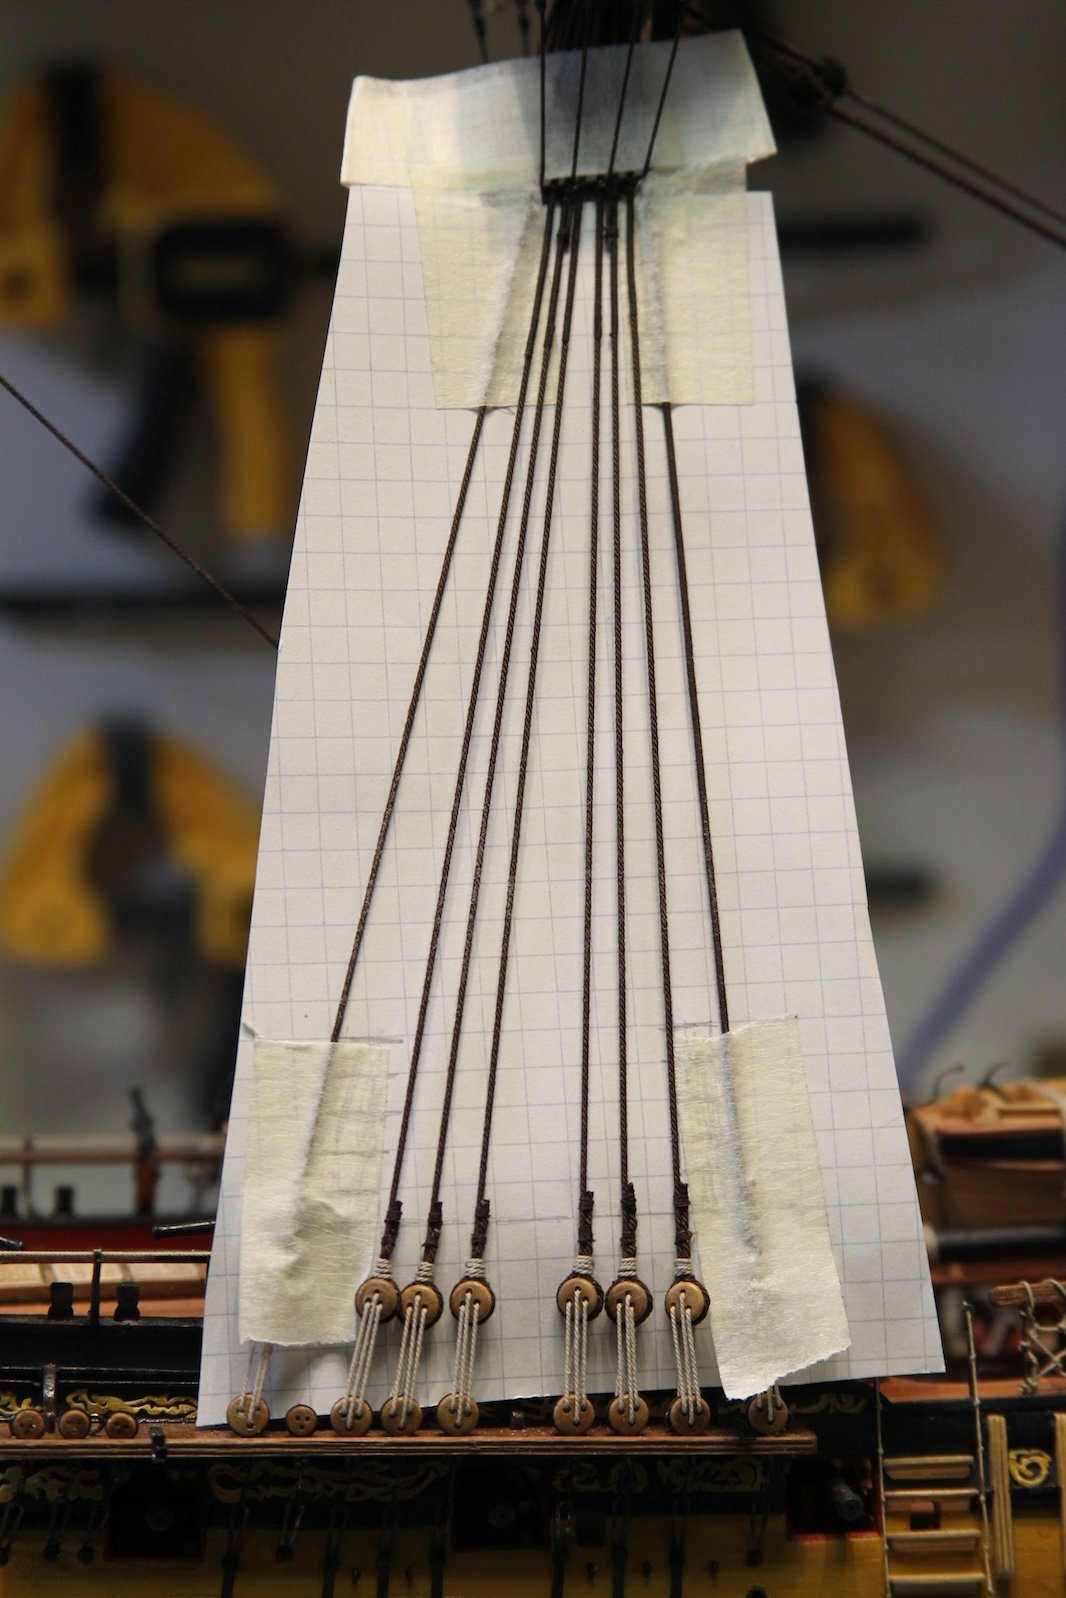
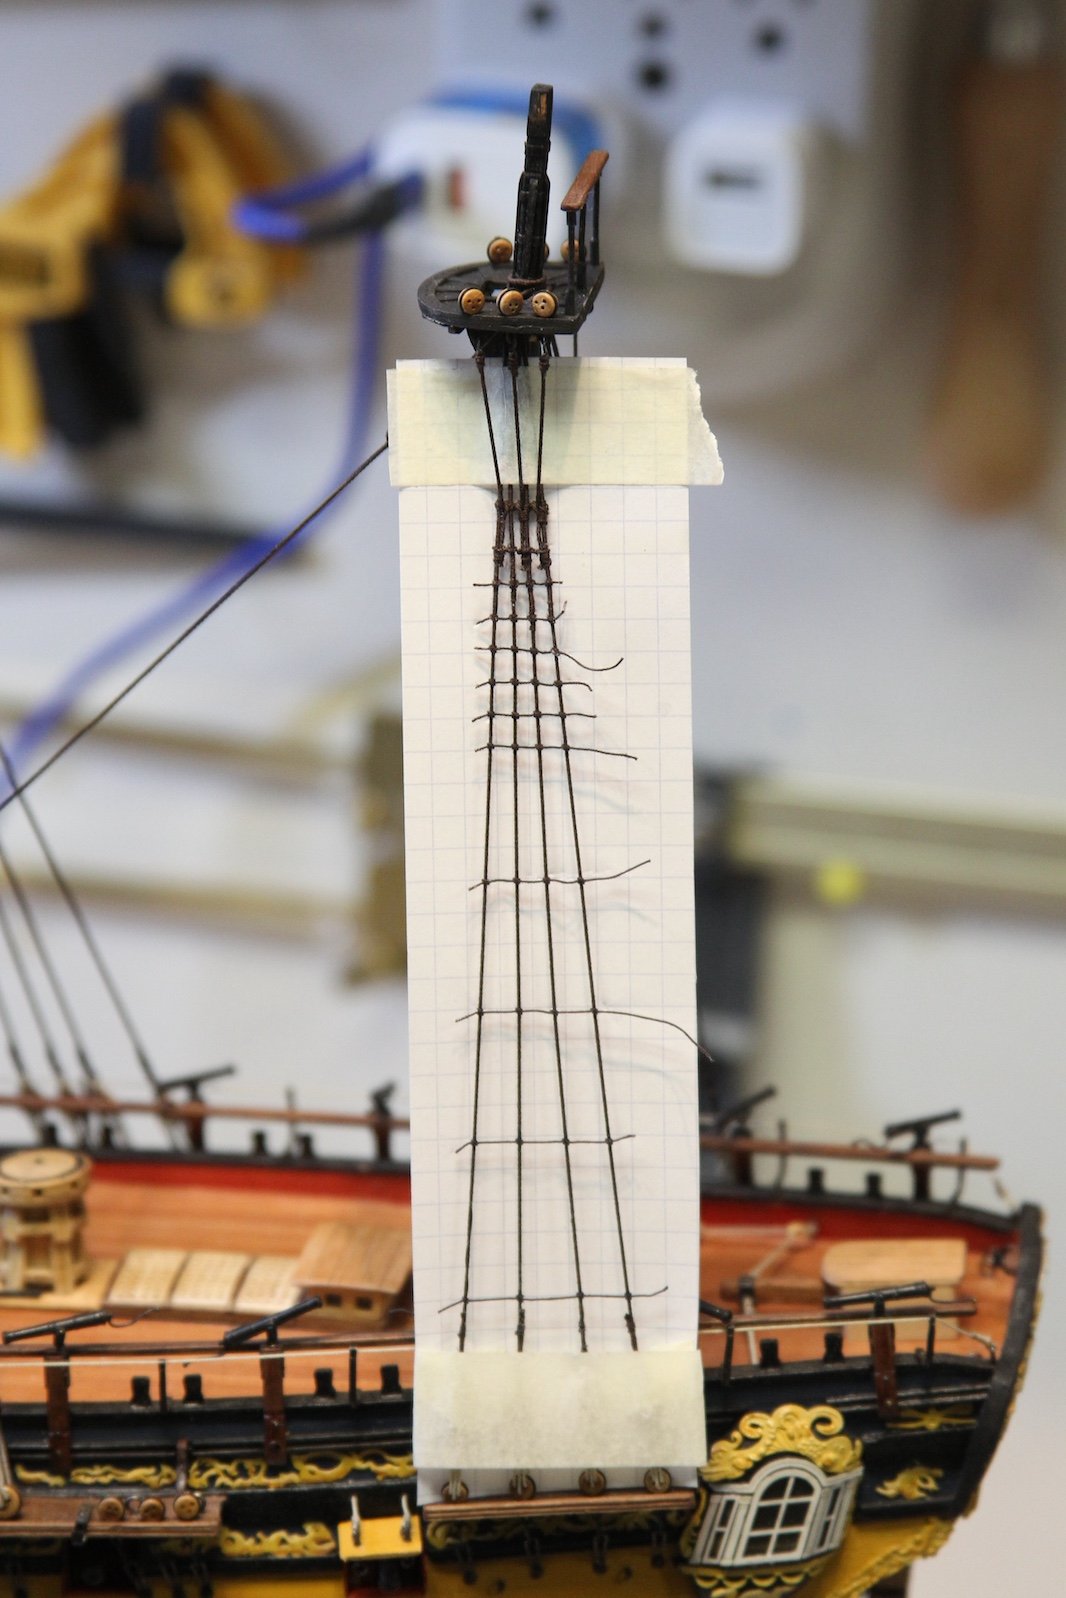
It's always a pretty big step when you knock off the lower ratlines. Just a couple of additional notes - the first six lines on the top and bottom of both the main and fore shrouds skip the foremost and aftmost shrouds. Otherwise the process is the same as the mizzen - skipping every few lines to prevent the shrouds from squeezing together or skewing. I used a long ruler to make sure my graph paper was positioned properly to the match the lines of the ship and the other ratlines.

I also wanted to note here that it is quite important (especially at this scale) to let the diluted PVA dry completely before you try and trim the edges otherwise the knots will unravel and you'll have to redo some lines. After the end knots dry, I use a brand new blade on my scalpel, hold the end of the rope as tightly as I can with my smallest tweezers, then gently cut the rope as close to the knot as possible with a slow back and forth sawing motion using only the weight of the scalpel. Trying to "slice" the rope does not work here and results in pulling and fraying.

This is also one of those places where it really does make a difference when you use higher quality lines - another benefit of making my own. The polyester fibers do have a tendency to slip a tiny bit, so going through and adjusting the clove hitches across each ratline is paramount to maintaining some semblance of evenness throughout the rigging. I have some a bit more slack than others, but overall I'm pleased with the end result. As we all know - this is one of those times when patience really does pay off.


For those who are curious - a total of 784 clove hitches including the ratlines across the futtock shrouds.
-
-
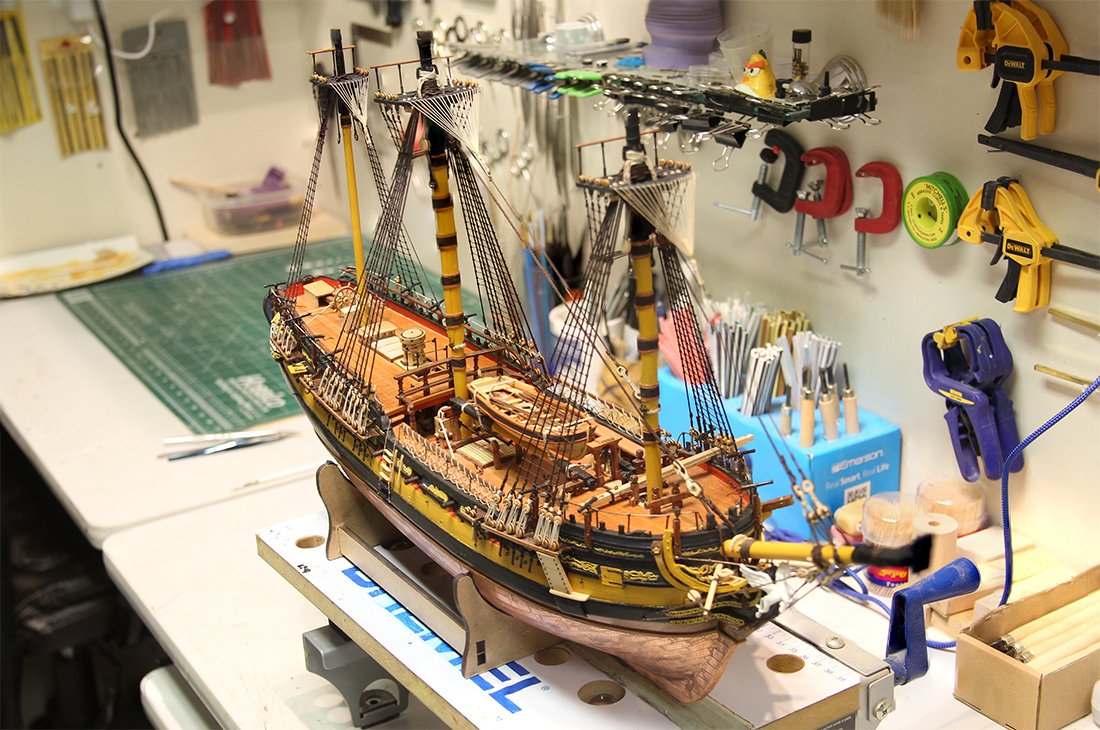
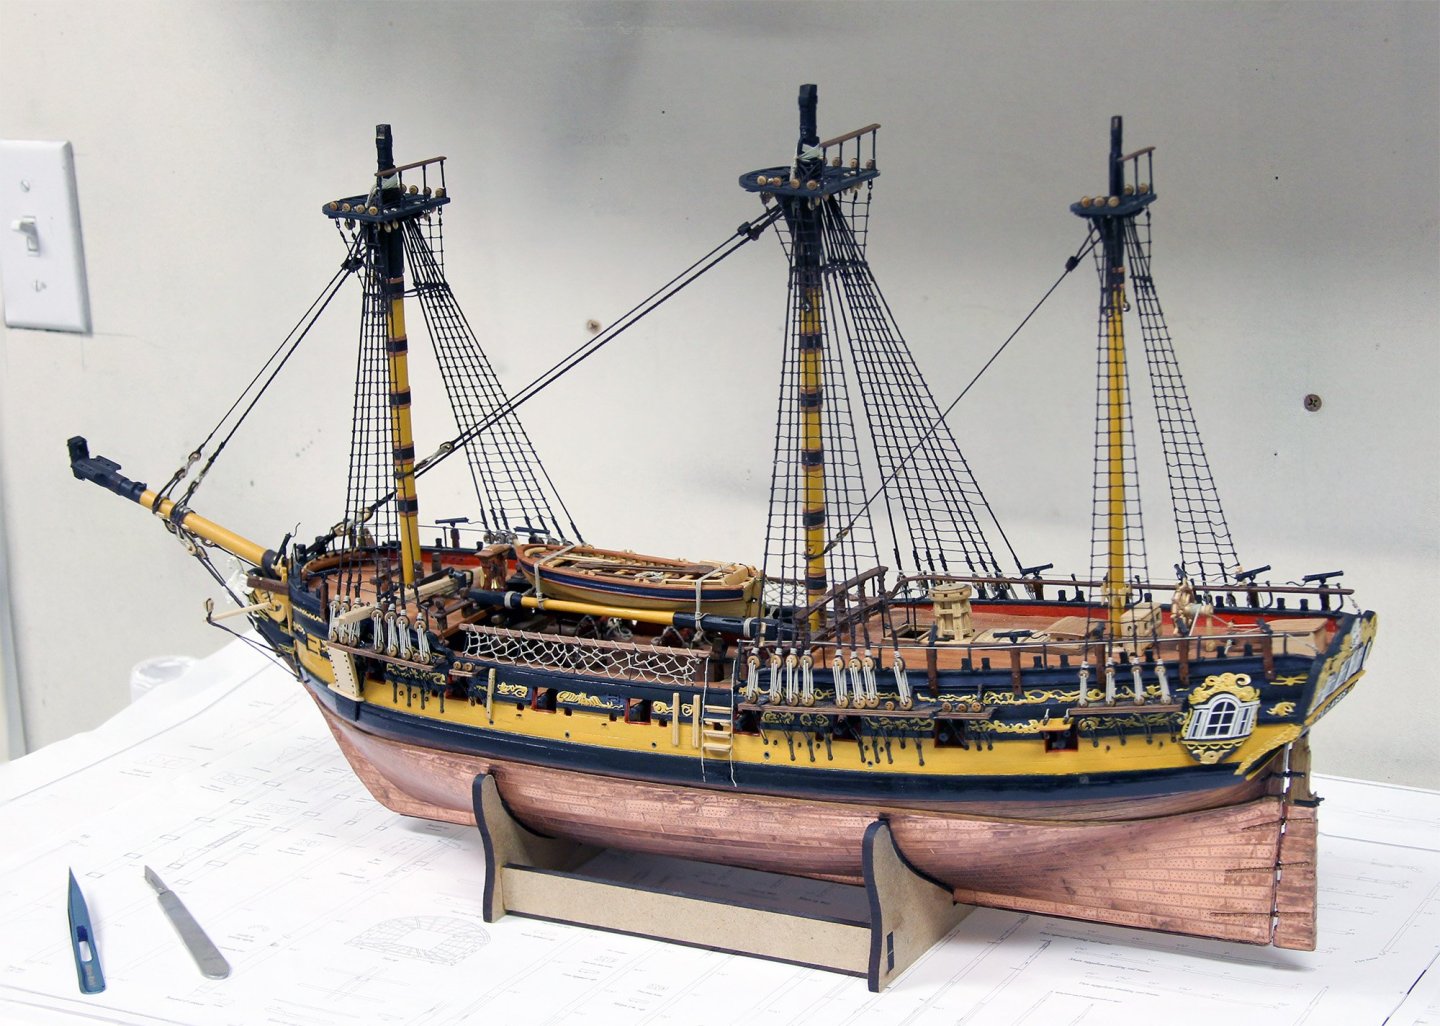
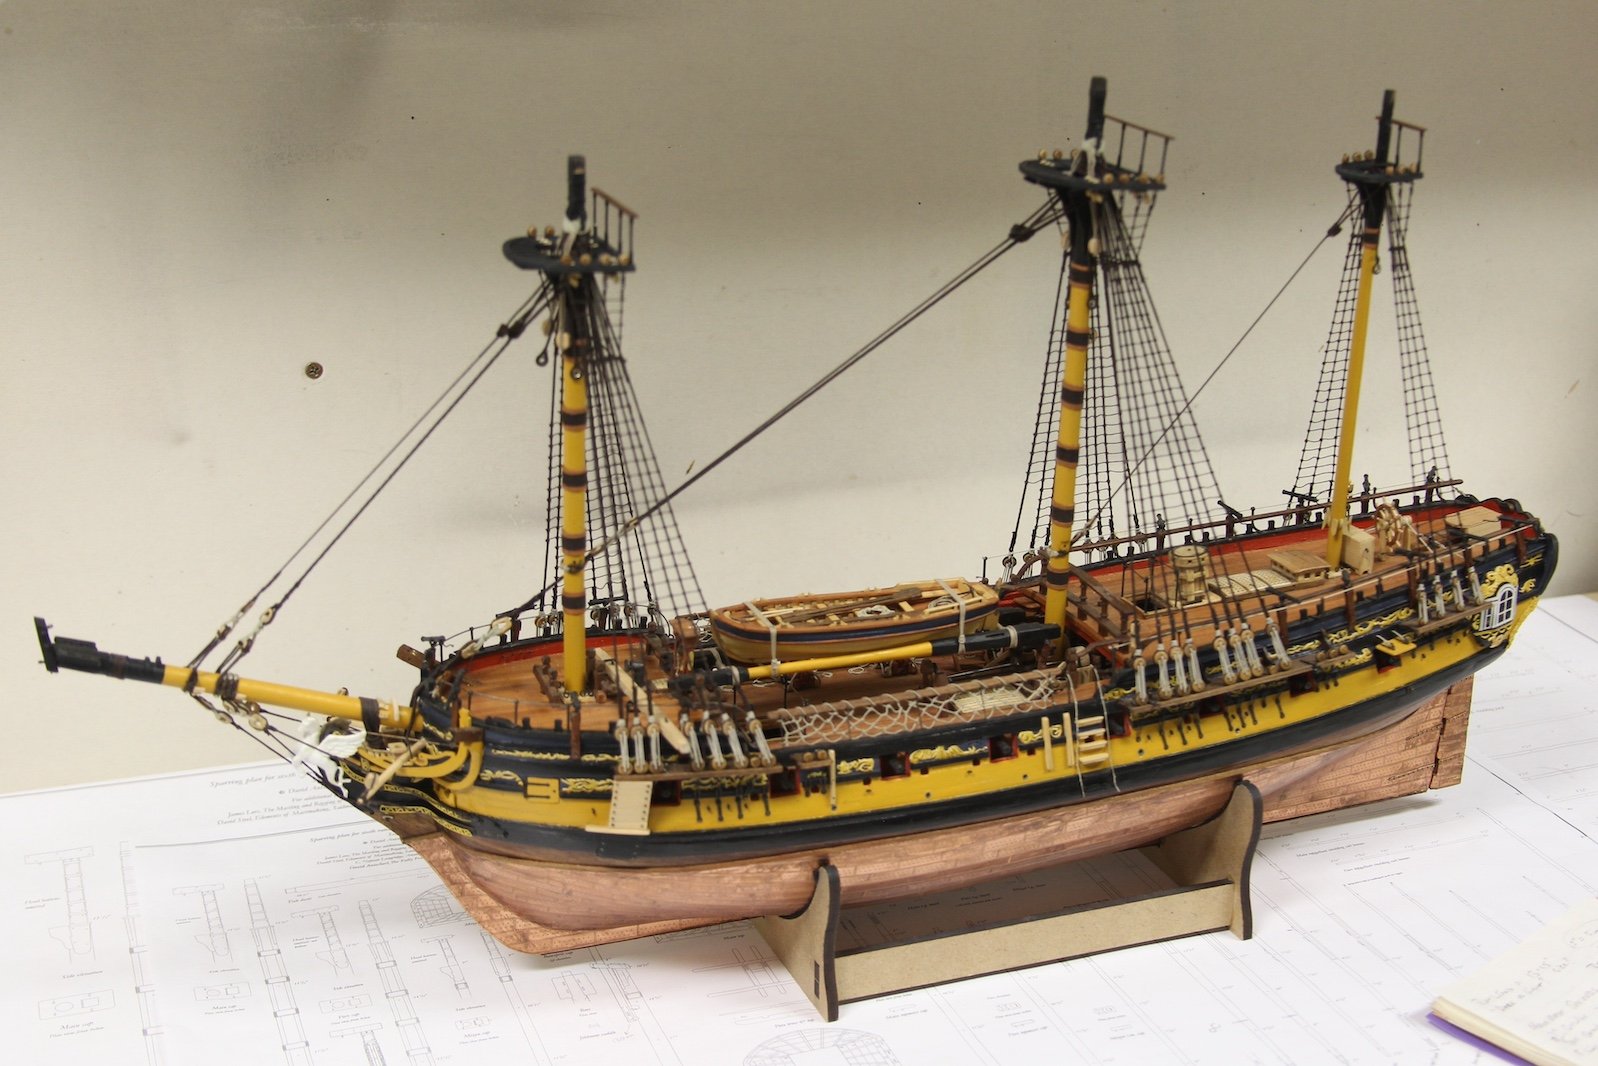
Love the perspective shot - not a small ship!
- mtaylor, Ryland Craze and Blue Ensign
-
3
-
Thanks @Blue Ensign- I appreciate it! I’ve been combing through your old Peg log as I go of course - so I’ll keep at it along with Dan’s - trying to note the differences between Lees and others as well. I've finally been able to get ahold of the TFFM volume, and I have all the computer images from Greg - a little harder to distinguish specifics sometimes versus the print.
thanks again!
-
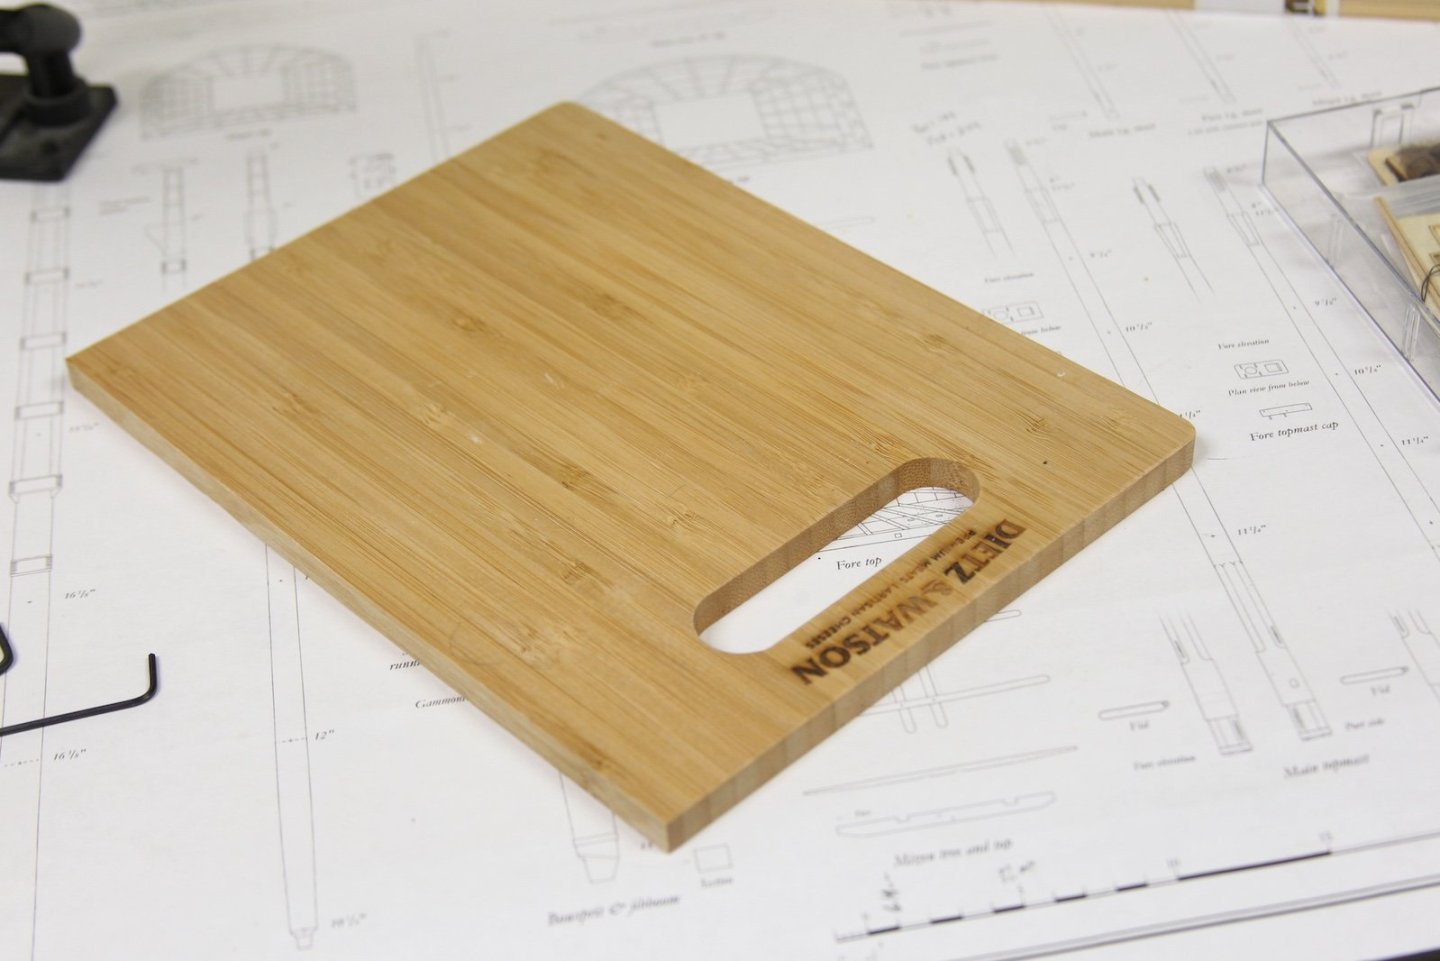
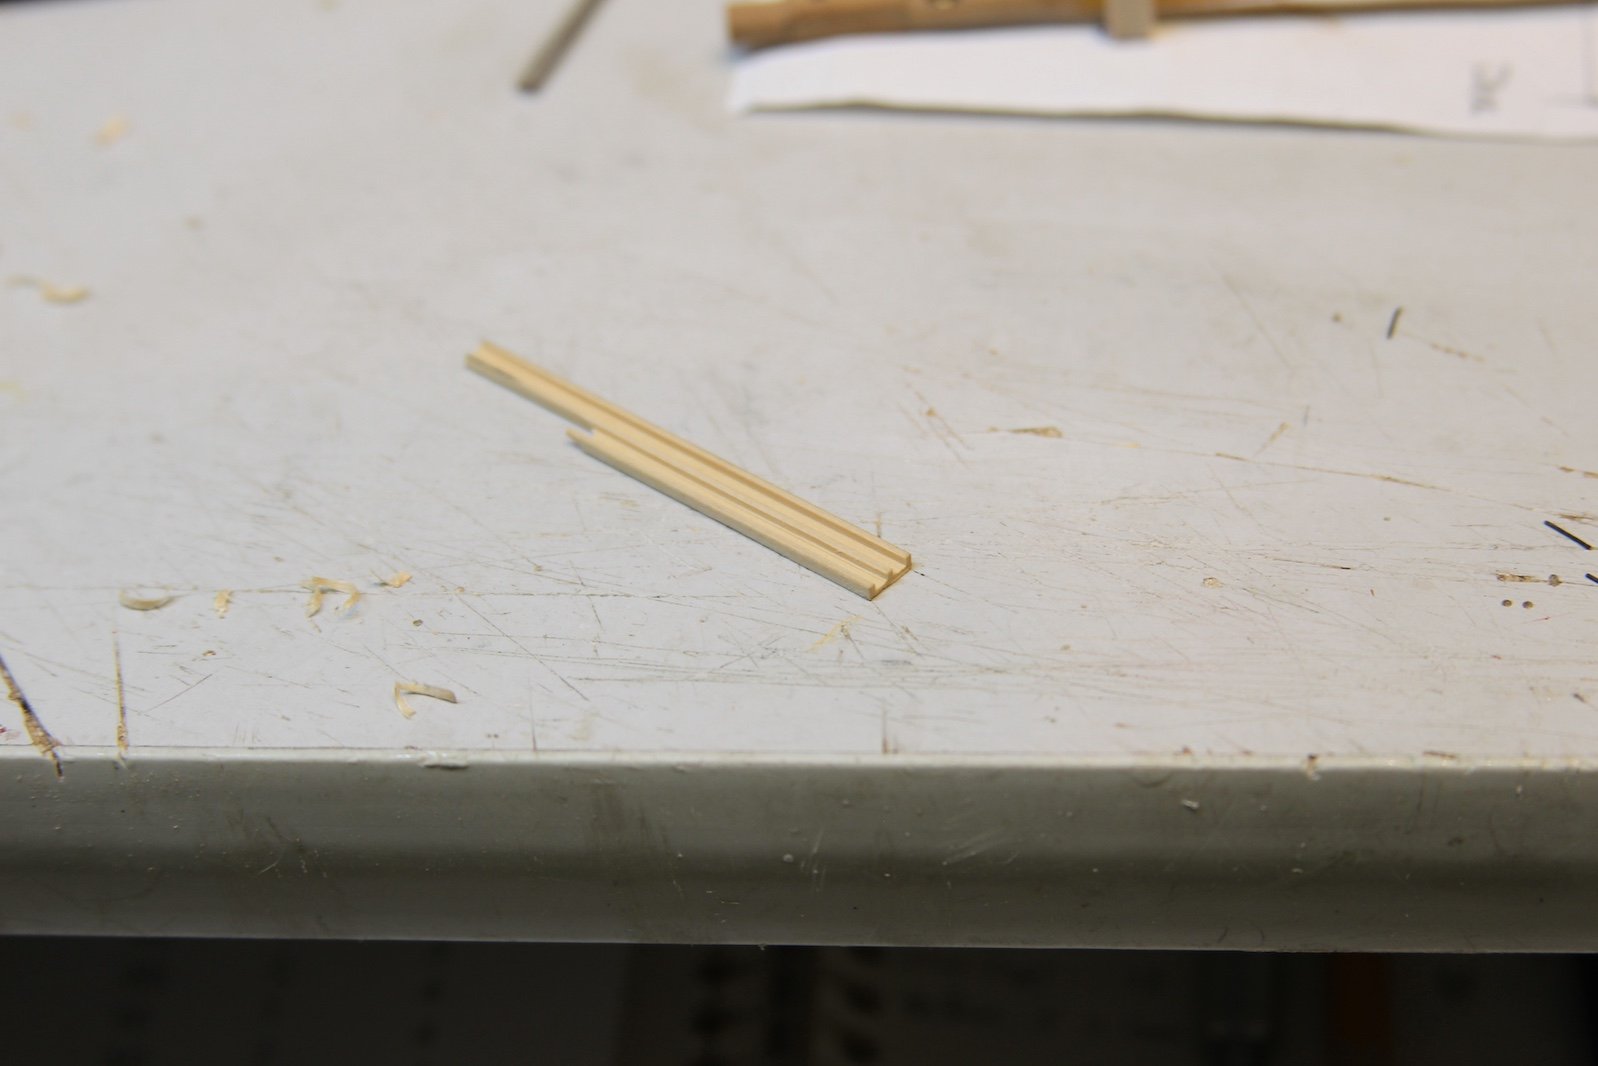
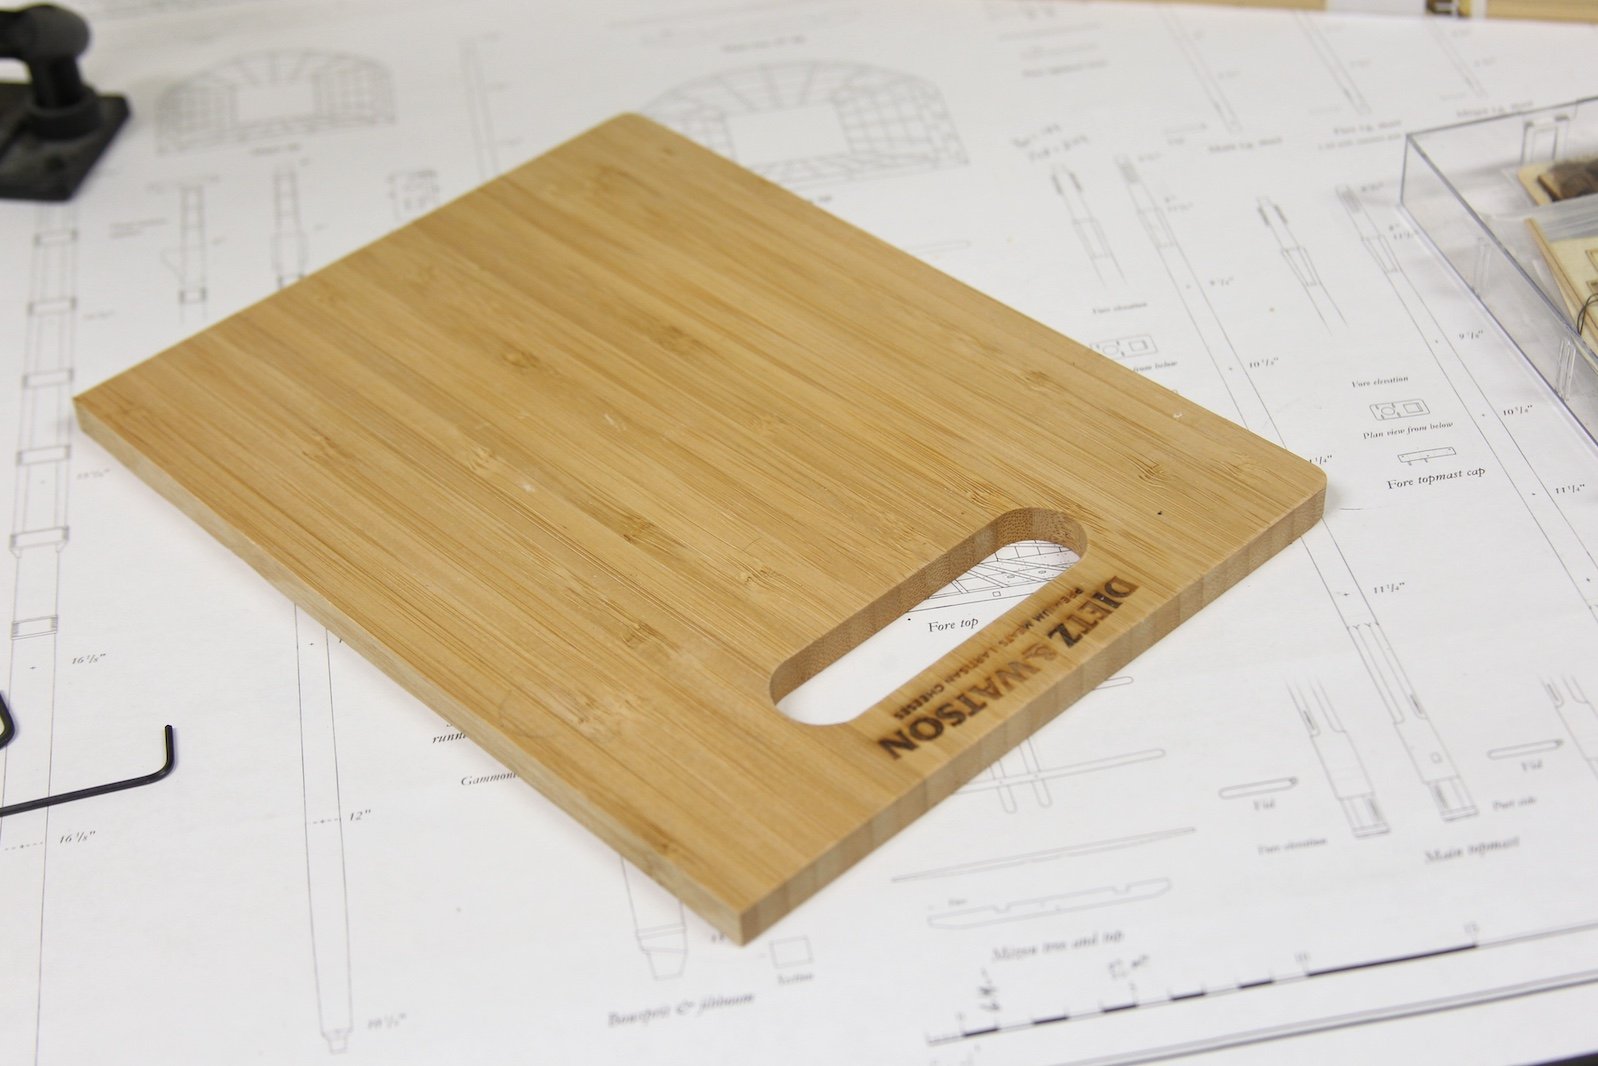
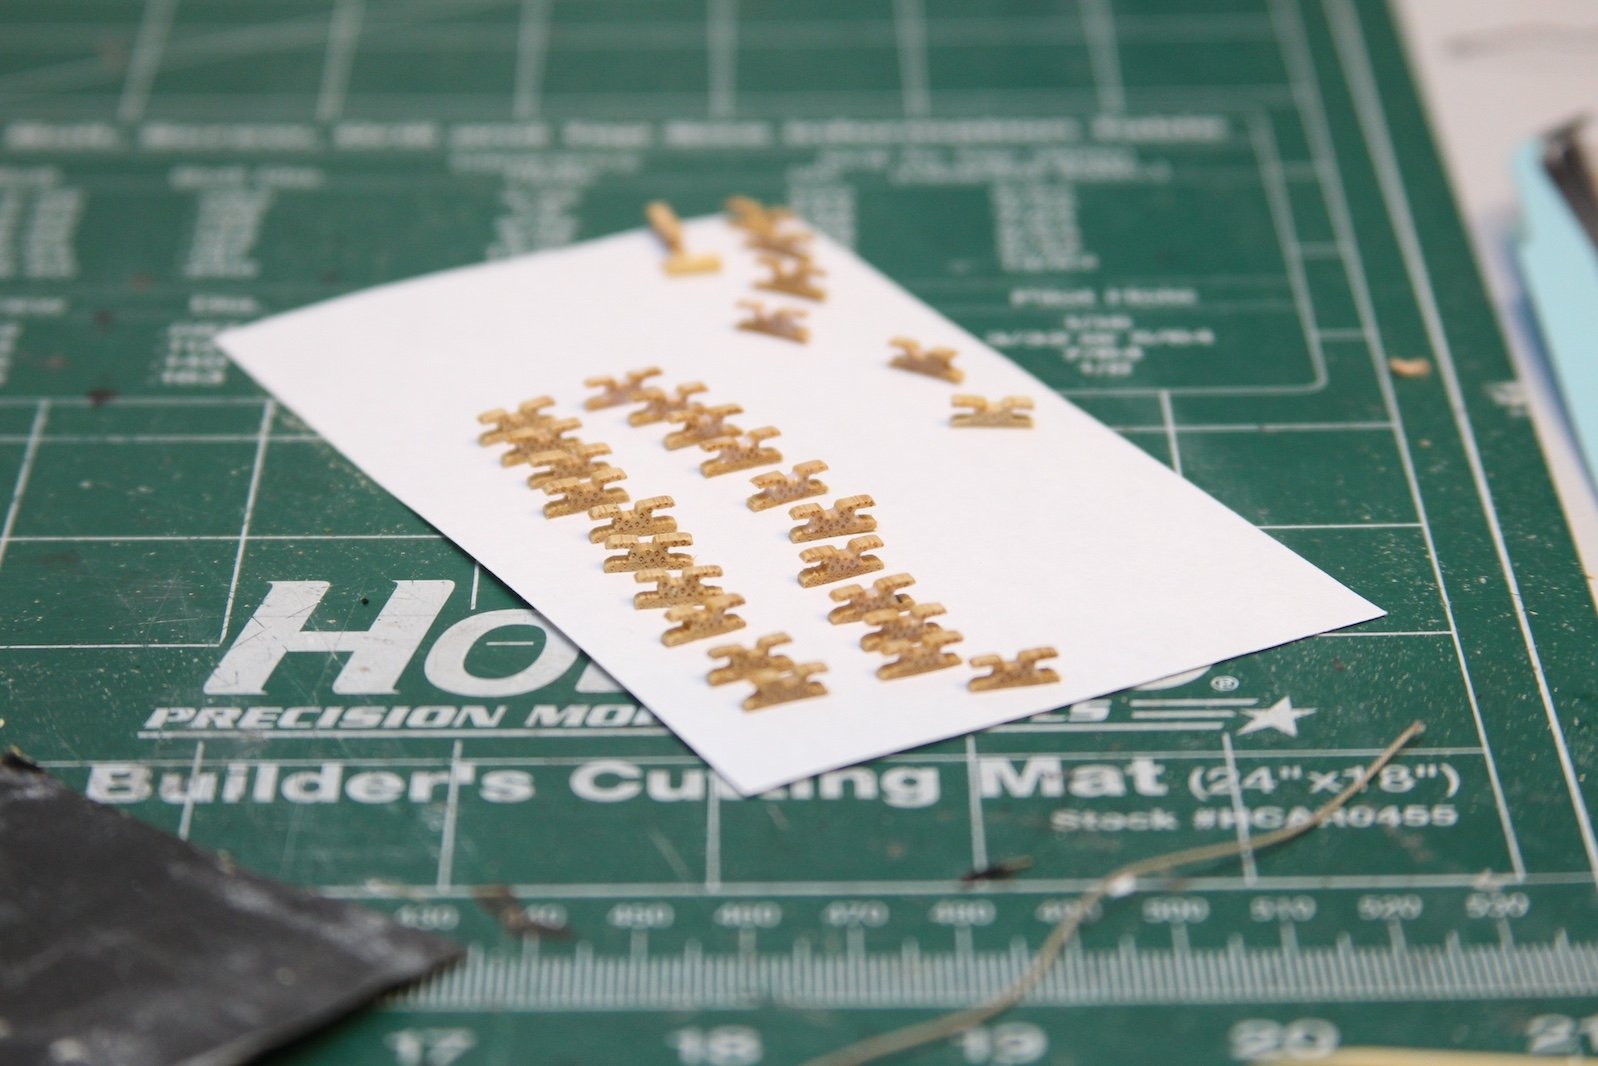
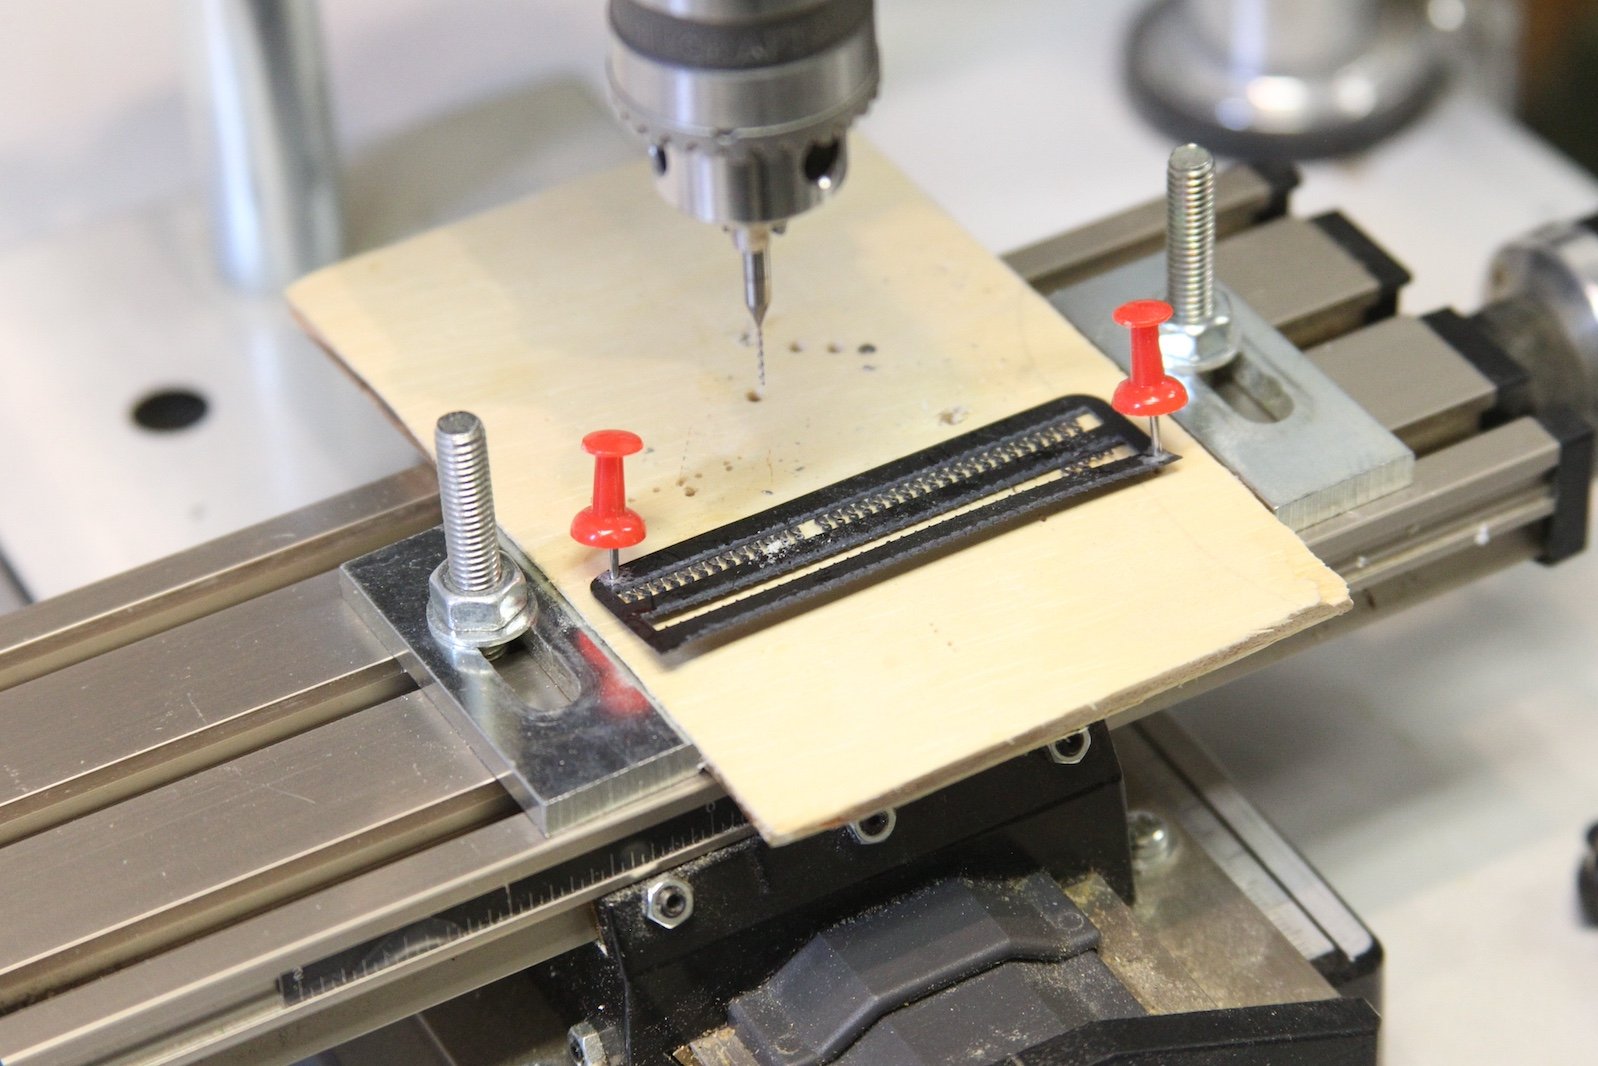
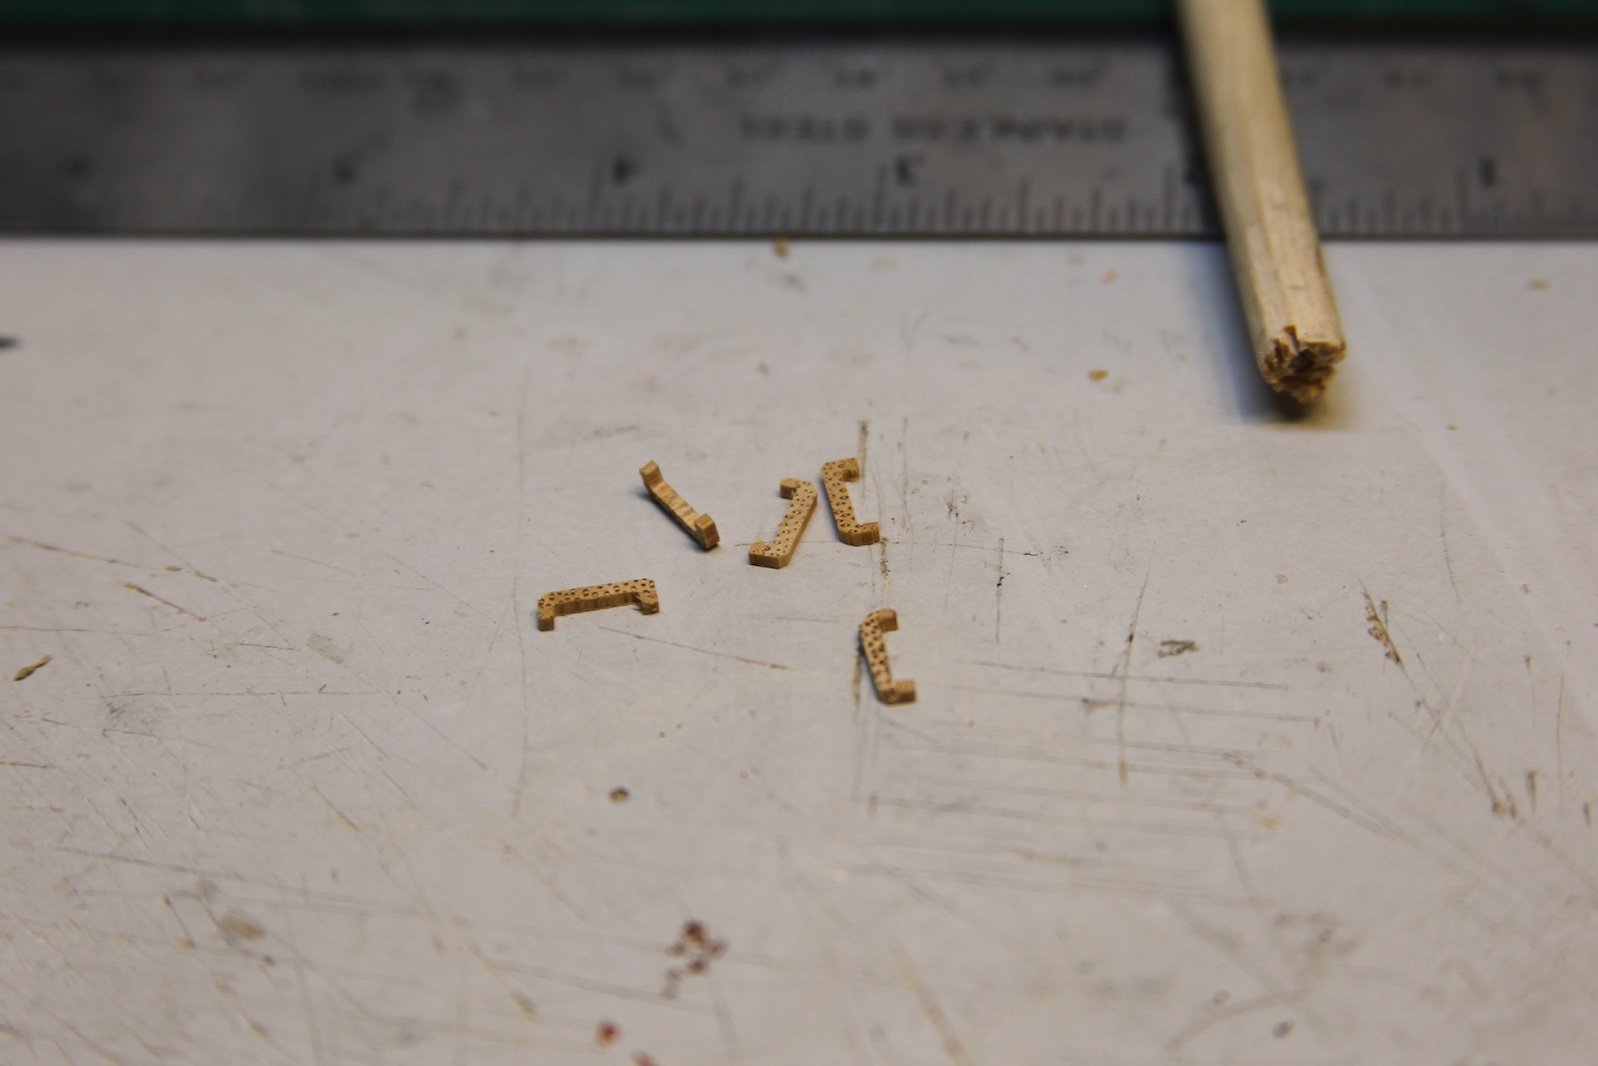
I took a break from ratlines this morning to work on some shroud cleats that I'll need soon. My inspiration for how to do these came from a variation of Dan Vadas. I started with a 4m thick by 10mm wide strip of this random (not sure what it is) hardwood that came from an extra cheeseboard the Admiral got rid of.
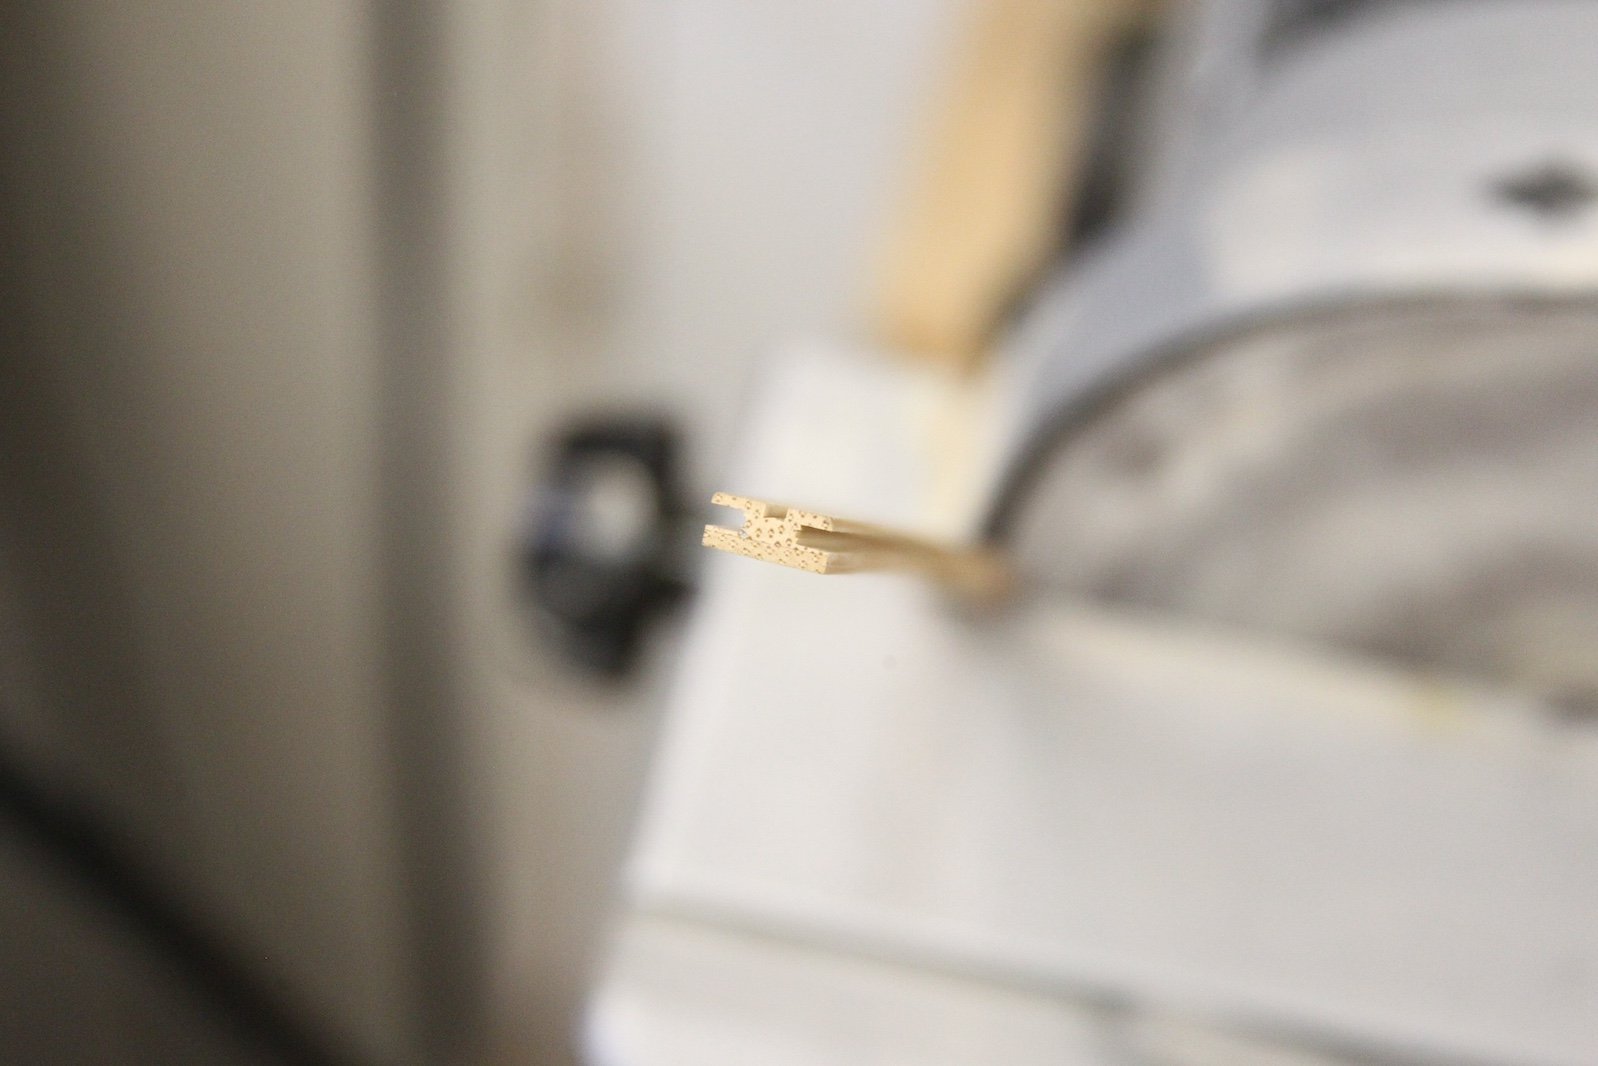
First, I added a slightly thicker (just under 2mm wide) blade on the table saw to notch the sides deeply and the top shallow. The top is shaped with a round sanding tool then a round needle file.


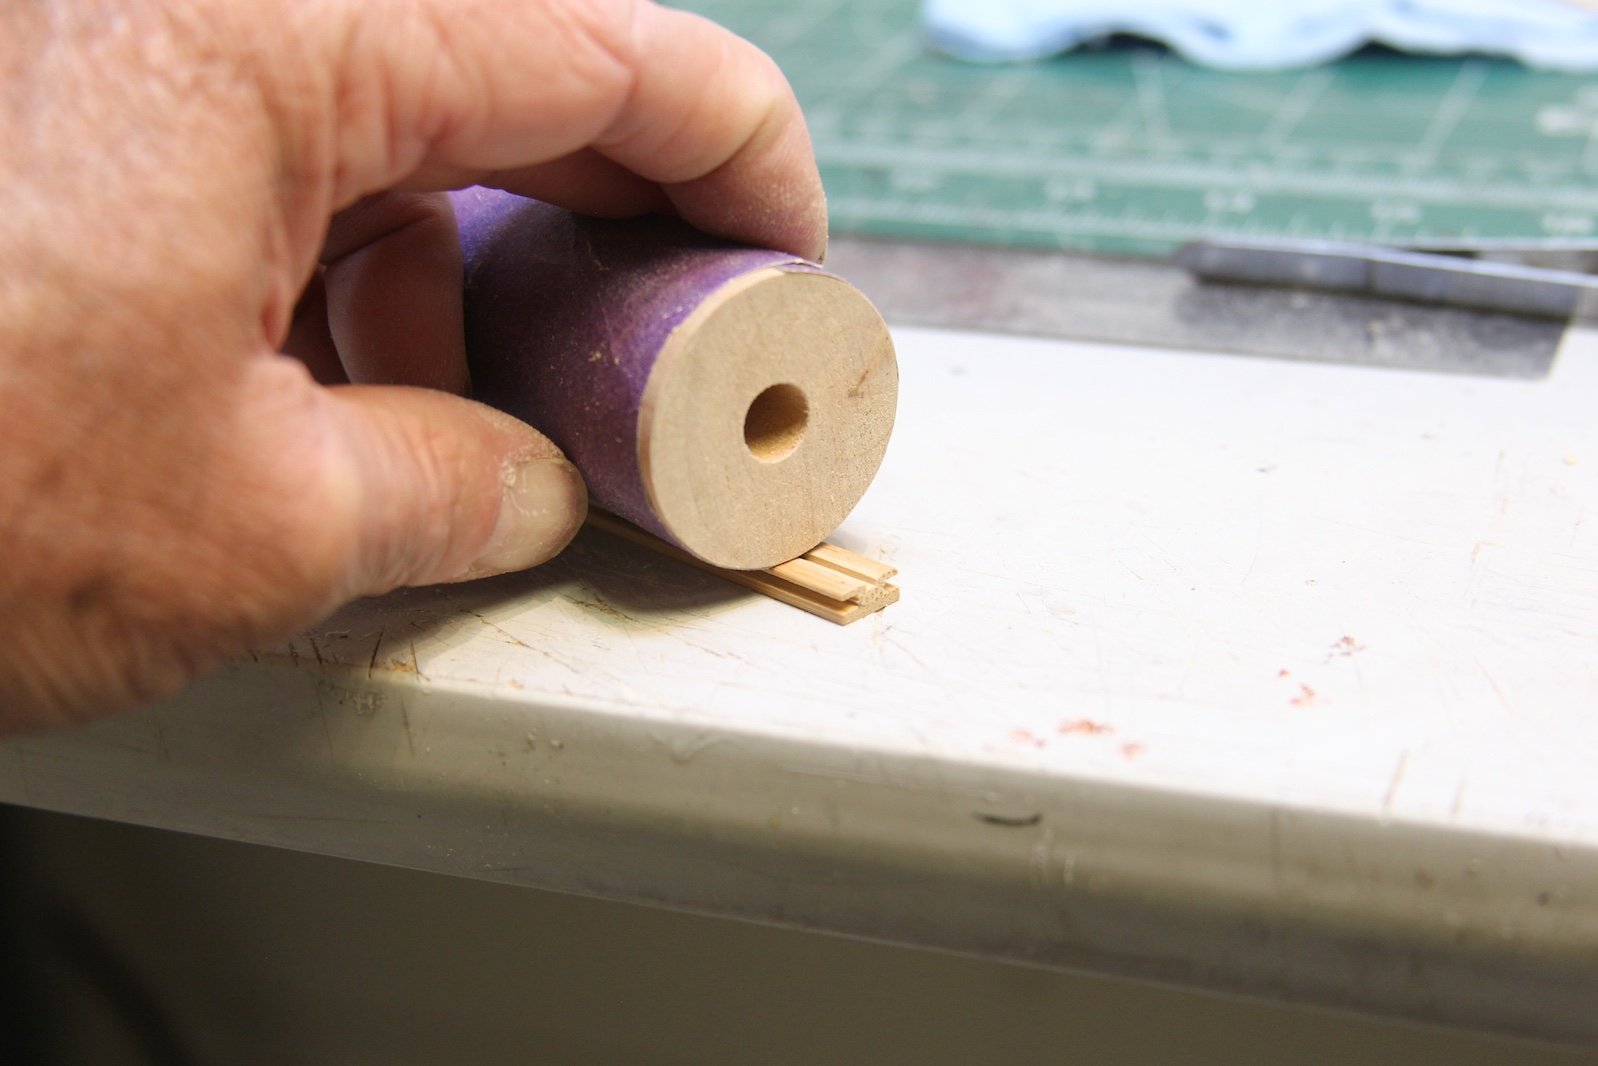
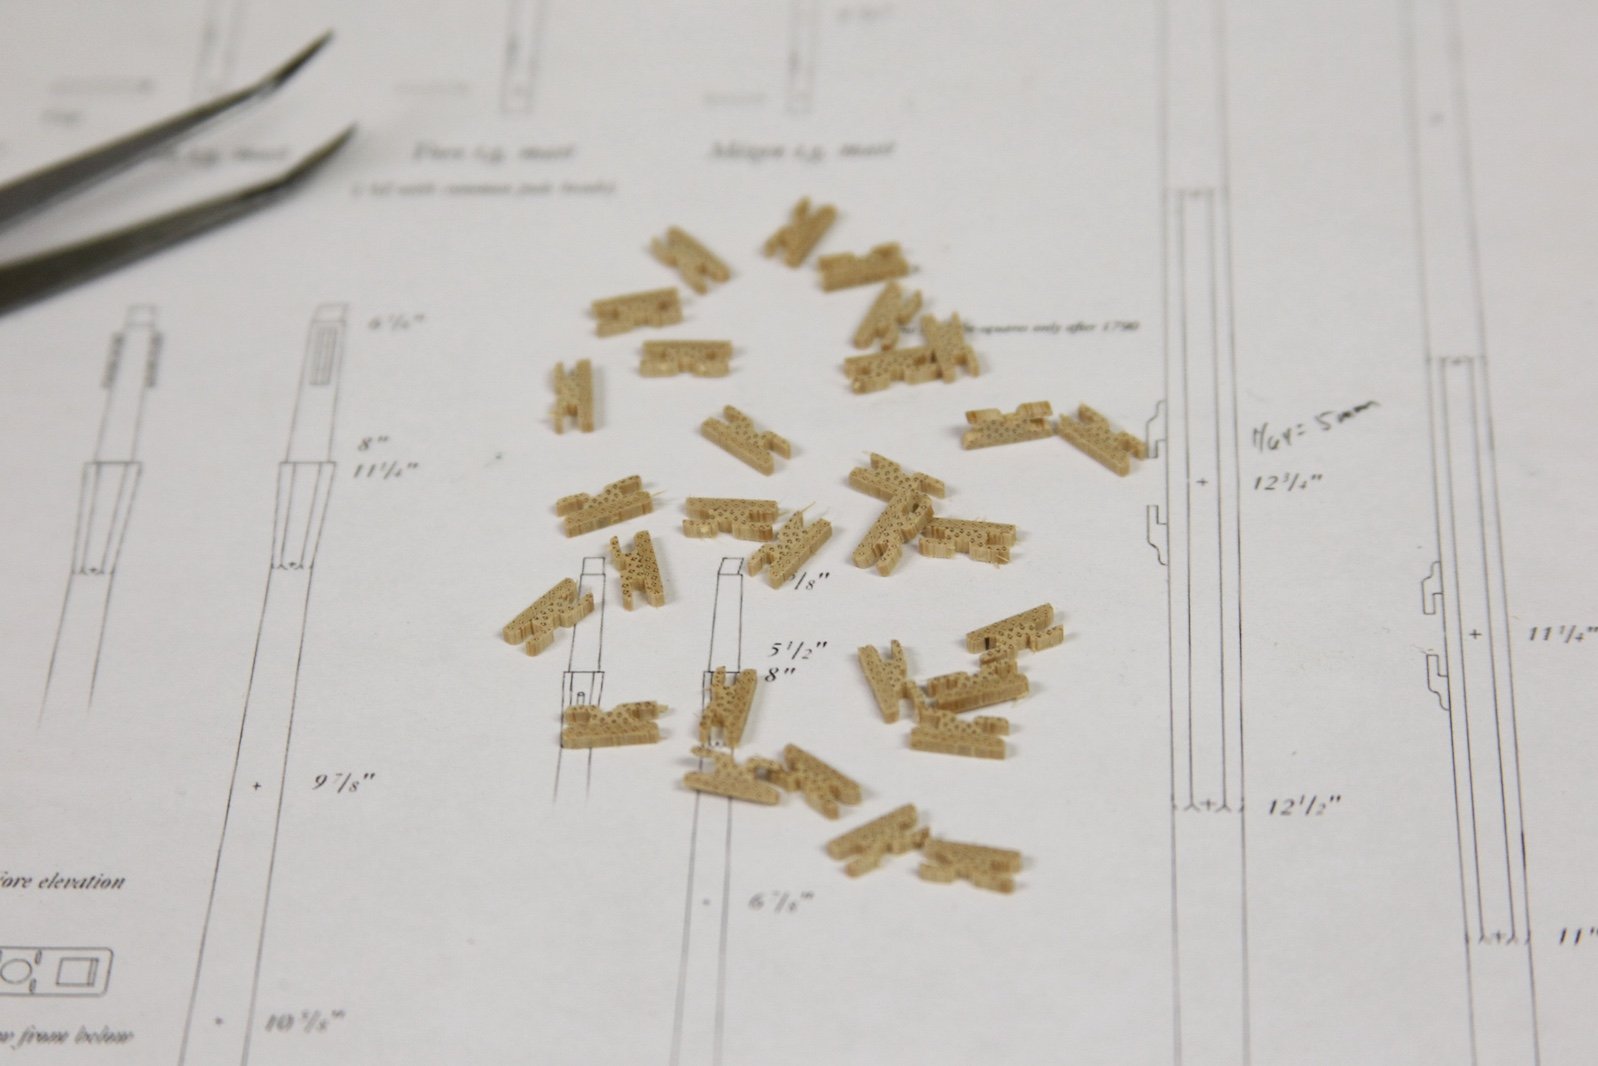
Varying degrees of VERY light sanding is down to create some shape to the grooves before I switch back to my thinnest table saw blade to cut over 30 cleats at 2mm thick each. If you're going to follow a similar method - make at least a handful more than you need as quite a few don't survive the process; particularly at this scale.
After the they're cut, the individual cleats are then subject to even more delicate sanding to round out the edges. More are lost to this process as well regardless of how gently I apply 600 - 1000 grit sand paper. Each survivor is then dipped into water based wipe on poly to provide a modicum of strength for later rigging then left to dry.
Here's a final product seized to the main foremost shroud to see how it looks. I mounted it by sticking it in place with the barest touch to CA before seizing it with .10mm line.
I ended up with 28 or so workable cleats, which should be a couple more than I need. I actually had a pretty difficult time determining exactly how many I'd need. After scouring the FFM images I have, as well as some Swan logs here, I finally came up with a total of 26 - though it appears not all of them are rigged when all is said and done. Here's my list (applies to both port and starboard sides):
Mizzen, Main, and Fore tops - the first two aft shrouds (12 total). Lower Mizzen - the foremost shroud (2). Lower Fore - the foremost three shrouds (6 total). Lower Main - the first two foremost shrouds and the fourth shroud (6 total). If someone (maybe one of the Swan experts @dvm27, @Blue Ensign, or @chris watton?) has a solid reference on how many shroud cleats are used and where they're used - I'd appreciate it greatly.
- gjdale, BobG, Thukydides and 5 others
-
8
-
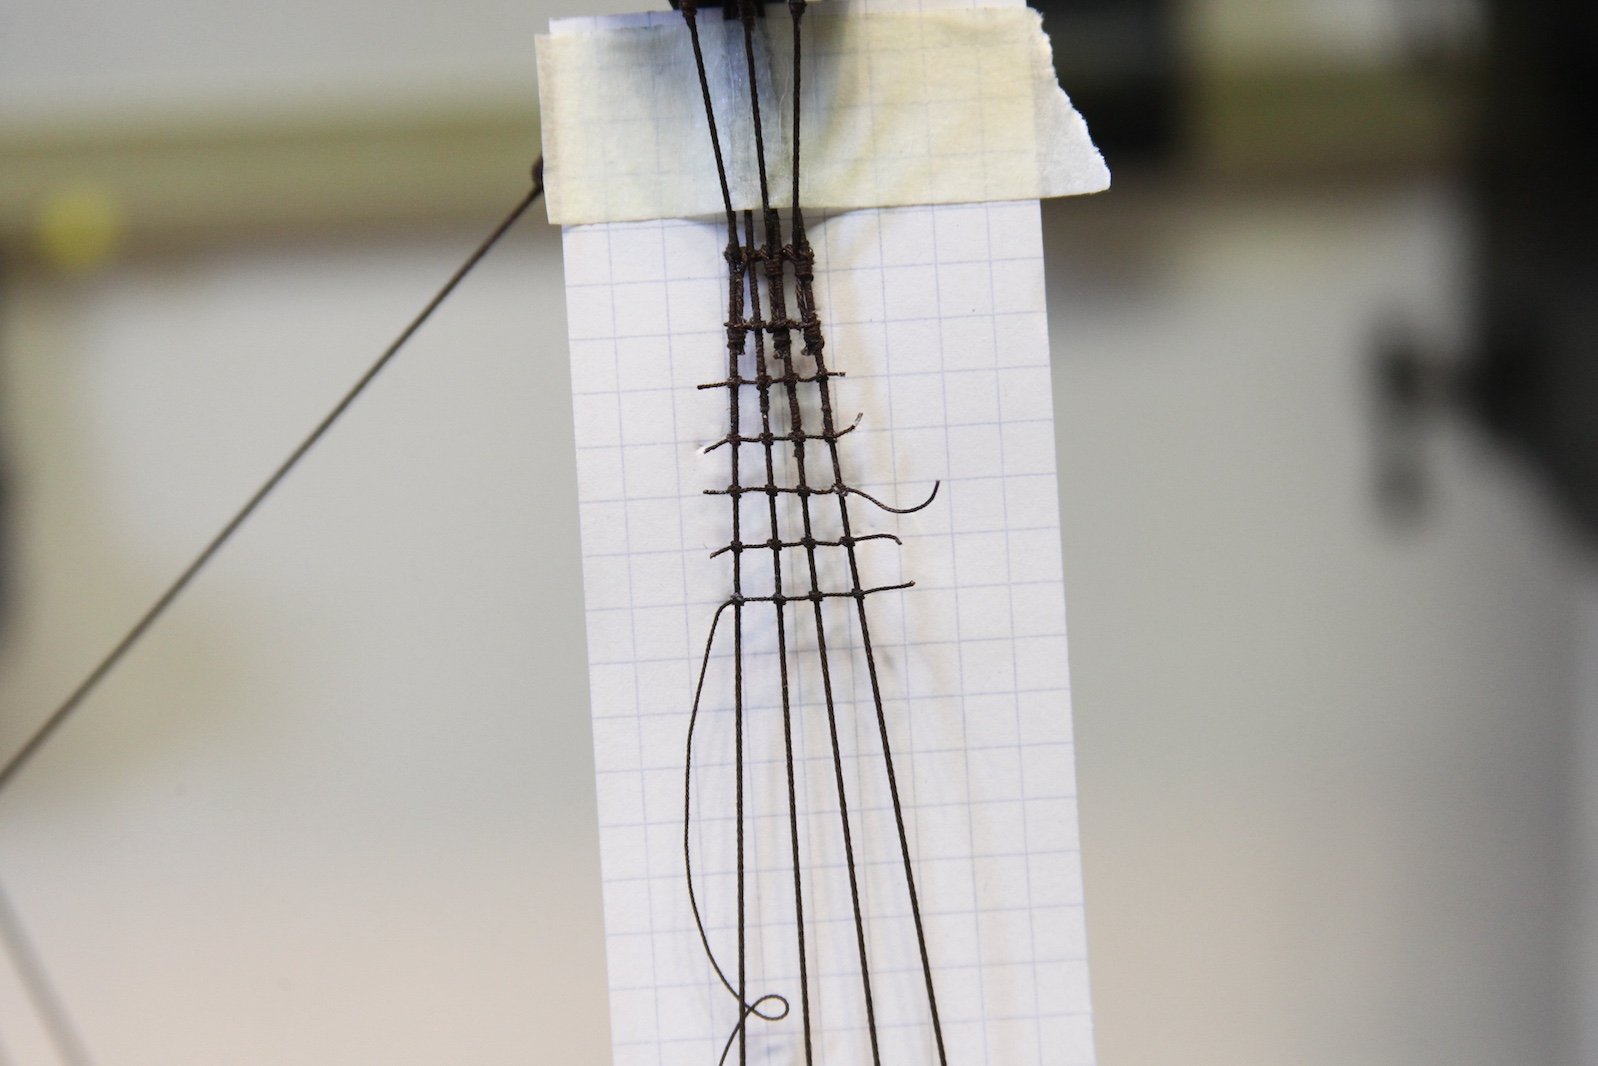
The Great Ratline Color Debate
Chevy versus Ford. Coke versus Pepsi. Boxers versus Briefs. These are just a few of the most notorious debates in our world. For those of us here in "ship nerd land" - the color of ratlines is right up there with the others. I think at this point I've read nearly every post on this forum about ratline colors over the last few months as I've neared this time in the build. Just as I thought I got to a decision - I'd see something else to change my mind. Early on I was definitely leaning toward a natural (non-tarred) rope for the ratlines. But as I looked at other builds from some of the most stalwart builders leaning toward darker ratlines - I was swayed that direction. Then, I see shots of the Victory using tan lines (even though it's obviously using more modern rope) and I started rewatching "Black Sails" for the upteenth time - more tan ratlines. Ultimately - it because a matter of contrast and aesthetics. This build is already going to have plenty of contrast between the running and standing rigging, especially since I'll most likely use tan for the crow's feet. So I finally landed on darker ratlines.
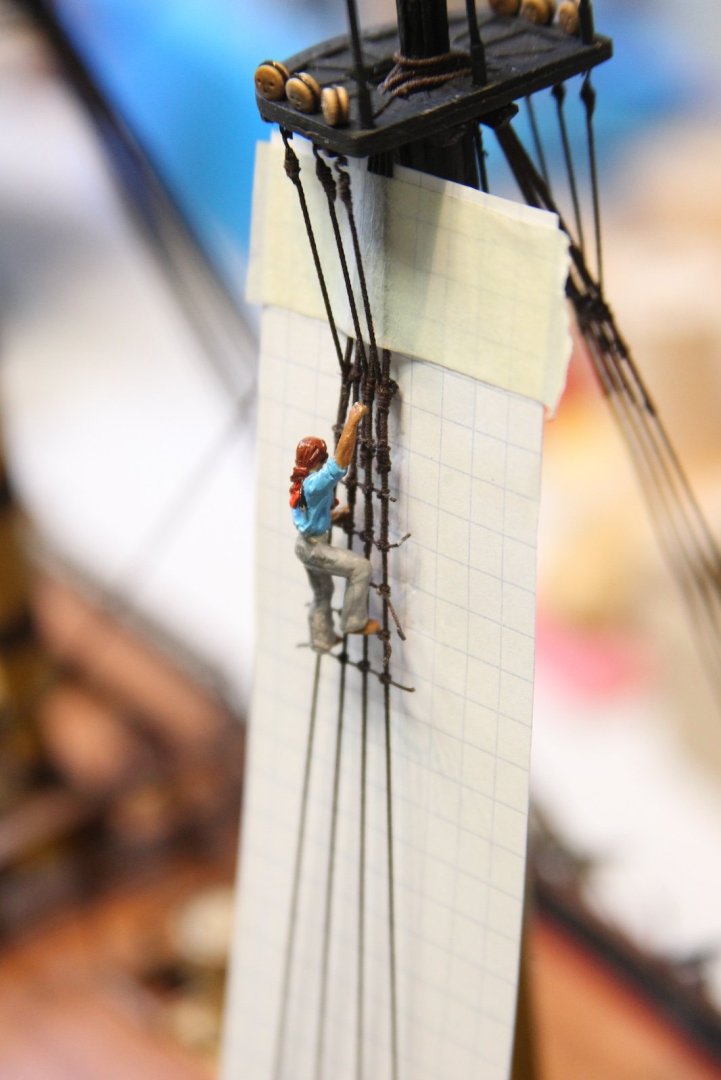
My lines are a little over .10 mm as that's the smallest rope I can make with three lines of Gutermann Mara 150 spun tightly. I went with a distance of 13" between the lines; which at 1/64 is close to enough to 5mm. I pulled out some graph paper with 5mm squares and cut it to fit behind the mizzen shrouds - also adjusting the bottom of the graph paper to parallel the ship's lines, then taping it off.
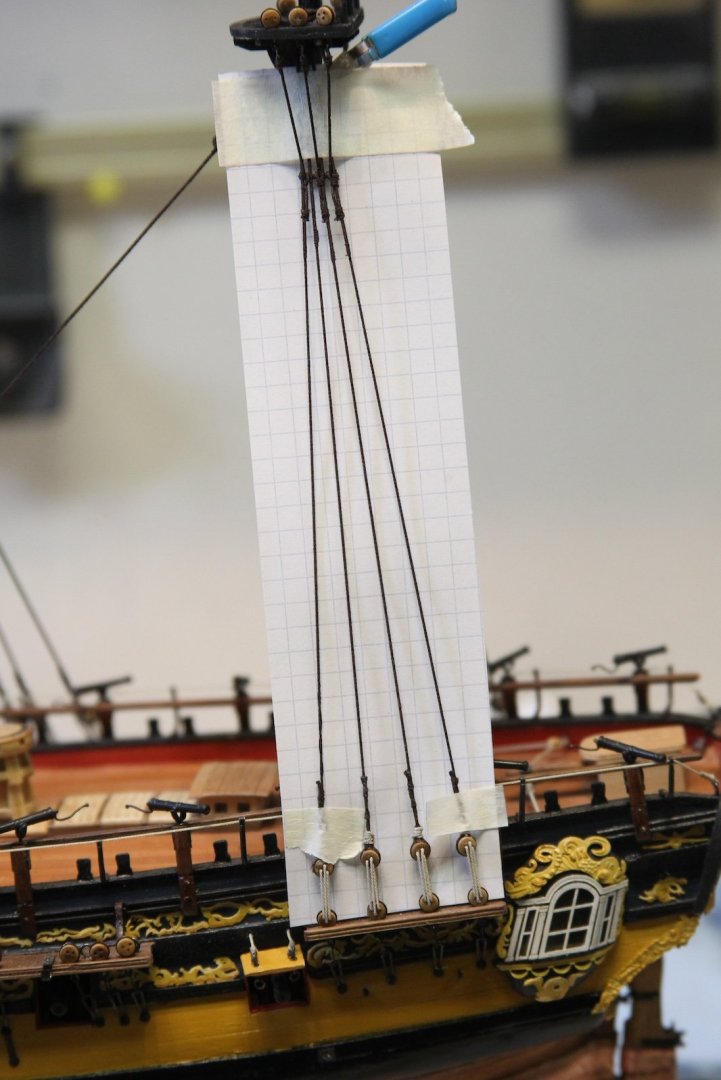

After the first handful of clove hitches at the top, I used my seaman to see if my distance was what I was looking for - he seemed ok with it, so I pressed on. It should be noted that my first few clove hitches were super bulky because when I looked up a clove hitch to job my memory - I ended up following some funky version that had the line cross back through itself in an odd way. I took all those knots out and started again with the basic clove hitch getting a much smoother result.

To avoid the dreaded tugging of the shrouds, I skipped a few ratlines at a time, then went back to make adjustments, and only when I was satisfied did I go back and tighten knots and coat them all with diluted PVA.
After giving the glue a day to dry, I'll go back and clean up all the ends and press on to the other side and rest of the masts.
-
-
The futtock shrouds were pretty straightforward - particularly compared to the catharpins. I'm using my supply of 3 mm deadeyes throughout - even though I do realize they upper deadeyes are to be a bit smaller than the smaller of the lower deadeyes - and the mizzen deadeyes smaller yet. However, I have a pretty large supply of 3mm deadeyes, and the look is comparable in my opinion. So, a compromise I'm willing to make. I did however, make the futtock plates on the mizzen noticeably shorter by comparison.
After the deadeyes are all loaded up, I selected my hooks. Instead of the supplied hooks - which unlike the deadeyes are clearly too large, I went with my leftover hooks from rigging the cannon. I'm pretty sure they're from Syren, but I have such a random supply of fittings at this point, I have a difficult time remembering from where my blocks, deadeyes, or hooks etc, all come. At any rate, I did have to widen the holes on these hooks to accept the lines, and definitely broke a few and sent a few flying across the room while doing it. The futtock shrouds for the fore and main are .57mm diameter at scale; I'll be using .50. And the Mizzen shrouds are .44mm; I'm using .40mm.


To attach the lines - first I measured the approximate length that I would need - about 50 mm for the fore and mains and 40 mm for the mizzen. Then I seized them all the to the hooks first. I attached the hook to the futtock strap, looped it over the stave then seized it to the shroud. Keeping the line taught while seizing - but not so much that it pulled on the rest of the rigging - was accomplished with a very tiny dab of CA right where the upper seizing would ultimately cover it up. I also alternated from port to starboard with each one to keep the rigging balanced as I went along.


-
Only partly because a short business trip took me out of the yard for a few days - the catharpins have taken quite a bit more time than I would have liked. Others have said as much, but I am here to reiterate - these things are SUPER fiddly to get anywhere near correct. Each one has to be measured perfectly to link the shrouds under the mast tops, but that measurement is quite difficult to maintain when making the eye splices on the ends. I started by serving a .45mm diameter rope for the length that I would need to make all eight of the catharpins. Then, for each one I would start with an eye loop, remeasure the distance using a small piece of timber placed against the shrouds, then cut the other end of the catharpin a quarter inch long, unwind the served rope, then feed that serving thread through the line itself to create the splice, then wrap the thread to finish it.
I had at least three than despite every effort ended up being just off enough to not work out. To get the catharpin attached to the shroud, I started by attaching one end at the bottom of the shroud, then feed the guy up to the futtock stave, pinch the other end to the opposite shroud, and then tie both sides off using a needle to feed the seizing through the eyeloop and around the shroud. It took about an hour for each catharpin start to finish.
The last two pictures are the fore and main finished. There are a couple that are a smidge loose, but will tighten up when I attach the futtock shrouds.


-
I like it Christian. The eyebolts on carriages for anything less than 1:48 scale is always a pretty big challenge and always seems to look bulky. I'm interested to see the finished cannon / carriage, but on the surface this seems to be a pretty good solution toward cutting down on knots, etc. You'll notice in all of my builds - I have not issues sacrificing some accuracy (within reason) for a more aesthetic look.
-
Thanks very much Christian. I was so apprehensive about the rigging portion, I ended up taking almost a year and half off of the build! It was a combination of deciding to spin my own rope, as well as this being the most complicated rigging I'd faced. Once I got back into it though, I was happy I did. The complexity is actually an asset as it forces me to slow down and really take it one step at a time.
Also - although it has ended up being a lot more work to spin rope, it has helped quite a bit as I can size it as needed.
-
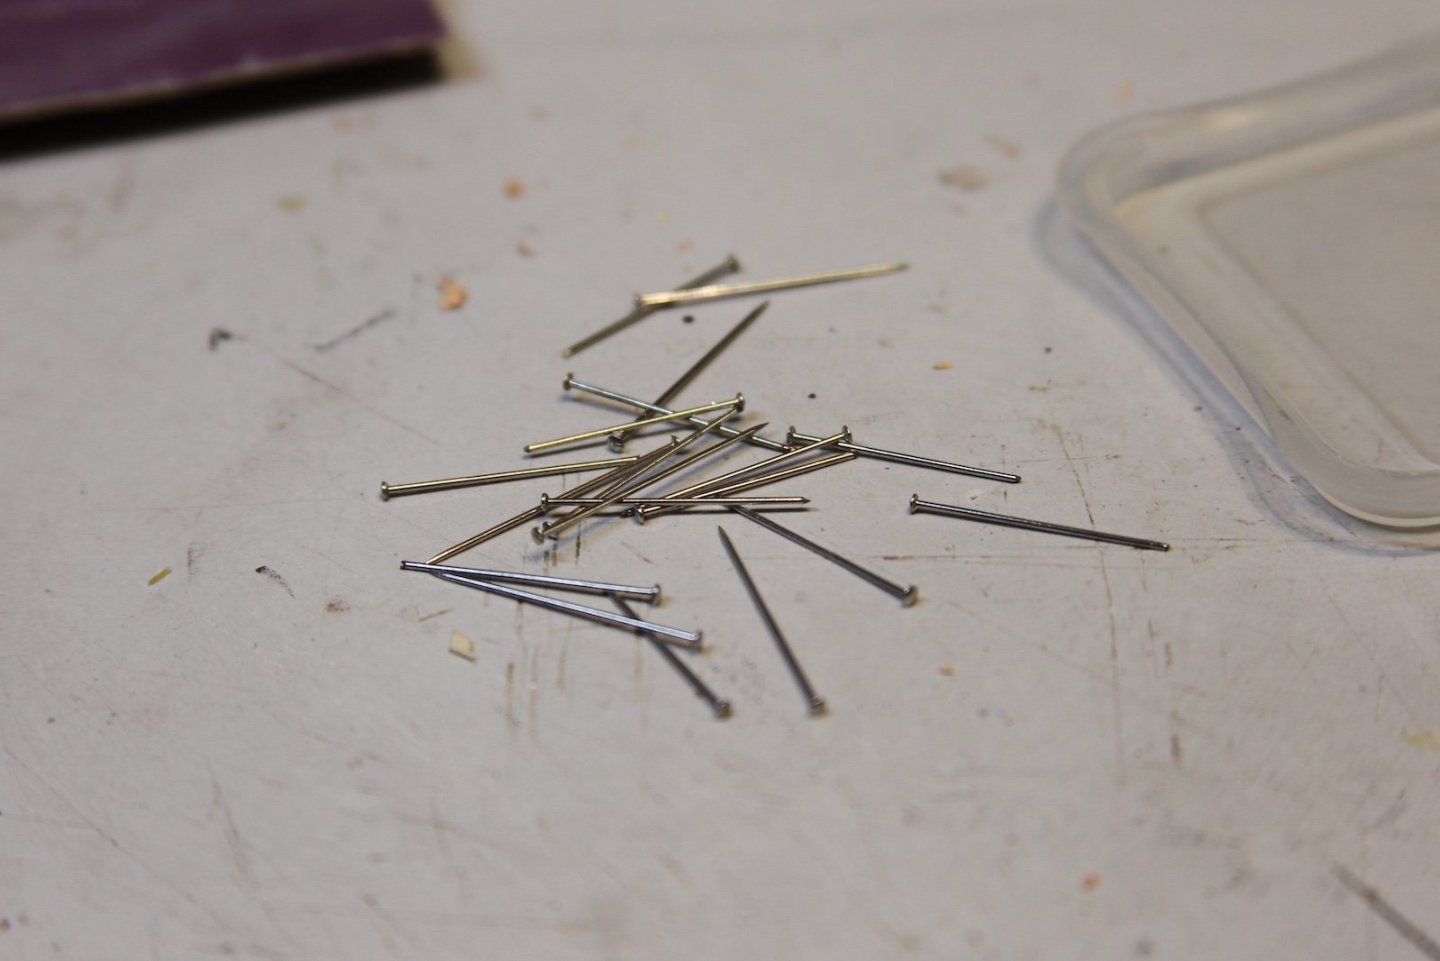
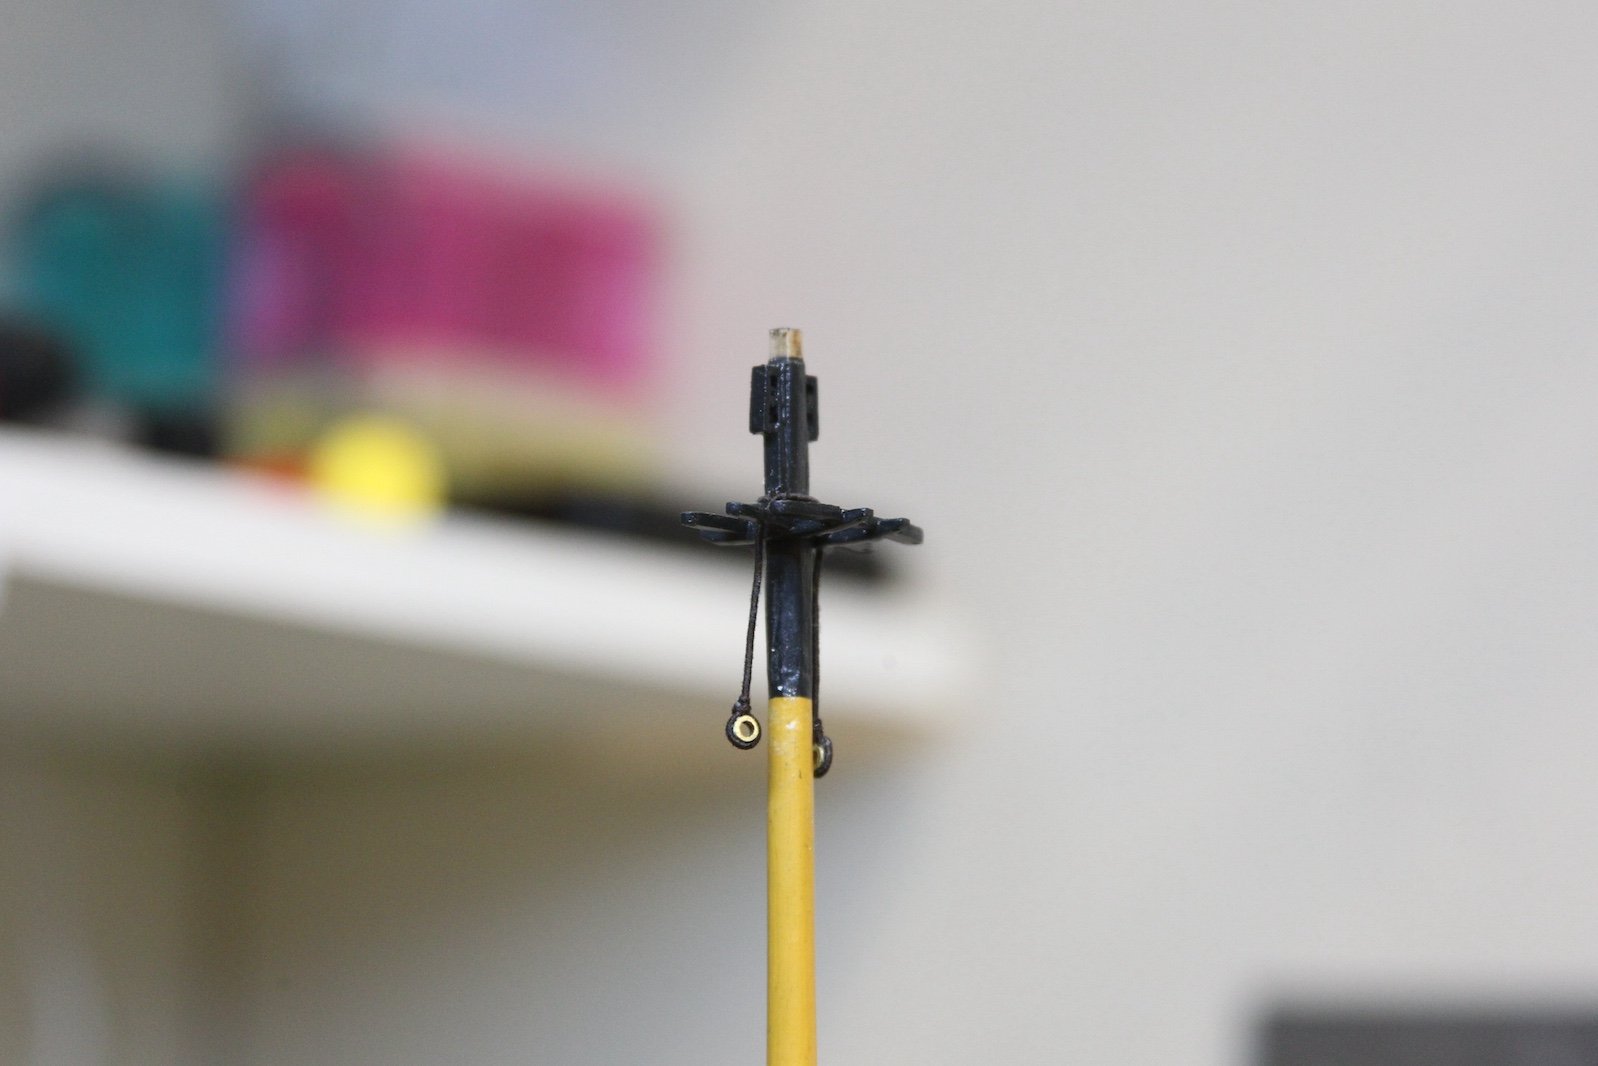
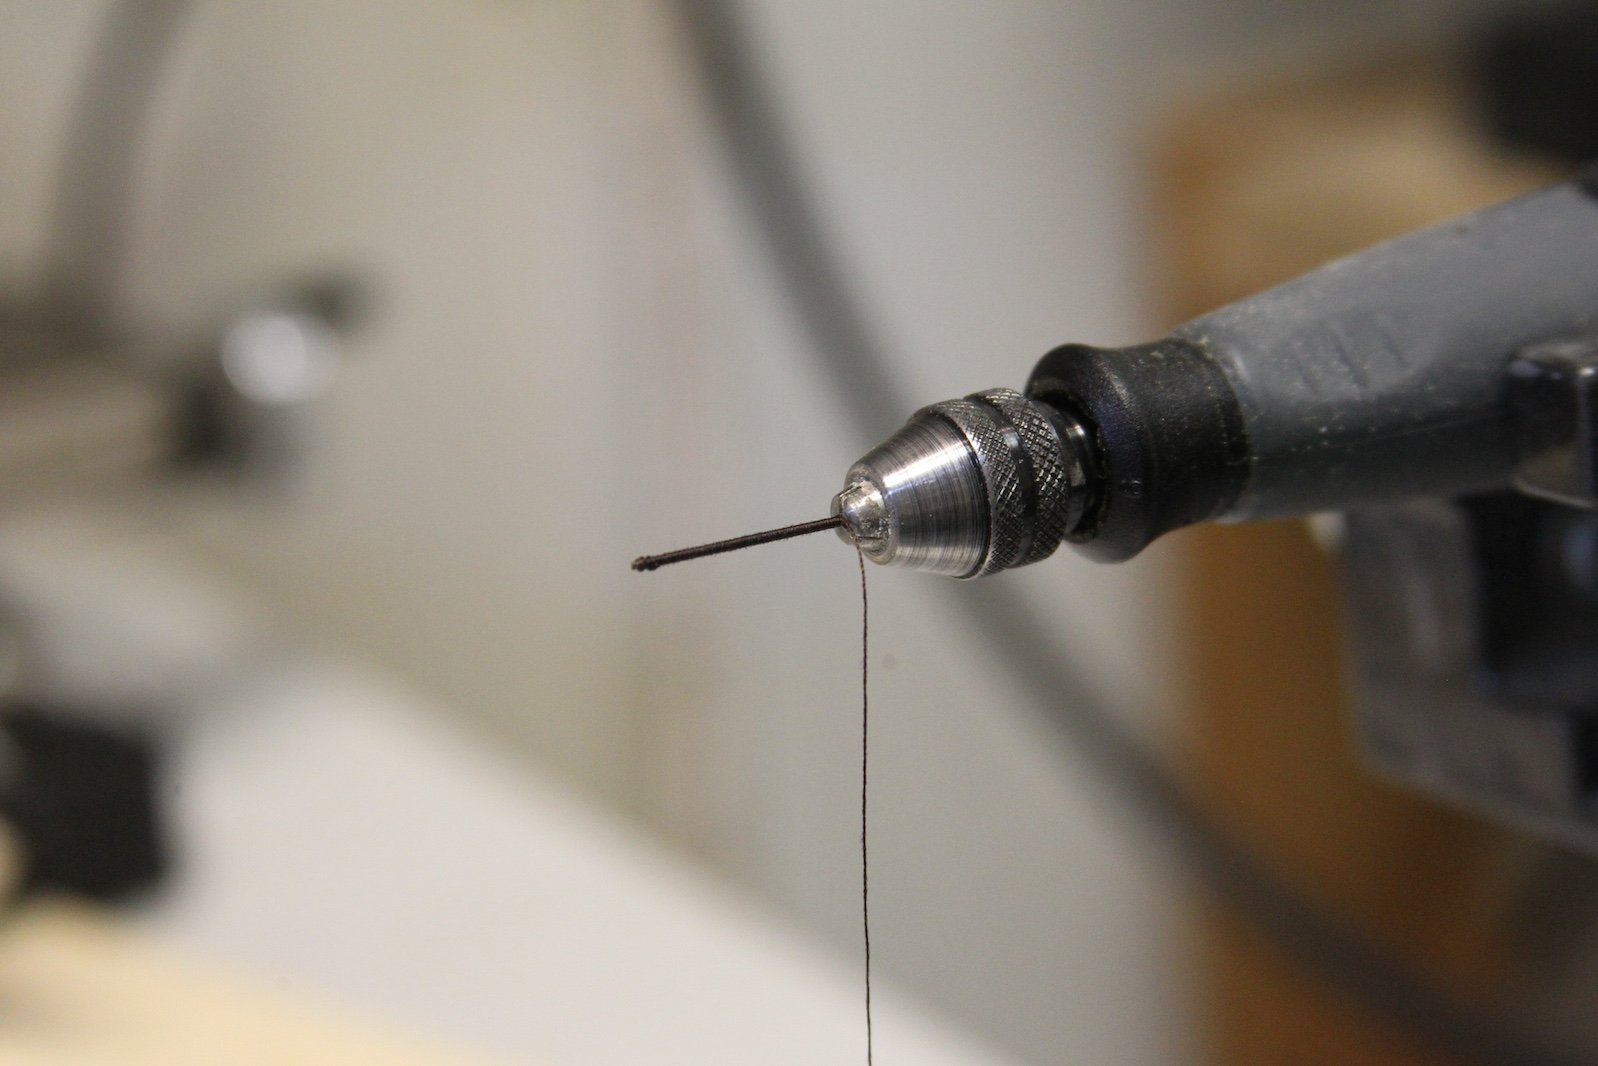
Now that the mast tops are affixed, I can add the futtock staves. The futtock staves are fitted the same distance below the mast tops as the mast head rises above it. The scale for these lines is .5mm, however I am skeptical of having just a served line. I've seen quit a few folks serve something more firm like a strip of bamboo or wire to create something more rigid to withstand the pull of other rigging. I'm taking this tactic as well, and for my futtock staves I'm opting to go with serving a straight pin, as they are just under 1mm. A smidge bulky, but still looks goo to my eye. The serve the pin, I loaded it into my dremel, started with a tiny touch of CA to hold the Mara 100 line in place, then I rotated the dremel by hand to serve the line.

Another distinction here is that the plans and images I have from TFFM show the staves attached to the outside of the shrouds. However, as I understand it, most British ships had them on the inside of the shrouds. Also, the other builds that I follow for reference (mostly Dan Vadas) have them on the inside - so this is what I'll be doing. I measured the distance and lined up the staves, then used another tiny dot of CA on a couple of shrouds to hold it in place while I seized it to the shrouds. I cut off the ends of the pins with wire cutters, sanded a tiny bit, then touched the metal ends with a dark sharpie to match the serving line, etc.


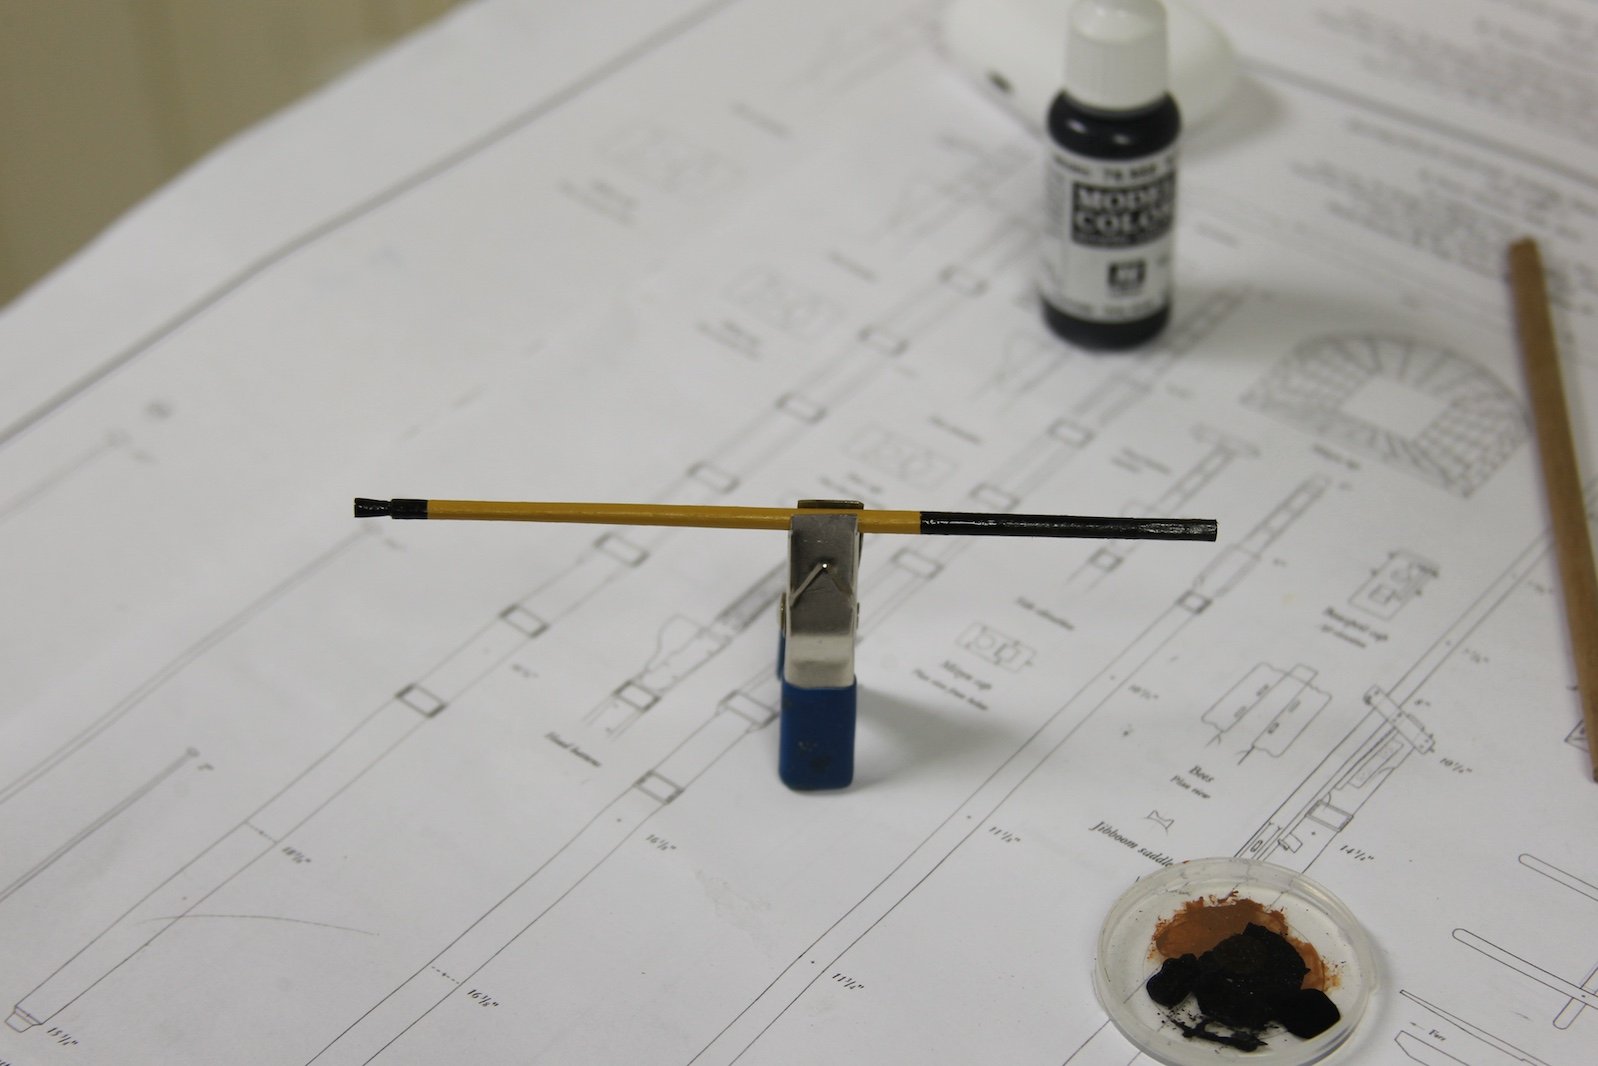
I was having a very difficult time matching the port and starboard futtock staves exactly to keep everything level. And then I stumbled on this idea - putting a small piece of timber across the staves to create a 'level' until I could place the opposite stave.
- Knocklouder, ccoyle, Dave_E and 4 others
-
7
-
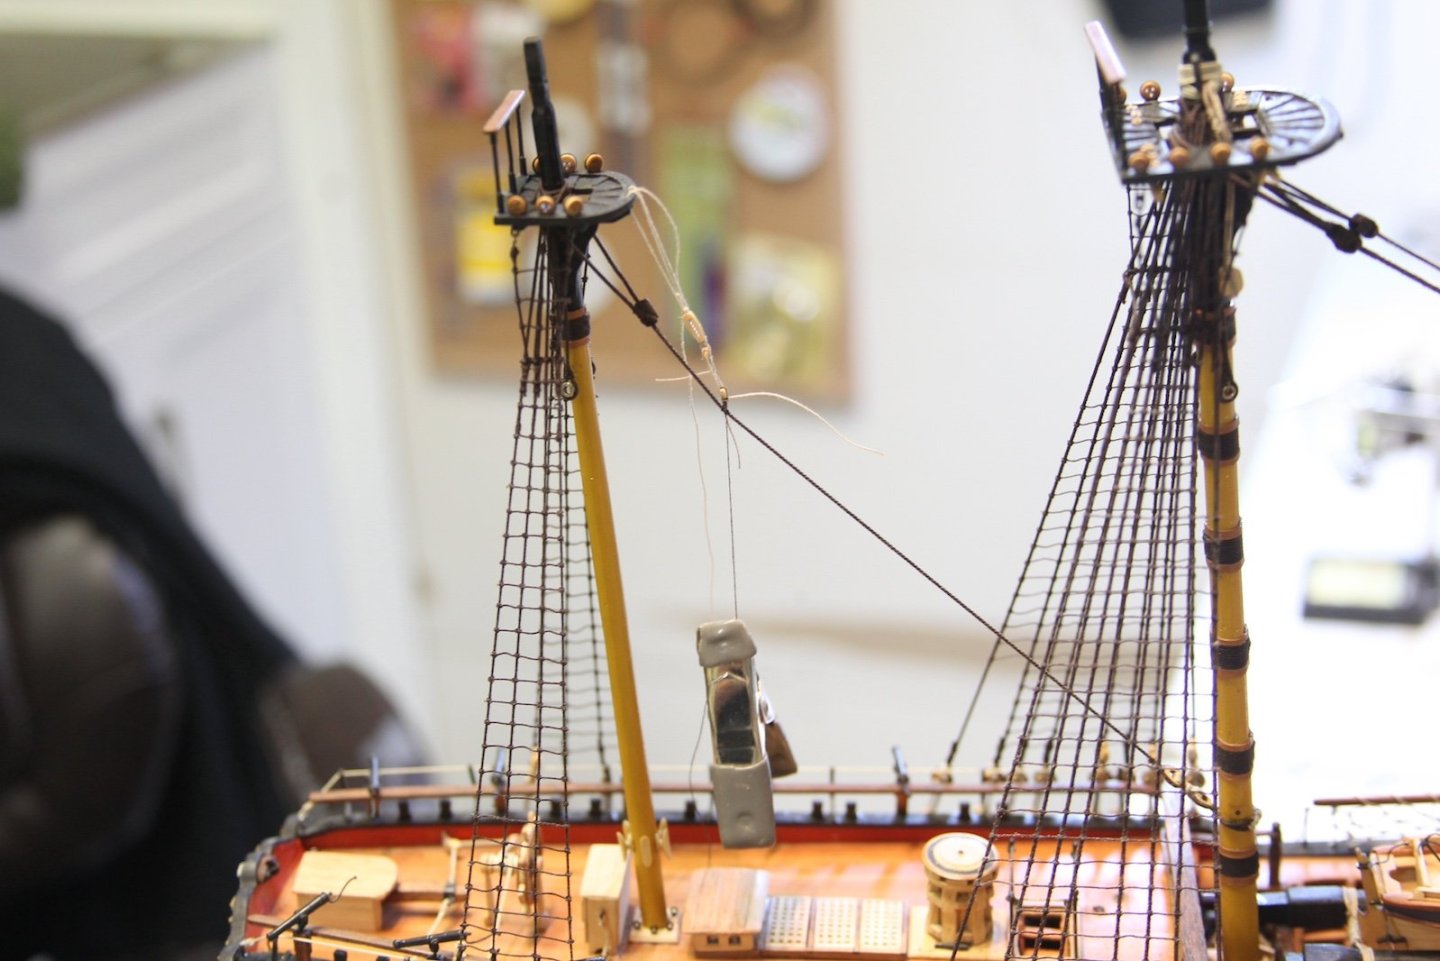
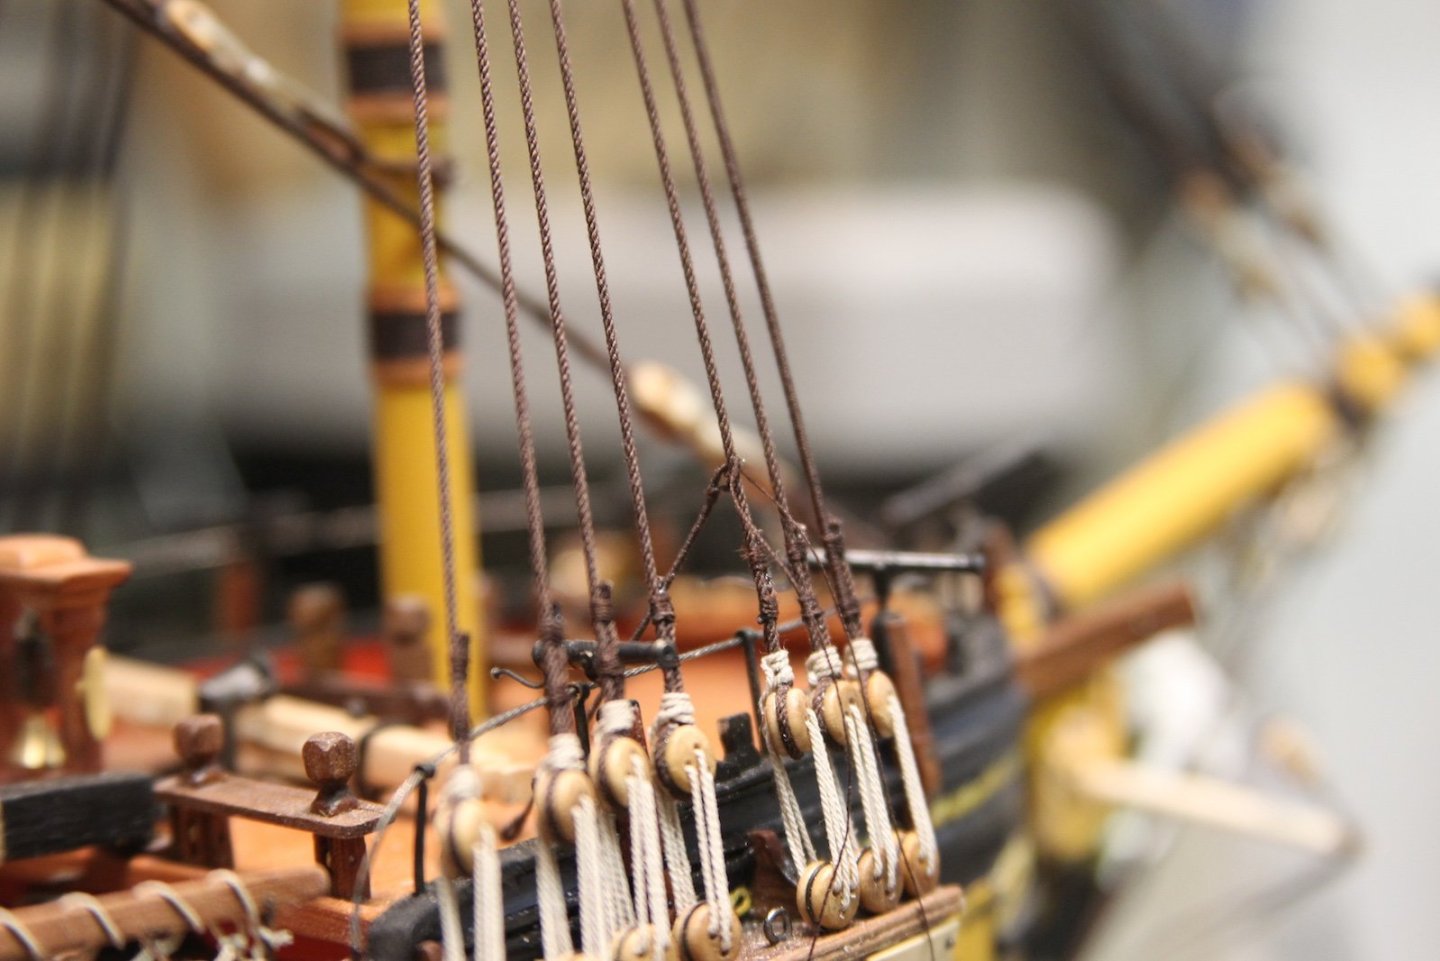
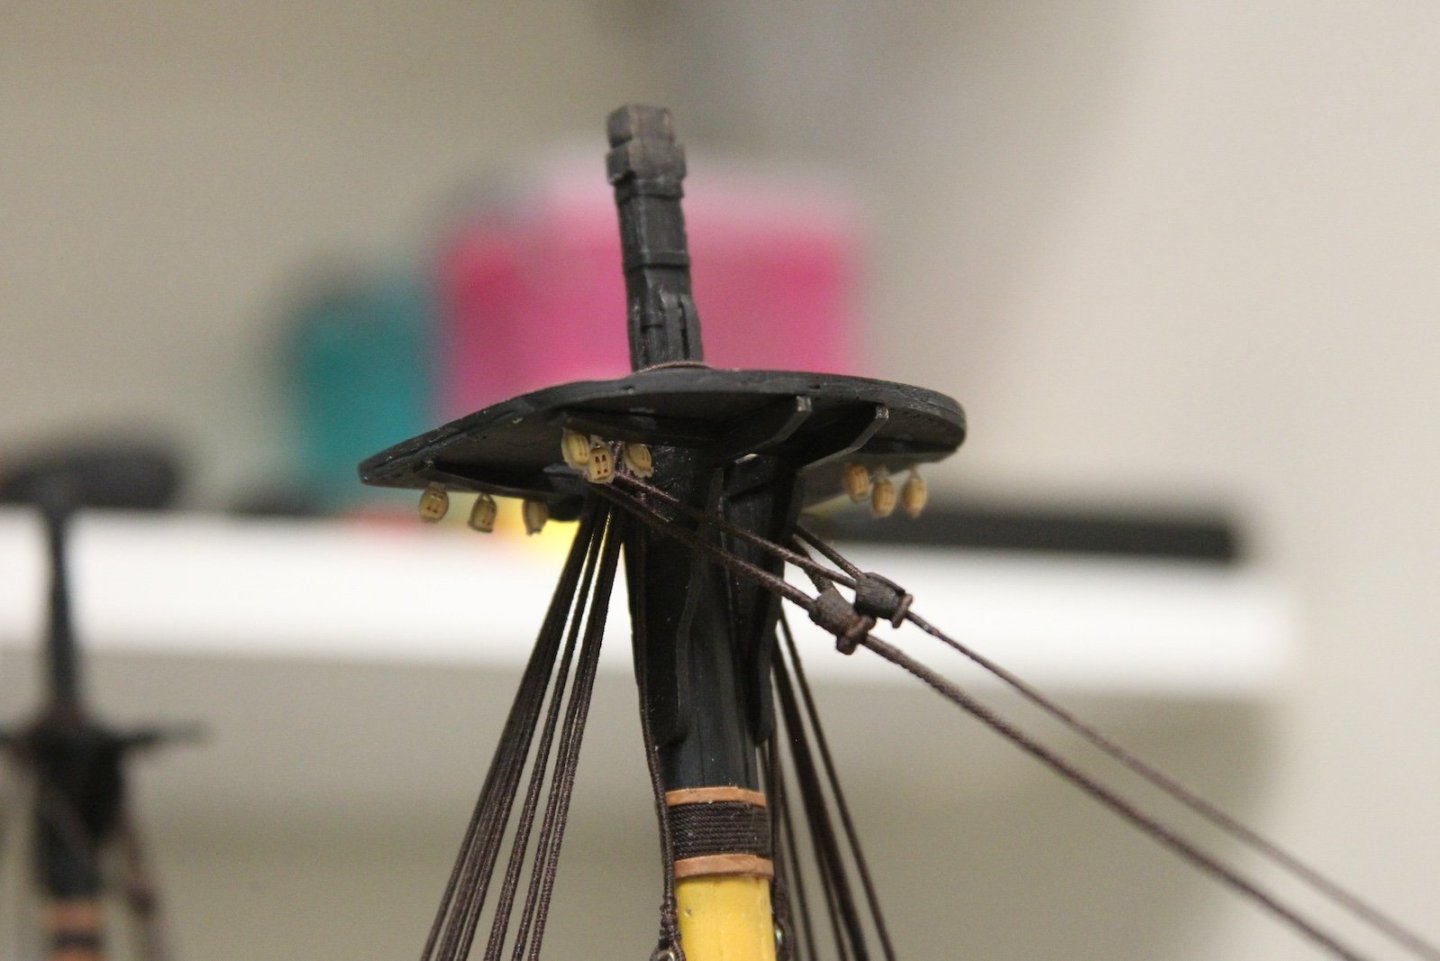
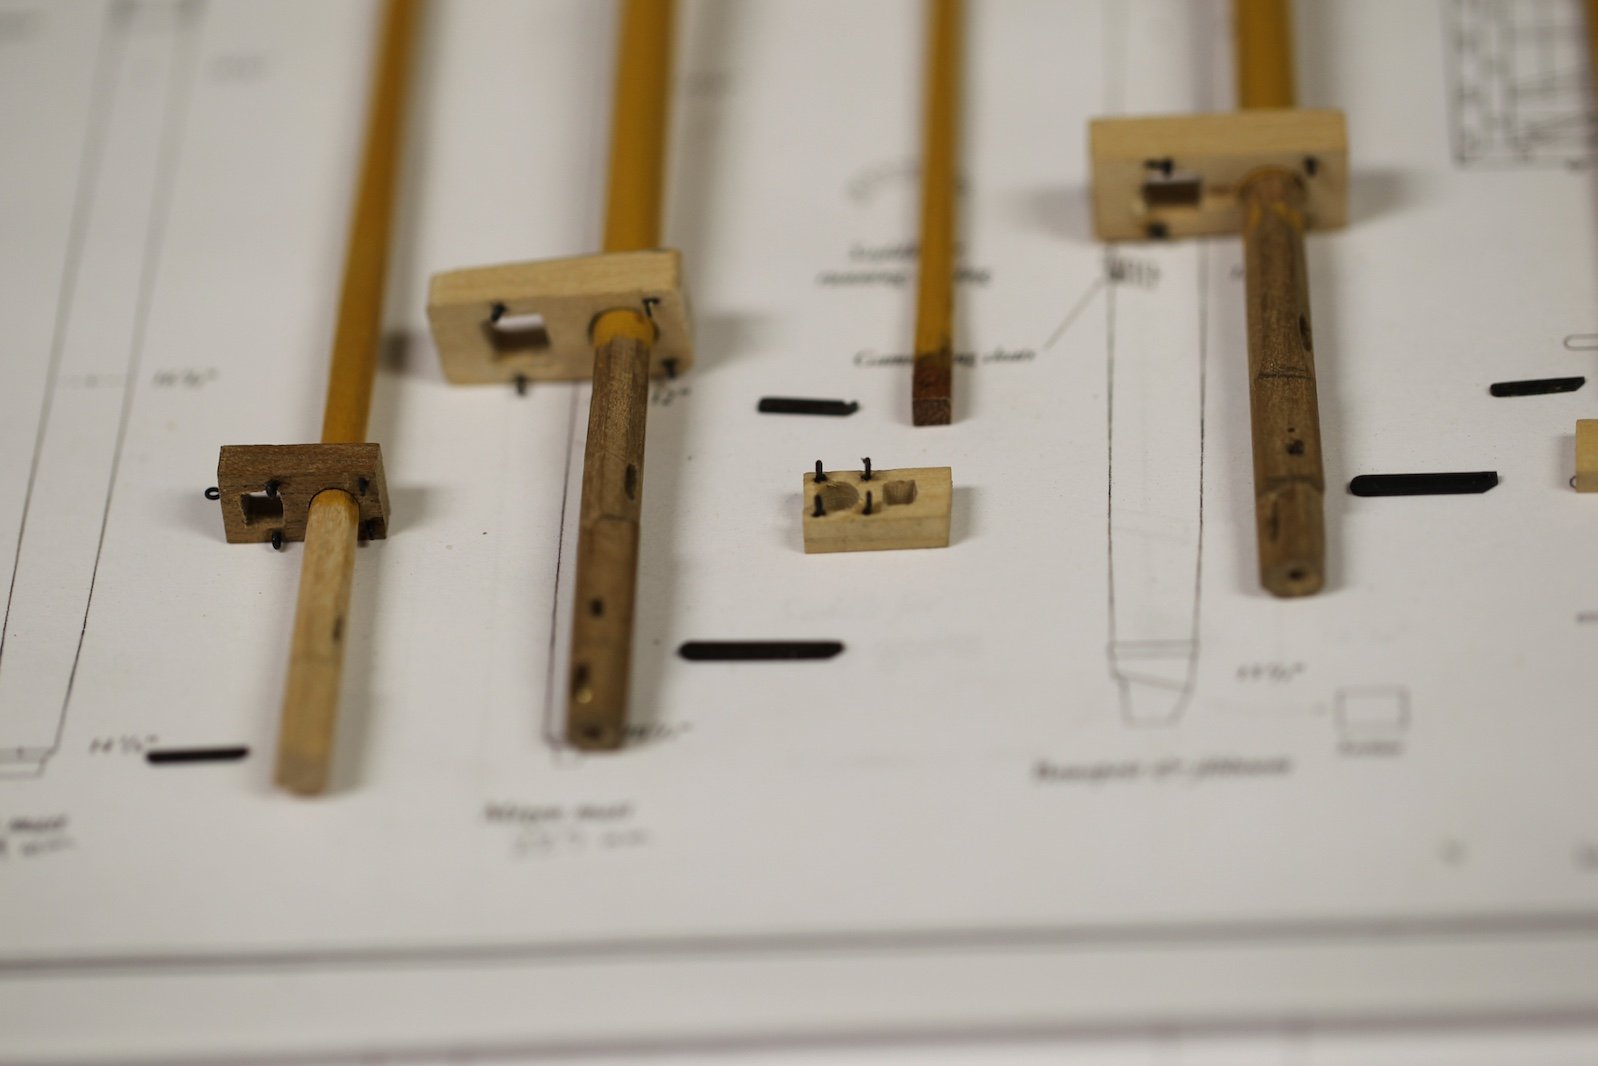
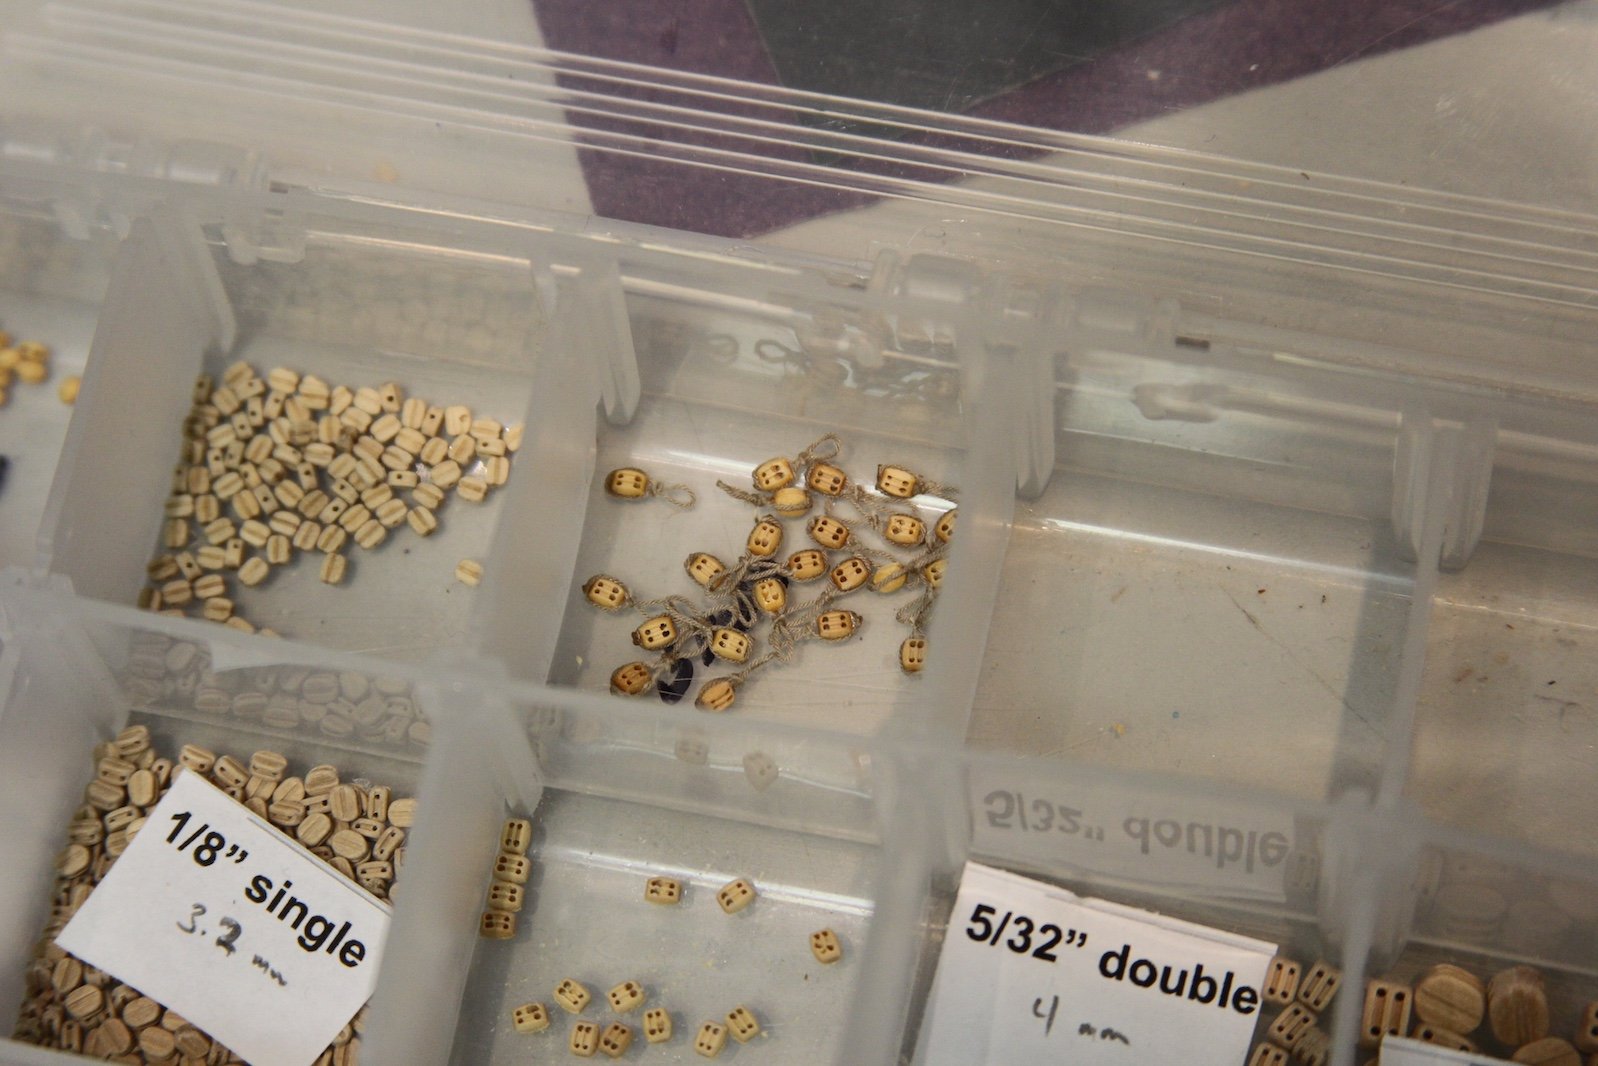
This is one of those infamous posts we've all had multiple times - defined as "a short post but a lot of work." I wanted to rig the jeer tyes prior to fitting the mast heads, as it just seems like it'd be easier to get these buggers at least somewhat correct without the masthead in the way. The jeers are the tackles for hoisting and lowering the lower yards and are comprised of 20" single blocks (about 8mm) double stropped with 7" (.88mm) line and lashed to the masthead with seven wraps of 3" (.38mm) line through two closed cleats. My .85mm line looked a little bulky around the block, so I used .75mm instead which I liked better visually.
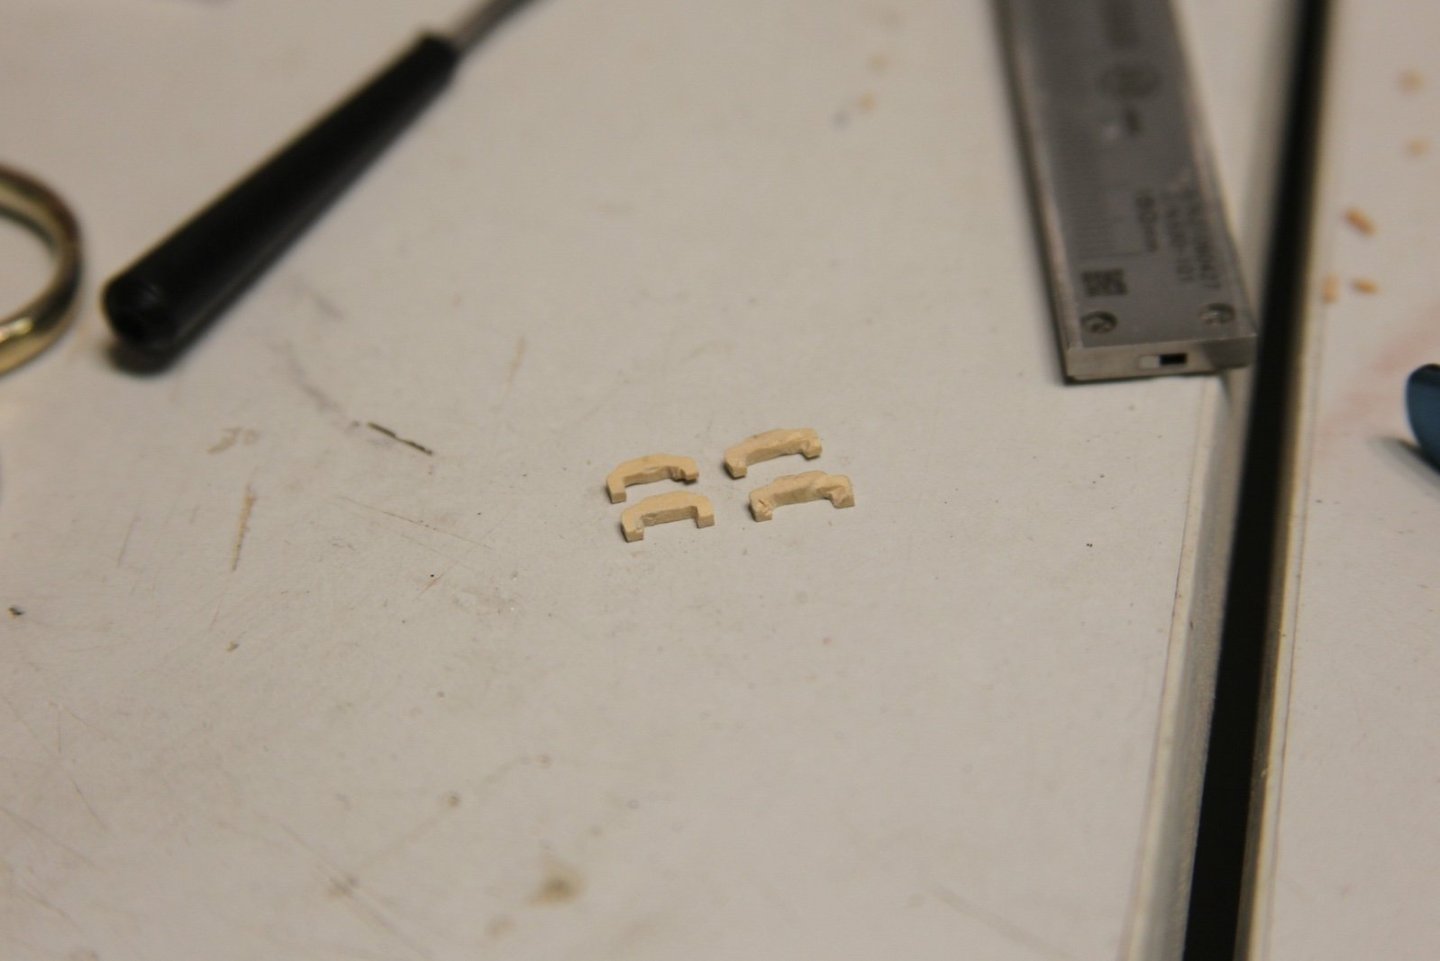
The cleats took me two iterations. The first is boxwood, and I tried to give them some nice shape and a little finesse with some sanding and they just ended up looking like they were cut out of wood by a third grader with a dull pair of scissors. So I tried again with some dense scraps of an unknown wood that used to be a pen case, and I simplified them to just rectangular closed cleats. Helpful that they'll eventually be painted black. Notice that I made an extra knowing at least one would either break or go sailing across the room.
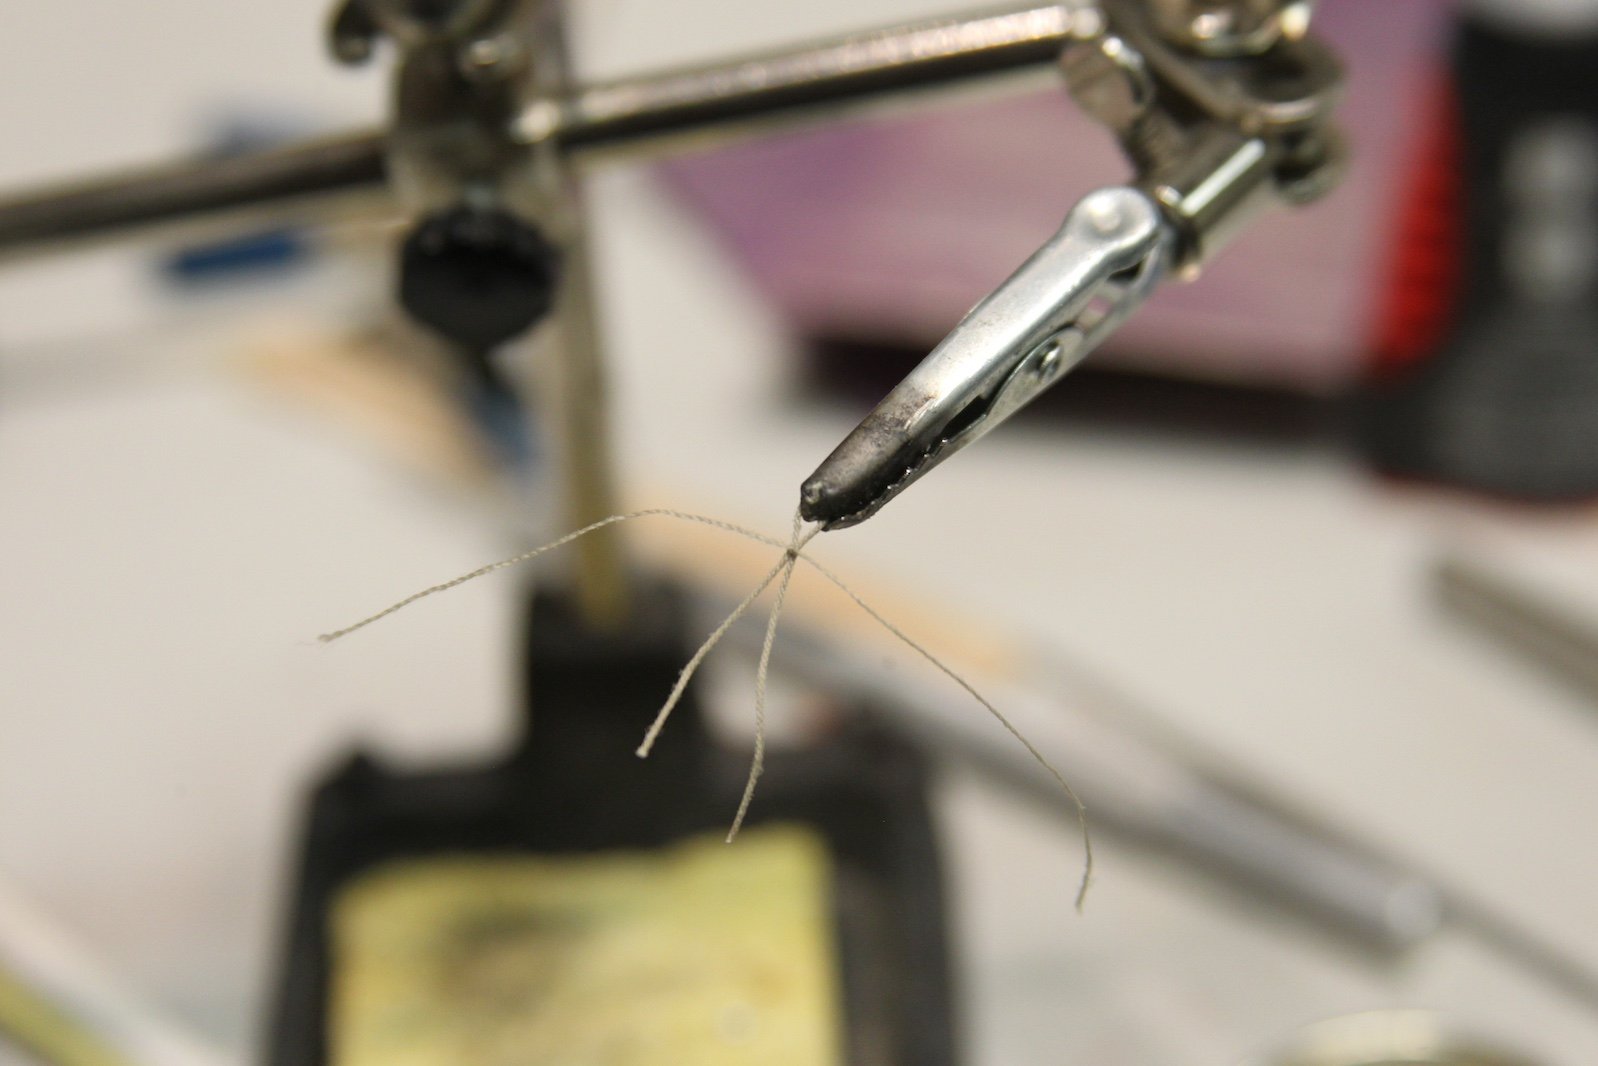
The double strop is made from a 90mm length of line turned into a closed loop by securing the ends together, then folded around the block creating a 45 mm long strop. I closed the loop by feeding a needle and mara 100 thread through the two ends and seizing it at the base of the eye. An eye is seized at the other end, then both strops are looped over the block and seized once again.

The jeers are lashed to the mast through the cleats and the eyes with the aforementioned .40mm rope, while being careful to lay the rope as cleanly as possible around the masthead. It's not shown here, but I used a small clamp attached to the block to give it a little weight and tension while feeding the line through the cleats. The strops should hang down just long enough that the yard will sit at the level of the futtock shrouds when they are rigged later.
- David Lester, gjdale, BobG and 3 others
-
6
-
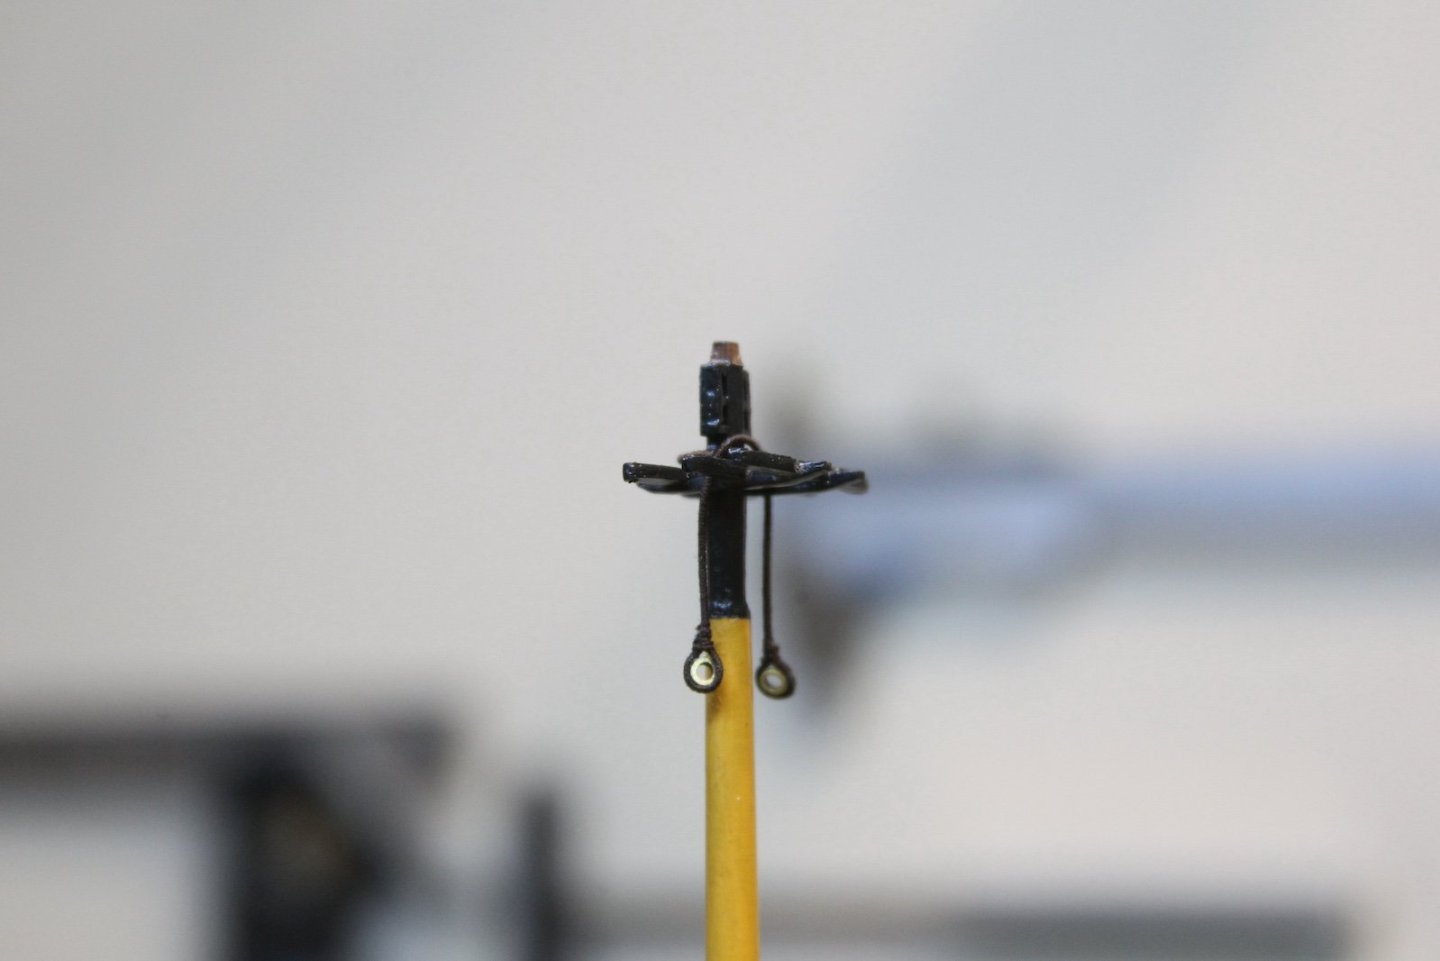
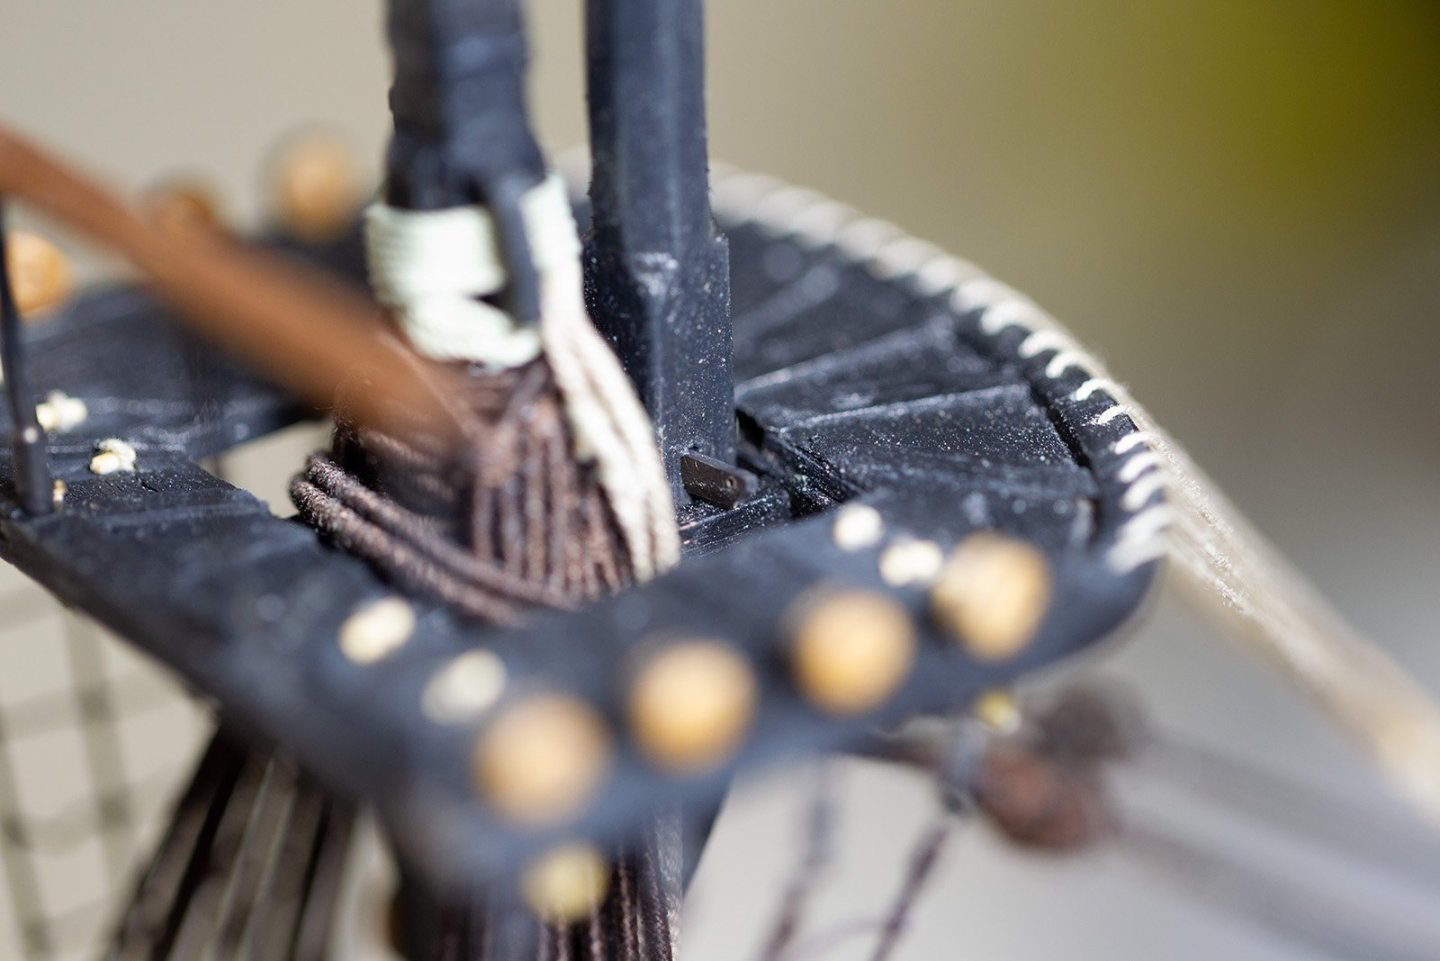
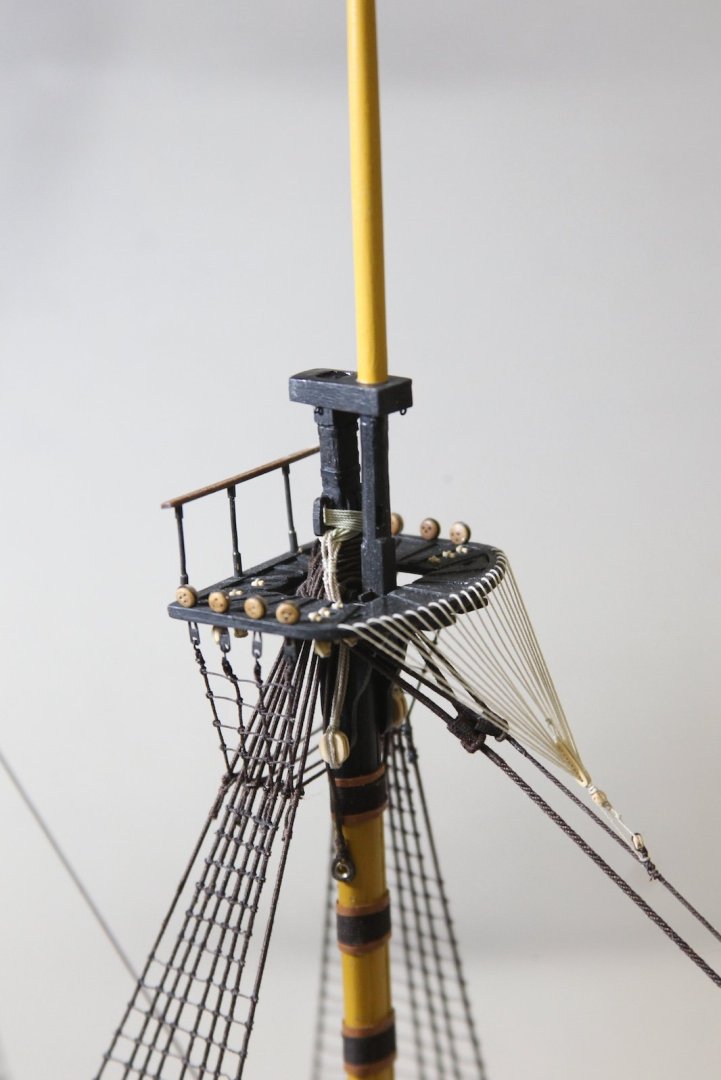
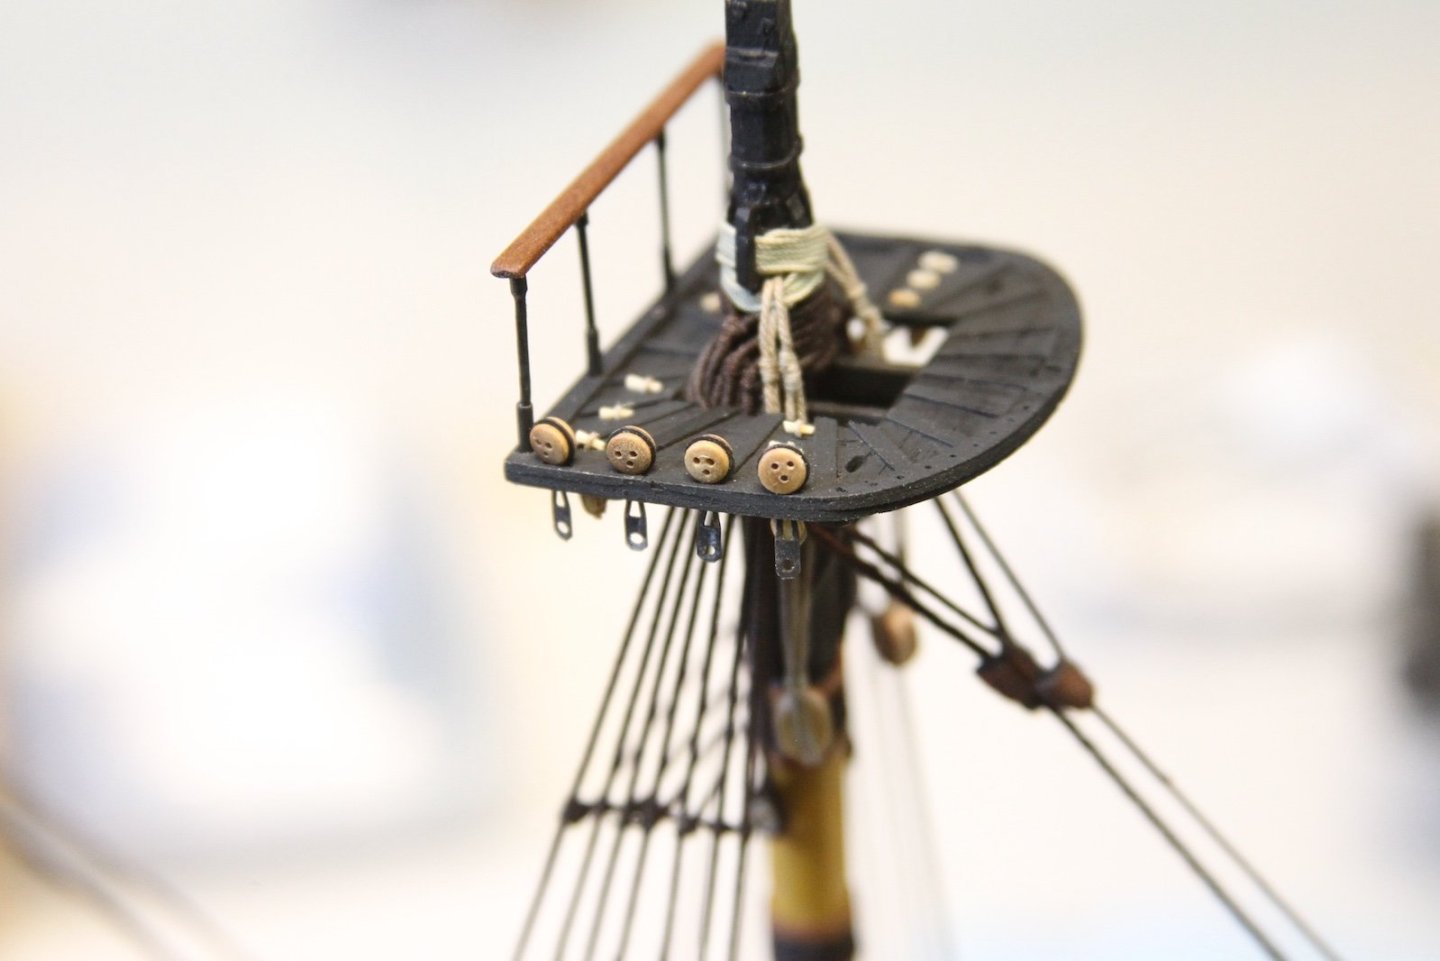
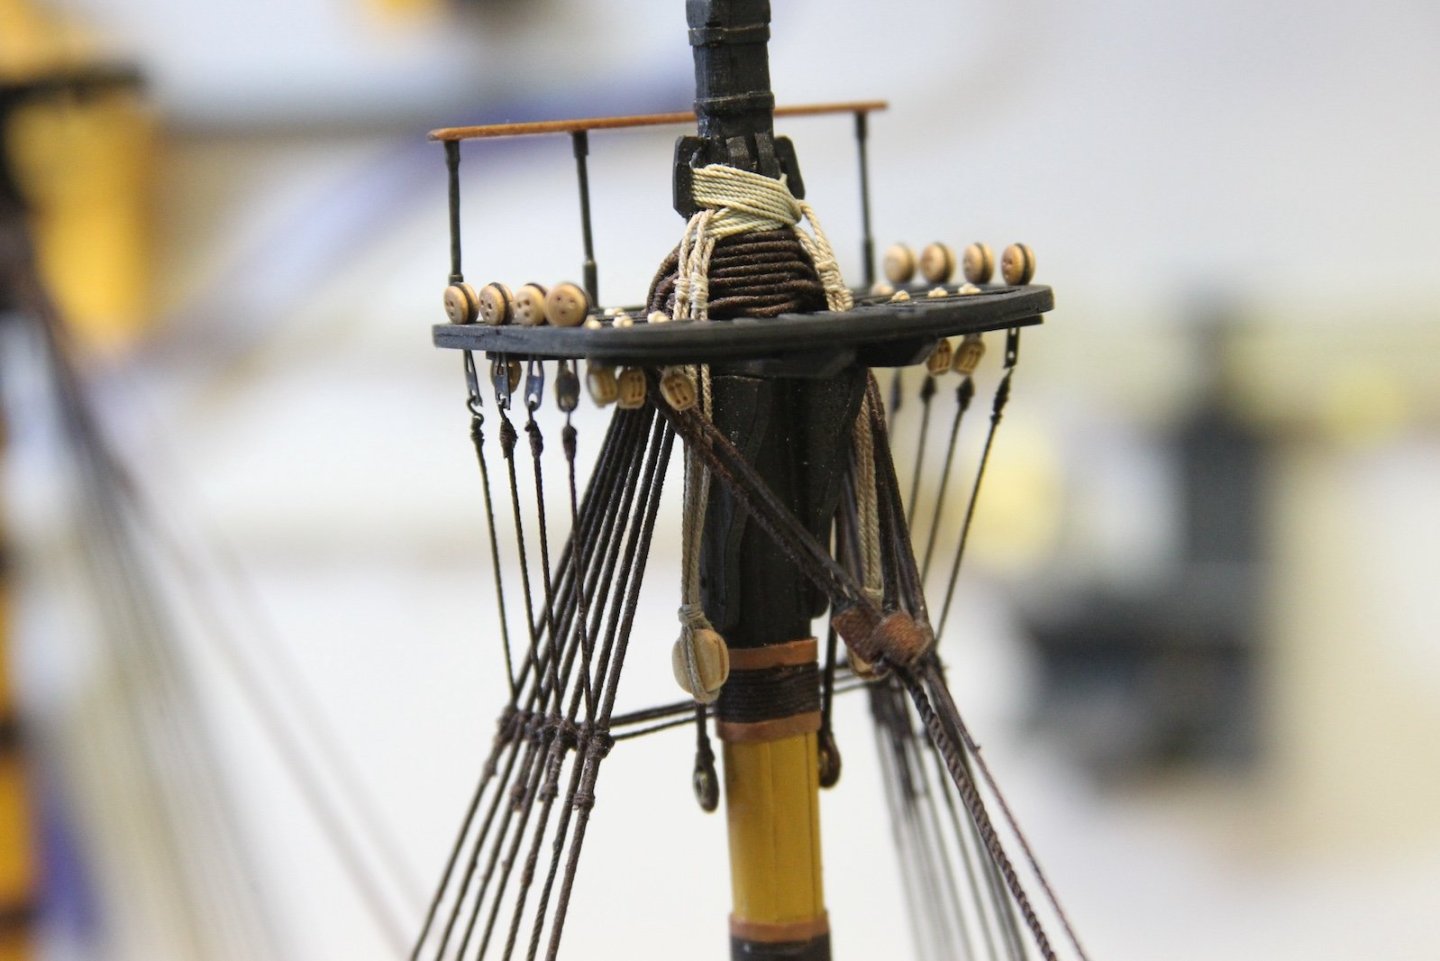
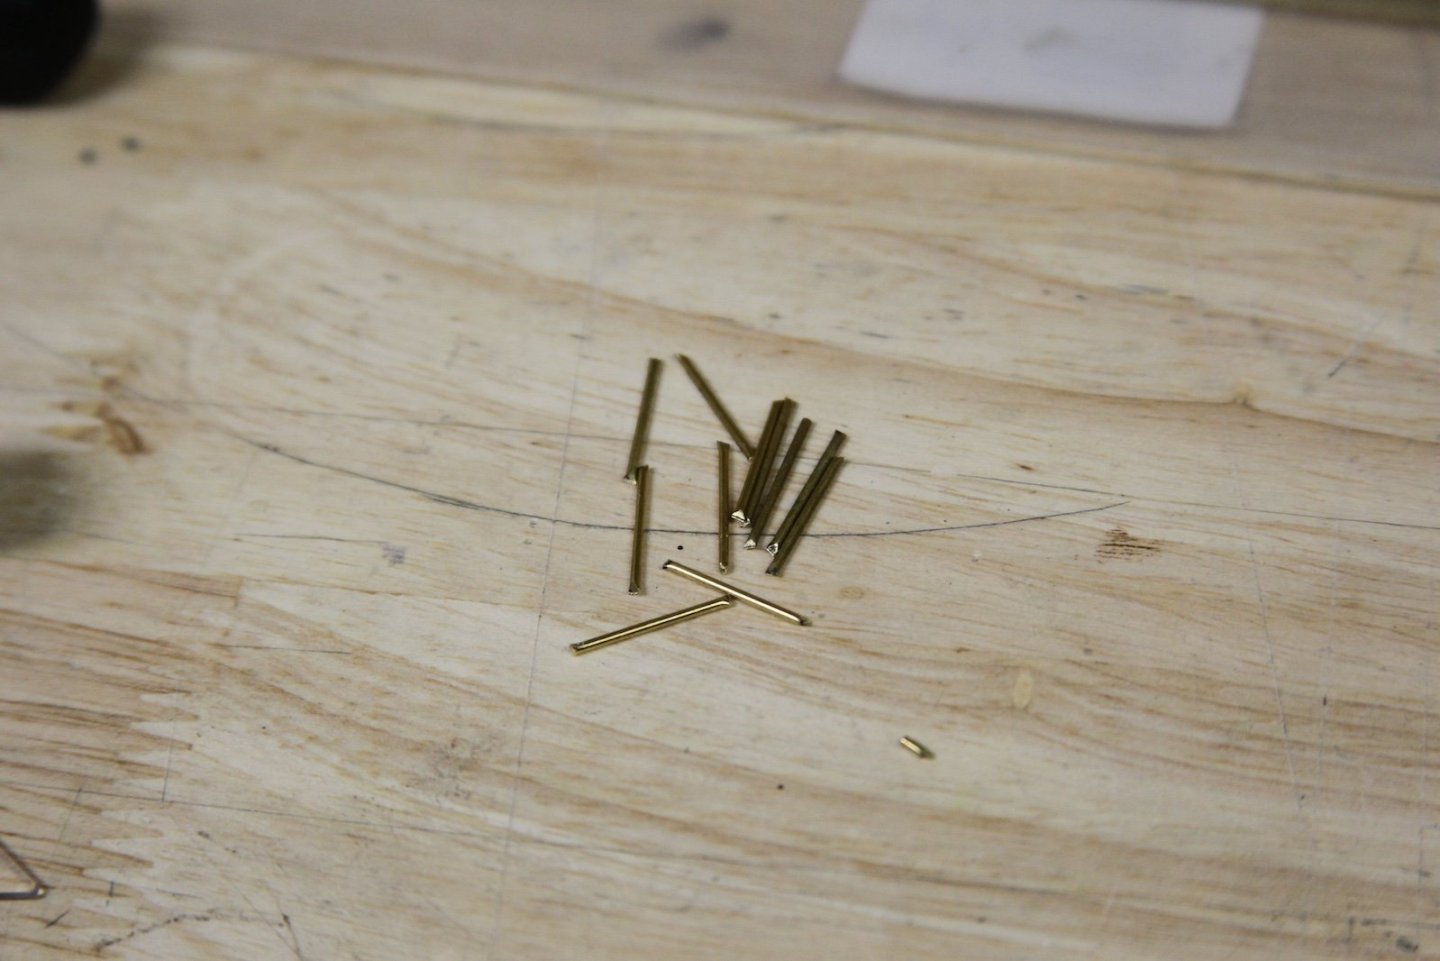
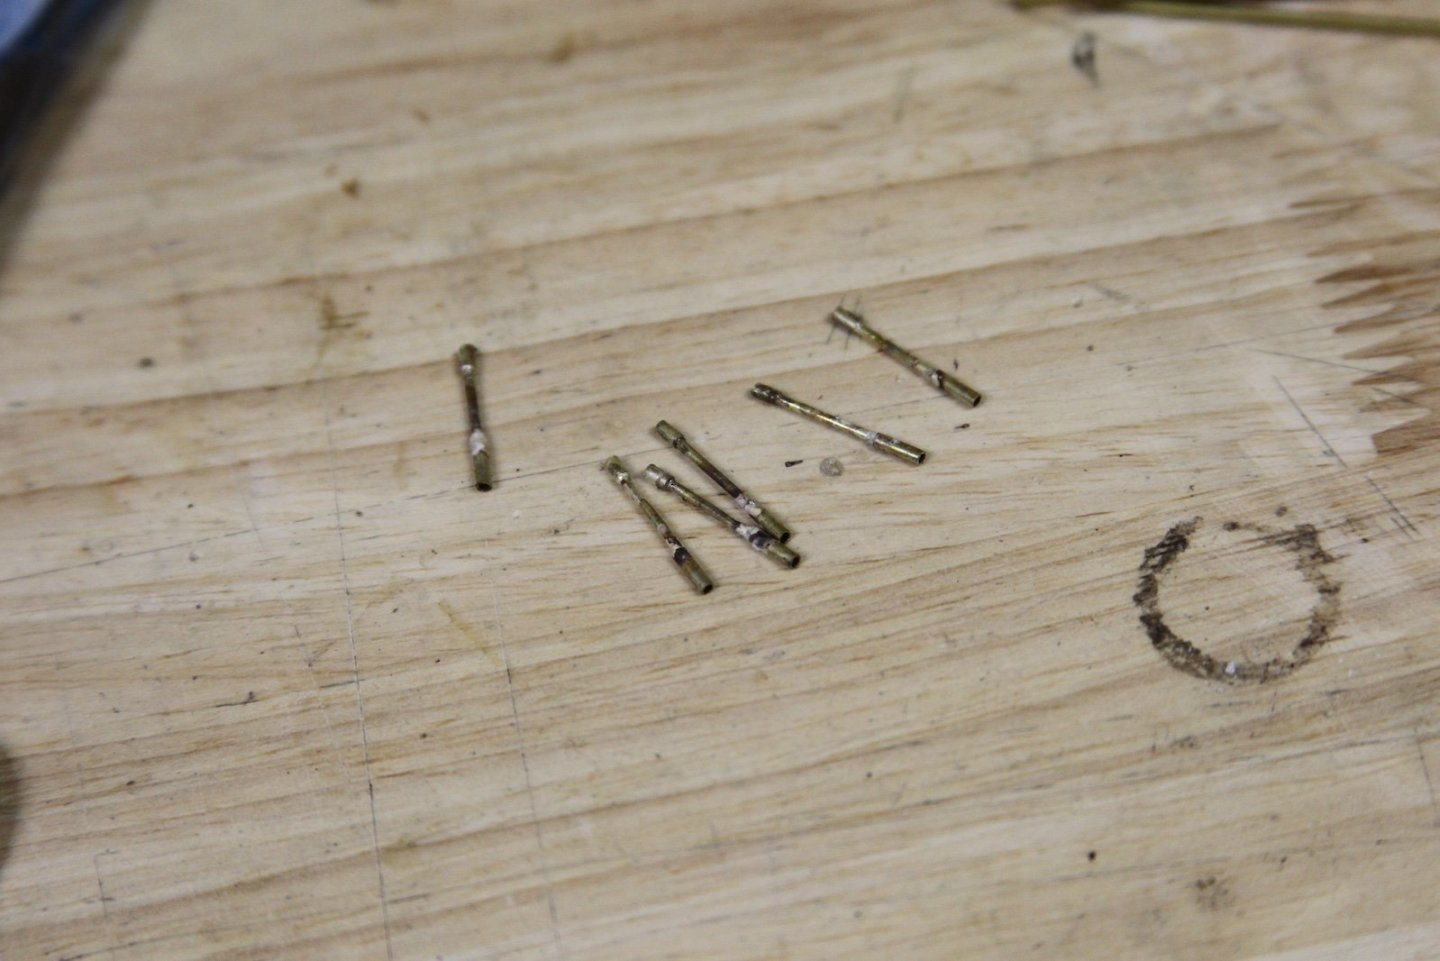
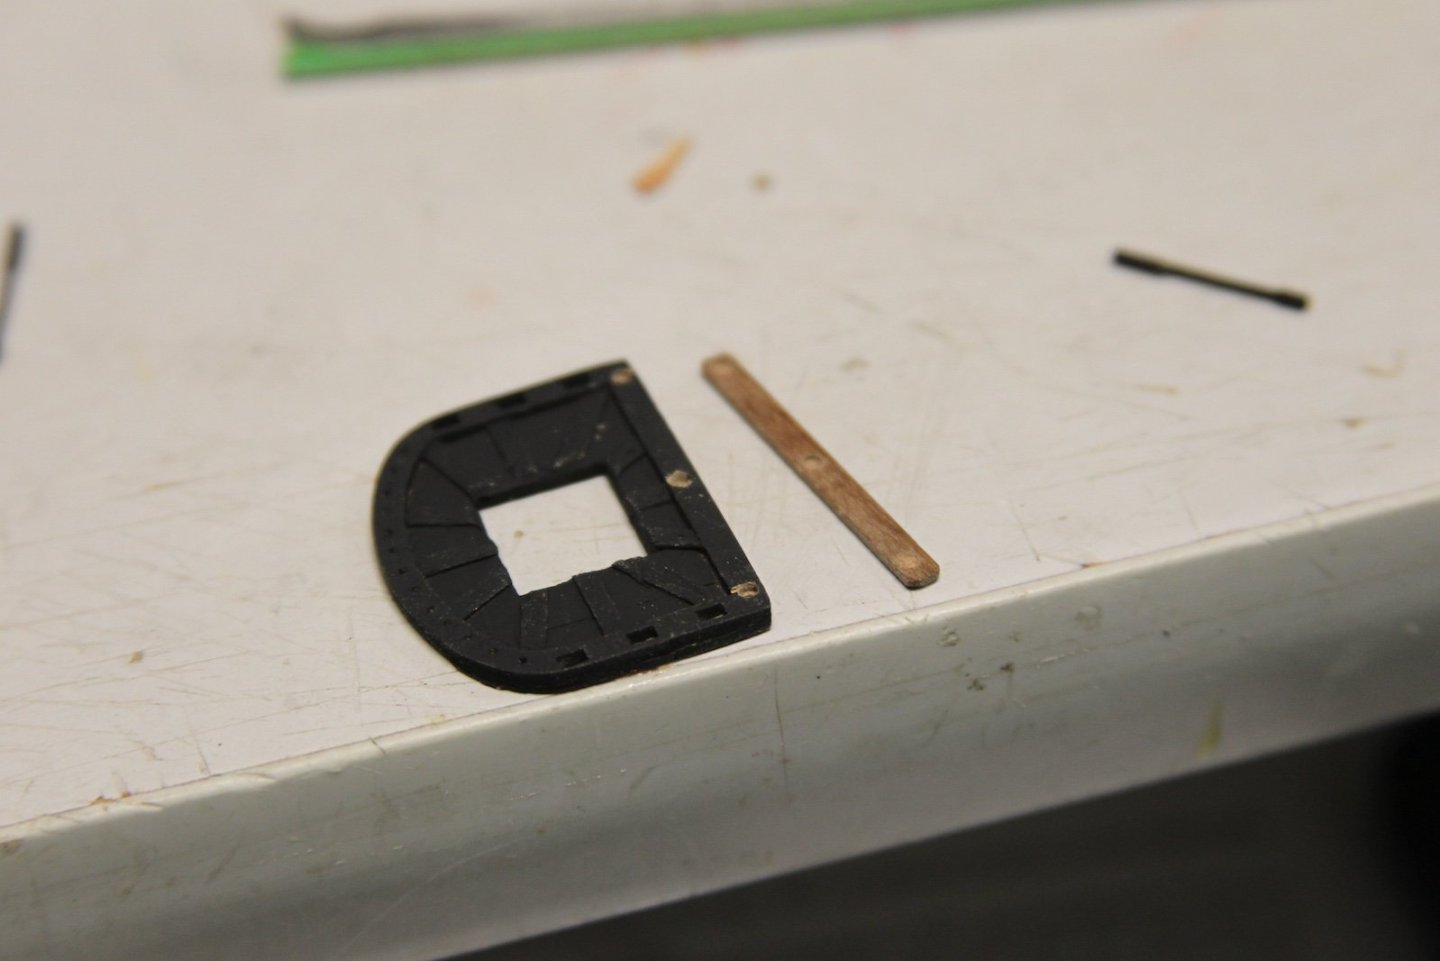
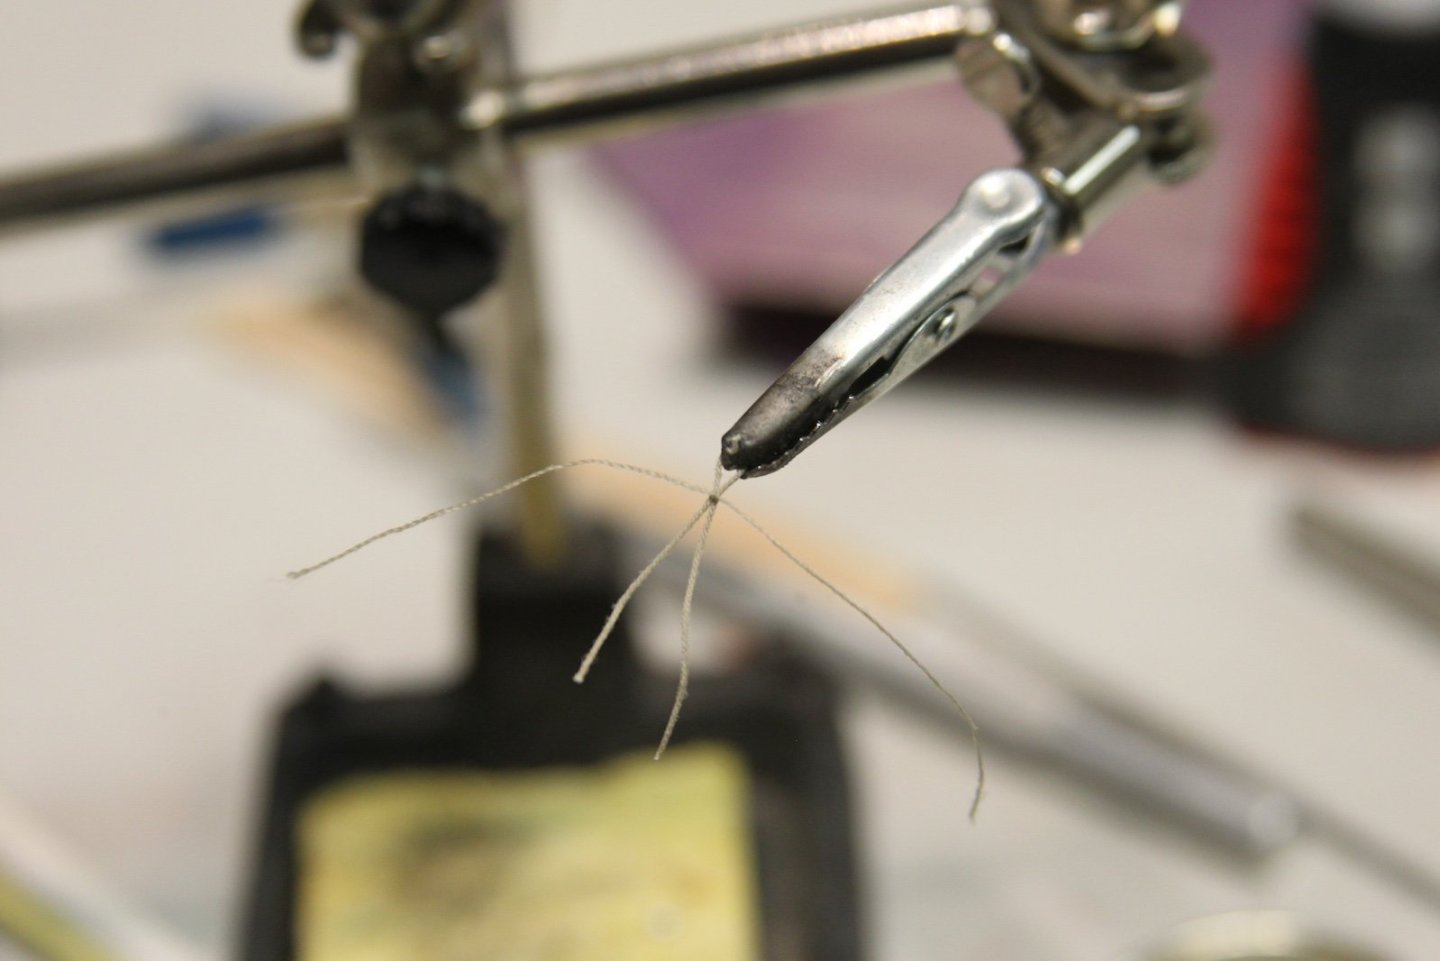
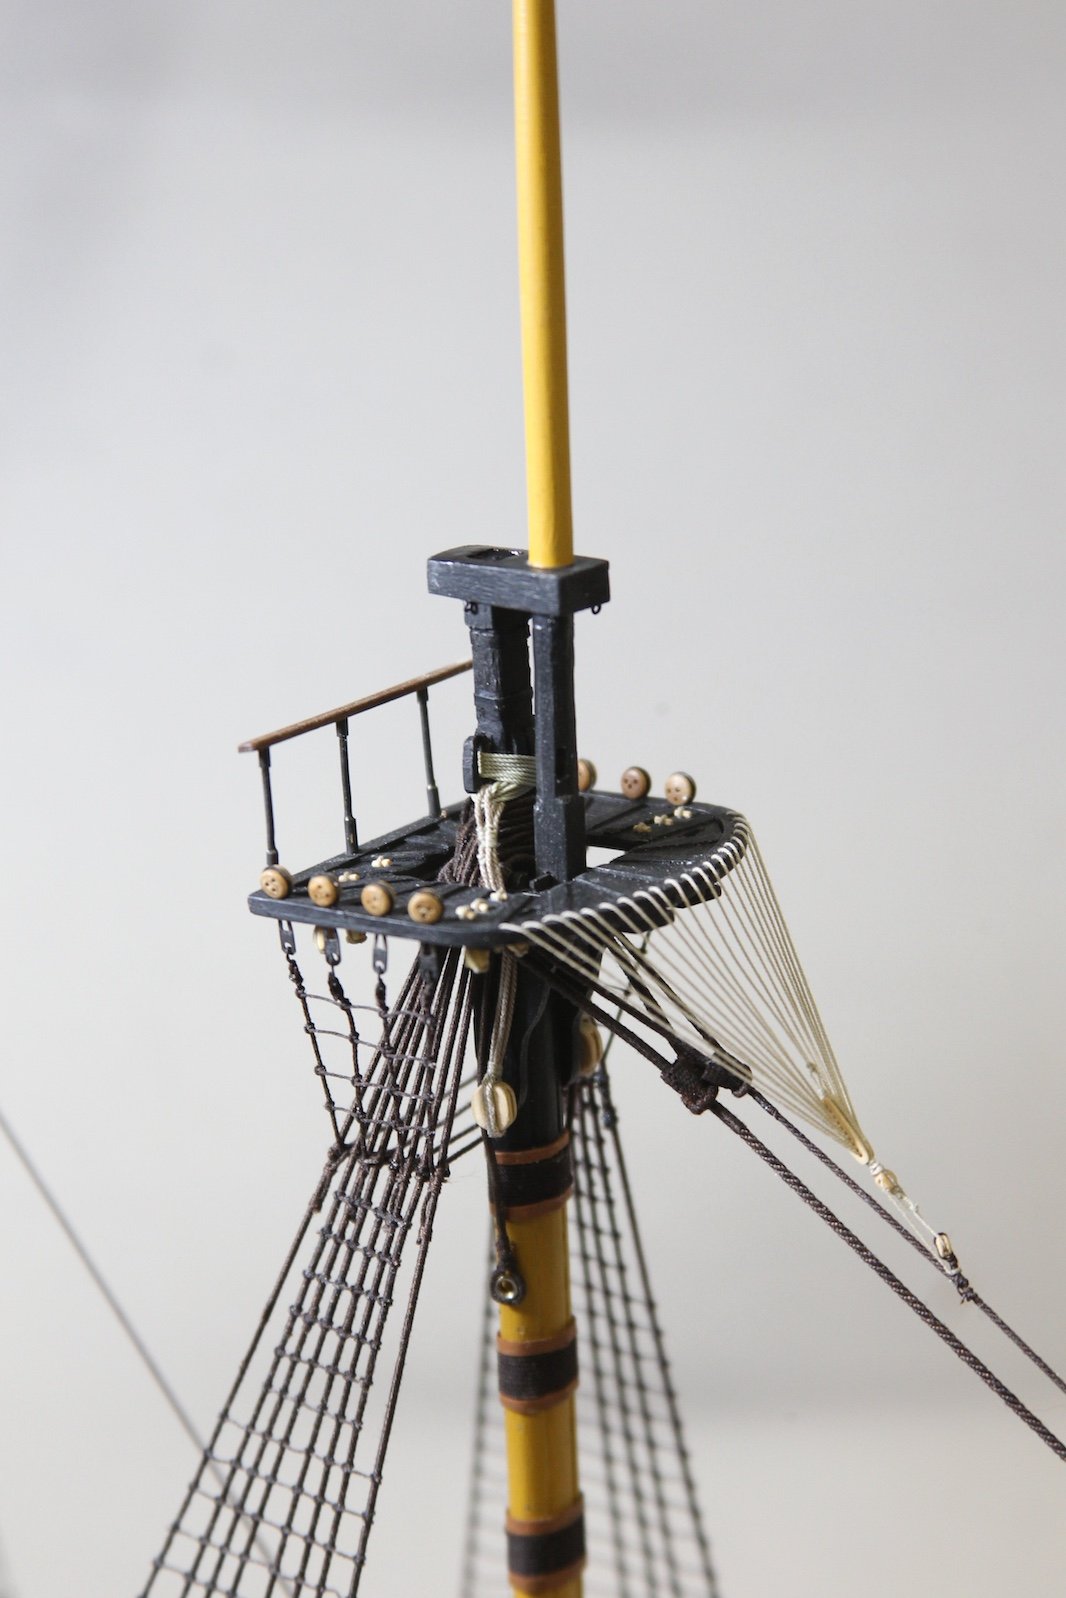
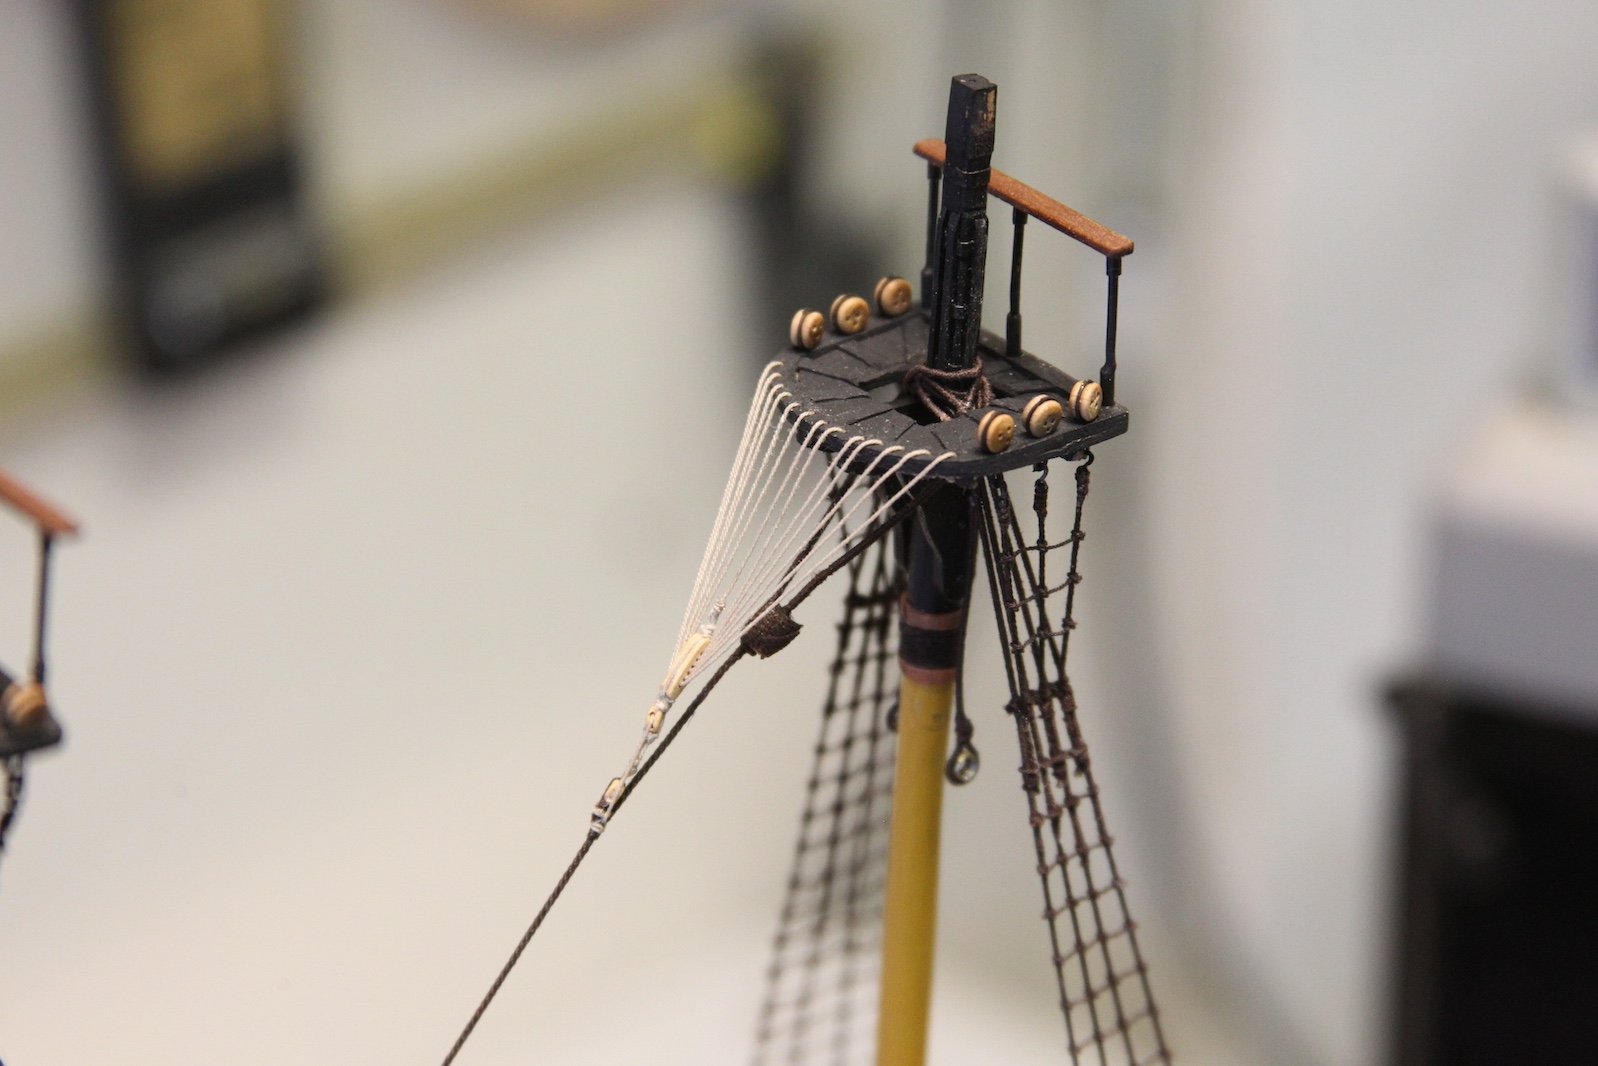
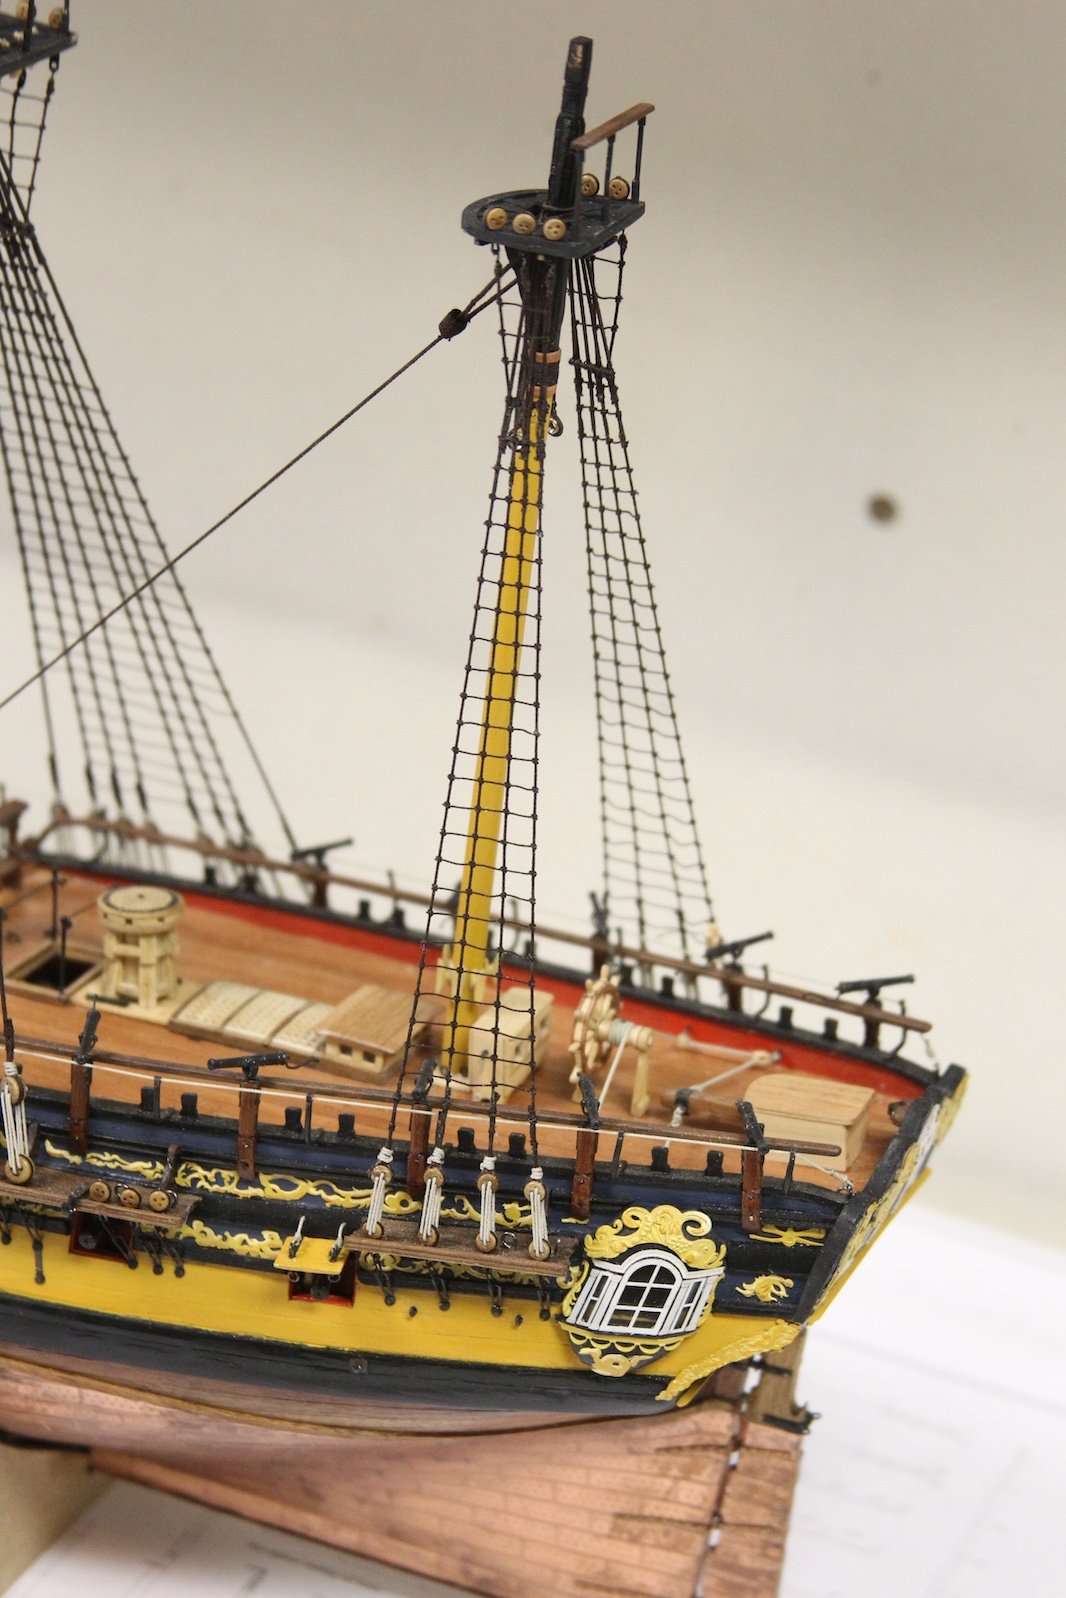
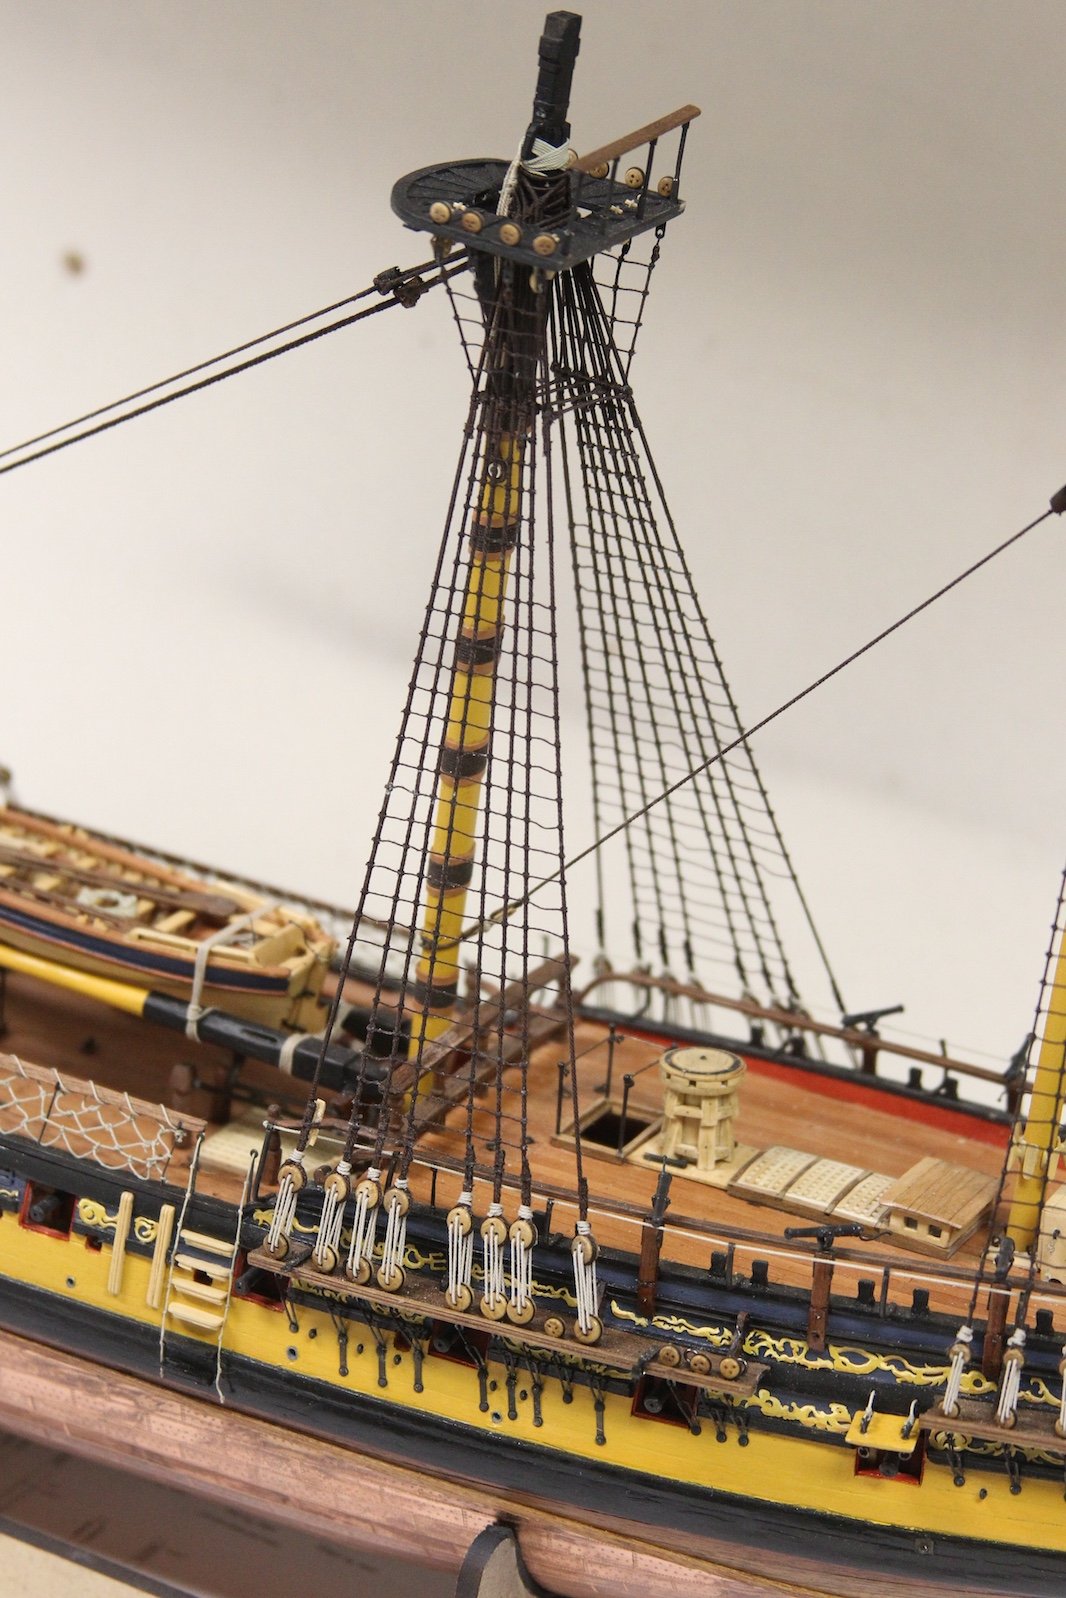
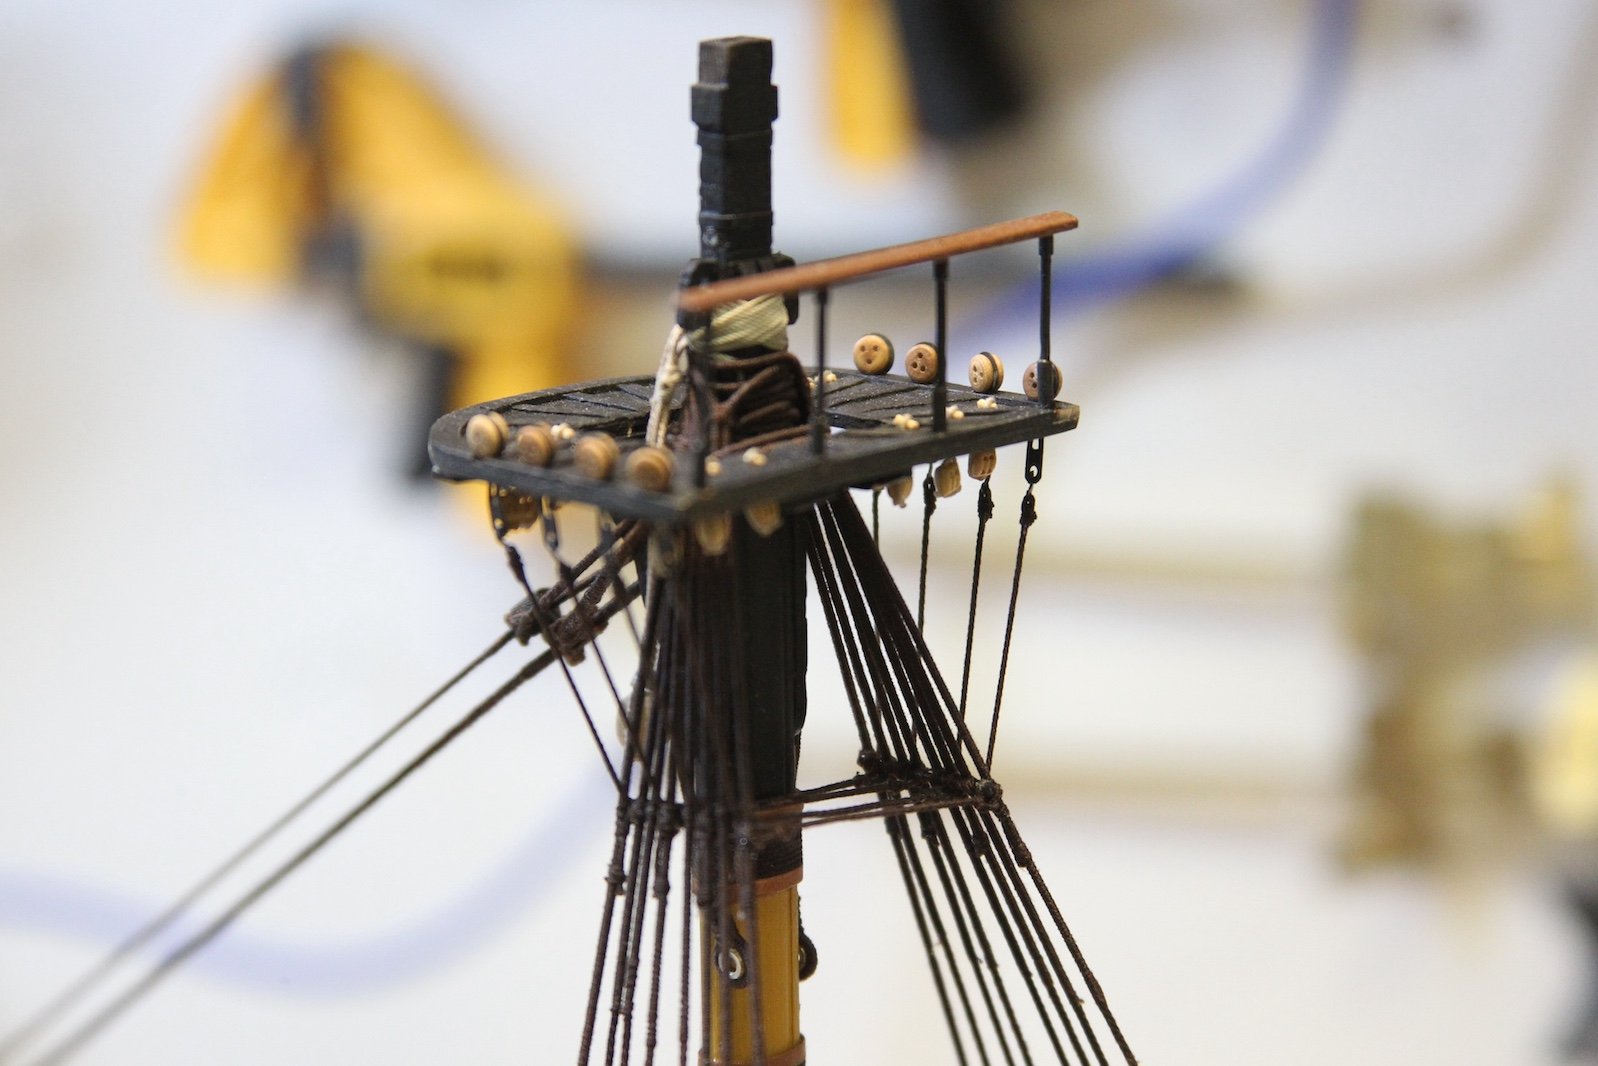
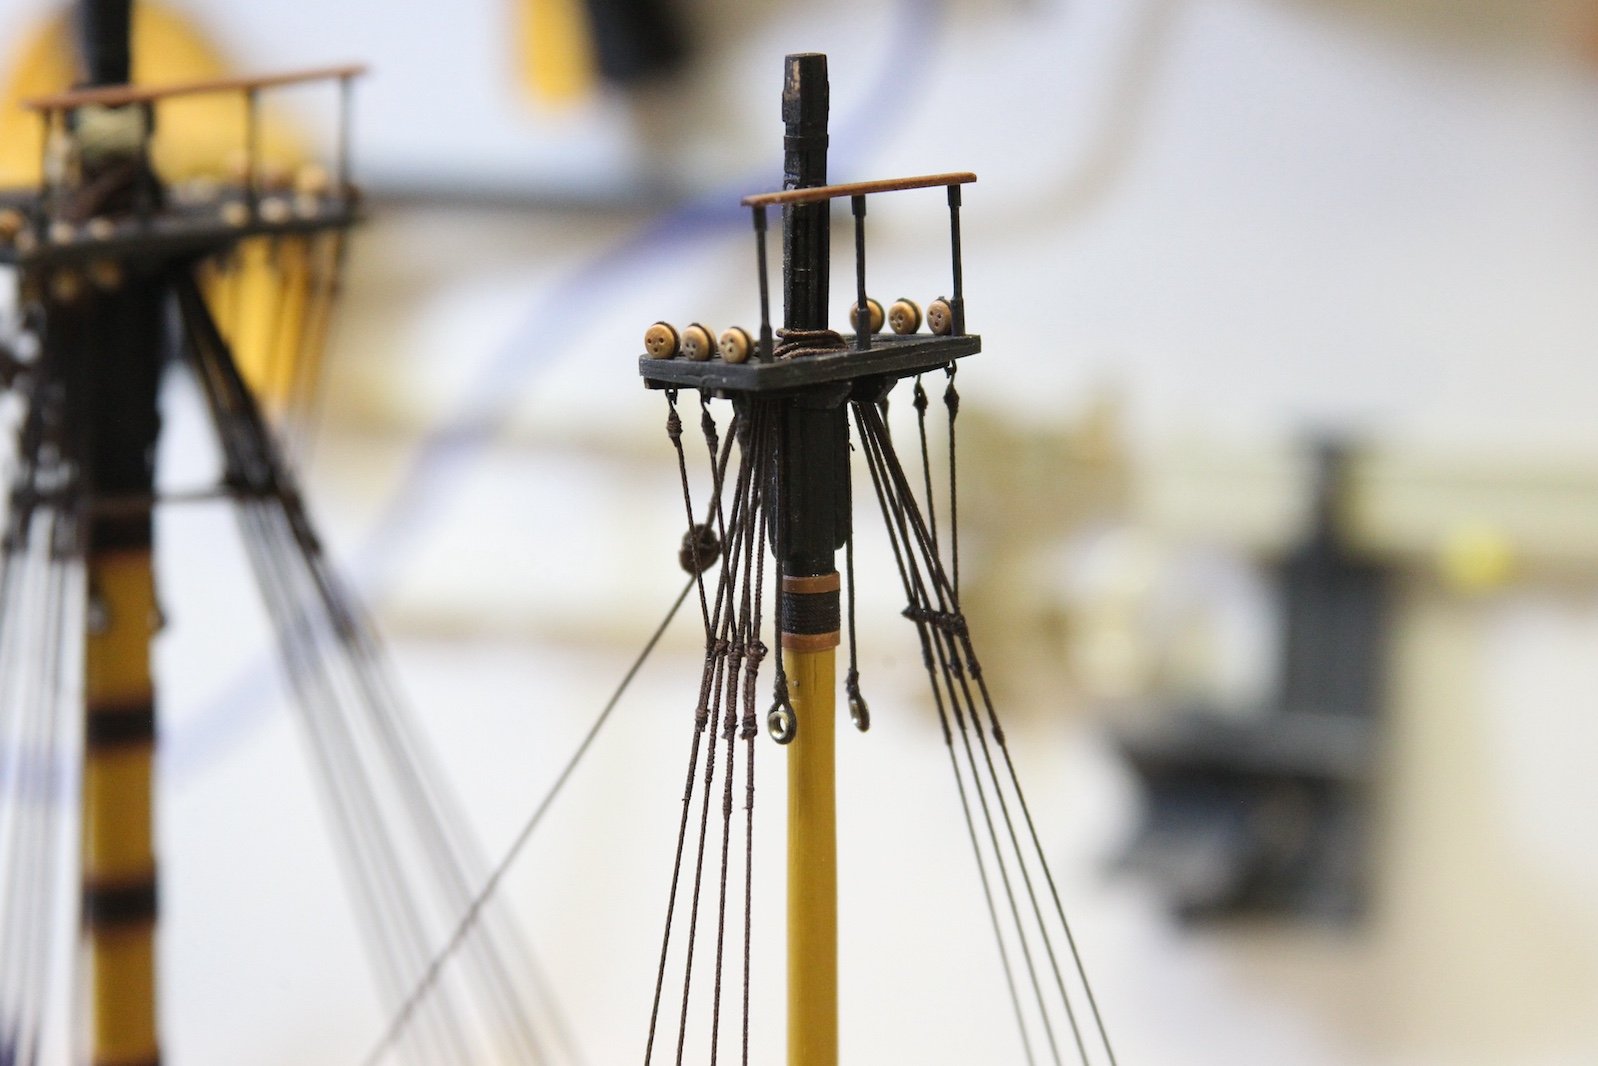
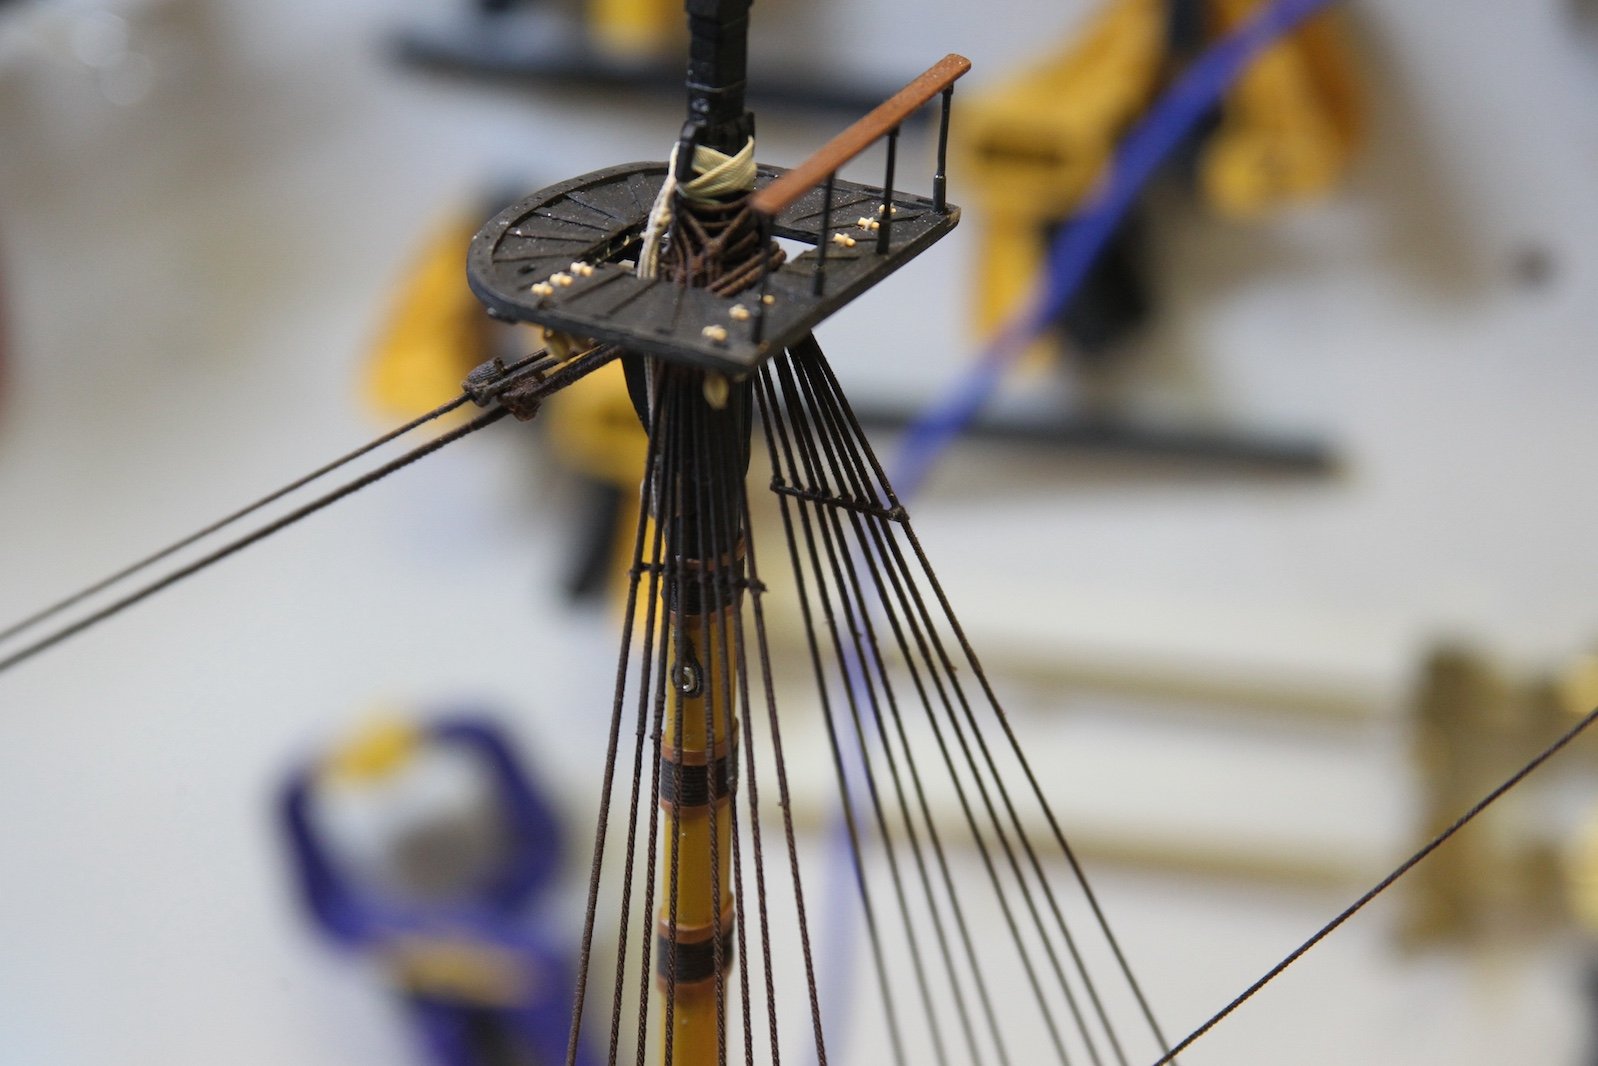
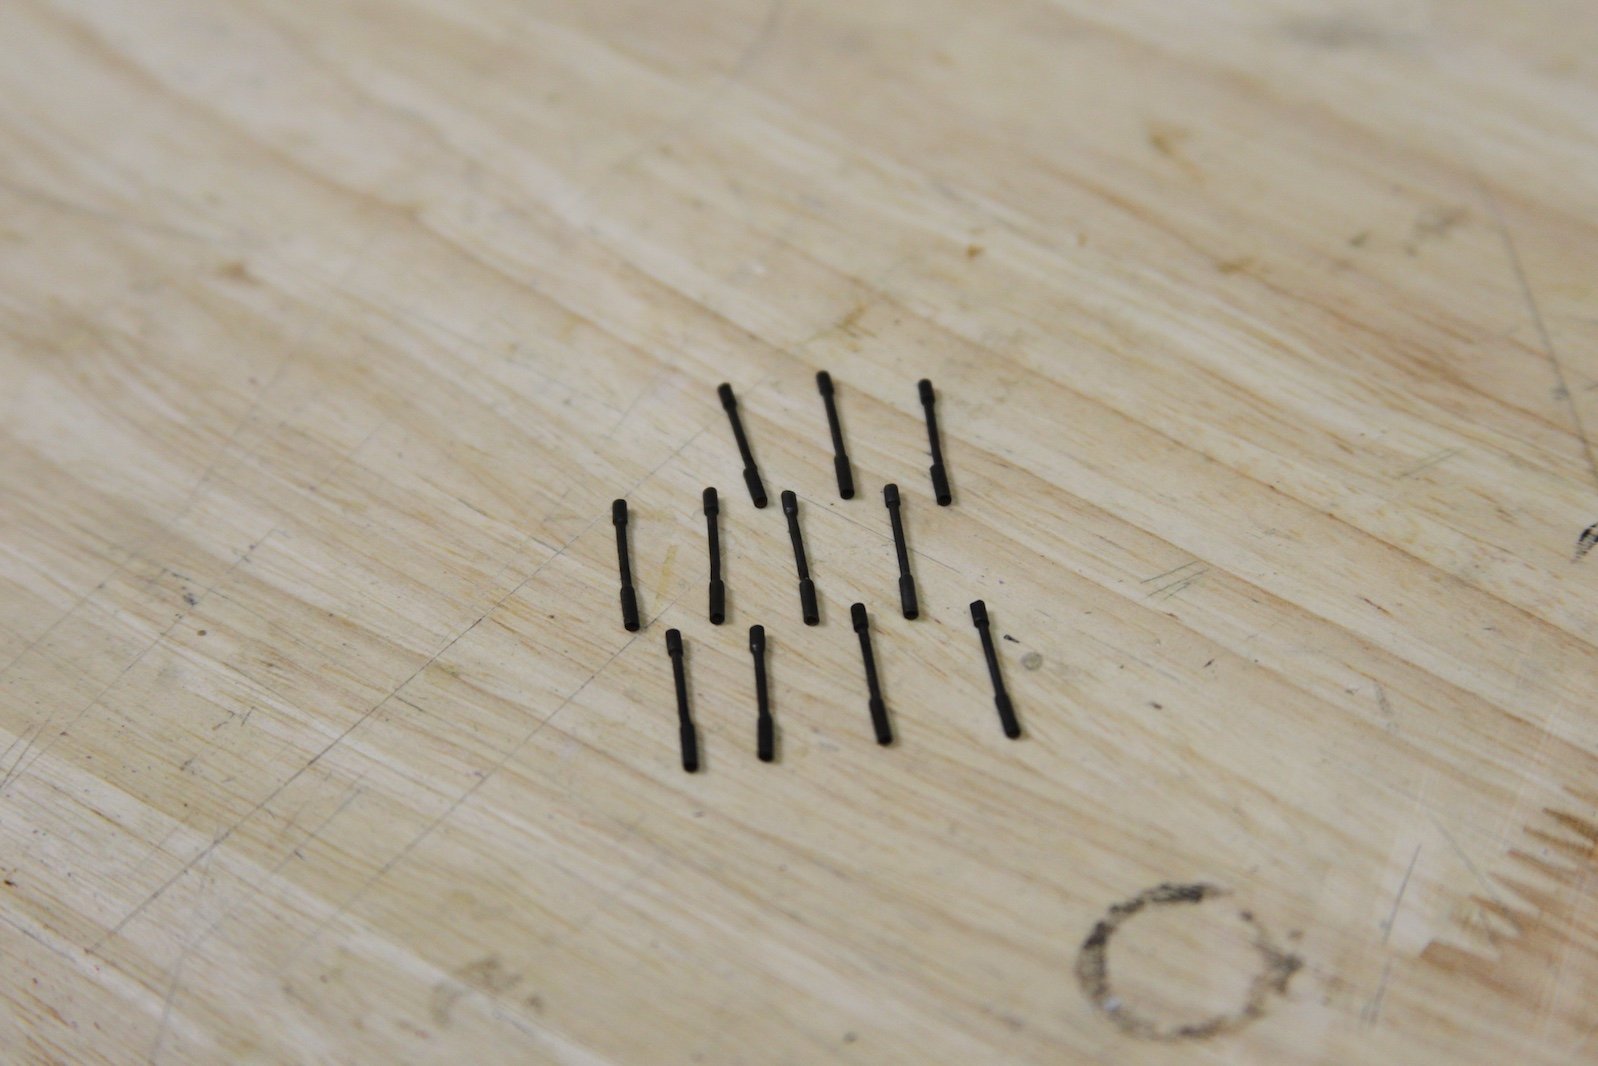
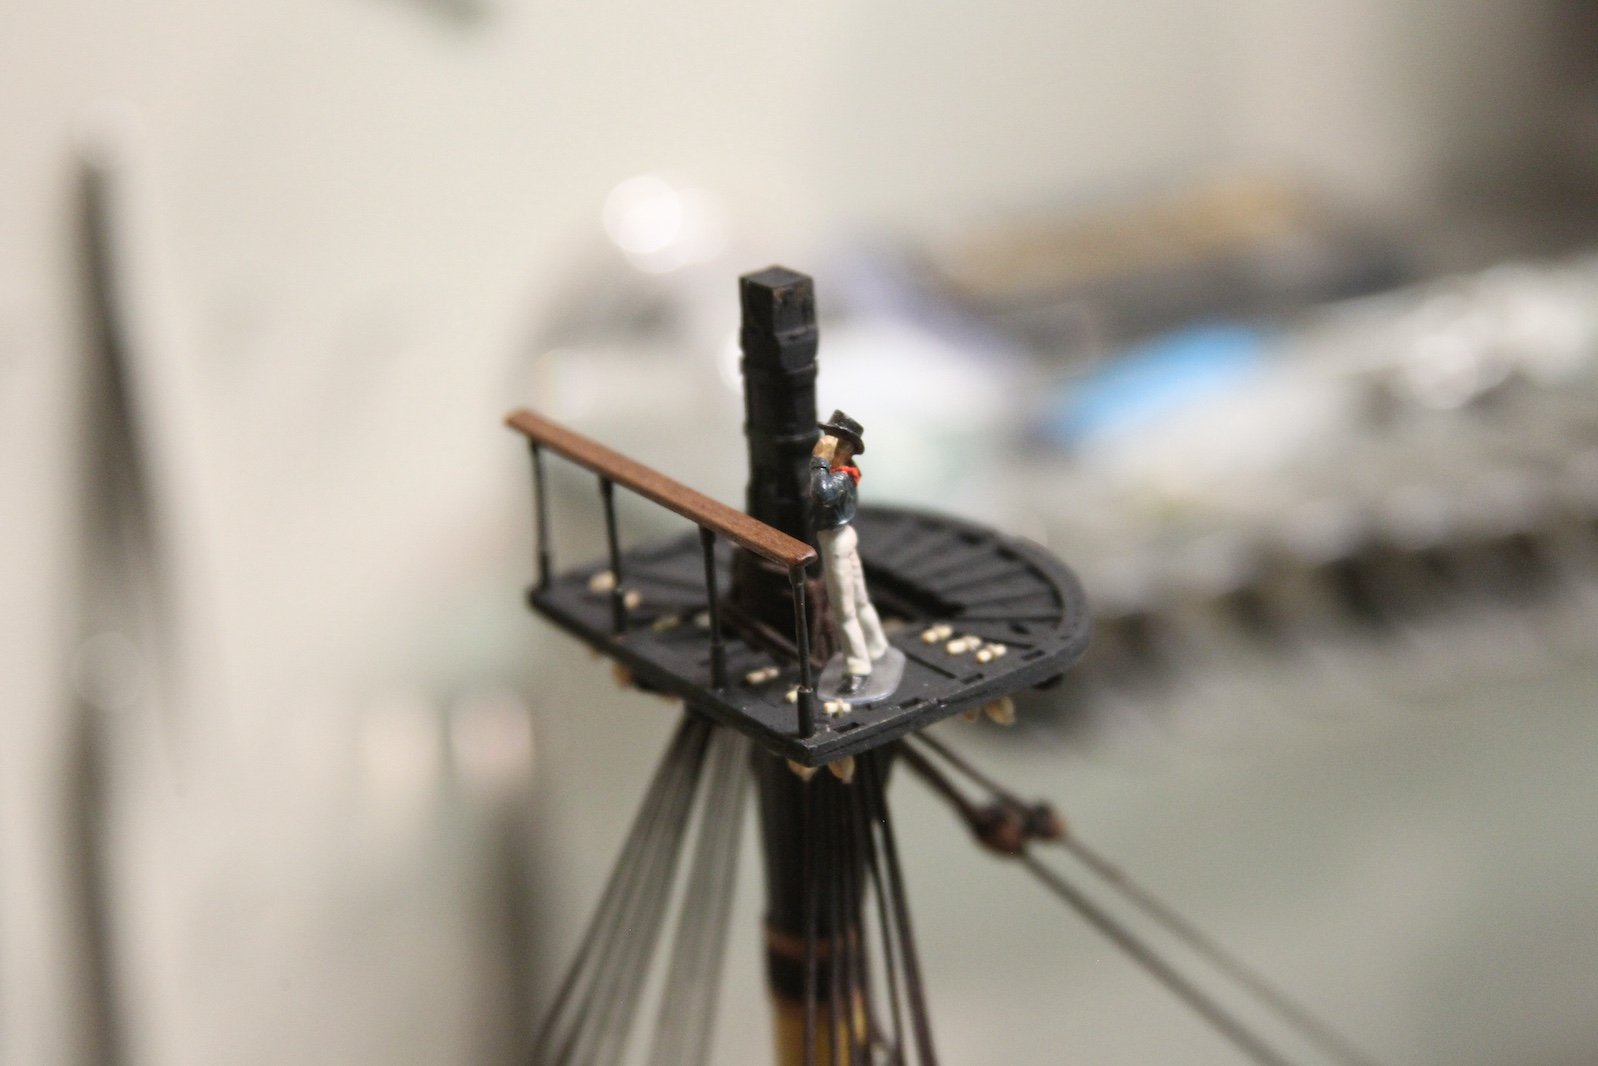
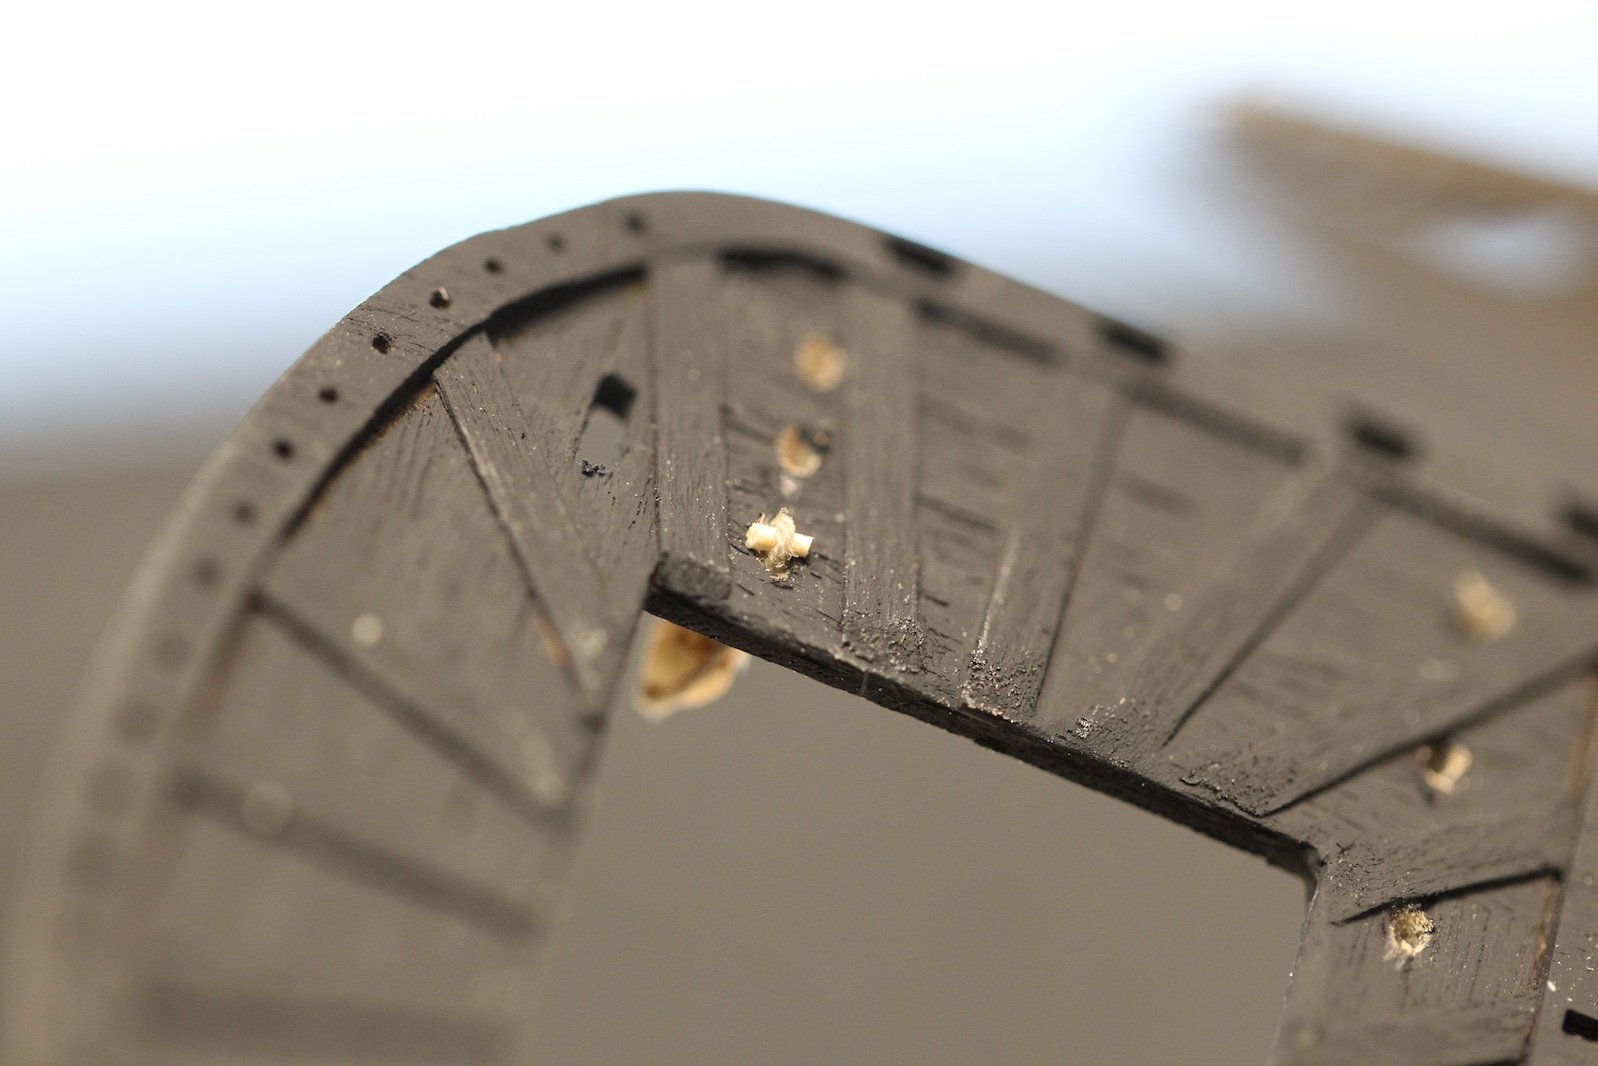
I wanted the stanchions and railings for the mast tops to match the main part of the ship, so I used brass tubing and walnut again. The stanchions are three parts - the main post is a 1mm brass tube cut to 15mm with each end sanded to a point to facilitate my later placement and soldering. The bottom of the stanchion is 2mm tubing cut to 5mm and the top is 2mm tubing cut to 3mm (missed taking a shot of these). The bottoms and tops are slid over the top of the pointy ends of the middle and silver soldered into place.
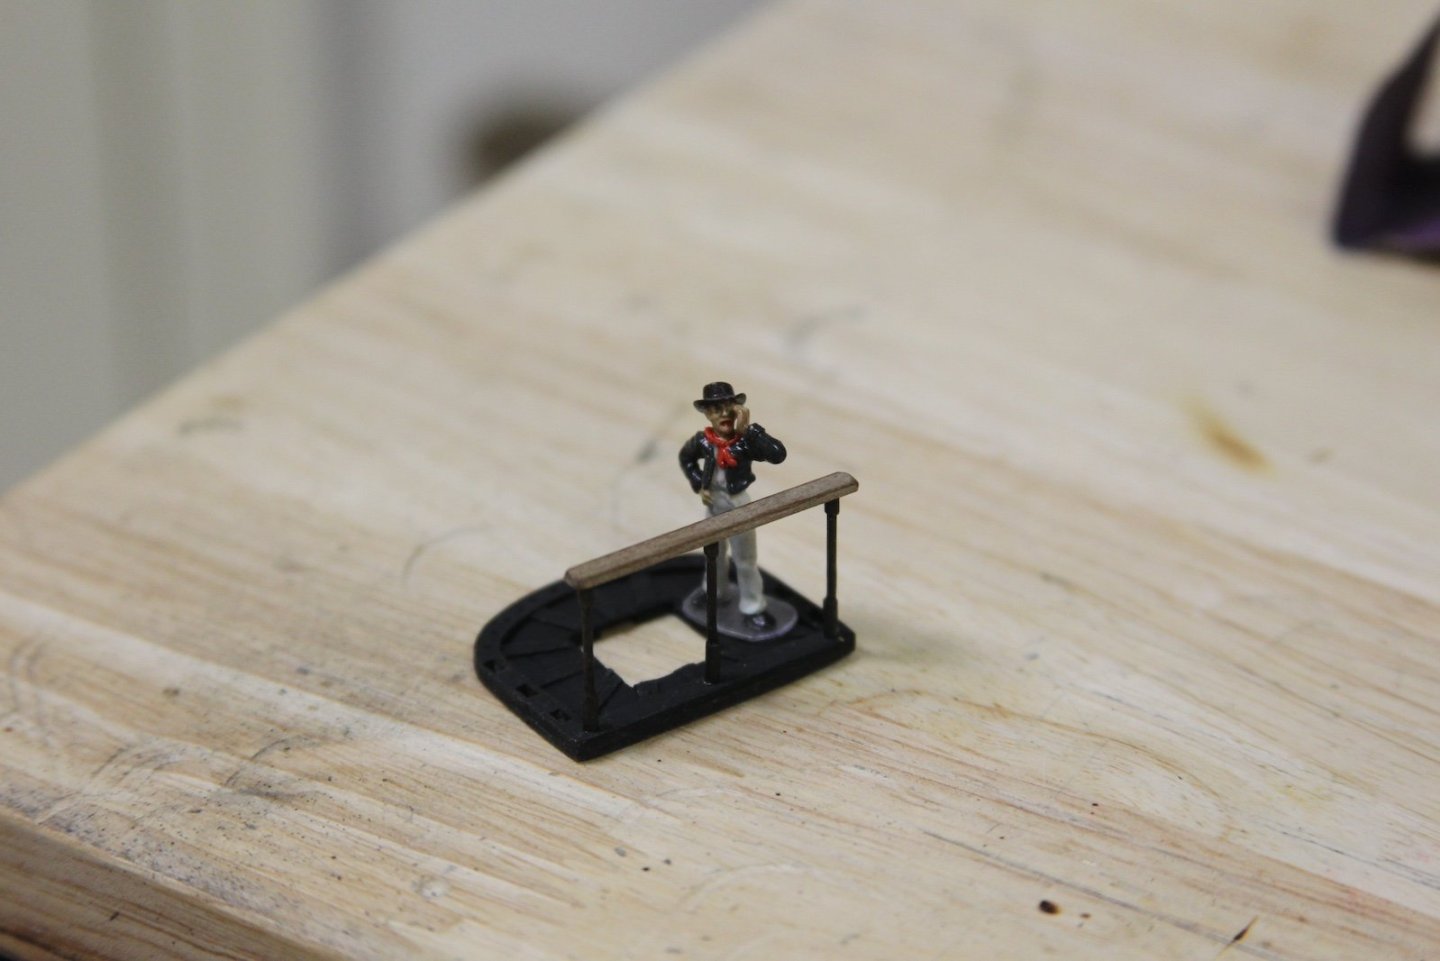
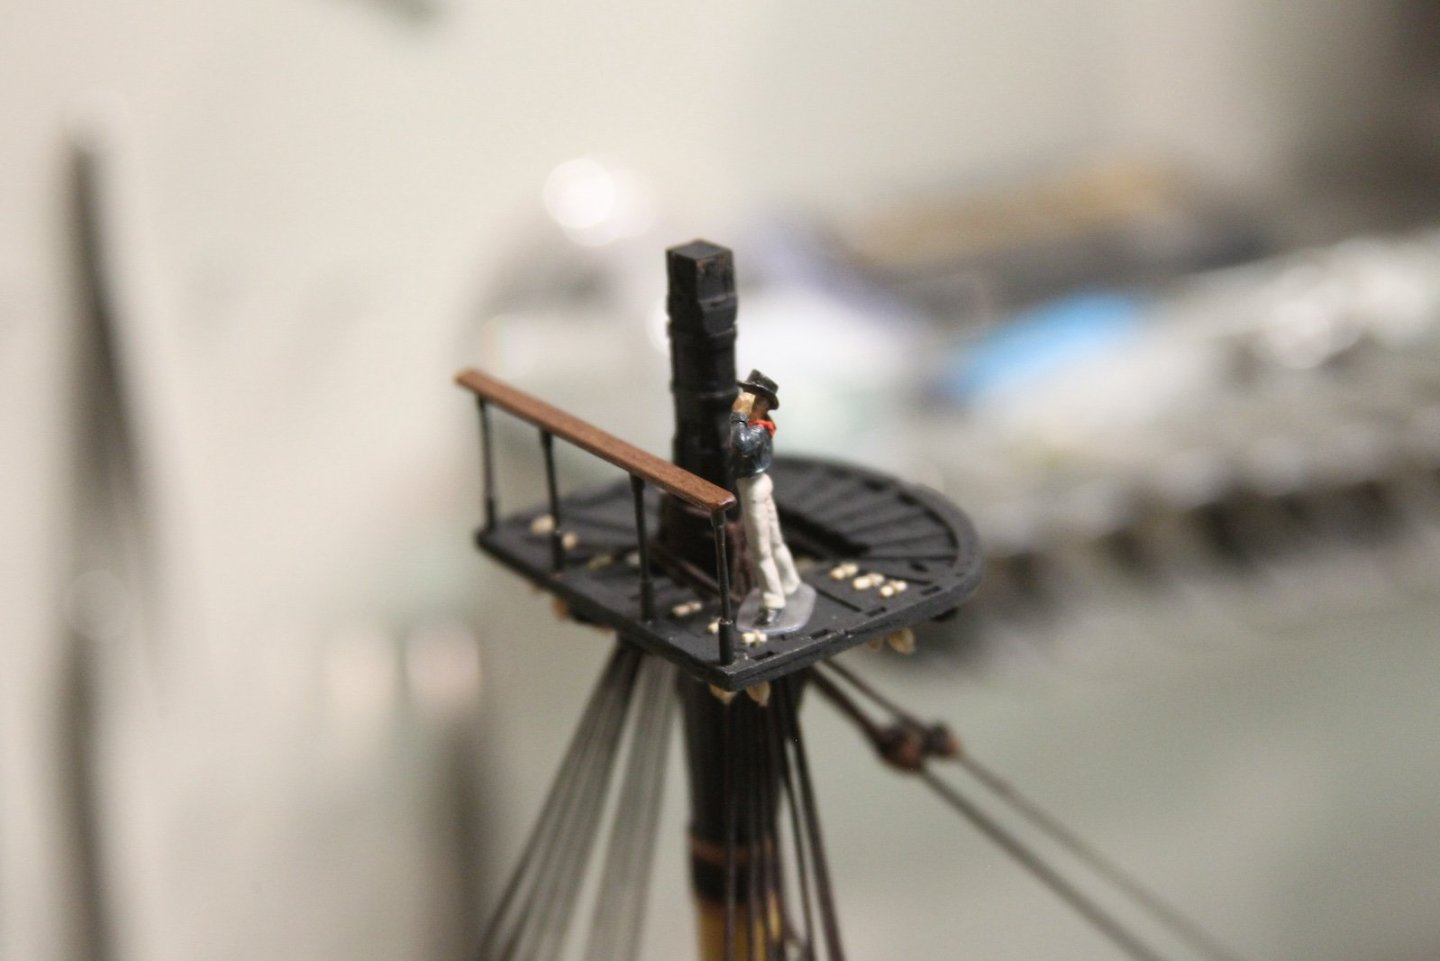
The stanchions are sanded and blackened - my blackening process is laid out here in post #175. I bored out spaces in the mast tops and the railings to fit the stanchions then assembled them. The first mate let's me know that the sizing and scaling are pretty close to what I'm looking for.

-
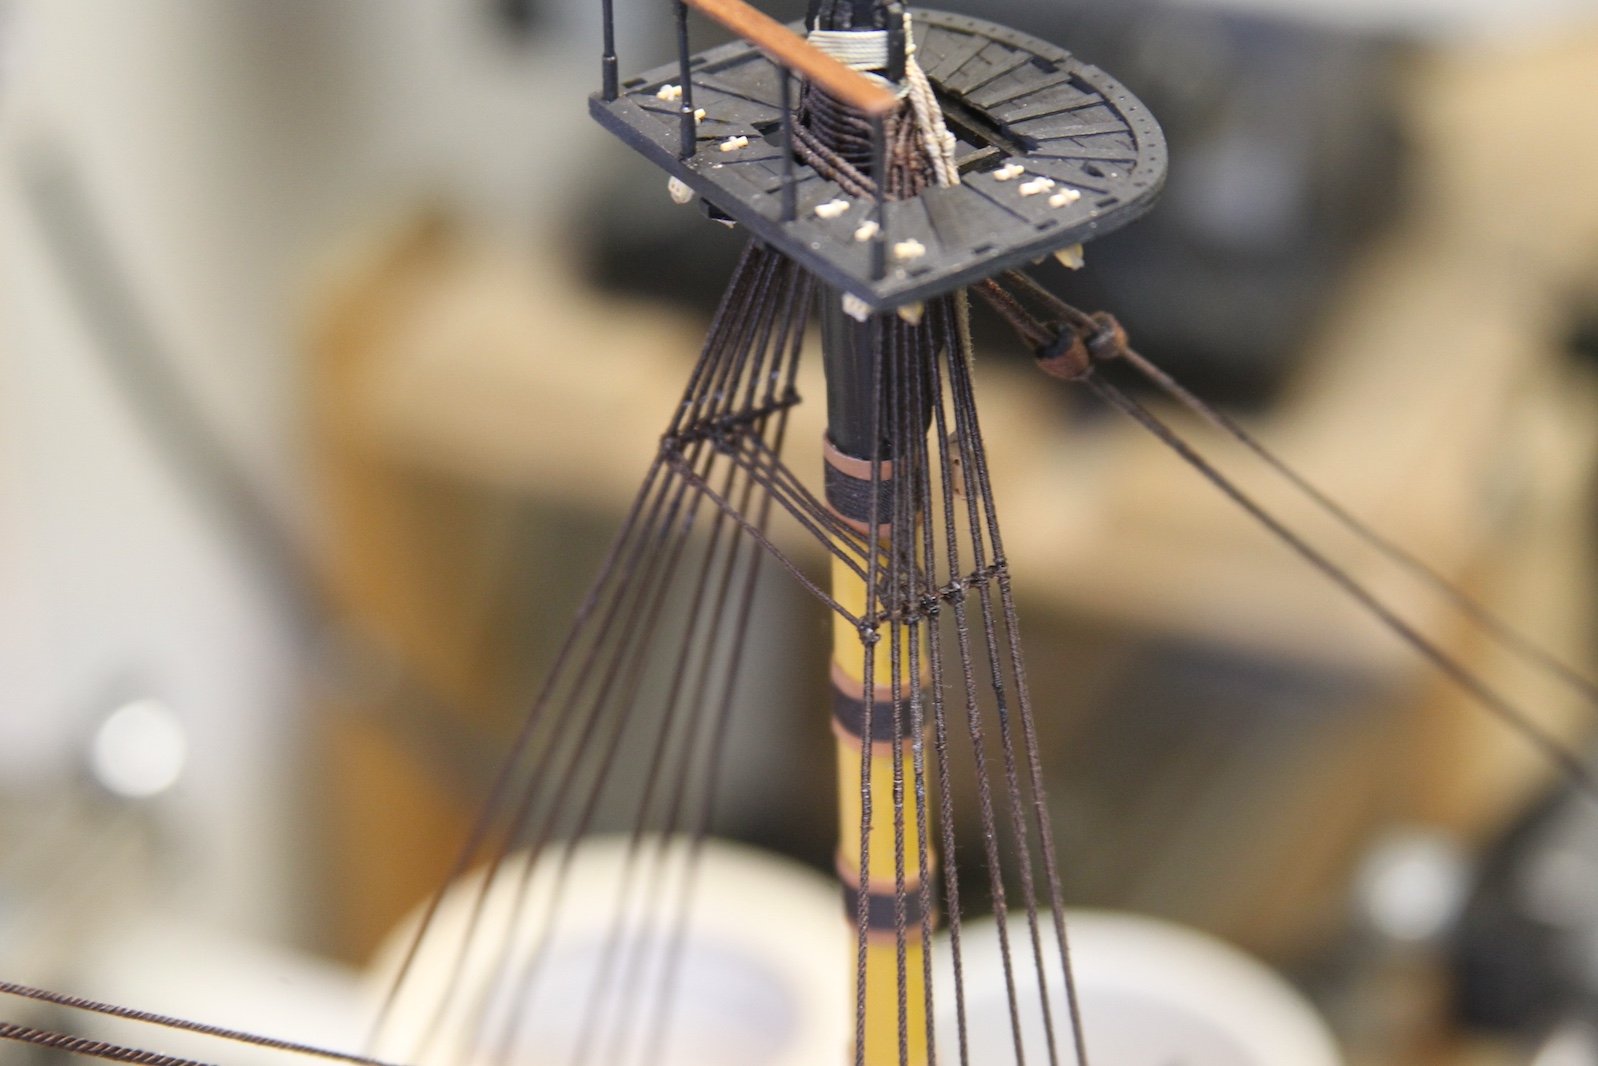
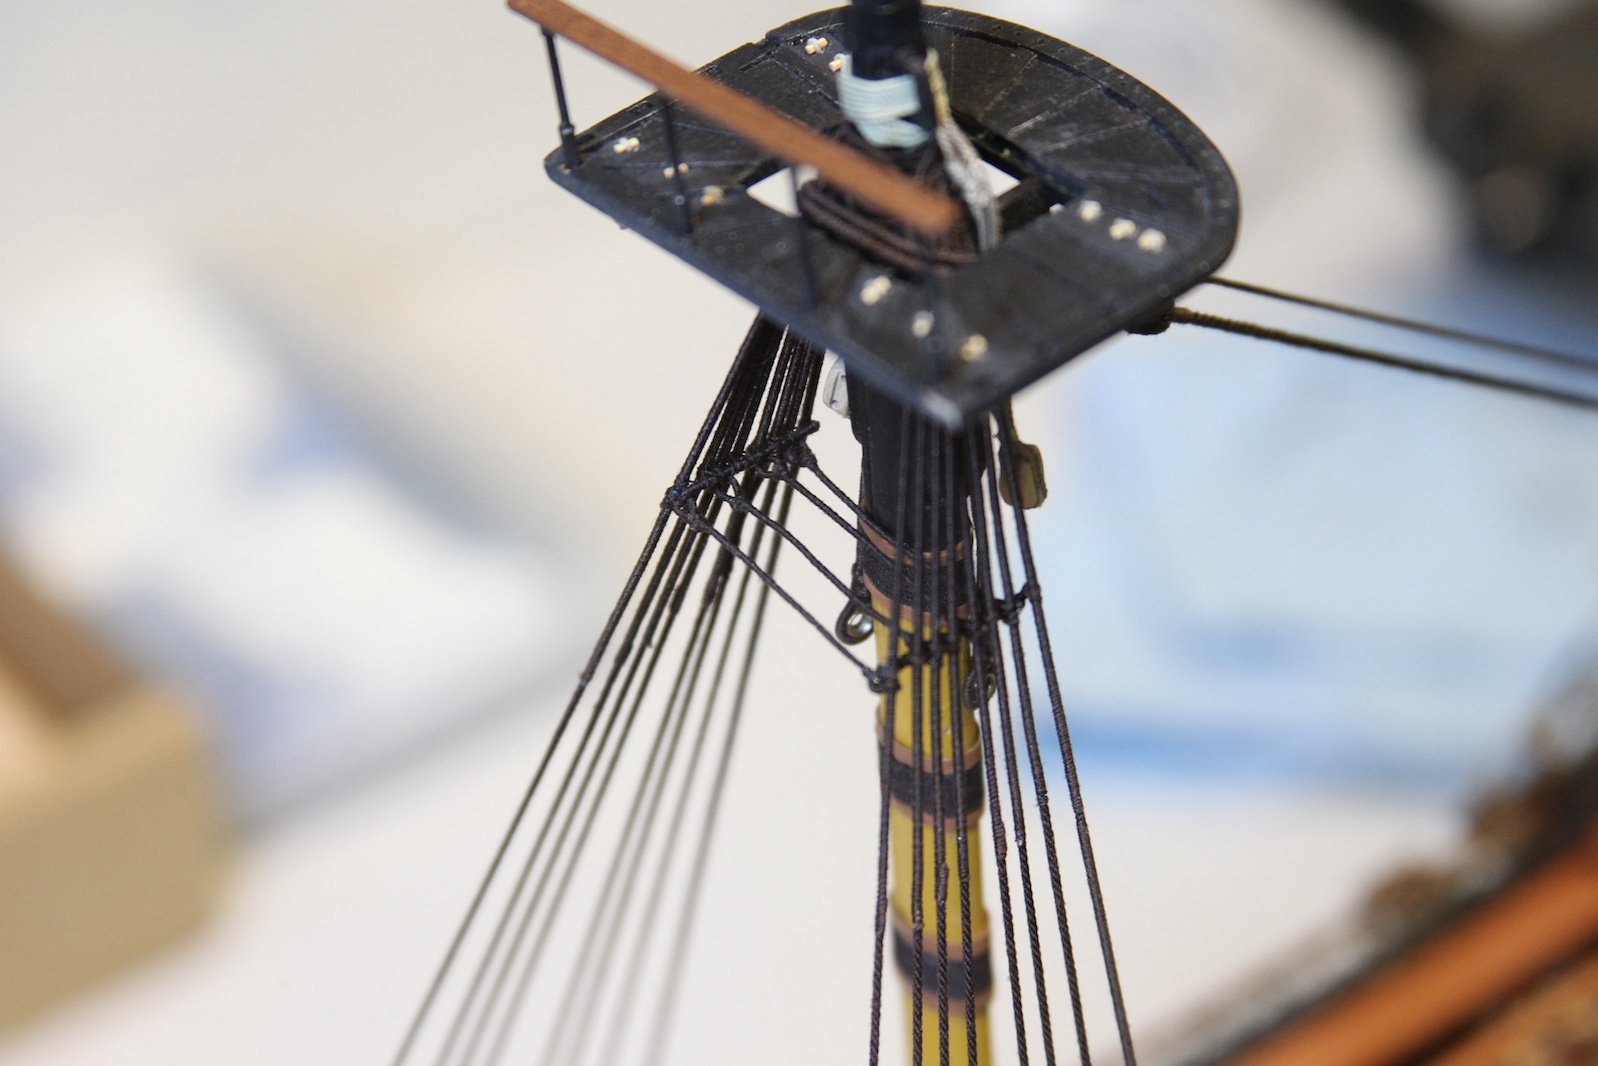
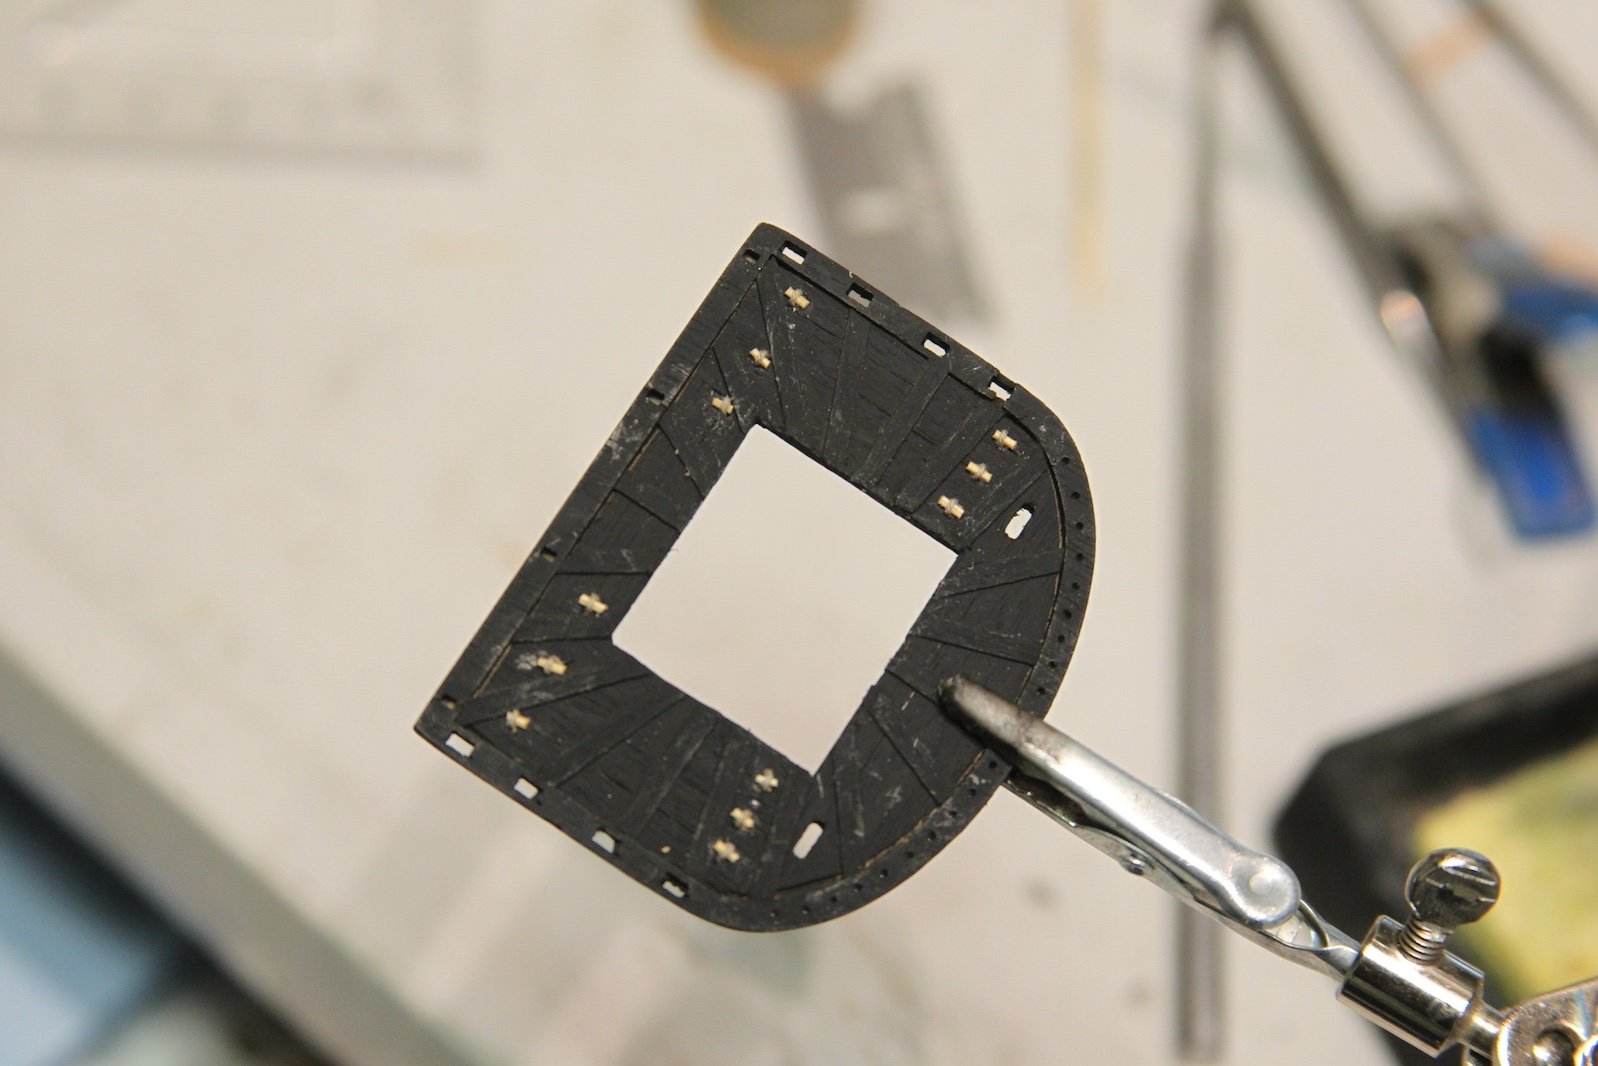
The next step for the mast tops is to mount the blocks beneath the tops. As with several of the fittings, there are a number of variations to the blocks mounted beneath the mast tops. As is my default for most of the build, I'm predominantly following the TFFM.
First - I've committed myself to pegging the strops of the blocks rather than taking the easy way out and using eye bolts. Truth be told, it would probably be little noticed if at all, but pegging the strops through the mast top adds one of those little nods of accuracy that die-hards may take note of. Now, that said - because these blocks are hardly visible after the running rigging is added - I am not above "cheating" a little bit with the stropping of the blocks by simulating the seizing with overhand knots and using a tiny touch of CA to secure the bottom of the strop to the block.
I start by tying off the strop at the top creating the eye that'll attach to the mast top, then I'll secure the block to it. Admittedly, I didn't do an awesome job of consistency with the size of the eye - probably should have found a proper size dowel to get more consistency and keep the 'seizing' from slipping. I stropped all 24 blocks - all the same size at 3mm. In truth, the inner blocks were a bit smaller than the outer - but not a noticeable size difference to me when mounted under the mast tops. Another little short cut that's hopefully not noticeable to anyone else once rigged. What is noticeable, is that I pre-drilled the top block holes a little wider to ease the rigging later.


The pegs are quite tiny and fiddly. I sanded down a bamboo toothpick to the smallest diameter I could get before it just fell apart - it ended up being just under 1mm. Then I cut off 1.5mm of the end with a razor blade to create the peg. I use fishing line to feed through the hole and pick up the loop in the block and pull it back through the mast top then add a dab of just slightly diluted pva to hold it in place.

Once all 12 per mast top are done I needed to touch up the paint a bit, then I test fitted then on the ship to make sure the cross and trestle trees didn't run the risk of fouling the blocks, etc.


HMS Pegasus 1776 by Moonbug - Amati/Victory Models - 1:64
in - Kit build logs for subjects built from 1751 - 1800
Posted
The upper mizzen shrouds are a repeat of the lower shrouds with smaller line. They're 2.5" circular, translating to .32mm in diameter with .15mm lanyards. The foremost shroud served its full length, the other shrouds served just below the hounds and the aftmost line is the backstay. Each shroud is paired with the rear pair splitting off as the third shroud and the backstay.
The process is the same as the lower shrouds for me, I have my smaller version of the "deadeye measurer" illustrated in post #283. I measure out the shroud, mark the necessary length that needs to be served with a tiny spot of white paint, serve the line, then rig it to the mast. Once again, I go back and forth from port to starboard to make sure the mast ends up straight. All that said - the backstay did present me with a choice to make. The kit instructions show the backstay attached to deadeyes hooked into eyebolts just forward of the quarter badge. Lees has the backstay attached to a deadeye plate bolted into the ship just above the badge, and the FFM shows a small stool fitted above and aft of the quarter badge (also shown in Vadas' vulture. Although I've been leaning toward the FFM with most things, I simply do not have the room around my quarter badge to accommodate a ledge. So I opted for my own version - an eyebolt and deadeye plate just above the badge, but I also attached the deadeye to a plate/chain then the eyebolt. I realize this departs from accuracy slightly, but it keeps lines from being fouled and is also pretty pleasing to the eye to me. It was definitely a bugger getting the deadeye evenly rigged amongst all the things happening back there however.
I kept most of the deadeyes loose until they were all rigged, then tightened and seized all the lines and lanyards.