


SawdustDave
-
Posts
1,770 -
Joined
-
Last visited
Content Type
Profiles
Forums
Gallery
Events
Posts posted by SawdustDave
-
-
Thanks Jon.
My carving has gotten a little rusty, but seemed to be coming back as I got into the second board. Times like this makes me wish I had stuck with my original plan to build her 1:50th scale.
Also, these closeup’s will help me go back and clean up some of the rough spots, although, the scale really doesn’t allow a lot of improvement.
Two more to match these, then I think the others will be a piece of cake by comparison.
Cheers
- CaptainSteve, Piet, Canute and 3 others
-
 6
6
-
Two quick shots this morning....
First - The davits completed painted and installed....Second - The first two gangway board carvings done....
-
And whilst in the mood, decided it's about time to break out the carving utensils.... been looking forward to this for a very long time.
-
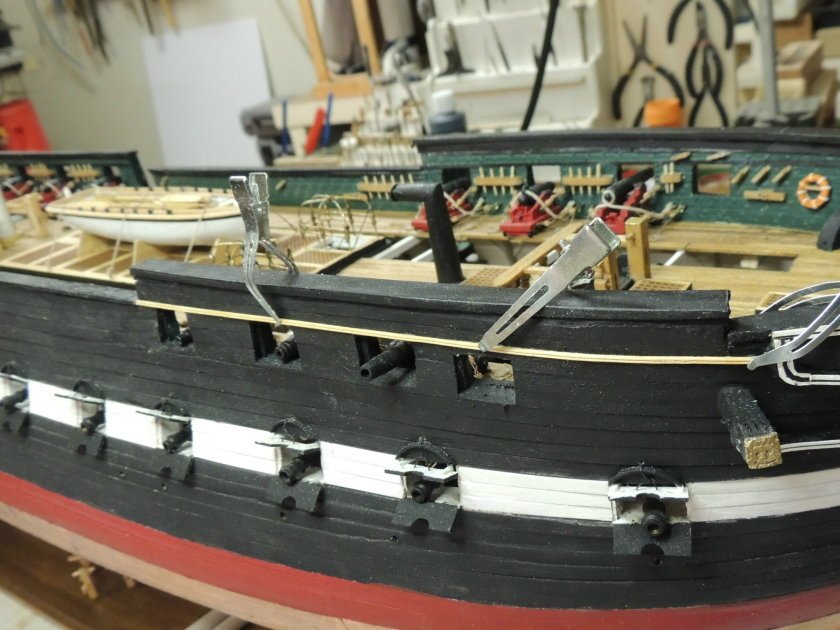
As I began working on the three sets of davits, I am running across a few details I left undid.... with intentions to eventually come back to them.
One example being this strip of shaped molding just above the upper gun ports.
I remember deciding that I didn't wish to take the time of scraping the profile into the strips at that point..... then completely forgot about it until now.No time like the present, huh?
- Canute, CaptainSteve, JesseLee and 9 others
-
12
-
-
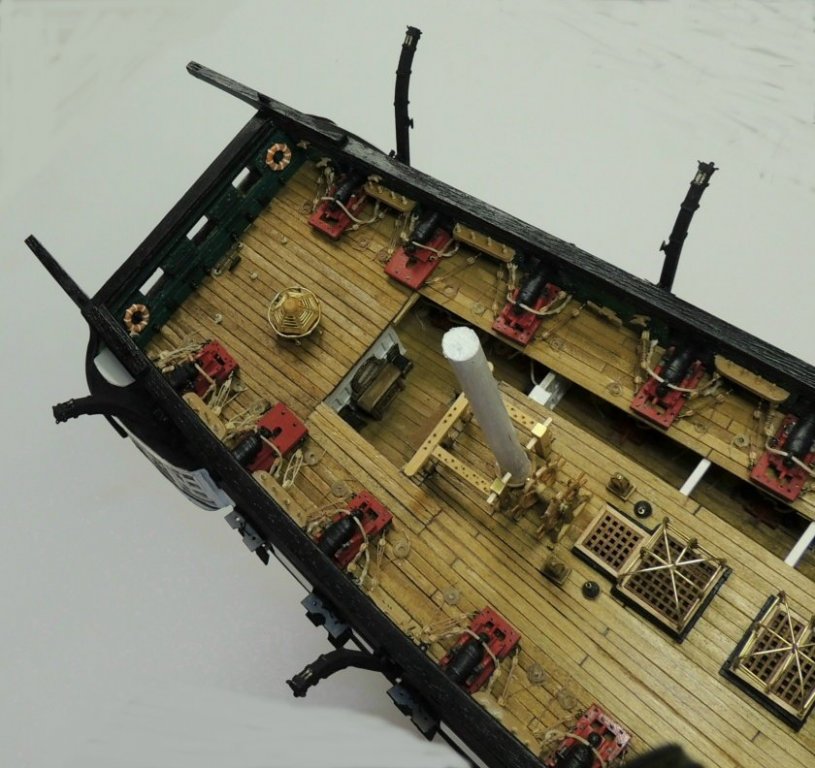
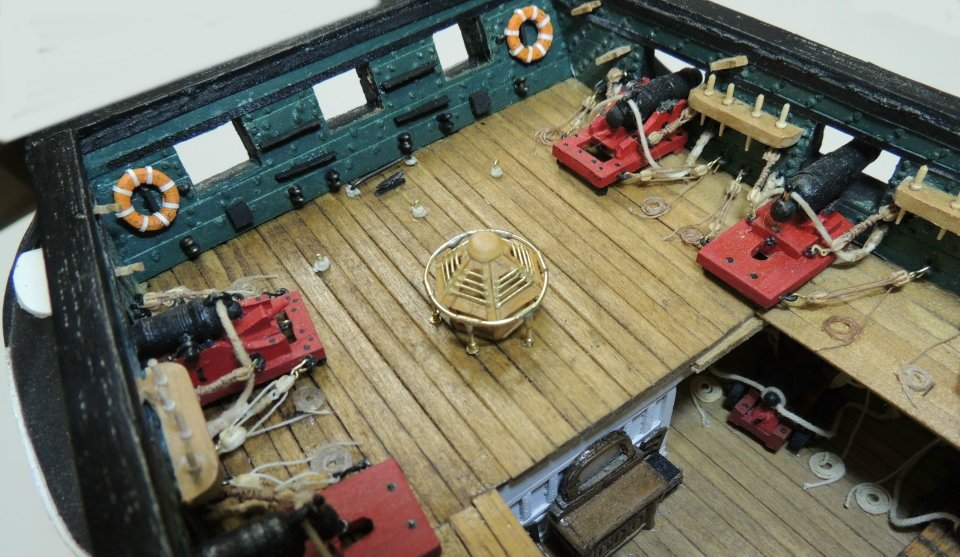
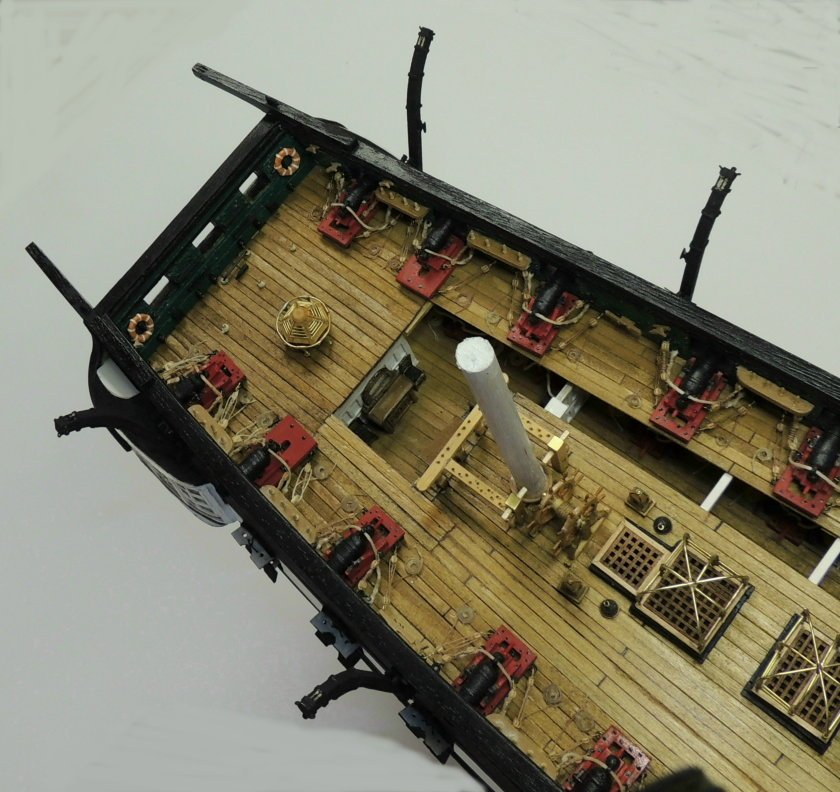
Inboard Stern Bulwarks....
Along with installing the skylight fixture, I just finished wrapping up the various fixtures found on the bulwarks of the stern as well as a few deck trimmings.
One note regarding the skylight....
I found the overall circumference of the brass rail surrounding the skylight is slightly undersized, which prohibits the placement of the brass sheet on which the skylight base should be mounted. Haven't decided yet whether to simply leave as is, or remove the entire rail assembly and e-make larger. Not real crazy about that option to say the least.Otherwise, I am ready to begin working on the three davits.
- Geoff Matson, CaptainSteve, Canute and 7 others
-
10
-
Thanks for the visit Jon. Interesting questions -
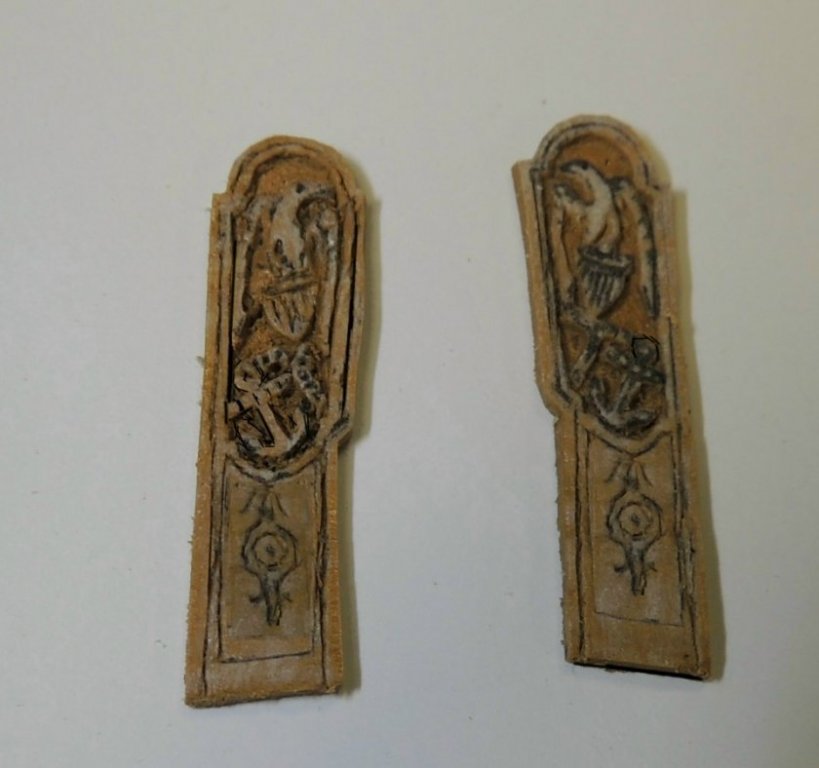
The wood I used to build the panels is indeed very thin.... 1/64th thick.... it is a single ply taken from a piece of 1/16th" plywood I found in my boneyard pile.
Of course, the thickness is so thin it allows very little edge surface to glue the tiny frame butts, so I simply reinforced the back side with a strip of paper.... seen below.This shot taken of the back side of the two panels I was unable to use.
Note the thickness of the paper on the left panel vs. the paper on the right after I have peeled the paper away from the CA leaving very thin remains.
Also note the outside rails on the left panel are noticeably wider than the rails on the right panel. I made the rails a little oversized to allow for trimming and sanding to custom fit into place.

Hard for me to say the best technique for building this fixture. I used auto cad to work out the geometry and it came pretty darned close in spite of the need to re-cut the two panels.
You're so right about the slightest bit being off making a huge issue at this scale.
Just allow for, and be prepared to make some very small tweaks in the assembly process.Hope this helps Mate.
- Canute, Piet, Geoff Matson and 4 others
-
7
-
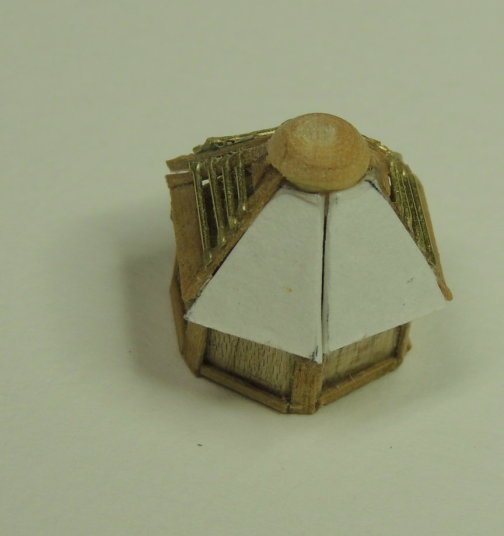
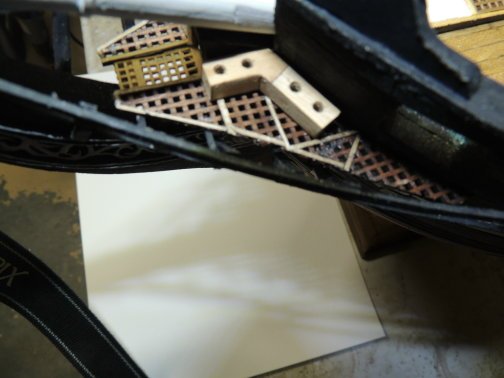
Skylight progress....
Fitting the six wedge shaped light panels to the base has proven to be a little tricky. After creating all six panels geometrically identical, I was able to get four of them to fit fairly tight As careful as I was in laying out the geometry of the six panels, I just couldn't make all of them come together in assembly.
Seen in the second pic, I have cut the paper patterns which will be used to re-make the last two panels.
- Geoff Matson, CaptainSteve, Piet and 7 others
-
10
-
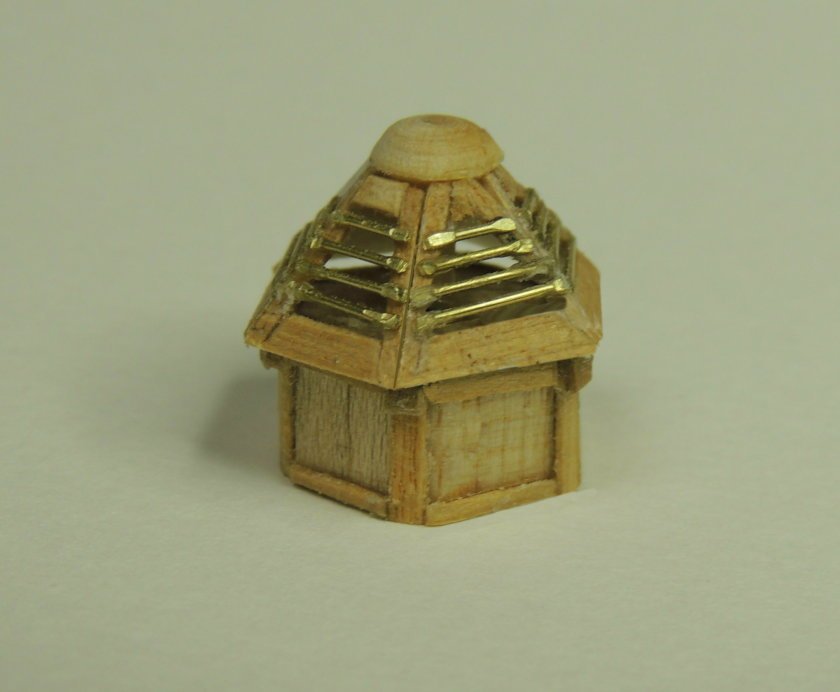
Skylight fixture....
Progress on the skylight fixture is coming along very slowly. The brass railing has not been cleaned up yet, and I haven't added the stanchion footings.
After I finish gluing the brass bars in place, I'll try to find a way to assemble all those little parts.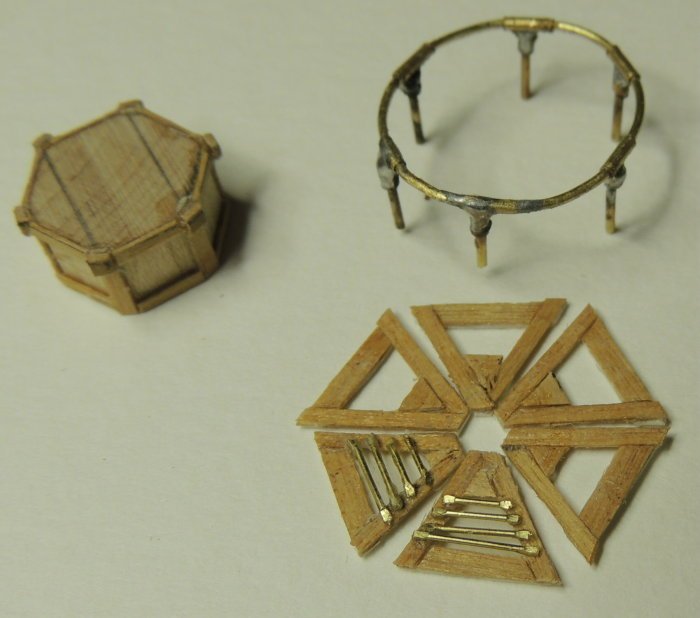
- Ryland Craze, Canute, mtaylor and 10 others
-
13
-
OK, so maybe I can still claim “the FIRST” rigged Confederacy .... yahaha
Dave
-
She looks great sir. You have done a wonderful job.
-
-
The case gets stronger and more stronger Jon.
With that information, I now feel compelled to provide for the safety of my crew.
I am a real “ People Person” to the core.
Dave
-
5 minutes ago, JSGerson said:
I got curious about the life preserver and found this at Nauticapedia:
So yes, the Constitution could of had a life ring (kisbie), but not until 1855 or later.
Jon
That pretty much solves it for me Mate.
Thank you for all that effort.
Dave
- Canute, Piet, CaptainSteve and 1 other
-
4
-
Finally made it over to your Confederacy log Vic.
So you will become, as you know, the second fully rigged Confederacy in the world.
Whether completely accurate or not, I would not take anything for my rigged model.
Can’t wait to see your final.
Pulling up a chair from here out Mate.
Dave
-
Good question about the steps Jon.
The steps are hand cut from basswood. The mistake I made with the first long solid piece, was that I failed to do the layout with the strip positioned at the exact angle of the bowsprit. Everything looked great until it was positioned onto the bowsprit.
Part of the issue was that the angle of my bowsprit is not correct, as noted by the amount of exposure where it passes through the bulwarks of the bow and then through the deck planks. This error is way beyond any possible corrections at this point.
So my only reasonable fix was to re-cut the steps to fit the angle of the bowsprit surface.
I do recommend a jig that will hold your strip of wood at the exact angle when laying it out. I also suggest making the cuts on a wide strip and then ripping to the scale width after cutting, filing, and sanding. Very careful measurement of the flats and risers being the key, I simply used a piece of paper as a spacer to make the measurements from one to the next.
Hope this helps.
- Piet, CaptainSteve, Canute and 1 other
-
4
-
6 hours ago, mtaylor said:
.... would the Constitution have had the life rings? I thought those came about much later.
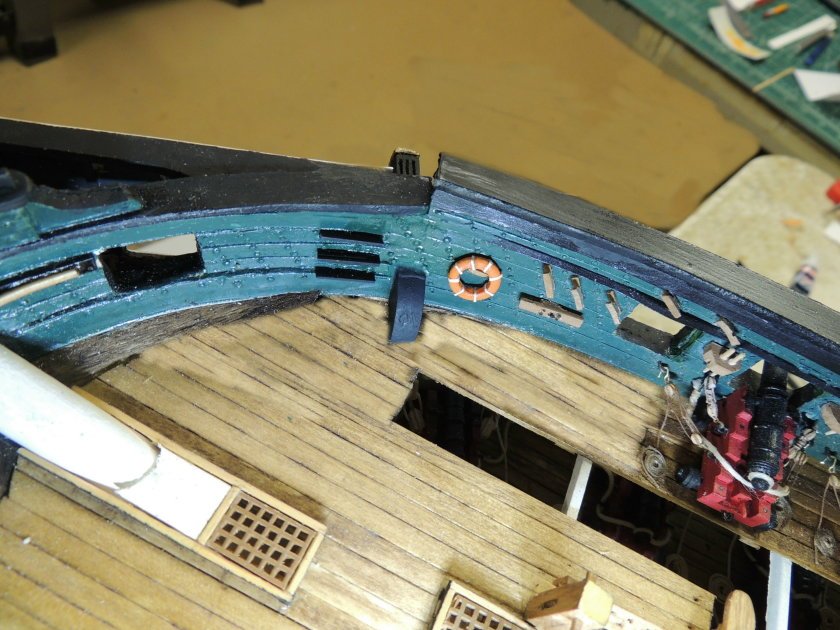
Pat, Mark, Paul.... Yes, I saw that one coming. It did occur to me whilst turning those little rings. Actually knocked off production at that point, but was having so much fun making them I guess I was compelled to finish the one I was working on.
So, naturally, I then had to see it on board. It’s just hanging on a cleat with no glue.
At this point, I must admit, I’m a little torn between the obvious historic fact and the optics.
We all have to agree, they’re just “cute as a little button”.
Thoughts?
Dave
- Piet, JesseLee, CaptainSteve and 3 others
-
6
-
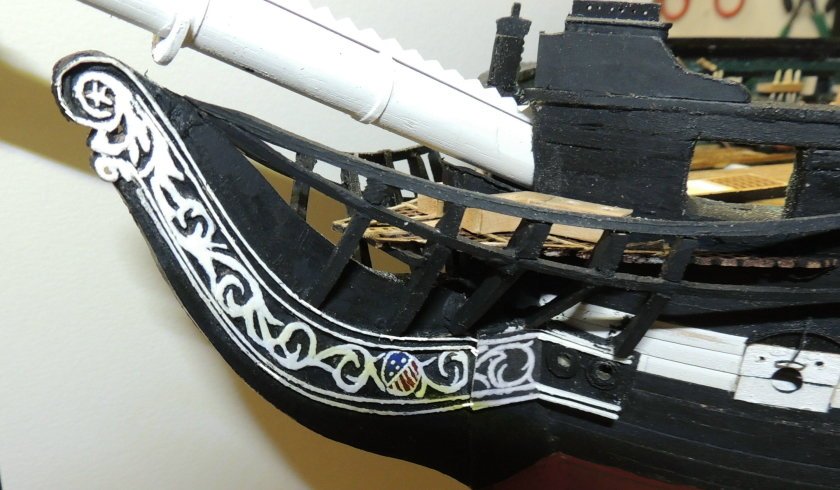
Bow Structure Progress....
I finally corrected an issue that has bothered me for months.... the bowsprit steps. It was brought to my attention by a local modeler who asked me about the angle of the steps.
OK, so the flats of the steps were noticeably pitched at an angle that would not have served well for walking on.
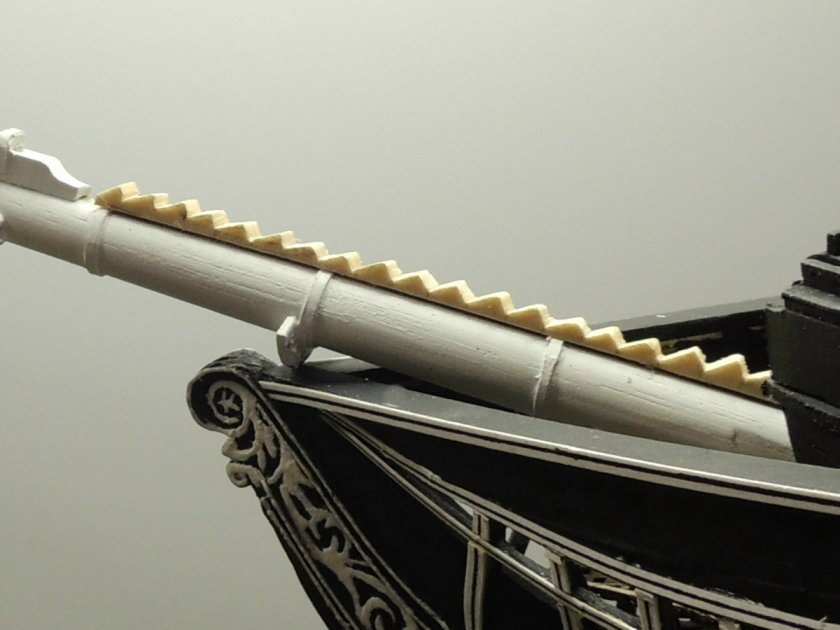
So, I ripped them off and re-cut them.... much better.
I also painted the flats of each step. Also note the gammon irons have been added (a royal pain in the butt). I definitely think they should have been added before installing the heads.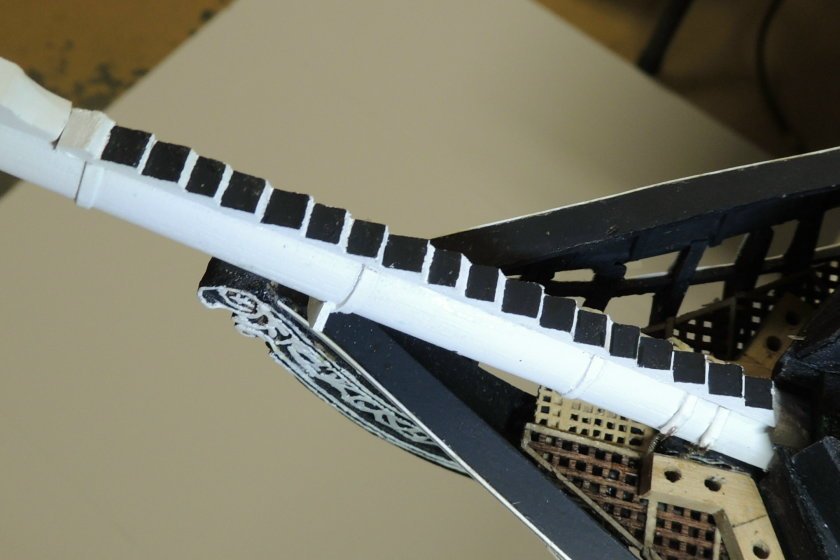
Next, I created the little life ring - and added the three steps to the bulwarks.
Finally, I was able to fill in the opening above the bowsprit....
Think I'll move to the stern and begin detailing the stern bulwarks next.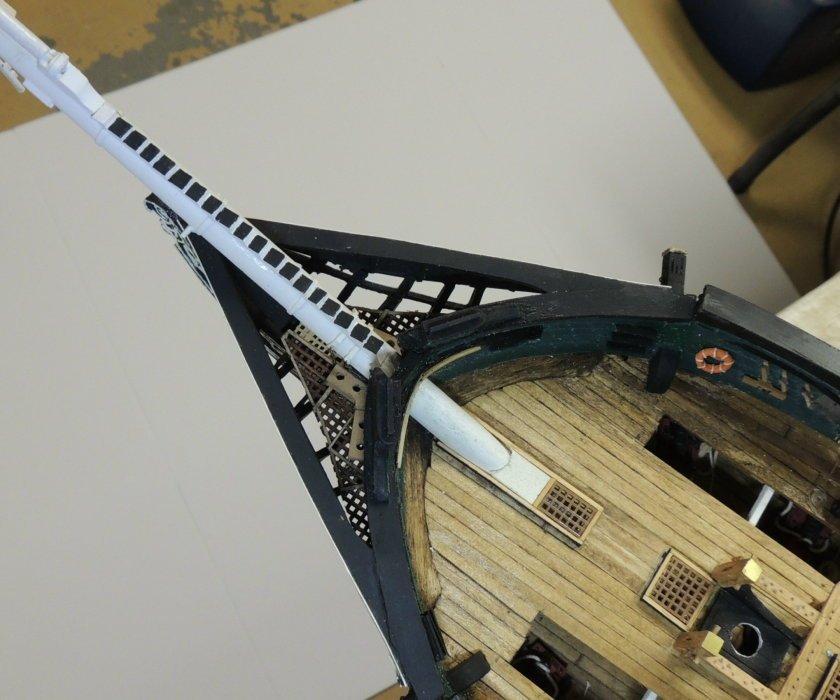
- yancovitch, Canute, JesseLee and 11 others
-
14
-
13 hours ago, Piet said:
That's a sneaky way of doing it Dave, but effective. It looks really great.
Cheers,
Tried masking and painting Piet.... What a mess!
Just call me Sneaky Dave.
- mtaylor, Piet, CaptainSteve and 1 other
-
4
-
2 hours ago, reklein said:
Very tidy paint job on the headworks. Would you please show us how you did it??
Sorry Bill. I tend to forget to post photo’s explaining most of my techniques on this particular built since there are so many excellent comprehensive build logs for this ship.... Tom and Ken among many others.
However, I will explain the clean trimming for your benefit.
The technique I used for the white trimming of the rails is simply using Titebond wood glue to apply very thin strips of a heavy watercolor paper along the edges.
Actually, I used CA gel to secure the beginning end and then, after 30 minutes set time, was able to glue up the length of each strip a couple of inches at a time.
I would have several strips going at a time, so it actually went pretty quickly.
I used an old fashion office paper cutter to make precise width slices.
I am experimenting with thin watered down CA to give them a seal coating. I will be very careful to come up with a coating that will not yellow the paper stock.
-
Thanks Tom, Pat, and Piet (and all the visits from friends).
As you would expect, the starboard side went considerably smoother. Here's the single shot taken this morning before I begin working on the unfinished inboard bulwarks in the bow and stern area.
Such a pleasant morning for taking her outside for this shot.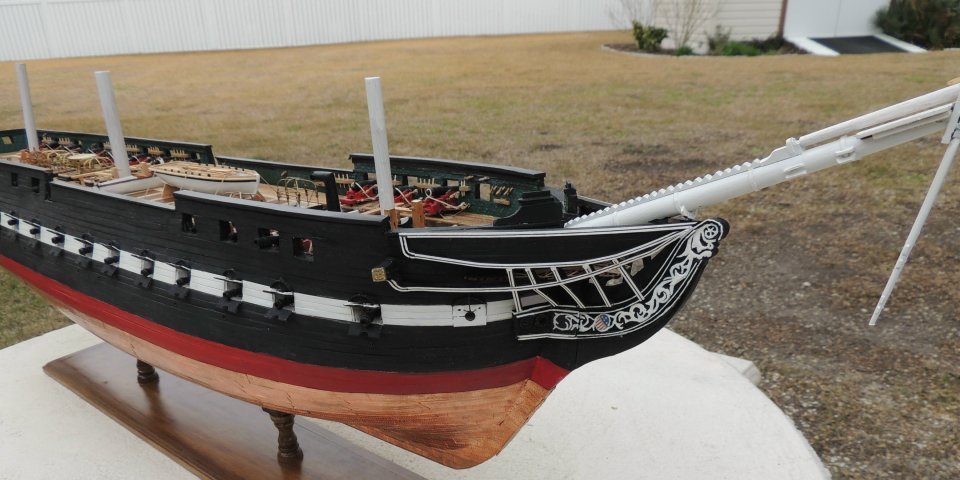
-
PORT SIDE COMPLETED....
I decided to completely finish the port side head rail structure before going to the starboard side.... primarily because I was not sure how I would approach the white edge trimming.
The second photo includes the cat head, installed, but not completed (the rigging of the eye bolts have not been done)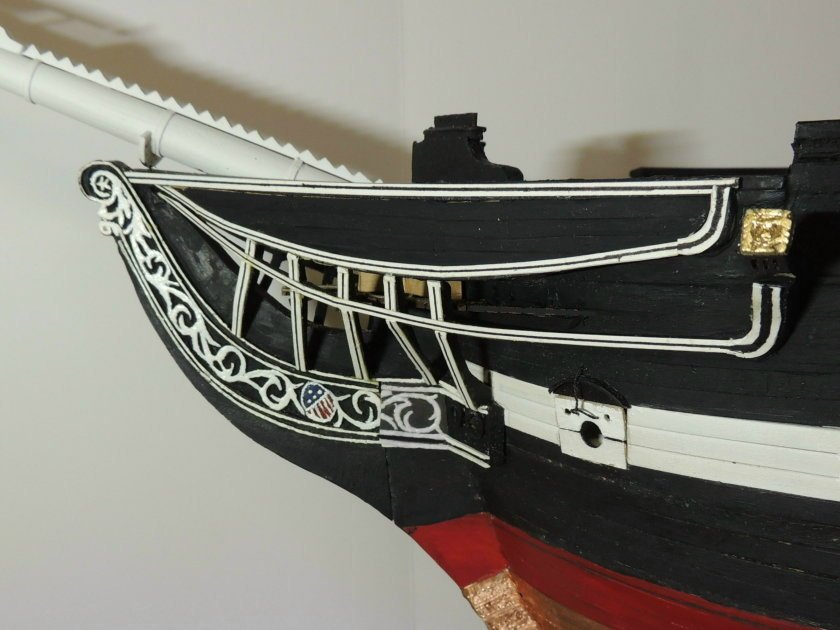
- Canute, usedtosail, BANYAN and 10 others
-
13
-
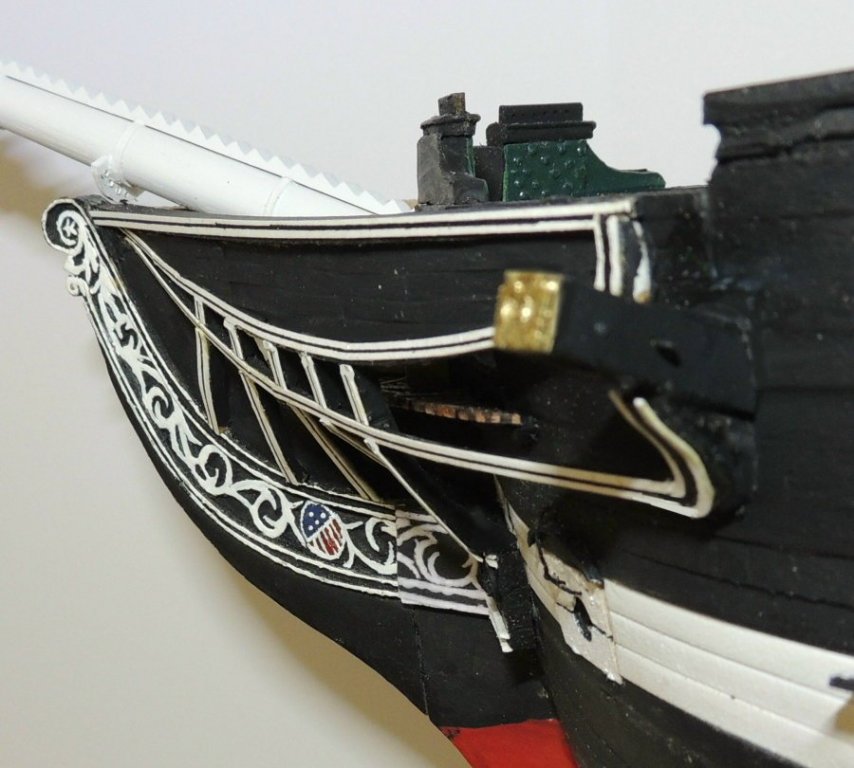
PROGRESS....
It's been a while, so I took a couple of shots of the current stage of progress on my attempt to frame out the beak structure.
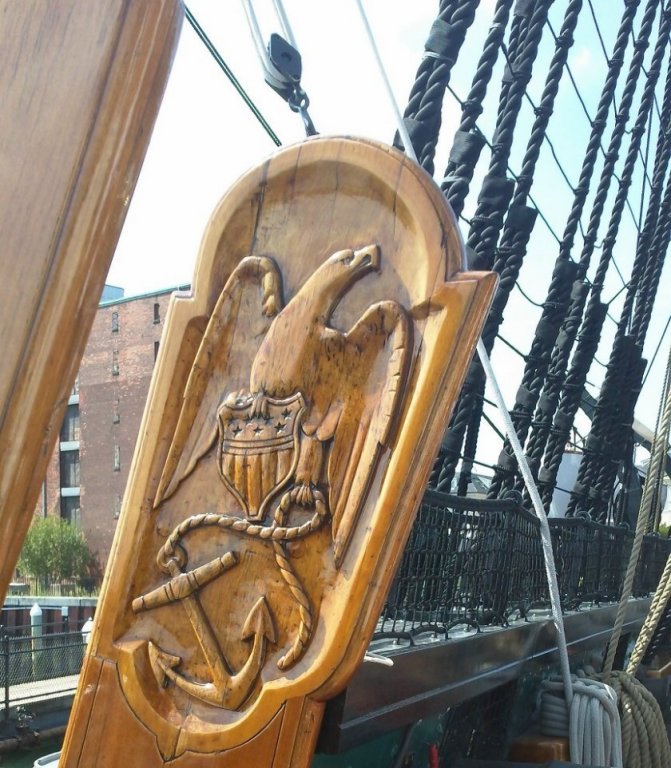
The cat head carvings....
Somewhat disappointed at the details after painting them, but I'm going with them.... these were cut off and glued to the cat heads before installing.
I'll come back to them in my next posting.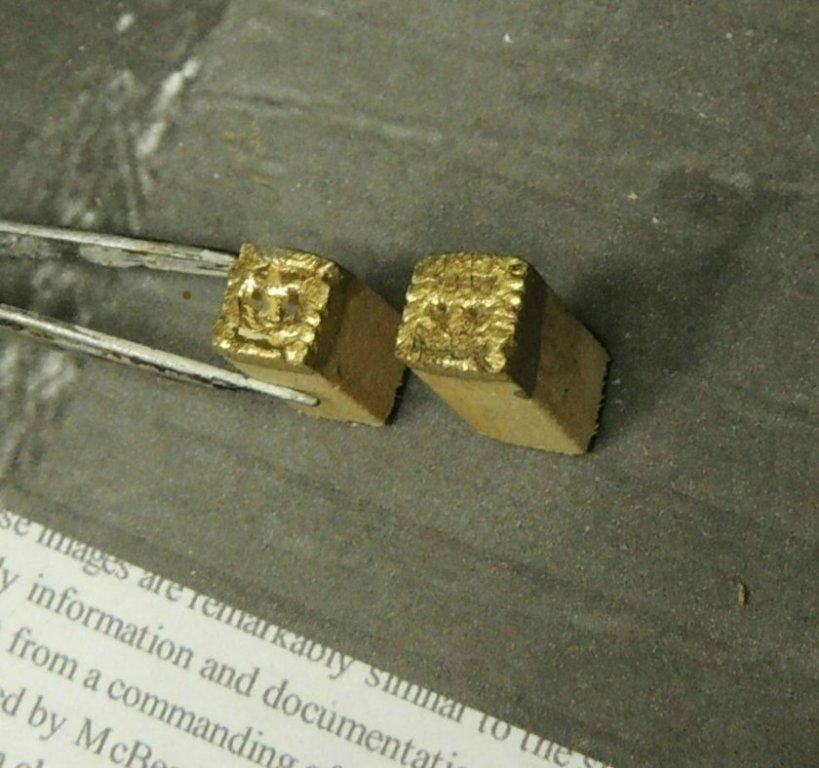
Then there's the framing out of the beak structure.
I am really embarrassed to admit the number of "do-overs" required to get to this stage.
Ready to add the top rails and panels and then begin adding the white edge trimming.
Grating and heads installed....
-
That is great news Nenad.
I don’t know how you have managed to do the work you have done up to now without clear vision.
- Omega1234, popeye the sailor, jay and 3 others
-
6


USS Constitution by SawdustDave - FINISHED - 1:60th Scale
in - Build logs for subjects built 1751 - 1800
Posted · Edited by SawdustDave
PLANNING AHEAD....
While working on the several remaining board carvings, the sequence of upcoming progress is going through my mind.
My thoughts are.... it seems like I should work on the bumpkins and channels next.... followed by hammock stanchions and netting.
I'm throwing this out for input from some of you who might be kind enough to give me your thoughts because I'm pretty bad for getting myself in a jam by doing these things in the wrong order.
Any thoughts?