


Landlubber Mike
-
Posts
4,547 -
Joined
-
Last visited
Content Type
Profiles
Forums
Gallery
Events
Everything posted by Landlubber Mike
-
 I don't often check the sold history prices, but I've watched various items I might be interested in to see where auctions tend to shake out. What's interesting is that for some kits, the final selling price after a bidding war can be $100+ over what it sold in another relatively contemporaneous auction. Just have to do your due diligence.
 -
I was very surprised that some kits like Jeannin were (and are) still available. That one easily goes for $300+ on eBay.
-
I've never bought from Andy's before, but I have to say, that was incredibly nice of him to offer the kits at the normal pre-WW-closing price. I'm now going to add his shop as a go-to for my modeling needs.
-
They posted on Facebook.
-
I also picked up the Jeannin Stahltaube - on my wish list for a long time now but has always been in the $300+ range. Also picked up an Albatros B.II and Junkers D.1. Hope it all works out! Almost everything looks like it's sold out already - wow! If you missed any, Sprue Brothers will run a similar pre-order.
-
Nicely done Kevin!! Beautiful work on a cool subject.
-
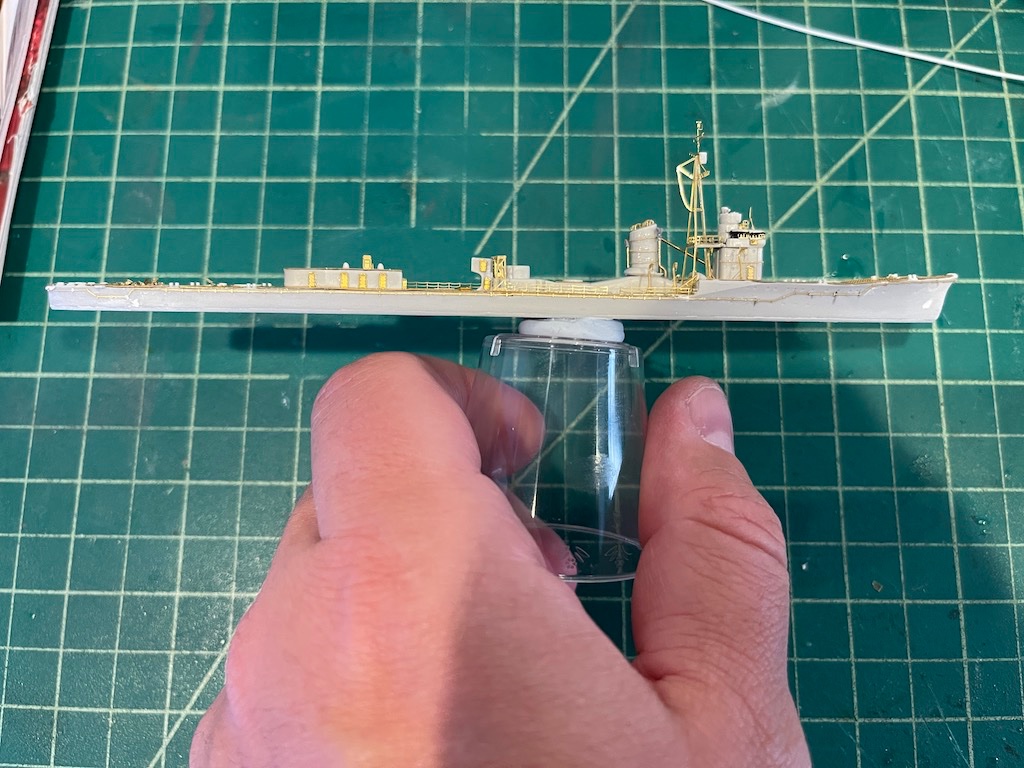
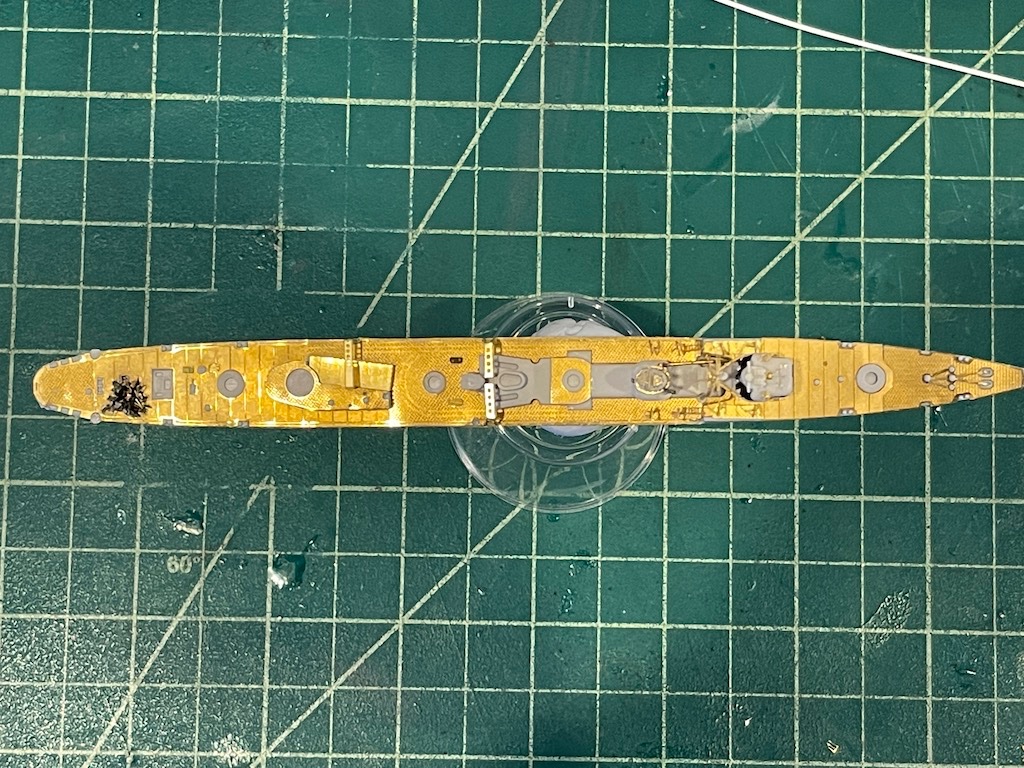
Quick update on this one. I added some more PE details to the Asashio in the hopes of putting as much on as possible without interfering with painting later. This diorama is going to be of the Asashio getting repairs by the Akashi at Truk after the Battle of Midway. The only details I could find were that the ship was hit by a 500lb bomb in the stern area and strafed, and unfortunately, I didn't find any pictures of the damage. The bomb killed 22 crewman but otherwise the damage couldn't have been too bad as the Asashio not only helped its sister ship the Arashio rescue 240 survivors from the sinking Mikuma, but it also escorted the crippled Mogami to Truk. Using my micromotor, I went ahead and carved out an area to represent what the damage could have looked like. Interestingly, these 1/700 ship hulls are hollow, which made the work pretty easy. Having the brass deck on top helped also to represent the damage to the deck. From there, I had some extra junk pieces of PE from earlier builds that I ended up twisting and cutting and threw it into the hole to represent debris. Here is what it looks like at the moment: There are a couple of paravane towers along the sides of the hull just behind the hole (that sit on the circular platforms in the picture above). I'll probably twist up the starboard side to show it mangled as part of the explosion. I'll add some twisted wreckage and other debris, including beating up rack that sits on the rectangular area in front of the hole. Question for the group: I might actually extend the hole to the starboard side - does anyone think that is a good idea? Again, I don't have pictures of the damage, and have to assume that the 500lb bomb didn't create massive damage given that the ship continued operations until it got back to Truk. The hole still might be a little small though, so I can show a little more extensive damage by taking it all the way to the starboard side. Apparently the ship received emergency repairs by the Akashi, then went to Sasebo for more extensive repairs. So maybe extending the damage a little more would be more consistent for what happened. I also plan to display the Asashio and Akashi pointed to the right, with the Asashio off the starboard side of the Akashi, so the damage will feature prominently in the diorama. Thanks for looking in!


-
Beautiful job as always Craig, and the display base is fantastic! You've inspired me to pull mine out once I get through my current plane models in progress.
-
Craig, that prop is incredible - really nice job! @ccoyle, I used Infini line on my Shimakaze build and really liked it. It's definitely better scale for ships than I think EZ Line, which by the way isn't too bad itself. Properties are very similar to EZ Line. EZ Line I believe is flat, but not sure about the Infini line - at such small diameters, you really can't see the difference so personally I'm not bothered by it. As Craig noted, it's nice that Infini includes diameters (in deniers). FWIW, they also make rigging line for planes. Free Time Hobbies has Infini line in stock, in fact, I just ordered some as part of an order for other stuff that arrived today.
- 140 replies
-
- 10
-

-

-
That rigging looks beautiful Craig - spot on man!
-
That's coming out insanely good Ron. Looking forward to your final display! For your diorama settings, do you cut off part of the bottom of the hull to reduce the height? If so, how do you do it? Cutting through something strong like MDF bulkheads would be a bit nerve wracking!
- 542 replies
-
- 2
-
-
- Sphinx
- Vanguard Models
- (and 3 more)
-
My sister in law has one. Cute dogs! Yours is really adorable. Love the eye patch.
-
Wow, that looks fantastic OC! The excavation kit looks like a lot of fun for kids - heck, I would have a lot of fun with it!
-
F-86F-30 Sabre by Egilman - Kinetic - 1/32nd scale
Landlubber Mike replied to Egilman's topic in Non-ship/categorised builds
Hey EG, looking forward to seeing how you work out that Marston matting. I saw the various PE sets out there and thought it would be cool to do a diorama using it - nothing like learning from the master so I'll wait to see what you do -
Really nice job Kevin breaking up the solid mass of color the way you did. Looks fantastic! I need to start doing that on my planes.
-
Best wishes Bob - speedy recovery and you’ll be better than ever.
-
Very cool model OC. Looking forward to this one!
-
That soft line between colors came out really well. Nice job on this one! As much as I like using Vallejo, I have issues at times with the nozzle getting clogged. Flow improver and thinner help a lot. Also, make sure you really clean your airbrush. Vallejo I think leaves a trace amount of clear residue that you might not see. So, you think you have your airbrush cleaned out (needle, nozzle, etc.), but it's still a bit clogged. I try to remember to spray water to test if the nozzle is clogged before filling the paint cup, but I forget sometimes and it's a pain to then have to dump the cup, and really clean things out if it's clogged. Using something like a bit of lacquer thinner will really clear things out. It could also be older paint that has just clumped a bit.
-
That's a real beauty there John. I've always wondered how these were to put together. You're a walking advertisement for this kit - looks fantastic!
-
F-86F-30 Sabre by Egilman - Kinetic - 1/32nd scale
Landlubber Mike replied to Egilman's topic in Non-ship/categorised builds
That's looking really great EG! Nice job! You're on the home stretch!