


Landlubber Mike
-
Posts
4,551 -
Joined
-
Last visited
Content Type
Profiles
Forums
Gallery
Events
Everything posted by Landlubber Mike
-
 Not sure what I'm going to do yet. Frankly, I'm a little intimidated doing it. Not exactly an airbrush pro, and I'm unclear how many layers of paint I'll need before getting to the final stage. If I did black base, I might start with black on the whole model, then a darker gray color along the panels across the whole plane, then on the whole plane go with the base coat gray color that would be the base for the top half of the plane. I'd stop there for the top half of the plane, and then go a lighter gray until finally hitting my base coat insignia white for the underside of the plane. Not sure if that all makes sense, and it's a lot more rounds of painting than I'm used to doing. The alternative would be to paint the top half in the base coat gray and the bottom in insignia white, and then use washes, oils, etc. to break up the solidness of the base coats. I'm somewhat leaning towards this option, but haven't decided just yet. Part of me wants to take the opportunity to try out blackbasing, but it does seems a little trickier to pull off.
 -
You did a really nice job with those windows. With their size, I'd be nervous if there were imperfections. Yours look perfect - did you use Novus or any of the other polishing compounds? I started using Novus on my current Wildcat build and it helped clean up the clear parts.
-
Great work Patrick! Especially at such a small scale.
-
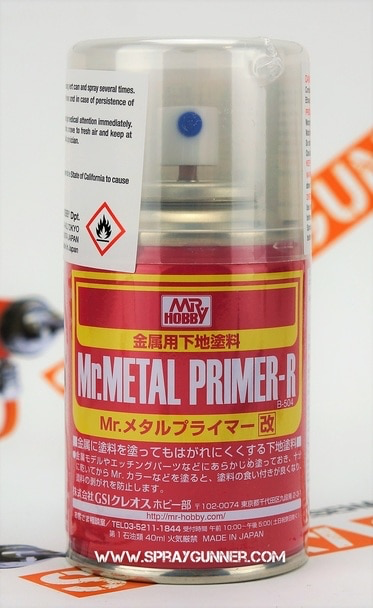
With any brand, vallejo, Mr. Finisher, etc. I generally leave on my primer coats undisturbed for at least 24 hours. I've had Vallejo peel even after that period. For example, on my last build, I had used Tamiya tape inside the cockpit to help seal it when painting the fuselage. It pulled the paint and primer off the instrument panel - which probably had been primed and painted weeks before given the rate I build. I can't recall whether the paint that was pulled was off plastic or metal though. On metal, Vallejo primers don't seem to have very good adhesion. The Vallejo primer I used on the PE frames for the open panels on this build scraped off fairly easily, and I've had that happen a number of other times. Maybe I haven't pre-treated/cleaned the PE frets enough, or maybe oils from my hands left a film on the PE, I don't know. I picked this up a while back but haven't used it yet. I might try spraying the PE frets down with this stuff first to give a better base for Vallejo to stick to. Of course, it's totally possible all this is due to user error, which, if you ask my wife, normally ends up being the case.
-
I'm a big fan of acrylics, especially when it comes to clean up. I hate cleaning out my airbrush after using Tamiya or other lacquer/acrylic lacquers. What I've found, however, is that Vallejo primers can pull up when taped, especially when painted on metal surfaces. For areas like the cockpit where I won't be taping, I use Vallejo primer just because it's easier. For areas like car bodies, plane fuselages, etc., I think the lacquers are a much safer bet.
-
I spray mine in a booth that is vented out a window. The booth is in my basement, and this stuff still stinks up the joint.
-
Thanks OC - I have to say, this primer really does all the work.
-
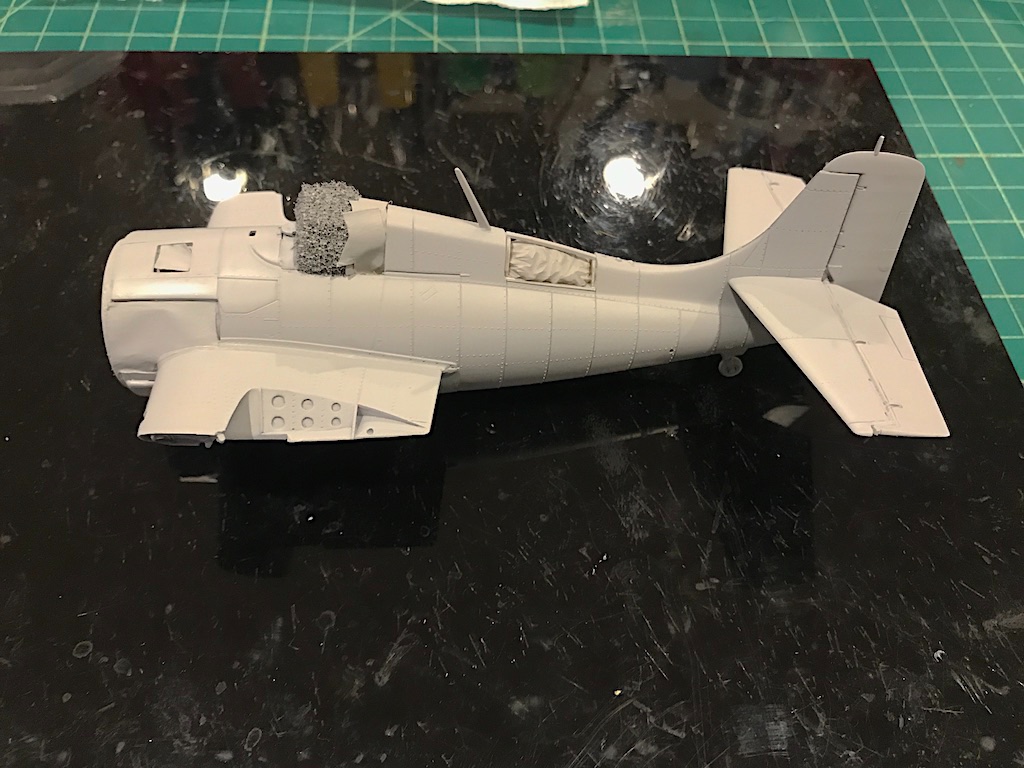
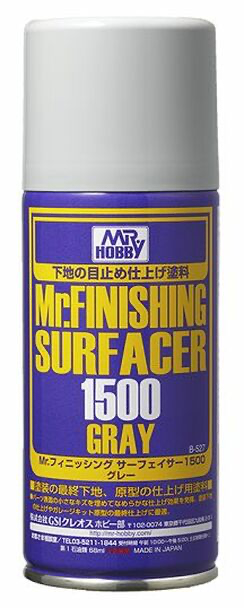
Well, it's taken me a while to get here, but finally got the fuselage primed. Woohoo! I love using Mr. Finishing Surfacer right from the can. It dries (very quickly) in almost a baked on consistency and can be sanded, unlike Vallejo which is prone to peel. Its leveling properties are almost magical. I had a spot where too much spray had accumulated so I was preparing myself to have to strip it off and re-spray, but I came back a half hour later and everything was perfect. The gray is nice because it highlights any flaws or other issues that need correcting. Fill, sand, re-spray -- piece of cake. Highly recommend it. Really stinks though, so make sure you have a spray booth with exhaust or a nearby window. I'll inspect for any issues tomorrow, and then I might be able to get the base colors on. I'm still considering black-basing the entire plane, then slowly coming back to a white underside and gray topside. Will have to sleep on that one though.
- 241 replies
-
- 10
-

-
It does, but I have three kids under the age of 10 so I need to be careful. It's a good thing most of my modeling happens after they go to bed. 🤬
- 179 replies
-
- 8
-
-
- hatsuzakura
- pit road
- (and 2 more)
-
Good question Yves. So far I'm self-medicating with tequila and bourbon which seems to be going ok. The interesting thing is that despite the complexities of working on this one, I've been fairly even tempered and not at all frustrated. Maybe it's from having super low expectations. My 1/72 and 1/48 planes on the other hand drive me nuts as I seem to break things off almost as soon as I can put them on. Probably the worst for me was working on my 1/64 Badger build - I can't tell you how many times I broke a cannon loose off the deck, or an errant elbow hit the bowsprit or a spar and popped off the rigging. No amount of tequila or bourbon could settle me down when that happened!
- 179 replies
-
- 9
-
-

-
- hatsuzakura
- pit road
- (and 2 more)
-
Good question. I think you're right about the solid hull or the availability of the Morgan as having something to do with it. If I ever get through my stash of models, I was thinking of scratch building a weathered whaler like the Katy Cory - so much cool stuff you can do with all the whaling equipment.
- 109 replies
-
- 1
-
-
- model shipways
- kate cory
- (and 1 more)
-
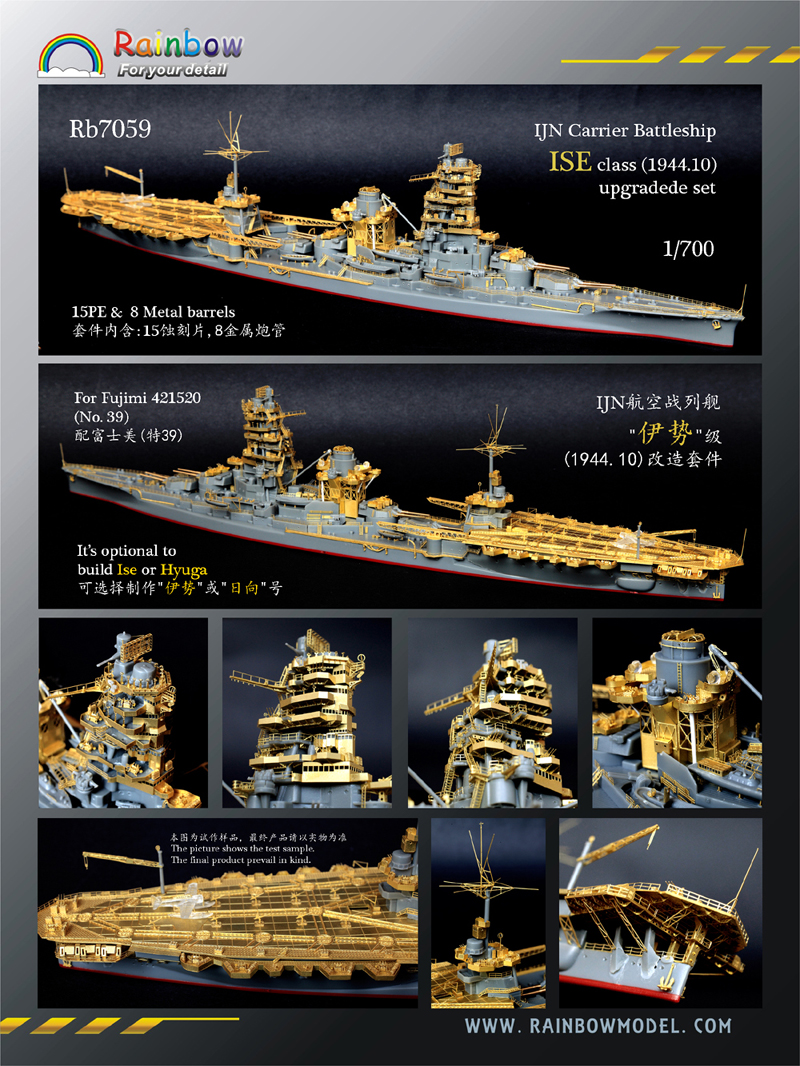
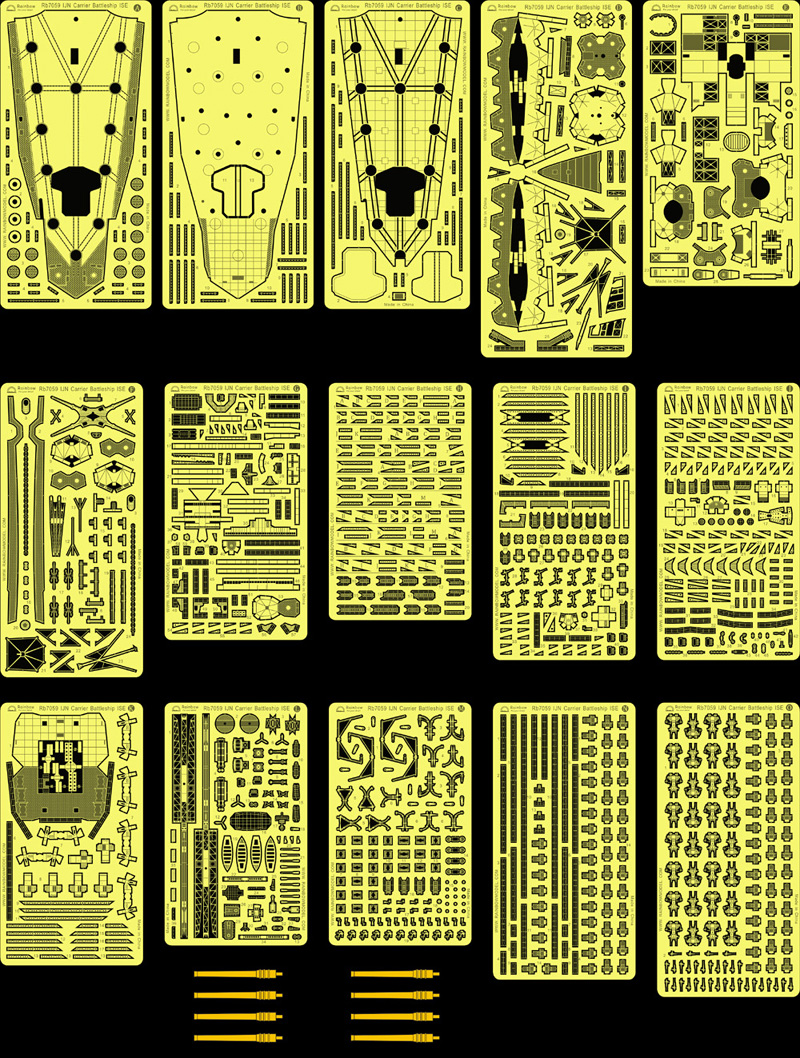
Thanks guys, we will see how it goes. I've always had very good finger dexterity, but the eyes are another thing. For most of my life I had great near vision, but now in my mid-40s, that's kinda going south. So far I'm fine with the Optivisor but my guess is that the sands are running out of the hourglass on these kinds of models. Too bad as I love this scale for just the sheer number of different type of vessels, especially on the auxiliary side. I've picked up a number of kits from oilers to repair ships to submarine and seaplane tenders, etc. as well as the more standard fare like cruisers and battleships and aircraft carriers. I'm also hoping to display them as waterline dioramas, which is a little easier at this scale (or at least they will take up less space) - big reason why I'm taking a big interest in your waterline techniques! I originally picked this Hatsuzakura as a fairly inexpensive way to learn how to do PE before tackling my 1/350 ships. Little did I know how tricky PE is at this scale! When i get back to my 1/350 Shimakaze, I'm sure the PE will look huge. I'm chomping at the bit to get to some of the other 1/700 kits in my stash though. Ultimately, this is what I'm working up to. Only 15 sheets of PE 😳 There's a lot to do with the pagoda tower, lattice work, etc. I figure this has to be one of the ultimate PE subjects if you are a masochist.
- 179 replies
-
- 12
-
-
- hatsuzakura
- pit road
- (and 2 more)
-
Beautiful job! I've always liked this little whaler.
-
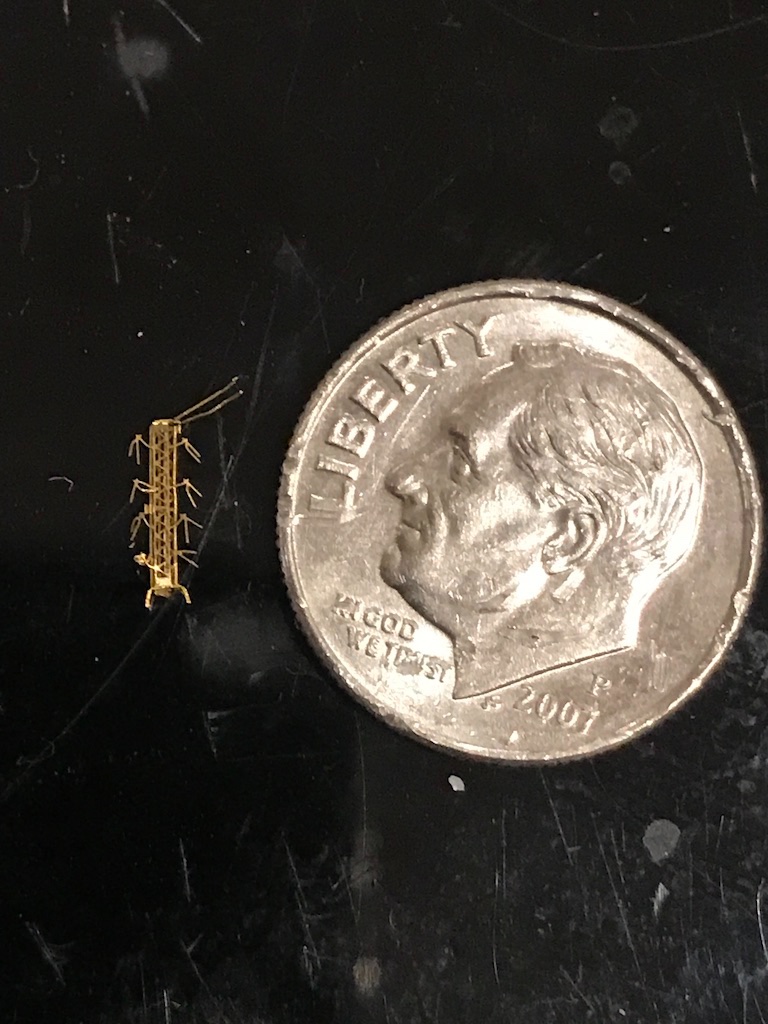
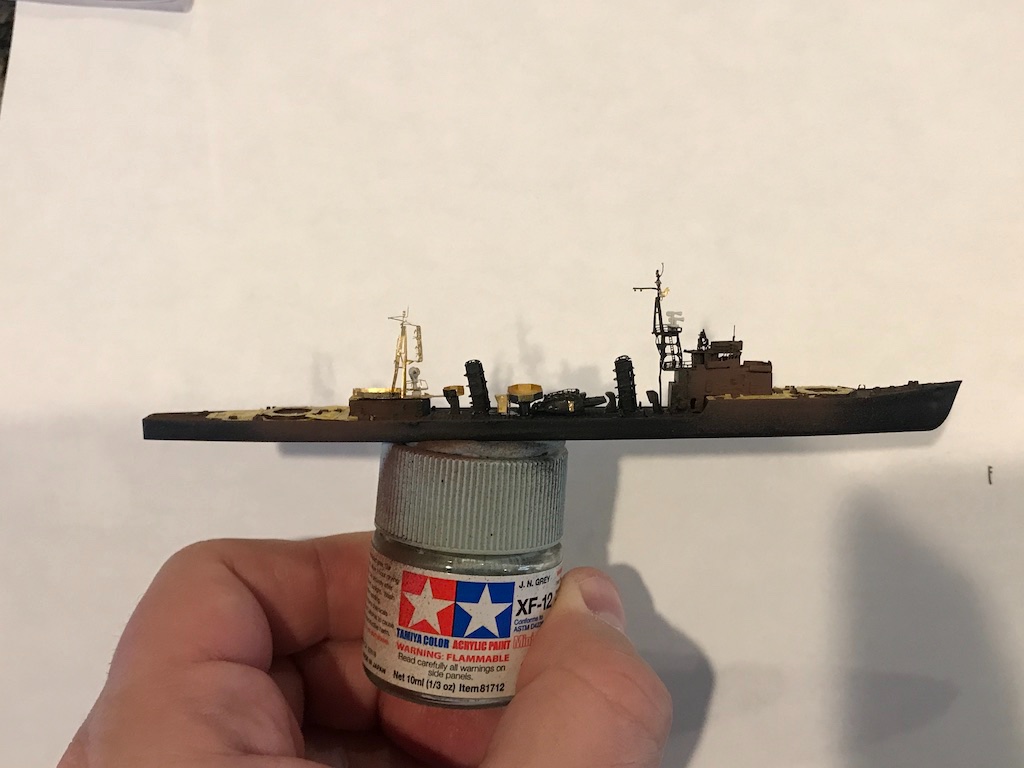
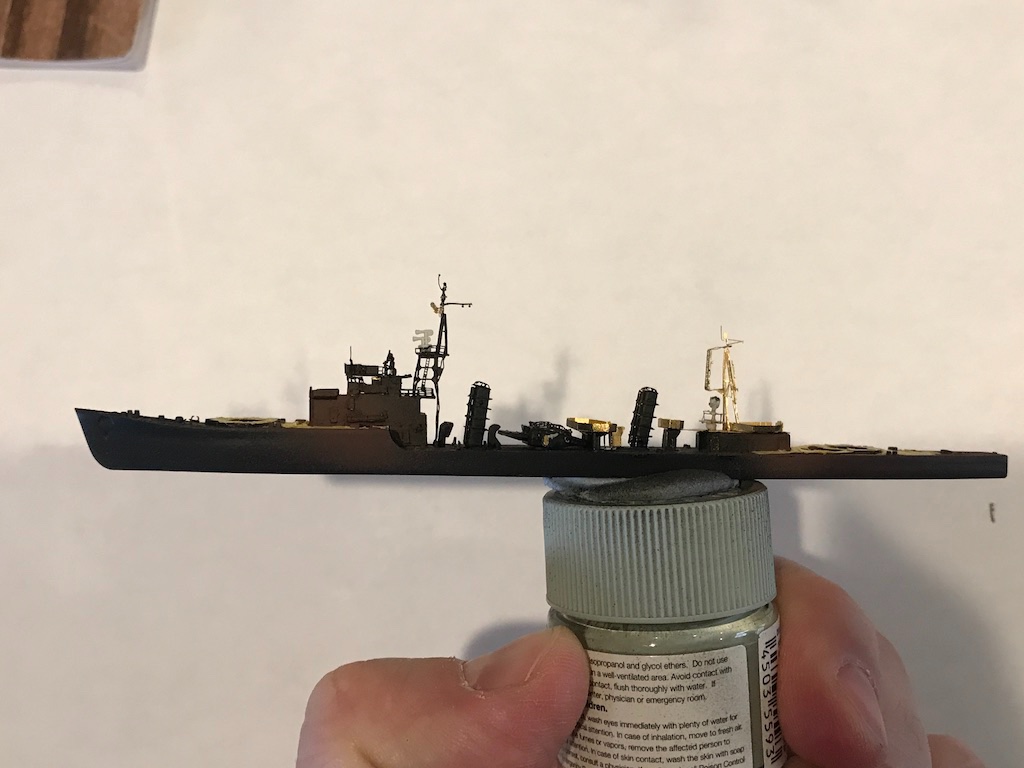
The diorama builds from @CDW and @Egilman inspired me to dust this one off and get back to it. I was a bit burned out cutting 1-2mm squares of tape to mask the linoleum deck, and got a little stuck in figuring out the build sequence given that a number of deck items to be painted gray would sit on top of the linoleum parts. I think what I'm going to do is get as much done on the ship as possible that isn't on the linoleum, paint it, then after removing the tape, separately paint the remaining items and add them to the model. It's going to be tricky as the PE is so small. I might just prime and paint the frets, then assemble the pieces, rather than assemble and then paint as I've been doing here. That's the only way I think I can get it to work. In any event, I finished building the bridge and bridge tower, and added the rear tower (not sure if it was for radar, radio, etc.?) which was a very intricate and tiny piece with at least five bends and probably a couple of more: I've gotten a lot better at working with PE this small, but it's still a challenge. Some of the pieces are like thick hair in diameter. So, you have to be very careful not only extracting it from the fret, but also in building it up. This Five Star set doesn't have any detailed instructions for the most part, so you are forced to study the pictures and diagrams and figure out how to bend the part to completion - some of these are like origami with a number of bends and folds, and the pieces are so small that even my smallest Swiss tweezers seem too big at times. Optivisor is an absolute must! Thanks for looking in!
- 179 replies
-
- 12
-
-
- hatsuzakura
- pit road
- (and 2 more)
-
Thanks for showing your steps on creating this diorama. I've seen the TP approach in some other builds on Youtube, and it looks like a great technique.
-
Nice job Kevin. I haven't been too into the Japanese planes - mostly because of the color - but they are growing on me after seeing your work. Excellent job on the paint scheme!
-
Holy cow, this is absolutely incredible work! Your planking and other wood work is pure perfection, as if computer drawn. Amazing!
- 607 replies
-
- 2
-
-
- winchelsea
- Syren Ship Model Company
- (and 1 more)
-
Thanks! I was using some from UMM that have an angle. I'll have to try these out. I actually have similar dental tools my brother gave me that I might try as well.
-
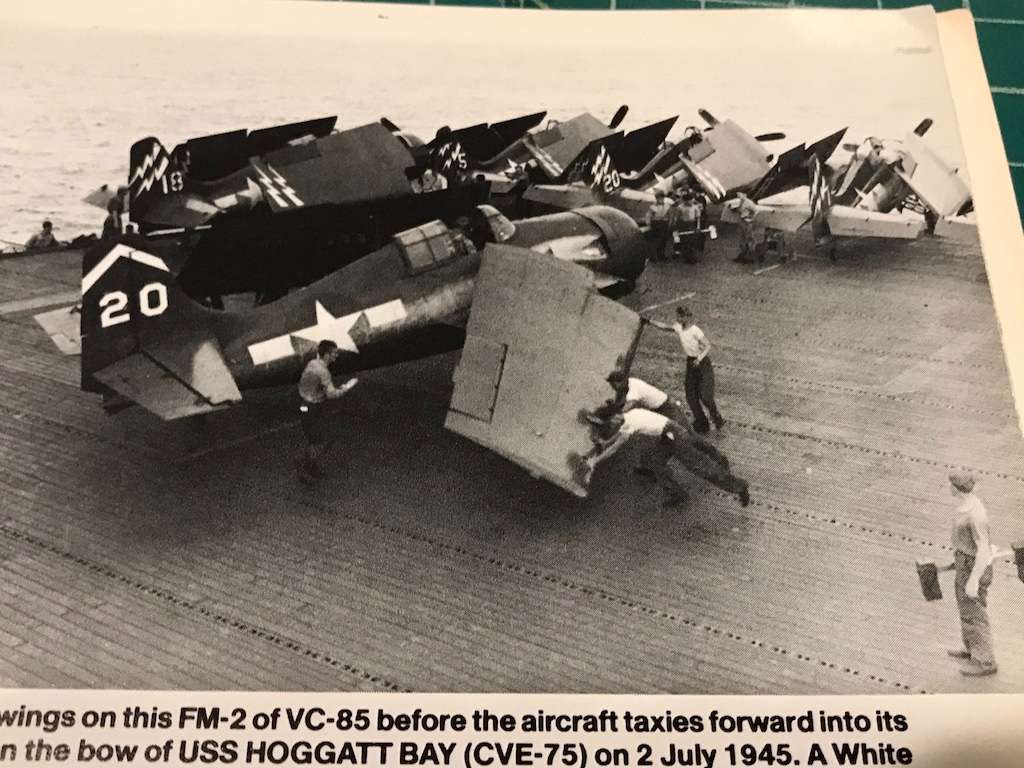
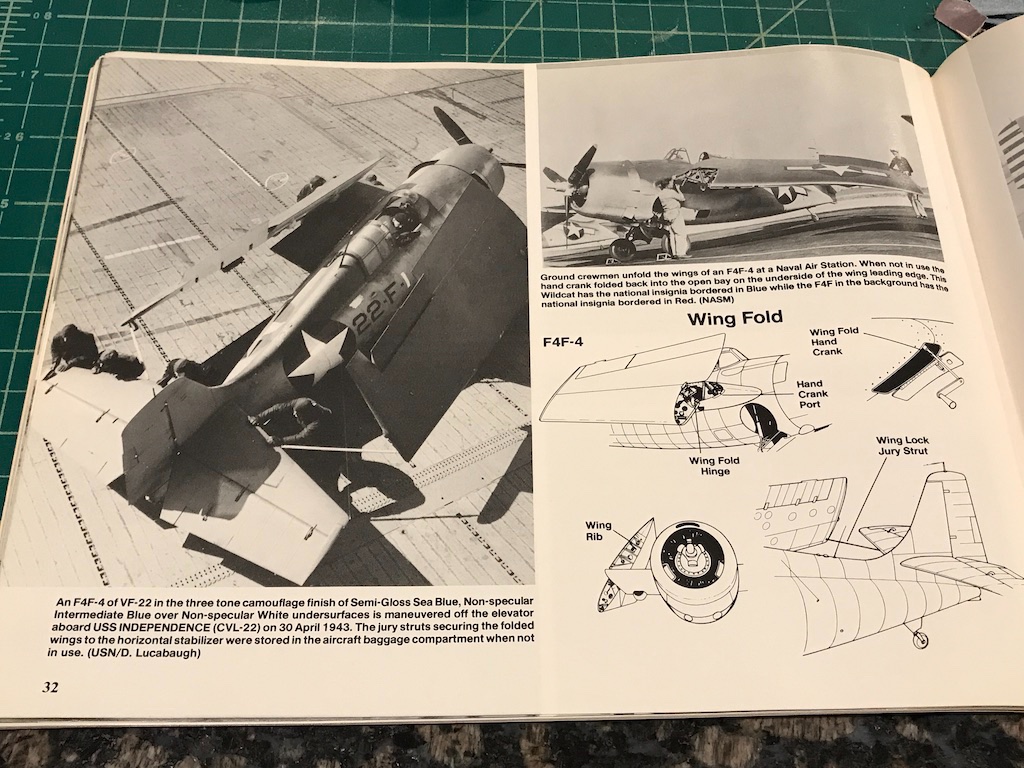
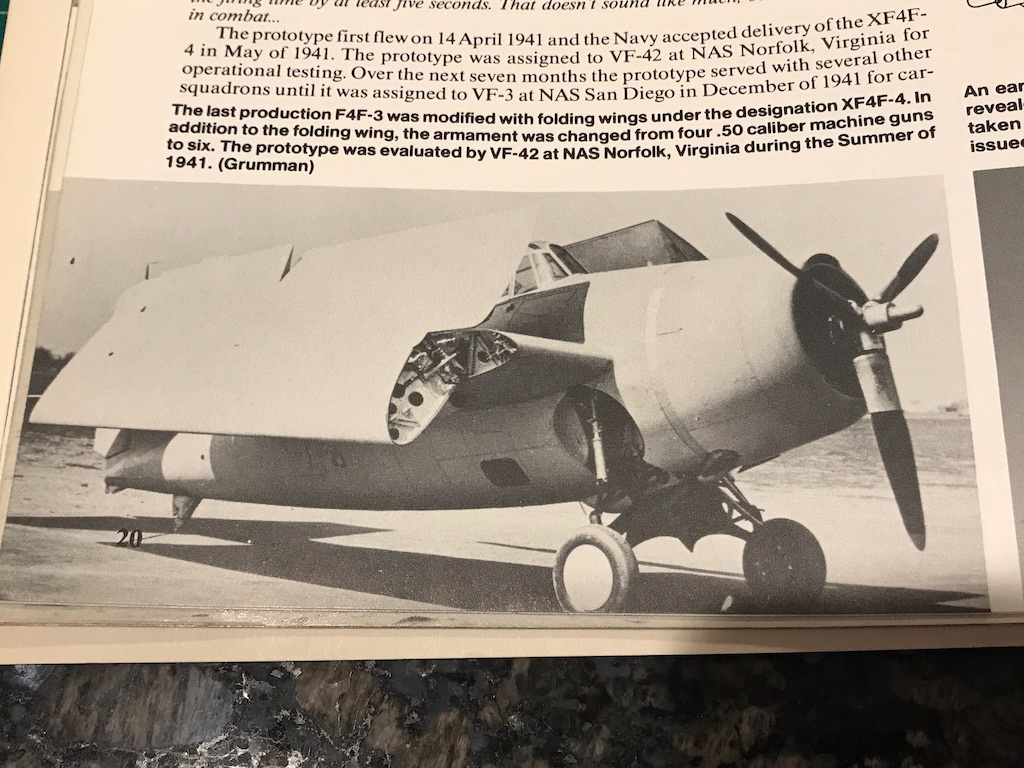
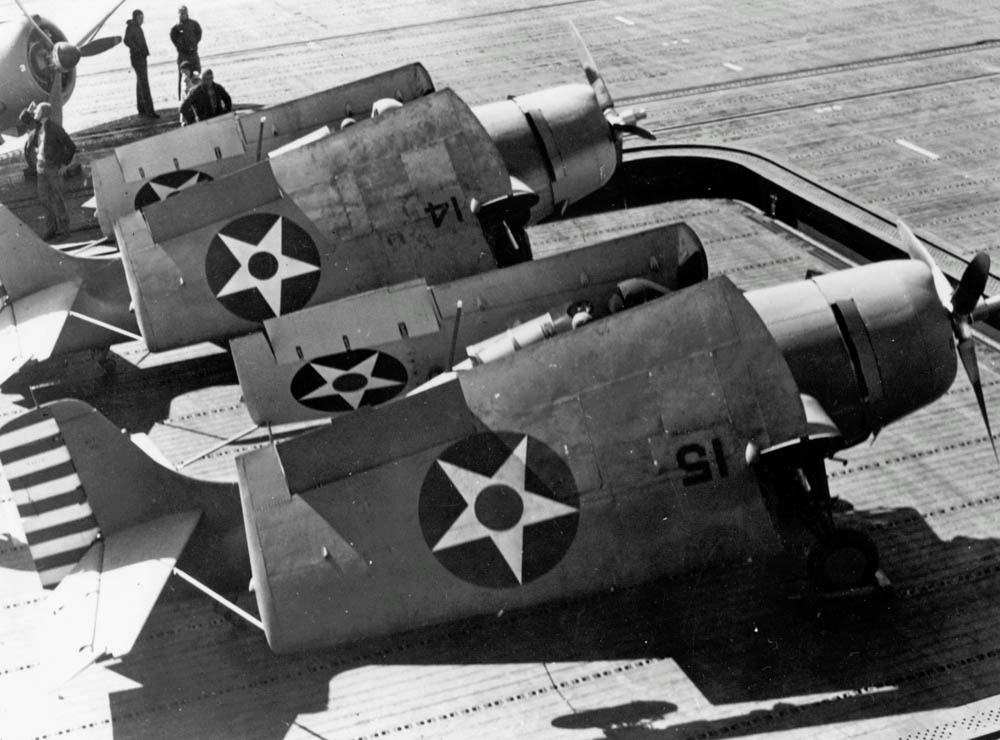
Lou thank you! And your example is better than mine - great picture! The picture is also great for showing how many more planes could be carried by a carrier. The wingspan of the F4F-4 was 38 feet. When folded, the wingspan was reduced to 14 feet 4 inches. That enabled the Navy to increase the number of fighters assigned to a squadron from 18 to 27. American ingenuity! In looking at the Squadron book, apparently the early F4F-4s - which were designated as the XF4F-4 - were made by Grumman to include a hydraulic wing fold system. During tests, the weight of the aircraft made it inferior to the F4F-3 when it came to speed, climb, and maneuverability, so the final production of the F4F-4 came with the lighter manually folded wings.
-
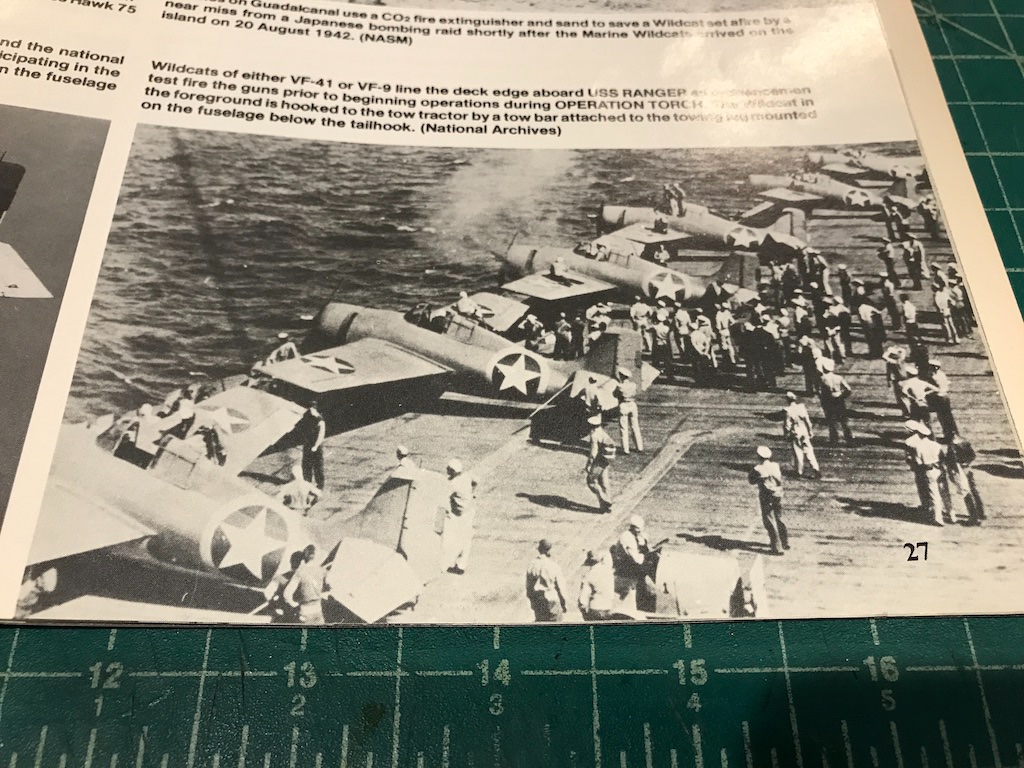
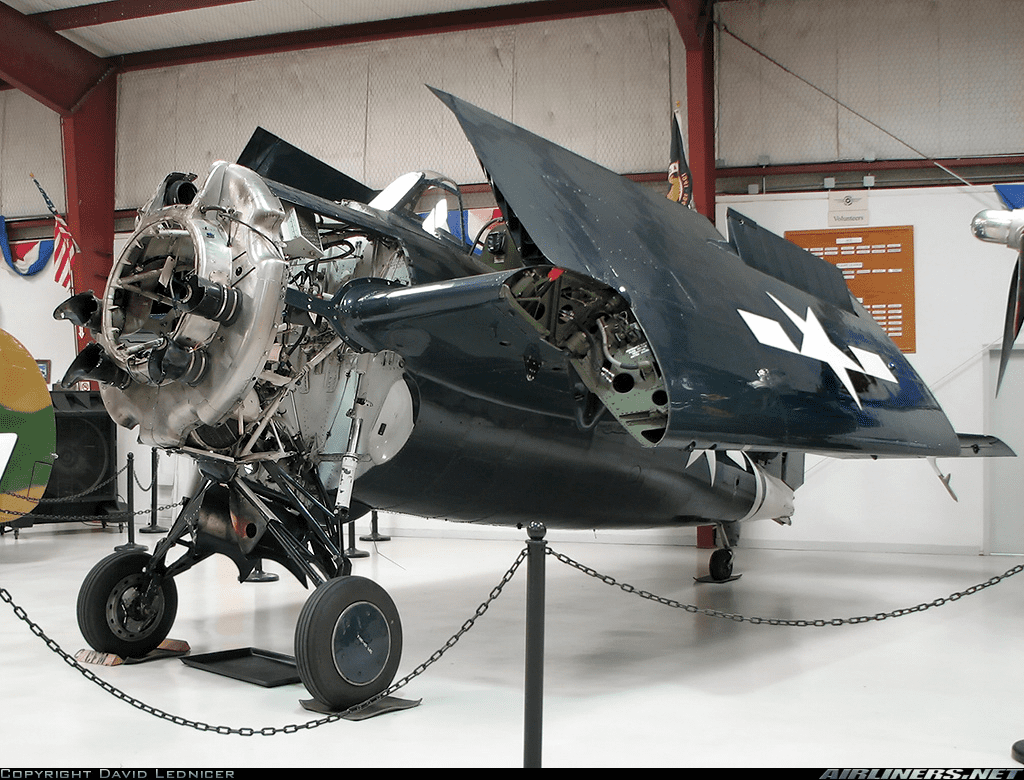
Thanks everyone for chiming in here! I have a few panel scribers, and while they work great, they are triangular in shape down to the blade so what I've found happen is that you end up scribing out an increasingly wider section the deeper you go. Given that the elevators are probably 3mm thick, if not a little bigger, the kerf (not sure if there is a more appropriate term when scribing) was getting to the point where it was just easier to mill them out with a micro milling bit. Are there others that are more scalpel like in application? As for the drooping, while there was a hand crank, I don't know whether they were mechanically locked or not. I found a number of pictures suggesting that both the ailerons (damn, I suck at terminology and I just talked to Lou the other day who corrected me) and the elevators did droop. Here are some pictures of different Wildcat variants, for example, from the Squadron In Action book on the Wildcat. Some other random pictures I have on file as well (first might be an F6F Hellcat, but likely similar engineering): At this point, I'm not going to change things. It was a little tricky getting them to sit in the position, but what I finally did was use CA, and once dried, followed up with a very thin line of two-part of epoxy along the underside seam. I was worried that CA can be a little brittle and I'd likely knock one or all of them off at some point in the future, so the epoxy gives me a little more peace of mind. So, I think they are stuck there, whether correct or incorrect 😐

-
Great pictures and research - looking forward to seeing your execution of the diorama!
-
Javlin/Kevin posted a diorama scene a year or so ago that got me sucked into trying out 1/700 kits. Definitely need an optivisor if you're going to use PE aftermarket, as the pieces are practically microscopic. Very challenging for sure. You can see how small some of the pieces are in my Hatsuzakura log linked below. But doing "live" scenes in a water diorama looks incredibly cool.
-
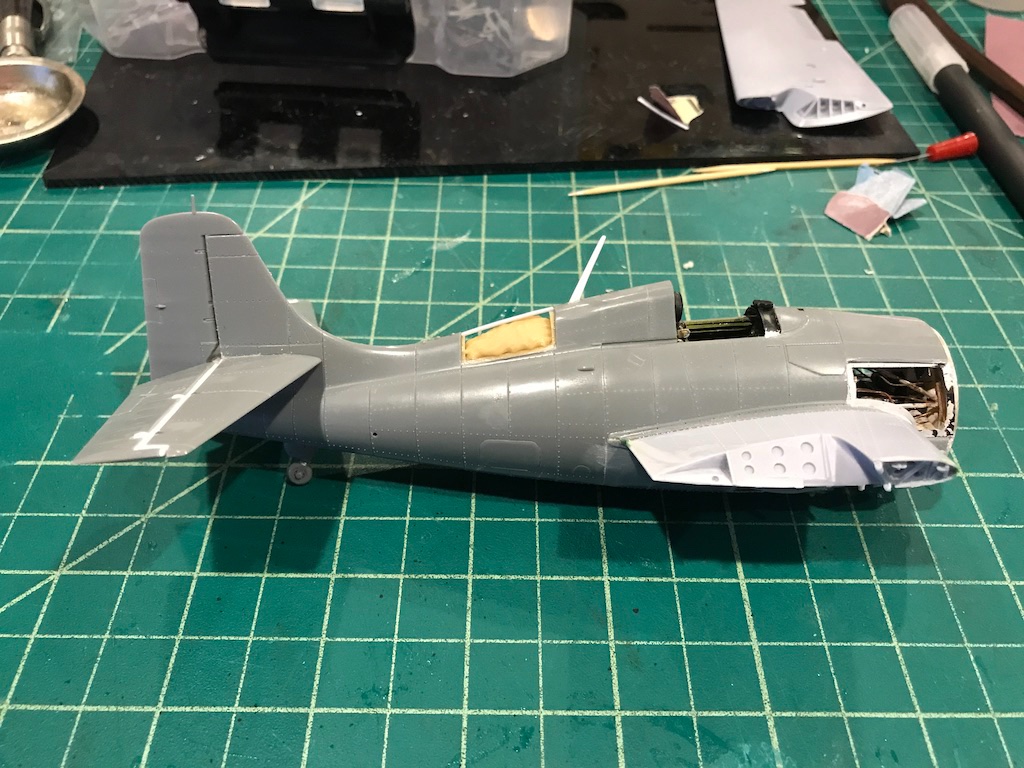
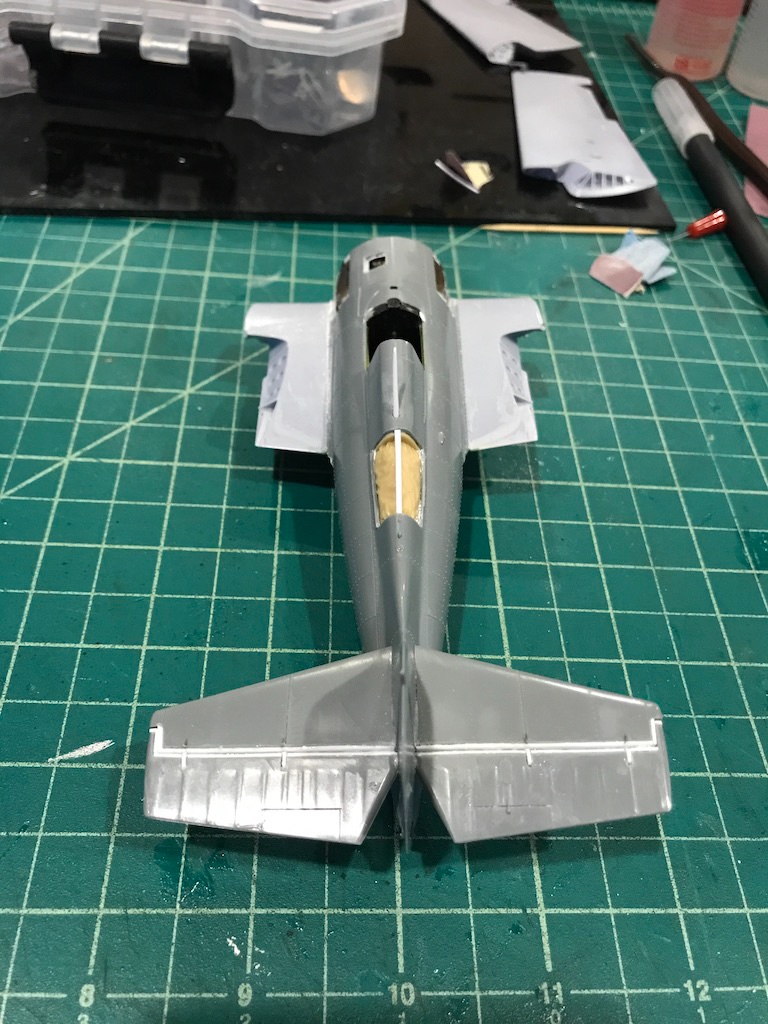
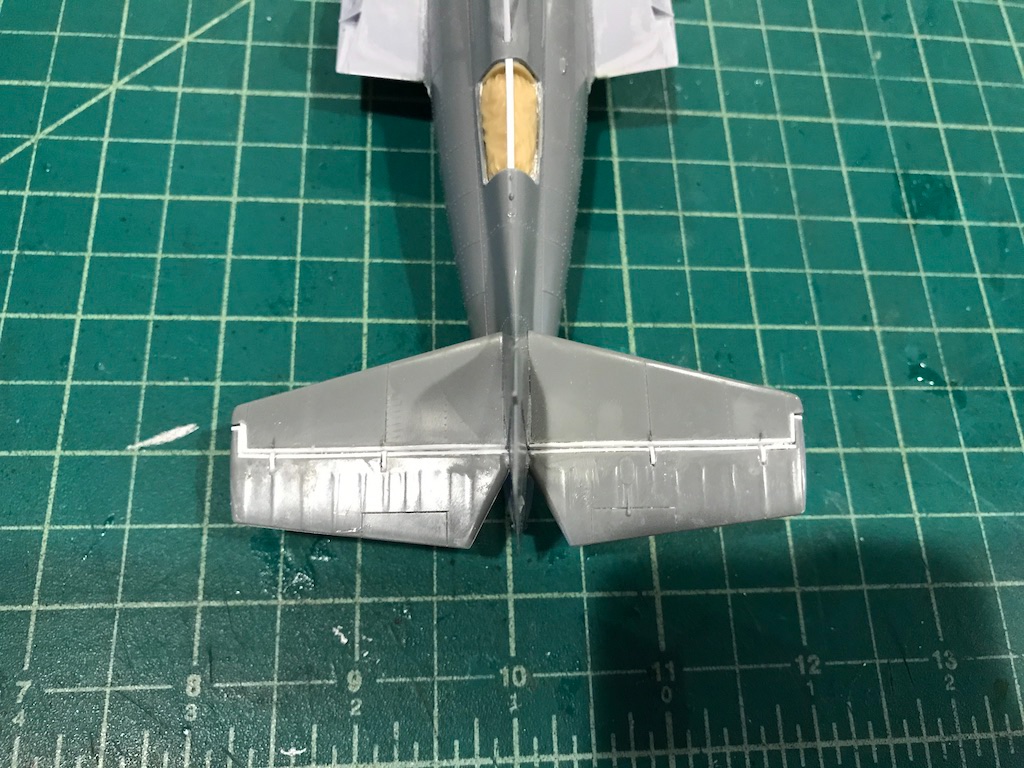
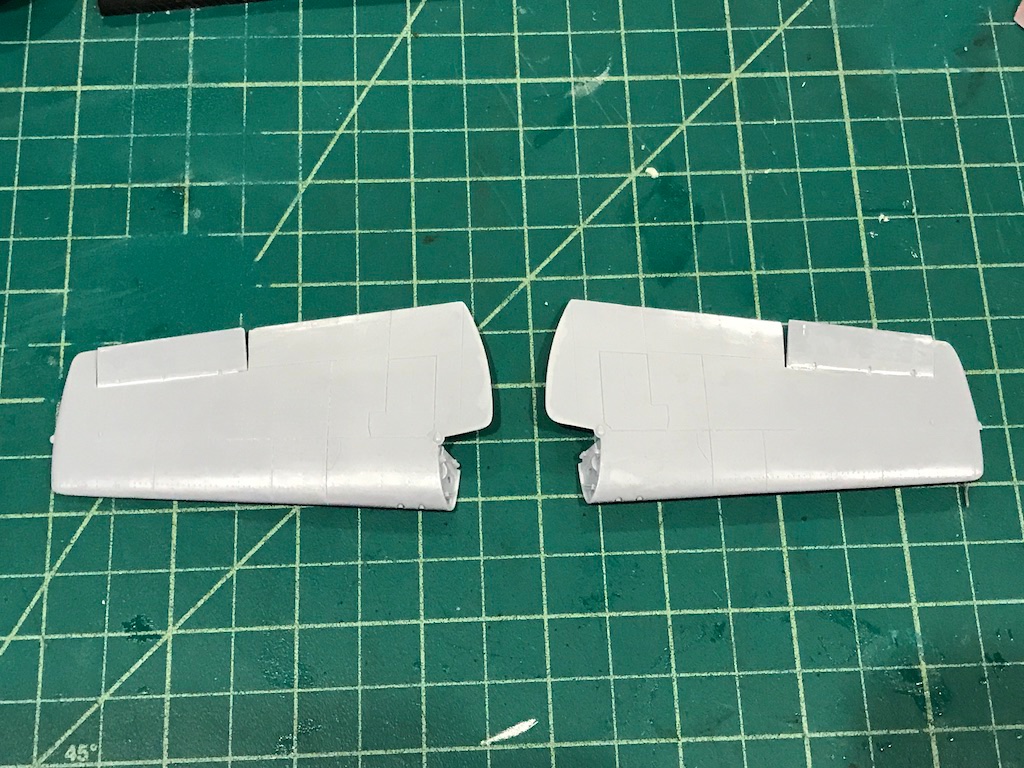
Happy new year everyone! Hope everyone is doing well and having a good start to the year. I had all these grand plans to get a lot of modeling done over the past few weeks, but with the holidays, family stuff, honey-dos, etc., I didn't get as much done as I was hoping. I did get some time in on various modeling projects like this one though. After more time than I would have originally estimated, I finished the elevators. I wanted to drop them, but it was a bit harder to cut them out because there is a tab that extends to the front so you can't make a straight cut across with a razor saw. I was hoping to either cut through enough to be able to bend them down (like I did on my earlier builds) or cut them out completely, but the plastic was fairly thick and hard, and the scalpel would get bogged down. Since I was too lazy to continuously change out the blade, I decided to mill it out using a tiny bit in my micromotor. That ended up making things easier, but then I needed to build back a bit of the lost material. That was probably for the best as I was then able to shape the leading edges instead of having two square edges. While I was at it, I "dropped" the flaps (I think that's what they are called) on the wings. Apparently when the wings were folded, the flaps "dropped" toward the top side of the wings. I also added the framing spine over the top of the life raft compartment. A bit of some sanding and filling here and there, but now I think I can finally get to the painting stage. Thanks for looking in!
- 241 replies
-
- 11
-
-
That's some great "cosmetic surgery" there - good job sticking with it and not giving up!
-
Nice job Popeye! That came out fantastic!