-
Posts
4,414 -
Joined
-
Last visited
Content Type
Profiles
Forums
Gallery
Events
Everything posted by Landlubber Mike
-
Tom, this is the set I have been using. With Covid, wouldn't be surprised if masks and cartridges are still hard to come by. https://www.amazon.com/gp/product/B009POHLRC/ref=ppx_yo_dt_b_search_asin_title?ie=UTF8&psc=1
- 54 replies
-
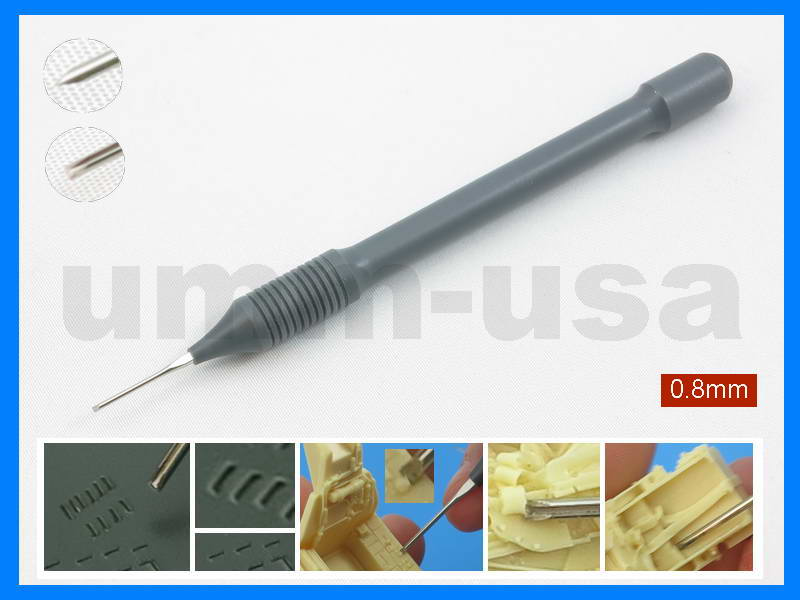
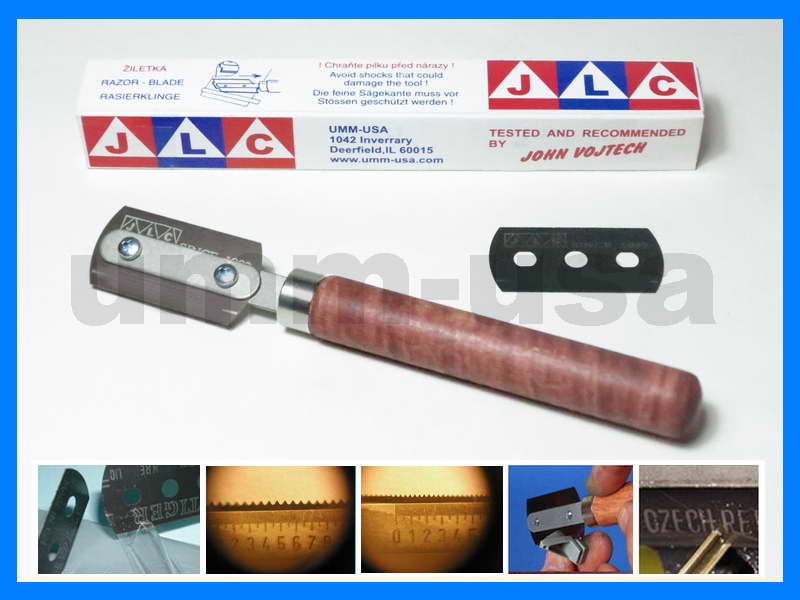
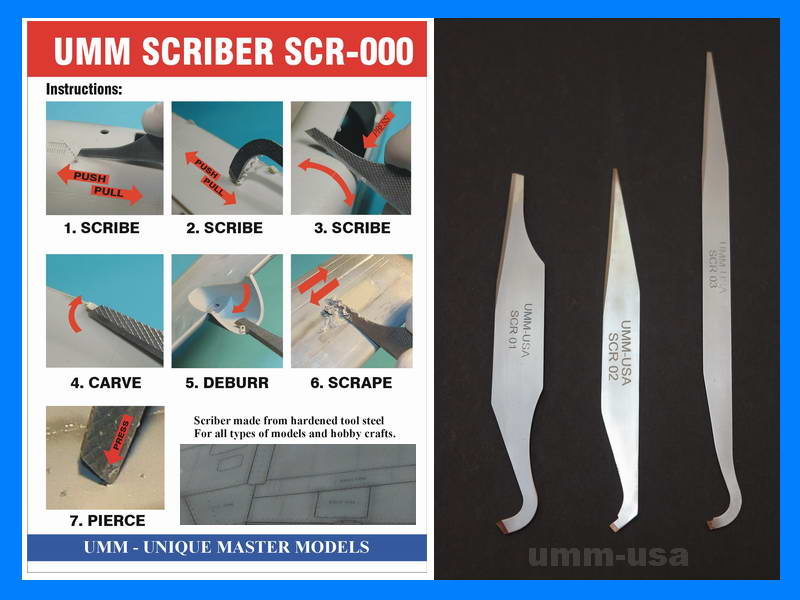
Just wanted to pass along some tools I've found very helpful on this build. I picked these up from John Vojtech of UMM-USA (Unique Master Models) : http://umm-usa.com/onlinestore/index.php (no affiliation). He's got a lot of other goodies for plastic modelers on his site, so just a warning Micro saw - very helpful to cut plastic and resin parts with a very thin kerf. I used this to cut out the fuselage for adding the life raft. He also sells mini miter boxes for this saw. Scribers - these are really helpful for a variety of uses as shown below. I used them to cut out the various panels from the cowl and fuselage. I started with a #11 blade to deepen the panel line a bit, then ran the scriber to finish the cut. Much quicker, easier, and safer than trying to use an X-acto blade in my opinion. Micro chisels - very helpful to cut out and remove sections of parts for better fit, to replace with aftermarket, etc. They come in different sizes and shapes.
-
Thanks guys for all the kind words, really appreciate it. Well, after many more hours than I care to admit, I think I'm done assembling the cowl. Lot of surgery and new parts! The Aires PE and resin parts generally fit very well, but the instructions are sparse to put it mildly. Good diagrams showing what goes where, but there is quite a bit of dry fitting and figuring things out on the fly. The engine compartment forward of the firewall in particular took a lot of studying, research, dry fitting, etc. to figure out how things all fit together. Here's the cowl - I'm pretty pleased with how it came out. After cutting out half of the cowl and carving out the air intakes, I added the interior frames (PE), the three air ducts (resin), and eight cowl flaps (PE). Aires also gives you exterior panels to cover up the open areas if you choose, or you could display them off the model in a maintenance scene. Unless I decide to open the gun bays, that should be it for the Aires set. The rest of the build should come together fairly quickly given the relatively simple color scheme and the fit and design of the kit. Thanks for looking in!
-
Hey Tom, good to hear from you. Hope all is well over there. As Grant suggested, a respirator mask might do the trick. I don't use one when building models, but when I turn pens and add a CA finish (which requires lots of CA), I use one of those 3M masks with two pink cartridges. Can't smell a thing. The one issue with those masks is that they are a bit heavy, so working hunched over doing fine detail work on a model over a long period of time may put some stress on the neck.
- 54 replies
-
I'm in for this one too! Though, I might have one eye closed. I started with plastic ships and told me that was the end of plastic for me. Then I started on planes, and said no way will I buy car kits. Well after a bunch of car kits in the stash, I have been saying no armor kits! With your skills, I'll be sorely tempted to break yet another vow!
-
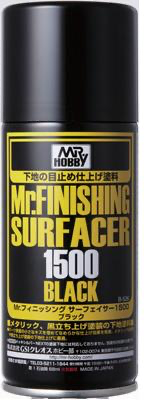
I've used the Mr. Hobby spray on primers and really like them. They spray great from the can without any need for decanting. Great coverage, and the primed surface is very hard and scratch resistant (unlike Vallejo). The number on the can is the "filler" capacity of the primer (higher the number, the less filler it is). Don't expect huge clumps coming out of the can, but it does fill slight scratches, etc. and levels perfectly. Unlike Vallejo, you can sand this without pitting or other issues. Only issue is the smell which is pretty terrible like most lacquers/acrylic-lacquers (I forget what exactly this is). I like Vallejo for the ease and use it a lot for smaller detail parts, but for larger sections like car bodies and planes where you might need to use a little filler and want a very smooth finish, this is hard to beat. I've put Tamiya and Vallejo on top of it without issues. I've used gray on my other models, but they also have black (and white and possibly some other colors). I've been using Vallejo Metal Colors for engines and on the aluminum bare metal finish of my F3Fs. There I used Vallejo Gloss Black primer as recommended, and the effect was very nice. I discovered, however, that the Vallejo primers can use a bit of thinning as they come out a bit thicker and tend to gum up the airbrush.
-
I made a little more progress on the cowl last night. Managed to get one of the PE framing pieces installed. Also included the top air intake. The kit's intake was molded into the cowl, but the Aires resin part provides a little more depth as it runs along the full length of the top of the cowl. Add this piece has been a royal pain. Just gluing this on took over an hour. 🤬 It's been hard to glue and use clamps, and like I mentioned earlier, the CA seems to take considerably longer to set the PE against the plastic (in part I think because the PE likes to spring to it's original position). I thinned the cowl sections, but the shape doesn't seem to perfectly line up with the shape of the cowl. So, I think I'm going to have to cut a little off the bottom plastic so the PE frame is the same width is exposed across, which will mean re-riveting the plastic part (sorry that probably isn't very clear). Fingers crossed that the other side goes a little better. After including the other side, there are two separate intakes that run along the cowl from front to back and ending into that small rectangular section, and then the cowl flaps.
-
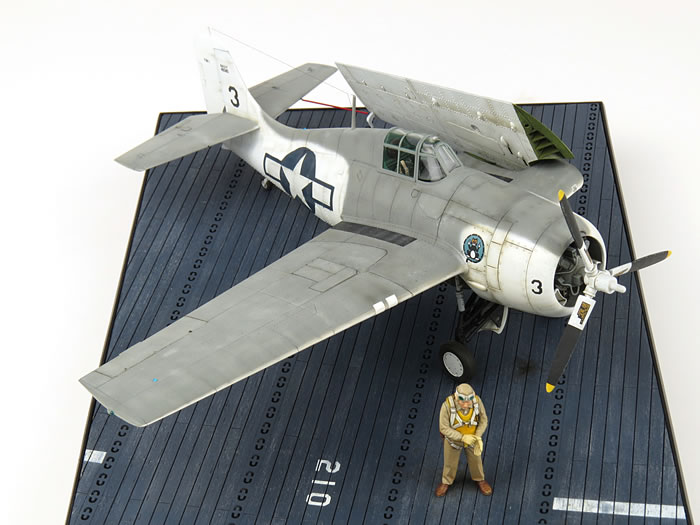
Roger, I know that F4F Wildcats were in both the Atlantic and the Pacific theaters. What I'm not sure about is whether FM-1s were in the Pacific. I've done some searching but haven't come across anything definitive. A number of sources note that the FM-1s were included on escort carriers in the Atlantic, so that's pretty clear. There weren't too many FM-1s made by GM/Eastern (1,150), and 311 were sent to Britain where they were designated as the Martlet V (and later as the Wildcat V). In any event, the Wolfpack FM-1 wing fold conversion set has markings for an FM-1 aboard the USS Core (CVE 13) in 1943. Colors are "Gull Gray" on top and "Insignia White" on bottom. Here's a picture I found online of someone that used the Wolfpack set to build an FM-1. Forgot I had found this. Good example of the color scheme. I have to say that the one wing up/one wing down is growing on me. The builder here kept the original kit wing on the right, and used the Wolfpack on the left. Decisions decisions. I might see if I can find the base this guy used which was the Skunkmodels SW-48015 WWII USN Wooden Deck Display Base. Looks pretty cool. Speaking of color schemes, has anyone tried blackbasing (where you use black primer as the base and then work colors up from there)? I was thinking of trying it out, but am thinking that the black might be too dark a base for the Insignia White areas. I like what this guy did where the panel lines in the white areas are more a brownish gray.
-
This PE is from the Aires set. My guess is that it is stainless, reminds me of the Eduard stainless. The slight bends are easy. The issue is when the part doesn’t touch the part to be glued too. The PE wants to spring back so I’ve found you need longer holding/clamping time or the CA just doesn’t grab. And of course sometimes you can’t use a clamp so you’re down to fingers, and any slight movement doesn’t let the CA set.
-
Thanks for the kind words guys and all the tips and suggestions, I really appreciate it. I may have mentioned this before, but one thing I've really enjoyed with these models is learning all the history and technology that goes along with these planes. It's been very fun learning and sharing with you all.
-
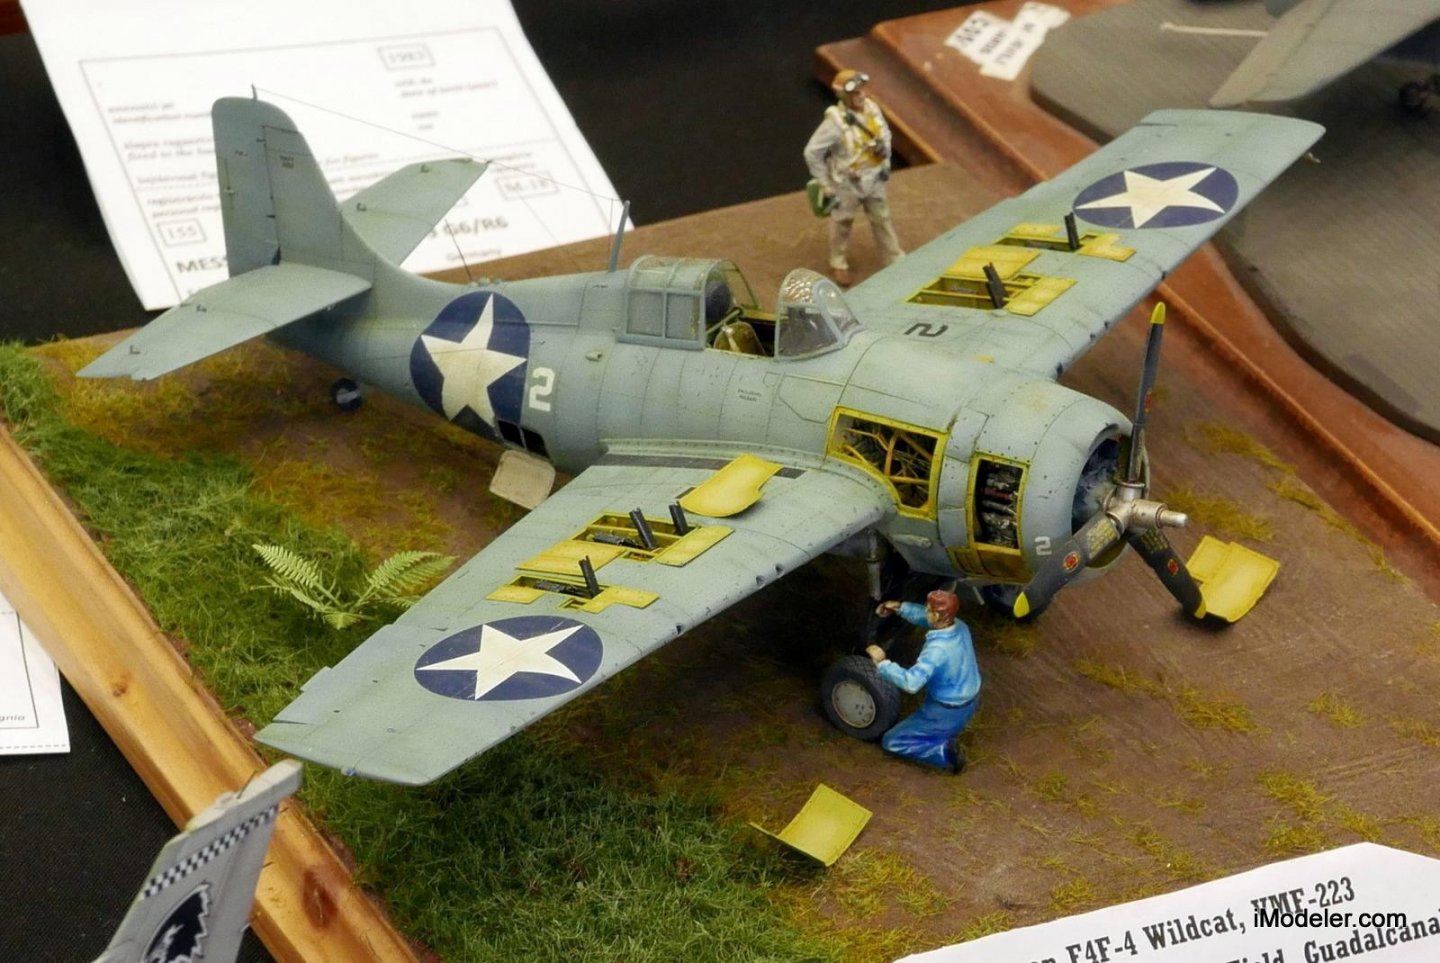
Thanks for the pointing out the cowl flaps. The way Aires has the PE, it looks like these are supposed to be partially open as you surmised. Found another diorama where it looks like the builder used the Aires detail set I'm using for an F4F-4. The modeler has the cowl flaps slightly open and the gun bays open. Looks pretty cool (though, again, wings are down)! I still might pass on the gun bays on this kit though. I have a few other kits where I have the option to open the gun bays so might try it there. Also, I think the color scheme and decals for the FM-1 Wolfpack are for an Atlantic-based plane, and these FM-1s generally were used on escort carriers. I'd love to make a diorama scene like the above, so will probably have to wait until I get to a different model where I can model terrain (and not have to figure out whether gun bays were open on folded wings or not).
-
I've been spending a lot of time on the model, but making excruciatingly slow progress. More than a few times I just wanted to put it back on the shelf and work on something else, but figured I should press on and try to get over this stage of the build. It's not that the Aires set is bad - I think it's quite good aside from the serious fit issues of the cockpit side panels and dash - it's just that there is a ton of work needed to modify the kit parts to accept the various detail parts. I'm still fairly new to this plastic stuff, so maybe I should have started with something a little simpler or at least a well-designed kit that I didn't have a lot of aftermarket for -- I keep saying that on all these plastic builds 🥴 But, all complaining aside, I'm learning a lot and so far I'm pleased with how things are looking. So here is where I am. Managed to get the bottom tub completed. As I mentioned earlier, the Aires cockpit fits together really well outside of the fuselage, but there are serious fit issues when you try to install it. So, rather than drop the fully assembled cockpit into the bottom tub which is inserted as a unit into the main fuselage, I only included the cockpit tub into the bottom tub, and inserted the seat back, dash, and cockpit side panels into the main fuselage. Took some surgery to make it all fit, but eventually got there (you can see some of the cuts, etc. in the picture below which won't be visible once glued into the main fuselage). I also put together the section of the engine compartment between the air dam and firewall. That wasn't too bad, but there was a lot of test fitting and sanding/cutting back to get the framing rods fit in place correctly. Need to dirty it up a bit more, but I think it's looking good. The next part which has taken me more hours than I care to admit was cutting out the front quarter panels and installing the cutaway frames. I was really afraid of cutting too much away so it was endless dry fitting, cutting and sanding a bit, dry fitting, cutting and sanding a bit, etc. Finally got the panels on last night though, hooray! If you look just above the cutaway panel, there is a small square panel on the top left of the fuselage. I think that's the access panel to the oil tank, which is the dirty yellow squarish thing in the prior picture. I think I might cut that panel out for a little more visibility into the engine compartment. Saw another modeler do that and thought it might be a nice way to show off more of the compartment including the oil tank. For an idea of how things will look, here is the bottom tub dry fit into the main fuselage: Now I'm working on the cowl. Lot of surgery here to cut away most of it. There is a fairly detailed PE framing piece that goes on each side, which are covered by what I believe looks pop up panels along the edge of the cowl. Then there are three resin parts that look like air intakes that get attached to the inside of the cowl. I have a love/hate relationship with the PE in this set. I believe it's made of some kind of stainless steel or perhaps aluminum. It doesn't seem to like to glue via CA to plastic very well, but maybe I should have done some more prep in cleaning off any residue or etching it. On the plus side, it's a lot stronger than brass and holds its shape very well. My worst nightmare came to be two nights ago when I was trying to glue one of the front quarter panels and it fell onto the floor. I stepped back out of my chair to a place I was absolutely sure the part wasn't, and ended up stepping squarely on the part. 😡 Not only that, but despite the part being fairly flat, somehow my foot managed to crumple it 🤬 Using pliers, I was able to straighten the part out, so in the end, the modeling gods must have taken pity on me ☺️ Thanks as always for looking in!
-
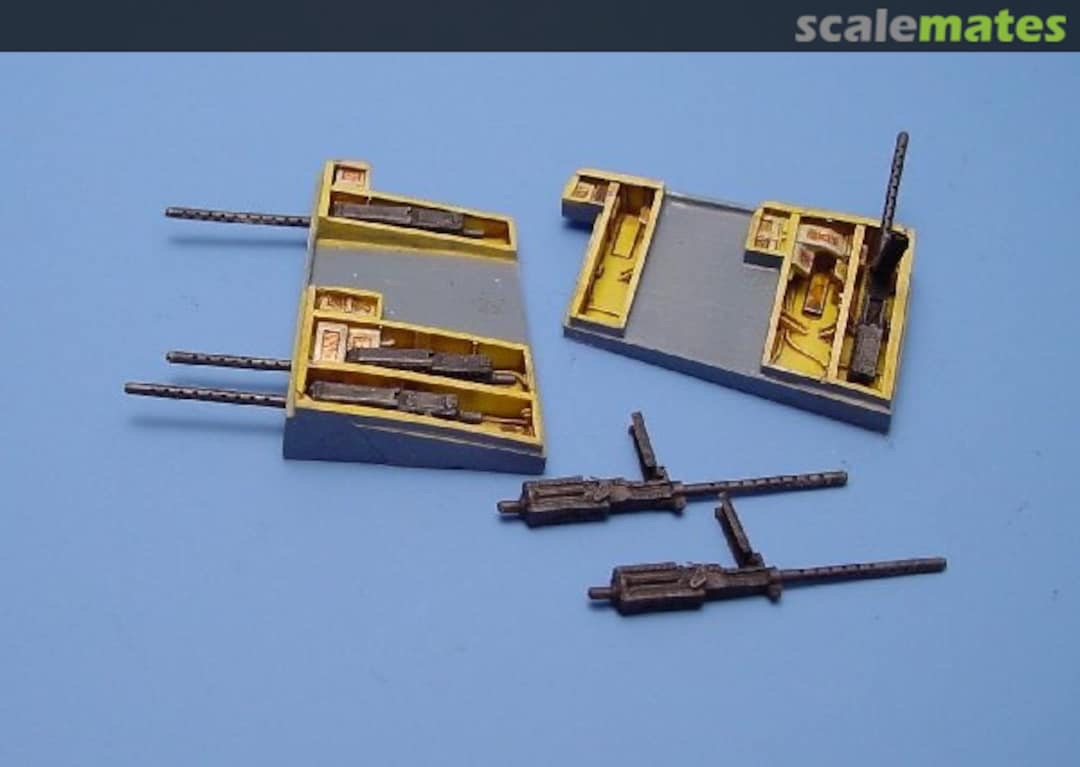
Thanks EG, really appreciate it. I'm still thinking about what to do on the wings. It's a bit hard to tell how much crisp detail the Aires resin guns and gun bay will give. The guns are made up of resin accented by PE so they might be ok, but at first glance they don't seem to be very crisp. So they might actually detract a bit, not sure. Also, if I do go one wing up one wing down, I'm wondering if I can connect the resin parts to make an unfolded wing, or if I'll have to go back and reattach the original kit wing and modify it to account for the two, rather than three, guns per wing configuration of the FM-1. I still have a little time to think about things.
-
Wow, not sure how I missed this one, but you're doing an amazing job. Fantastic work!
- 211 replies
-
- prince of wales
- tamiya
-
(and 2 more)
Tagged with:
About us
Modelshipworld - Advancing Ship Modeling through Research
SSL Secured
Your security is important for us so this Website is SSL-Secured
NRG Mailing Address
Nautical Research Guild
237 South Lincoln Street
Westmont IL, 60559-1917
Model Ship World ® and the MSW logo are Registered Trademarks, and belong to the Nautical Research Guild (United States Patent and Trademark Office: No. 6,929,264 & No. 6,929,274, registered Dec. 20, 2022)
Helpful Links
About the NRG
If you enjoy building ship models that are historically accurate as well as beautiful, then The Nautical Research Guild (NRG) is just right for you.
The Guild is a non-profit educational organization whose mission is to “Advance Ship Modeling Through Research”. We provide support to our members in their efforts to raise the quality of their model ships.
The Nautical Research Guild has published our world-renowned quarterly magazine, The Nautical Research Journal, since 1955. The pages of the Journal are full of articles by accomplished ship modelers who show you how they create those exquisite details on their models, and by maritime historians who show you the correct details to build. The Journal is available in both print and digital editions. Go to the NRG web site (www.thenrg.org) to download a complimentary digital copy of the Journal. The NRG also publishes plan sets, books and compilations of back issues of the Journal and the former Ships in Scale and Model Ship Builder magazines.


