
DONATION DRIVE - SUPPORT MSW - DO YOUR PART TO KEEP THIS GREAT FORUM GOING!
×


Landlubber Mike
-
Posts
4,541 -
Joined
-
Last visited
Content Type
Profiles
Forums
Gallery
Events
Everything posted by Landlubber Mike
-
 Isn't that always how it is? Every time my wife picks out the one thing she likes best out of a set of potential options, I don't even bother asking anymore because I know it will be the most expensive.
 -
Congrats on the move! I'm very envious of your workshop. Glad to see that the damage wasn't too extensive!
- 467 replies
-
- 1
-

-
- fly
- victory models
- (and 1 more)
-
I have the Anatomy of the Ship book, and didn't see any pictures of what I think you are asking. Have you looked here at these reviews of the kit and PE sets? They have the instructions copied there so they might be of some help? I unfortunately couldn't locate a similar review for the "Super Detail" set. http://www.modelwarships.com/reviews/ships/cv/cve-73/350-hsg/hsg-review.html http://www.modelwarships.com/reviews/pe/hasegawa/350-cve73basic/hsg-review.html http://www.modelwarships.com/reviews/misc/hasegawa/350-deckcve/hsg-review.html http://www.modelwarships.com/reviews/misc/hasegawa/350-usn-ac/hsg-review.html
- 25 replies
-
- 4
-
-
- Gambier Bay
- BlueJacket Shipcrafters
- (and 1 more)
-
Glad to see you're dusting this one off. Nice progress! I recently picked up the Hasegawa kit and am surprised to not see more models of these pretty cool escort carriers around.
- 25 replies
-
- 5
-
-
- Gambier Bay
- BlueJacket Shipcrafters
- (and 1 more)
-
Looking really great EG. That Nashville looks like a really nice kit. Hadn't heard of Iron Shipwrights before, but I'm trying to be a good boy and not spend too much time on that site
-
Great work!
-
That looks fantastic, excellent work as always!
-
Hey thanks very much! Sorry to have missed that you replied on my log. You should definitely put up a build log as there are a lot of helpful people on here. At some point I do want to get back to this model as I visited the real one a few years ago. Too many modeling interests, too little time unfortunately 😩
-
Quote of the month there lol
-
Wow, that's stunning! Again, I'm amazed you guys can do planes in card - really cool!
-
Yeah, it's sort of a hidden feature I suppose. The wing inset pieces are there, but no instructions for them. Doesn't look too difficult to implement, but certainly a little trickier than putting in the drop in wing sections from Wolfpack that I'm using on the Wildcat. I'm glad I did the Wolfpack first as it's given me some experience on how the wing folds operated.
-
Did you start this one? I can't believe how well these planes model in card with all the compound curves.
-
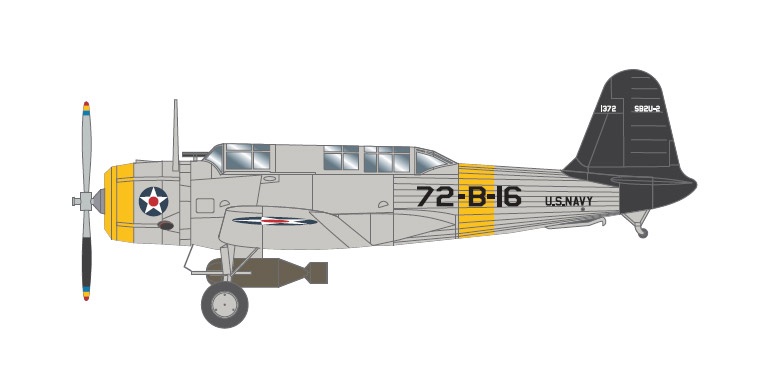
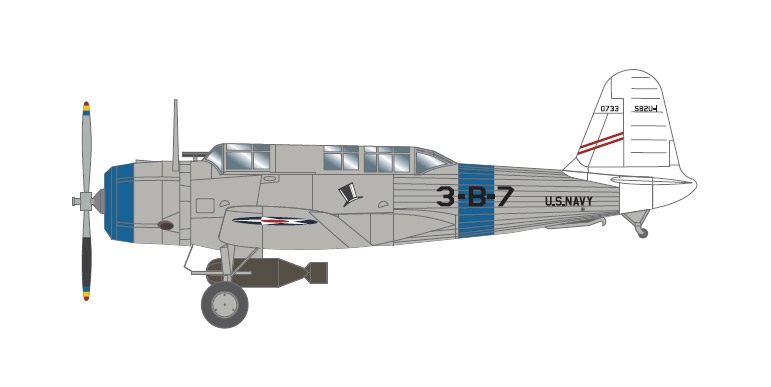
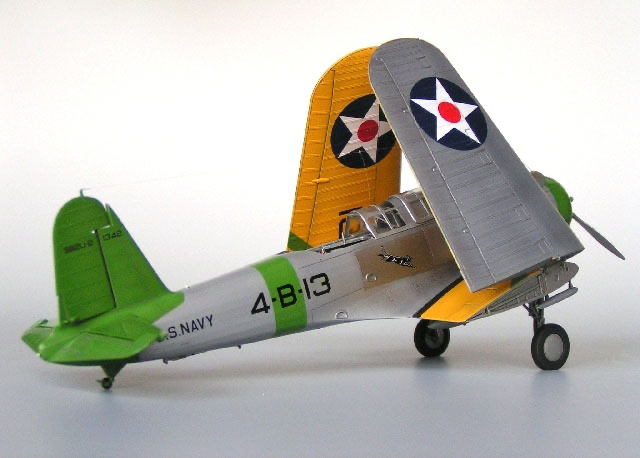
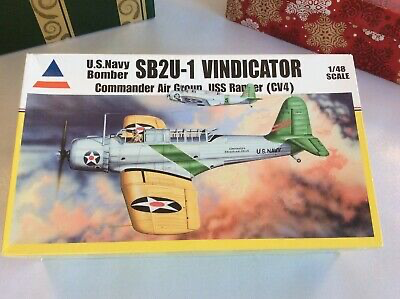
With my foray into plastic, I've done four Accurate Miniatures kits - well, I guess technically two were in-house creations (the F3Fs), while the F4B-4 and the P-6E were repops of some older Monogram kits. I was looking up other kits with yellow wings and came across the AM Vindicator - I had read about the plane, but never knew what exactly it looked like. When I found it, I was like, man this is quite the ugly bird, but kinda in an attractive way. Plus, when I saw there was a yellow wings version available, I was in. The knock on the kit is that a number of them had an ugly depression in the side of the rear half of the fuselage, which was a pain to fix because it was in that area that looks corrugated. When I bought the kit from UMM-USA, I asked if the particular kit they were selling had that issue and the owner, John Vojtech, kindly included another set of fuselage halves that look perfect. What a nice guy! Thanks for the clarification on it being pre-way versus neutrality patrol. I think I had actually copied those words from either the instructions or another build log, so good to have my terms correct! I'll probably go with the kit markings, as they are different and I won't have to paint the cowl a separate color. Otherwise, I have the Yellow Wings decals set for this plane and can do it up in the typical fashion of other yellow wings (like the other planes I built) with the belly band, painted cowl and tail, etc.: For the wing fold, the kit does not include any instructions at all, but includes the insert pieces necessary when you cut the wings in half. Another gentleman actually went through with it, and posted pictures here: http://www.hyperscale.com/2008/features/sb2u1cb_1.htm
- 241 replies
-
- 12
-
-
Thanks EG for the kind words and your thoughts. Looking at the pictures, I think you're right about going dark over light, especially to bring the line down a bit. Speaking of the line, I didn't mean for that sharp point near the tail, so I smoothed the curve on that one. I need to finish this one as I have my eye on other kits in the stash. Am thinking of doing the Accurate Miniatures SB2U-1 Vindicator kit as a simpler build given that there's not too much aftermarket available for it. I was thinking of doing it as the box cover pre-war neutrality patrol colors - I guess I'm a glutton for punishment when it comes to yellow wings. Anyway, looks like a nice and fairly straightforward kit - except for the fact that apparently the kit has parts to build it with the wings folded, though no instructions on how to do so. 🤔
-
Looks great - love the interior colors. The flocking came out fantastic.
-
Nice! These look like some sweet upgrades. Can't wait to see you put them together!
- 179 replies
-
- 7
-
-
- hatsuzakura
- pit road
- (and 2 more)
-
Those will be really sweet! Can't wait for you to start it!
- 179 replies
-
- 6
-

-
-
- hatsuzakura
- pit road
- (and 2 more)
-
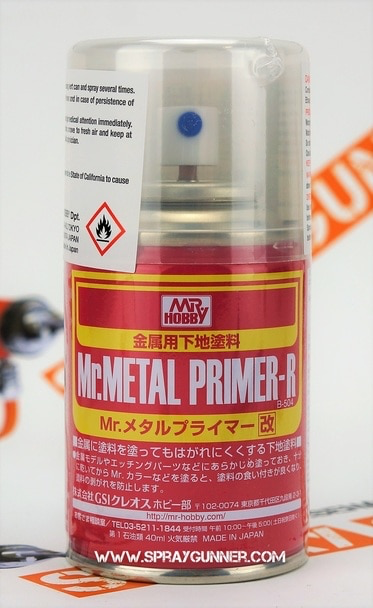
I used this on 1/700 brass photo etch and it worked really well. Smells terrible, but the paint held on very nicely with great coverage (Vallejo). The Mr. Hobby stuff is a little pricier, but I've really enjoyed working with their primers like Mr. Surfacer and Mr. Finisher.
-
Yeah, I usually do that but it's likely user error on my part in not fully getting it down. Very frustrating! Just went back over your Spitfire log which was very helpful (and came out beautifully). I didn't fully appreciate the blue tack idea at the time, as I thought you were just trying to avoid cutting out masking tape in the particular shapes for the camo. Now I see it was to also get the feathering effect. Since I already painted both colors, I'm going to try and feather in a transition by hand. I don't know that I want to re-mask. I was originally thinking of using the Vallejo gray rather than the Tamiya white, as the water based properties will be easier to work with. Then again, maybe the Tamiya will be easier. The white won't cover the gray as easily as the gray will cover the white, so maybe it's better to go with the Tamiya white. I have a bit of the Tamiya decanted so I can try it out. I'll probably practice using both and see which has the better effect.
-
Lou, are they resin with PE to attach? I picked up a 1/350 IJN Ise carrier/battleship on eBay that was loaded with Veteran guns. It's been a while since I looked at them, but I recall them looking very detailed. Will wait for you to blaze the trail on putting these things together 🤨
- 179 replies
-
- 8
-
-
- hatsuzakura
- pit road
- (and 2 more)
-
Nice work!
-
Love the looks of this car. What a beautiful convertible!
-
Wow, very nice subject! The Italians sure know how to add elements of design to many things - cars, ships, planes, clothing, jewelry, etc. Not sure about the practicality, but they definitely make beautiful things!
-
Ha! You know what's funny? I actually enjoyed this build a lot. My plane builds have been filled with frustrations from painting, breaking things and having to repair them, etc. Then I recently tried a new paint on a couple of car builds and the paint ran too hot and it crazed the plastic. This 1/700 build was fairly uneventful - just a lot of Optivisor work.
- 179 replies
-
- 10
-
-
- hatsuzakura
- pit road
- (and 2 more)
-
Thanks guys - that’s what I was thinking when it came to the rigging. Seems the safer course. Really appreciate all the kind words and encouragement. I’ve learned a ton on this build. The early portions like the bridge are rough in some places, but overall I like how it came out and will do better on the next one. Got to practice with PE, tried using a filter coat, played with weathering enamels, etc. I thought a destroyer would be a fairly simple subject to cut my teeth on, but man, there were a ton of nice details in the Five Star upgrade package. I should have mentioned a couple of small details I added. The life rings are pre-painted PE from Eduard - how cool is that! Easy to install. Also on the starboard side there is a rack along the rear deck structure. Looks like racks like that held wood for repairs, so I cut little splinters of some leftover tanganyika from my Badger build, wiped them in wipe on poly to bring the wood a little life, then glued them down. Nice little touch I think. If the model came out ok, I was thinking about waiting to put it in a waterline diorama setting until I had a few more of these, but I might put it on a base sooner rather than later. I’m pretty happy with it so I think the waterline is a go and will look into how to do it at this scale. The slightest bumps and touches bend pieces so having it on a base should give it a little more protection. Last week I dusted off the 1/350 Shimakaze and started working on it. After working in 1/700, the tiniest of the 1/350 is no sweat. Looking forward to bringing that one to life, but will probably add another 1/700 build as a side build. I might have added a few 1/700 kits to the stash 🤪
- 179 replies
-
- 10
-
-
- hatsuzakura
- pit road
- (and 2 more)
