Landlubber Mike
-
Posts
4,551 -
Joined
-
Last visited
Content Type
Profiles
Forums
Gallery
Events
Everything posted by Landlubber Mike
-
 Fantastic work!
 -
Really nice work Chris. So impressive that you can get card to turn out like that.
-
Sutcliffe 1/72 vac form Coronado
Landlubber Mike replied to Lucius Molchany's topic in Non-ship/categorised builds
Nice work! Looks like a good size model even at 1/72. -
Nice job! Those seatbelts look amazing!
-
Looking great, nice job! I have some of that Gator's Glue but tried using it to glue tiny hairlike PE on a 1/700 destroyer. Wasn't too successful, but maybe I need a little more practice. One nice thing about it is that you can use a wet brush to remove any excess paint. That did work for me pretty well.
-
Look at some of the very detailed construction manuals like the one Chuck did for the MS Confederacy. Probably one of the best resources for folks fairly new to the hobby.
-
Nice haul Denis, you must have been a good boy this year! I love that red and white scheme - I have one of the Wingnut kits with decals for that scheme (I think the Pfalz D.IIIa) and have been eyeing that scheme for it. Really sweet looking!
-
Awesome subject, I'm in for this one! Make some room guys!
-
Ha, you beat me to it!
-
Your help please with next model kit
Landlubber Mike replied to Koopyetz's topic in Wood ship model kits
I jumped from the Caldercraft Badger to the Amati/Victory Models Pegasus as my second build. It's a fantastic, well made kit with great wood and other materials. The Swan Class were really beautiful ships, and there are a number of logs here to help if you get stuck -- and then of course there is series of The Fully Framed Model books that can help if you want to kit bash and add additional details. -
Thanks Dan, that came out so well! That's exactly the kind of look that I think looks very realistic. Nice job! Very similar effect to when people use the oil paint dot technique, where they will add all sorts of colors - reds, blues, greens, browns, oranges, etc. When thinned and spread and mixed with the other oil colors, you get very subtle variations just like you have in your Spitfire.
-
What got me thinking about doing the black basing and mottling is the colors, and in particular the white, as well as the fact that there are only two colors. Seems that it would be better to try the overlay of various colors from black up to white to break up two solid masses of color beyond highlighting the panel lines.
-
Thanks guys, really appreciate it. I think the black basing with the light mottles gives that non-uniform look as in reality where light is hitting the plane from different angles. Otherwise, to me it seems a little more "plastic" (for lack of a better word) if you just paint the model a single color and then try to add panel lines and weathering effects. Another technique I've seen some do is to add tiny dots of oil paints in different colors to the model, and then with thinner, brush them across the model. That also seems to break up the color and make it more uniform. I have to say that it's been a big learning experience on the artistry side on painting models. I was somewhat familiar with shading and highlighting but all this other stuff has been really eye opening. Not sure I fully get all the techniques, but they are something I want to experiment with and bring over to wooden ship models when I get the hang of them.
-
I came across this the other day - really cool!
-
Amazing work Kevin! Very nice job, wow! Can I ask - what size needle are you using in your airbrush? I have a few kits in the stash with a mottled type of camo, and have been wondering if I need one of those micro-sized airbrushes.
-
Great job! I hereby nominate your log as the most epic on MSW
- 2,699 replies
-
- 7
-

-
- heller
- soleil royal
- (and 9 more)
-
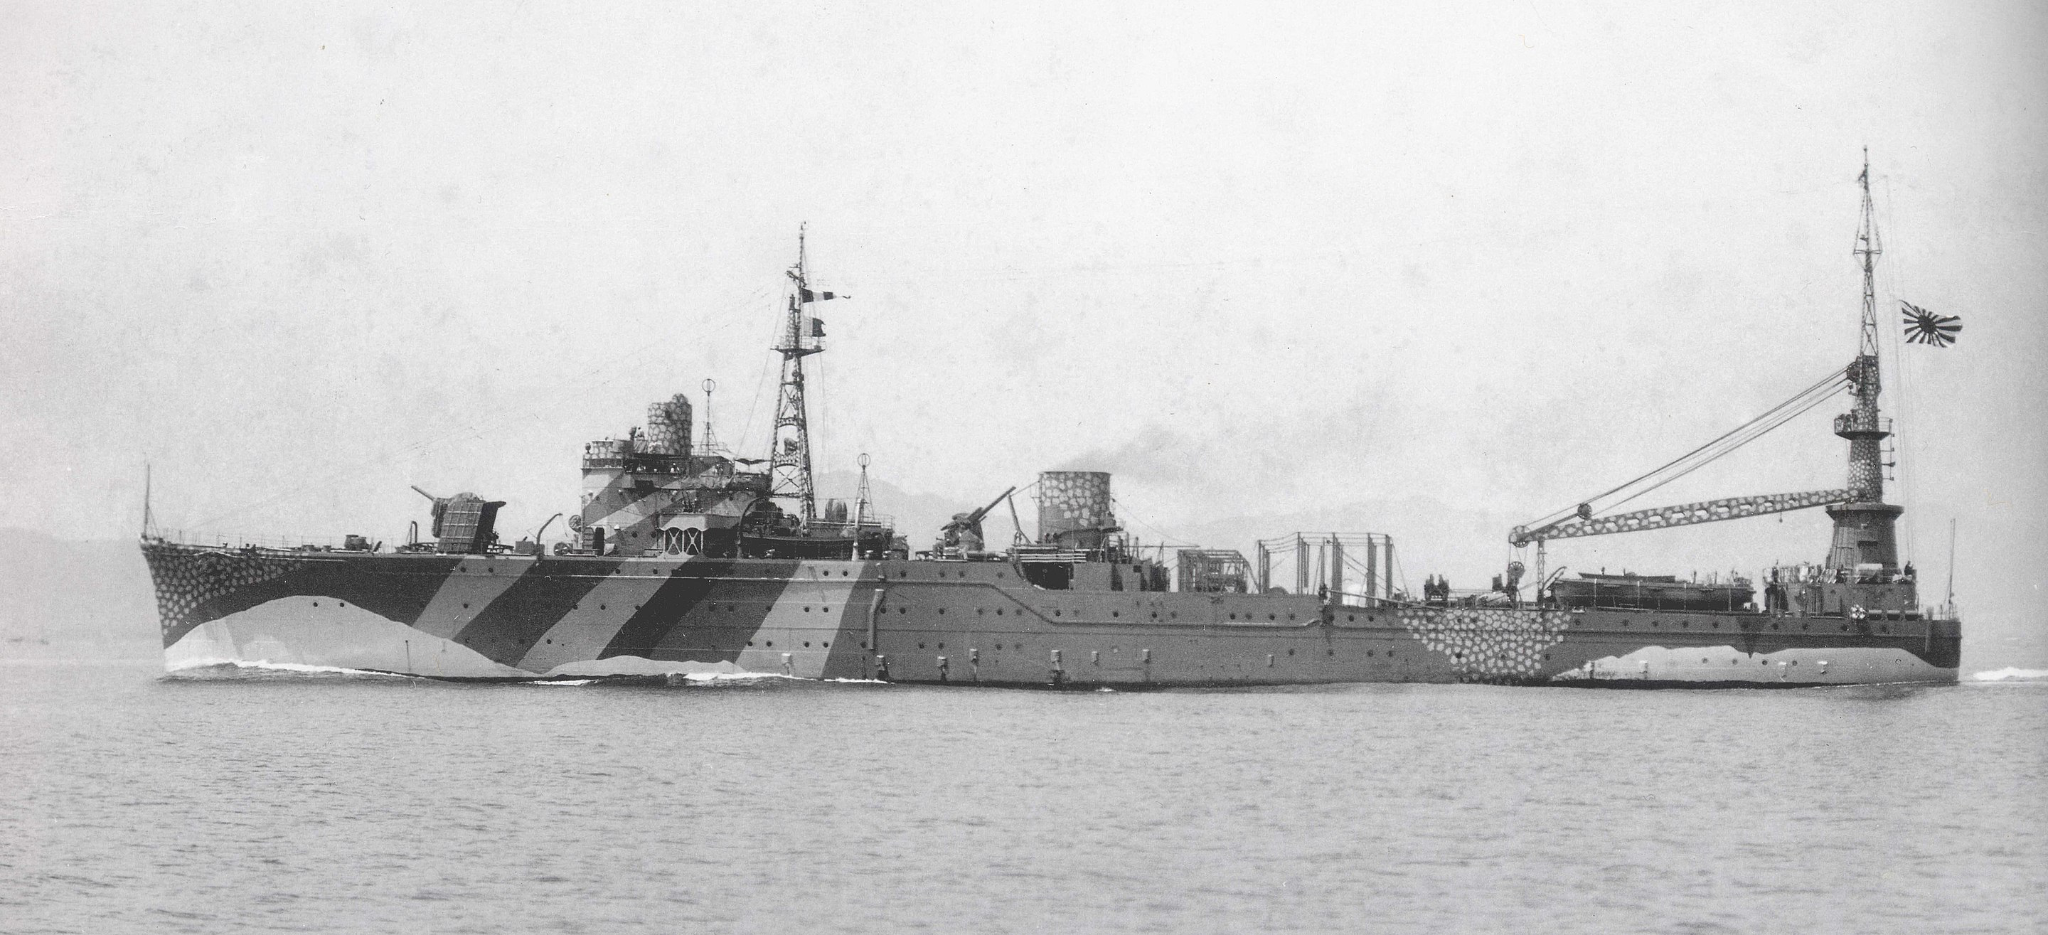
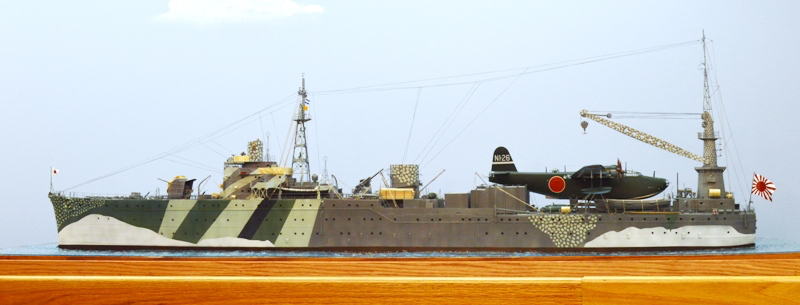
Lou, many thanks for mentioning this to me. Greg, if you'll have me, I'd really love to build a ship like this as part of a group build. I'd prefer the AV-3 configuration. Even better that it seems like the ship carried a complement of yellow-wing aircraft. Hopefully that's time-period correct, but how cool is that! Most of the ship kits in my stash are IJN because I tend to like the lines and distinguishing characteristics like the pagoda-style towers (the US ships seem to be more functional but less "stylish" design-wise), but I would be open to building a US ship. I do hear, however, that Santa is bringing me the Hasegawa Gambier Bay for Christmas As Lou mentioned, while all the battle-type ships are nice, I'm mostly interested in the various WWII auxiliary ships - seaplane tenders, oilers, repair ships, submarine tenders, etc. I think they are so interesting with all the cranes and various configurations. It seems like these auxiliary ships are mostly only available in 1/700 scale, where there are tons of options. I have a bunch in the stash with PE and wood deck upgrades. FiveStar, Artist Hobby, Rainbow, Toms Model Works, etc. have a pretty vibrant market for 1/700 aftermarket. Hasegawa has the Heian Maru submarine depot ship in 1/350 scale, and I think they offer two other versions of what is essentially the same converted ship as a hospital ship and a cruise liner (Hikawamaru). For a cool seaplane tender on the Japanese side, one of my favorites is the Akitsushima. A super cool design and camo scheme. I have both the Snowman 1/350 resin version and a 1/700 by Pit Road. There might be an old and rare limited edition Hasegawa kit in 1/350, and I just saw that Airfix might have released a 1/72 version of it 🤩 Sorry for the digression, but I'm in if others want to do a group build on the Langley AV-3!

-
Add some water on the bow like your picture and it will really all tie together. I saw another builder do that on a sub and it really set the scene. Looking fantastic!
-
I don't know the approach of the newer kits, of the older four Accurate Miniatures kits and this current (and older) Tamiya kit, the tail wheel is molded on one of the fuselage halves. So, there is almost no support at the point where the tail wheel landing gear assembly connects to the fuselage. Any stress and it pops right off, just like the radio antennae on my Wildcat 🤬 Adding the new radio antennae with a thicker base that extends into the fuselage seems to have be much stronger. Maybe the newer kits take a similar approach. All that being said, I tend to handle my models too much. Part of the issue is that I do a lot of my work on the kitchen island so I can be around my family and new dog. So, I'm sorta moving the model, the tools, etc. a lot more than I would like.
-
Thank you very much for that info! Makes a lot of sense, and certainly makes things easier for me. Really appreciate it! That's a great story about Pappy Boyington!
-
Crap, sorry to see that. Sounds like you have a plan forward though. This is me just speaking out loud, but can you correct it with a hair dryer, or adding an understructure that pulls things into the correct shape and epoxying it all together?
-
I've been thinking about how to paint the plane. It's a fairly simple two-color scheme with insignia white on the bottom and gull gray (I think) on the top. I was going to try out black-basing where I would start with a black primer, then pre-shade with a dark gray, then add the white and the gull gray. Then I thought about how people add an early coat of aluminum for chipping. Can that all work with black basing? Maybe I'll just add the "chips" by hand. Just curious as I've never used these techniques.
-
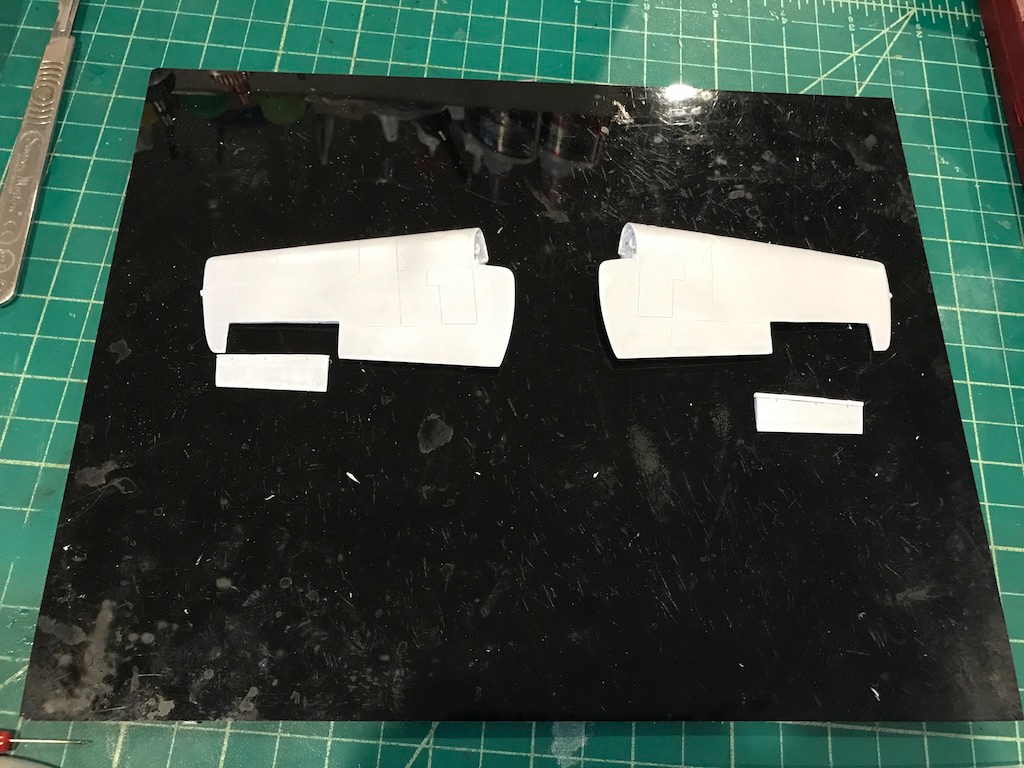
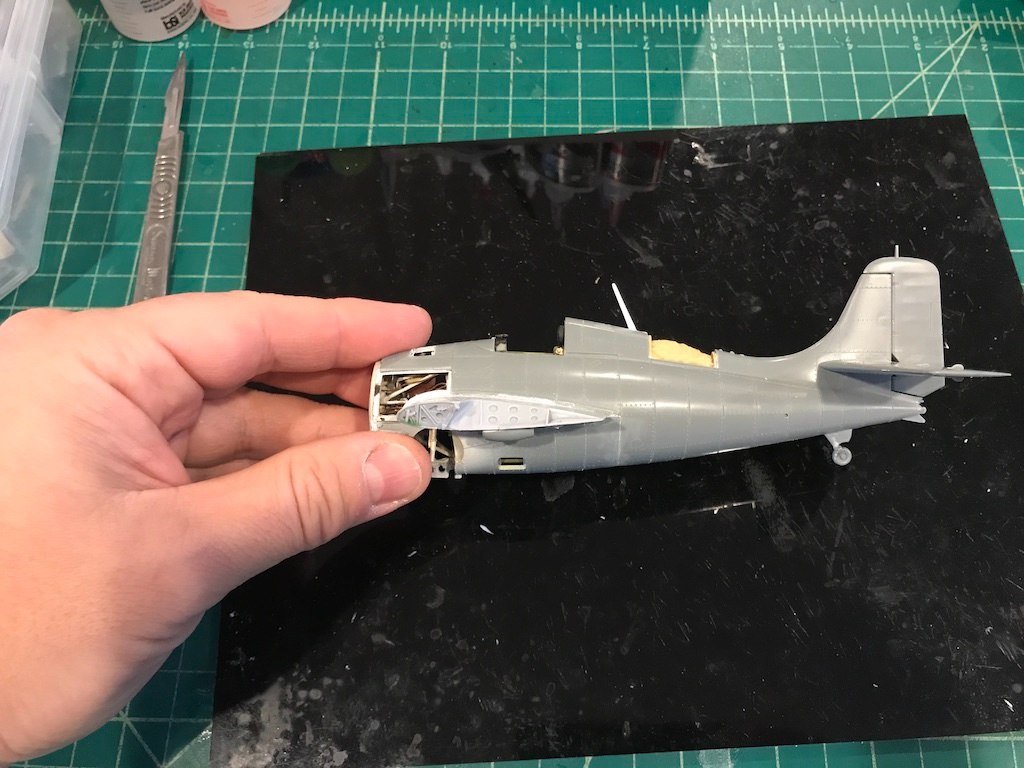
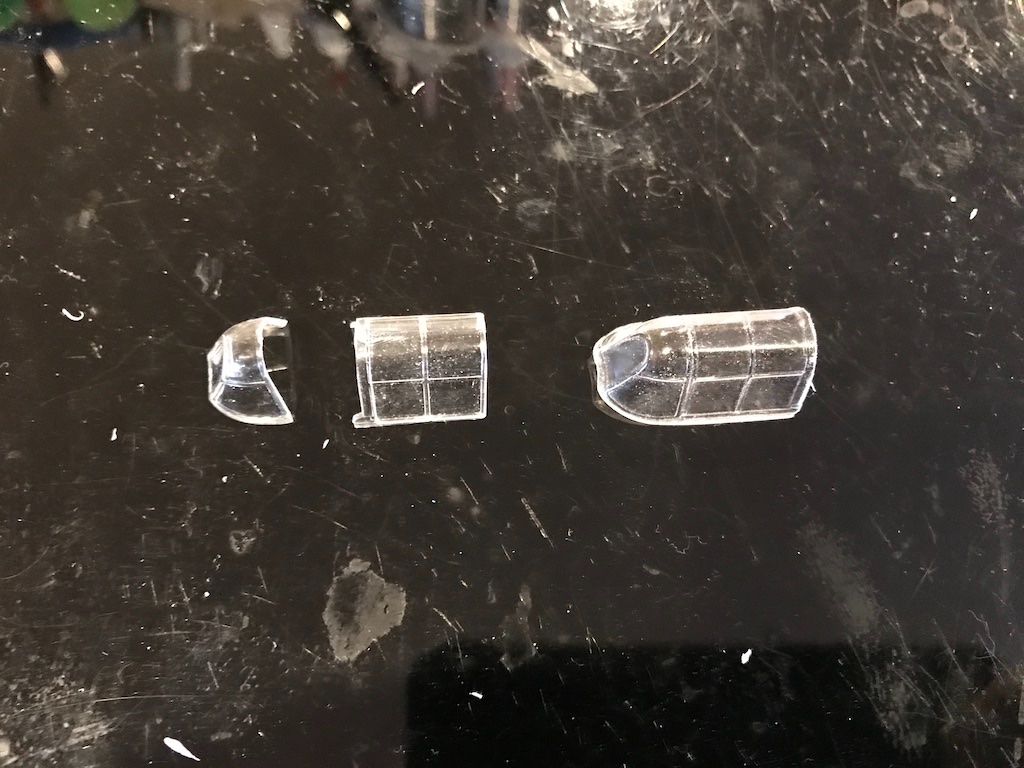
I've made some more progress on the Wildcat the last few evenings. Would go a lot quicker if I didn't have to back to repair things that I broke 🤯 Case in point, as I seem to do on every plane build, I broke the tail wheel off. Since I'm almost to the point of painting, I figured now was as good a time as any to put it back on so this time it's attached to the fuselage via a brass rod and 2-part epoxy. I'm sure I'll find a way to break it off again. I also had to replace the radio antenna. The kit part is only attached via a small nub into a tiny hole in the top of the fuselage. I attached it a couple of weeks ago promising myself to handle the kit gently, but of course a few days ago I reached for the kit without paying attention and snapped it off. Was too thin to pin, so I opened the hole up and built a new one out of plastic strip. The new part extends well into the fuselage and is glued in with 2-part epoxy, so hopefully I shouldn't have any problems snapping this one off. Of course, I had spent a good hour working on the first piece, test fit it into the fuselage, and put it down to get the glue ready and look forward to going to bed. As I put it down, the part slid down into the fuselage, doh! 🤬 I couldn't go to sleep on that note, so I rebuilt another one and this time, added a little blob of poster putty to the end so the same thing wouldn't happen. So, along with some minor putty work, here is where things are on the fuselage. I spent some time with the Wolfpack resin wings. After cleaning them up, I decided to remove the flaps so I could re-position them. Apparently the flaps tended to open "up"/"out" when the wings are folded, so I'll glue them into that position. One of the flaps came out a little thin, so in the picture you see that I added a thin strip of plastic sheet to the top that I'll shape into the right size. The auction included a Taurus vacu-formed canopy. After some research on how to release it from the mold, I managed to get it out (though the two rear corners would have to be glued back) and sanded it back to shape. I was planning to model it with the cockpit open, but the Taurus piece doesn't seem to be molded in a way with a thick enough frame to cut into two frames for the windscreen and the rear piece (hope that makes sense). So, I figured I would play around with it for practice given that these replacement canopies seem to be popular aftermarket for planes. In the end, the canopy doesn't really seem to fit correctly anyway (seems to be slightly taller/wider) so good practice I suppose.
- 241 replies
-
- 10
-