Landlubber Mike
-
Posts
4,547 -
Joined
-
Last visited
Content Type
Profiles
Forums
Gallery
Events
Everything posted by Landlubber Mike
-
 Agree about Paul - he helped me replace some cracked items on a couple of Pocher kits I own, and charged me very fair prices. His DVDs also have a kit inventory section that clearly show in pictures what a complete kit should contain. Helps a lot when looking at items up for auction.
 -
P-51B Mustang by jwvolz - Academy - 1/72 - PLASTIC
Landlubber Mike replied to jwvolz's topic in Non-ship/categorised builds
Nice work! Love the art work and color schemes on these planes. -
I used this (the matte version) on some recent 1/72 plane models I completed and was really impressed by it. They come in gloss, semi-gloss, and matte. Goes on really thin and does a nice job.
-
What do you think of the kit so far? I just got an email that they are taking pre-orders on Pocher's latest Ducati.
-
Thanks Carl, this is very helpful! Really appreciate it - things to think about
-
My pics were off the internet. The Smithsonian opened a new Air and Space Museum out near Dulles airport - it's a huge facility with tons of planes including one of the Space Shuttles. Well worth it if you are out here. Now that I'm modeling planes, I'll have to go back and take detail pictures to help with builds. For example, I have the Zoukei-Mura Dornier Do-335 kit in the stash. I believe that ZM came to the Smithsonian to study the plane to create their kit.
-
Ha, I have been! I'm just very much a novice (and a slow builder at that) so have been a little reluctant to post my work. 🙈 I live not too far from the Smithsonian Air and Space Museum - will need to head back out there and take more detailed pictures of the planes they have there. The one out near Dulles Airport is fantastic.
-
Bob, keep an eye on eBay. Prices right now are pretty outrageous for these kits. Only a few months ago, however, there were tons popping up for auction that went for about a third of some of the prices you are seeing now. On the lower end, I've seen prices for the Fiat around $300, Alfa Romeos (except for the rare ones like the Coupe Elegant and Muletto which go closer to $1,000) go in the high $300s to mid $400s depending on kit, and the Mercedes a little more than the Alfas. You're looking at low $500s for the Rolls Sedanca, a few hundred more for the Torpedo Cabriolet, and the Ambassador seems to run closer to $1,000. I haven't been as interested in the Bugatti so haven't been following them closely, but they are up there in the Rolls category in terms of pricing. The Paul Koos DVDs are well worth the cost, whatever kit you get. Very well done with hundreds, if not thousands, of pictures, along with build tips, options for improvements, etc.
-
Wow, that's very well done. I bet 3D printing will revolutionize the model industry. The detail you can get is fantastic, and my guess is that you don't have to worry about molds and the like.
-
Amazing work Grant! Those dials look fantastic. Love the real wood effect. I've got the Fiat and one of the Rolls Royce kits on the shelf alongside this one, and I've been considering using real wood in place of the kit "wood" parts. Nothing beats real wood! The Vallejo metal paints look very rich. I'm using them for the first time on my F3F builds. If I get half the effect that you are getting I will be a happy camper.
-
You just said what I have been trying to say much clearer and in fewer words It's the monochromatic effect that I'm trying to avoid. On silver cars, I saw one guy use a black marker in the door and panel lines to good effect. I just wonder if that will be too much against the dark yellow I'm using now. The other interesting thing is that many car modelers don't seem to try to add depth and highlights to the interior. Things like seats have lots of crevices, but they just shoot it with a color and that's that. Looks very toylike to me, but at this scale, I'm wondering what can be done. I'll just play around with things and see what happens. I have to remind myself that this was an inexpensive kit to give me experience. It's not like I'm starting out the gate with a Pocher kit or anything.
-
You've gotten some really great advice on here. A couple of other things I would add that just came to mind: 1. The one thing I liked about the Sherline is that their mills are very nice and the great thing is that the accessories are generally interchangeable between the lathe and mill (which leads to some cost savings). If you think you might be in the market for a mill, it might make sense to get the same manufacturer so that you can share accessories. For example, if you want a digital readout box, you can share the same box between the mill and the lathe which will save you some money. 2. I think someone may have mentioned this, but think about whether you want to work in metric or imperial. At least with Sherline, you can't share a DRO box between two different standards. I made the mistake years ago of buying a used imperial mill and metric lathe off eBay. When I went to buy a DRO package a year later, I had to convert at least one of them to the other standard which would require an expensive threadscrew and wheel upgrade that was like half the cost of a new machine. Since I wanted to switch to metric, I just went ahead and sold the mill and bought a new one (slightly bigger, with wider table, taller column, and hi-speed wheels) and added the DRO package. Then I got into pen turning, and realized the 8" lathe wasn't going to allow me to turn longer pieces because the chucks were taking up too much room. So, I sold that one and upgraded to the longer bed lathe. Later on I decided to start turning larger diameter wood projects, but was limited by the height of the lathe so ended up getting the riser block set. I say all this so you can learn from my mistakes Also to show you that the Sherline are very versatile with all the accessories. It might be hard to forecast exactly what you will need for the next decade plus when deciding on packages as your interests may change (mine certainly have), but buying a package of accessories will certainly save you money. If I remember correctly, the "A" package pretty much should be considered at a minimum as it includes a chuck which is fairly expensive if you buy separately. 3. Glad Roger mentioned the lathe with milling column option. Depending on how often you will be using a mill or lathe, that might be a very good option to go with. I've barely used my mill thus far, but have used the lathe a lot on turning projects (non-ship model projects). If I had to start all over again, I'd strongly consider that option to save on cost and bench space. Start with the lathe, and then if you want to get into milling operations, consider whether you can live with the milling column attachment (which from what I've read is a pretty quick adjustment to the lathe) -- or if switching between milling and lathe work will be a pain, get a stand-alone mill. My problem was I started with the mill, then upgraded the mill for the DRO. 4. Safety is definitely a must for the lathe. Not only eye protection, but be very careful of clothes, hair, etc. getting caught. My first lathe was the Proxxon DB250 mini lathe. I was turning a mast for my first ship, and finishing it with steel wool. Well, I got the steel wool too close to the spinning headstock and it pulled the wool into it. Thankfully, I immediately let go but it taught me a good lesson. My hair is short, but I always wear short sleeves and avoid using cloth or anything similar around the lathe. When I cover the lathe bed, I use paper towels instead. I also make sure that my family knows not to disturb me when I have my power tools running as a small lapse in concentration can be disastrous. Also, make sure that chucks are installed tightly. For some reason I had a chuck come off the spindle spinning at 2000+ RPM. Thankfully it didn't fly off, but just sort of spun off the headstock and dropped onto the bench. When it hit the floor, it was still spinning like a top. Was a good learning experience for me to continually check that things like jaw chucks - which are screwed onto the head or tail stock and are not secured by a drawbolt - remain tightly screwed on during the turning process. Learning by watching videos online is fine, but I have to say, you see people on YouTube doing really stupid, unsafe things. Whenever I watch those videos, I already try to read the comments as people will point out if the person was doing something not in a safe manner.
-
Thanks Carl! Not sure if I'm going to weather it per se (e.g., add rust and grime). I'm more thinking about how to accent the deeper areas with shading and highlights - for example, the door edges typically look "black" when you look at a car, but solid black might be too stark on a model. I've seen some people use a black pen or marker, or panel wash, to add depth to areas like the door. Others I've seen deepen the recessed areas by scribing them, which adds more natural depth and do not use paint, etc. Part of that seems to depend on how in scale the panel lines are. This is kind of the problem I have with paint on model ships. Areas are typically painted without shading and highlighting for a more "plastic" look, yet the same model has natural wood which is oiled or finished which has natural "shading and highlighting." So juxtaposing the two together seems a bit schizophrenic. Sorry to go back and forth on this. I'll just play around with it and figure things out as I go along. I'm just not very artistic
-
I am coming to the same conclusion after building a much less complicated cockpit on my F3F models. But, was fun trying to prove to myself that I could do it.
-
Ah yes, post race or bad guy car chase would be fun to model. Good idea!
-
Oh man that must have been fun to ride in and drive!
-
I think so 🙄. I find the subjects a little more interesting than 18th century British warships - at least at the moment.
-
The bumpers are actually a matt gray with black accents. Rims are same Matt grey with silver hub caps. Not a fancy chromed out car for sure! Just for clarification, by single color I was trying to say where a color is applied but no washes or highlights are applied. With planes people accent panel lines but that isn’t done when it comes to door seams, etc. That Aston Martin must have been a lot of fun!
-
Looks great! Stay safe with all that rain - maybe you should be building an ark?
-
I haven't used the Unimat, but have the Sherline. It's a fantastic machine that's build like a tank! The add-ons increase the financial cost considerably, but they also greatly increase the flexibility of the machine. I'd offer a few thoughts: 1. If you have the space, I would go for the 17" longer bed. If you want to add bigger chucks, etc. to the headstock and tailstock, they will eat up the distance between centers very quickly. I started turning pens on the shorter bed lathe, and ended up selling it and buying the 17" and now have plenty of room to use various accessories. 2. Think about what you want to do with the machine. Turn metal? Turn wood? Turn both? I say this because while the machine is good for turning small wood projects, you are limited by the height off the bed in the diameter of parts you can turn. Usually not a problem with metal given that the maximum diameter you can turn is 3.5" I believe, but is very limiting if you're going to be turning anything bigger than pen blanks. I ended up getting risers for the headstock and tailstock which bump the maximum diameter to 6". 3. I like the Sherline because you can replace parts very easily. So if you lose a screw or washer or broke something, you can replace it. 4. Think about getting the digital readout (DRO) - I love it as it has a tachometer and X-Y axis readout. Very helpful if you want to drill at a certain RPM, turn something to a certain diameter, etc. If you get it installed, you save some money and some time because it takes a while to swap things out to hook up the readout machine. 5. Take a look at discountcampus for better deals than buying direct from Sherline. The packages offer substantial discounts over buying the individual accessories separately, but look through the set to make sure you aren't getting a whole bunch of things you won't need.
-
I'm at the point where I'm trying to figure out how I want to proceed with painting the model. Unlike models of planes and ships where weathering, shading, and highlighting techniques are used, the car modelers seem to generally stay away from those techniques, and instead focus on getting as much of a shiny body paint job as possible (unless of course they are modeling an older, worn car) - essentially a show room finish with clean engine, body pans, etc. I think, however, that basic one-color makes a model look "plastic." I'm probably not going to weather this one (I still might, not sure), but I'm thinking about ways to at least add shading and highlighting to add depth to things like panel lines, the engine, wheel hubs, etc. So, I'm thinking of adding subtle washes and dry brushing to add some depth to various areas. If it looks like crap, I'll just weather and rust it out 👍
-
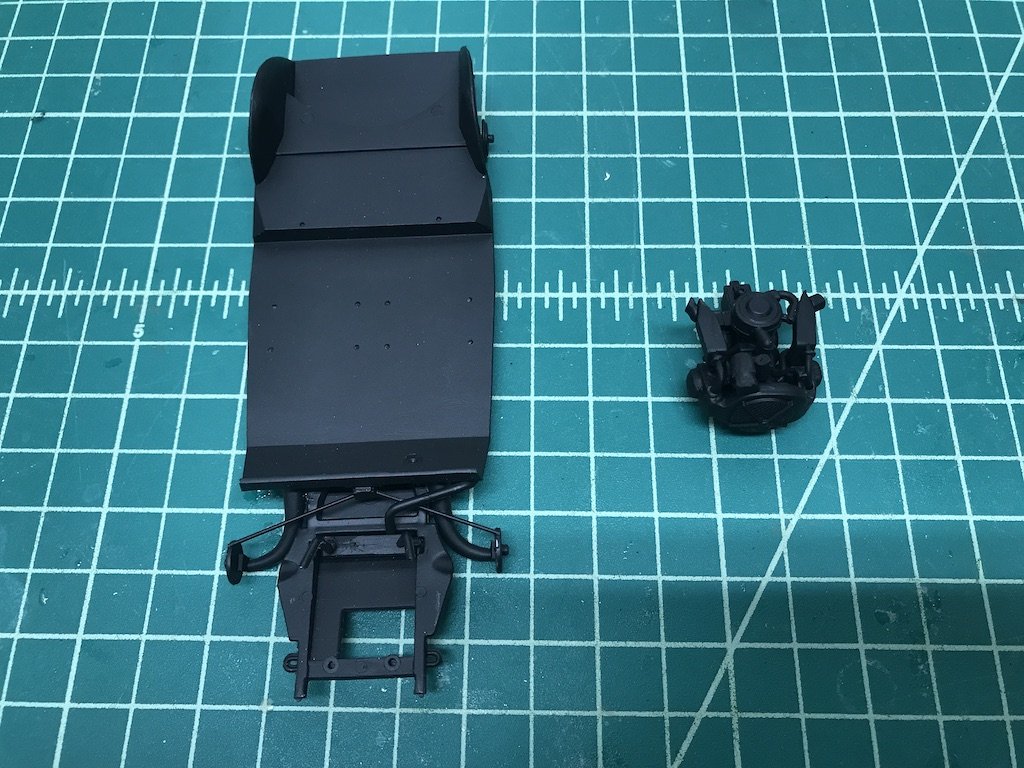
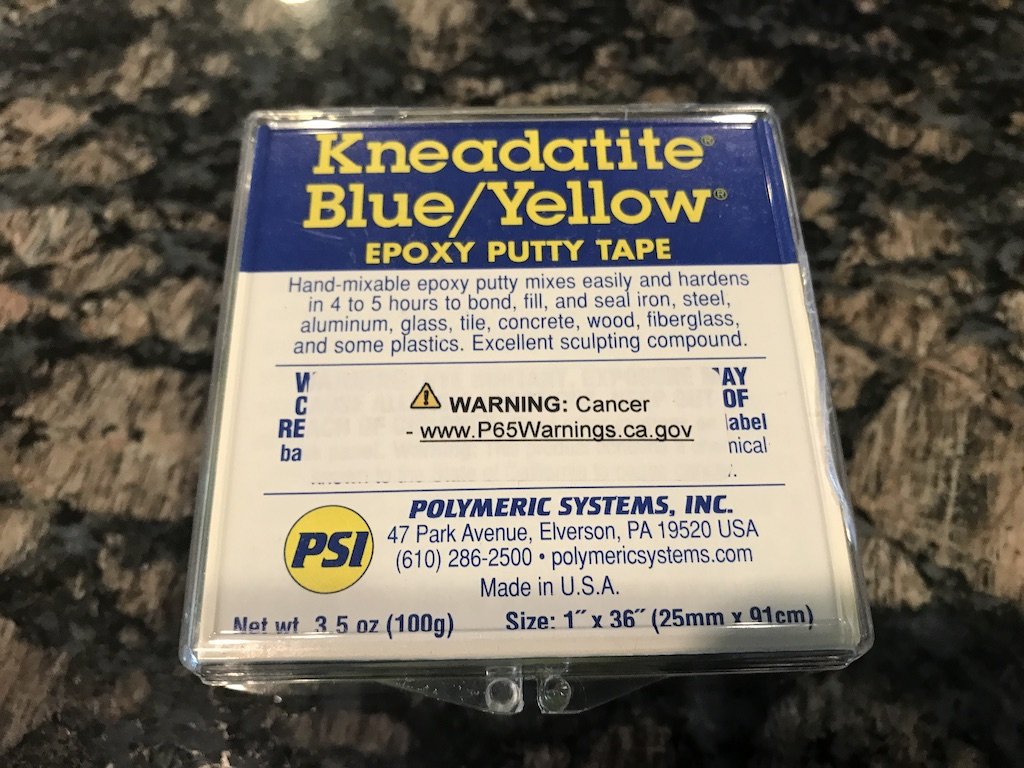
I'm not building this as the Dolly edition, but as a standard one color model. I've gone with Tamiya Dark Yellow (TS-3) and am using it straight from the can. Haven't had too many problems with the can, though I've had to apply and then sand in multiple coats in order to get a smooth, blemish free appearance. I finished putting together the chassis and the engine, primed them with Vallejo black, and have a lot of the other parts already pre-painted. The engine was a little tricky because I lost a piece to it. I'm not mechanical so not sure what the part represents, but fortunately it was one half of a two-part assembly that had a mirror image on the other side. I ended up using this epoxy putty tape to create a new piece - it worked really nicely and the completed part looked pretty good in the end.
- 126 replies
-
- 12
-

-
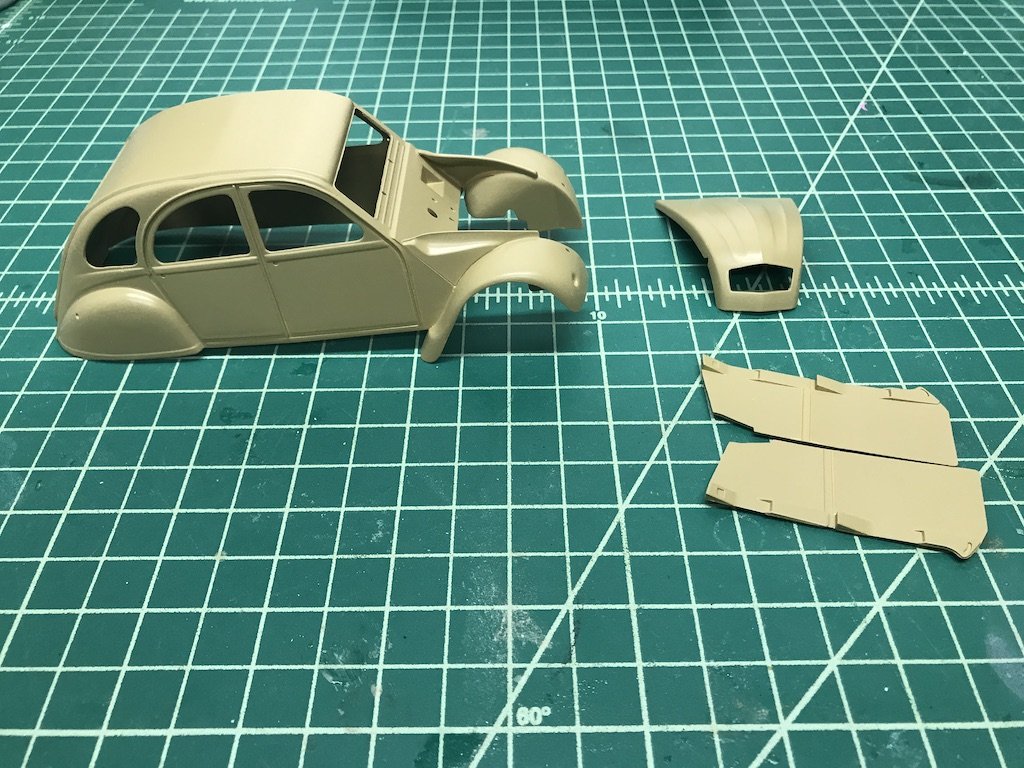
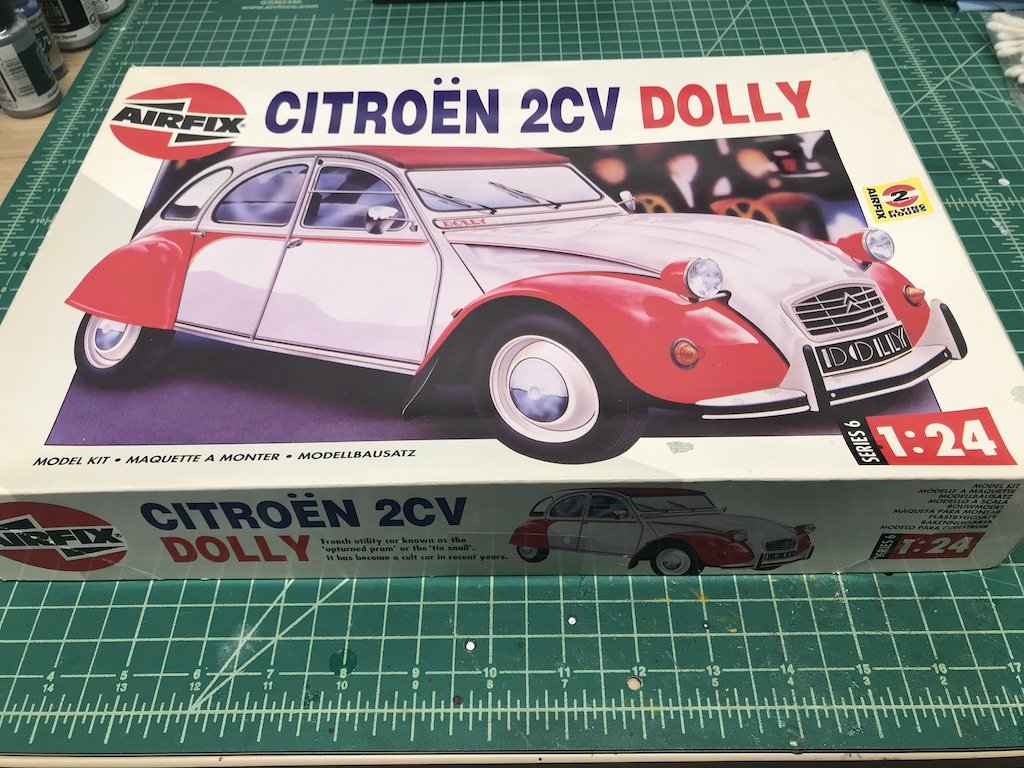
Here is another model that I've been building off and on the past few weeks. It's the Airfix Citroen 2CV (or "Deux Cheveau"). The 2CV (often called the "duck") was made between 1948-1990. This particular kit is the "Dolly" edition, which was a 2-color special edition in the mid-1980s. The 2CV is like the French equivalent of the Volkswagen Beetle - very simple design whose production spanned decades with cars exported all over the world. It was even in a James Bond film chase scene! The 2CV has basic features like a canvas roll-back roof, windows that opened by pushing on them with your elbows, seats that essentially were a piece of cloth draped over a metal frame, etc. Early years had a 10HP engine, which later increased to a massive 30 HP. I tend to go for more of the odd model choices, and saw this offered for $10 on eBay from a seller I had bought a plane or ship kit from, and thought why not? First car kit, and now the stash has many more 🙈 The kit isn't bad, and is a fairly basic curbside model. Even though the hood is a separate piece, I believe you have to glue it to the frame unless you trick it out somehow to be able to open (first model car kit since I was a kid so I'm not exactly sure). That might be for the best as I've had to make a few tweaks to make the engine fit, and I'm not sure that people will be all that interested in the beastly engine.
- 126 replies
-
- 10
-
-
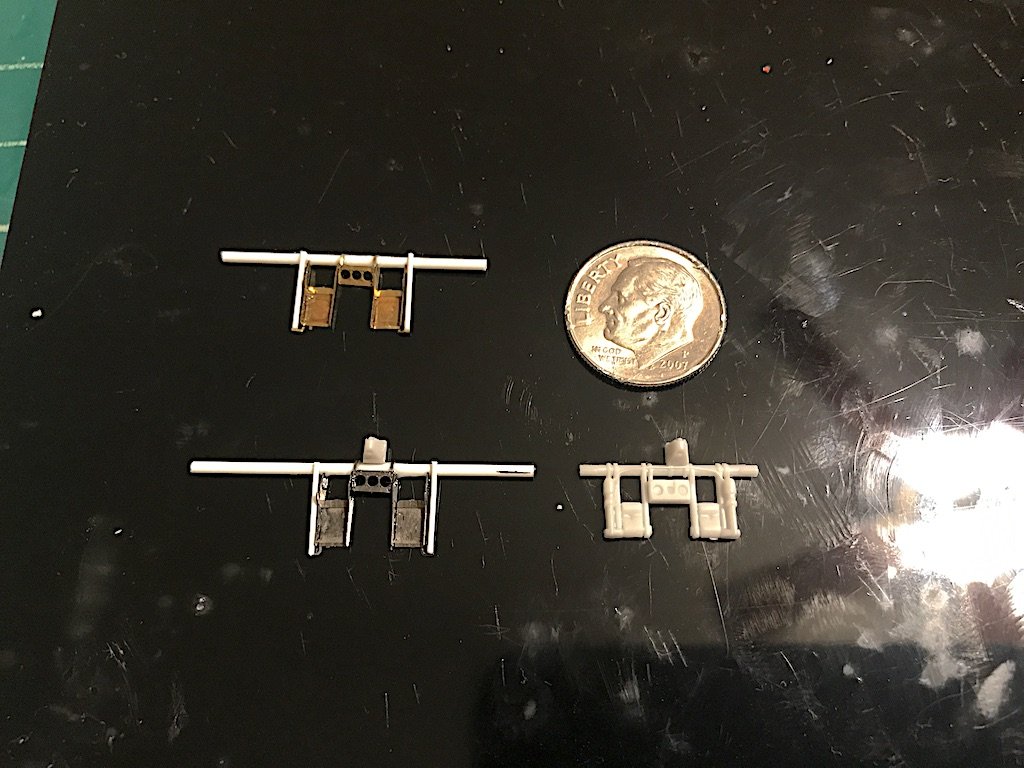
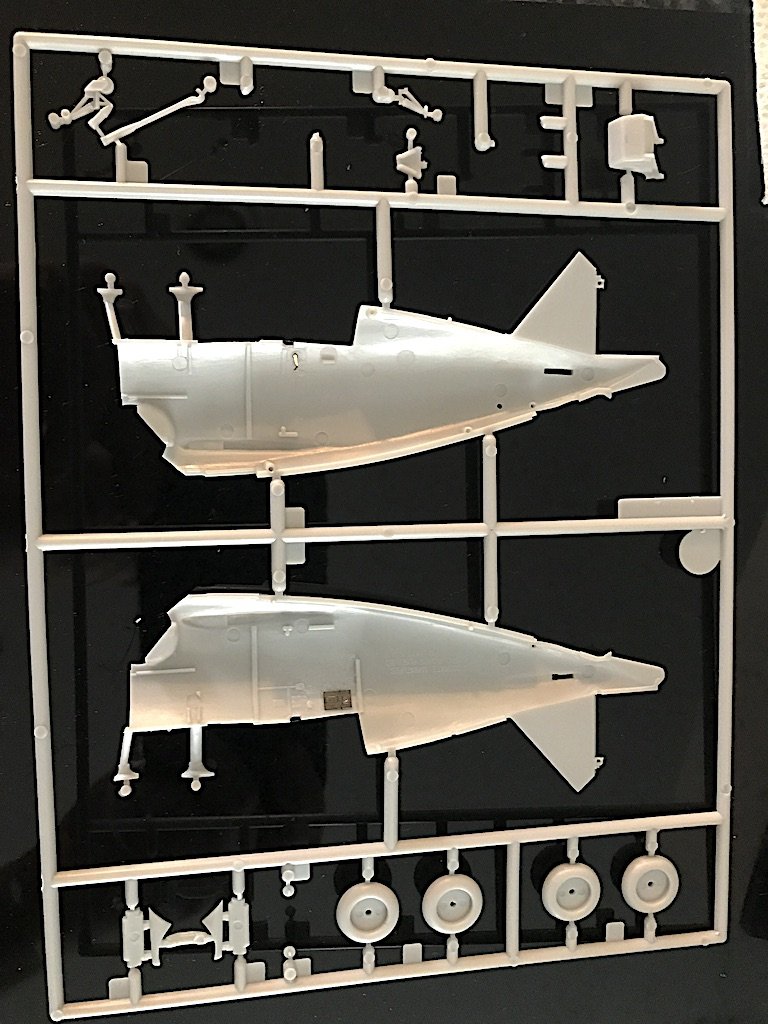
Thanks OC! I finally finished adding the Eduard upgrades to the cockpit portions (minus adding the gauge and other film pieces that I'll add once things are painted). I'm going to prime and paint the pieces first, and then assemble per the suggestions in the kit instructions. There wasn't much to add for the cockpit walls - just had to scrape off a couple of details that frankly were pretty good to begin with, and replace them with some PE: Here are the rudder pedals. All you end up using is the top section, and the rest is PE and scratch built (Eduard's instructions say to use "wire" but I used very thin diameter styrene rod). I made the top bar longer to help with the assembly, and will cut to fit when I start putting the cockpit together. It was pretty tricky trying to get that center piece with the three gauges installed as the PE straps are very thin. In fact, I broke one off on each of the two assemblies, and lost one so had to create a new one. The pedals were what really scared me as the sides were attached to the pedal by a tiny thin tab maybe less than 1mm wide - was really worried that the parts would break off so I added some CA to the seam between the parts to help keep things in place. Overall, I would say that this is one of those items where the kit parts are probably perfectly acceptable to use and you wonder why Eduard decided to add this particular upgrade to the package. Maybe they already had the specs to replace poorly designed pedals on another model and decided to port them over to this kit since they didn't have much else to modify given how good this kit is? The PE probably is less clunky looking, but the kit part has some details that aren't included in the PE-modified part. I went ahead and built them anyway to get more experience with manipulating and assembling PE. They look a little rough at such close-up magnification, but came out fairly nicely under normal viewing conditions
- 128 replies
-
- 10
-