Landlubber Mike
-
Posts
4,553 -
Joined
-
Last visited
Content Type
Profiles
Forums
Gallery
Events
Everything posted by Landlubber Mike
-
 I haven't used the Unimat, but have the Sherline. It's a fantastic machine that's build like a tank! The add-ons increase the financial cost considerably, but they also greatly increase the flexibility of the machine. I'd offer a few thoughts: 1. If you have the space, I would go for the 17" longer bed. If you want to add bigger chucks, etc. to the headstock and tailstock, they will eat up the distance between centers very quickly. I started turning pens on the shorter bed lathe, and ended up selling it and buying the 17" and now have plenty of room to use various accessories. 2. Think about what you want to do with the machine. Turn metal? Turn wood? Turn both? I say this because while the machine is good for turning small wood projects, you are limited by the height off the bed in the diameter of parts you can turn. Usually not a problem with metal given that the maximum diameter you can turn is 3.5" I believe, but is very limiting if you're going to be turning anything bigger than pen blanks. I ended up getting risers for the headstock and tailstock which bump the maximum diameter to 6". 3. I like the Sherline because you can replace parts very easily. So if you lose a screw or washer or broke something, you can replace it. 4. Think about getting the digital readout (DRO) - I love it as it has a tachometer and X-Y axis readout. Very helpful if you want to drill at a certain RPM, turn something to a certain diameter, etc. If you get it installed, you save some money and some time because it takes a while to swap things out to hook up the readout machine. 5. Take a look at discountcampus for better deals than buying direct from Sherline. The packages offer substantial discounts over buying the individual accessories separately, but look through the set to make sure you aren't getting a whole bunch of things you won't need.
 -
I'm at the point where I'm trying to figure out how I want to proceed with painting the model. Unlike models of planes and ships where weathering, shading, and highlighting techniques are used, the car modelers seem to generally stay away from those techniques, and instead focus on getting as much of a shiny body paint job as possible (unless of course they are modeling an older, worn car) - essentially a show room finish with clean engine, body pans, etc. I think, however, that basic one-color makes a model look "plastic." I'm probably not going to weather this one (I still might, not sure), but I'm thinking about ways to at least add shading and highlighting to add depth to things like panel lines, the engine, wheel hubs, etc. So, I'm thinking of adding subtle washes and dry brushing to add some depth to various areas. If it looks like crap, I'll just weather and rust it out 👍
-
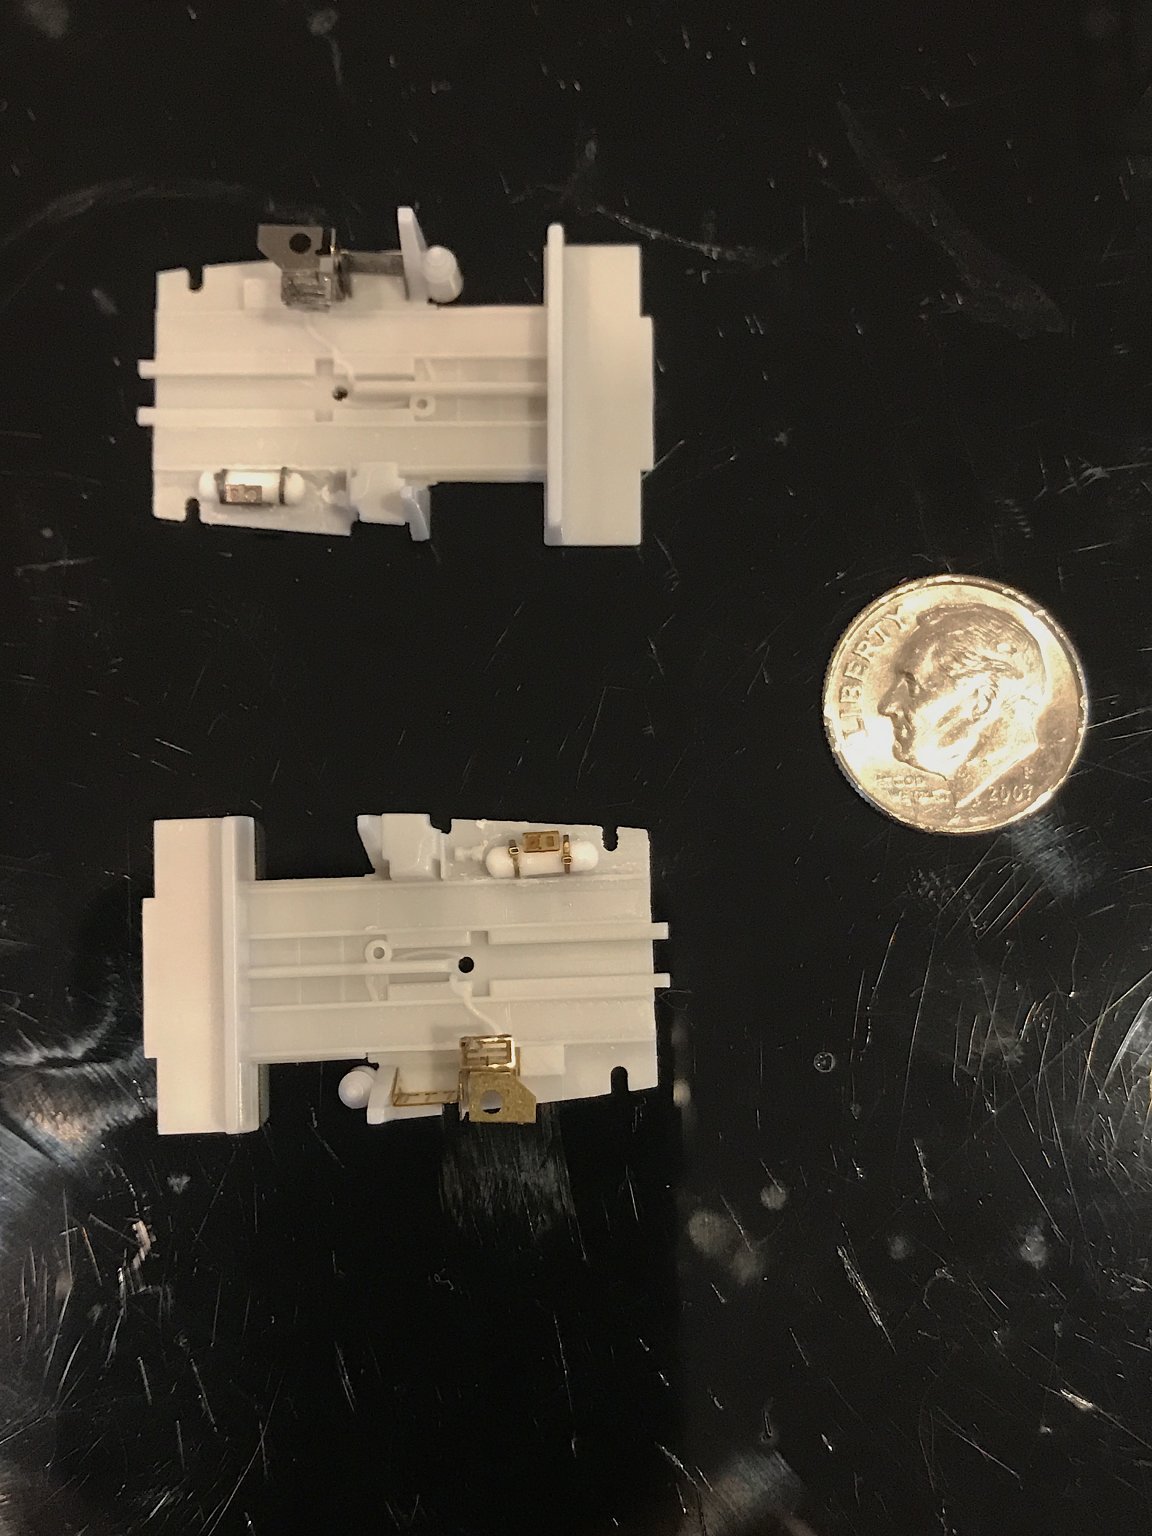
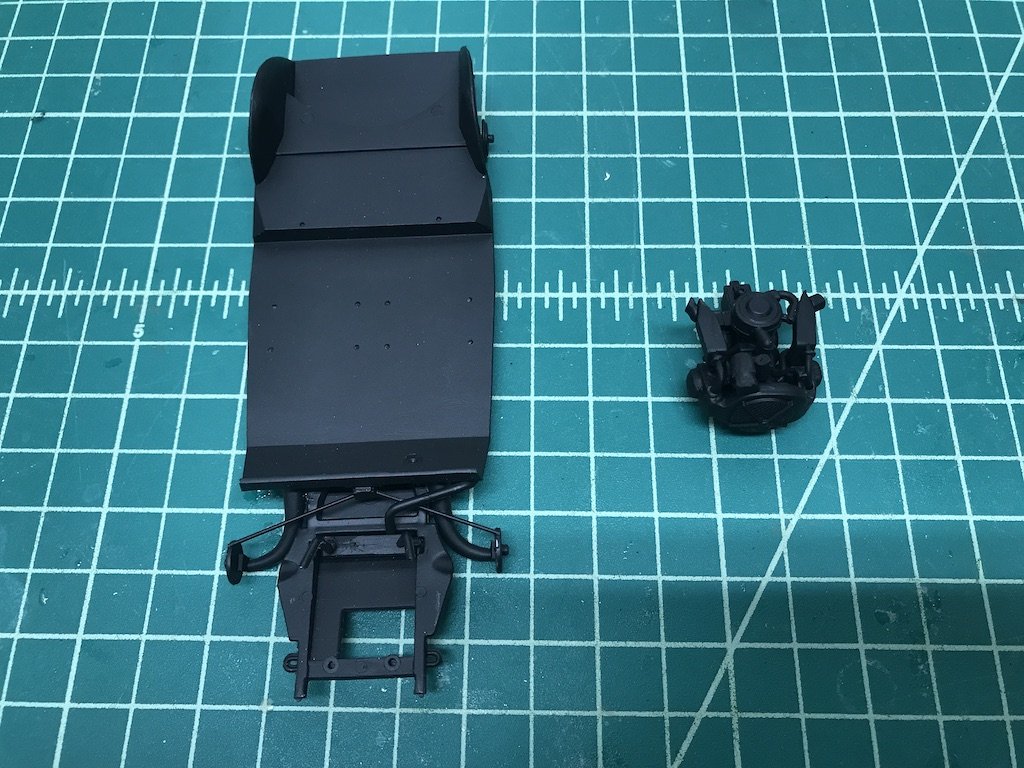
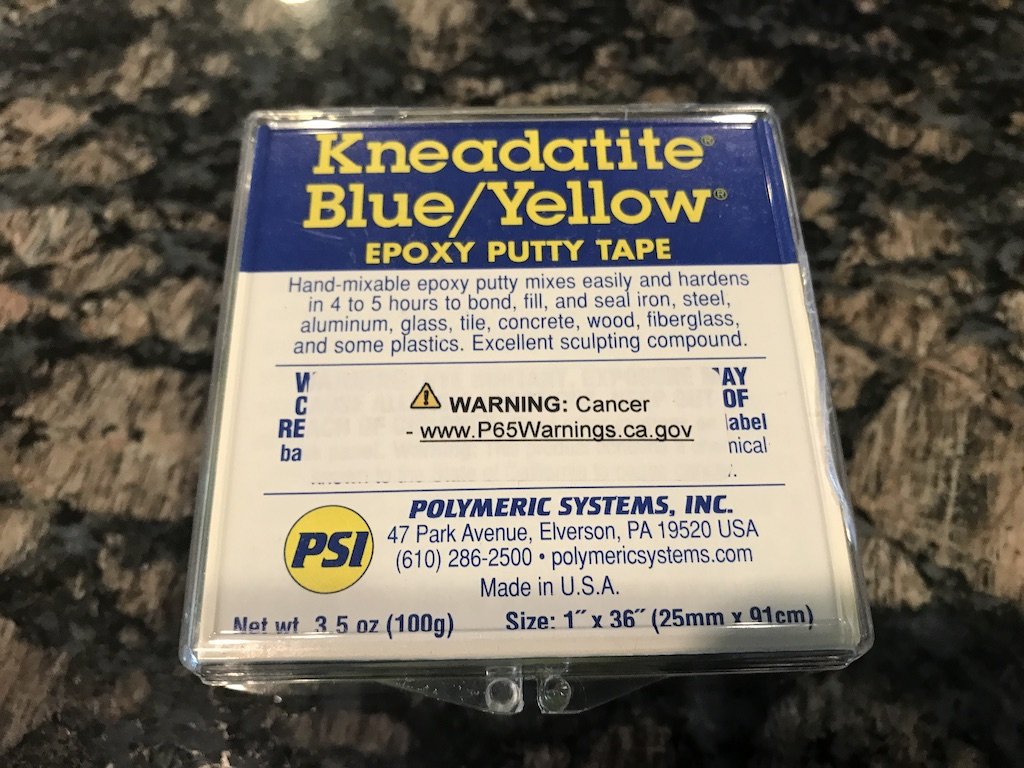
I'm not building this as the Dolly edition, but as a standard one color model. I've gone with Tamiya Dark Yellow (TS-3) and am using it straight from the can. Haven't had too many problems with the can, though I've had to apply and then sand in multiple coats in order to get a smooth, blemish free appearance. I finished putting together the chassis and the engine, primed them with Vallejo black, and have a lot of the other parts already pre-painted. The engine was a little tricky because I lost a piece to it. I'm not mechanical so not sure what the part represents, but fortunately it was one half of a two-part assembly that had a mirror image on the other side. I ended up using this epoxy putty tape to create a new piece - it worked really nicely and the completed part looked pretty good in the end.
- 126 replies
-
- 12
-

-
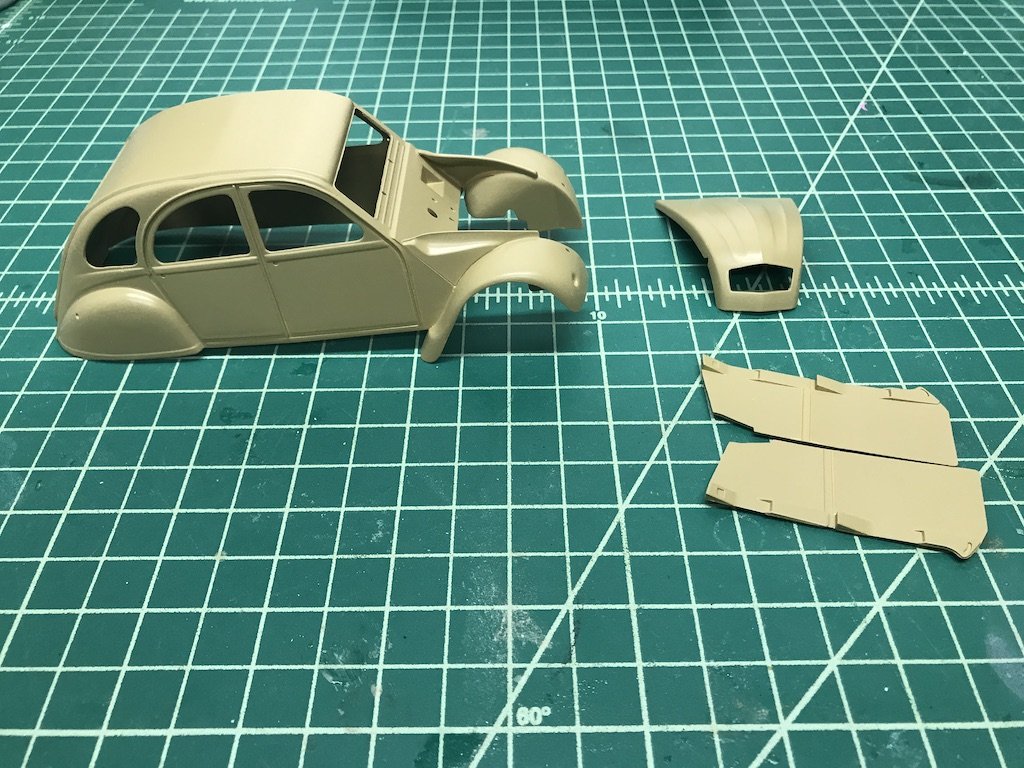
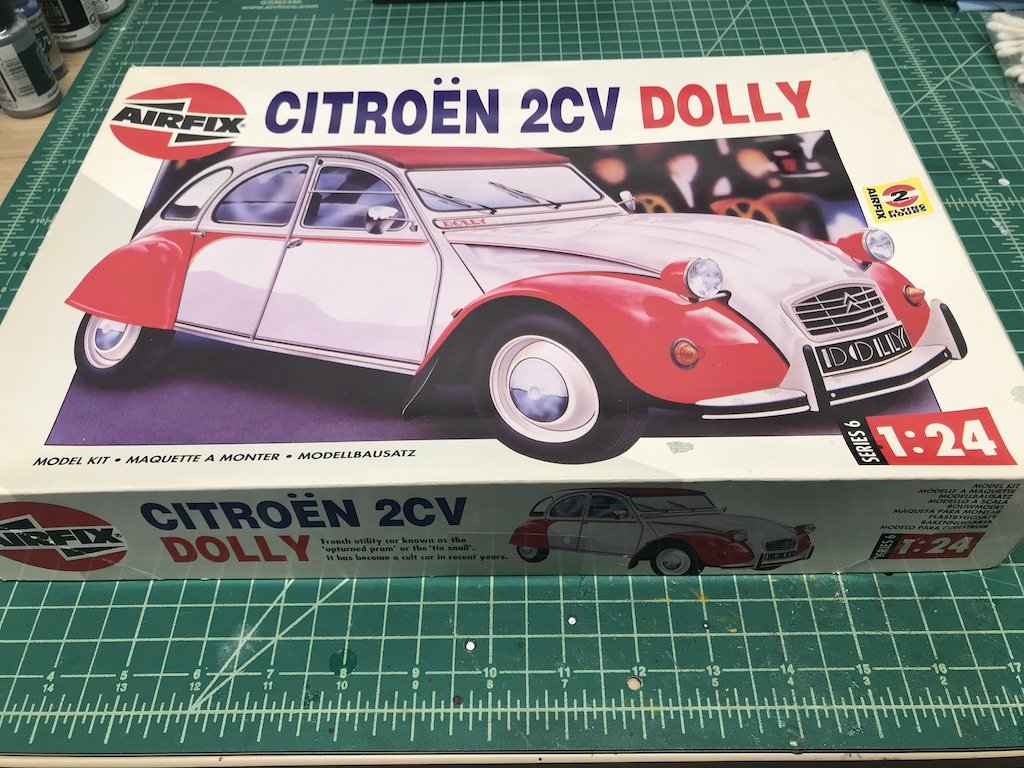
Here is another model that I've been building off and on the past few weeks. It's the Airfix Citroen 2CV (or "Deux Cheveau"). The 2CV (often called the "duck") was made between 1948-1990. This particular kit is the "Dolly" edition, which was a 2-color special edition in the mid-1980s. The 2CV is like the French equivalent of the Volkswagen Beetle - very simple design whose production spanned decades with cars exported all over the world. It was even in a James Bond film chase scene! The 2CV has basic features like a canvas roll-back roof, windows that opened by pushing on them with your elbows, seats that essentially were a piece of cloth draped over a metal frame, etc. Early years had a 10HP engine, which later increased to a massive 30 HP. I tend to go for more of the odd model choices, and saw this offered for $10 on eBay from a seller I had bought a plane or ship kit from, and thought why not? First car kit, and now the stash has many more 🙈 The kit isn't bad, and is a fairly basic curbside model. Even though the hood is a separate piece, I believe you have to glue it to the frame unless you trick it out somehow to be able to open (first model car kit since I was a kid so I'm not exactly sure). That might be for the best as I've had to make a few tweaks to make the engine fit, and I'm not sure that people will be all that interested in the beastly engine.
- 126 replies
-
- 10
-
-
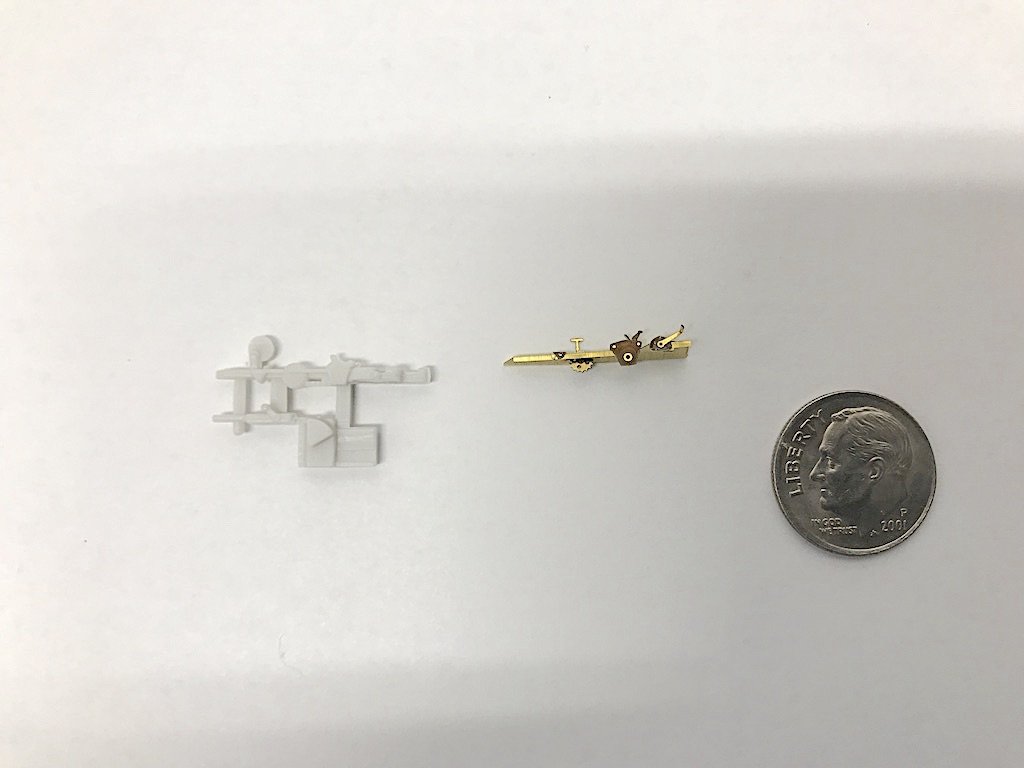
Thanks OC! I finally finished adding the Eduard upgrades to the cockpit portions (minus adding the gauge and other film pieces that I'll add once things are painted). I'm going to prime and paint the pieces first, and then assemble per the suggestions in the kit instructions. There wasn't much to add for the cockpit walls - just had to scrape off a couple of details that frankly were pretty good to begin with, and replace them with some PE: Here are the rudder pedals. All you end up using is the top section, and the rest is PE and scratch built (Eduard's instructions say to use "wire" but I used very thin diameter styrene rod). I made the top bar longer to help with the assembly, and will cut to fit when I start putting the cockpit together. It was pretty tricky trying to get that center piece with the three gauges installed as the PE straps are very thin. In fact, I broke one off on each of the two assemblies, and lost one so had to create a new one. The pedals were what really scared me as the sides were attached to the pedal by a tiny thin tab maybe less than 1mm wide - was really worried that the parts would break off so I added some CA to the seam between the parts to help keep things in place. Overall, I would say that this is one of those items where the kit parts are probably perfectly acceptable to use and you wonder why Eduard decided to add this particular upgrade to the package. Maybe they already had the specs to replace poorly designed pedals on another model and decided to port them over to this kit since they didn't have much else to modify given how good this kit is? The PE probably is less clunky looking, but the kit part has some details that aren't included in the PE-modified part. I went ahead and built them anyway to get more experience with manipulating and assembling PE. They look a little rough at such close-up magnification, but came out fairly nicely under normal viewing conditions
- 128 replies
-
- 10
-
-
Looks fantastic! I'm a little partial to desert camo schemes myself, but I have to say that this one is looking really sweet. Nice work!
-
Agree with Egilman - the invasion stripes came out nicely and really add a nice element to the model. Well done, congratulations!
-
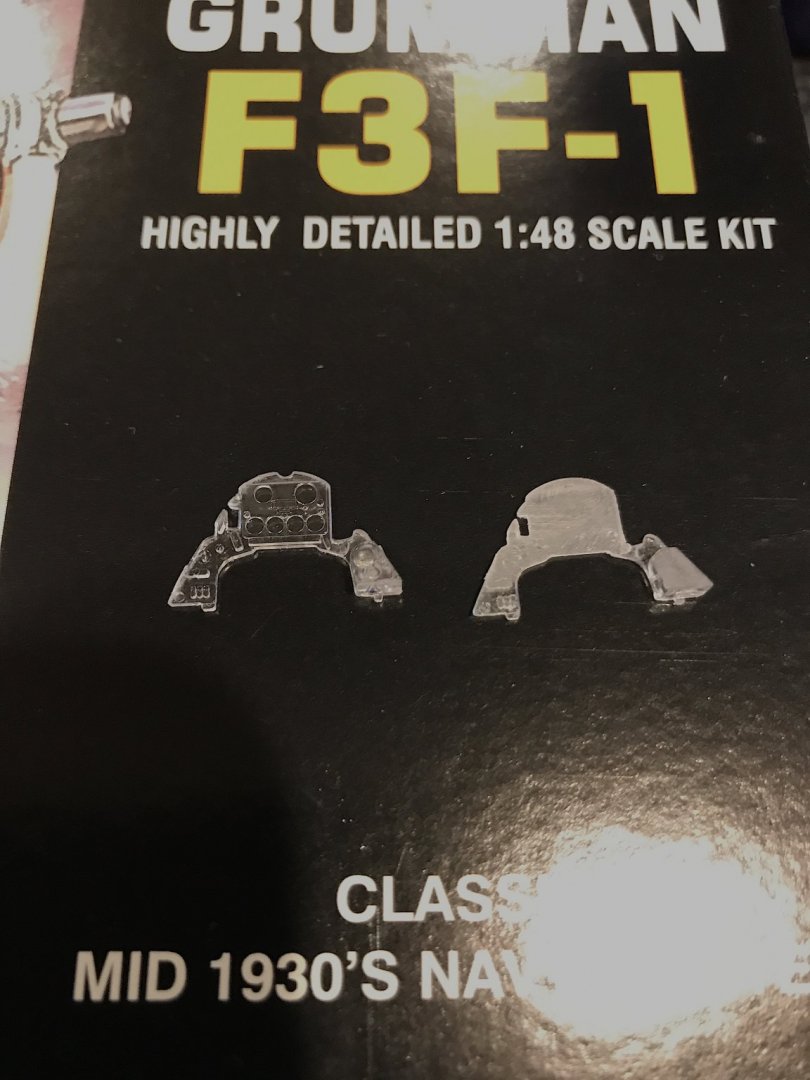
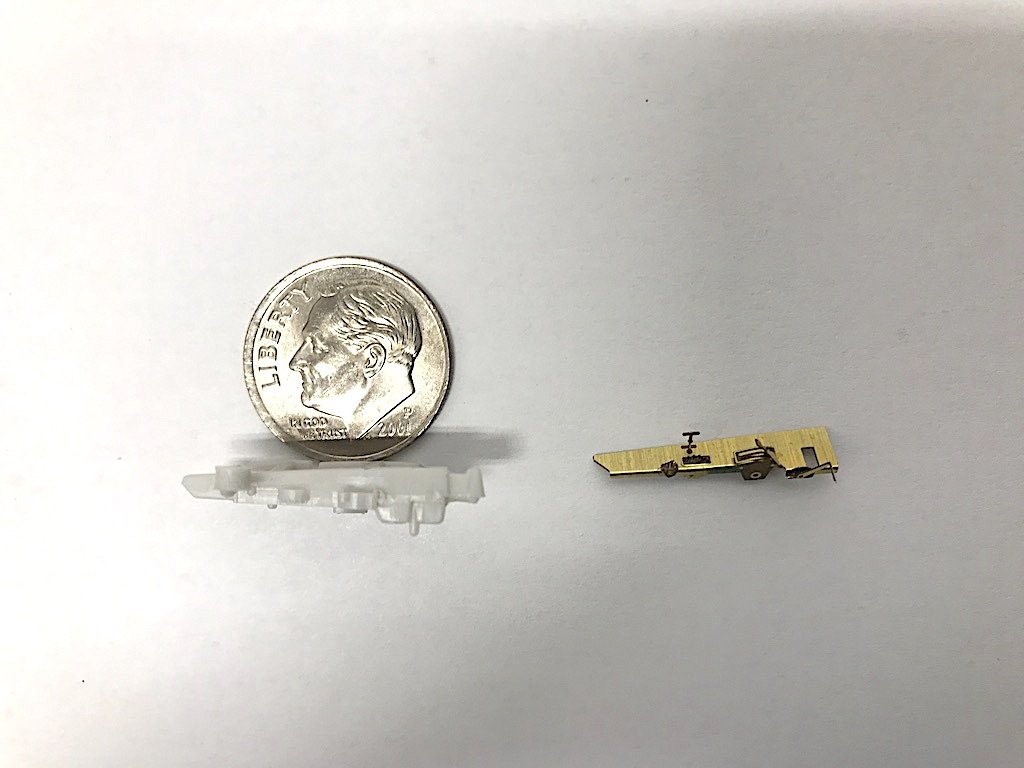
I've spent some time the last couple of days working on the cockpit - more specifically, working in the Eduard PE set into it. The PE set is probably a good 2/3-3/4 just for the cockpit so it's been a number of hours of work. Not sure how much will be seen at this scale, but it's been a good learning experience. Overall, I would say the kit parts are very nice, but Eduard does a great job here adding things like switches, handles, etc. For the instrument panel, the kit has a reverse decal for the gauges which goes in the back of the clear panel part. They also give you a decal right side up if you just want to slap the decal on the front. Very nice to have options! Eduard instead has you sand off a lot of the raised details, and then add a PE part over a printed decal-like "film" for the various dials and gauges. They also have you add a whole bunch of handles, switches, etc. I forgot to take a picture of the changed panel before priming it black (impossible to tell the details right now), but here is a picture with the dial faces removed juxtaposed against the kit part. I also spent a bit of time on the cockpit floor pieces. Lots of PE to add, including one small detail section that got removed and new parts added. Hoping to finish the last bit of cockpit PE tonight so I can prime everything and let things cure. The cockpit is generally all aluminum which makes the base coat fairly easy, but I'm going to try to use washes, etc. for depth and pick out some of the other details like the gauge faces, handles, etc. So, it's likely going to be a few more days of work to get it completed. I'd rather let things sit and cure for 24 hours, then try to rush things. There's still plenty else I can work on in the meantime.

- 128 replies
-
- 13
-
-
Nice work OC - I’m in for this one too. Kit sure does give a lot of marking options!
-
Love the lines on this one Popeye - I’m pulling up a chair for this one!
-
Looks fantastic. That box is huge - looking forward to seeing this come together. Love the blue!
-
Looking really nice!
-
Looks great! I had a problem with the PE too. Have to be careful not to bend them too much or they will break apart. I also had a problem with the main mast being a touch too tall for some reason which made the bottling tricky.
-
Yeah, it's considerably harder. Not sure if it's some kind of stainless steel or what. It's not too hard that you can't work it though, just a noticeable hardness differential. Thanks for cluing me in on how the film works. Looks pretty nice for sure. Thanks for the tip. I know this can be a problem with the brass parts also, but here, my guess is that while the stainless are harder, they are a bit more fragile if you bend them too much. The Eduard stuff is really amazing. The level of details, the little notches to help bends, and some of the texture and other details is super impressive. Amazing what they can do with PE (and Eduard pumps out a lot of PE sets).
-
Wow the juxtaposition of the wood against the painted parts is really striking. That must have been a cool car to see in person. Nice job!
-
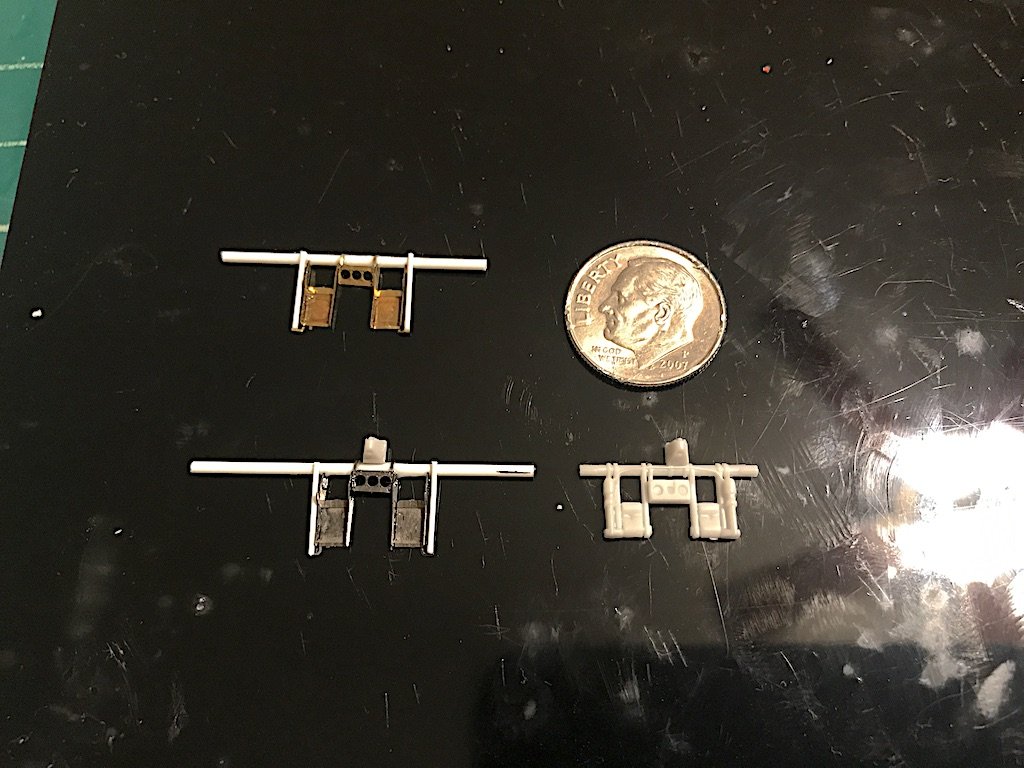
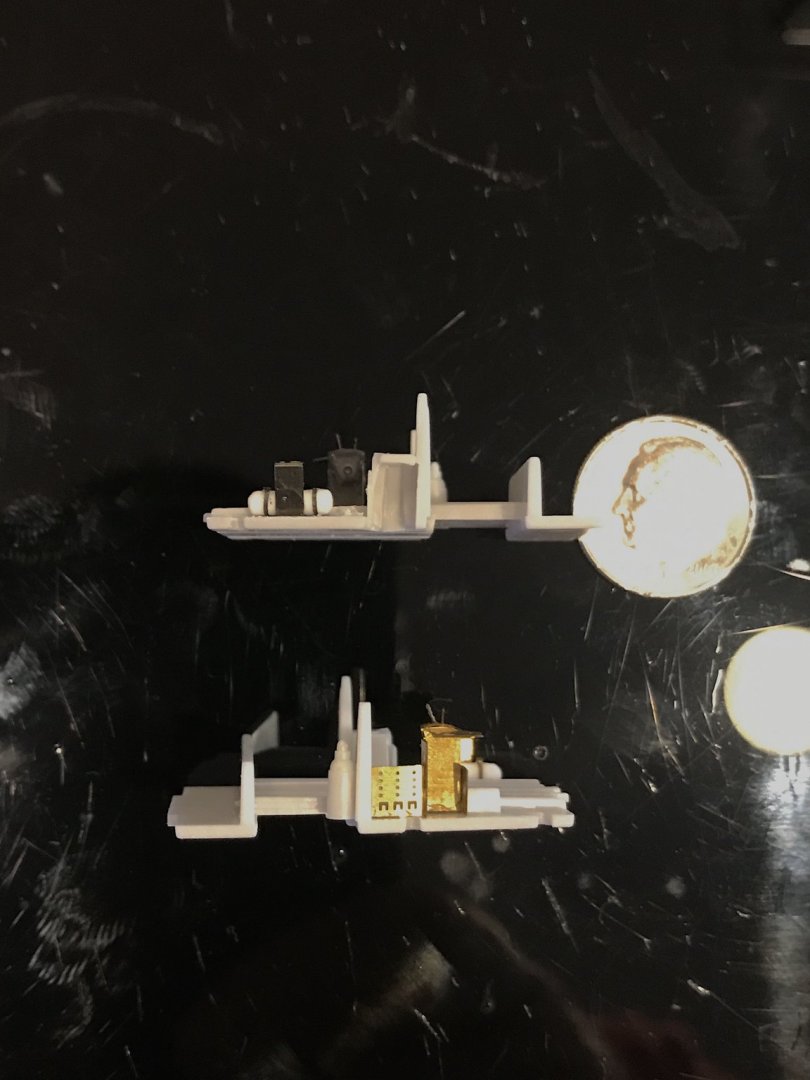
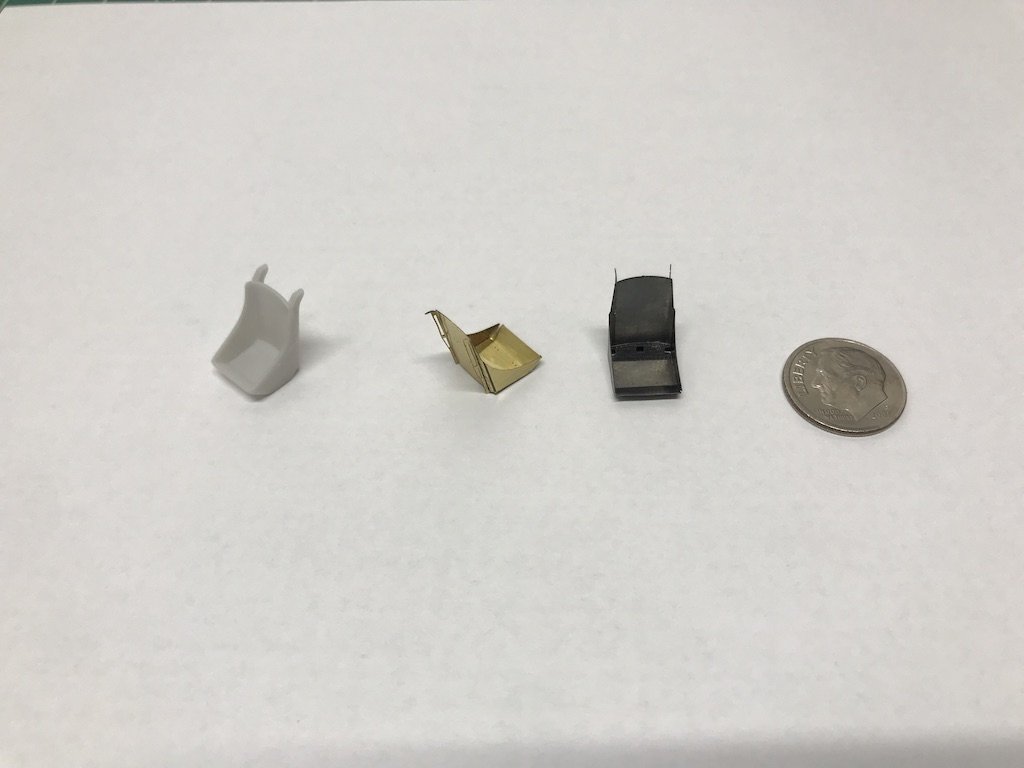
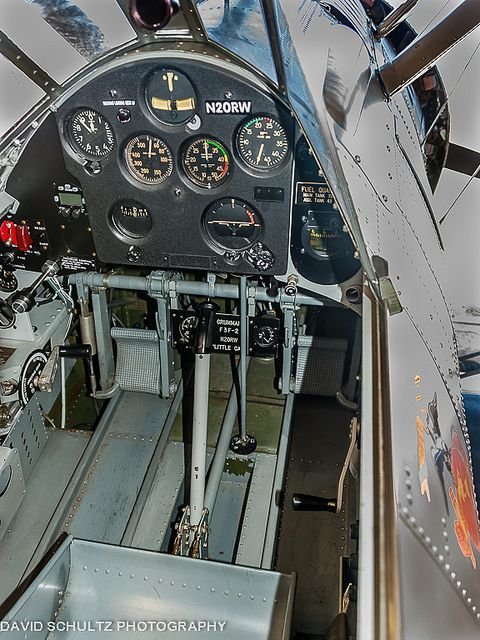
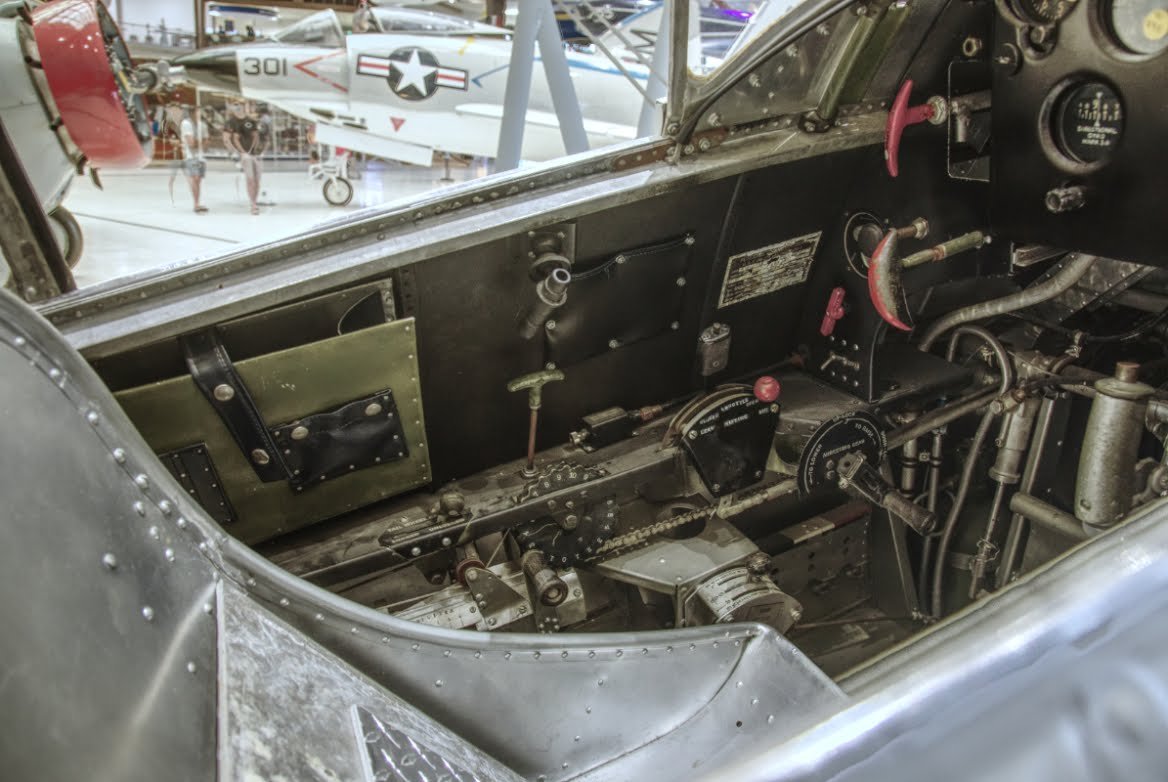
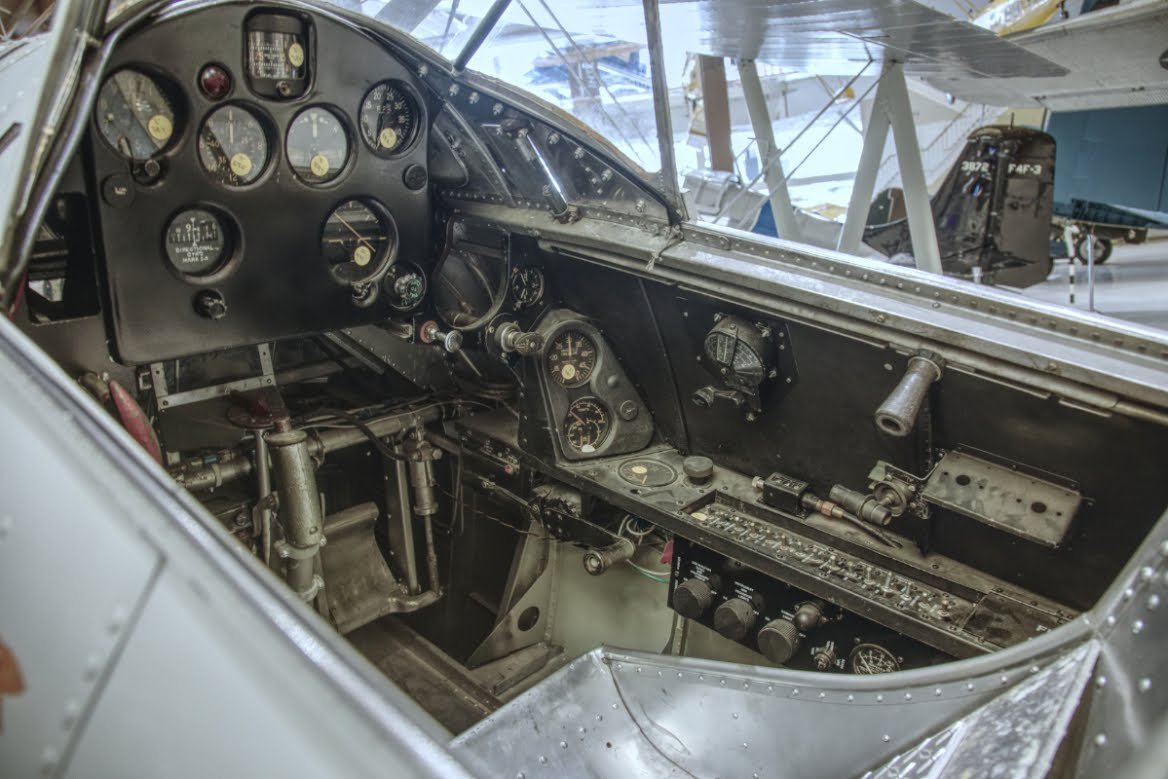
So I spent some time the last couple of nights working on the cockpit details. The cockpit pieces from the kit are actually nicely done, but I decided to try out the Eduard PE set, about 2/3 of which is dedicated to cockpit details. I have a set for each of the two models. One set is brass colored, while the other is more of a stainless steel color. The latter seems a lot stiffer to work than the brass colored one. The PE set has 54 PE pieces, and another four "film" decal-type applications for cockpit gauges and the like (I'm not sure if these are stickers, decals, or some other type of application). The PE set unfortunately is discontinued, but you can find them on eBay here and there. Here is the instruction sheet on the Eduard site: https://www.eduard.com/out/media/48317.pdf First I worked on the pilot's seat - the PE is a bit crisper and finer than the kit piece (mostly with the back rails), but I think the kit holds its own and likely any improvements won't necessarily be apparent in a busy cockpit. I'll add the seatbelt after these get painted. Looking at the pictures, looks like I need to touch up the corners a bit. Also included is my giant dime for scale 🙈 Here are pictures of one of the armrest consoles. The kit one is ok I suppose, as the details likely won't be readily apparent. The Eduards PE though really goes all out. I believe close to a dozen parts were used for it. These were fun to put together. It took me a bit of time to figure out how to read the Eduard instructions, but now that I understand how they are drafted, I can say that they are well done. The two above are the two stand-alone pieces from the PE set. The rest of the cockpit portion of the set requires modifications to kit parts. Probably only 1/3 of the way done so far. Here are some pictures of the real thing - the Eduards PE looks spot on! These planes were not for the claustrophobic, and those metal bucket seats don't look all that comfortable. The kit says to paint the interior and the exterior "aluminum" but these pictures give me ideas on how to use different tones to bring out the details. My order of Vallejo "Metal Color" paints just arrived and I'm glad I ordered different shades of the various "aluminum" colors. Edit: Not sure if the picture below is from the F3F series, but probably from a similar aircraft:
- 128 replies
-
- 10
-
-
Hello Martin! Congrats on the new house and upcoming move! Good luck with everything - glad to see your Fly and Rattlesnake making the trip with you
- 467 replies
-
- 1
-
-
- fly
- victory models
- (and 1 more)
-
MRAP ATV by CDW - FINISHED - Rye Field - 1:35 Scale
Landlubber Mike replied to CDW's topic in Non-ship/categorised builds
They look better than a lot of the resin upgrade sets from years ago. -
MRAP ATV by CDW - FINISHED - Rye Field - 1:35 Scale
Landlubber Mike replied to CDW's topic in Non-ship/categorised builds
Wow, the detail on those parts is stunning. Very nice! -
Nice! For the black and white stripes, are you going to paint or use decals?
-
MRAP ATV by CDW - FINISHED - Rye Field - 1:35 Scale
Landlubber Mike replied to CDW's topic in Non-ship/categorised builds
Craig you're killing me. When I went into plastic ships, I said that would be it. Then I added planes and said no way would I add cars. Fast forward and I have a ton of car kits, so I've said I'm not going to build armor. I'm of course going to follow your build, but I'm sending my wife your way to explain when armor kits start showing up on the doorstep 🤐 -
Indeed! Really fantastic work there OC. Way to stick with it - I think a lot of us would have called it a day, but you hung in there and created a beautiful model. Well deserved congratulations!
-
Nice work Grant, and you too Rick! I have this kit, but am a few kits away from getting the experience and confidence to do this kit justice. Your models are very inspirational though!
-
Thanks guys! Mark, I think 1/32 is about as far as I’ll go when it comes to planes 👍
-
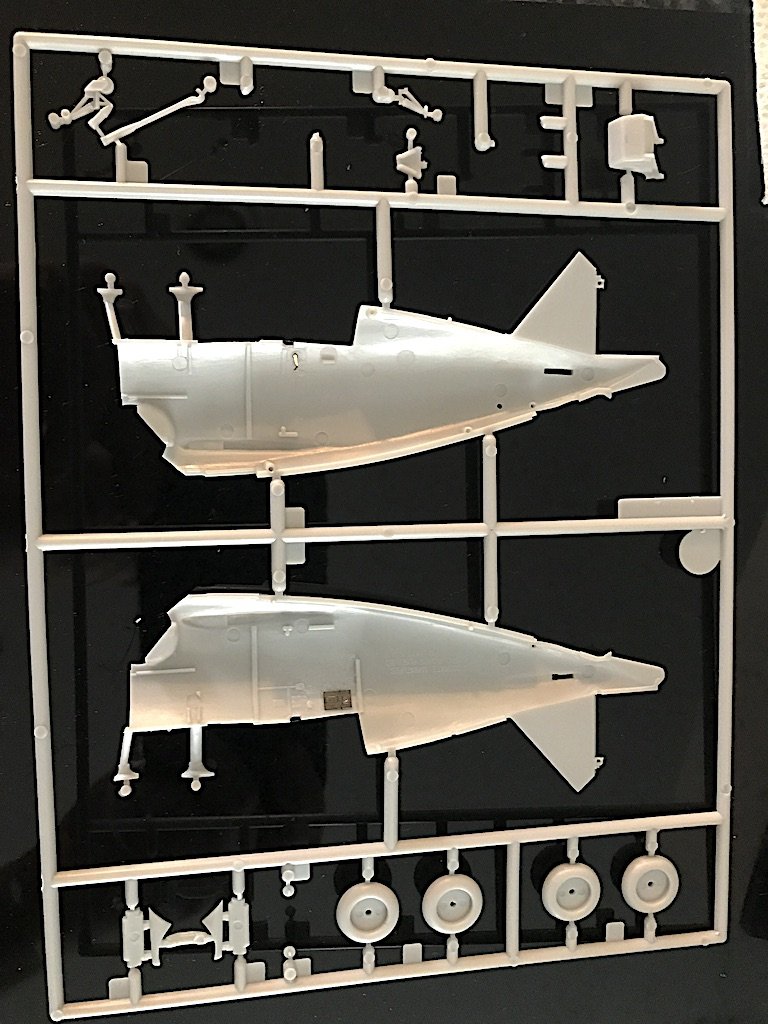
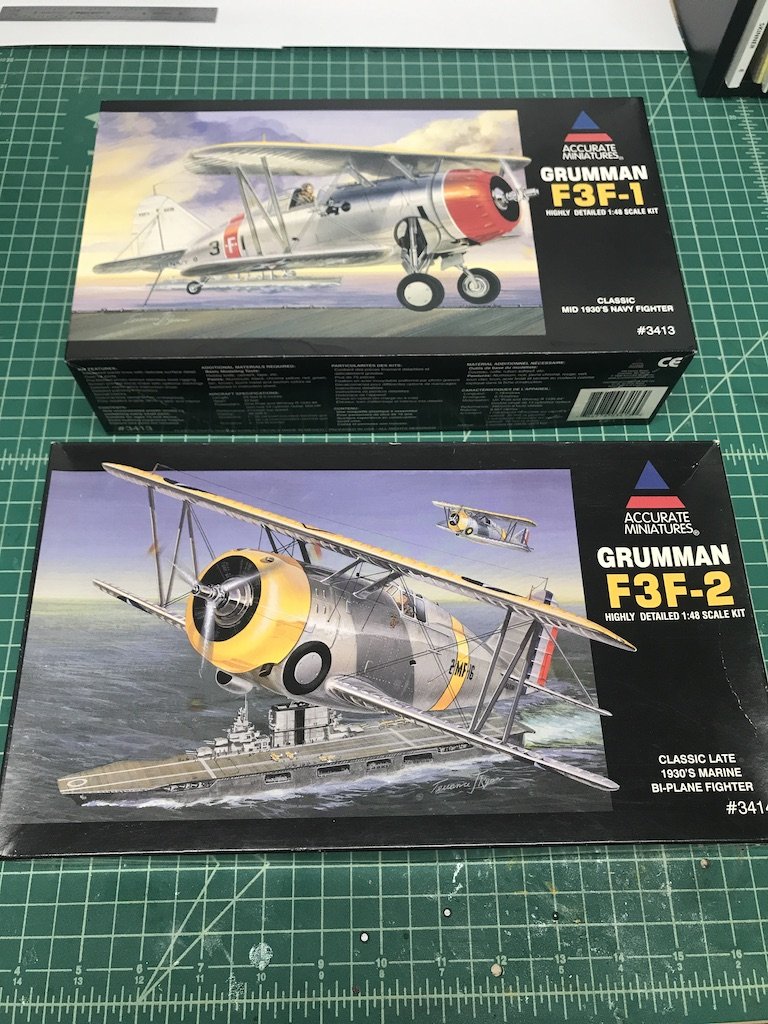
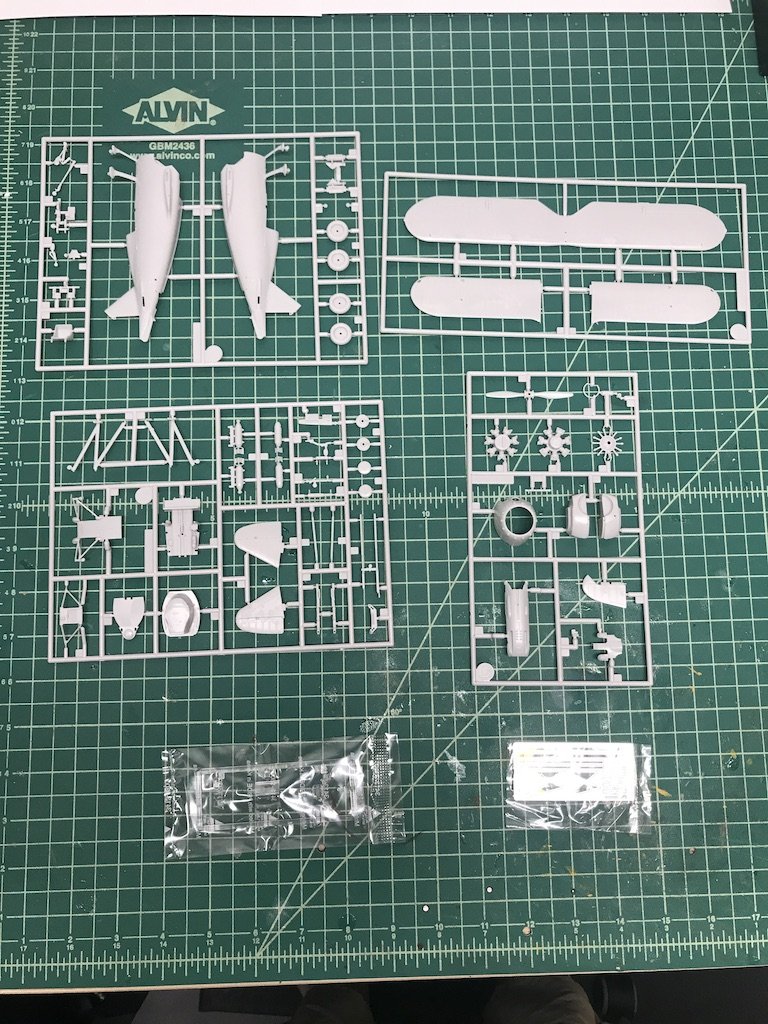
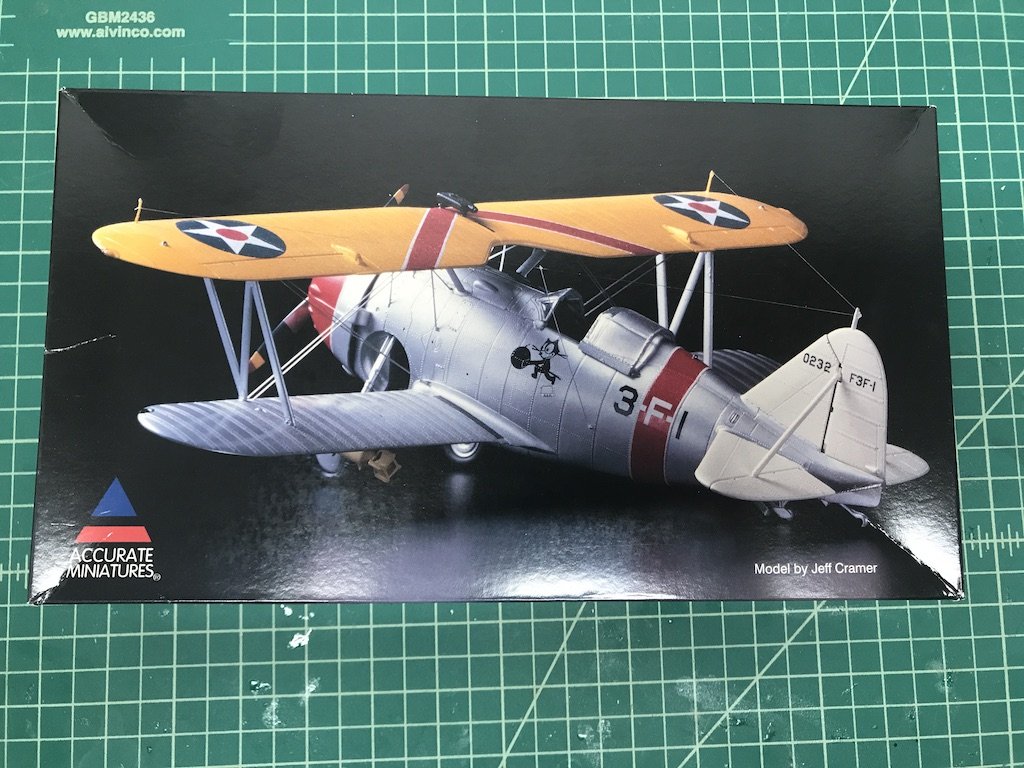
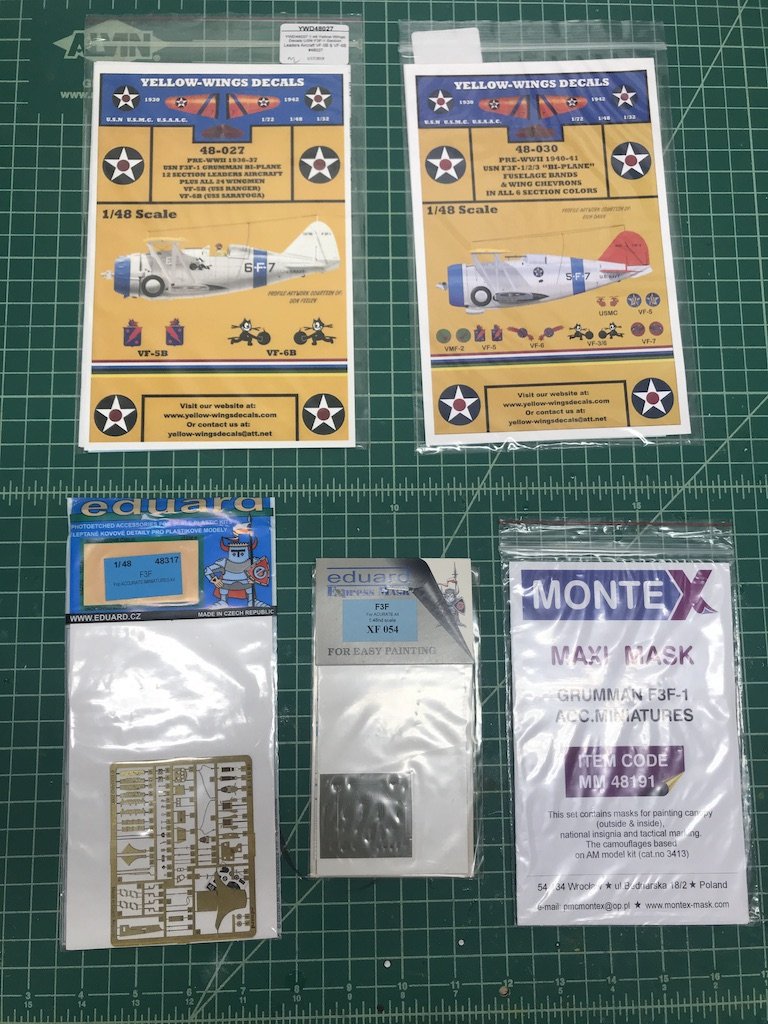
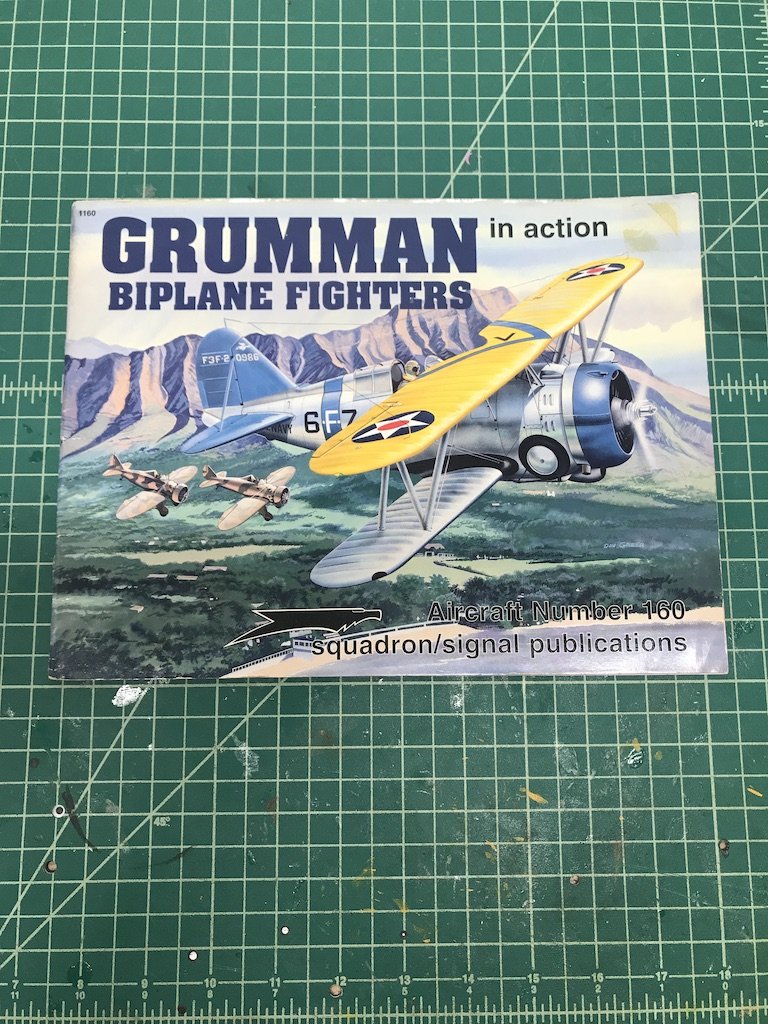
After building the Accurate Miniatures F4B-4 and P-6E, I'm building the Grumman F3F-1 and F3F-2 by Accurate Miniatures. Bottom box art: Reference material: Deliveries of the F3F-1 began in 1936, and the F3F-2 was delivered in 1937-1938. I don't believe that they saw action in WWII, as they were replaced by other, newer planes (the rate of development/improvement in war aviation was very impressive during this time). They ended up being used more for training aircraft than anything. Very cool looking planes continuing the colorful "yellow wing" line of aircraft. I have to say that the Accurate Miniature kit looks very well done. While I believe the F4B-4 and P-6E were reboxings of earlier Monogram kits, the F3F-1 and F3F-2 might have been developed in house. Sprues look very clean, decals are crisp, and the instruction manual is very detailed. The kit also includes a small fret of PE for rigging and the bomb rack. If the kit builds as nicely as it looks in the first impressions, I have to say that it's really a shame AM is no longer in business. Here is the aftermarket I'm planning to use (have a second set for the F3F-2): The Eduard PE set is mostly for the cockpit, but there are a few pieces for the undercarriage and bomb and bomb rack assemblies. I'm not sure if I'm going to use the Yellow Wings decals though. The question that really bedeviled me with the F4B-4 was can I match the nose color with the fuselage band and wing chevron? Same issue here, as you will have to paint the nose to match the colors. The nice thing about the AM decals, however, is that they assume you will just paint everything yourself! I thought about doing that with the F4B-4, but the fuselage band and chevron had very narrow black (or white) stripe borders -- impossible to replicate. The AM kit gives you very narrow black and white line decals to allow you to add the borders yourself. If I go that route, I might even try to paint the US insignias on the wings as the Montex masks give you stencils to do so. I'm digging the larger scale - hopefully a lot easier to handle than the 1/72 scale kits I just completed. I'm also going to try a different strategy on painting and assembly. With the F4B-4 and P-6E, there were slight fit issues so I needed to use putty in some areas to fill gaps. I decided to assemble the fuselage with the lower wing and tail in place, and then tape off areas to paint, which was a real pain I'm hoping that I can paint the fuselage, wings, and tail separately, and then assemble them to avoid having to go through the taping process. Fingers crossed that the fit is good! I haven't decided on colors yet, but I'm planning to paint the aluminum areas using Vallejo's "Metal Color" line which is their answer to Alclad. We'll see how that goes. For the yellow wing top, I'm going with Tamiya's "camel yellow" but this time will use the correct one (the TS line) and not the line for polycarbonate RC planes (the PS line). Should be fun kits! If not, hopefully my (mis)adventures will at least provide comedic relief to you all.

- 128 replies
-
- 12
-