


Landlubber Mike
-
Posts
4,549 -
Joined
-
Last visited
Content Type
Profiles
Forums
Gallery
Events
Everything posted by Landlubber Mike
-
 Well thank you Lou - my wife appreciates it I have to be careful as I'm running out of stash room. Need to get going on working the stash down 🥴 Not sure I can see it that well either Egilman - lots of close up work with the Optivisor. I found I need to take breaks on working on it so I don't get cross eyed or have a neck ache.
 -
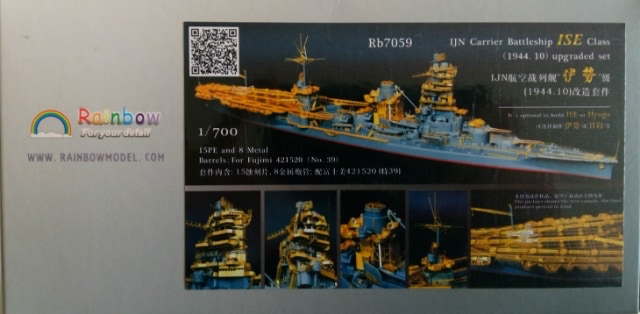
Lou, a collection of yellow wings would be fun. Not sure how many I'll build after these two (and possibly the Dauntless), but something to keep in mind. On the F3F kits I'm about to start, I bought some aftermarket decals for the chevrons, etc. The tricky thing with adding stripe and other decals is what do you do with other areas that have to be painted the same color but there are no decals for the section? Sometimes painting all sections and not using decals might work, but for some of the colored stripes, there might be a very thin black and/or white border which is impossible to replicate by paint. All things to plan in advance I'm going to have to keep an eye out for the JRS-1 - what a cool looking plane! The kit is discontinued unfortunately, and the one on eBay is going for $130 😳 Will have to be patient to find one at the right price. So the Fletcher class destroyers look fantastic - some fun PE kits are available: I have about 10 more ships in this scale in the stash. Not all ships in this scale have upgrade sets unfortunately, so I selectively picked the ones for my stash that had full PE upgrade sets (and decks where available). Half of those are auxiliary class ships which are on the simpler end of things. The goal is to get enough experience so that I can start on the 3-deck Akagi IJN aircraft carrier from Hasegawa and the ISE carrier battleship from Fujimi (see below). Depending on how these models turn out, I'll likely put them into some kind of diorama setting since they typically are waterline models at this scale.
-
Really nice work. Having done two planes in 1/72, I know how hard it is. You're making it look a lot easier than it is
-
Very cool work - your dioramas are very lifelike. Great creativity!
-
Nieuport Ni-17 by cog - Eduard - 1/72 - PLASTIC and PE
Landlubber Mike replied to cog's topic in Non-ship/categorised builds
Very nice job! What did you think of the fit of the kit? I like the WWI era subjects a lot, and have heard that Roden can be tricky. My guess is that Eduard does a better job. -
Wow, that was fast. I need to stop looking at different subjects - I've moved from ships into planes and cars, can't add more These Star Wars and similar genre kits look like a lot of fun though.
-
That's some really awesome work on what sounds like a tough kit. I love the Apache and remember wanting to build one as a kid. It has a real badass look to it. I almost bid on the Hasegawa kit with this Israeli conversion kit last week but it went for $$$.
-
Very cool! My kids would love this!
-
T-28s by ErnieL - Kitty Hawk Models - 1/32 - PLASTIC
Landlubber Mike replied to ErnieL's topic in Completed non-ship models
You do really beautiful work - can't believe I missed these logs. Really nice job! -
F-5F by ErnieL - Kitty Hawk Models - 1/32 - PLASTIC
Landlubber Mike replied to ErnieL's topic in Completed non-ship models
Beautiful model Ernie! That plane looks like a long needle! -
Wow looks fantastic! Will have to add that one to the stash 👍
-
Fantastic diorama - feel like you’re right in the middle of the scene. Well done!
-
That's coming along really nicely. Your planking is pristine - well done!
- 436 replies
-
- 3
-

-
- vanguard models
- alert
- (and 1 more)
-
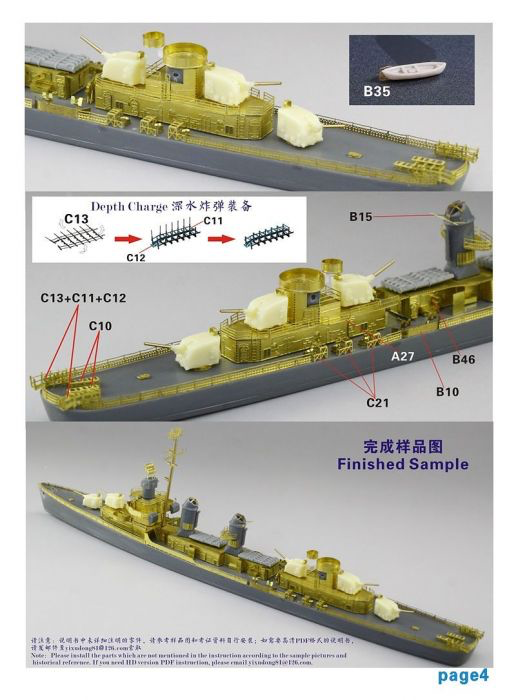
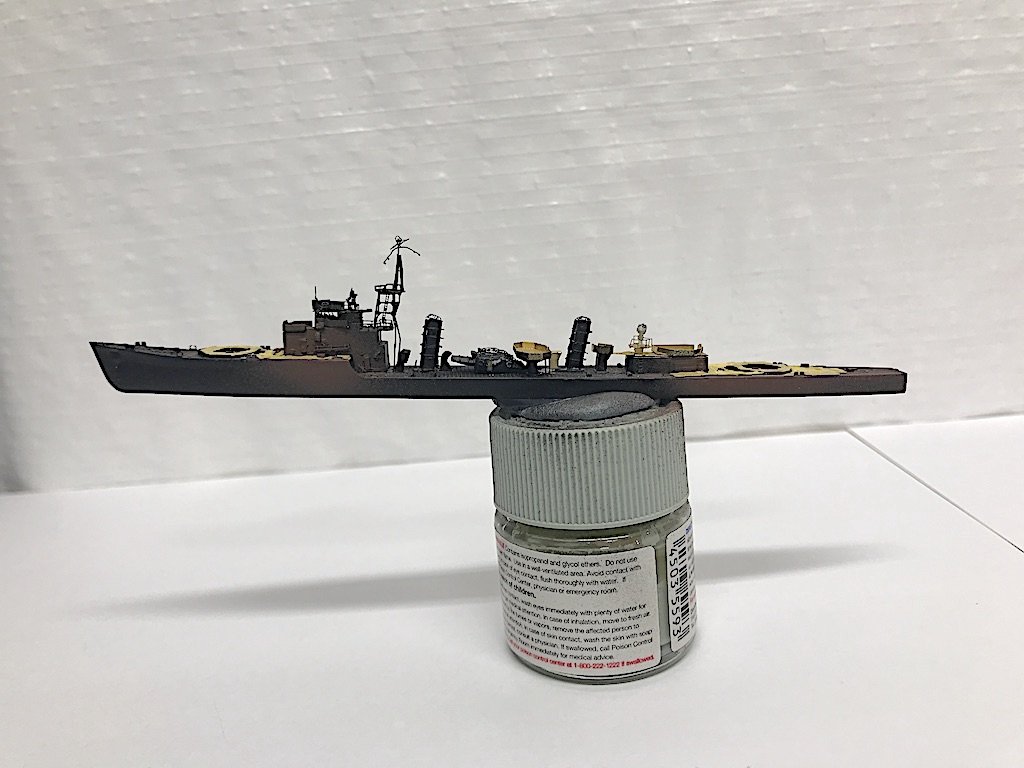
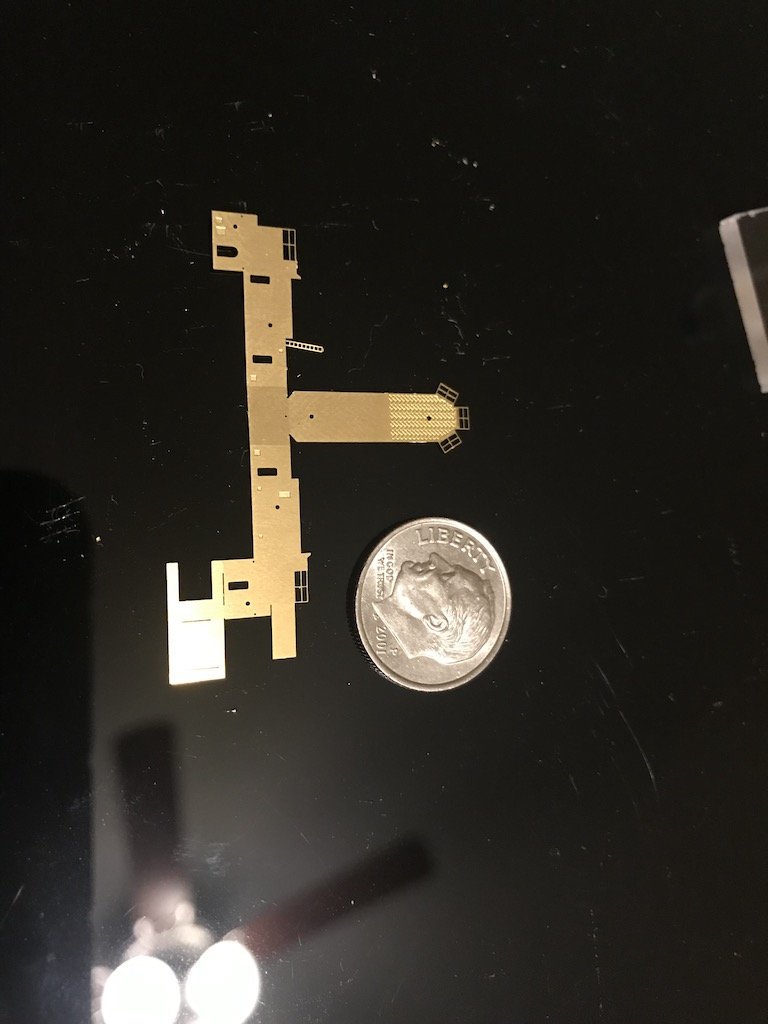
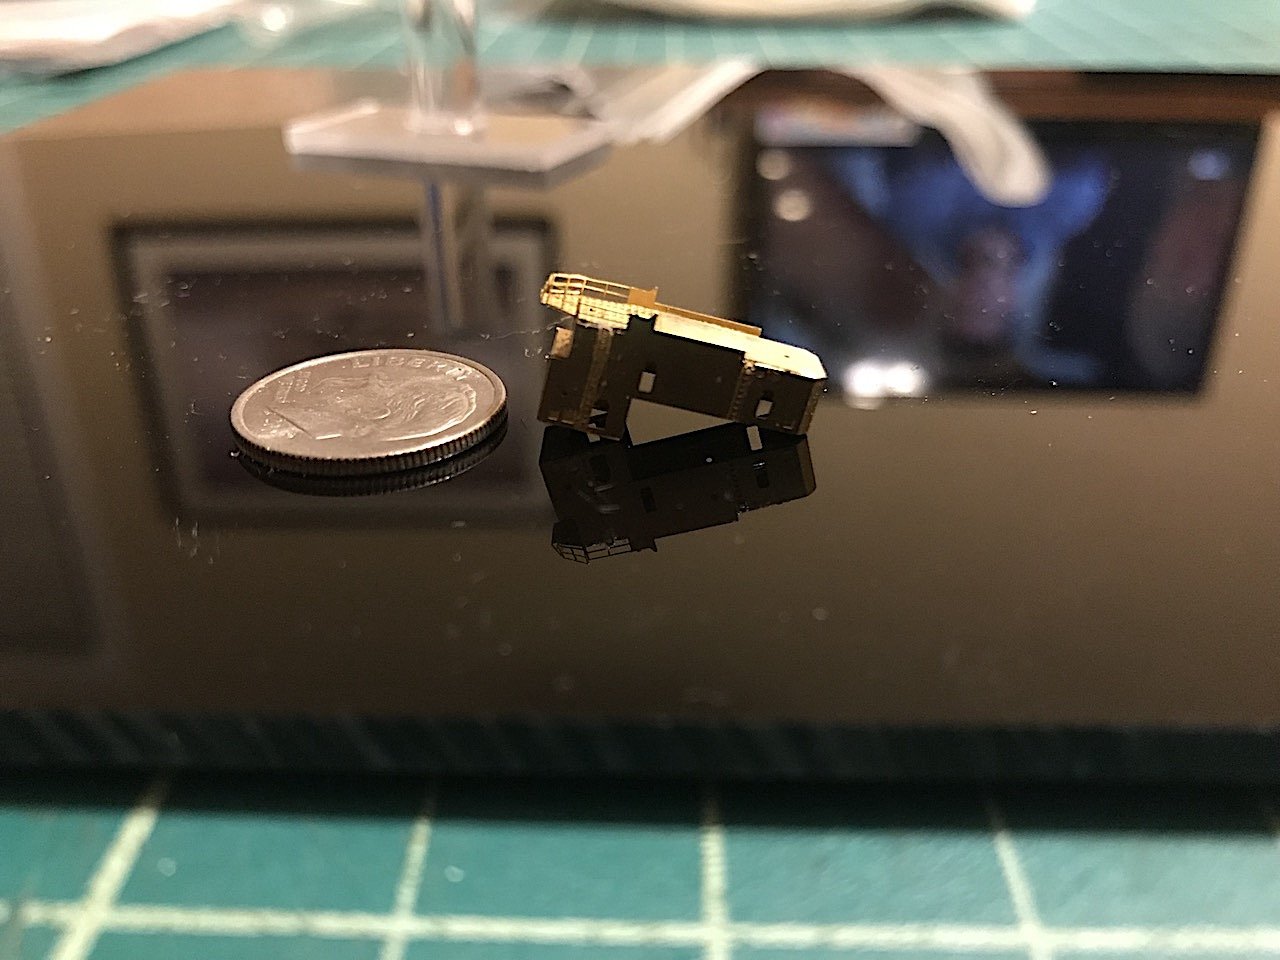
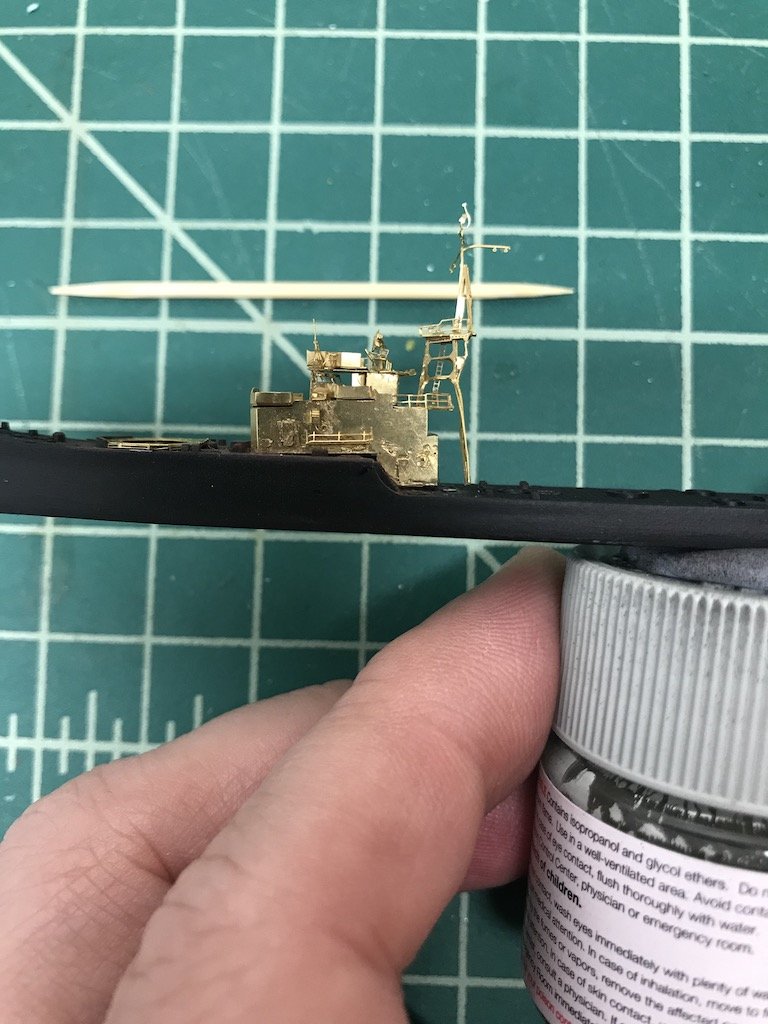
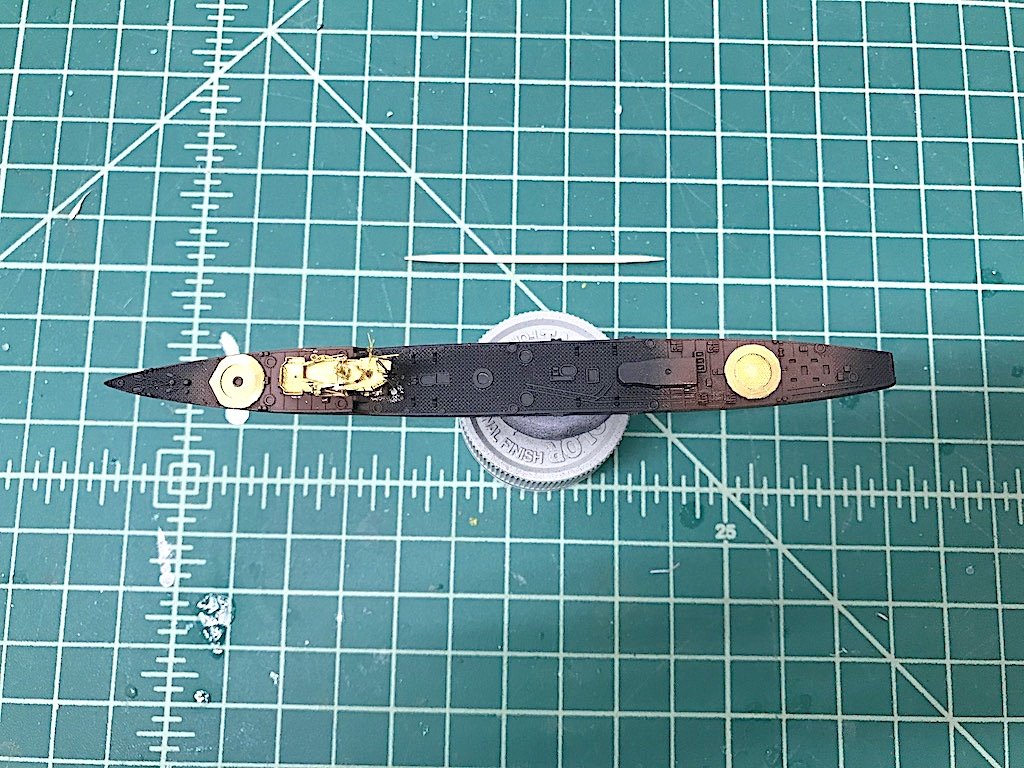
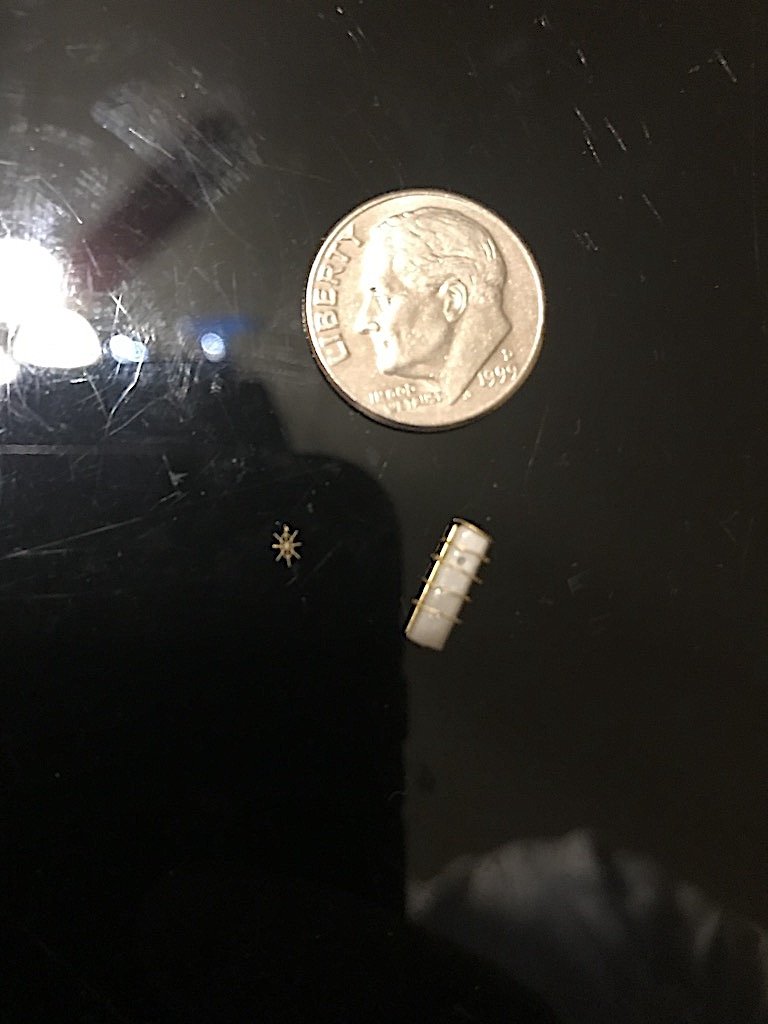
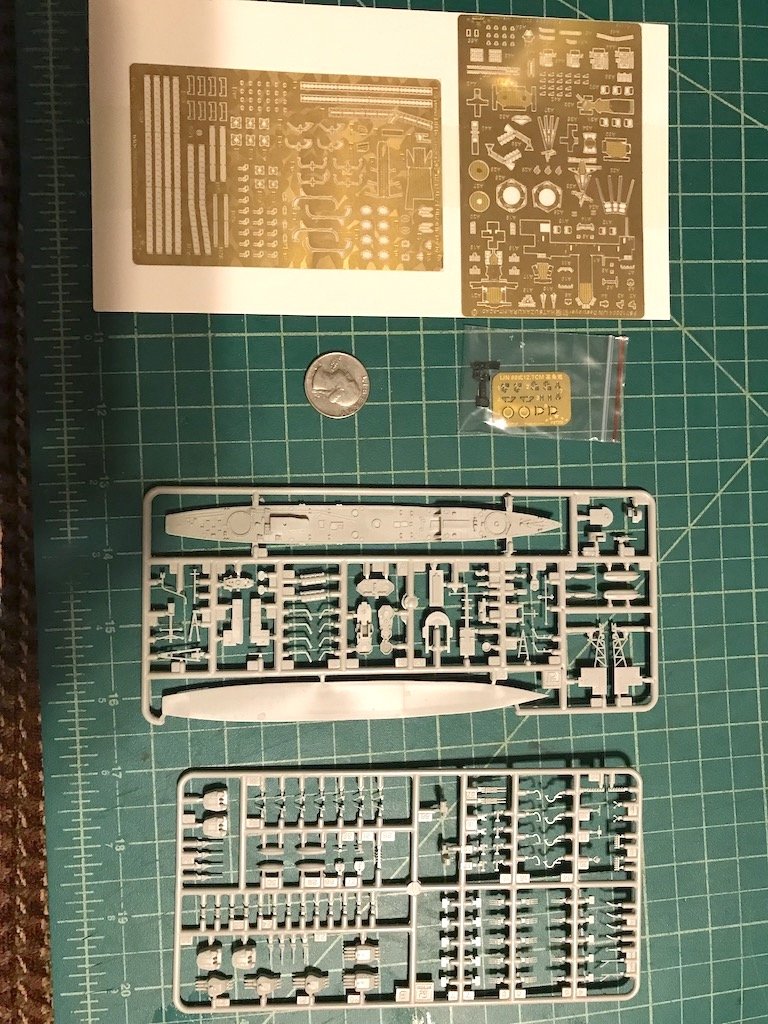
Here's where I am today. I've been trying to figure out the best order to build and paint these. This particular destroyer has parts of its deck in linoleum, which makes painting a lot trickier. I've painted the linoleum sections, and then spent a few hours cutting up Tamiya paint mask tape into tiny pieces on the order of a couple of millimeters to mask it for when I paint the steel sections. Probably a good two hours of work to mask about two square inches of deck 😳 The trickiest thing at this scale is the PE - this stuff is so thin in sections I swear you can breathe on it and it will bend. I need to straighten out the main tower, but after bumping it accidentally a few times, I don't want to keep fixing it because over time the pieces will just snap. So, it's a little bent at the moment. All in all though it's been fun and I've gotten a lot of experience with working with PE, gluing it, using my airbrush, etc. that when I go to 1/350, I should be in good shape.
- 179 replies
-
- 14
-
-
- hatsuzakura
- pit road
- (and 2 more)
-
I've been working on this off and on for a few months now. Here are some build pictures: Bridge Funnel - in second picture, can see how much improved parts look with PE given that the plastic tends to be way over scale (especially at 1/700) Rear gun platform - those little triangles were added underneath as supports!


- 179 replies
-
- 16
-
-
- hatsuzakura
- pit road
- (and 2 more)
-
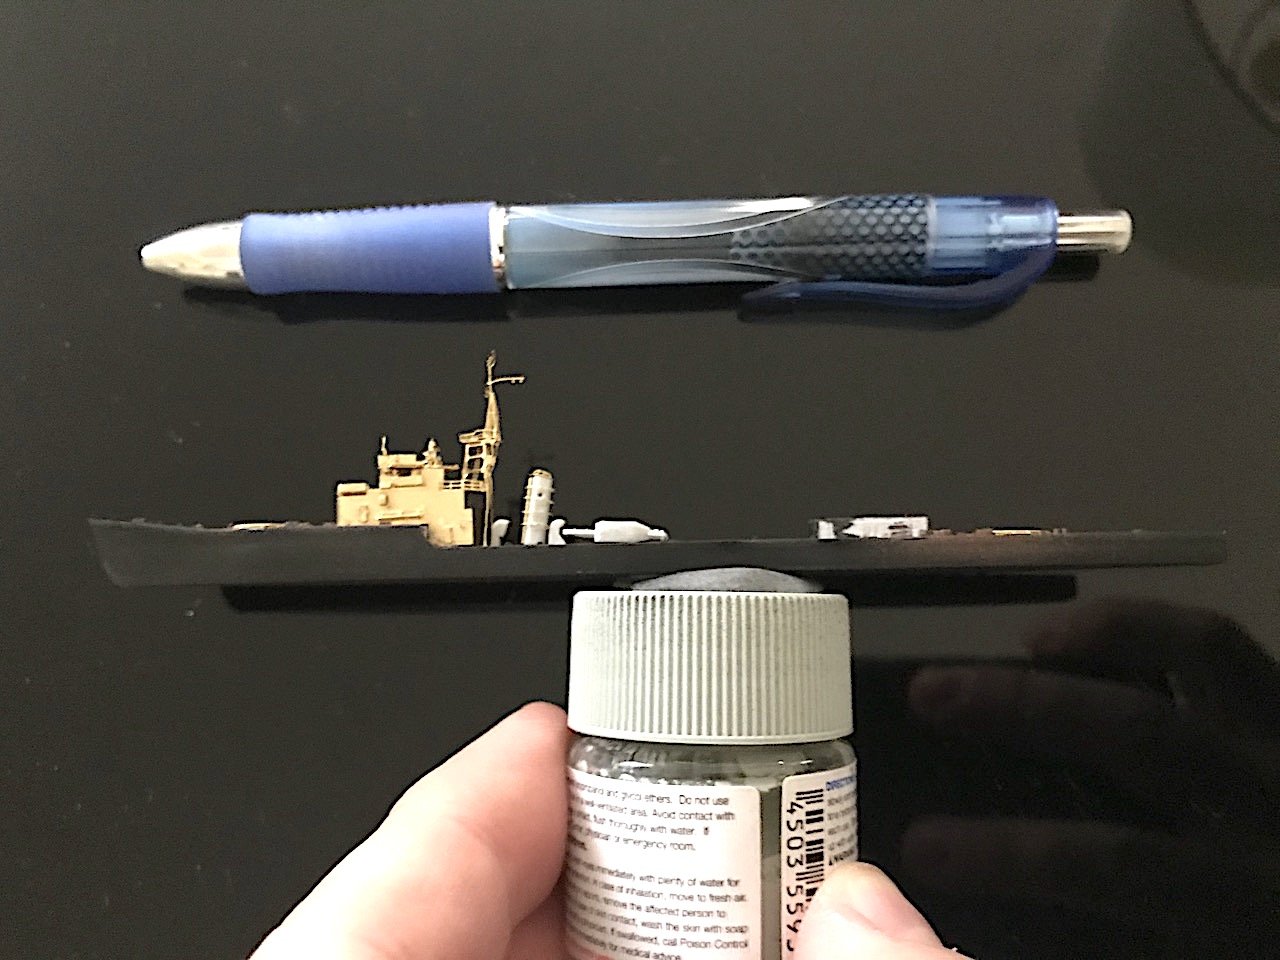
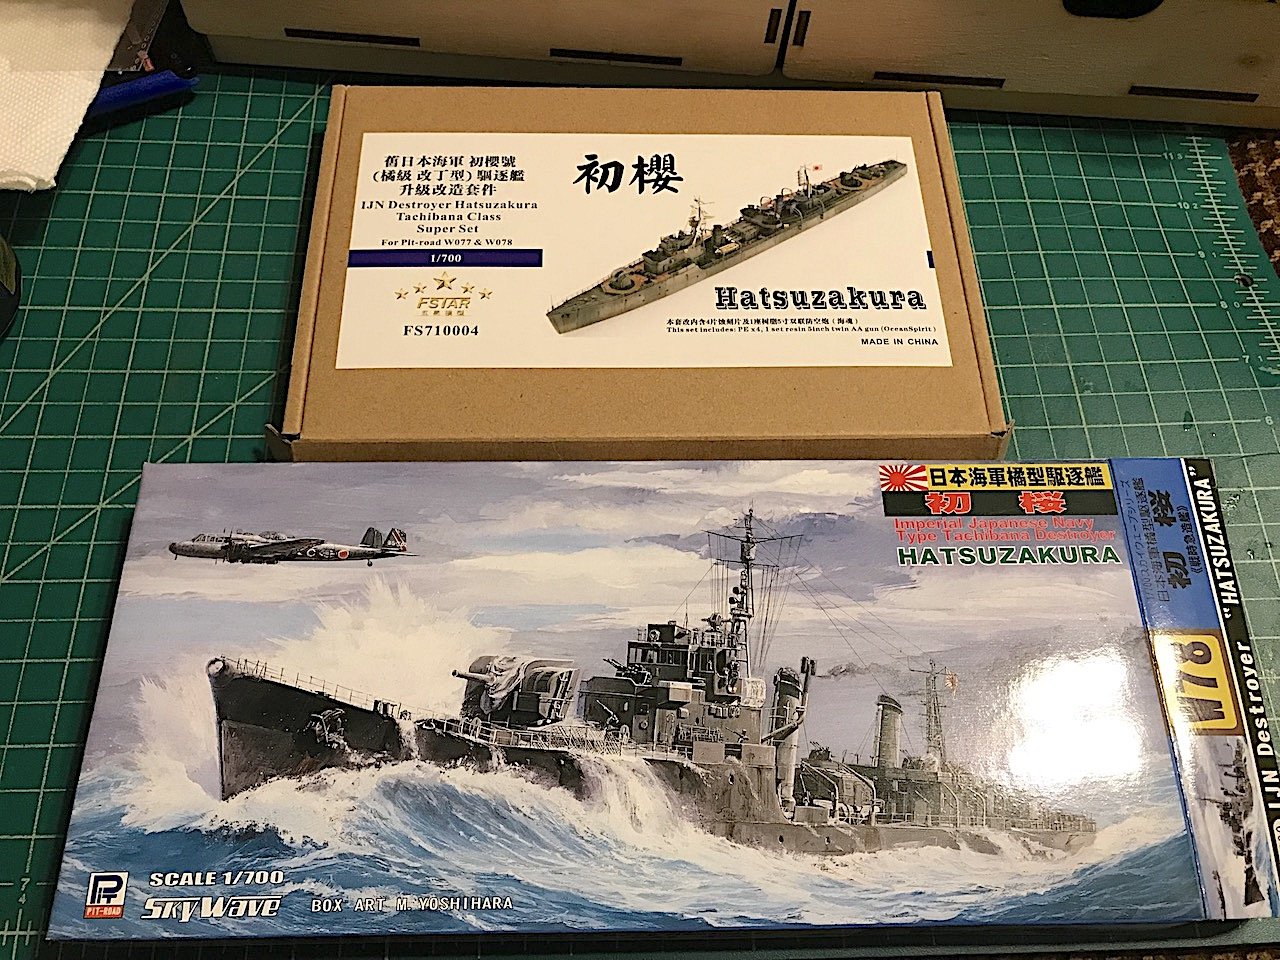
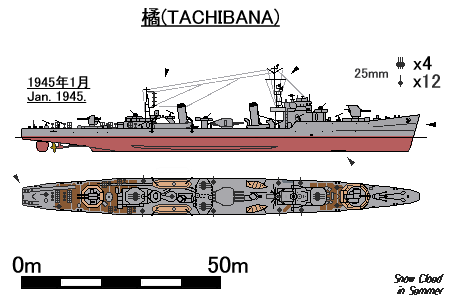
As my first plastic ship model, I decided to start small and go with the Pit Road IJN destroyer Hatsuzakura ("year's first cherry blossom") with FiveStar PE upgrade set. For a little about the Hatsuzakura, it was a Tachibana class destroyer that was completed in May 1945 and served for the remainder of WWII. This ship is pretty famous for being the ship that met the American destroyer in Tokyo Bay to discuss the entry of the Third Fleet for the surrender ceremony. After the war, she repatriated overseas Japanese citizens back to Japan. Later, in 1947, she was given to the Soviet Union who used her as a target ship and she was scrapped in 1958. I had bought a couple of nice 1/350 kits, but decided to start with a relatively inexpensive 1/700 kit to gain some experience (as I hadn't built any plastic kits since I was a kid). I ended up picking up the Hatsuzakura given that destroyers are a bit simpler, and this particular kit had a fairly extensive upgrade kit from FiveStar. I probably would have been better off with a 1/350 kit since the PE on this is microscopic - literally hair thin in many parts. I'm hoping that all the time I have been spending with the 1/700 PE will make the 1/350 stuff a breeze. I have a few other 1/700 kits in the stash though - mostly auxiliary ships like seaplane tenders and repair ships - as I tend to like less common things, and 1/700 is generally the only scale you can find these kinds of ships.
- 179 replies
-
- 10
-
-
- hatsuzakura
- pit road
- (and 2 more)
-
Love the Peggy and Springy - I'll have to try that sometime
-
Military Wrecker - Revell - 1:32 Scale - PLASTIC
Landlubber Mike replied to CDW's topic in Non-ship/categorised builds
This one went together quickly - very nice job! Looking forward to the final product. -
Thanks for the kind words OC. I was able to learn a lot from the build logs from you and others on here, so thank you! I still have a ways to go to get better. My problem is that I'm mostly a lap modeler, which gets hard when you are dealing with such small models. One thing I need to learn to do is to be a lot more careful when handling or otherwise near my models - I can't tell you how many times I've broken off, bent, or otherwise had to rework a part. I probably busted the rigging on my Badger build no less than two dozen times with errant elbows, etc.
-
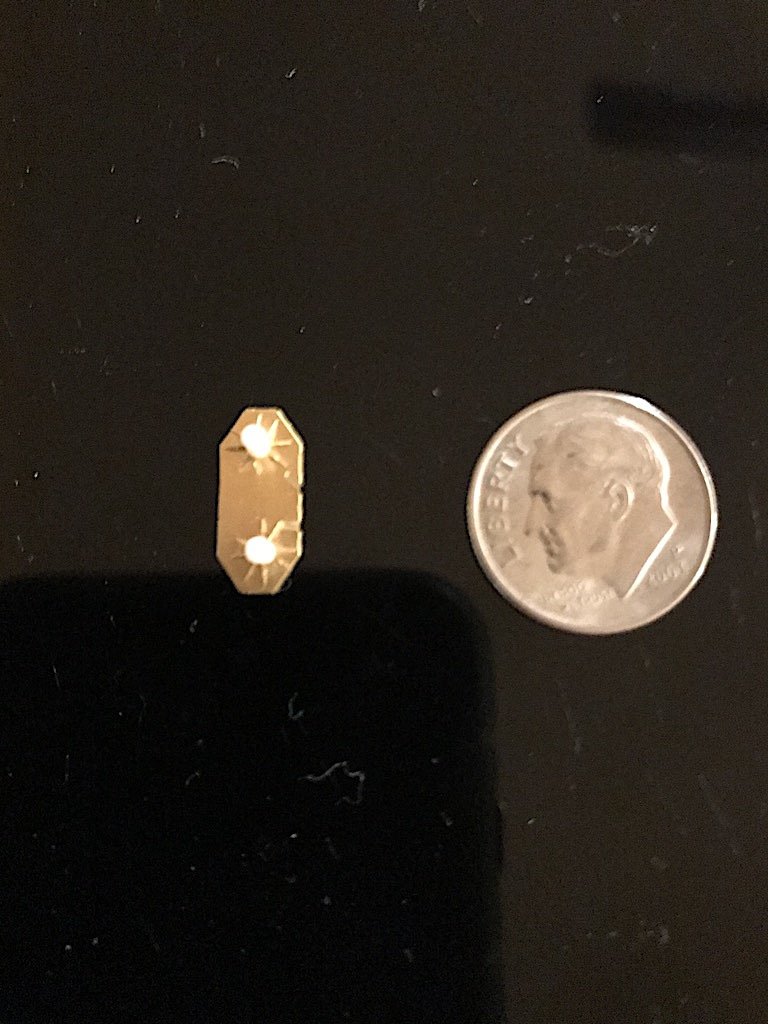
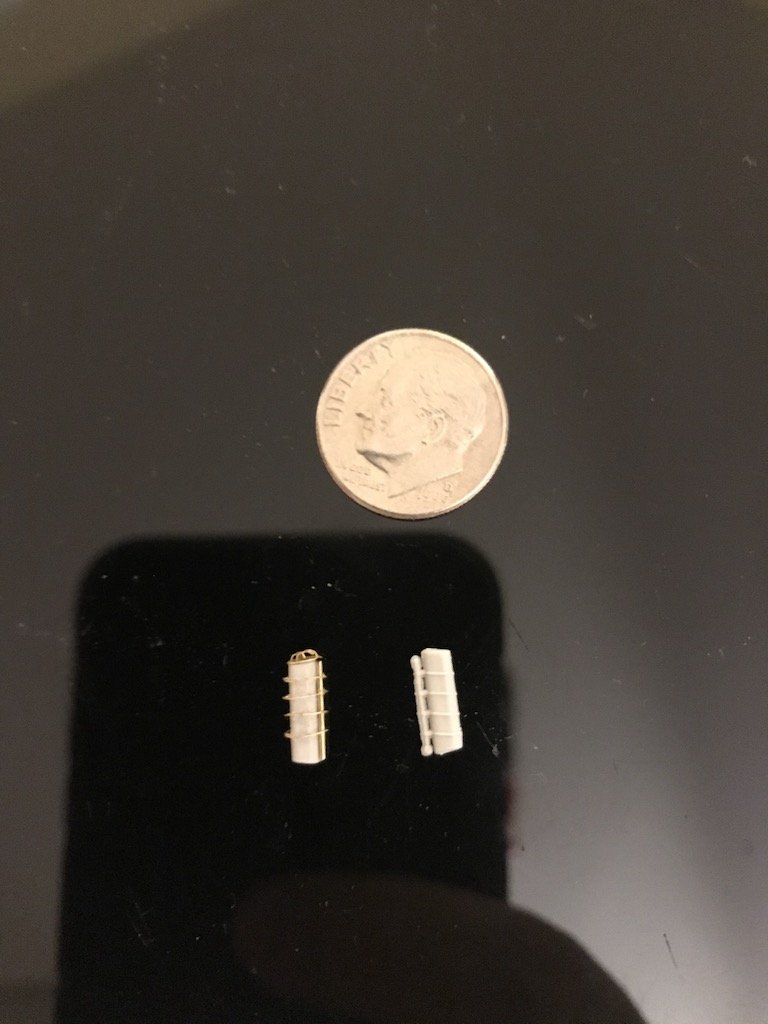
Awesome, thank you for the suggestion! Actually just looked him up - I read his The Rising Sun. Very good book that provided a lot of insight into how various aspects of Japanese society and government contributed to their imperial war posture. Thanks for the very kind words. I'll get some logs up. If you think planes at 1/72 scale are tiny, you should try ships at 1/700 scale. The PE is practically hair thin! I think I've posted this before, but here is a picture of a funnel - kit funnel on right, PE-modified one on left. I swear I'm going to go blind finishing this one. Maybe I'll add a build log for it. Thanks for the scoop on Roden - I've been watching your Dr.1 log, very nice work! Have you tried ICM kits? I've heard good things and they seem to have lots of interesting subjects. If you like WWI kits, I've been picking up Wingnut kits where I can, as they are out of business unfortunately. Love the subjects they offered, and by all accounts I've read, the fit and details on the kits are impeccable. I'd rather spend more money on a kit than buy a cheaper one and have to wrestle with fit issues.
-
Thanks Joe! I'll have to look for that one. I got on a WWII kick recently. I read Ian Toll's two books on the Pacific theater in WWII (I think a third is expected in the near future), and have watched a few documentaries on Netflix. I think the general perception is that America has always had a mighty military, but we were being in terms of technology and tactics in the early parts of the war. Amazing thing was how quickly we advanced during the way to achieve technological parity with the Japanese, and even superiority in some areas.
-
Thank you for the kind words. You're right about things being so tiny. While there are fewer details, you have to be very careful with glue as any imperfections show up in a bad way. It's funny, the Starfighter cockpit resin set came with two right panels. Freaked me out, and I spent a ton of time trying to figure out what to do. Ultimately chopped it up and reassembled it so that it looked like the left panel. After gluing the cockpit in the body, everything pretty much disappeared anyway so all that time I spent was for naught. Not sure if the cockpit resin set is worth it. The kits though come with no seats, and you just glue the included pilot via a pin into the sidewall. Aside from the seat and stick, you really can't see any of the other elements of the resin package. If you are showing it without a pilot, you'll probably want the resin to at least add the seat. I should have mentioned that the kits fit together fairly nicely. I believe they both are reboxings of older Monogram kits. The one annoyance I had was that the pins on the supports between the wings weren't angled, but were generally straight with the piece. Since the supports fit on an angled basis, you would think that they would have molded the pins on the ends to be angled as well. It didn't necessarily affect the construction, but the joinery doesn't look as clean as it could have been had the parts been molded the correct way. Thanks for the earlier tips on the yellow - pre-painting with a white/flat yellow coat, and then adding the final yellow color. I'll be trying that this go around. That would be a really cool looking model at that scale. One thing that I wasn't sure about was how to do the paint scheme in the front. The decals gave some of the black for the owl feet, but not the nose (all they gave were the white "eyes" that had a touch of black next to them. I wasn't sure what to do to make the painted colors match the decals. What I ended up doing was adding the white "eye" decals, then painting over them with white paint so that they matched the white "feet" at the bottom. There are probably better ways of doing it, but that's what I ended up doing. Post a build log when you start it! Thank you! Optivisor is a big must! There are lots of colorful subjects during this era. Less so when you get to WWII.
-
Thank you! And yes, lots of tweezer work and wearing the Optivisor for sure. I’ll be interested to see how the 1/48 scale goes. I don’t know that I’ll be going back to 1/72 any time soon, but Eduard, Roden, etc. have lots of cool subjects in 1/72, so who knows. In the meantime, I’ve picked up a bunch of 1/48 WWII kits, as well as added a few of the 1/32 Zoukei Mura kits to the stash. I’ve found some really good deals on eBay where you can get a kit and lots of its aftermarket for good prices.
-
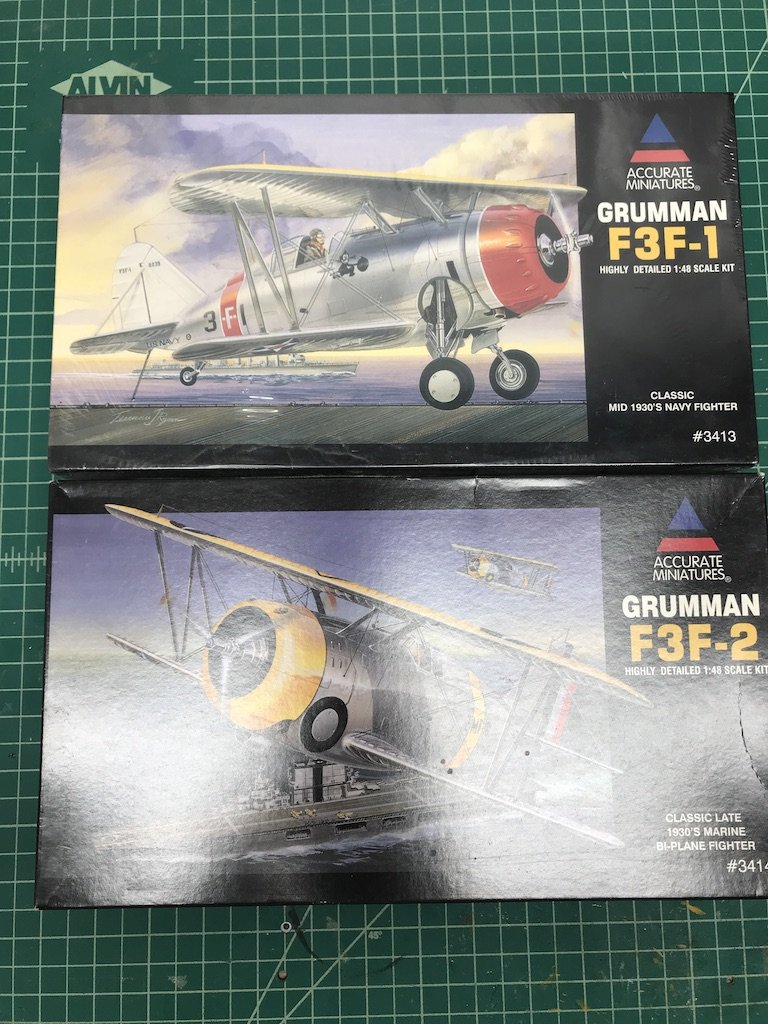
Since I'm a glutton for punishment, I think I'm going to build two more yellow wings next - the Accurate Miniatures F3F-1 and F3F-2. I have the Eduard PE and Yellow Wings decals. These are 1/48 scale, so hopefully should be a little easier to handle. This time I have the correct Tamiya paint 👍
- 27 replies
-
- 14
-
-
Yeah sorry guys - my iPhone changed default picture setting to HEIC. I'll upload new ones in a bit.