MEDDO
-
Posts
1,871 -
Joined
-
Last visited
Content Type
Profiles
Forums
Gallery
Events
Everything posted by MEDDO
-
 I am pretty dangerous with the power tools. Will need to take it slow if I decide to use it. Probably over multiple sessions a little at a time. Steve did you use a drum attachment or a disk?
 -
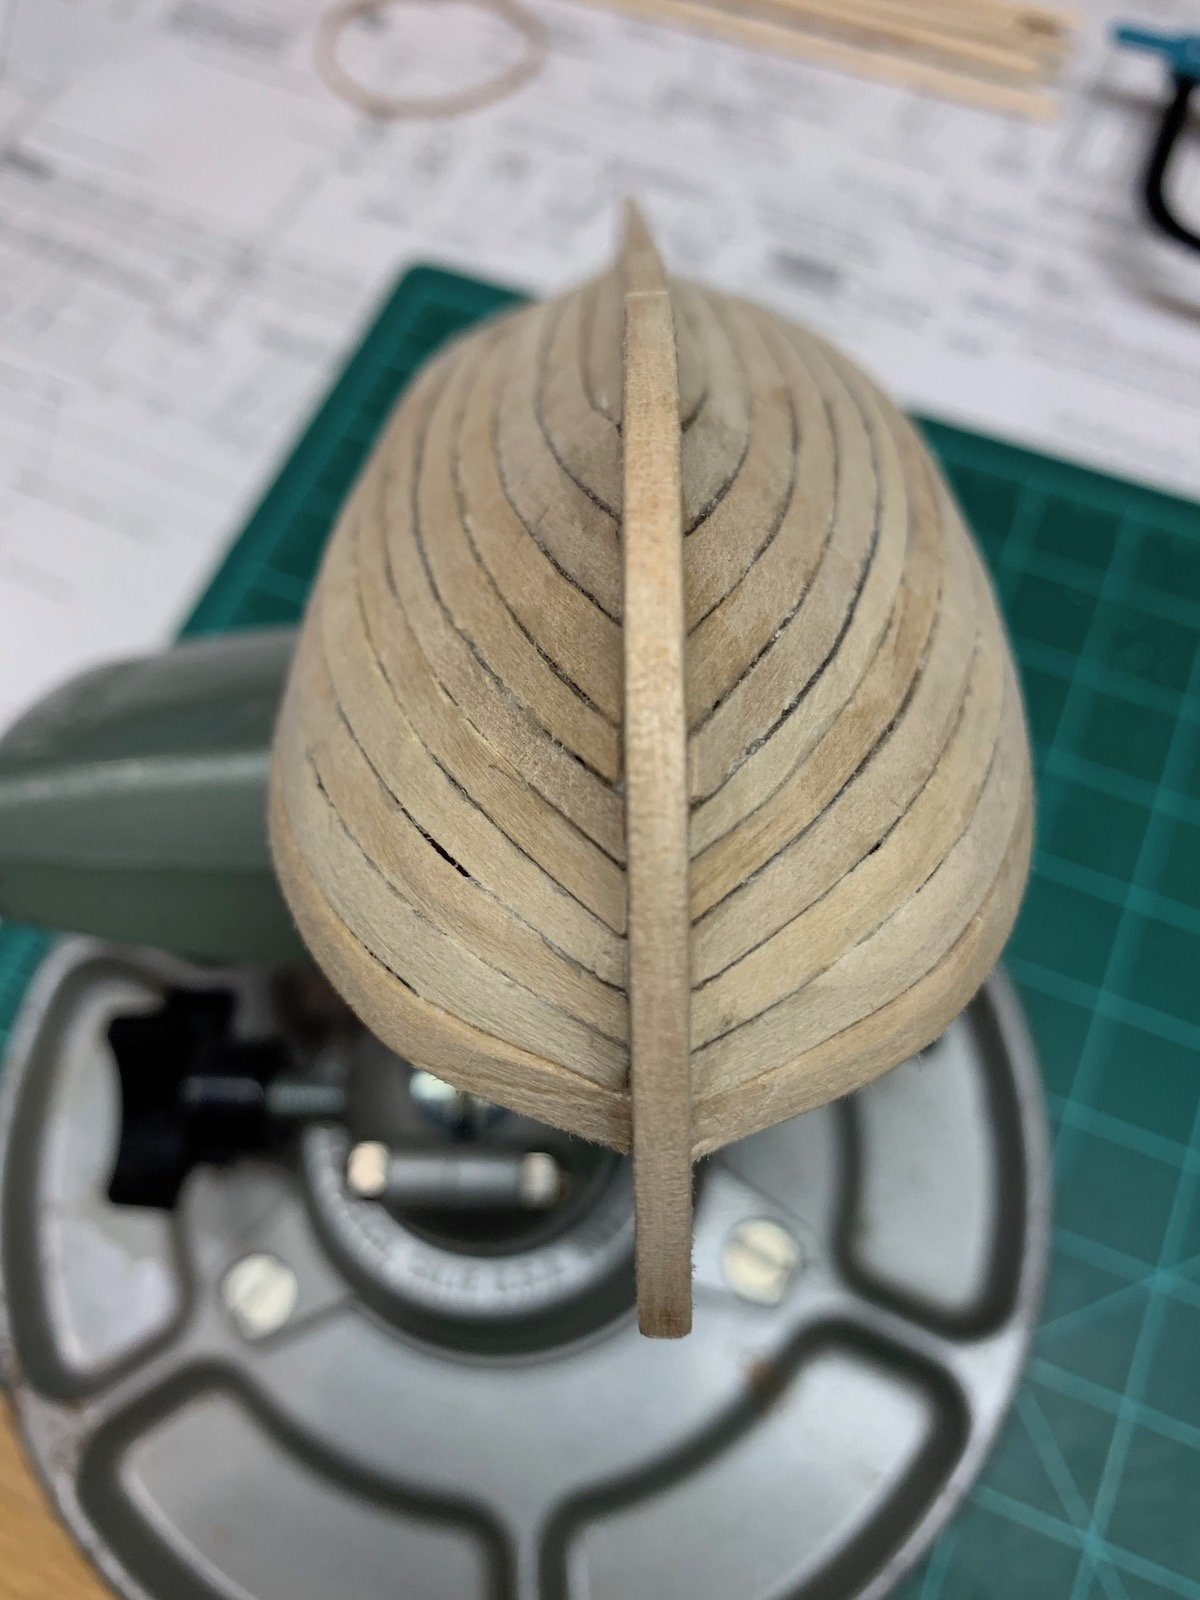
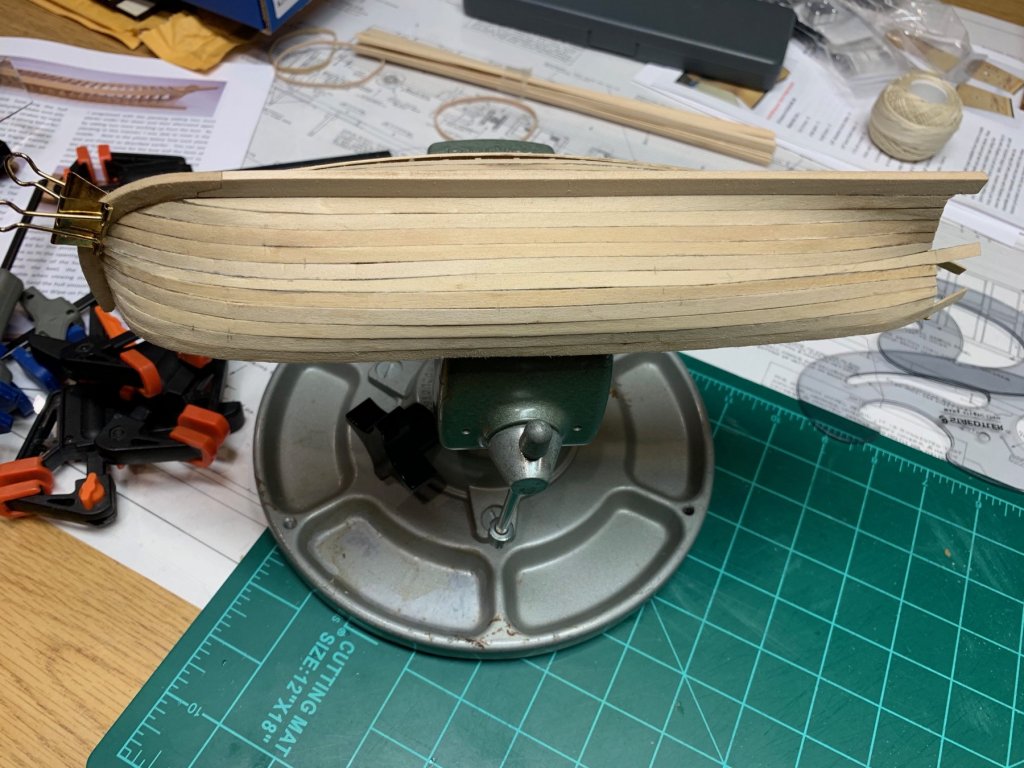
Wipe on poly to the outside. I decided not to go ahead with the treenails. Tried a few on a scrap plank and just wasn't getting great results. May rethink that later but for now just leave it alone. I did spend the day removing the center tabs. Now onto sanding and thinning out the frames

- 90 replies
-
- 6
-

-
- english pinnace
- Finished
- (and 1 more)
-
Plank length for longboats
MEDDO replied to tkay11's topic in Building, Framing, Planking and plating a ships hull and deck
Would also like to see a build log for this. Tony, are you going to rig this? M. Delacroix also sells the sail and rigging plan for this on his site. -
Excellent view there. Do you worry about the sunlight causing some fading/damage through that window?
- 692 replies
-
- 3
-
-
- eagle of algier
- chebec
- (and 2 more)
-
Impressive website. I will b einterested in following along to see how you get such wonderful detail in this scale.
-
The serve-o-matic came together nicely. One issue I had was when it came time to glue the 'back' gears to the tube I used CA as suggested in the instructions. I accidentally ham-fisted it and slid the gear just a little too far up the tube against the support. Of course the ca bonded instantly. It didn't glue the rod to the support but the pressure is just a bit too much so it didn't rotate freely. Solution was to debond the support and move a mm out and worked fine. Every time I touch CA is a disaster.... I also like the Medway longboat but also need to focus on what I already have. Look forward to seeing your progress here on this kit. Seeing how well you did with the pinnace and the longboat I am sure this will be another impressive result
-
Yup. Steve I was thinking that. I have been going over some previous builds here (yours, BE, MikeB4, and Mike Y) and trying to decide. Done properly they are hardly noticeable. Done poorly they stick out like a sore thumb. Too big or too dark...yikes... On the other hand this is an experimental/learning build for me so at least trying on something like this will give me some good experience. I will definitely be treenailing the Cheerful/Echo/whatever is next
- 90 replies
-
- 1
-
-
- english pinnace
- Finished
- (and 1 more)
-
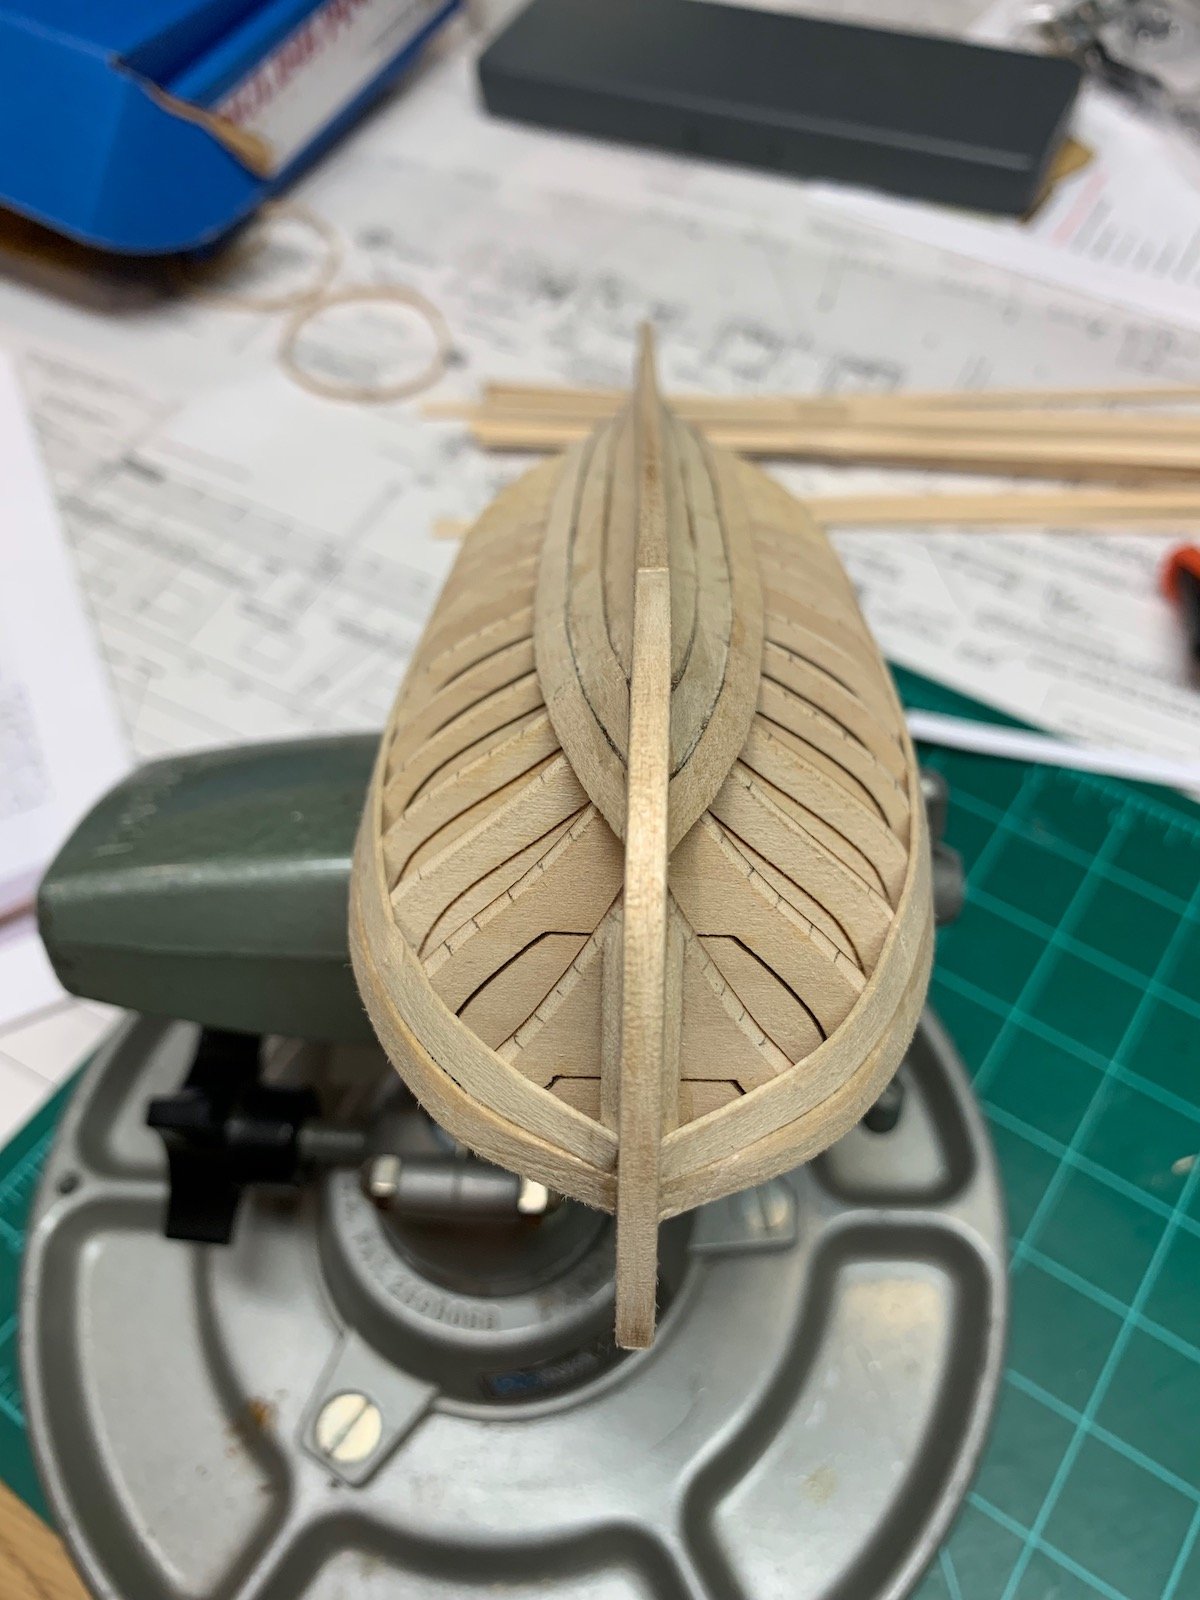
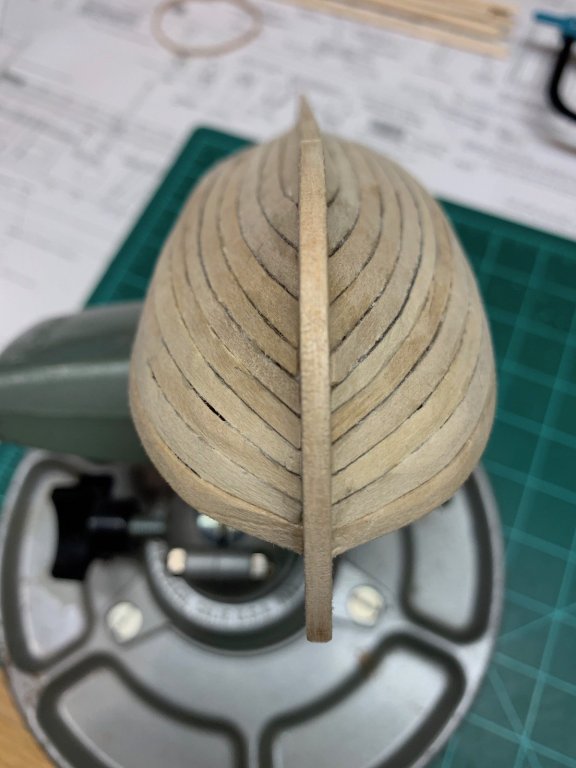
So now... To treenail or not to treenail, that is the question... Eventually plan for wipe on poly, seal, and then painted white bottom
- 90 replies
-
- 2
-
-
- english pinnace
- Finished
- (and 1 more)
-
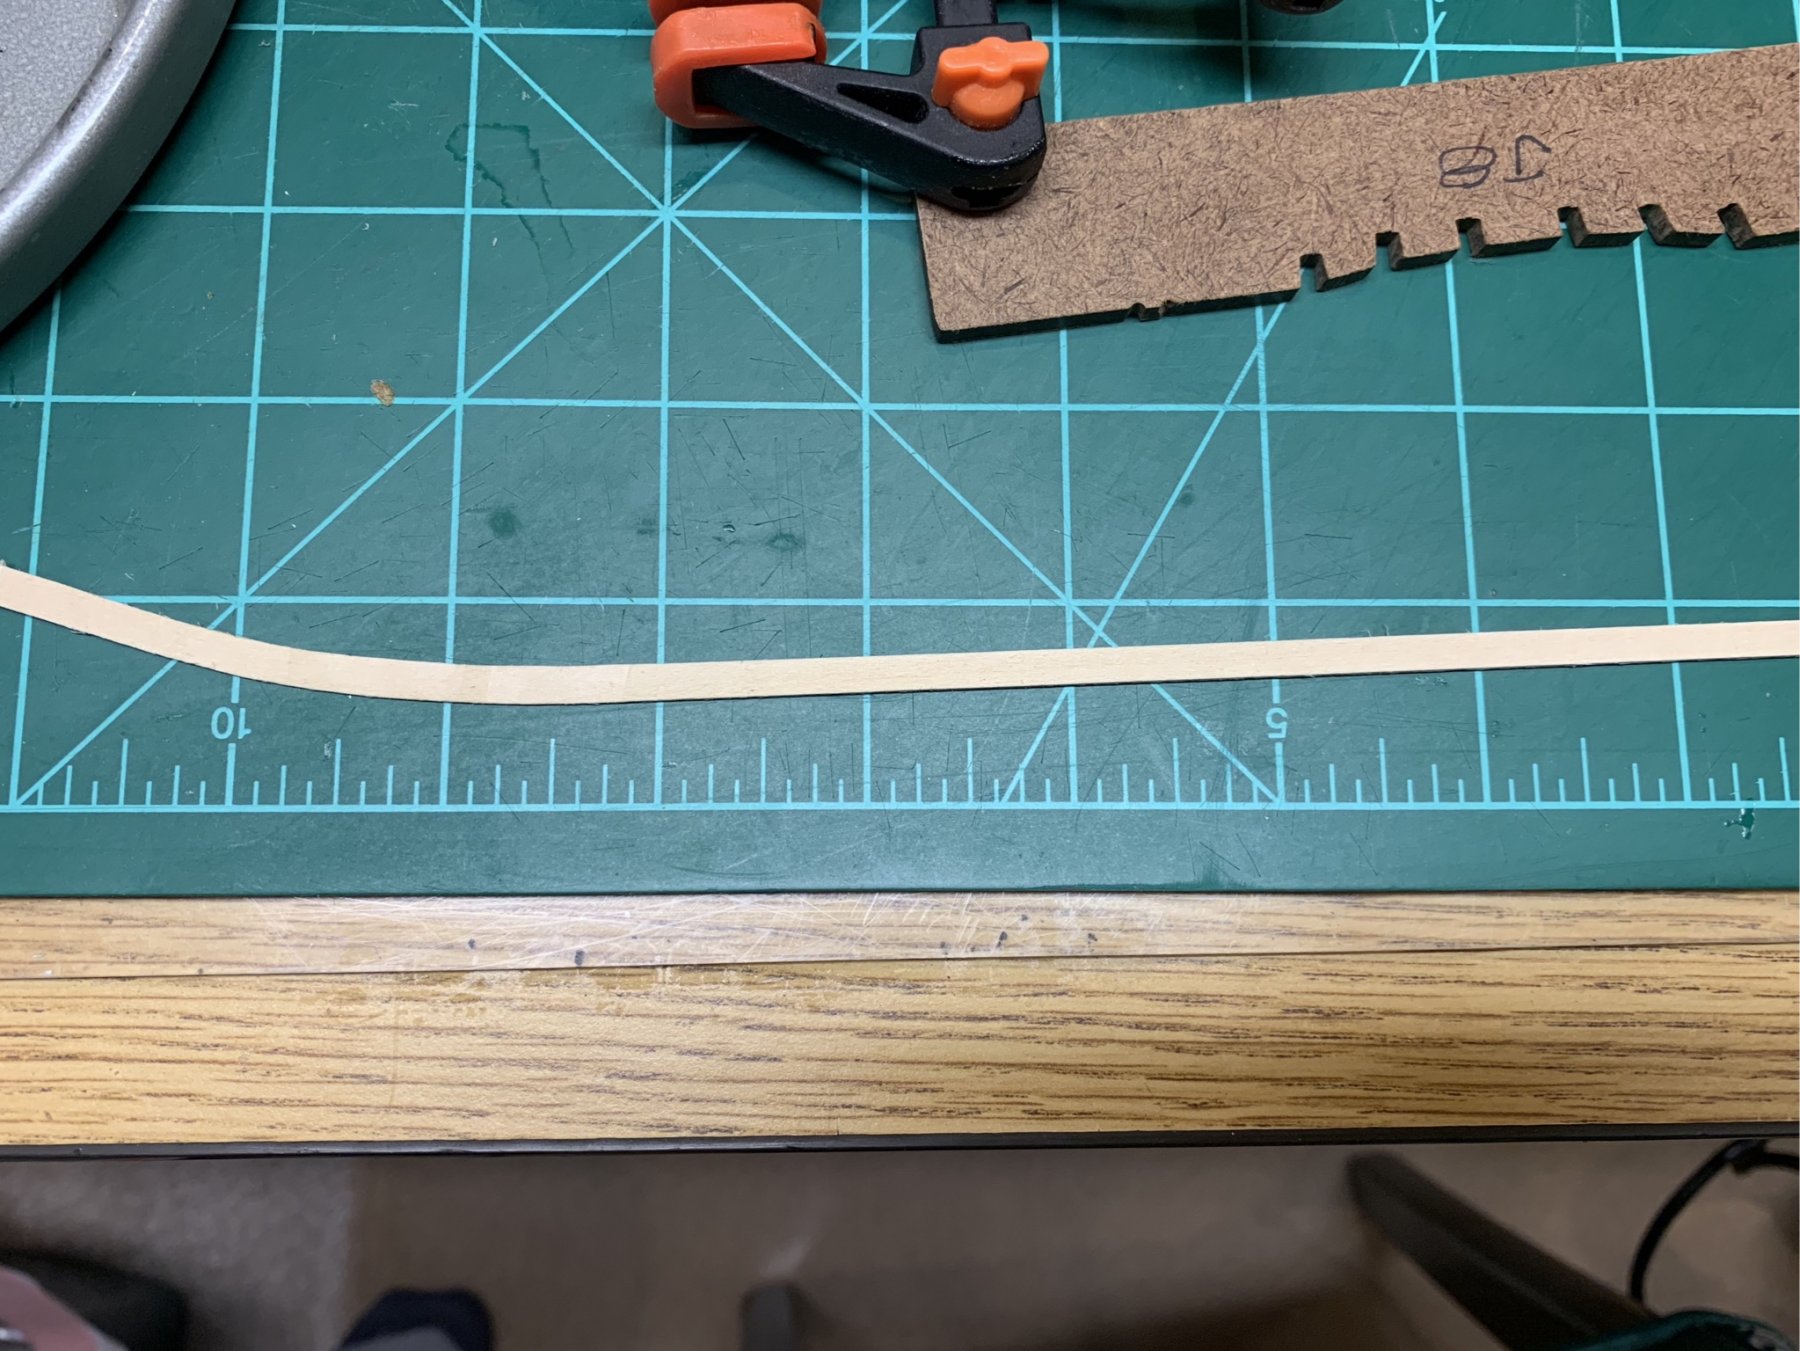
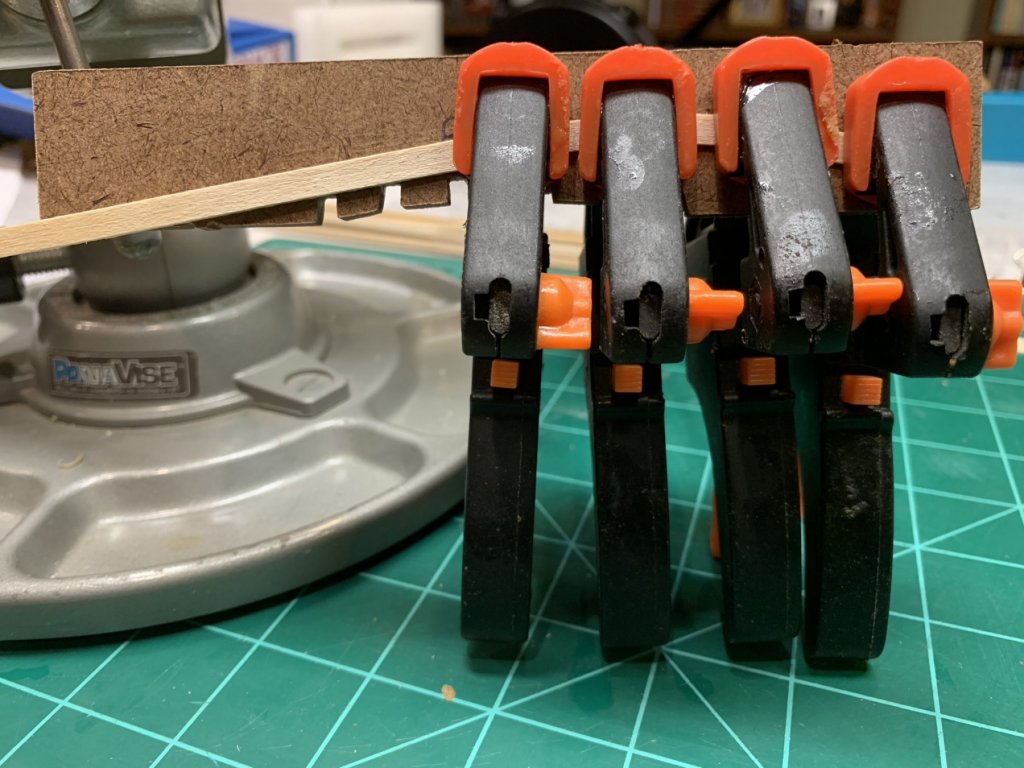
I have been using the kit supplied basswood on the Pinnace. It is really brittle and dry and not uniform throughout. I have been using amodified Chuck method for the bends. First I soak the wood in water just for 30sec or so just to get it damp. Then I clamp it to a flat piece of something (here it is some fiberboard). Using a bunch of clamps and bending it a bit each time. Need to be careful as then wood will tend to rise/curl up on the inner radius a bit. I just use a clamp to smash it down. There is a fine line between this and the wood either folding and/or splitting. After a few you get a feel for the limit. Once all clamped up I then use the heat gun to warm the whole thing a bit and then alternately remove a clamp and dry the wood in between. Once dry replace clamp and then do next clamp. Once entire piece is dry I remove all clamps except for the 2 on each end and then go over the wood again with the heat gun to make sure it’s dry then it is done. Then wood does spring back a bit but if I needed you can repeat process for greater curve. The edge bent basswood piece below was made in less 5min. One thing though I am using a heat gun and not a hairdryer. It will definitely burn you and it scorched wood a couple of times when I got too aggressive. Also kinda melted the edge of the plastic clamps a bit.😳

-
You can find a basic summary (about 300 pages) in John Harland's Seamanship In The Age Of Sail. Very nice descriptions and diagrams for ship handling.
- 1 reply
-
- 6
-
-
Nice use of the saw. It seems that it can provide a nice joint.
- 152 replies
-
- 1
-
-
- medway longboat
- Syren Ship Model Company
- (and 1 more)
-
Getting Back Into The Hobby After 45+ Years
MEDDO replied to Tom in NC's topic in New member Introductions
Welcome! Nice model! I like the walking beam engine vessels. -
Great work there. I know if I tried that for sure be rounding over the corners.
- 263 replies
-
- 1
-
-
- Medway Longboat
- Syren Ship Model Company
- (and 1 more)
-
I really do like the fact that you can attempt to do the first way then there is a back up if it gets messed up
-
I absolutely love these two books. The second one is just as good if not better than the first one. And I really hope that they continue on for the fourth fifth and six rates (which is my particular interest).
-
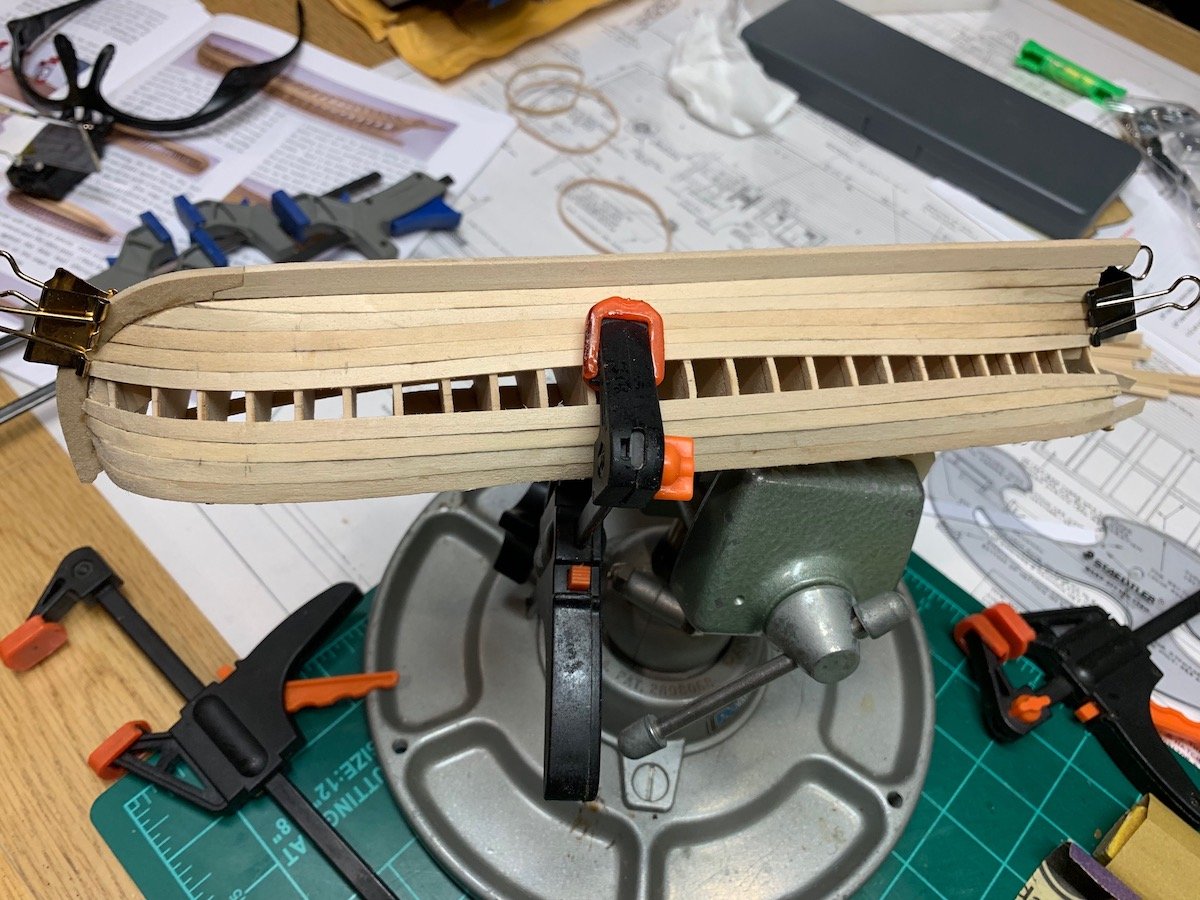
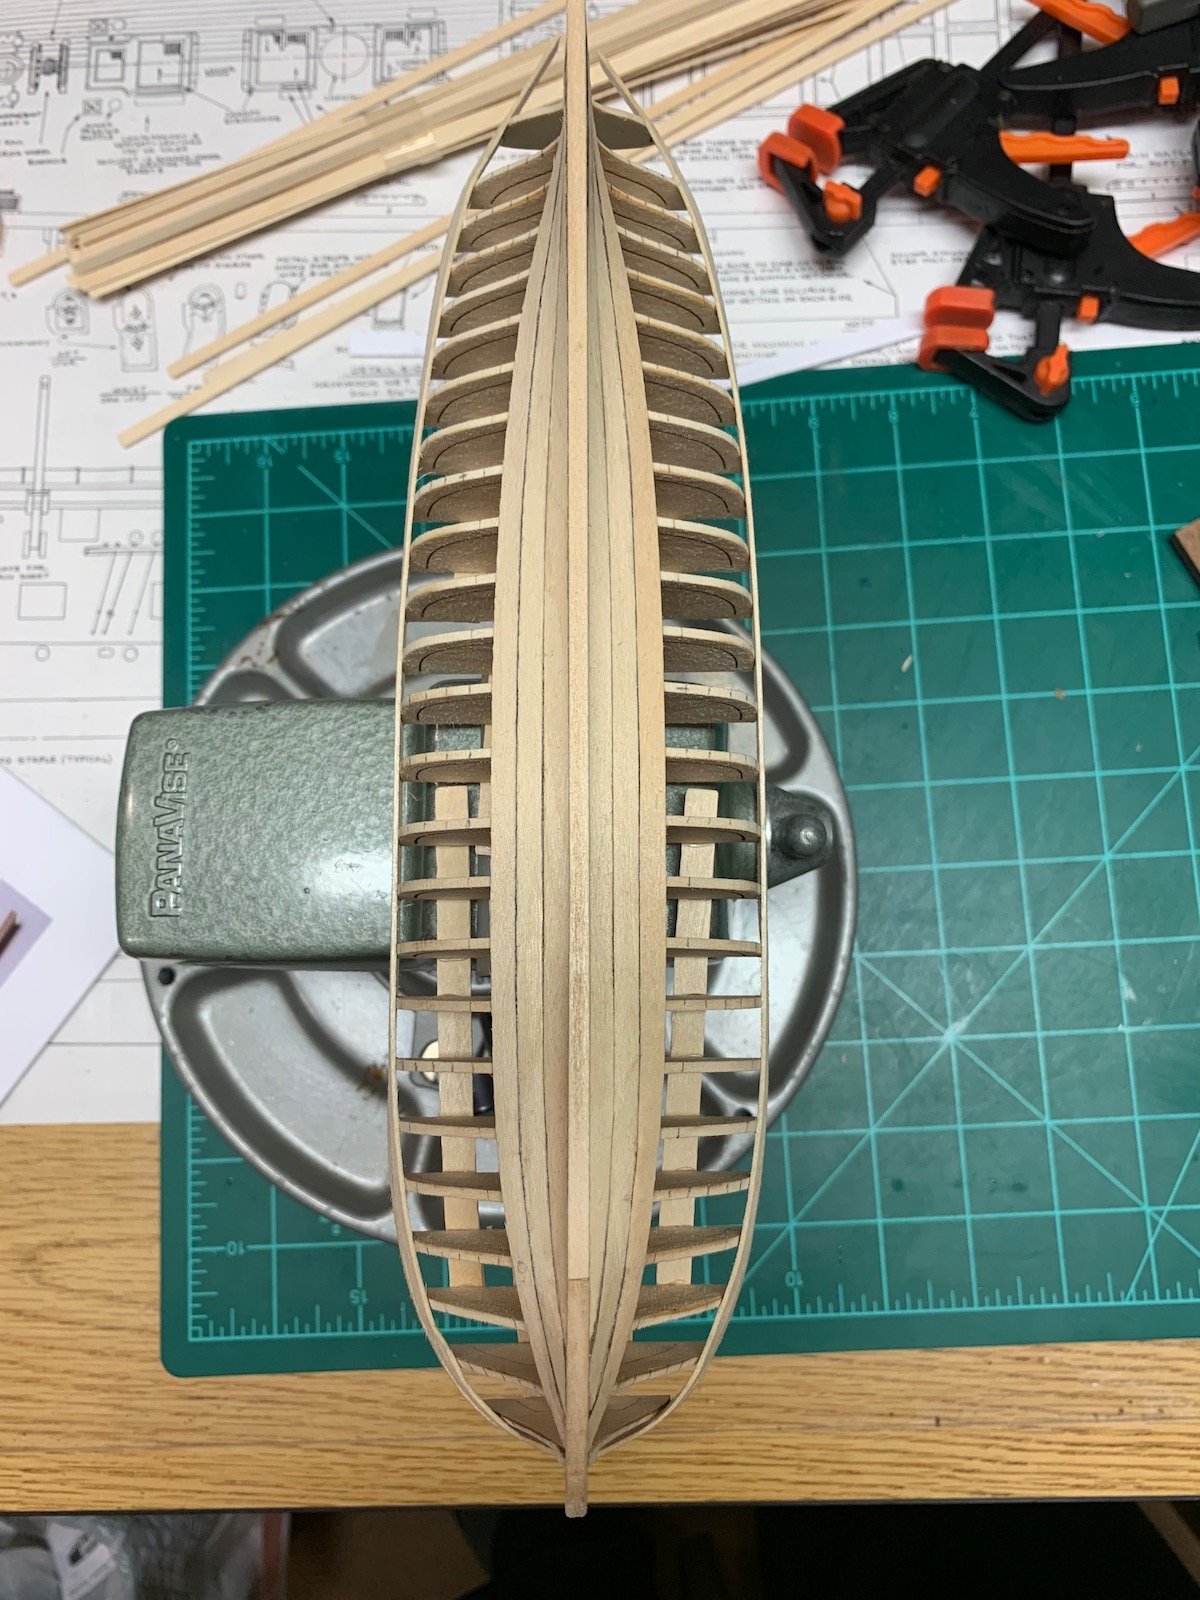
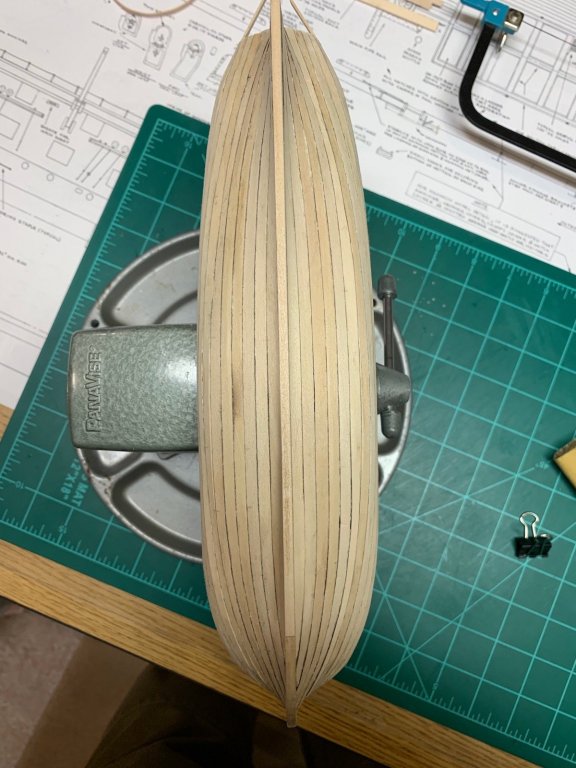
So first planking job somewhat symmetrical. It is going to need a few spot dust/glue fills but not too many. Need to practice a few more times.
- 90 replies
-
- 6
-
-
- english pinnace
- Finished
- (and 1 more)
-
After a bit of cleanup and a touch of sawdust/glue filling I think it will look better. Last plank only needed the front clamp... it was a really goofy shape...
- 90 replies
-
- 5
-
-
- english pinnace
- Finished
- (and 1 more)
-
Very clean and neat planking there.
-
Just 2 more to go. This wood is giving me angina. If it is not splitting then its folding over when bent and it is so soft if you even look at it wrong it dents. I guess I am getting a bit better as I need less clamps for each one.

- 90 replies
-
- 4
-
-
- english pinnace
- Finished
- (and 1 more)
-
Echo by davec - FINISHED - cross-section
MEDDO replied to davec's topic in - Build logs for subjects built 1751 - 1800
Looking good Dave. Definitely like the contrast in woods. -
Impressive work and very inspiring. Eventually will be building this and will be referencing your build for sure.
- 574 replies
-
- 3
-
-
- cheerful
- Syren Ship Model Company
- (and 1 more)
-
Ryland, will be nice to see the start of this project.
- 263 replies
-
- 2
-
-
- Medway Longboat
- Syren Ship Model Company
- (and 1 more)
-
Maybe in 200 years or so someone will send in some kind of camera nanobot to look around 😀
-
Thanks Dave. Now the real tapering begins. At least the next ones will not have such a massive edge bend on them.
-
Thank you Kevin. I am learning this stuff as well. My last few models haven't had any planking so this is basically a first for me.


- 90 replies
-
- 5
-
-
- english pinnace
- Finished
- (and 1 more)