HOLIDAY DONATION DRIVE - SUPPORT MSW - DO YOUR PART TO KEEP THIS GREAT FORUM GOING! (Only 20 donations so far - C'mon guys!)
×


MEDDO
-
Posts
1,871 -
Joined
-
Last visited
Content Type
Profiles
Forums
Gallery
Events
Everything posted by MEDDO
-
 Look forward to it!
 -
Kurt sounds like something which could be adapted for the NRG Conference roundtable maybe?
-
Looks like a great subject. Unfortunately my French is very weak. Maybe a few years with Berlitz, Duolingo, Rosetta Stone will get me to the point where I could read and understand something like this😁
-
Thanks Chuck. I am sure to have some questions along the way.
-
Also wondering this thanks
-
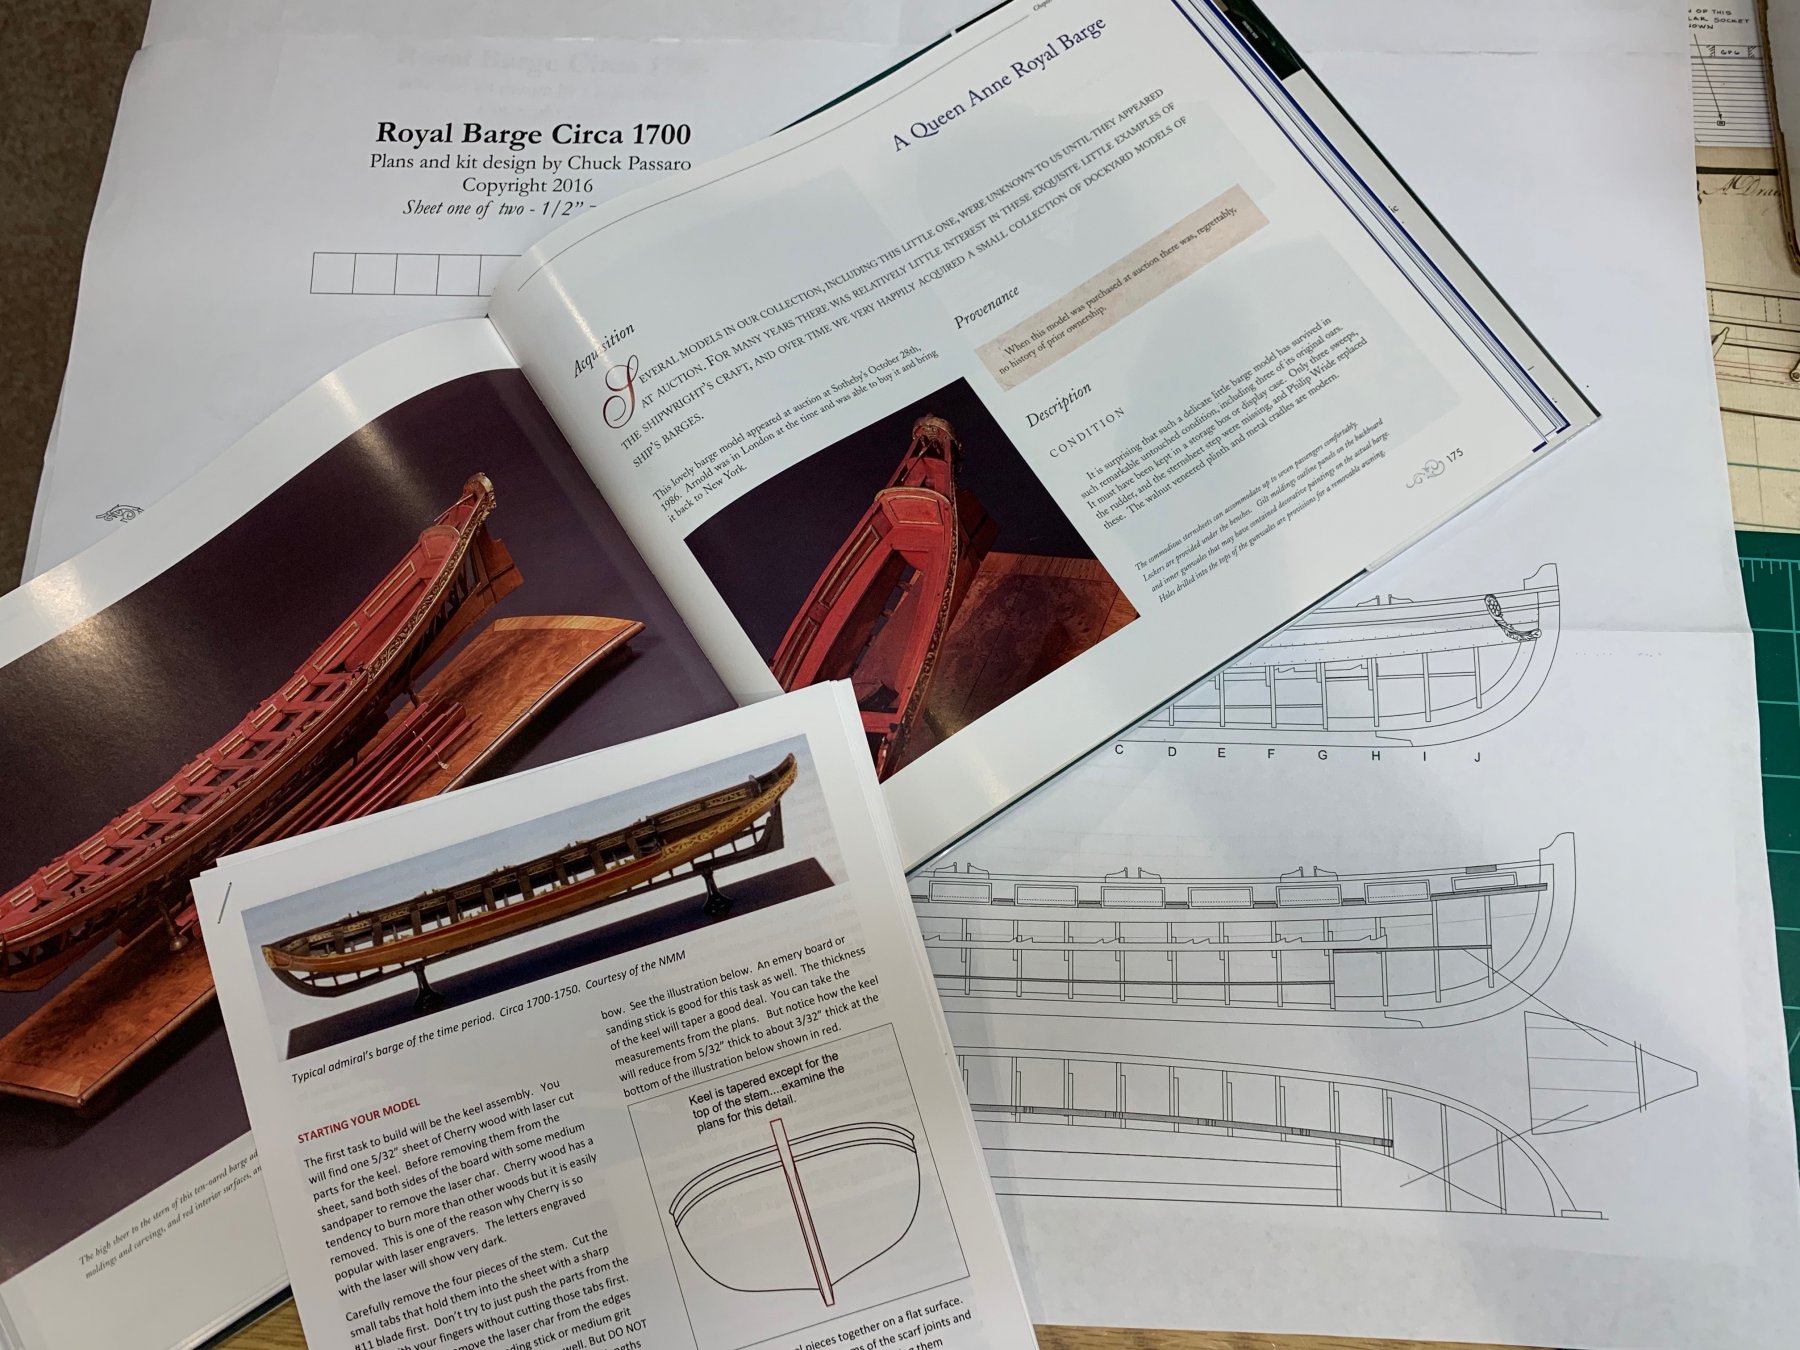
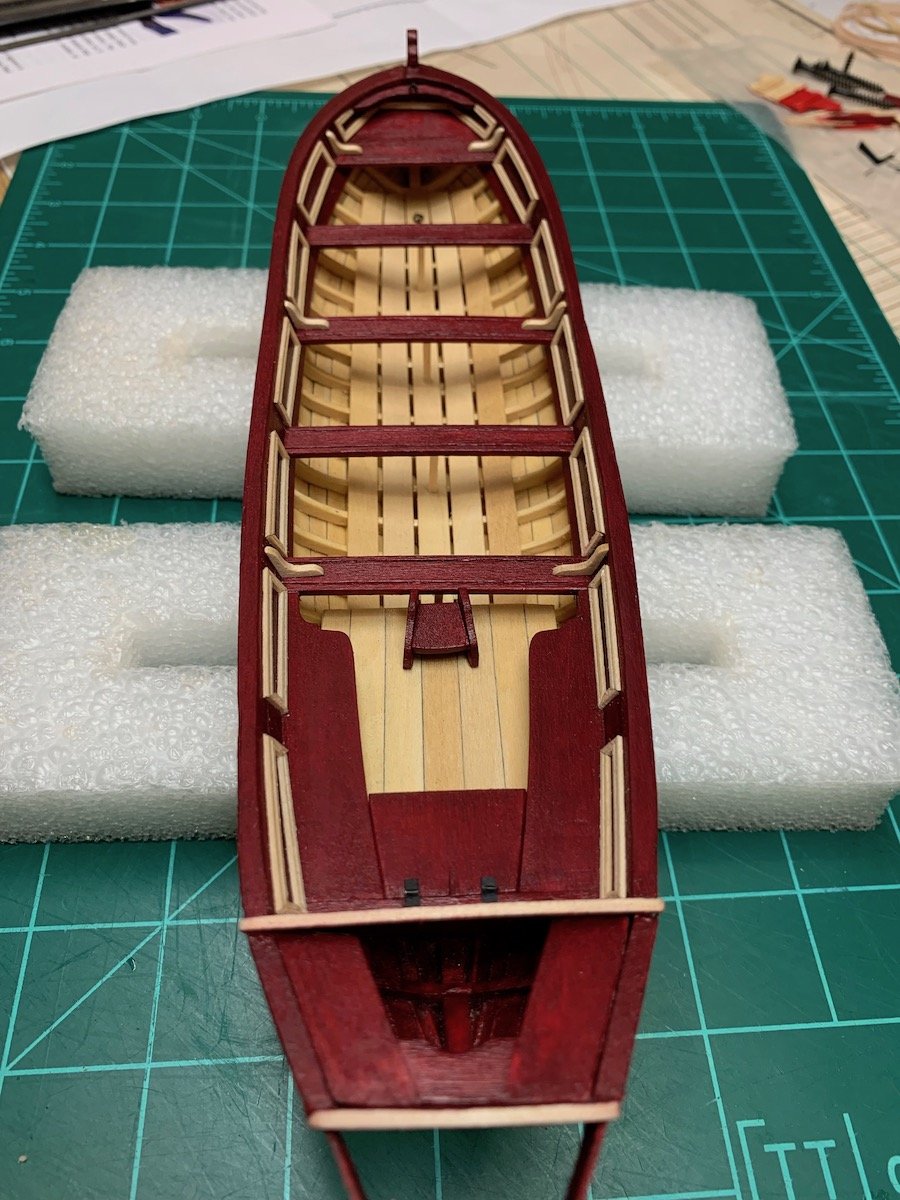
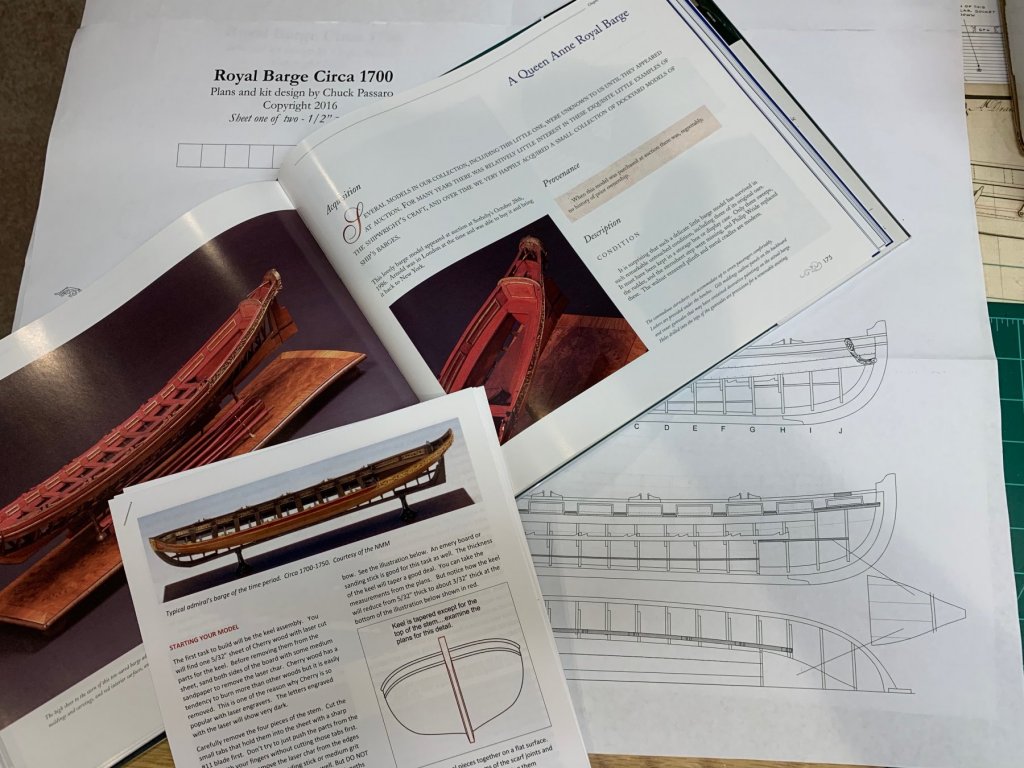
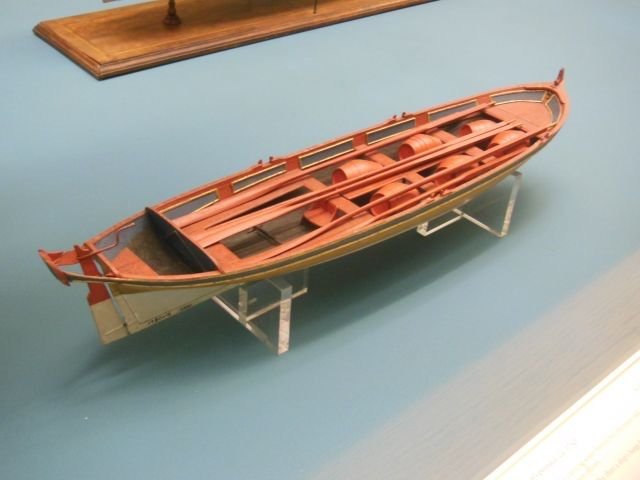
After seeing Chucks Queen Anne Barge at the NRG conference in St Petersburg (2017) I knew that I wanted to build this one. I have always been drawn to the so called dockyard or admiralty style models. I really like the exposed frames and the ability to see into the ship/boat to see the architectural details. After learning quite a bit on the last build I am moving on to this more complicated kit. The kit was packaged well and has 2 pages of plans and pdf instructions form the website. I do like having paper instructions so printed the pdf's (now I know why Chuck doesn't include them) for a cost yikes. The instructions seem very nice and comprehensive. I also have a few books which talk about this type of craft The Boats of Men of War by W E May, as well as the 17th and 18th Century Ship Models from the Kriegstein Collection. One of the things I thought was interesting was the size of this model. The Pinnace is also 1:24 scale and is much smaller. Now on to sanding the char. Remarkable little on the face so that was a nice find.

- 221 replies
-
- 11
-

-
- queen anne barge
- Syren Ship Model Company
- (and 1 more)
-
Ryland those are planks are tight! Very nice
- 263 replies
-
- 1
-
-
- Medway Longboat
- Syren Ship Model Company
- (and 1 more)
-
Beautiful family. Thanks for the great service, your products were/are wonderful.
-
Thank you B.E. At at the beginning I was unsure about the darker red but it has really grown on me and I kinda like it now.
- 90 replies
-
- 1
-
-
- english pinnace
- Finished
- (and 1 more)
-
Thanks Chuck for that info. For those of us less experienced it is nice to see how to do it right.
- 1,784 replies
-
- 4
-
-
- winchelsea
- Syren Ship Model Company
- (and 1 more)
-
Welcome! A build log in the appropriate forum is a great way to show us your work , ask questions etc. (there is a way to properly name it with instructions pinned at top of the sub forum) Nice pictures btw
- 6 replies
-
- 1
-
-
- schooner atlantic (gulp!)
- cape upright
- (and 2 more)
-
Thank you Ryland and thank you Druxey. I feel like every step of the way I was learning something new. edit: Druxey this was not quite my first build but it was the first time I tried to do it properly haha
- 90 replies
-
- 2
-
-
- english pinnace
- Finished
- (and 1 more)
-
Thanks Steve.
-
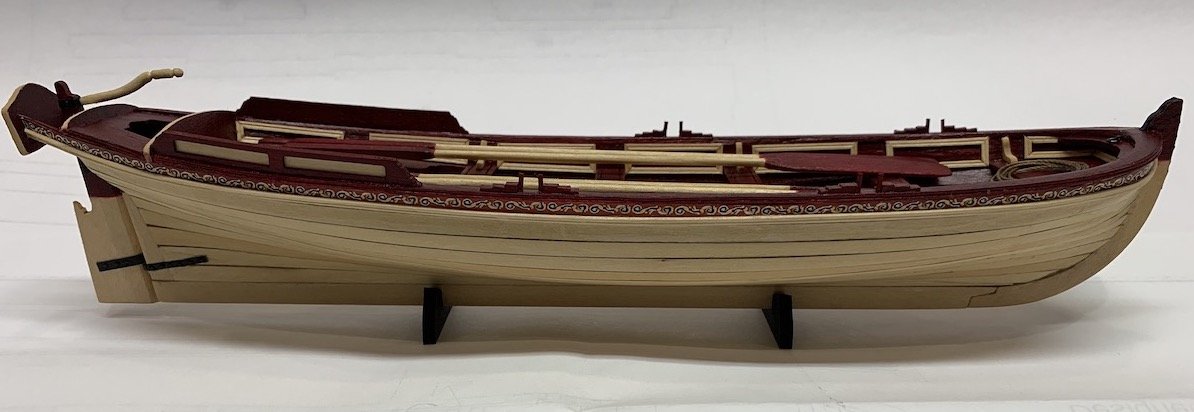
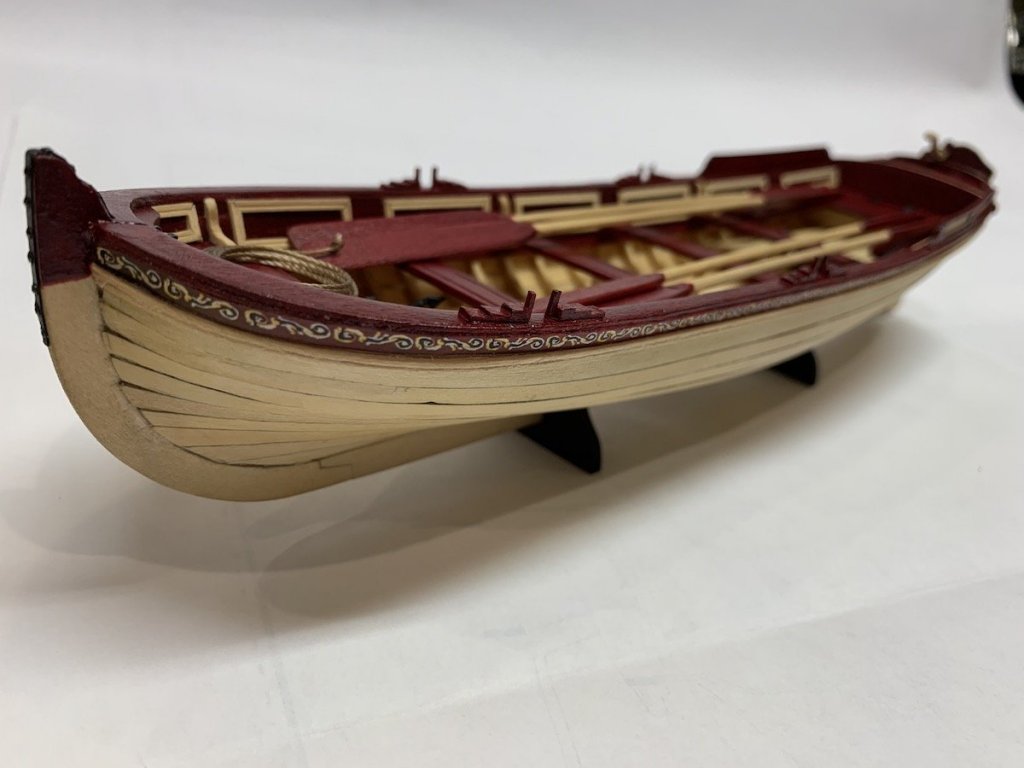
I am going to eventually case this and I am not sure how I will present it but at this point I am going to call this complete. Basically this was an attempt to build straight out of the box with no extras and using minimal tools. Tools used were just an 11 blade, a 1/4 inch chisel, forceps, mini file set, digital calipers, sand paper, cheep clamps some glue and paint (I think that's all). I think it came out ok. This was also my first planking job using Chucks edge bending techniques and proper spieling without drop planks or stealers (other than when I ham fisted and broke off a plank end at the stern and put in a 4mm wedge to replace the split plank end). There was a lot of learning going on here and I think it was a fun build overall. Will probably also put these in the gallery at some time. Next up planning for to move onto the Queen Anne style Royal Barge from Syren. Thanks all for following along with me and for all the likes and comments.


- 90 replies
-
- 13
-
-
- english pinnace
- Finished
- (and 1 more)
-
Congrats on another wonderful build. It certainly is a joy following along with you.
- 574 replies
-
- 2
-
-
- cheerful
- Syren Ship Model Company
- (and 1 more)
-
Thank you Ed for allowing us to come on this journey with you. This is a fantastic example of what is possible with our art/craft and this build log is priceless.
- 3,618 replies
-
- 3
-
-
- young america
- clipper
- (and 1 more)
-
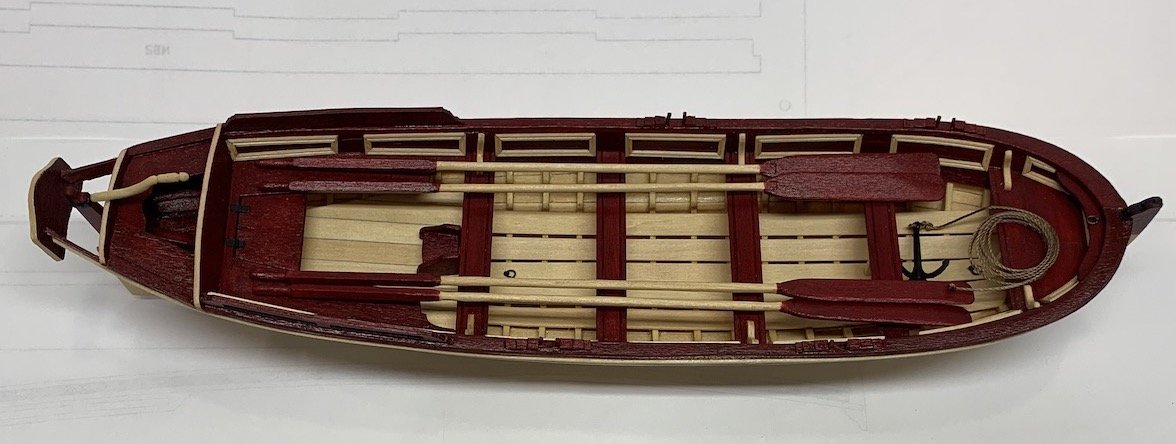
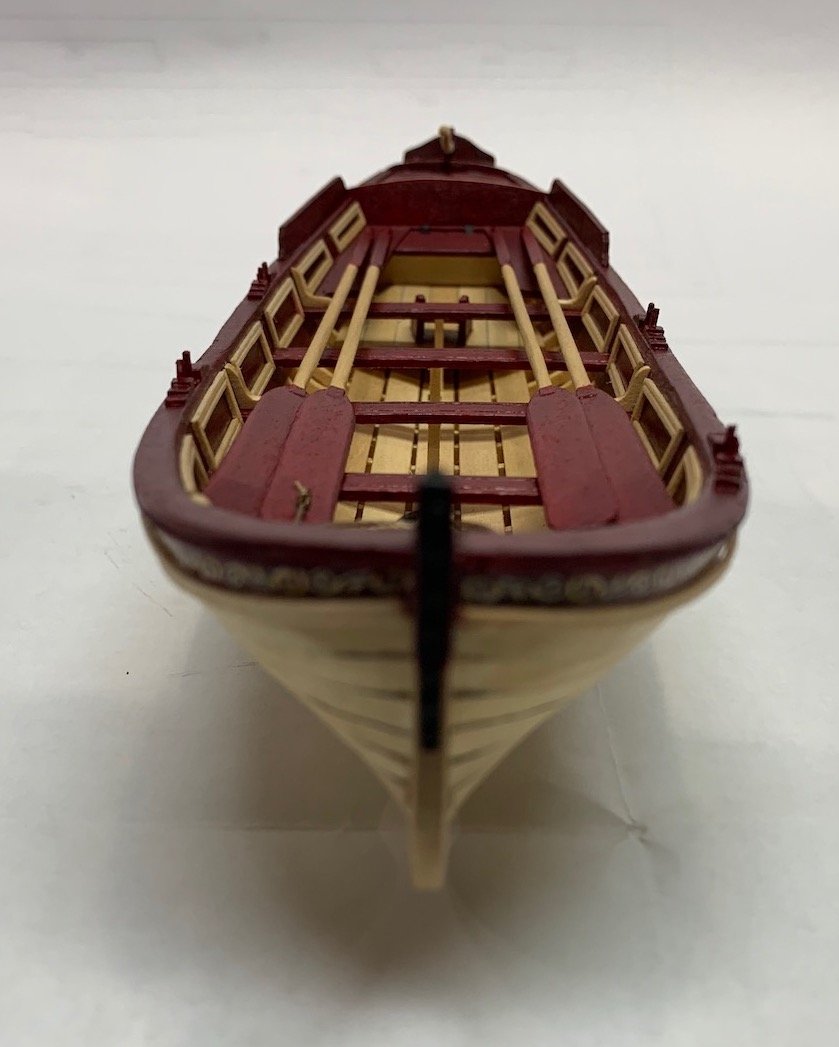
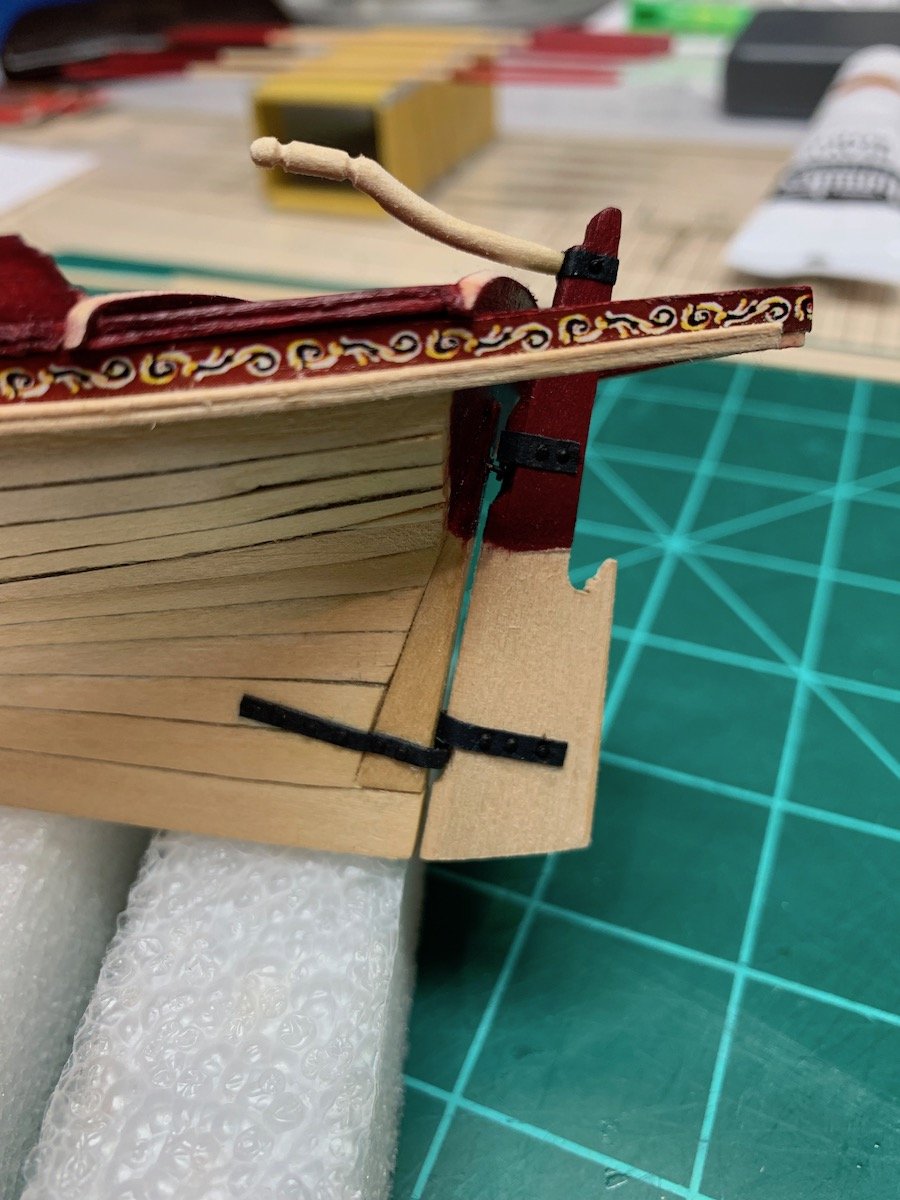
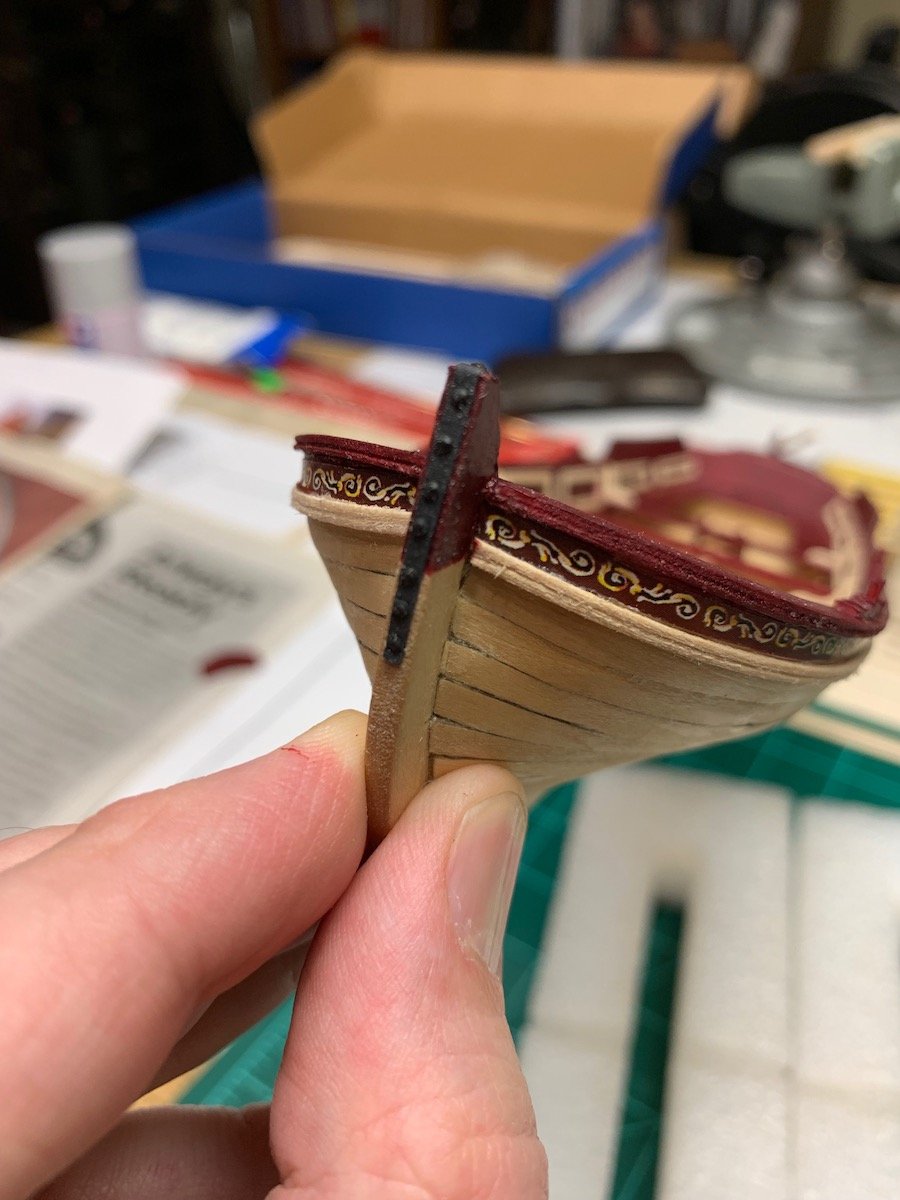
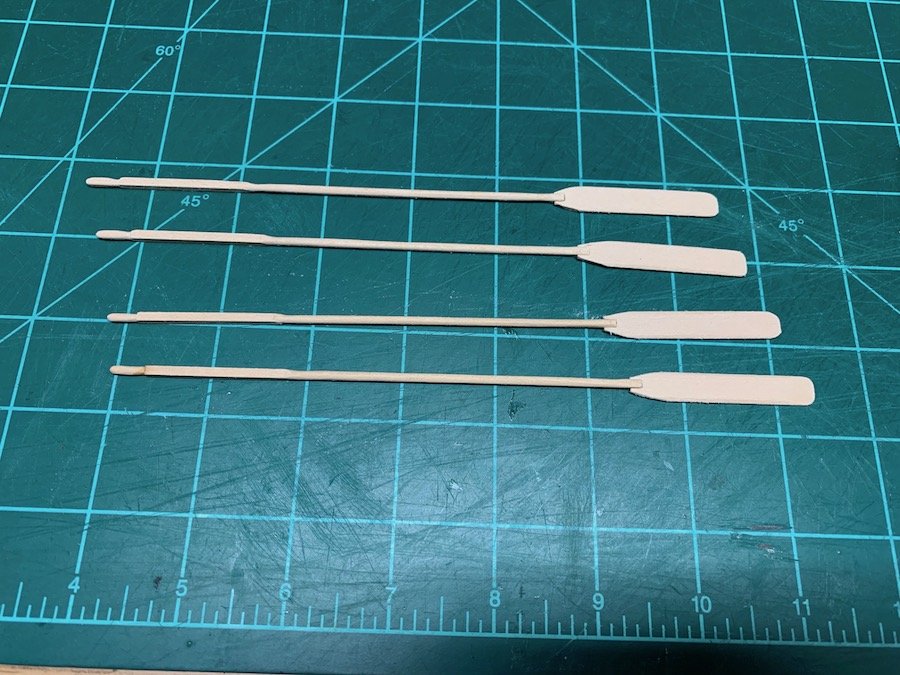
Made the oars (just dry fitted for now), oarlocks (also dry fitted), got the ironworks and nails done and can ship the rudder (but am leaving it off for now). Working on the flying transom next.

- 90 replies
-
- 6
-
-
- english pinnace
- Finished
- (and 1 more)
-
Enjoy your rest and relaxation. Maybe we will see one of those little umbrellas in your next post 😁
- 1,784 replies
-
- 2
-
-
- winchelsea
- Syren Ship Model Company
- (and 1 more)
-
Very nice progress. I never thought wax would pop off the lines like that. Hopefully it is not too sticky and can be picked up neatly.
-
Thanks Steve for the input. I was leaning toward this option as well. Tomorrow I will be able to blend it in and test fit it to see how it goes.
- 90 replies
-
- 1
-
-
- english pinnace
- Finished
- (and 1 more)
-
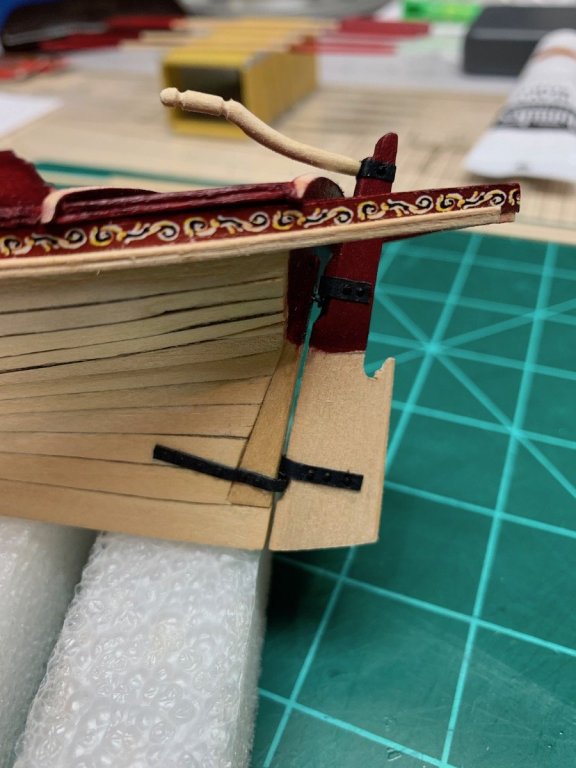
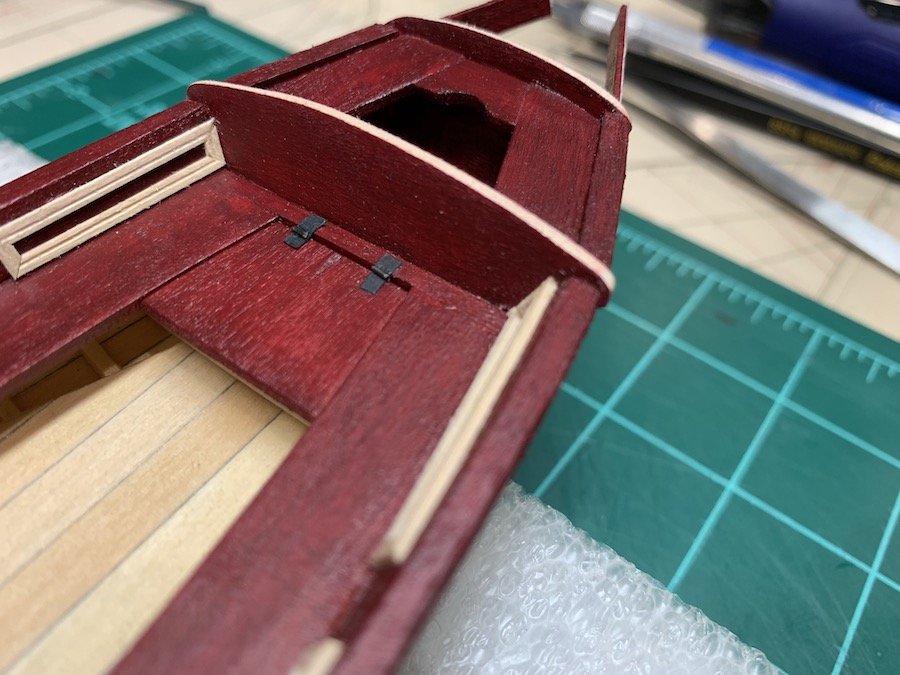
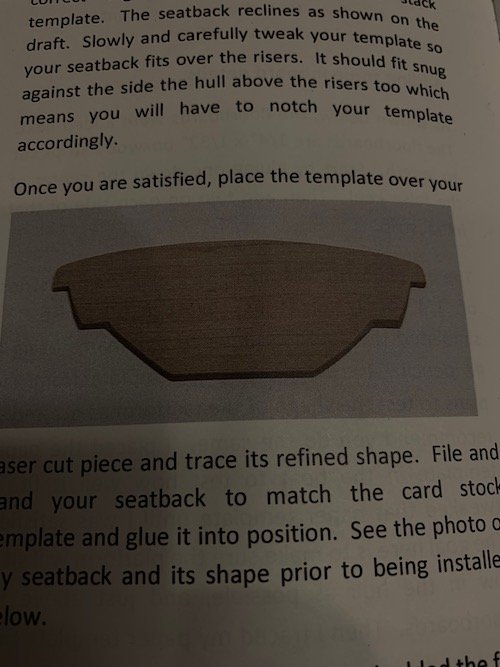
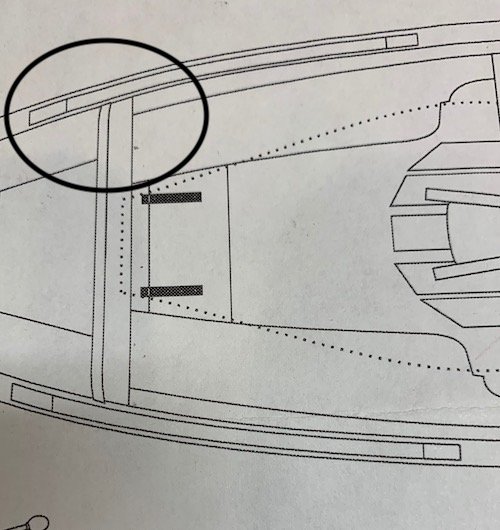
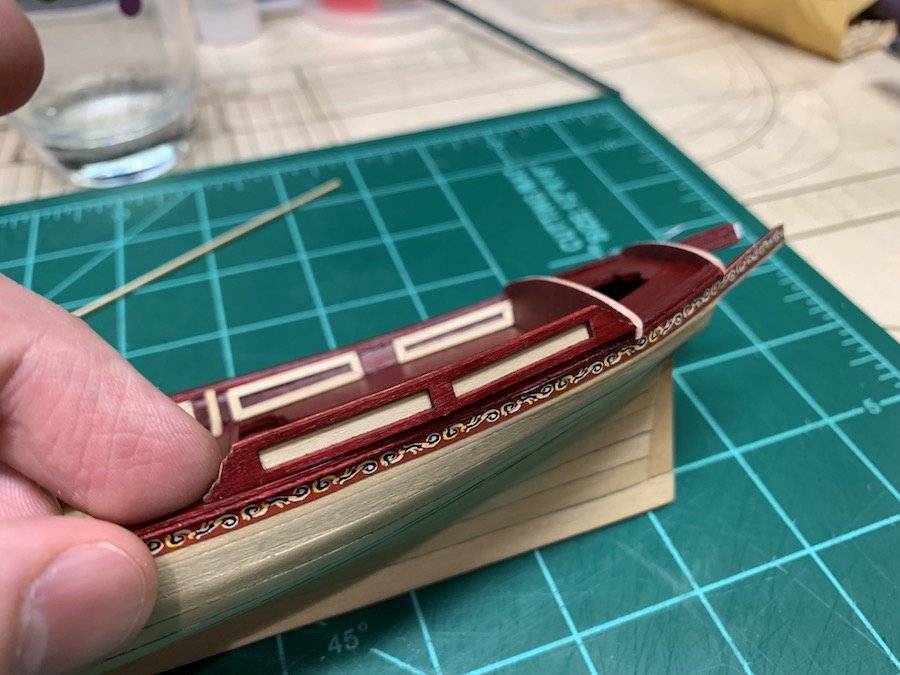
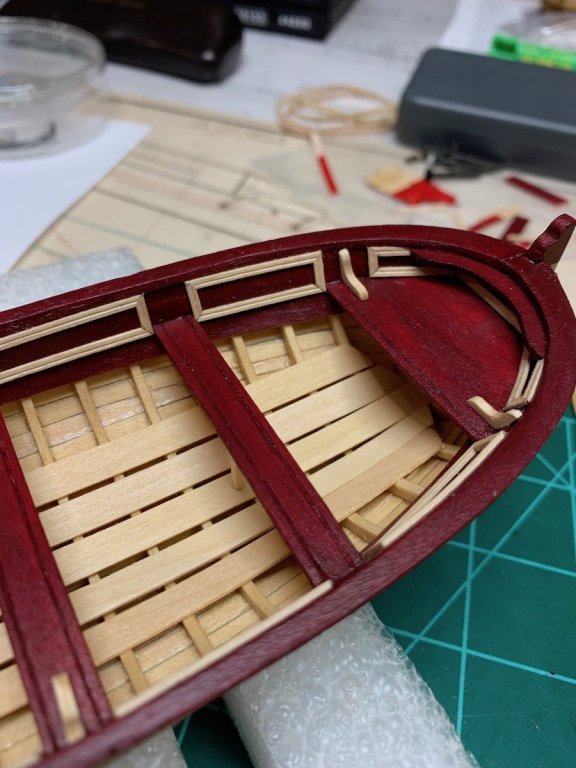
Moving on to the splash panels I found a pretty big mistake. Need to learn to read the plans, read the plans then read the plans some more BEFORE taking the next step. So when I made the rear seat I left the edges overhanging. I got the general shape from the instruction manual template One thing I never noticed was when I was placing the caprail that it basically stopped at the setback. I then added another piece to finish off the rear cockpit caprail behind the seat. Worked out great. Now for the problem. I am now going to try to fit the splash panels and find the overhang is in the way. On the PLANS it is quite clear the splash panels extend aft of the seatback. Ug.... There are multiple ways to go about this that I can think of. 1) Easiest would be to just leave it off. Someone here on MSW went that way and their build looks great. Also see NMM example and Rodgers Collection This leave a nice clean look but less interesting. Also was trying to build this straight outta the box so there's that I guess. 2) Option number 2 is to just add the splash guard in front of the seatback and shape so it flows nicely. Someone else on MSW took that route. The kit has a spare panel I painted up to see what it would look like. Not bad I guess. 3) try to cut a notch into the panel and fit it around the seatback. I think this may end up looking kinda busy and weird so not really a fan of this one. 4) I could try to carefully shave down the seatback and place the splash panels where they are supposed to be but then I would also have to drop in a small filler piece to join the fore and aft caprails together. This might work using wood putty/sawdust over the filler piece and some careful painting. This is the most dangerous if I mess up the seatback because I cannot replace that. I am also not sure I can blend in the filler piece well. Welp there you have it.... Lesson learned.... Read the plans AND understand them before proceeding. Need to think on this for bit

- 90 replies
-
- 4
-
-
- english pinnace
- Finished
- (and 1 more)
-
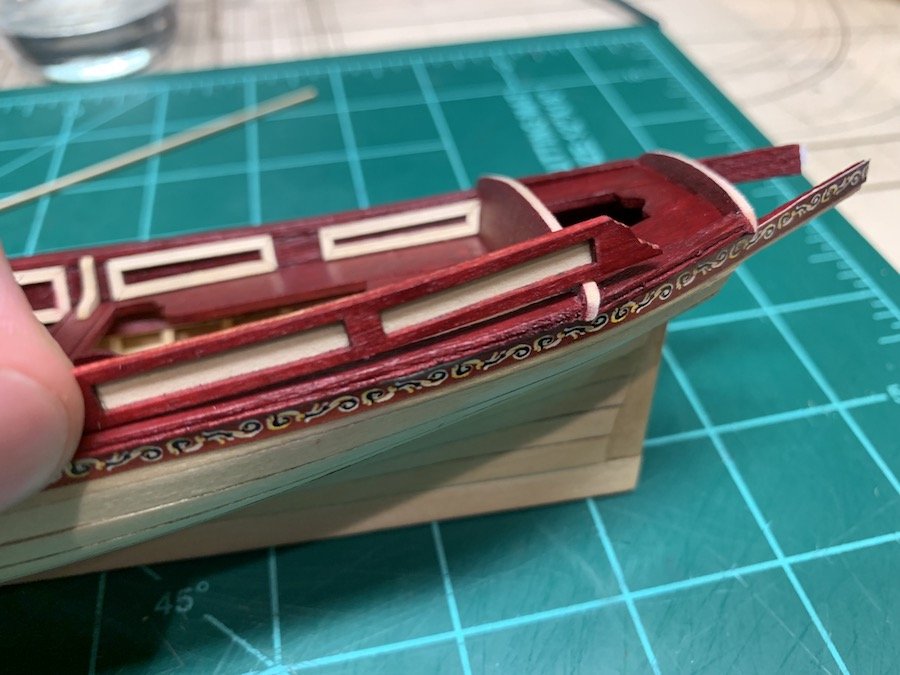
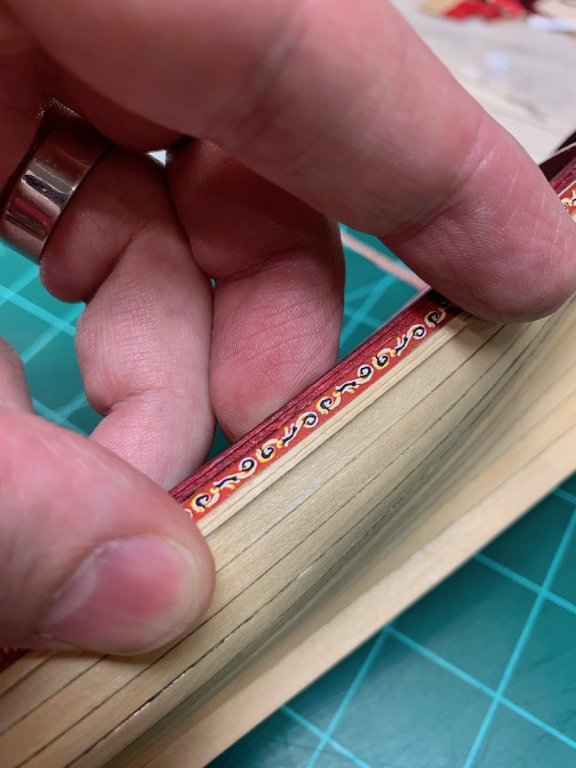
Thanks for all the likes. I just realized I painted the edge of the caprail earlier. I am not sure if I will be able to sand it off as it only hangs over just a bit. I cut out one of the frieze and held up a bit of the moulding I used for the internal panels to see how it looks. Will thin out the rail a bit as it seems overly large.
- 90 replies
-
- 4
-
-
- english pinnace
- Finished
- (and 1 more)
-
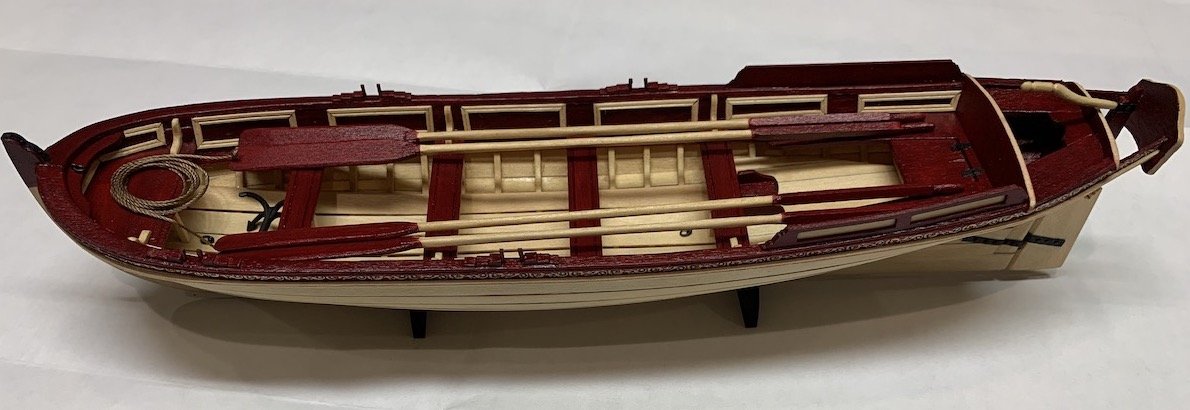
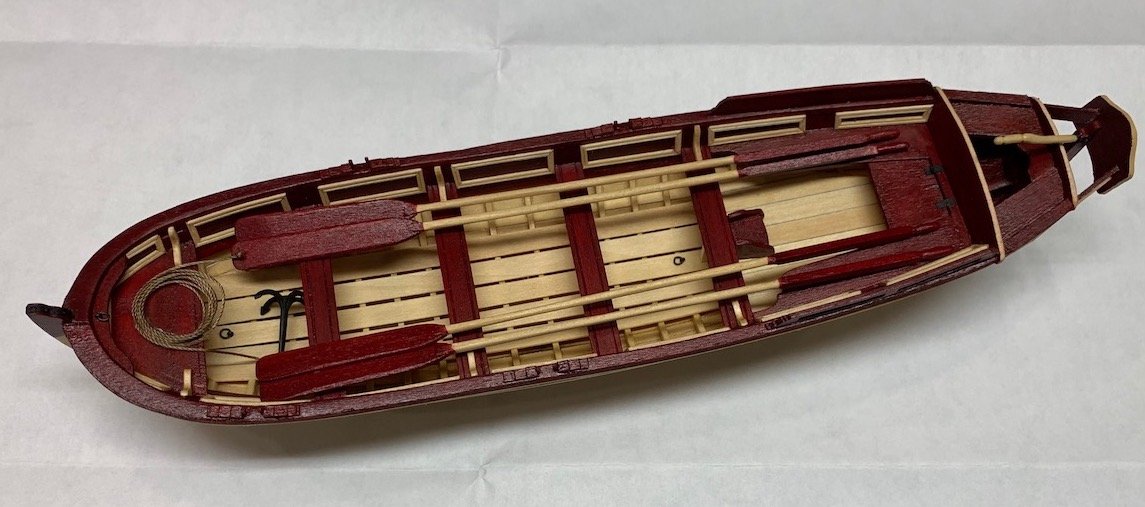
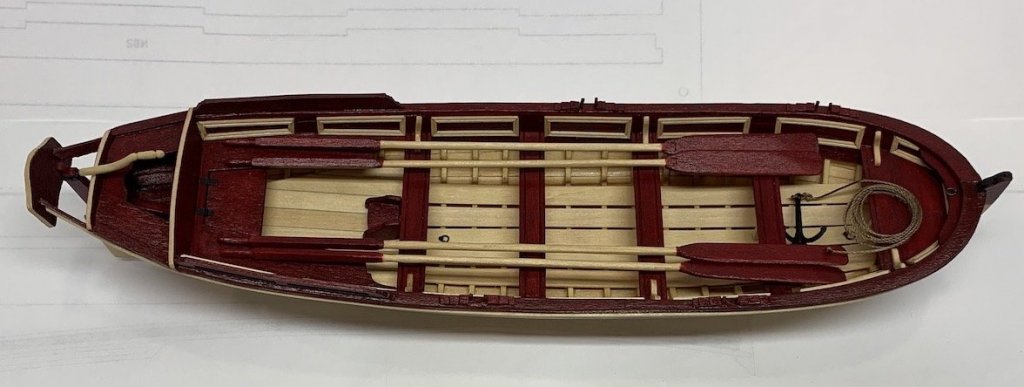
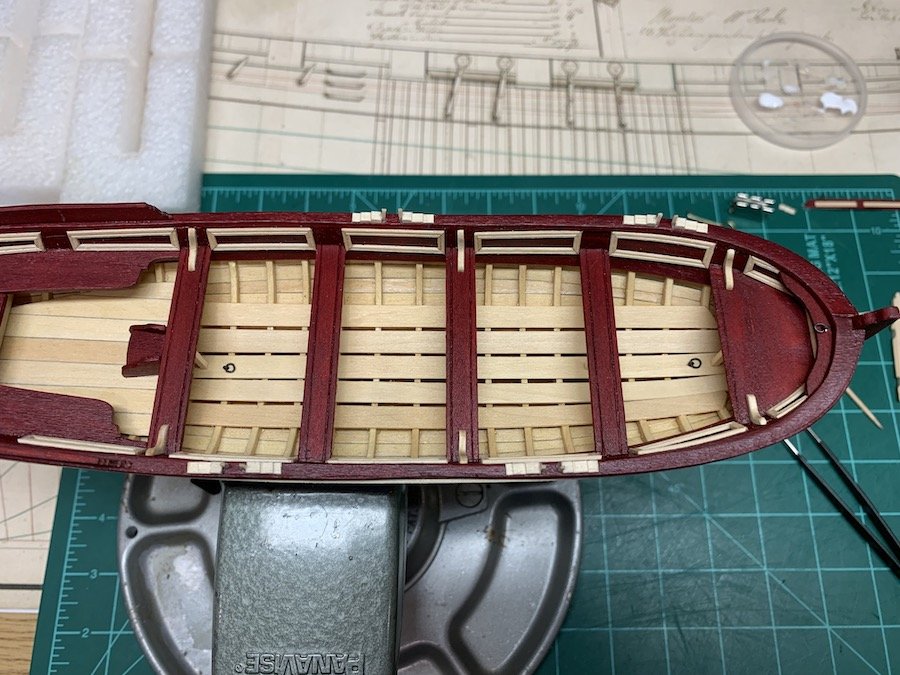
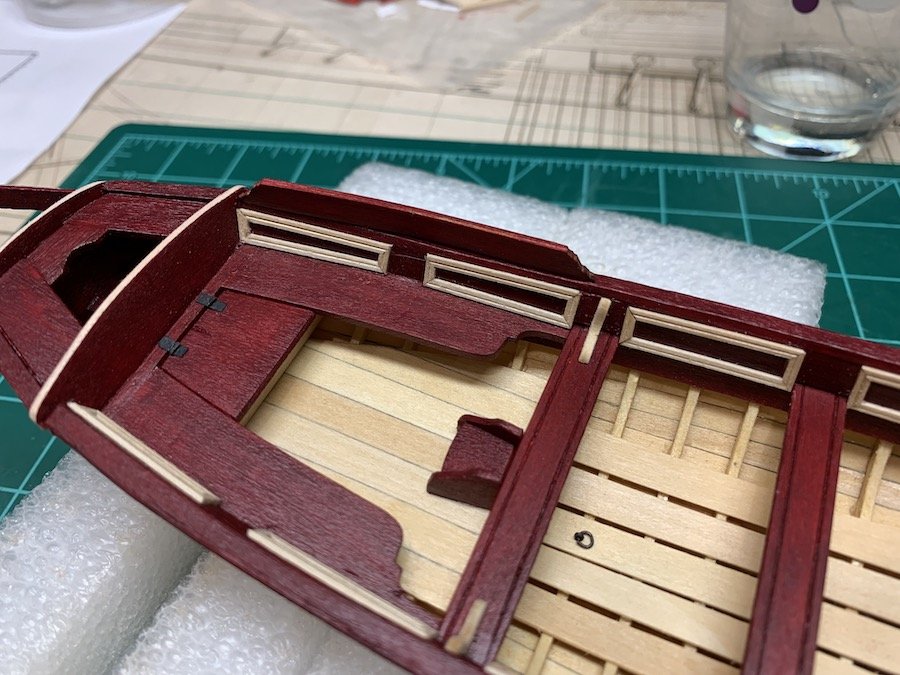
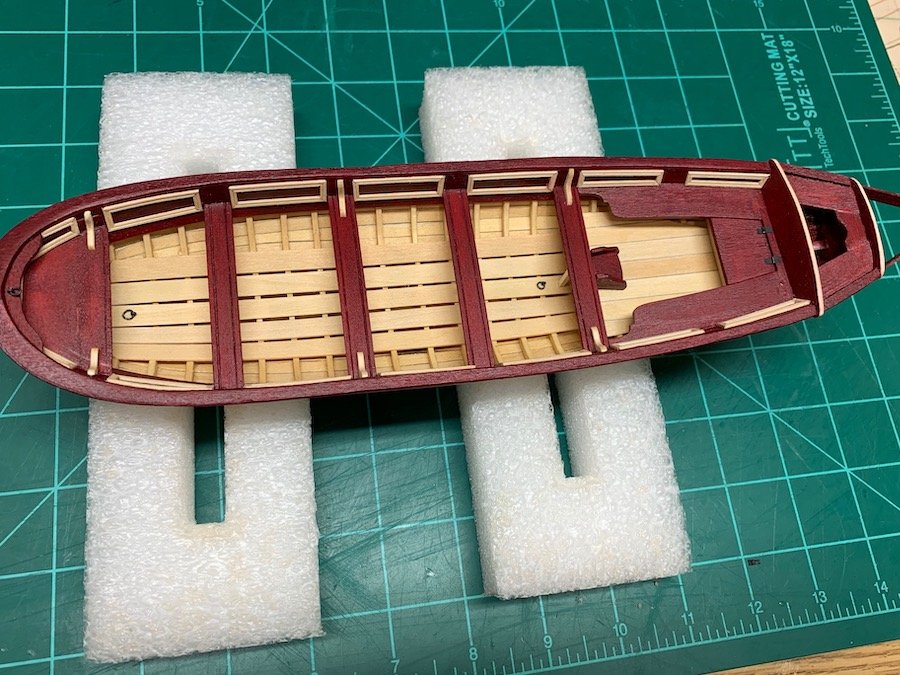
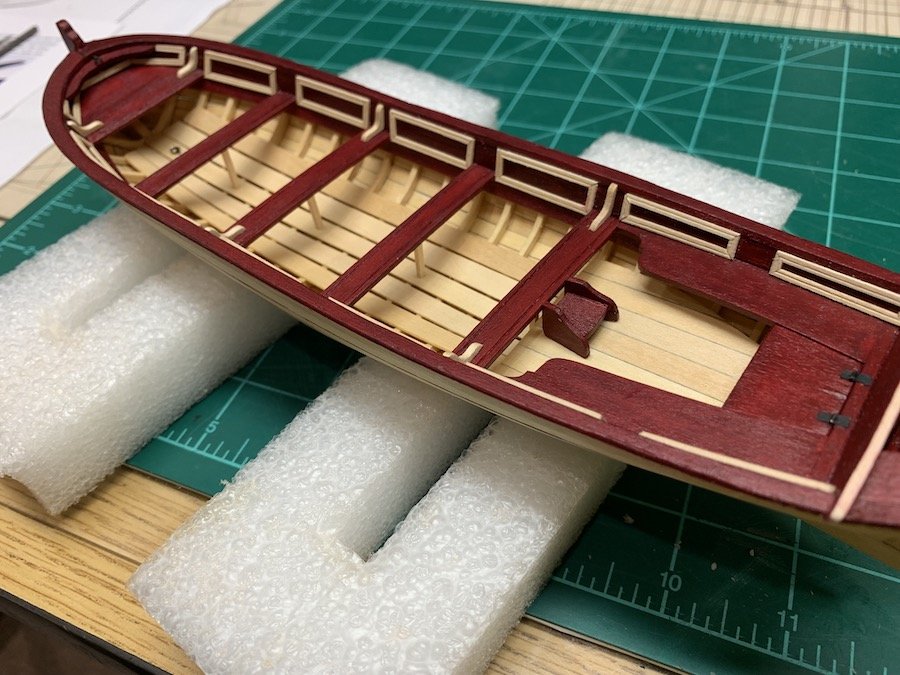
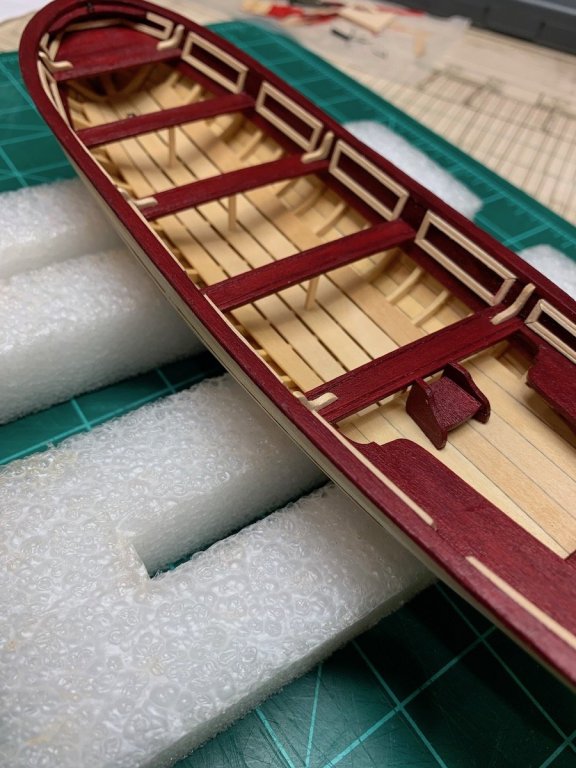
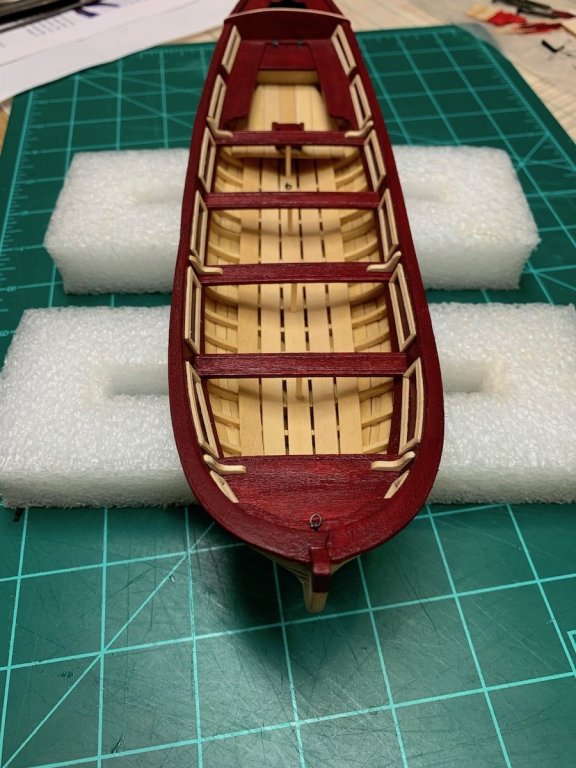
Finished the inboard details. Here are a few pictures Next up is the outboard details including the frieze and rail, splash boards, rudder/tiller assembly and the flying transom. Then its just the oars and display I think.

- 90 replies
-
- 12
-
-
- english pinnace
- Finished
- (and 1 more)
-
Very nice carving. I have a blank set and am going to try to carve mine as well when I get to that point. (The barge is next after I finish the pinnace). It is nice that the kit gives you the opportunity to try this out.
- 103 replies
-
- 2
-
-
- queen anne barge
- Syren Ship Model Company
- (and 1 more)
-
In general I think I prefer the clean look myself. I think that many people who rig the guns tend to use oversize blocks and oversize line which tends to make it look very cluttered and clunky. If you can get down to the appropriate size blocks and make sure that the lines fall properly then they can look very nice. With how clean and neat your build looks so far it would be a shame to make it look too clunky. On the other hand it certainly is more authentic if you do rig them. These were very cramped and tight workstations with lots of moving parts and pieces.
- 128 replies
-
- 3
-
-
- mordaunt
- battle station
- (and 1 more)