

kirill4
-
Posts
903 -
Joined
-
Last visited
Content Type
Profiles
Forums
Gallery
Events
Posts posted by kirill4
-
-
-
Good day,
Dear Bosco72,
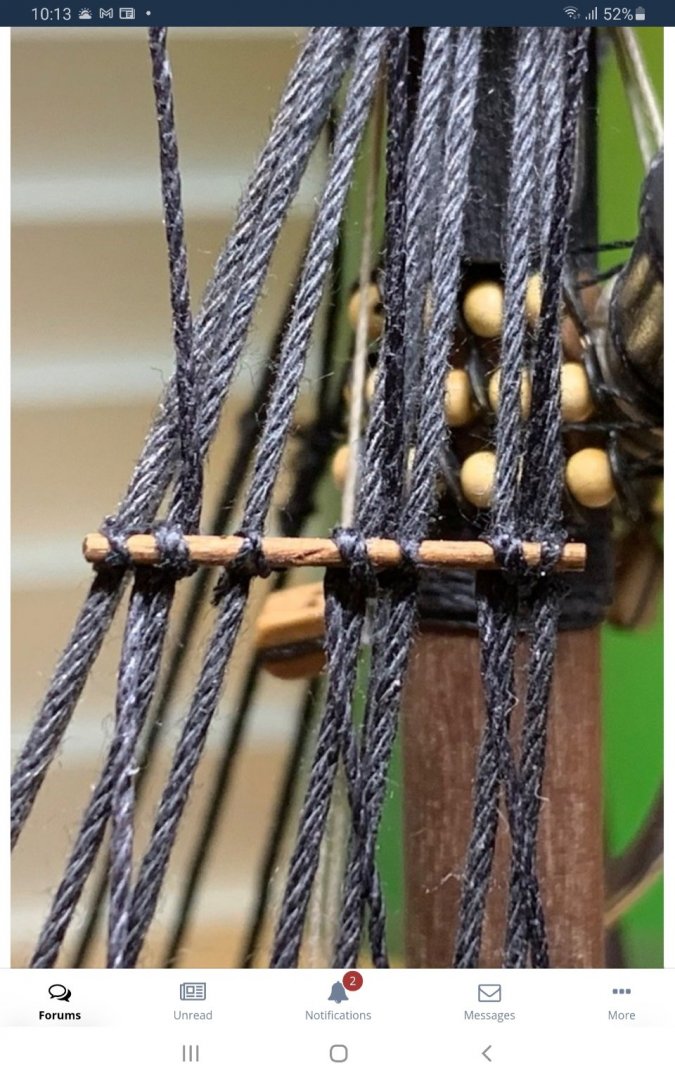
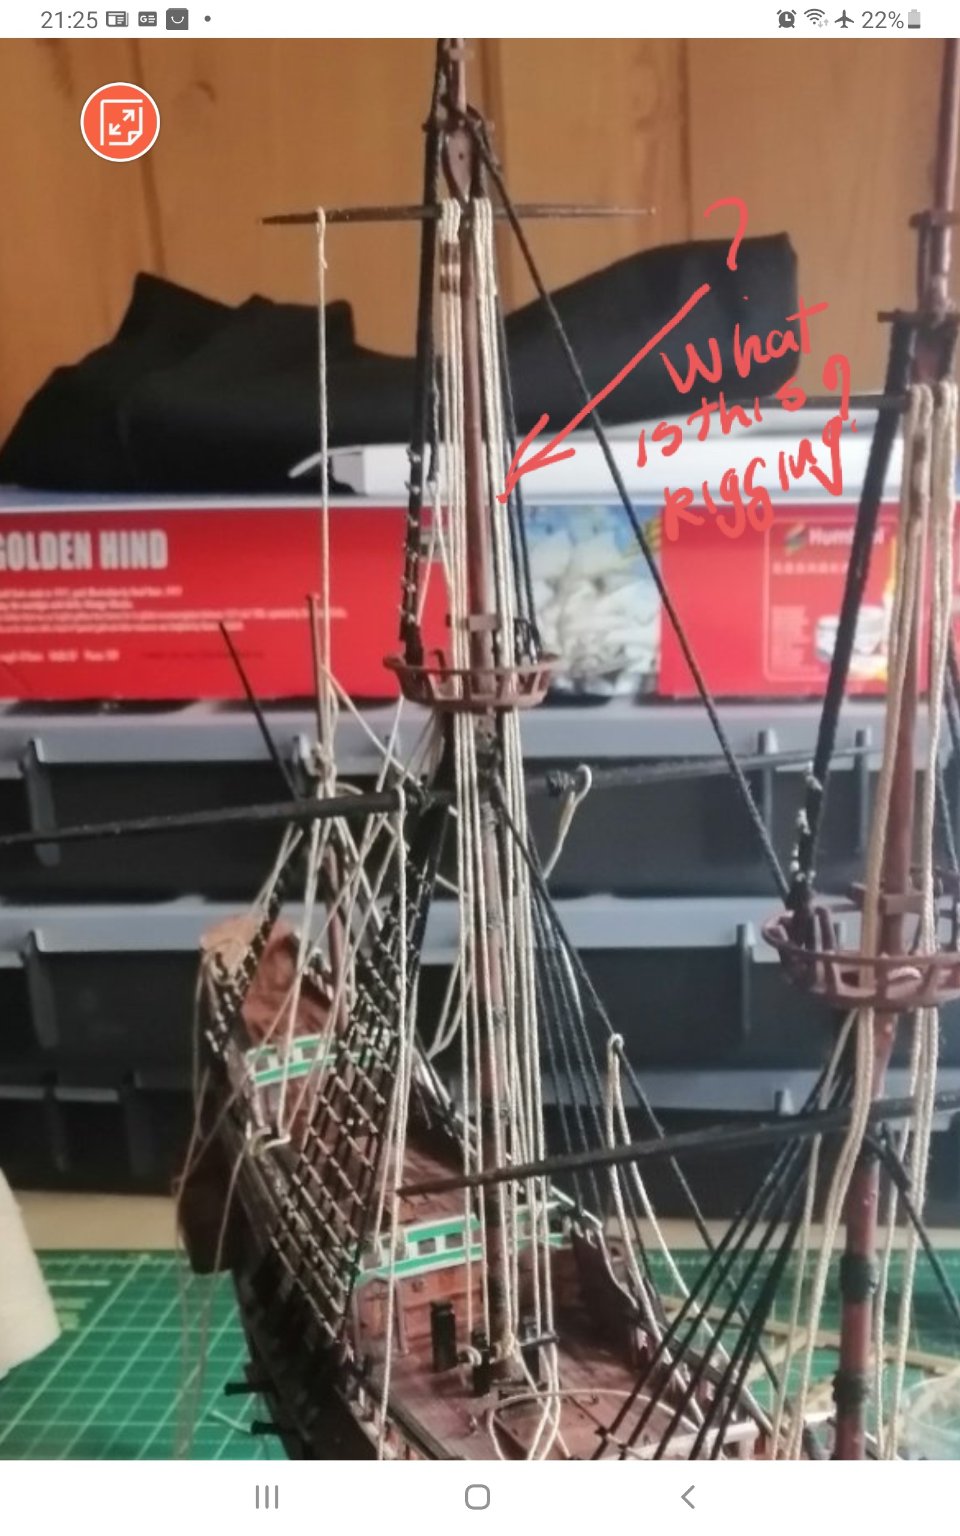
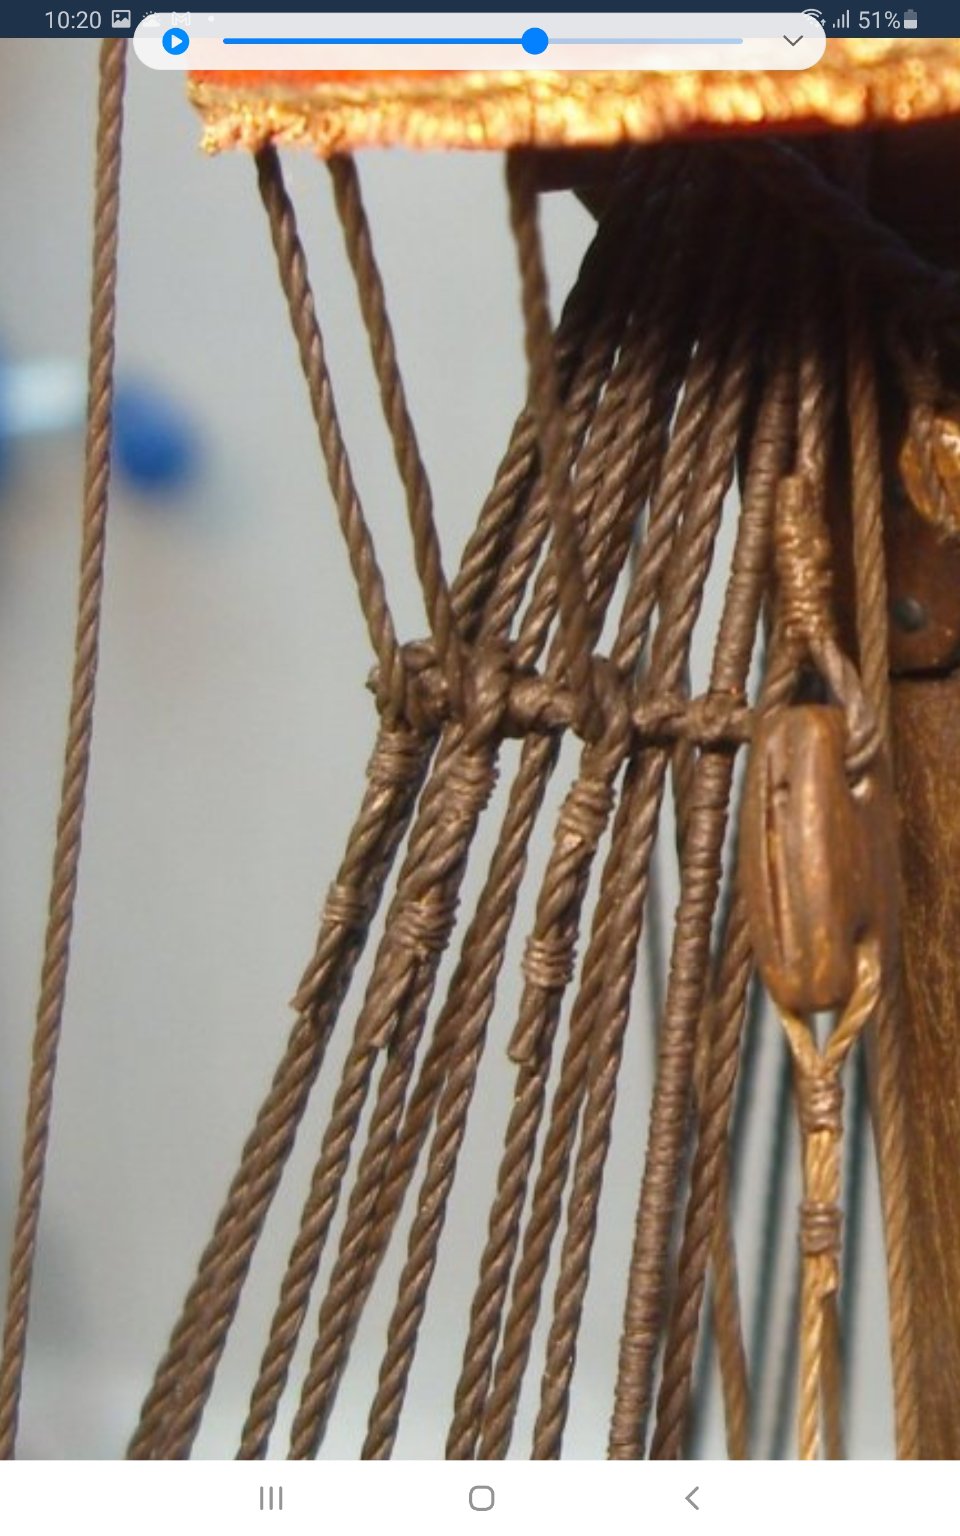
Please advise, what is the purpose of this rigging?
Can't understand their functionality...seems to me there could be something wrong with arrangements...
All the best!
Kirill
-
Thank you very mach,
Bruma,
clear about deadeyes... I thought/ planned to use "dremel " hand drill to machine a little bit topgallant 2 mm conventional deadeyes to smaller size? but it is just my plan... I didn't try to do it...
And I think to use liquid plastic to replicate/ casting blocks and dead eyes as much as I need in different sizes and shapes...
they are seems too expensive for me if planned to purchase all ness-ry quantity on the market...
I planned to purchase 10 pcs of each sizes and shapes( high quality professional made blocks and deadeyes) I need and than to replicate them in epoxy or in plastick...as much as I need...
- mtaylor and FrankWouts
-
 2
2
-
Oh , sorry ,
You already answered about chains...
- FrankWouts and Bruma
-
2
-
Ah, sorry,
that chain You was lucky to find ,smallest one , how many links per cm is it ?
is it "Trumpeter" made/ product?
sure/agree that clipper sheets( of this period) need to be made from shain! even we have to sacrifice a scale a little bit
")
-
Good day Bruma,
some vital important questions for me,
1. What are the sizes of deadeyes which you use? all 3 sizes ( main,top and top gallant)? or You use more sizes?
Where did you find them( deadeyes)?
2. I saw you use same size for top gallant and top mast deadeyes? why? or it looks same only on the foto?
-
Good day shipman,
for this site ,for ordering , maybe we could use google translator?...sometimes it works
but this smallest chain size, 16 links per 1 cm , may be it will be good for sheets? or it is still too big?
-
Good day Bruma,
Oh! Exelent work!!! Very clean and accurate! studied your posts with great interest!
Will follow your build with great interest!
Have plan to assemble this kit somewhere in future ...
found some shops with chain and steel ropes...
there are sizes in chains(segments)/cm
http://www.greenstuffworld.com/en/97-hobby-chain
https://lavka-korabela.ru/products/tsep-10-zvenev-sm?tab=tabOptions
https://www.shipmodeling.ru/shop/model_elements/tsepi/
it looks like smallest will be 16 links / cm - link of 0.65 mm approx in length?
Shipman mentioned somthing 0.45 mm link...
- Cirdan, shipman and FrankWouts
-
3
-
-
Good day Andy,
I will follow as well !!!
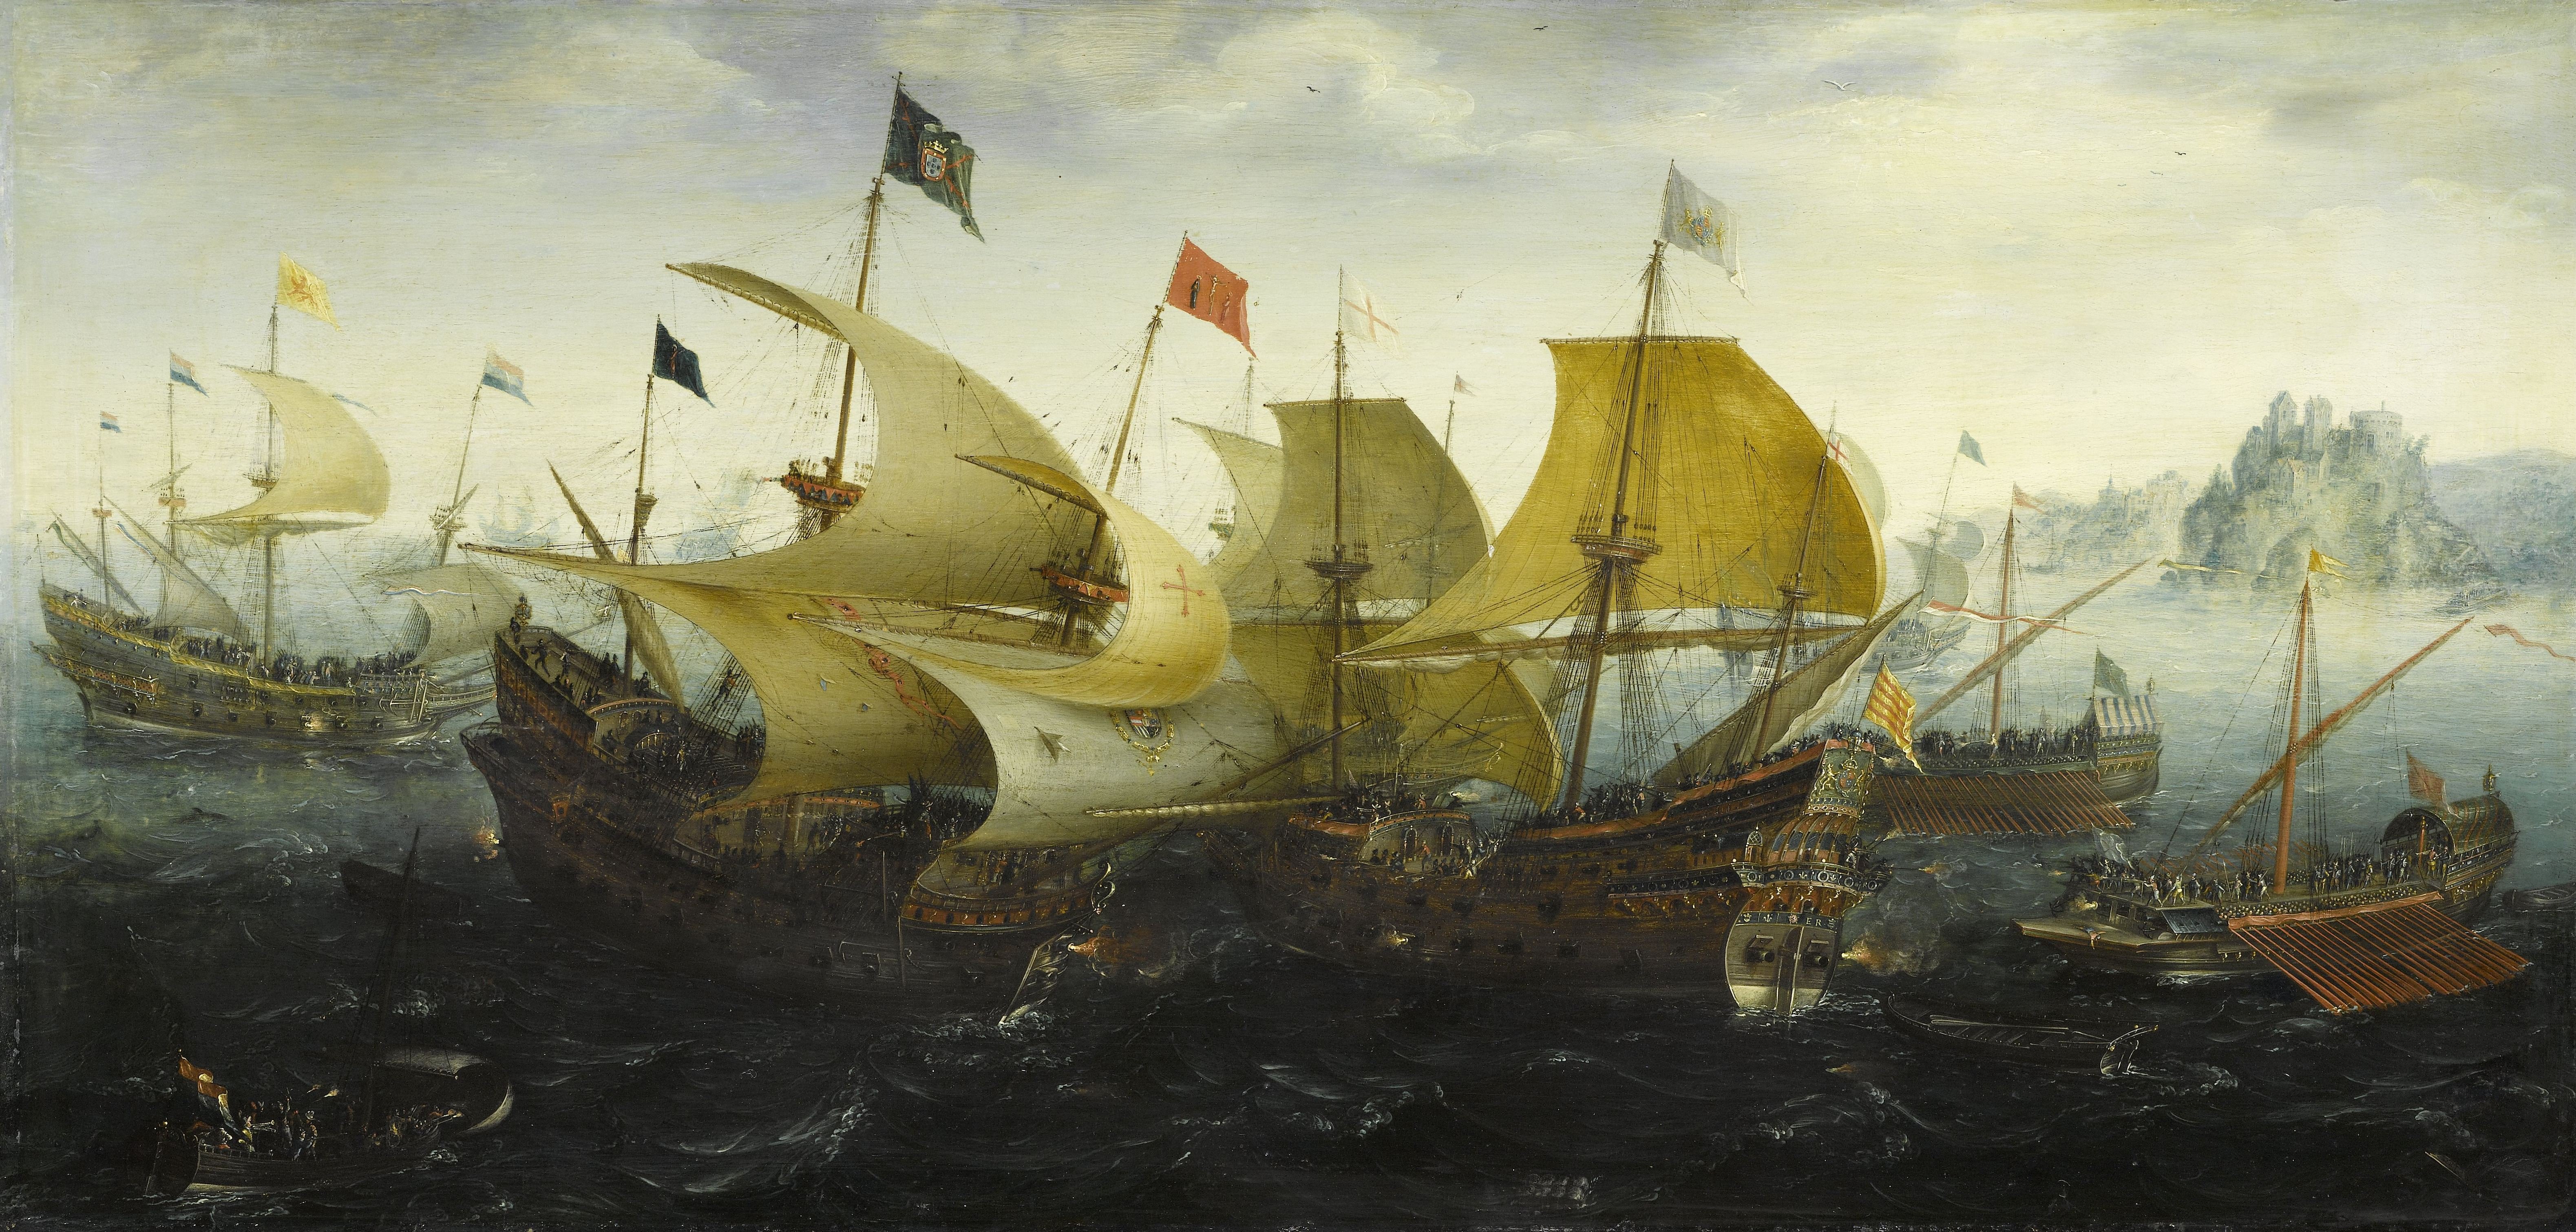
I like galoeon's period... :)))
Good luck in building!!!:)))
ps
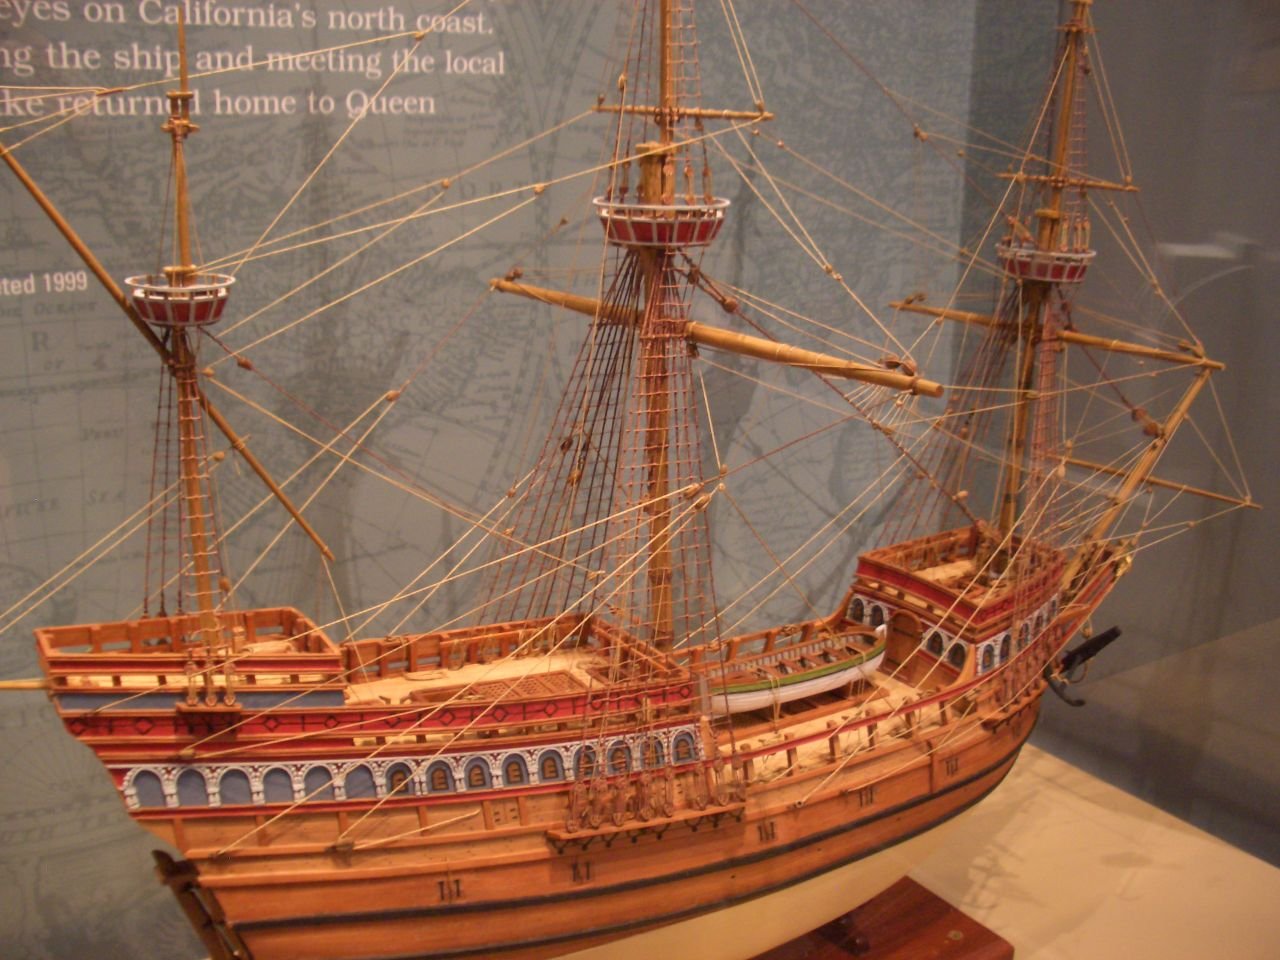
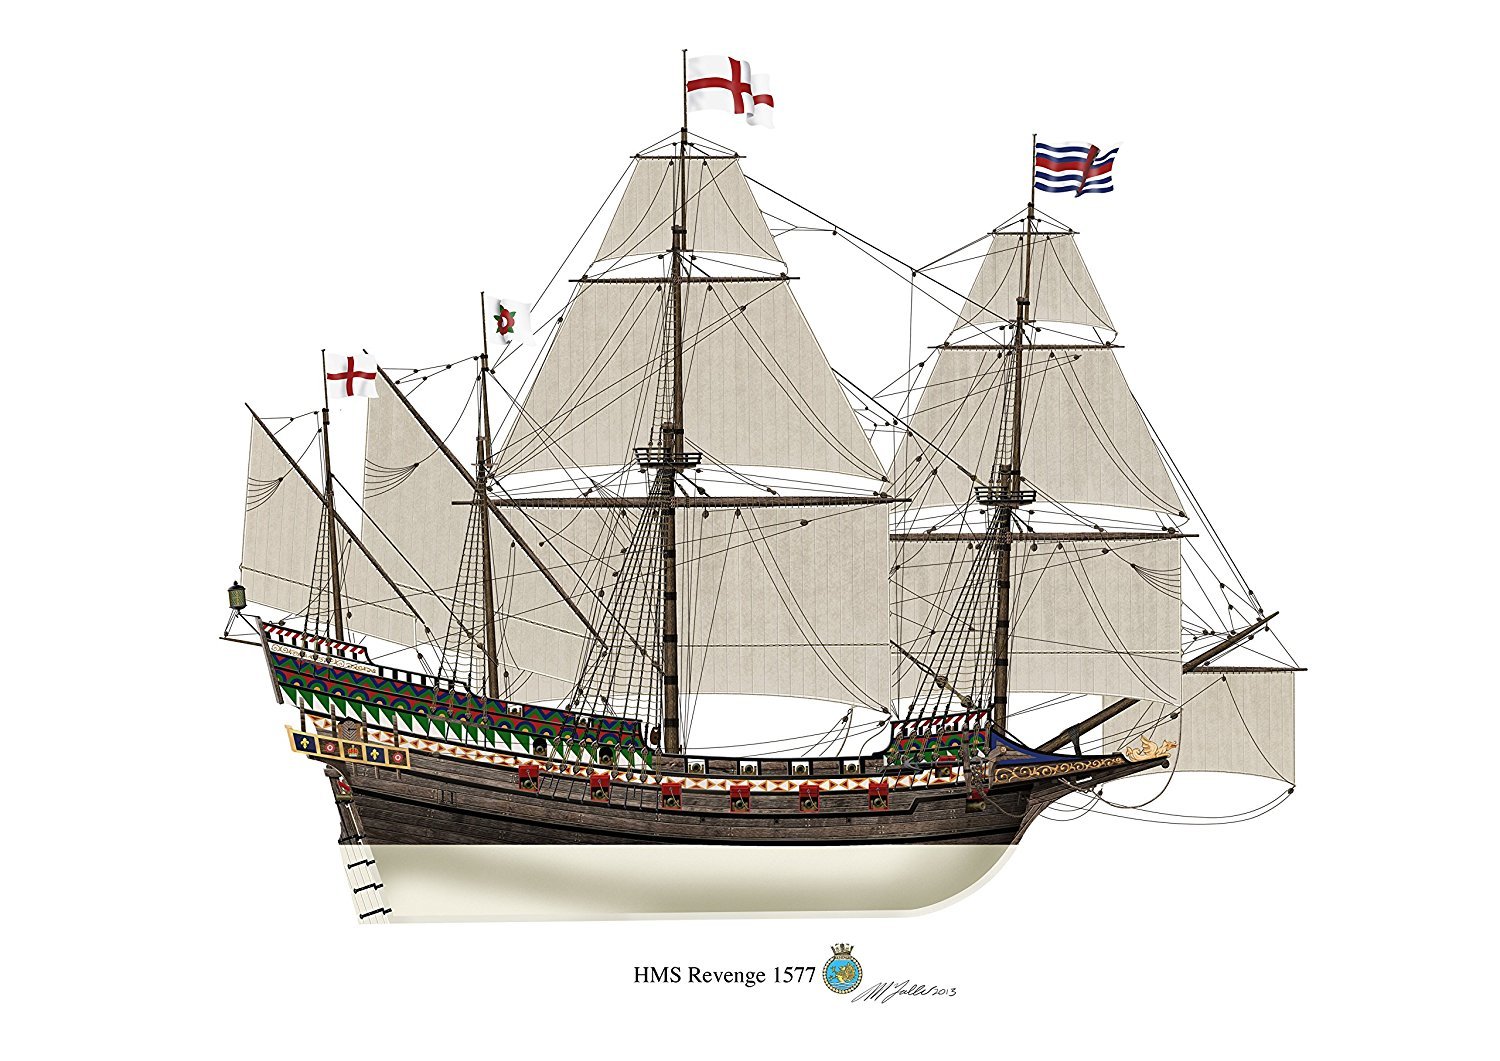
compare to the replica itself...at the first glance...
deadeyes kit's is a wrong shape ,they need to be in triangle form, and belaying pins form/ shape as well are not correct...and moreover actualy no need them fitted in pinrails( if supposed to be fitted by the kit) during this period...
.thumb.jpg.237cef265223a039b152ff76a8379797.jpg)
- Andyrew and Larry Cowden
-
2
-
-
-
-
Perfect!!!
Looks Very Good!!!
I read somewhere that talreps/ or deadeyes lanyards of standing rigging tarred all the way as well... means not only ratlines could be dark colors...
I didnt darkening lanyards on my model...may be need to do it
-
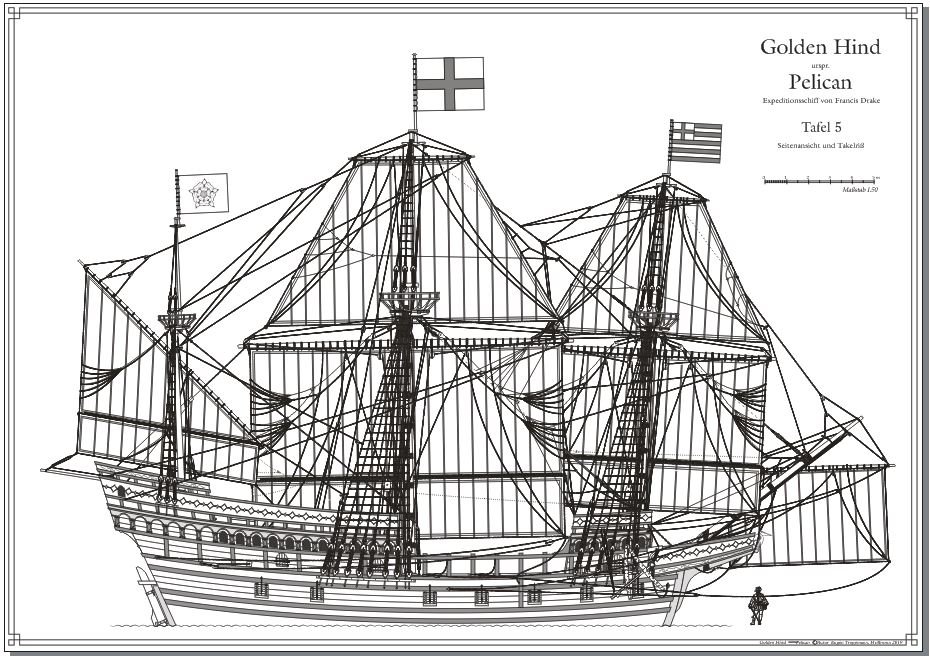
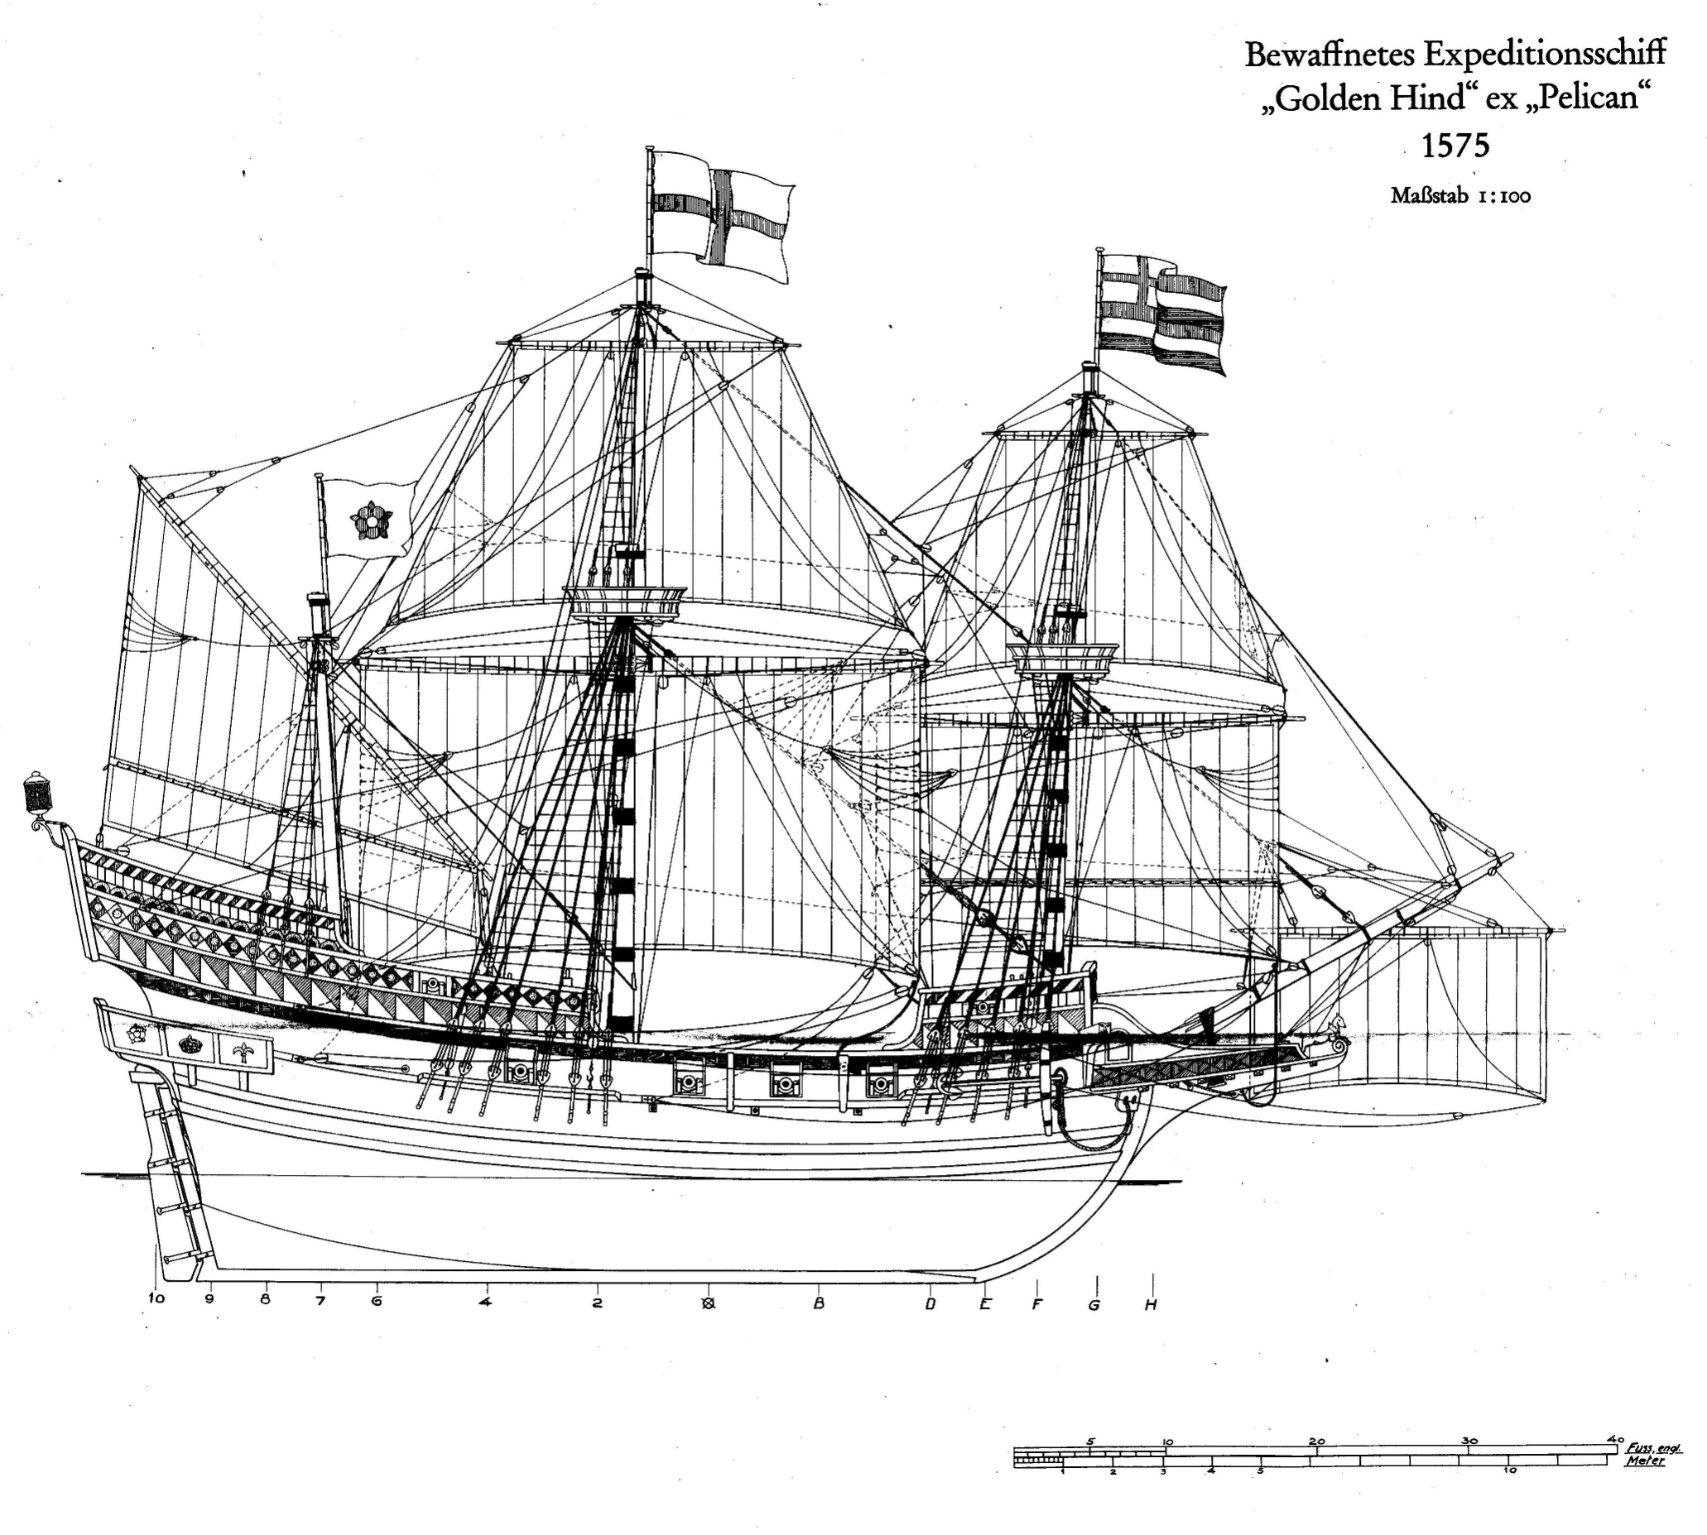
thereis GH reconstruction by Aker
-
Good day Bill,
This is correct for the period of 16 - 17 centuries
No pin rails at all ! they not in use yet
some belaying pins however coud be used - fitted in holes drilled trough railings...- see Vasa artefacts and Mary Rose as examples....
no pinrails You will see as well on the drawing GH made by eugen.t I posted above
-
Jonathan,
Good Day!
O!!!
Yes!:)))
It looks very nice now!
However,One moment!!!
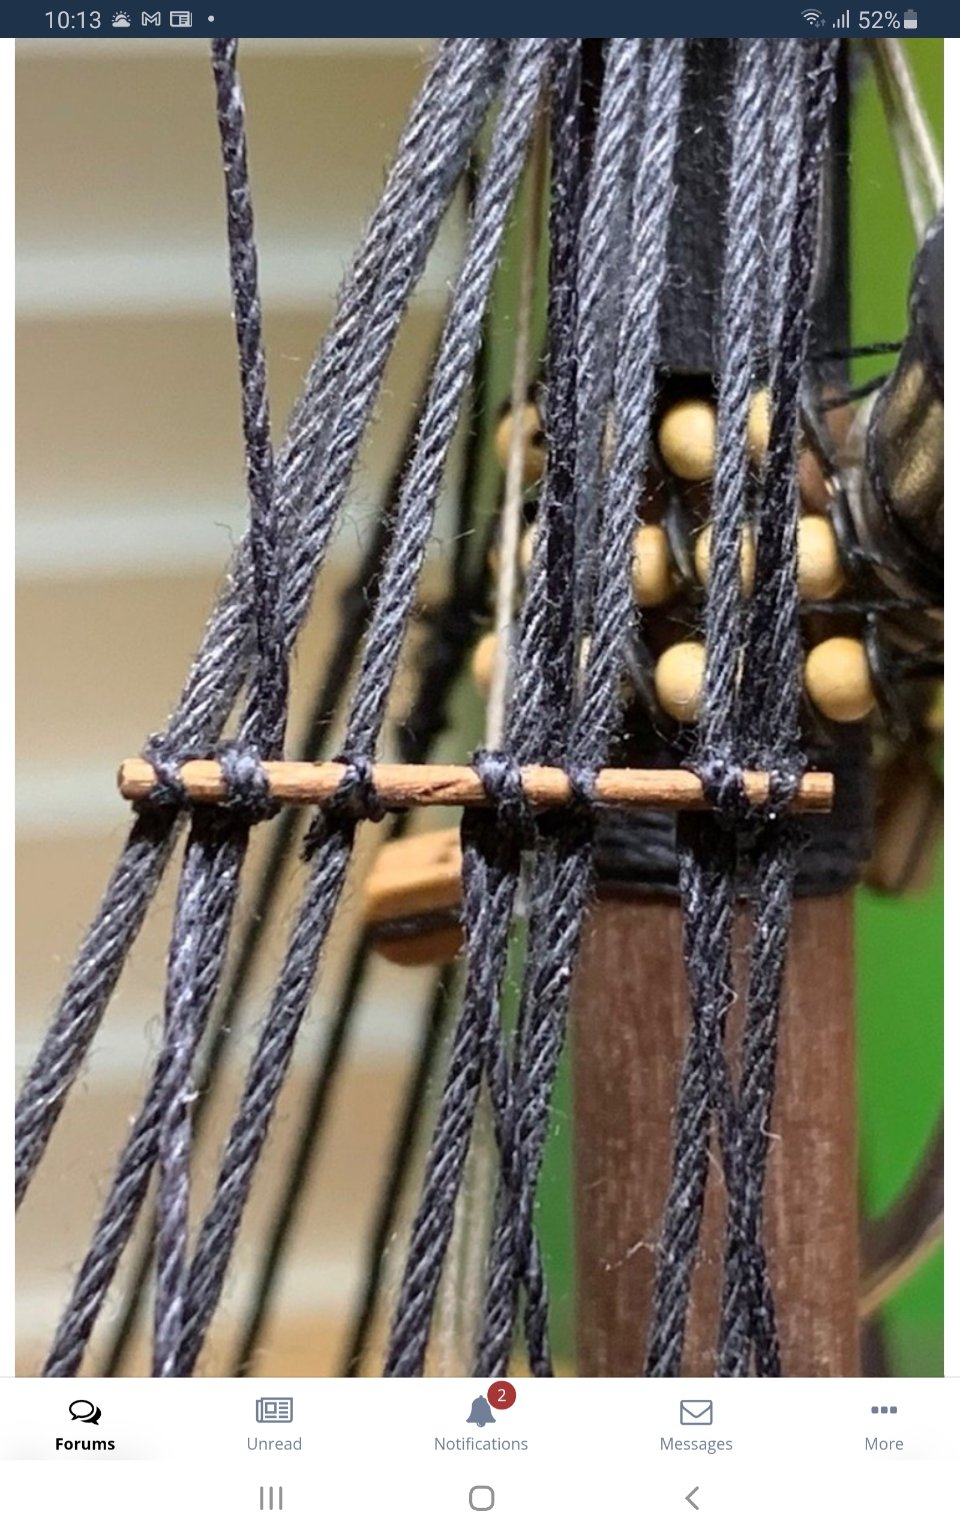
please check carefuly how You did pass the line around staff...
You started from inside,but need to be started from outside:
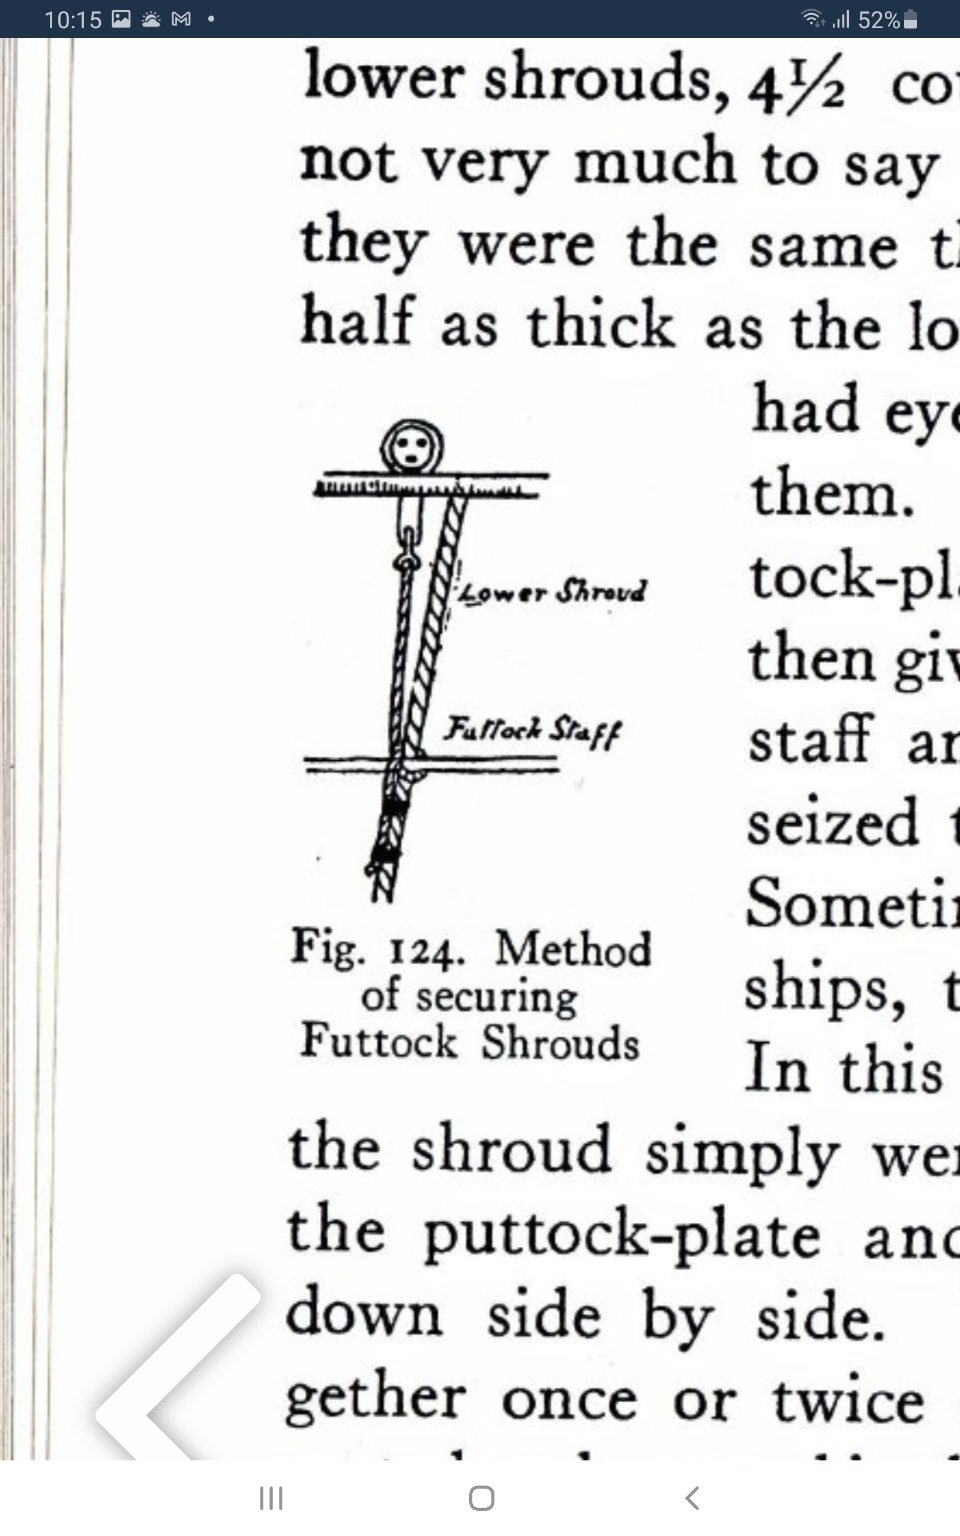
than f-shrouds goes down under f-staff passes behind main shroud
than goes up and outside between f-shroud and upper part of m-shroud thas making half hitch and
down along main shrouds
seized to m-shrouds and cutted in ness-ry length


- J11, GrandpaPhil, Cathead and 3 others
-
6
-
Good day Bill,
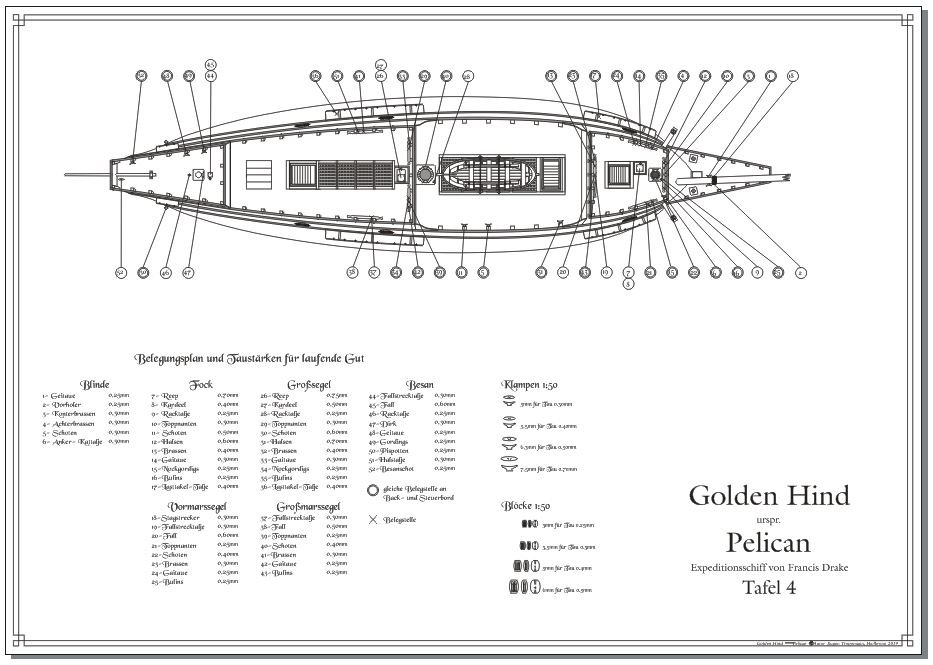
There are exelent rigging plans made by our colleague from Germany
eugen.t https://www.segelschiffsmodellbau.com/t6619f952-Alternative-Rekonstruktion-der-GOLDEN-HIND-11.html
You could use this rigging plans as well... rigging of Mayflower(replica) and GH in reconstruction are almost identical...
-
-
Good day Ron!
How is going You and your galleon?
Do You have any progress in building?
All the Best!!!
Kirill
-
Mark,
Each time I'm reading your posts I start thinking why human life such too short!!! :)))!!! at least my life obviously to short to complete all my modelling plans :)))
still can't finish my curent project with galleon... and meanwhile constantly dreaming about how to build SR kit or gallera or chebeck kits ...???
I'm very satisfied that when I will be ready for that kits ,I will have your build log as REAL guidance!!!
Thank Your very much for sharing your ideas and achivements!!!
All The BEST in 2021!!!
Kirill
- Hubac's Historian, mtaylor and EJ_L
-
3
-
Good day Olga ,
Very accurate work !!!
It was Just pleasure to watch it in details !
Great job!!!
And Thank You very much for your video posts about ships modelling books and tricks how to make foto- all very usefull information !!!
All The Best In 2021!!!
-
guys,
just tried to make reverse translation from english to russian my posts...it looks like abracadabra of 10-15%my written text
I'm very sorry for inconvinience when you are reading my "english" posts 🤪
-
guys,
just tried to make opposite translation from english to russian my posts...it looks like abracadabra of10-15%my written text
I'm very sorry for inconvinience when you are reading my "english" posts 🤪

.jpg.0e88b009a4a694fd907fc4690451dae5.jpg)

Golden Hind 1575 by bosco72 - Airfix Classic - 1:72 - first ever model build
in - Kit build logs for subjects built from 1501 - 1750
Posted
I understood it should be running rigging of main and topsails , at least such running rigging ocupate this area as a rule
the only difference will be how to show them ...
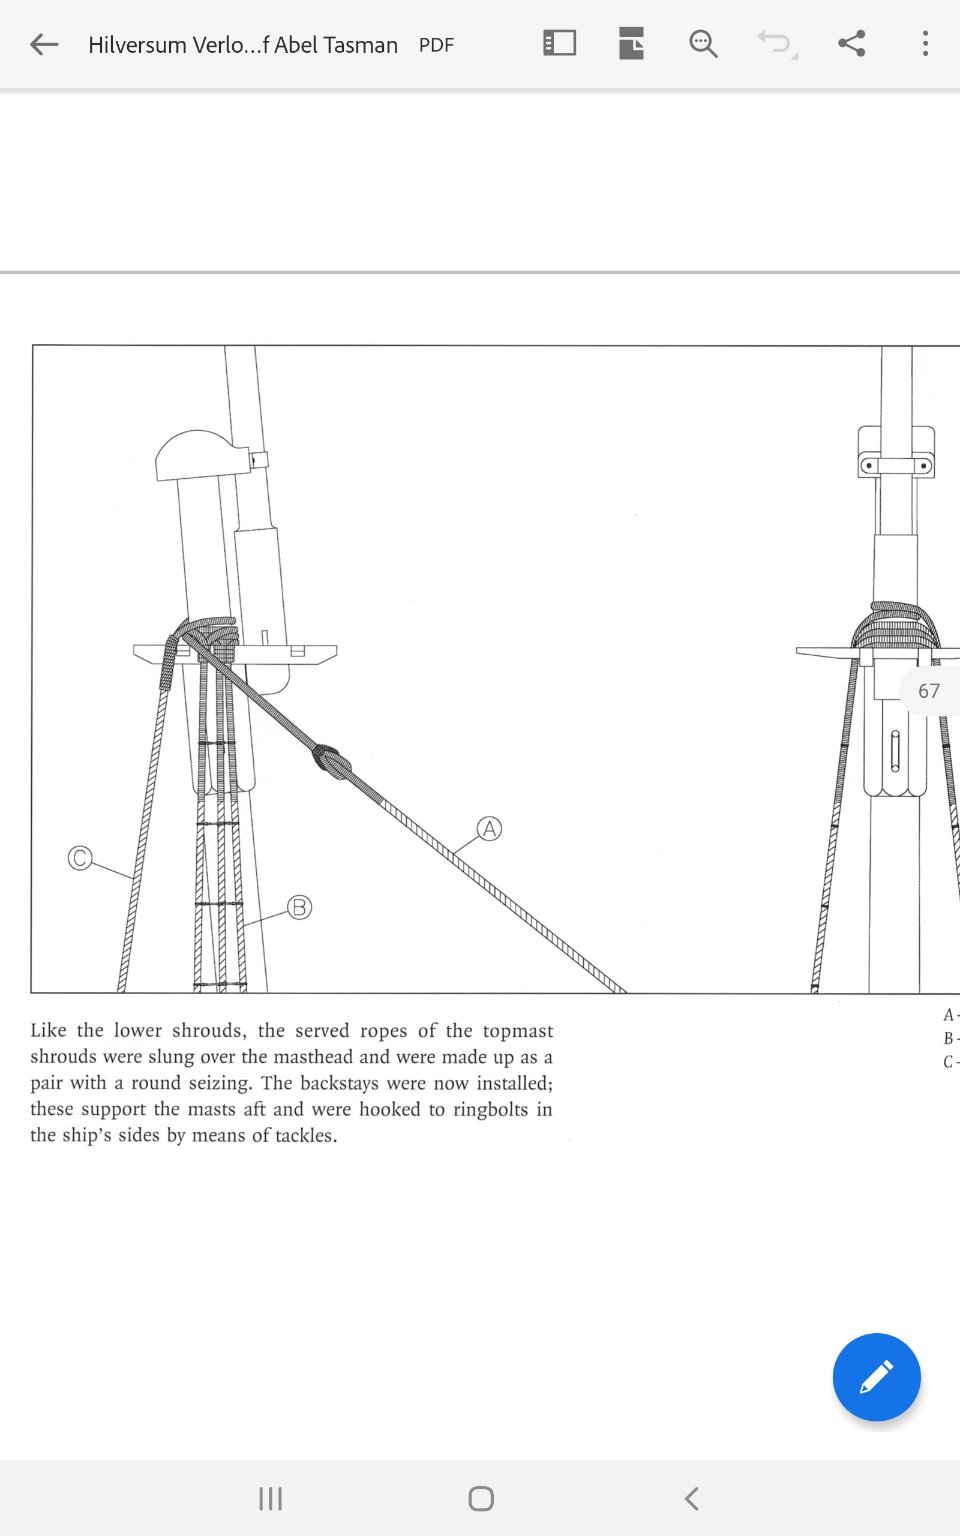
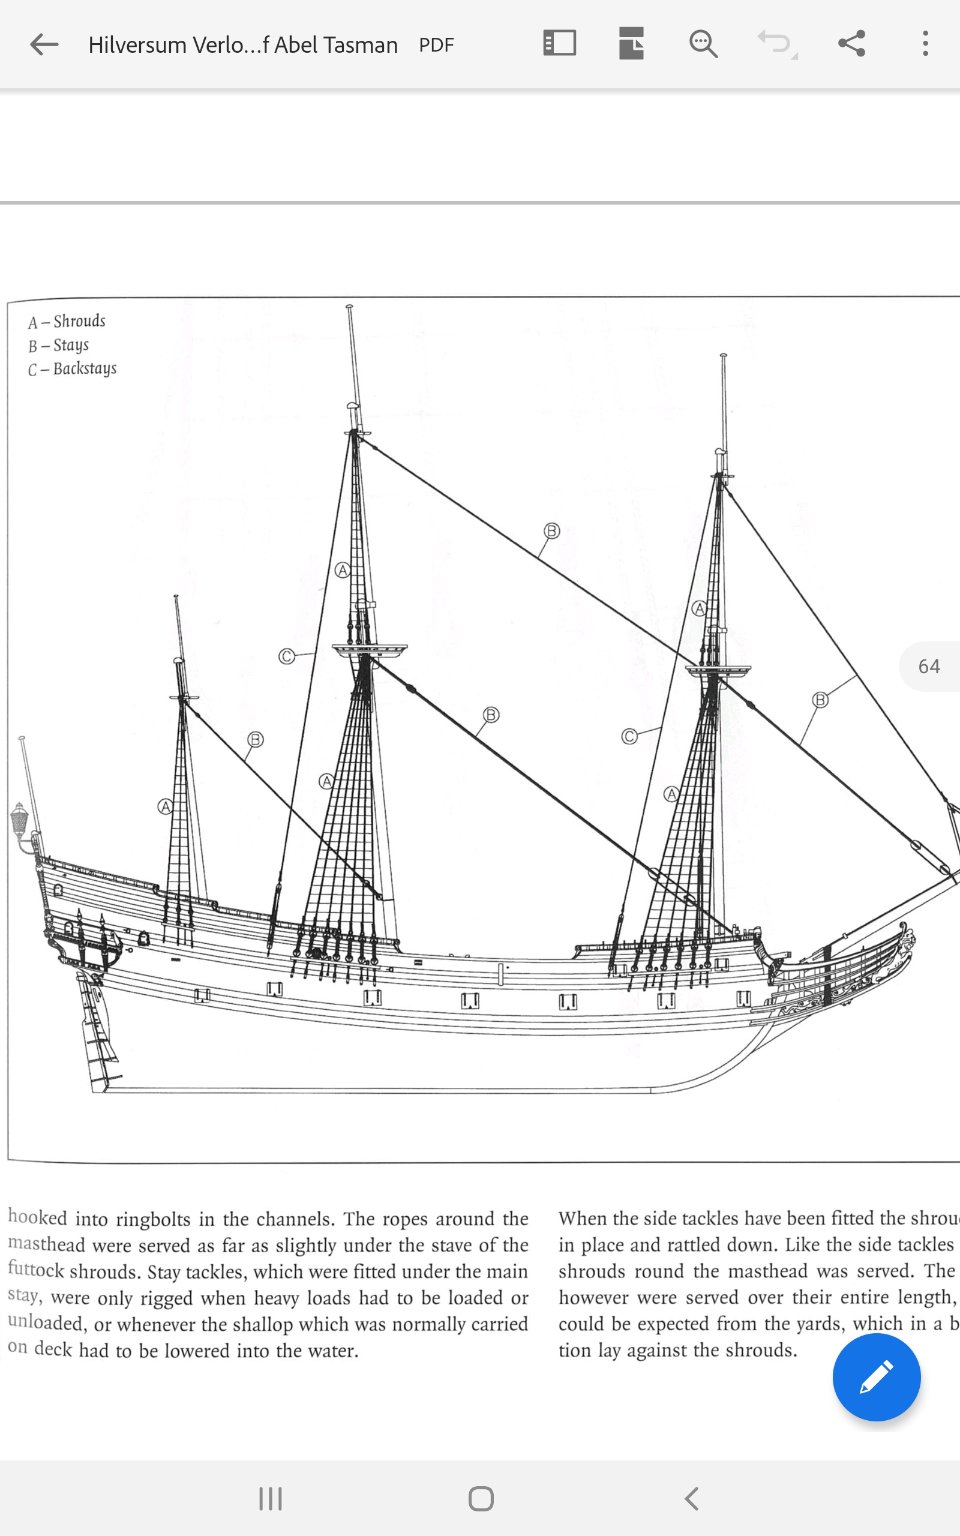
I have some pictures made by famous author Ab Hoving which probably could help You in rigging your galleon model and save some time otherwise ness-ry for study books about rigging