Jack12477
-
Posts
5,678 -
Joined
-
Last visited
Content Type
Profiles
Forums
Gallery
Events
Everything posted by Jack12477
-
 Edward, here's a couple of links that will prove useful for tools micro-mark The Small Tool Specialists Lee Valley Tools (they have some really nice machinist clamps that work very well with model ships) Also, the emery boards ladies use to file their nails make great sanding sticks - get the wooden kind not the foam kind - available in any drugstore, even in Manhattan. Yes, time flies when you are having fun (as the saying goes). Nice progress so far. Looks like you have a good assortment of tools already.
- 32 replies
-
- 4
-

-
- phantom
- model shipways
- (and 1 more)
-
Angus, I have to agree with Dave. The hoops I've seen on our 19th century ice yachts all have a lot of play between the hoop and the mast. Yours look fine.
- 389 replies
-
- 2
-
-
- scottish maid
- artesania latina
- (and 1 more)
-
Robb, that's for the explanation. I like the way your hoops came out. I'll have to remember this for my next model.
- 389 replies
-
- 3
-
-
- scottish maid
- artesania latina
- (and 1 more)
-
Edward, pulling up a seat to watch your build. Good luck with the kit. You might want to take a trip to your local Michaels (arts/crafts chain store) or equivalent and pick up a good supply of old fashion wood clothes pins (the spring action type), get several sizes including the teeny tiny ones that look like doll clothes pins. The make fantastic clamps. Also pick up popsicle sticks - make excellent glue spreaders. Office Depot and Staples carry metal binder clips - great clamps also.
- 32 replies
-
- 2
-
-
- phantom
- model shipways
- (and 1 more)
-
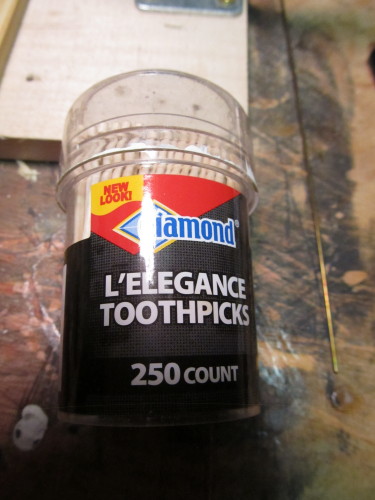
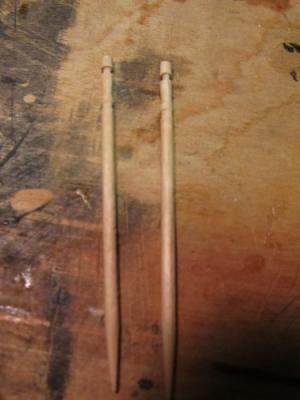
Ken, go to your "friendly" Target store and get some of these toothpicks - they are much sturdier than the average toothpick and work great for applying glue to small areas. I found them in the paper plates section.

- 80 replies
-
- 8
-
-
- choctaw
- heinkel models
- (and 1 more)
-
Blocks look good, Robb. What type of reed are you using? Is that bamboo or some local reed?
- 389 replies
-
- 3
-
-
- scottish maid
- artesania latina
- (and 1 more)
-
I agree. All of my Artesania Latina plans and parts lists are annotated that way
- 389 replies
-
- 3
-
-
- scottish maid
- artesania latina
- (and 1 more)
-
Hi Danny, I totally agree with what George said. This will mean a lot to the family in the years to come.
- 59 replies
-
- 5
-
-
- norske lowe
- billing boats
- (and 1 more)
-
Ken, just pulled up a chair to watch ! Sounds like fun kit.
- 80 replies
-
- 3
-
-
- choctaw
- heinkel models
- (and 1 more)
-
Grant, been away from the sight for a few days, just catching up. I echo everyone else's comments as well. I've lost two Corgis in the past few years, so I know the loss you are feeling. My sympathies to you and your family.
- 456 replies
-
- 5
-
-
- finished
- bomb ketch
- (and 2 more)
-
Bob, mine is the model 220 also - has the same config shown in your picture
- 277 replies
-
- 1
-
-
- model shipways
- 18th century longboat
- (and 1 more)
-
In Bob's 1st photo, to the right of the stand there is a black knob (horizontal - just above and behind the drill), when you loosen that knob it allows the drill to rotate - on my stand that mechanism has "detents" that "click" at different positions as you go around the arc. Never measured the resulting angle(s) but one of them is 90 degrees and one is 45 degrees. Check you model and see if it works the same way. They're like "click stops"
- 277 replies
-
- 1
-
-
- model shipways
- 18th century longboat
- (and 1 more)
-
Looking great, Augie. I like the color of the woods. Gotta be careful with those #11 blades, tho. Their as dangerous as my woodcarving knifes.
- 2,191 replies
-
- 4
-
-
- confederacy
- Model Shipways
- (and 1 more)
-
Great idea Bob. Thanks for the tutorial. Will have to use that myself, especially since I have that same Dremel stand and tool.
-
Ken, when I did my Model RR ballast I used a 4 parts water to 1 part glue plus 2 drops of detergent. Not sure if that would work for the rope versus your 50-50 mixture. It left the Model RR ballast firm but slightly elastic. Also not sure if 4-1 ratio will allow the rope to stick to the deck; it should hold the rope coils together without overly stiffening them, but not sure about the deck holding ability.
- 440 replies
-
- 2
-
-
- niagara
- model shipways
- (and 1 more)
-
Ken, if you add a drop or two of liquid dish detergent (e.g. Dawn) to the diluted white glue - it acts as a "wetting agent", i.e. breaks down the surface tension of the water and makes it soak in better. I used to use it for laying down ballast on my model RR.
- 440 replies
-
- 3
-
-
- niagara
- model shipways
- (and 1 more)
-
there is a beautiful collection of these bone ships at the US Naval Academy Museum in Annapolis. I've personally seen them (along with the Roger's collection) and they are amazing models. Well worth the visit
-
Proxxon EF vs. Dremel 7700
Jack12477 replied to rtropp's topic in Modeling tools and Workshop Equipment
Richard, I have the WE248 model (3,000-23,000 RPM). I've used it to sand as well as drill (#76 bit) and it works fine for modeling. Yes they do list it as a woodcarving tool but it work great on my wood ship models. It's light weight and shape make it great for small jobs. The thing that sold me was the fact it accepts all of the Dremel colletts so I can use all my Dremel bits as well as various sized drill bits. I got in a WoodCraft store in Delaware for about $85. Can't speak to the portable version, 243. Have not seen that model. -
Per, I encountered the "problem" with my kit. I searched around in my stash of wood leftover from previous kits until I found some that matched Chuck's plans and ignored MS' instructions. Worked fine for me once I found the right wood.
- 335 replies
-
- 3
-
-
- 18th century longboat
- Finished
- (and 1 more)