Jack12477
-
Posts
5,674 -
Joined
-
Last visited
Content Type
Profiles
Forums
Gallery
Events
Everything posted by Jack12477
-
 Hi, Nigel, nice work on the model. I use gesso on my boat hulls (Marie Jeanne and Willie Bennett) to seal the wood before painting. Works fine for me. Thin it down a bit with water first. Try it on some pieces of scarp first before committing it to your model.
 -
Hmm, can barely read the etching on the glass "The Famous Grouse" <???> - Hmm, must be a new Dutch solvent for washing off potato chips/crisps Yes, Carl, the swing is most relaxing
-
Hi Carl, just found this build. Hanging the hammock chair to a sky hook in back row. Ken, that amber liquid is antifreeze!
-
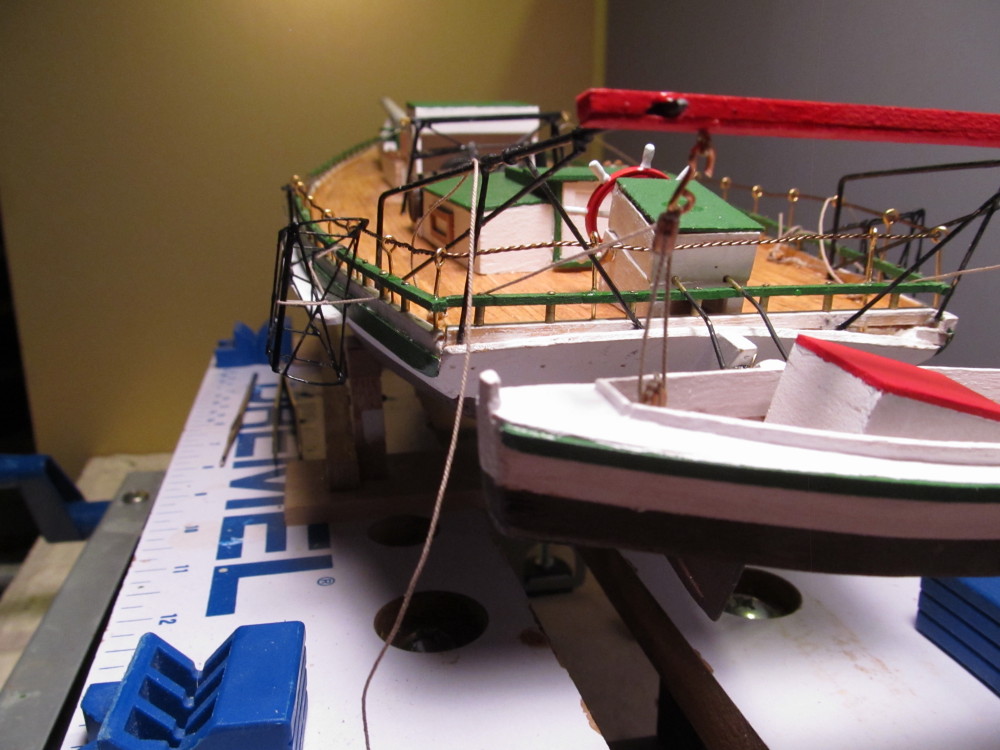
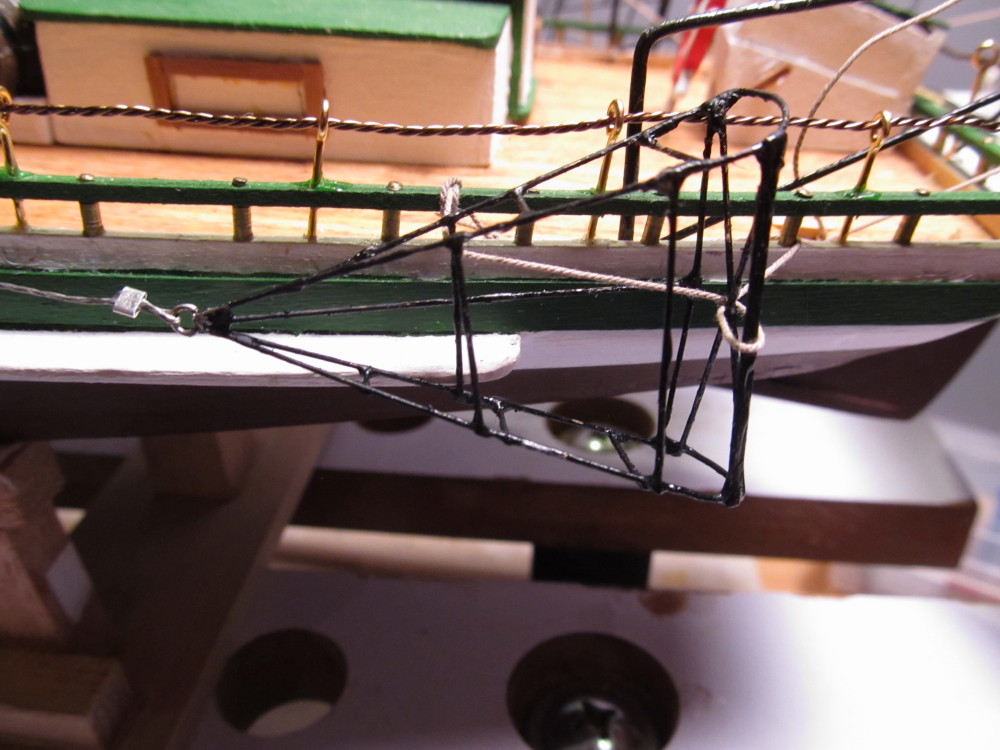
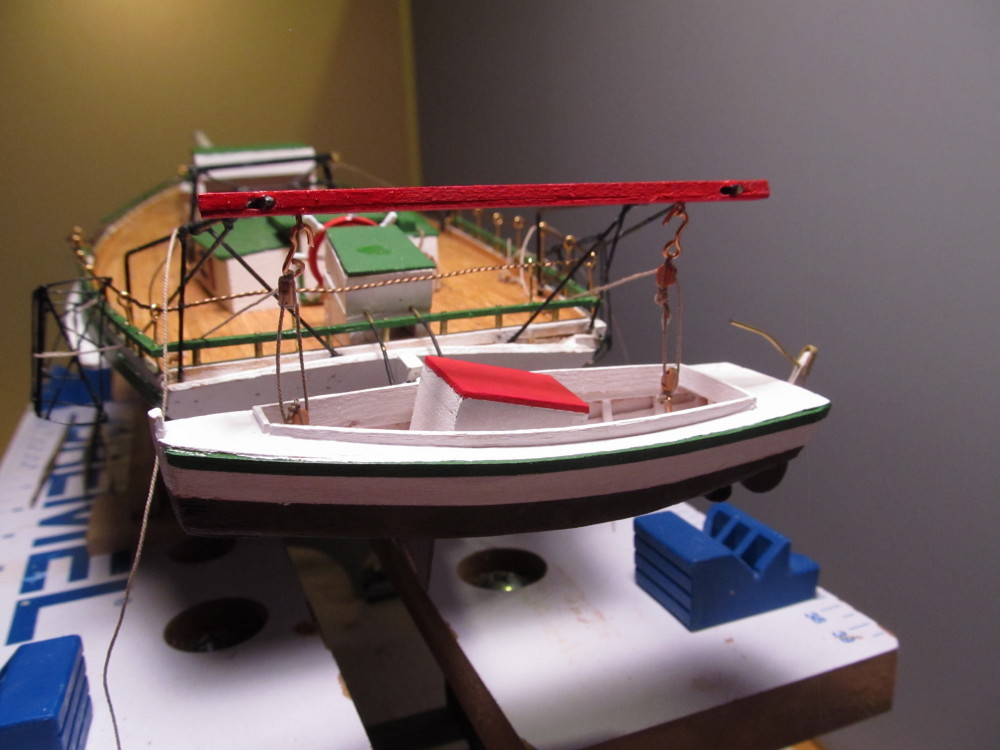
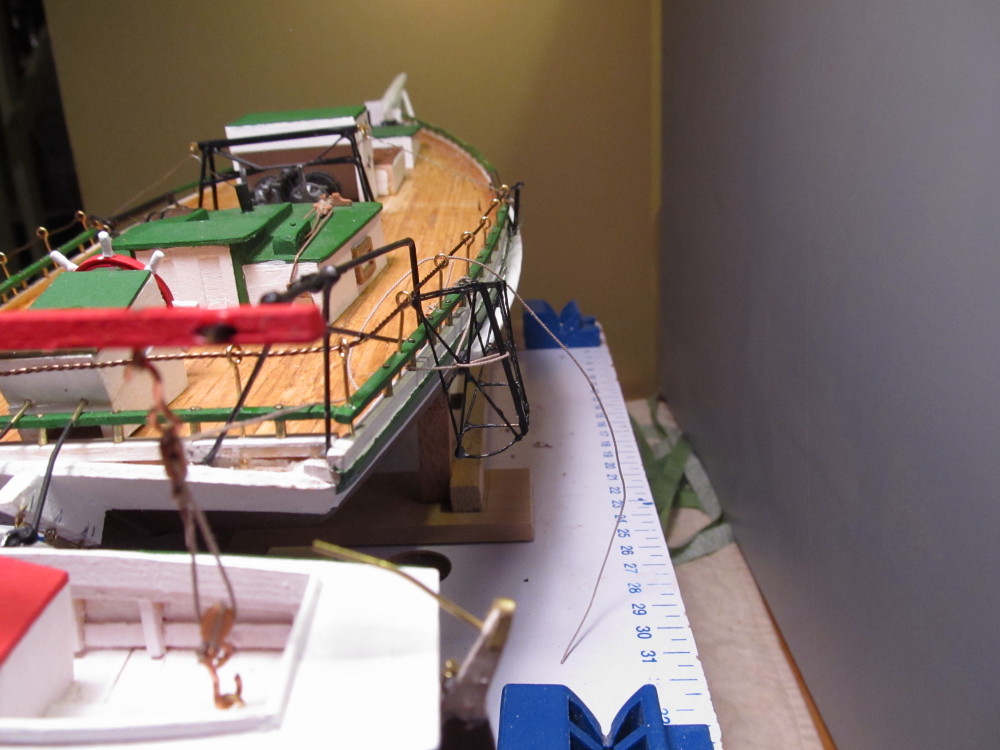
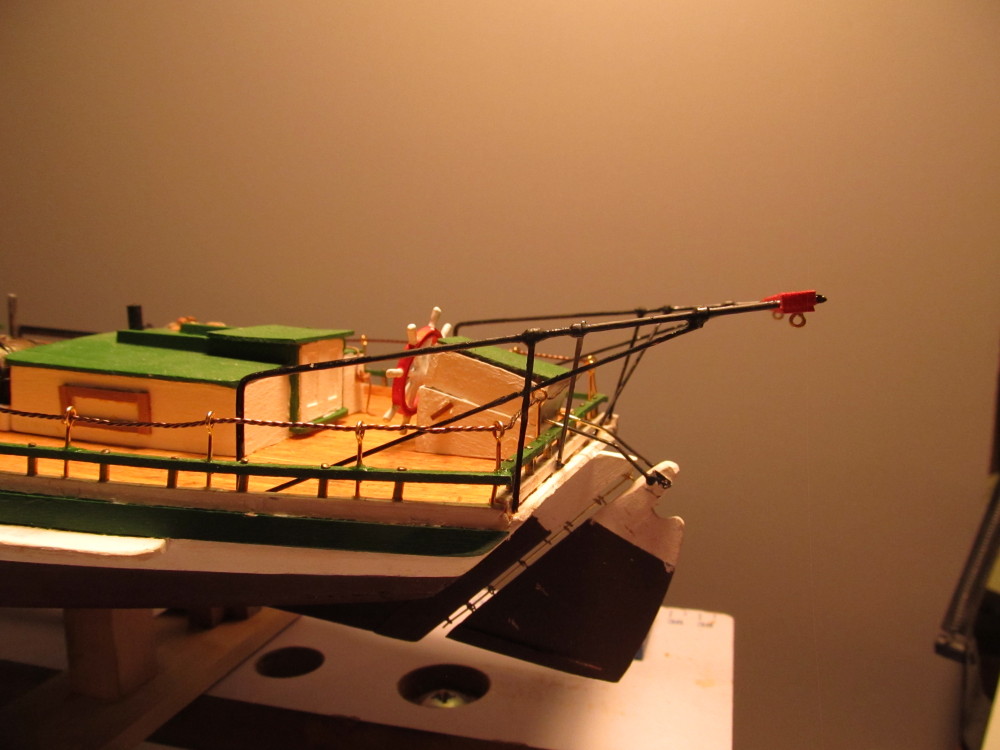
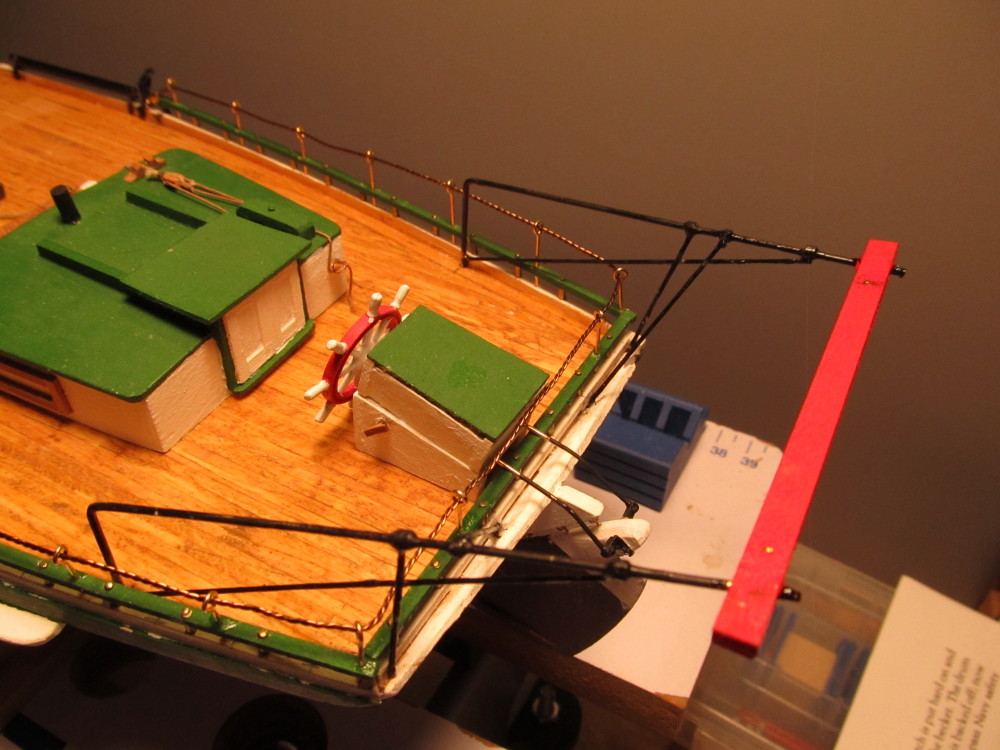
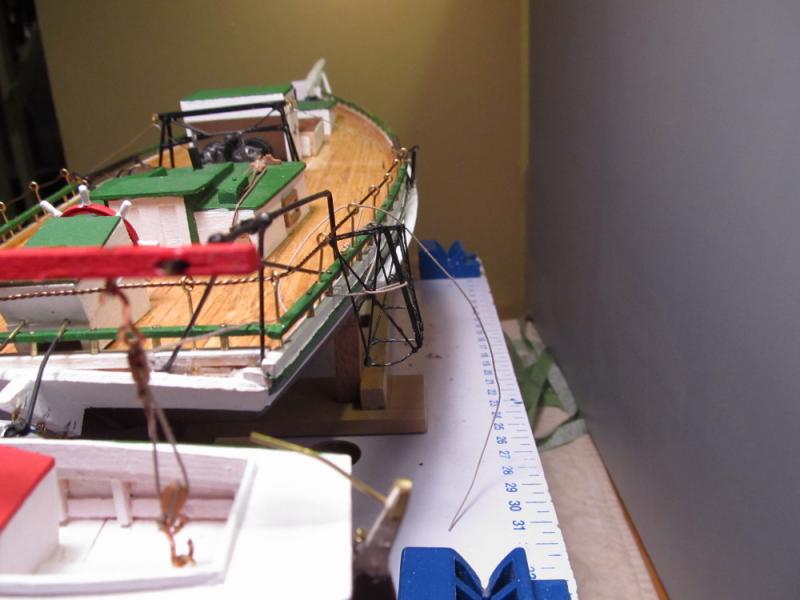
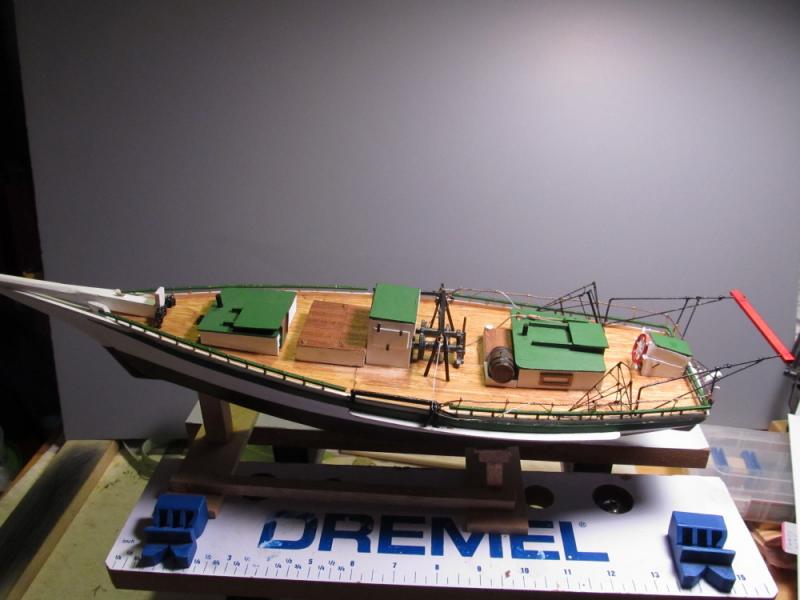
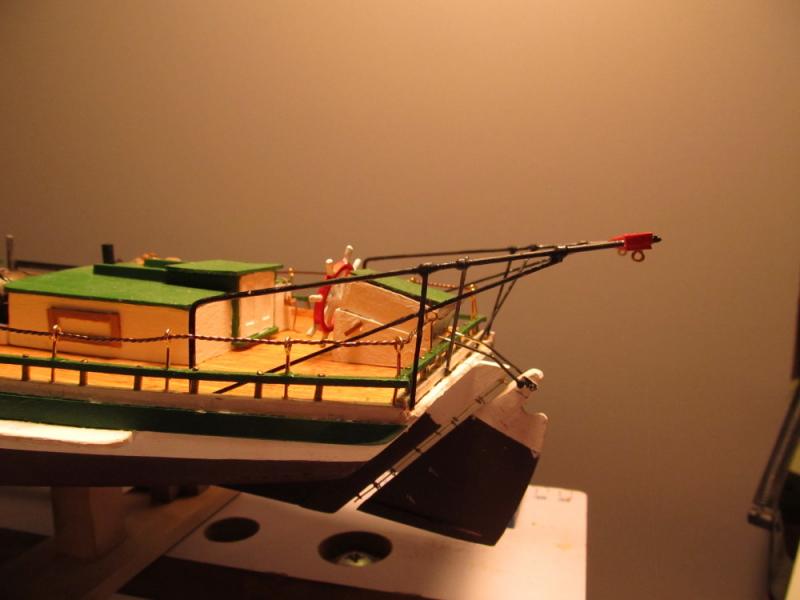
Thanks, Russ, Denis, Mark for the compliments and all who clicked the Like button. Decided to hang the dredges off the side of the boat at the stern. Hung the push boat from the stern davit but left the ropes long and loose in case I need to remove the pusher from its davit during later construction. For now the ropes are wound around the cleat with friction holding them fast. Some progress pictures.


- 250 replies
-
- 9
-

-
- willie l bennett
- model shipways
- (and 1 more)
-
I too have enjoyed your carvings. That is a fine set of carving tools you have.
-
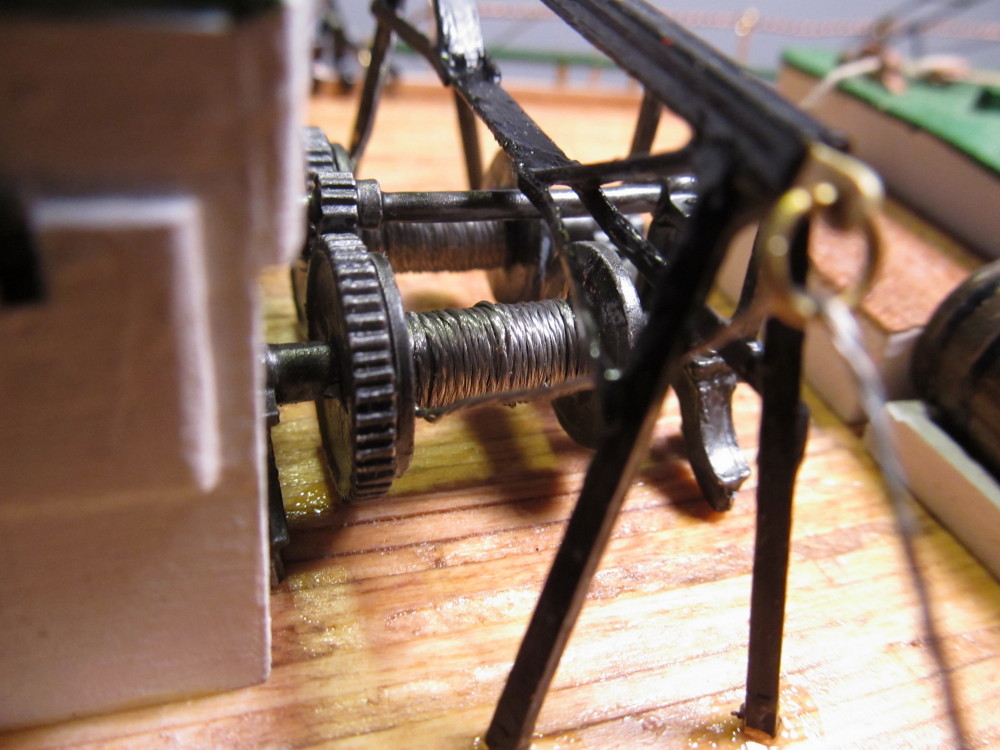
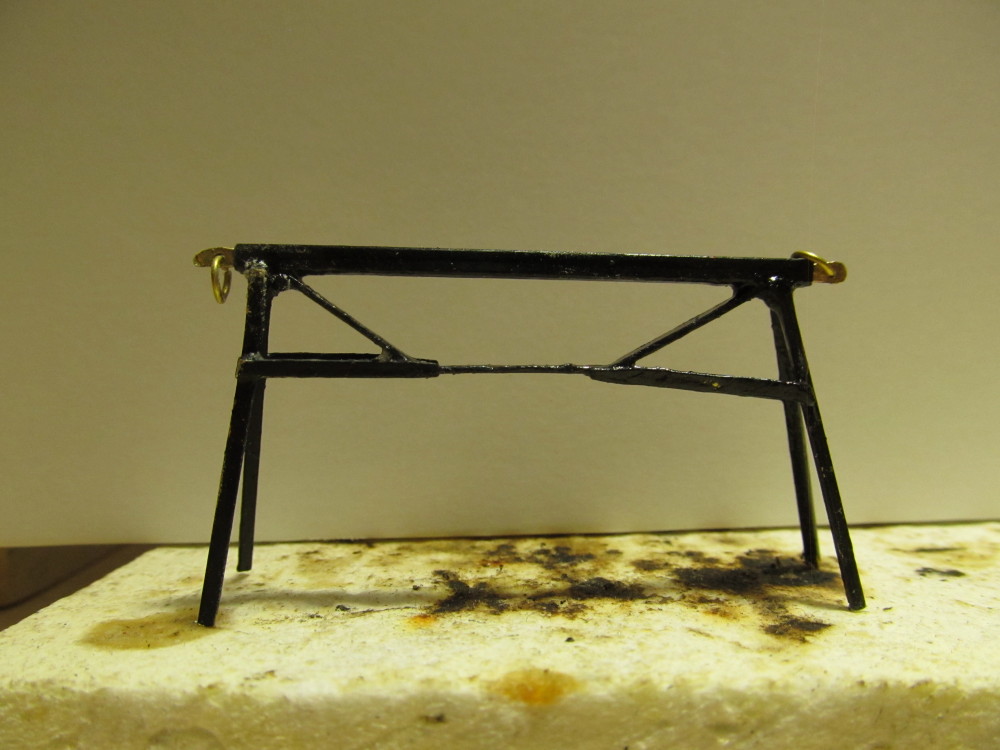
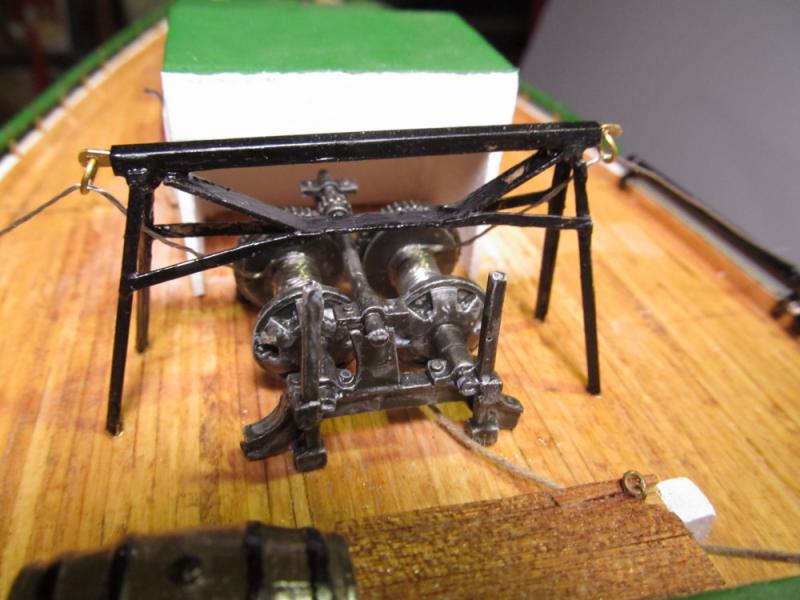
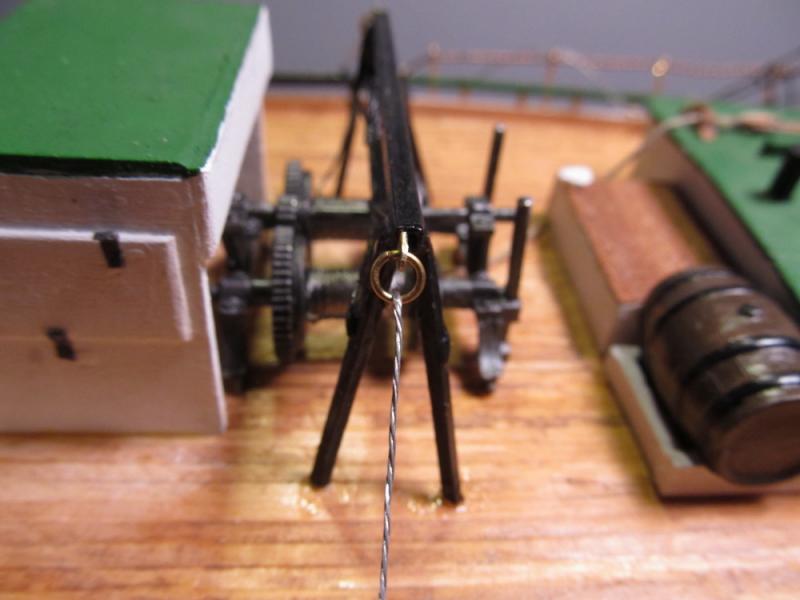
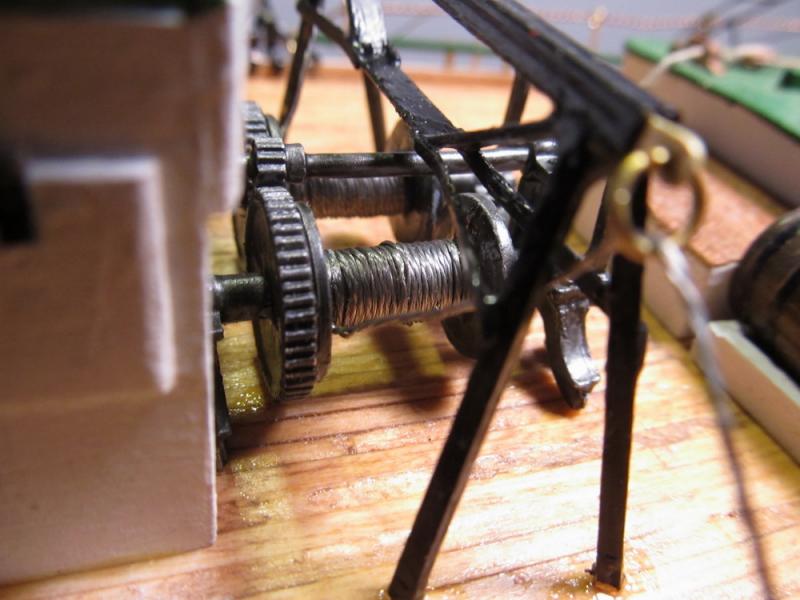
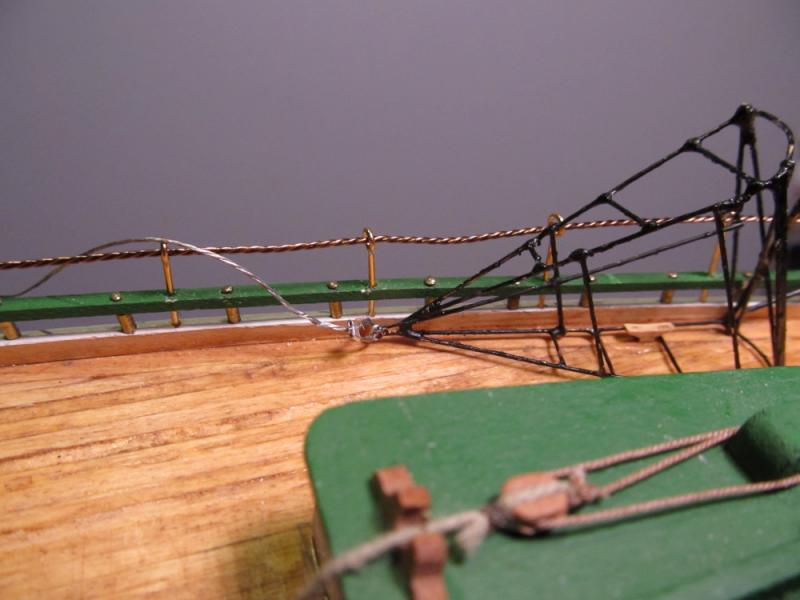
Small Update: I finished the winch and A-frame; wound the cable around the winch's two drums, then attached the pieces to the deck with medium CA (gap filling). Used a drop of CA to hold the ends of the cable so I could wind them onto the drum, then another drop to hold the end of the wrap in place so it would not keep unwinding on me. To attach the cable to the dredges I used 2 mm jewelry crimps to crimp the cable into a loop around the eyelet on each dredge, For now the dredges are just placed on the stern deck until I decide how I want them to be permanently - on deck or lashed to side. Photos follow: Comments, critiques, suggestions always welcome.
- 250 replies
-
- 12
-
-
- willie l bennett
- model shipways
- (and 1 more)
-
Carl, it is 7.9 mm
-
Denis, Carl, Mark, the welder's apprentice thanks you for your compliments. And also all who visited and clicked the Like button.
- 250 replies
-
- 5
-
-
- willie l bennett
- model shipways
- (and 1 more)
-
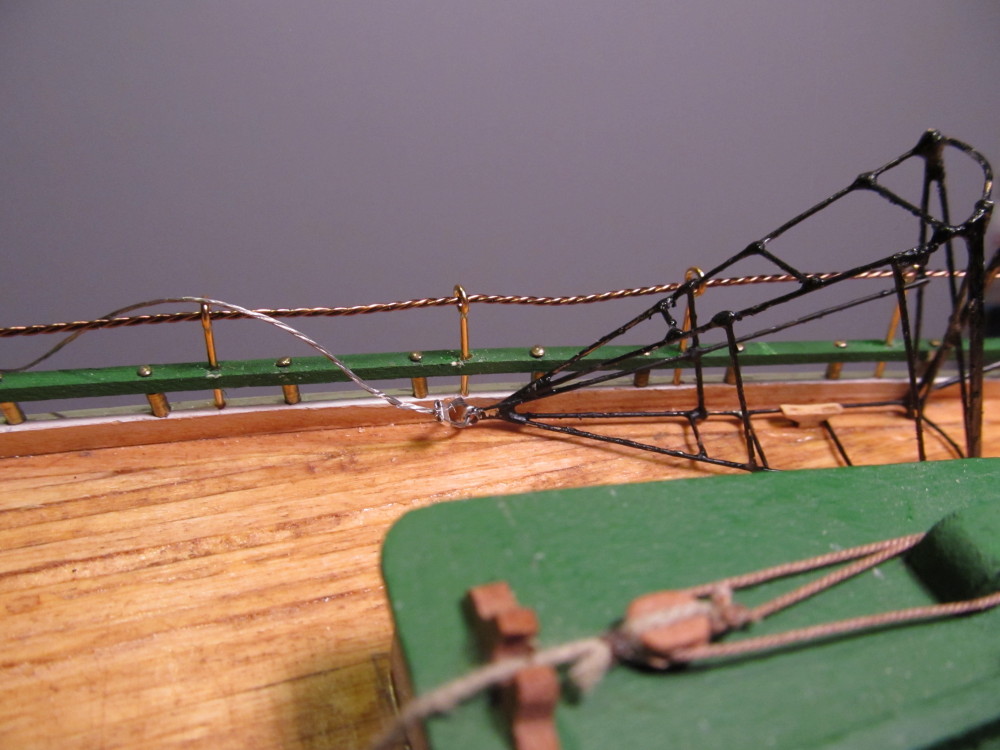
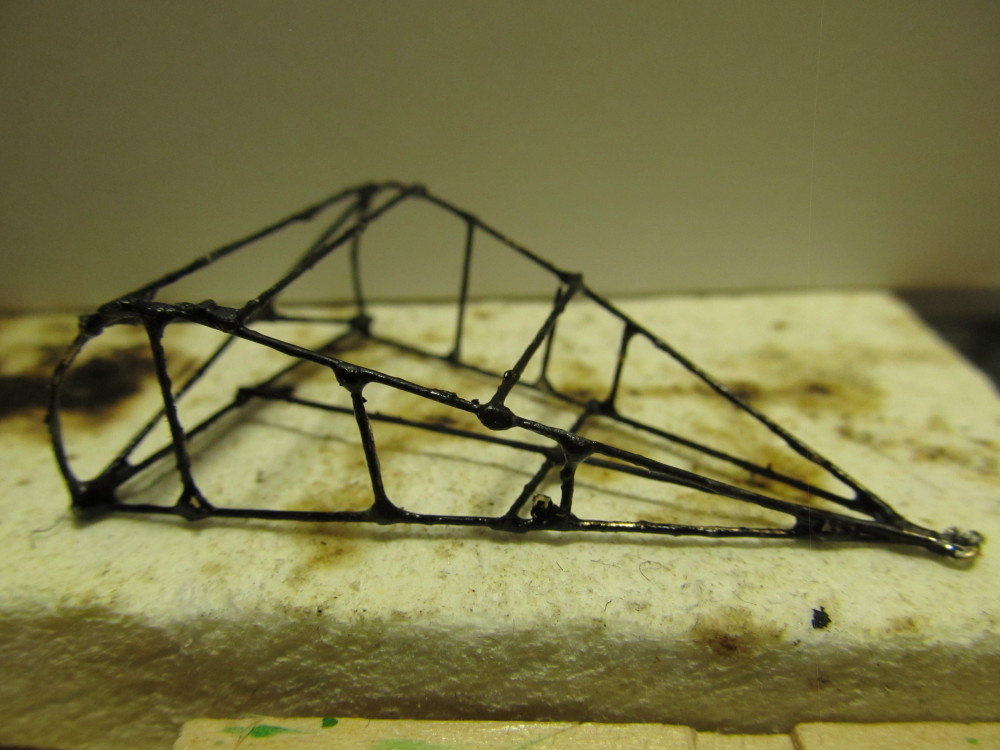
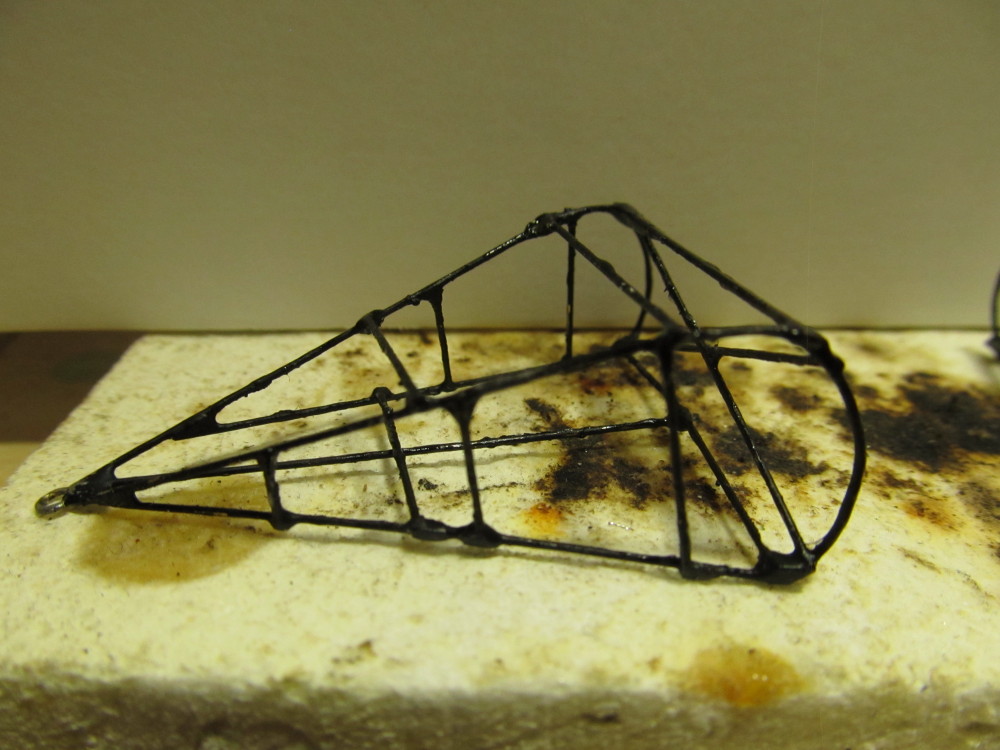
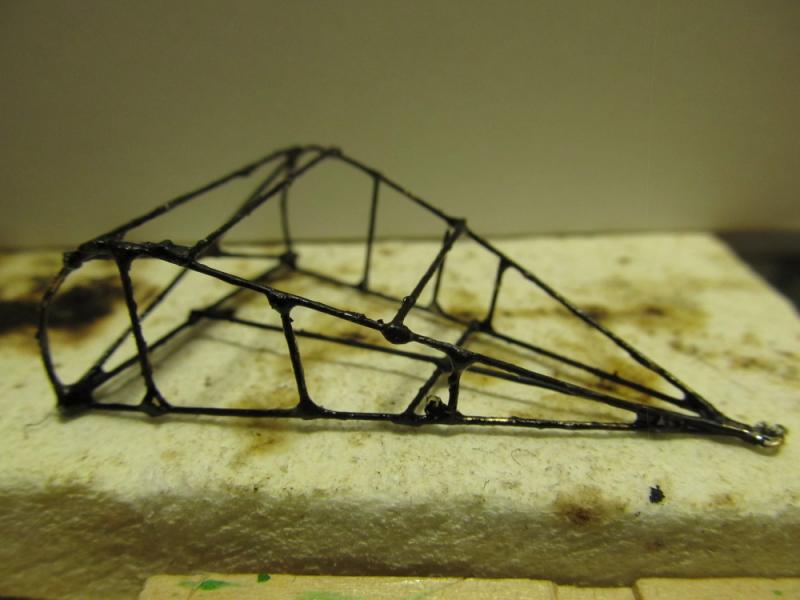
Happy New Year everyone. I hope everyone has a happy, healthy and prosperous 2017. Been distracted from the build with other interests, like ice boats, but I did manage to finally get the brass pieces soldered and painted. I definitely need more practice at soldering. Photos of the progress so far are shown below: Next challenge is getting the wire for the dredges wound around the winch drums in a realistic looking manner - so far that has been more a challenge than expected. But we will persevere.


- 250 replies
-
- 12
-
-
- willie l bennett
- model shipways
- (and 1 more)
-
Aperature and F/stop are synonymous terms for the same thing; as is the terms ISO and ASA . It's not so much the camera is dumbed down as much as it has taken over control from the photographer and made the photographer the dummy . Somewhere on your camera is a dial with settings for different shooting modes or styles, example P, TV, AV, M and icons for Portrait, Scenery, Movies, etc; usually on the top of the camera. On this dial Look for P for Program mode, AV for Aperature priority mode or TV for shutter priority mdoe (takes it off of AUTO mode); these settings will allow you to manipulate the other settings via the display screen on back - not sure which camera you have so you may need to hunt around or dig out the manual. Set the camera to AV. AV will allow you to set the camera at an specific Aperature and the camera will then choose the shutter speed depending on light level. (TV allows you to choose a specific shutter speed, e.g. 1/500, and the camera will choose the aperature. When you select AV there should be a dial on the camera back that changes the aperature setting (pop-up window). You can also adjust the sensitivity (i.e ISO) settings to allow it to work in lower light levels. The higher the number the smaller the lens opening, lower the number the bigger the lens opening (i.e diameter). There is also a setting for daylight and tungsten light source which affects the color of the picture. If Mike is coming to your shop soon, have him walk you thru your camera's settings. Most of the P&S digital cameras can be "smart" cameras also. I have the Canon PowerShot SX130 as well as a Pentax DSLR. Reminder - when done shooting photos of your model, return the camera to AUTO mode for any family stuff you want to shoot.
- 1,051 replies
-
- 6
-
-
- cheerful
- Syren Ship Model Company
- (and 1 more)
-
Chuck. if your point and shoot camera has a optical zoom, try backing away from the model and use the zoom to fill the picture frame. Use the smallest f/stop (i.e aperature for example 8 or 16) to keep you depth of field. Use a tripod or solid surface to support the camera. I have the same problem with the macro focus on my point & shoot. Beautiful model !
- 1,051 replies
-
- 3
-
-
- cheerful
- Syren Ship Model Company
- (and 1 more)
-
Professor, try Barnes and Noble http://www.barnesandnoble.com/w/model-building-with-brass-kenneth-c-foran/1107898888?ean=9780764340048 That's where I got my copy.
-
Very nicely done, Jay. And a Merry Christmas to you also.
-
I have three River Birch trees that exfoliate bark like crazy - I just peel some of it off as it sheds.
-
WOW. Nice cradle Mark. Really sets the model off ! Now to remove the "flight deck" and you're back to the 17th (or is it 18th?) century look. :D
-
If you can find a Midwest brand kit in any of the hobby stores near you (they're no longer in production), they are an excellent beginner kit. Levels go from 1 to 4 with 1 being a Beginner kit.
-
Also open a build log here for whatever model you choose to build. You will be able to get plenty of helpful advice as you progress along with the model. Good luck.
-
The Dremel is useful but use it off model as Hipexec suggests. Dremel makes a kit that contains addition collets for smaller and larger drill bits/accessories. It's not too expensive. Pin vise is good as Jaager recommends. I have the variable speed Dremel myself.
-
Nice present Dave. What size tabletop is it? 6 inch? 9 inch?
- 962 replies
-
- 4
-
-
- sovereign of the seas
- ship of the line
- (and 1 more)
-
I have the entire set of Veritas/Lee Valley miniature planes, chisels, scrapers. The only tool I have not used yet is the scraper. The low angle block plane gets the most use, especially on planking strips and for smoothing the hull and deck after planking. The tiny chisels are good as MikeY pointed out for tight places where only figure pressure is needed. For something that looks like a toy or something to display on a shelf these tools are amazingly functional right out of the box with no additional sharpening/honing needed. I still use the full sized versions but for model work these are fantastic IMO.
-
Dave, finally caught up with your build. Magnificent work ! Great looking model. I like the results you got with the flags. very nice. Break out the champagne and celebrate. And I am envious of your spacious workshop.
- 962 replies
-
- 4
-
-
- sovereign of the seas
- ship of the line
- (and 1 more)
-
Maybe Santa is telepathic ! After all he does know if you've been naughty or nice ! Right ! ;) ;)
-
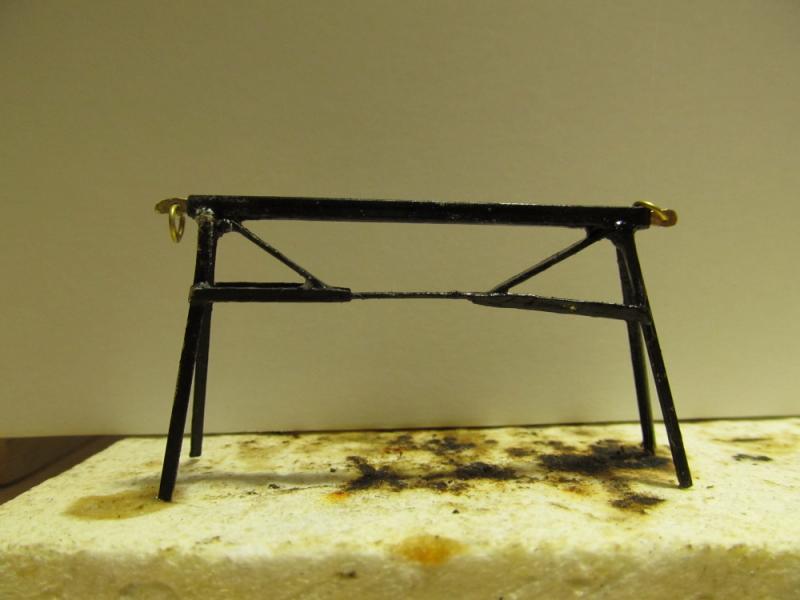
Thanks, Mark, Ken, Carl, and Denis for the compliments and encouragement on my soldering. It is getting a little easier - now I just have to master keeping everything in alignment while I solder
- 250 replies
-
- 3
-
-
- willie l bennett
- model shipways
- (and 1 more)
-
Very nicely done Jay. Came out really well. Regarding grain - it's not just the circular grain you encountered in that branch piece. It can also occur in straight grained blocks. I've seen the grain change just as I carve deeper into a block when I am carving figures. I have to be constantly aware of which way it is going and adjust my carving accordingly. Also there is a big difference between air dried wood and kiln dried wood. Kiln dried tends to be harder to carver in my experience than air dried.