hof00
-
Posts
1,651 -
Joined
-
Last visited
Content Type
Profiles
Forums
Gallery
Events
Everything posted by hof00
-
 Thanks OC, Muh appreciated. Agreed, the model is definitely not short on the detail side of things... 🙂 My thoughts are beginning to turn to Cabinet. options. Cheers and Regards, Harry.
 -
Thanks Bob, I think I am "Almost" finished. 10.5cm AA Guns tomorrow and I'm sure that I'll find some other bits to keep me suitably occupied.....🙂 Cheers and Regards, Harry. "
-
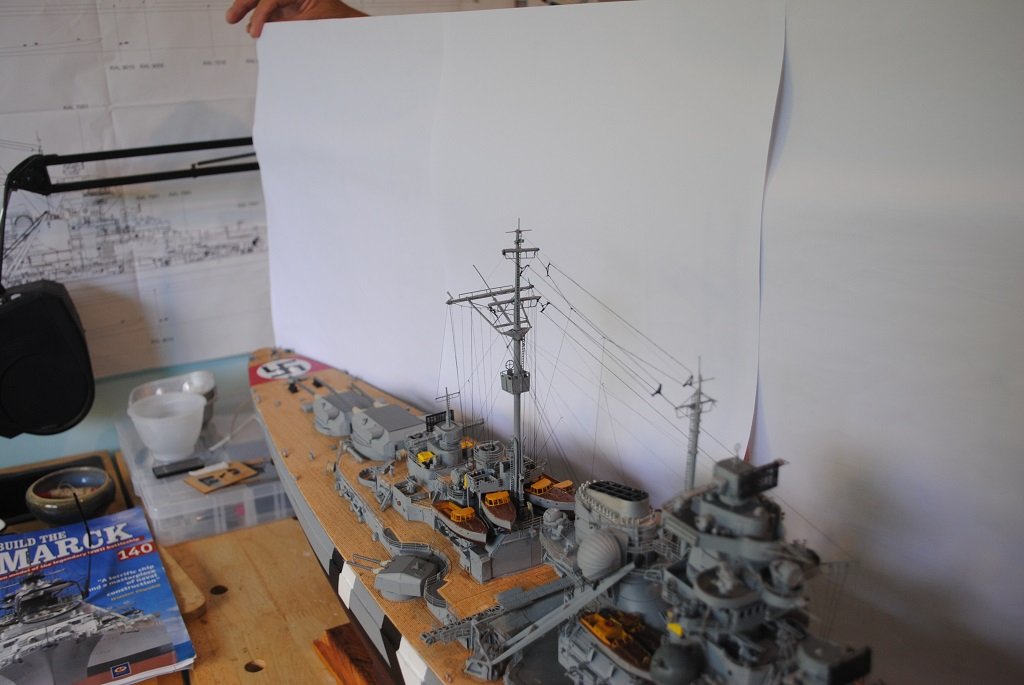
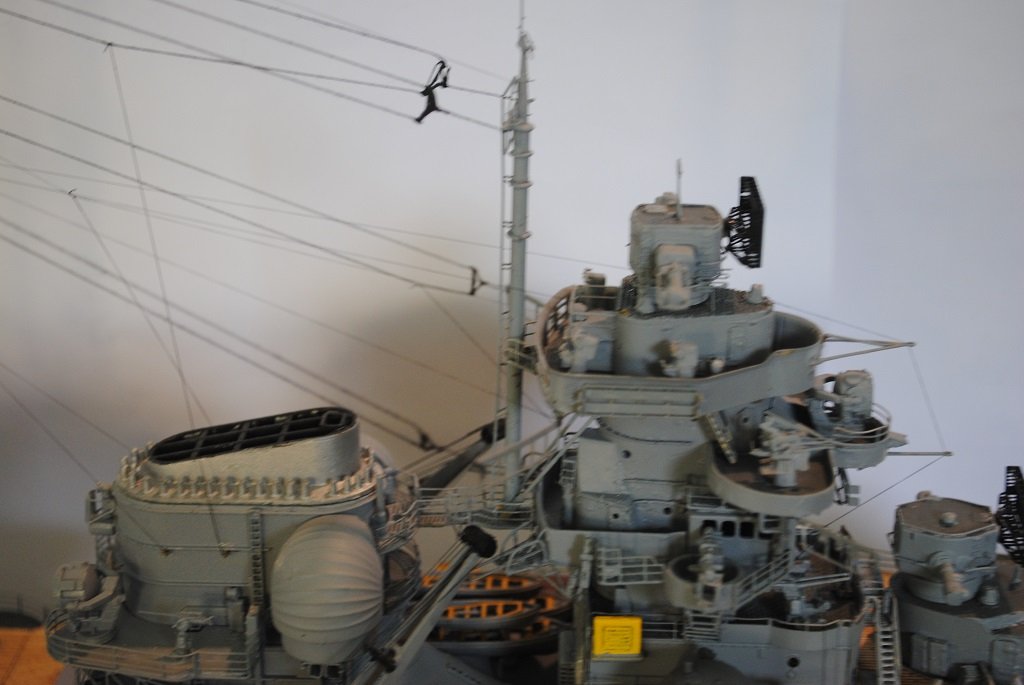
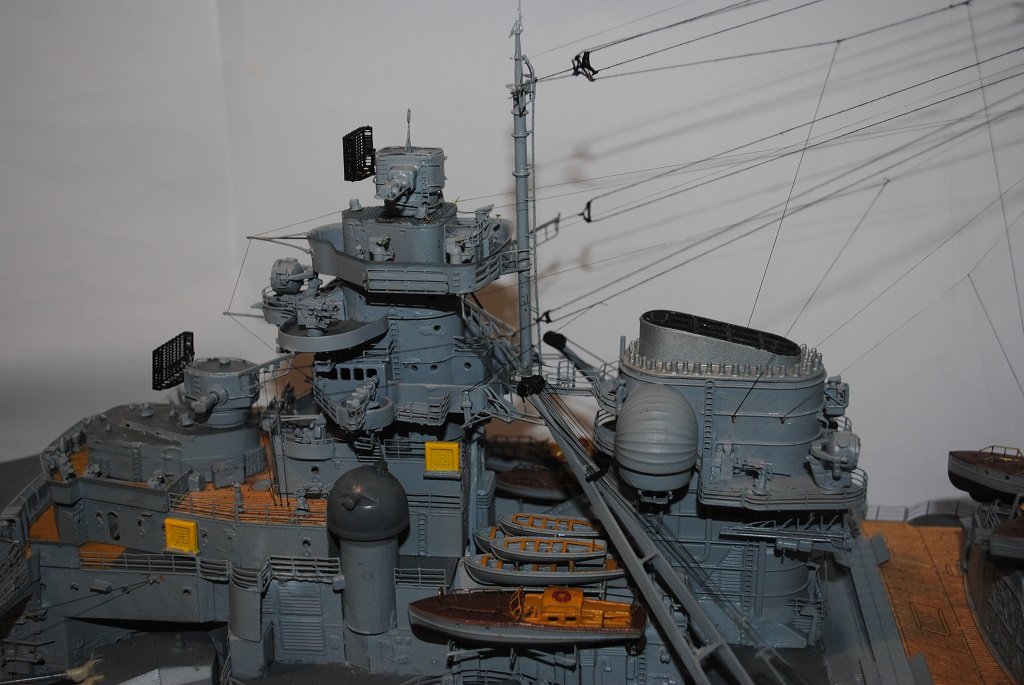
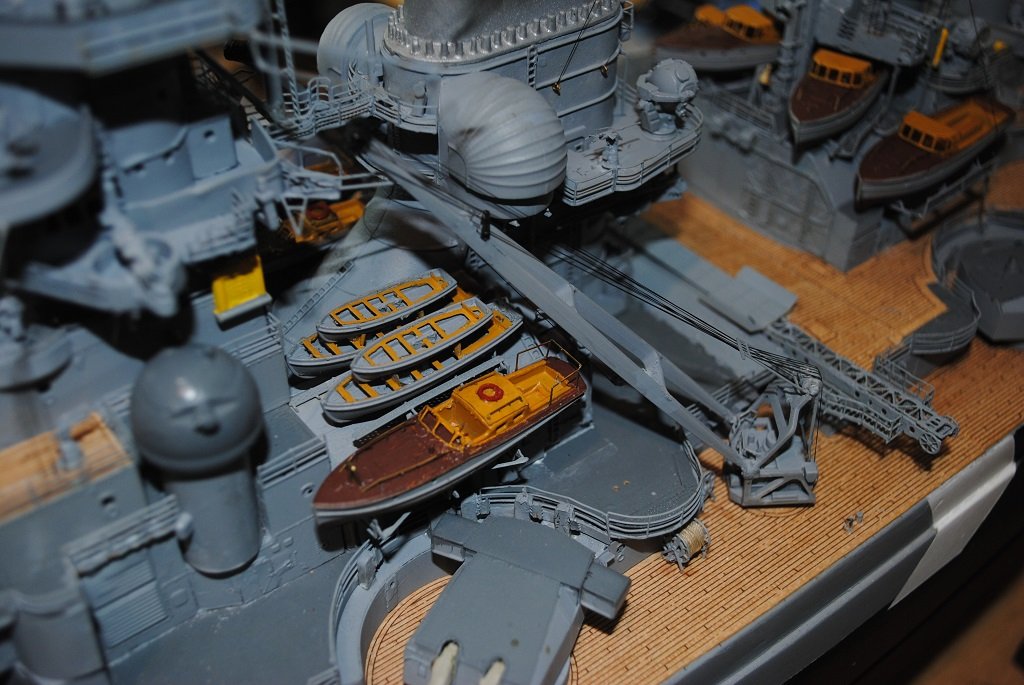
Hi All, Apologies for the bad lighting in the above photos. The next round, I'll ensure some better lighting. Cheers....HOF.
-
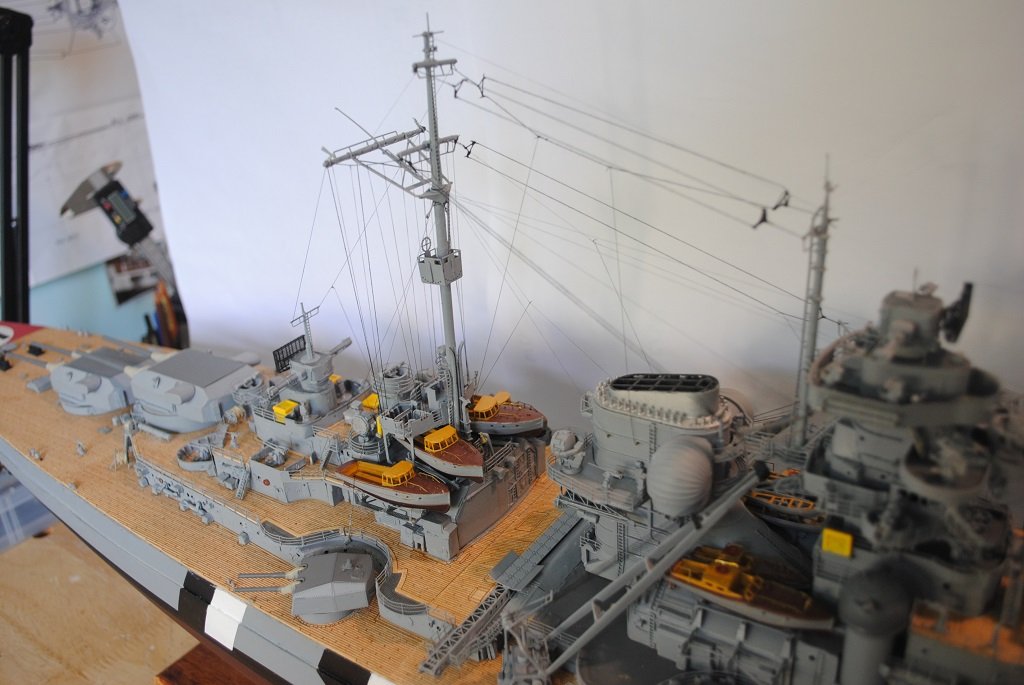
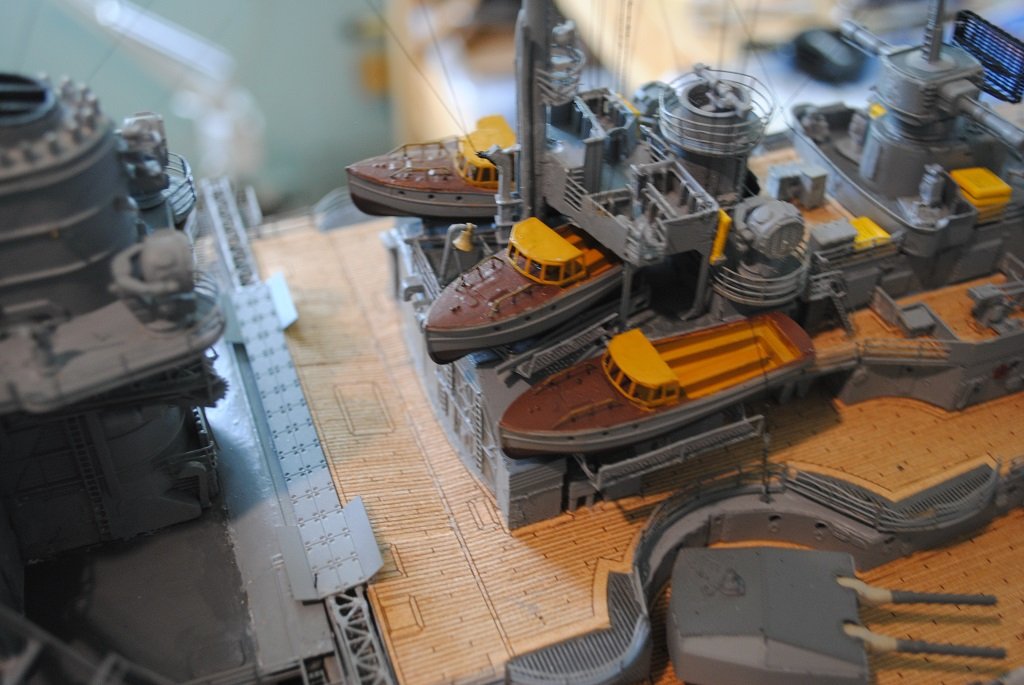
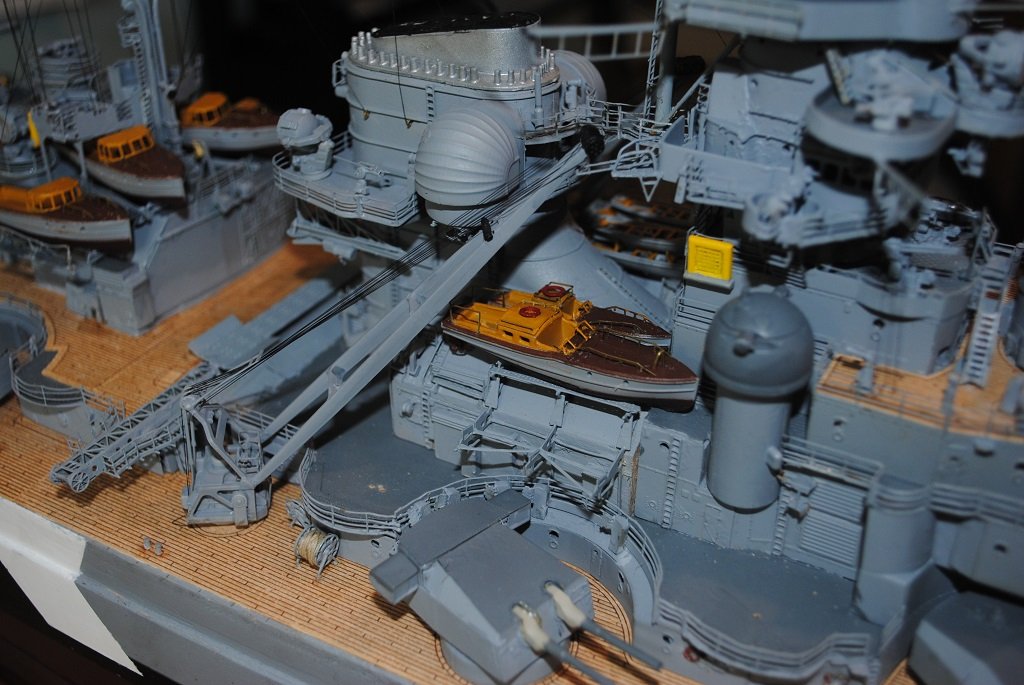
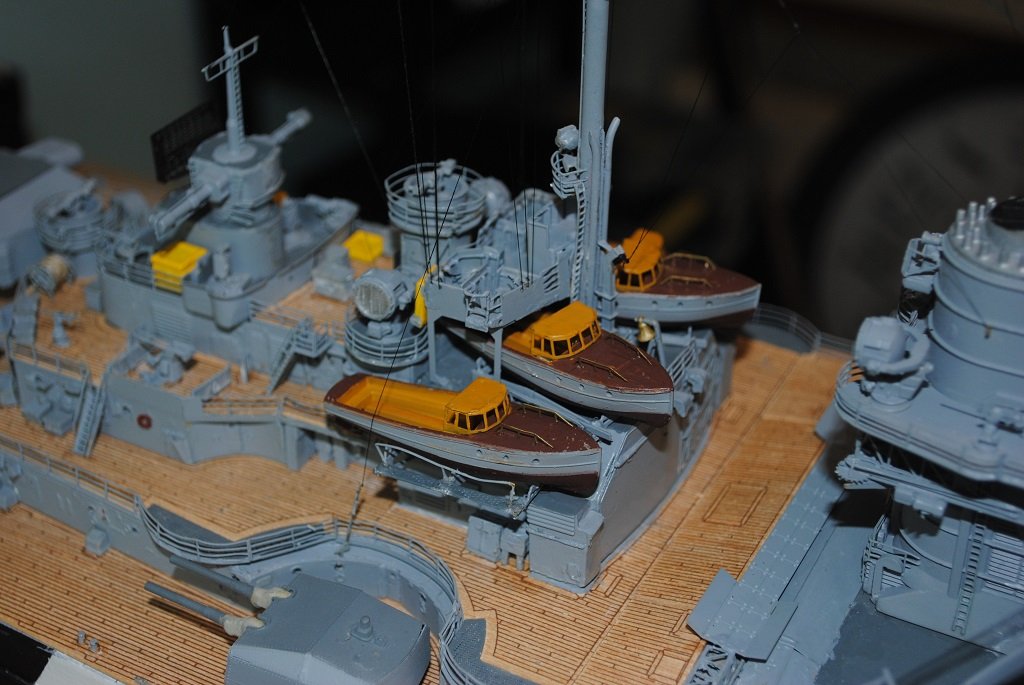
Hi All, A reasonable update: So, Rigging is now complete with the exception of the Propeller Guards. I tried so hard but could not perform Rigging satisfactorily without assistance. (Still dealing with the right Rotator Cuff thing....) So, my lady stepped up and gave things her very best, I am so very grateful and very happy with the result! It took about 4 days to complete in +30.0 C temperatures. HOF busied himself with directing operations, passing Tools/Glue as required. 🙂 Joe 100, (Joe), had provided me with Rigging Plans, (Thanks Joe), but I ended up going with the "Kit" instructions, perhaps a little simplified but these I felt were enough. (Instruction sequence was really good and ensured that one did not "Paint yourself into a corner," so to speak. For the majority of Rigging material, I used "Infini" 110 Denier Lycra Thread and Polyester Cotton for Rigging intersected by other pieces under tension. I gave the Boats a bit of a touch-up and the rest of the Ship and gave the Superstructure a dose of air-brushed Vallejo Satin Polyurethane. (The effect was fantastic blending in all touch up paint. Boats installed on thier Skids. Currently finishing up the eight 10.5cm AA Guns and I may get these installed today. Getting there.... Things left to do: 10.5cm AA Gun Installation Interference Grids Aircraft installation Main Deck Railing Bow/Stern Flagstaff installation Accommodation Ladders and Davits Propeller Guards Anchor Buoys (I think that's it.... 🙂) Cheers....HOF. Photos:

-
Thank Chap, Appreciated. I have to remind myself that thi is my first "Ship with Guns.... 🙂" Lots of firsts for me also, PE etc. Cheers and Regards, Harry.
-
Value-for-Money Airbrush
hof00 replied to BANYAN's topic in Painting, finishing and weathering products and techniques
Hi Pat, I quite like the look of the Air-Brush kit. A plethora of accessories!! (I might just have to save for one.) Cheers....HOF. -
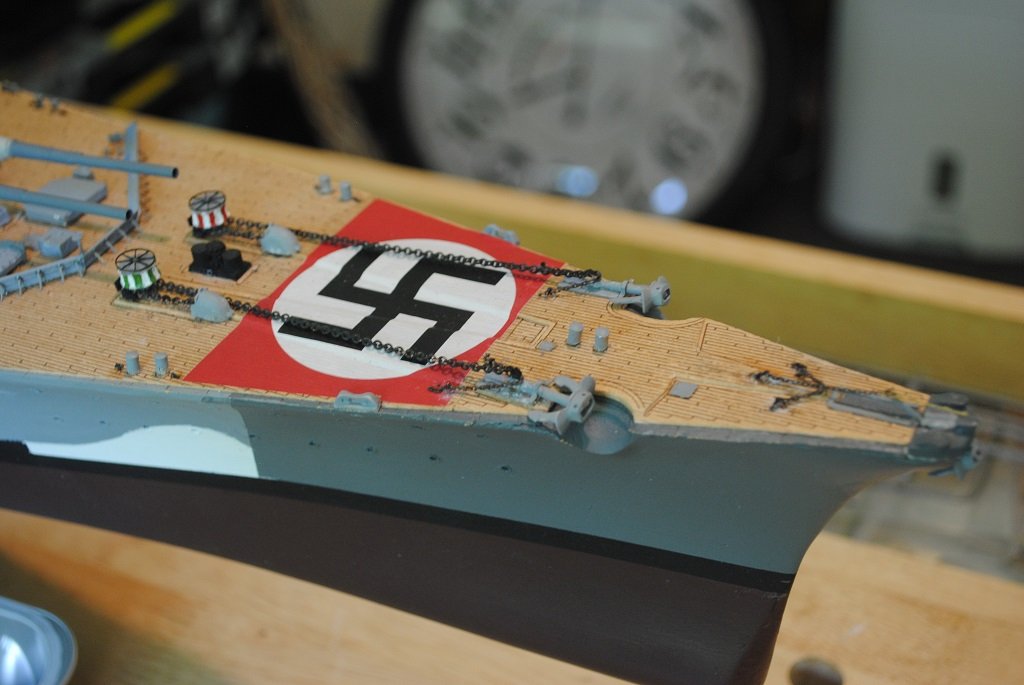
Hi All, Photos to go with the "Small" update. I installed the Stern Booms and Stern Anchor Cables. I made up all Booms with a simple jig and painted prior to installation. (I'm not really 100% happy with the Grab Rails but you can't really see them unless you are really close.) (Maybe I can get things perfect with my Trumpeter Bismarck.... 🙂) (There are other aspects of this model, (My work), that irk me but far too late to do anything about them. 😐) It'll be o.k. Not much left to do.... Rigging Boats (Already constructed) 10.5cm AA Guns (Already constructed) Interference Grids Accommodation Ladders? Main Deck Railing Touch-Ups Anyway, "Full steam ahead and damn the torpedoes!!" Cheers and Regards, Harry. Photos:


- 544 replies
-
- 12
-

-
Hi All, Tiny update. Bow Anchor "Cables" re-done for the fourth time!! My error was not taking the outboard Cables right up to the Anchor Shaft. Installed the Bow Booms on the Hull and am working on the Stern Anchor Cables at present. I'll get some pictures up soonish. Cheers and Regards, Harry.
-
Hi Darryl, Very kind words, thank you. Cheers and Regards, Harry..
- 248 replies
-
- 1
-
-
- Cutty Sark
- Revell
- (and 2 more)
-
Thanks Chap. The CS took ma 6.5 years of weekend work tro complete and was my third ship model. (A very steep learning curve. 🙂) The plastic "Connex" thing in the foreground is my Serving device. I did a "Truncated" build log on MSW if you are interested. Cheers and Regards, Harry.
- 248 replies
-
- 1
-
-
- Cutty Sark
- Revell
- (and 2 more)
-
Thanks for looking in Chap!! Yup, far too late for an alternative Blackening solution. (Needs Must I guess.... 🙂) I think I'm getting somewhere.... Cheers and Regards, Harry.
-
Hi Darryl, An early photo of my Cutty., this is the 1/78 Sergal/Mantua 1/78 version. The reason I am posting this is the size with reference to the plan on the wall. (As I mentioned, I could not recall what "B" size they were/are. 🙂) Cheers and Regards, Harry.
- 248 replies
-
- 1
-
-
- Cutty Sark
- Revell
- (and 2 more)
-
Hi Chap, The plans that I had enlarged were from the Museum. I got them enlarged to the largest "B" size. (I think that's a "B2?" Not sure sorry..... ) You should ge6 3 plans, Sail, Rigging and General Arrangement, Sheer/Plan views. Once enlarged. they were about 1/96 Scale. (And yes, they took up lots of Wall Space!! 🙂) Cheers....HOF.
- 248 replies
-
- 2
-
-
- Cutty Sark
- Revell
- (and 2 more)
-
Hi Chap, That is really good!! (Thank you for the photo.... ) The diorama is going to look awesome!! (I have been following along for a while, it will be good to see everything come together.) Cheers and Regards, Harry.
-
Thats a reasonable size!! 🙂 How many figures total and are you intending a dust cover/case of some description? Cheers and Regards, Harry.i
-
Hi Chap, Looking really good!! (I was going to ask when we were going to see the figures in place on the Diorama.) Can I respectfully ask what are the Diorama dimensions? Cheer and Regards, Harry.
-
Hi Chap, I got a "First Edition" Longridge set a few years ago from Abe Books. I did find them very useful. (Campbells Plans are really good also although I had to get mine enlarged at a local print shop so I could read the detail.) Cheers....HOF.
- 248 replies
-
- 1
-
-
- Cutty Sark
- Revell
- (and 2 more)
-
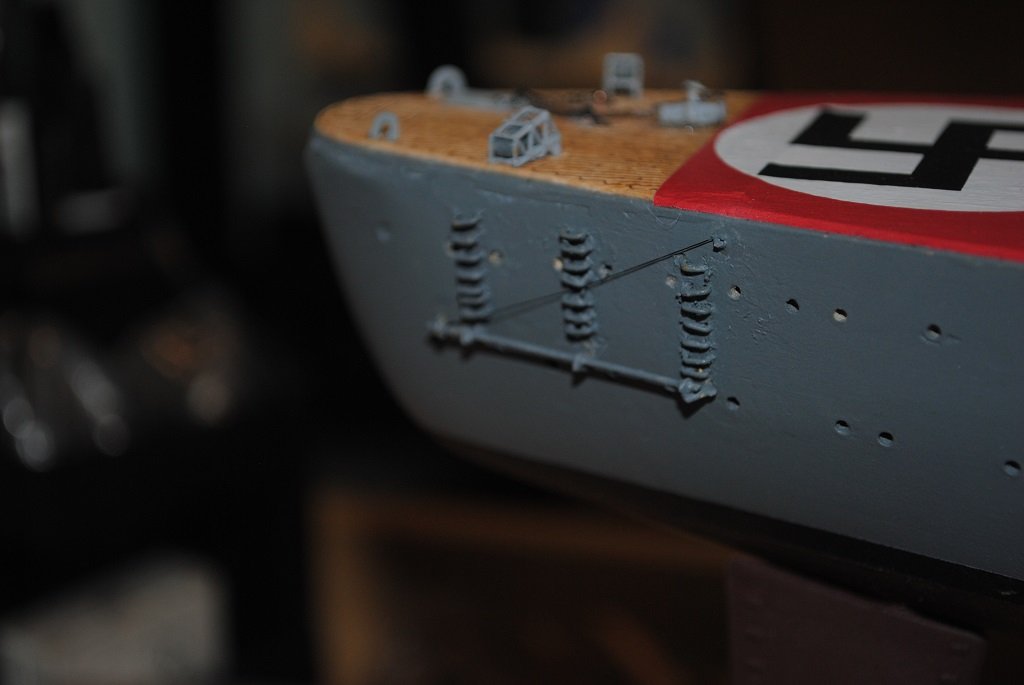
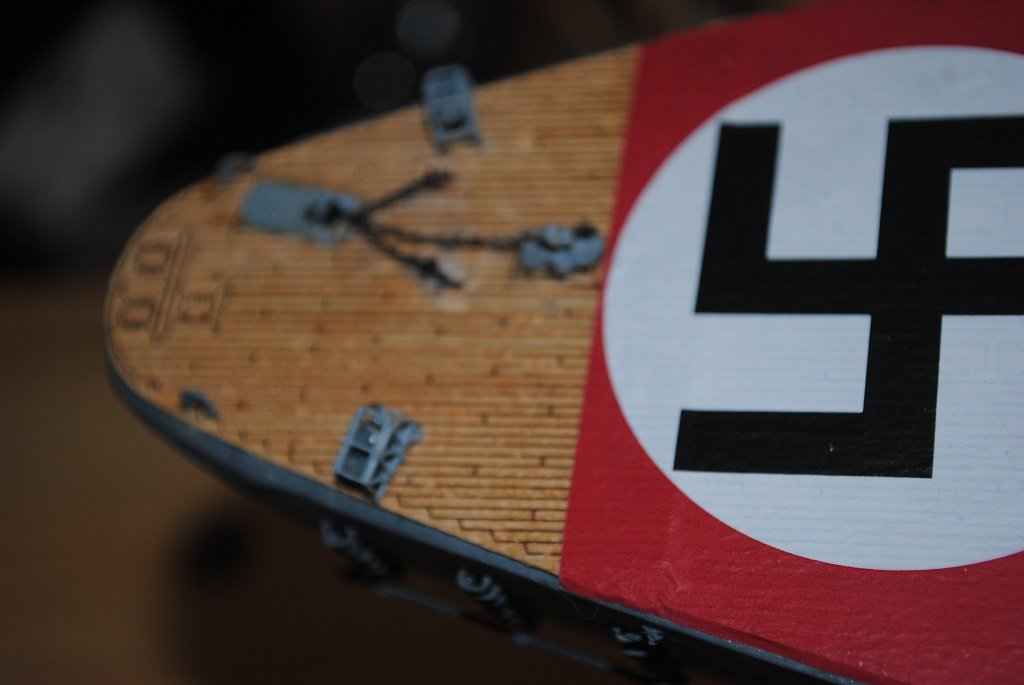
Hi Joe, The information is just superb thank you!! It is really good to add correct terminology to my repertoire of "Ship Lore," i.e. "Cable." Thanks again for advising equipment that was removed prior to operation Rhine.. I don't think that I will delete these smaller craft. (It looks like my Ship will have all the "Bells and Whistles. "🙂) Again, not 100% historically accurate but I like the look of these bits. (The only ones to know will be you, me and anyone else that reads this information.... 🙂 Yup, I intend to install the Booms "Stowed," much simpler I think.... Of note, my "Super 3D drawings of Bismarck," (Kagero), show the color scheme as of May 27, 1941. This depicts the Ship "Fully Loaded" and Inc. Swasticker markings Fore and Aft. (Artistic License? 🙂) Anyway, onwards!! Cheers and Regards, Harry.
-
Hi Joe, Thanks for the info, appreciated!! Well, I have the Bow Anchor and "Cables" installed., probably not 100% historically accurate but I am comfortable with what I've got. 🙂 I have the Stern Cables to install later today. Edit: BTW were the Bow/Stern Booms for Boat recovery or something else? Cheers and Regards, Harry.
-
Hi Marc, Good to see your "Hale and Hearty." At least you can mix a little free time with business. Cheers and Regards, Harry.
- 525 replies
-
- 1
-
-
- cutty sark
- mantua
- (and 2 more)
-
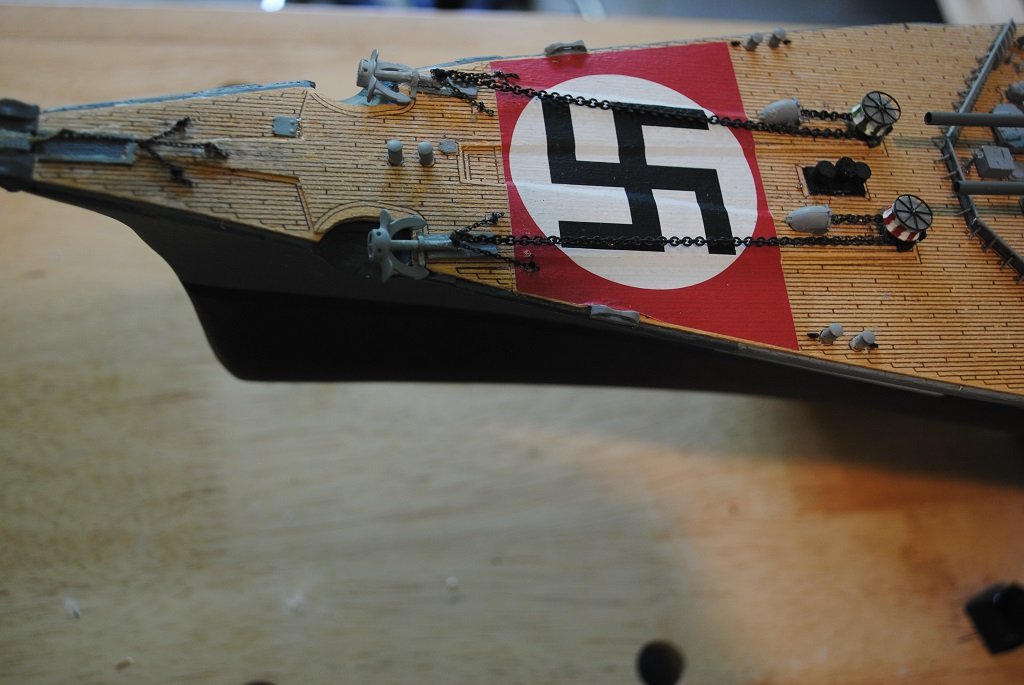
Thanks OC, I had another look at the Starboard Main Anchor Chain. I just could not live with it twithought any tension. De-bonded Chain at the Spurling pipe, "Tweaked" and re-attached. Much better, Port and Starboard Chain runs are now clear of the Deck... Much improved!! 🙂 Cheers, Harry.
-
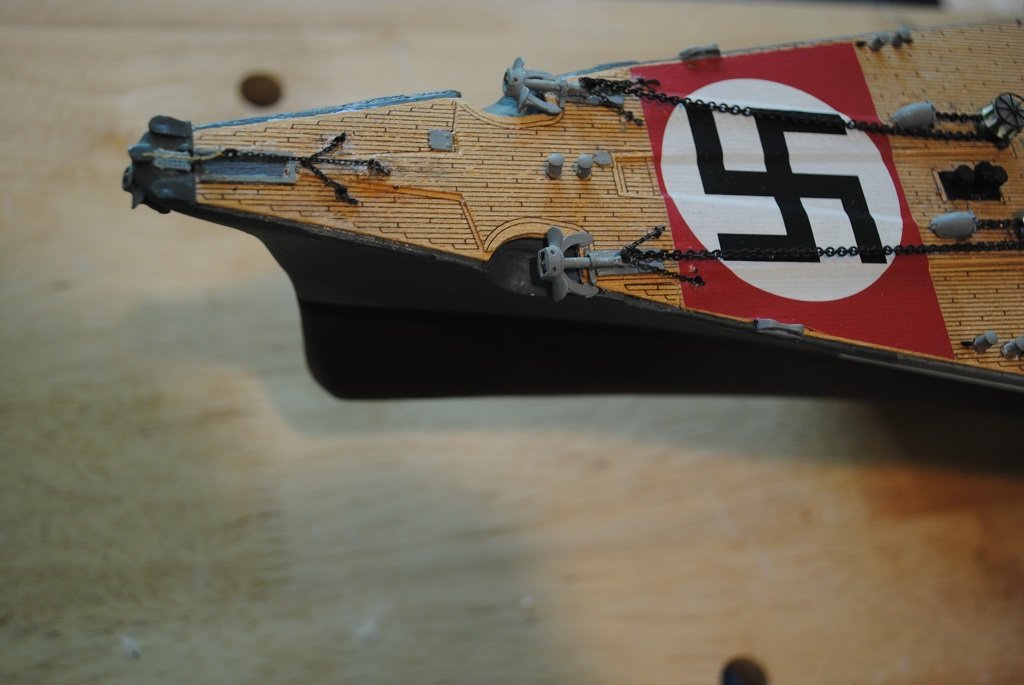
Hi All, Another small update: Completed the Bow Anchor Chains, I used the "Eyelet" method of attaching the small Chains. (A couple of small touch ups required.) The Main Anchor Chains affixed but I feel that the Starboard side could have had a tad more tension. I don't think I'll push my luck, unless of course, it bugs me too much.... 🙂 I'm reasonably happy with the result, (I have to be, I'm not doing it again!!) Stern Anchor Chain tomorrow and maybe the Fore and Aft Hull Booms (I made these up some time ago.) I am looking forward to Rigging the Beastie, sort of.... 🙂 (The new "Specs" are awesome!! I can see again!!) Cheers....HOF. Photos: