


Justin P.
-
Posts
991 -
Joined
Content Type
Profiles
Forums
Gallery
Events
Posts posted by Justin P.
-
-
2 hours ago, mnl said:
I have both violin planes and scrapers.
Do you use the full size cabinet scrapers for this?
- Canute and thibaultron
-
 2
2
-
44 minutes ago, Cathead said:
Don't read The Evening and the Morning (the new prequel to that series) if you know anything about the Anglo-Saxon/Viking period, your eyes will roll out of your head.
Meh... none of his books are really accurate perse, but they’re still pretty good. After reading the other three, I felt obligated to read the new prequel, though after a few chapters it was clearly his least notable entry in the series. I enjoyed it overall, but not nearly as much as Pillars or the other entries.
-
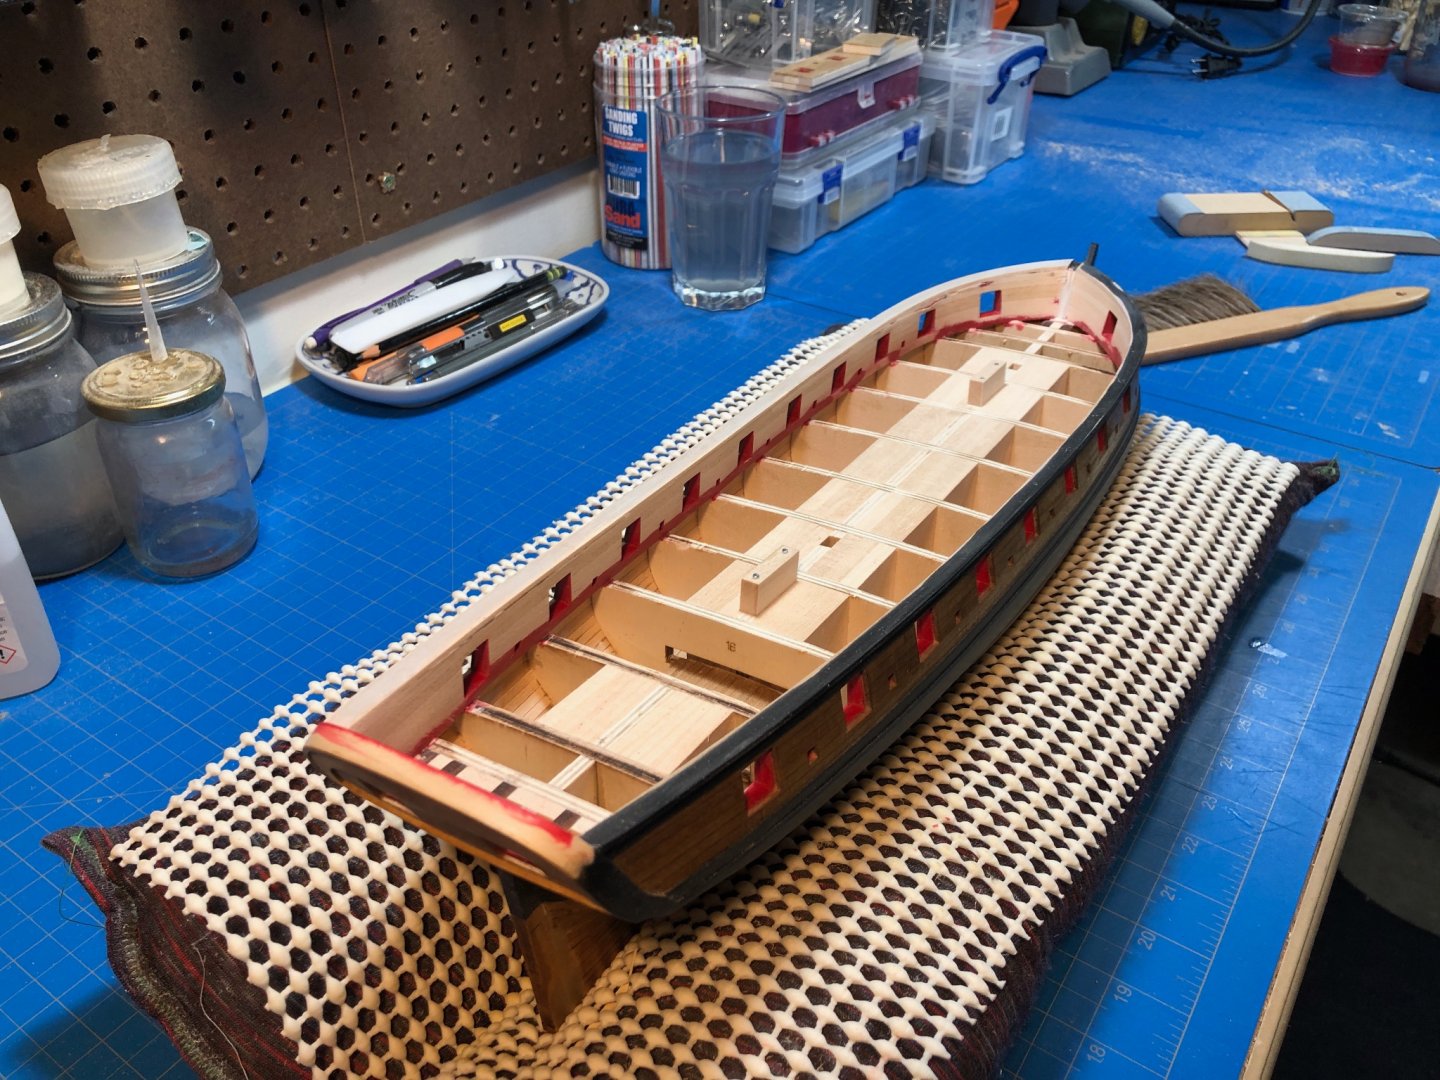
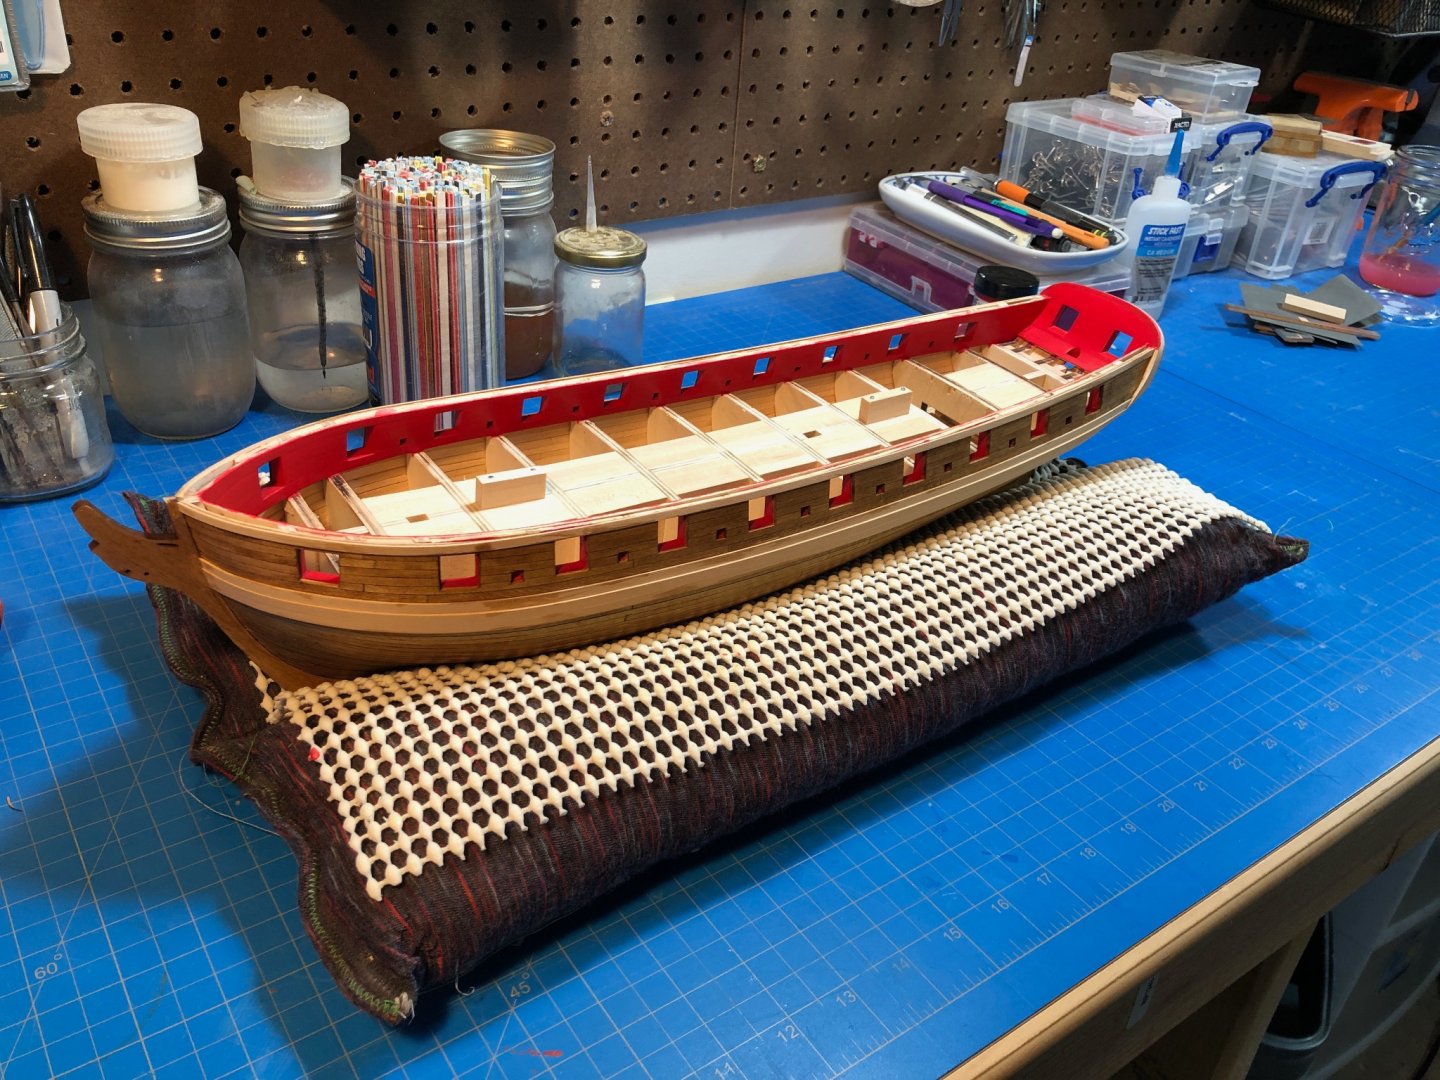
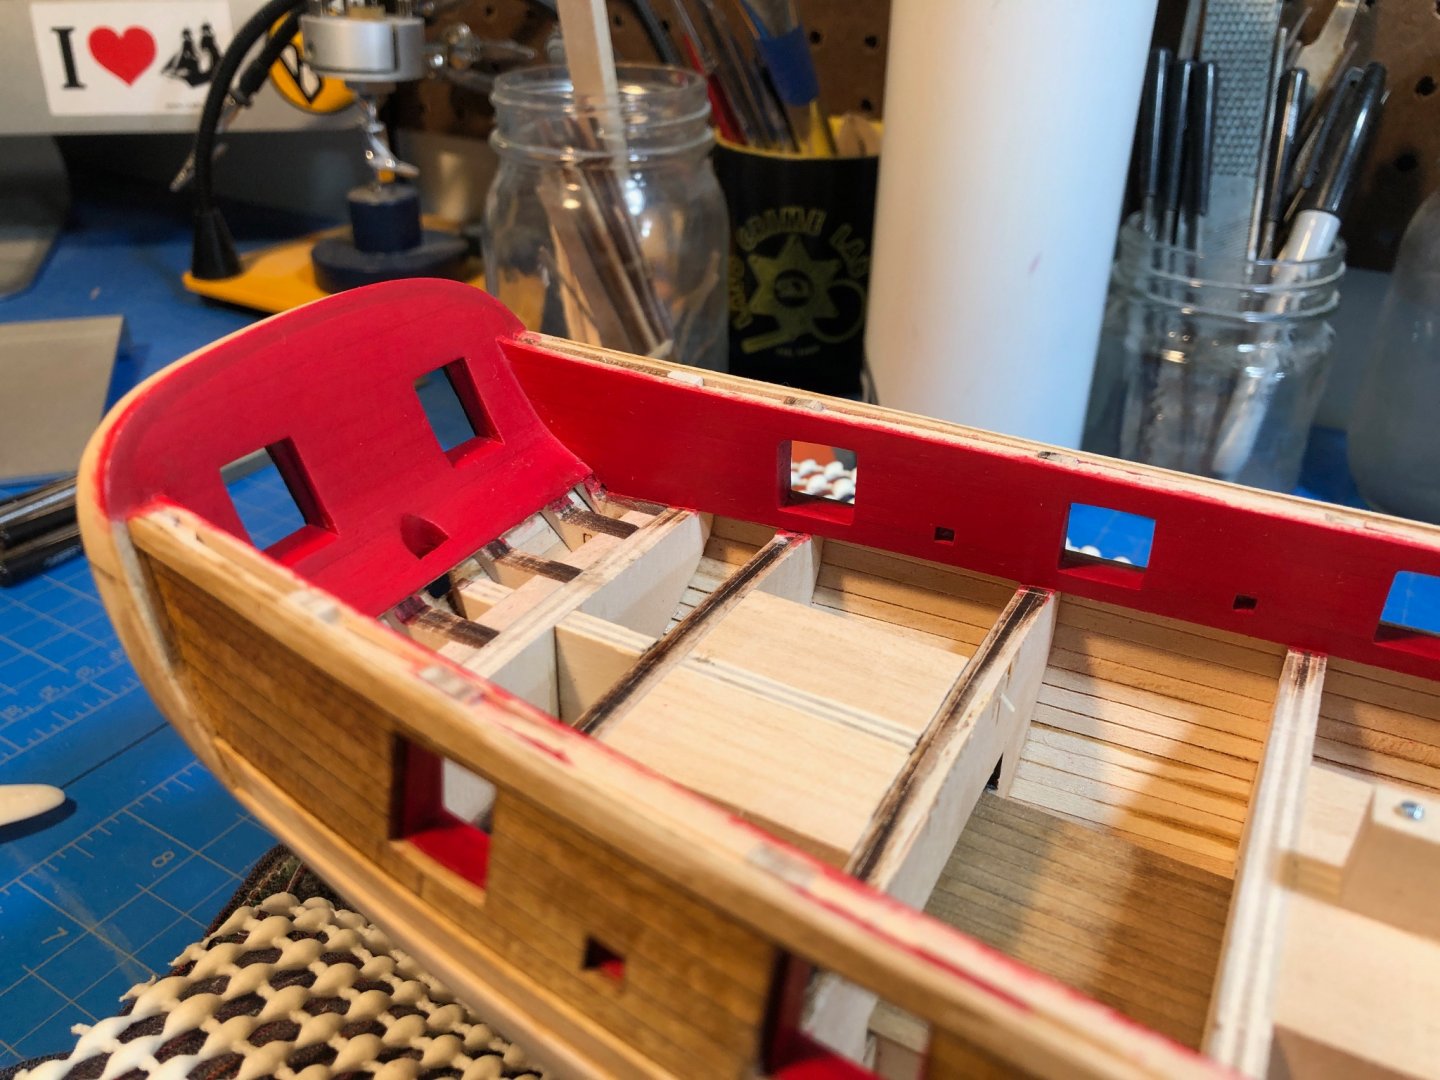
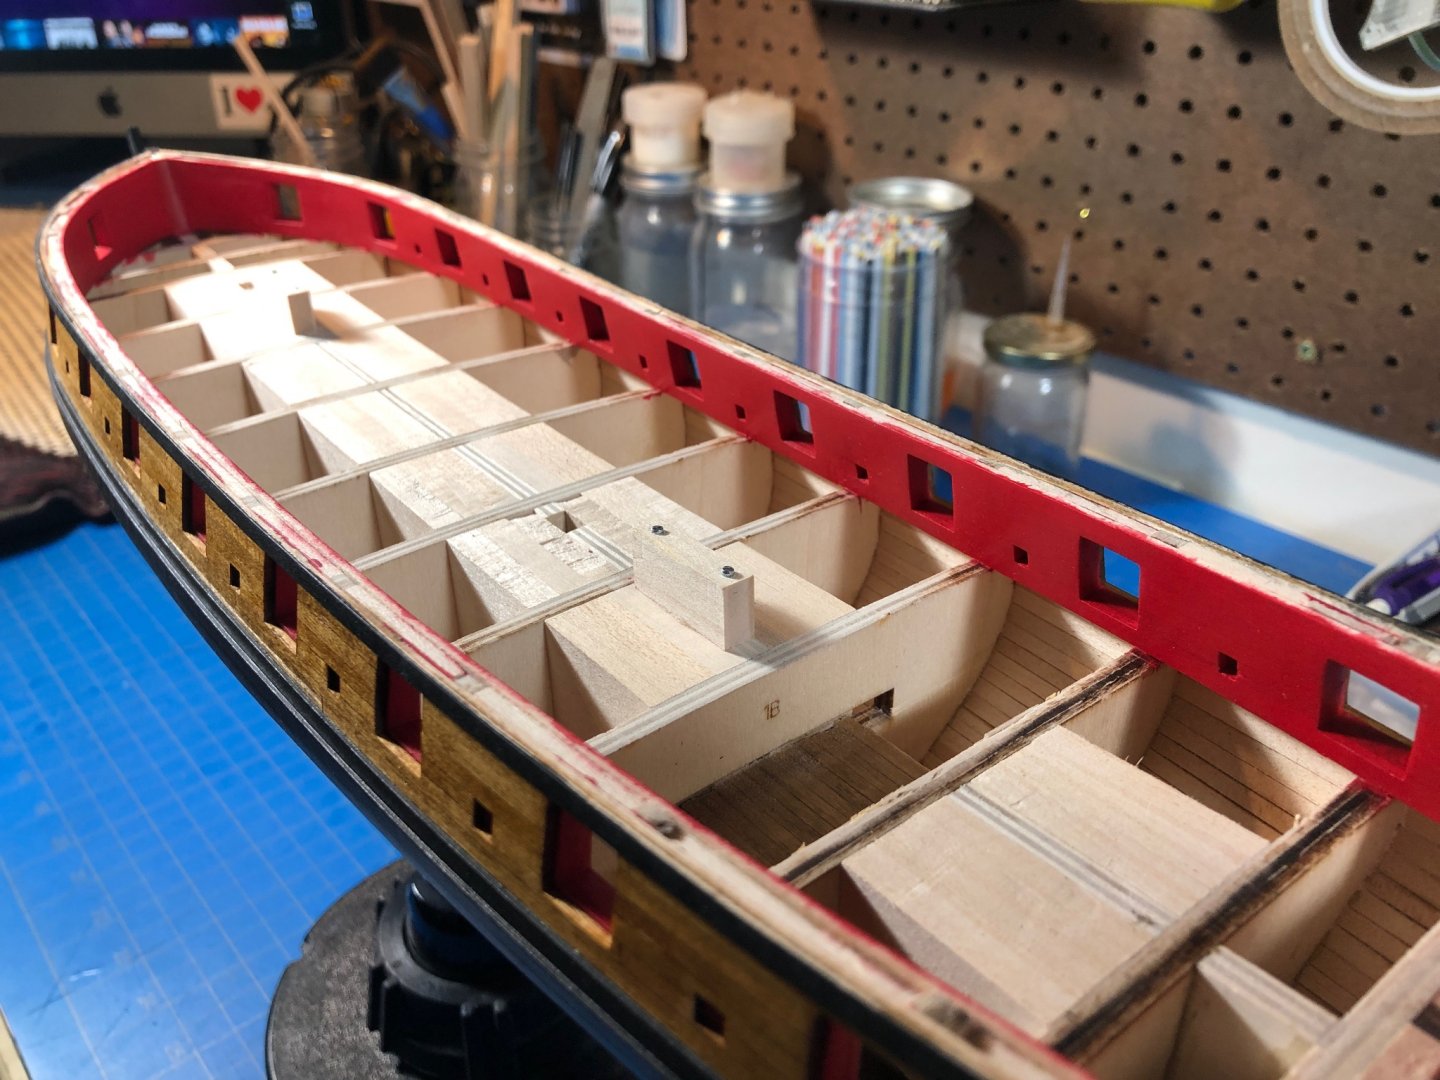
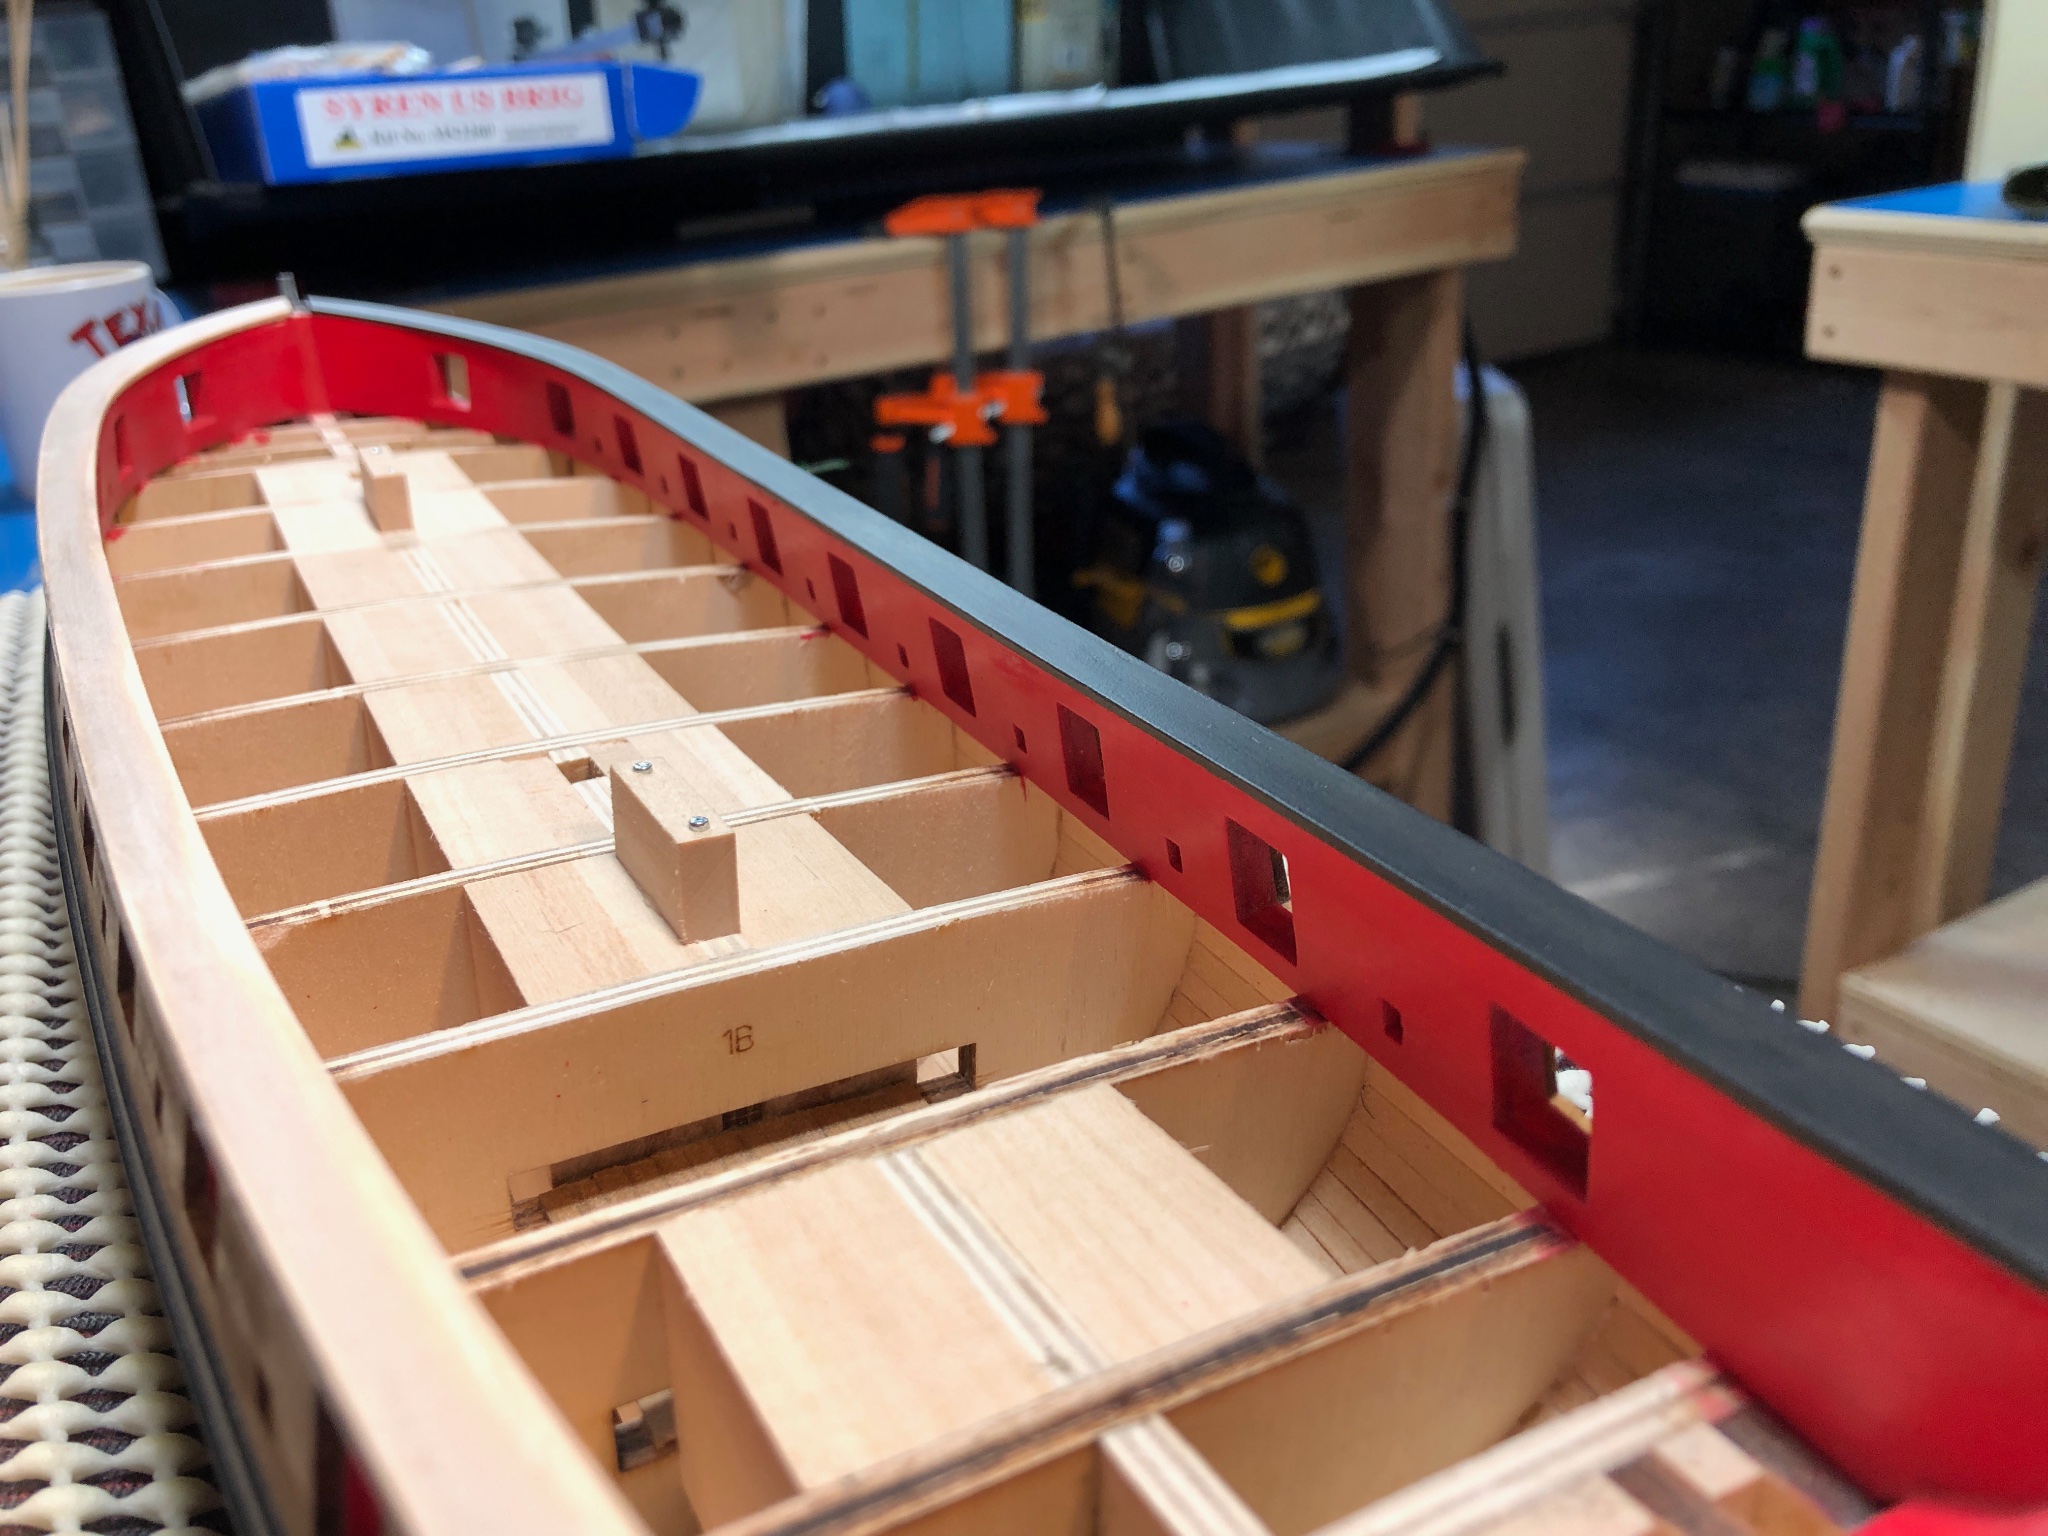
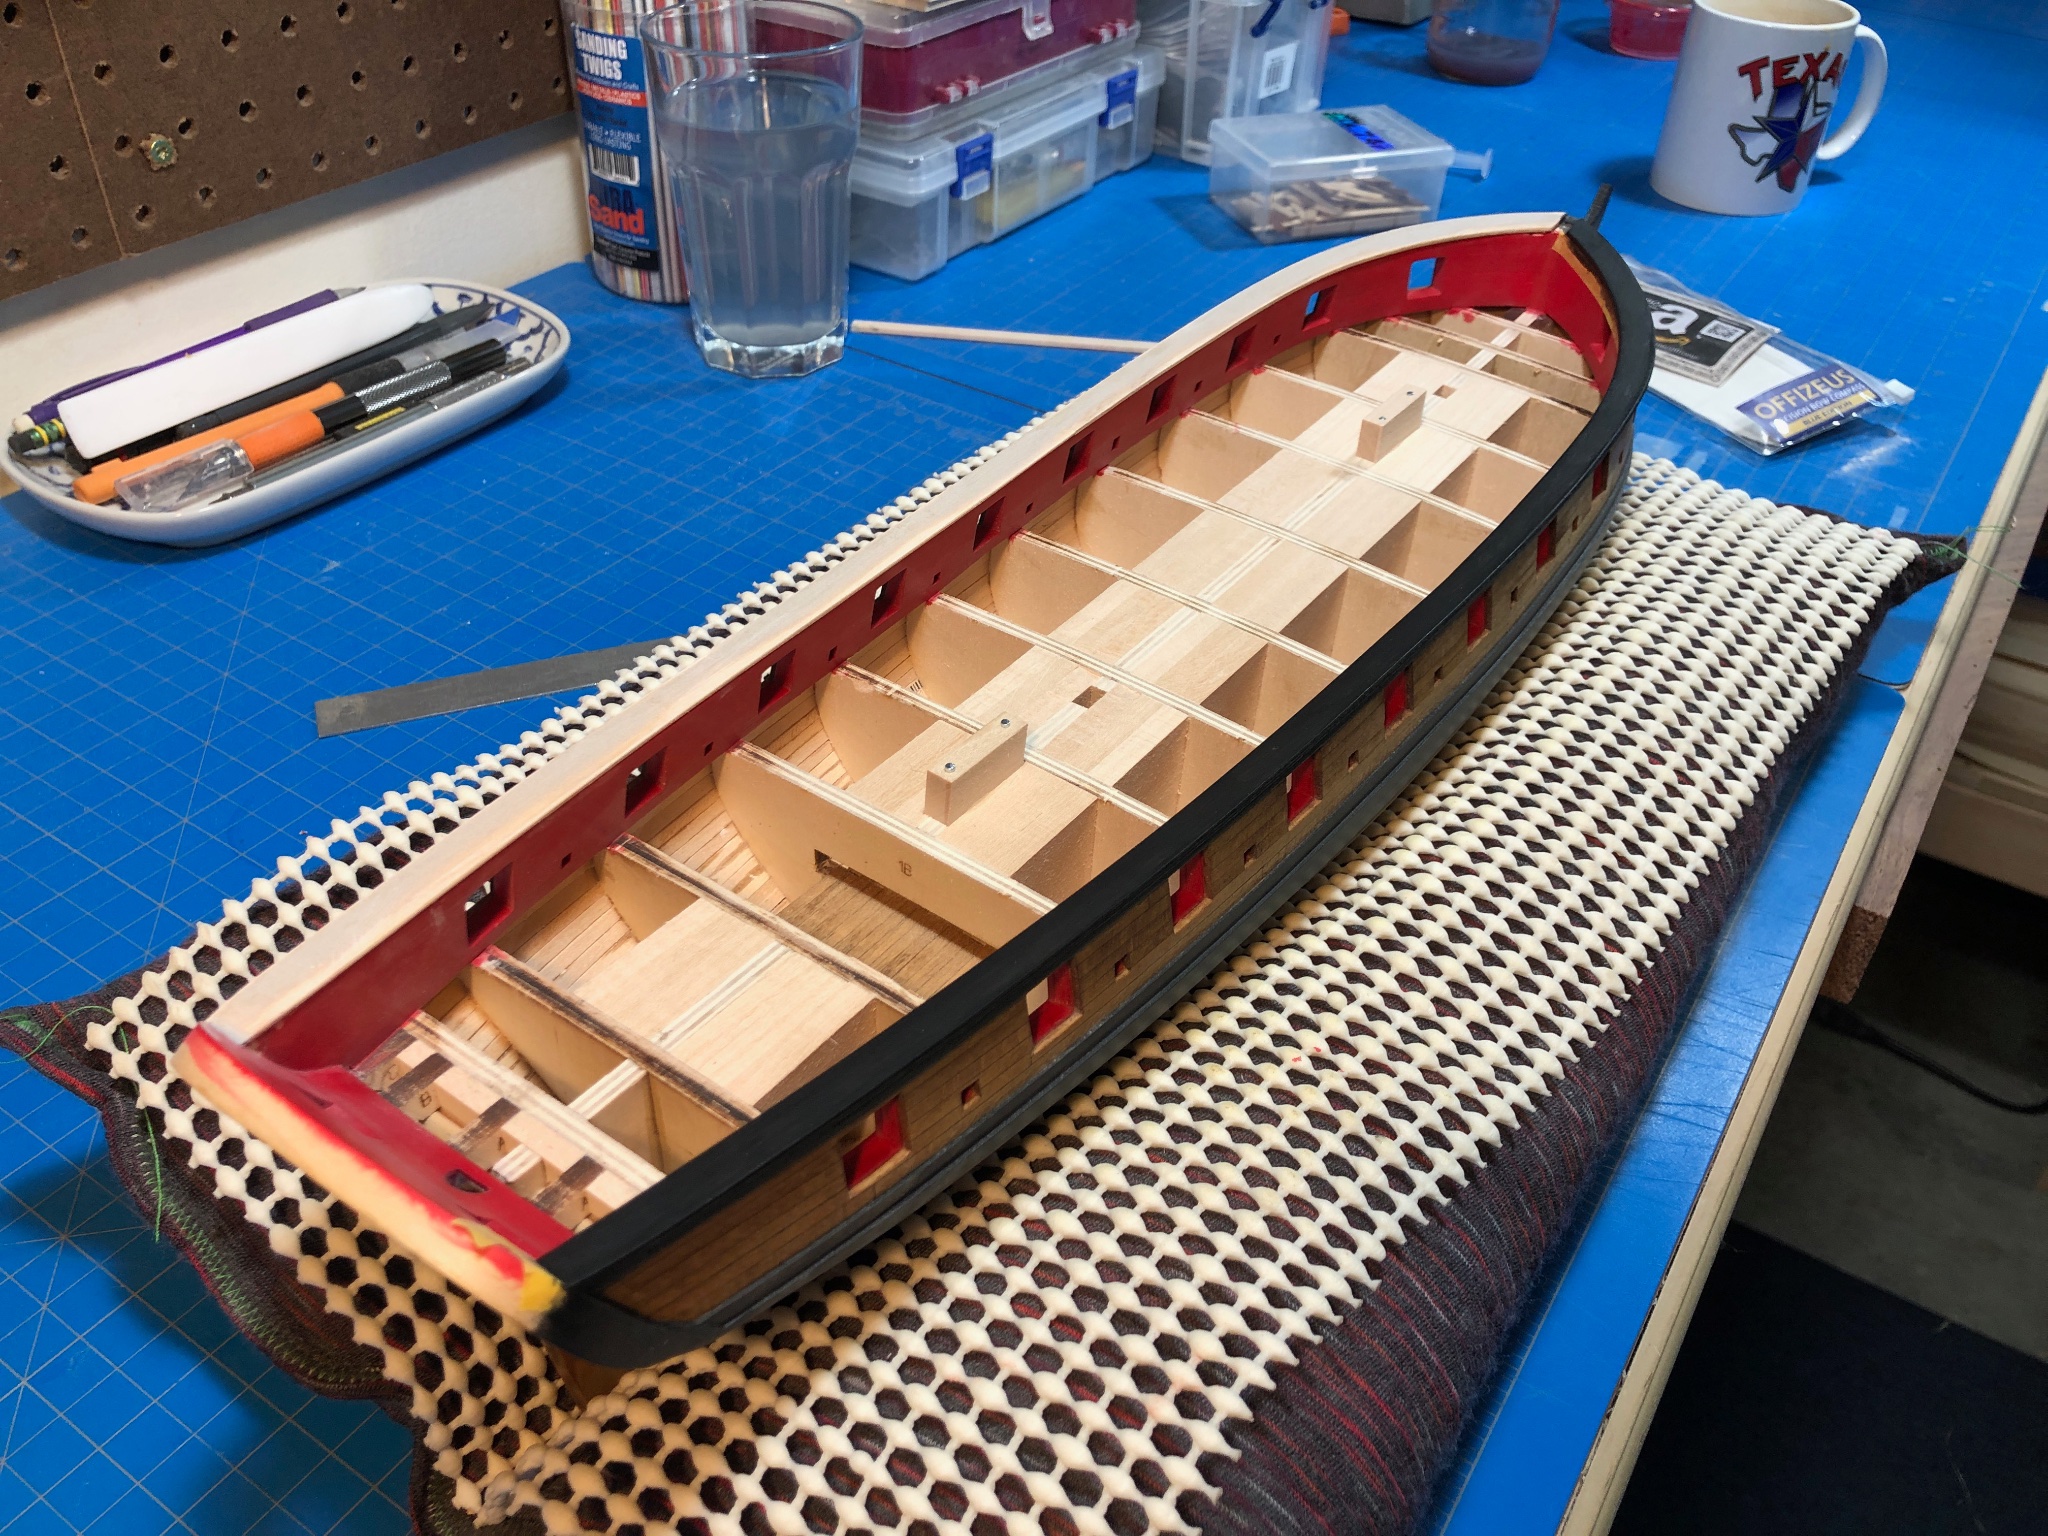
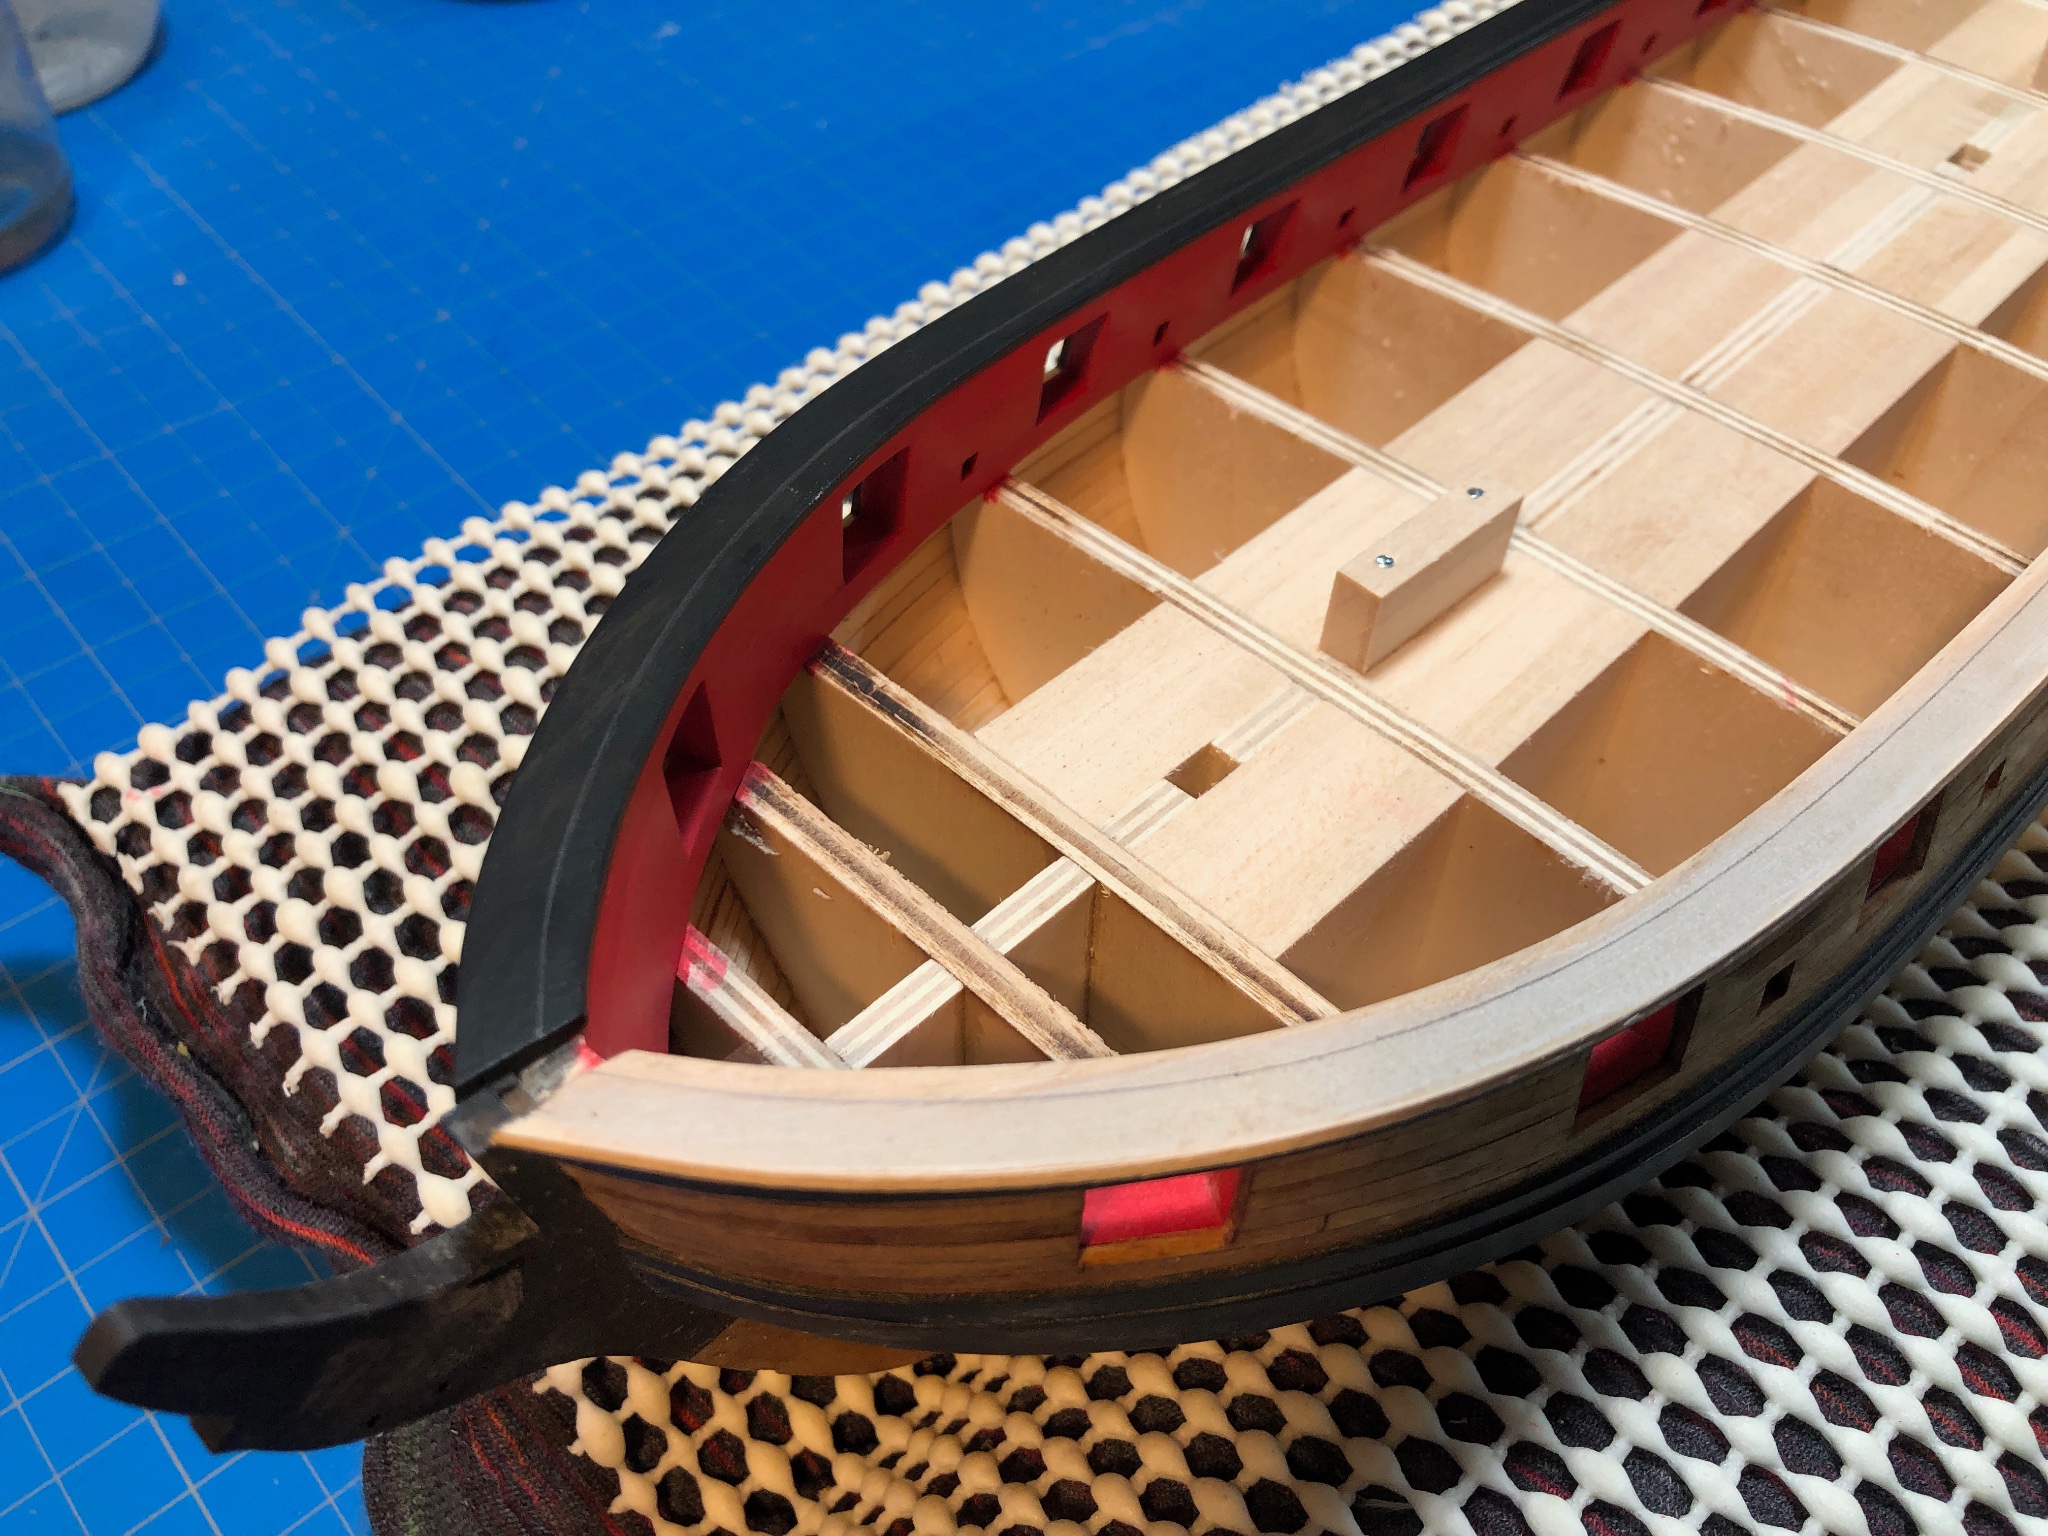
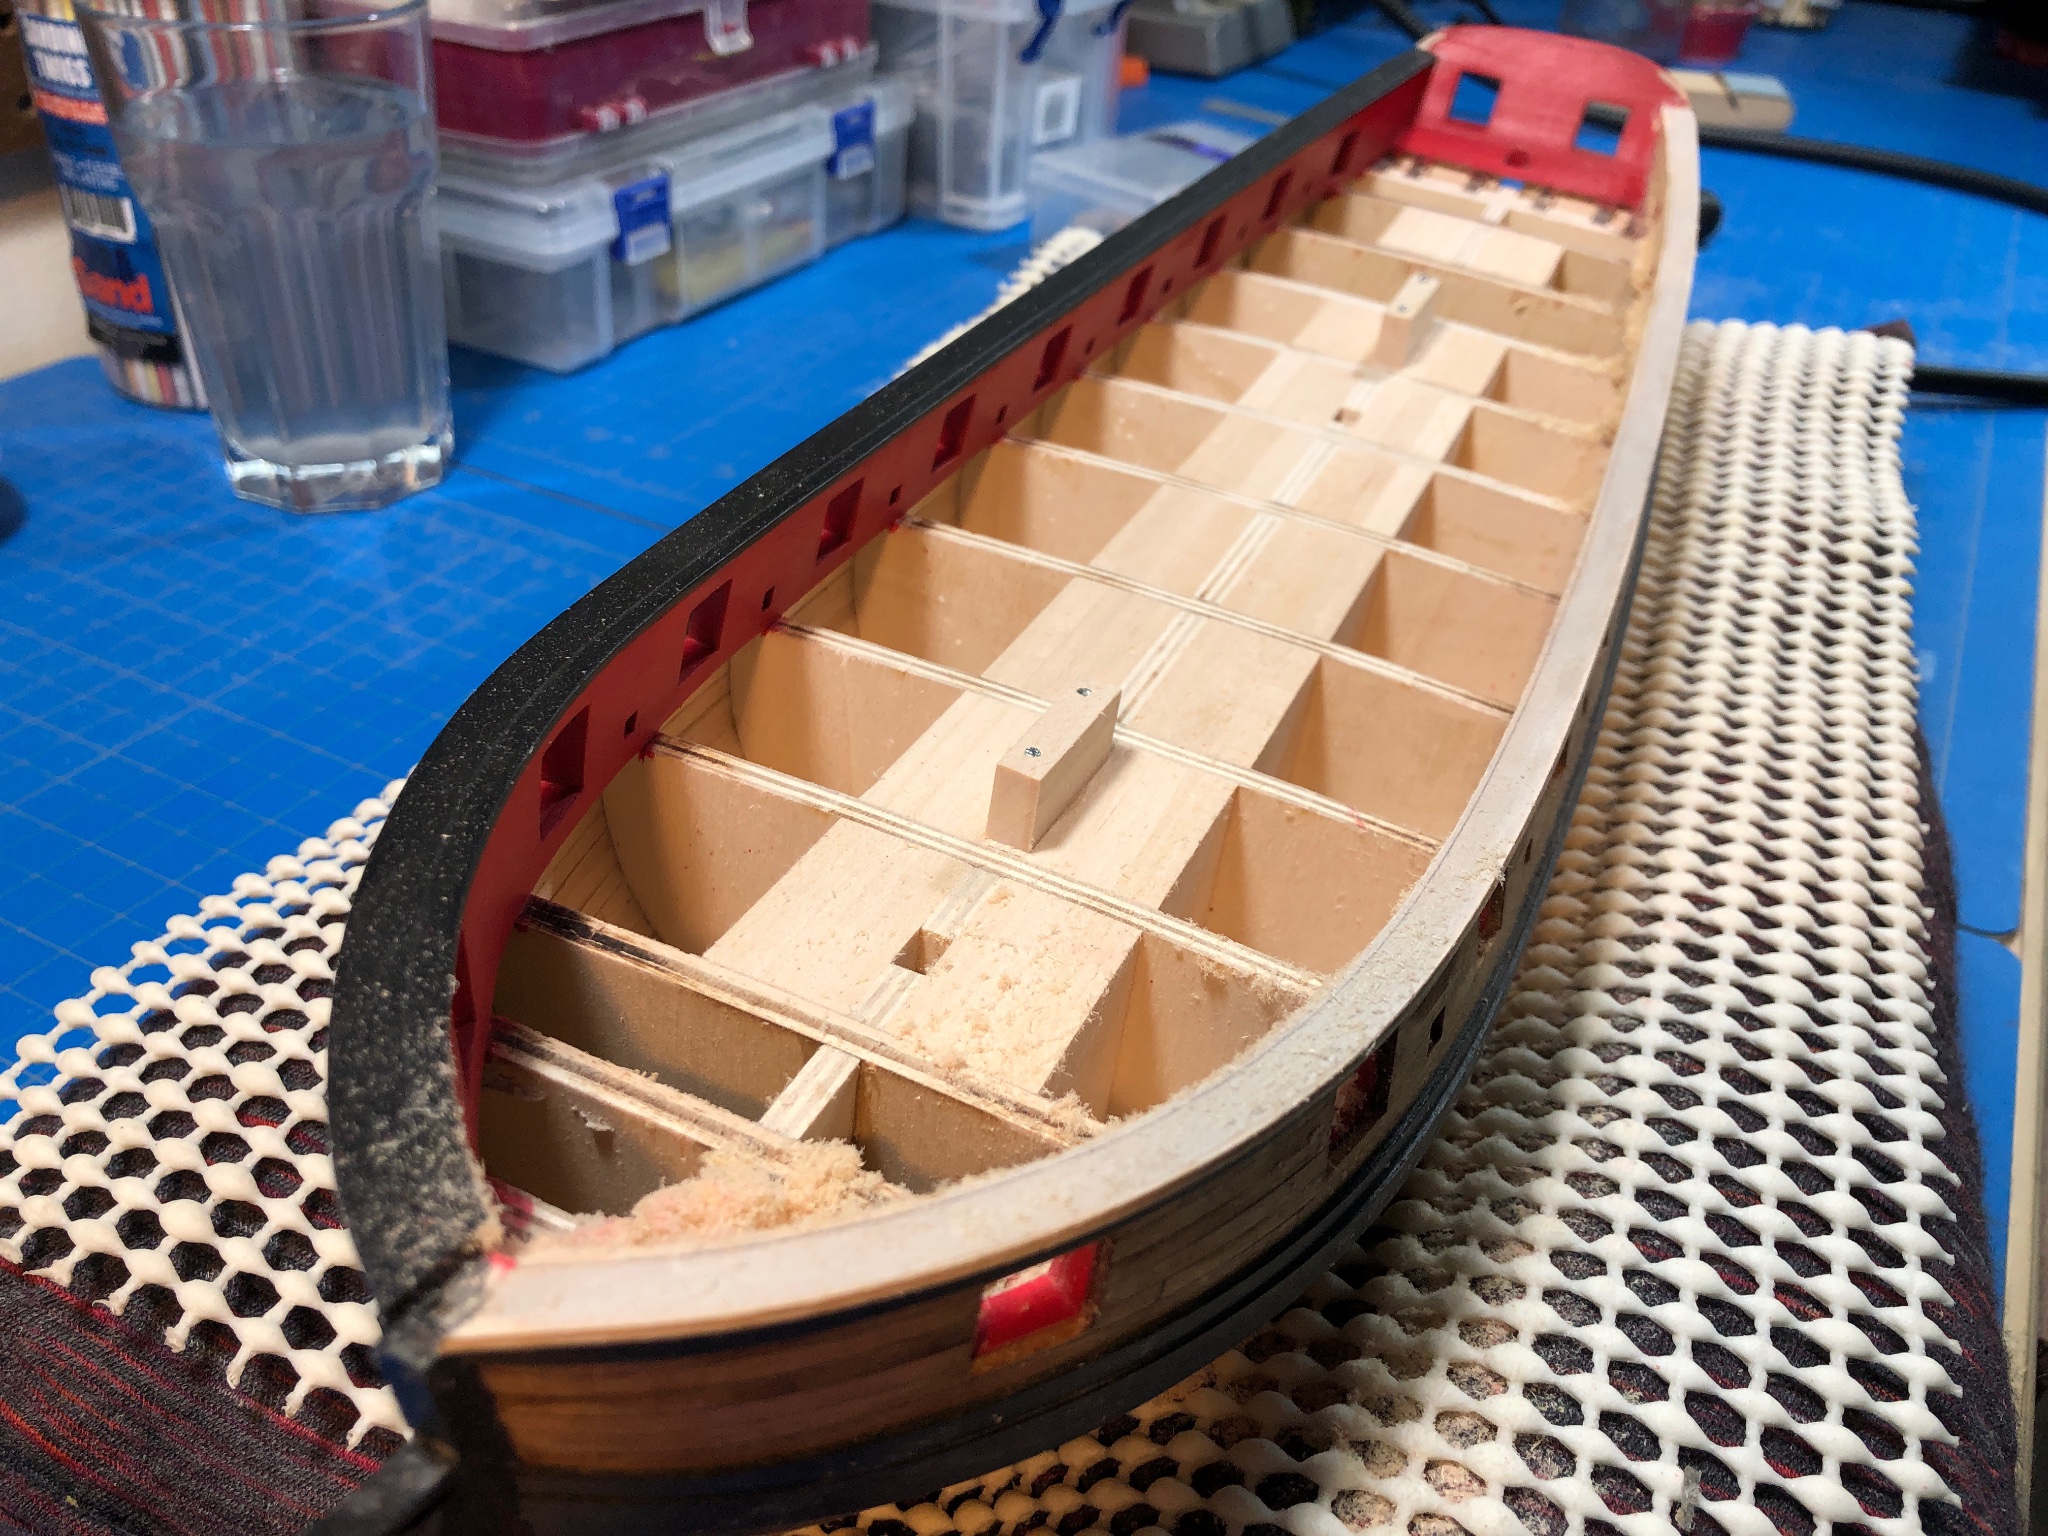
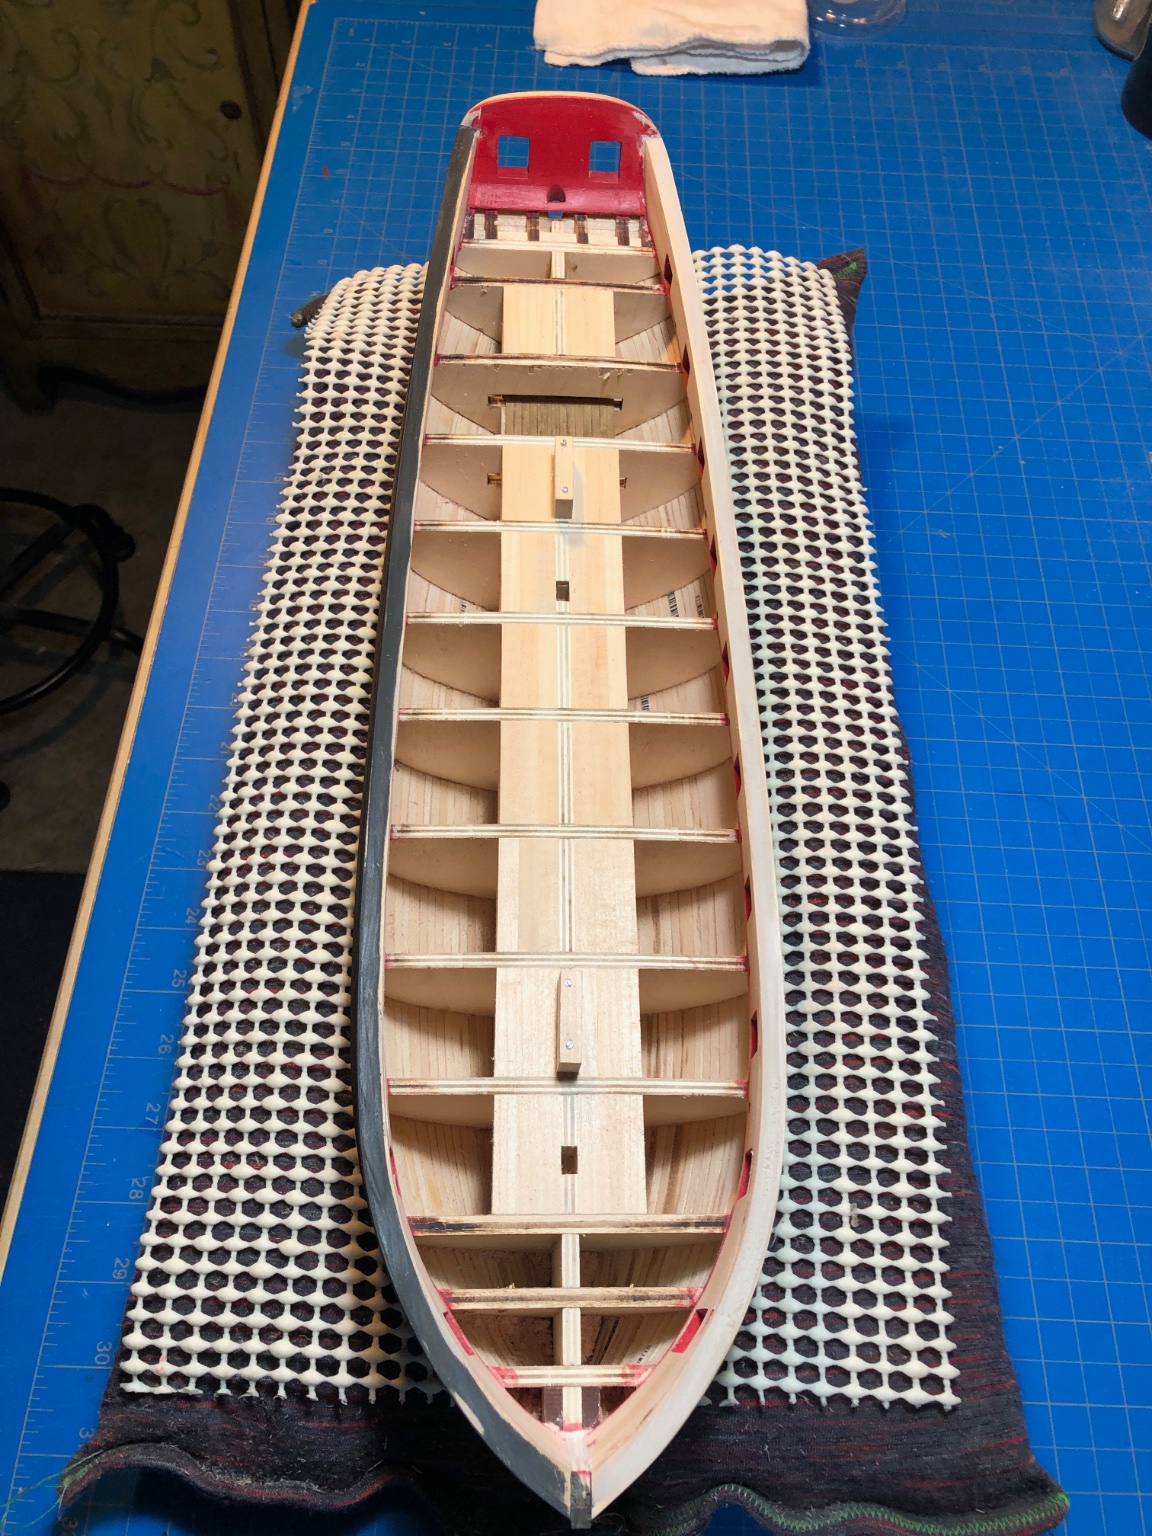
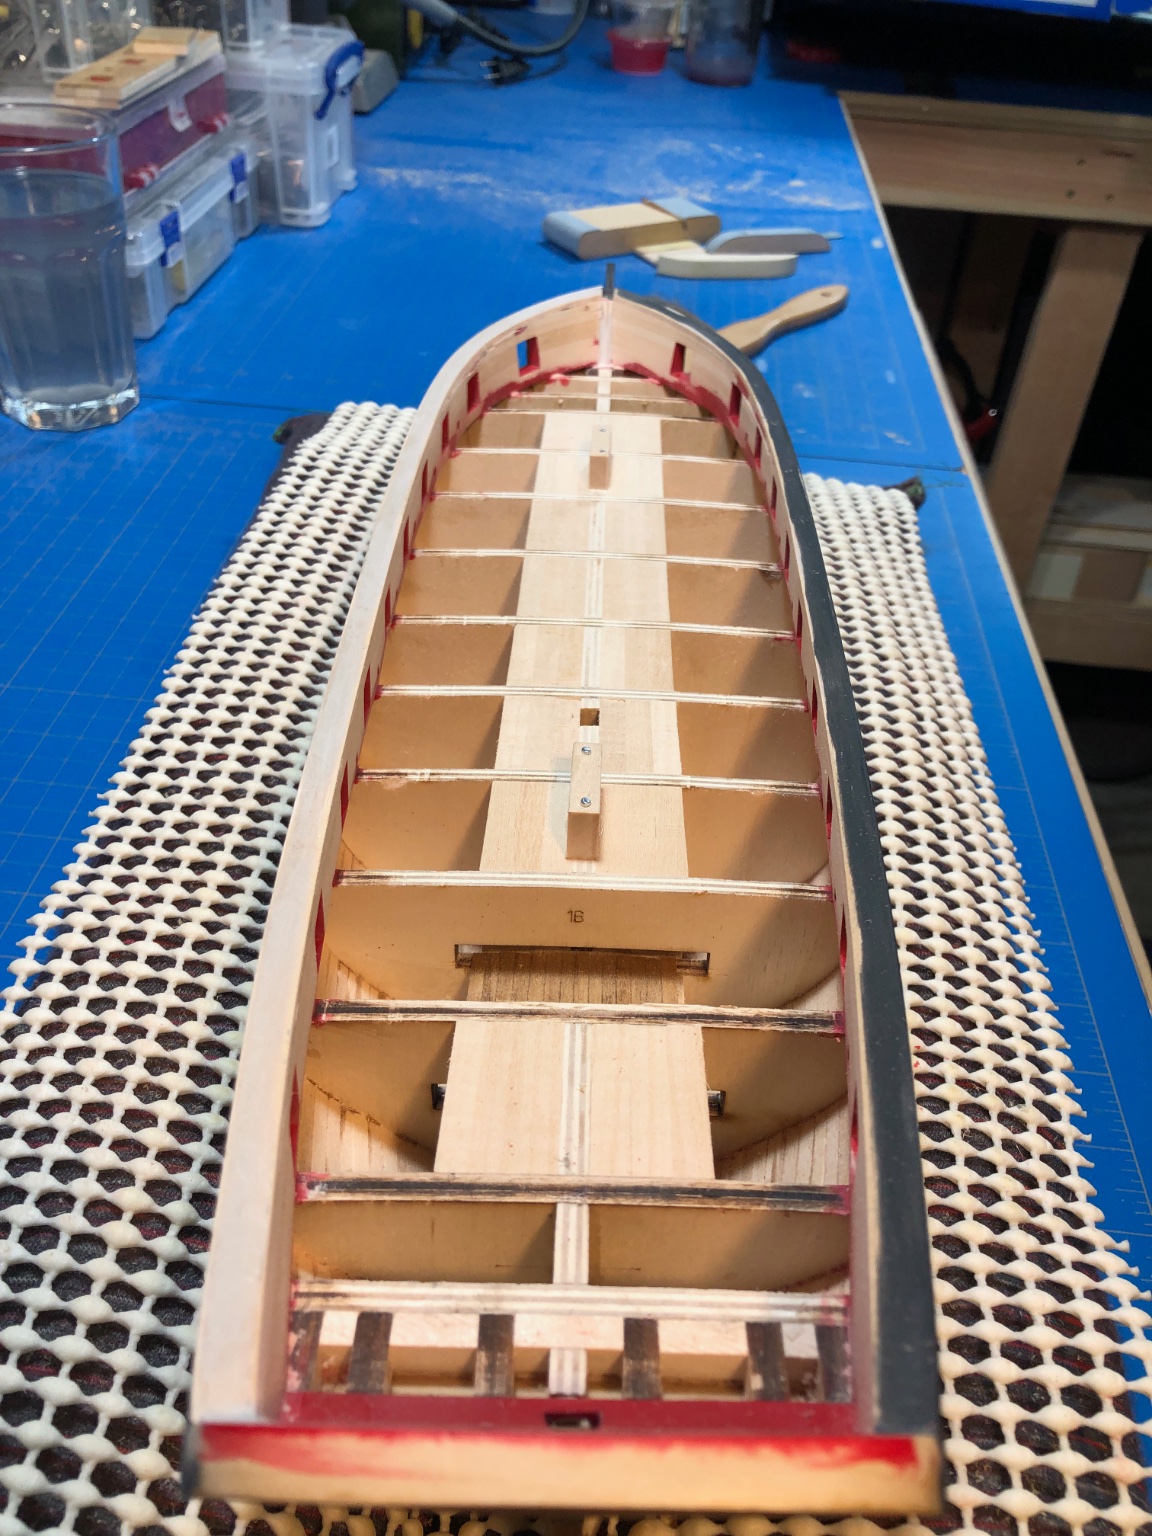
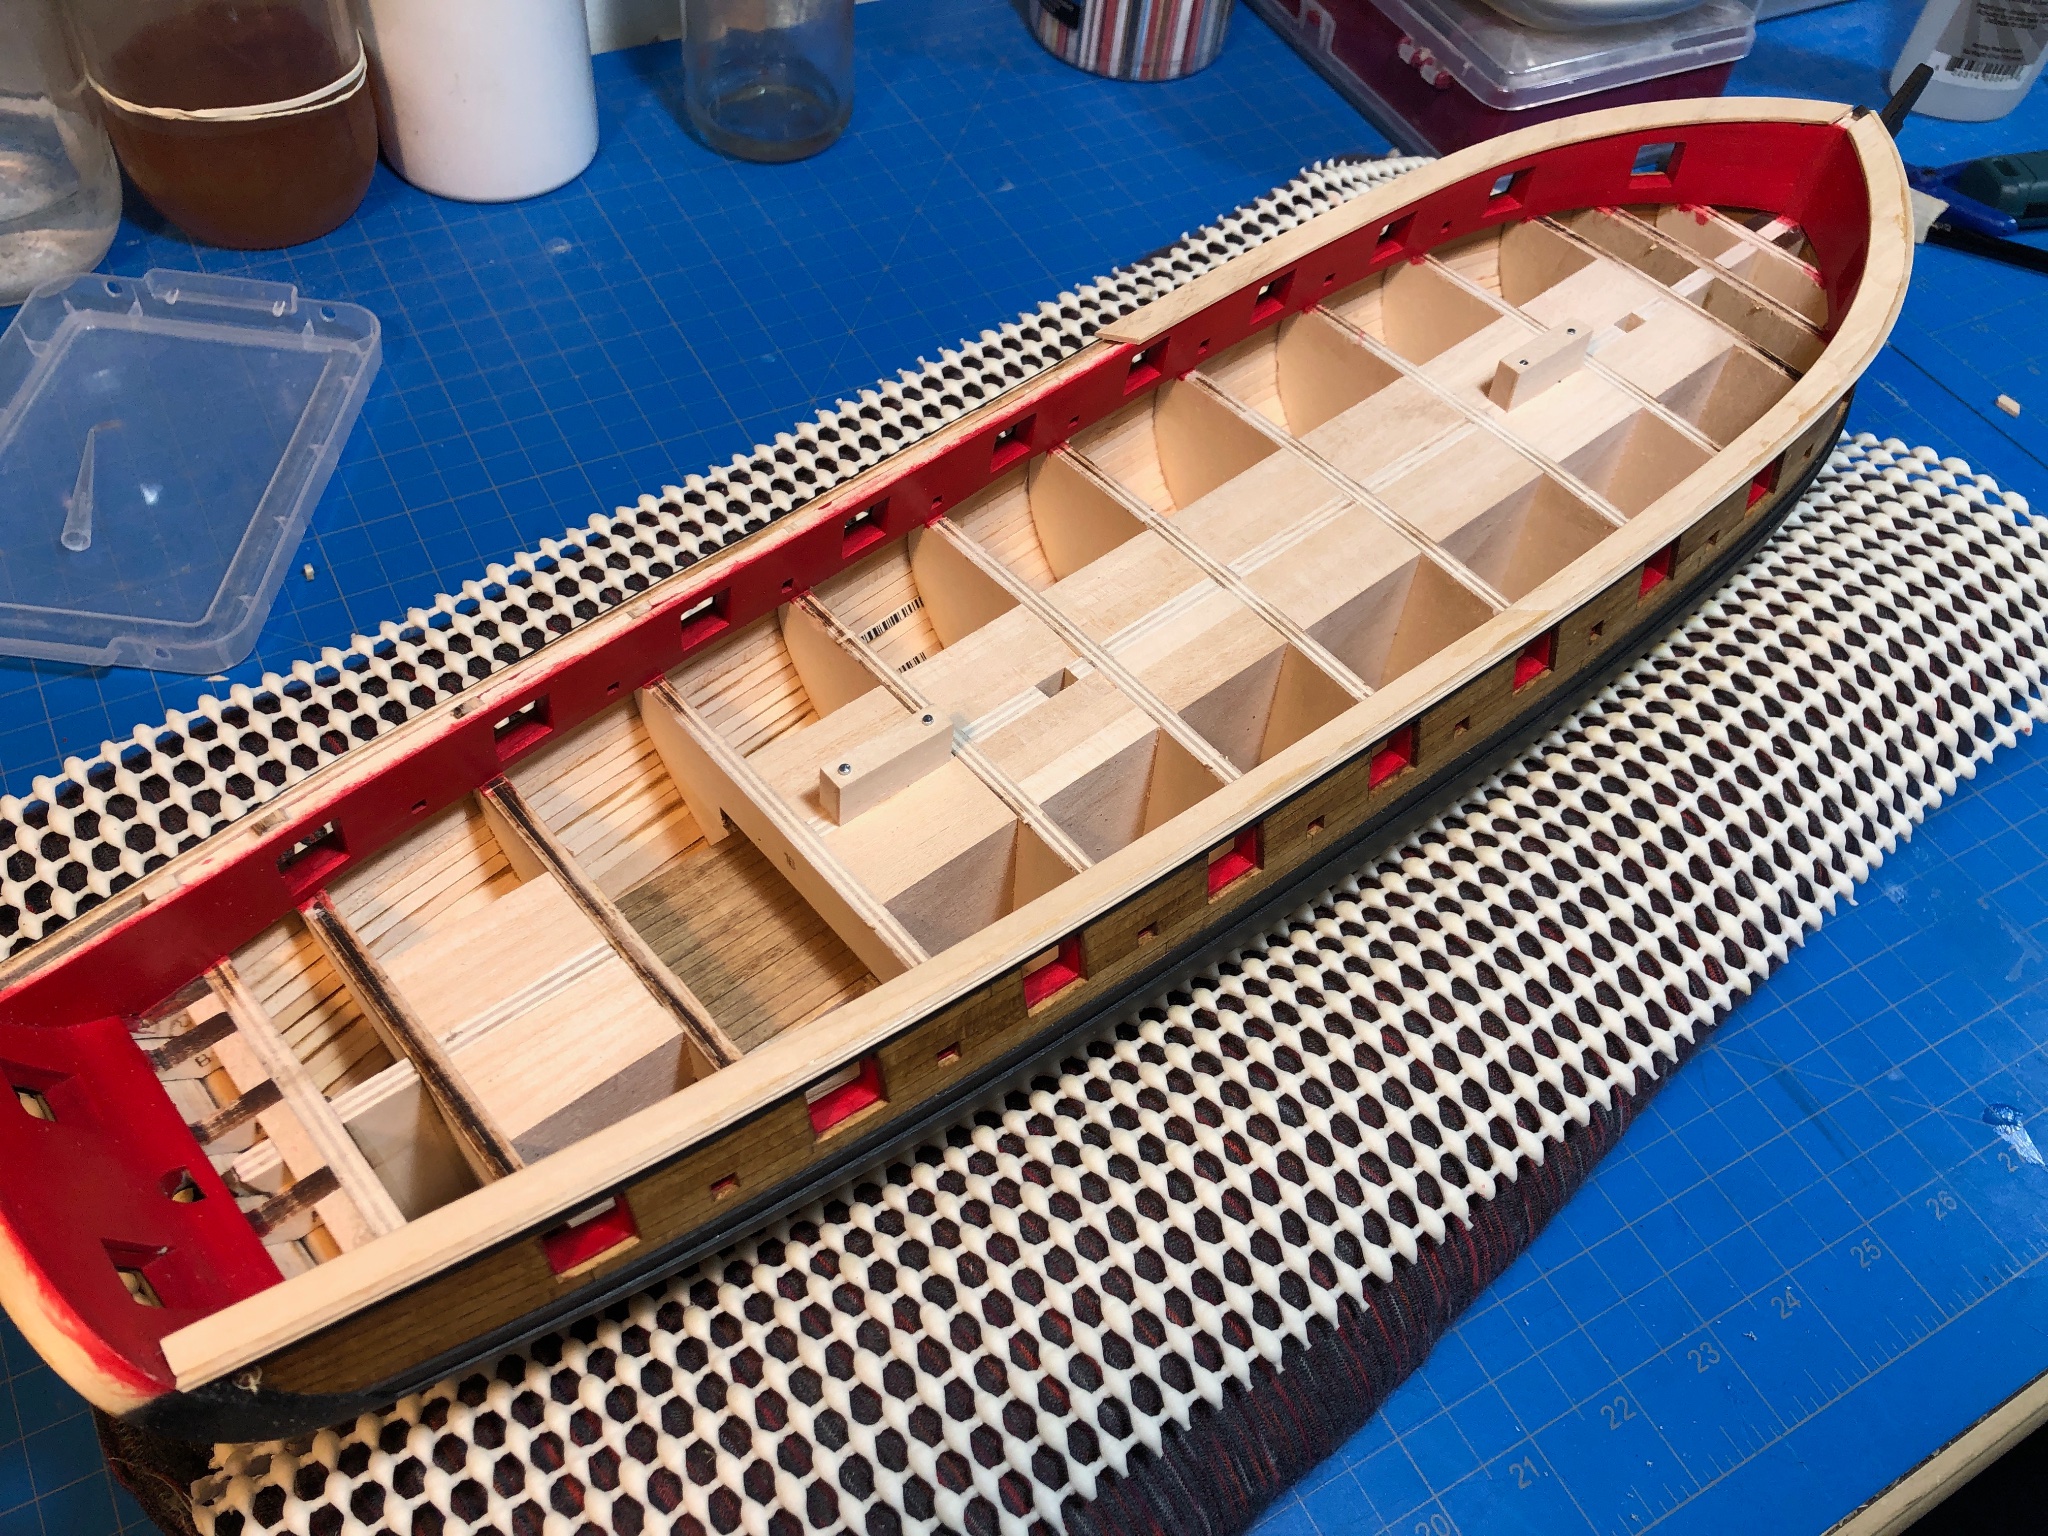
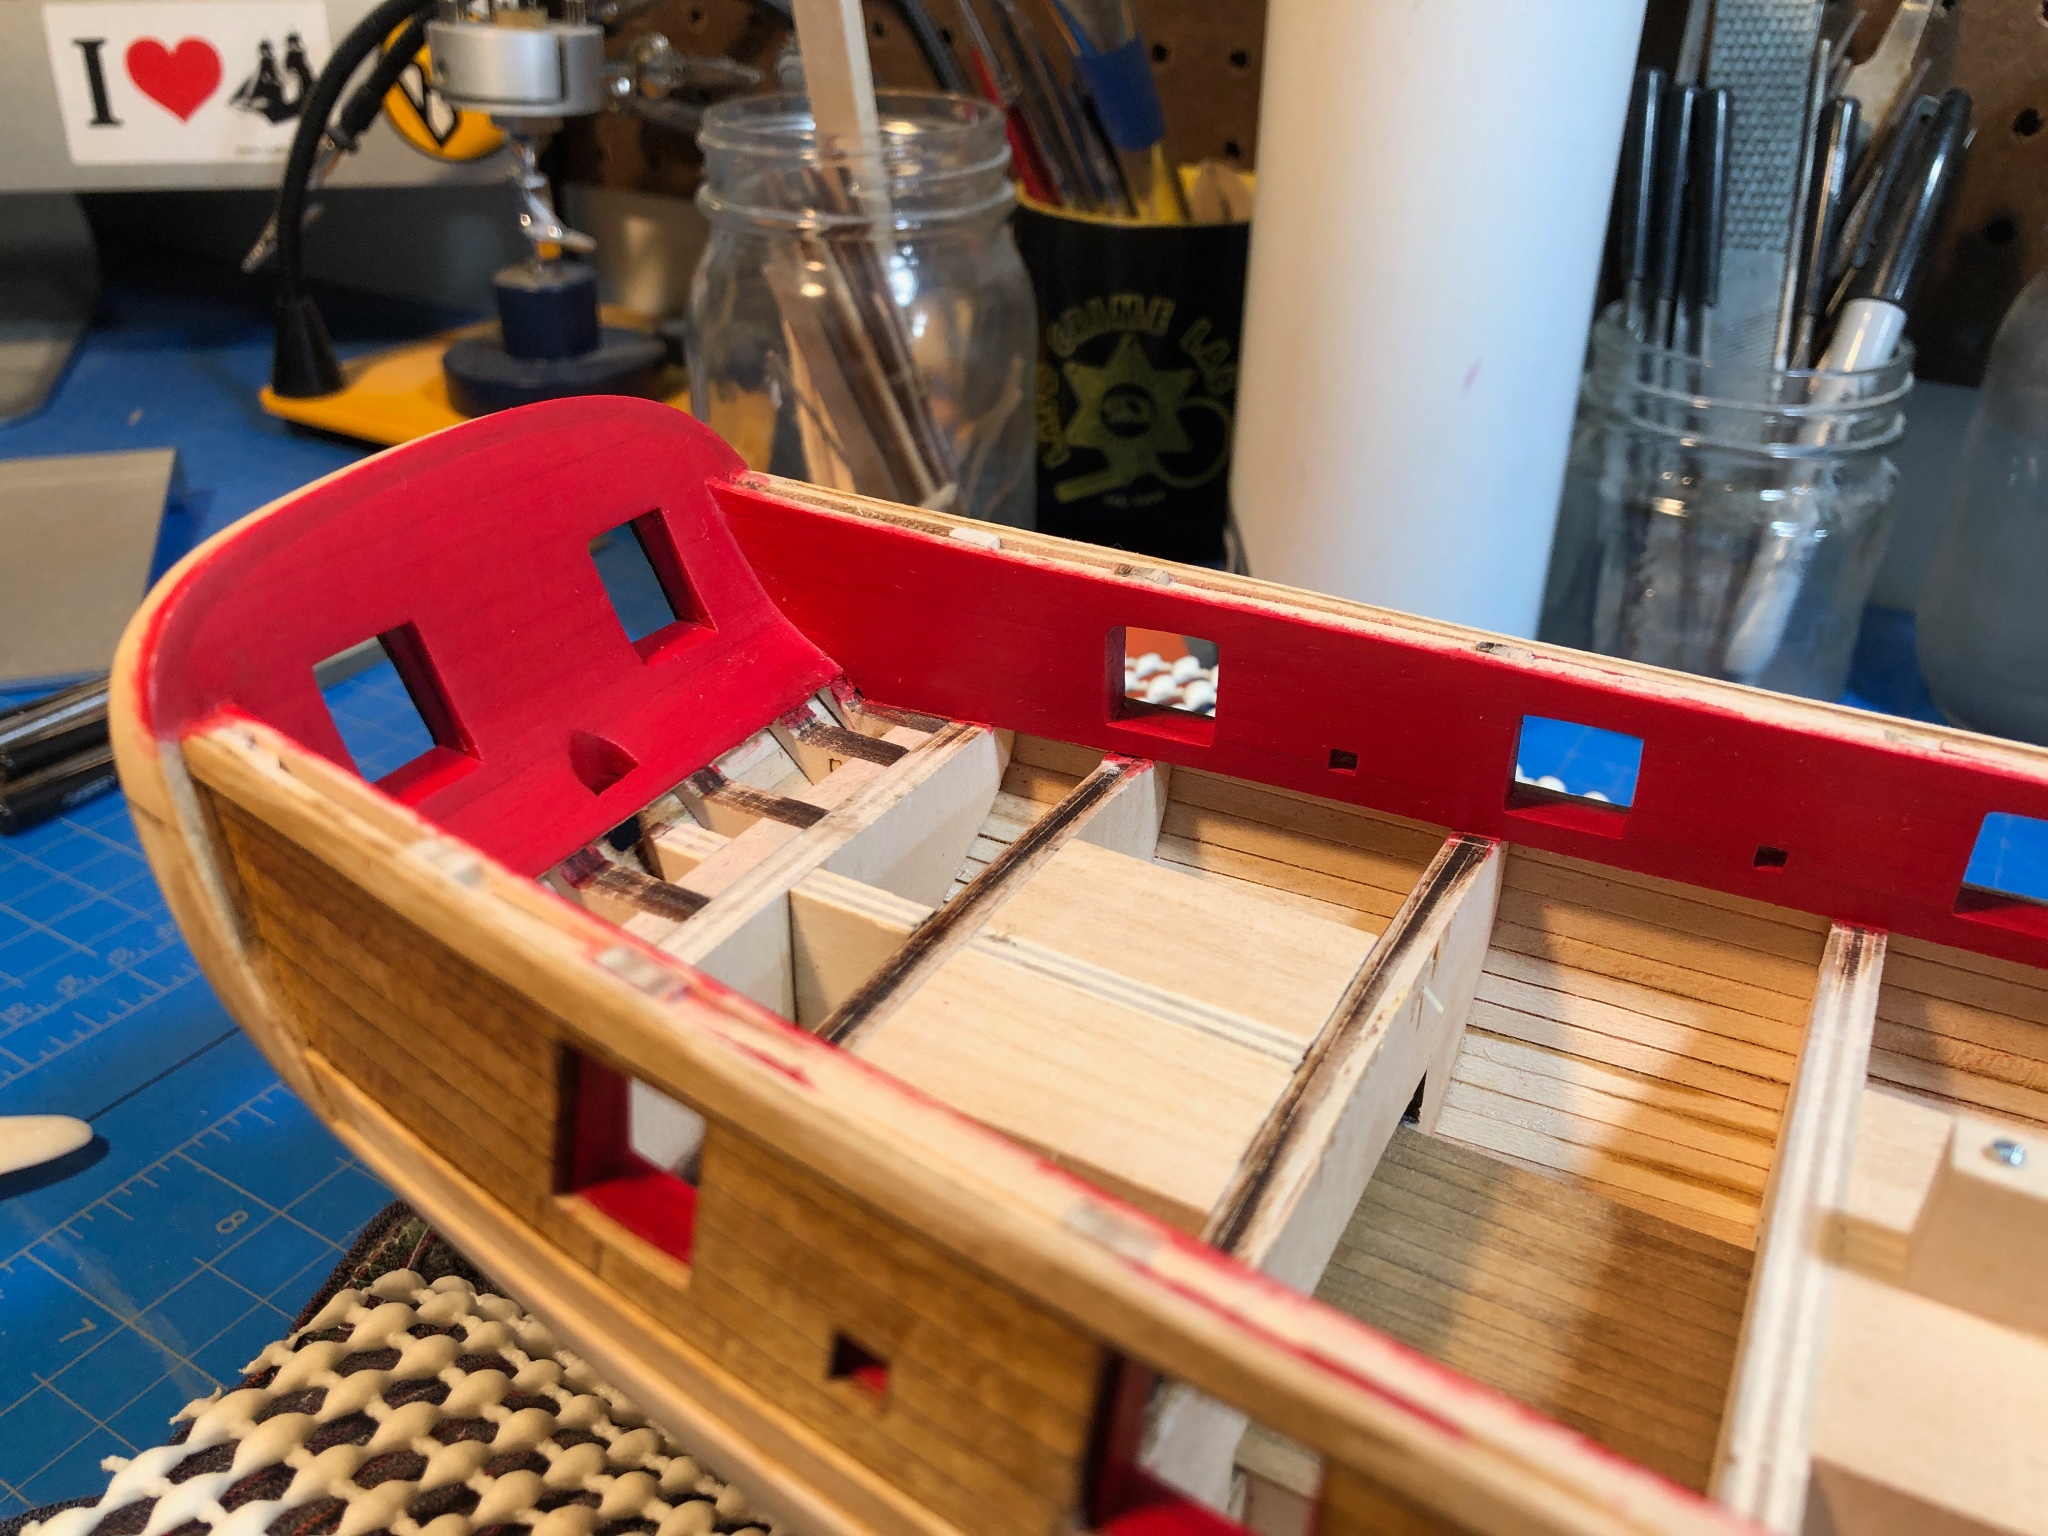
Ok, so sanding out the inner bulwarks was the way to go. I don't know quite what I was thinking with ripping everything out, though I was a bit saddened as the result till now was pretty good...


I spent a couple hours this afternoon working on it, and I think with a few more hours finishing everything again and cleaning up it will be ok. Very happy with that outcome, thanks again to @Chuck and @glbarlow for saving the day with their very practical fix.
For anyone in a similar predicament, here is how I tackled it:
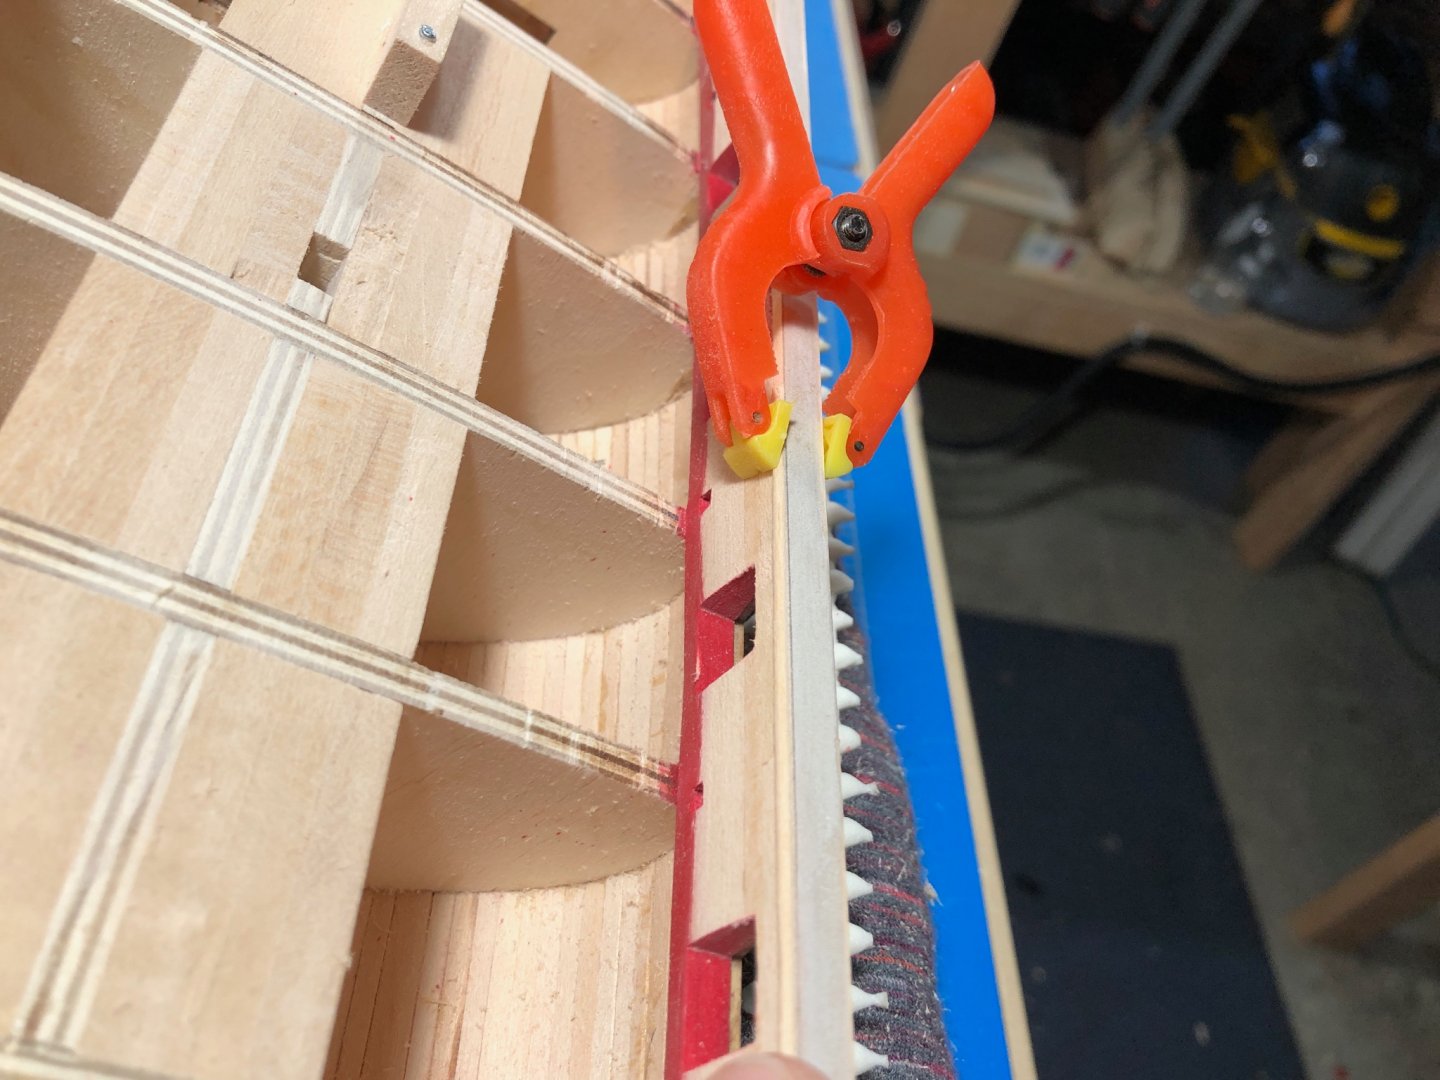
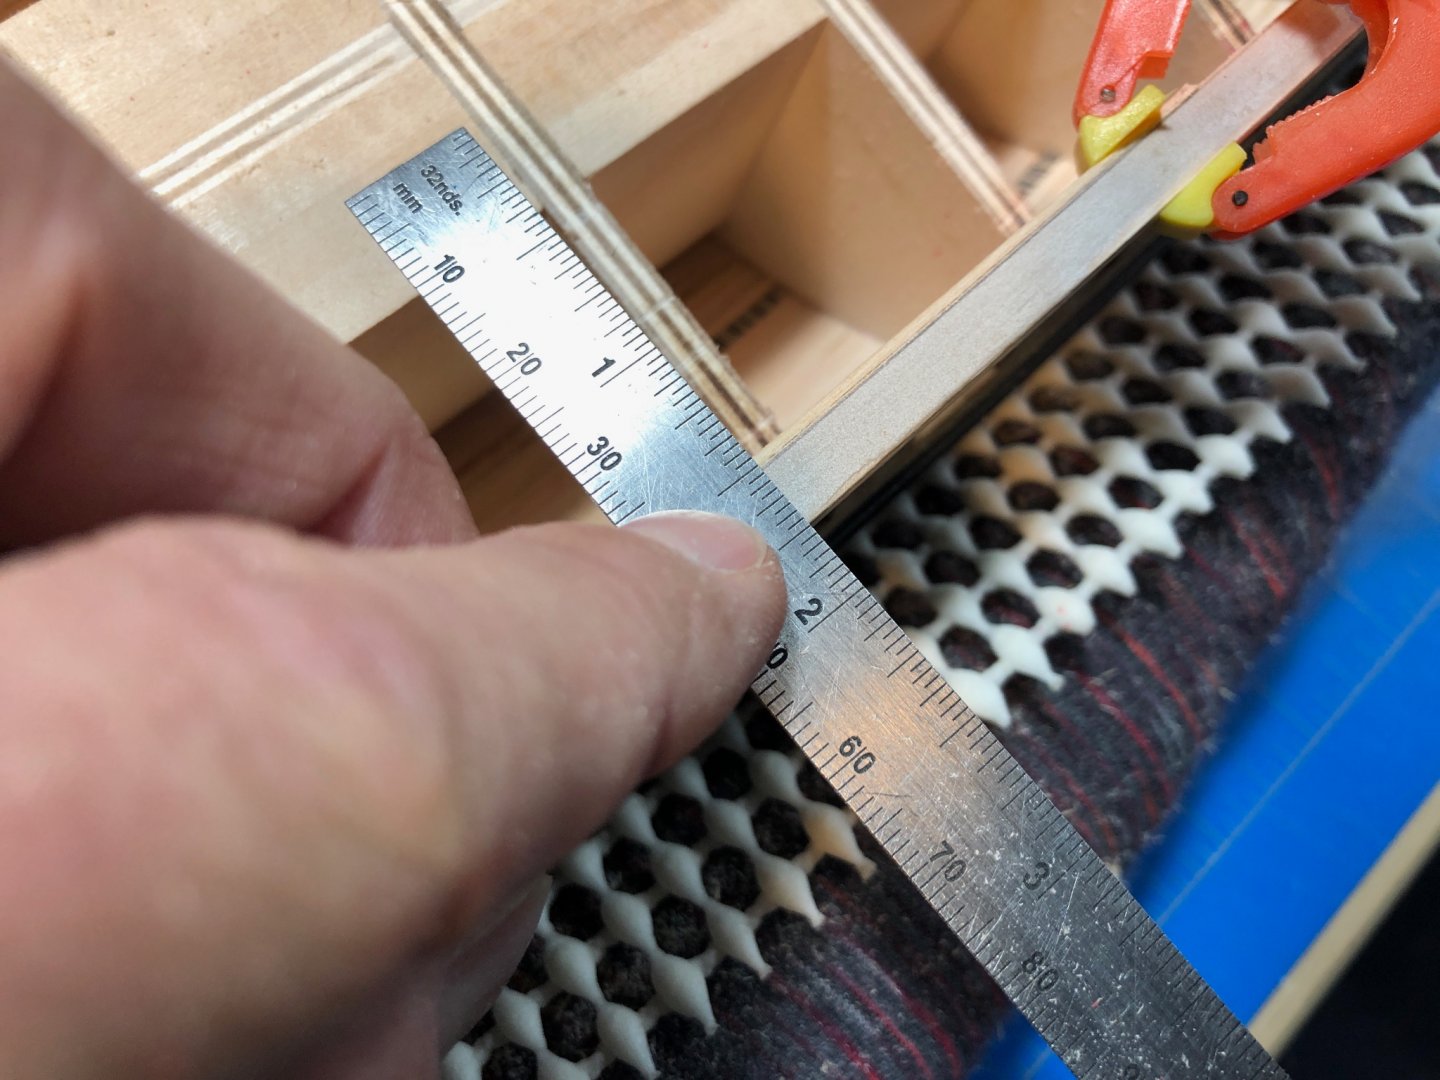
Set my compass to just under 1/4" and take a line off the outer edge of the molding and began sanding with a low grit paper mounted to a sleigh shaped block:


I was able to remove quite a bit of material very quickly this way while the shape of my block slide over the gunport with relative ease.
You can see the progress here:


Now Im playing with the idea of recovering my overhang with a very thin strip brought through a half-dome scraper. The width now is 1/32" over 1/4" and that includes the outer molding...
-
10 minutes ago, glbarlow said:
I carefully sanded my cap rail flush with the bulwarks after they were painted.
How did you account for the required overhang of the rail over the inner bulwarks? Your idea is intriguing but would leave me with interior bulwarks that run right up to the rail with no obvious segway between components...
EDIT: I see in your build log that your rail runs flush with the inner bulwarks, perhaps I can sand it back beyond and add a thin piece in the same way the outer molding is installed... Good idea. I like this better than I do ripping it apart!
- Matt D, WalrusGuy and Ryland Craze
-
3
-
I use a small finger plane to take it down in an octagon shape and then sand... works a treat and is quite fast.
- Ryland Craze, Bob Cleek, mtaylor and 2 others
-
5
-
I think good advice overall. While Im tempted to leave it, the amount of work invested already has made me want to make it as good as I can and Im not generally one to settle on a big detail like this. I did go back and review a lot of builds to gauge the effect and I think @Chuck and @glbarlow are right about the end result. I also can see how much of difference in overall scale look it can have when looking at the result @Gahm achieved in his build. Its a big hiccup, but one that will hopefully cement the lesson learned... also a lot of redo work... Ugh, Now Ive got to think about how to do this... What Im thinking is Ill rip out all the interior planking rather than just sand it back, and sand the framing more back from the inside. I should be able to do this with minimal damage to existing built up components - keyword here: "should."
Thanks all for chiming in... wish me luck.
- Ryland Craze, BobG, Matt D and 1 other
-
4
-
Ugh... having a bit of a crisis of commitment.
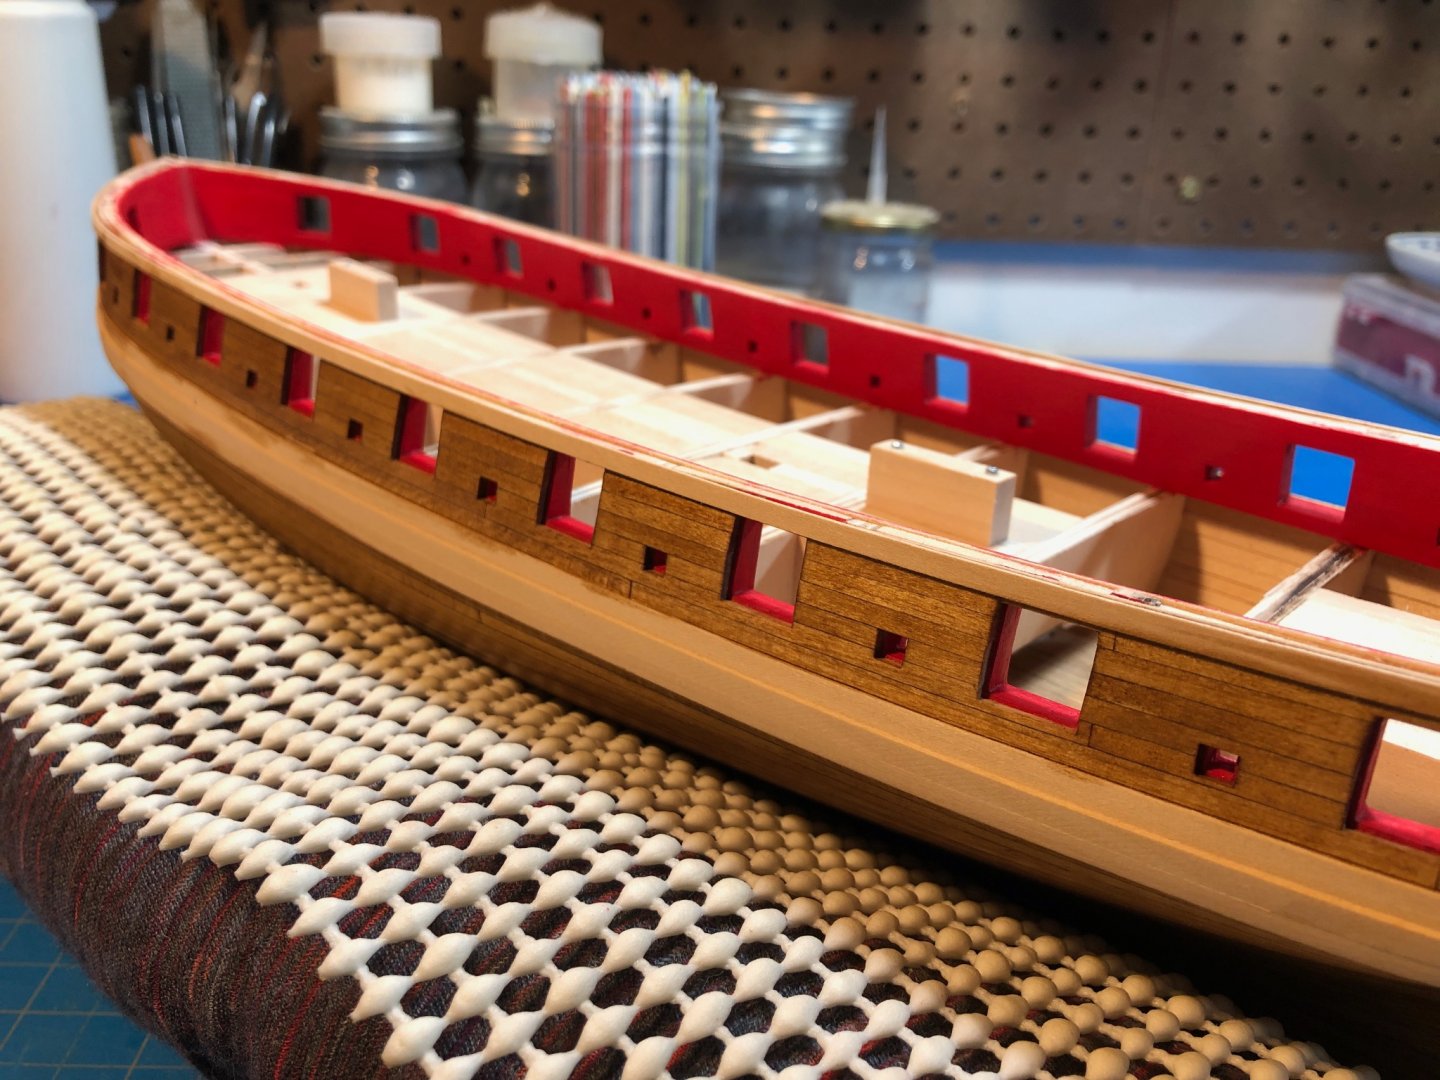
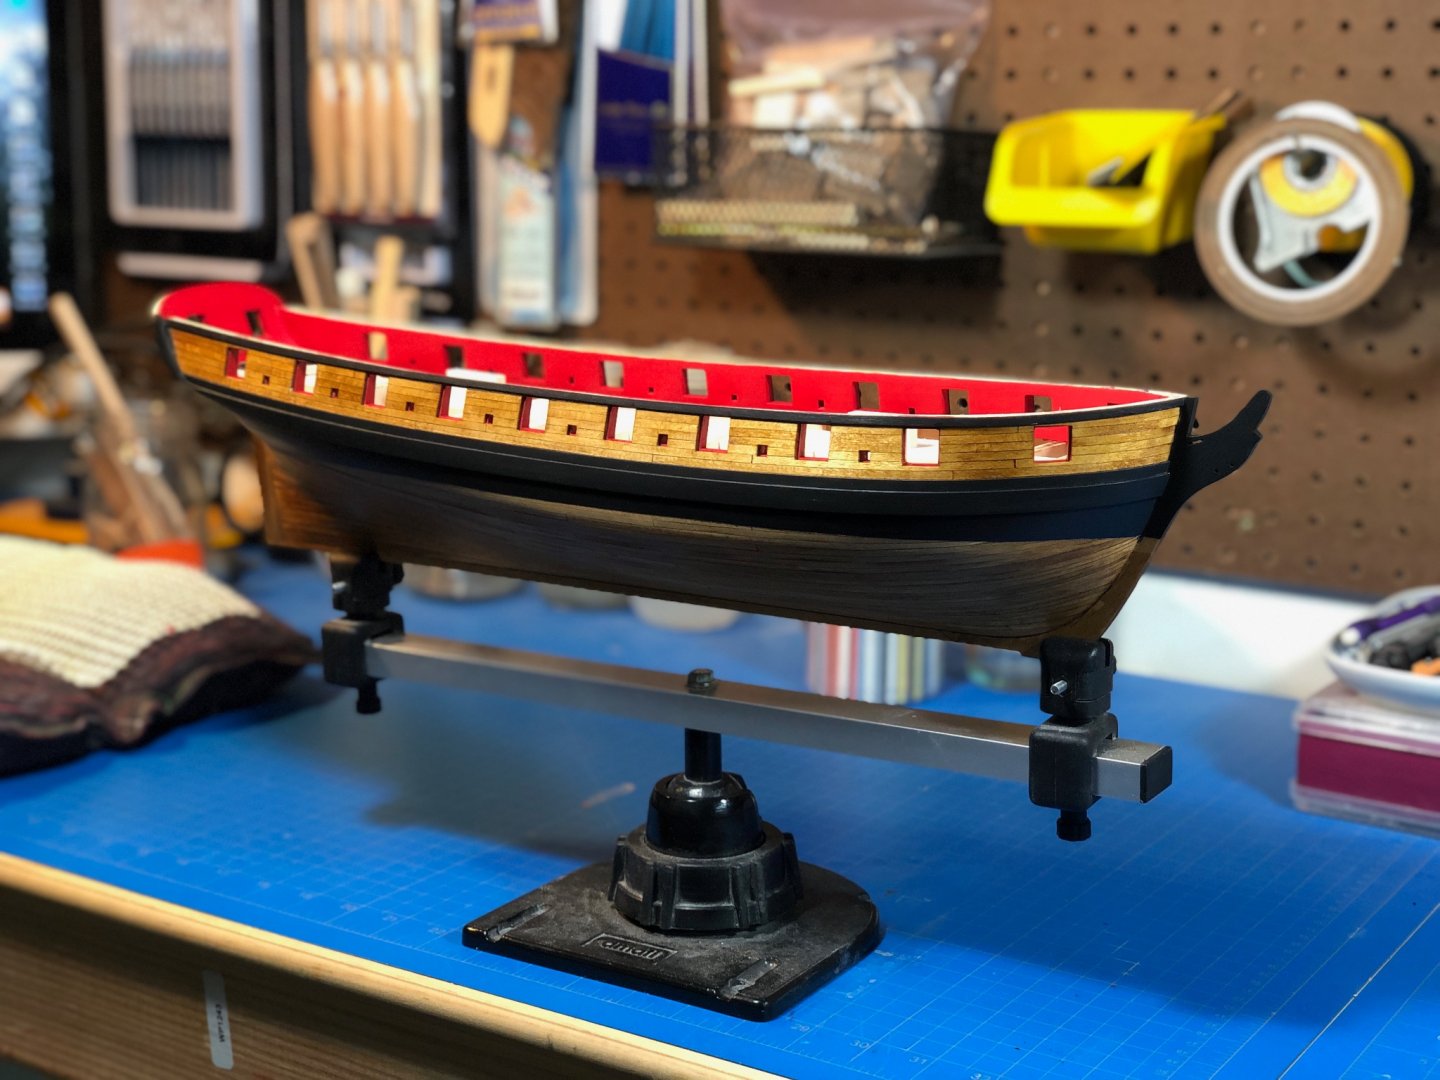
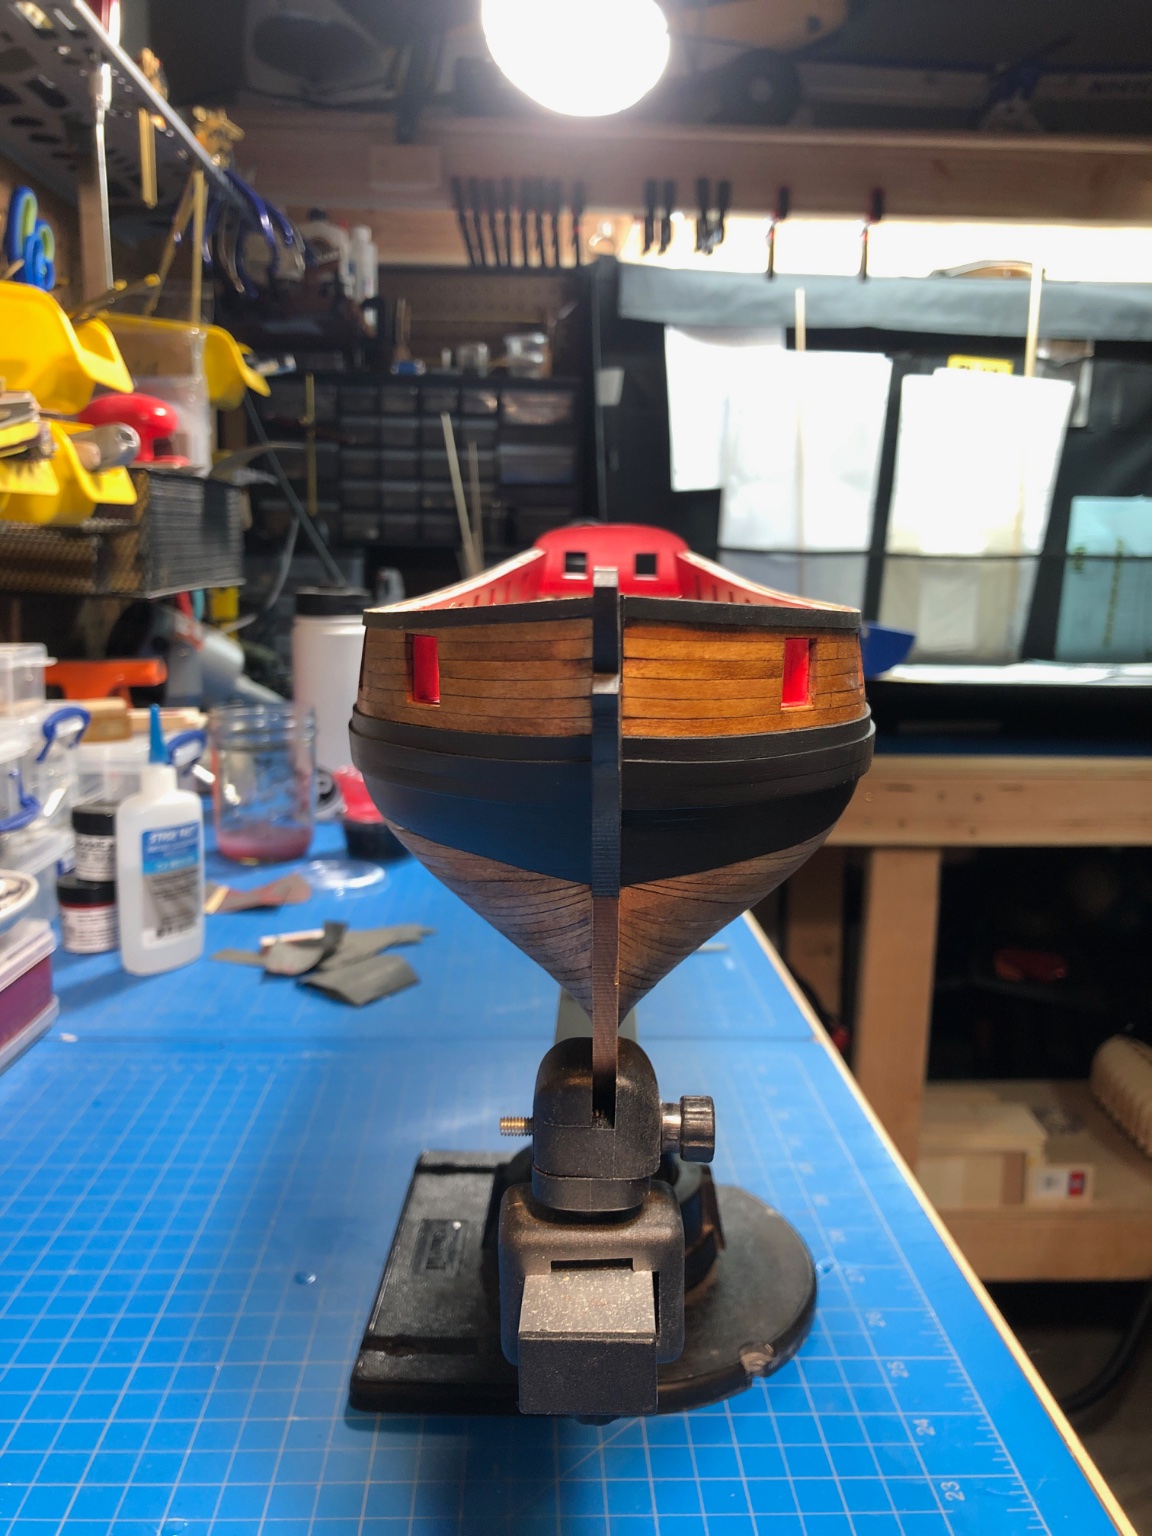
I started building out the cap rails and am realizing I have overlooked the importance paying particular attention to the overall thickness of my bulwarks. In order to achieve the desire slight overhand inboard and out, as well as fit a decorative molding Ive come out with a rail that is, to my eye, entirely too wide. The instructions call for a finished cap rail that is no more than a 1/4" wide, which is exactly the width of my bulwarks at their narrowest.... Following the instructions, and accounting for as little additional width possible has left me with a cap rail that is just shy of 3/8"... and while the finished product came out well Im now agonizing... Do I step back far enough to fix this or plunge on hoping this one (really out of scale detail) doesn't ruin the look of the whole...
Thoughts? See a unpainted but complete starboard rail.

-
Just found your build! Apologies for the late welcome to what seems to have become the 2020 (and beyond) COVID Syren build group. Love your ships boat and plank shaping jig you put together, looks like you made it to fit the complex curvature of the bow... Ill shall remember that move.
-
5 hours ago, Overworked724 said:
But it’s going to be glaring at me every time I look at it!
Perhaps now you now which side of the ship will be displayed? Great recovery though. Now dont mind me as I fret over this in addition to every other upcoming step
")
-
-
On 11/23/2020 at 5:39 AM, Overworked724 said:
My intention was to prep and paint the cap rails off the ship
I too, am thinking this is how I might approach it. Ive just had success fine tuning the odd fitment of previous builds by over building the cap rail and installing it, and then sanding back to an even consistency of reveal and shape. Im trying to wrap my head around that now with so much work having gone into the finish of the interior and exterior bulkheads that Im afraid of having to do ANY sanding in the vicinity of that paint job! Now having just seen your scuppers I'm starting to worry about having drilling once again on top of it all - ugh!
-
On 11/23/2020 at 4:28 AM, Gahm said:
Beautiful paint job, Justin!
Thanks Thomas... though I have to admit, I cant no longer look to your build log for inspiration without spending the rest of the evening wondering why I am even trying! Your work is splendid. I appreciate the time you took to respond to my query ahead of my painting step.
-
If only I knew the first thing about developing a ship model plan... I have some ideas -> USS Vincennes (1826), HMS Discovery (1789), HMS Chatham (1788). I wouldn't even know where to start!
- mtaylor, ferretmary1 and BobG
-
3
-
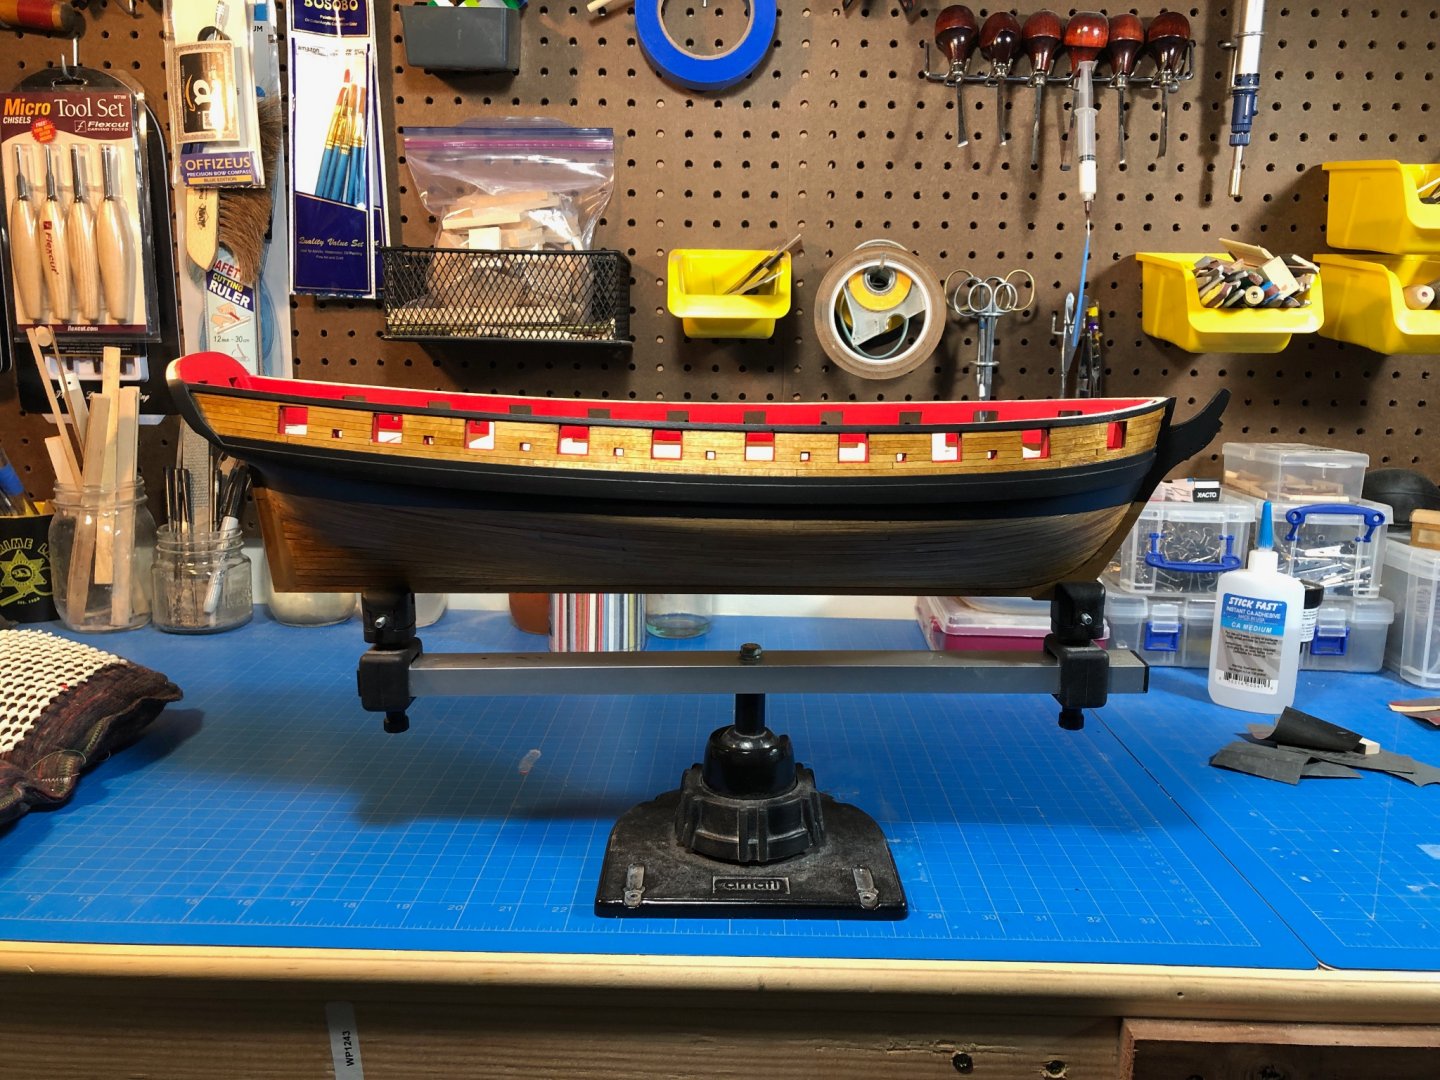
PAINT. Nope, not my favorite task at all.
I started with the interior bulkheads using Model Shipways "Red Trim." Its quite red, but I think after one gets over the shock of the color it actually grows on you a bit. I also think the effect will die down after other details are integrated. I think it took about 5 coats, following advice from @Gahm and others. I have till now used the the diluted layering technique but hadn't not lightly sanding between coats which I must say did make a difference in the final result. I also did a very fine sanding with a 3000 grit to soften the little gloss I had.
I then masked and had a go with Model Shipways "Spar Black" for the exterior. I think if I had to do it again I probably would have gone ahead and got the cap rails fully completed prior to this stage, but it is what it is. I definitely did not quite think out ahead enough steps here, so will caution anyone reading this and contemplating their own build - success seems to be about being 10 steps ahead of yourself! Ill just have to be extra careful now when the time comes.
I still have some cleaning up to do and need to complete the transom cap but ran out of weekend. There are a few tiny things that still need to wrapped up in the transom just as soon as I come up with a solution. In the absence of Thanksgiving (thanks COVID), this year we are repainting the kitchen and den so I might not get much time in the shop over the next week. As whenever "we" are doing a house project, its general ME doing much of the work, ha. Over the last 5 years the kids have absolutely thrashed a few drywall corners so Im started in on replacing the metal corner bead and replastering first thing in the morning, then trim and so on... ho hum.
I hope you all have a good holiday no matter how you are spending it!


- ccoyle, JpR62, Overworked724 and 8 others
-
11
-
-
When I do treenails, IF I do treenails its almost always with a pinvise... slower but more accurate I find. Those power tools always backfire on me in one way or another, but good luck! Very curious about your core job there... what are the bits you are using, did I miss that in your log somewhere?
-
I agree the jig is a great idea... gonna steal that one too! Yes I think we are more or less around about the same stage. I started painting my interior bulkheads this week and have been taking it very slow. Im glad tp be setting aside the heavy sanding papers for a bit thats for sure! Im looking forward to what you do with your decking, I havent given that as much thought as you and the others have and up until this point was planning to go ahead with the basswood, now youve got me thinking...
-
12 hours ago, glbarlow said:
I use Admiralty Paints
Thanks Glenn, Ill have to look into these and give them a try. To be honest, painting is not my favorite thing to do to a wood model... I think I may choose my next project based almost entirely on the how much paint is involved!
- Overworked724 and glbarlow
-
2
-
18 minutes ago, Overworked724 said:
My plan is to lay down a false deck and use thinner wood (1/32” or 3/64”) for my planking/margin. My hope is the false deck will give me greater stability and purchase while laying down the deck as well as nibbing and joggling at the bow.
This is a great idea. Hopefully you won't mind if I follow suit.
-
-
Very cool to see another one of these here! This is a great little kit and produces a wonderful little model. The materials are pretty good too.
-
Making quick progress. Think long and hard about those treenails... in my opinion they are a delicate detail that can make or break a finish - and ones patience!
- WalrusGuy and Overworked724
-
2
-
-
3 hours ago, Overworked724 said:
Yes I did. If it has a ‘curl’ or upward swish at the bow, you will get crowded quickly and the planking becomes quite difficult.
Exactly what happened to me.


Ken Follett, A Column of Fire
in Book, Monograph and Magazine reviews and Downloads. Questions and Discussions for Books and Pubs
Posted
This is the most articulate and concise breakdown I’ve read. I didn’t mean to come off contrarian and agree, I just think that unfortunately the most vocal critics tend to be his most ardent fans. For the uninitiated, I would still advocate reading them, starting from E&M on through...