HOLIDAY DONATION DRIVE - SUPPORT MSW - DO YOUR PART TO KEEP THIS GREAT FORUM GOING! (Only 13 donations so far - C'mon guys!)
×


Justin P.
-
Posts
1,008 -
Joined
Content Type
Profiles
Forums
Gallery
Events
Everything posted by Justin P.
-

To add sails or not? What is your preference?
Justin P. replied to Bill97's topic in Masting, rigging and sails
They only seem to look right when done really, really well. That is to say, all the details and in appropriate scale. Ive seen so many great models that would look far superior is someone would free them from all the old laundry. -
Great job on the decking. I bet the nibbing was a real nail biter, I could relate!
- 950 replies
-
- 1
-

-
- syren
- model shipways
- (and 1 more)
-
It does seem like the black sheep! Frankly I think it comes down to what you are trying to do, and how confident you are in your final decisions. There have been plenty of instances where I regretted its use as I moved to undo something. However keeping some debonder around has helped a lot in this regard. I tend to agree that CA needs to be used minimally if at all with rigging, but for everything else I think its mostly fine.
-
Thanks Bob, again I think undeserved but Ill take it The clamping device is a "work holder" I picked up from Ages of Sail some time ago. Ive been using it more and more for the small stuff as it has some heft to it and thus give the work a bit more presence. Its also really great for painting small bits. Foredom is what I would call a more serious rotary tool than the Dremel. All the Dremel bits work with it, but as a tool the Foredom is much more purpose built. My own Foredom is over 25 years old. They are foot controlled so more speed precision and are much better designed and thus less hard on the hands. Well worth the upgrade if you are using your rotary a lot. I keep both a Dremel around and the Foredom. 99% of the time I use the Foredom. Its easier and faster to switch out bits and more flexible. I also think the Dremel is too fast for most things. https://www.foredom.net Mostly CA to be honest, but when necessary Ill use a PVA.
- 66 replies
-
- 1
-
-
- Finished
- Model Shipways
- (and 1 more)
-
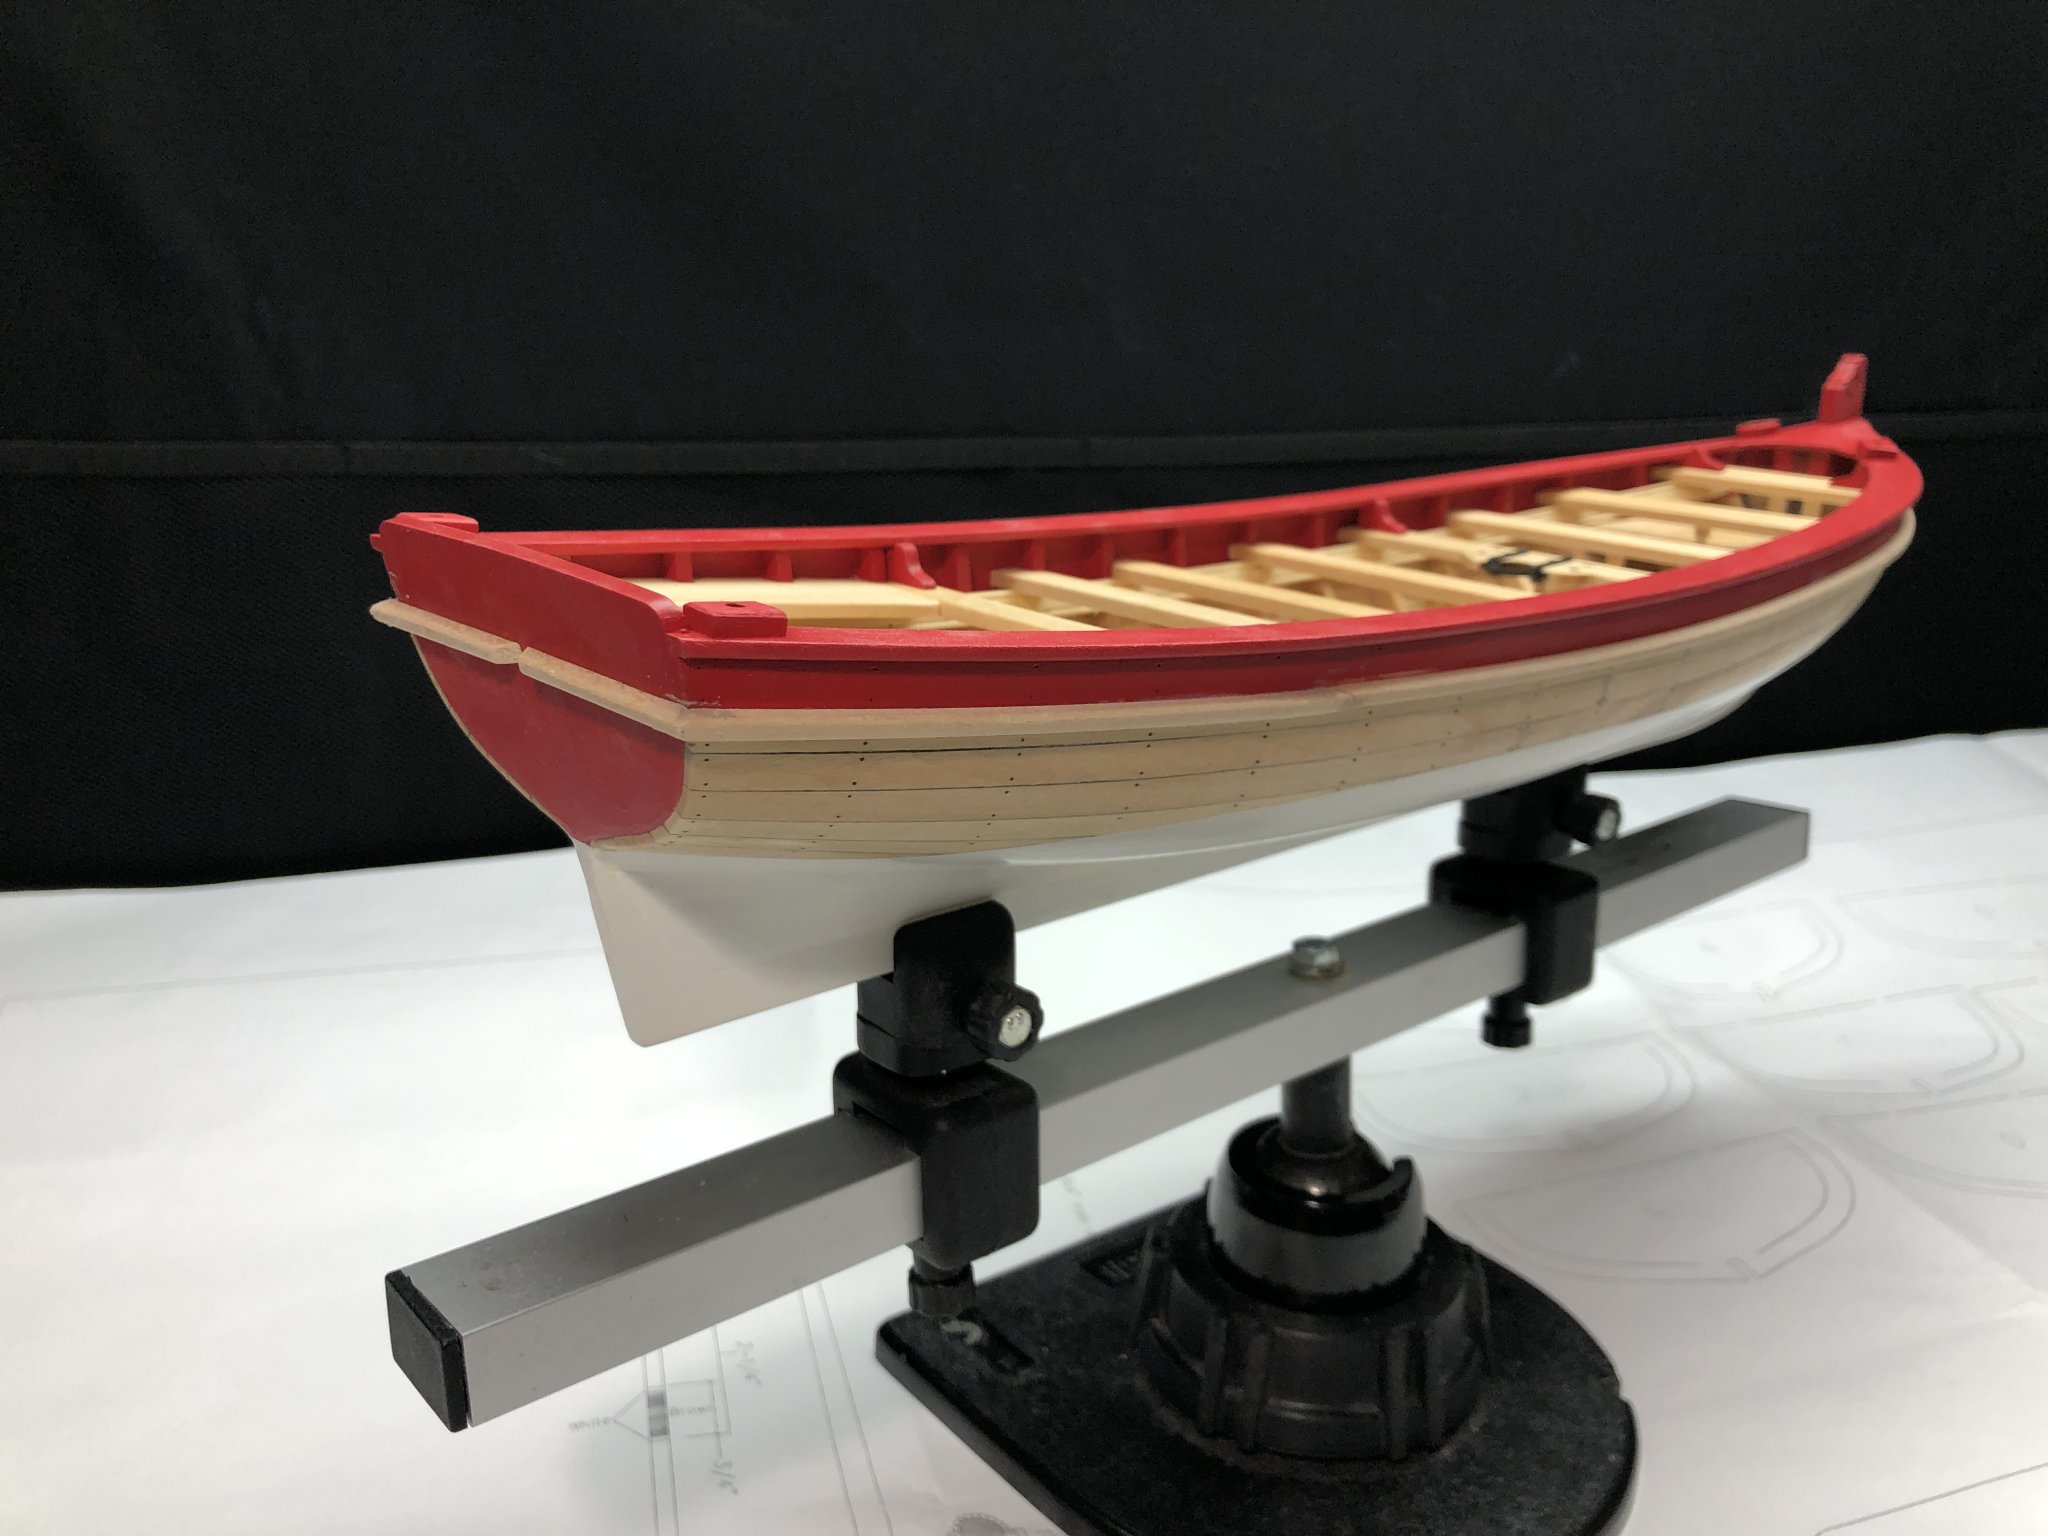
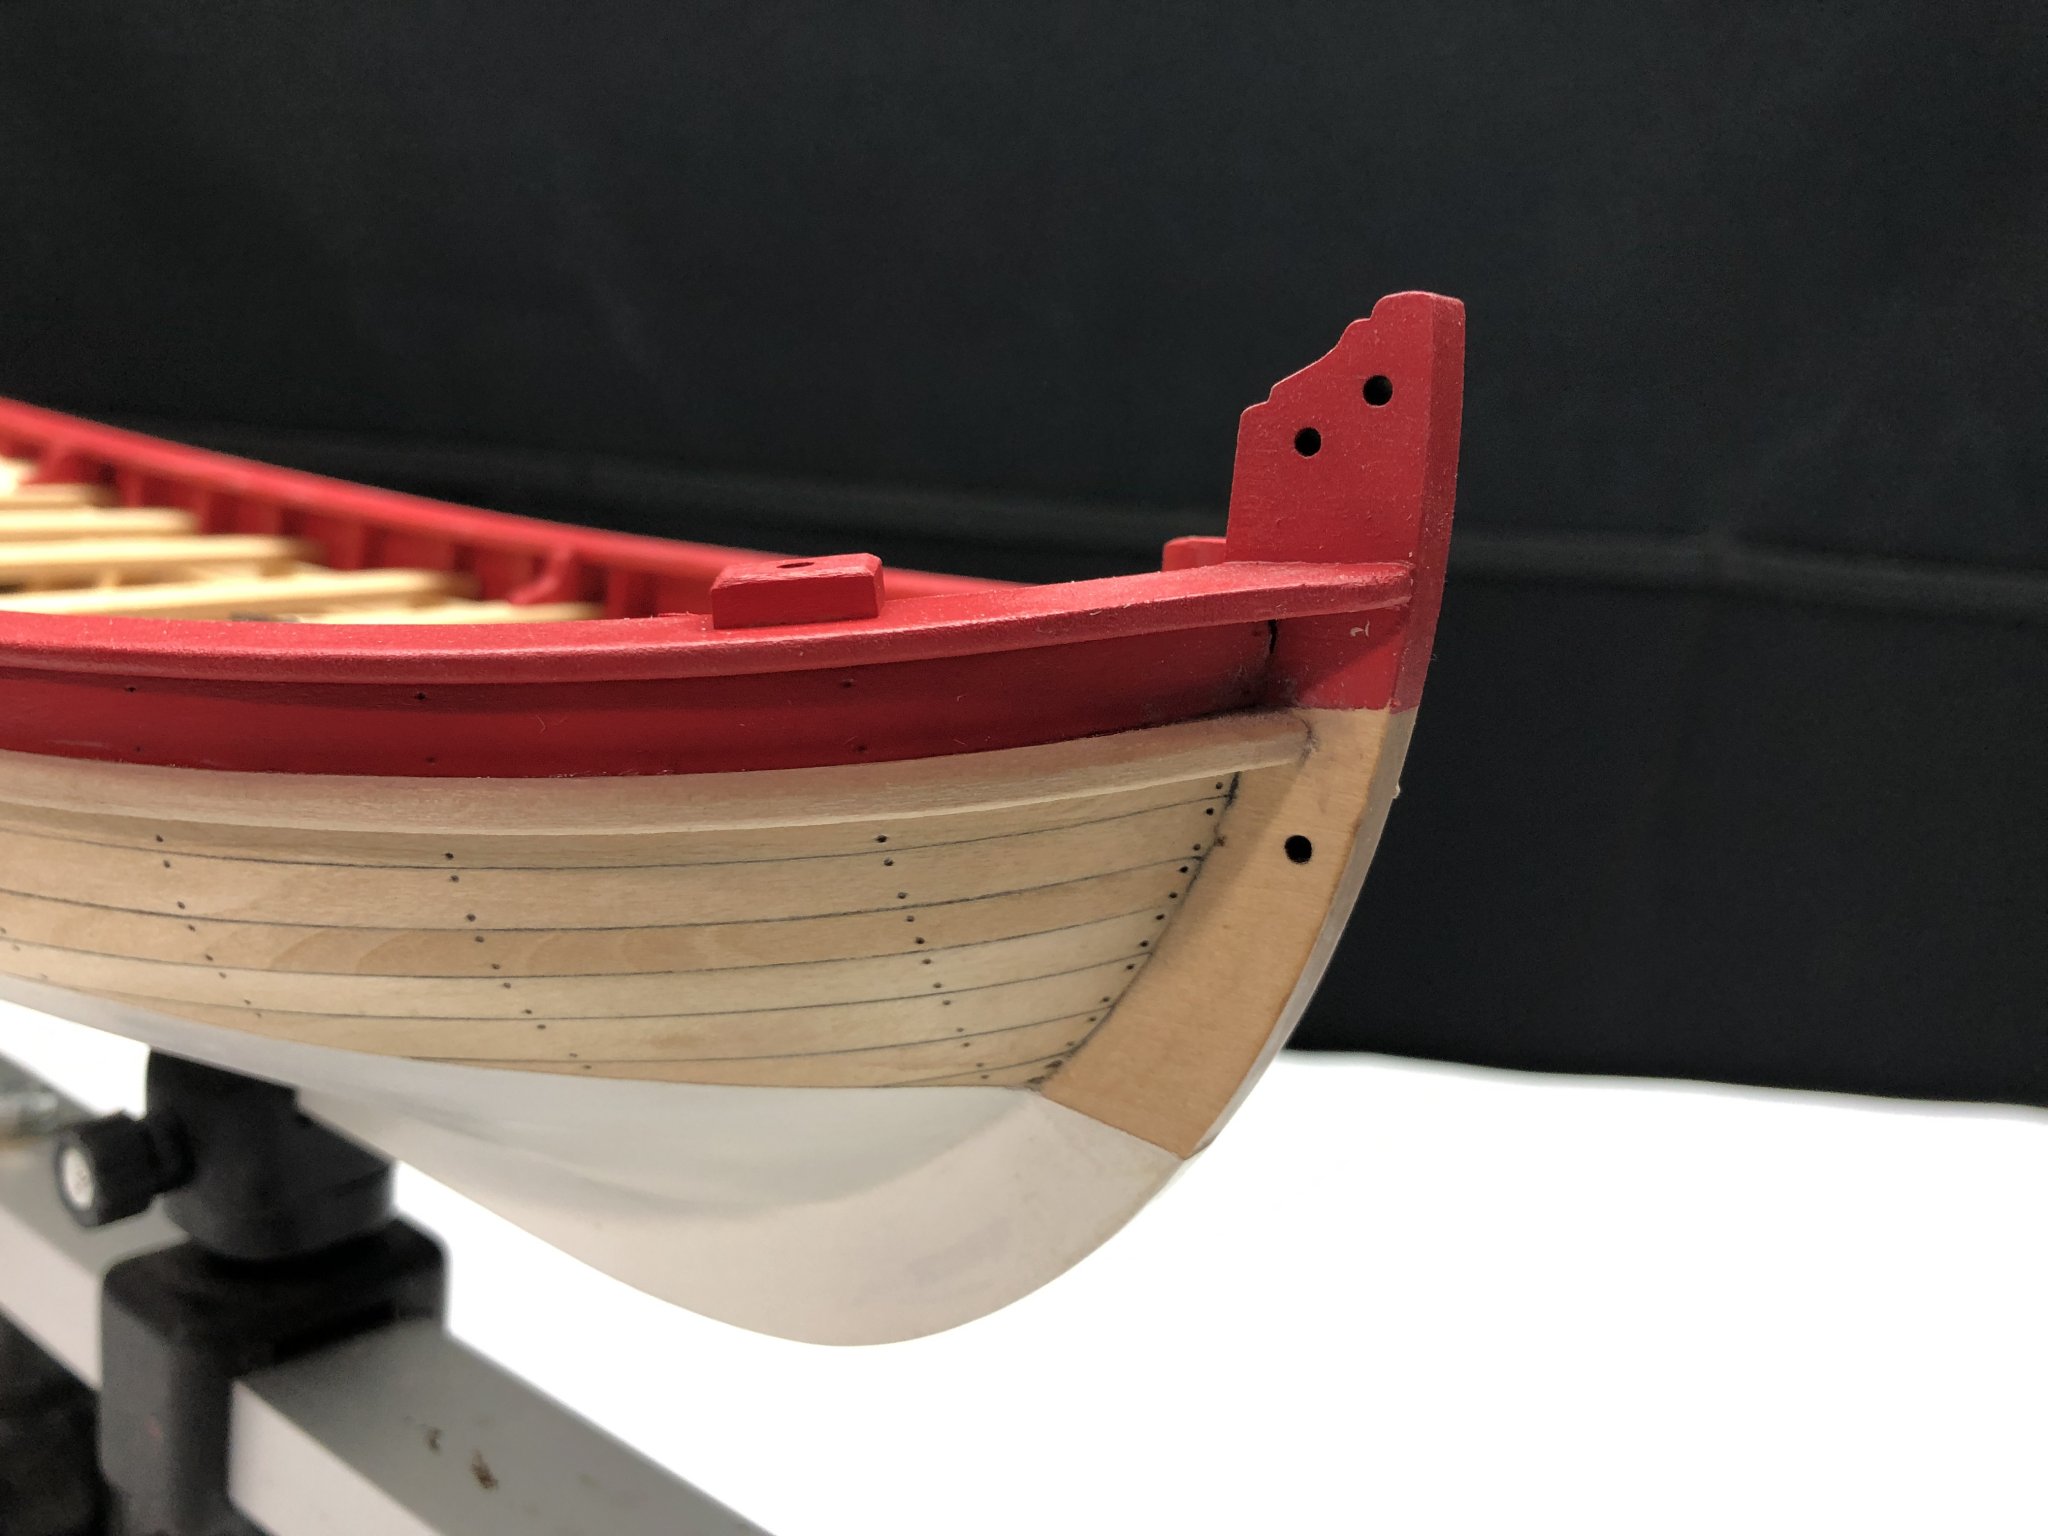
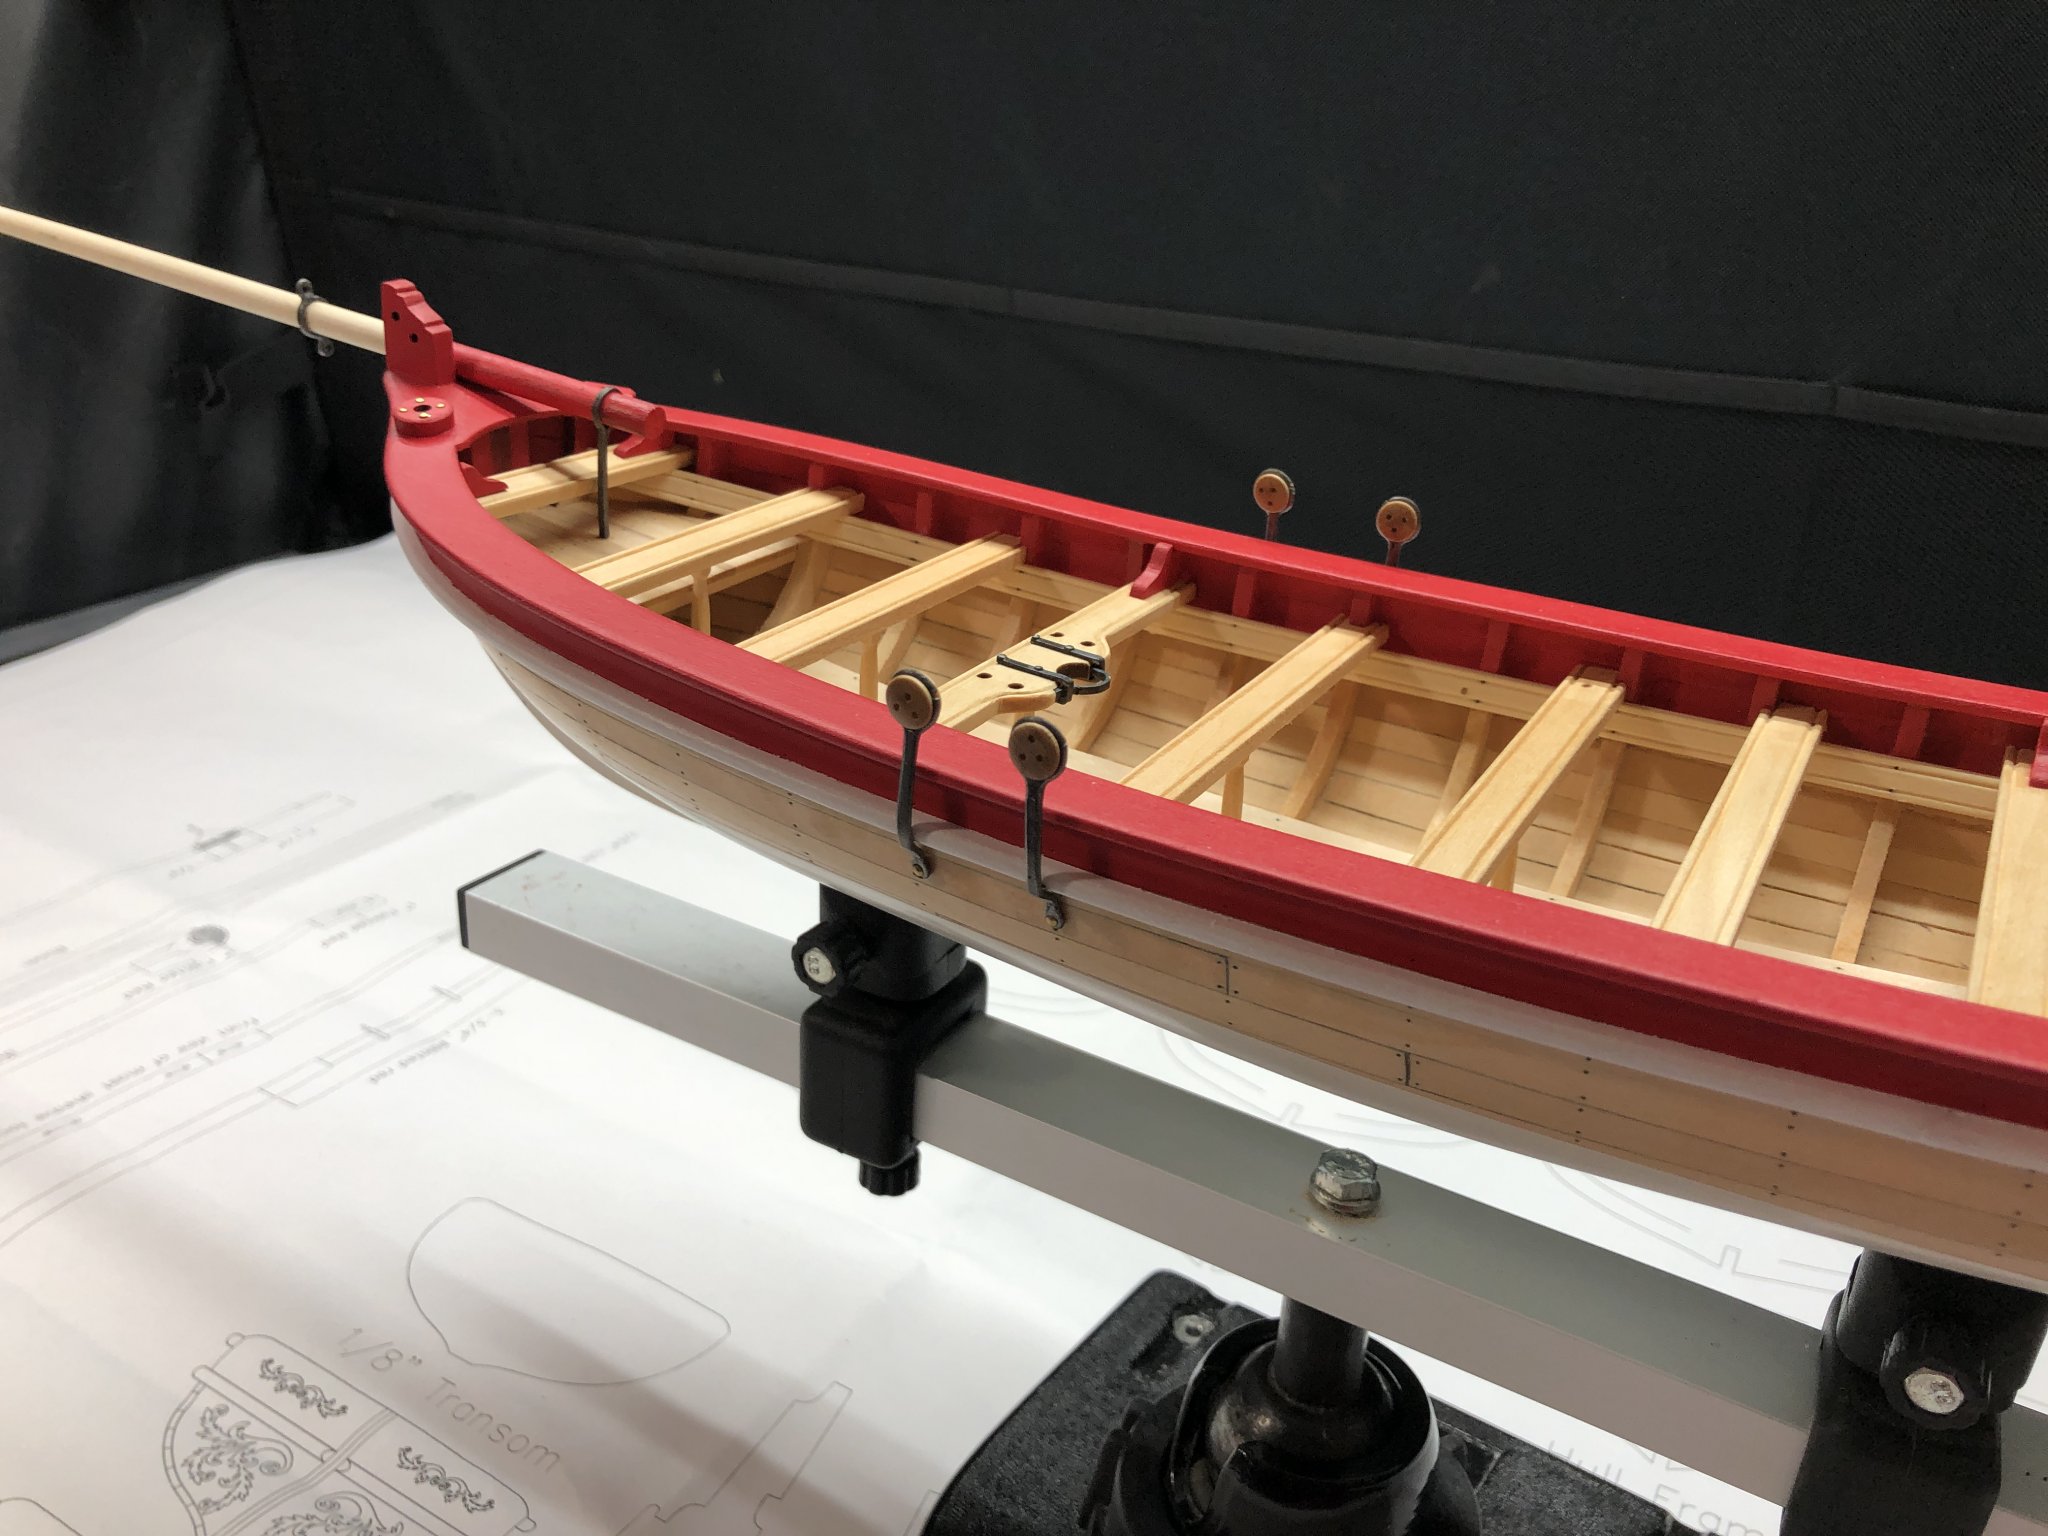
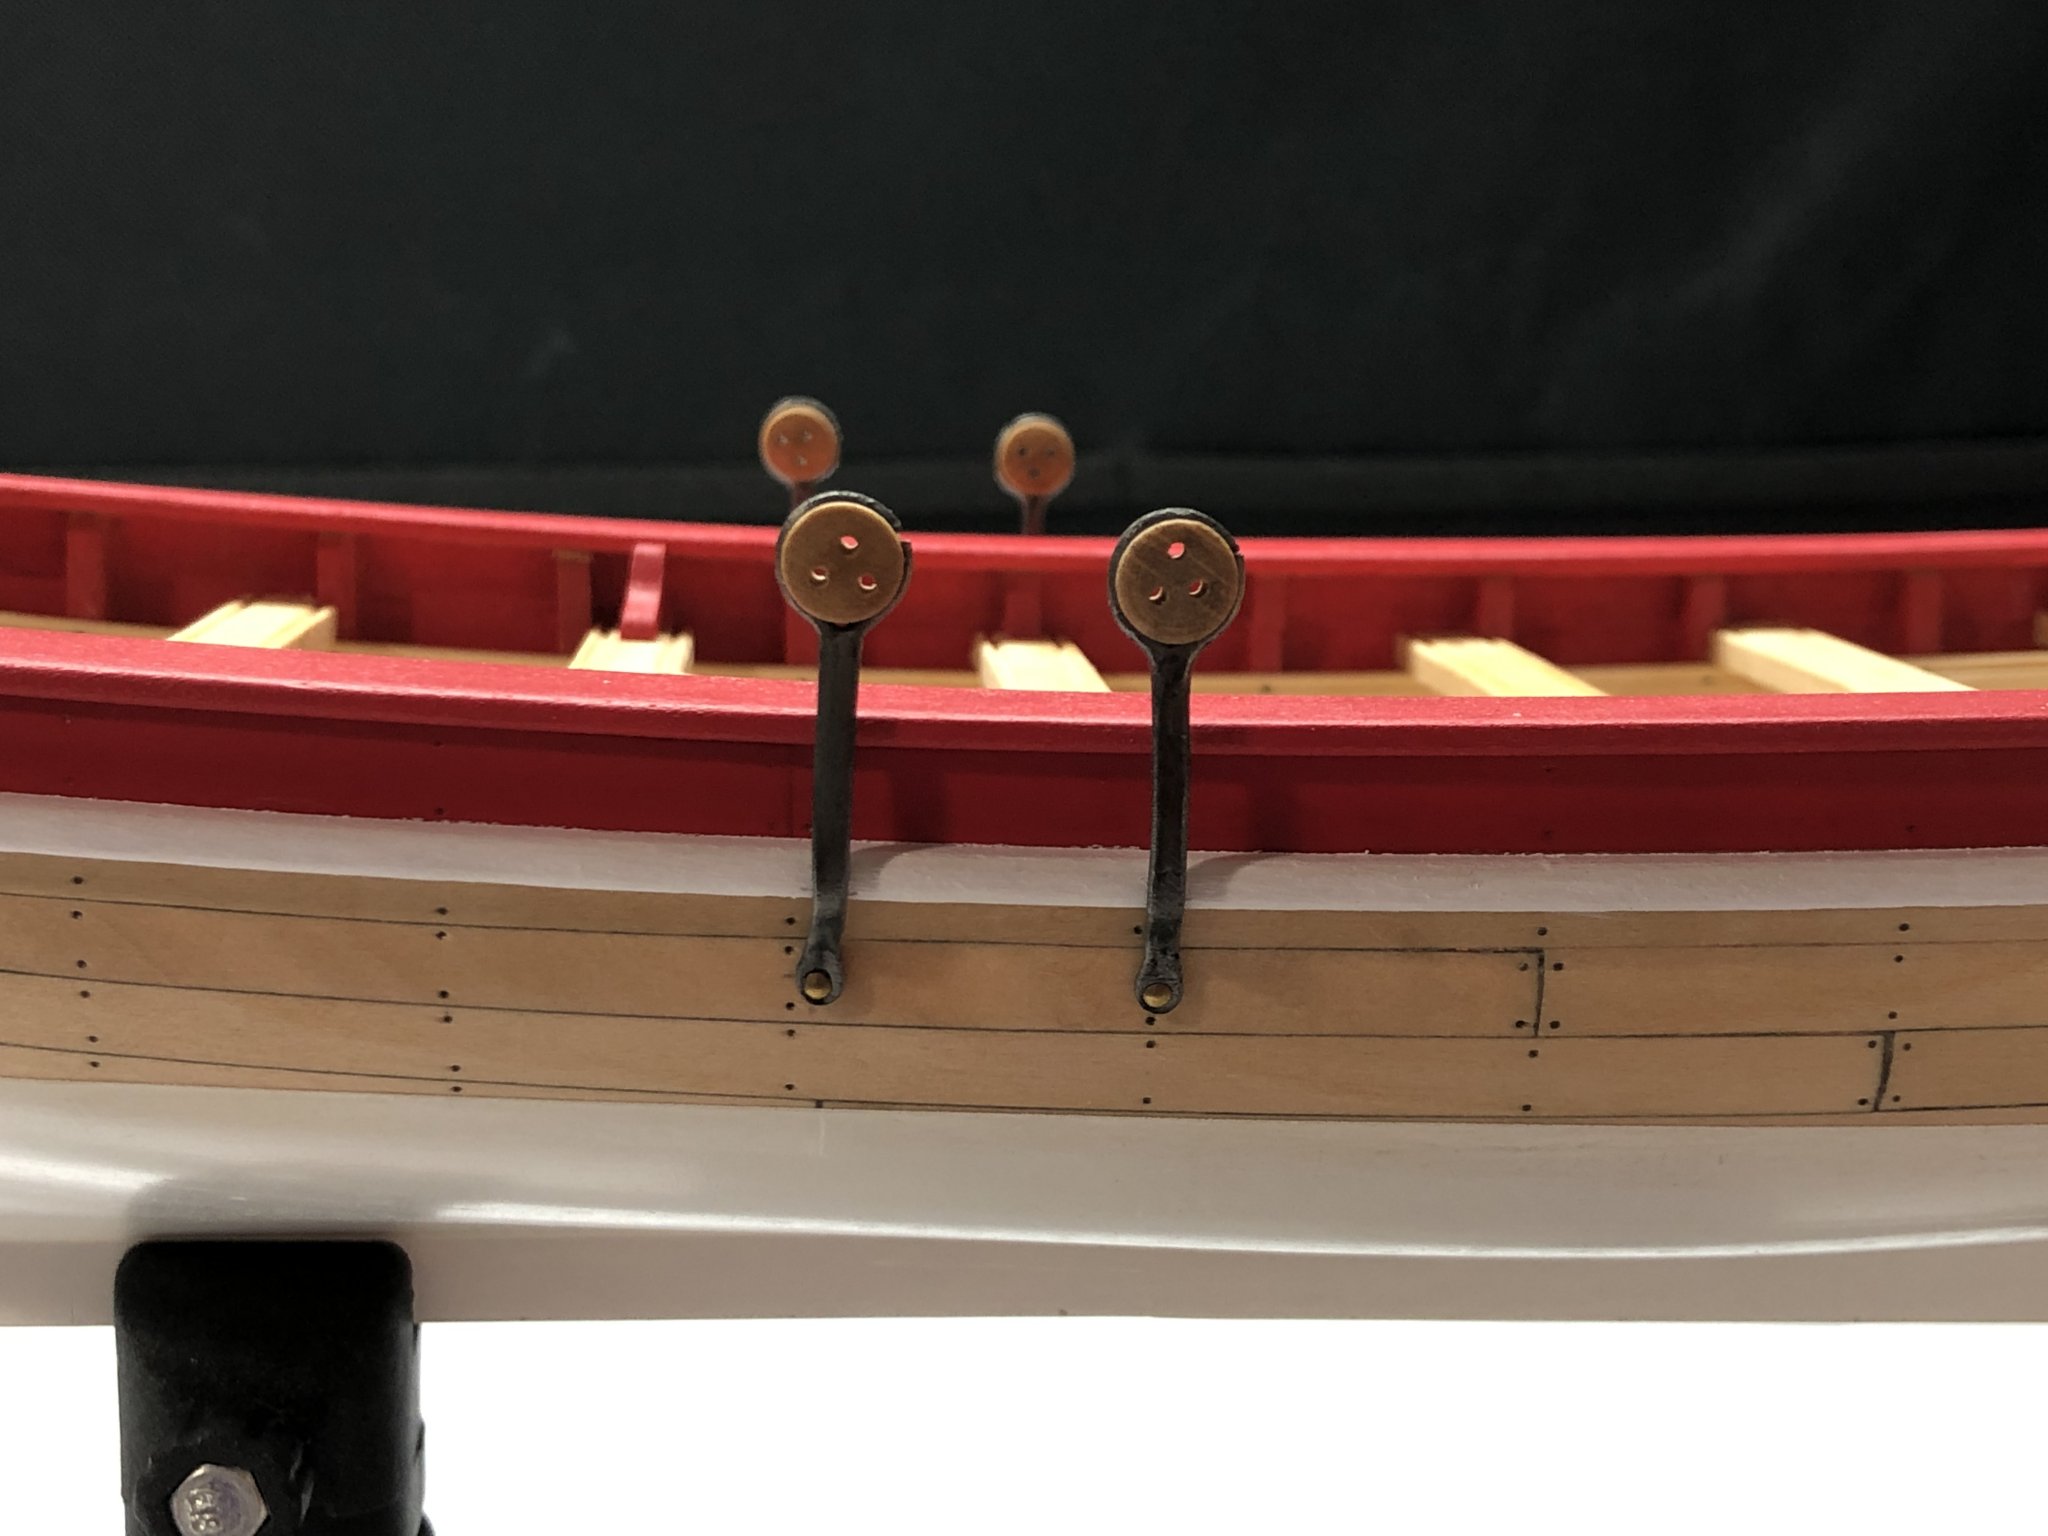
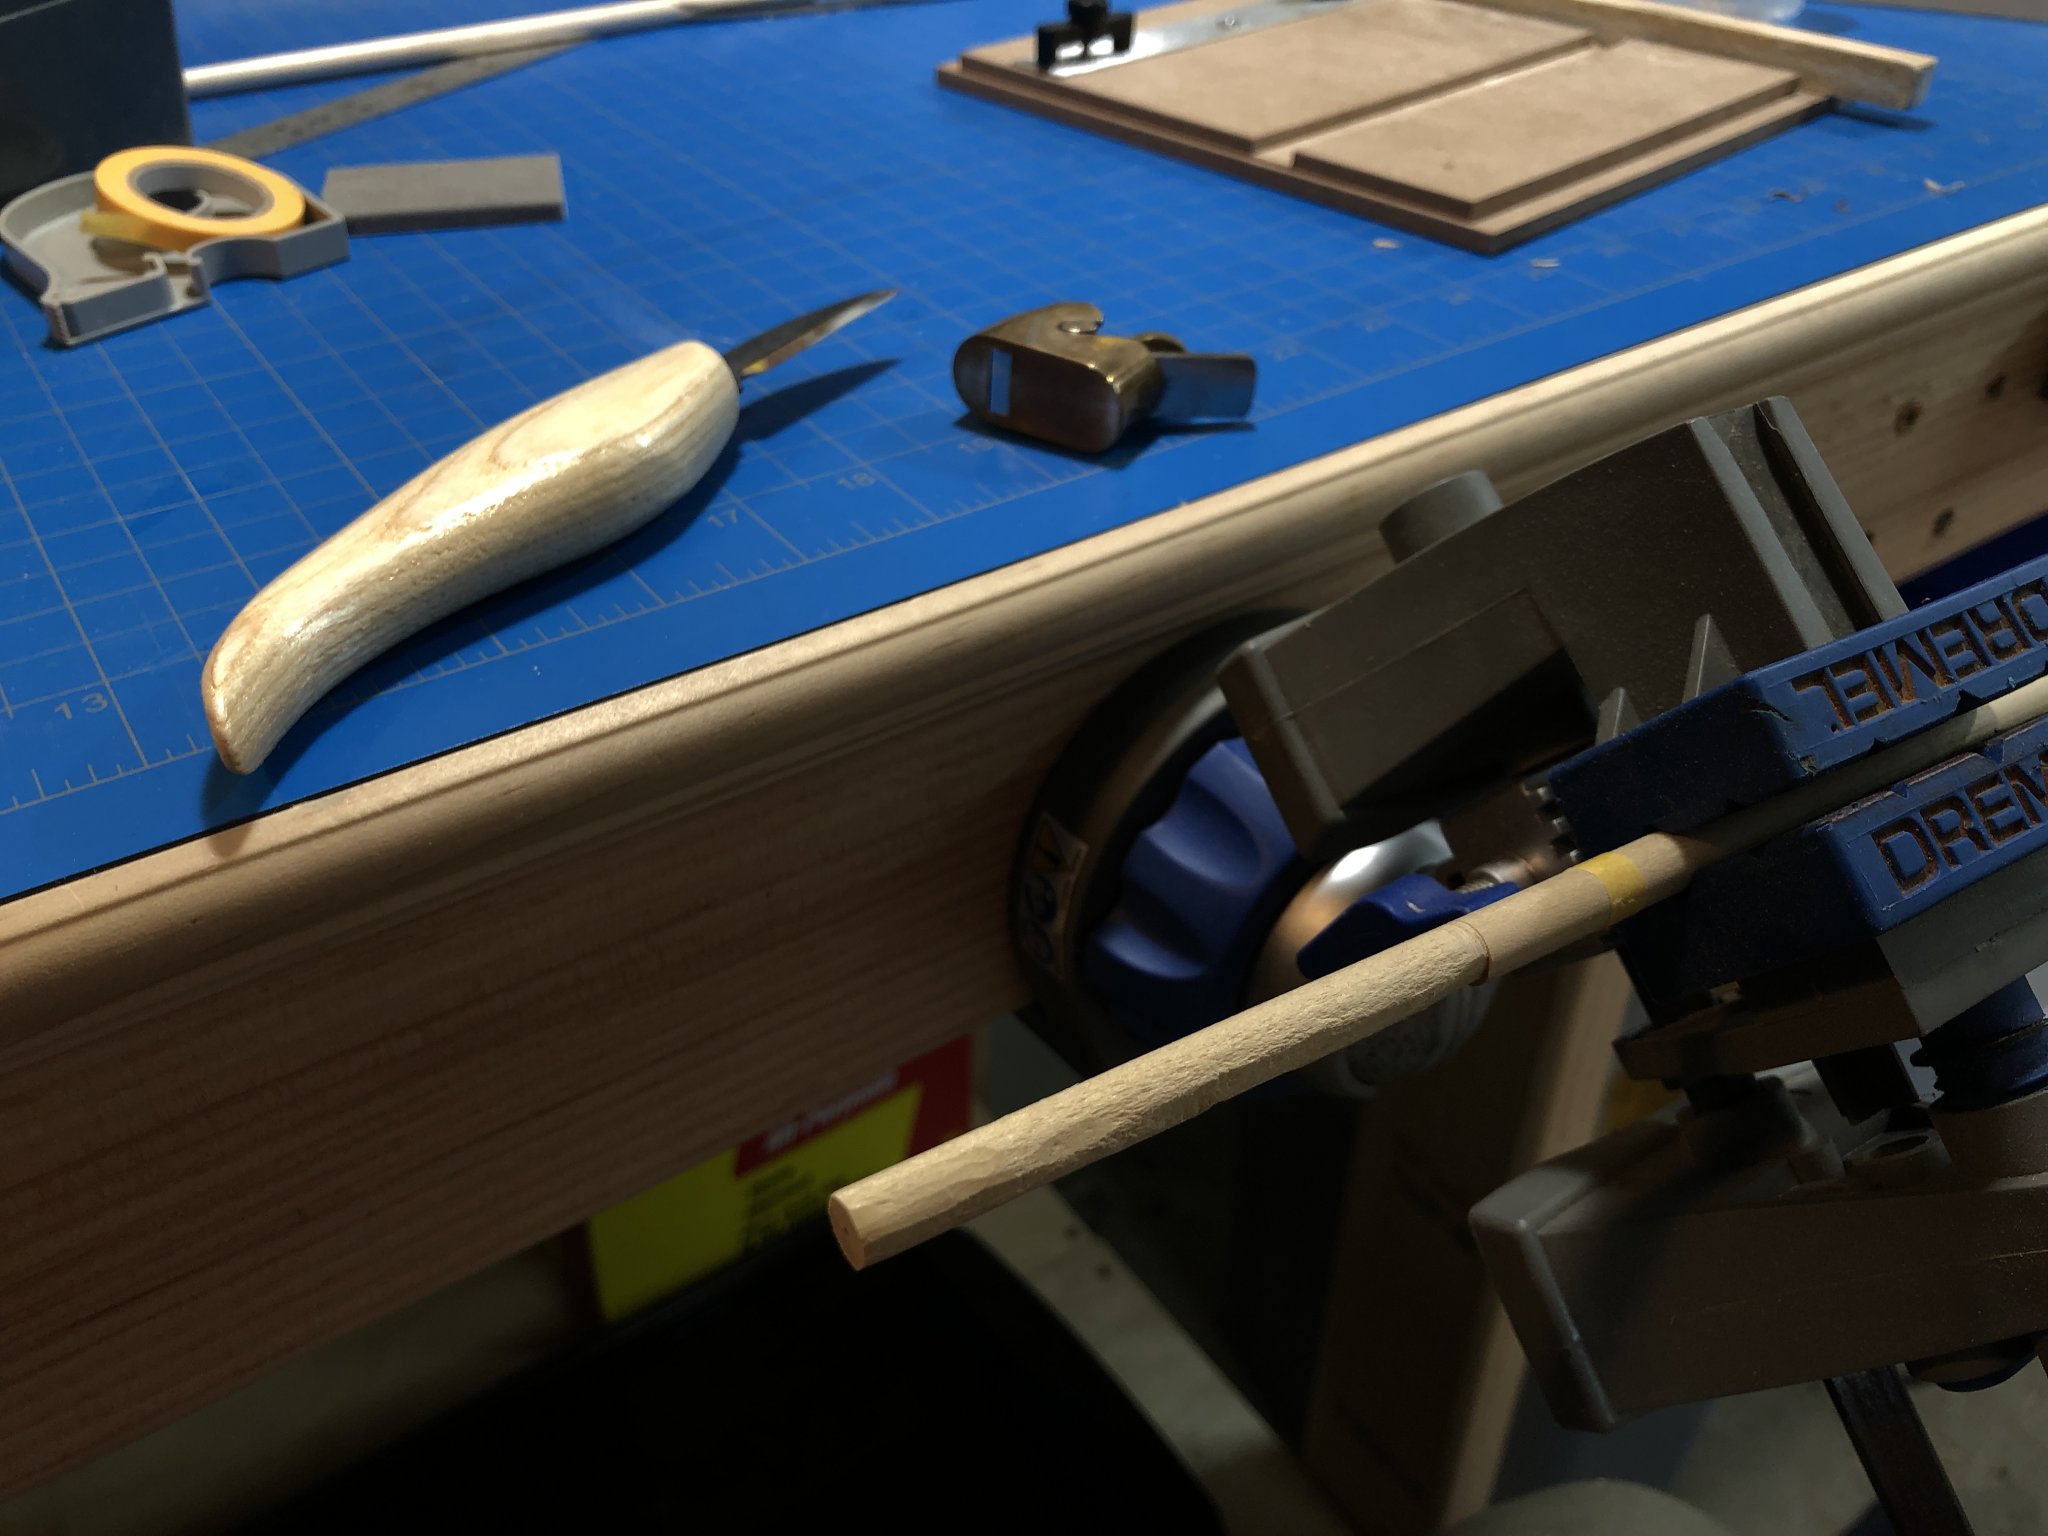
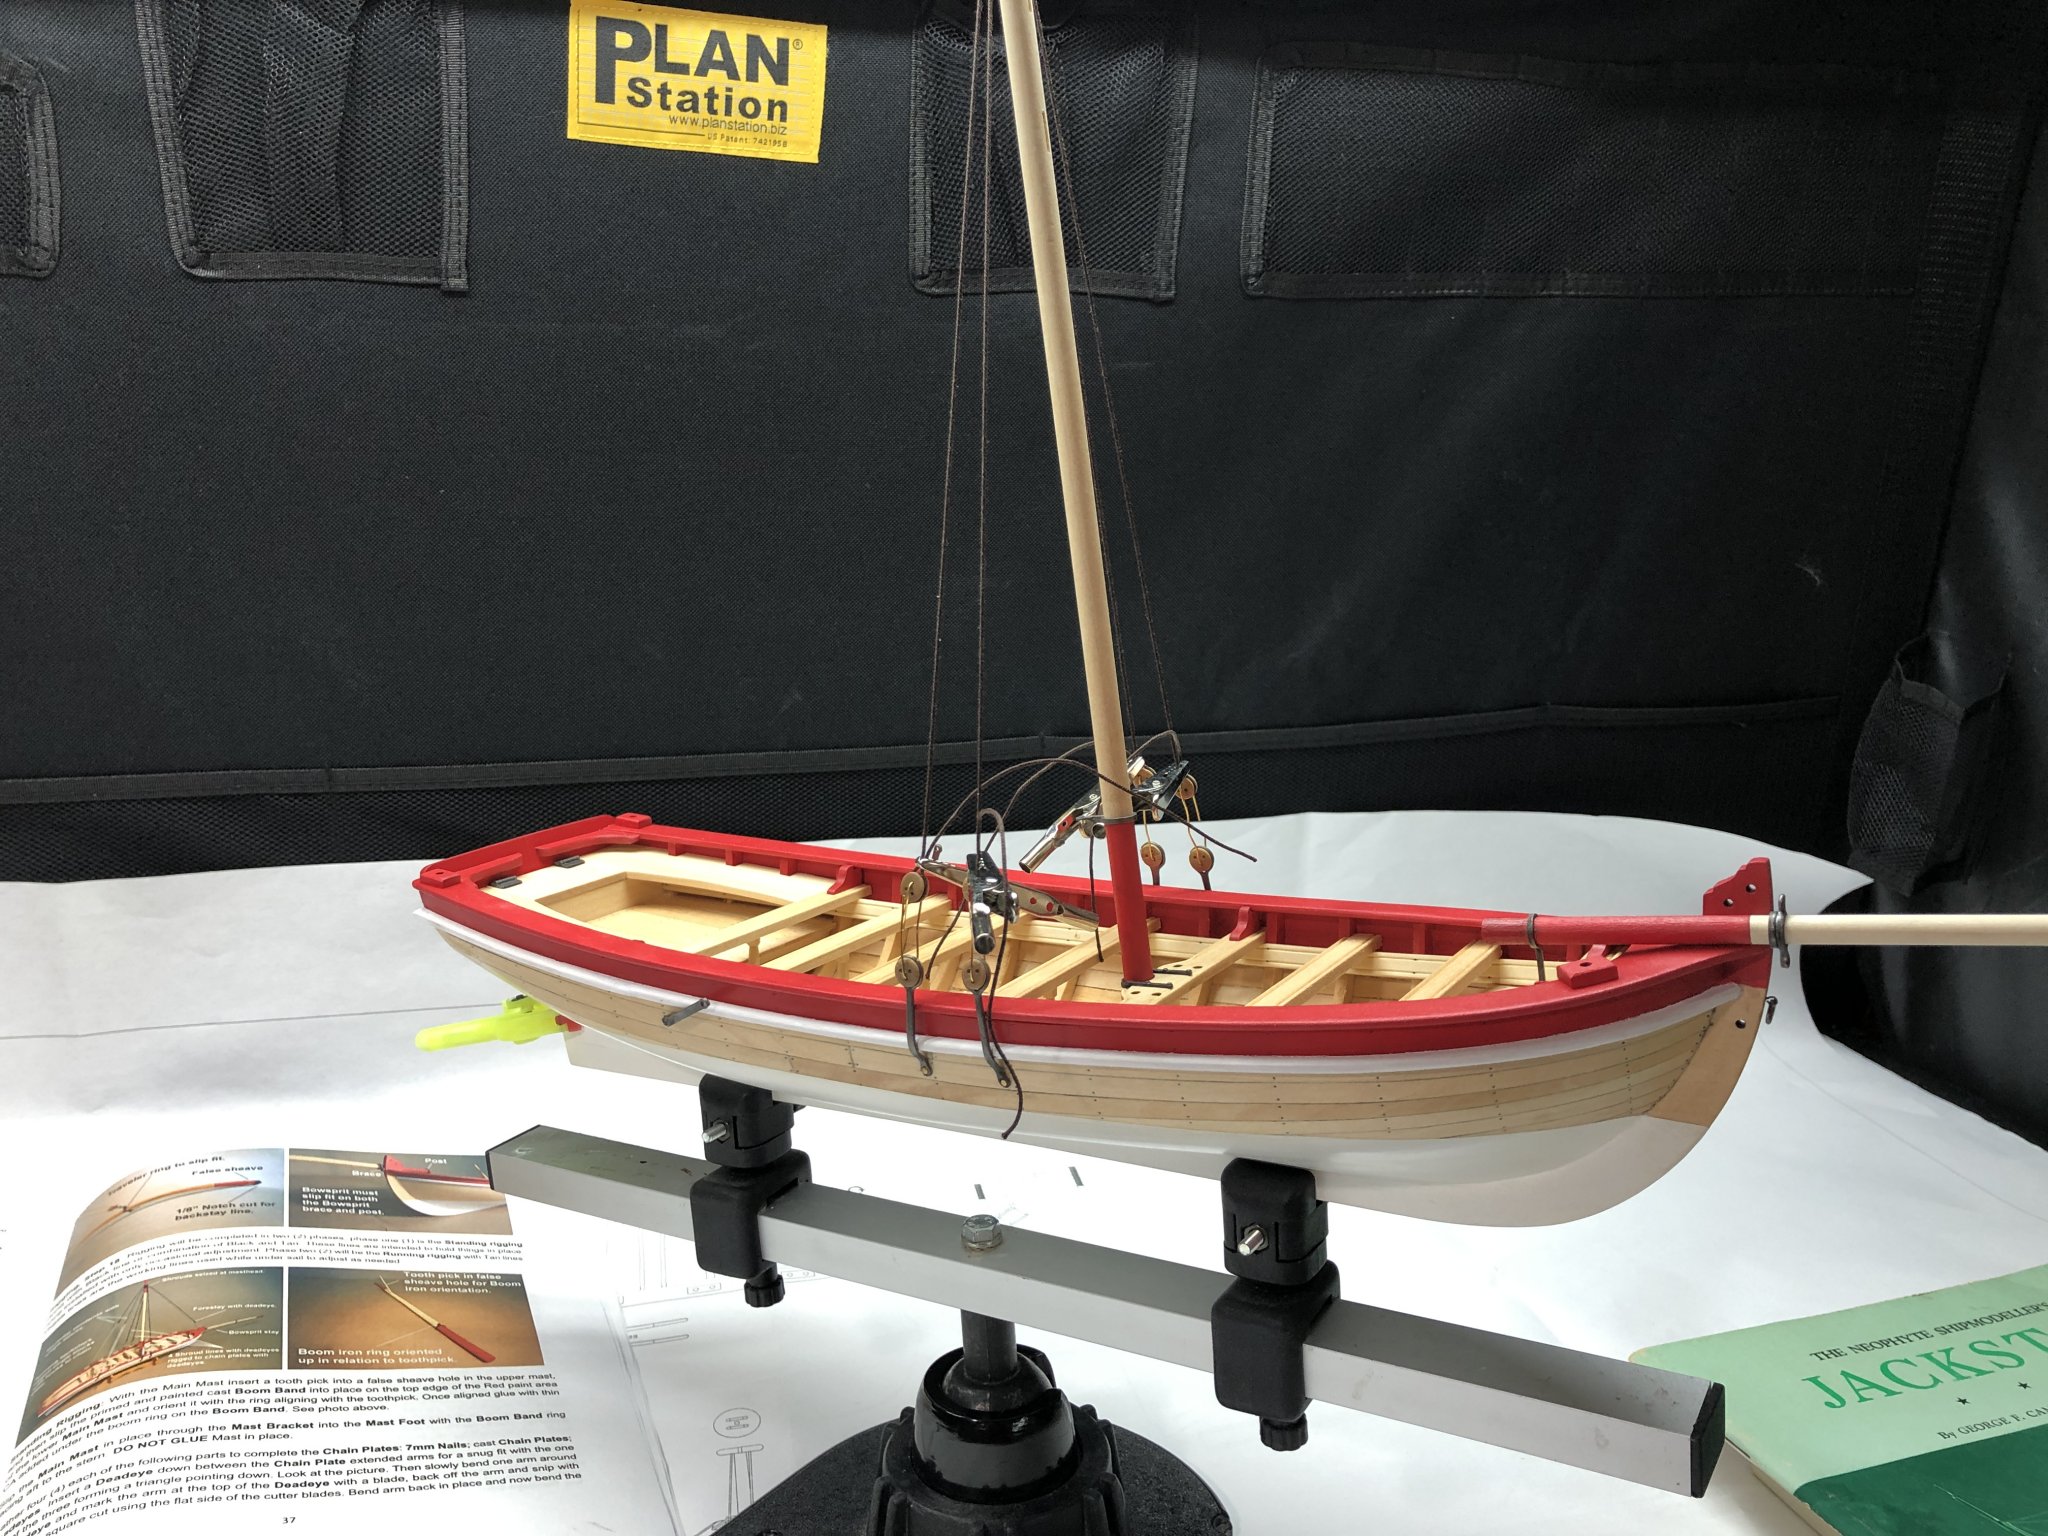
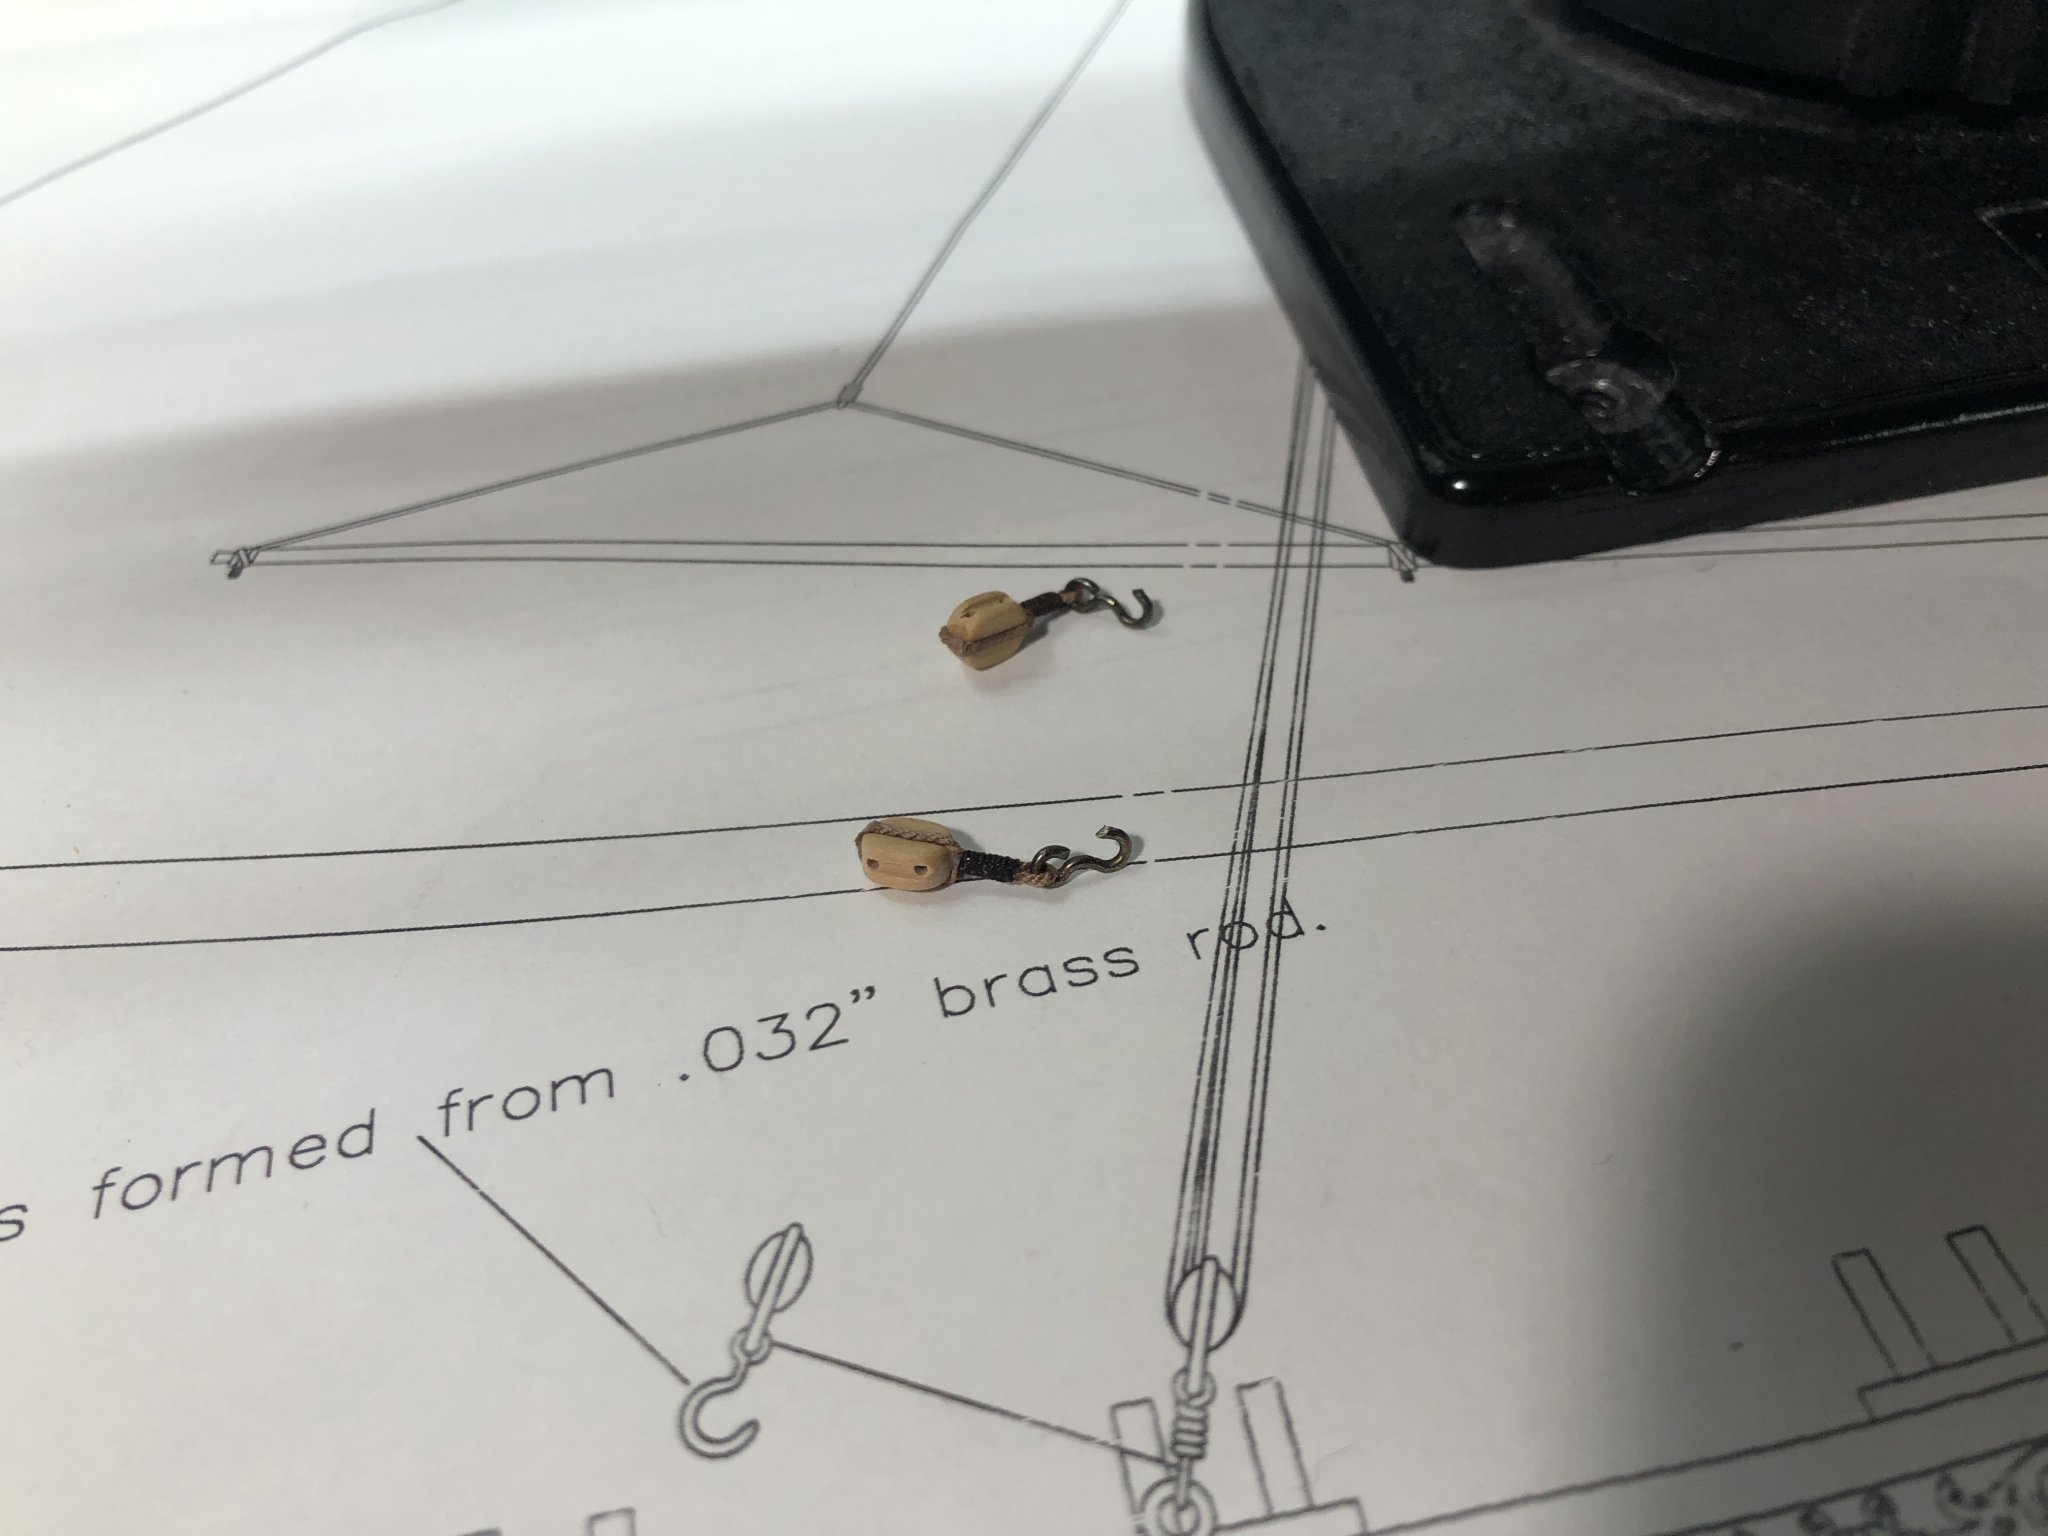
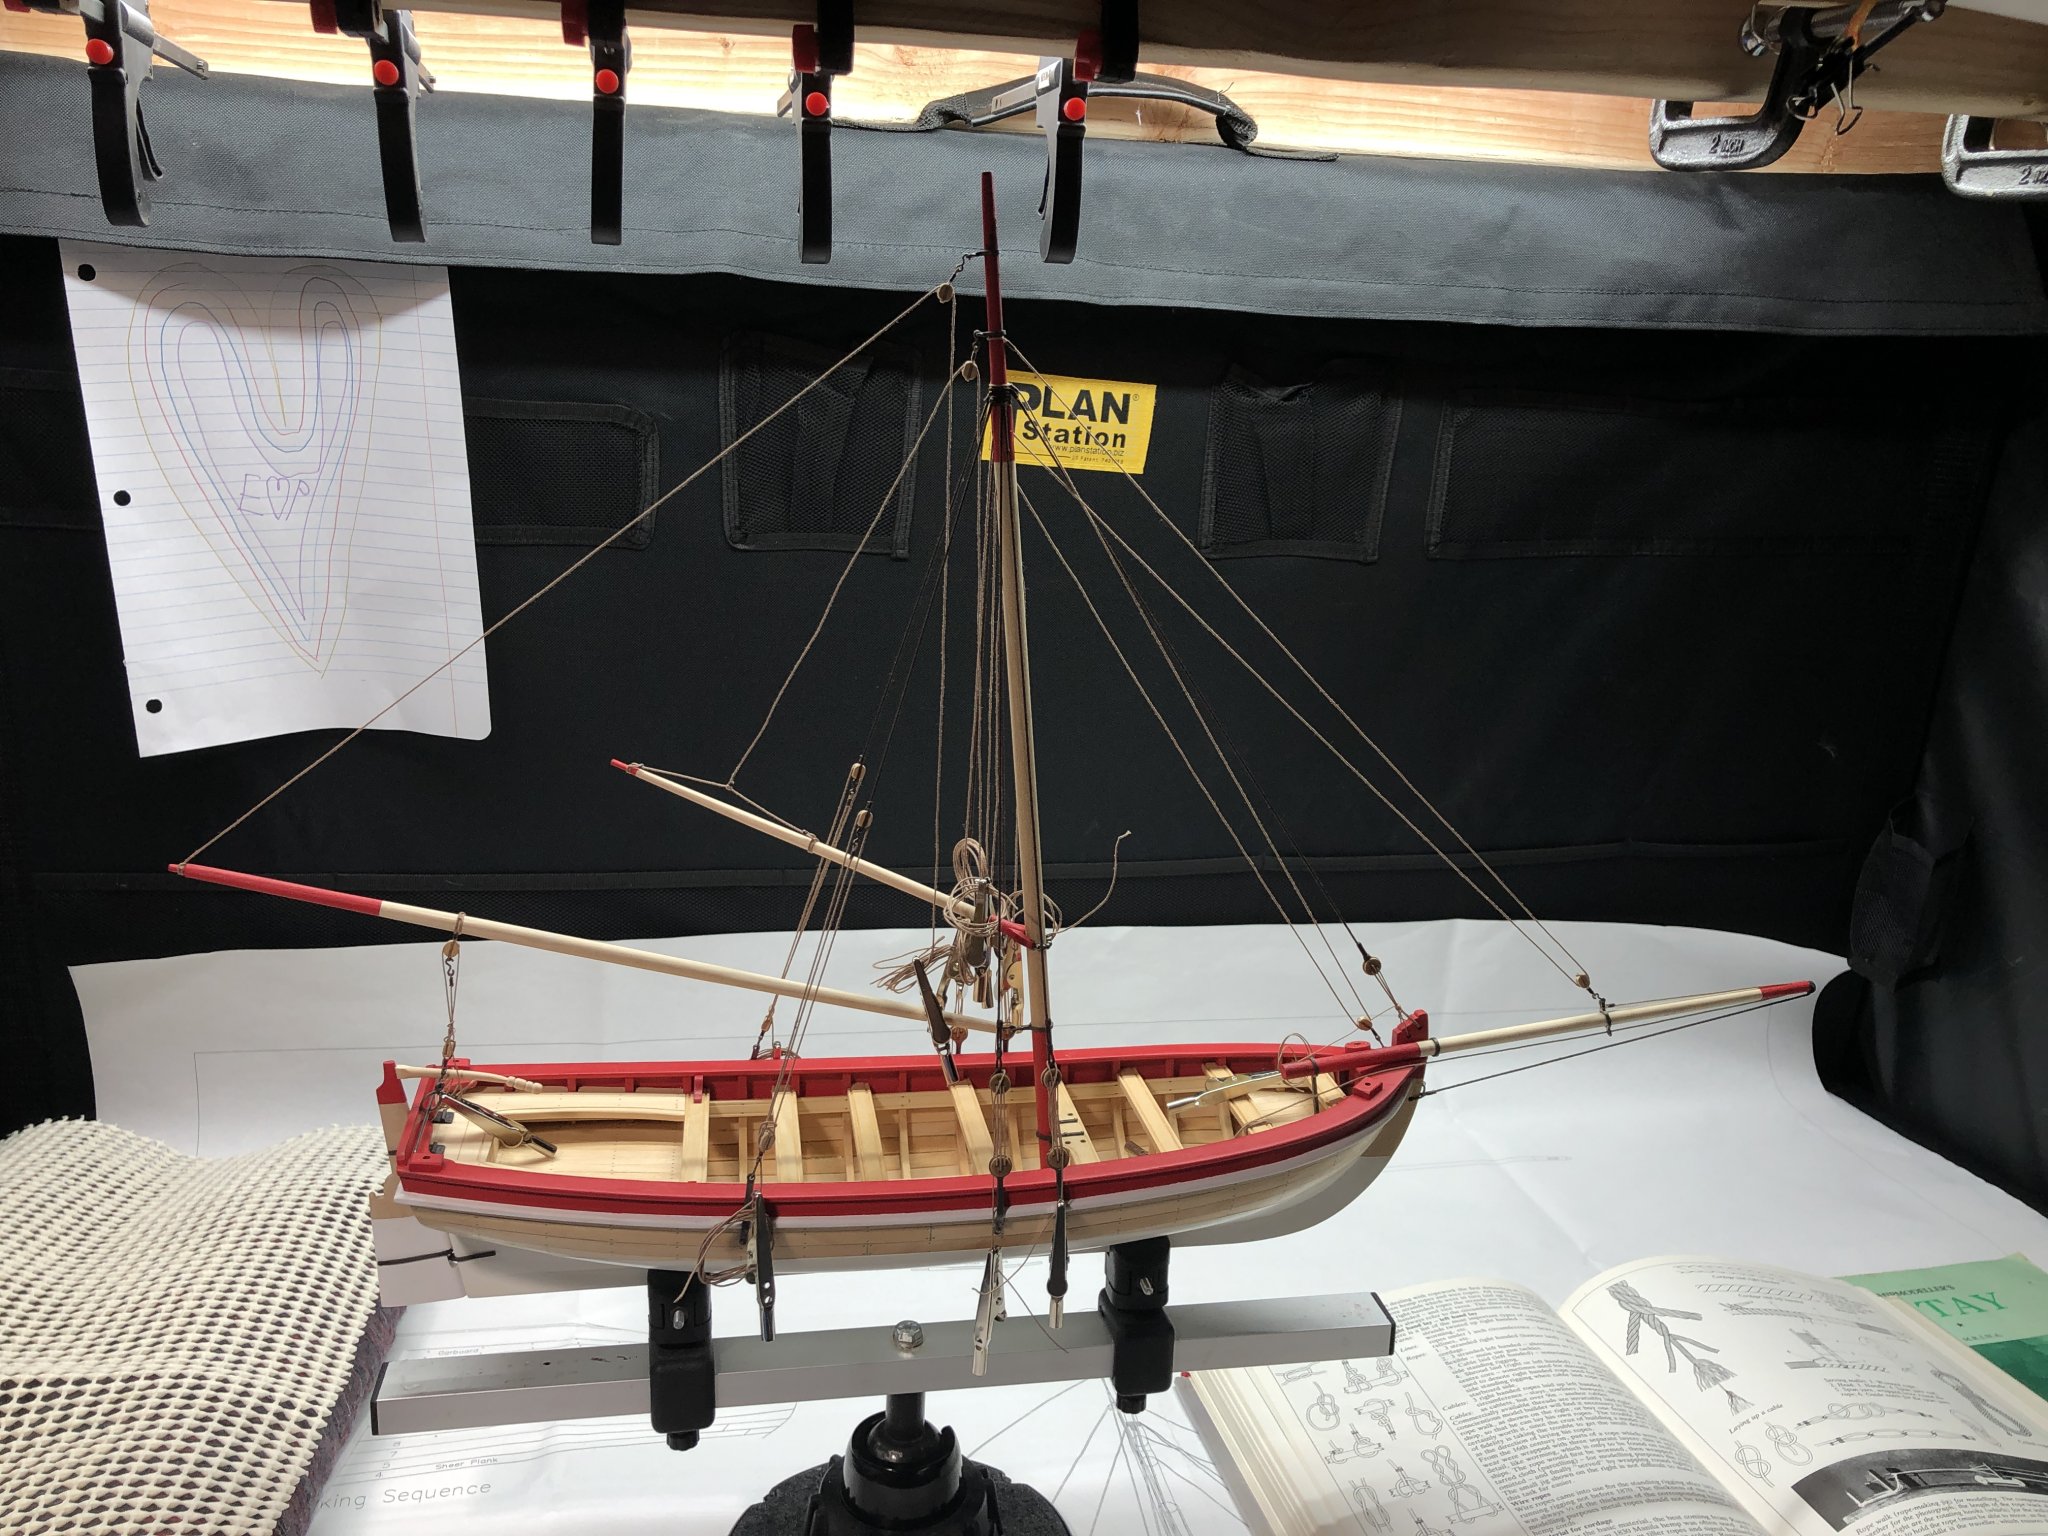
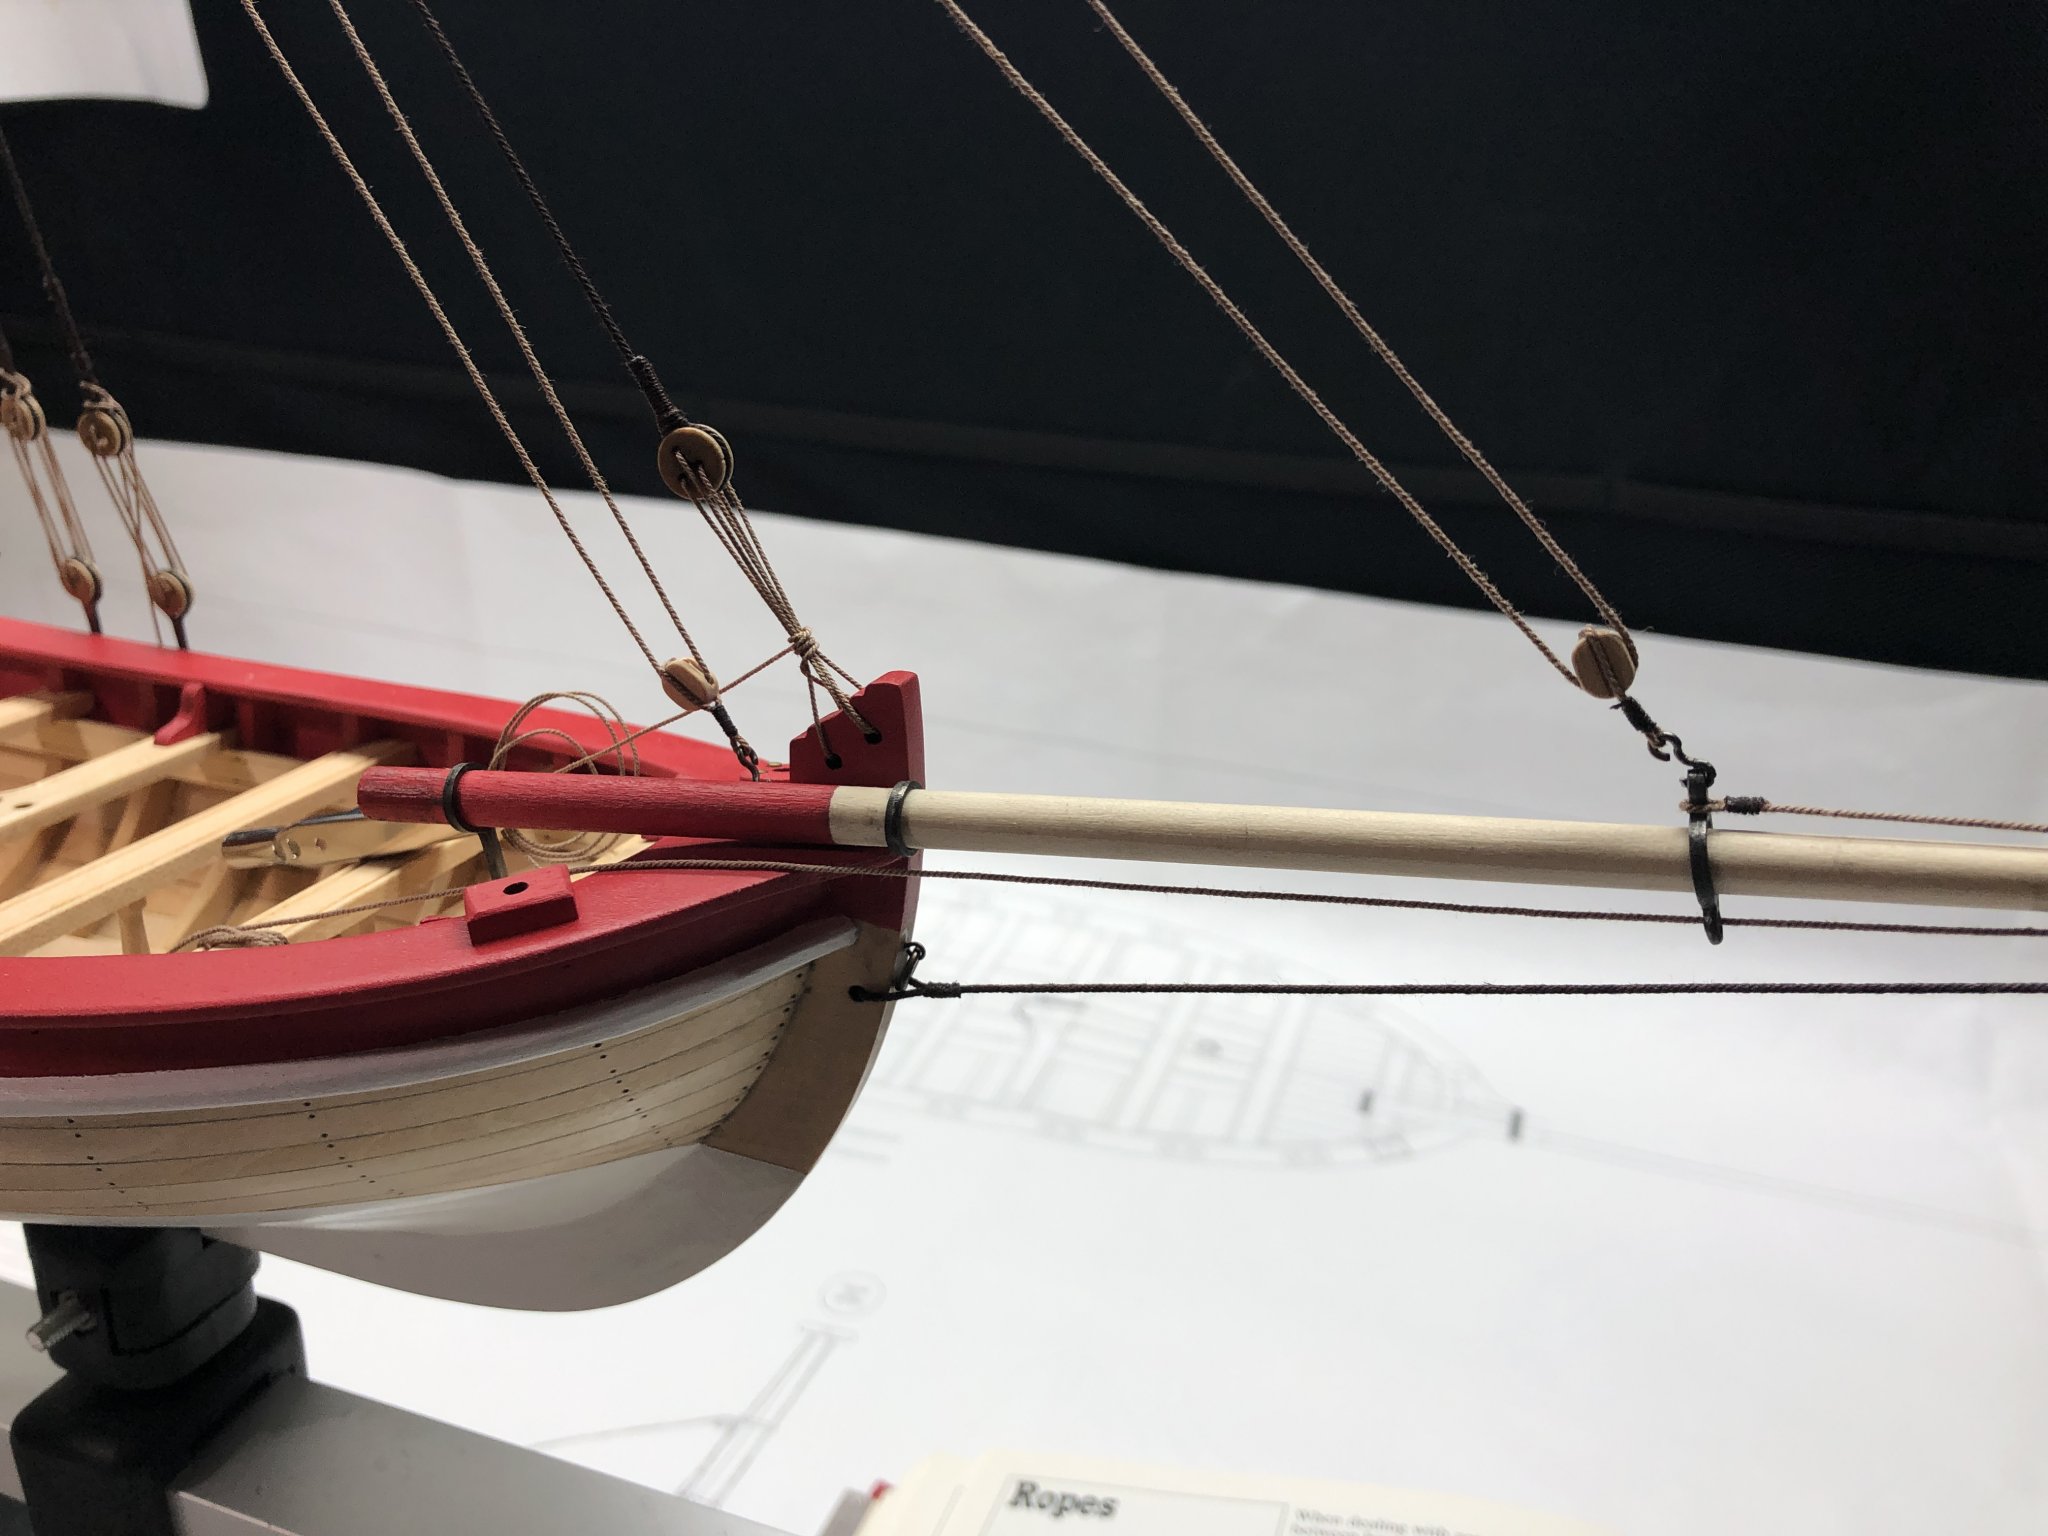
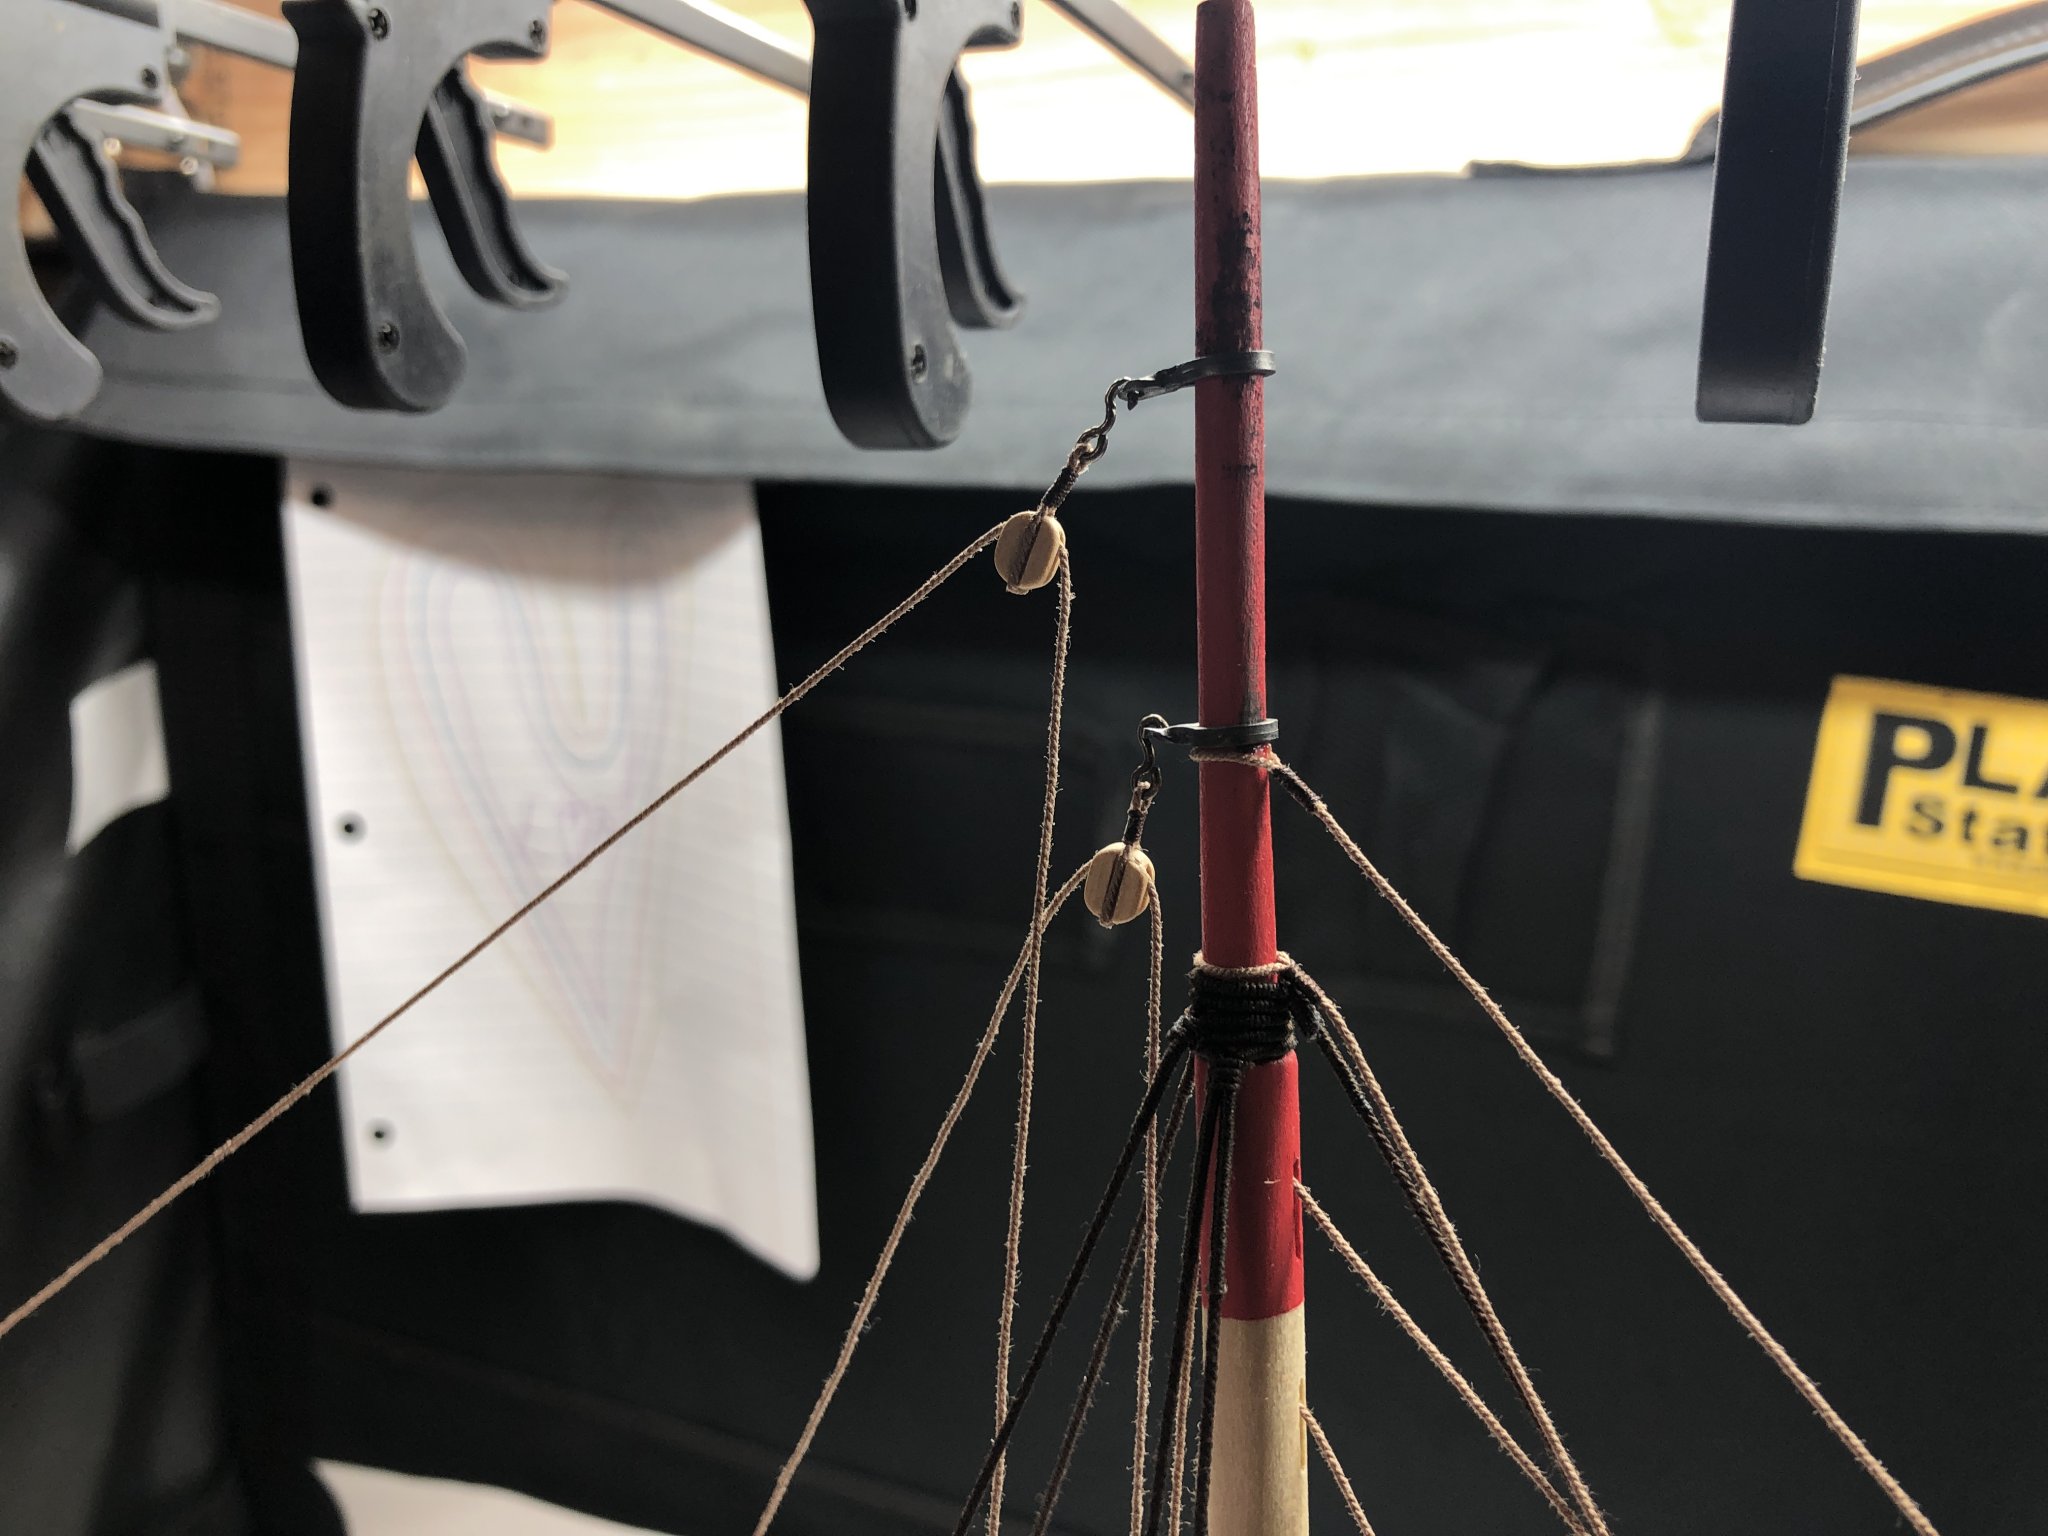
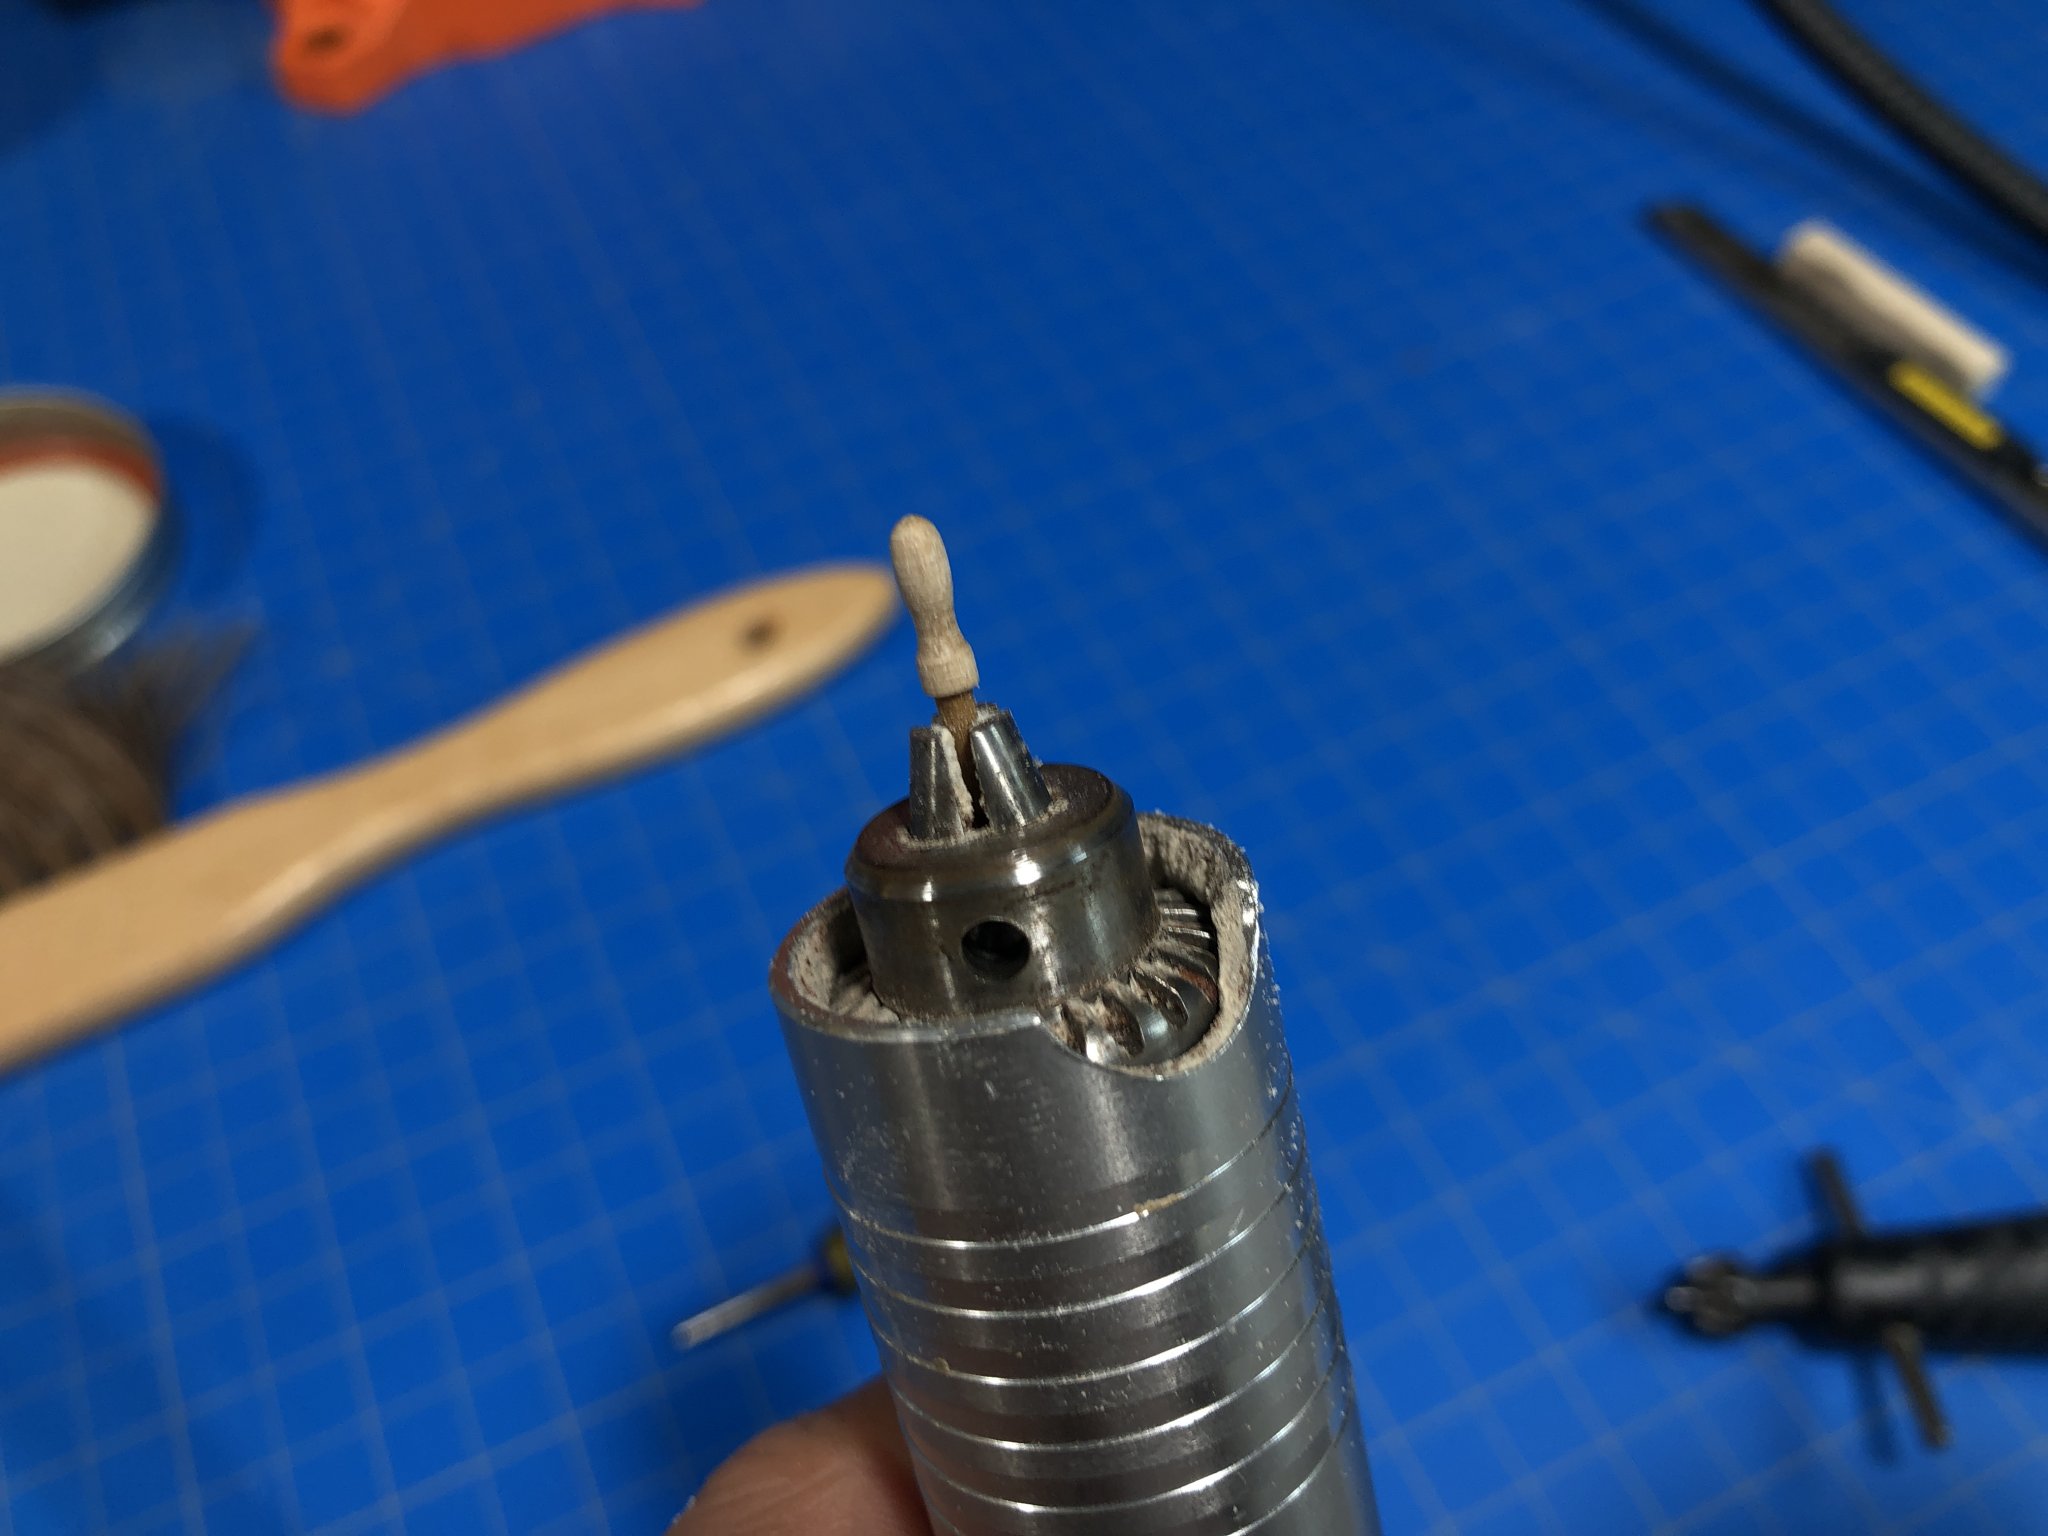
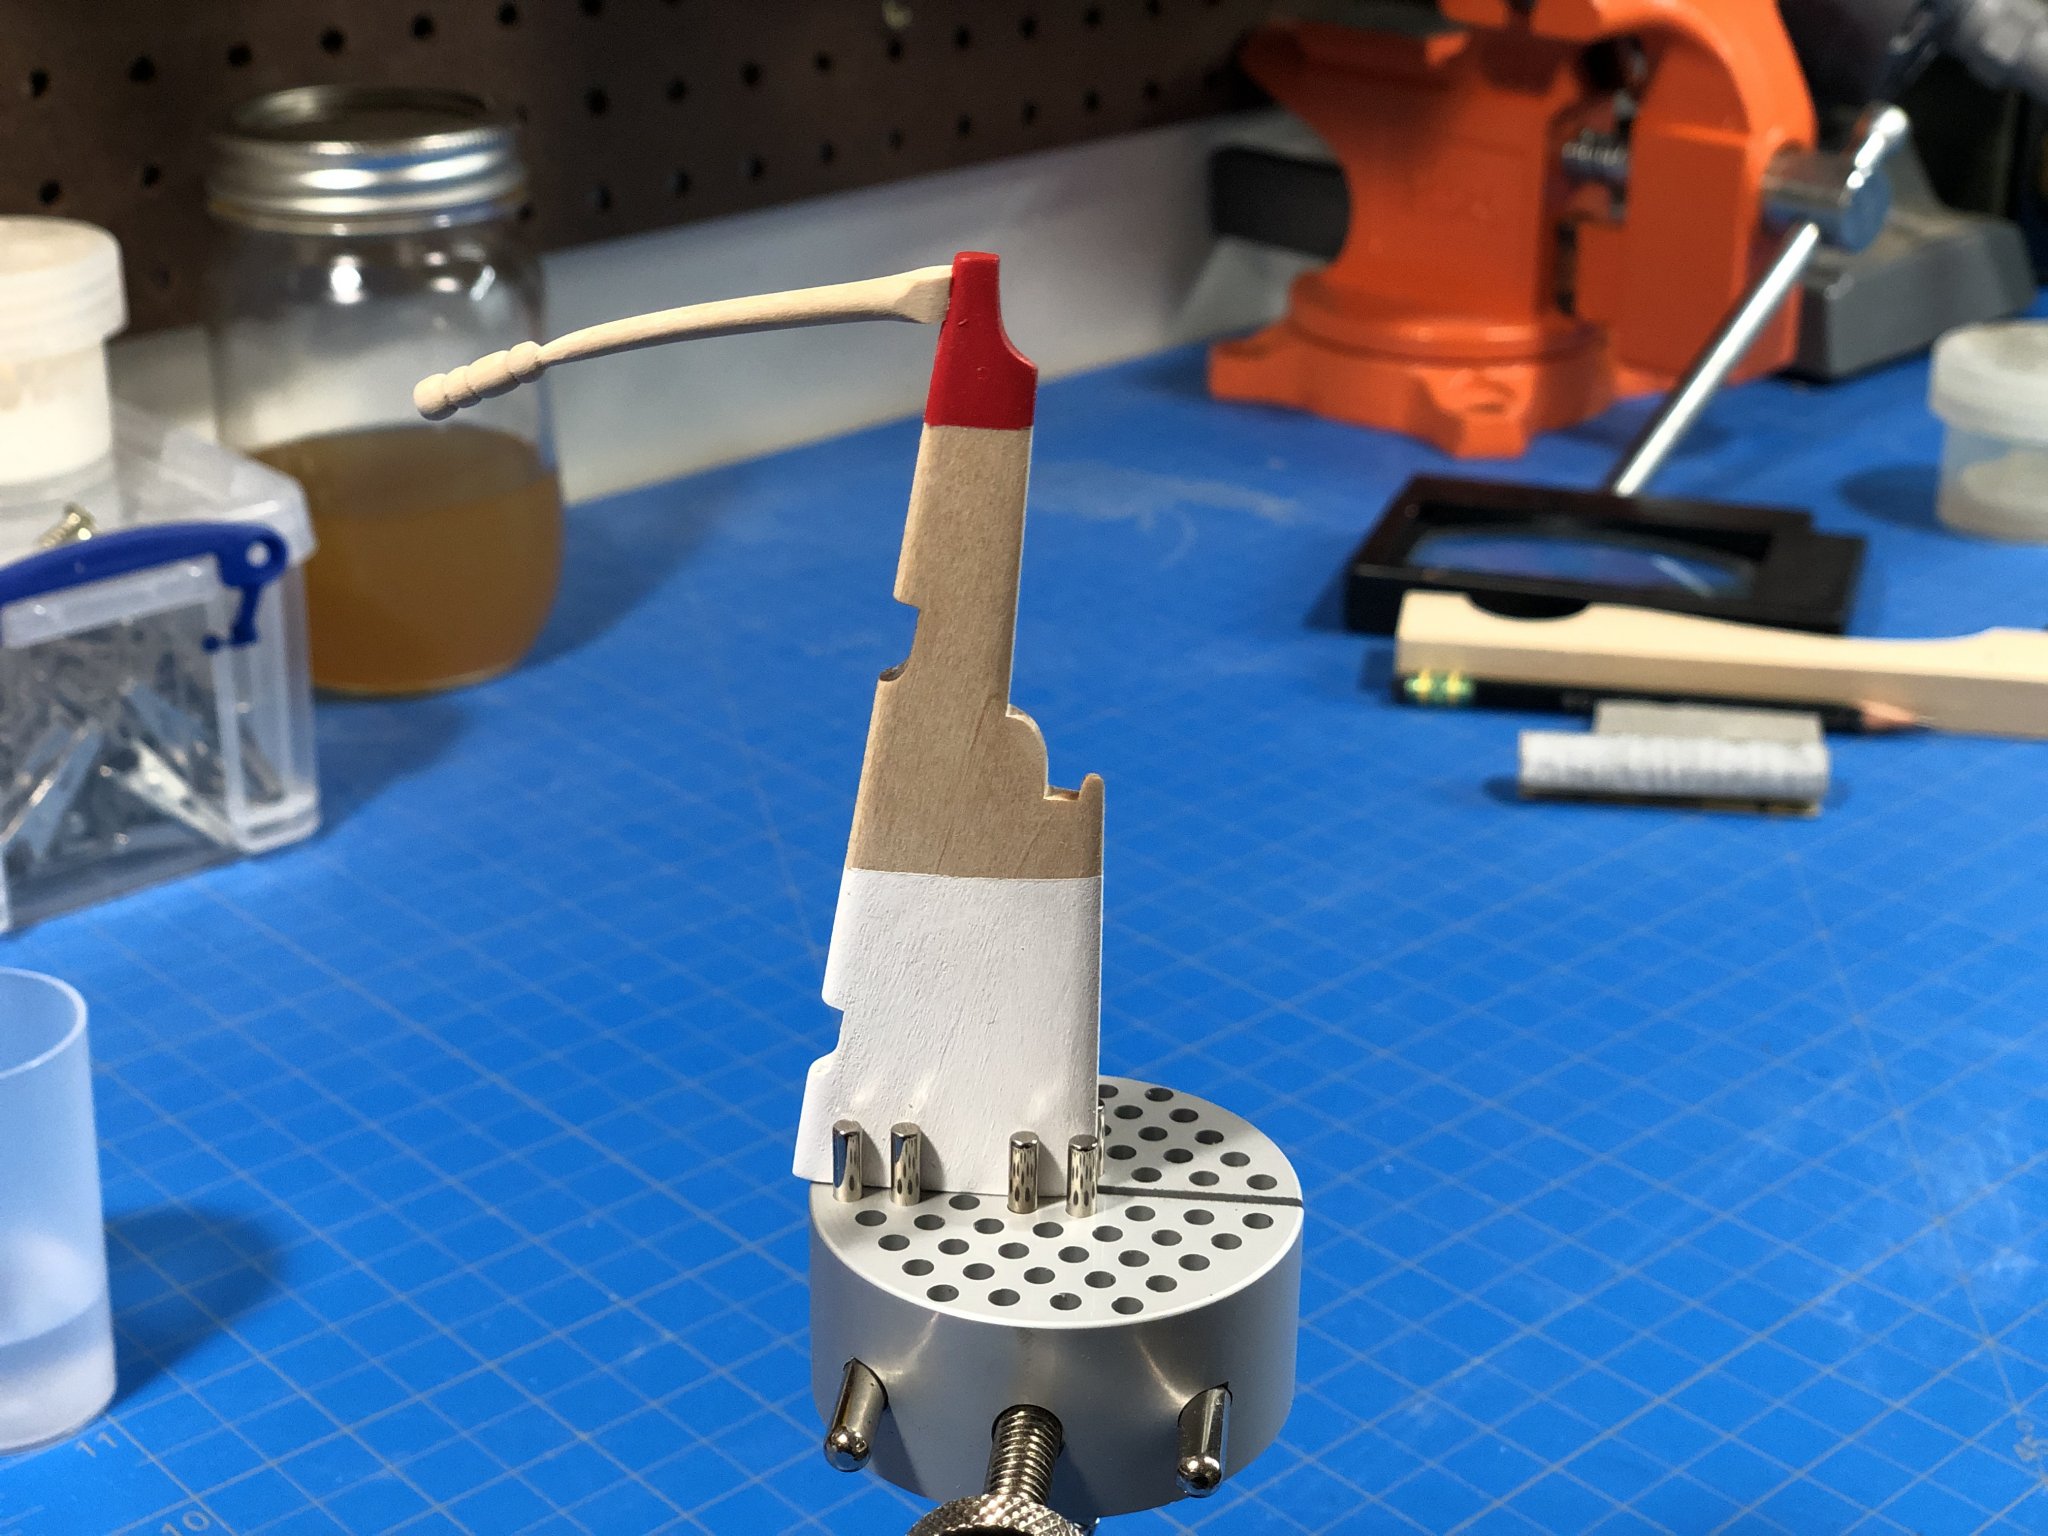
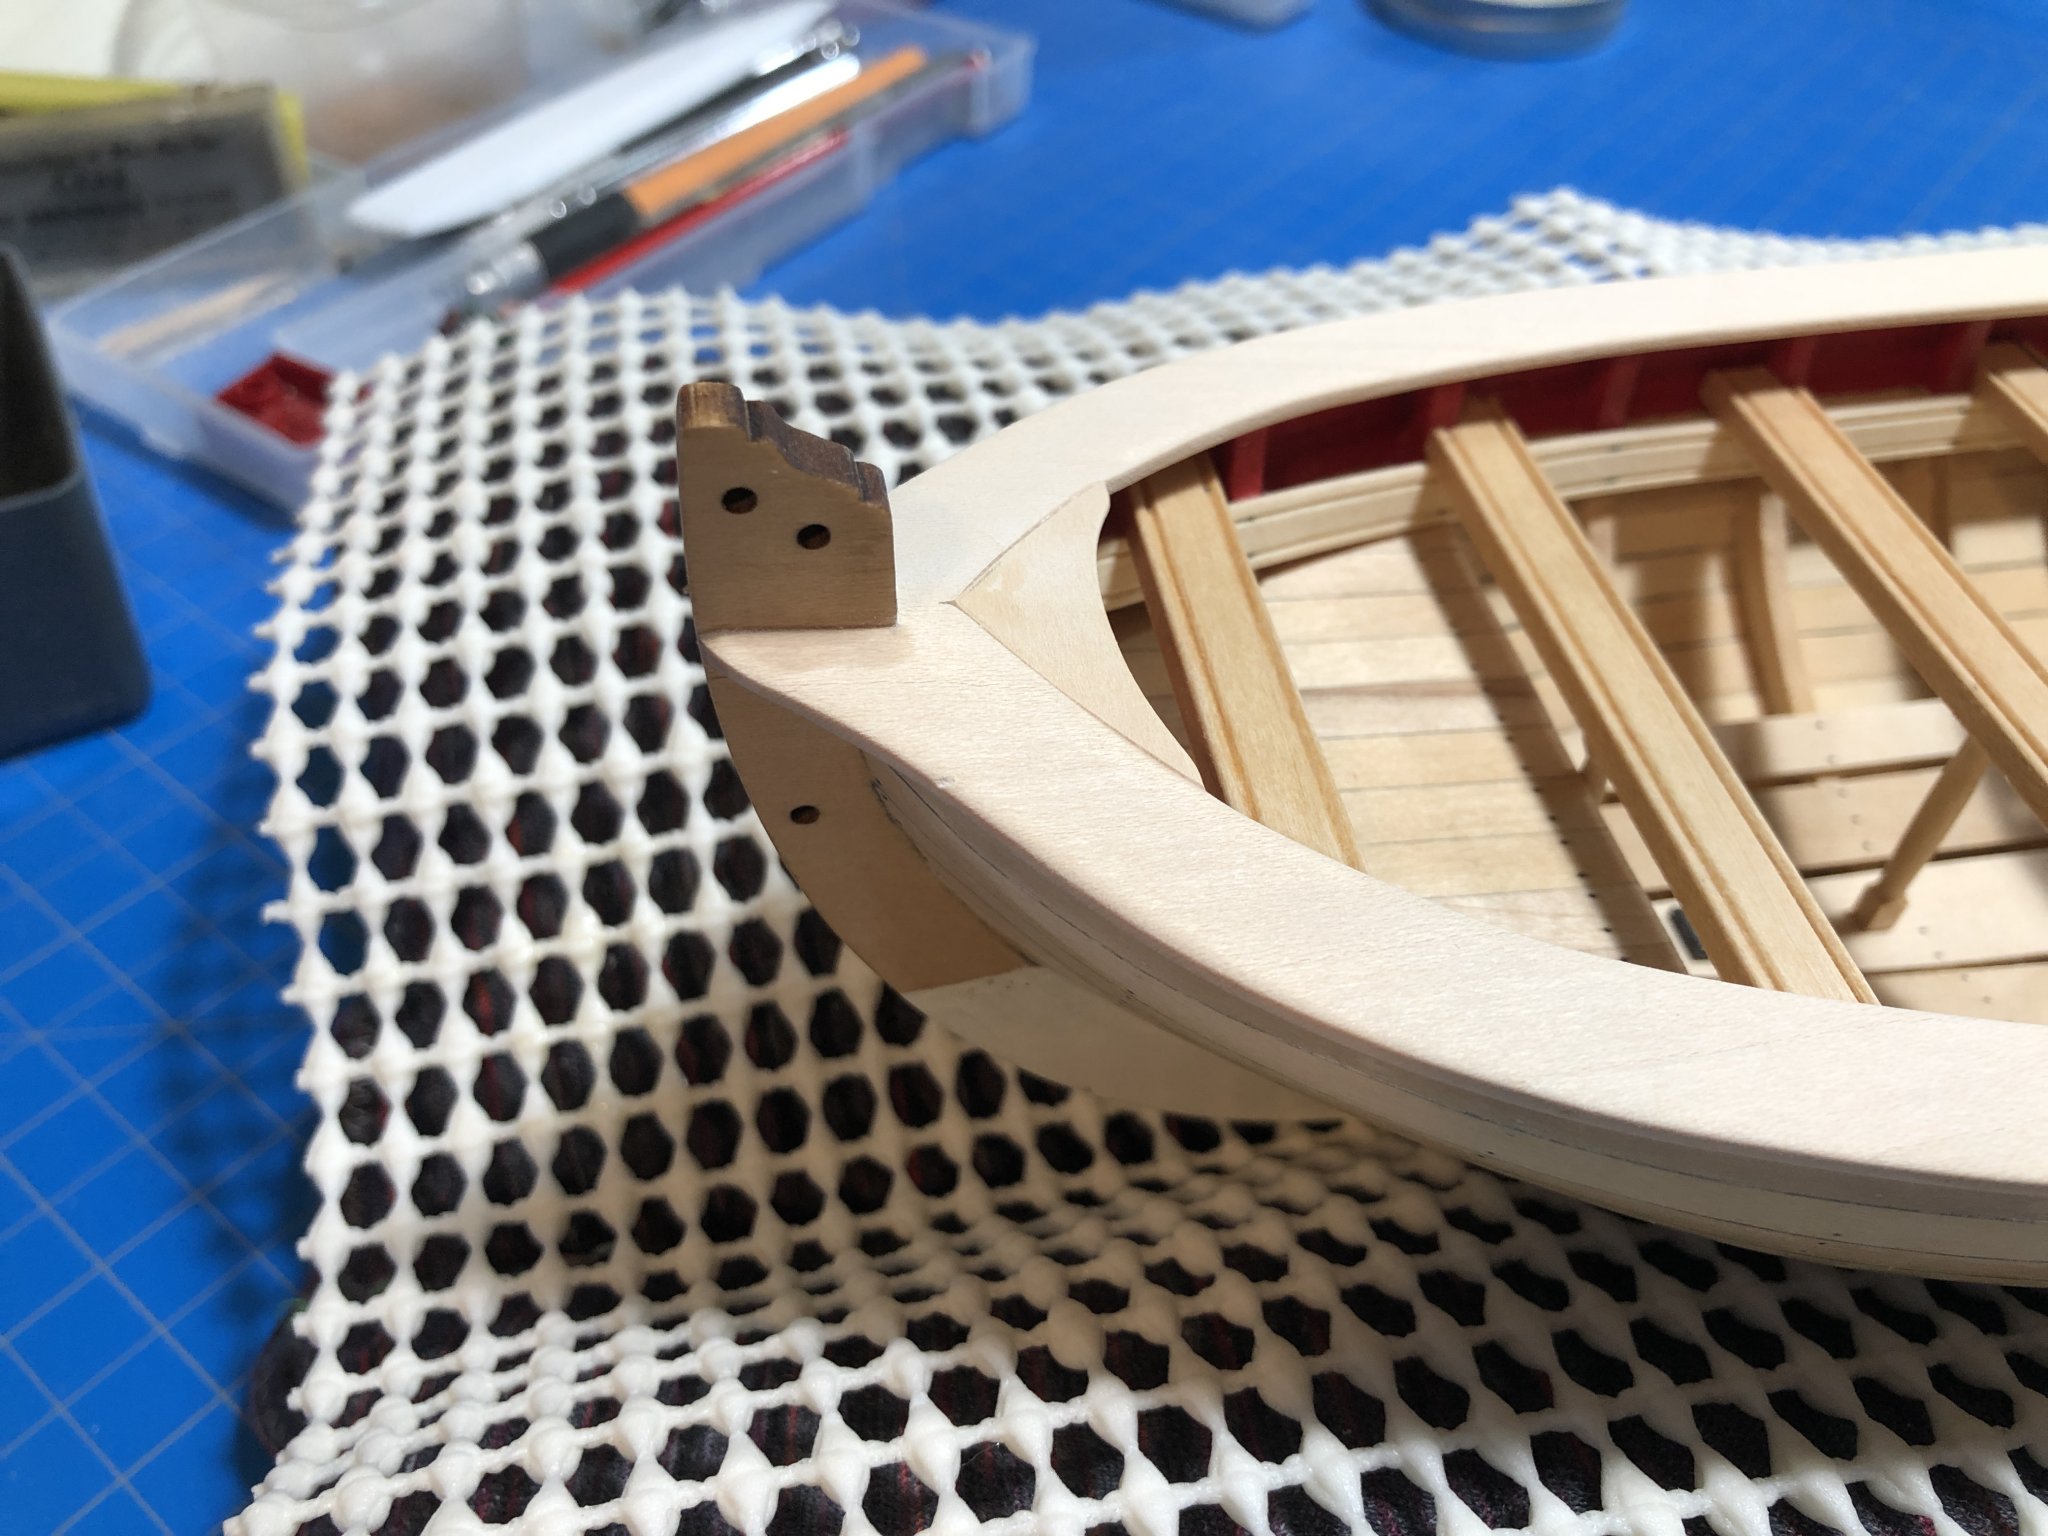
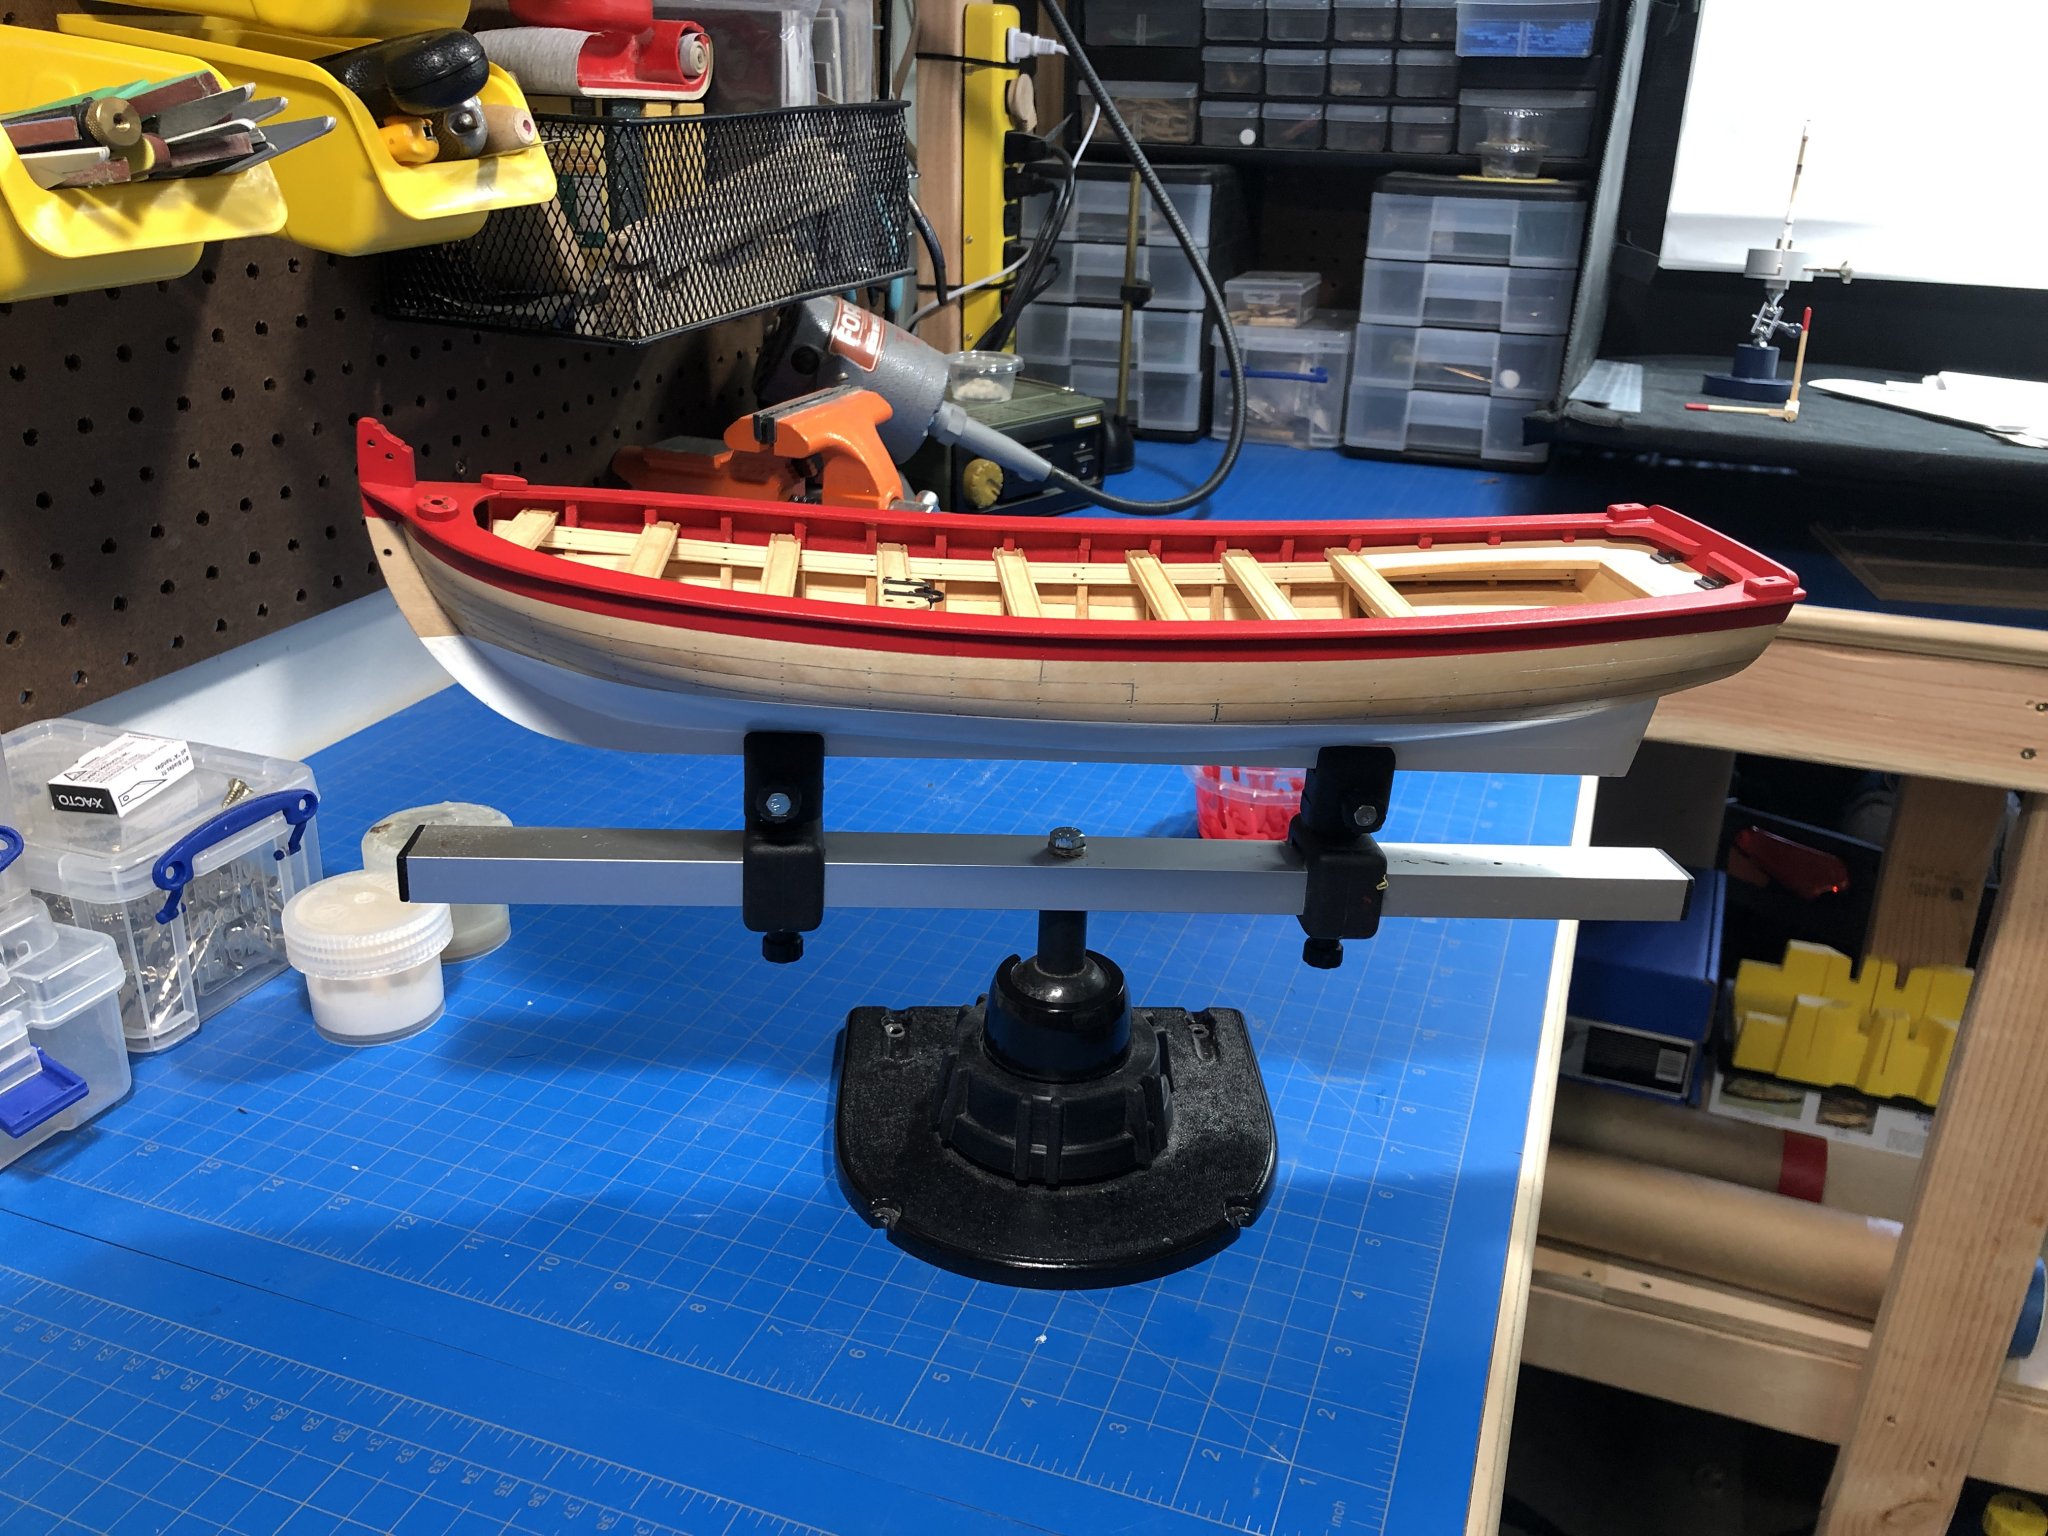
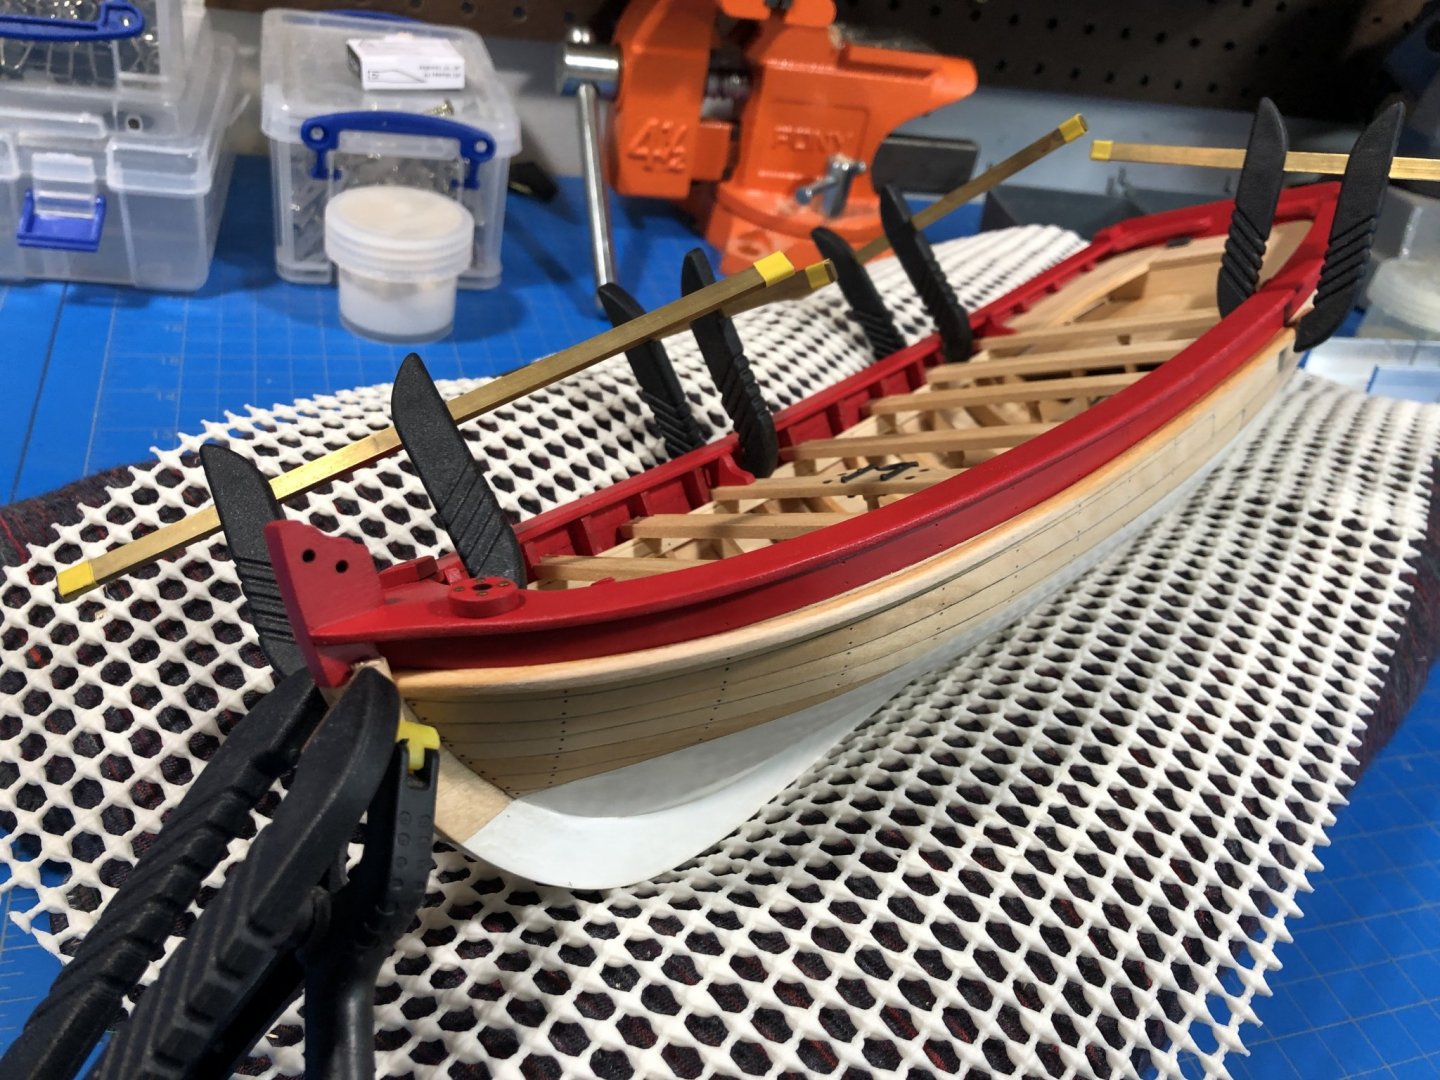
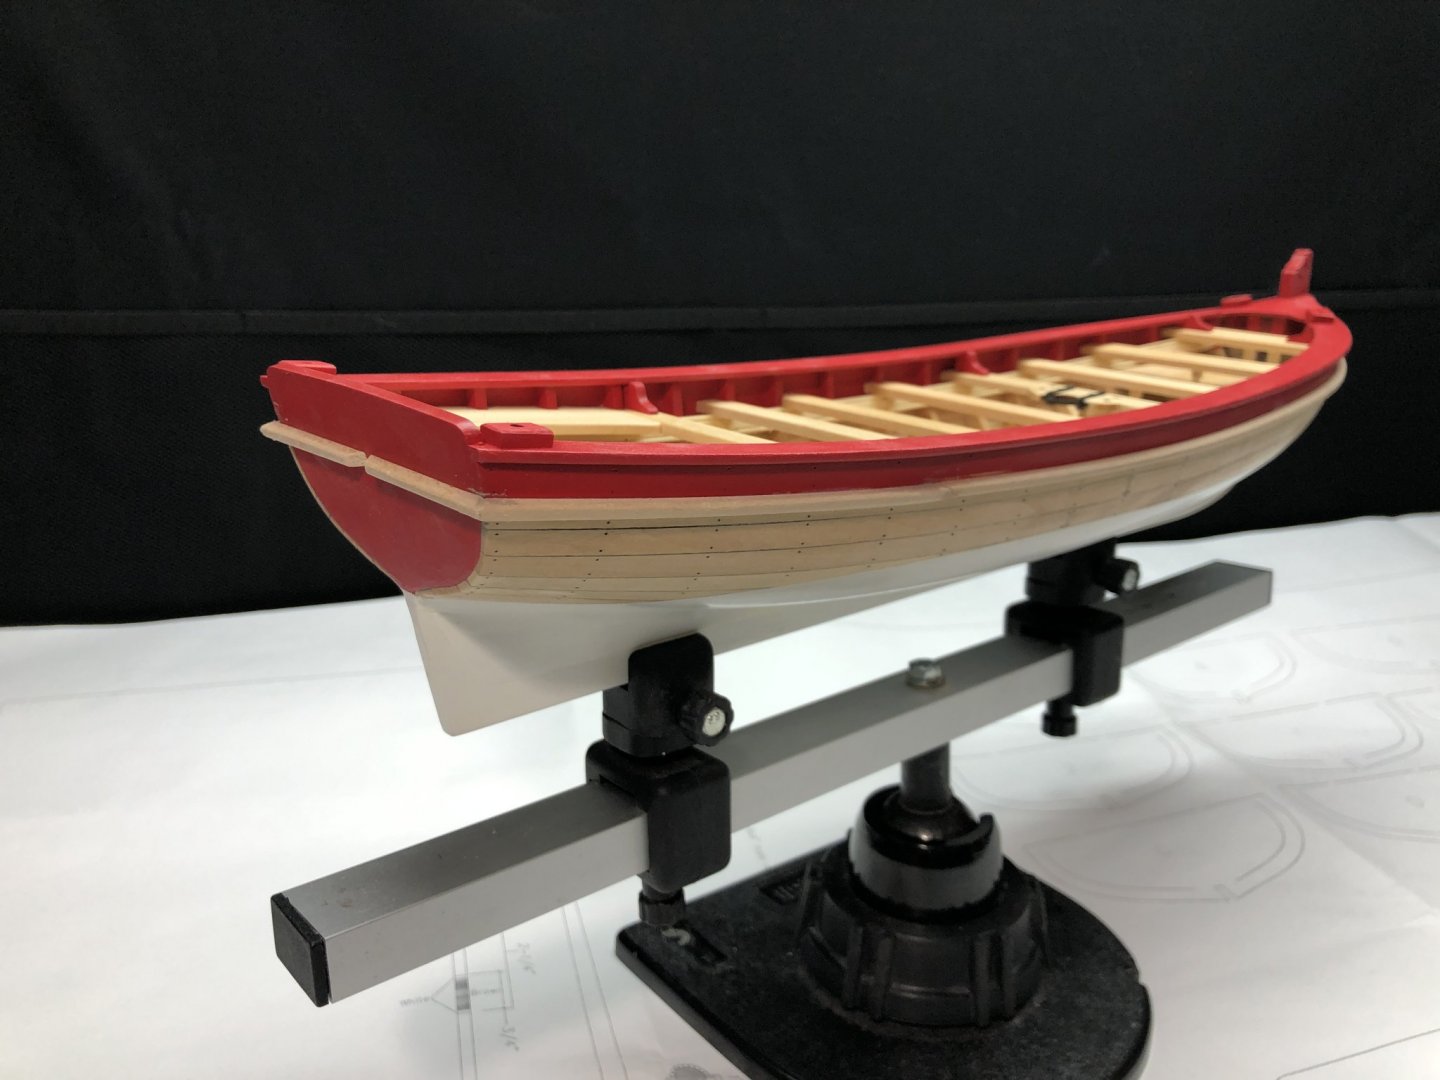
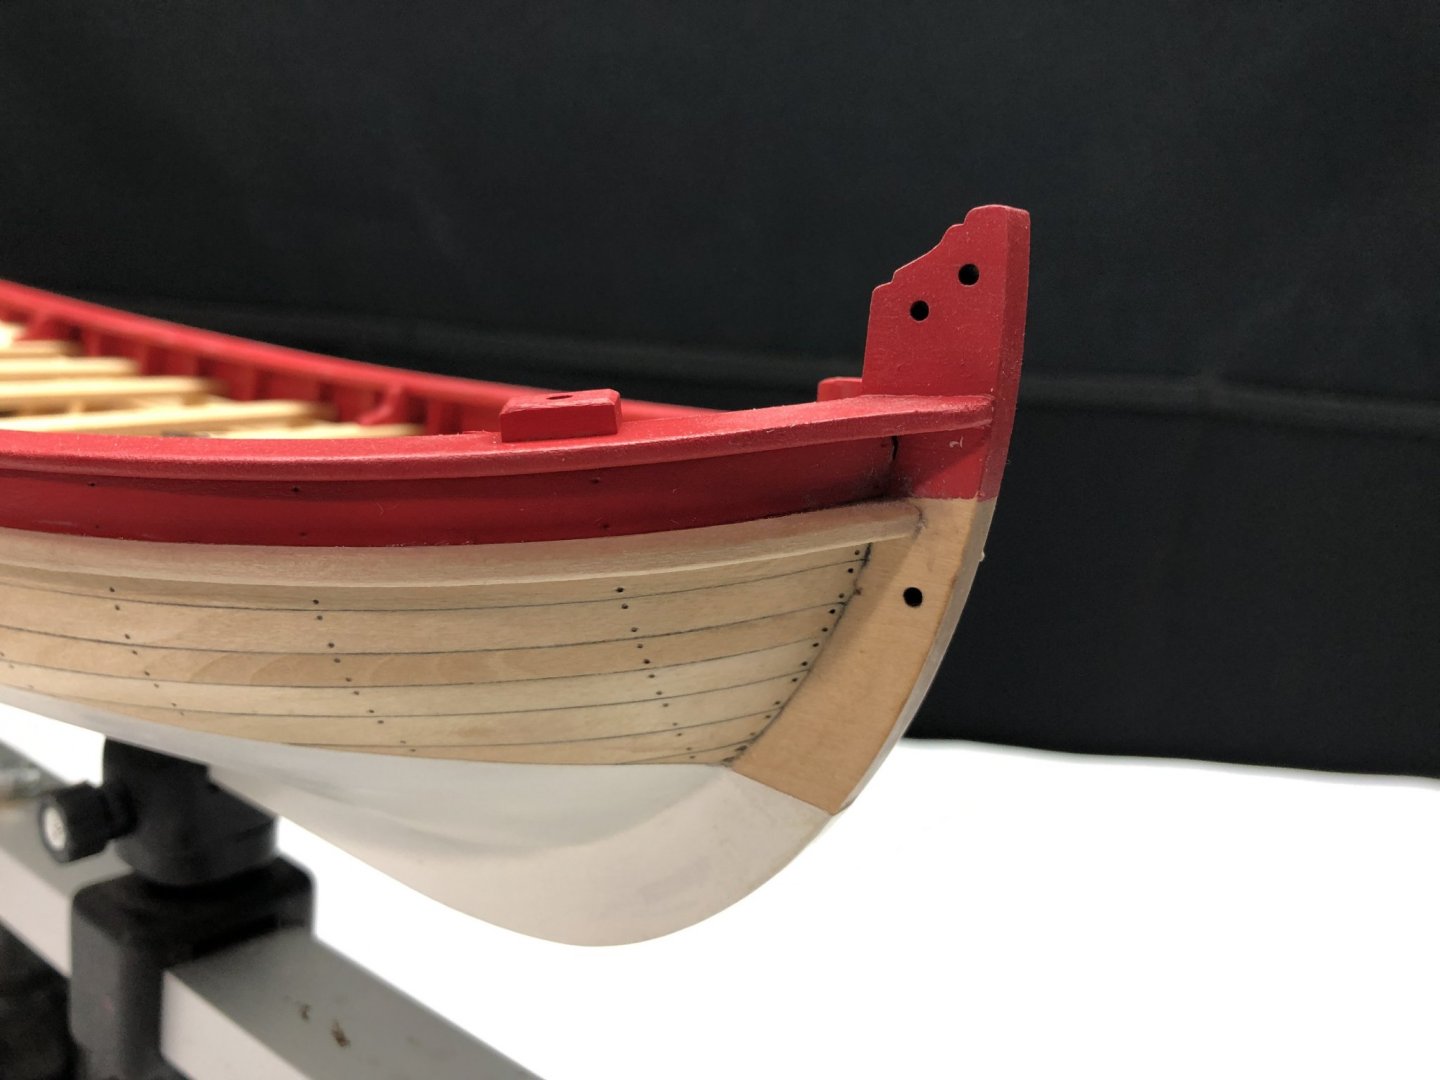
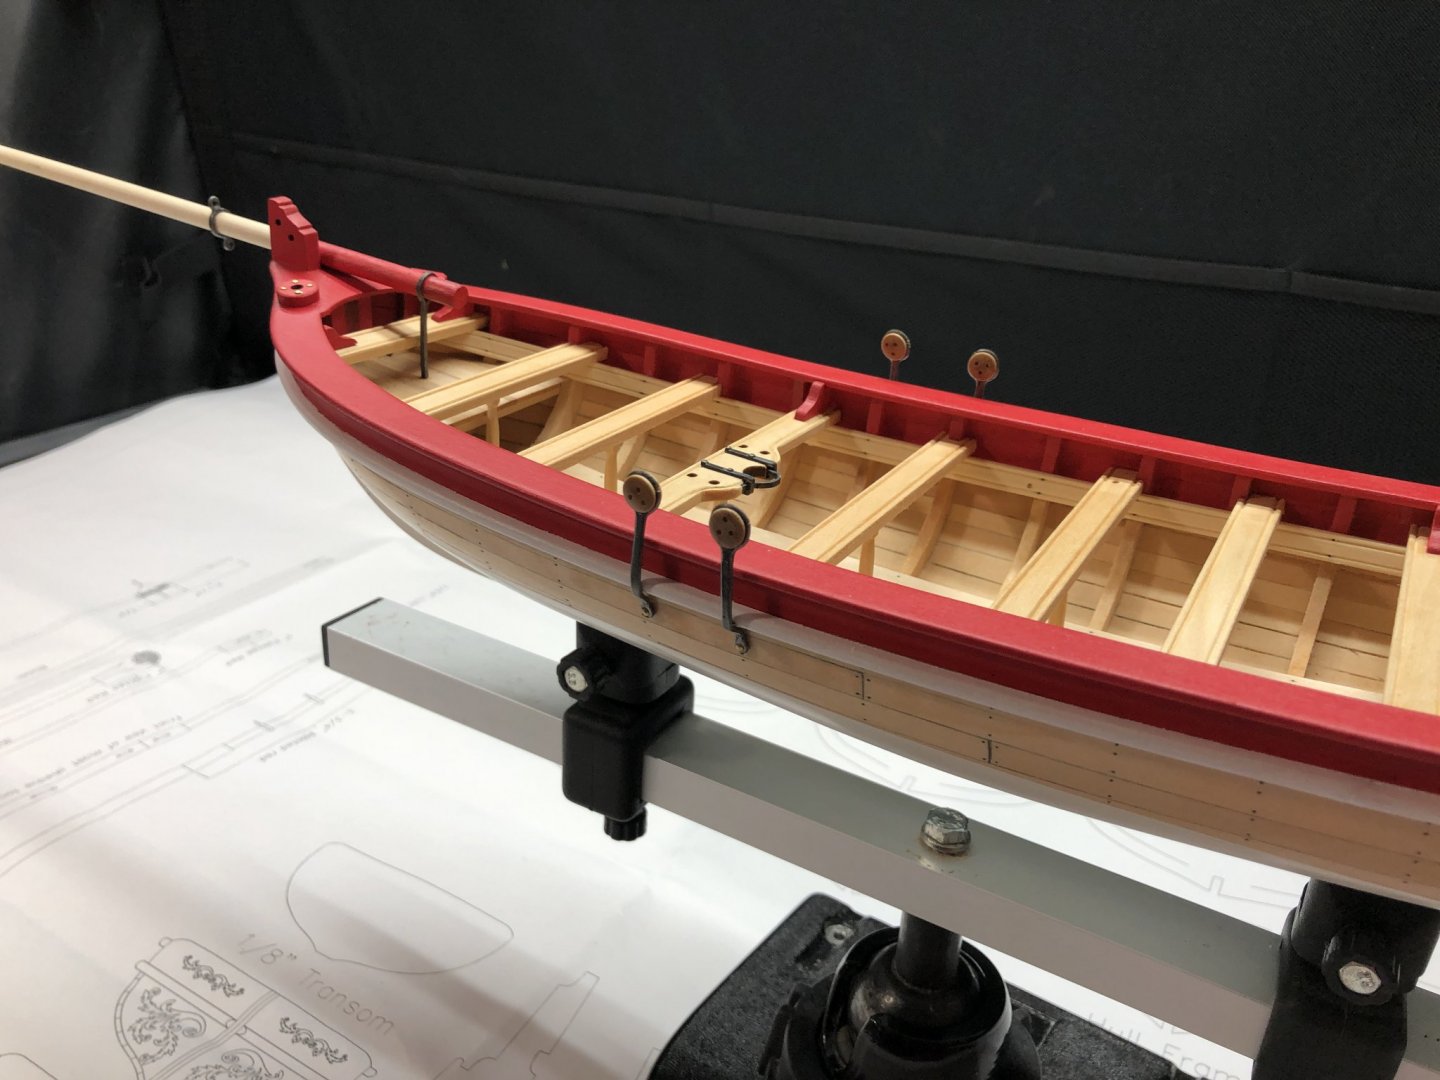
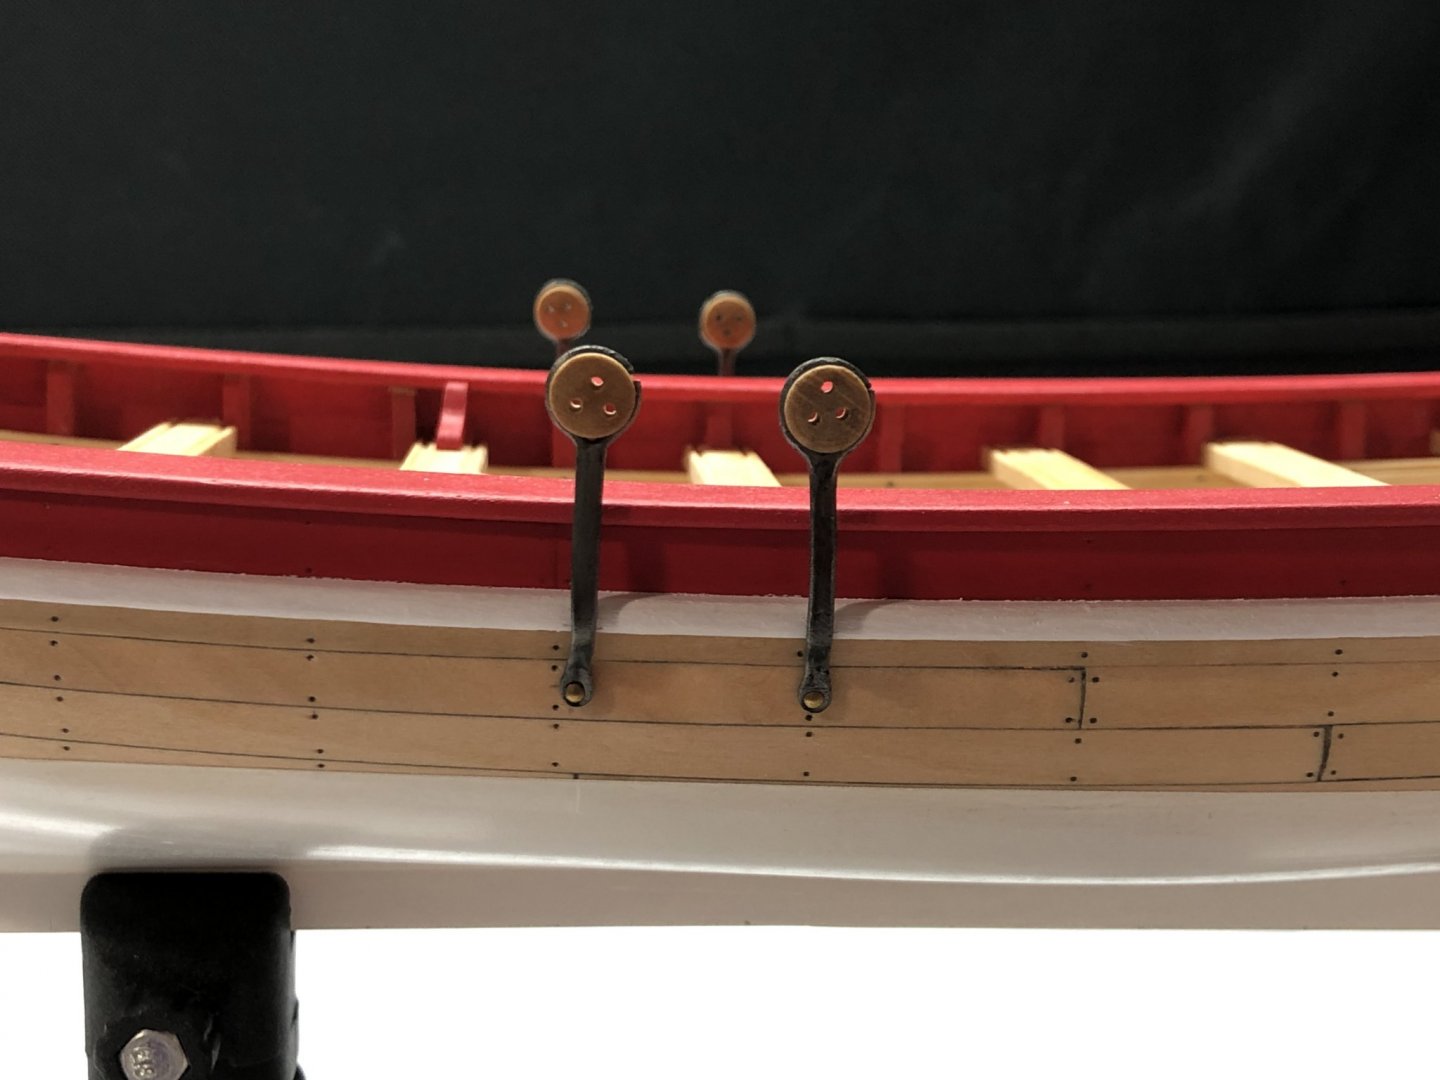
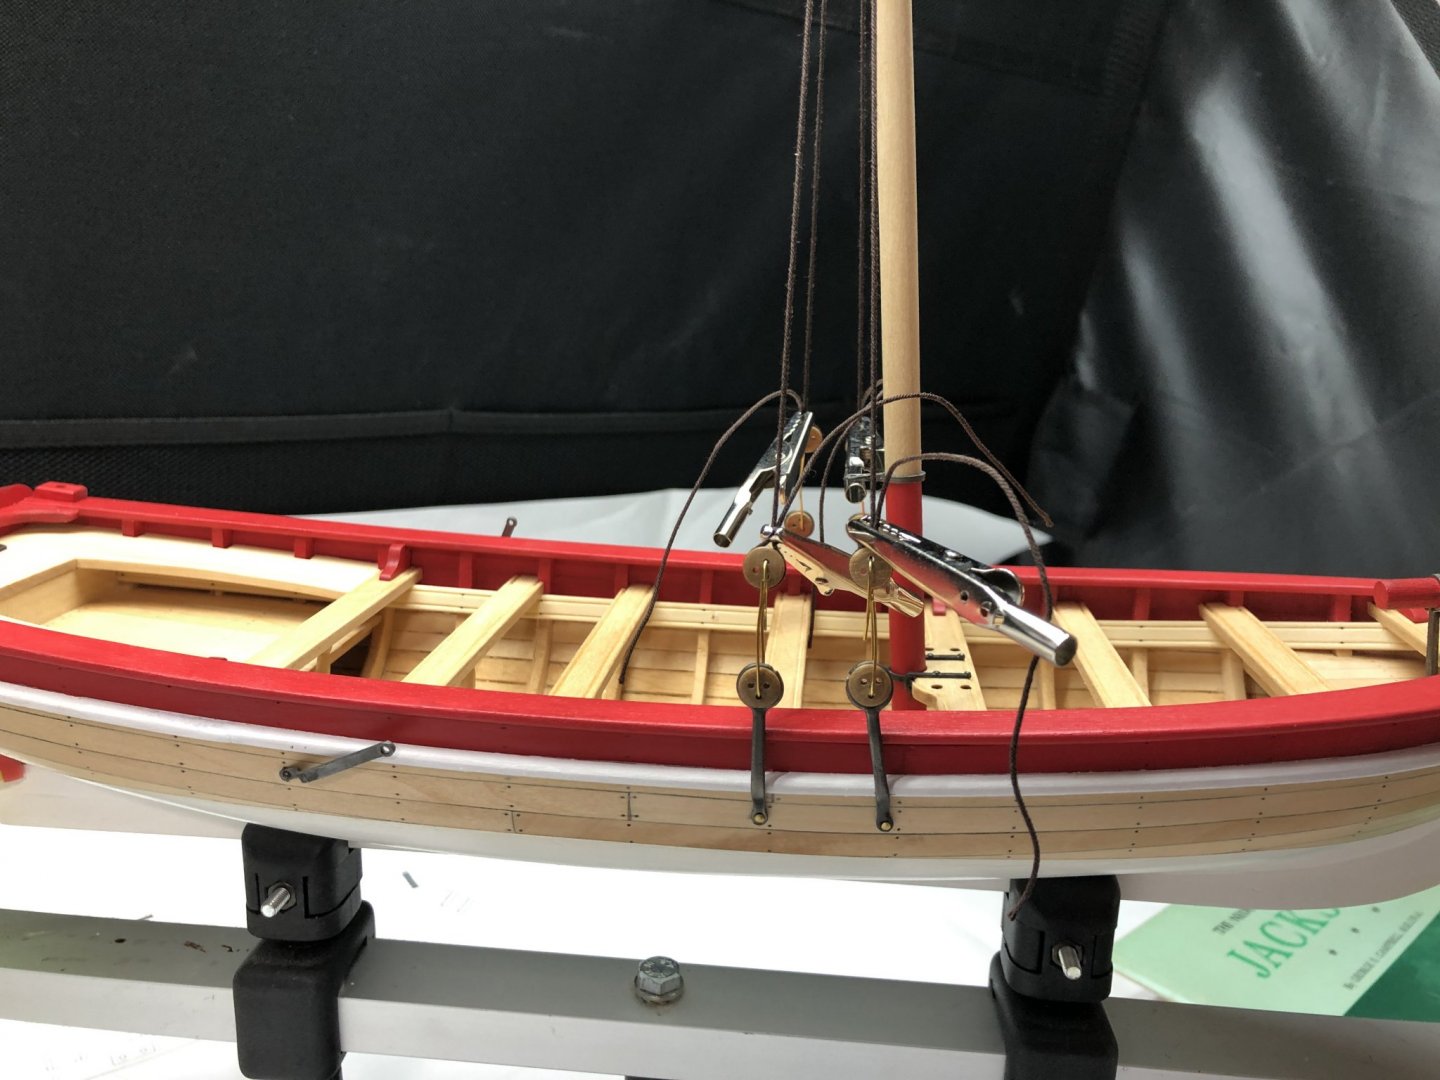
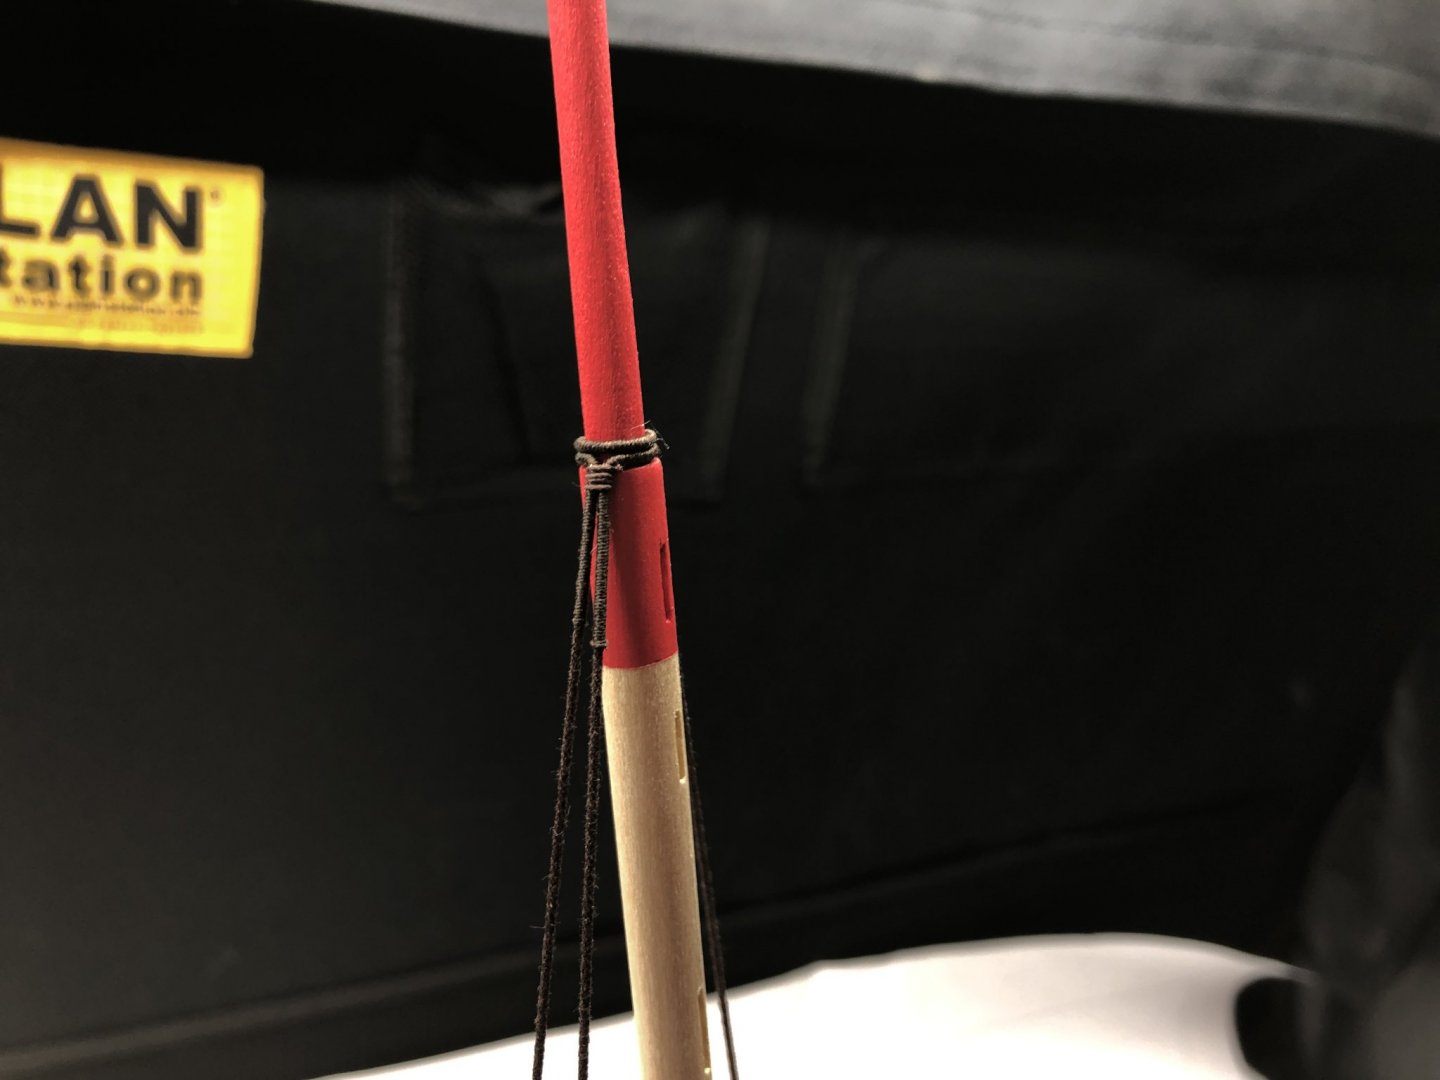
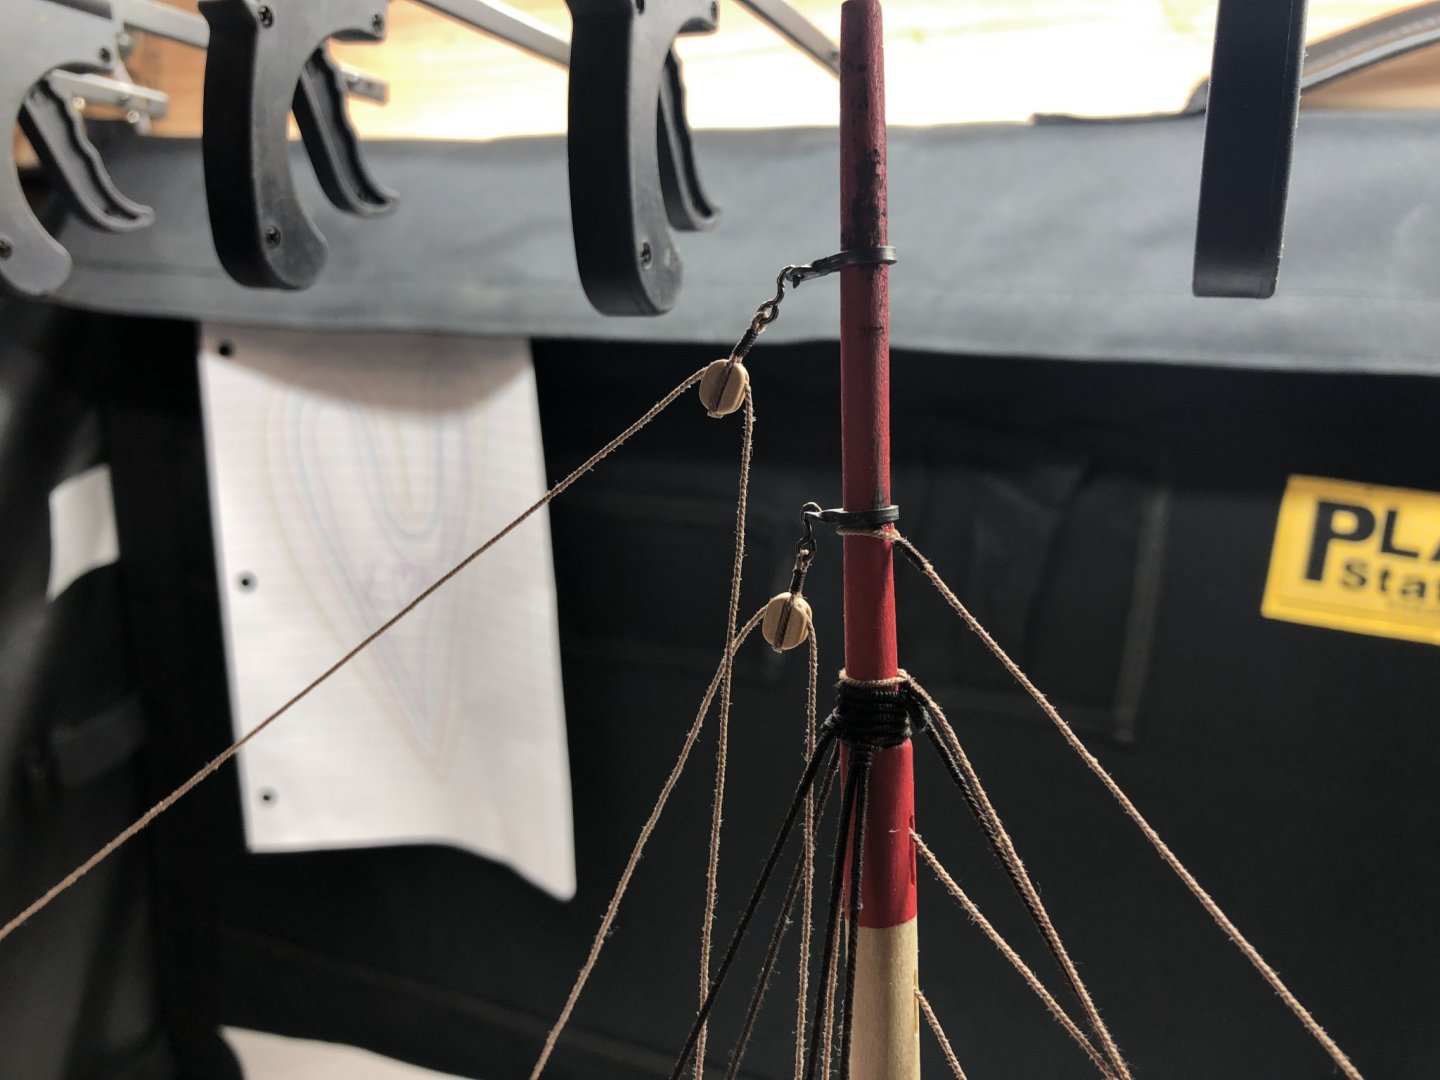
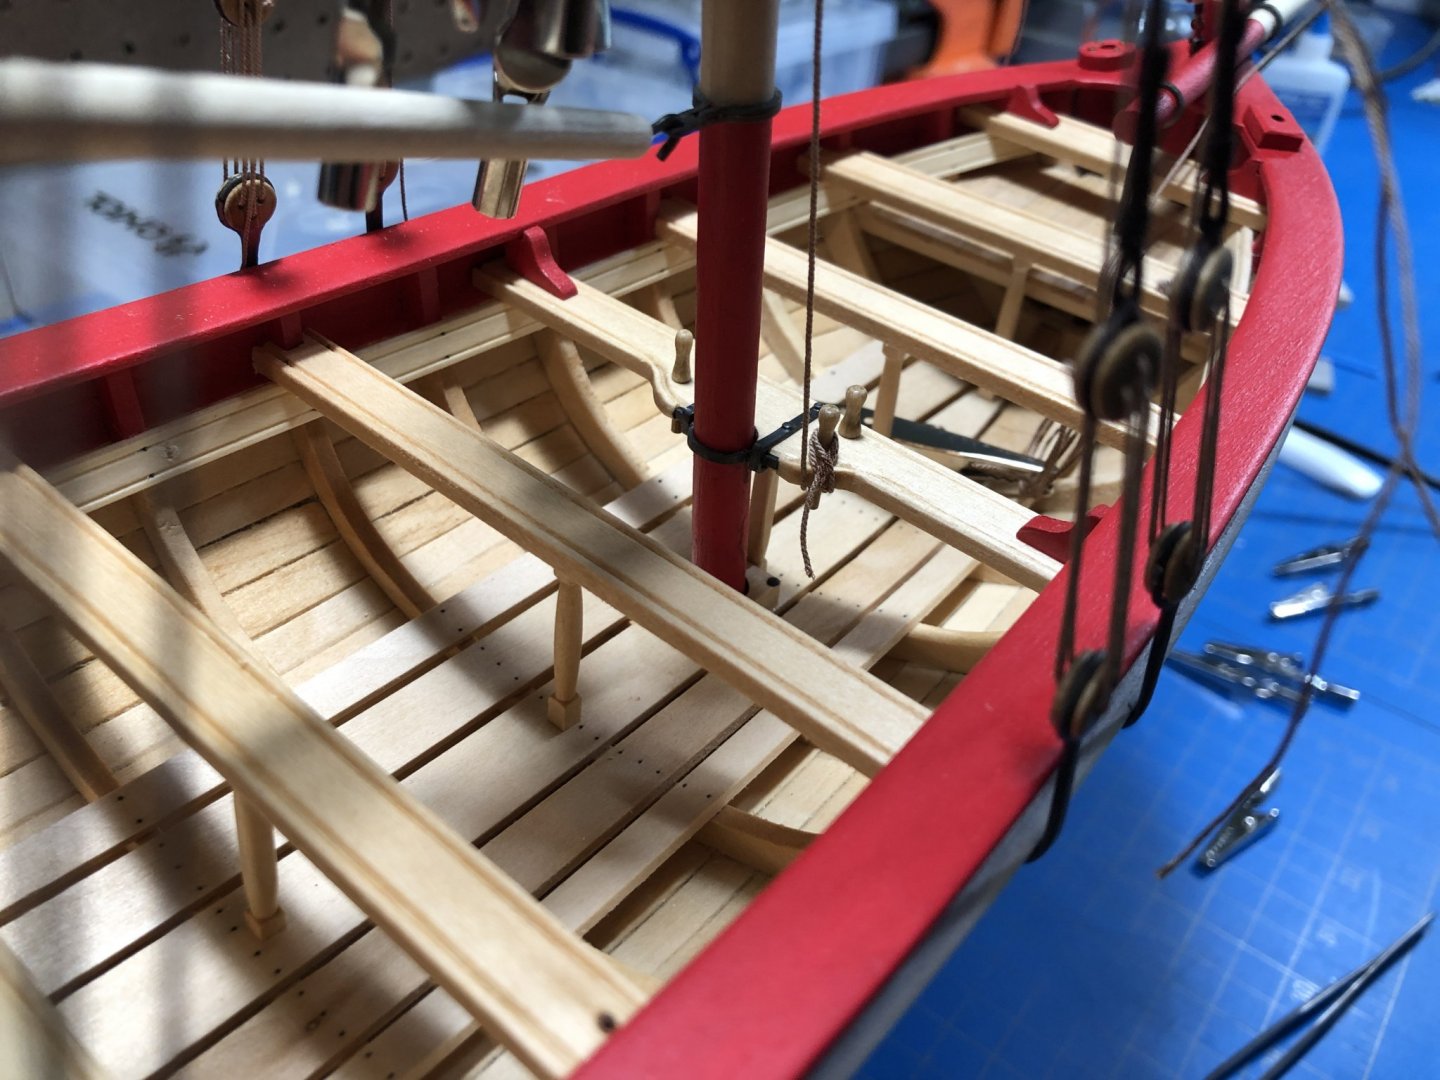
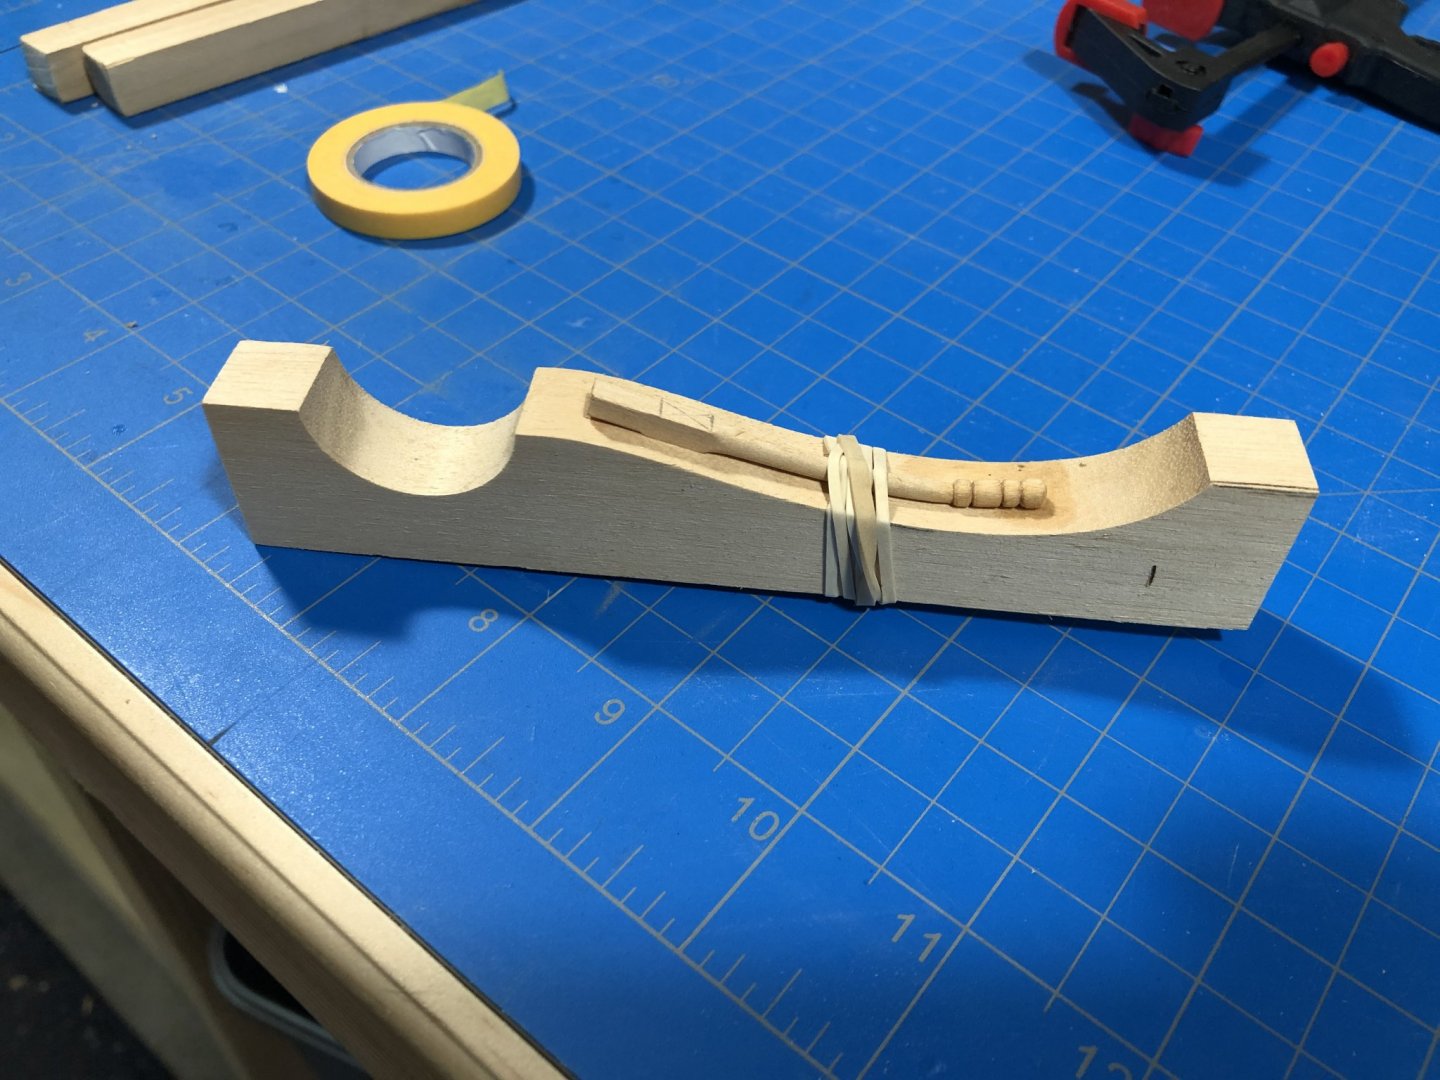
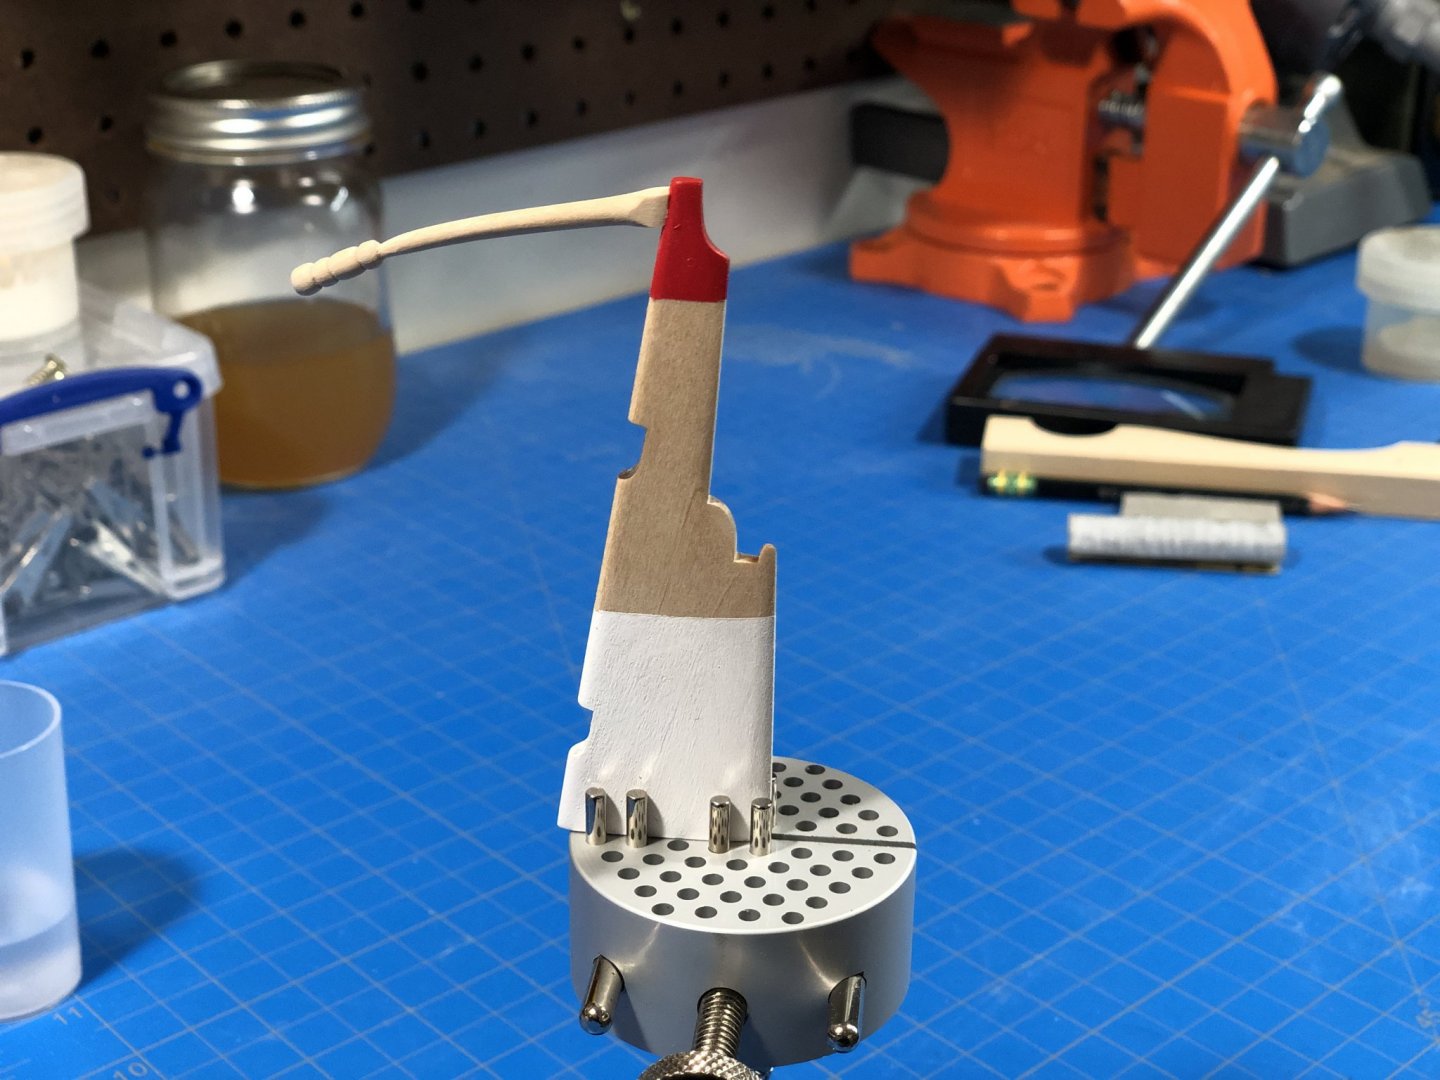
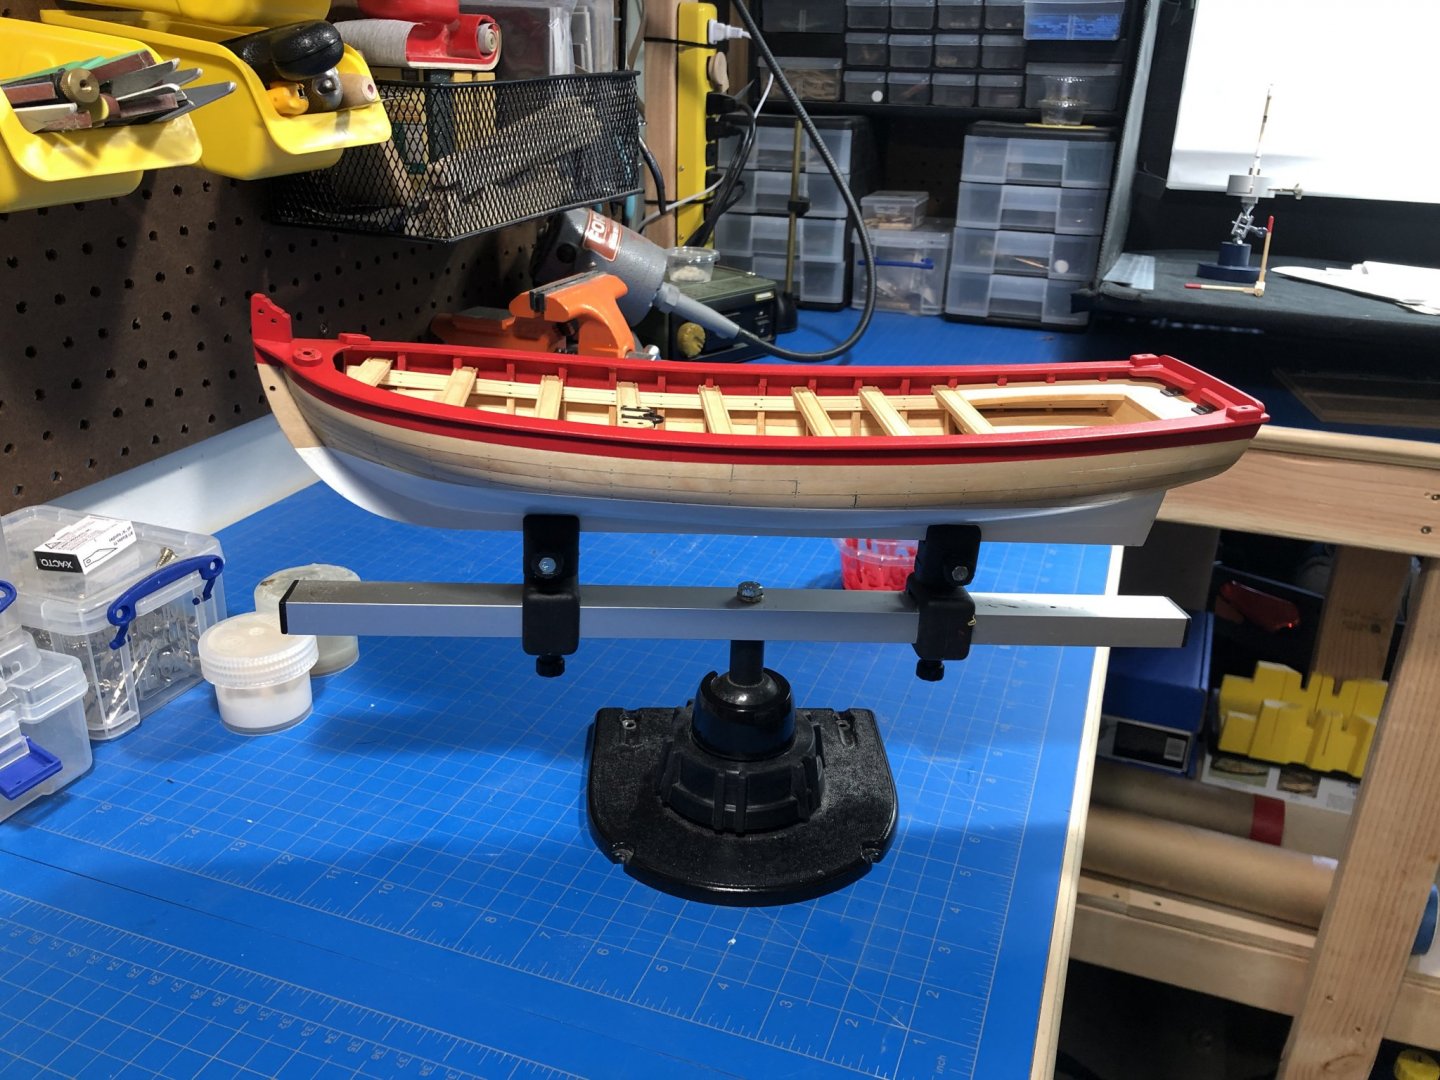
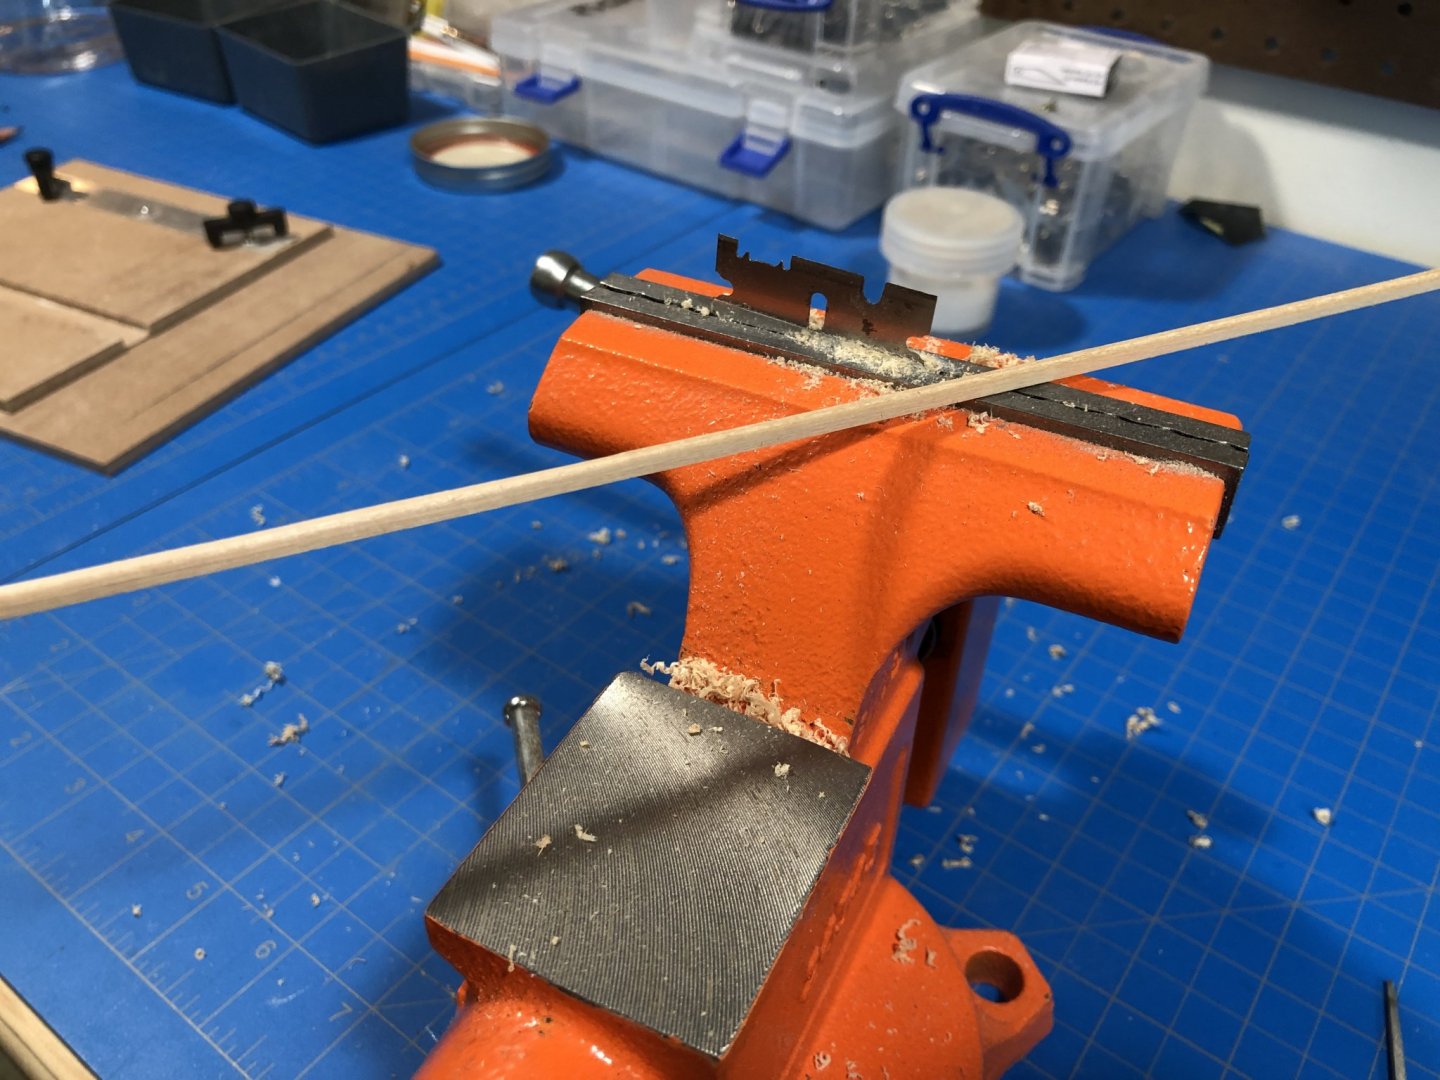
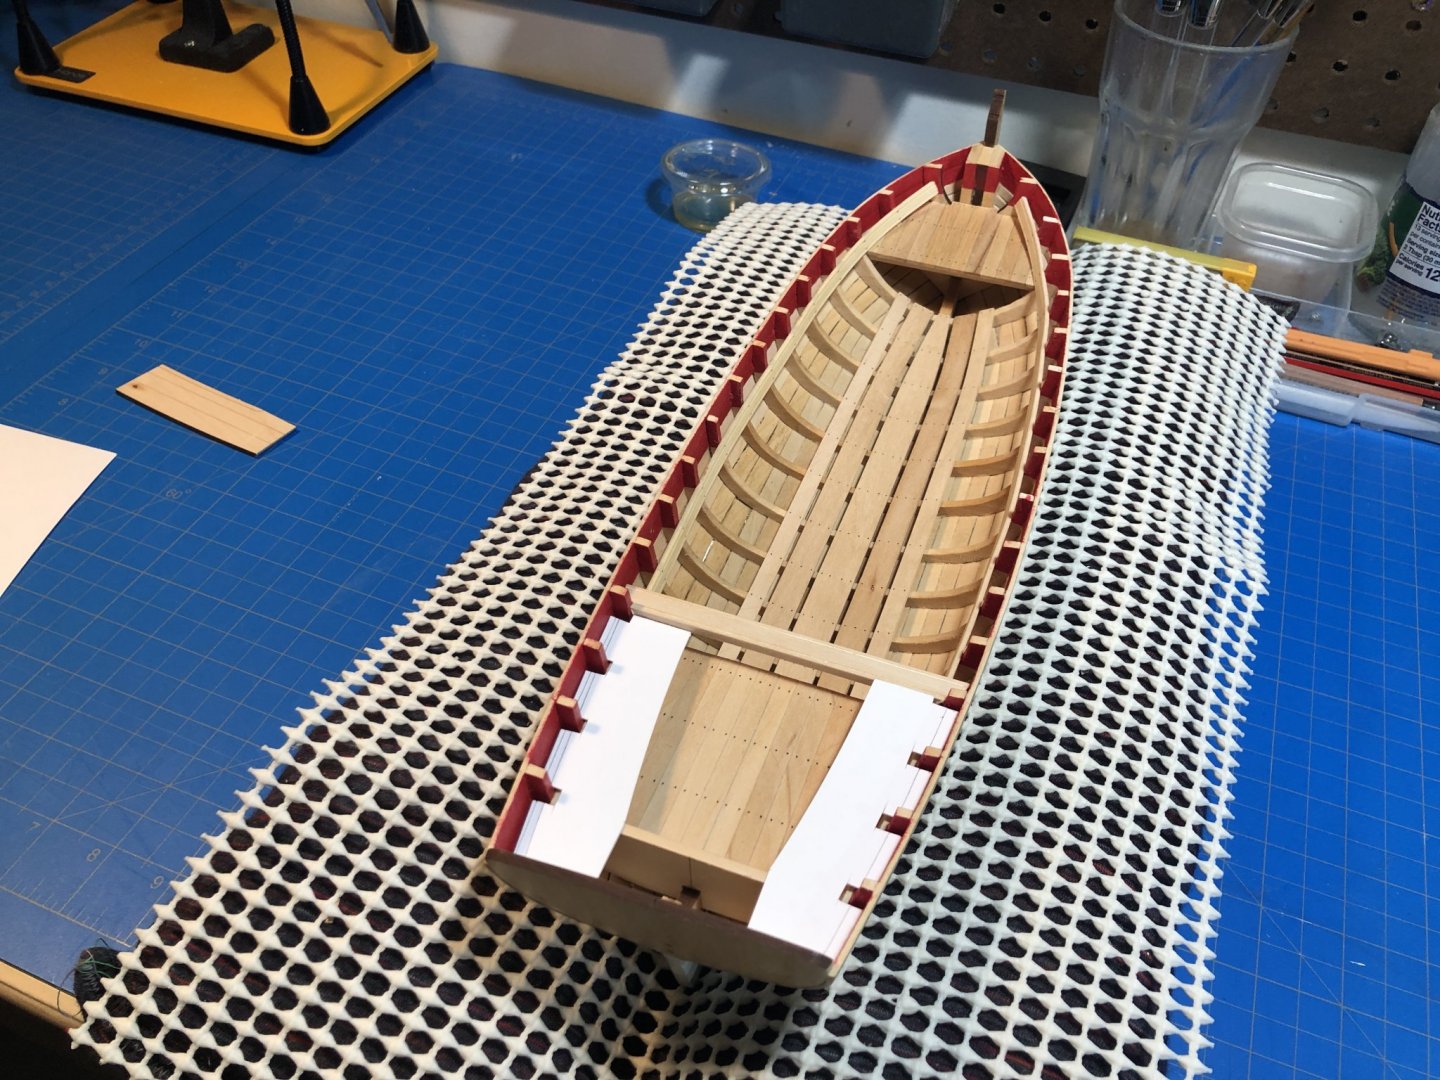
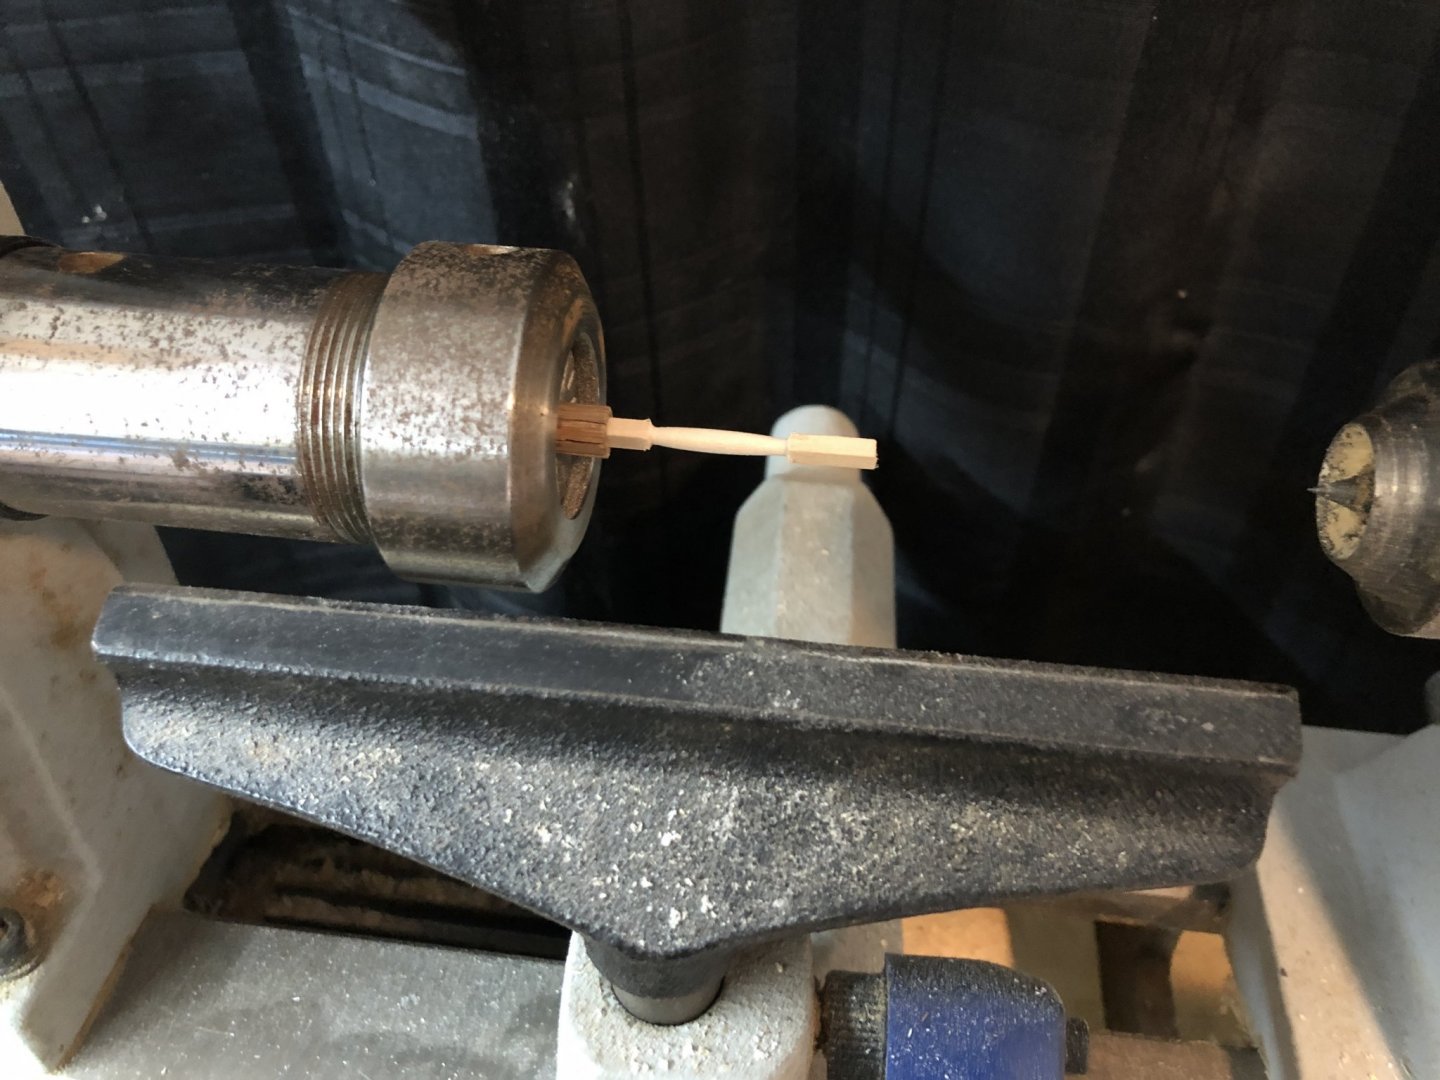
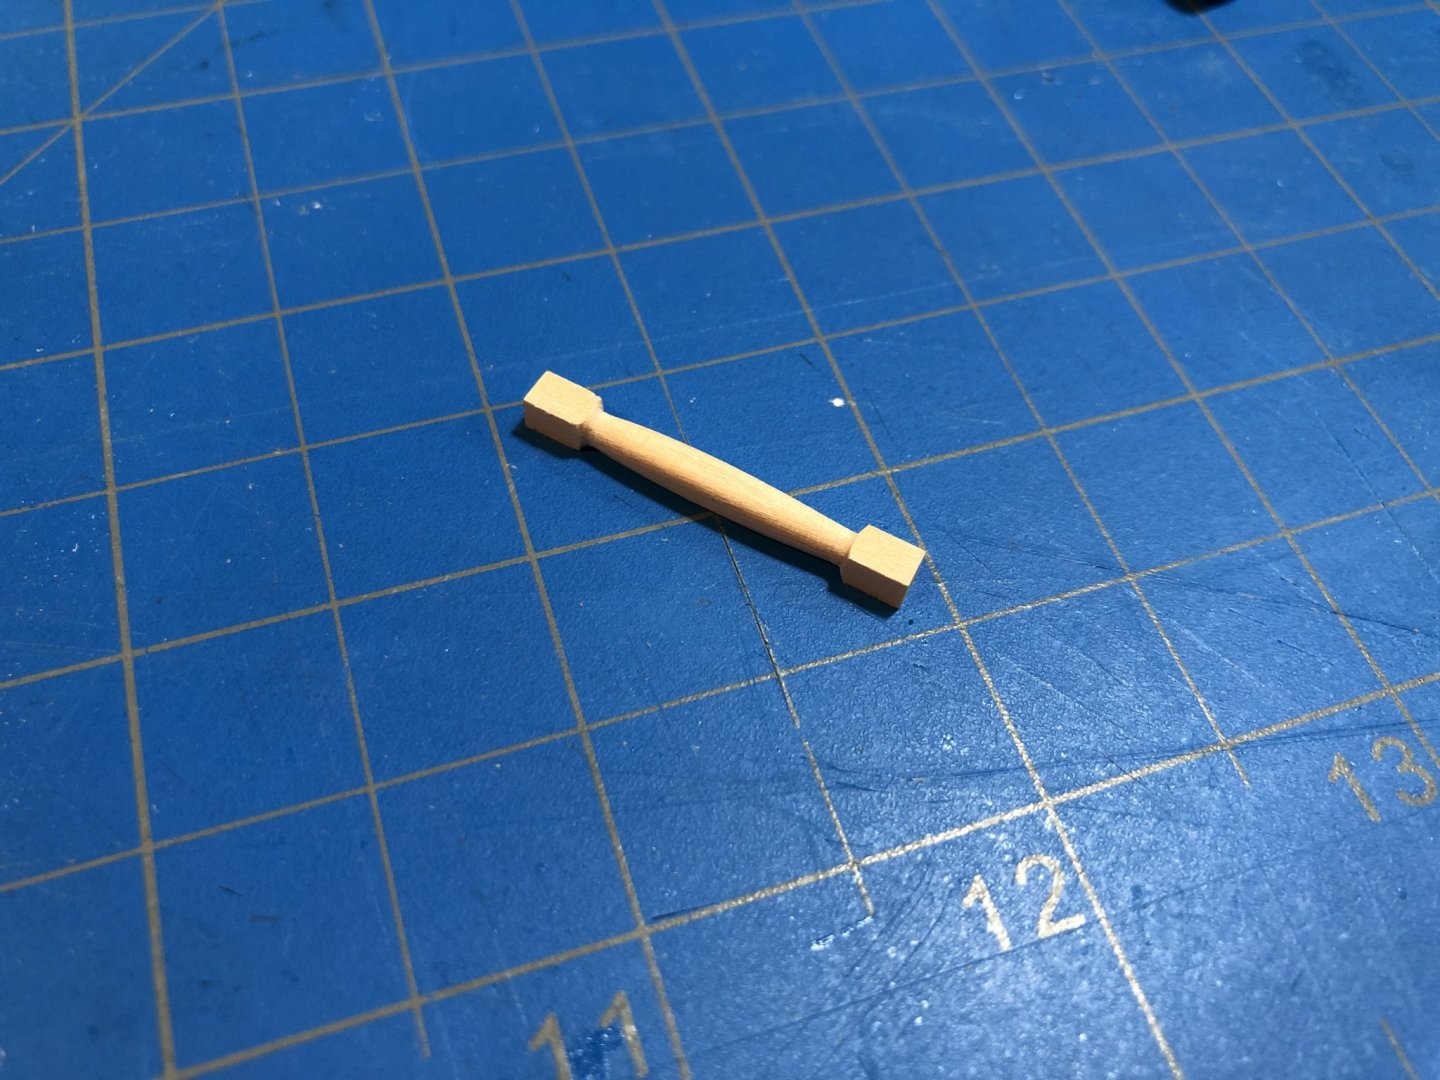
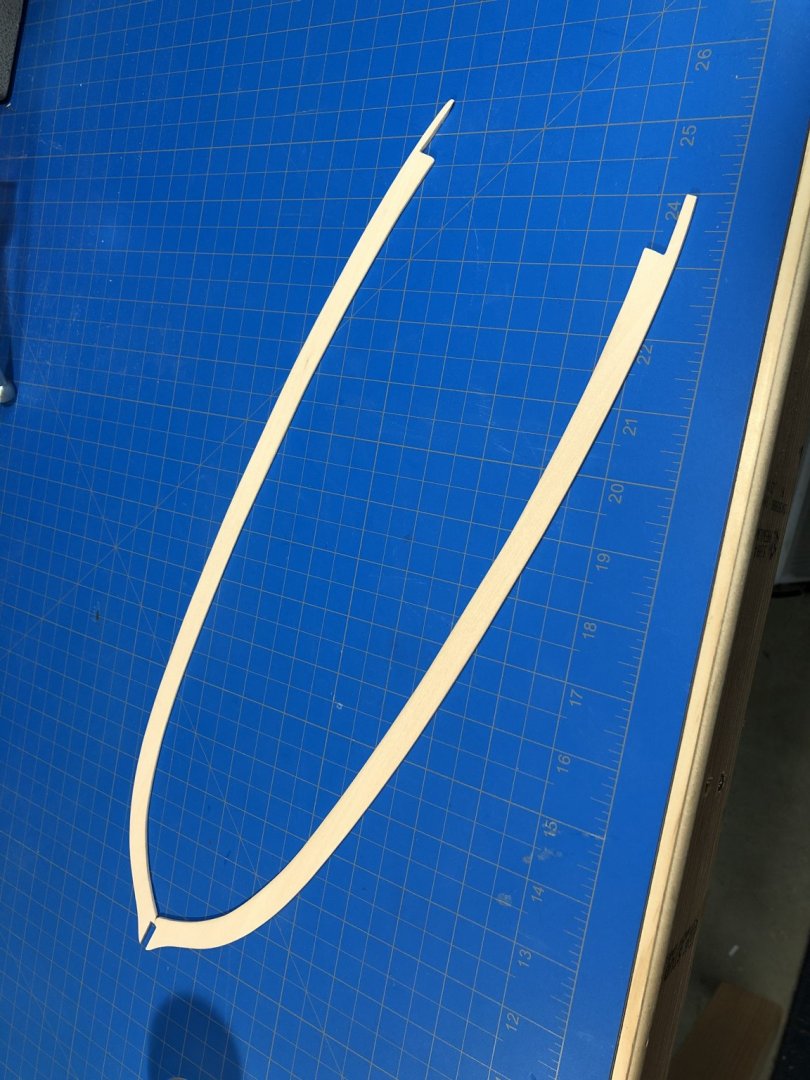
Work continues as those of us who choose, hunker down, and wish the world the best. Ive been steadily marching towards the finish line checking off small tasks as I go and lengthening my "don't do that again" notes. So much learning goes into these small boats that Ive grown really fond of them. I look forward to Medway when it becomes available again. As my skills have improved Ive been contemplating some redo projects to complete a nice collection of small boats. We'll see... In the last few days since my last post I was able to get the rub rails bent to shape and dry fit. The instructions have you bend them and then paint before installing but something about that sequence didn't sit right with me so I decided to install before painting. This allowed for more precise fitment and very minor gap filling where my miters weren't quite perfect. After drying, I began painting the rub rails as specified in the plans. It turned out ok-ish. I guess the benefit of painting prior to install is the very clean line, however I felt it was a balance between my skills at getting the perfect fit versus painting the best line. Using a combination of masking tape and a careful, non-caffeinated hand I was able to get a passable result. Ive had to go back and forth through some areas, as one one would do when painting in a line along the ceiling in a house. Ive also installed the bowsprit, deadeye chainplates and backstay anchors. The instructions here get a little imprecise, but with some careful study of other build logs, and a bit of common sense I was able to piece it together. Some details are depicted in the manual photography, but not mentioned at all in the narrative which I found frustrating. I also began shaping the mast and fitting it in the usual way. I found I had none of the problems observed by other builders with fitting the hardware to the mast so long as I was willing to make minor modifications to the cast metal parts. I feel perhaps this was always intended, with other builders expecting a bit more precision in the provided cast metal parts. I think they actually are made larger to provide more room for error - but that is just my opinion. I also began setting up shrouds. Ive made the highly recommended decision to replace all the tackle and rope with Syren products, which is simply much more satisfying to work with, and the result much more in-line with the time and effort invested in such endeavors. I served my shrouds in the usual way using a Syren serving machine and used a jig to get the deadeye distances correct. The pictured jigs are NOT what worked by the way, I ended up using a scrap bit of wood with nails as is documented in many logs across MSW. I then began work with the Gaff and Boom, back and forestays and the bowsprit rigging, all of which were not particularly well outlined in the instructions. Here Wolfram Zu Mondfeld's Historic Ship Models was an invaluable resource. In fact much of my rigging questions were answered through 80% that book and 20% perusing MSW logs of similar builds. Everything from block stropping, deadeye rigging, knots, and other peripheral rigging minutia is well covered. I also decided to scratch build new belaying pins. The provided pins were absurdly small brass things that really did not look or function correctly, nor did the reference materials bear out the use of metal for a belaying pin. I knocked a few out pretty easily with some dowel stock and my foredom. I made a bunch until I got it right and could consistently make the same size and shape. Time well spent. Currently working on the other bits as most of the rigging is done. I need to go through and shoot photos of all the cleaned up rigging and so forth which Ill include in the next post. I did get the deadeyes rigged and lines belayed. All that's left is coils and touch-up paint where my blackened metal components left some black scuffs on the paintwork. I also have a flag halyard to rig now that a glaring omission in the instructions has been cleared up for me thanks to BobG. Ive also got to convince myself to add the oarlocks - which I think are just hideous as designed for this kit. The rudder and tiller gudgeons were not well executed on my part, so I need to return to that mini-model and see if I can recover it. Getting there.


- 66 replies
-
- 7
-
-
- Finished
- Model Shipways
- (and 1 more)
-
Which direction do the tails of shrouds go?
Justin P. replied to Maury S's topic in Masting, rigging and sails
I’ve found bulkiness can come from disproportion in the chosen scale ropes and dead eyes. When things are correct (or close to correct) then everything looks “right.” But to answer your question, yes they should cross and be seized vertically at the throat. There are probably many ways to accomplish the right look without actually seizing, but figuring a way to do it is more rewarding even if frustrating and fiddly. -
Which direction do the tails of shrouds go?
Justin P. replied to Maury S's topic in Masting, rigging and sails
It is entirely a function of how the rope was laid. Dont have a source for this image off the top of my head, I stole it from google... pretty sure its well described in Zu Mondfeld in a similar way, though referred to as right and left handed.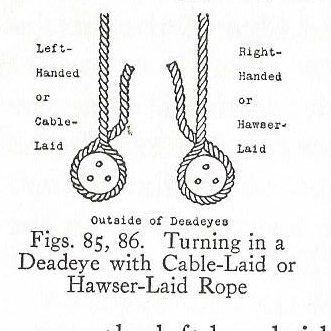
-
Thanks Bob, I wouldn't assume much from this model. The instructions are good, but sequencing is confusing and some elements are half completed or ignored completely so there has been some guess work. Thankfully a essential third-party resources (of which of course is MSW) have gotten me through the vast majority of it. Thanks for the reply.
-
Arthur, Can you help me understand where the Flag Halyard is meant to be rigged? Or point me to a reference? The instructions mention the Ball truck but then never return to it. Ive scoured pictures but can't figure out exactly where this line is being attached down at the hull. Thanks.
-
tool review Planet Working Bench
Justin P. replied to James H's topic in REVIEWS: Model Shipwrighting Tools, Parts and fittings
Sorry, I don't mean the miniature vise. I meant the mounting clamps for the planet bench. Cant be only 10mm. -
tool review Planet Working Bench
Justin P. replied to James H's topic in REVIEWS: Model Shipwrighting Tools, Parts and fittings
What is the clearance on those clamps.... looks like about 3"? -
Bob, she looks great. I love that we've not seen very many of these builds and that your doing such a nice job of it.
-
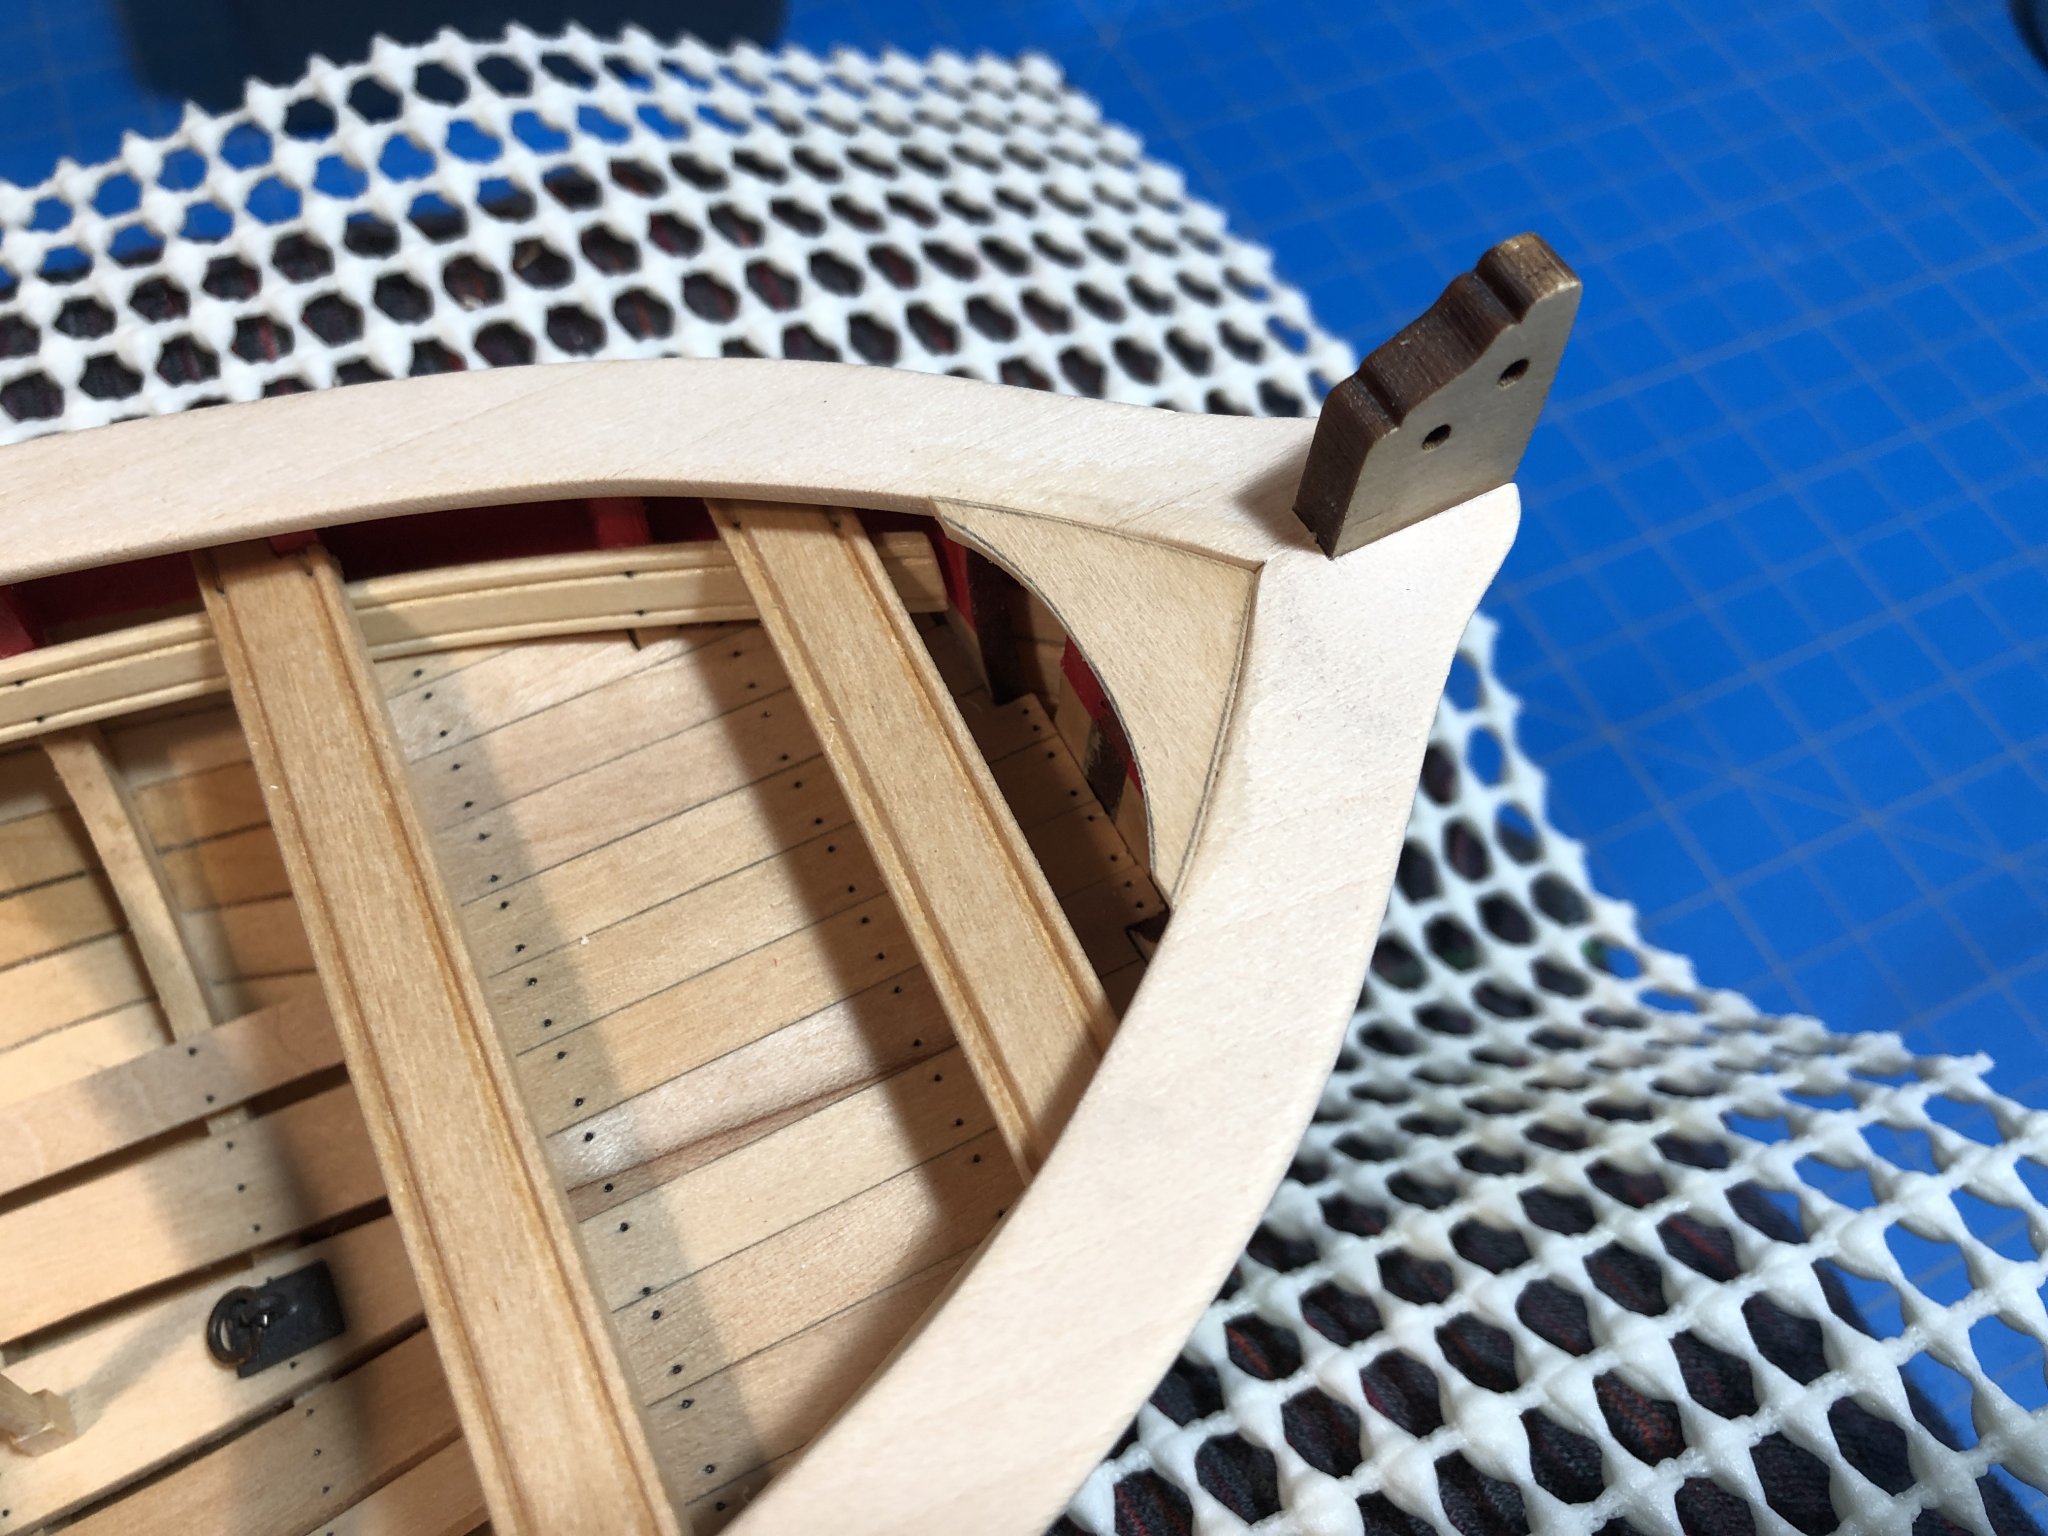
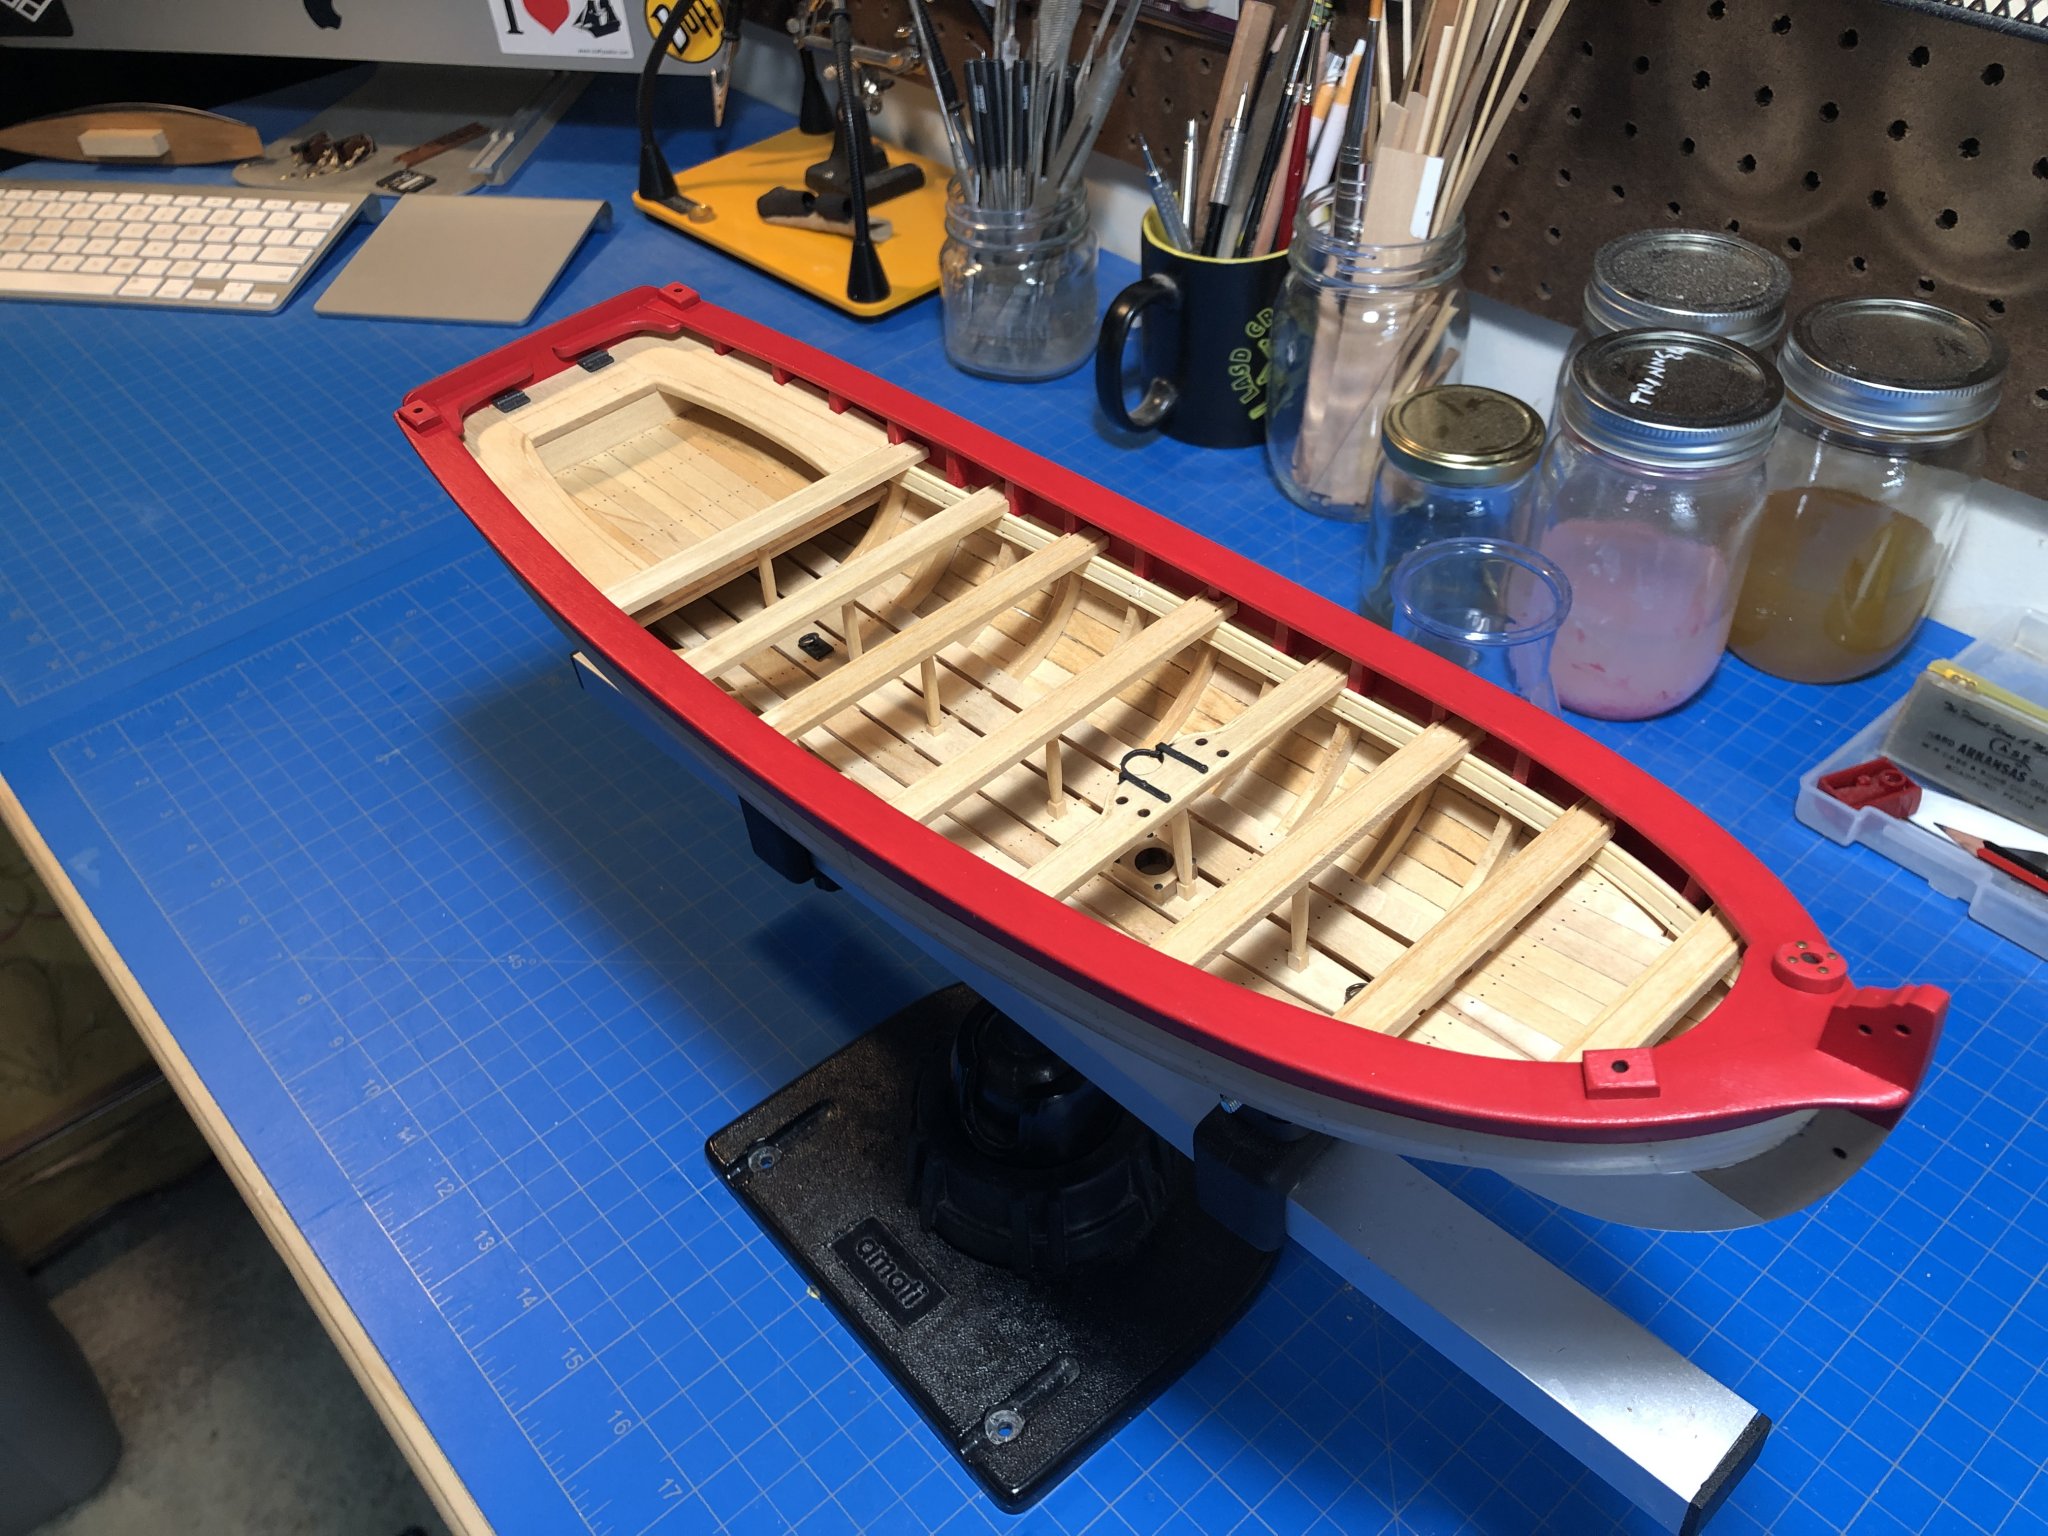
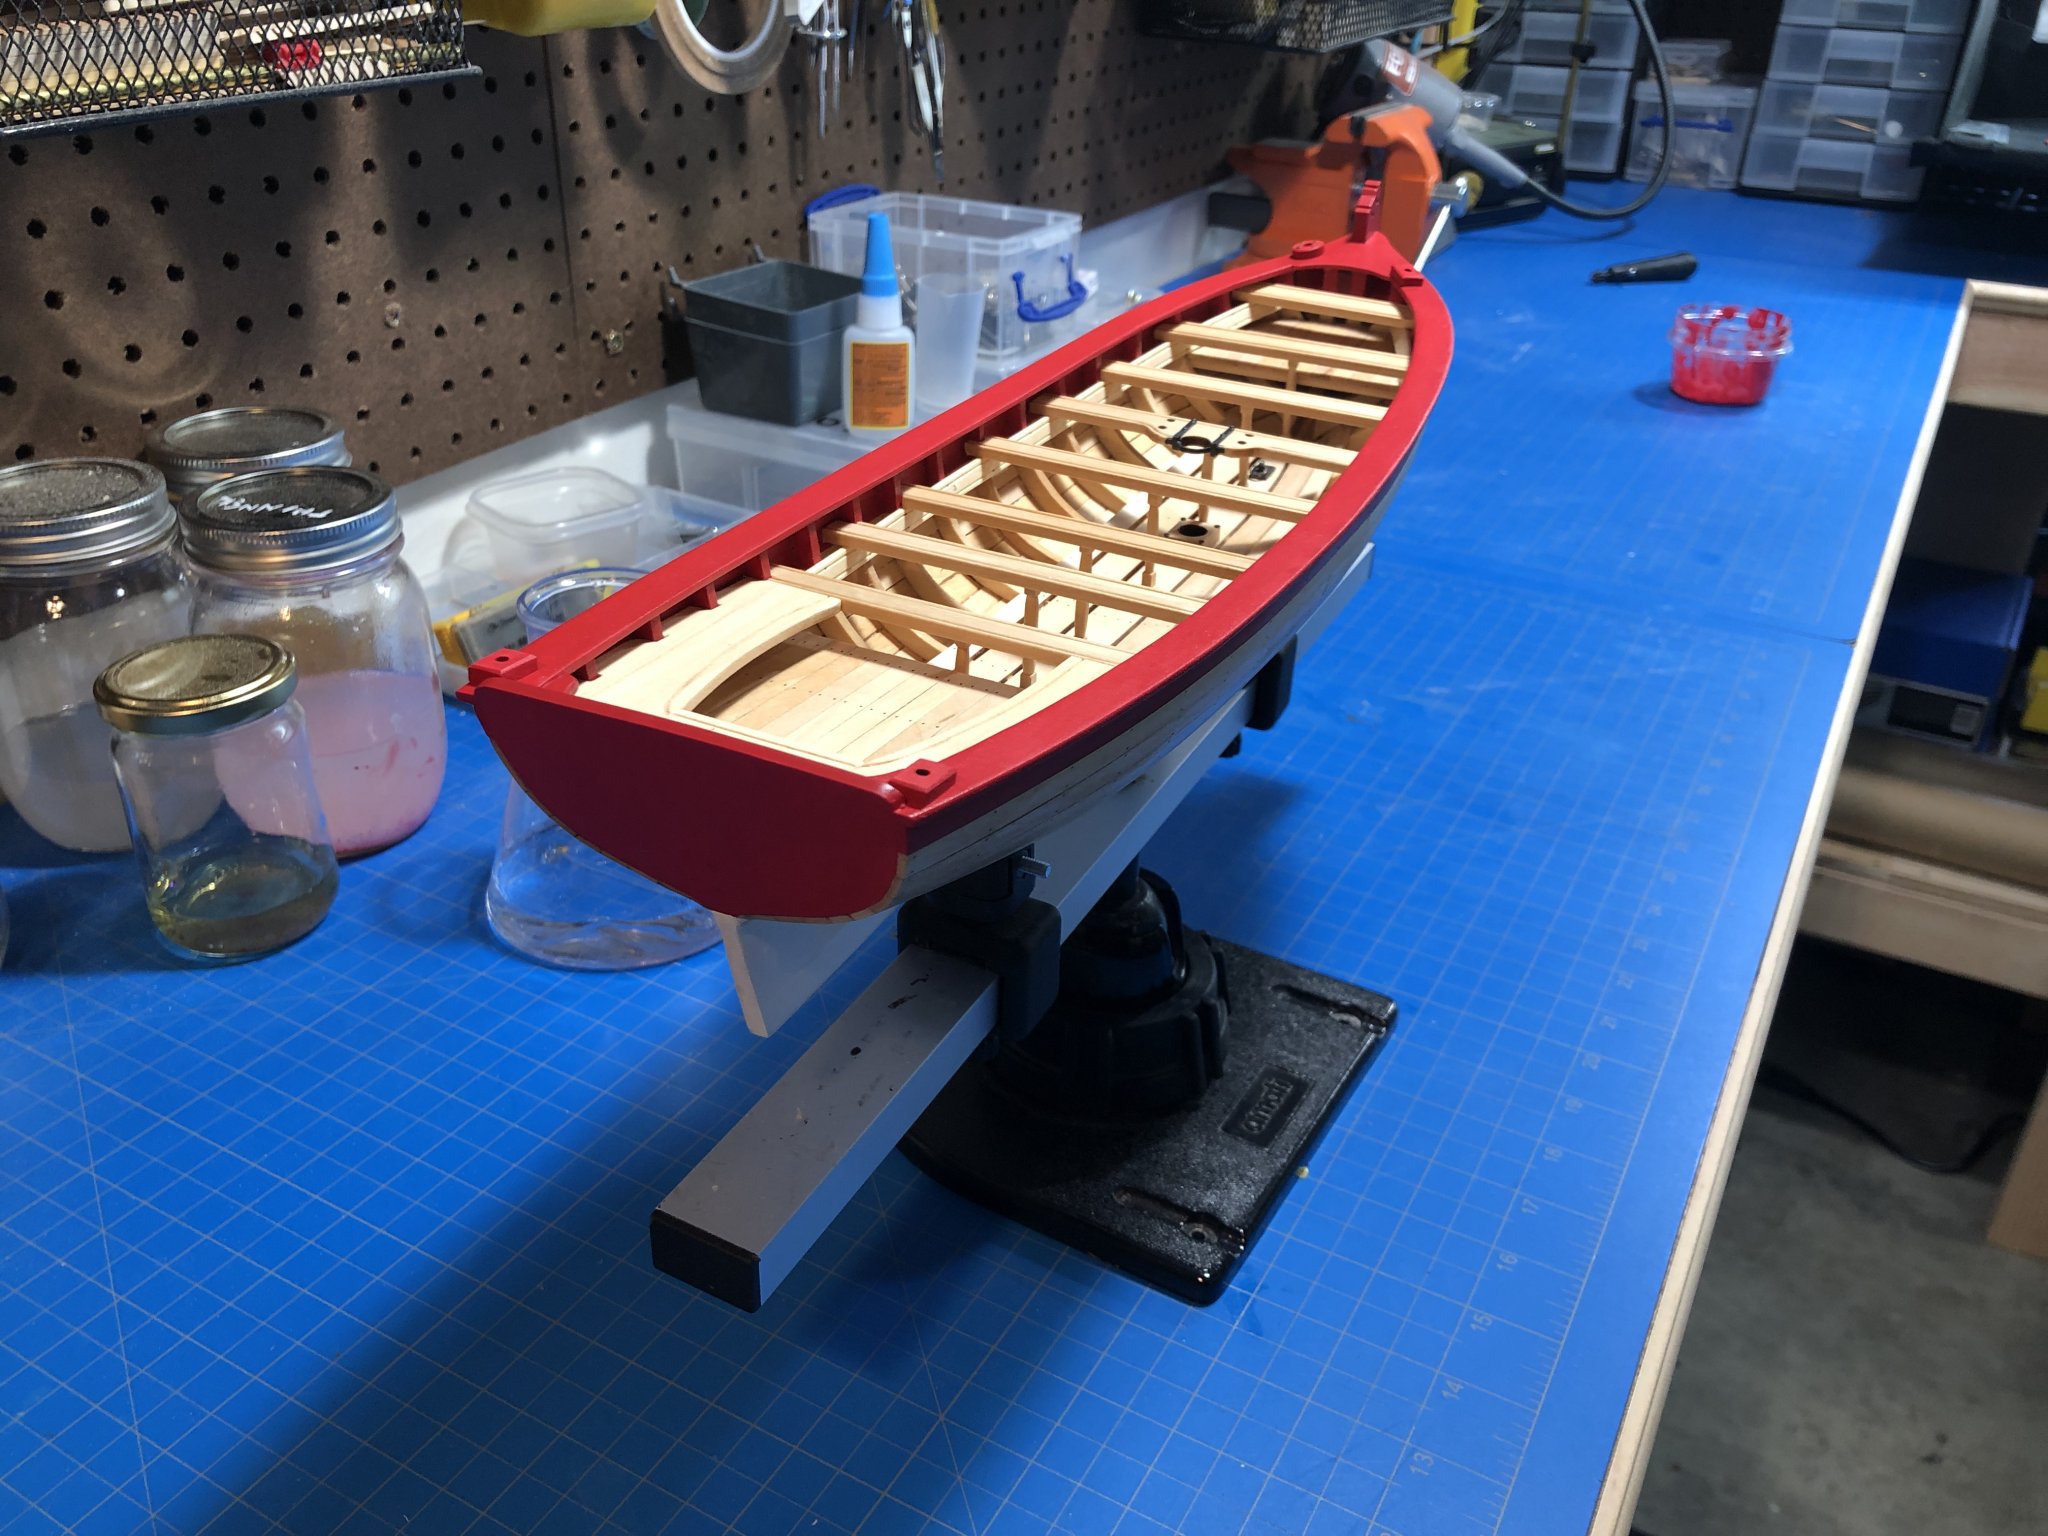
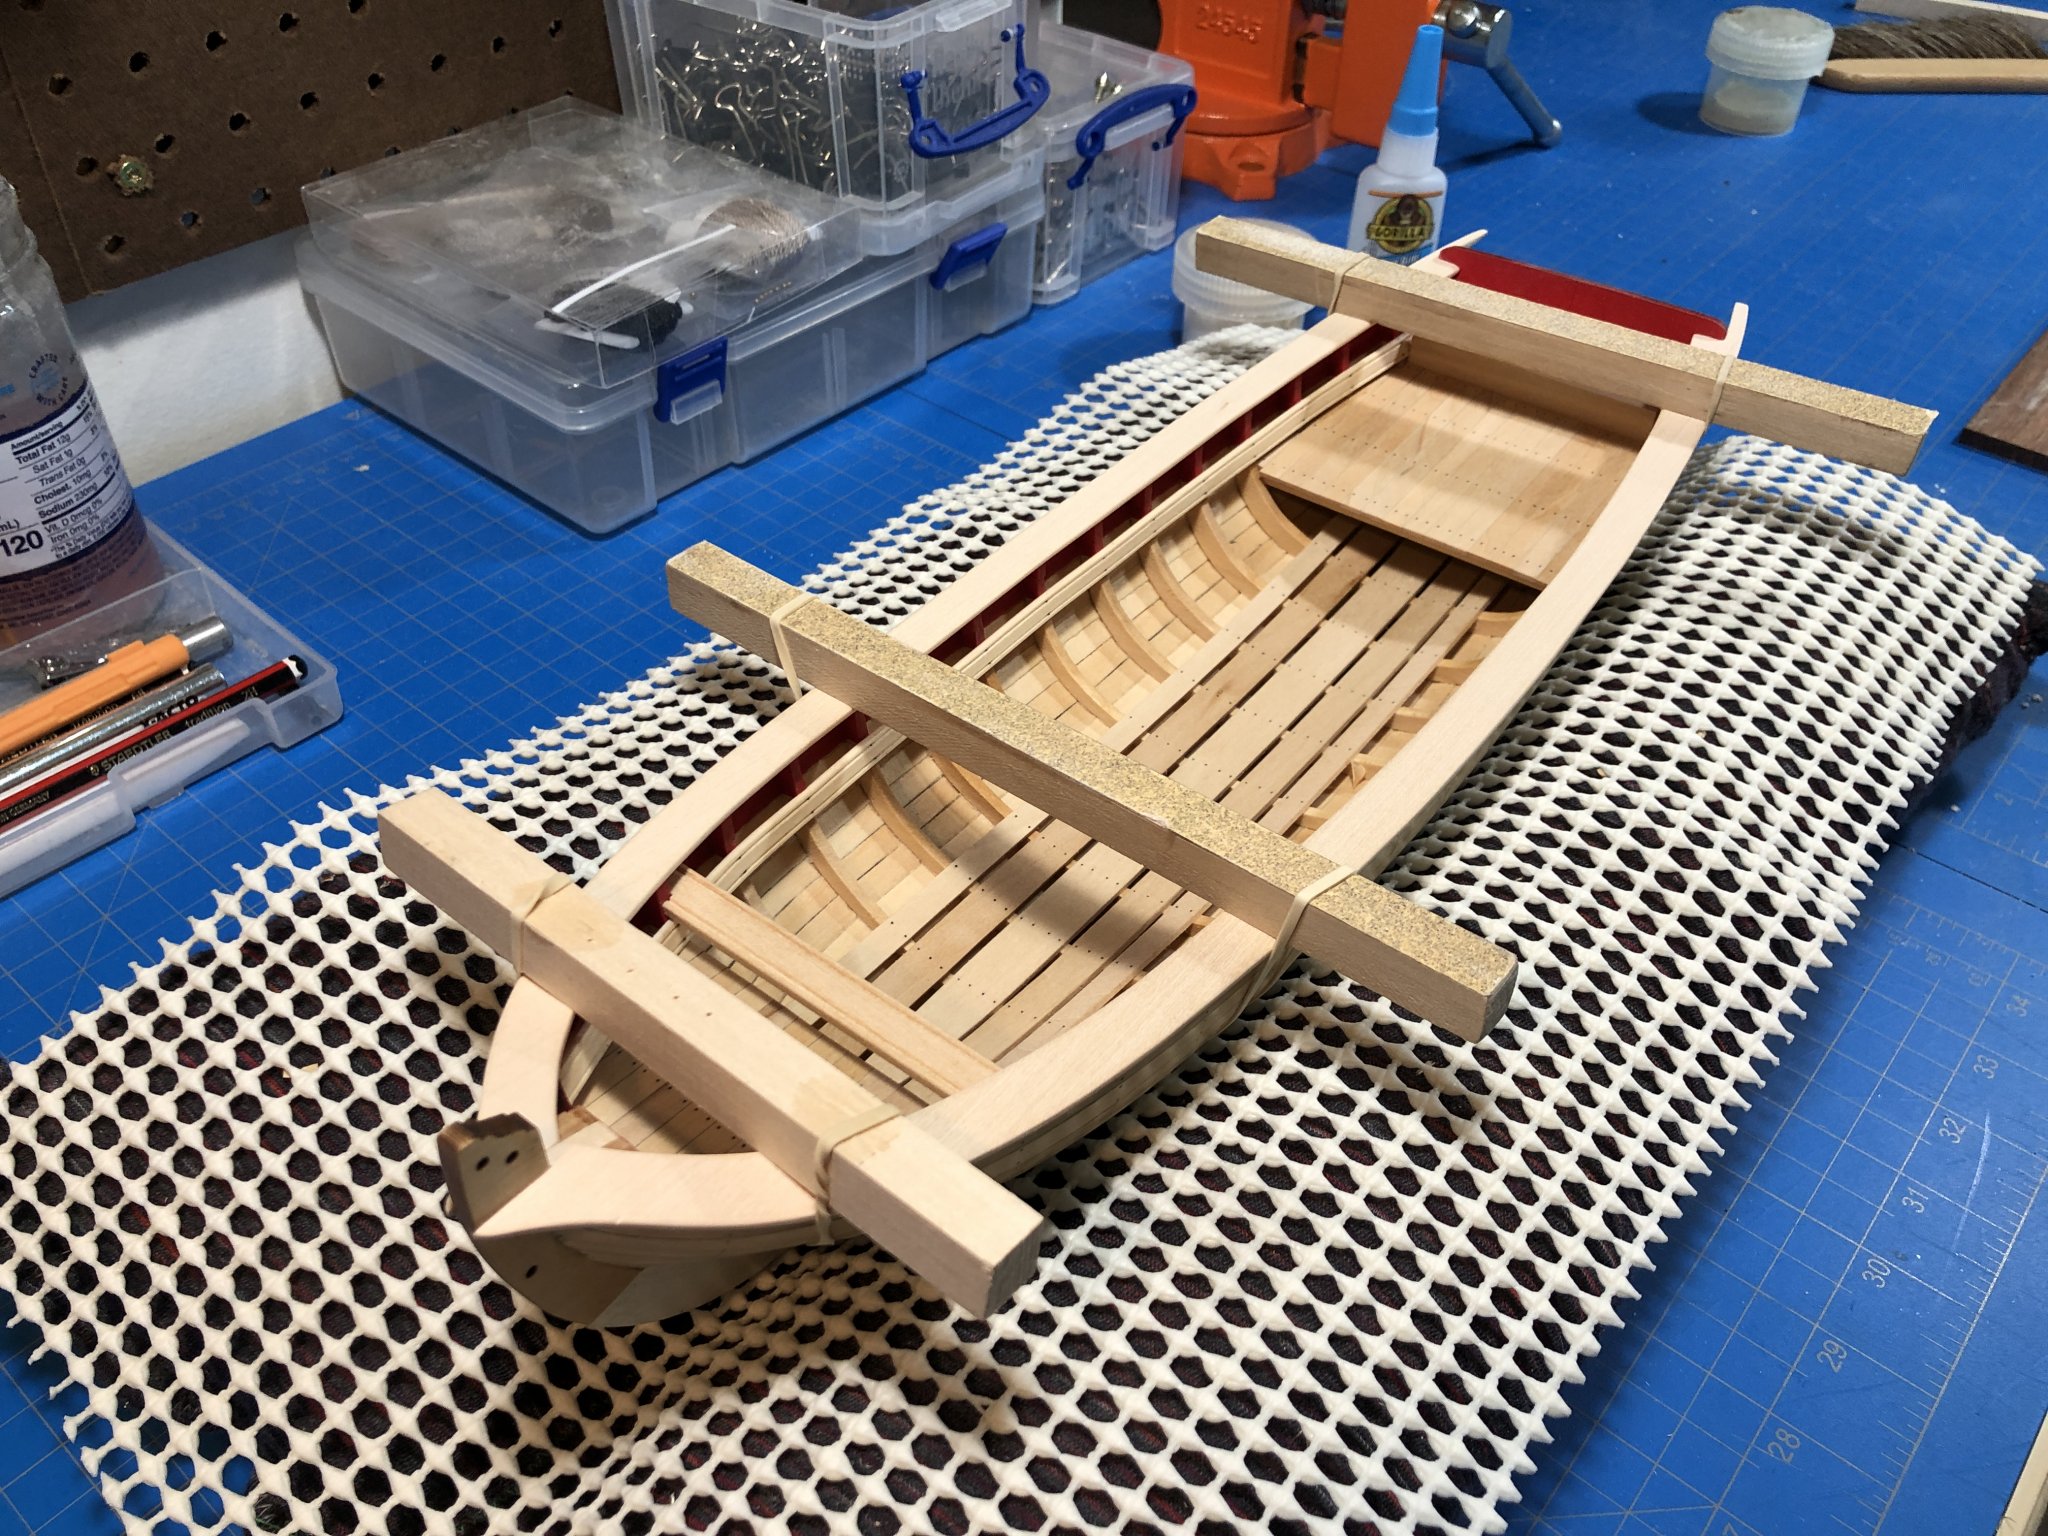
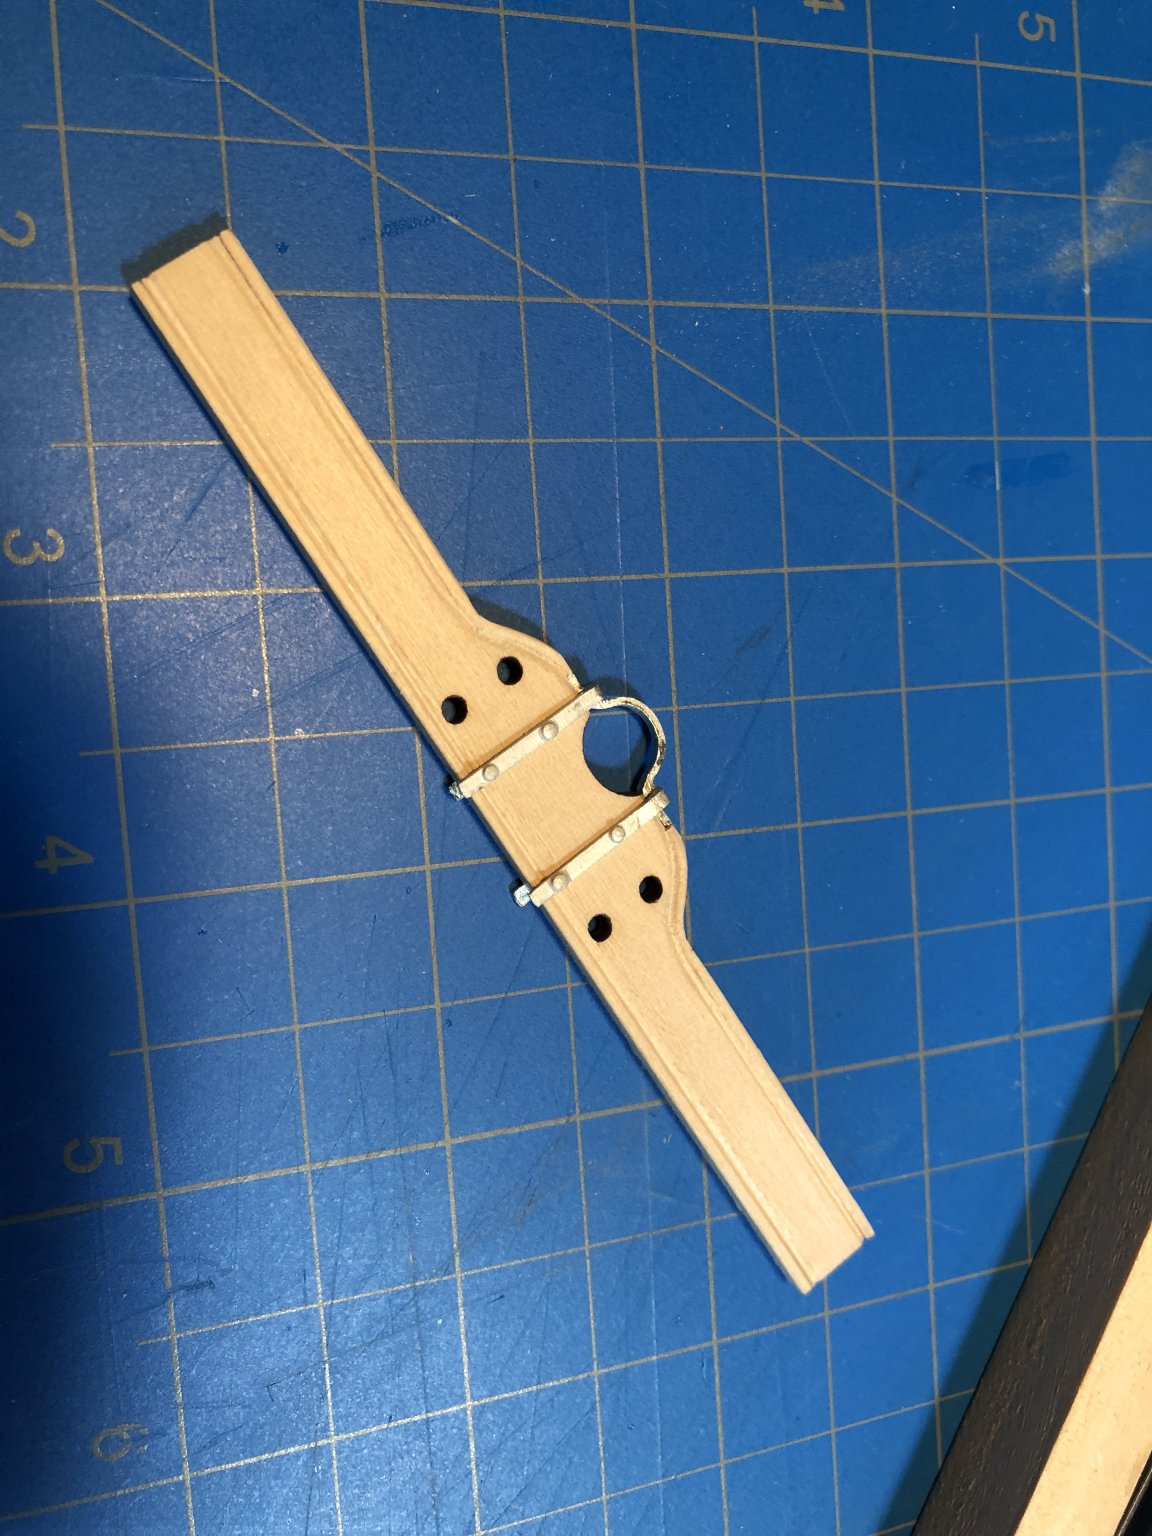
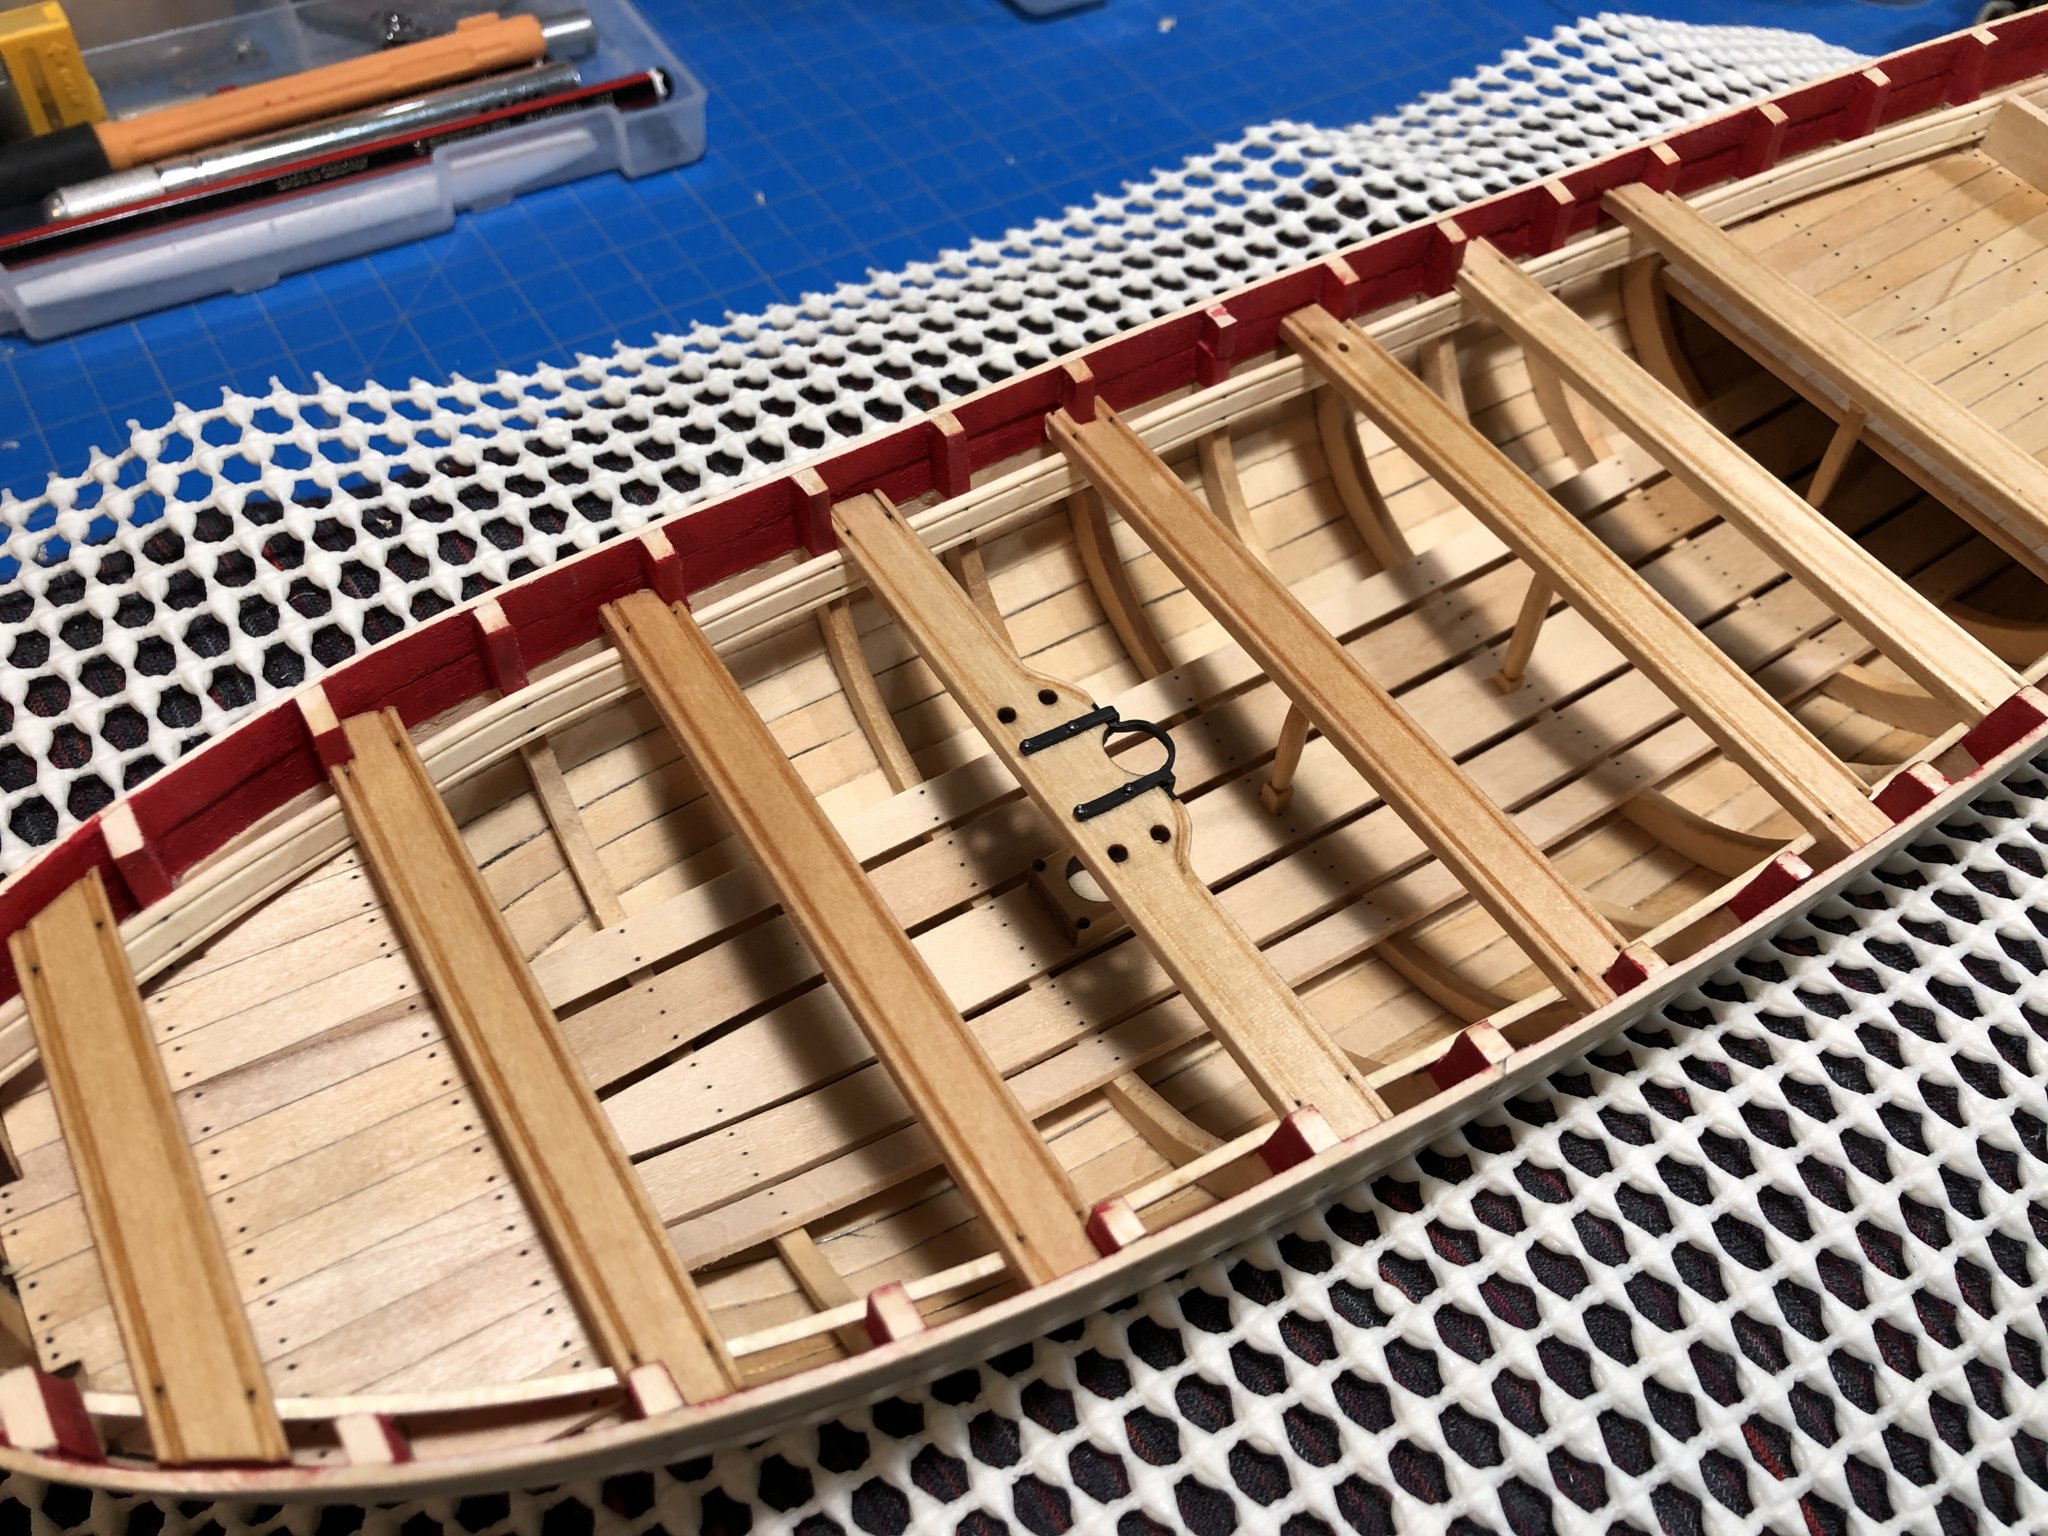
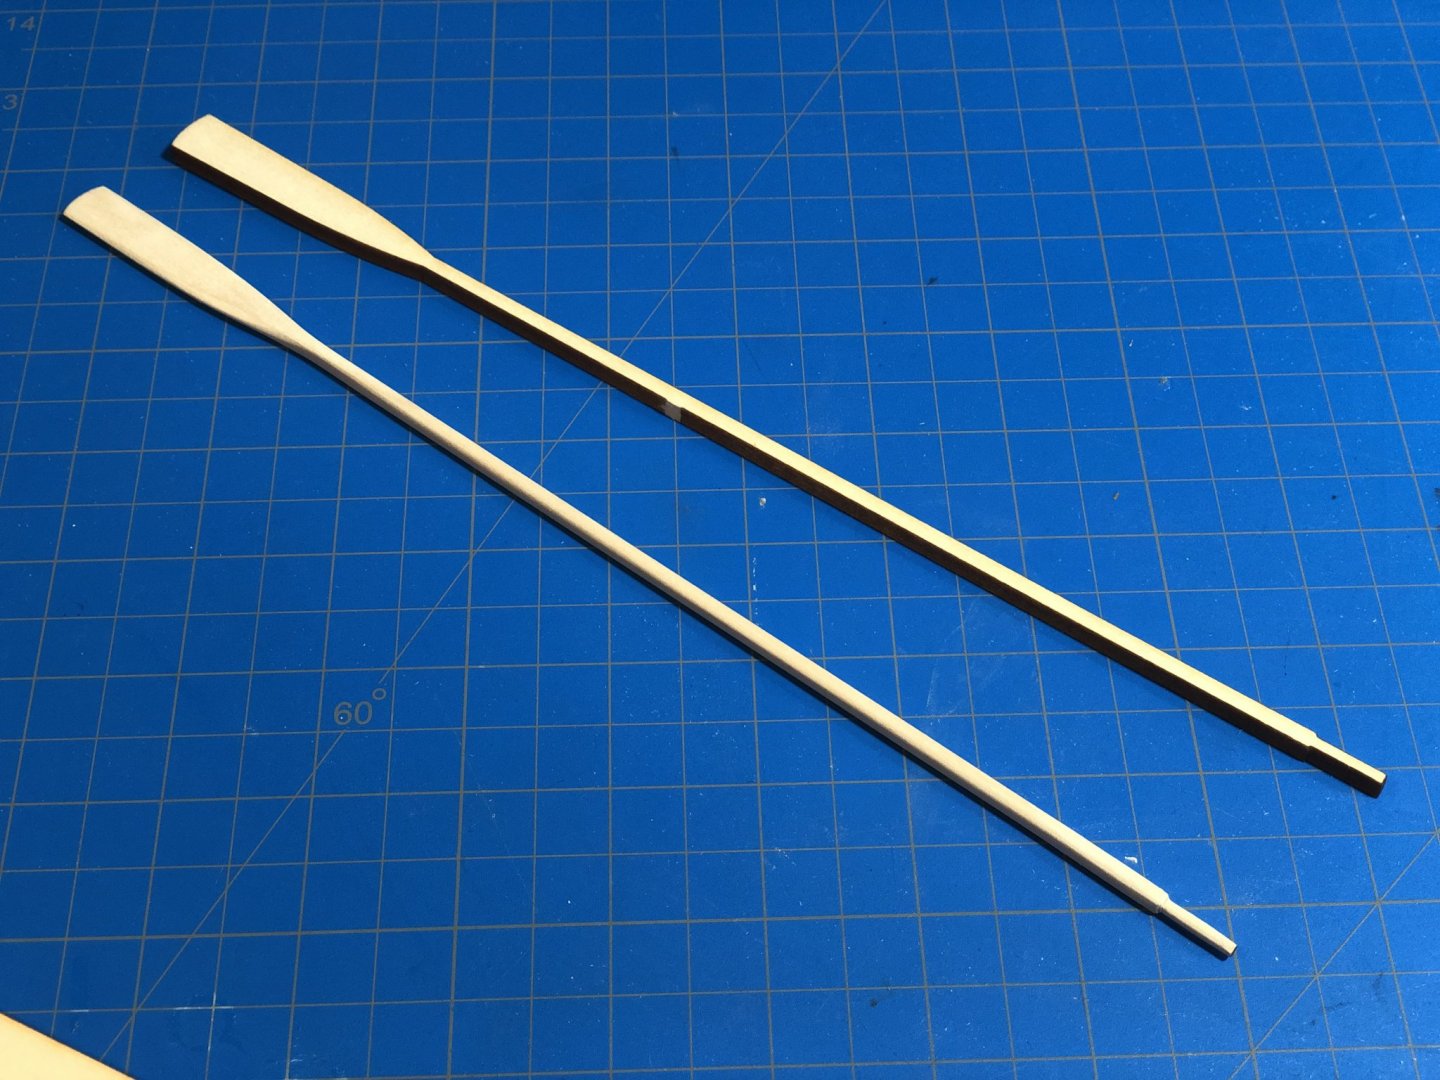
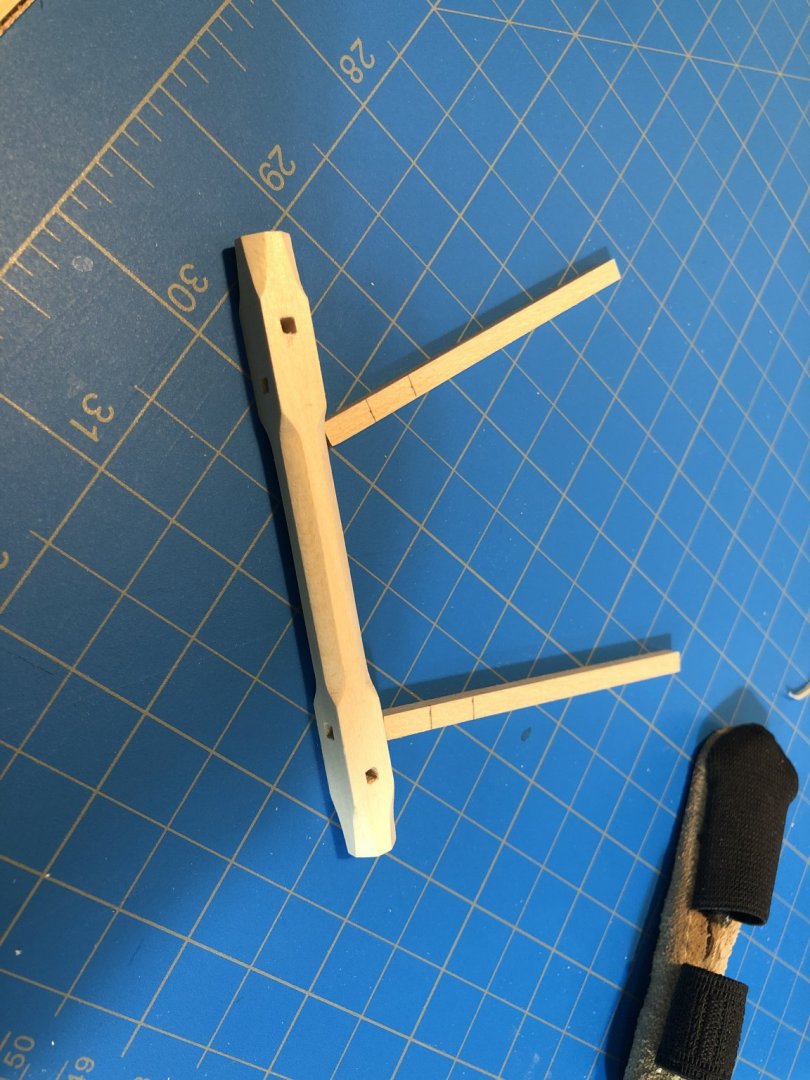
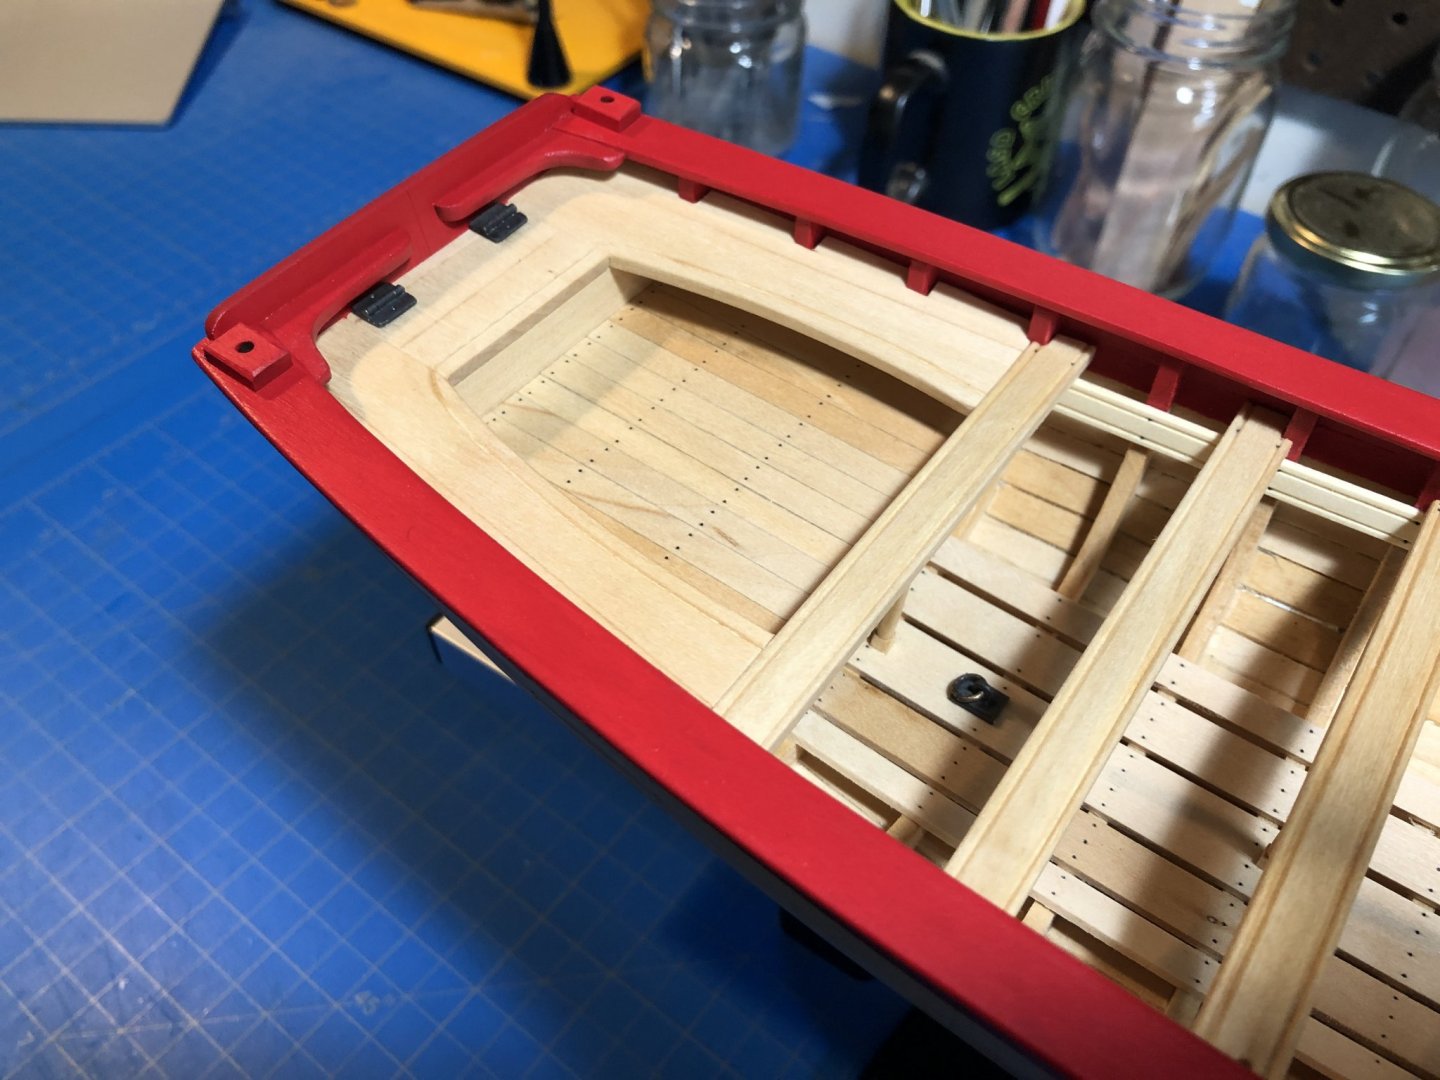
I hope everyone had a nice Memorial Day weekend. An especially solemn occasion for anyone who has known or lost friends or loved ones in war. I spent this morning watching the 21 Gun solute via virtual program at the USS Constitution. I thought the Sailors there did an excellent job with the reading of names and the salute. I thought they brought home the reality that those ships really were battlefields and not just vessels. The rest of the day was spent wrapping up a weekends worth of work. I've made progress but its no longer linear in the way one might expect reading through the kit instructions. Because I was waiting on lumber to scratch build the cockpit seats, I had to spend time elsewhere so began work on the windlass, rudder and tiller, as well as the oars. When the lumber finally arrived this weekend I also spent time fashioning up the cockpit seats. They will look odd to anyone familiar with this particular kit, as I chose to impart a bit more fluidity in their lines and made them a bit more narrow than was called out for in the kit. The issues of scale are becoming much more apparent with the more kits I build so recognize much that is starting to go awry. I was also able to get the cap rails installed, seems filled and the lot painted, as well as the transom knees and thwart knees shaped, painted and installed. A sharp eye will note the backwards transom knees. This unfortunately is not the result of artistic license, but more the result of too late a night and acceptance. I spent so long shaping them to fit all the angles and fit was so good I just accepted they were backwards. I only realized it, of course, after they were well and glued in place... ho hum. I finished up the day working on the rub rails, which required another scraper and some time sanding. They'll go in once I figure out how to make the process for fitting, bending, painting and so forth work for me.


- 66 replies
-
- 10
-
-
- Finished
- Model Shipways
- (and 1 more)
-
Now you're really livin! ha.
-
I do have a Byrnes, but hadnt thought to use it like that. Great idea.
-
Absolutely. As I said in post #8, I was only attempting to take advantage of a tutorial if it was still around. I appreciate it though, very much. When I first read that there was a tutorial I was a bit surprised! I have no real interest in making these in any kind of bulk, more that Syren was out of stock in what I needed and thought I might try a go at it. I only need a handful. Interesting! This is more or less how I had imagined it myself, but without a mill I was anticipating separating out the blocks and then having to cut grooves one by one... Aside from the grain direction being all wrong in that diagram I assumed this was how it was done. At first I was certain the process was over engineered but I guess if you need to turn out thousands of these there really is not other way around it but using complicated jigs, mills and bits. Seems a whole different world then hardworking a few dozen over the course of a day. Nope, not for me. If I had that kind of requirement I definitely would wait as long as needed to buy them from Syren! I admire your fortitude. I have one of the flapper block tumblers that MS sells, and modified it according to Chucks instructions for use with his deadeyes and it works really well. I had actually tried to use it with the MS kit provided blocks and they just shredded or broke apart. It is apparently designed to take those blocky blocks down a notch but it just made mulch with mine...
-
I'm actually surprised he ever had it spelled out somewhere to begin with, honestly. I was thinking of asking him about the tutorial myself as well, but he seems so busy I just didn't want to constantly be asking him questions so I appreciate your response. As well, I can completely understand his reticence in divulging his secrets! I actually just contacted him recently about the availability of blocks through his store. My time at the bench is so rare that I would always opt to buy something like blocks rather then spend a day making them; that just isn't where I get my pleasure from. Unfortunately, if you follow his company thread it seems the blocks, in particular, go rather quickly. I think that's great for him, but a bummer for us who aren't lucky enough to snap some up when we need them (or clever enough to stock up when we don't need them - something he himself doesn't like us to do). When I wrote him yesterday he said he was two weeks out from restocking his supply in the size I needed which translates to probably more like five weeks before I can get my hands on them. Which again is not a big deal, Im happy to wait and is not a complaint about his business. Given the wait I just thought "what the hell" maybe I'll give making them a try, and if doesn't work out Ill just buy them when stocks are replenished. Ultimately, I don't need many for my current build so even if I choose to make them - literally by hand - it won't be time wasted. If anything it'll be a lesson learned and a new appreciation for the product he provides! BTW, I do have a copy of Fredericks book around so Ill take a look!
-
I looked over your build log, thanks for detailing you method (based on Chucks). I can't find Chucks tutorial though... any help would be appreciated.
-
Thanks to you both! If you have them handy, sure! Ill take a look in my Syren supply. Im a bit far off from that point yet, but was looking at the provided line and comparing some numbers to his catalog, also being aware that some people are able to suss out the appropriate scale diameter of actual rigging line. Id be curious to see how the various selections compare, true scale/Medway Longboat line/MS Armed Longboat kit line.
-
Arthur, Did you end up going with a close proximity selection for your Syren line replacement or did you base your diameter choices on some other information?
-
Me too. I almost always feel like I really don't know what result Im going to get. I am only just starting to realize that when I think I'm done, Im probably only half way!
-
Yes, and a few others had the same problem. It seems almost inevitable, as I ran back through the instructions and can't see a step where I might have prevented this. There are some very narrow tolerances to get it to fit just right. An easy solution would be to make the port and starboard seats longer, so that a builder can cut them down to suit. The stern locker lid I think would fit fine with adjustment. I had planned to upgrade the rigging as well. Actually Ive done this for a few projects. I hadn't thought about the blocks though, Ill definitely do that.
-
Thanks. Im trying to do a careful job, but find that there is always something I could do a bit better. I think that is the joy of it.
-
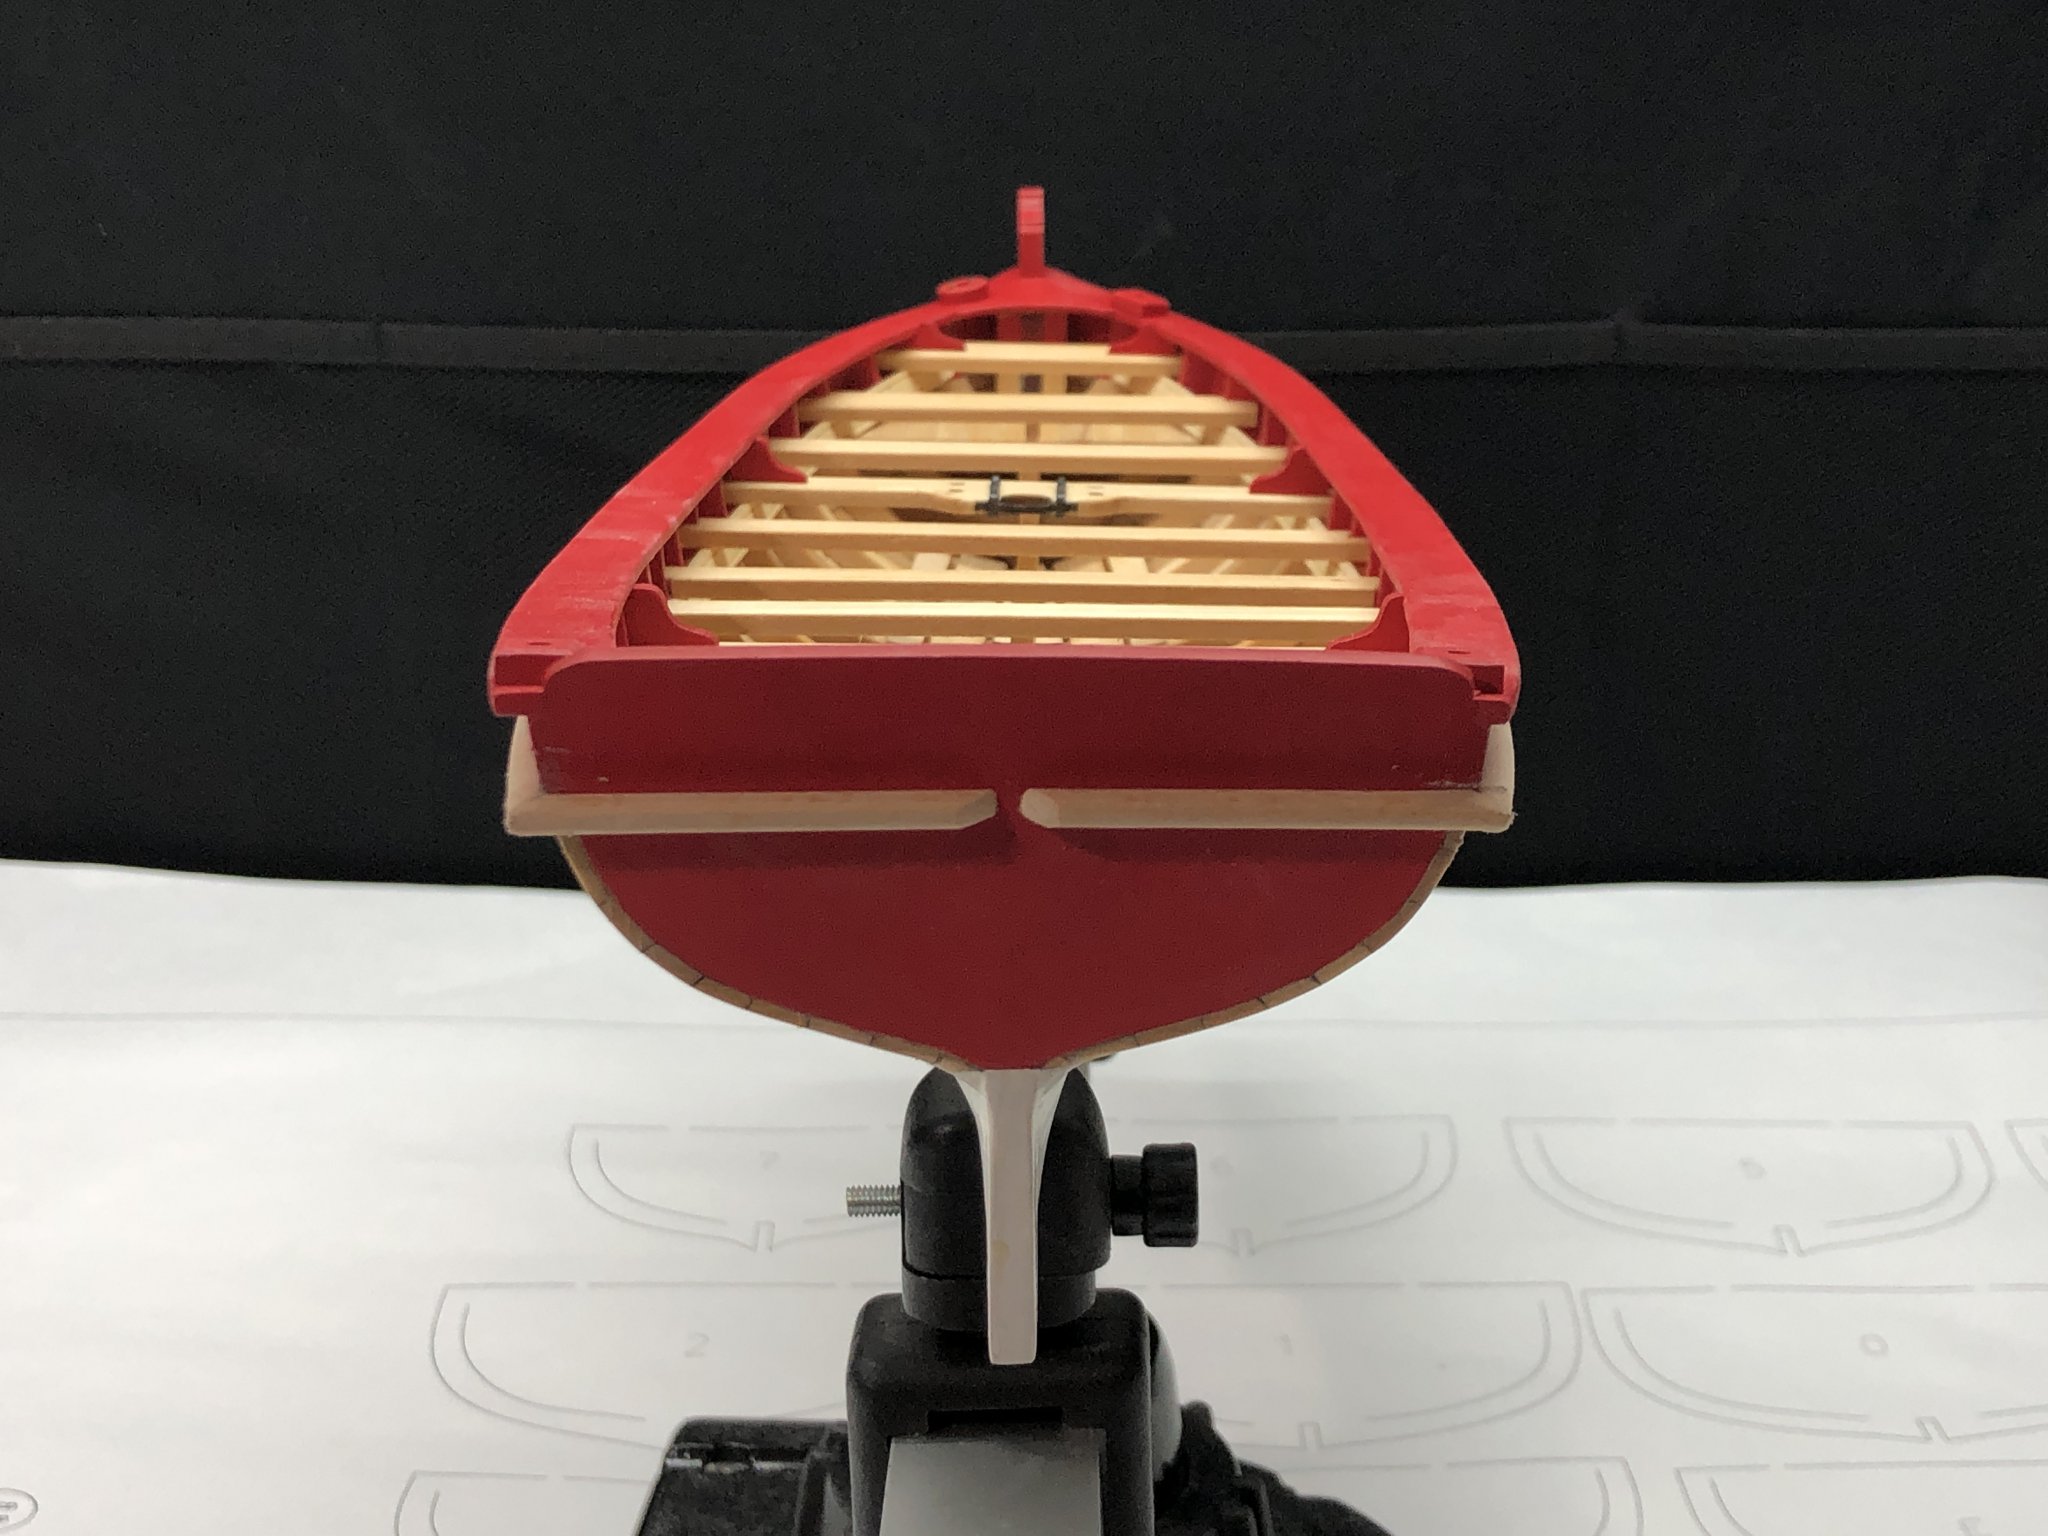
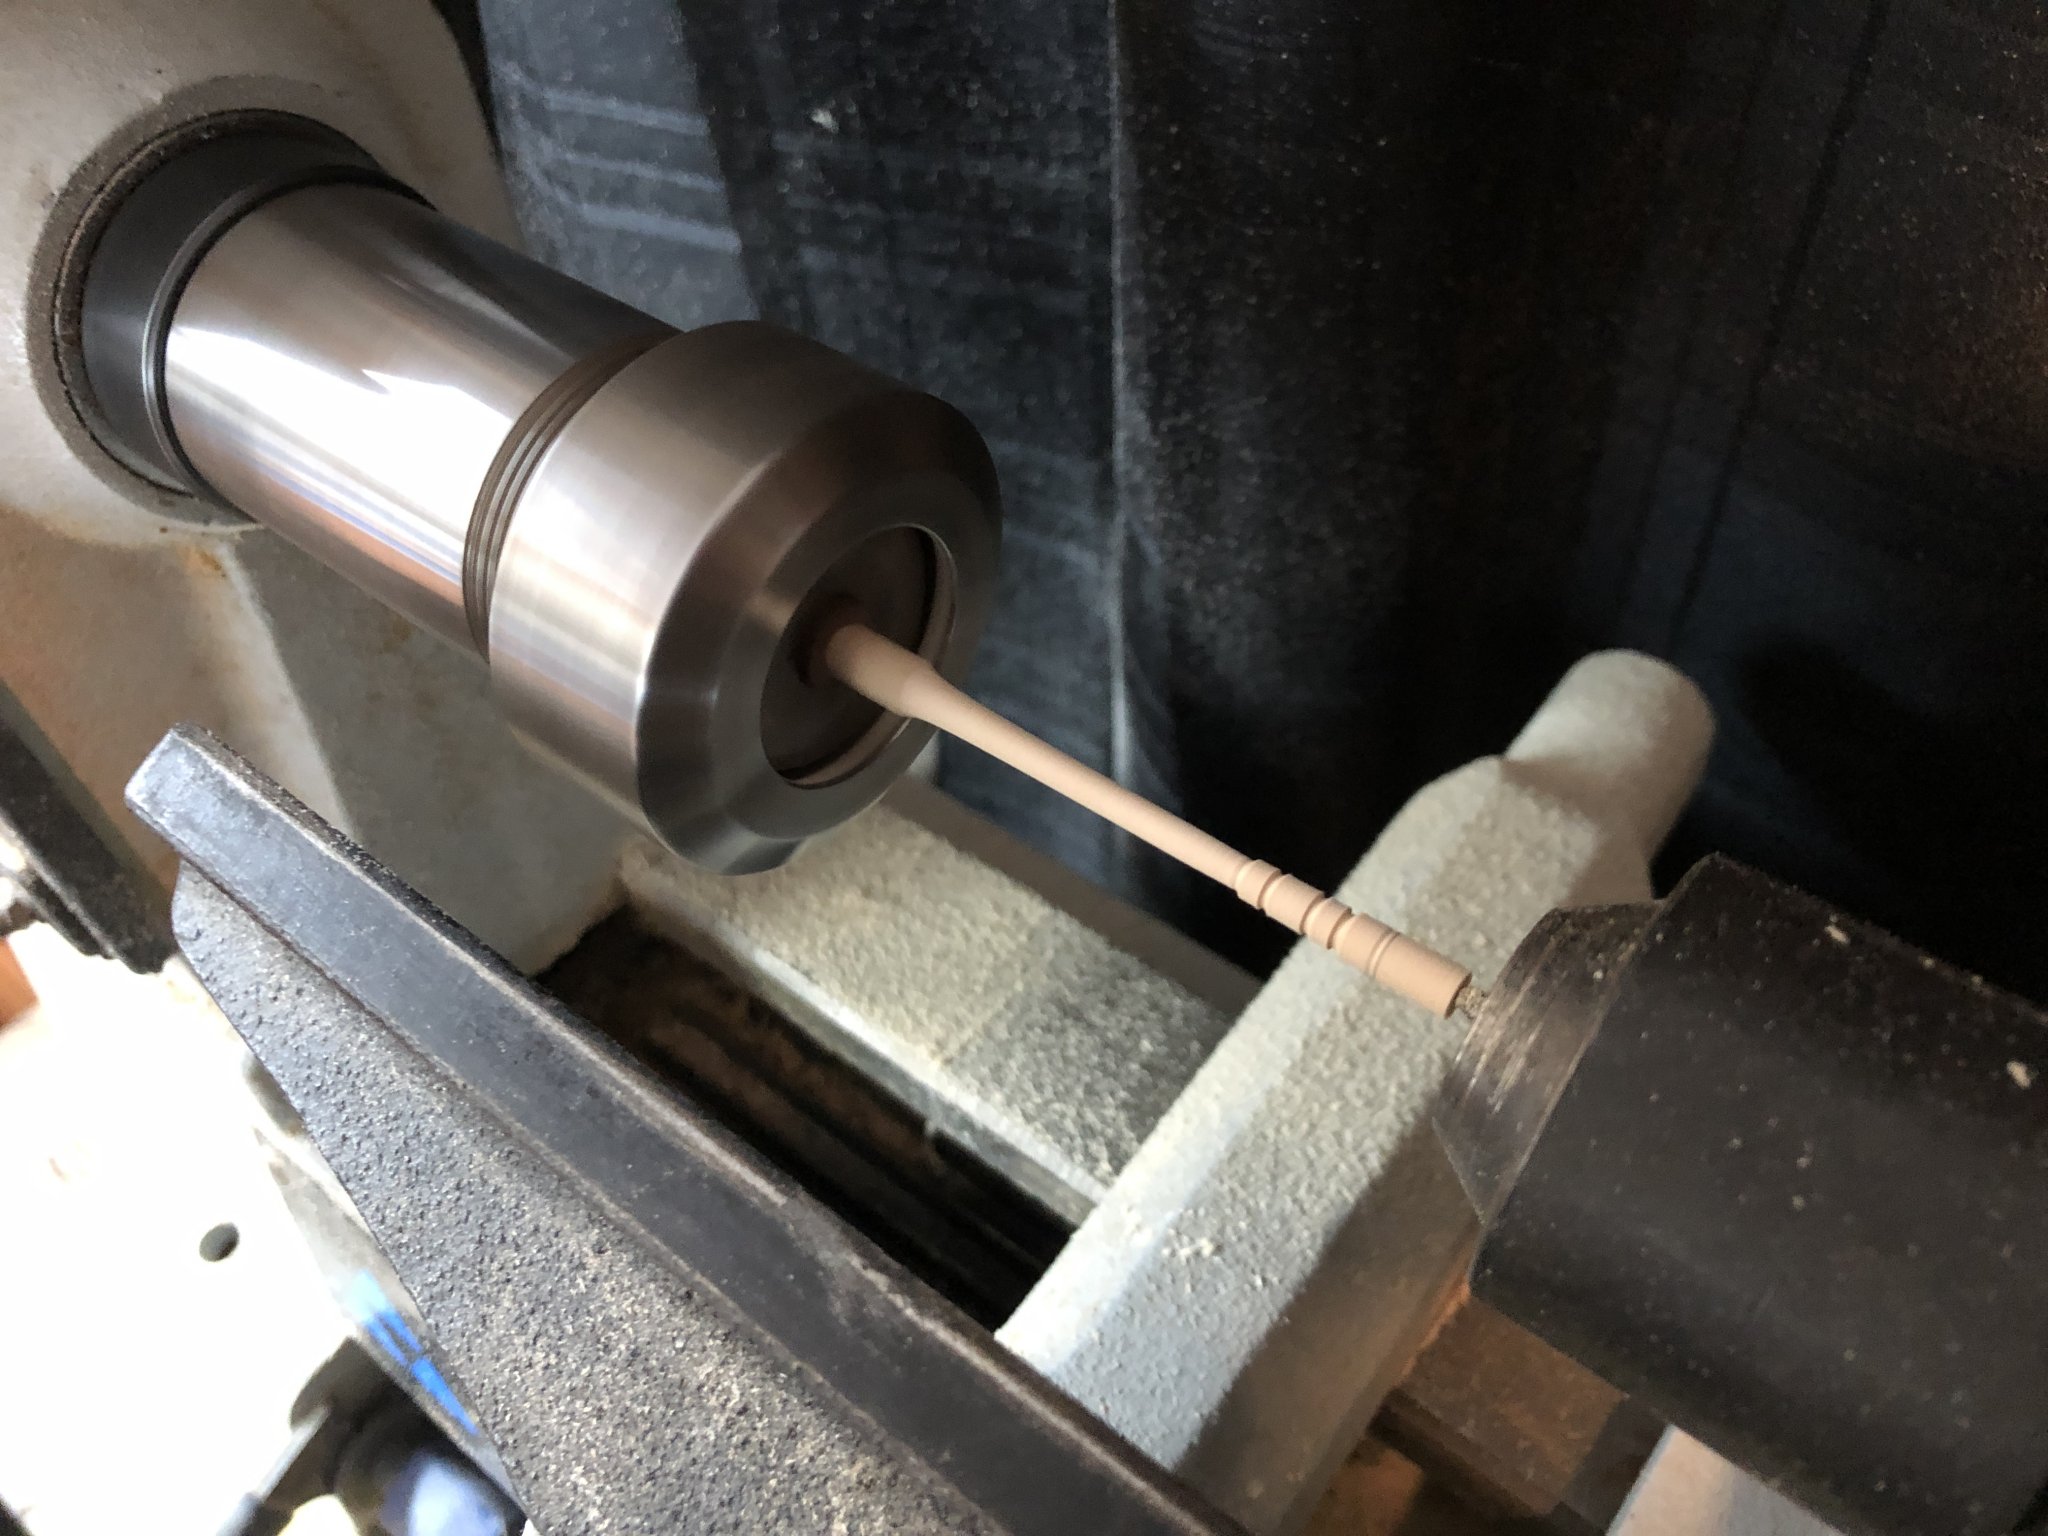
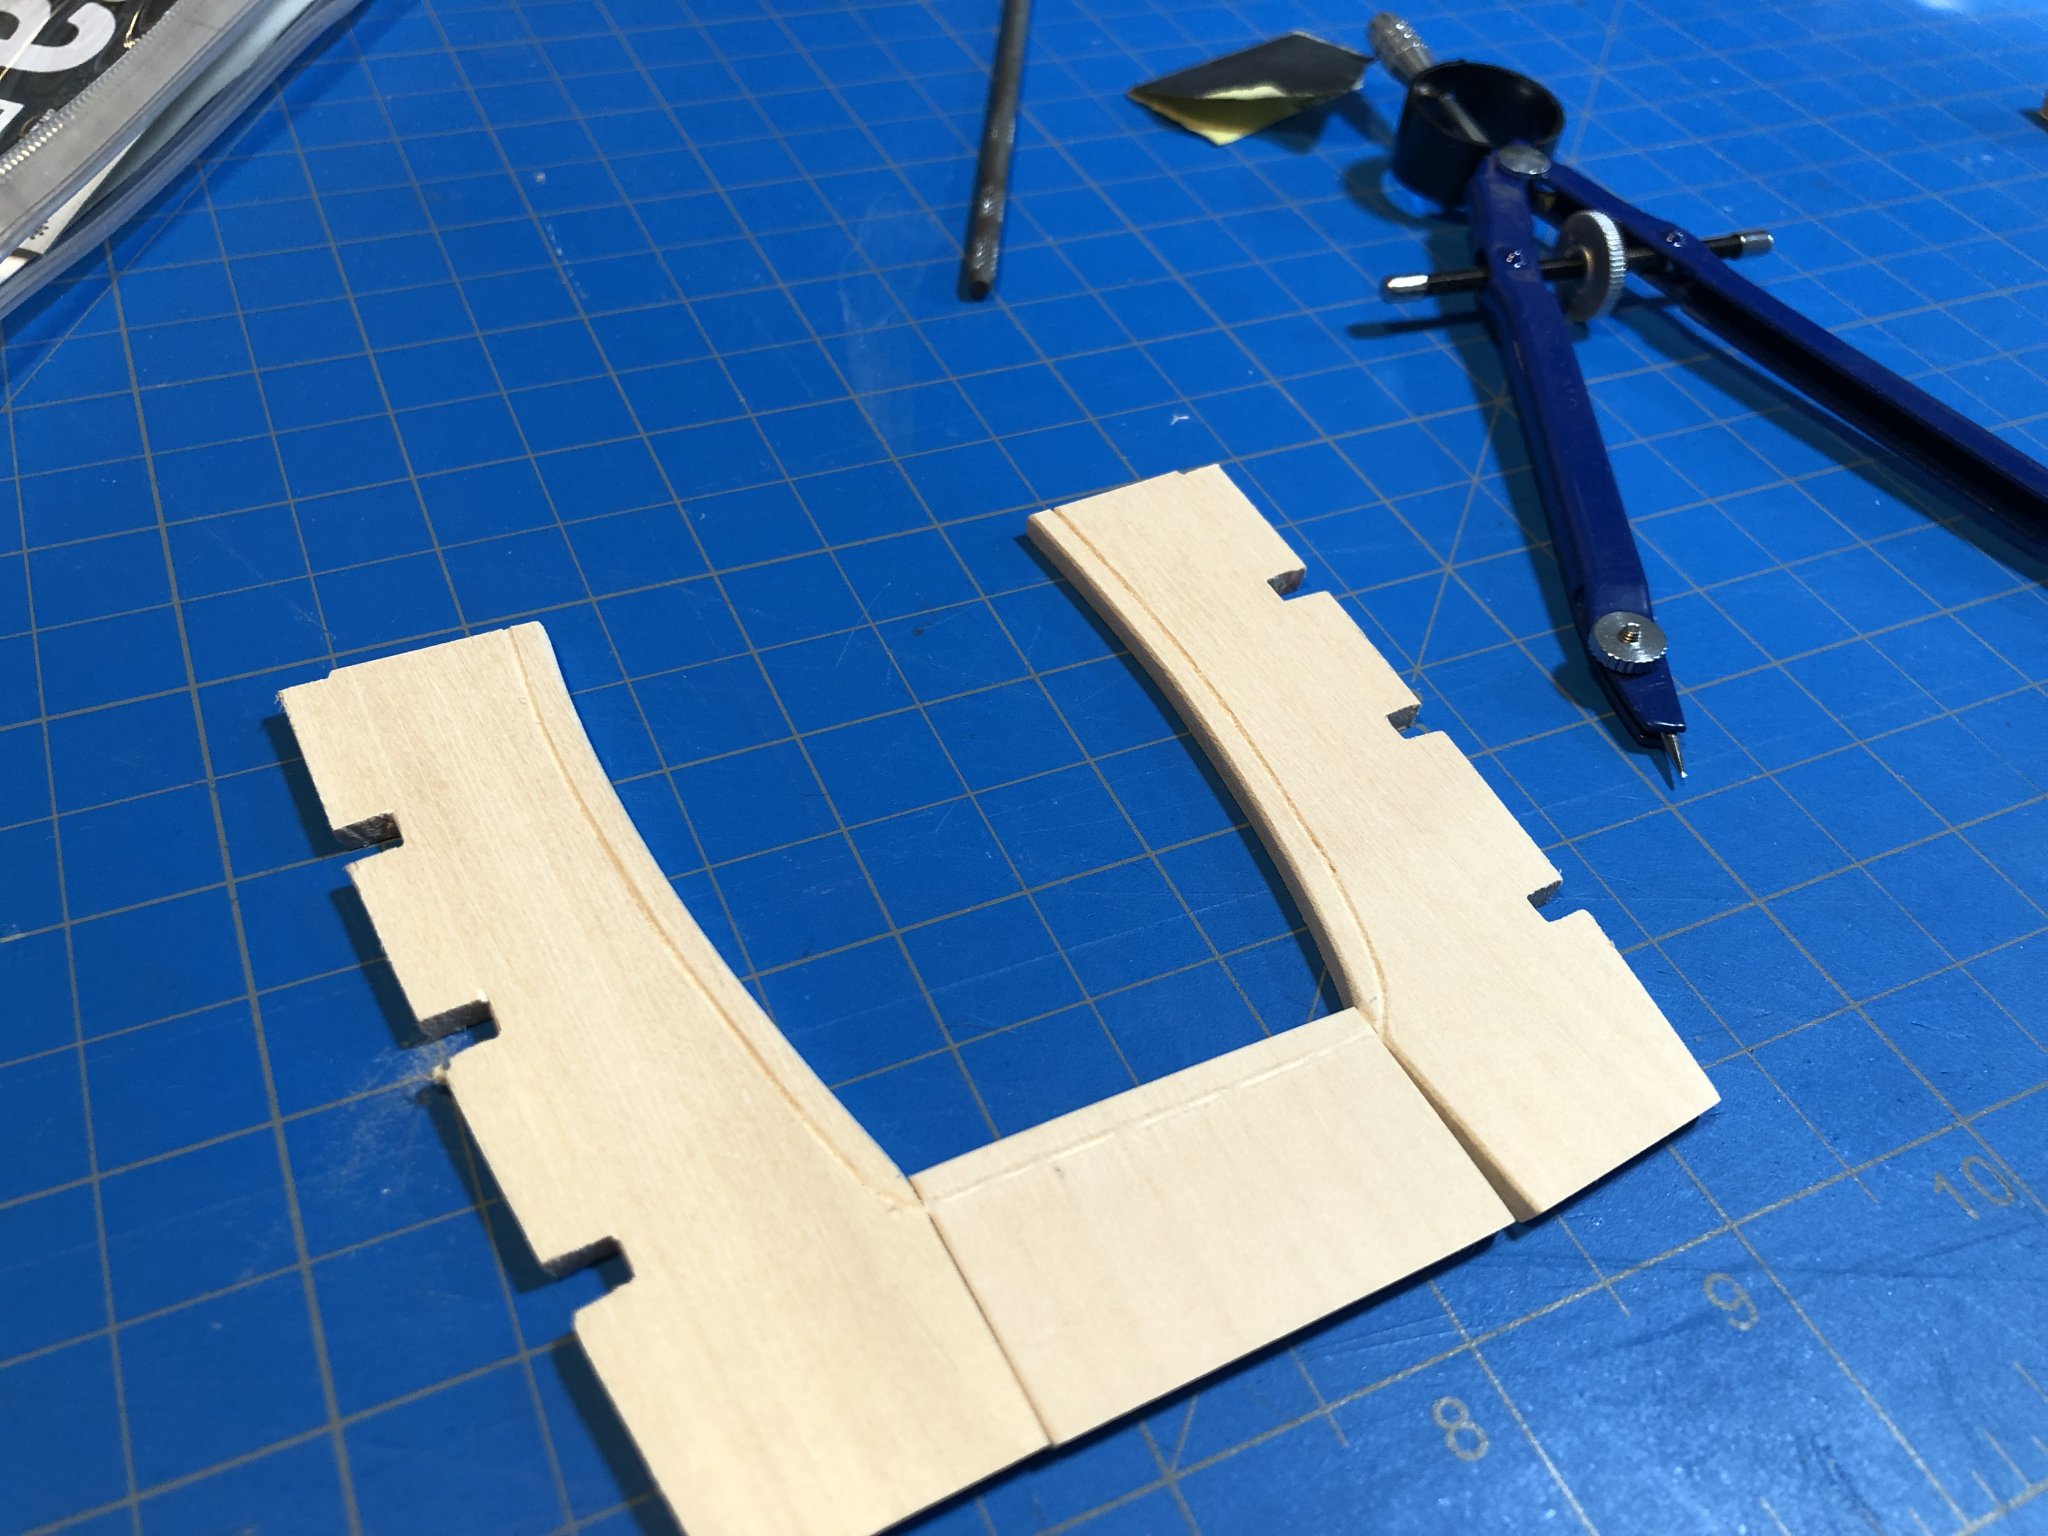
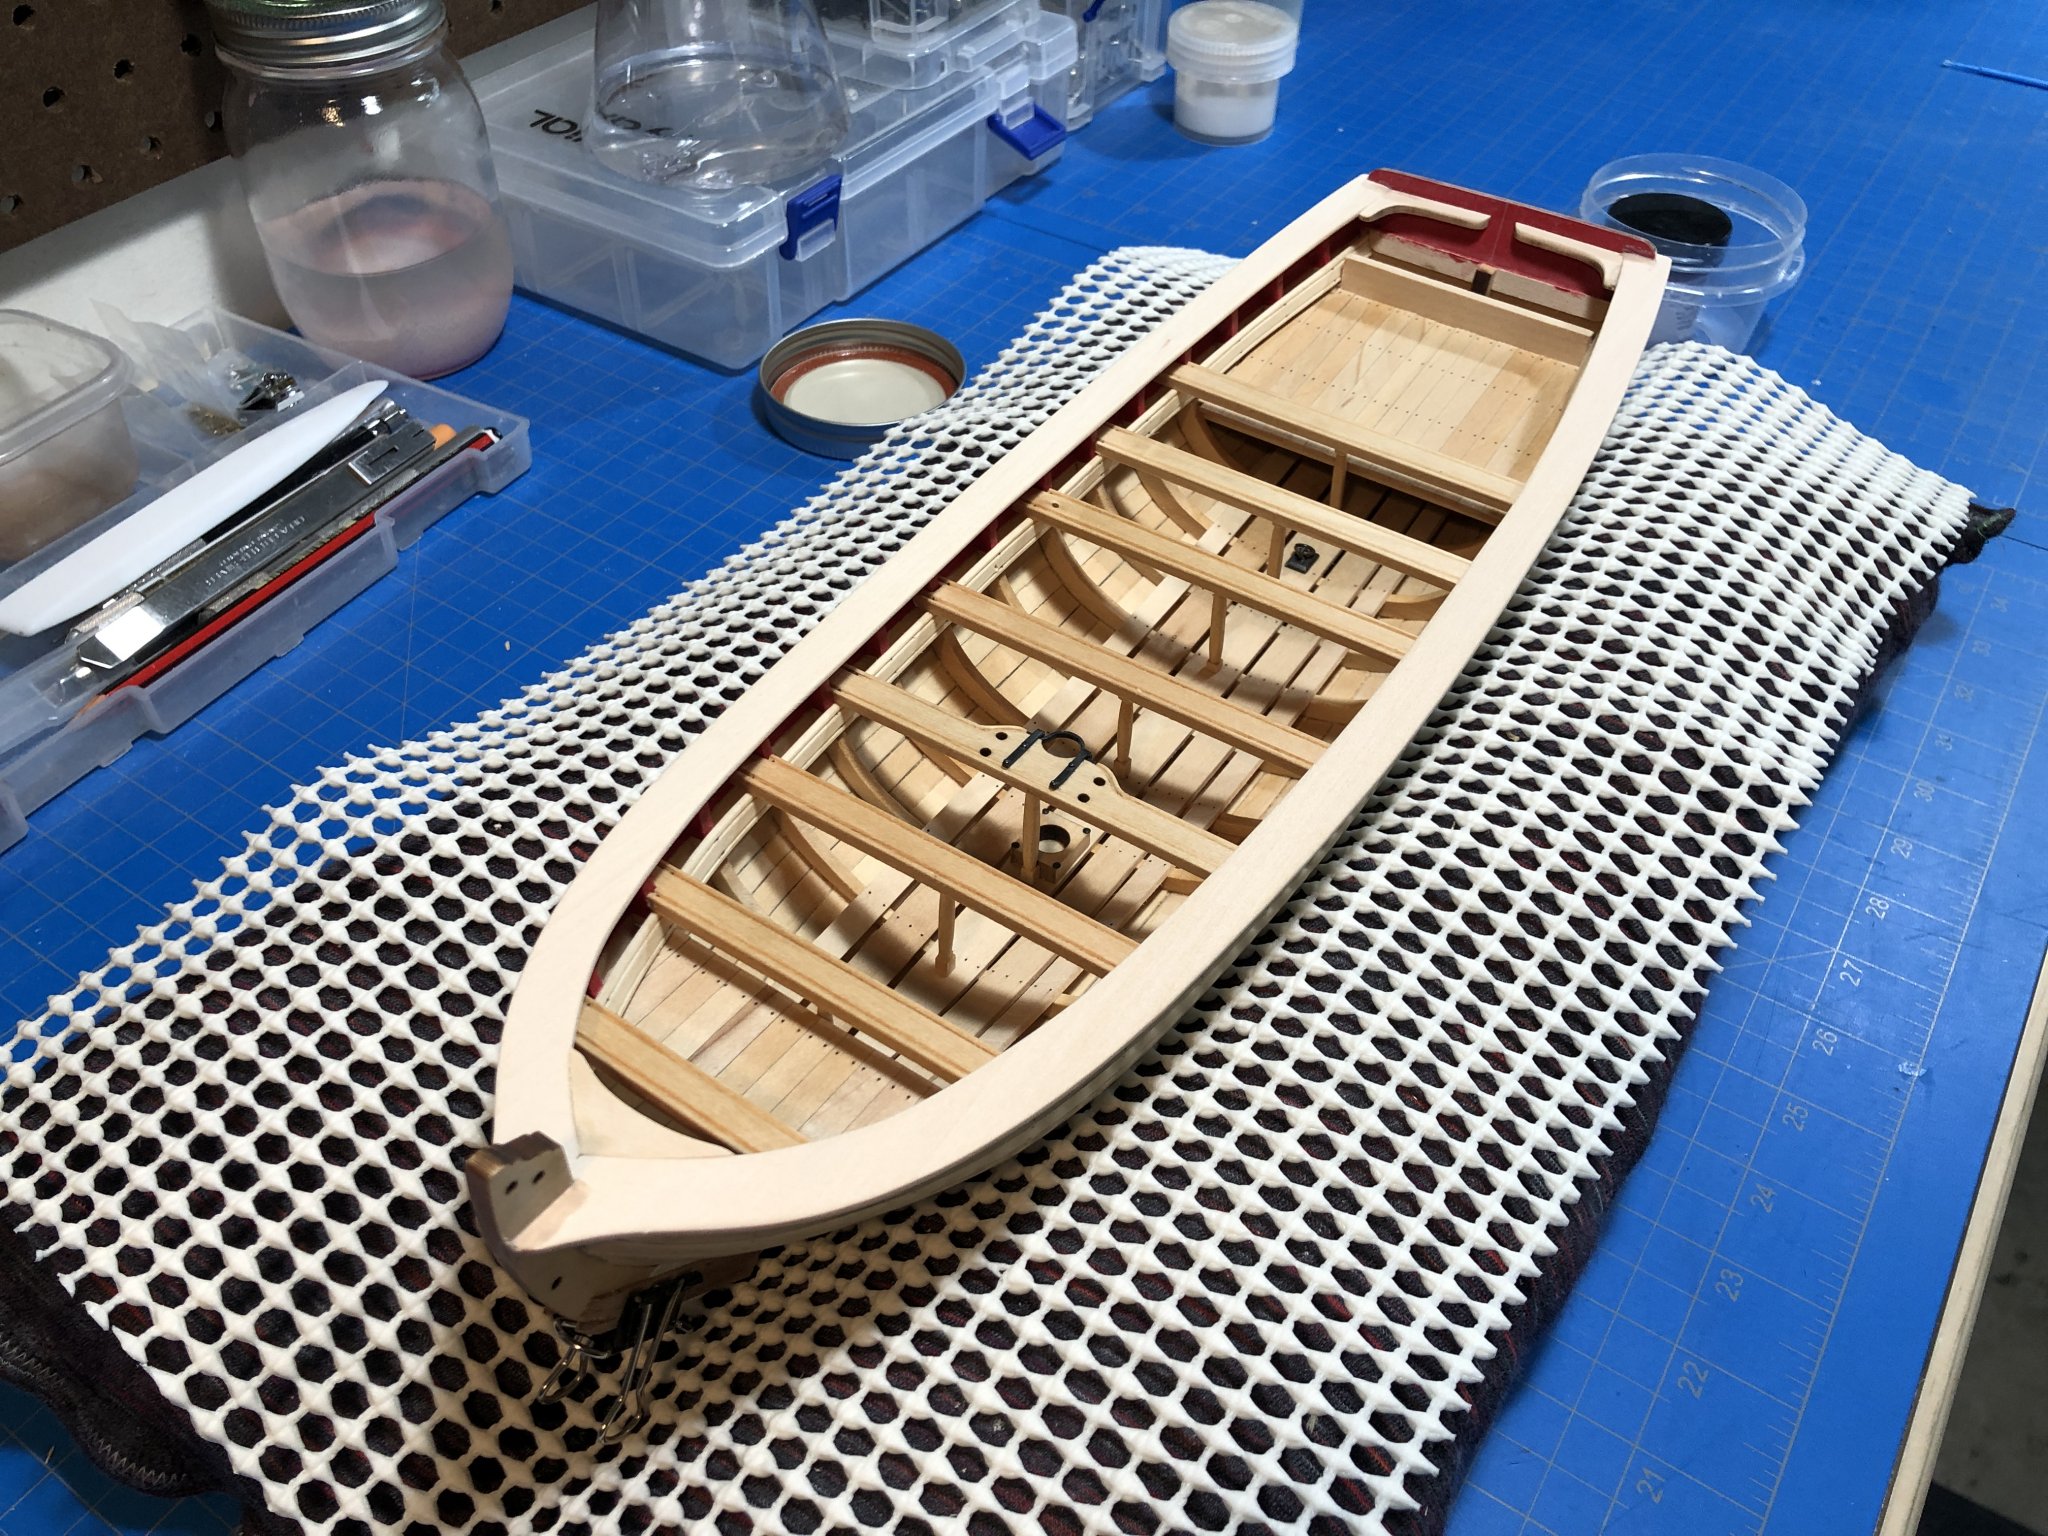
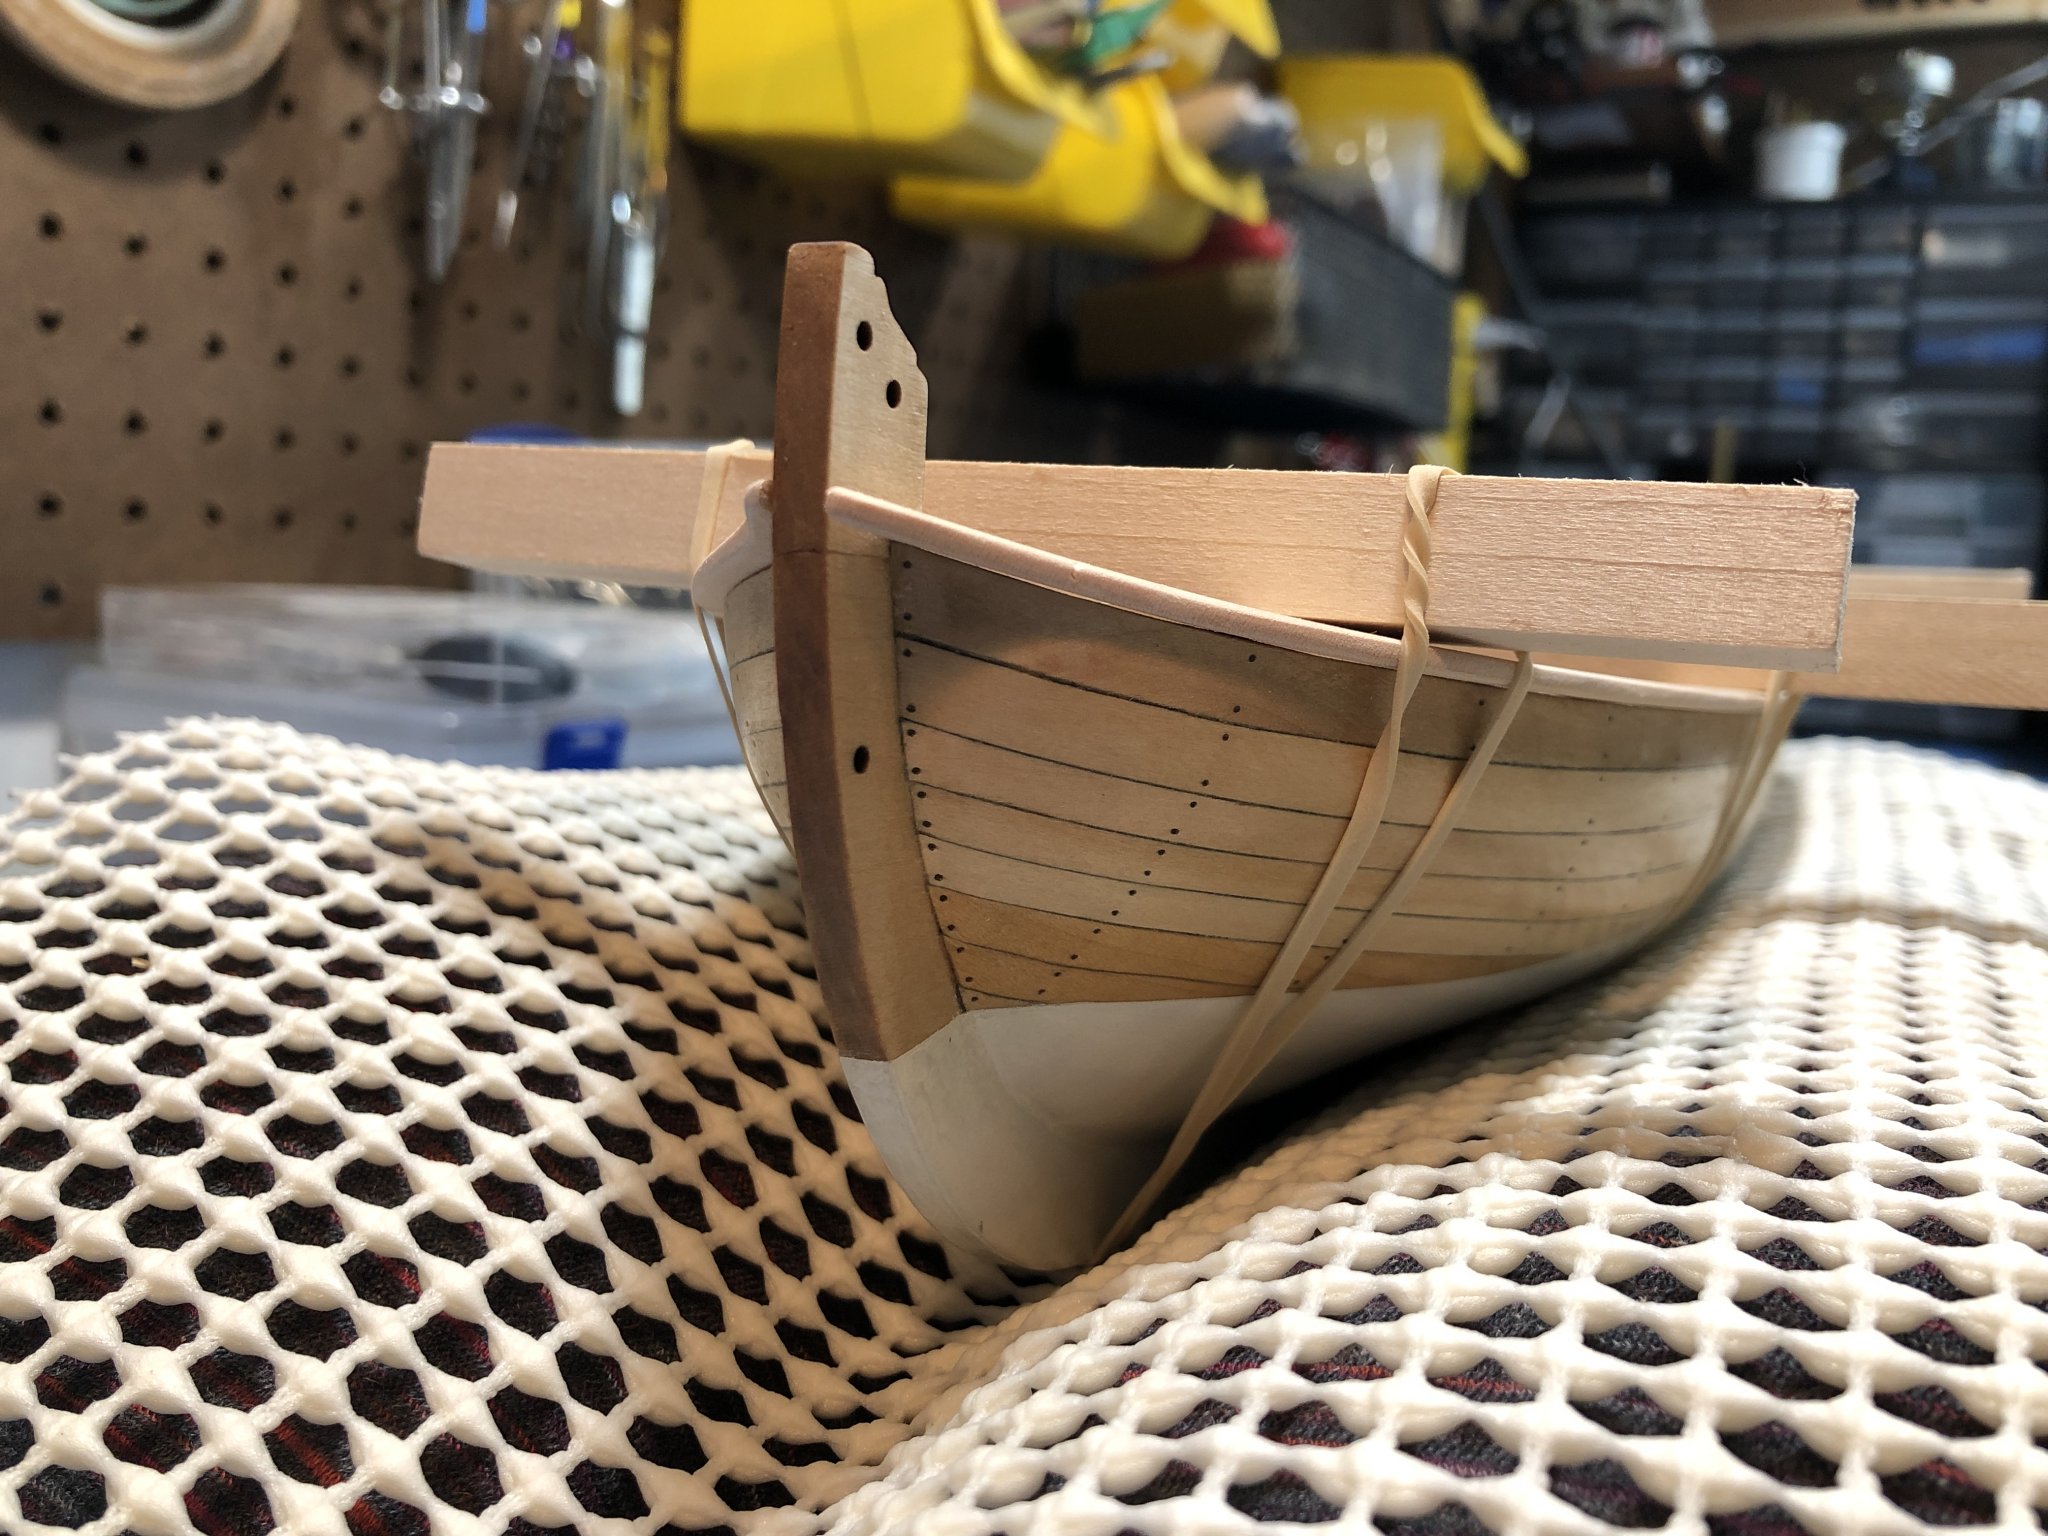
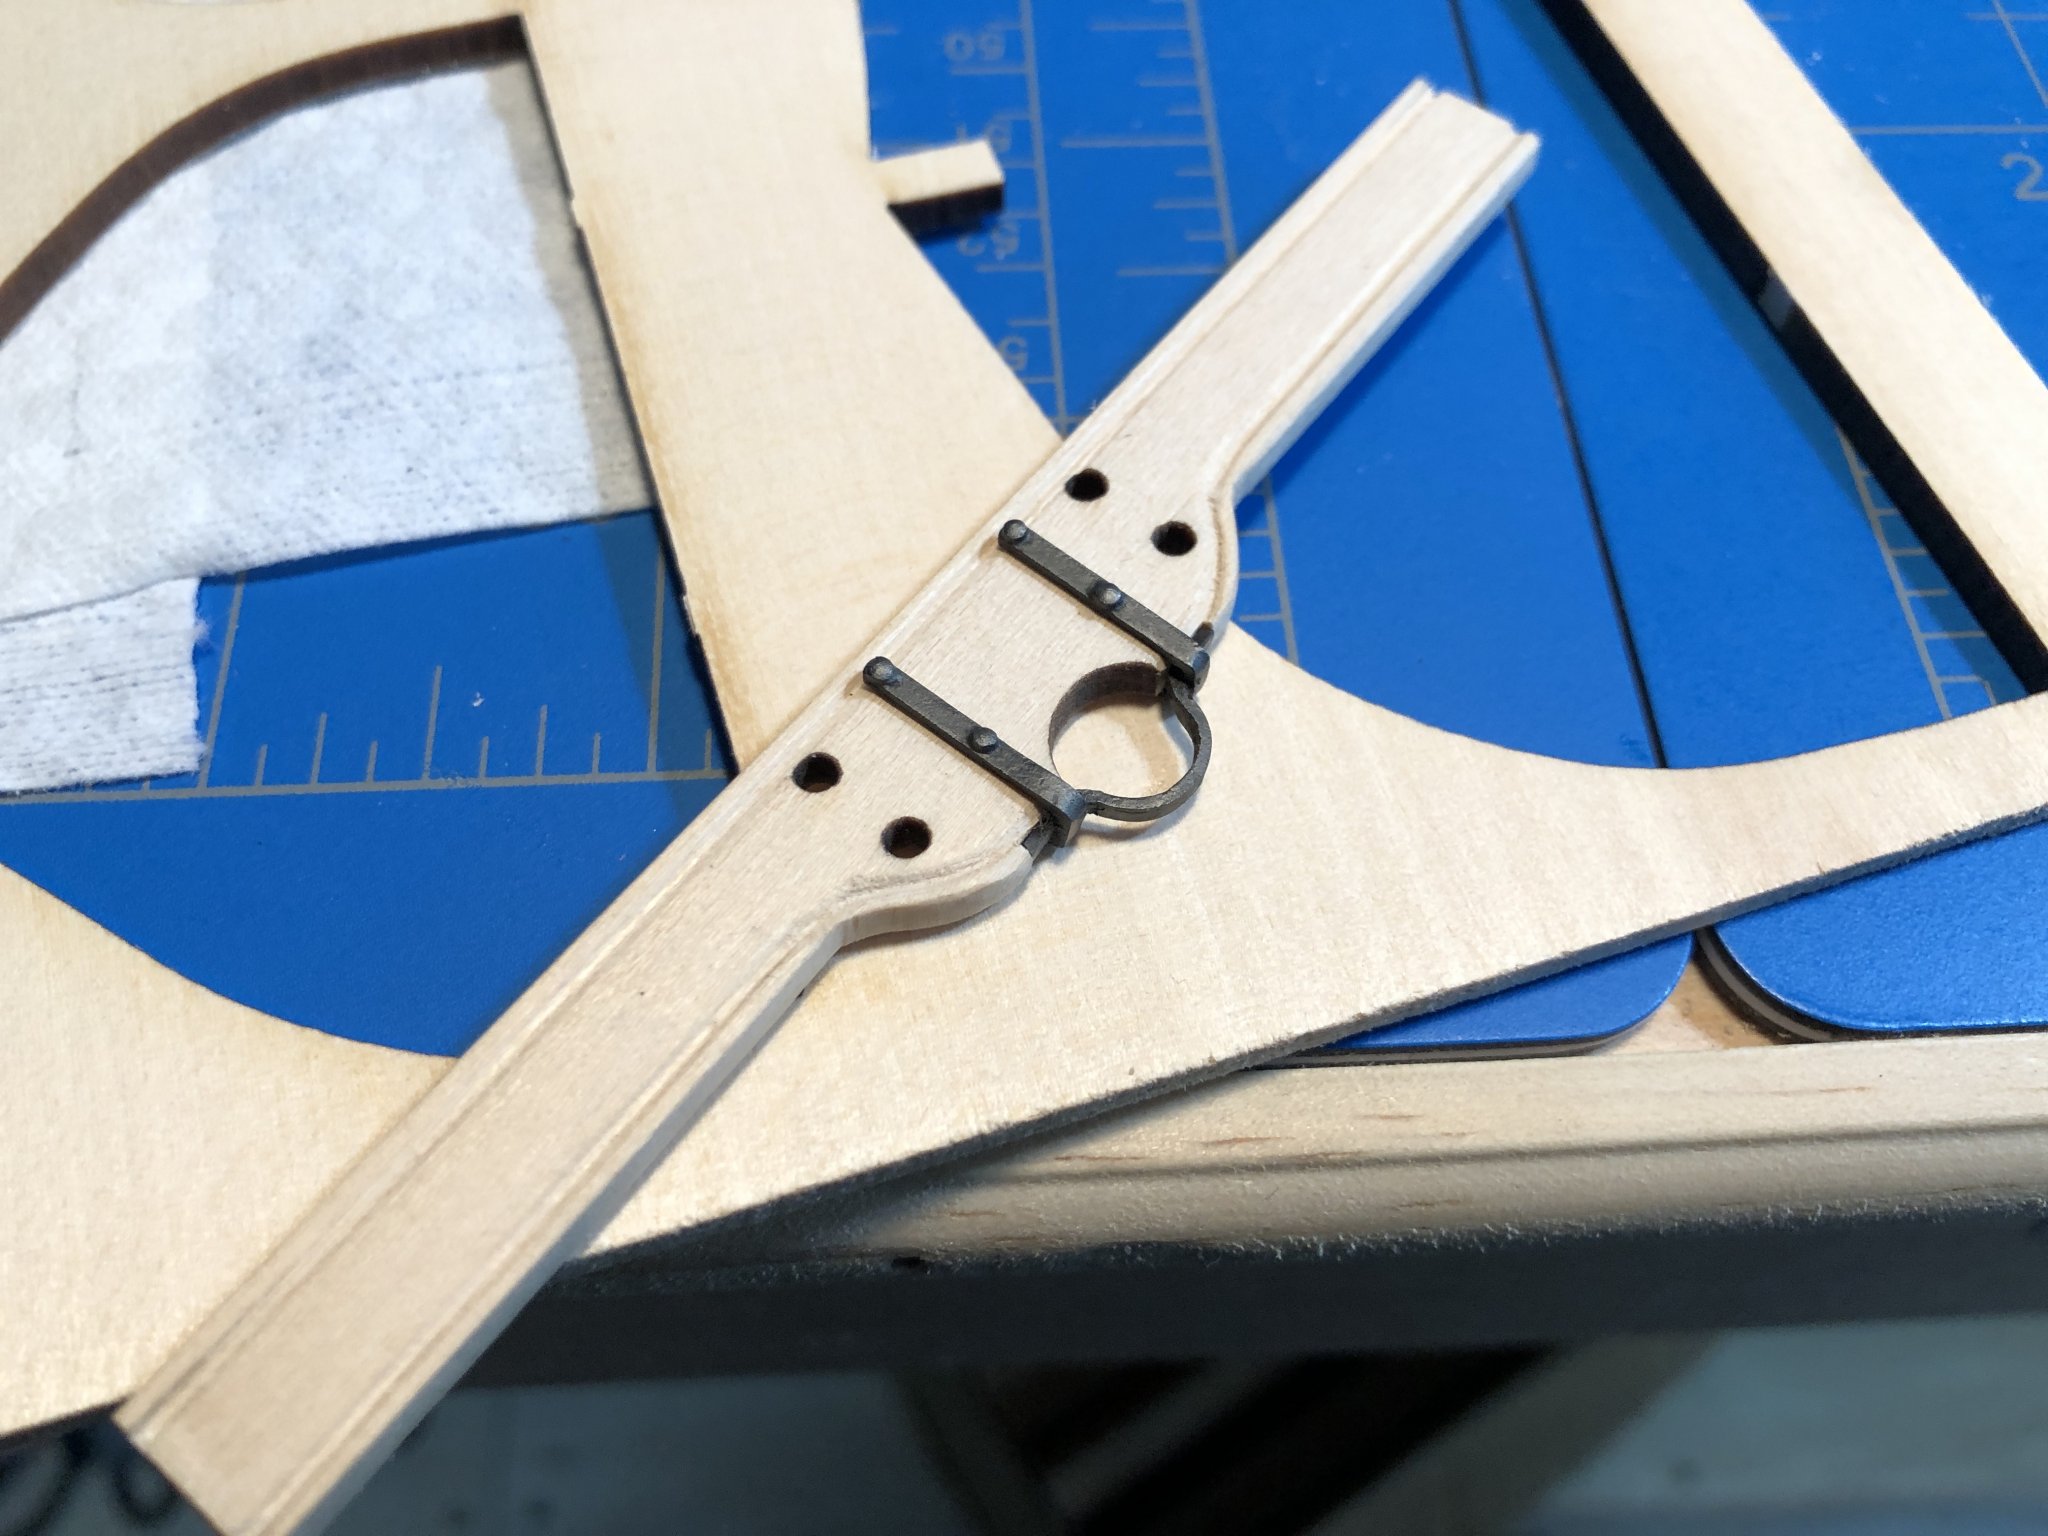
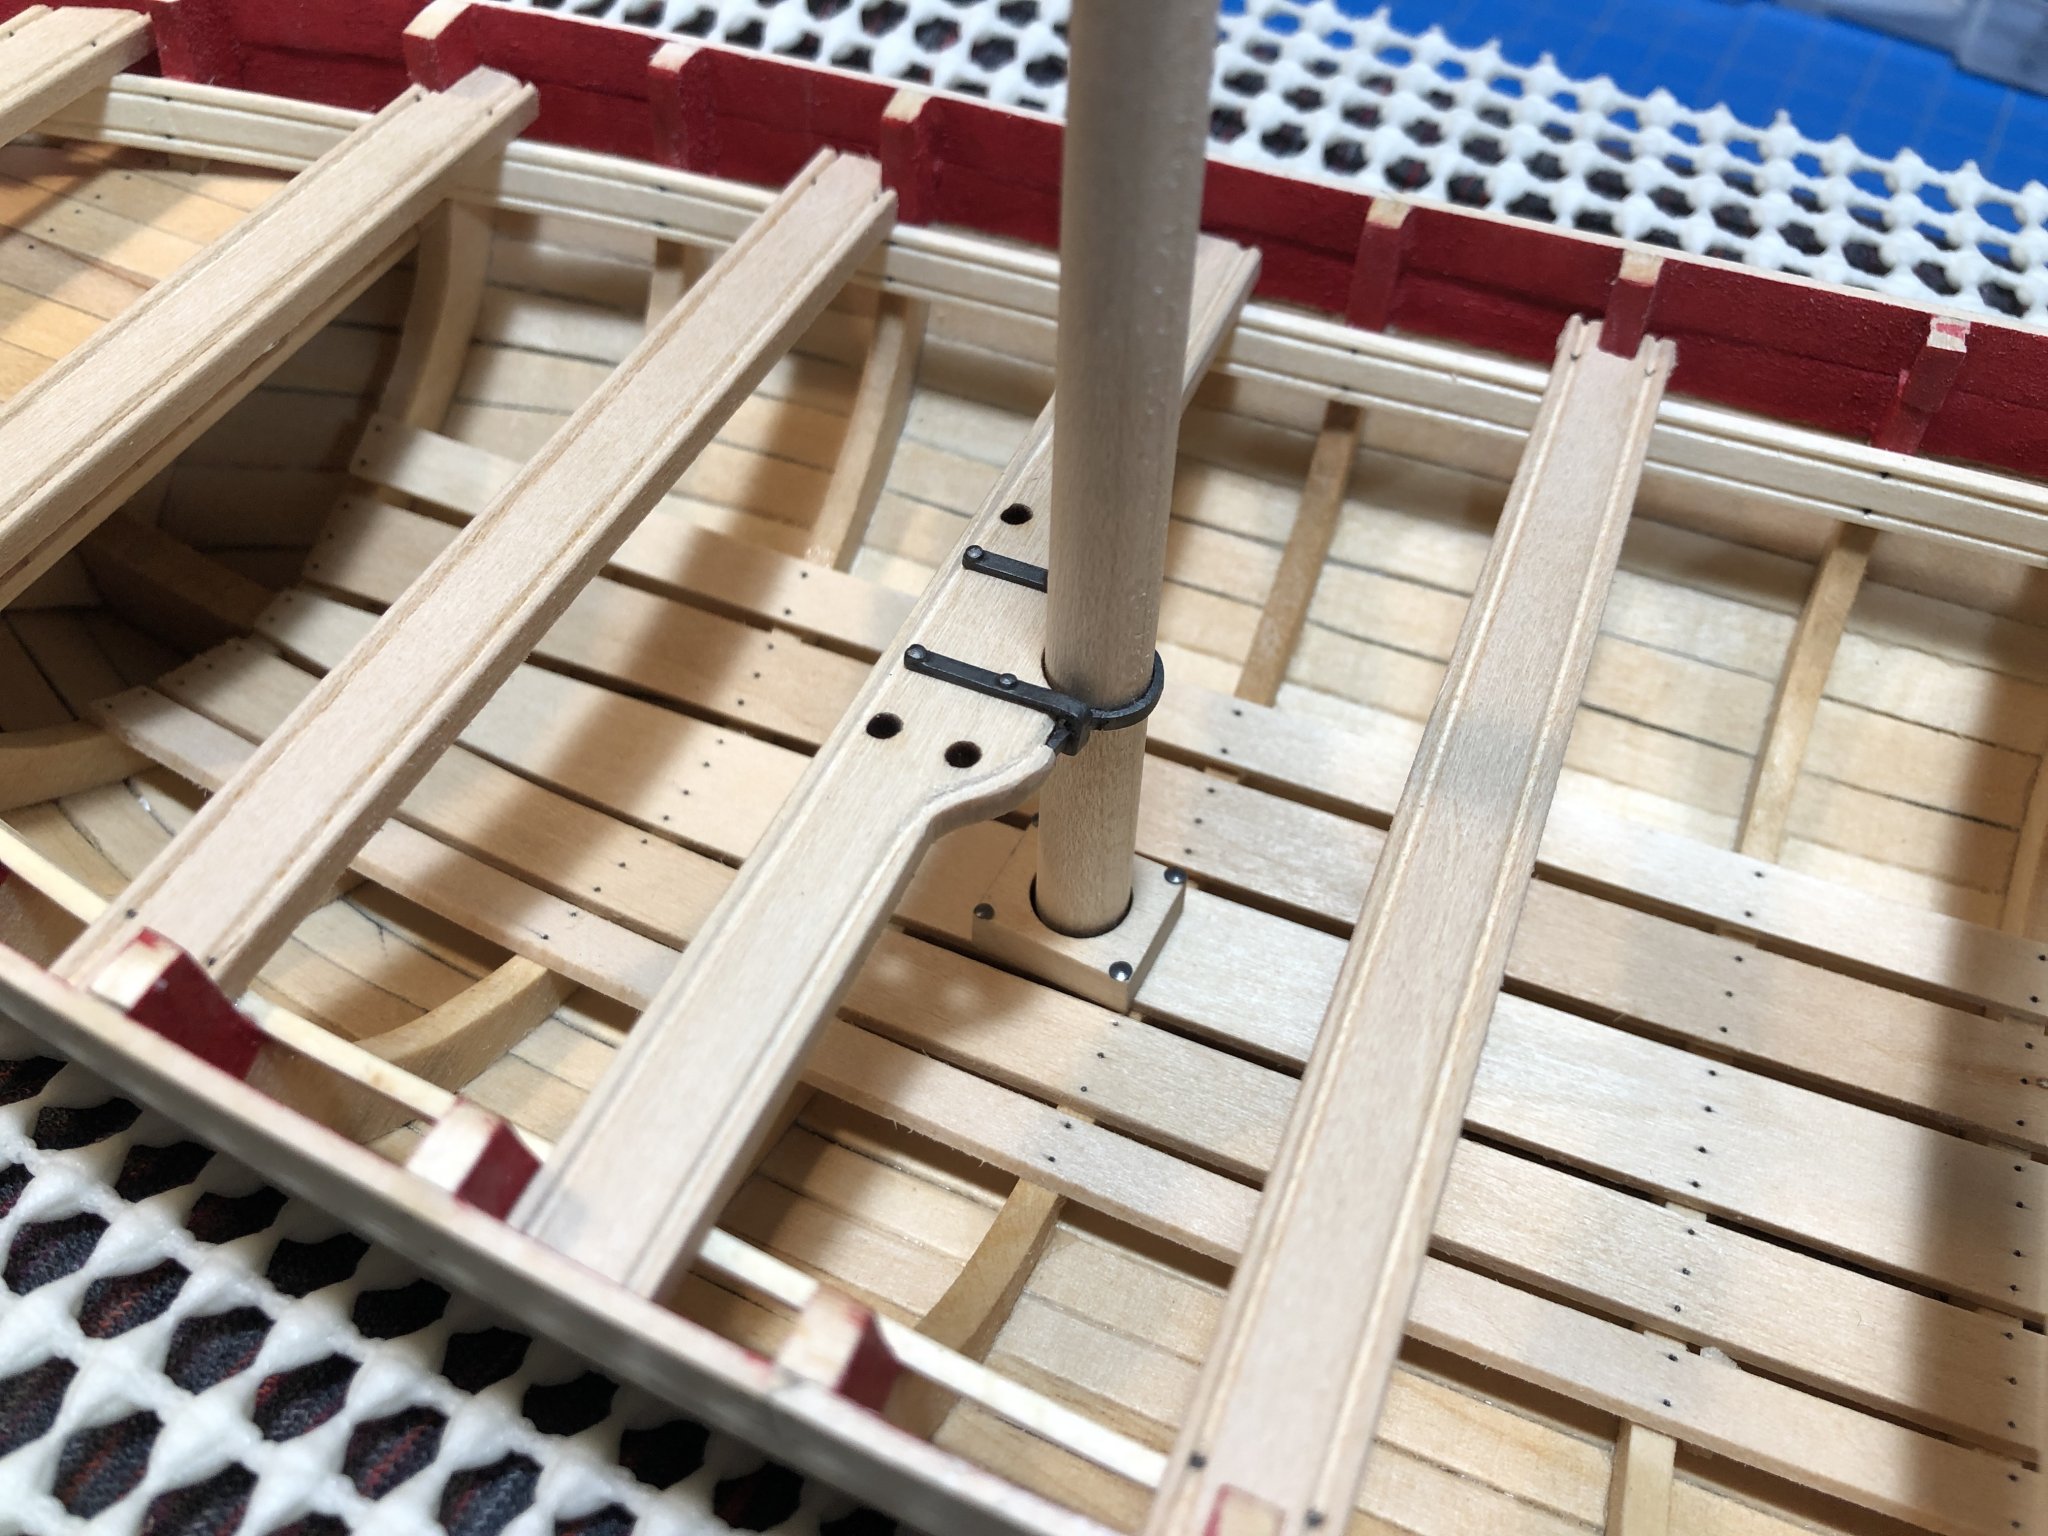
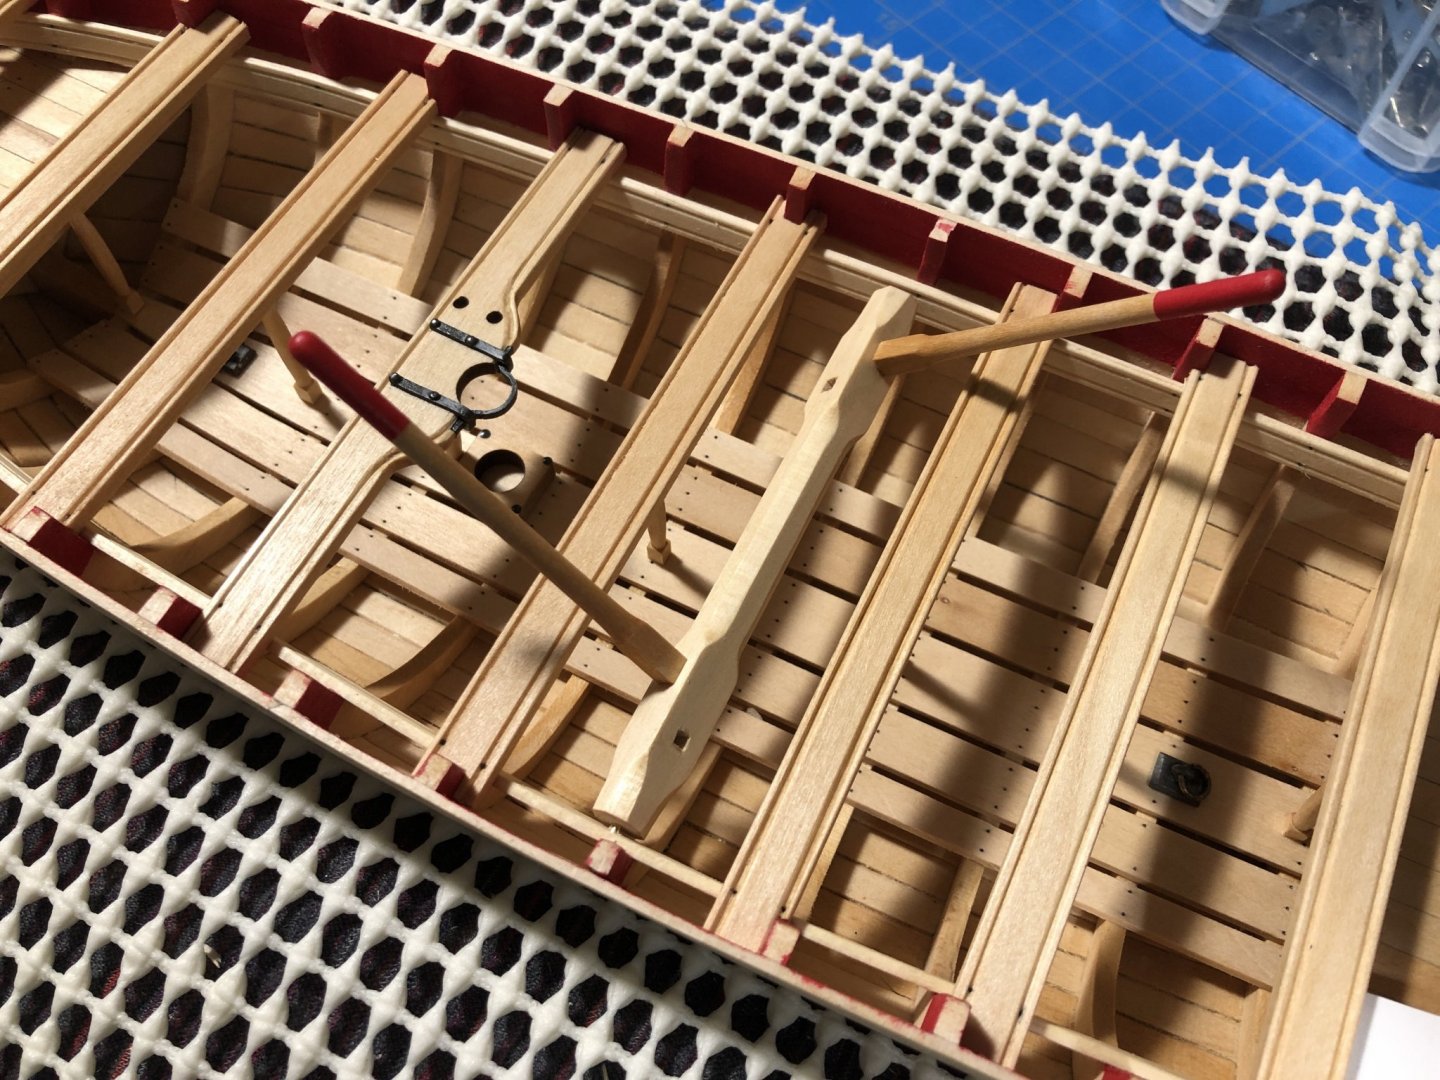
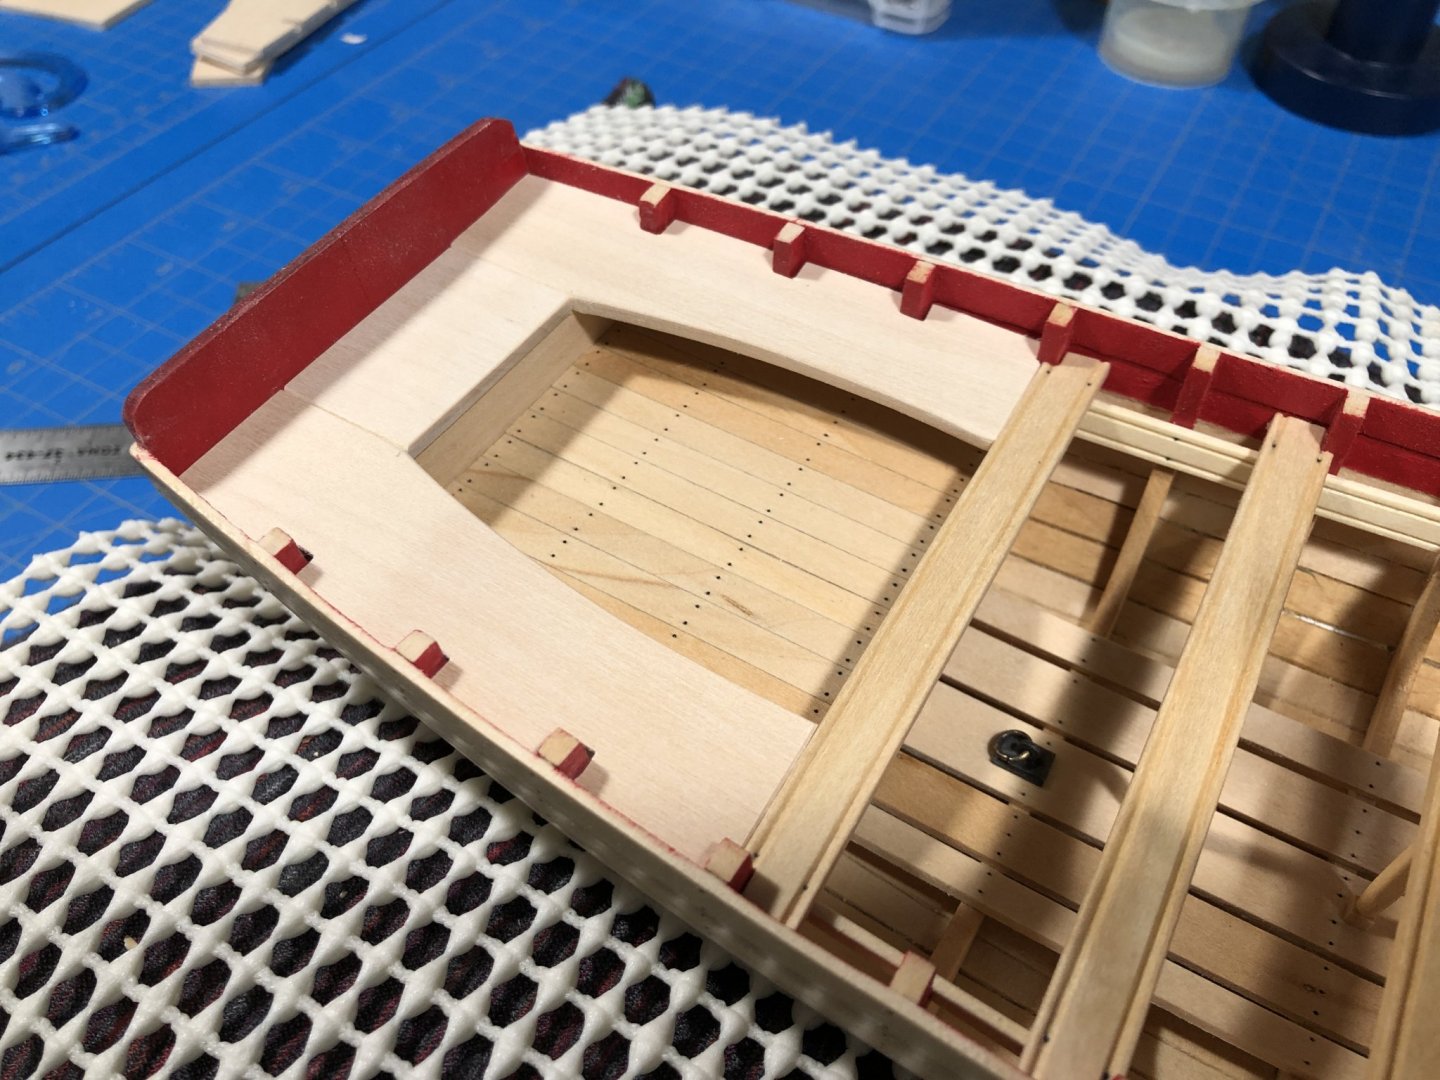
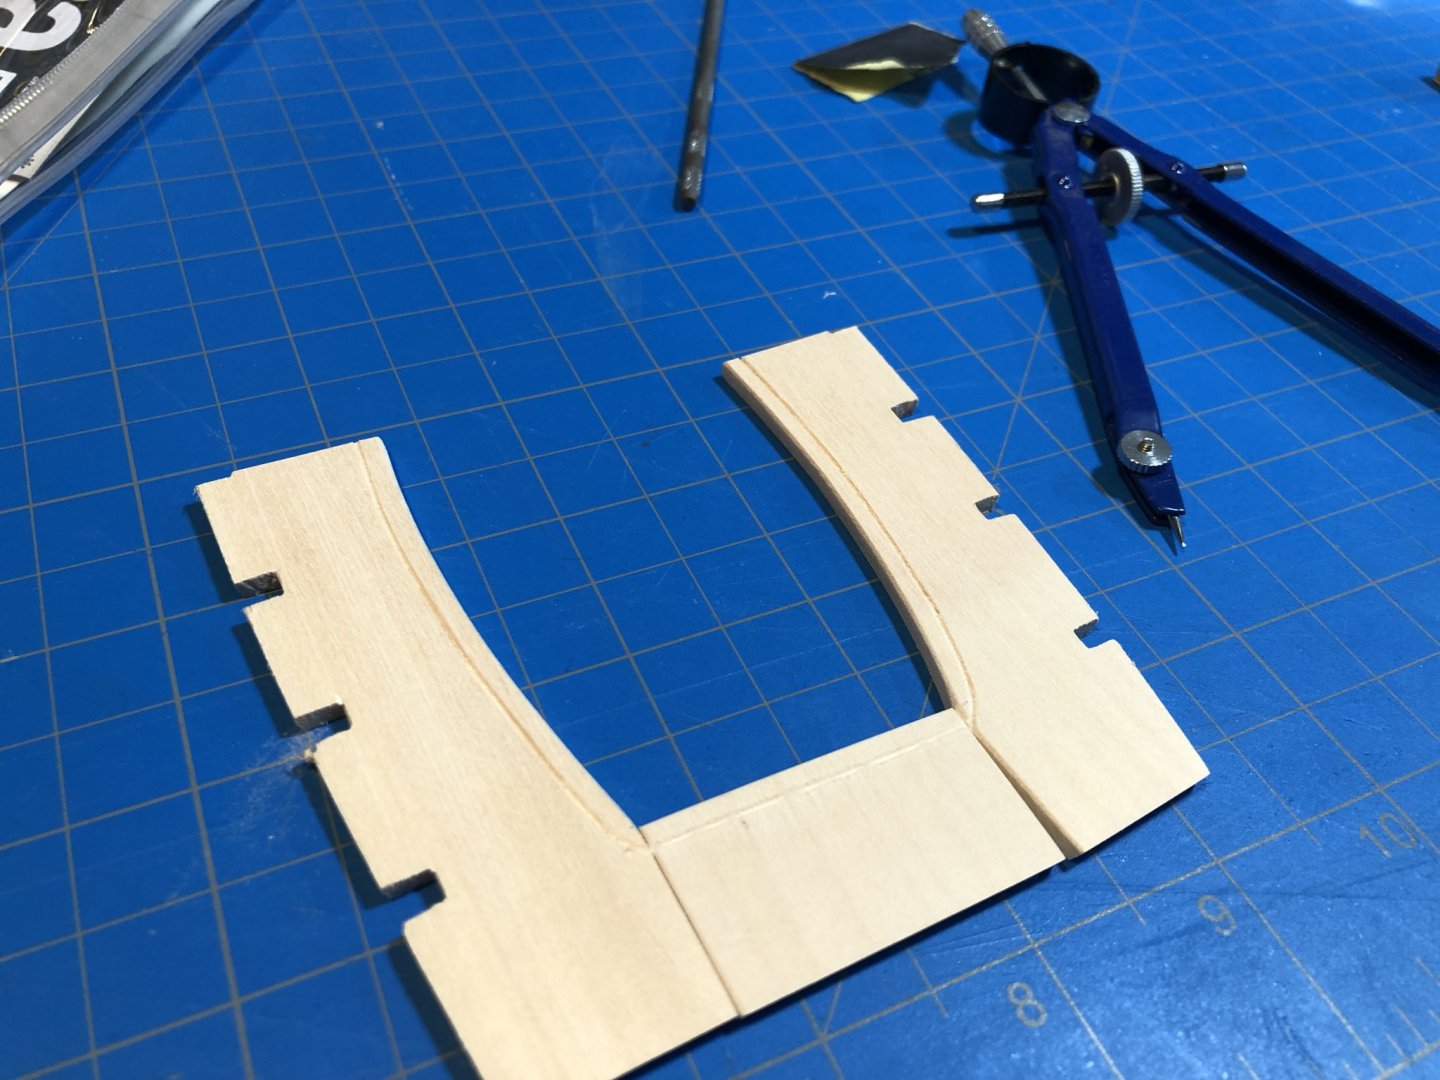
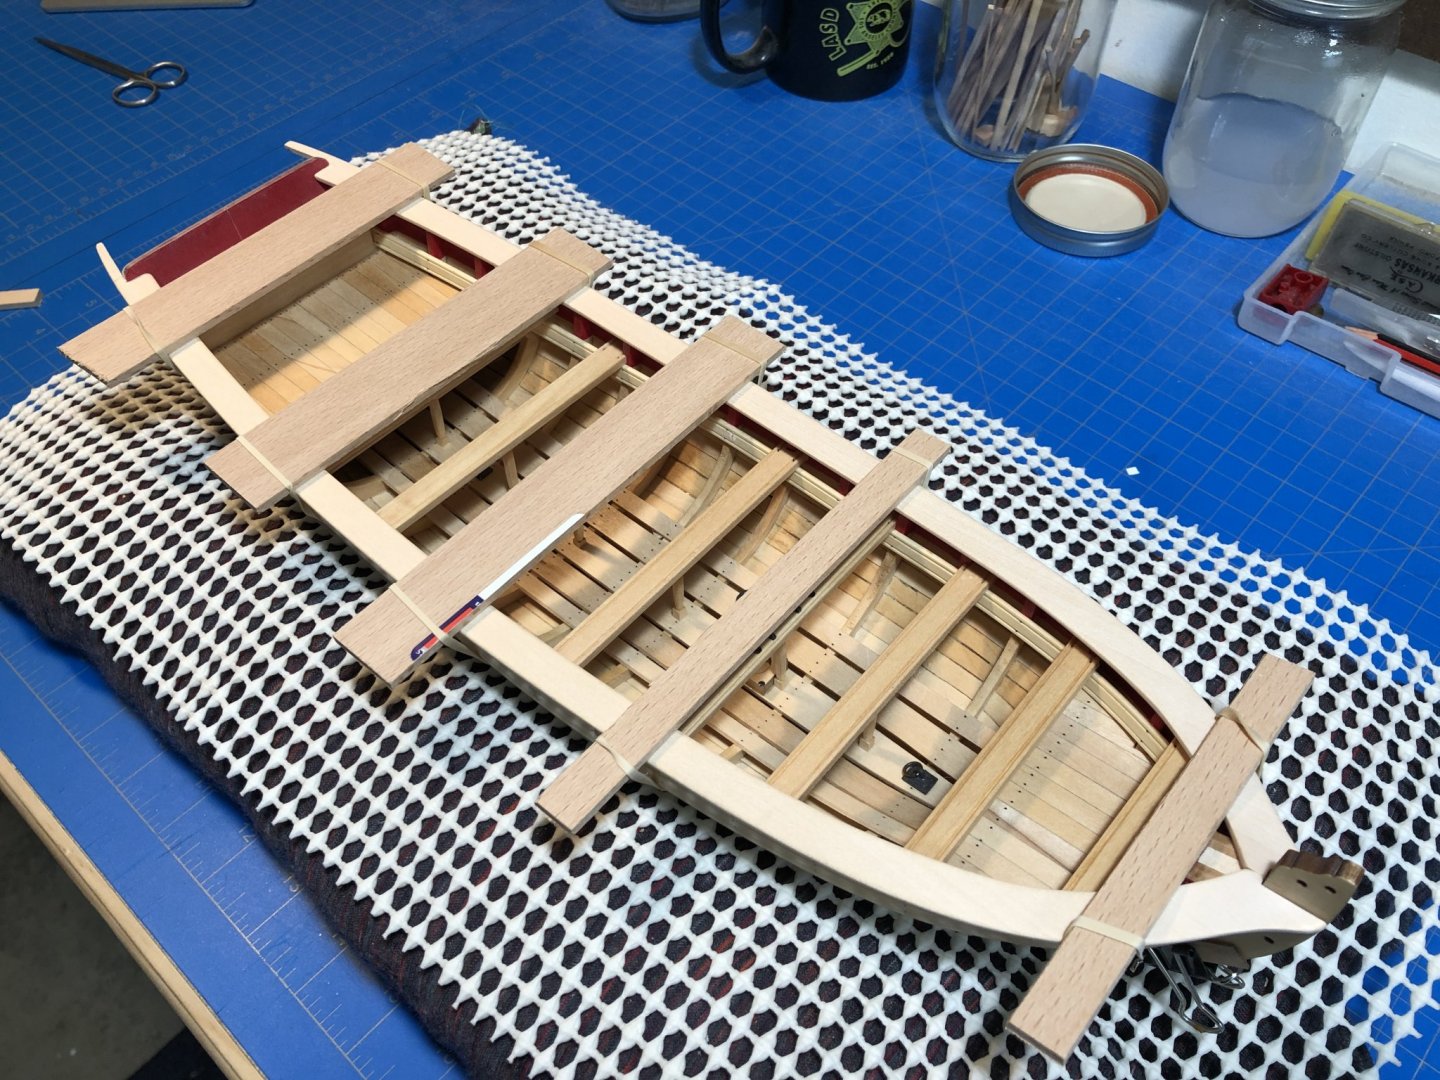
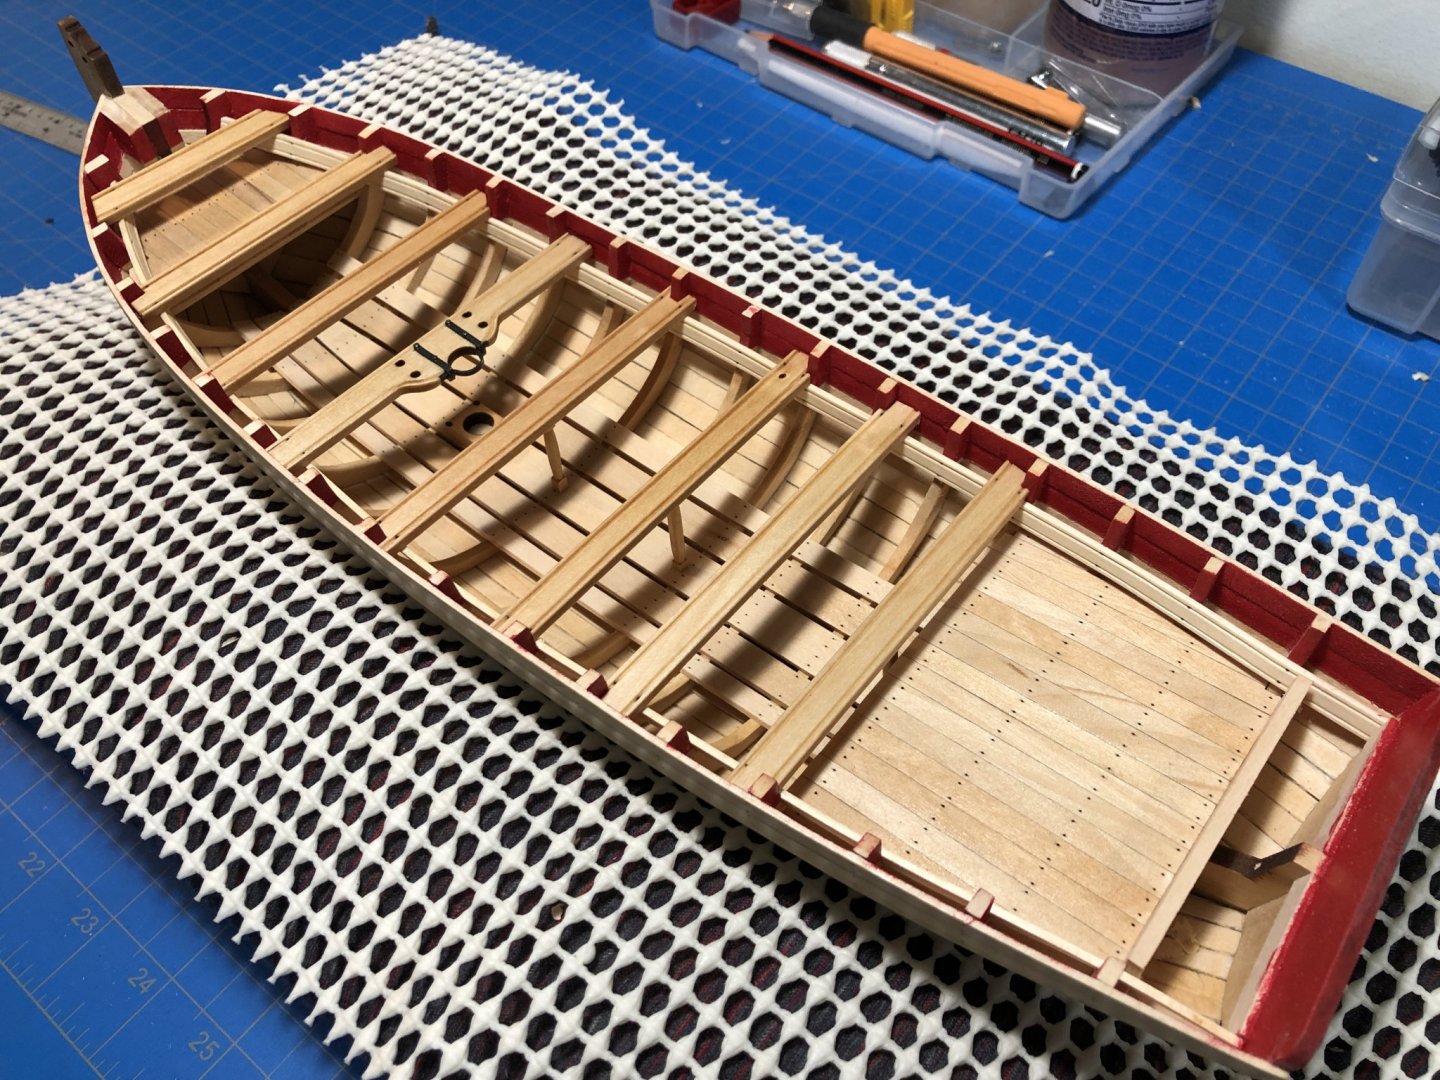
Another few days and another few steps completed. I neglected to mention that in these stages I got a little out of order, but I think the end result is that things came together a bit less clumsily then had I followed the instructions step by step. I also began to realize that the same problems outlined by others are definitely being repeated in my own build. For instance the laser-cut cockpit seats and stern locker definitely do not fit - not even close. In fact they were almost 1/4" short which struck me as odd, and the fore aft measurements align with the frames and transom, so weather I managed to magically make my boat 1/4" longer or they just are way off somewhere in the manufacture of the kit. I suspect a little of both. Ill give both Model Shipways and myself 1/8" degree of error ;). So I needed to fabricate those myself, which is no big deal but still something I wish I had foreseen as I didn't have any 1/8" basswood sheets laying around. I went ahead and made the templates and moved forward with other steps. Next was to fabricate the cap rails which turned out to be easier than I was anticipating. I did have some 1/16" sheets so I knocked those out pretty quickly. They are not quite finished as I want to get everything install before finalizing their shape and width. I did however take them down pretty close to done just to get an idea of how things would come together. The cap rails do seem a bit wide but that's because I haven't taken down the outboard edge and given them a final shape. Hopefully they'll lean out a bit and better fit the proportions of the boat. After satisfying myself with the caprails I moved on to thwarts and thwart supports install. I also waded into a bit of metalwork. The mast bracket needed a little cleaning and is made for a much larger dowel then the one provided, or so it seems. Other builders have also ran into this problem but with COVID, running out to find the right mast was not something I was interested in doing. Not to mention it fit the mast thwart notch and the mast foot well enough that I decided to do a little Macgyver to make it work. Notching out the mast thwart and manipulated the bracket a bit gave me just enough extra space that the oversized bracket fit nicely afterwards. After running it through some pewter blackening solution, it turned out pretty nice. (DRY FITTING THE MAST AND MAST FOOT) I also moved ahead with some (not all) of the thwart center supports. Mounting them up in the lathe I was able to turn them out pretty quickly. For a days work Im pretty happy. Gave everything a coat of wipe-on poly as it will likely be a couple days before I get back to her but I am loving this little boat.


- 66 replies
-
- 15
-
-
- Finished
- Model Shipways
- (and 1 more)
-
A little late to the party, but happy to be here! Looks great.