HOLIDAY DONATION DRIVE - SUPPORT MSW - DO YOUR PART TO KEEP THIS GREAT FORUM GOING! (Only 36 donations so far out of 49,000 members - C'mon guys!)
×


Justin P.
-
Posts
1,008 -
Joined
Content Type
Profiles
Forums
Gallery
Events
Everything posted by Justin P.
-
 Thanks Bob!
 -
Plexiglass And Plans Question
Justin P. replied to Mike the Maxx's topic in Modeling tools and Workshop Equipment
I use one of these, and then use a sheet of 4mil mylar over the plans. When I need to put them away it just folds up so I don't have to roll and preroll the plans. Hangs very easily on a wall and provides a very sturdy additional work space. When not in use, folds up flat against the wall, but also has a handle to be carried away and stored somewhere else. https://www.amazon.com/Plan-Station-Portable-Workbench-WS3800/dp/B075V3LX1H/ref=sr_1_2?dchild=1&keywords=site+plan+desk&qid=1619196633&sr=8-2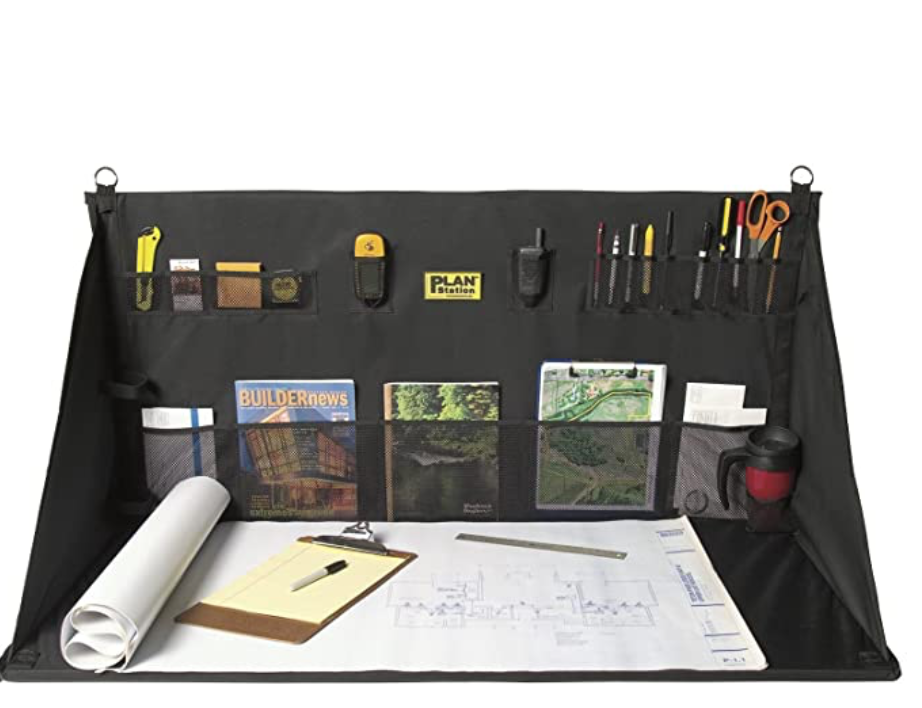
-
Great kit and parts source
Justin P. replied to JohnU's topic in REVIEWS: Model Shipwrighting Tools, Parts and fittings
I love Cornwall Model Boats too. I think the Canadian shipping thing is a product of warehousing. They probably don't stock EVERYTHING in one place and rely on other vendors for stuff they do list. I ordered a tool the other day from a mom&pop shop in Missouri, and the system they sold was shipped from San Diego. My local Hobby Shop is an RC emporium, with a few static model options but nothing like what we need in terms of materials or tools. 5000 options for batteries, and exactly one option for x-acto knife - that sort of thing. The best place to buy hobby lumber is actually my local hardware store, not the hobby shop. Incidentally, they also tend to carry more useful tools too. The closest good shop for me would be 4-500 miles away. So I shop online, and even then I have found that I have increasingly sought out even more niche companies like Syren as opposed to ModelExpo for upgrade parts. Which is to say, even if my local shop had the very basic of "mainstream" model ship stuff like Model Shipways, I still wouldn't be likely to buy from there. Im sorry to hear. Id like to check out your website, is there a link? I tried googling it, but a few options came up and which one might be yours wasn't immediately obvious to me. There is wisdom here. Ive definitely found that the more equipped I have become both in tools and in experience the more I am drawn to scratch building. I enjoy a good kit, but the expense + time in looking for replacements parts + additional expense in buying/making those parts makes kits sometimes a bit more tedious feeling. I dislike shelling out a few hundred dollars knowing full well that almost half of the wood, fittings, rope etc is more or less useless. I agree that it is a natural evolution one makes in time, and can see myself headed in that direction. Though I have kits on the shelf, I don't anticipate pulling one down after my Syren is completed. My capabilities have grown thanks to the kits I have built, and the experience Ive gained and of course my involvement with MSW. I feel compelled to take that next step and scratch is it for me. That said, one of the greatest benefits of having developed an "equipped" shop for scratch building is that now my kids come into my shop and look around and I can literally see their creative inspiration sparking. Maybe not with models, but when they ask if we can make something, my model projects get swept aside and we make something. I never thought my little corner of the house would become a place of fun for them, but ship modeling and my tool obsession has left us with this place where literally anything we can think of (within reason of course) can be made. They may never take up ship modeling as a hobby, but being around the tools and wide variety of techniques and materials is I think giving them something potentially more beneficial. Whats most distressing to me is the state of hobby mills and wood availability. There are a few options, but I do miss having someone who catered specifically to ship modeling. Couldn't have said it better myself. -
Do you mean this sort of thing: Seemed pretty straightforward to me, which part are you struggling with?
-
HMS Discovery 1789 by Don Case - 1:48
Justin P. replied to Don Case's topic in - Build logs for subjects built 1751 - 1800
Shaping up nicely, I’ll follow along if you don’t mind. I love Discovery as a subject and hope to give her a crack someday myself. -
You can find smaller pieces (pen blanks) of the Castello and the like more easily than the larger stuff that's for sure. Very interested in those tagua nuts, thanks for sharing!
-
Just catching up! Everything looks really great, those yards especially.
- 950 replies
-
- 1
-

-
- syren
- model shipways
- (and 1 more)
-
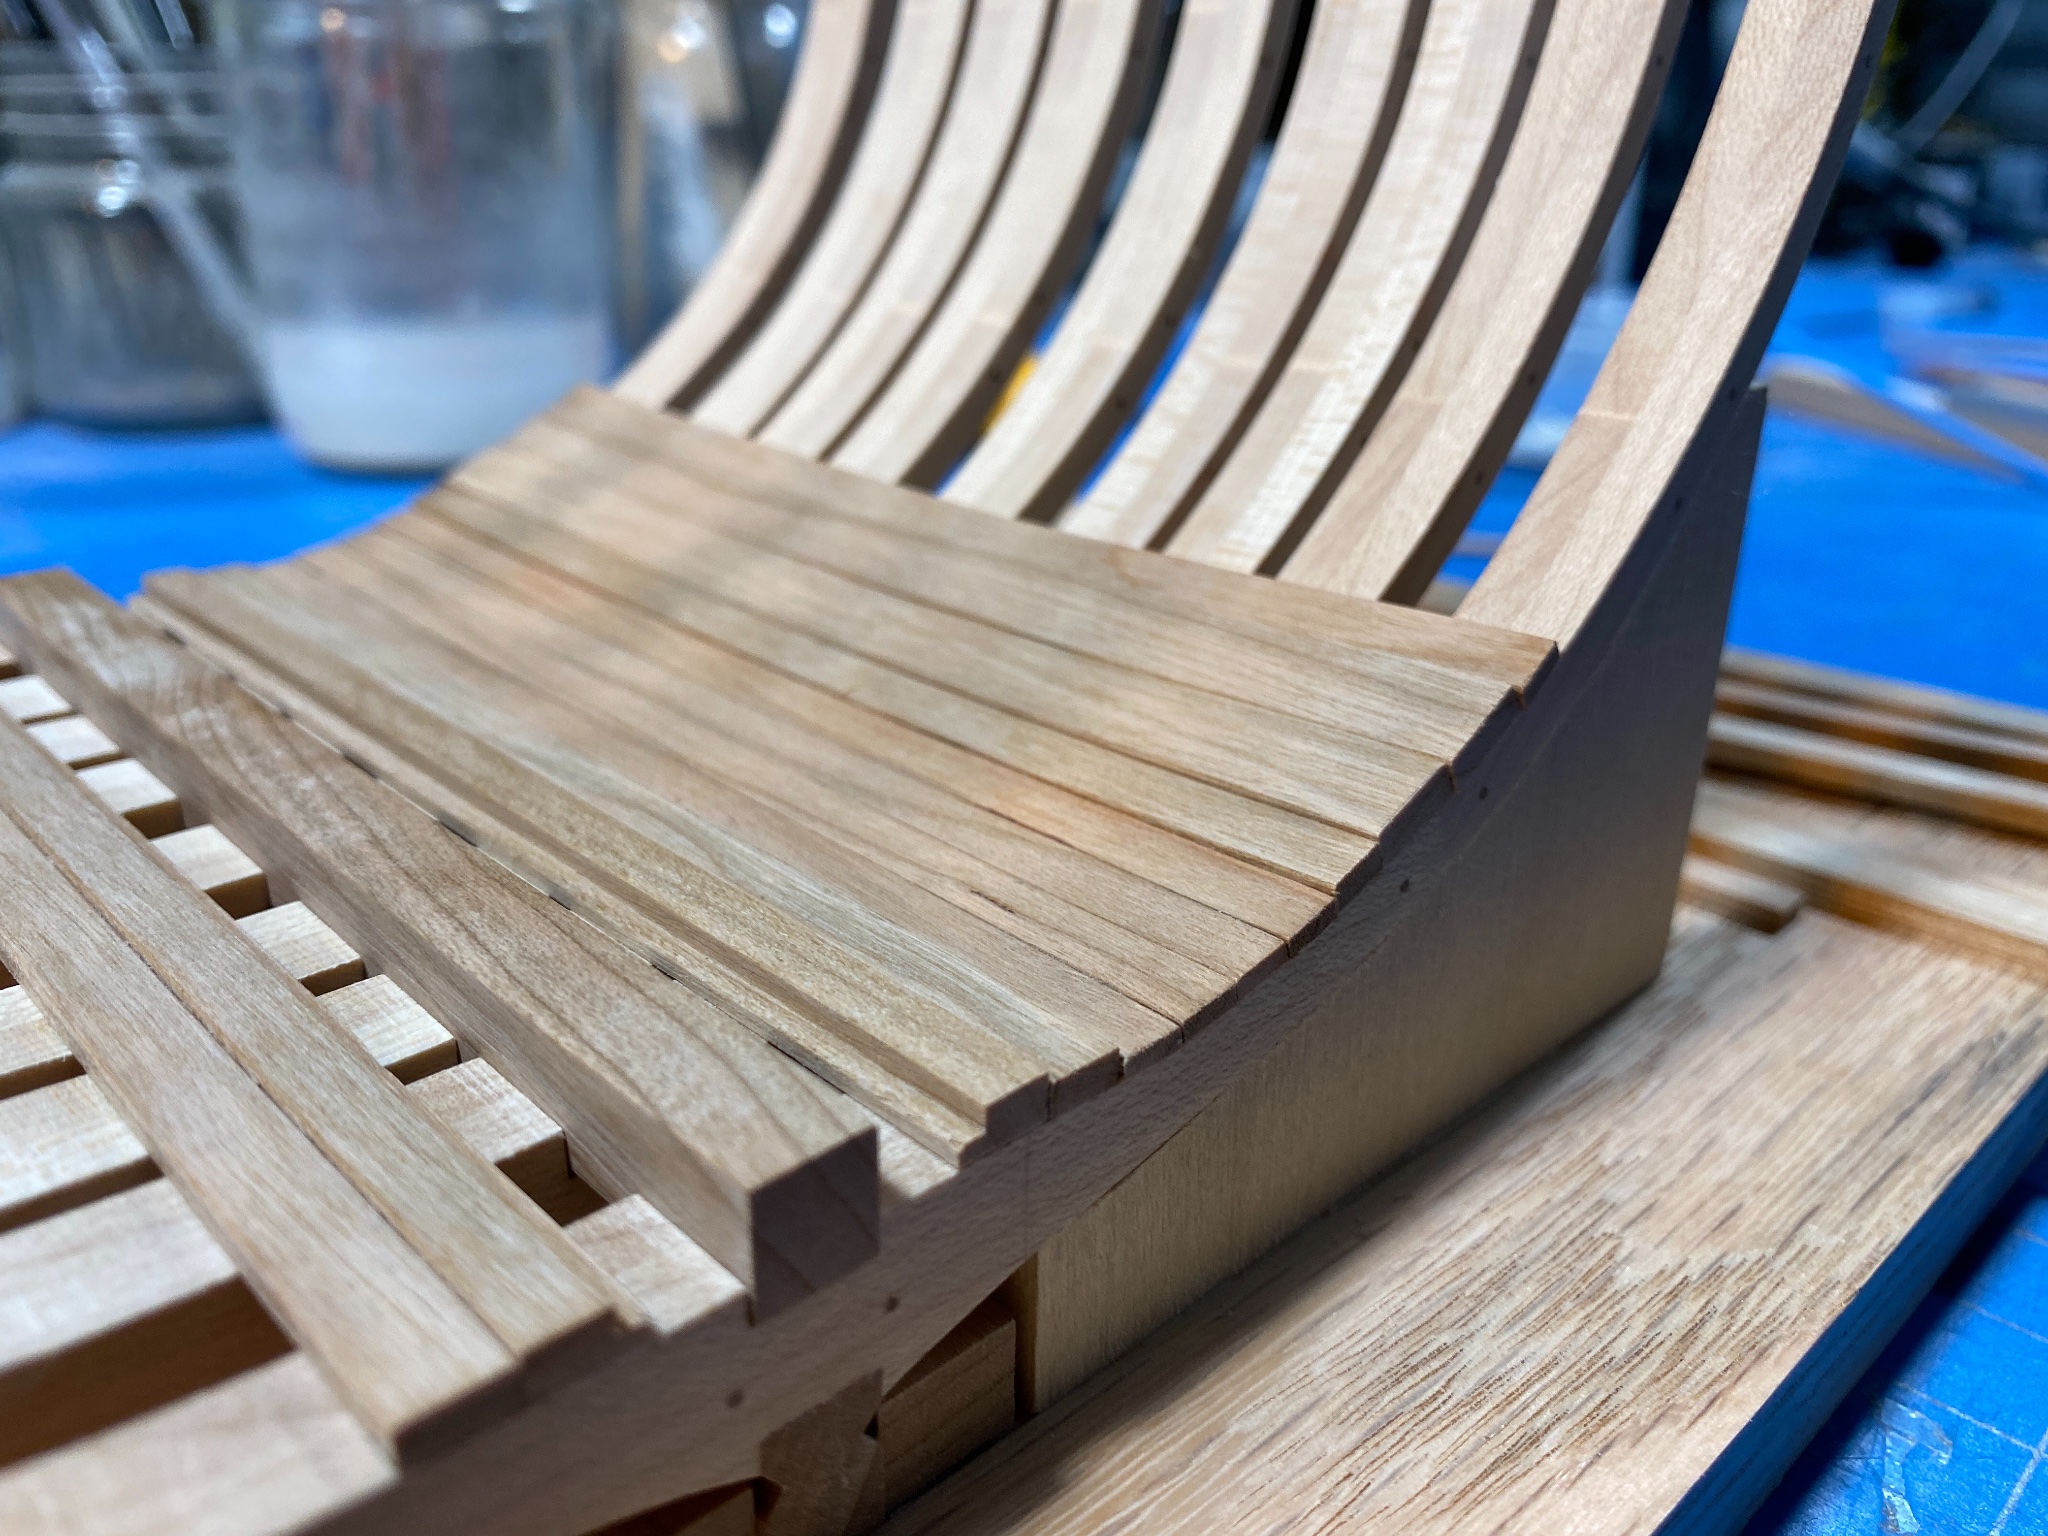
Slow and Steady wins the Race. Among other things in the past month I have steadily made progress on the Triton. I started adding some inner planking, thick stuff and keel components. I suppose this is the rather boring part of the build as far as build logs go but anticipate much more to discuss when we get to deck framing and other more interested (challenging steps). Though I do rather enjoy the process of shaping and fitting each of these planks. Its slow, rather straightforward and gives a pleasing result.


-
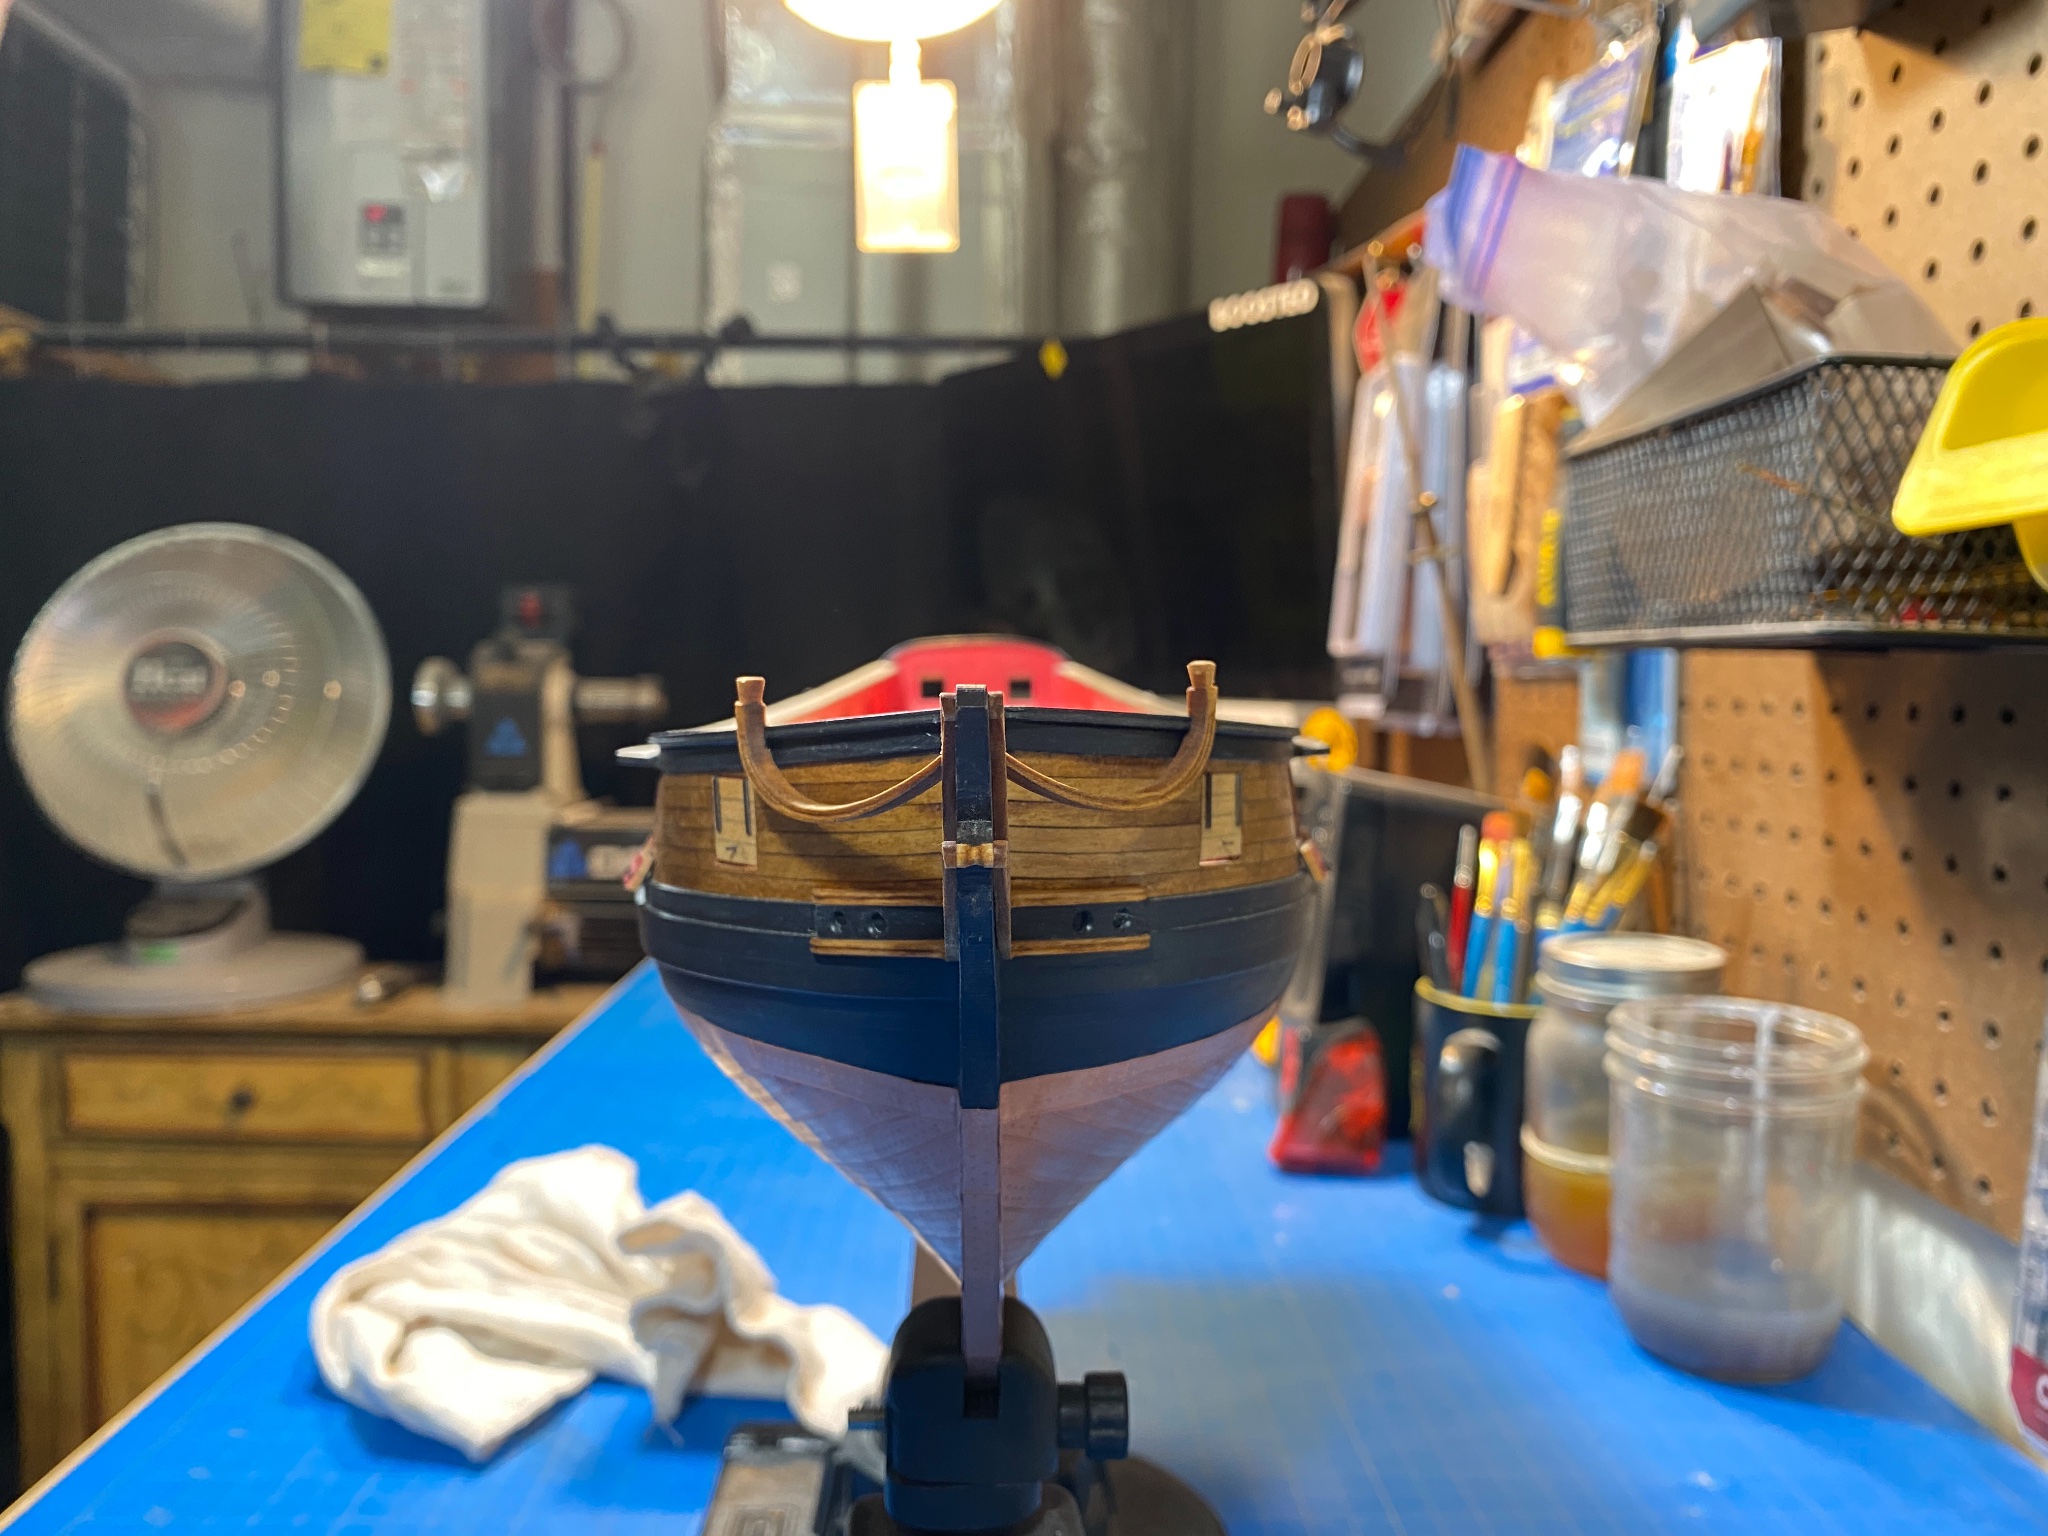
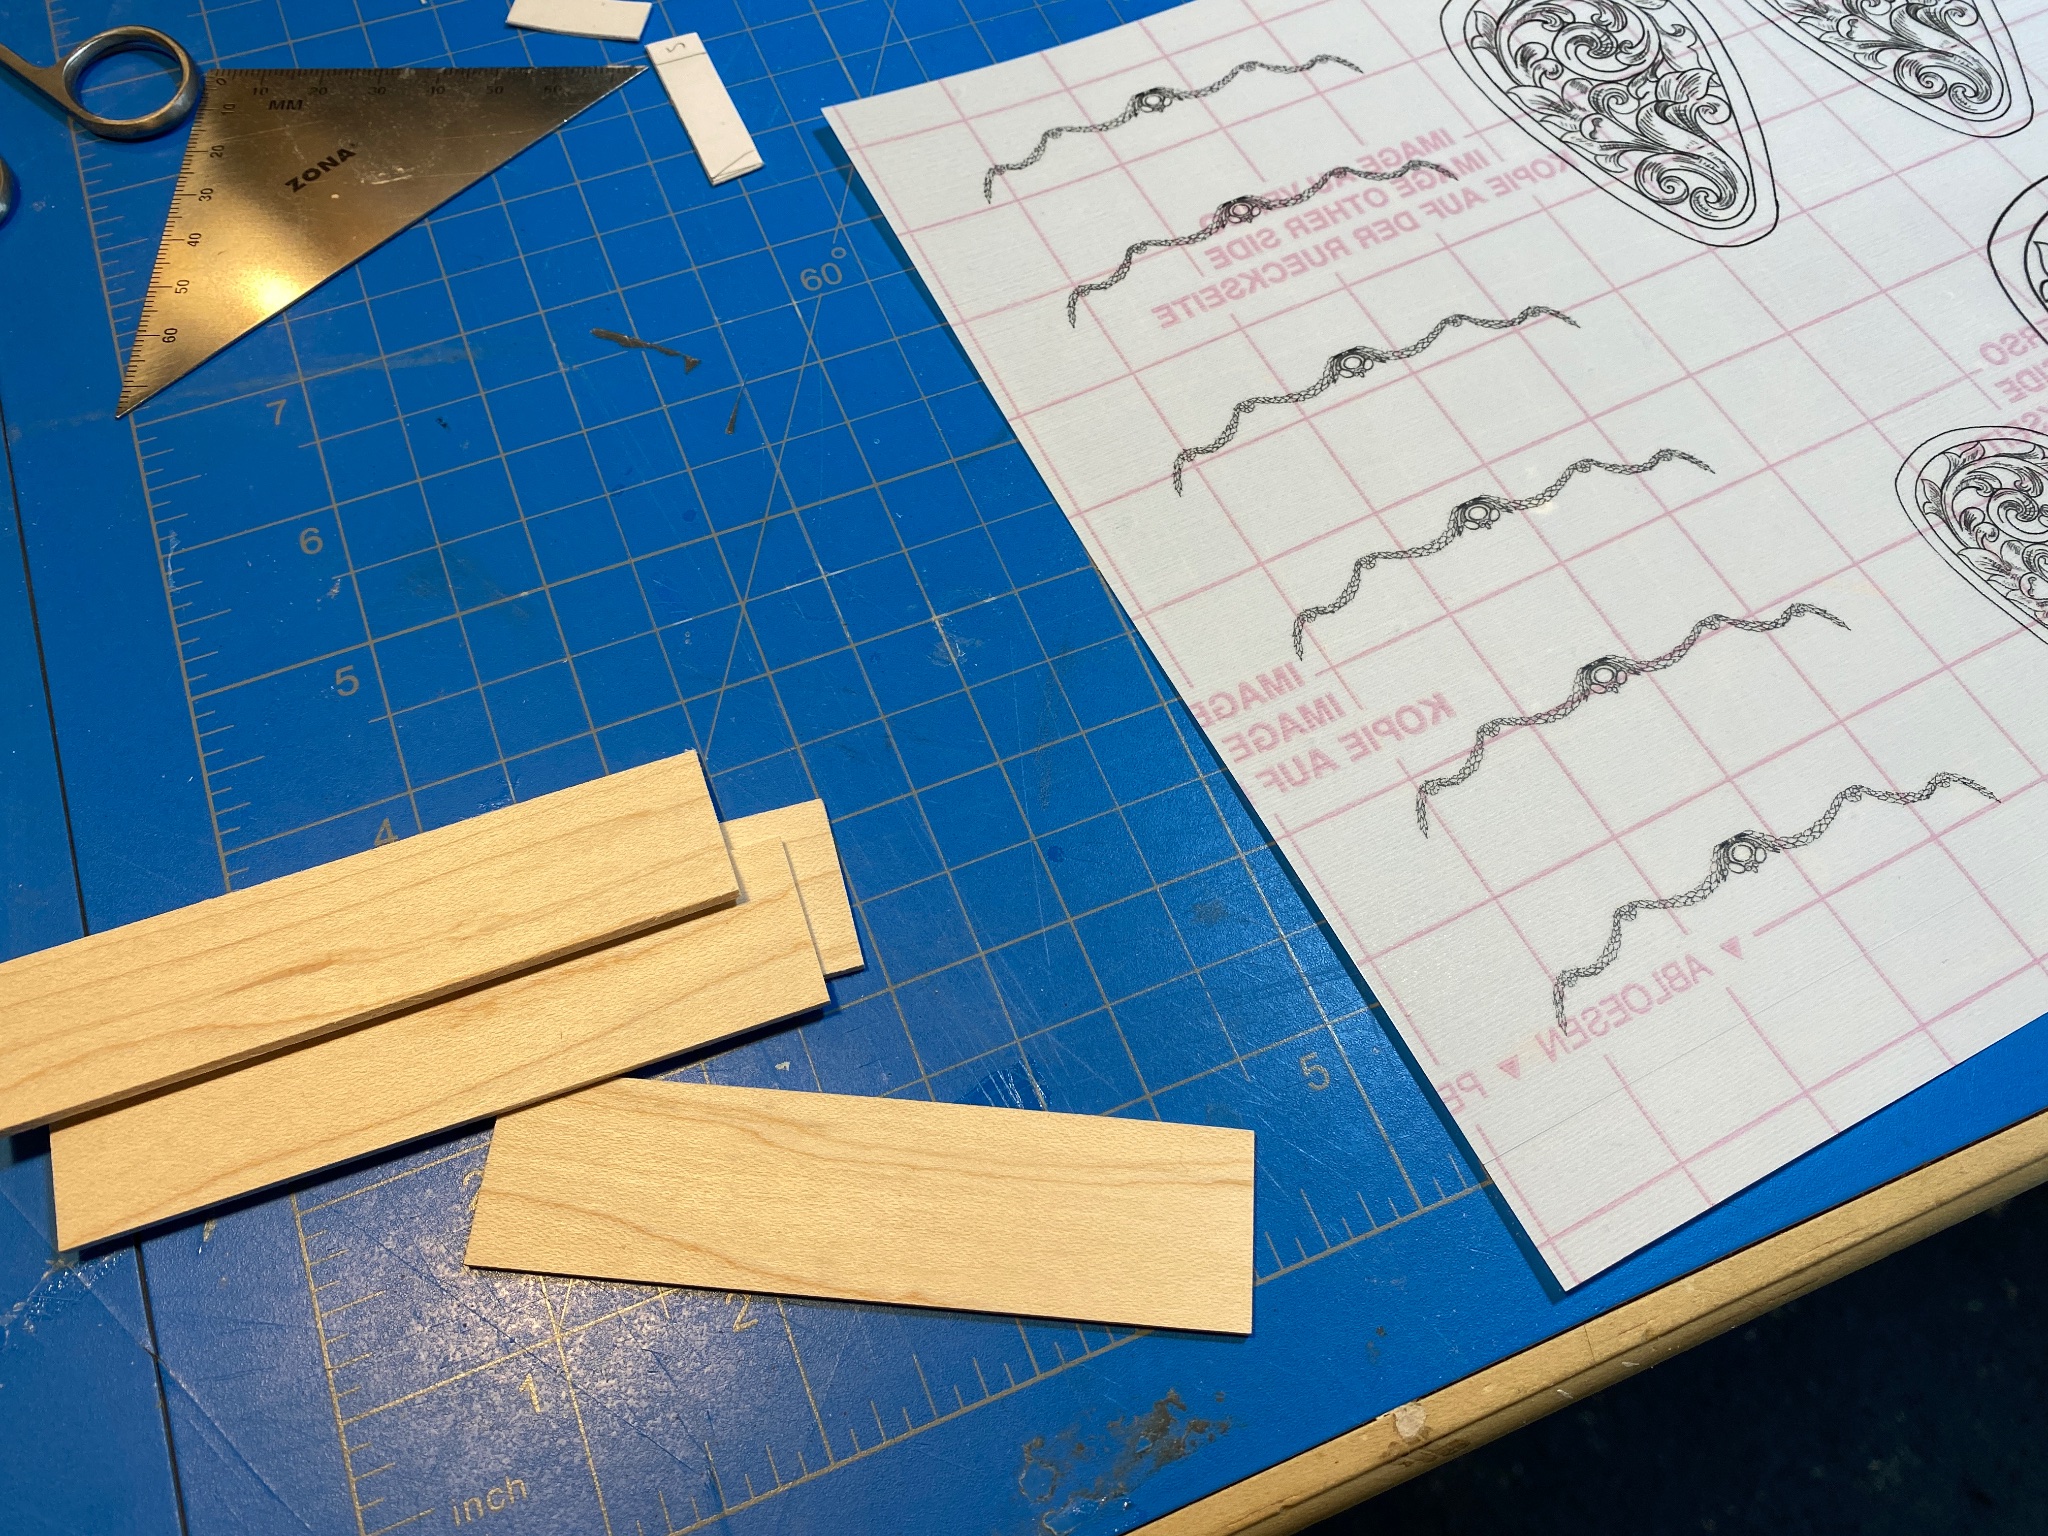
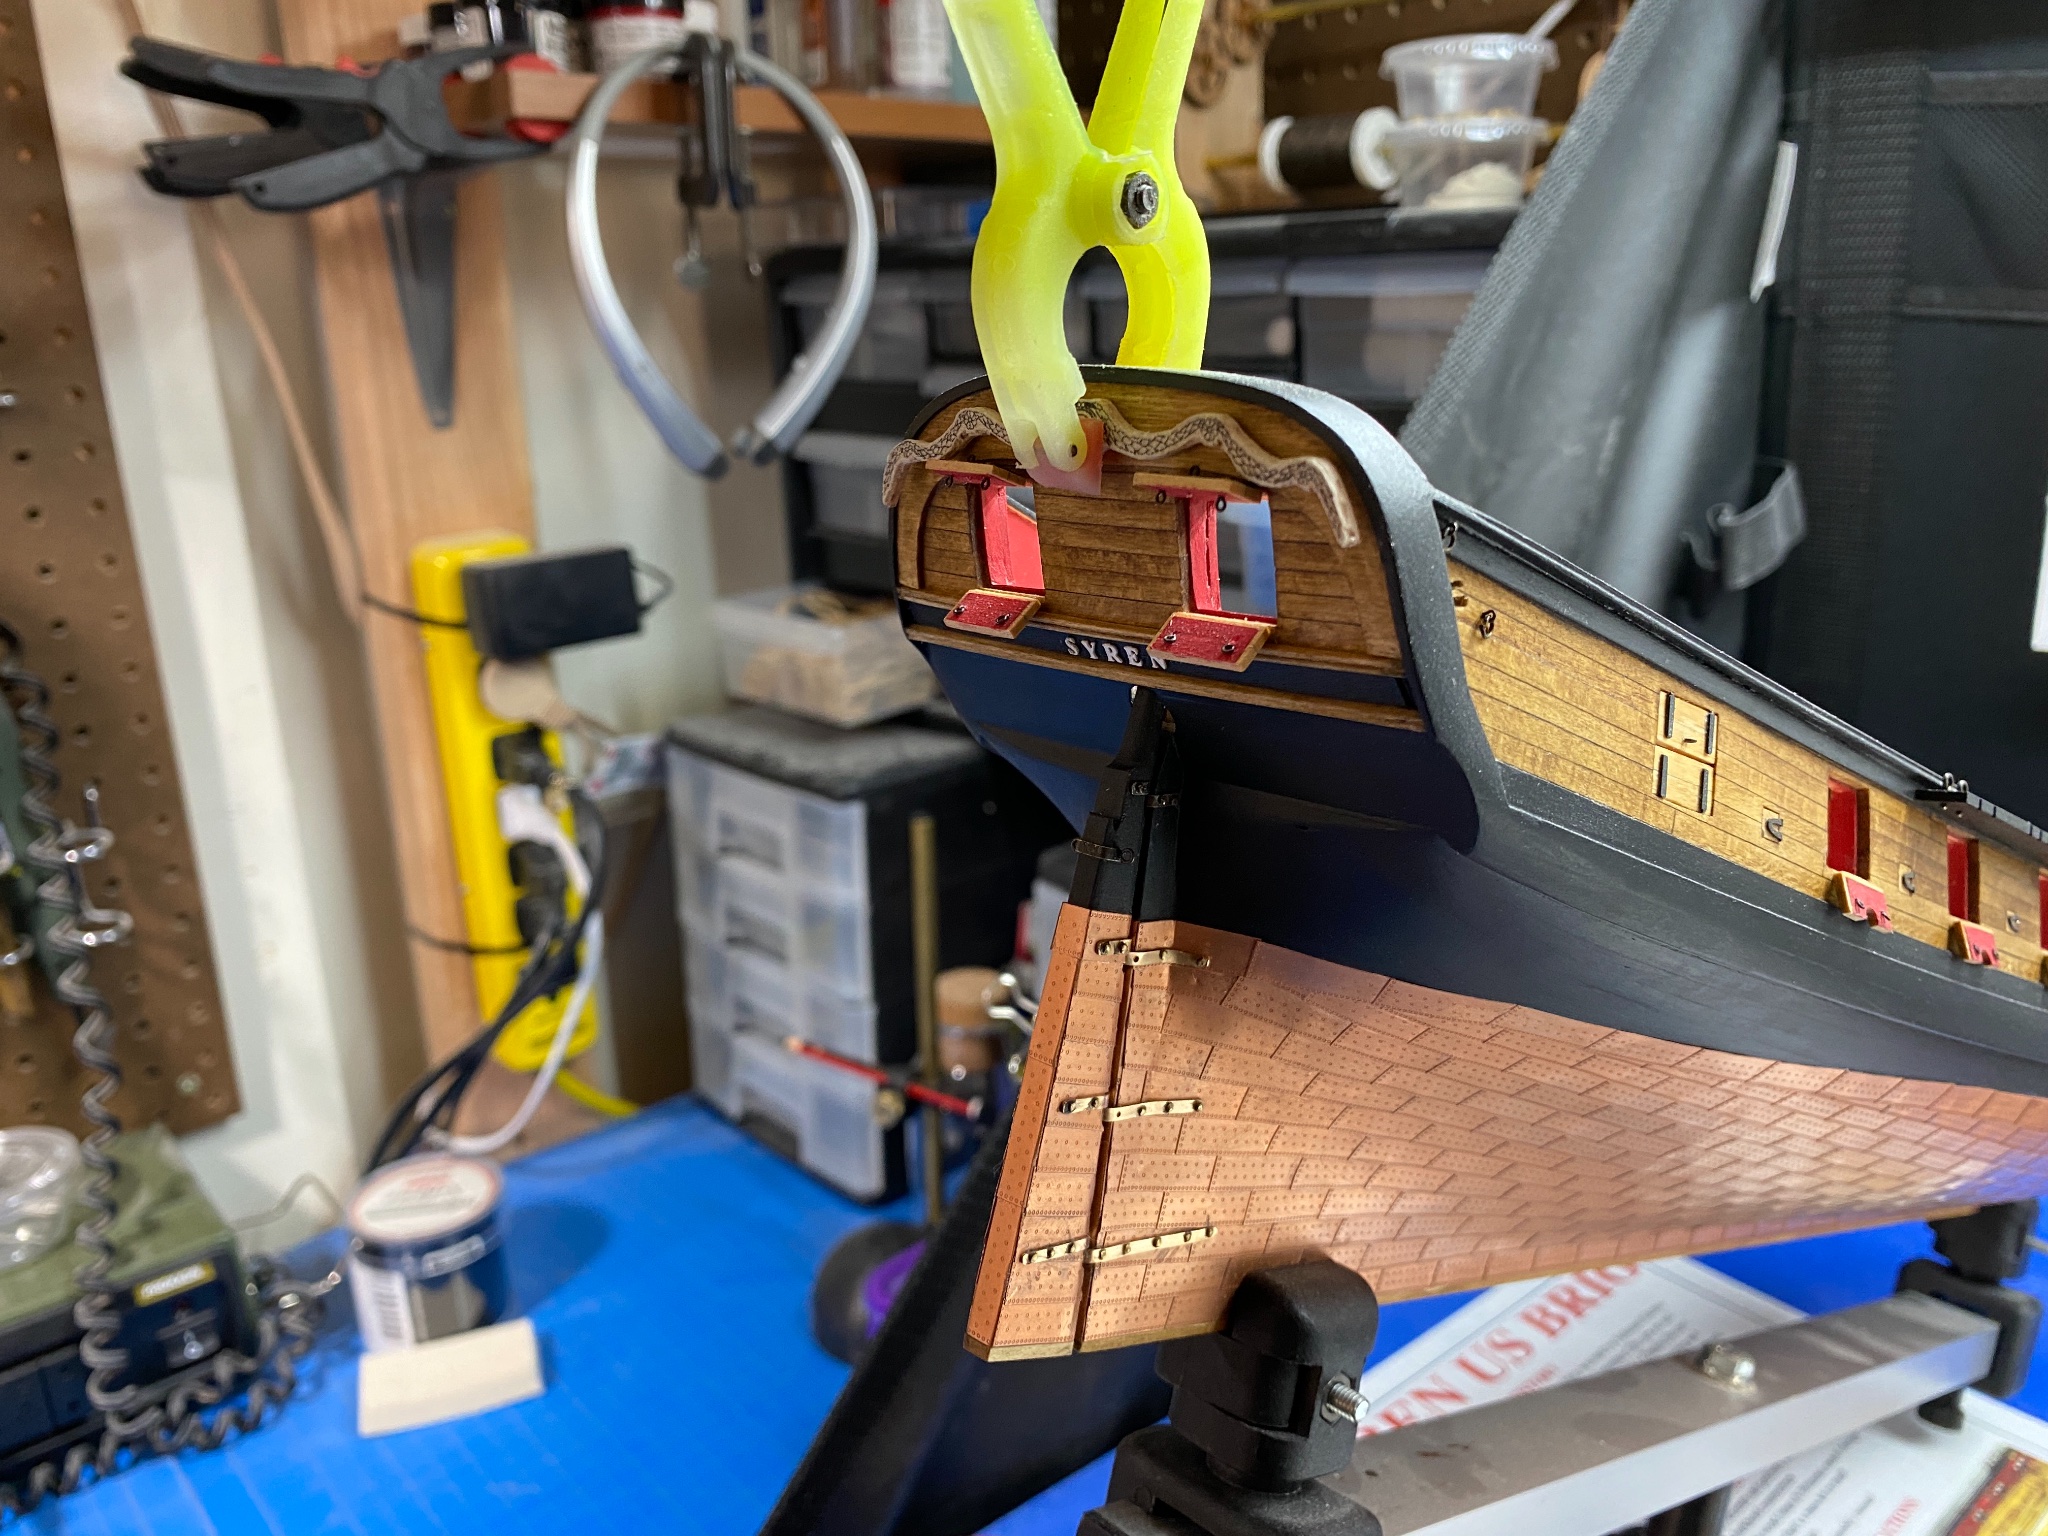
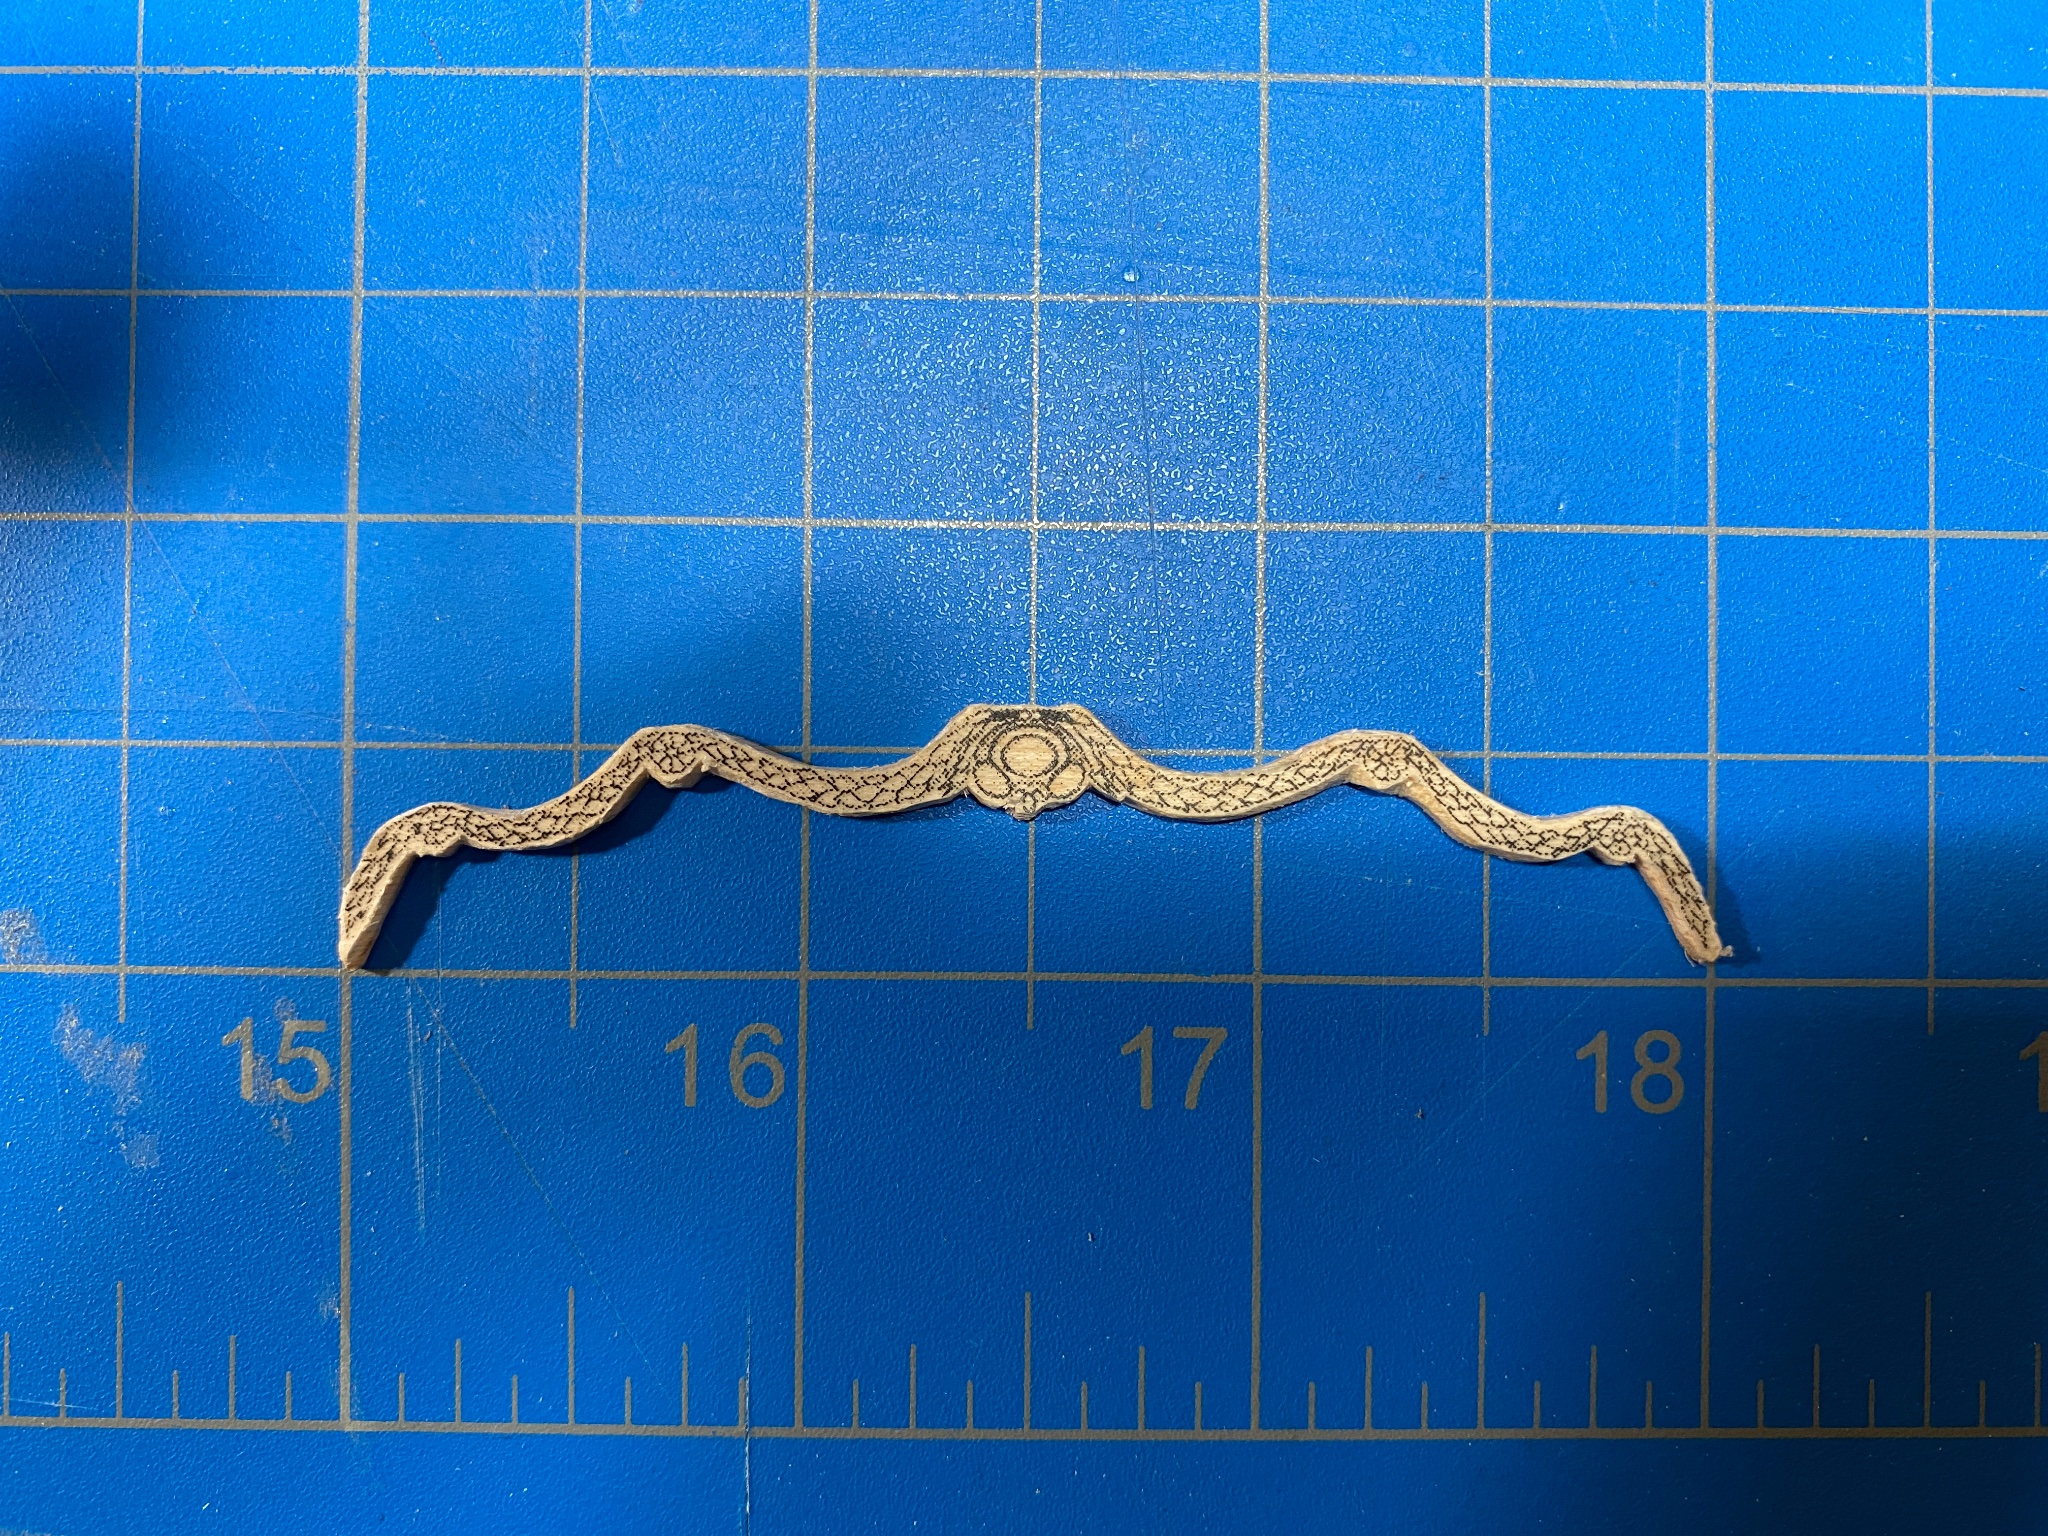
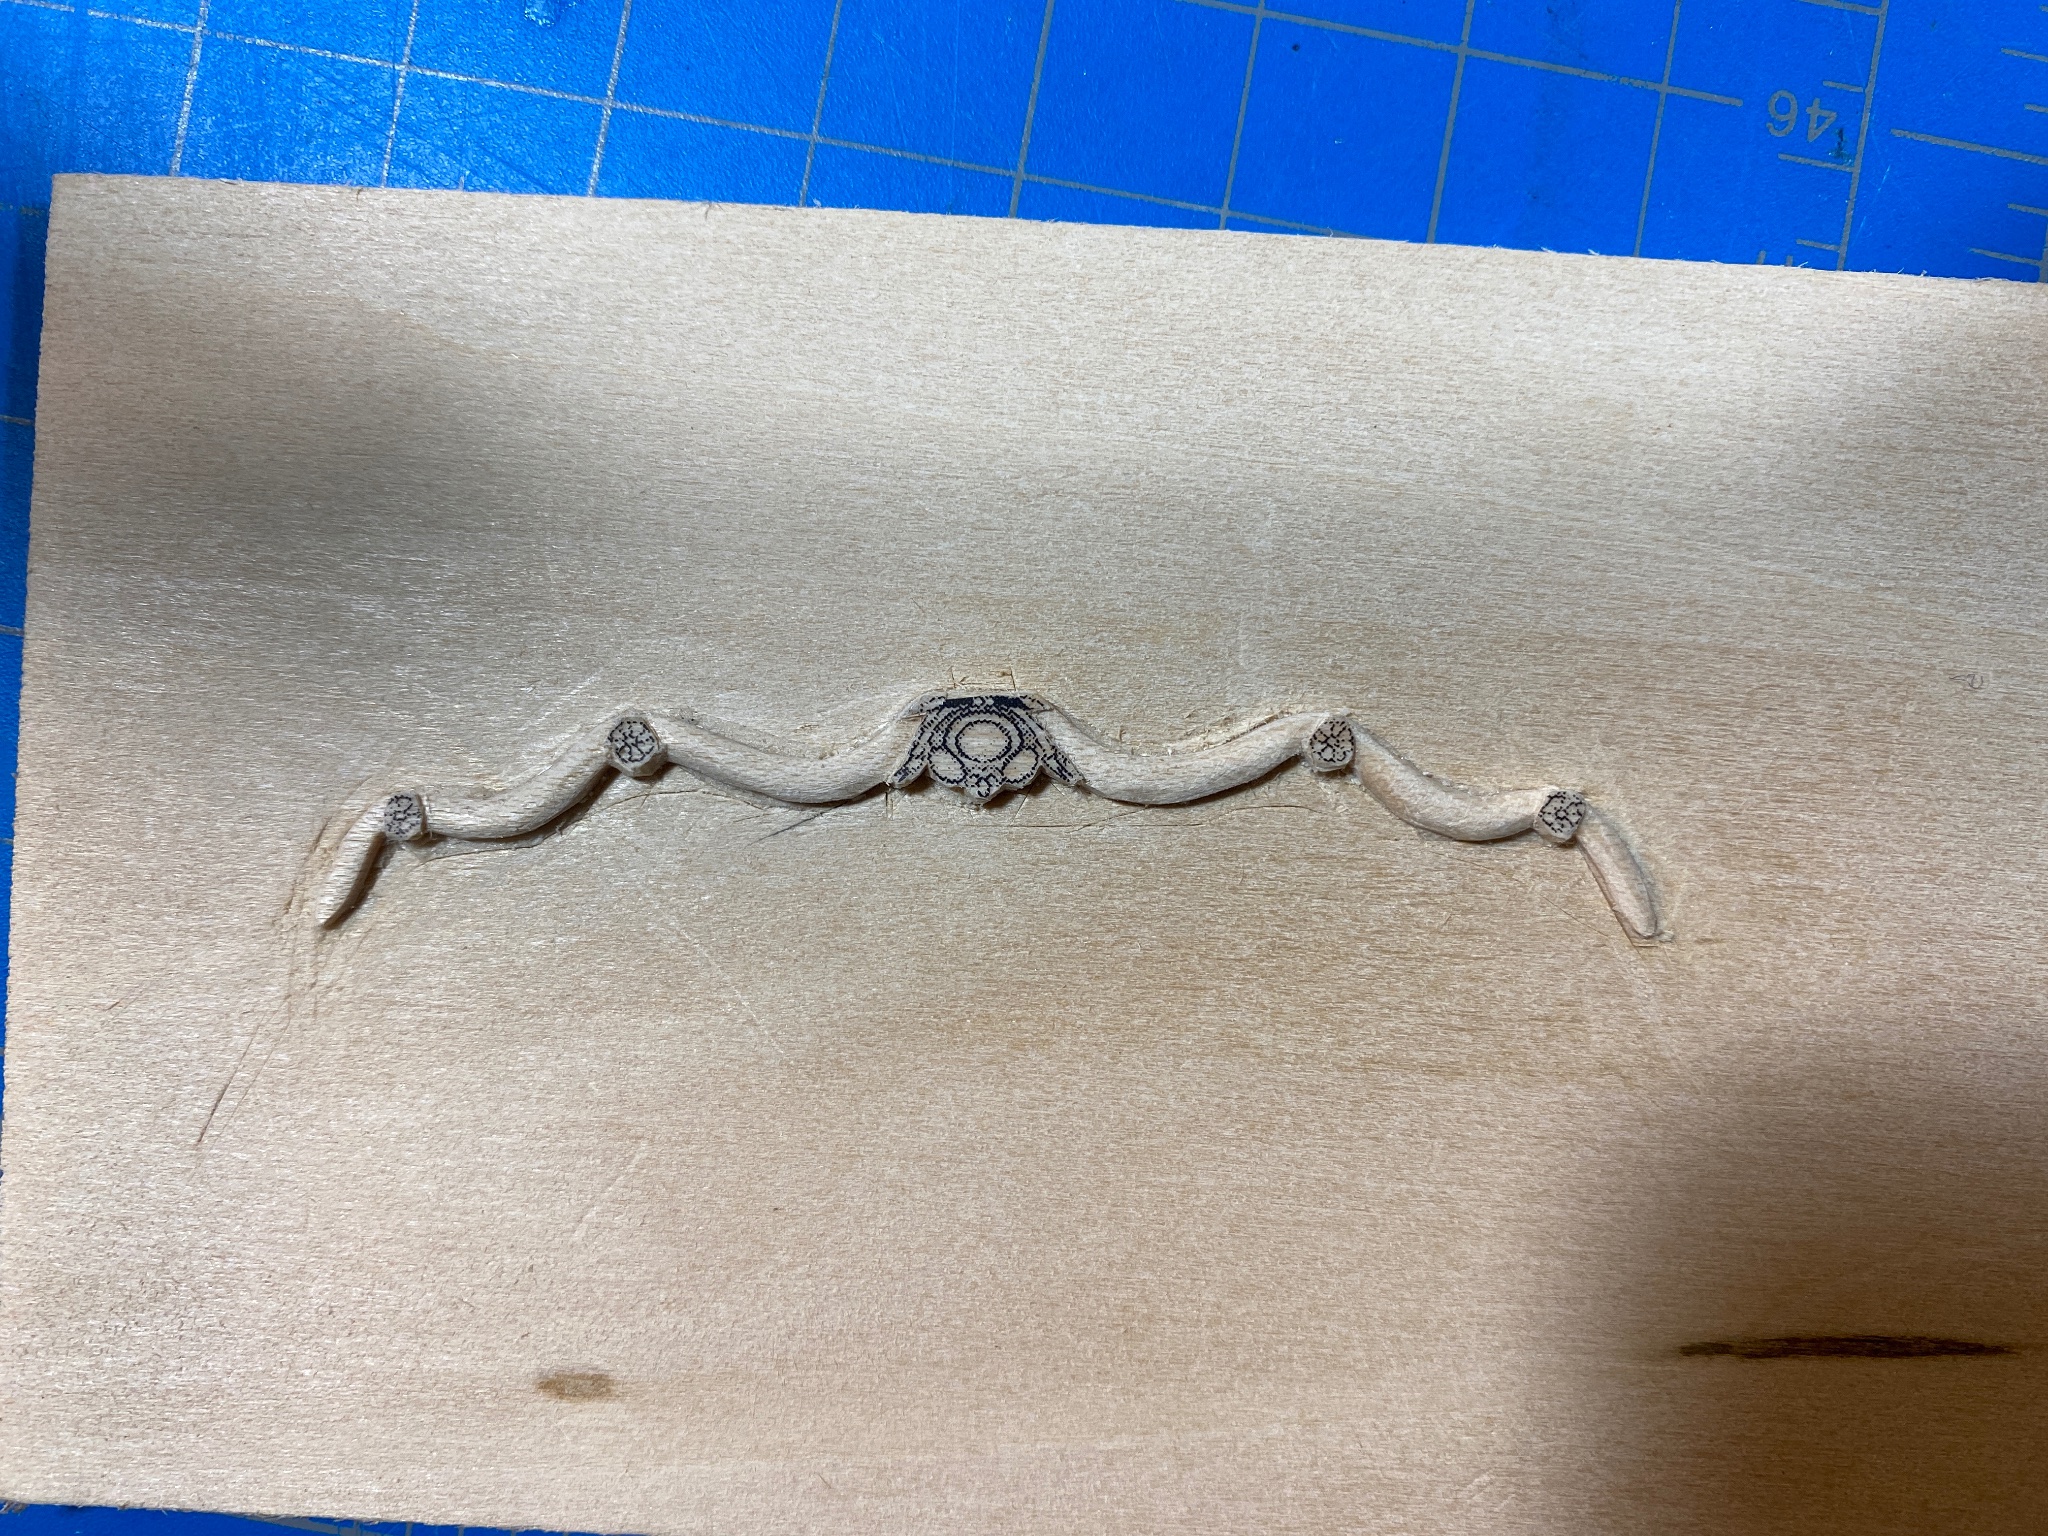
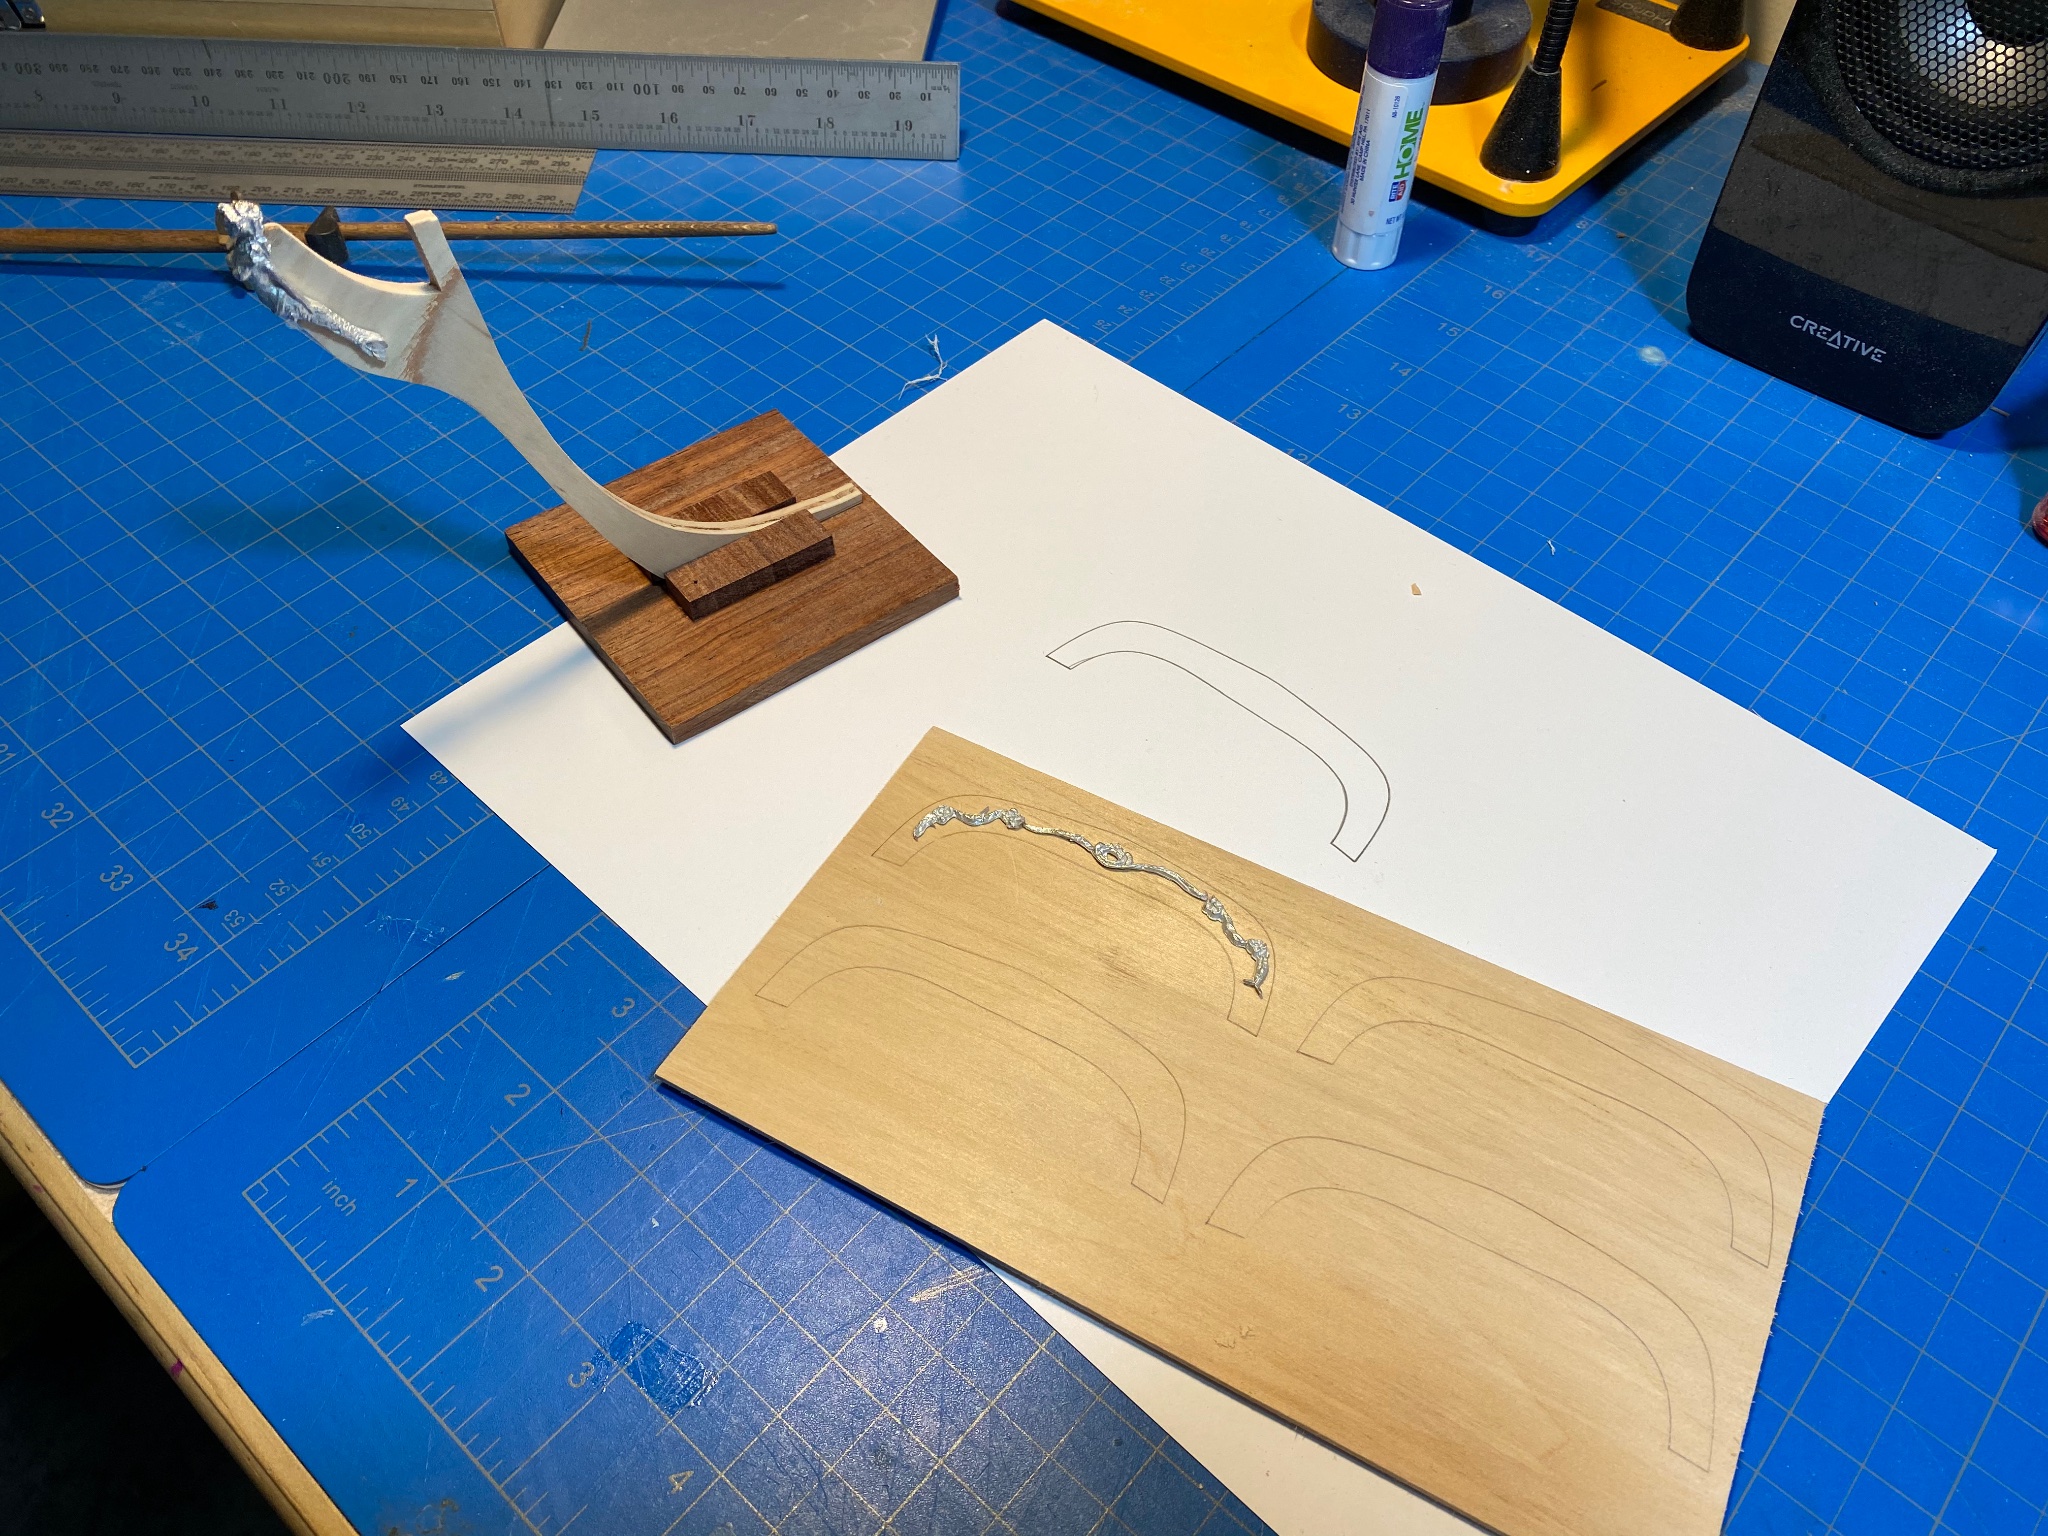
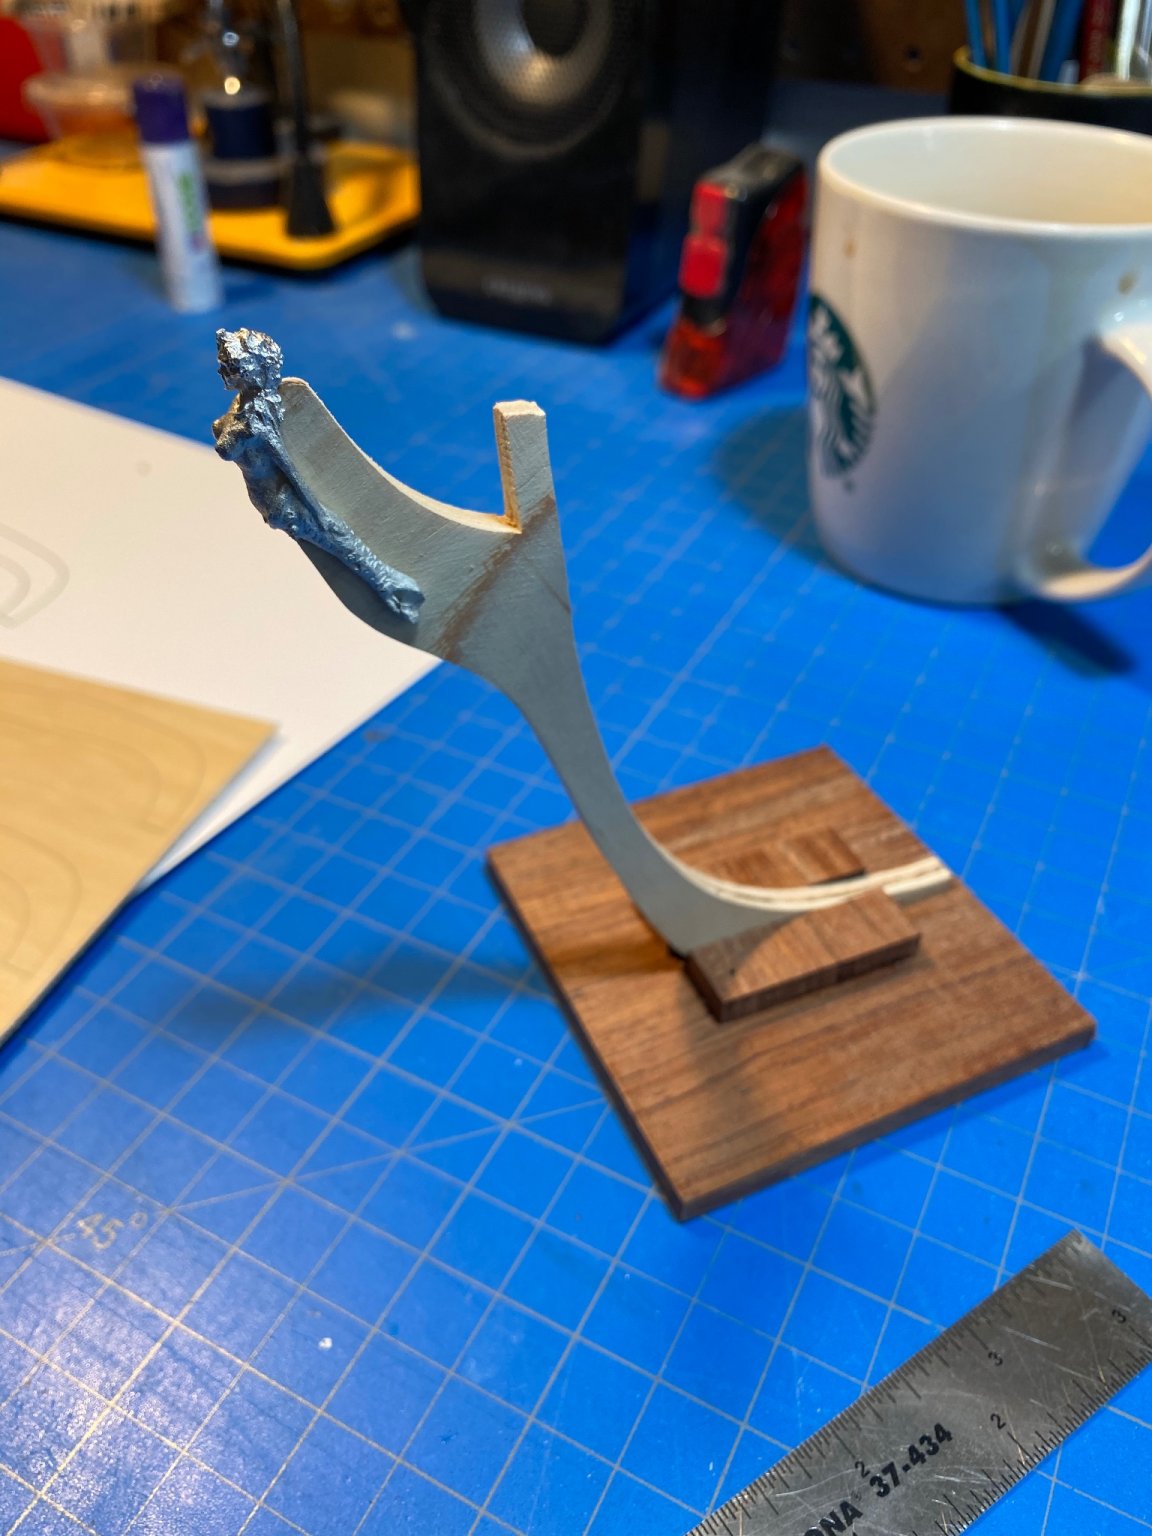
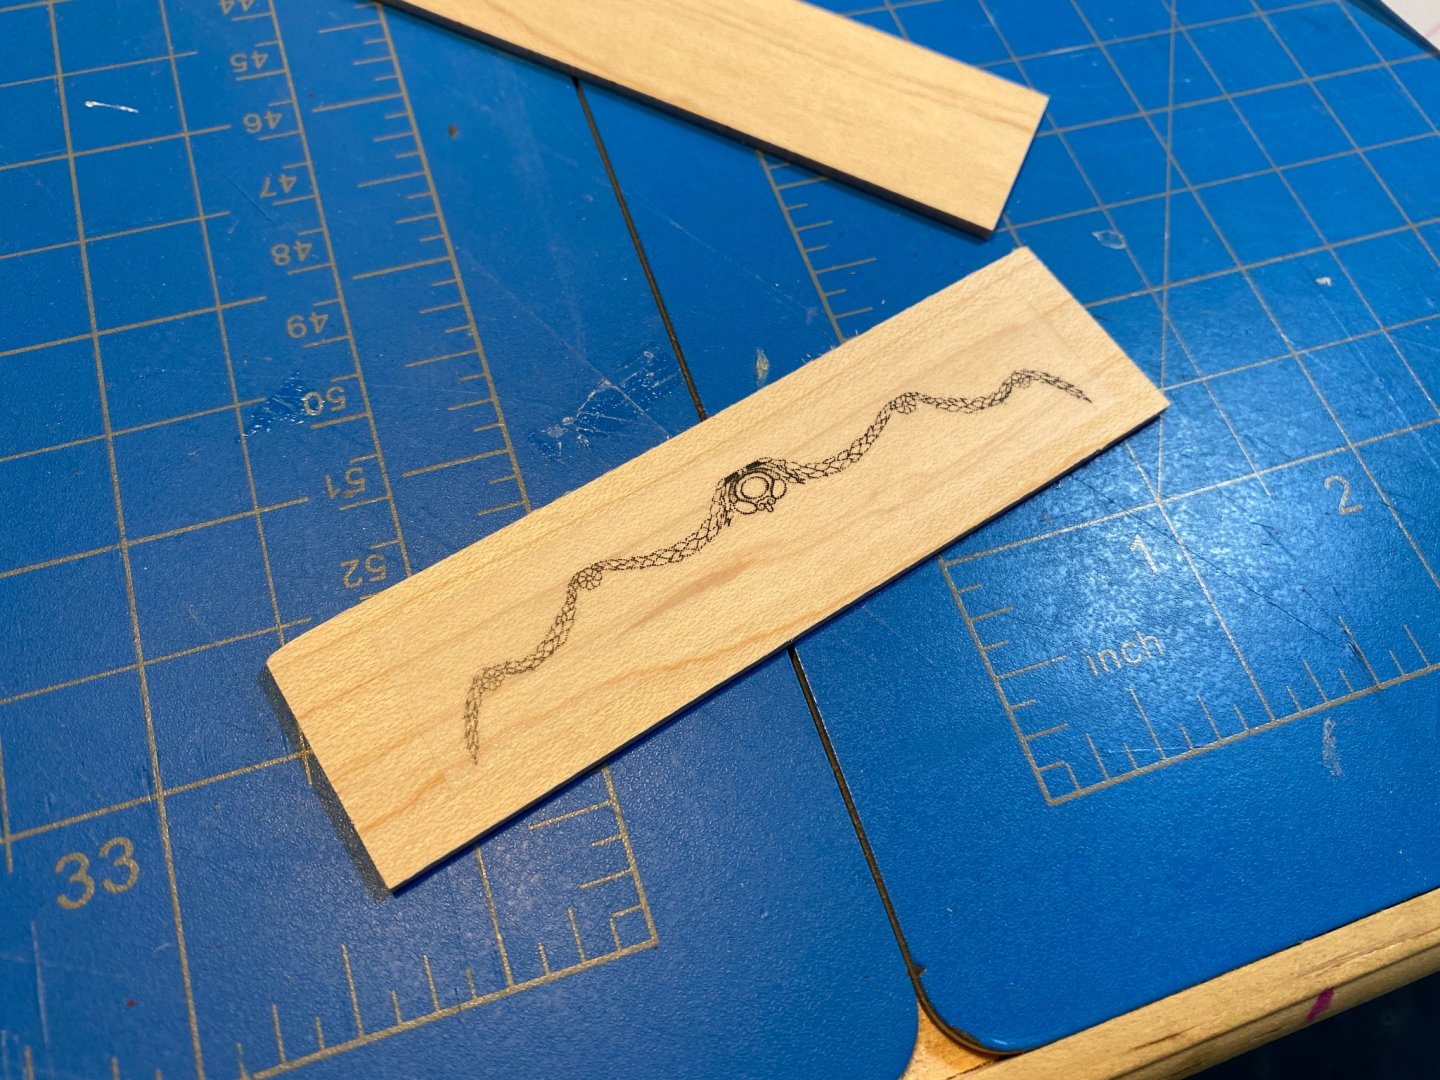
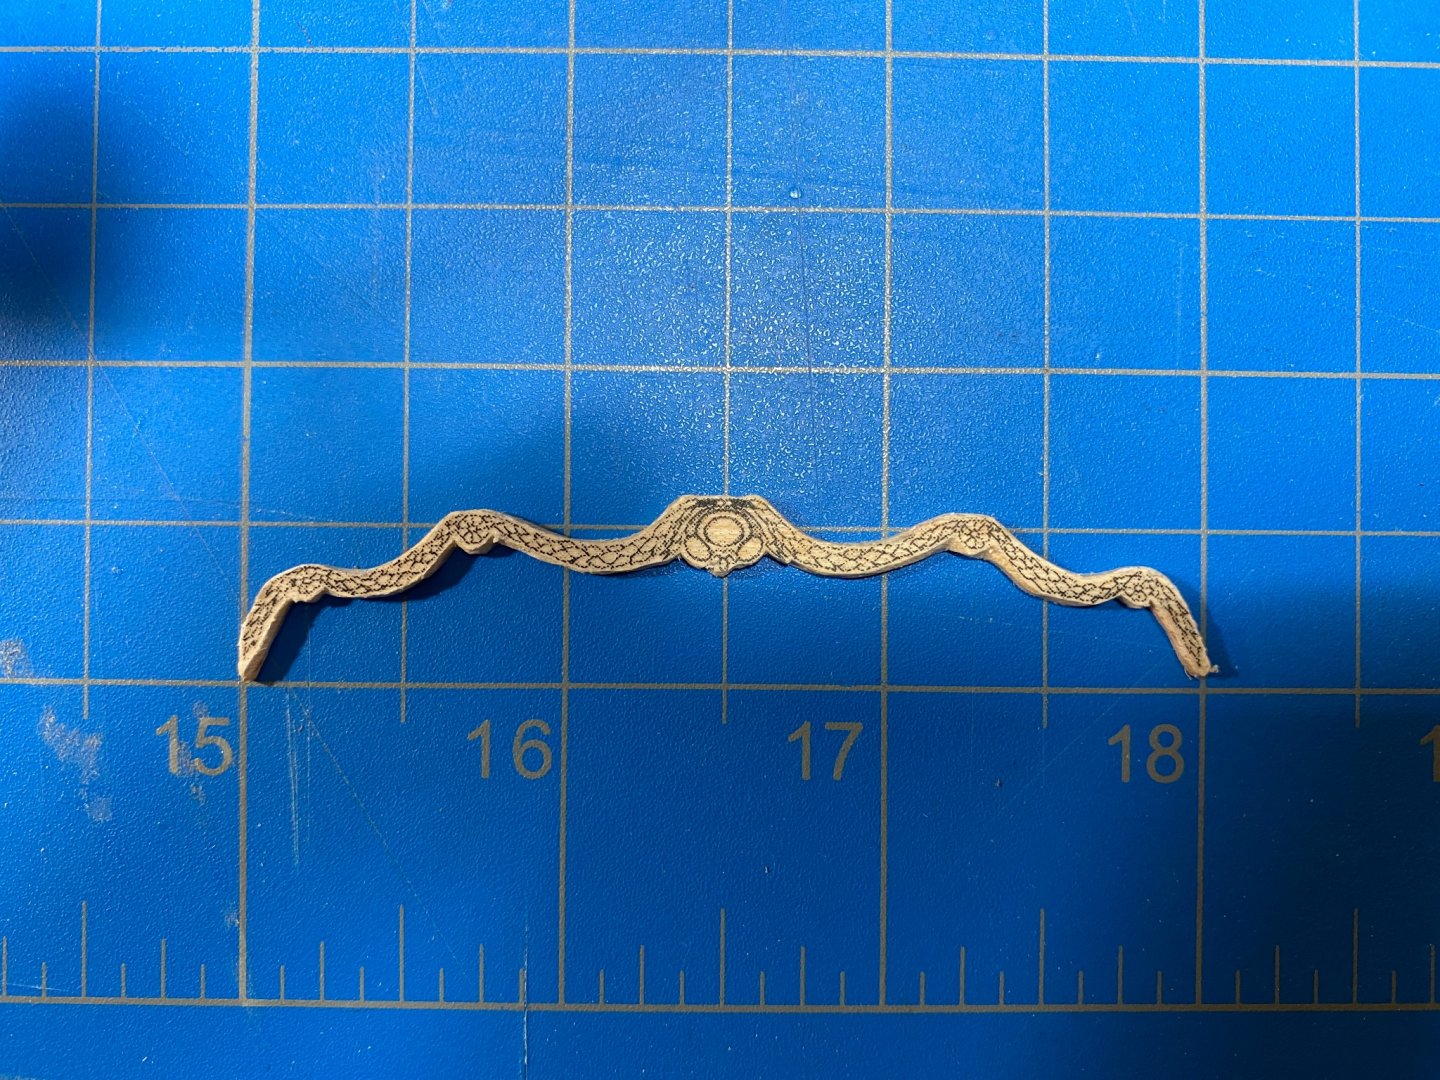
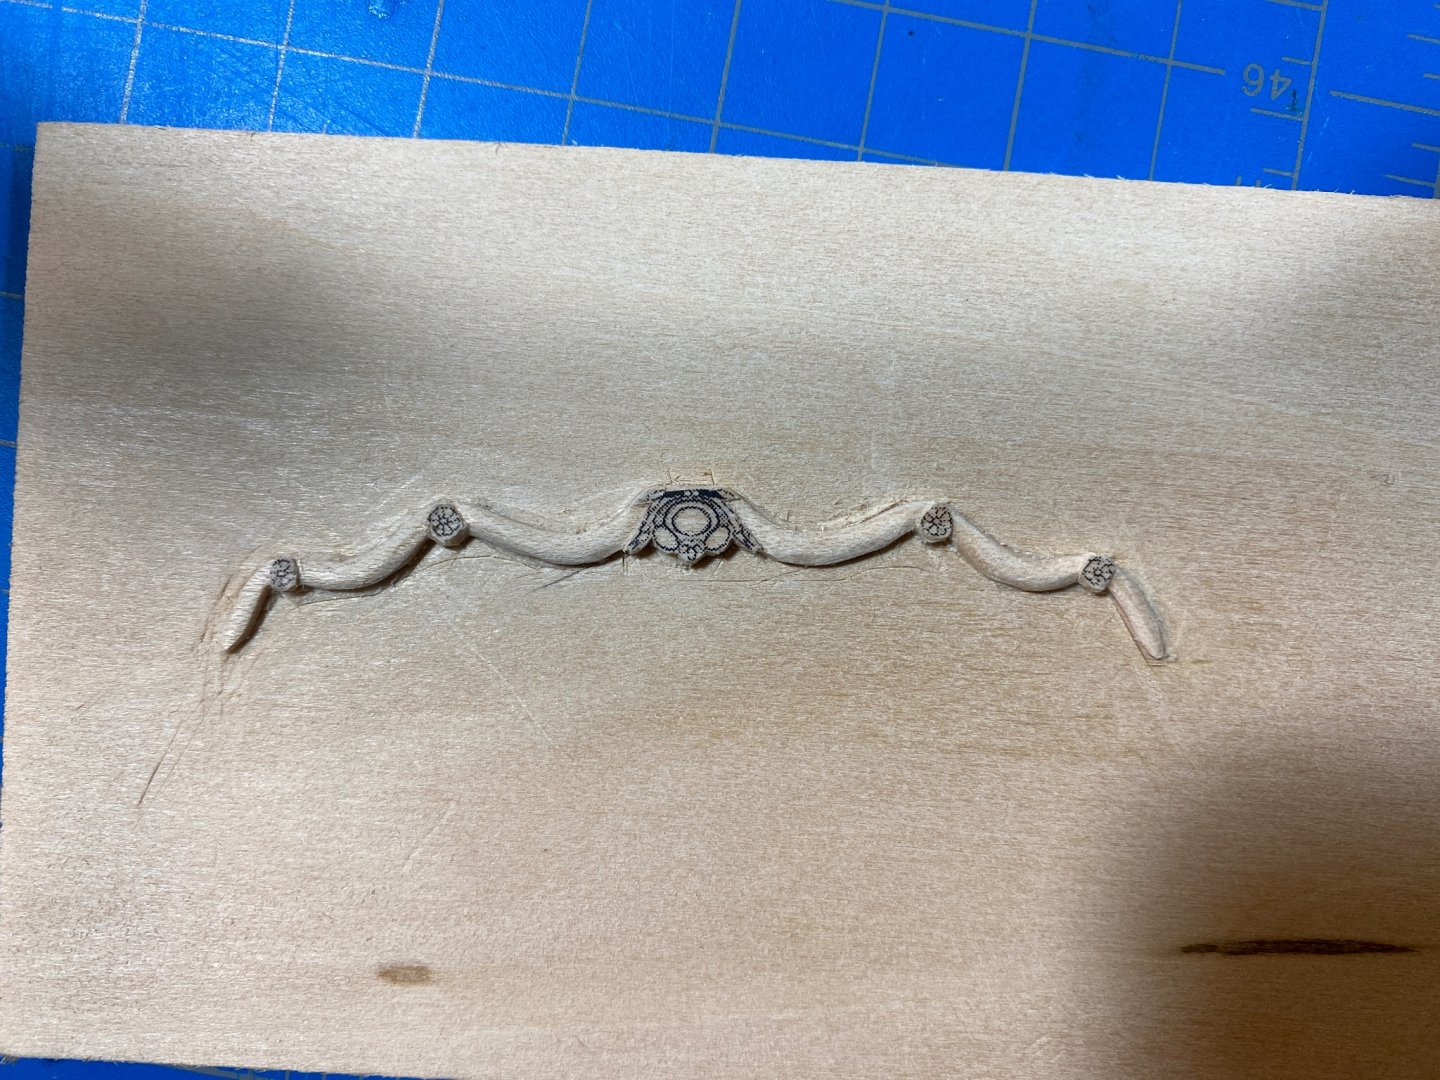
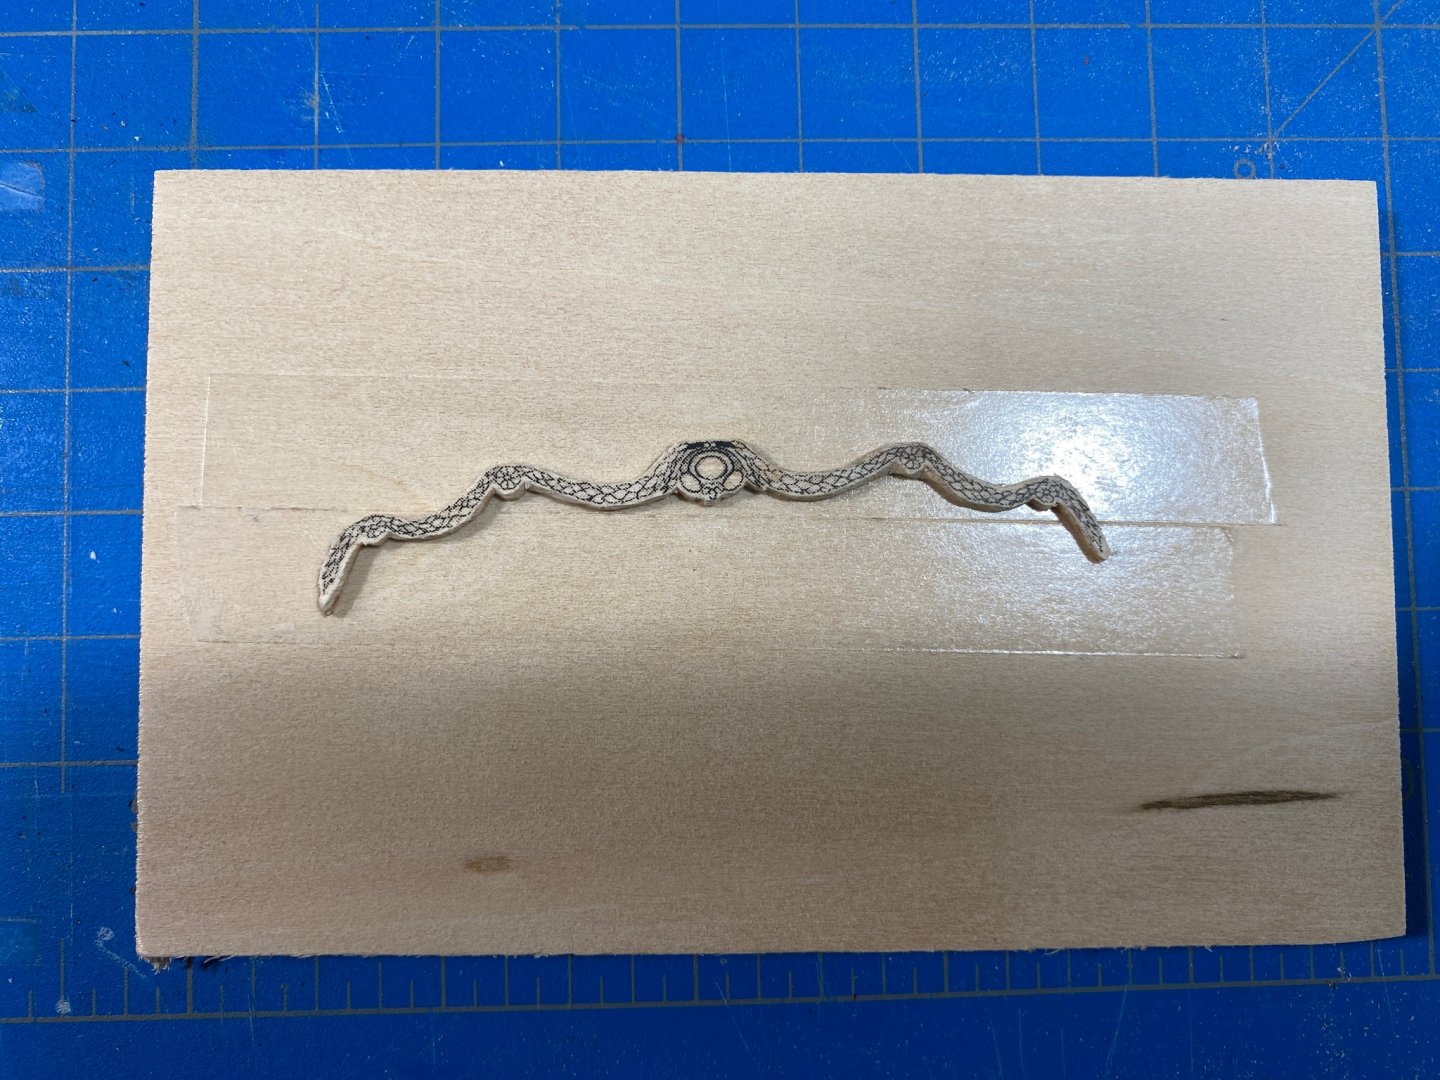
Wow almost a month since my last update... since then Ive gotten part of vaccine, took the family to Hawaii and returned to 75% onsite work. Cant say I welcome the last, but resetting after a sunny trip to HI sure made a difference in getting my attitude straight. Ive been a little all over the place with Syren. In my last post I was working on ways to come up with a figurehead that I like that hasn't really gone anywhere definitive yet. I have a tried a few things, and will continue to do so until I have something worth showing. I did however start working on the timber heads and have taken a crack at the transom ornamentation. Both of which have gone much more smoothly than my attempts with the figurehead. For the stern ornamentation I had to redraw the plan digitally to get a good copy, then resize it down to fit the final dimension of my transom which ended up a few millimeters shorter than the original plan version. I then printed a few copies onto adhesive backed stencil film and mounted it to hardwood. I have ZERO carving experience so Ive been trying all sorts of techniques (hence the number of printed stencils). Ultimately I used a fine high-speed rotary tool (dental drill type) to cut out the pattern as it is so delicate I kept breaking it, so I remounted it using double stick tape for carving after checking fit. I found that remounting it for carving was essential so that it had the support needed for the tools (even if really sharp). Thats about as far as Ive gotten. So far Im happy with the progress and hope it eventually turns out. The one pictured is my third attempt, perhaps there will be a fourth. I still need to carve in the details, which I still need to work out how to do.


-
They certainly have that right, but the models won't last just because McCaffery built them. Perhaps he chooses more reliable materials, perhaps he doesn't. I don't really know... My guess is that from a material standpoint, there is likely little difference between his models and your own. In my opinion, its up to clients to ensure a proper display environment, which in the end is the only thing that I believe will have an impact on their longevity. As far as the original premise "that a properly built ship model should last for a hundred years," well I don't know. I don't know how you define "properly built," and feel the target of 100 years is mostly arbitrary. As far as the original text: "...it is reasonable to expect a new ship model to last one hundred years before deterioration is visible." Frankly, I don't know what this curator is talking about - after 100 years I can think of an arbitrary number of ways decay might be visible. Off the top of my head, I can't think of any man-made object, let alone a compound object, that will not show some form of decay after 50 years.
-
Ive actually tested this in artificial aging chambers and in a light-bleaching lab. Given the right parameters, nothing is "archival." "Archival" paints are favored for their inert chemical make-up and their light-fastness as a stand-alone product. Its all in how you use these products, not the products themselves.
-
As a professional conservator I probably land on the more conservative side of this discussion. Many of the materials being used today, especially on model ships, make me cringe. The coatings, the glues, the plastics and display scenarios are all either not well vetted or are just what is practical (vs. ideal). The worst are those that use really modern materials to provide an easier building experience. There is no such thing as archival quality anything - given the right scenario all things will deteriorate. This becomes even more complex as we combine many different materials into a compound object of organic and inorganic materials. The best "archival" acrylic paints were never tested in combination with highly acidic woods - etc. That paint may be red forever, but it may also end up as red flakes at the bottom of your display case... Those decals and such will just be brown in 15 years, or worse will be brown on one side and white on the other. Its very hard to predict how an object will age, but it is very easy to make the right decisions early and be knowledgable of inherent vice. All this to say that I cringe only because I know the time and care put into these objects, and its difficult not to get up on a soapbox every time I see something I know with absolute authority will not last. We have to decide for ourselves, few will end up in a museum, and even fewer of us will have grandchildren who want these things laying around so I say enjoy what you are doing now, and forget the rest 🙃
- 31 replies
-
- 12
-
-
Table Saws Once Again
Justin P. replied to Ron Burns's topic in Modeling tools and Workshop Equipment
See if you can get yours in Swiss pear or boxwood... 😜 -
Table Saws Once Again
Justin P. replied to Ron Burns's topic in Modeling tools and Workshop Equipment
In due time. You'll be happy you went with the Byrnes even if the wife isn't! The sliding table is excellent, and something I use very often. -
Wow. I sure wish I could be a fly on the wall in your workshop. Just wonderful skill. That longboat is a thing in and of itself.
-
Membership expiring? How can I tell?
Justin P. replied to Srodbro's topic in NAUTICAL RESEARCH GUILD - News & Information
As I recall the secretary will send you an email when it is time to renew. -
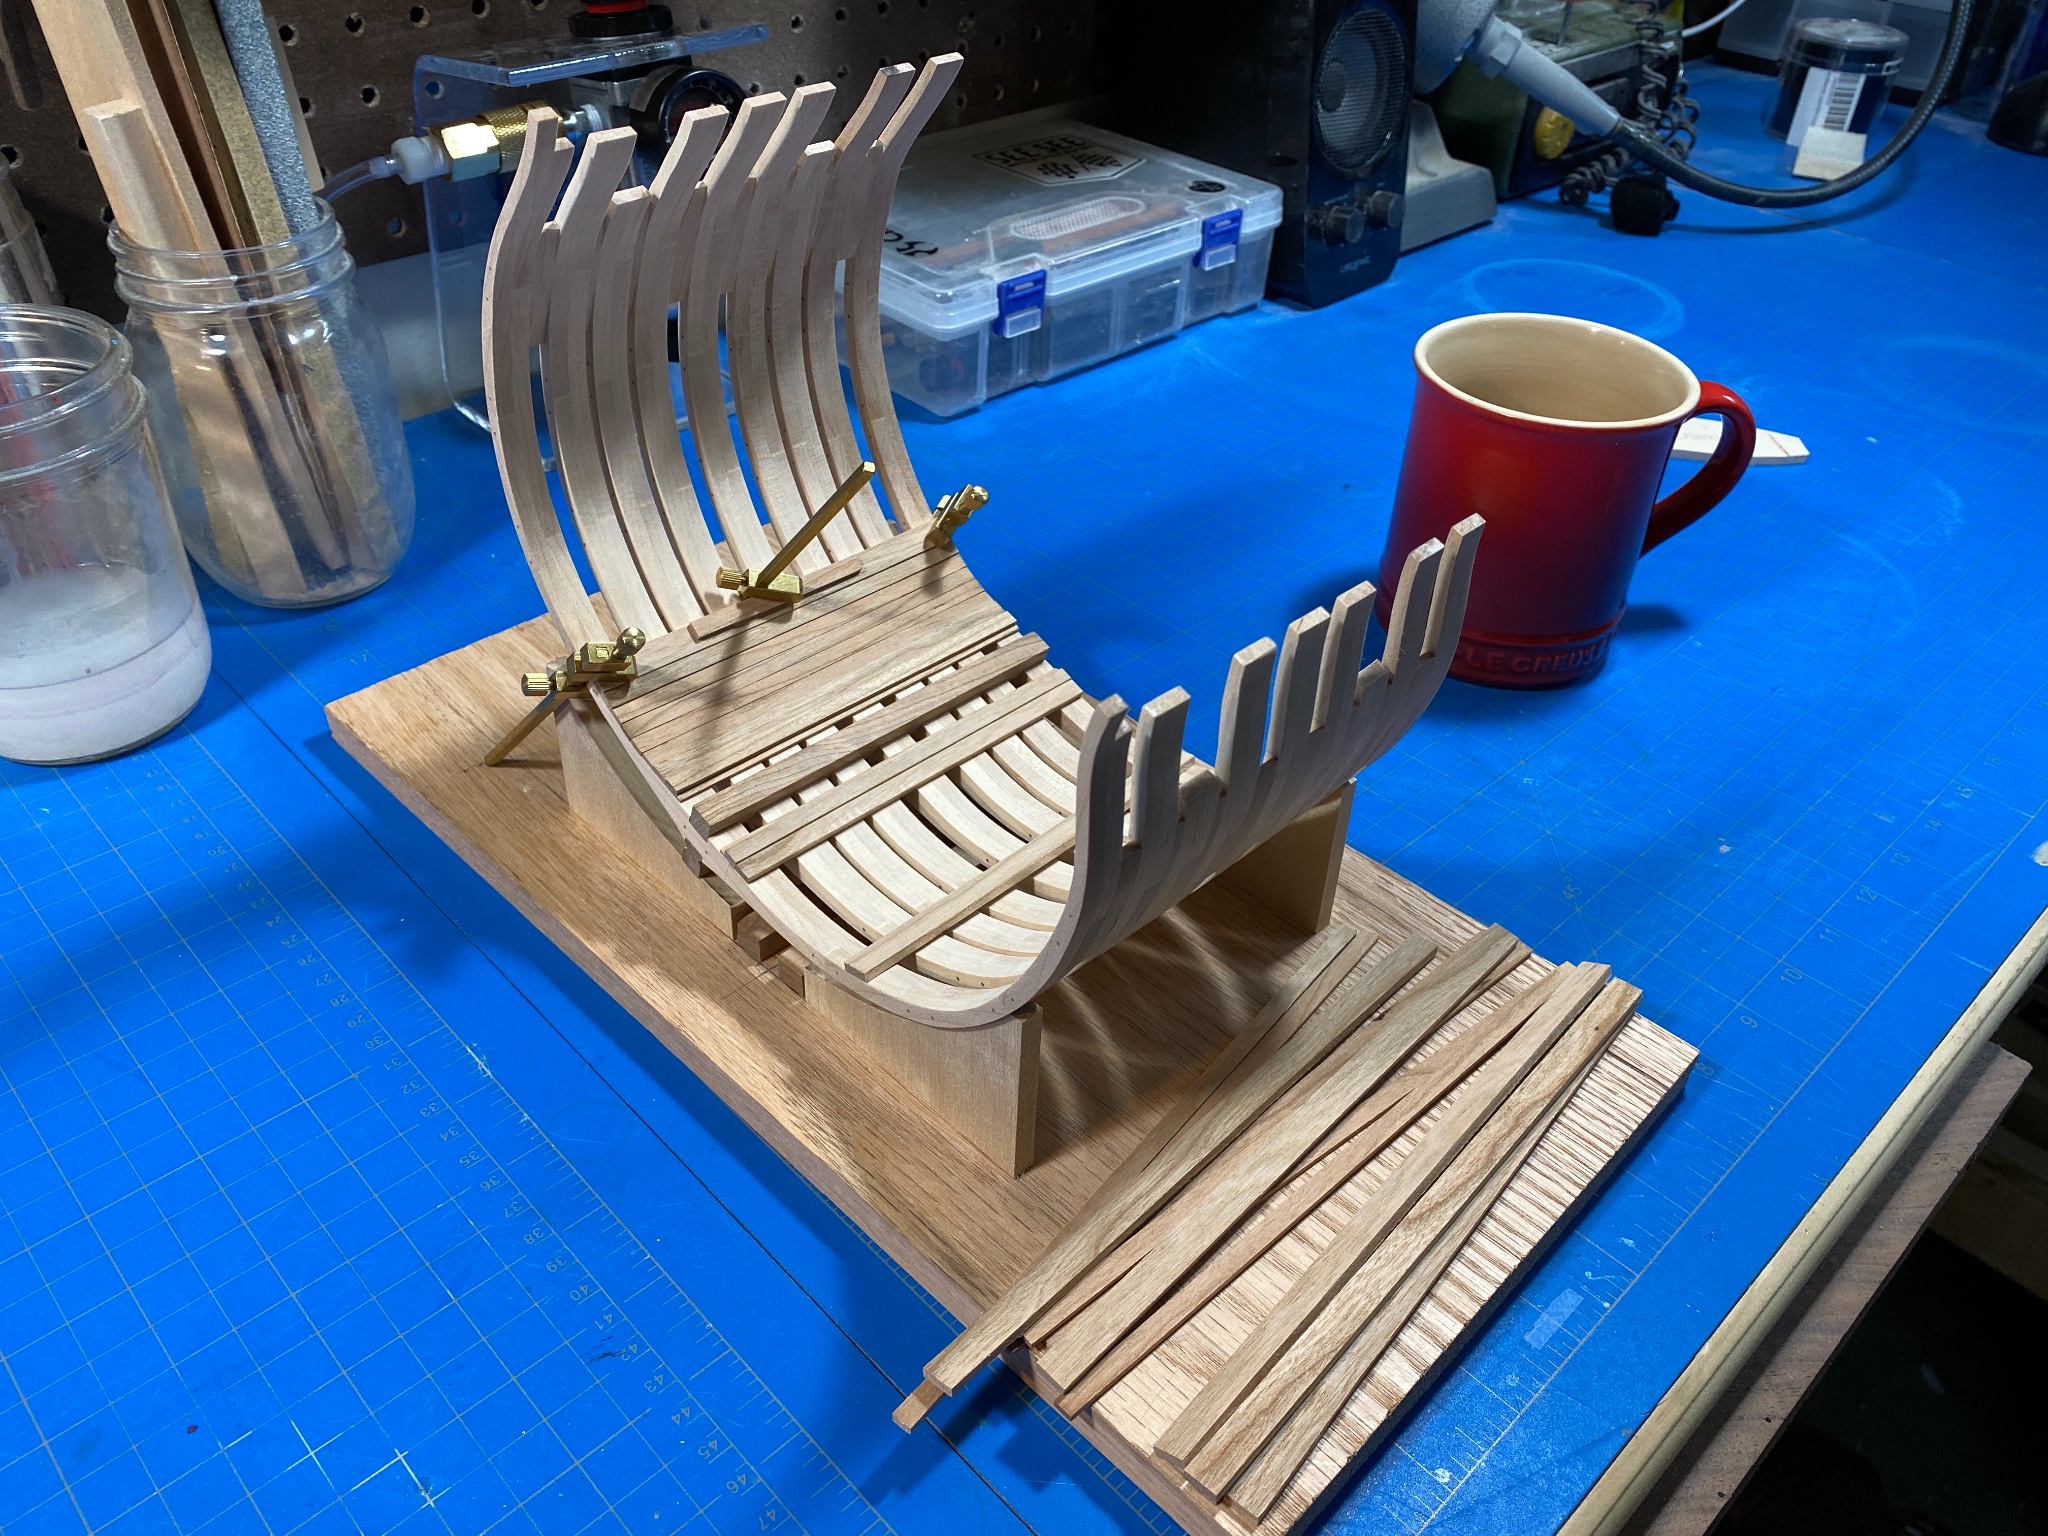
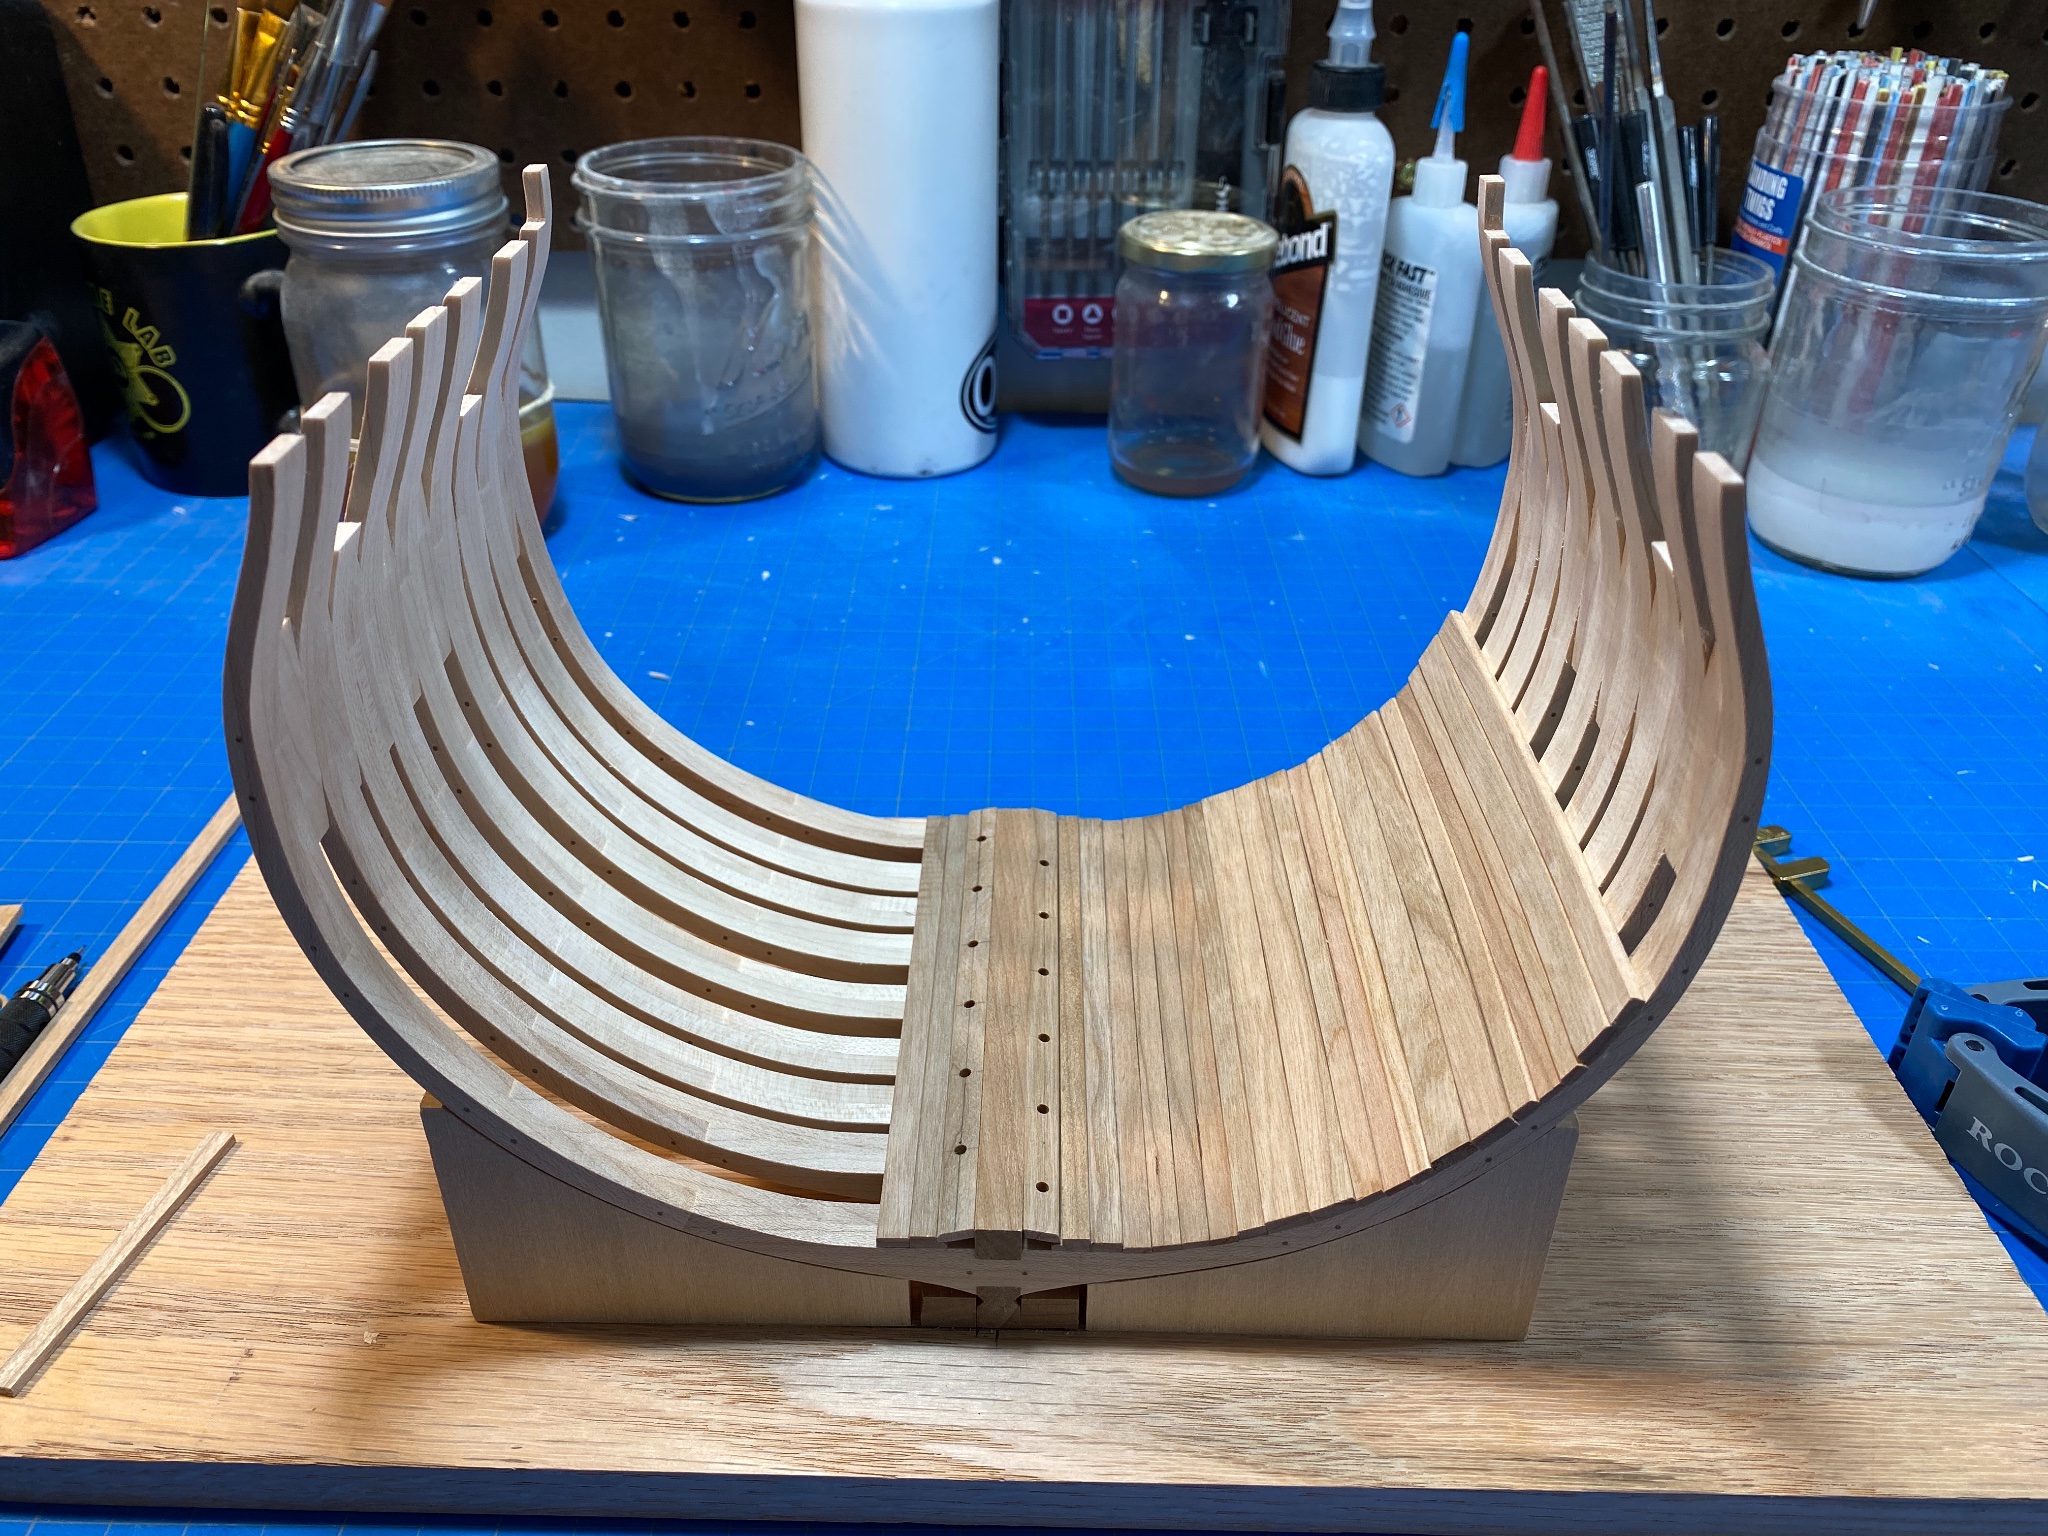
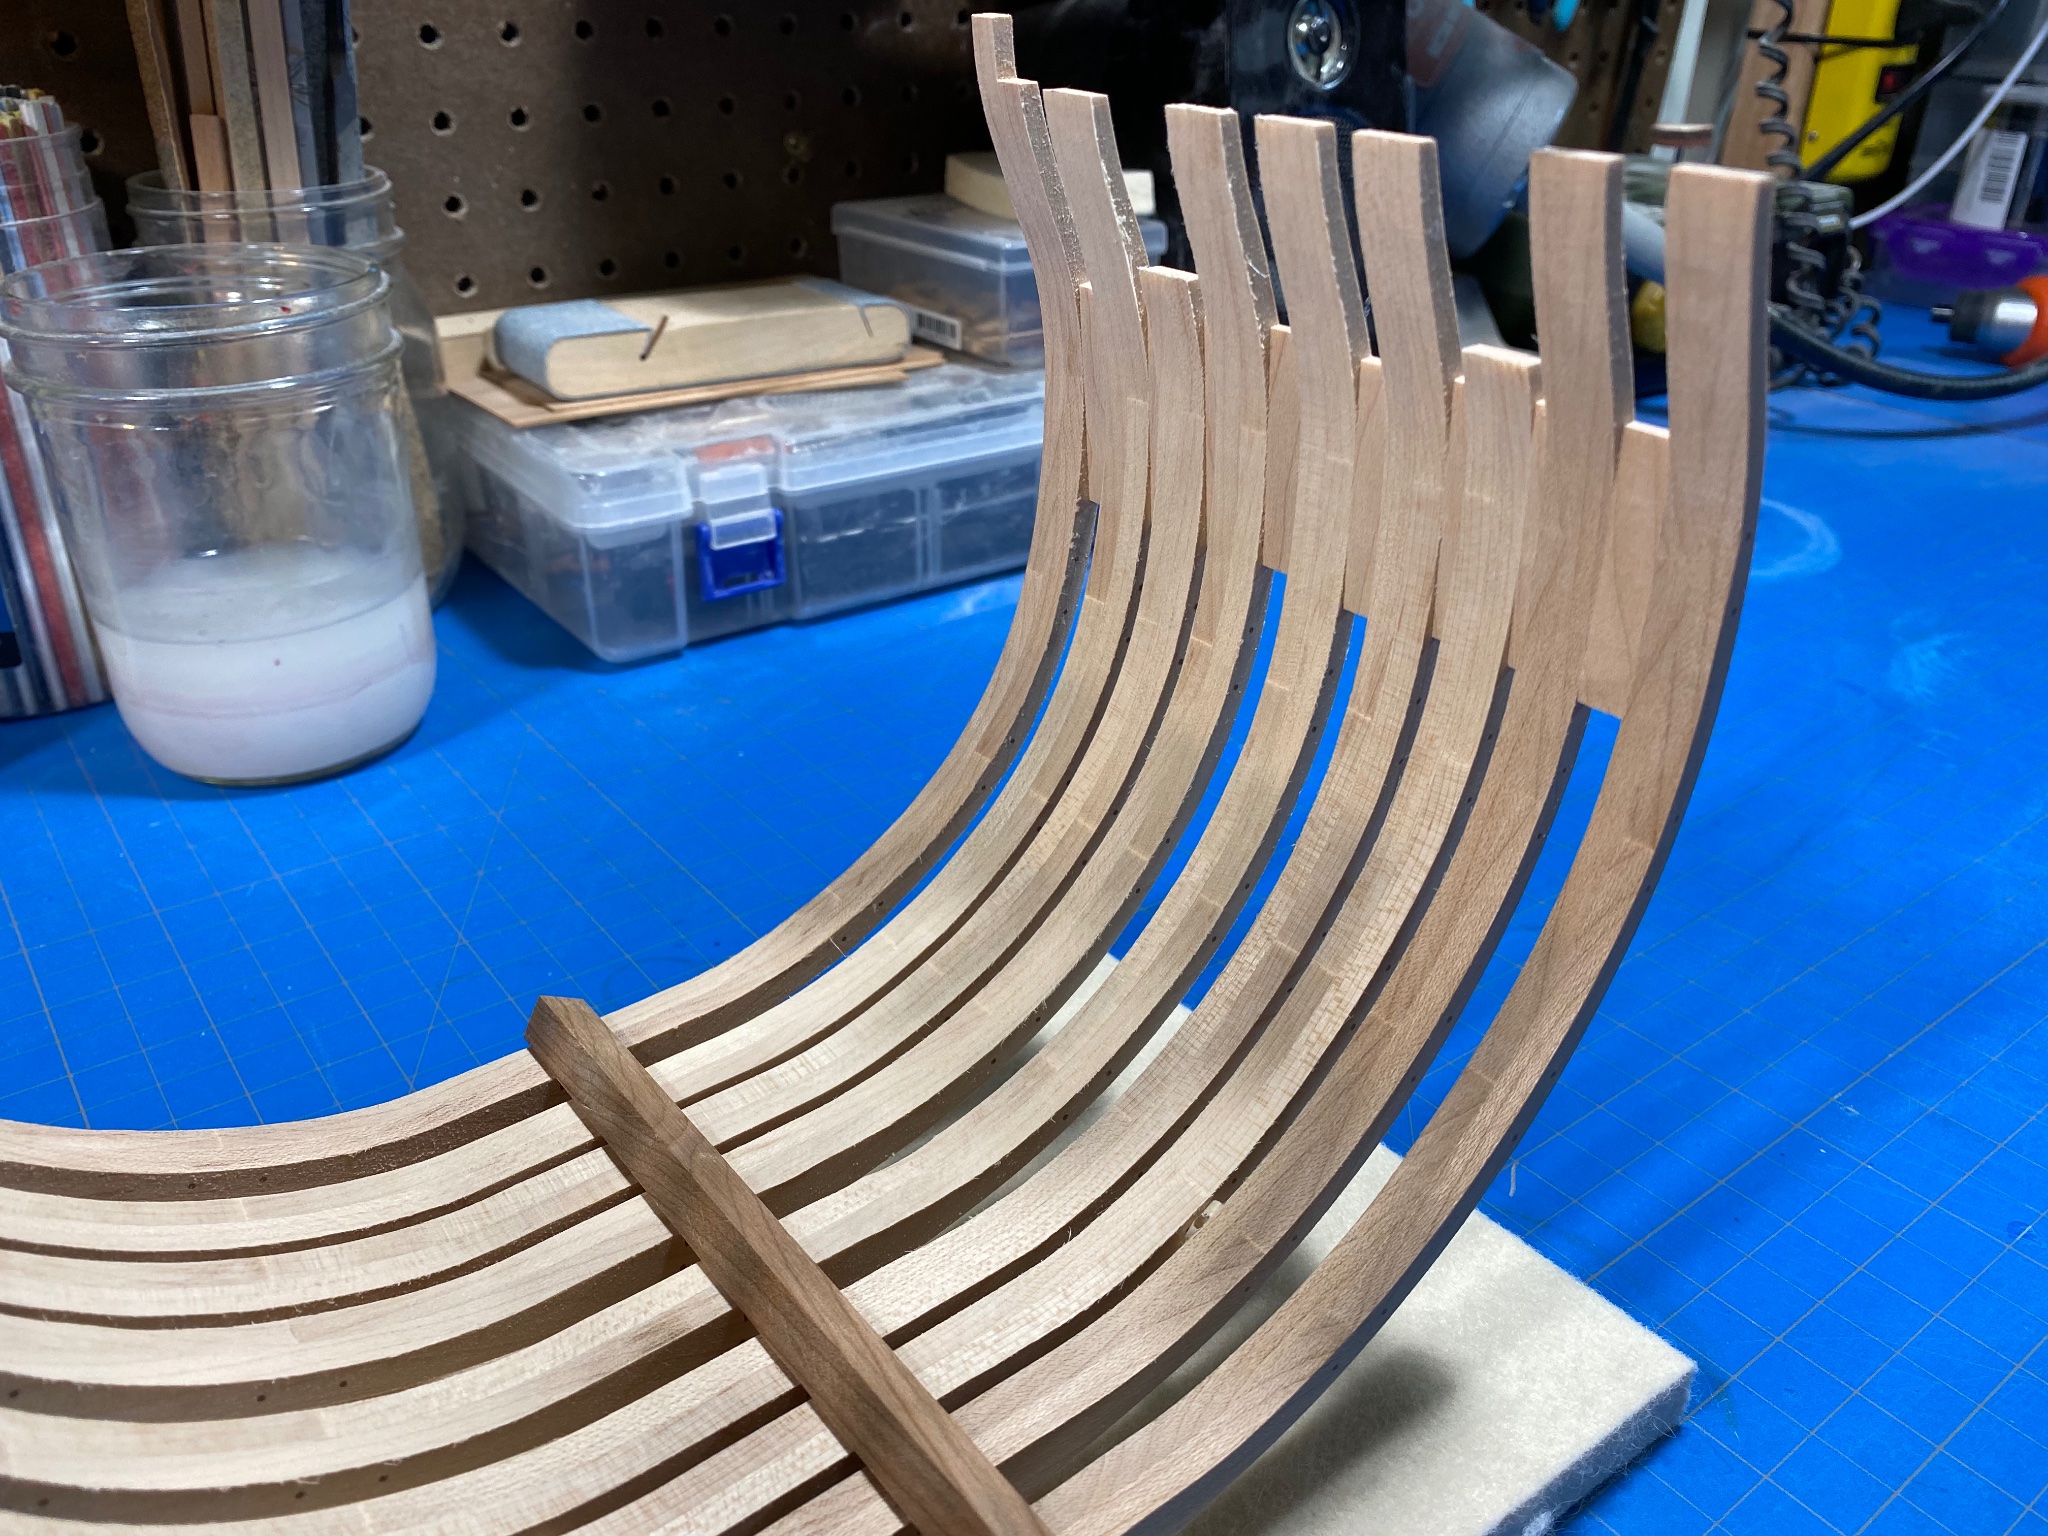
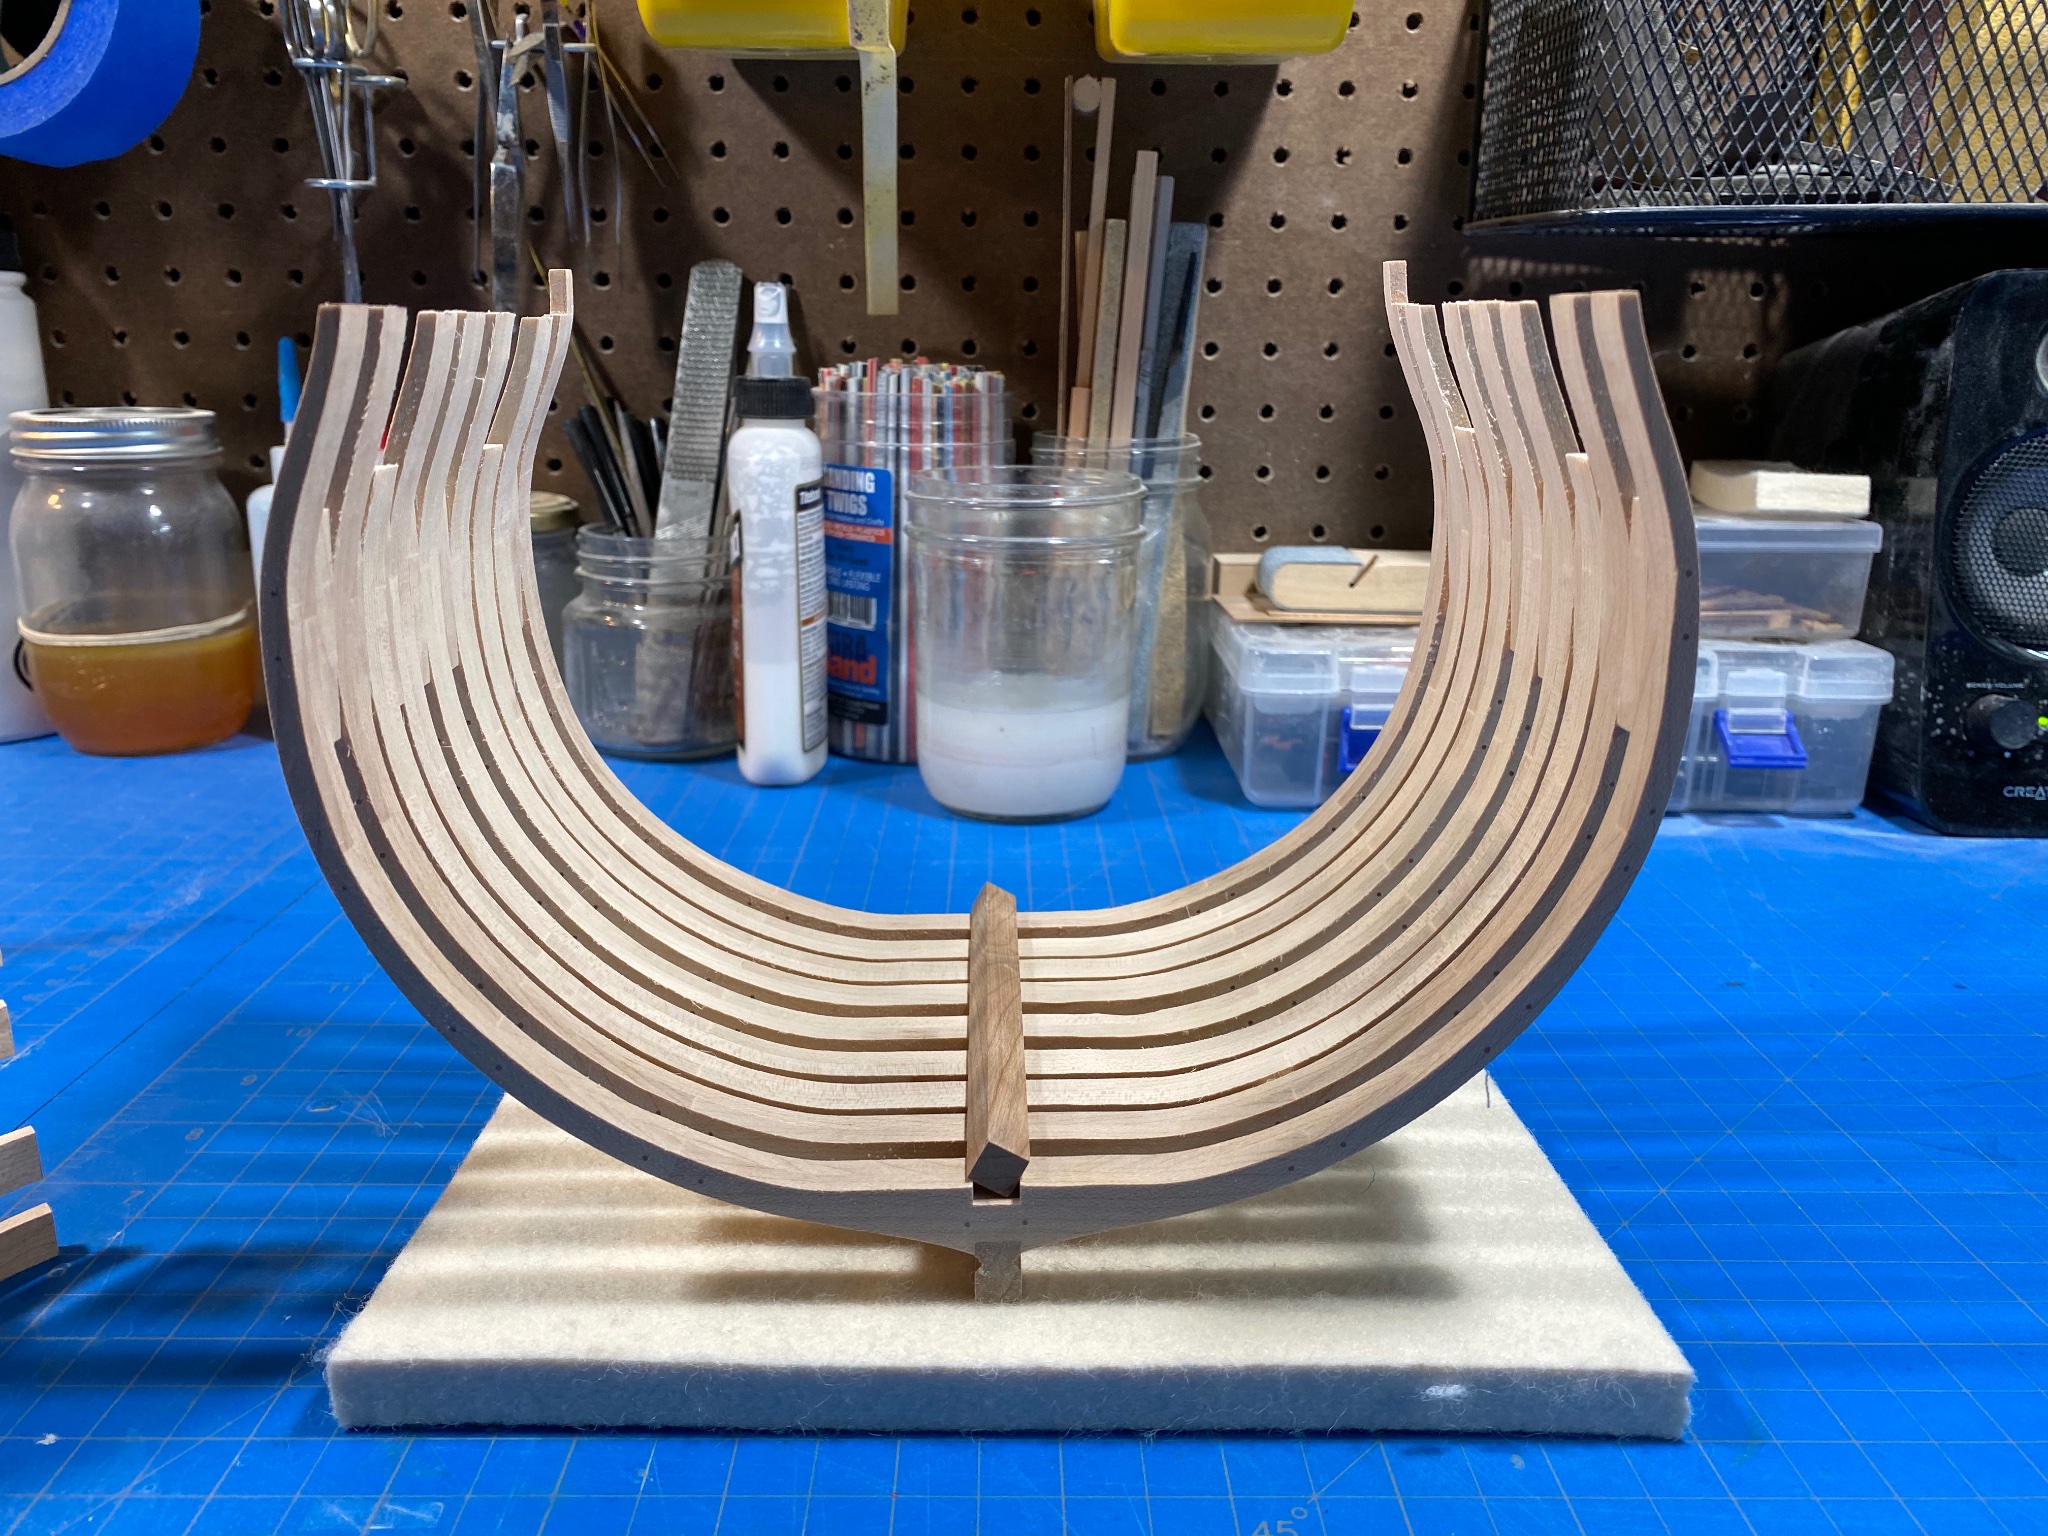
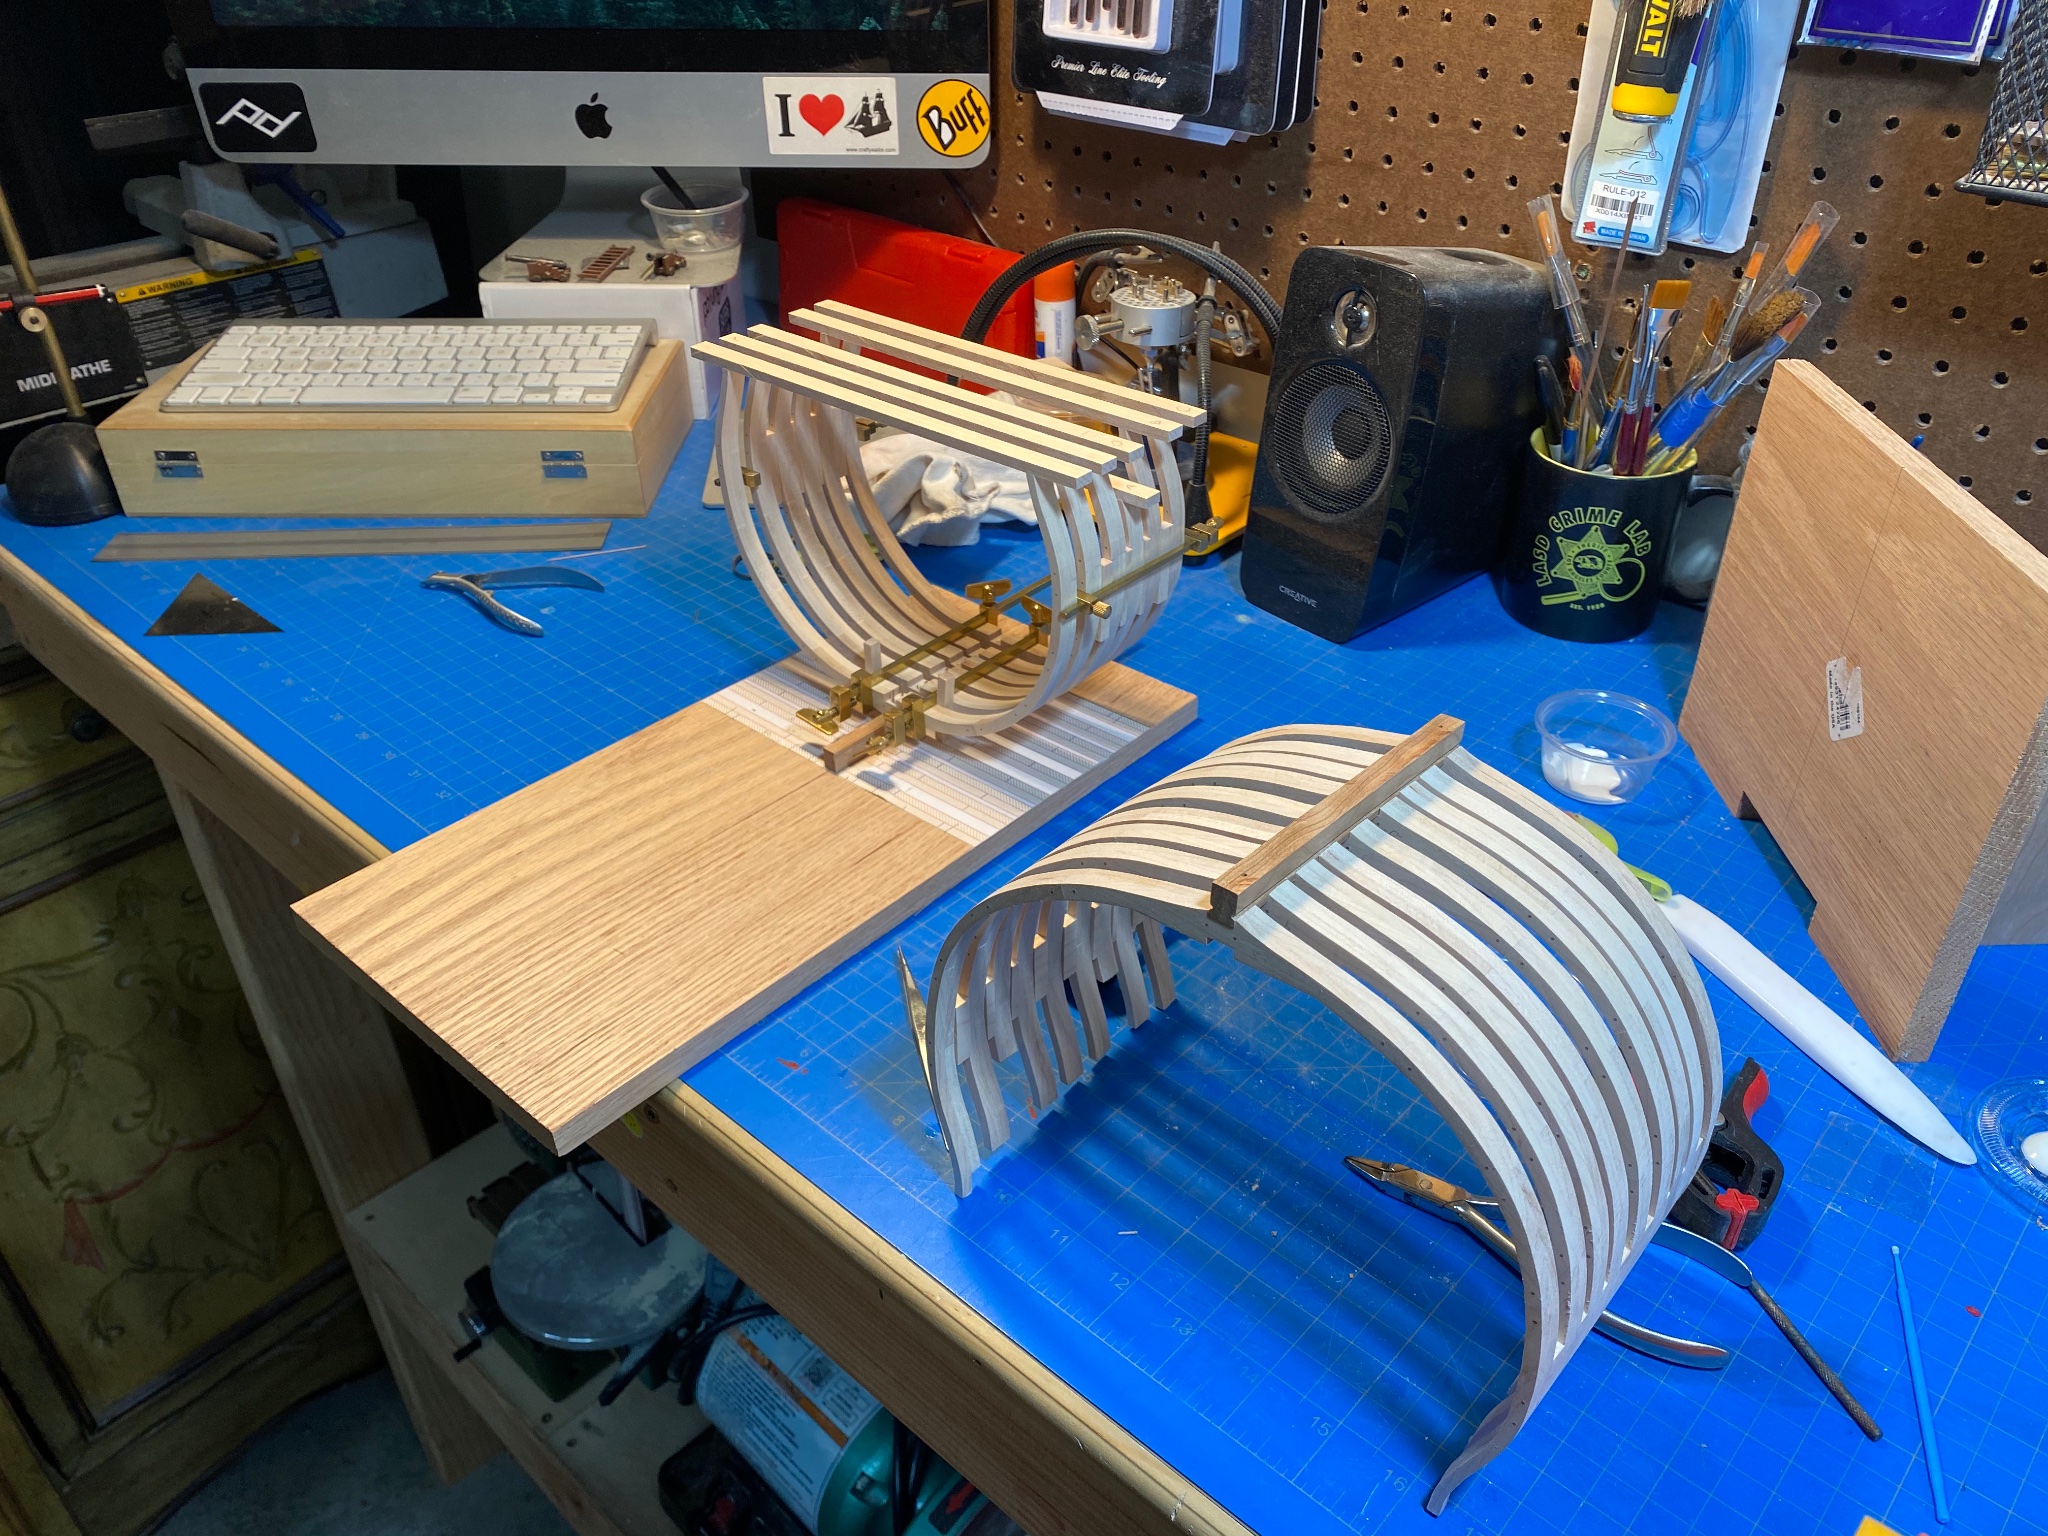
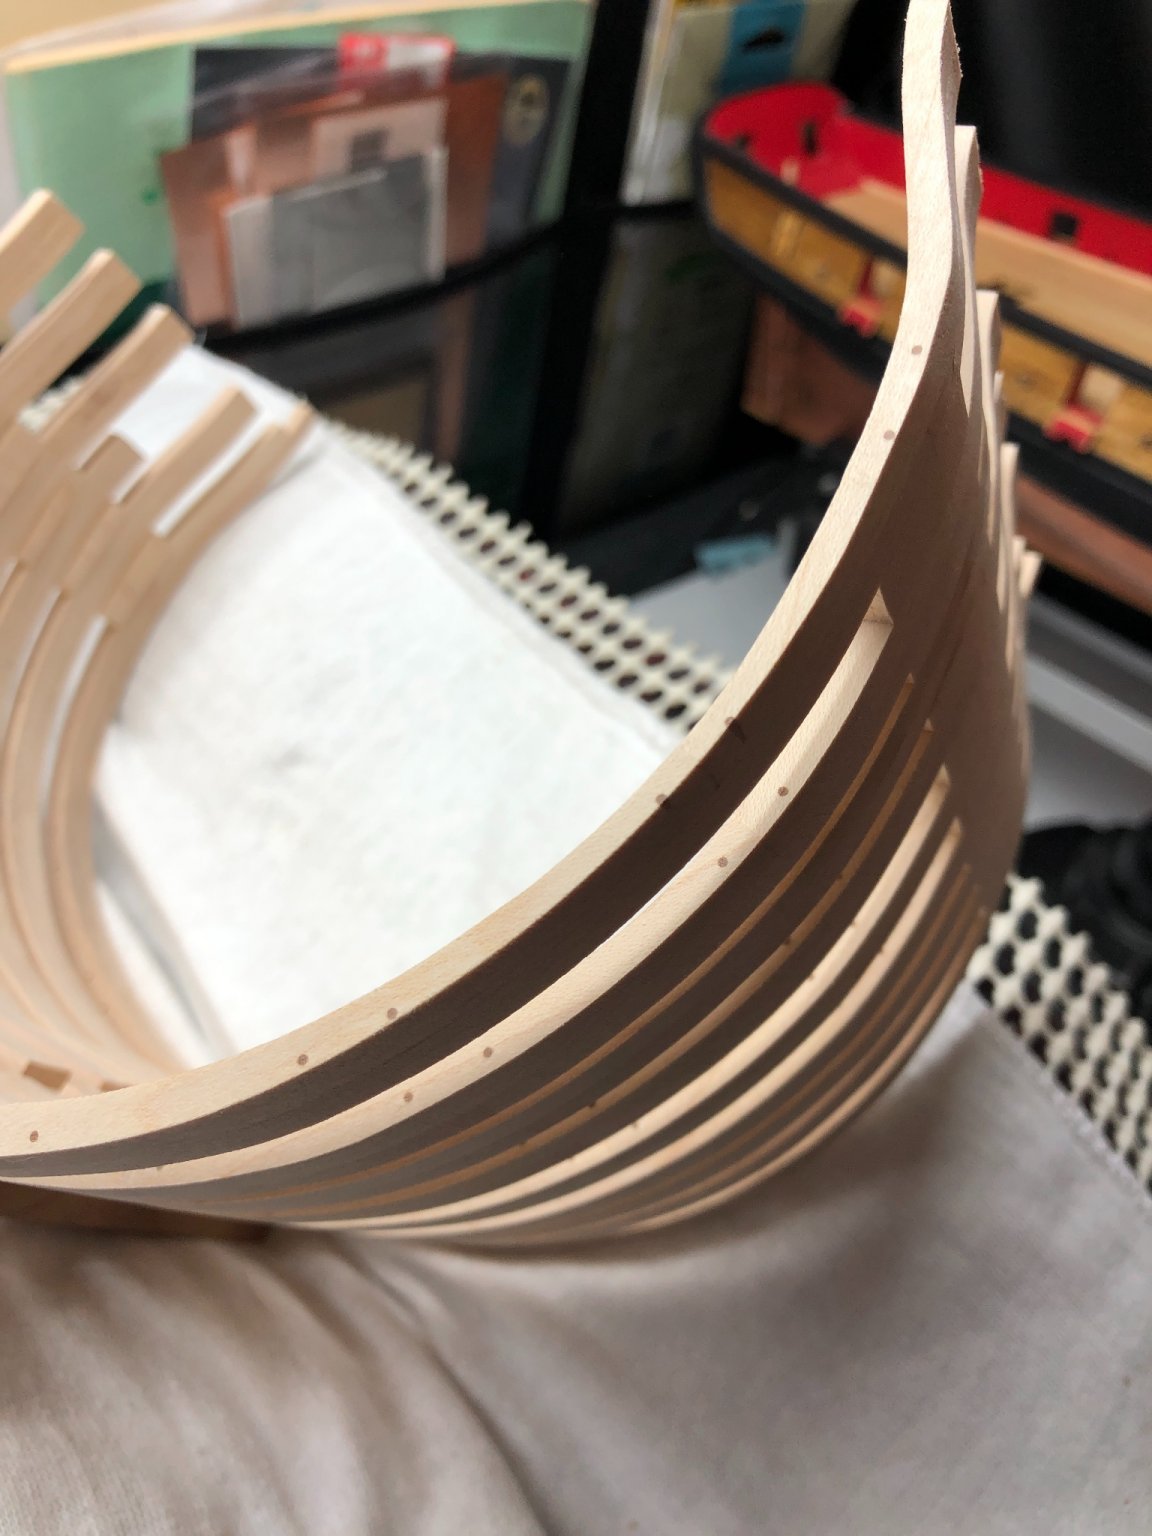
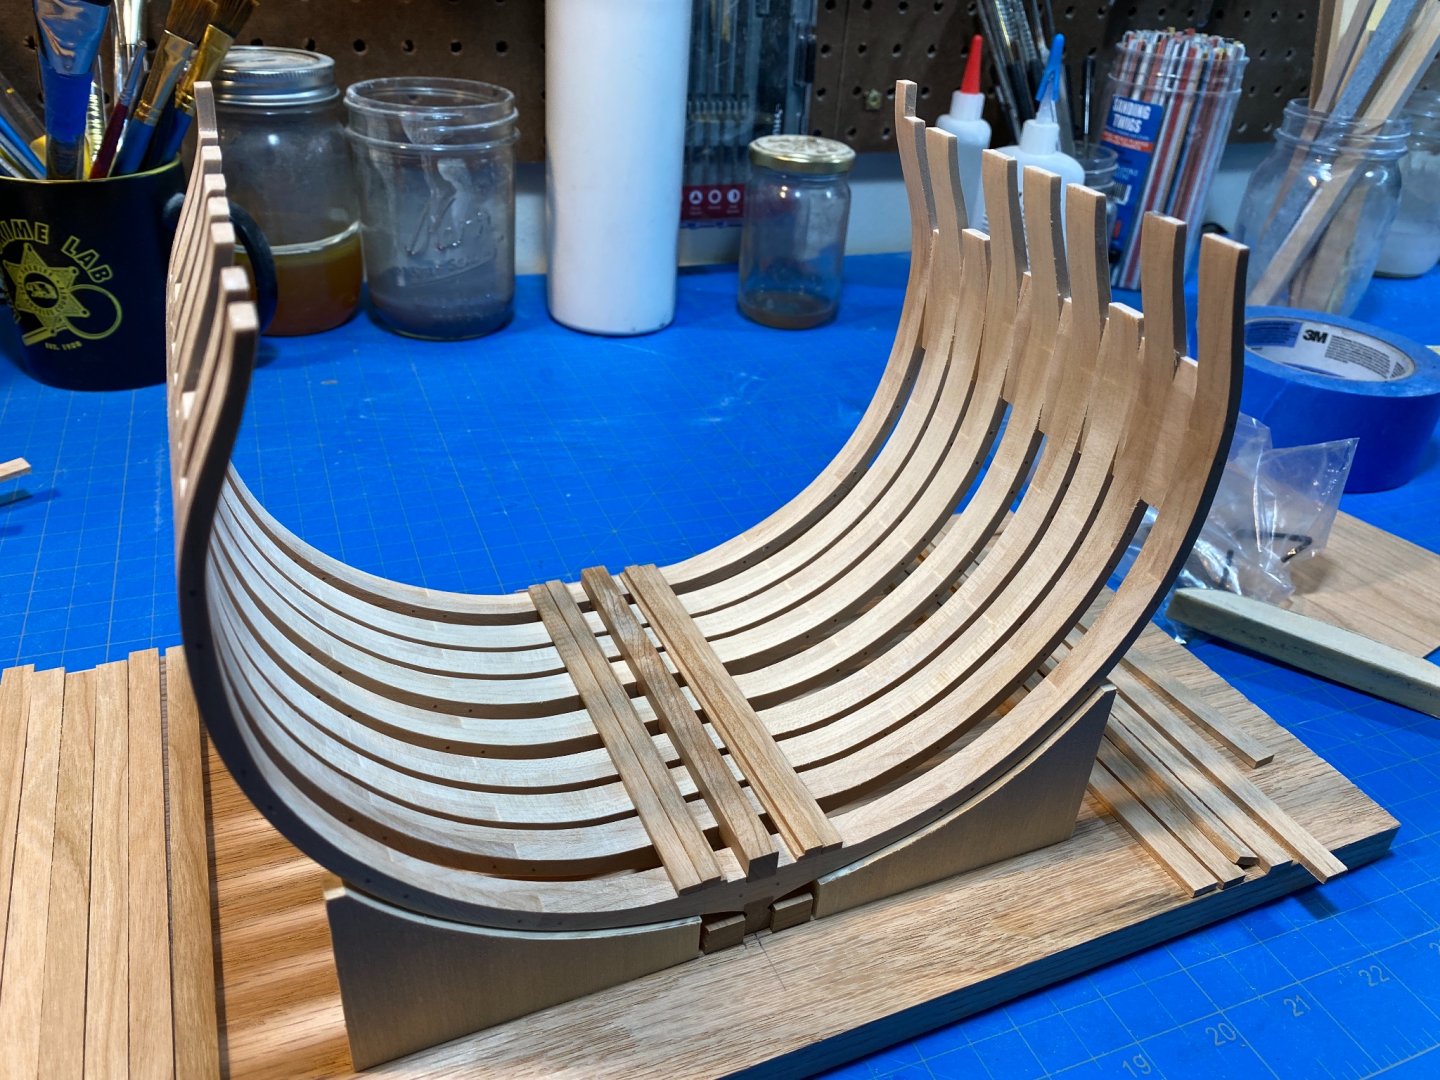
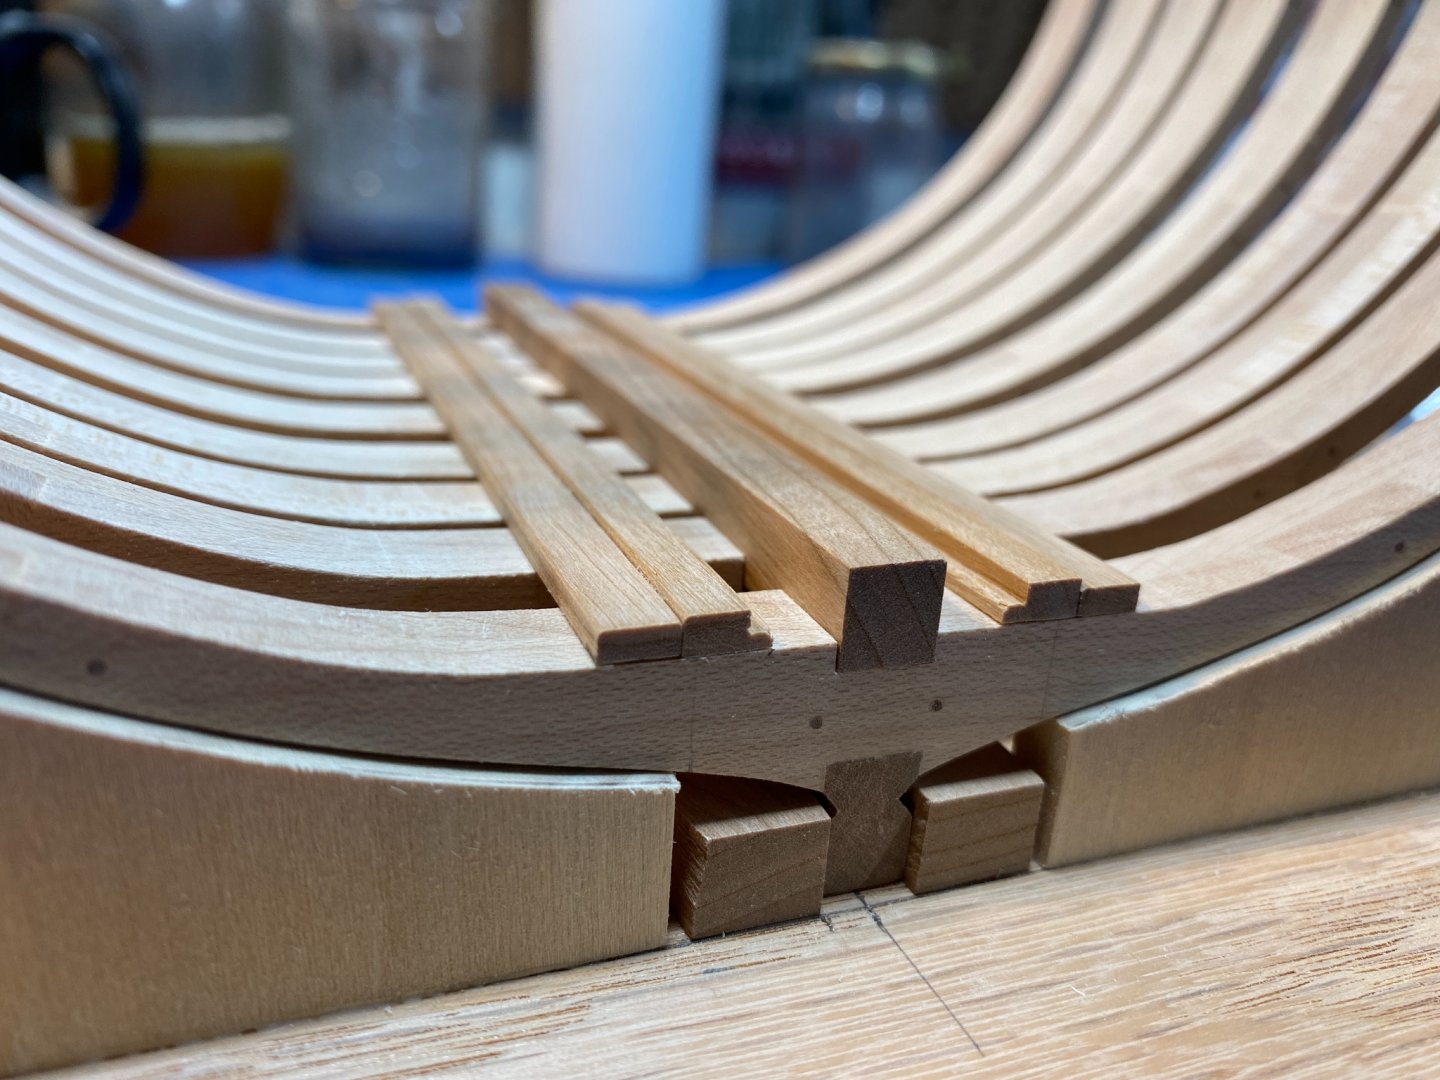
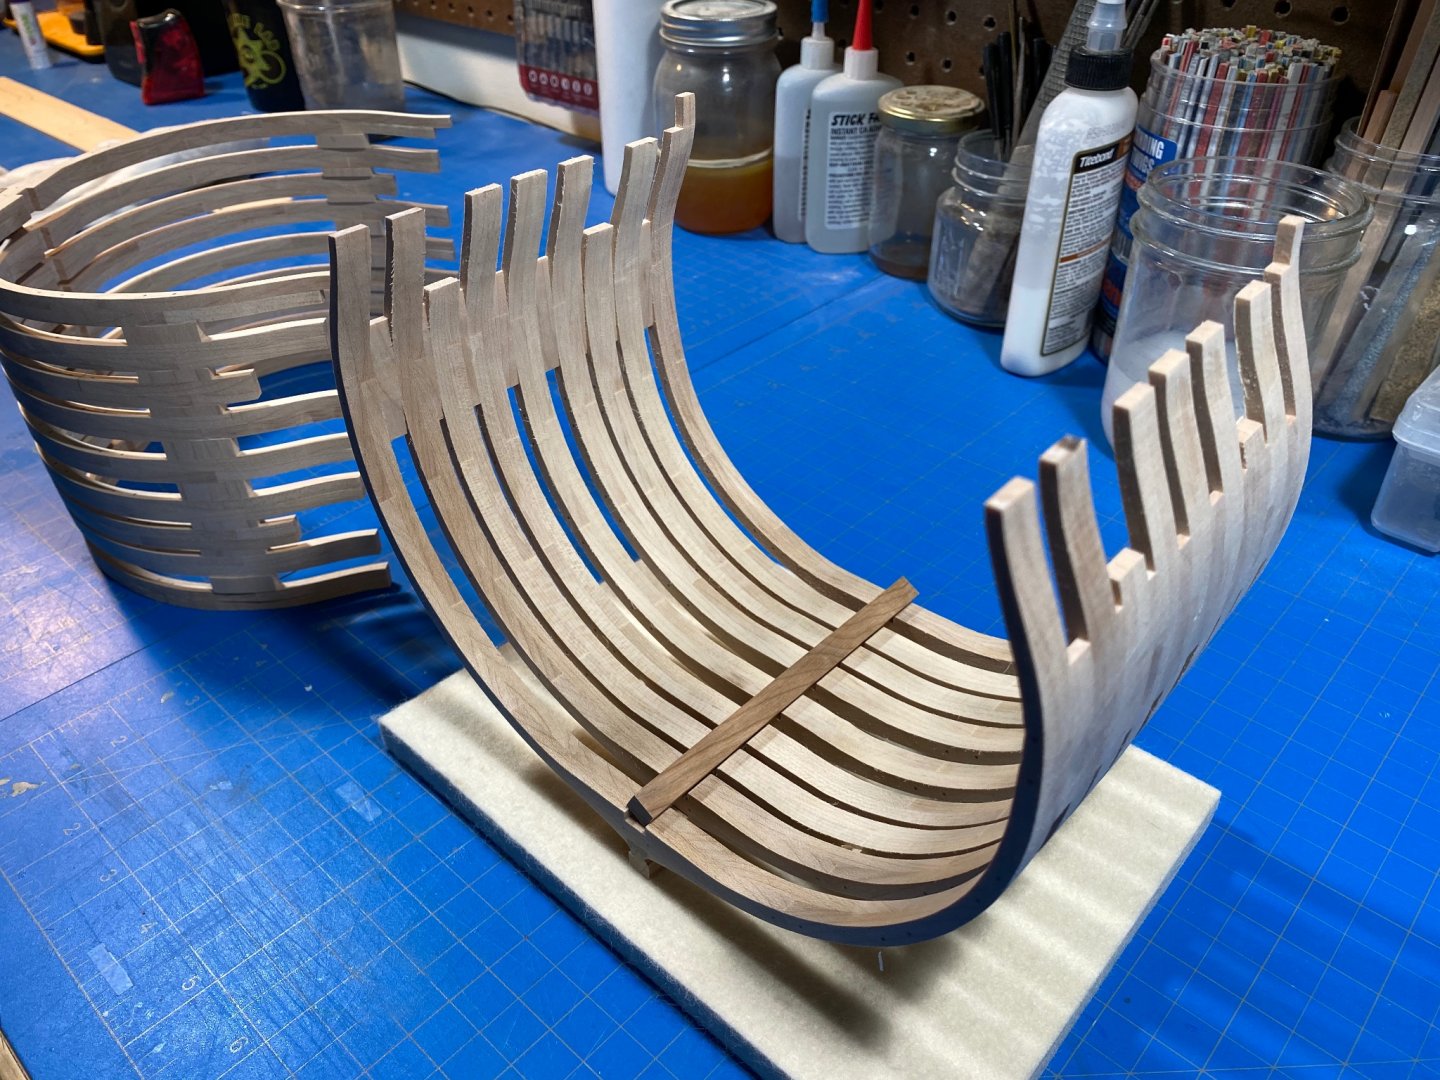
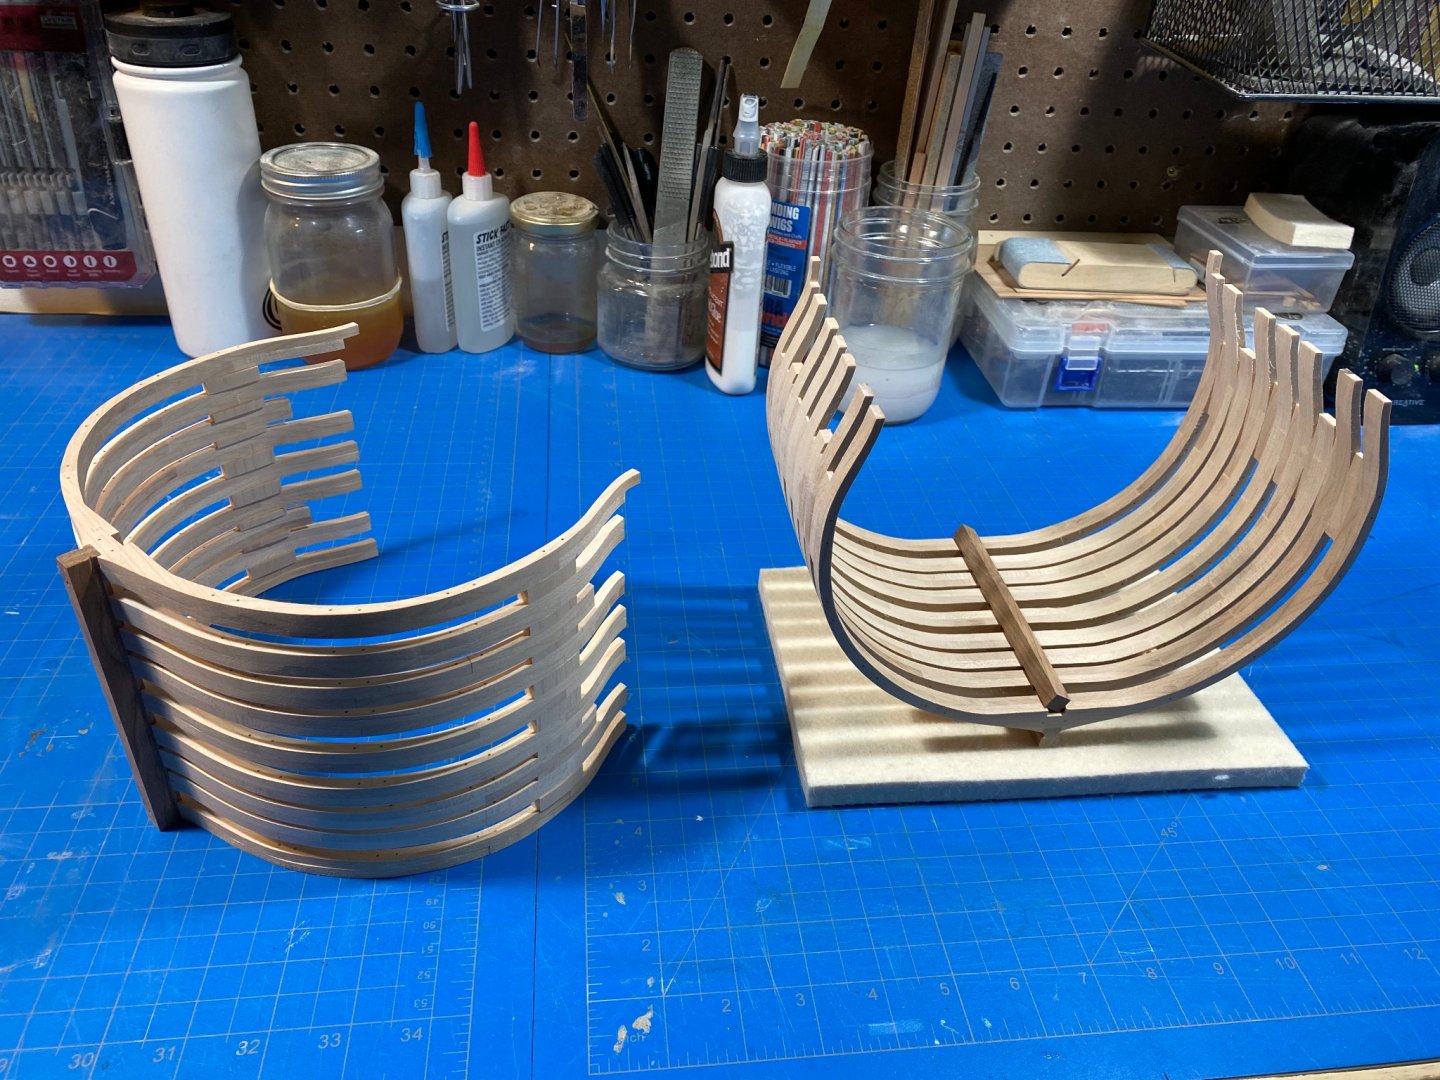
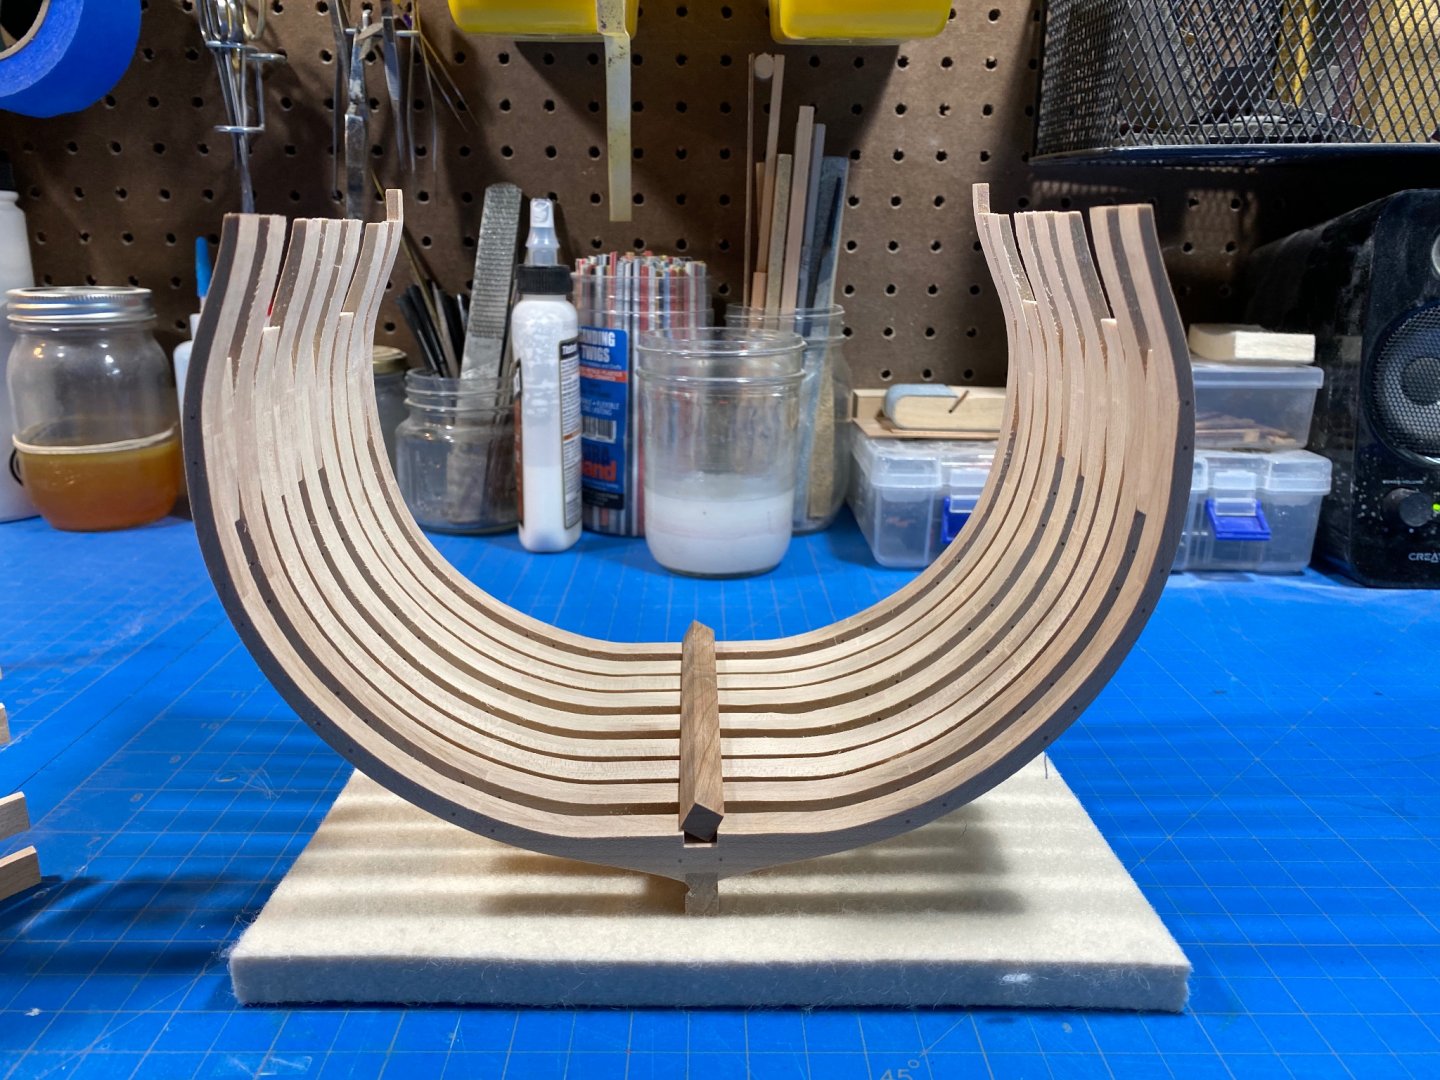
Triton Hull part II: Not much technically to update other than to say Ive finally finished reframing the hull. Lots learned, so in the end Im happy to have gone through with it. I did a few things differently which helped tremendously in time, cushion and level of frustration. Namely, I waited to take down the material to the plan lines until after I had the entire frame built and I stopped trying to make treenails of the same diameter as the hole drilled, fit. Taking them down one step made for a much better fit and a lot fewer broken pieces. Roughly faired, with keelson ready to go.


-
Thanks Patrick: I should have known UPDATES It feels like ages since Ive last posted on my Syren progress. Aside from actually working on the model itself Ive been doing some background on miniature carving and sculpting to get some headway on the transom decorative work, and the figurehead. Reviewing Chucks stuff here, as well as reading Bill Short's "Carving Ornamentation for Ship Models," both of which I found helpful. Work is returning as COVID restrictions ease, so time is slipping away sadly.. back to my 2.5 hour commute and lots of reading time. I think Ill have a crack at both methods suggested in the Syren instructions. Ive some Sculpy experience so Ill take a crack at that before trying the carving. I built a dummy stem and made some transom stencils to practice on... Ill update as things move forward.


-
As said above, depends entirely on period. Not every pintle and gudgeon was made of iron and I think it reasonable to say that new sheathing on a ship would have been shiny (for a time at least). Otherwise, my knowledge on the subject is not comprehensive, but based on the MANY HOURS of bright work duty I was assigned as a young naval serviceman I can tell you Naval officers invariably like their metal bright and polished 😏 https://ussconstitutionmuseum.org/2016/11/18/new-copper-sheathing-2/
-
I suck ripping planks with my Byrnes saw
Justin P. replied to bigcreekdad's topic in Modeling tools and Workshop Equipment
Perhaps looking into a feather board mod might help? I too have trouble occasionally making cuts and a lot of the time the answer comes down to how Im holding/supporting the wood, blade height choice and feed speed. Many of the videos online about doing similar things on full size table saws have directly applicable tips that can be helpful to understand the mechanics of what you are asking your tool to do. -
Thats a lot of knots to tie! Take breaks and rest your eyes often!
- 950 replies
-
- 1
-
-
- syren
- model shipways
- (and 1 more)
-
Me too. All the time Ive had is slipping away as we ease out of COVID restrictions. I guess there was a silver lining in all this.
-
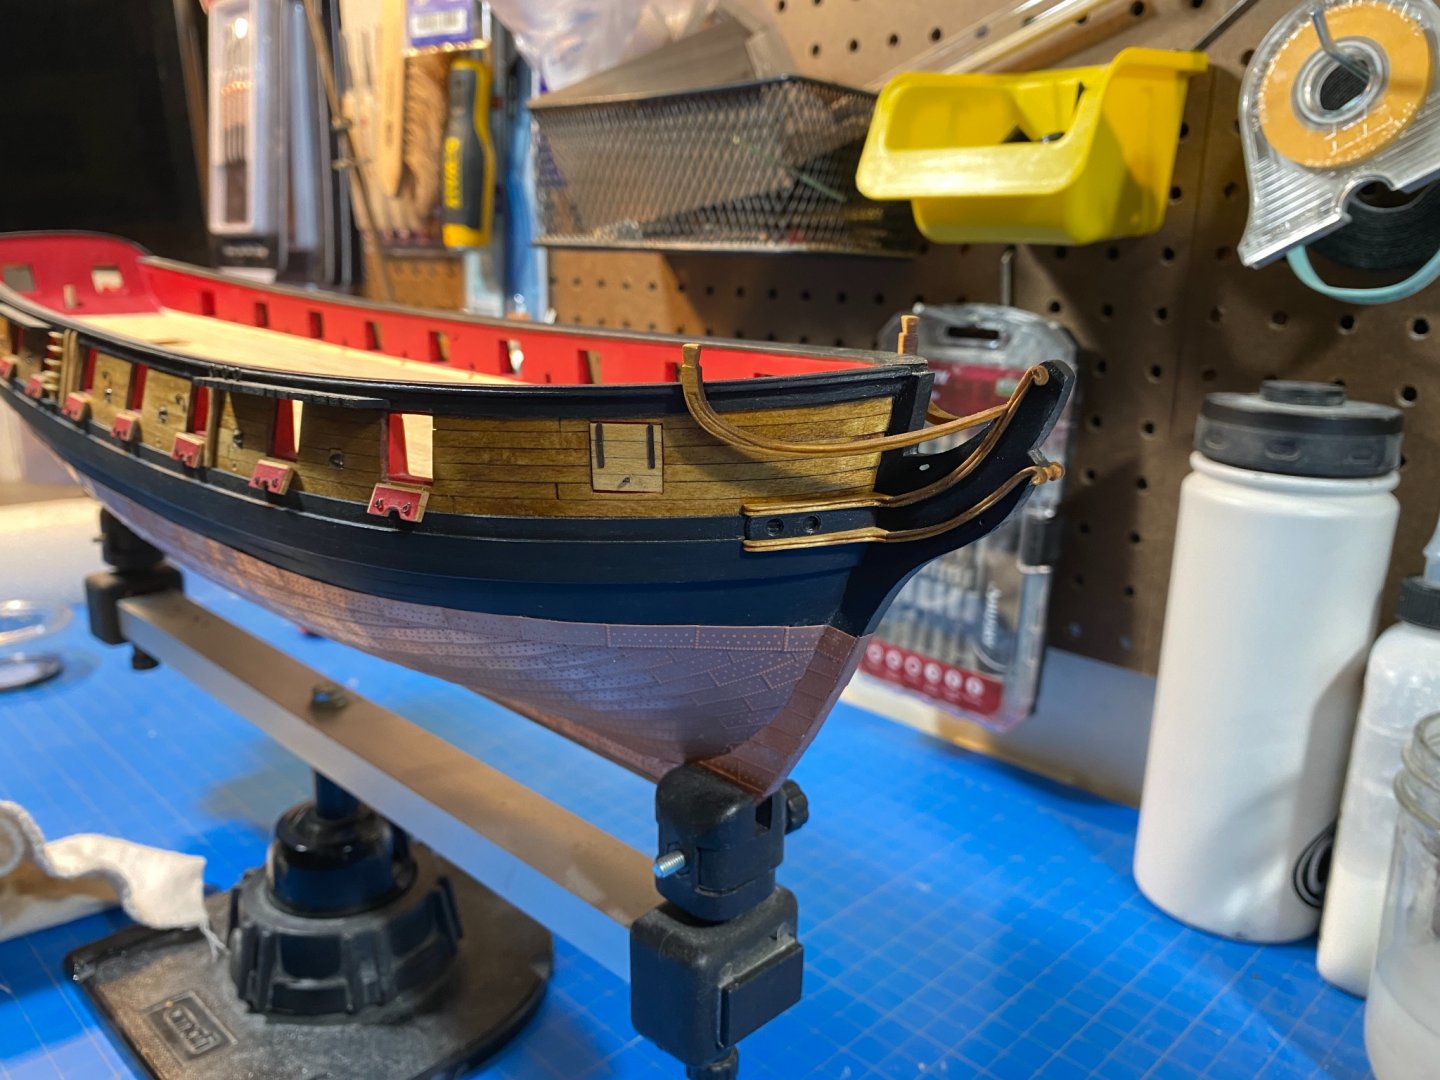
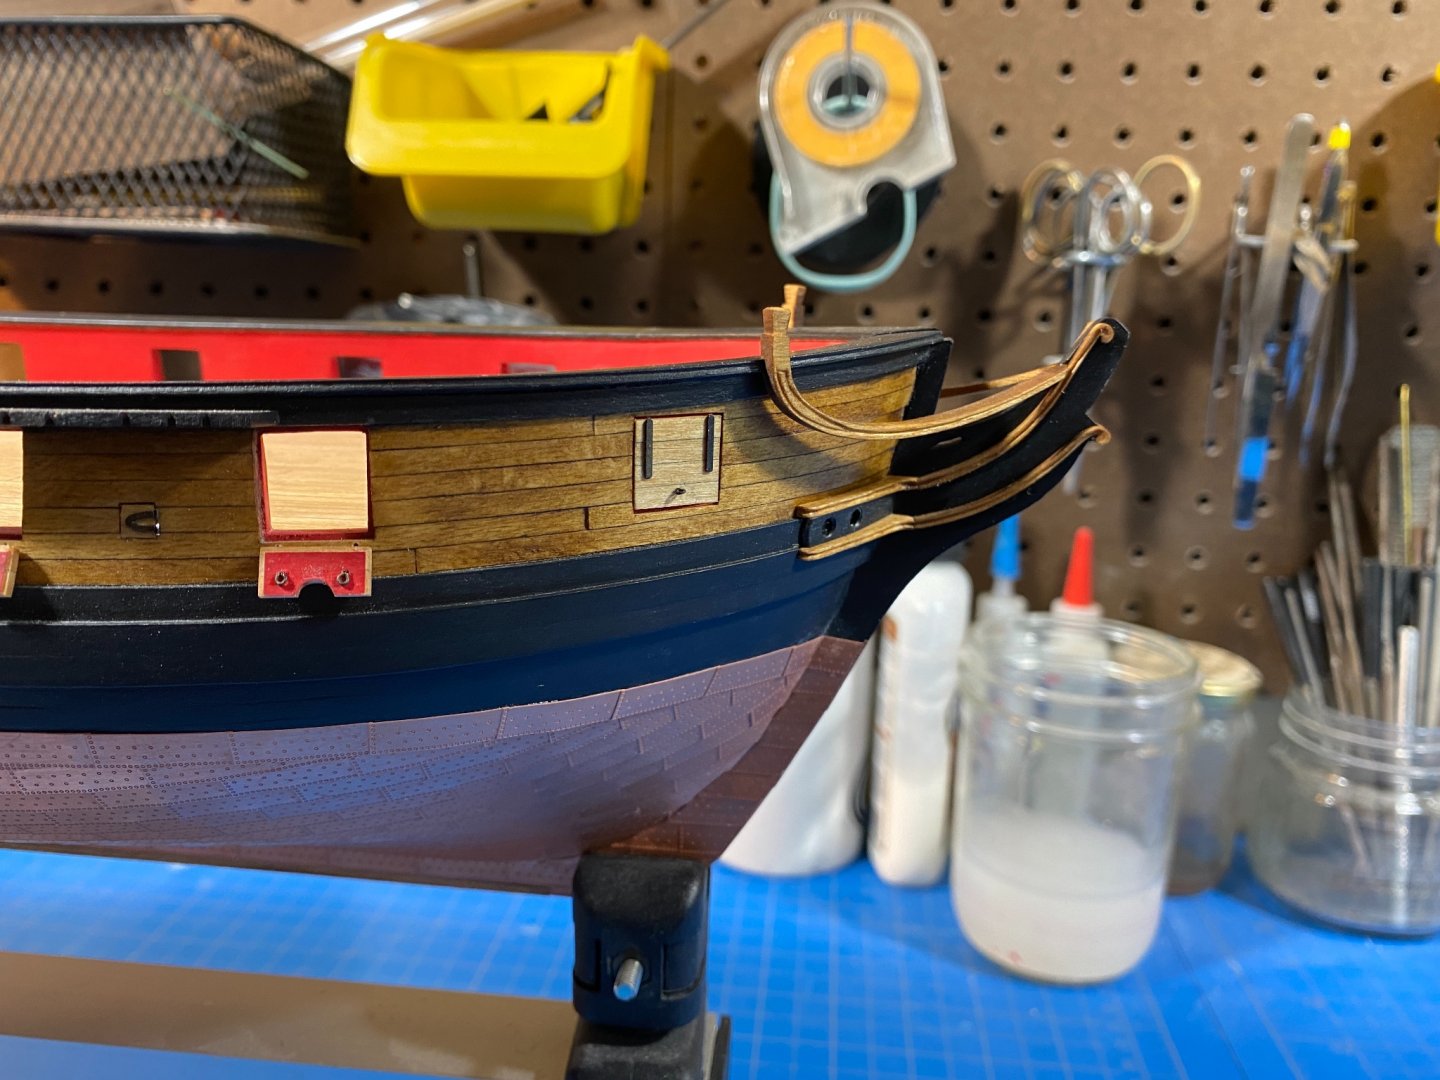
One step forward... one giant leap back. Geez.... where do I even begin. Last week I started fairing a bit, having completed most of the major hull construction. Needless to say the big lesson here is that fairing hardwoods is not the same as fairing basswood or plywood bulkheads. No big deal, just sand and sand and sand... takes time. However - one must always watch the backstroke. Somehow... and Im not entirely clear on how this happened... I messed up. I hope the problem is obvious in the photos... My theory is that I let my mind wander a bit too much while I was sanding, and just didn't pay enough attention to how my downstroke was rounding out. A phenomenon that carried on far too long...ha. Sadly, I cant even recall what I was so busy thinking about. There were seven complete stages of grief, Ill spare you all the grisly details but will share that one of my daughters asked that night at dinner "So... what happened in the garage earlier Poppa? - It didn't sound great." --- Its been almost a complete week since this happened. I can say that I honestly tried to find a way to recover. In the end I settled on rebuilding that "C" frame, hoping that I could simple fair back the new frame into the existing shape of the hull and everything would be fine. And I did remake that frame - and this would have been a fine solution - but in my haste to remove the offending frame, I damaged the keel. This being the display "face" of the whole model it was all just too much for me to accept. As with any build we accumulate a list of "we'll do it differently, and better next time" items. My list, reached the threshold with these last two errors. The keel had a few issues, and the frames have had a running list of their own. My threshold for acceptability has been reached. So.. Im starting over. Ill remake all the frames and though Ive remade the keel about 4 times, Im going to do it again. While some might argue that this is a case of perfect being the enemy of good - for me, its a case of making sure the lessons are learned. Learning was the whole point of this build as I understand it, so as painful as it is - Im retiring this hull to the boneyard. Not to mention that if ever there was an argument for rookies NOT to buy a bunch of boxwood this is it ;). Im thankful I stuck with domestics as the hit on my wallet is far less than it could be. Precision takes time, and even when I think Ive learned the lesson to slow down, I learn yet again that I must slow even more - to think everything out more than twice. To try and envision how each decision will impact the next three steps and never let my mind wander too much! Its times like these that I have to remember to tip my hat to the Antscherls, Herberts, Passaros, and Tostis out there whose skill and precision likely didn't come overnight. I like to think their bone pile is much higher than my own ;). Not to mention those unpublished folks here on MSW whose work has me always wanting to do better, and whose contributions teach me something new almost every day - there are just too many to name.