HOLIDAY DONATION DRIVE - SUPPORT MSW - DO YOUR PART TO KEEP THIS GREAT FORUM GOING! (Only 69 donations so far out of 49,000 members - Can we at least get 100? C'mon guys!)
×


Piet
-
Posts
3,568 -
Joined
-
Last visited
Content Type
Profiles
Forums
Gallery
Events
Everything posted by Piet
-
 Sjors wrote: @ Piet, You are a real Dutchman. Watch everything in detail and yes, the doors are turning ( in your dreams or mine ) Hey buddy, you disappoint me. With your dexterity doing those intricate ratlines - - - and no working doors???? How are we supposed to get inside ??? - - - Cheers,
- 1,616 replies
-
- 4
-

-
- caldercraft
- agamemnon
- (and 1 more)
-
Wow, great progress Popeye and a good choice in the paint color Looks like you and i are on the green kick Cheers,
- 956 replies
-
- 3
-
-
- andrea gail
- trawler
- (and 1 more)
-
Thanks to those who dropped by and your likes. Hi Patrick, well, the O19 is still very much alive and on my north side work bench. She has taken a temporary backseat so I can finish that little lobster smack model. That has also gotten a little out of hand with detail work. I should have just build the kit as is without bashing and added "stuff." However - - - I just couldn't help myself There are just a few details yet to add to the O19 before I can contemplate making the display board and cover. One of the details for the O19 are the hinges for the mine tube door. The problem is access or the lack thereof. I need to make a drawing first to see how I can approach it. The difficulty is with attaching the stationary part of the hinges to underside of the ballast tank plating and still have the door close flush. I may have to drill two very small holes in the deck plating for tiny brass wires to draw the hinges up to cement them to the underside. The other detail is the dinghy cradle inside the deck area and then a few figures for the crew. The last one may be done much later after the model is safely put in my studio. Yeah, I do have some sad feelings about finishing this model but I do have other plans cooking that are equally exciting. Thanks so very much for asking and your concern. It's much appreciated. Cheers
-
Great looking tug Nils and fantastic bit of engineering on the boiler and engine. Cheers,
-
Thans everyone for dropping in and for hitting the like button. Hey Augie, great seeing you here and thanks for the kudos. Yeah, I like the green, it reminds me of the Dutch ships and houses in Holland. I find it a happy color. Hi George, yes, that wetting or damping of wood is something not wel known except for real wood finishers. I use a wood conditioner for soft woods, it holds the wood fibers together and hardens it some. Final wet-sanding with at least a 600 grit wet or dry sandpaper. Comes out like a baby's skin. Hoi Sjors, glad you found me even with such a short name Piet, yup, that's short but like my name-sake, a famous Dutch admiral, my deeds are great Thank you my friend for being amazed at my humble little kit build. I did figure out that kit building is very difficult - that's why I'd rather do scratch building, much easier. Well, today was more of a frustration day then progress. The stain on the display board just didn't want to dry. Even setting it outside in the sun (70 F) it wouldn't dry and remained slightly sticky. This is setting me back big time because I really wanted to mount it to the display board.. But I did some more touchup paint work and fiddled some with the boom. I added the gaff fork to it as Dee_Dee suggested but now have a problem in holding it to the mast and making ready for fastening the sail to it. I know, I could have temporarily tied it ti the mast but instead I installed parrels inside the gaff type fork I'm also working on the cord that prevents the boom from being pulled up by the sail. Very tricky place to work, it's between the cabin and mast, not much room to serve it. I hope that the stain has dried enough by tomorrow so I can mount the boat to it and get on with the rigging. Looks like that making the sails will commence very soon. Cheers to all,
- 176 replies
-
- 4
-
-
- muscongus bay lobster smack
- Midwest Products
- (and 1 more)
-
Yup, I know the feeling about finding dried-up paint when you want to use it. In my case it was a 5 mile run to get some new paint. The mast work looks splendid John, great going my friend. Cheers,
- 2,250 replies
-
- 1
-
-
- model shipways
- Charles W Morgan
- (and 1 more)
-
Yup, those reefing lines at these scales are always a problem but you are doing okay with the thinned PVA ! It's looking really very nice! Cheers,
- 607 replies
-
- 1
-
-
- scottish maid
- artesania latina
- (and 1 more)
-
Very nicely done on that bulkhead Sjors. It even had door handles on the doors! Are they hinged and work too??? Cheers,
- 1,616 replies
-
- 2
-
-
- caldercraft
- agamemnon
- (and 1 more)
-
Mayflower by SawdustDave - Finished
Piet replied to SawdustDave's topic in - Build logs for subjects built 1751 - 1800
Birthday? Did anybody say it's Dave's birthday? Oh my, I'm late, I'm late so here is my belated birthday wish for Dave - - - happy birthday Dave and many more. We can celebrate mine when I see you in April Cheers, -
Marvelous looking work Nenad and congrats with strike being over! Cheers,
- 4,152 replies
-
- 2
-
-
- cutty sark
- tehnodidakta
- (and 1 more)
-
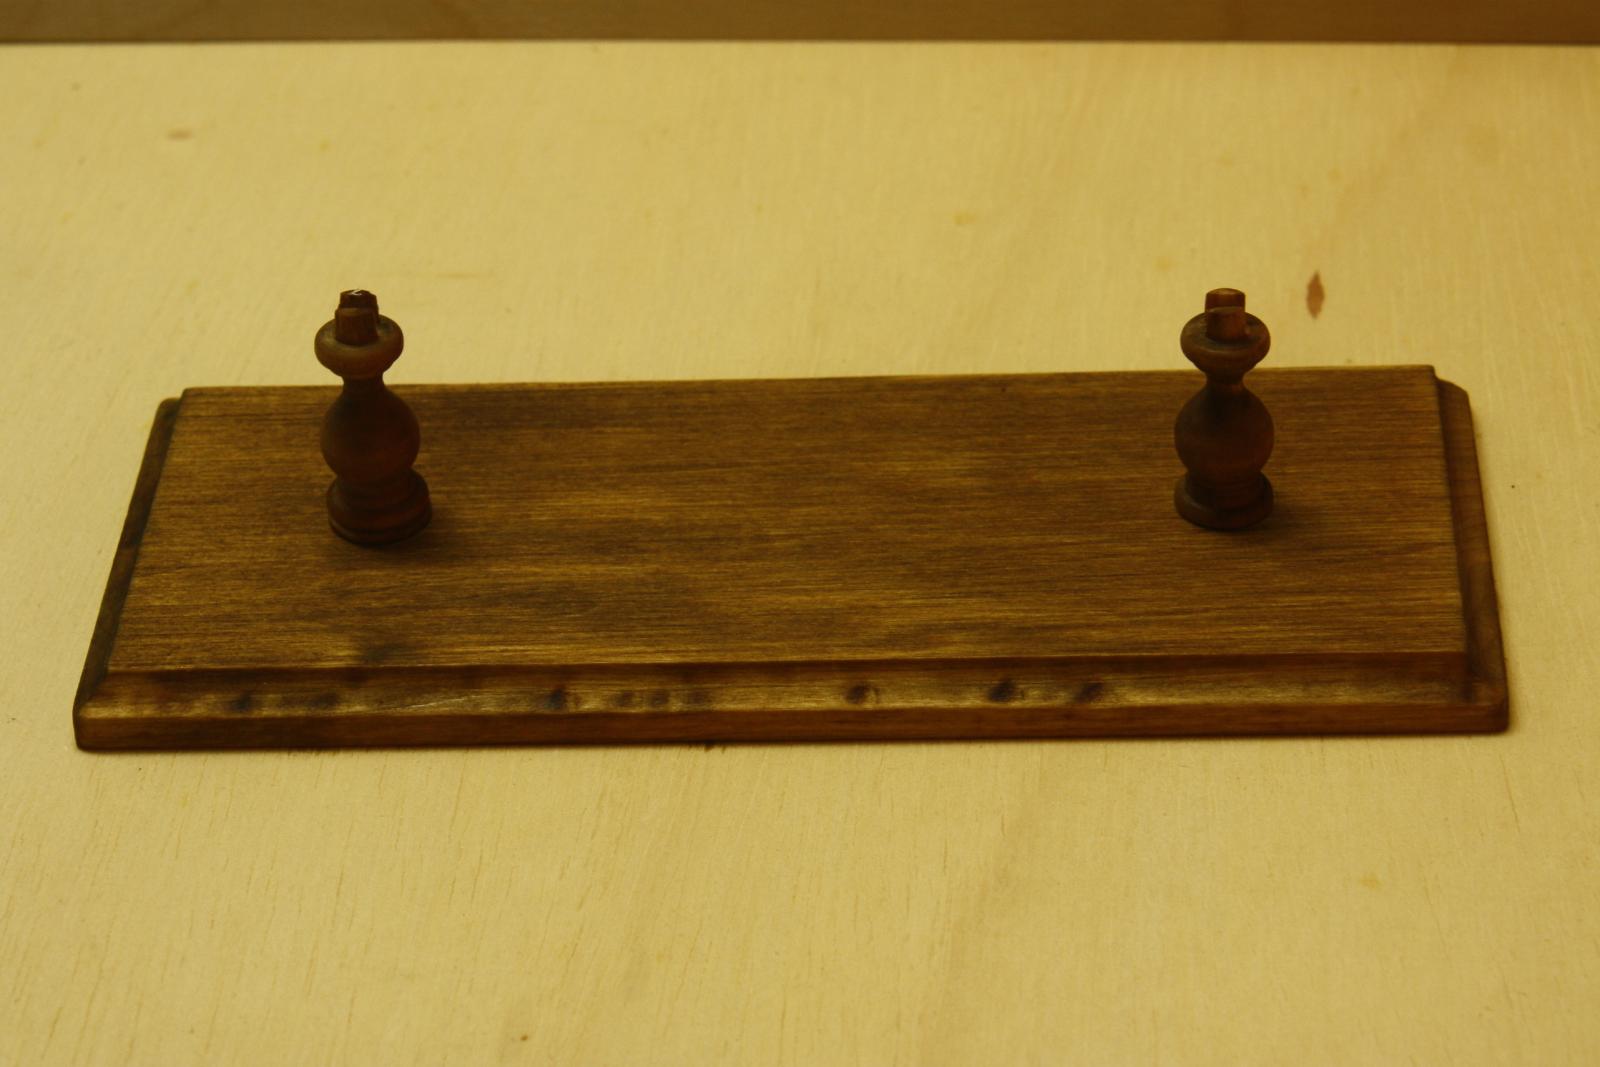
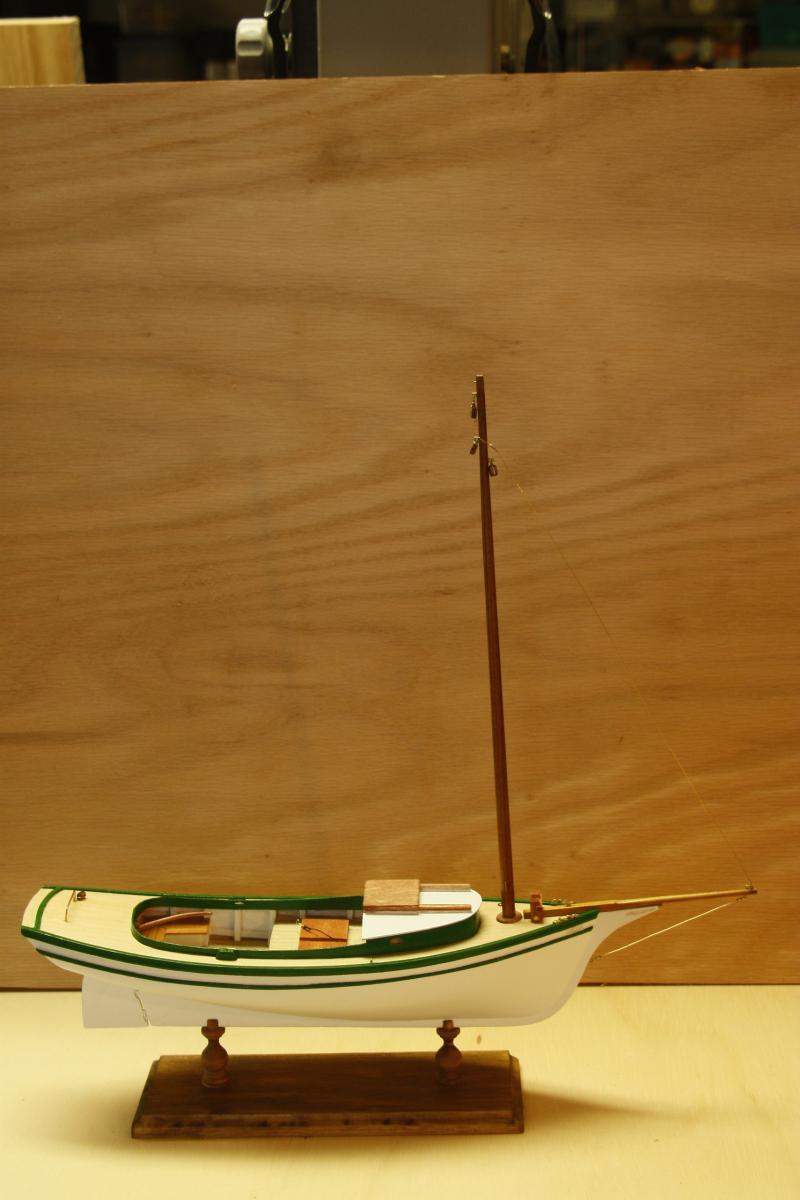
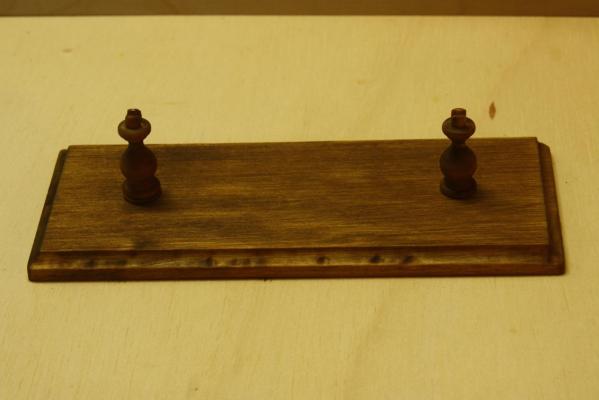
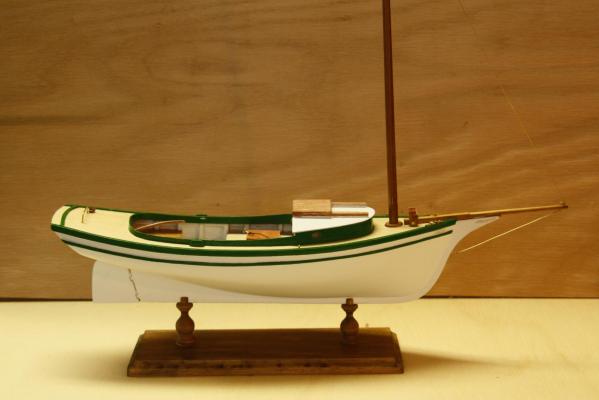
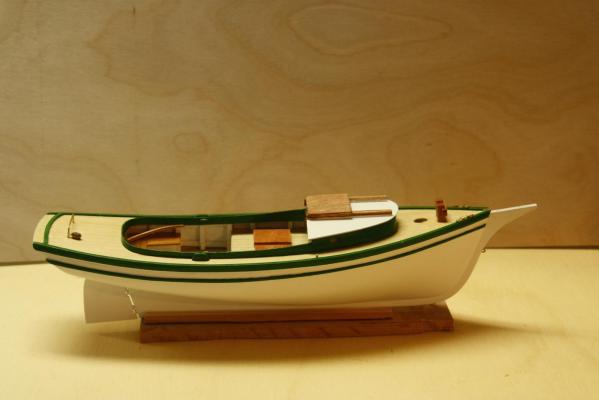
I decided to make the display board today. I took a 3/8 inch by 6 inch basswood plank and routed the edges with my Proxxon hand tool. I put the tool in the Poxxon drill press thingy and routed the edges. Came out okay. I sanded the board with worn out 300 gritI sandpaper so as not to raise up the nap. An old trick I learned from a furniture finisher. Sometimes he would wet the surface to raise the nap and then sand it. I then prepped it with a pre-stain conditioner and let it do its thing while I primed the centerboard. Yeah, that thing has yet to be cemented to the keel and now that the model is raised on the pedestals I can finely install it. After the stain has dried I'll rub the board with a soft cloth and then a piece of hardwood. Another trick I learned when in aviation tech school. I also modded both pedestals for the display board, making one a little shorter and the other a little longer by adding a wooden washer below it to make the waterline of the model close to to be parallel with the display board. When all that was done I figured that the pre-stain stuff had done its work and stained the board and the posts with white oak stain. It came out surprisingly nice, even though it was basswood. Tomorrow I'll paint the centerboard white and cement it to the keel. I'll also made two bamboo pins that'll go into the posts and keel to make it a sturdier on its legs so to speak. After the model is permanently mounted to the display board I can begin with the rigging and sails. Here are a pics. The display board - still fresh and sticky from the stain. In real life it's a lot lighter in color. This shows the model temporally mounted to the board. I put the mast on yesterday and when you squint real hard you can also see the forestay. This is a little closer up. Oh yeah, I also made the centerboard puller upper cable with a handle on the end. You can barely make it out but in this pic it's draped over one of the fish bin hatches. Cheers,

- 176 replies
-
- 11
-
-
- muscongus bay lobster smack
- Midwest Products
- (and 1 more)
-
Thanks everyone looking in and your comments but above all - your likes. Hello Brian, thanks for dropping in and your suggestions. What you did to the trail boards was rather ambitious to say the least. That idea never occurred to me, I was thinking of just hand painting some simple line decoration on it. I really like the idea of scroll cutting a design in the boards, that'll be the cats meow. I have already gone way overboard with this thing soooooh, I can give it a try. Hi Captain Bob, thanks my friend. Cheers,
- 176 replies
-
- 1
-
-
- muscongus bay lobster smack
- Midwest Products
- (and 1 more)
-
Hoi Sjors, @ Piet, Thank you ! Are you building something or are you retired ????????? Don't see your name anymore..... Yes, I am retarded - uhm - - retired but not from ship building! Right now I am building a model of a New England lobster smack from the 1850's. This model will go for auction next April to generate money for a very worthy cause here, the Wounded Warrior fund. That log is right here in the kit build section. The O19 must take a backseat eight now till this little model is finished, then I can complete the O19 with a few more details and the display board and case. After that I'll get back to the VOC ship model and perhaps a botter or kotter or a VOC Jacht in a lamp. Cheers,
- 1,616 replies
-
- 3
-
-
- caldercraft
- agamemnon
- (and 1 more)
-
Mayflower by SawdustDave - Finished
Piet replied to SawdustDave's topic in - Build logs for subjects built 1751 - 1800
Hey, stuff happens Dave but it's better discovering outsized blocks now and having the sources for good new ones. I'll take a few of your blocks off your hands - - IF they are scale 1:80 in Amsterdam feet I can use a whole buch for my VOC ship. Cheers, -
Very nice work Popeye and I really, really like your banter about all you plan and do. It's more thinking out loud that keeps your logs interesting. Thanks! Cheers,
- 956 replies
-
- 3
-
-
- andrea gail
- trawler
- (and 1 more)
-
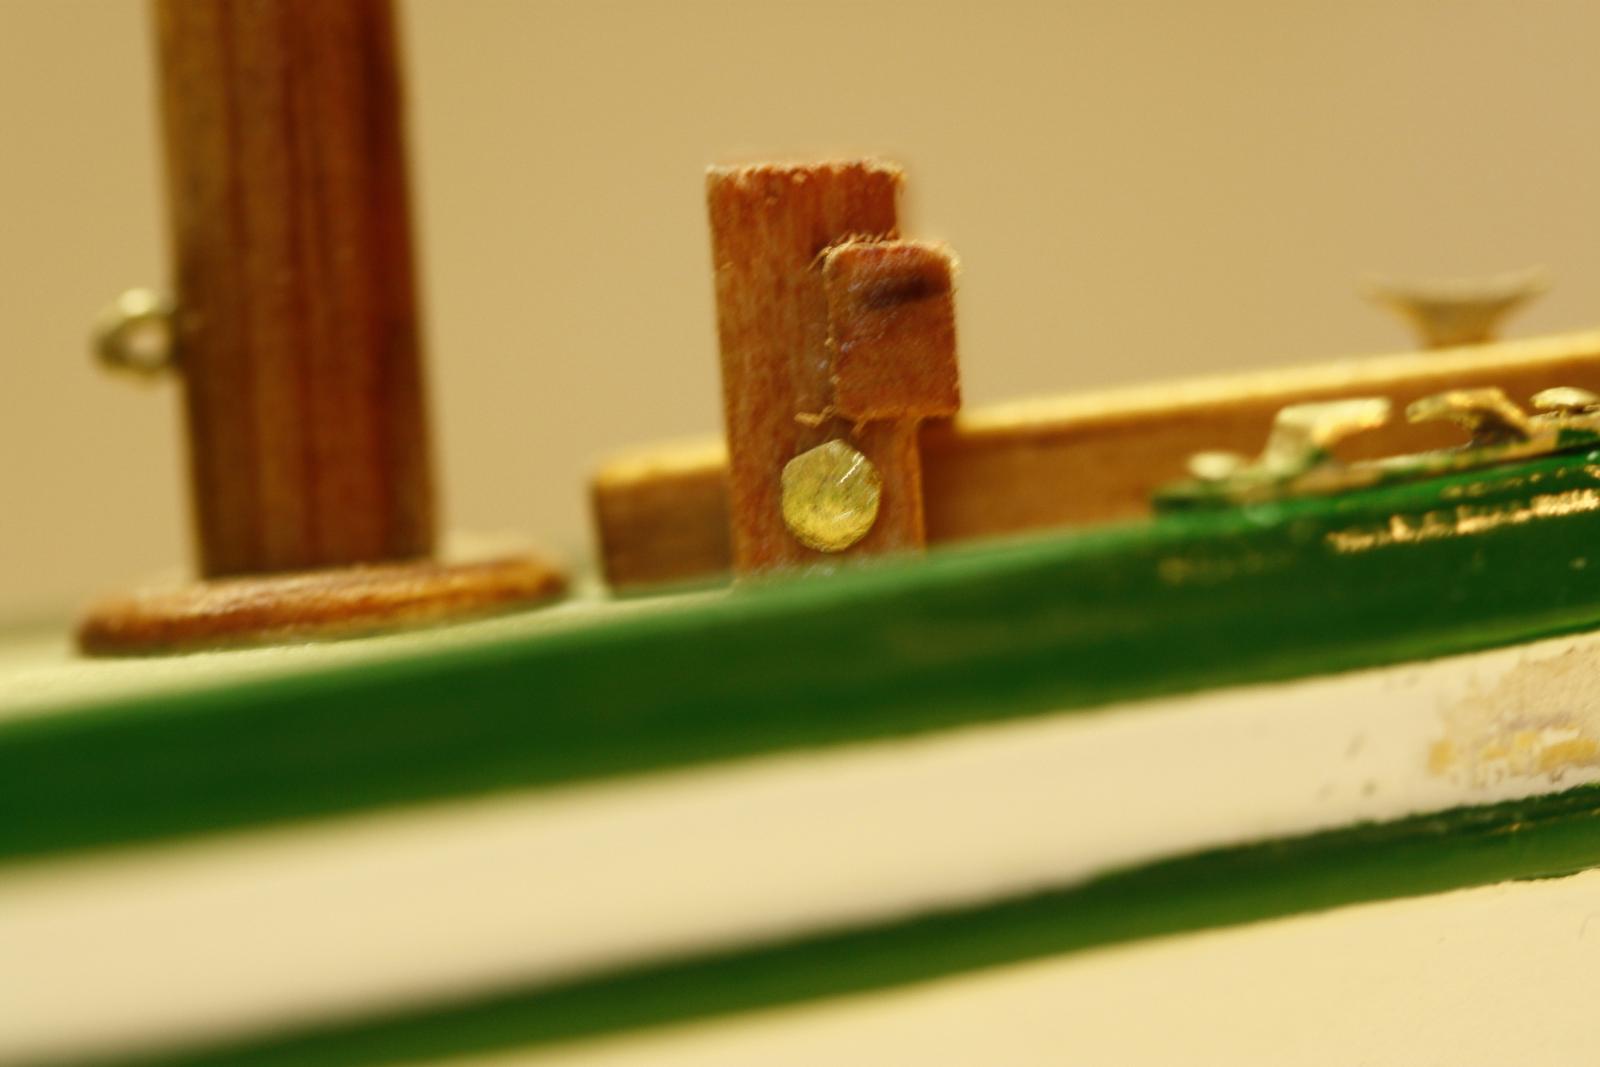
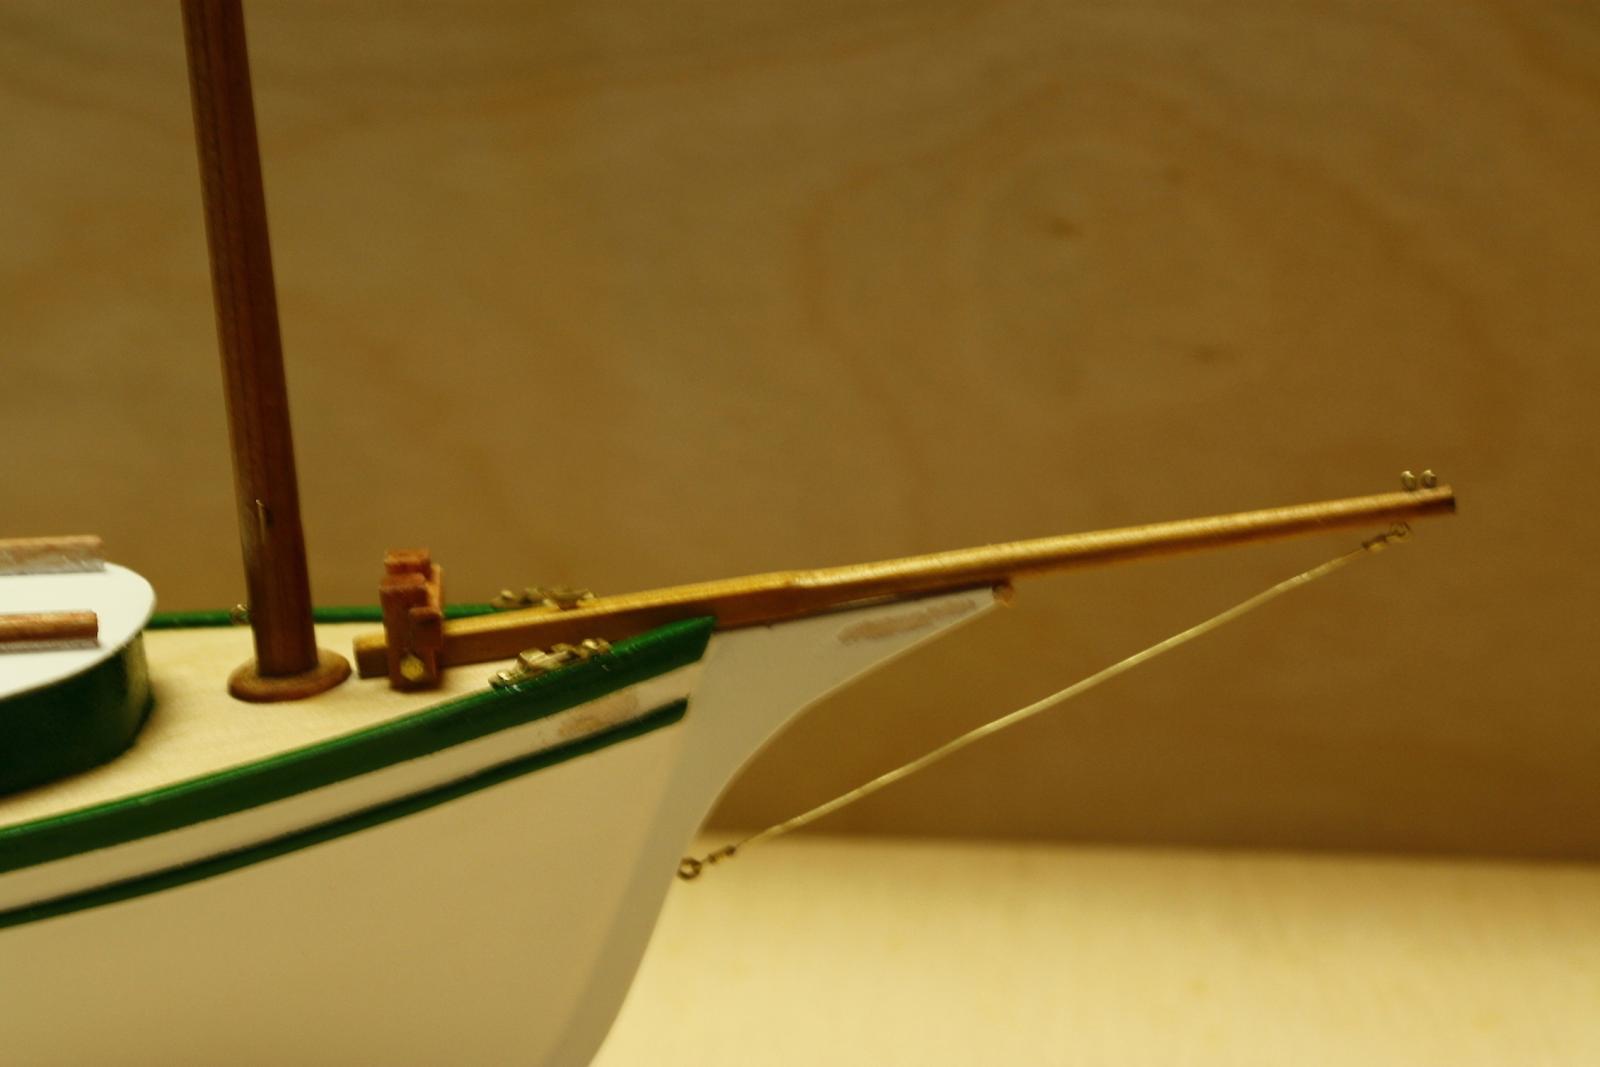
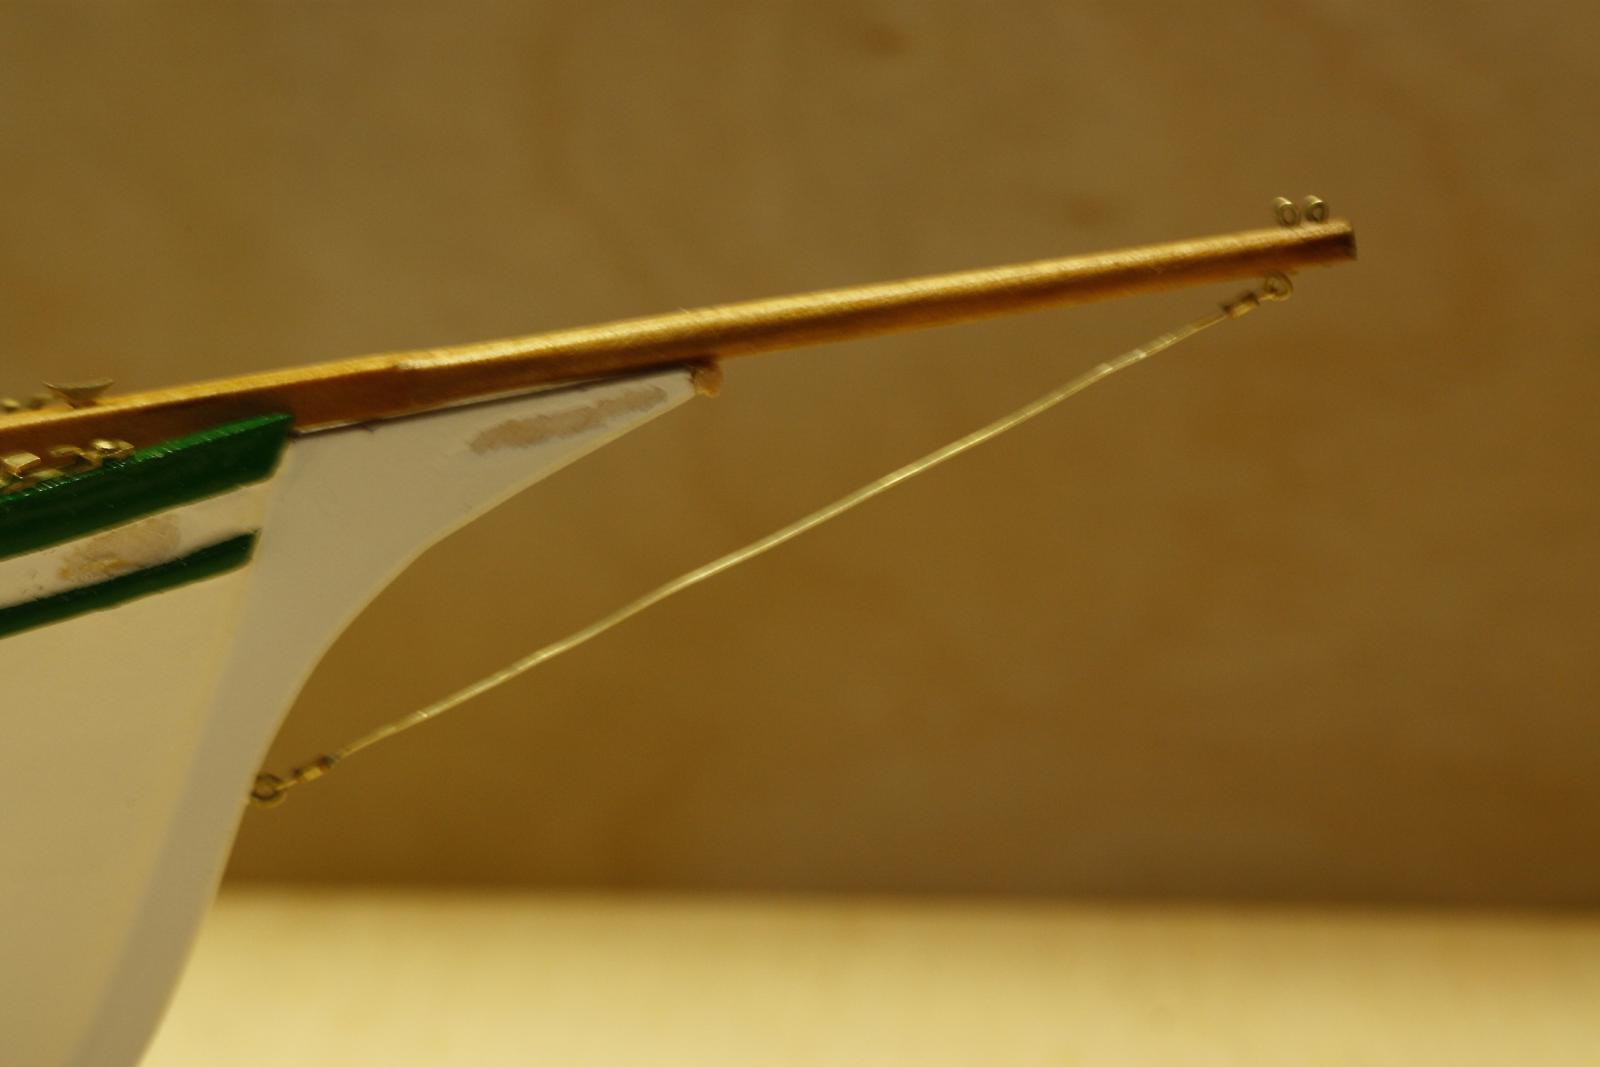
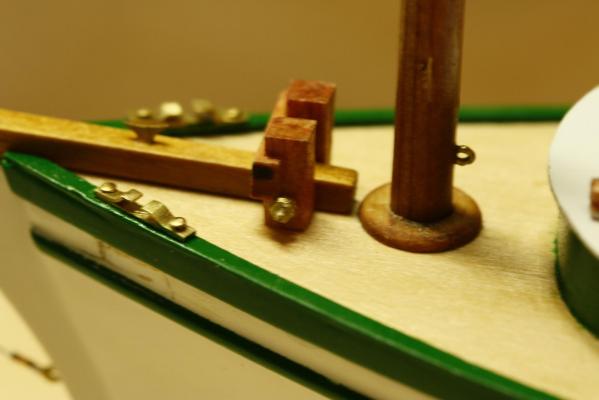
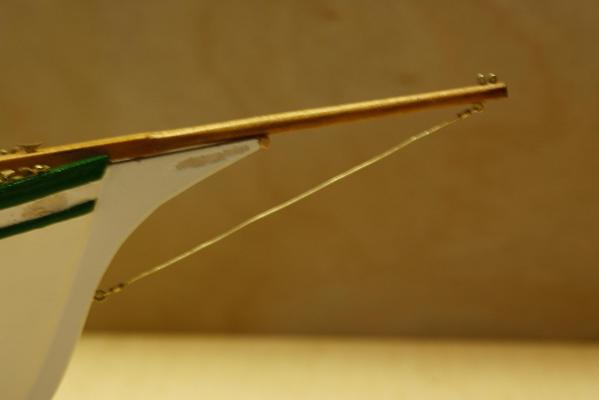
Today - - - what did I do today - - - oh yeah, in the morning after my morning coffee I decided to make the trail boards. Wont cement them on yet because I'm not sure yet how to finish them. Yes, they'll be painted green but what kind of decorative motief to put on it. Then there is the question of a name and where to put it. I needed to scrape some of the white off at the places where the trail boards are to be cemented. I installed the bowsprit with my previously made hardware and also installed the lower stay. Then it was time for me to drive down to see my urologist / oncologist for the 3 month visual check. I got a little scare last week. His assistant called me and told me that the lab found questionable stuff in the urine sample. Well, when the doc looked inside the bladder he was very pleased and told me that it looked perfect, better then three years ago when the cancer was found, not to worry about the lab findings. This was good news and I'm a very happy camper After I came back I had to get my passport pics taken and complete my passport renewal forms. Gwen wants to mail them out tomorrow. Passports, did he say passports? Yup, Gwen and ur daughter Marianne cooked up a plan to go to the Netherlands this June for three weeks!!!!!! Okay, I had some extra time and installed the mast. I also installed the fore stay. I used 0.1 mm brass wire for both the bowsprit and fore stay instead of the kit suggested black thread. To simulate turnbuckles I used small pieces of 1 mm brass tube. I had to drill these out with a #72 drill bit so I could double the wire back through them to secure it and then a touch of solder. I think that I really need to make the display / mounting board for this little thing to give me a steady base for the rest of the rigging. The kit suggested one is a joke and this little boat deserves something nicer. I have a small plank of basswood that I can shape on my mini router and then stain it in oak, walnut or something like that. I have two nice looking pillars for the keel to rest in. We'll see how this basswood idea works out. I looked in the craft sore but they had nothing I could use that looked anywhere near decent. Okay, here are a few pics of today's efforts. This is a close-up pic taken with my Canon 100 mm macro lens. I was too lazy to get my tripod and set the aperture smaller for better depth of field. Here you can see the bolt I made a few days ago with two washers and a nut. You can also the fuzzies from that #*^%@( boxwood on the samson post. Looks like I need to take care of that too. Same camera setup. Here we have a washer and the nut "screwed" on. I secured it with a dab of CA. I don't think that bowsprit is going anywhere soon Same camera setup. Here you see the backstay installation. You can also see where I scraped off some of the paint for the trail boards. Cheers,


- 176 replies
-
- 14
-
-
- muscongus bay lobster smack
- Midwest Products
- (and 1 more)
-
Thanks everyone for looking in and your like votes, it's much appreciated. Hey George, you know women, they have always something to hmmmm, point out Yeah, Gwen pointed out a few raggedy edges from the masking tape. Old eagle eyes Gwen but I'll try to clean them up as best as I can. Yeah, I like the green paint too, it's the same color I used on the model of her Friendship sloop. Hi Popeye, Yes, I love the paint as well. A sofa ??????? The crew should be happy with two bunks with mattresses and blankets, a cupboard and table No wet bar yet though. Cheers,
- 176 replies
-
- 3
-
-
- muscongus bay lobster smack
- Midwest Products
- (and 1 more)
-
Great Scott Popeye, you are going like gang busters with this build! Marvelous detail work. Cheers,
- 956 replies
-
- 2
-
-
- andrea gail
- trawler
- (and 1 more)
-
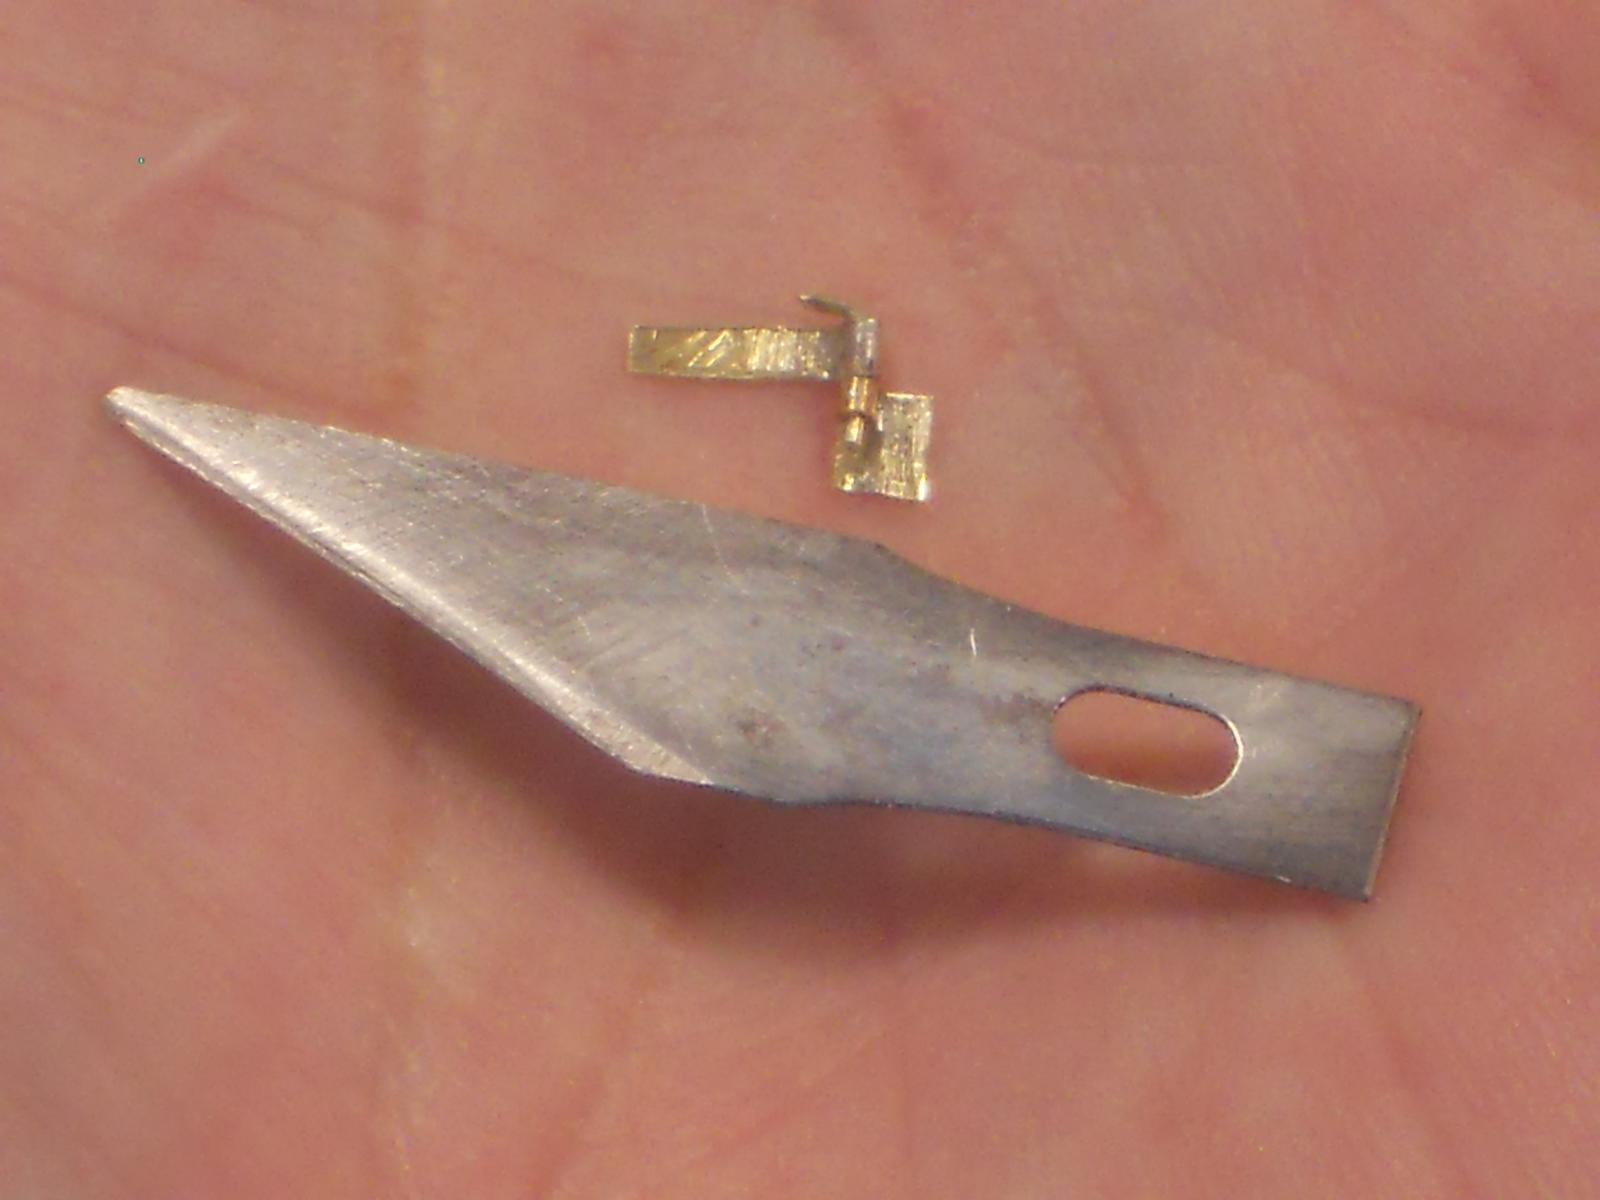
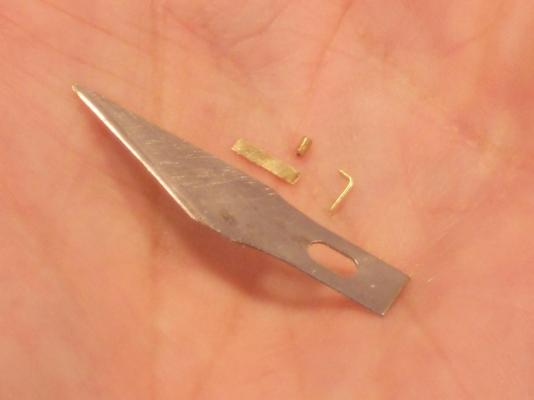
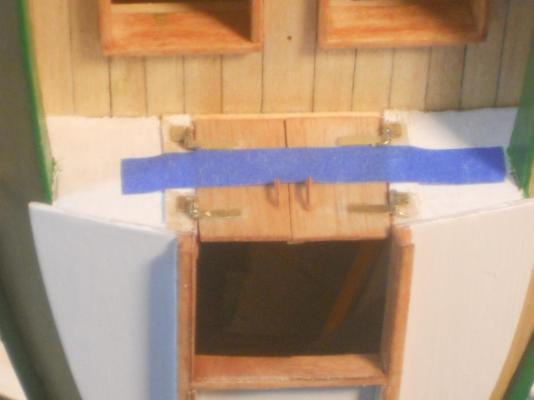
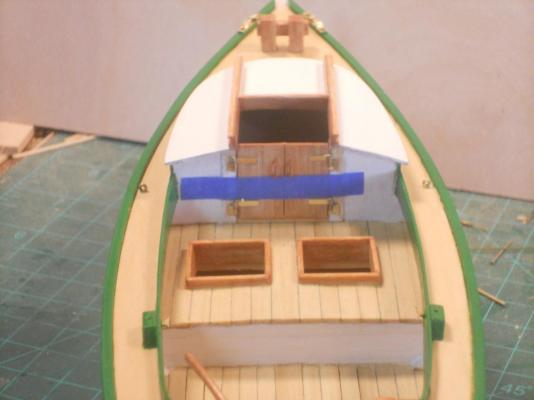
Well, it's been a few days but I was not sitting on my hands. Had to do other things that took priority over model building. Yes, there are a few more important things - - - when the Admiral suggests that something REALLY needs taken care of - - - In any case, I painted the trim work green and put some poly on the decks. Looking okay but the trim needs some touching up. That'll be an ongoing thing with me I'm afraid. I keep seeing things that could be just a tad better. While the paint was drying I started making the cabin door hinges from 0.1 mm brass shim, 1 mm brass tube with 0.5 mm brass rod for the hinge pins. All very fiddling work but it went off like clock work, no problems. Next came the job cementing these little parts to the doors and then the frame parts to the door frames. First I cemented the door parts to the doors with CA. Okay, now to cement the frame parts. I taped booth doors together front and back with masking tape and then set them int the door opening. As the pics show I also secured the doors to the bulkhead. Hey, my mommy didn't raise a dummy I then clamped the model into my small Proxxon vice by the cutwater so she stands bow down. This way the door bulkhead is now horizontal. The small fame parts could now be placed on the frames and slid into the hinge pins. So far so good. A little touch of CA and holding them tight against the frames till te CA had done its grasping job and presto, job done. Now I had to give it the hingeing test and wouldn't you know it, one of the tubes was not soldered on correctly. So, that one had to be redone and reinstalled. No problem, just another 15 minutes and it was back on. The only problem is that the doors won't open all the way when the fish bin hatches are on. They'll just have to squeeze through a narrower opening, sorry guys I could now finish with paint touch-up on the door bulkhead. I'll have Gwen, the Admiral, look at it tomorrow and let me know where else I need to touch-up. If the paint job is satisfactory then I can start with putting the bowsprit on and rigging that. Then the mast and rigging it. Hmmm, we are slowly getting there. The sails will be a challenge for me Here are a few pics of my efforts of the last few days. This shows the three parts that make up the door parts for the hinge. A similar setup applies for the frame parts, except that I made them smaller as shown in the next picture. This shows the completed door hinge assembly. This shows how I jigged the doors so I can cement the frame ends to the frames. Sorry, I didn't take a pic with the boat bow down in the vice but it worked like a charm. This is another shot of jigging the doors. This shows the completion of the door hinge installation. I think it looks a little better then the paper hinges I had on previously. This is taken before I repainted the bulkhead. This is how my little sloop looks like as of today. Cheers,


- 176 replies
-
- 13
-
-
- muscongus bay lobster smack
- Midwest Products
- (and 1 more)
-
Mayflower by SawdustDave - Finished
Piet replied to SawdustDave's topic in - Build logs for subjects built 1751 - 1800
Gudgeons and pintles are looking mighty fine there Dave !! Cheers, -
Oh, how I would have liked seeing the looks on the faces of the people in Mystic walking around with half a tree What a great price to have John and a nice idea for it. Actually, the O19 is not quite finished yet, still a few details to add like the dinghy cradle and your mine bun door hinges Then the display board and case. I need to finish the lobster smack first before I can het back to my father's sub. Your Morgan is looking really nice. Say hi to Diane for me and Cheers to you,
- 2,250 replies
-
- 2
-
-
- model shipways
- Charles W Morgan
- (and 1 more)
-
Hang in there Jesse, we are all rooting for you. Cheers,
- 607 replies
-
- 1
-
-
- scottish maid
- artesania latina
- (and 1 more)
-
Yup, them chainplates are looking mighty fine John! Cheers,
- 2,250 replies
-
- 1
-
-
- model shipways
- Charles W Morgan
- (and 1 more)