

michael101
-
Posts
441 -
Joined
-
Last visited
Content Type
Profiles
Forums
Gallery
Events
Posts posted by michael101
-
-
3 hours ago, gsdpic said:
Looks like you are off to a good start on this beauty. I'll follow along.
Thank you Gary
-
Hello Yves nice to see you in my build log
you right , it will be much better with the keel
‘and about the step with the nails I’m not using this method but it ok to do it like that because it’s the first plank , there is second plank that will cover it
")
-
Hello friends
I’m very exited to start sharing with you my build log of the Riva Aquarama 1/10 of Amati
my review for the kit
its outstanding beautiful kit everything it’s high class
I hope you guys enjoy the work and the process of my build log
and please feel free to add your comments
First of all I had to send the box for framing 😎 (even the box made of high class material and beautiful printing )

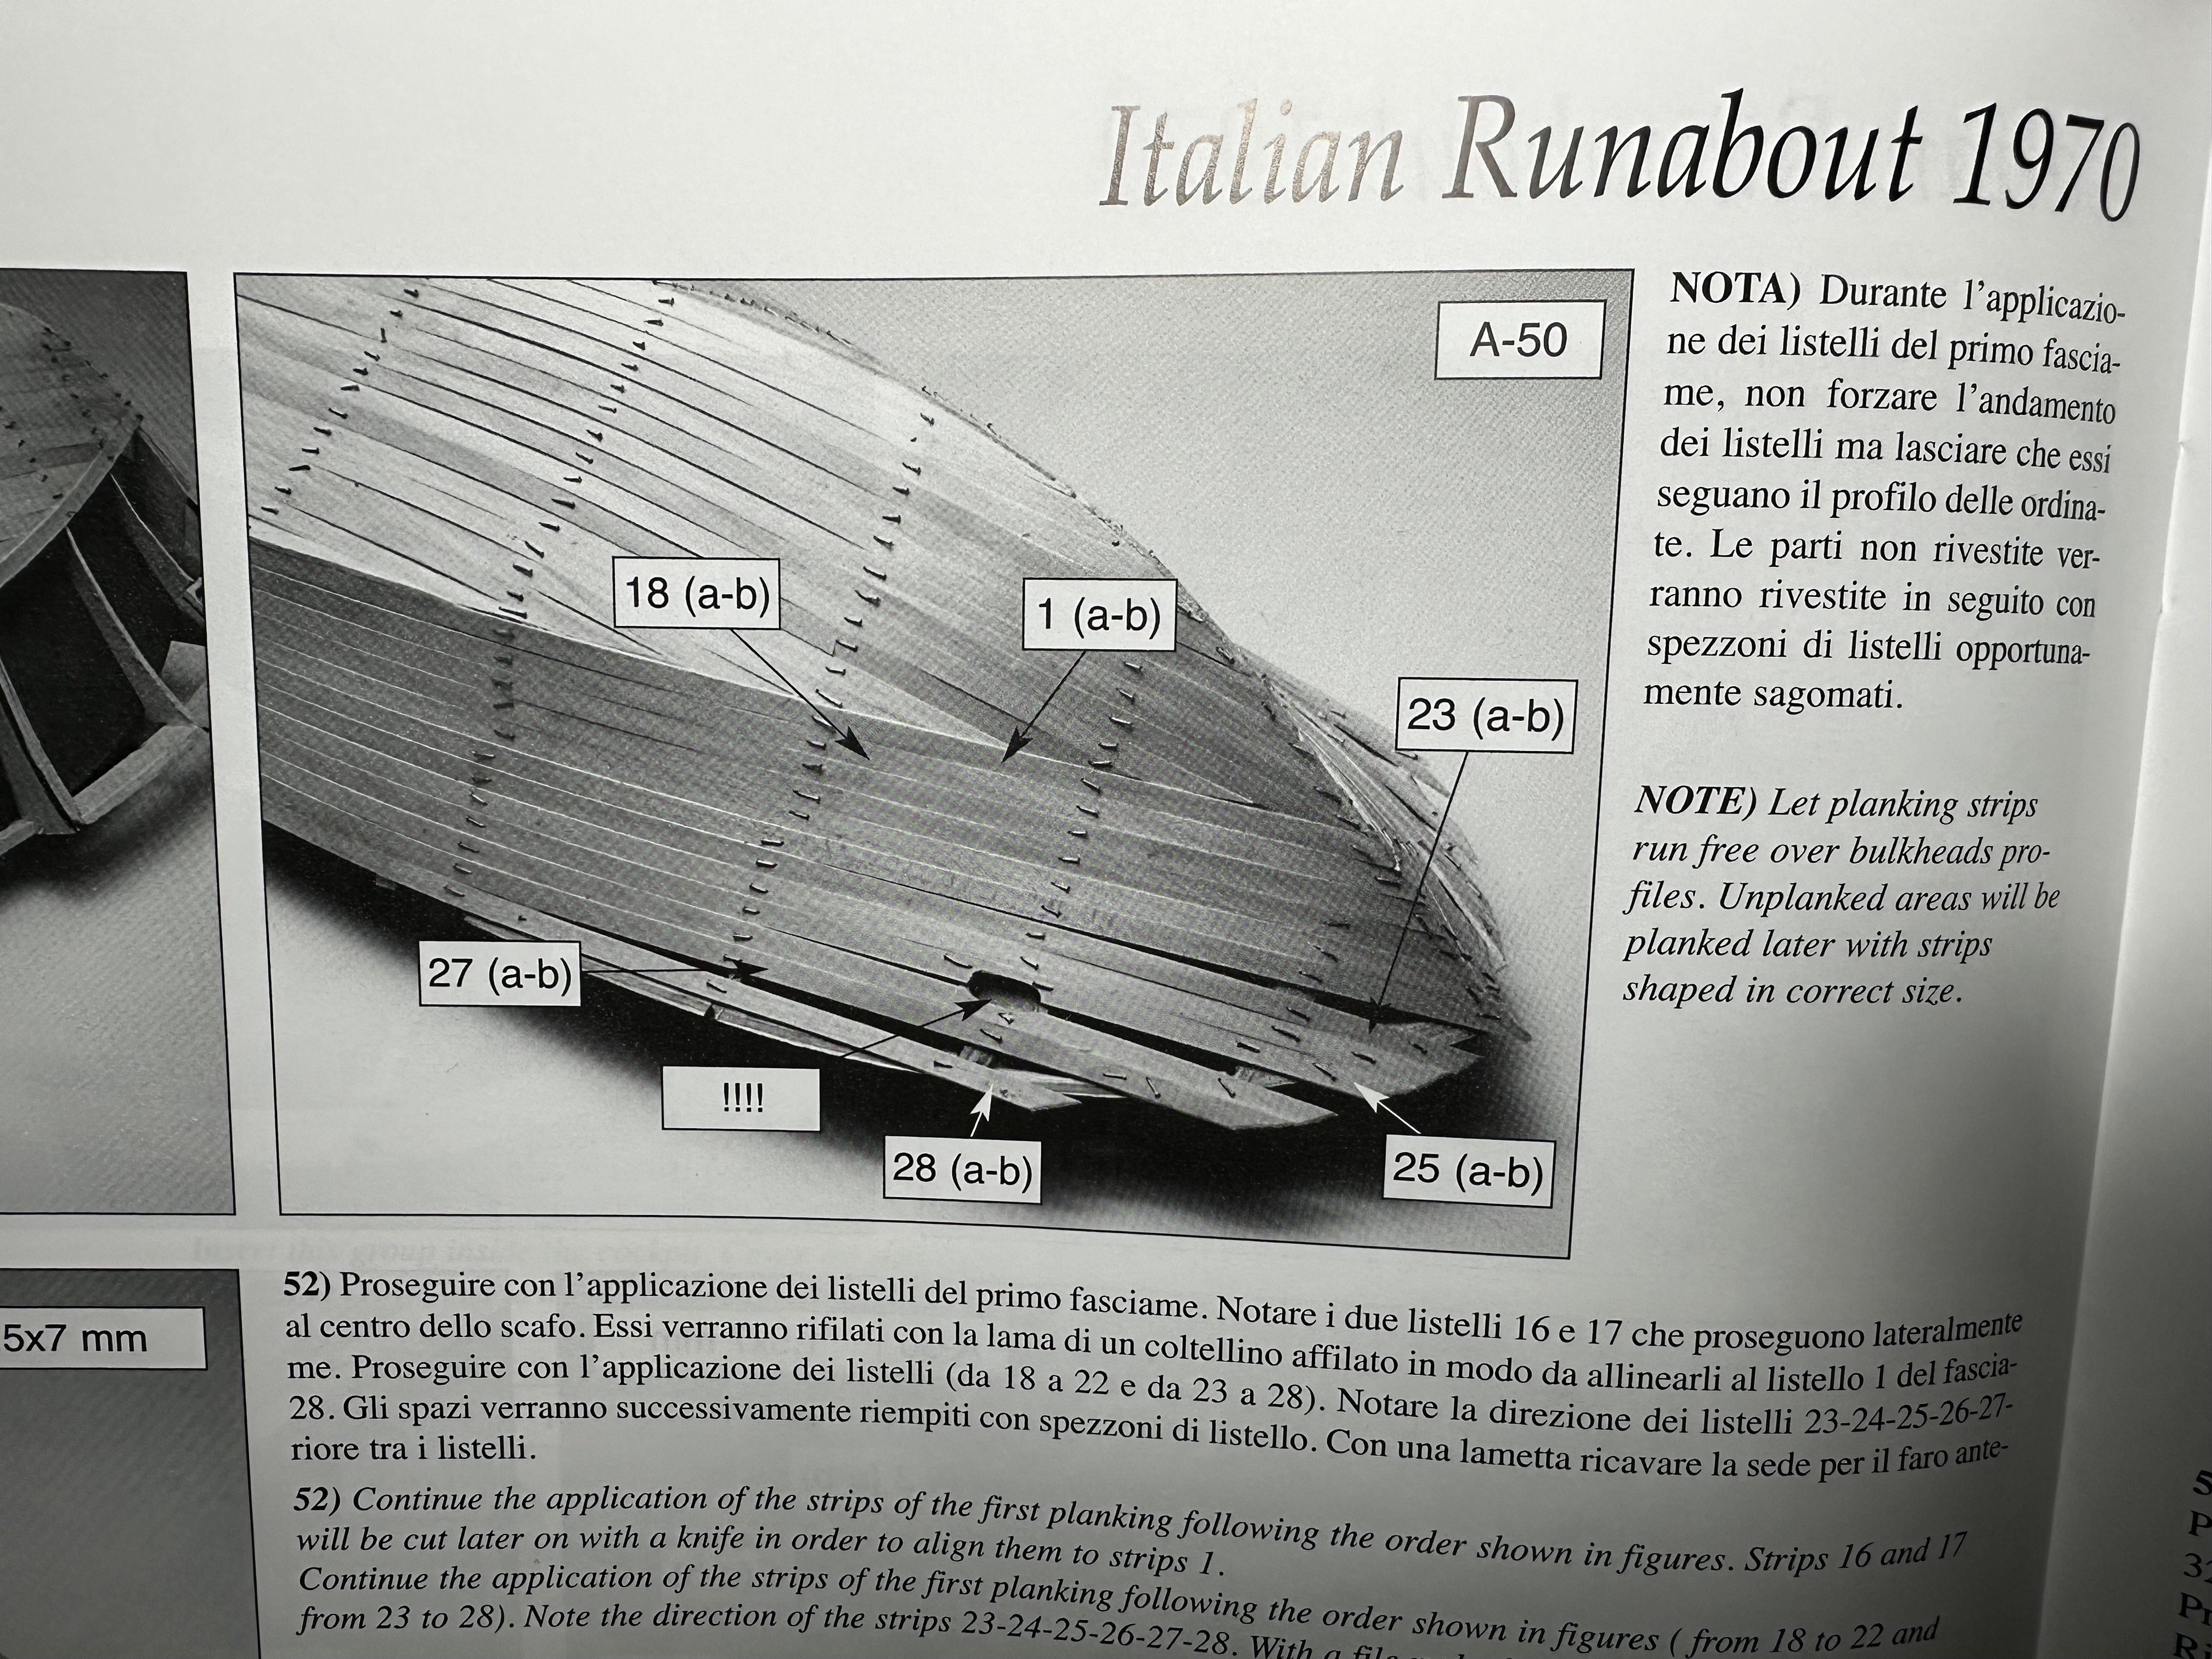
For starting I saw the manual that told you to plank the boat over the keel and totally cover it at the bow on this why :

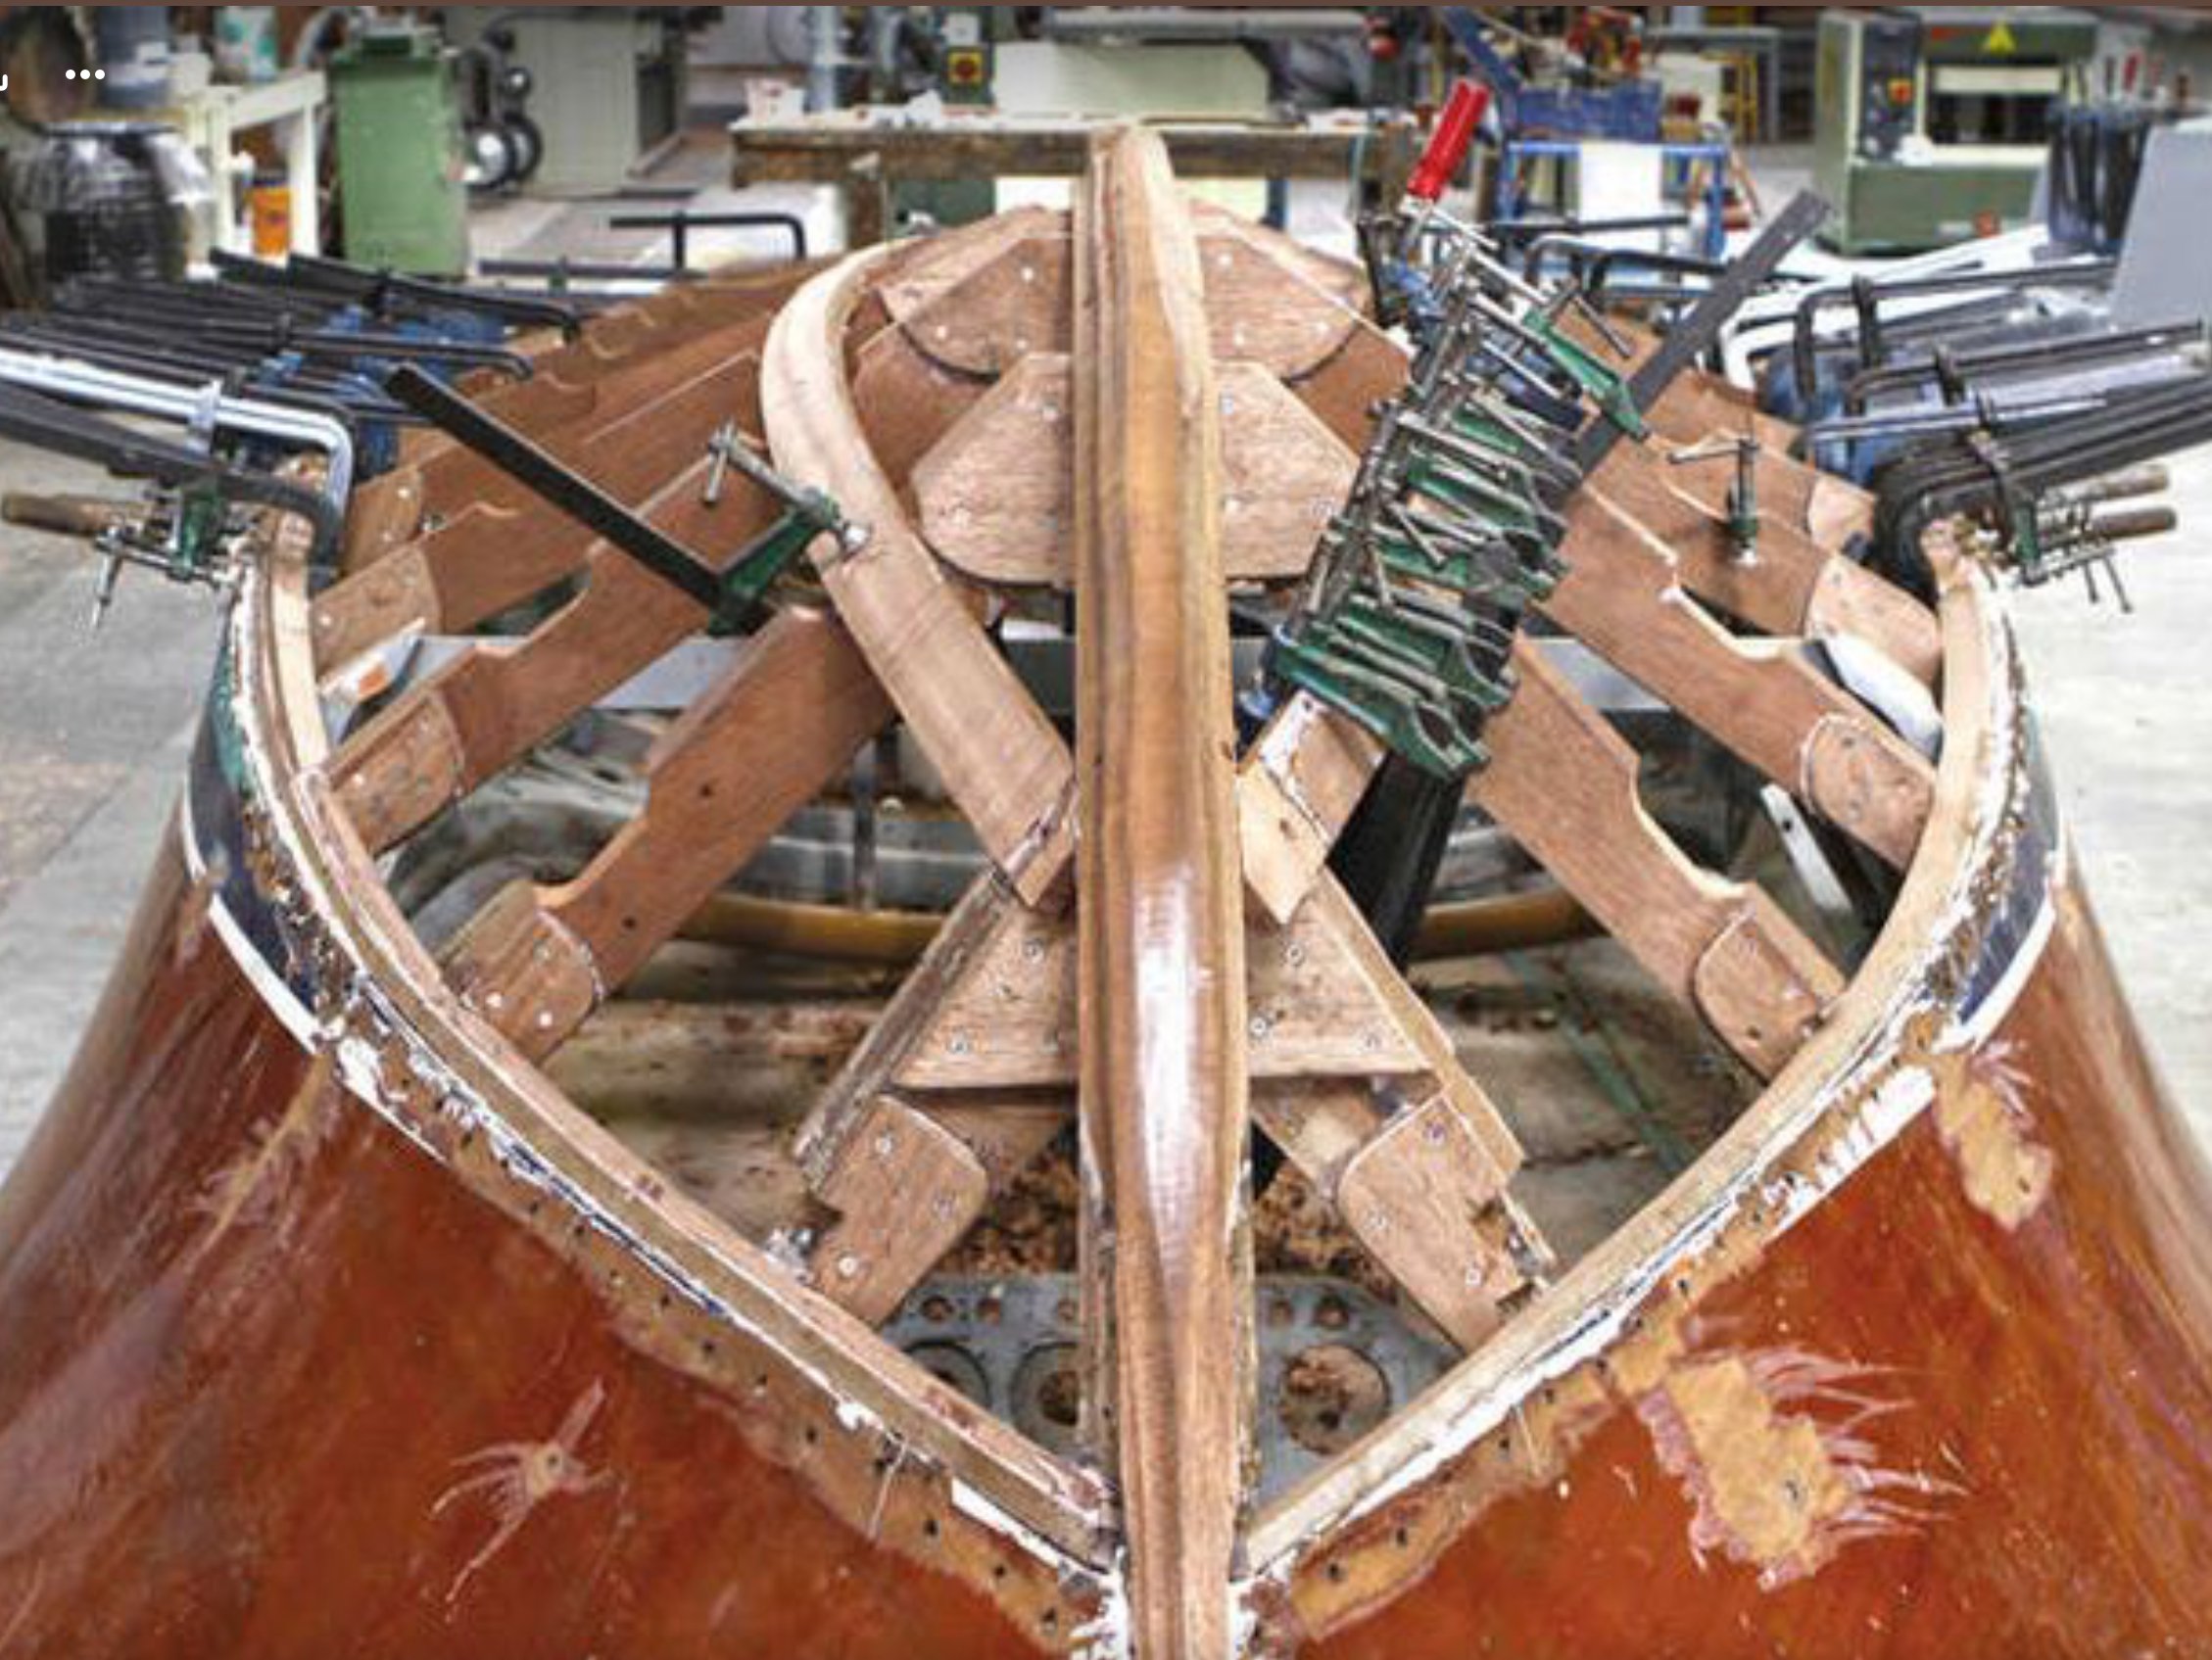
But I didn’t found it aesthetic and after searching pictures of the original boat I did found that the original boat do have keel :

so I decided to add a keel for the boat ..
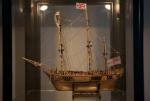
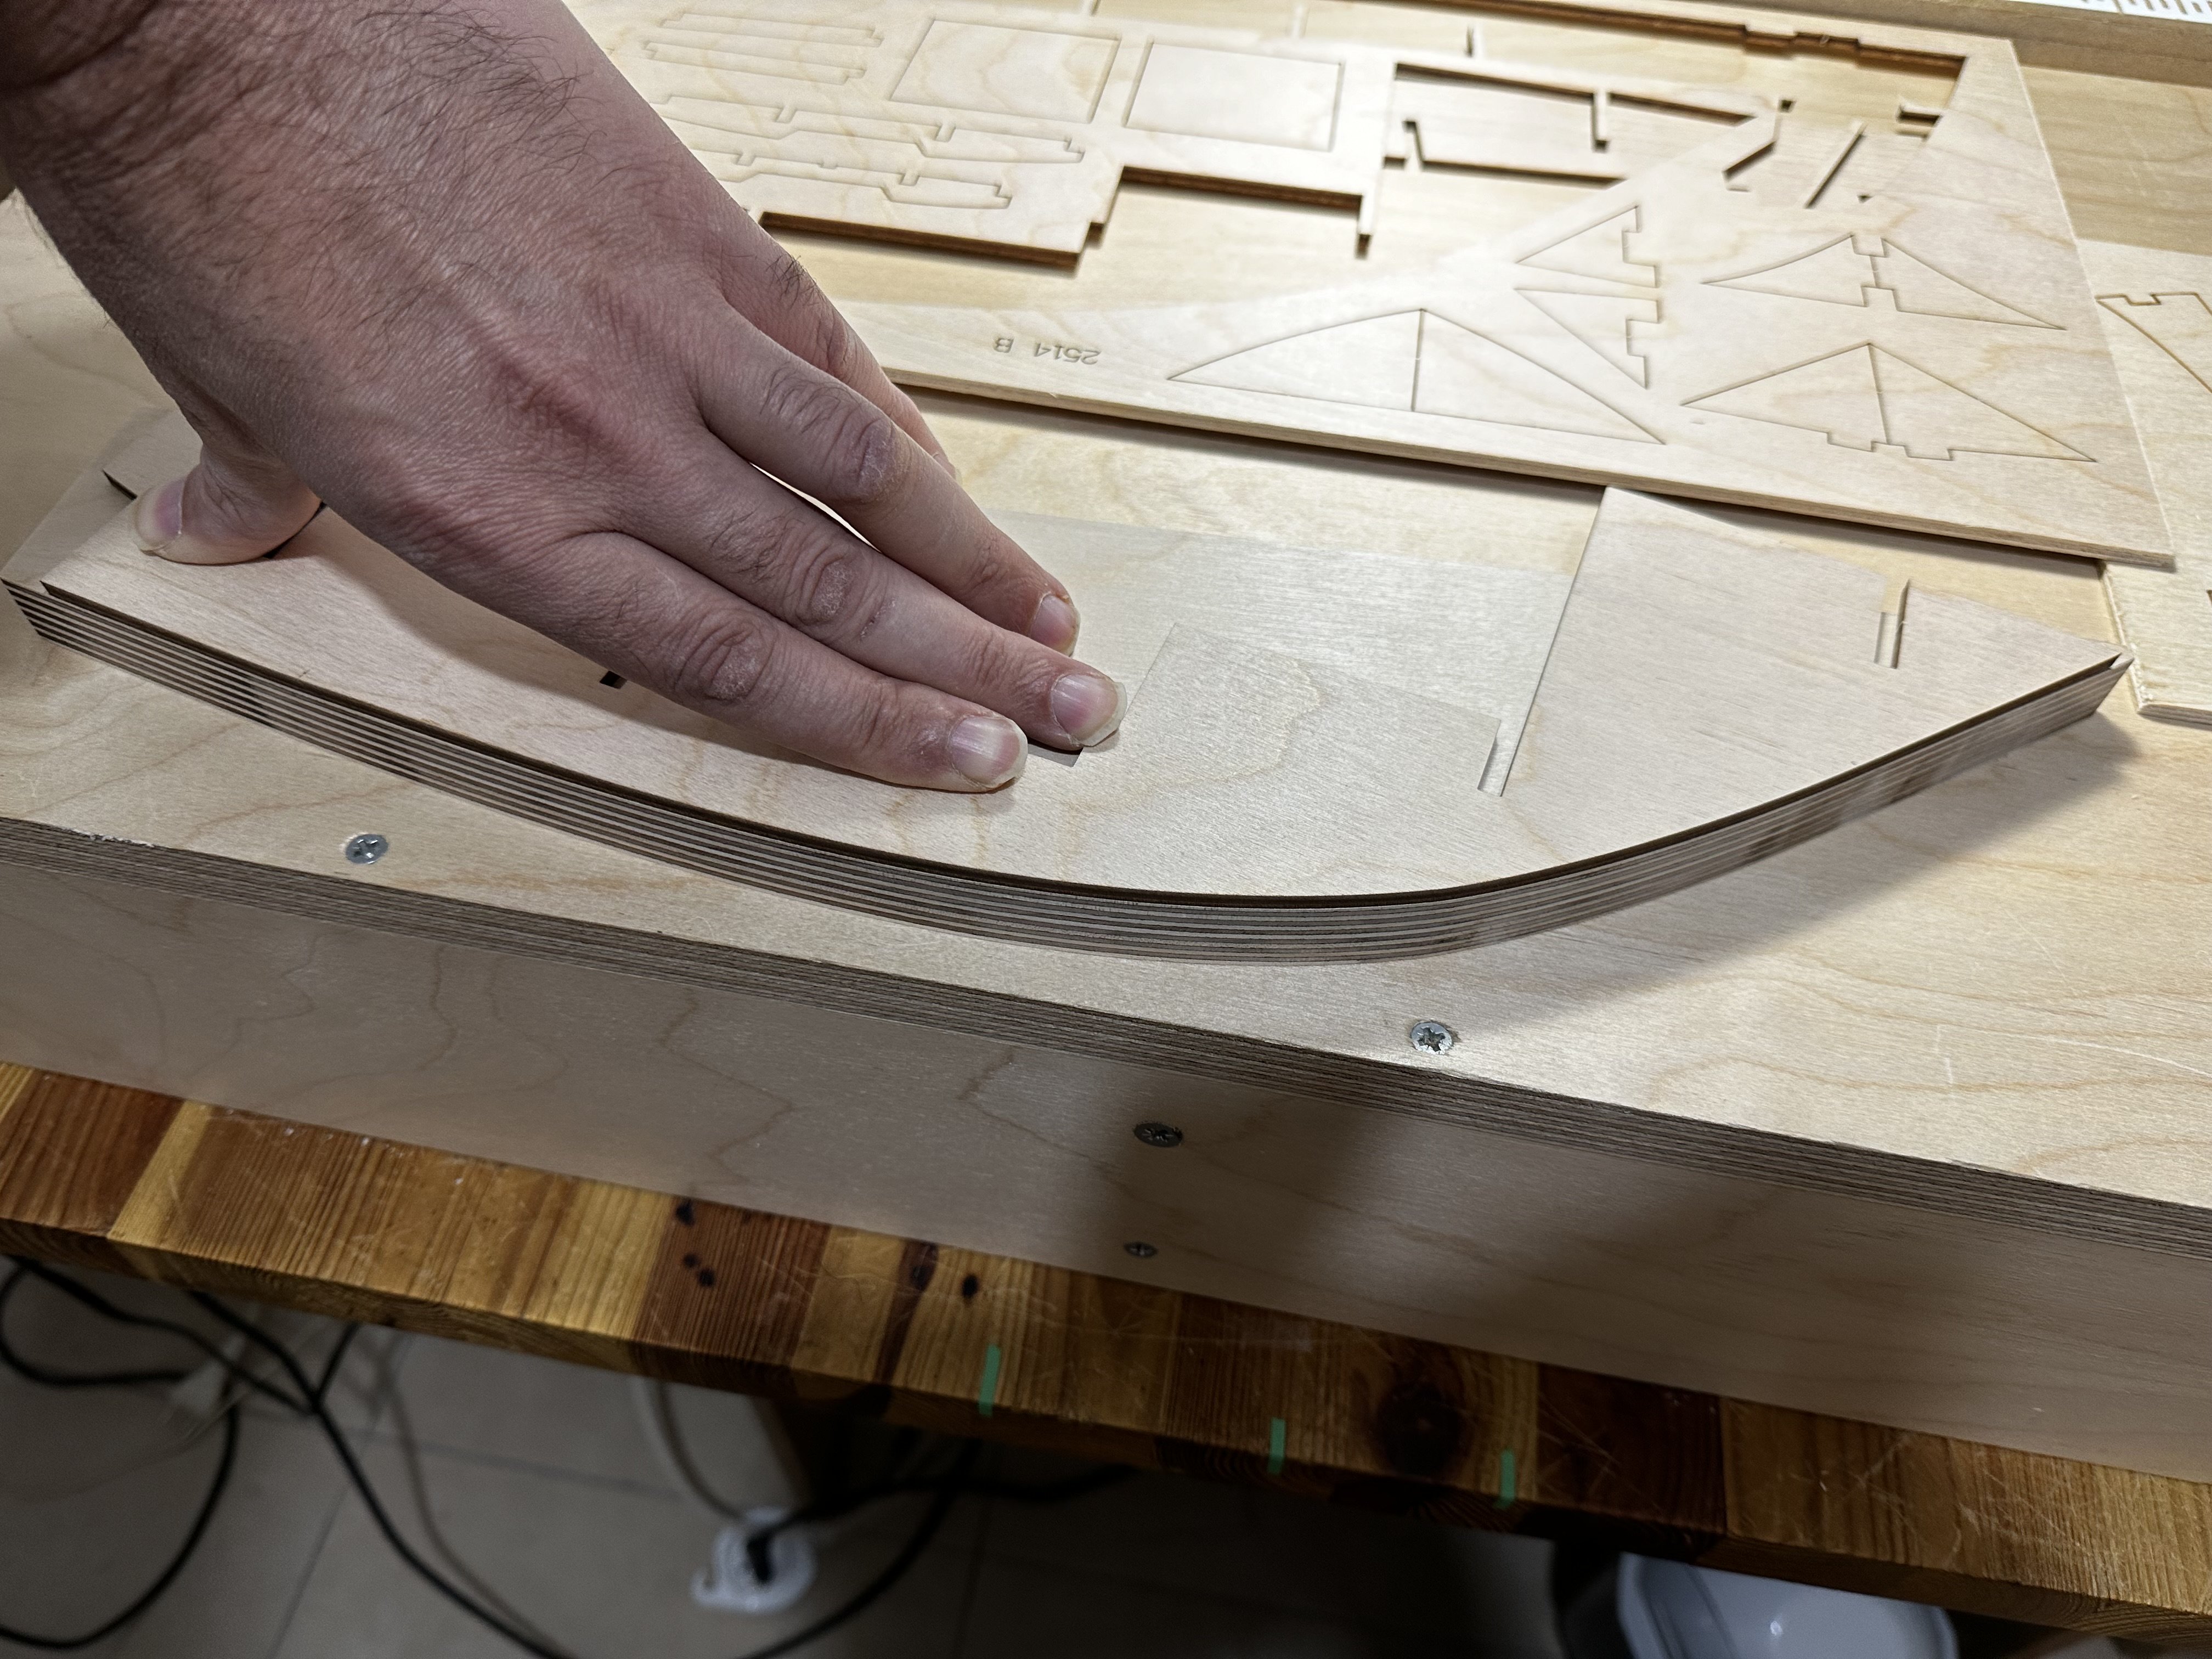
the thickness of the plywood it’s 4mm so I decided to add a keel of 2mm wide as following :
first of all I made a template of the exact curve of the bow by marking the hull on 18mm plywood than I cut it by scroll saw

and after all I made a notch with the router for putting the strips inside the template without having a problem of banding side way by mistake
this banding must be flat for side way because we want to add it exactly at the middle all over the hull and making a beautiful keel

I have cut the first strip from walnut because I didn’t want to spend a lot from the mahogany planks that came with the kit
and anyway the first strip will be covered by the bout planks from the sides
the first cut was 2*2 And all the rest was 1.5*2 from mahogany I made in total 1 strip of 2*2 and 3 strips of 1.5*2 so the new keel it’s 6.5mm (it’s a lot more than what I need but after the 2nd plank I will sand it down to be flat with the 2nd plank

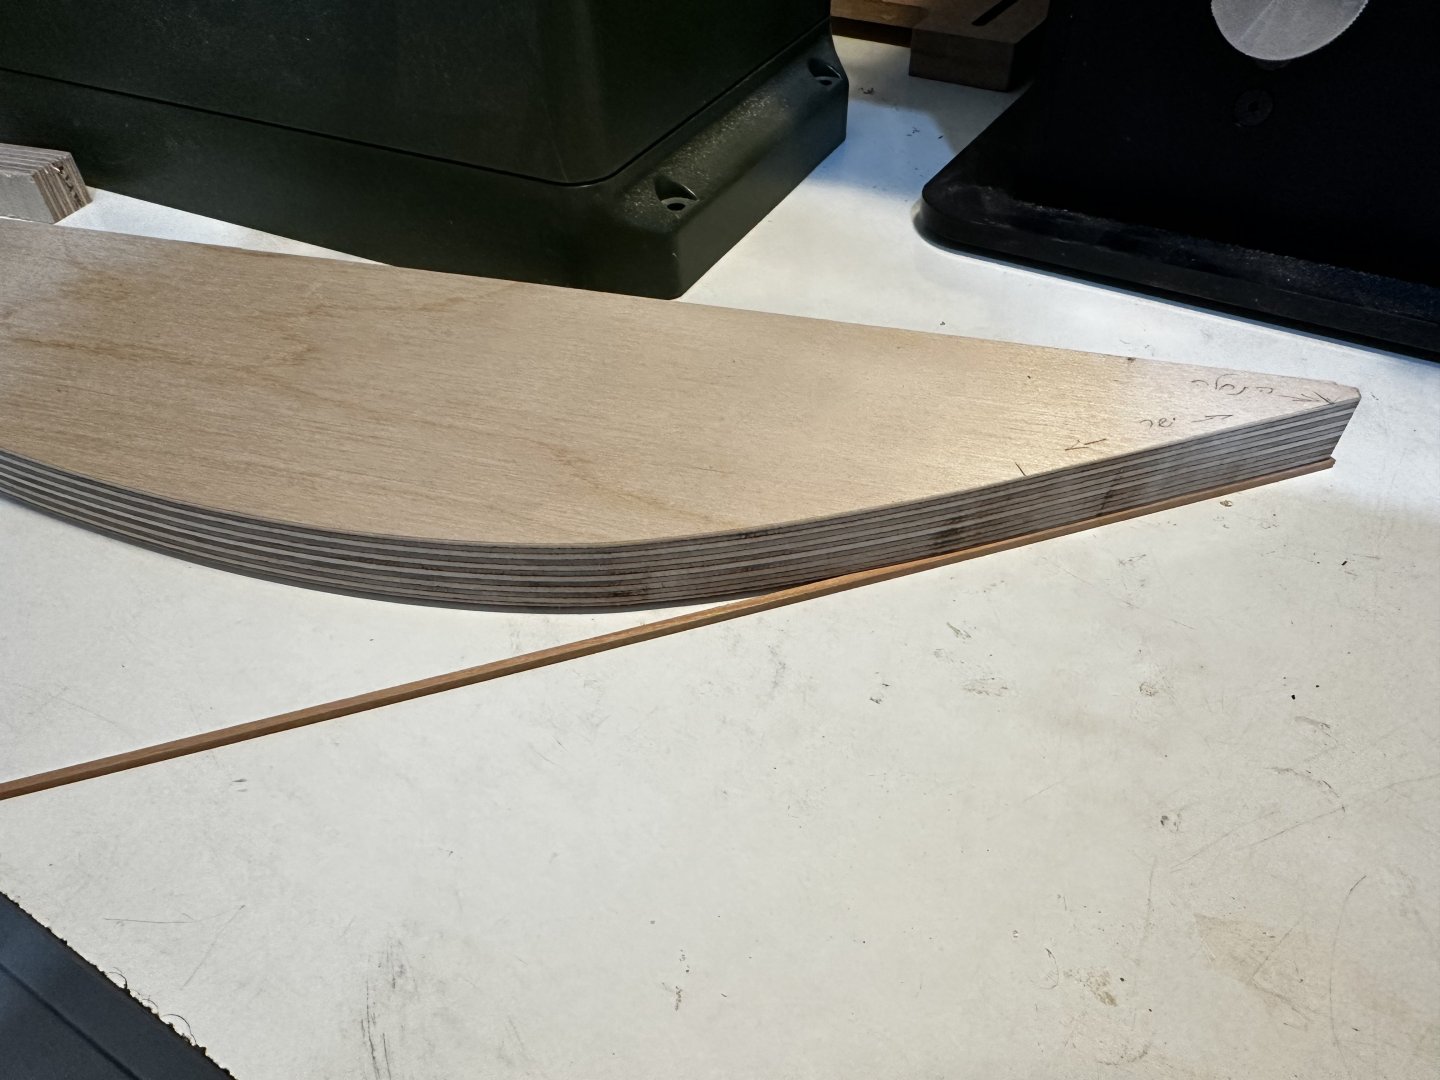

After banding the strips I add them to the hull by insert planks of 1mm underneath for gluing the new keel exactly at the middle of the hull
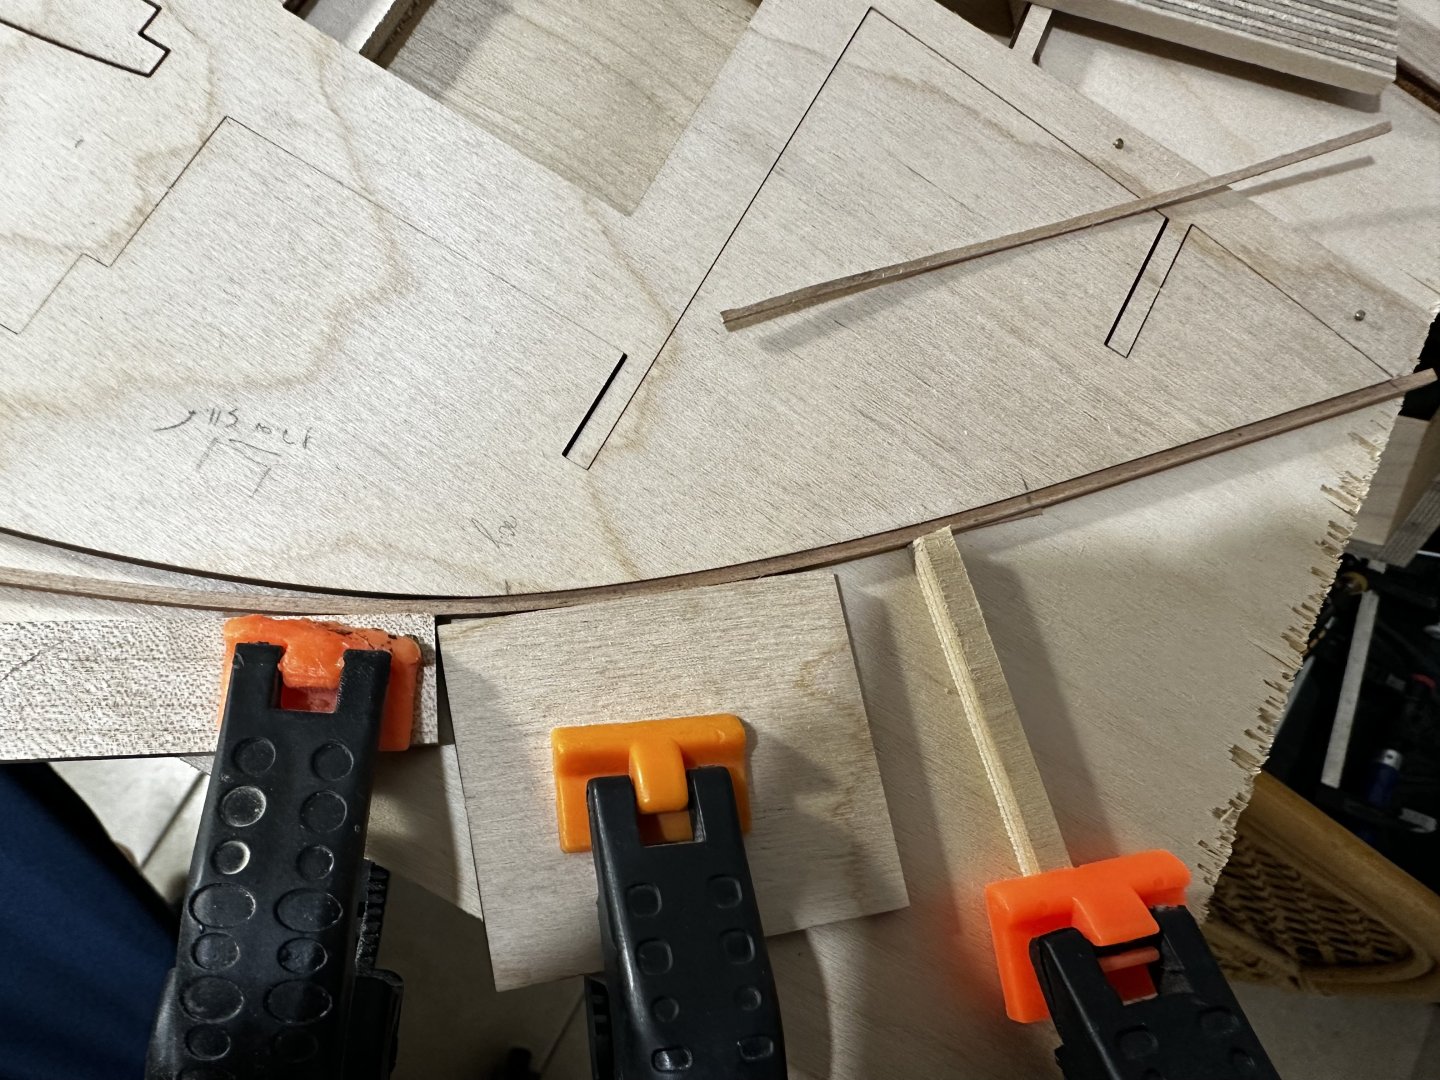
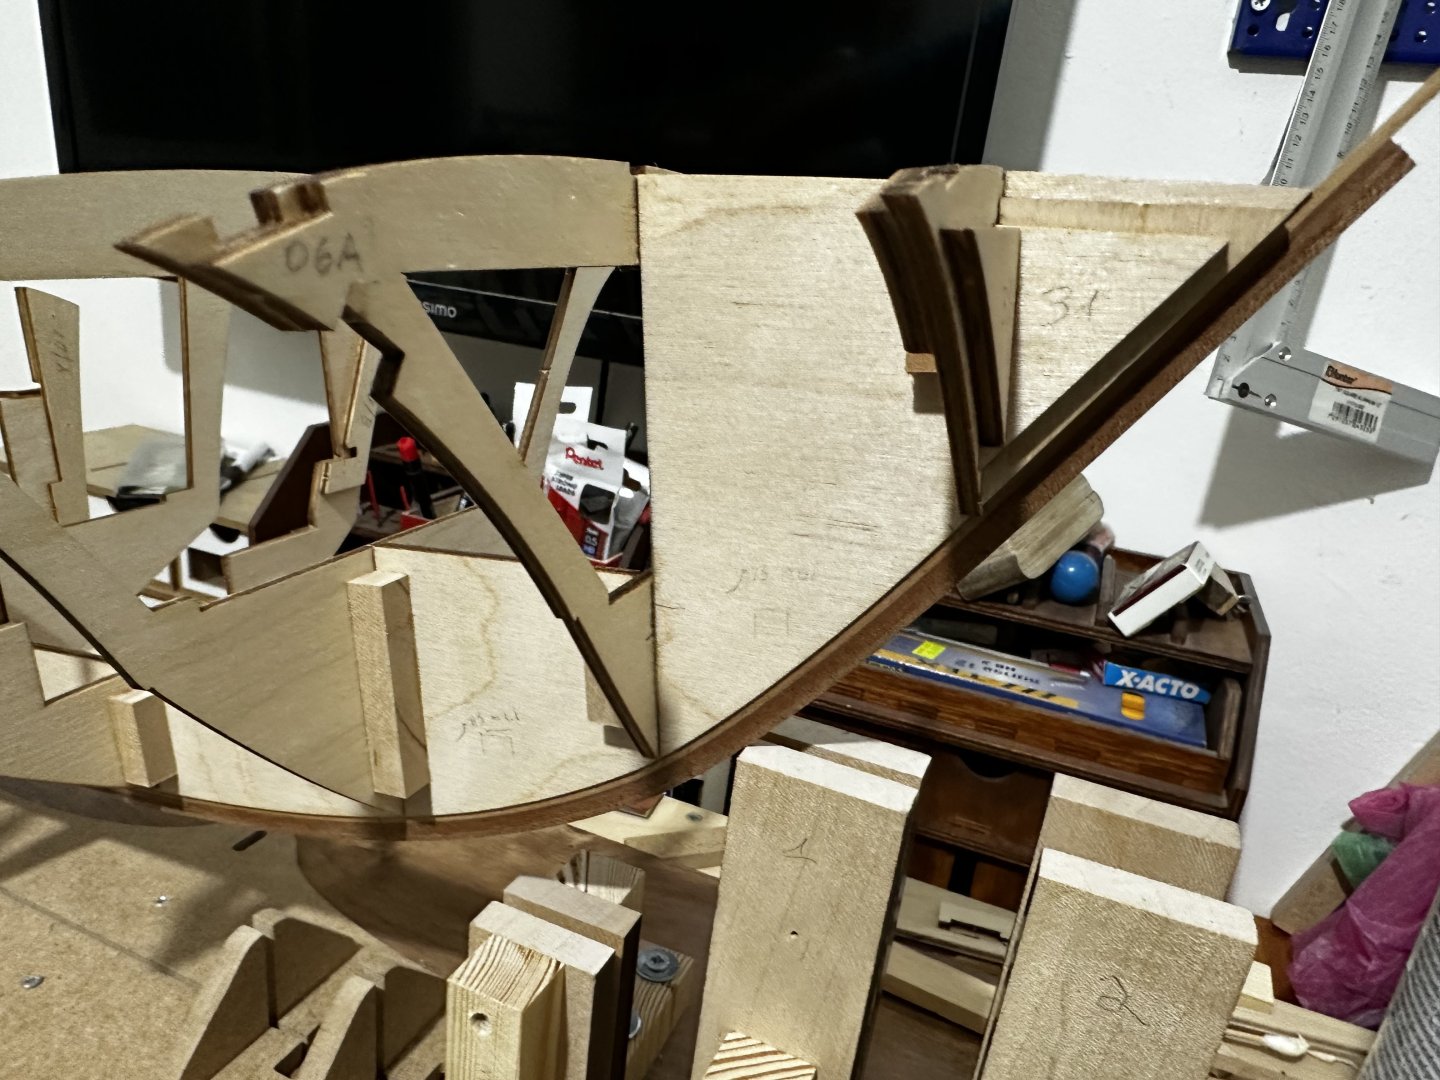
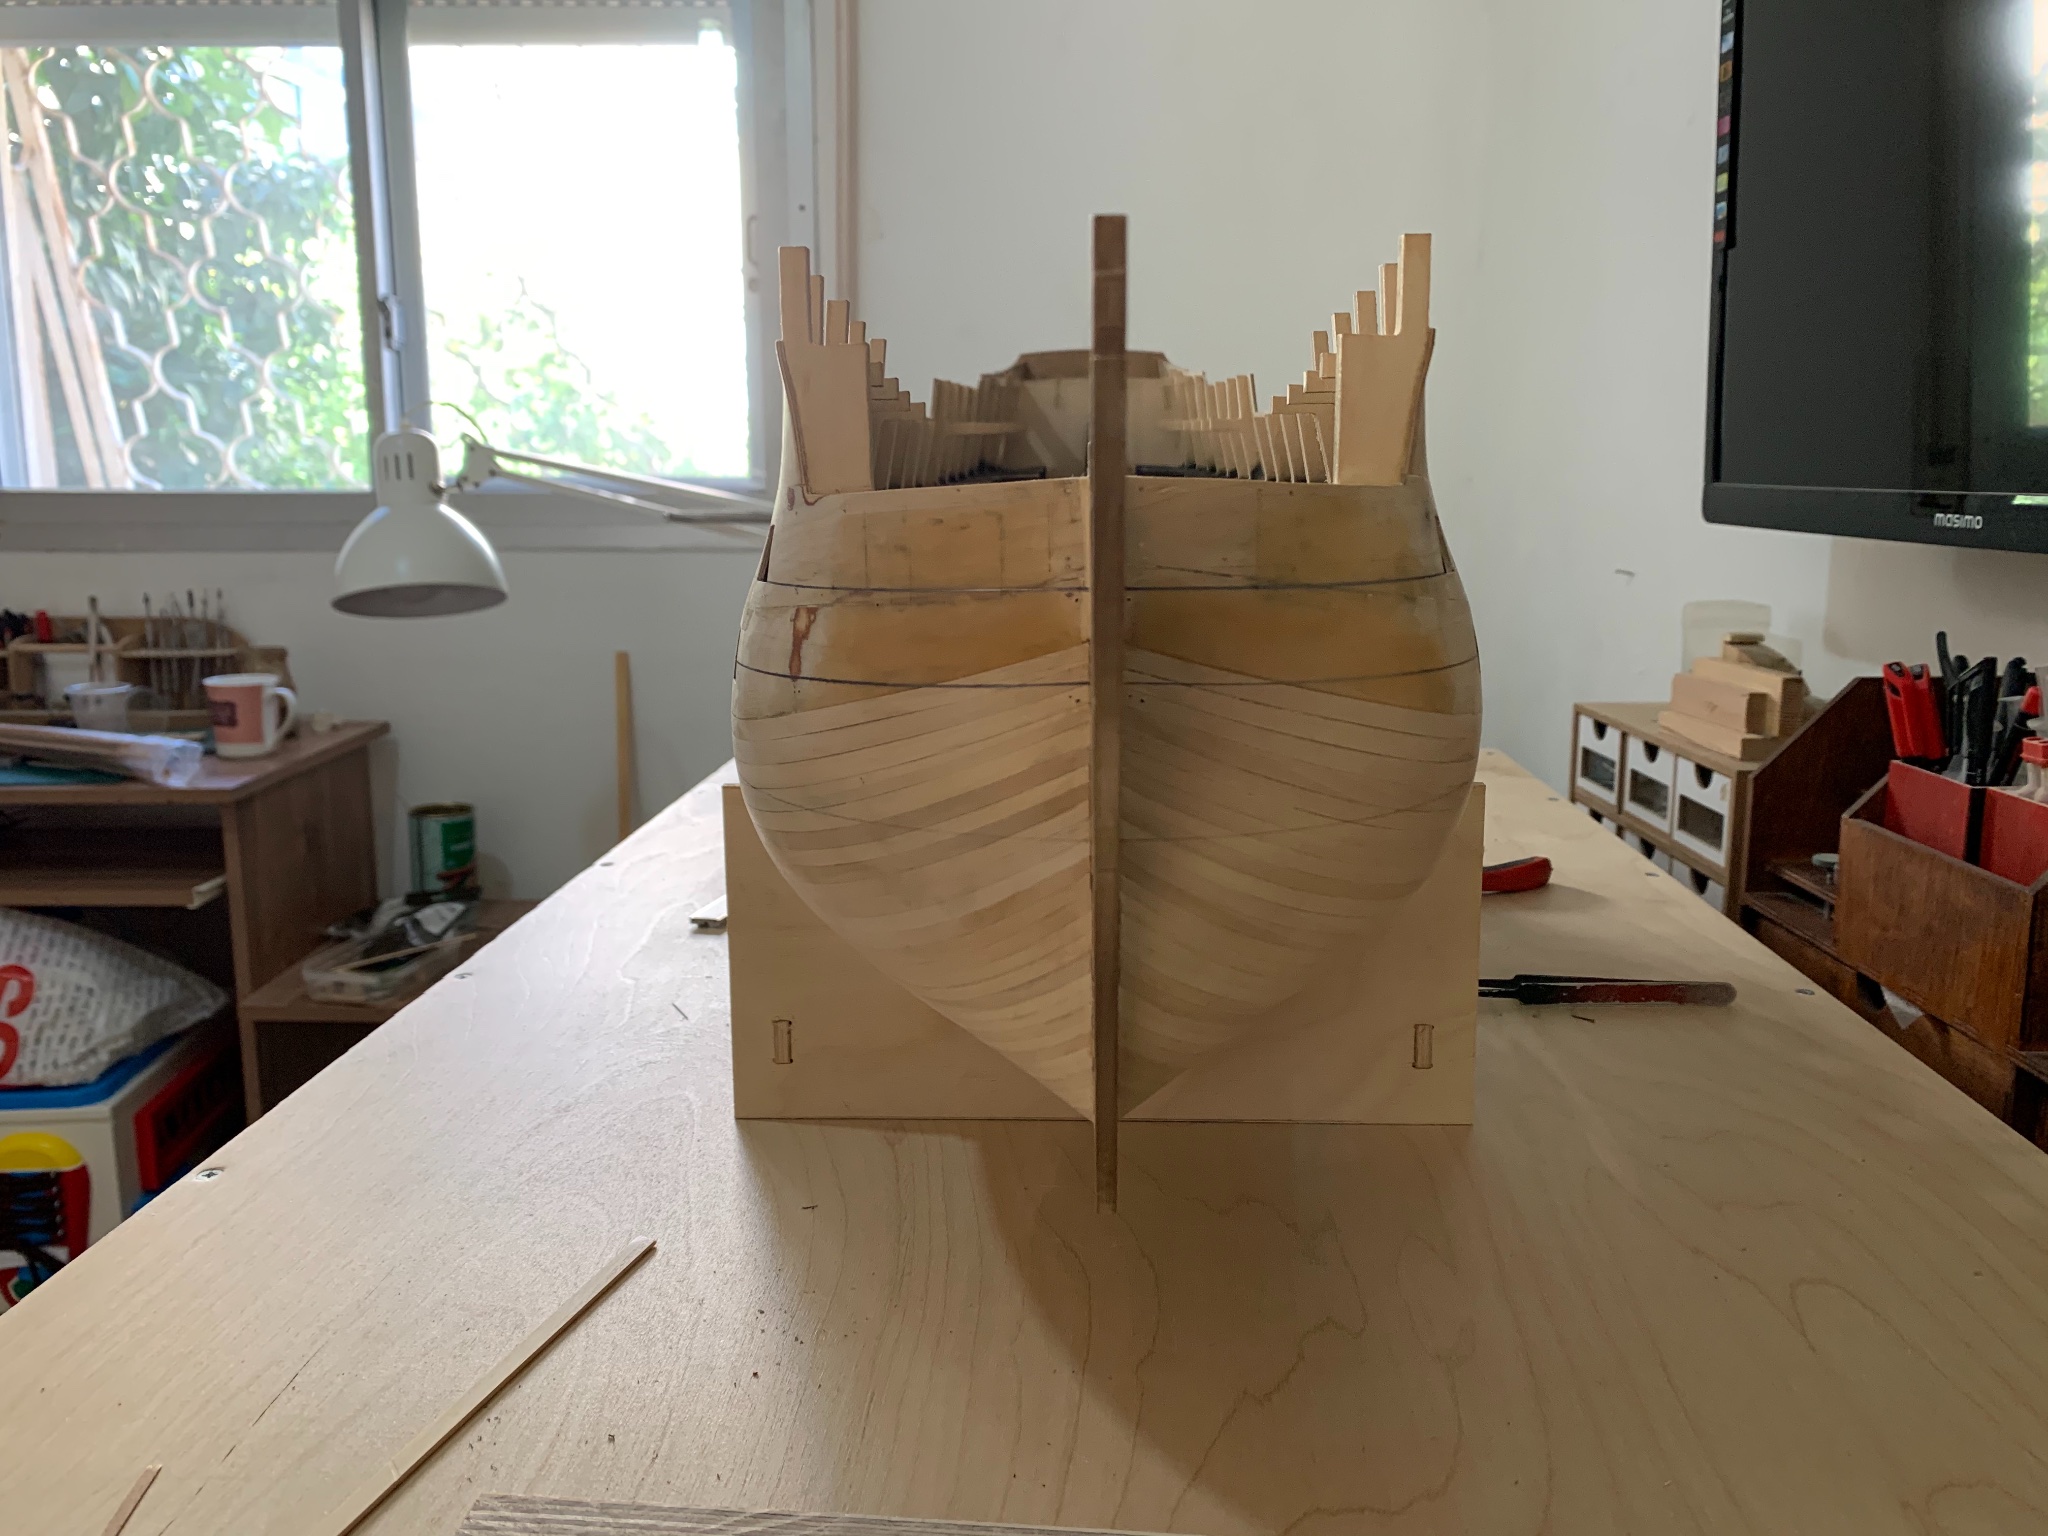
Here you can see the new keel I (took the hull out of the stand for shooting a picture )
-
The big question it’s how it will work on double plank .. you don’t want the first plank to move away
also the glue between planks ,if you will not glue them between you can get problem after a year (summer and winter time are changing the plank wide so you can get black spaces between planks )
- mtaylor and Quimp Slattery
-
 2
2
-
Hello friends ,
I’m about to start a new project ,
and I need to add 2*2mm strip to the keel (all over the the keel ..)
the boat will be use mahogany so the natural choice it’s to use the same wood for the finished keel
but to be honest I never used this kind of wood
and for me the best wood it’s walnut for making the finish shape of the boat ! The only problem it will not be the same colore of the planks
so what do you think is it Mahoney good wood for shaping 2*2 mm to be like a triangular or it’s not hard and compressed as walnut ?
I will be more than happy to hear your advice before starting the project (tomorrow morning I have a free day to start working on my new Riva aquarama project )
- Keith Black and mtaylor
-
2
-
-
The only thing I can say about this ..
it’s a piece of carton ! (I don't want to use ugly words out of respect for the forum)
today I worked all a day for square the main jig ! And nothing !!!!!! (I’m using the best square over the world the Kinex one !!!)
So if you working with that piece of carton don’t blame yourself why your ship it’s twisted !!!!
also it’s good for you to know about the “new model “ it’s made of 2 pieces and not from one solid piece !
so this post not relevant anymoreI’m very disappointed ! ! ! !
do a favor for yourself don’t spend your money on it !
-
-
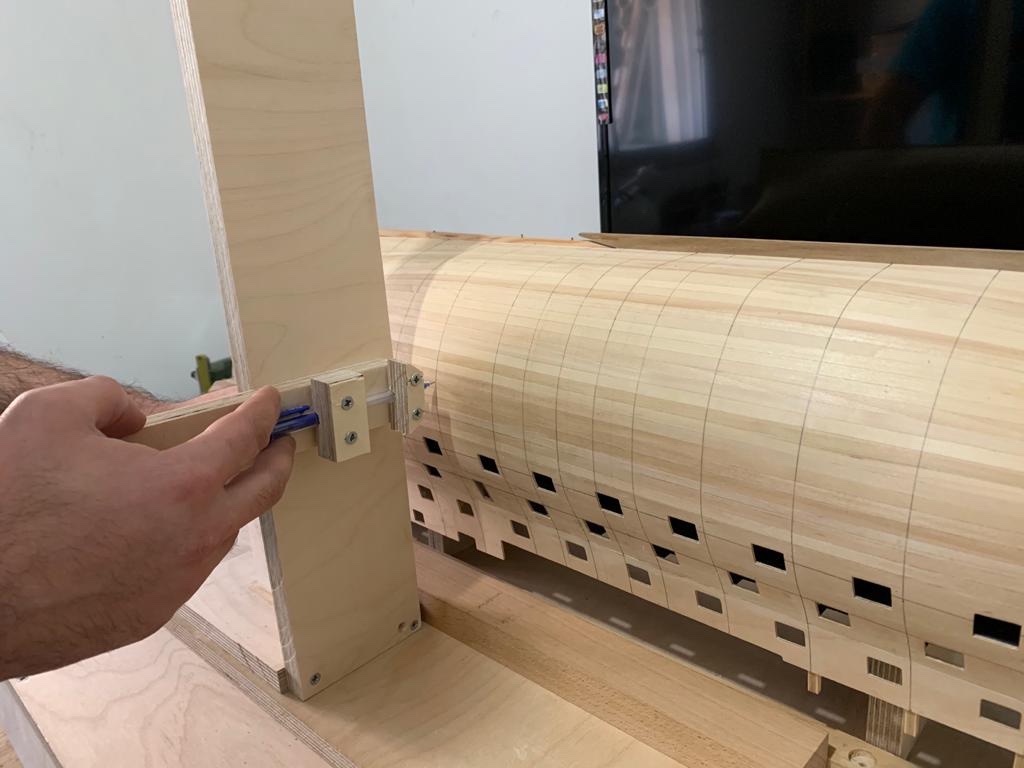
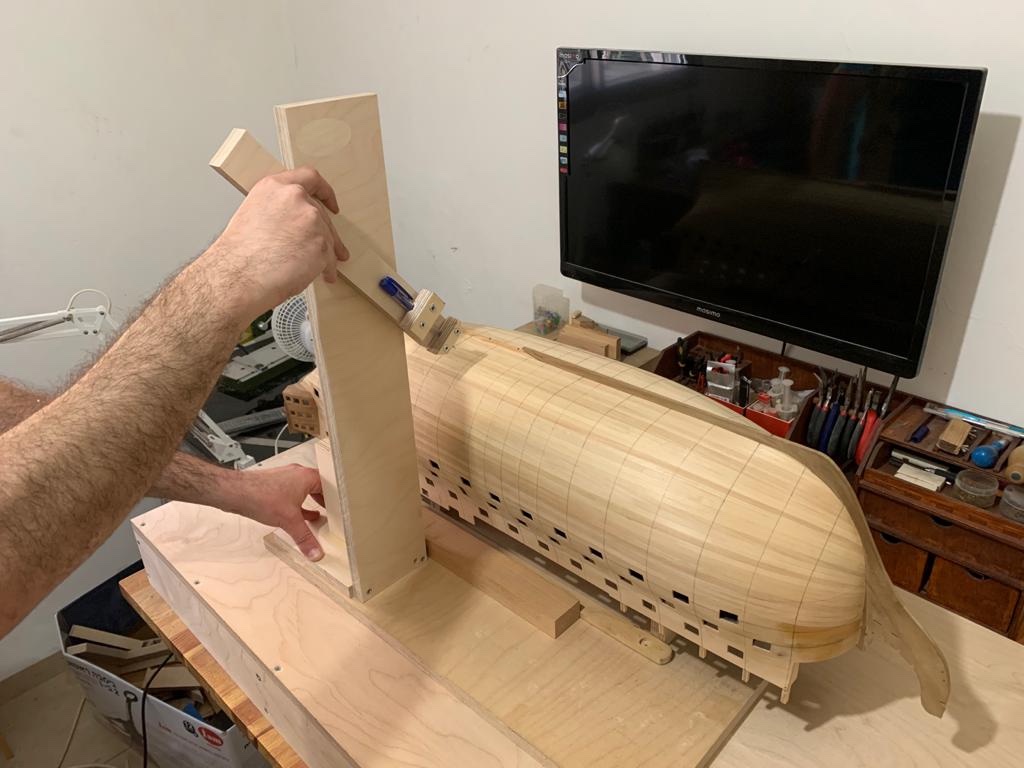
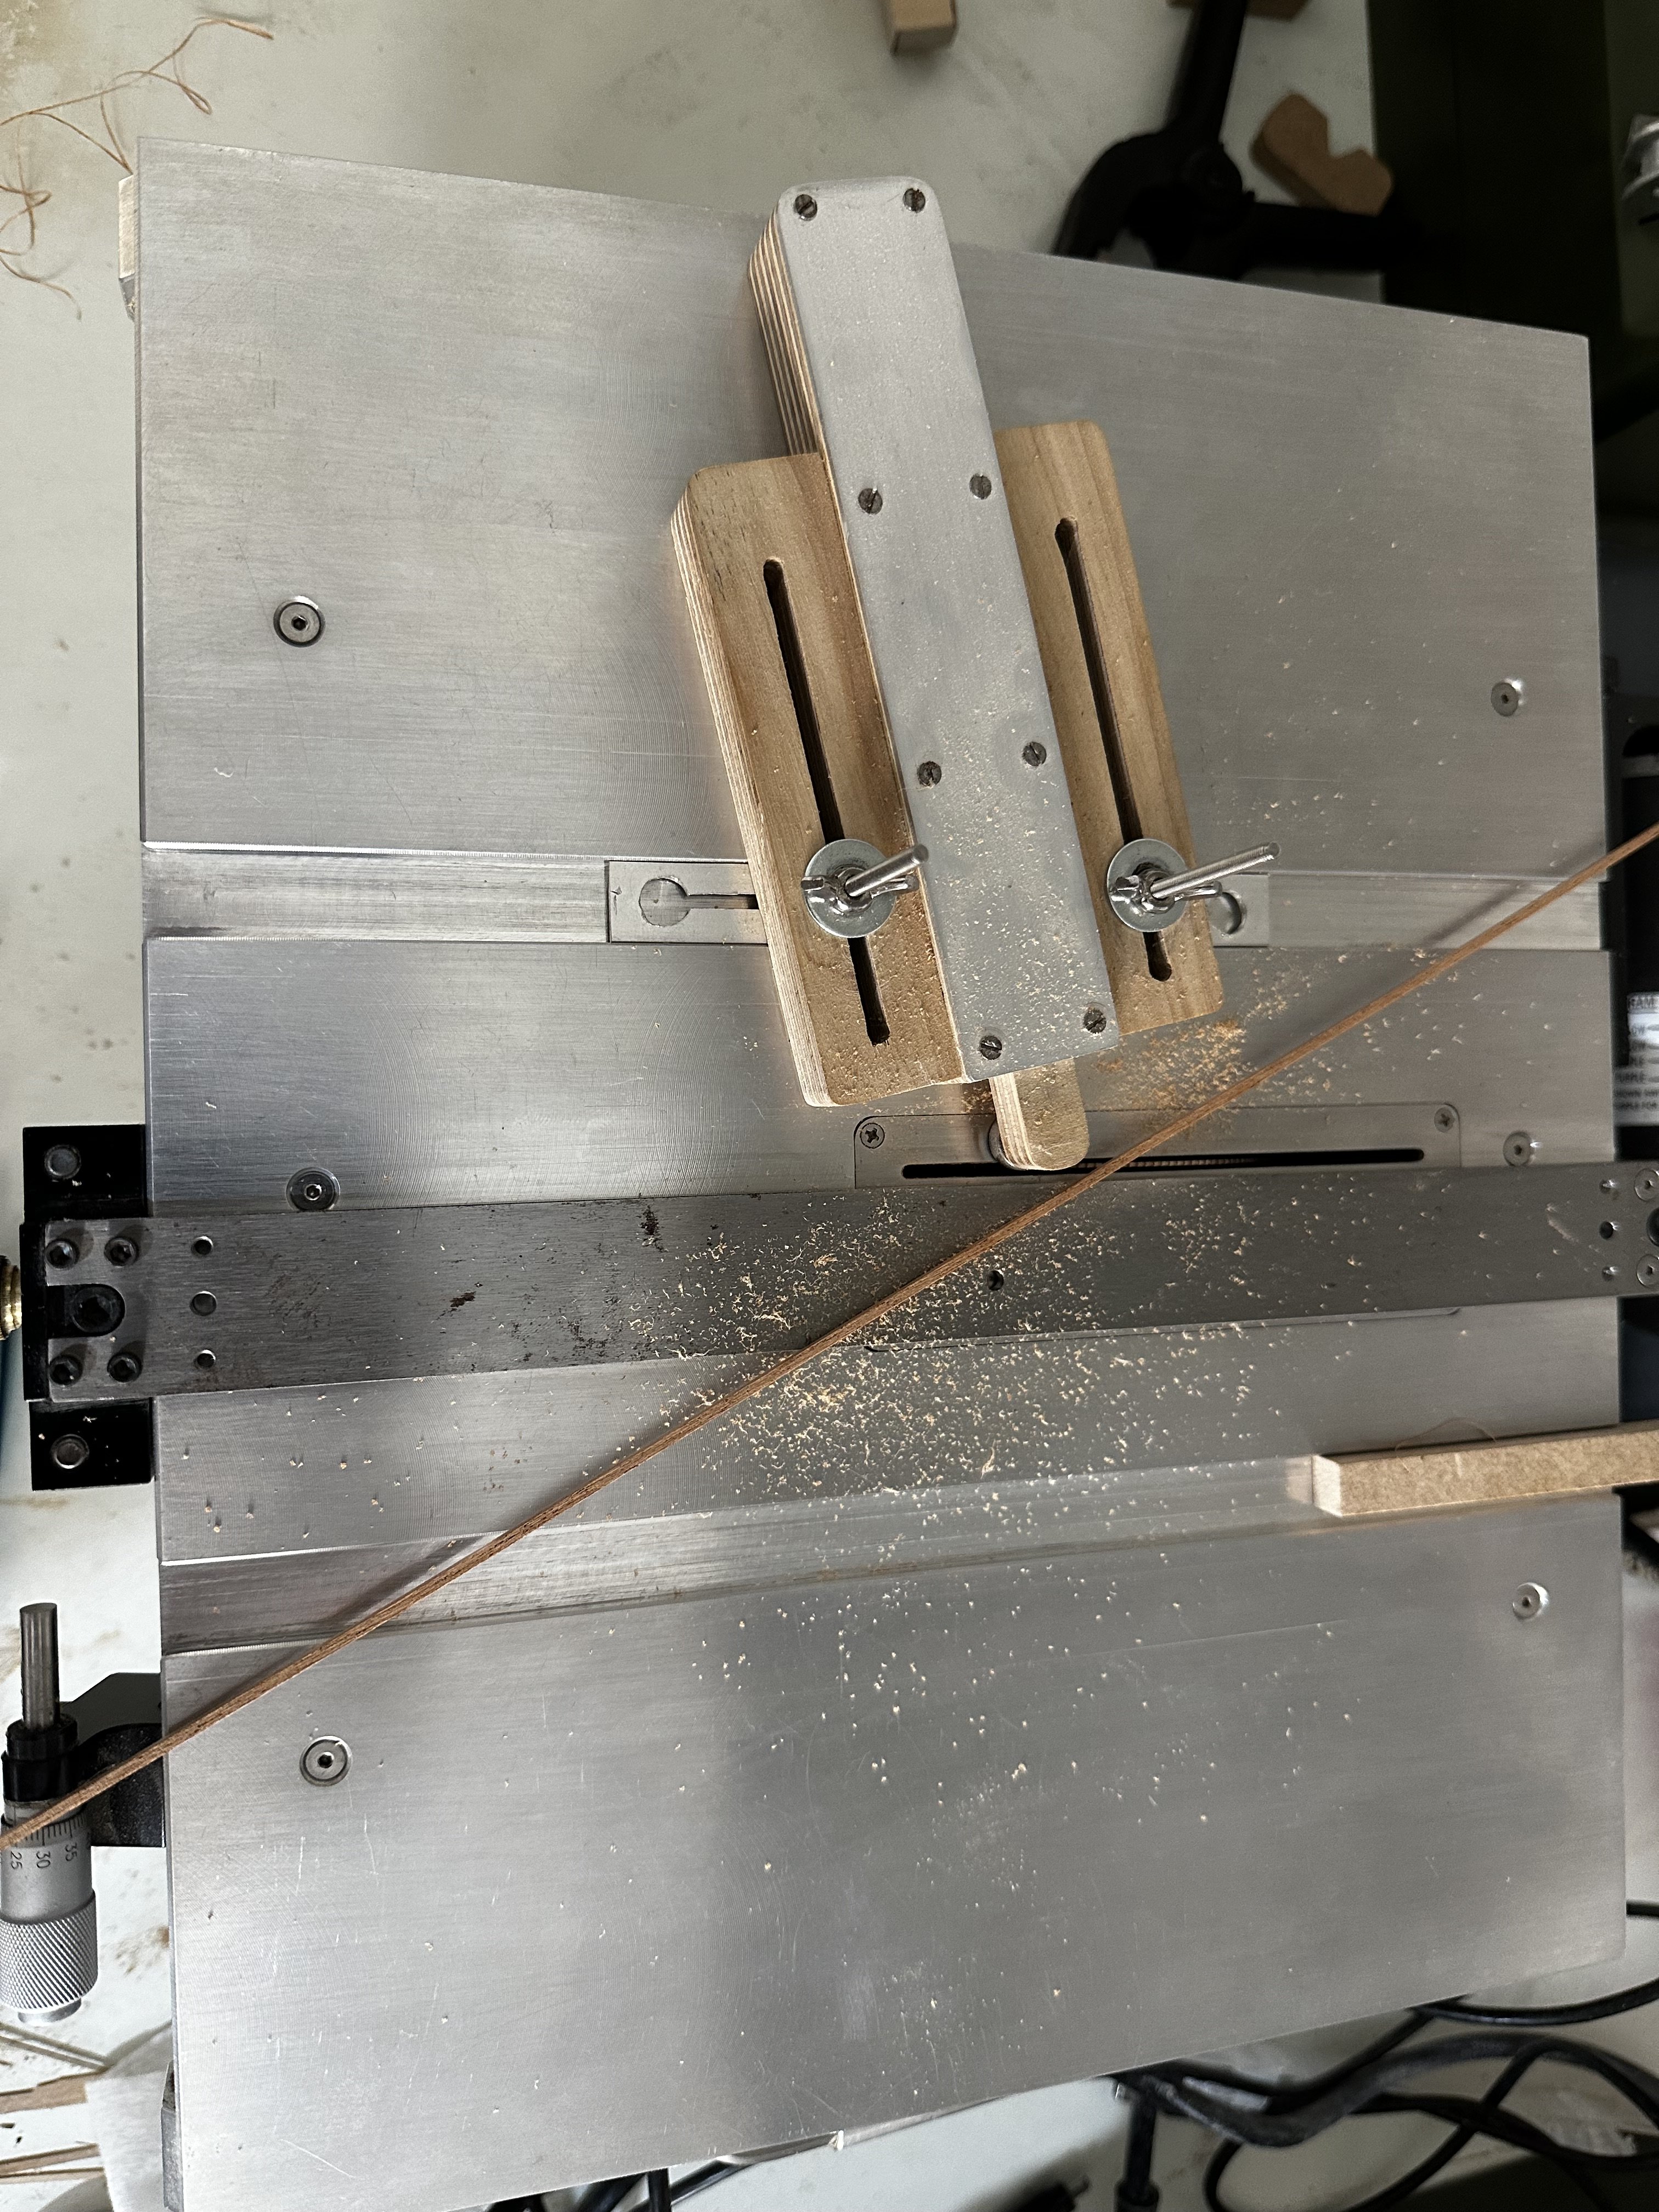
Here is a little update ,
very usefully jig for marking vertical lines on the ship i hope it will help other builders
so, here i have marked the bulkheads lines on the first plank and also the pattern of the butt shift system on the middle of the ship ..
but i will talk about this method later ..
here is some pictures :
Best regards,
Michael.
-
-
What a beautiful process Robert !
you did a perfect job as always !
Best regards,Michael.
-
-
6 hours ago, Robert29 said:
Nice writeup and explanation Michael. Taking your time and planning the best approach to do things always pays off at the end. Keep up your good work Michael.
Robert
Thank you dear friend !
and like you sayid i just taking the time because there is a lot to plan before starting this stage
Best regards
Michael
-
Guid for transferring lines from plans to the model
After a lot of thinking I have found the way to transfer the Wales lines from the plans to the ship you can use the same method for other things you need to copy from the plans in a perfect and exact waySo I’m happy to share my guid with you
")
and hop it will help you !
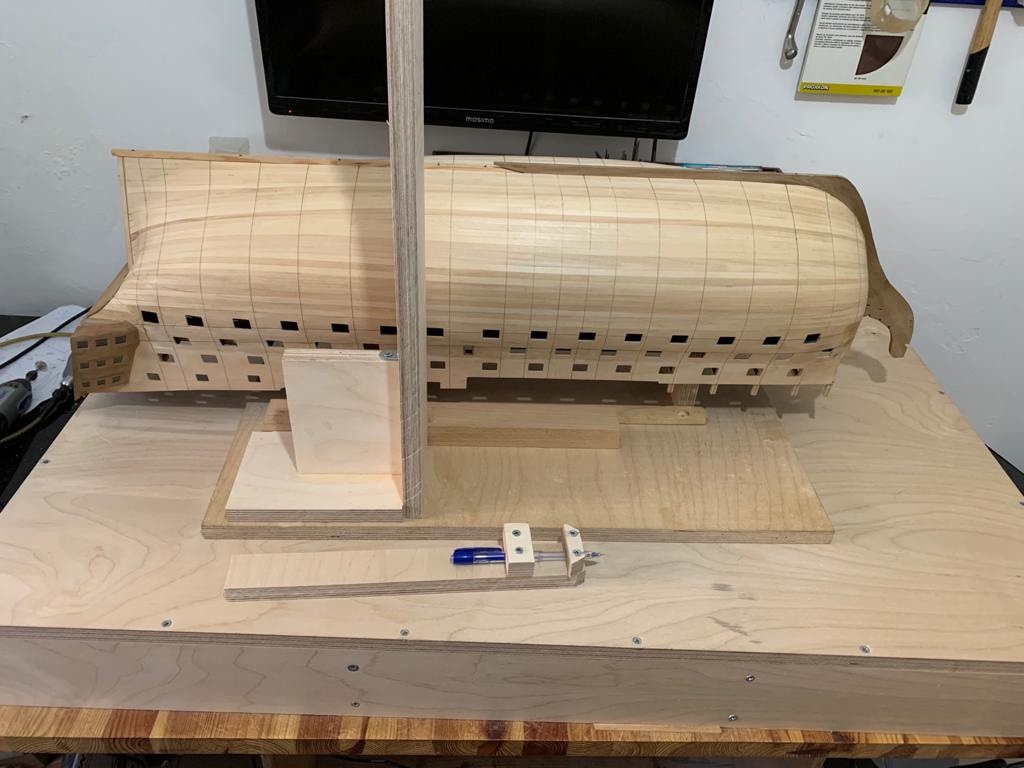
1. First you have to put the ship even on the desk or if it on a stand make sure the ship has the same distance from the table to the keelson at the bow and at the stern !!!!
2. Also make sure the ship is even left and right !
after the ship it’s even left and right also bow and stern are even you can start working (take the tame on this stage it’s very important to have the ship even !)
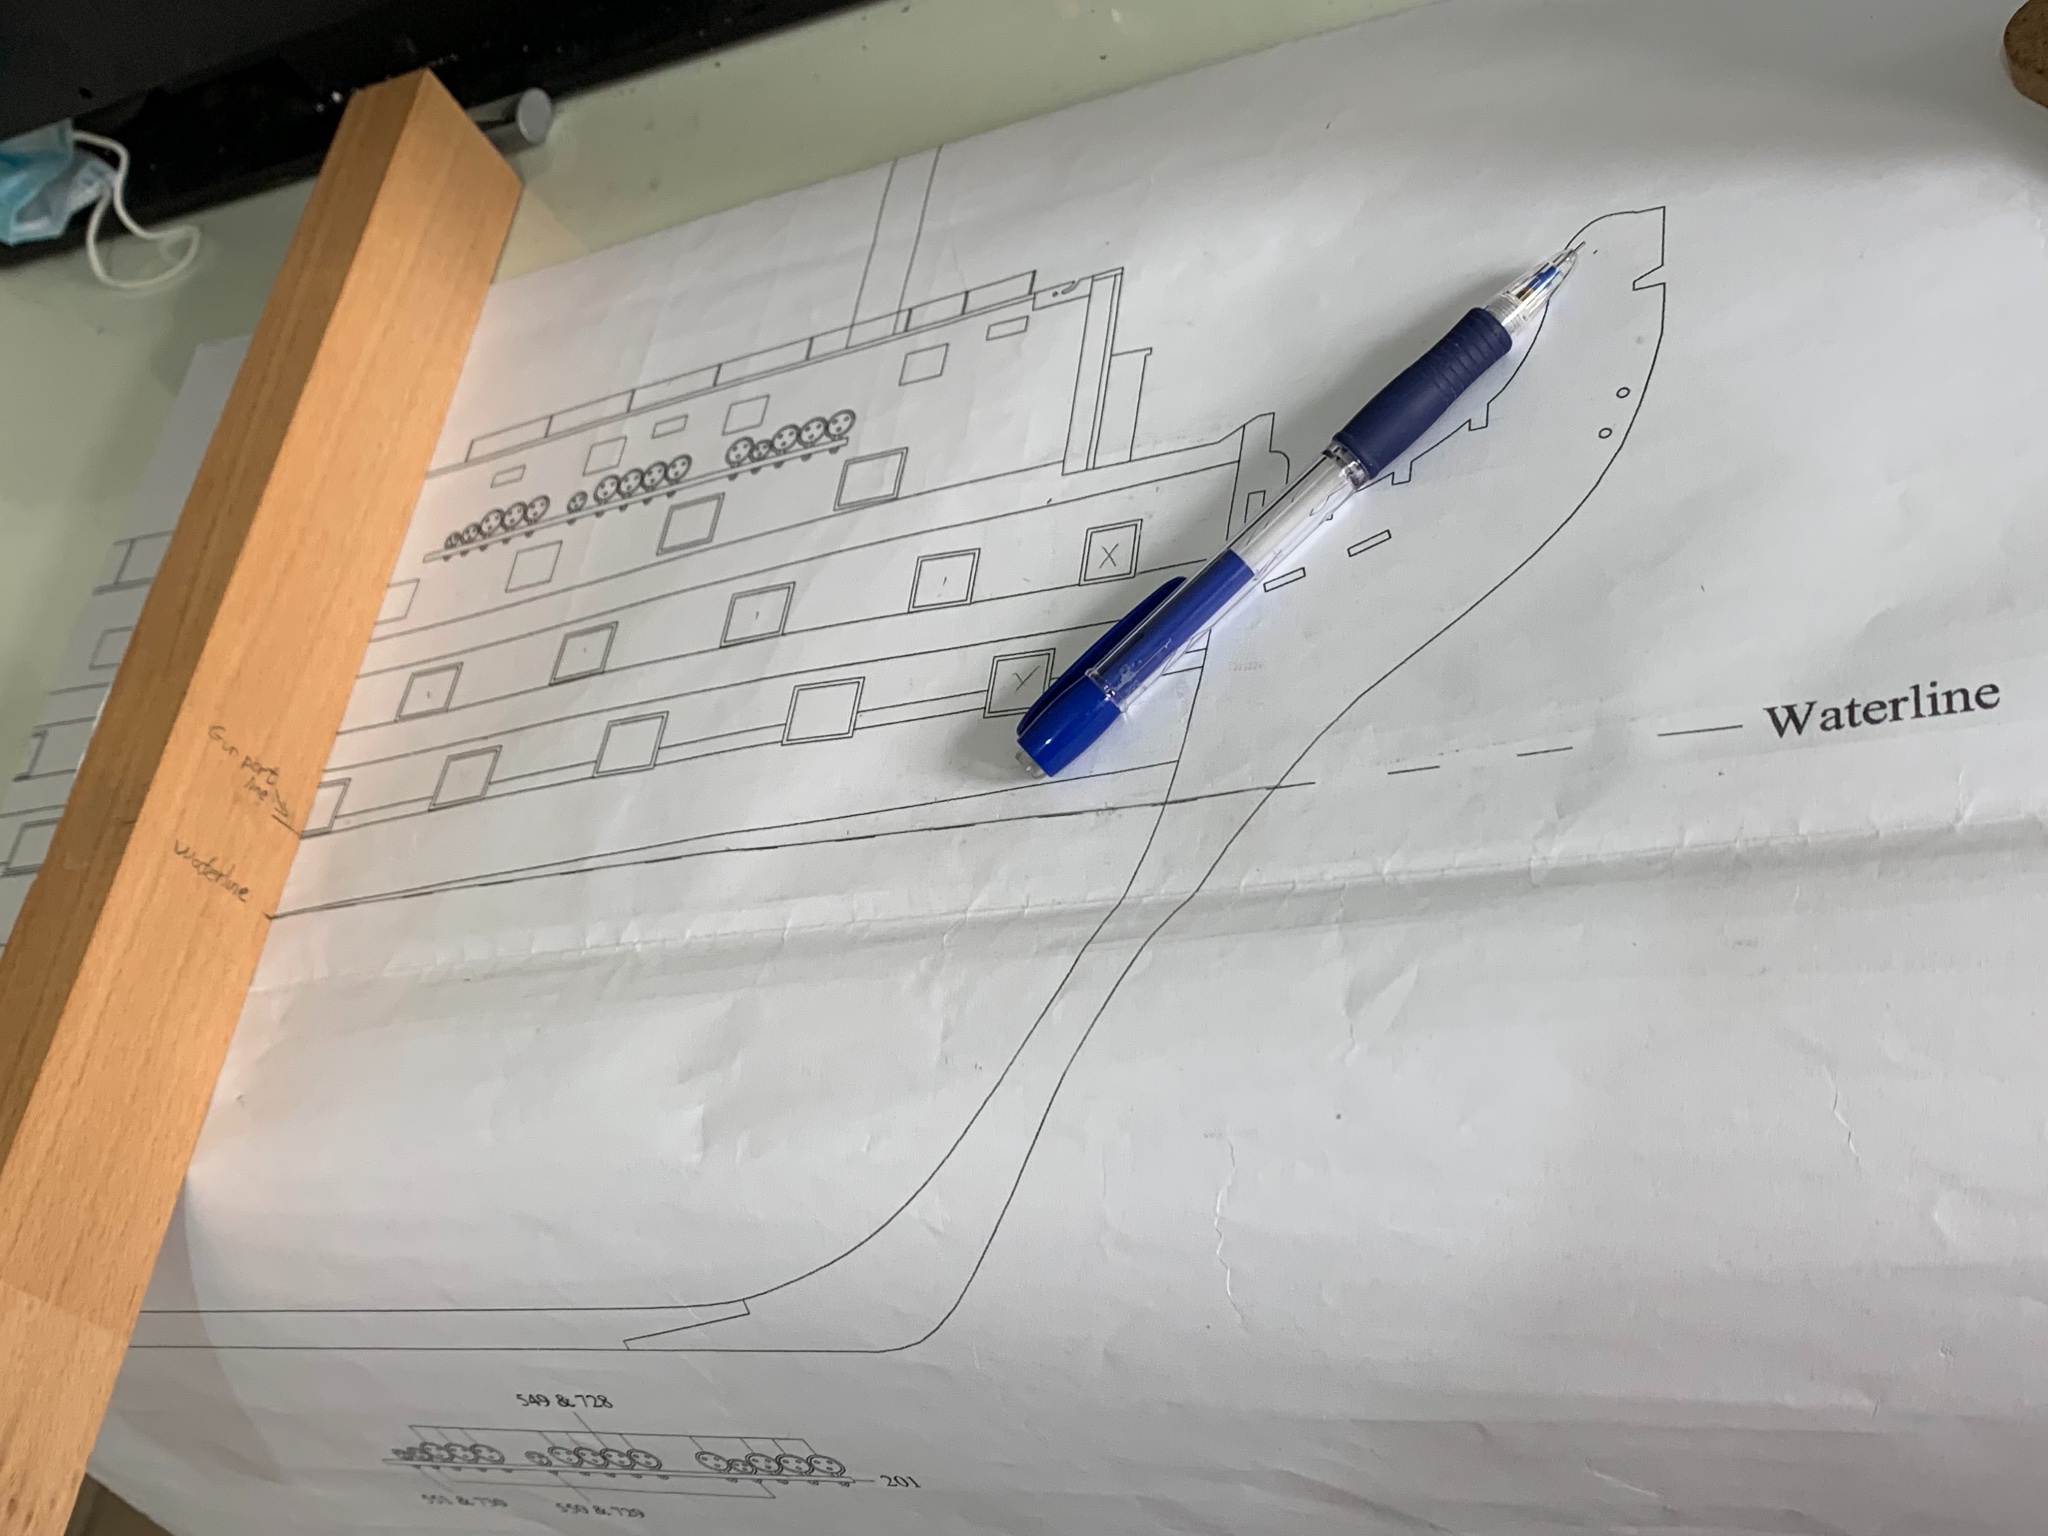
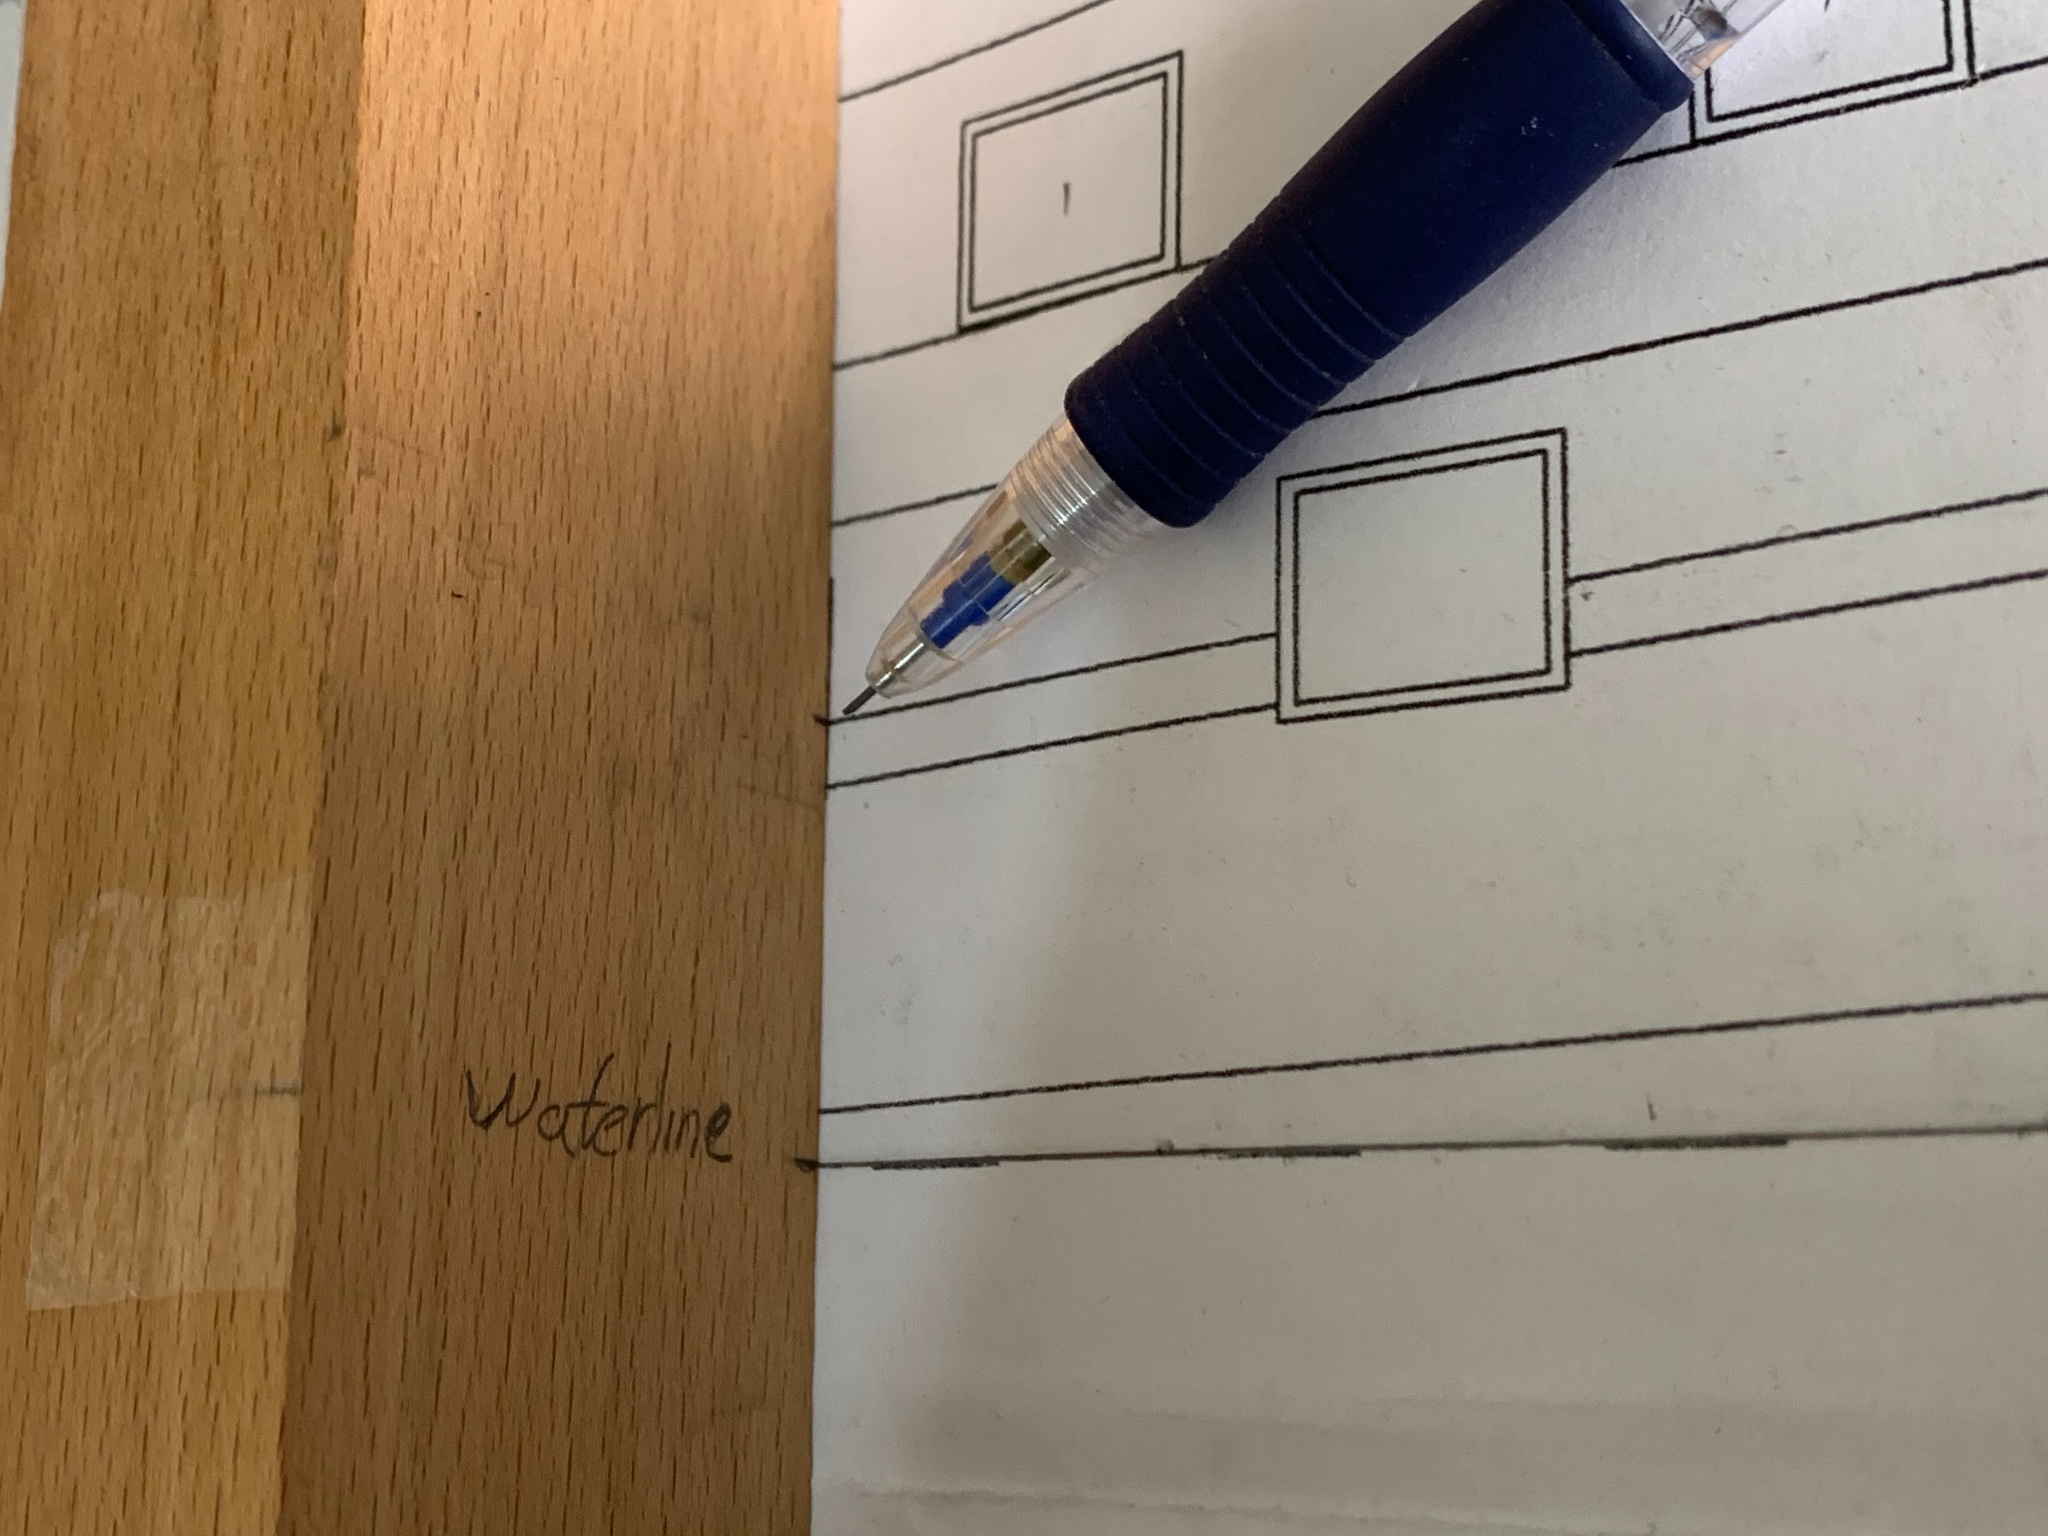
3. now you need to take a reference from the ship to a straight timber (in my case I mark the lower edge of one gunport but you can take reference from other things that you have already on the ship and also on the plan )
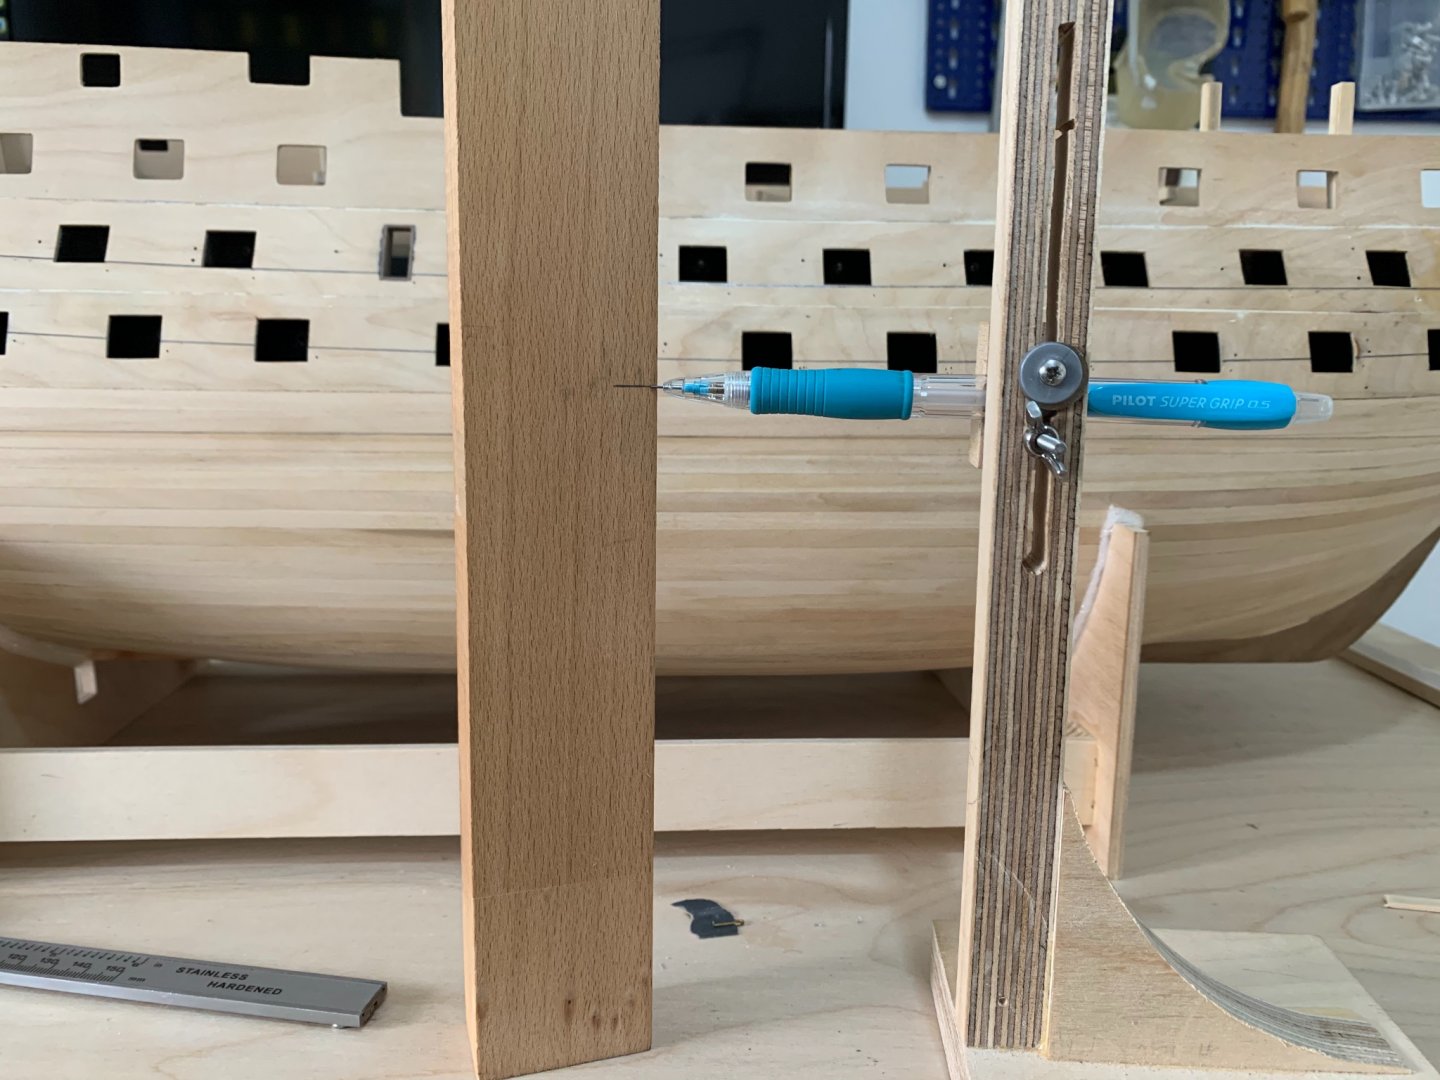
4. Now you need to lay down this timber on the plans on the same gunport edge (on the pictures it’s not on the same gunport because I just took pictures to show you the example ... but it must be on the same gunport
when you have it on the exact edge line , mark the water line on the timber :
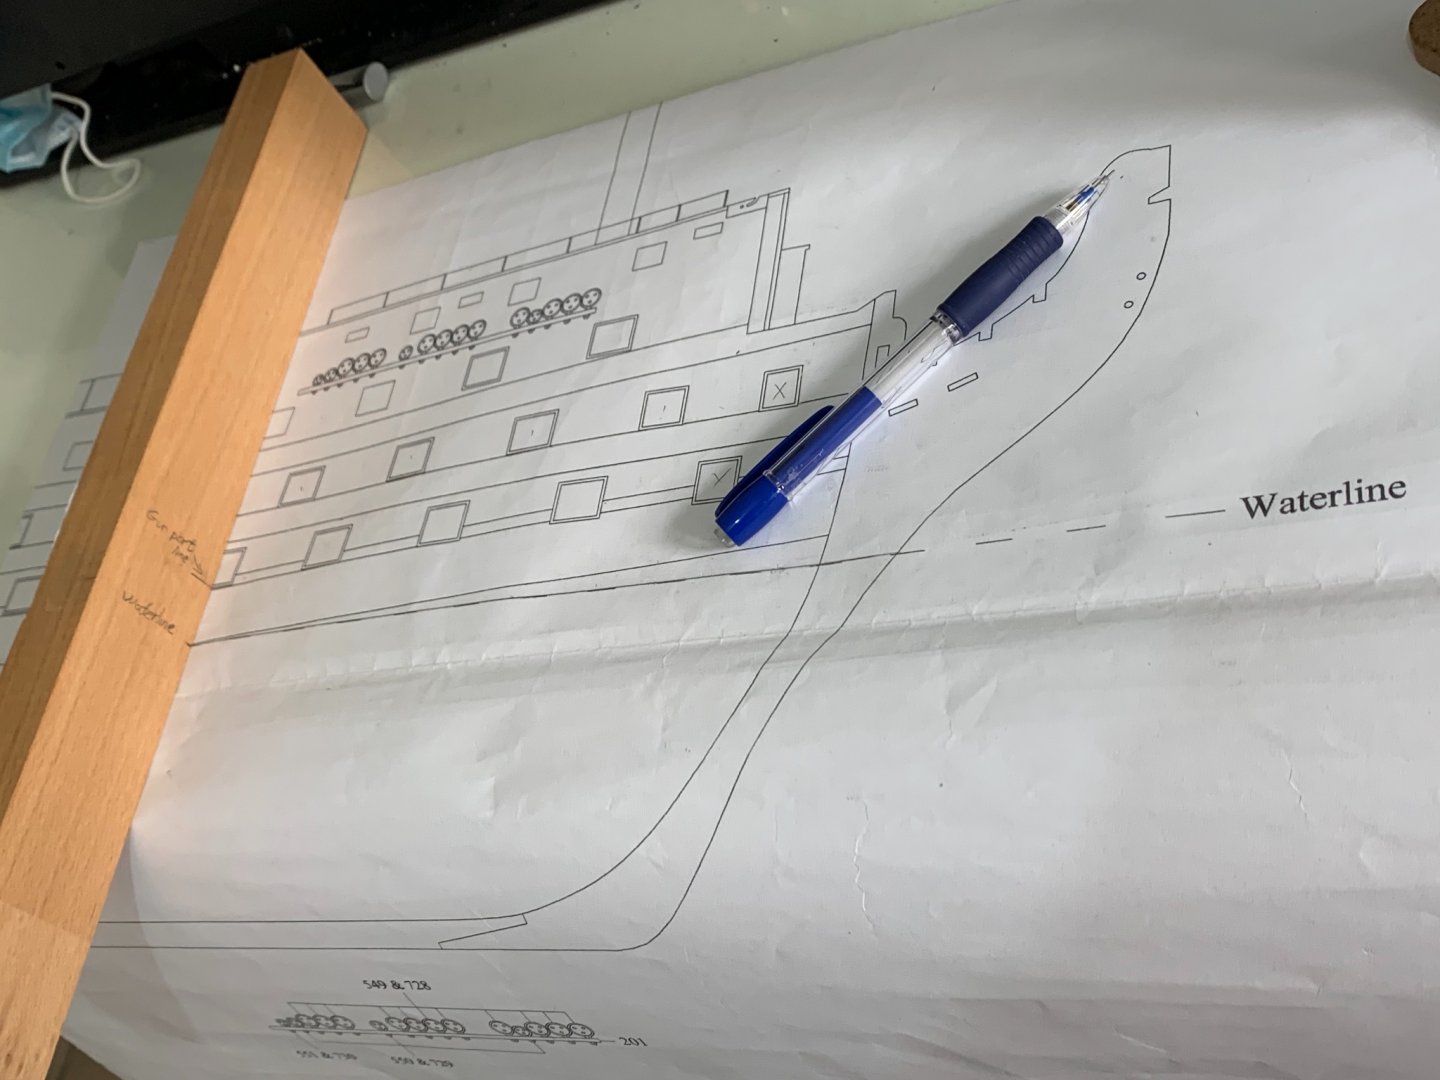
After you have the waterline marked on the timber just erase the gunport edge line from your timbernow when you have the waterline marked on your timber you can start taking a perfect references from the plan!
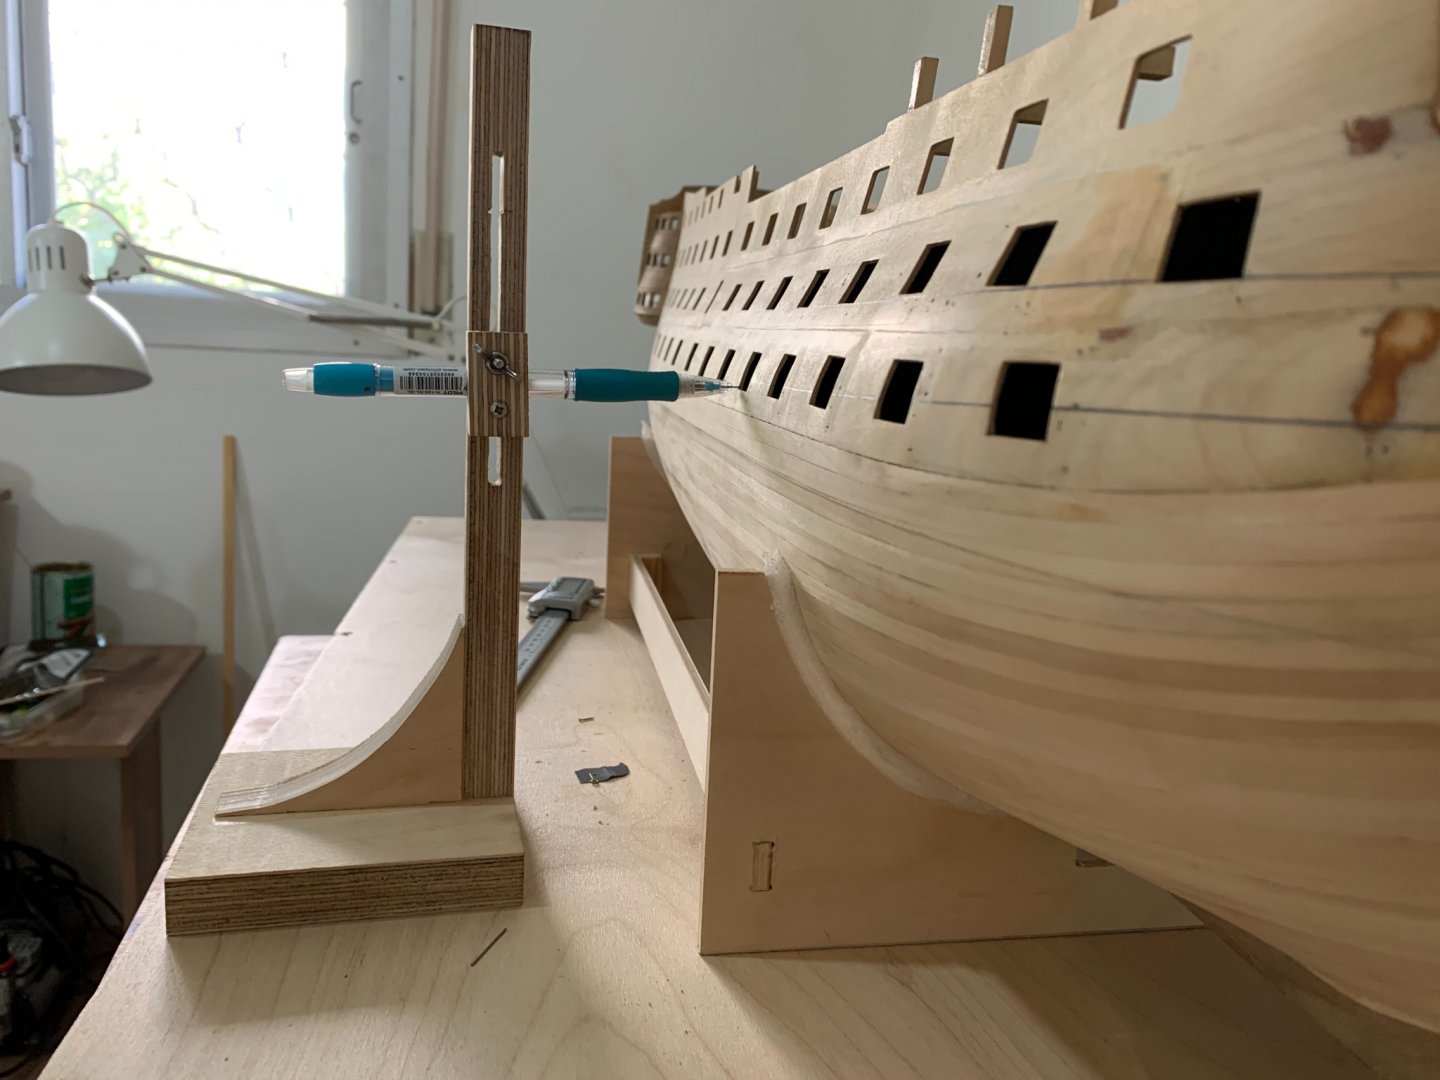
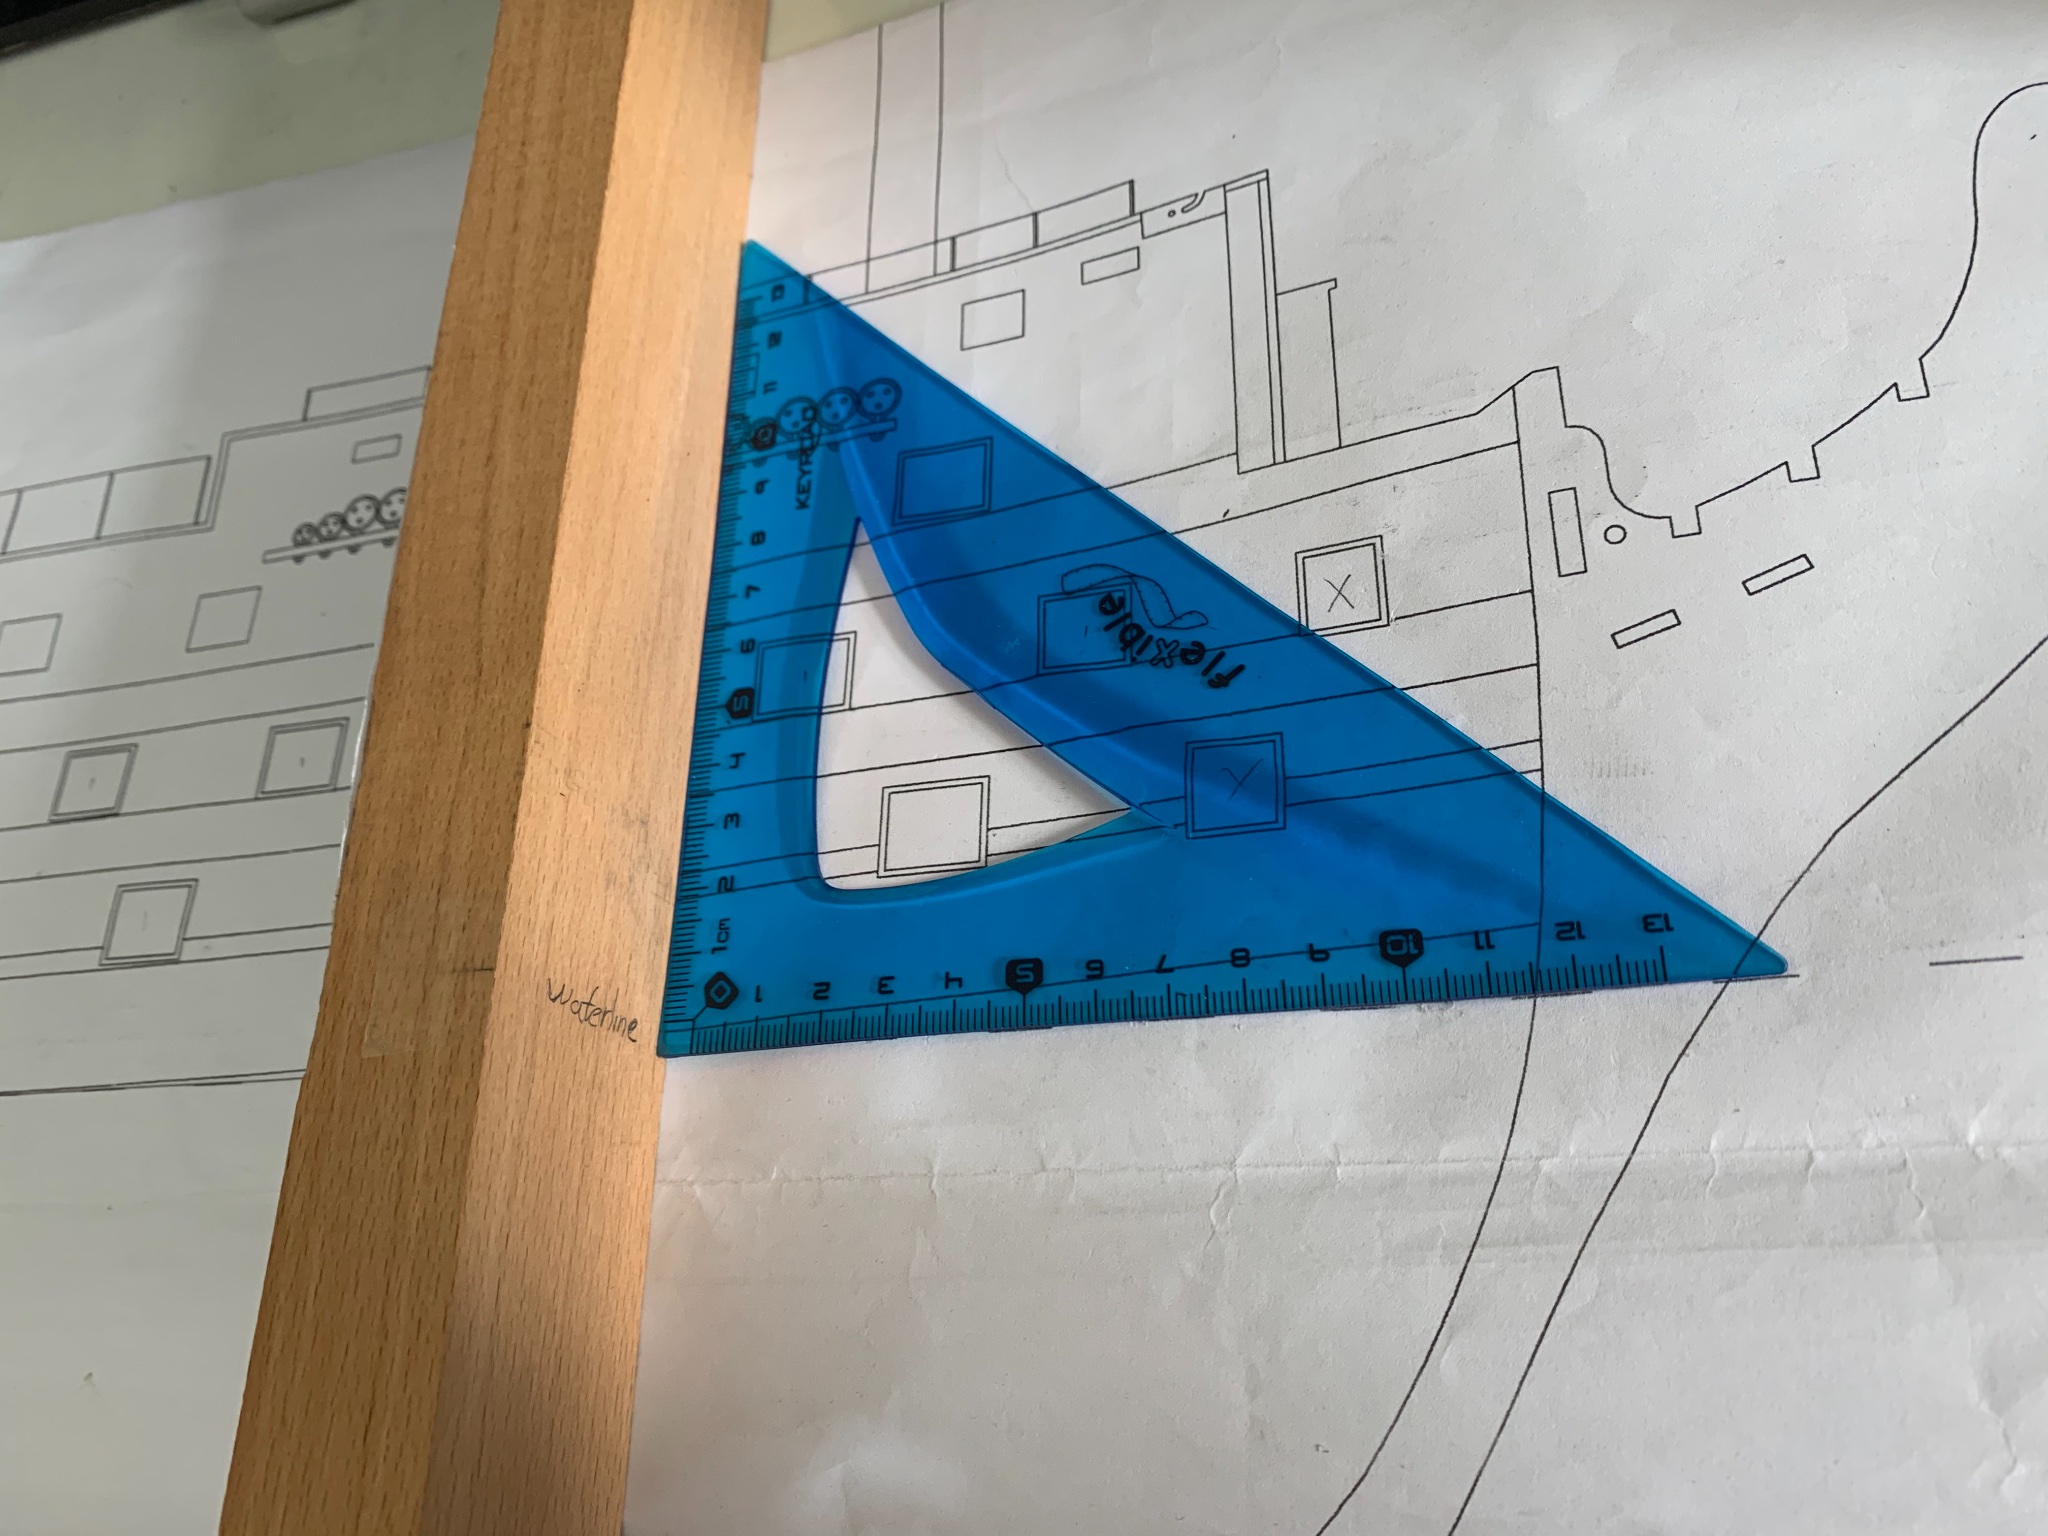
5.now just put the waterline you have marked on your timbre on the waterline of the plan under the mark you want to transfer and use 90 degrees ruler between the timber and the waterline to be sure it’s straight
6. Simply mark the line you want to transfer on the timber in my case it’s the line of the wale:

7. When you have it marked on the timber you need to put the timber again on your table and adjust your pencil holder to be exact on the same line
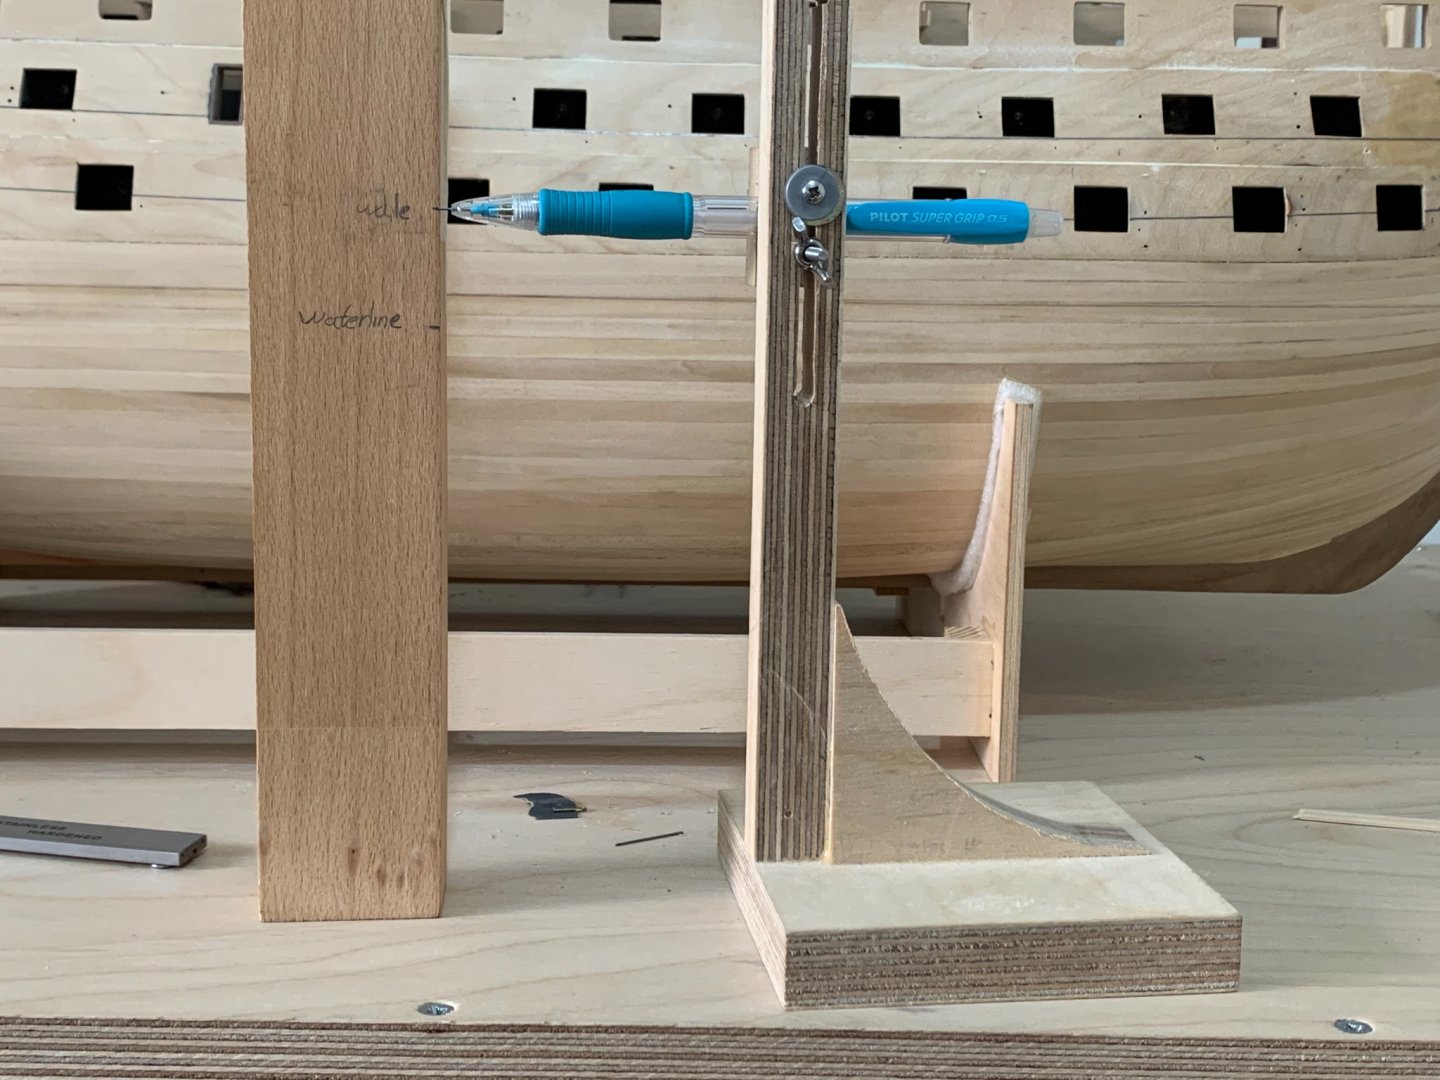
8. Now after adjusting the pencil holder move it and carefully mark the dot on the model
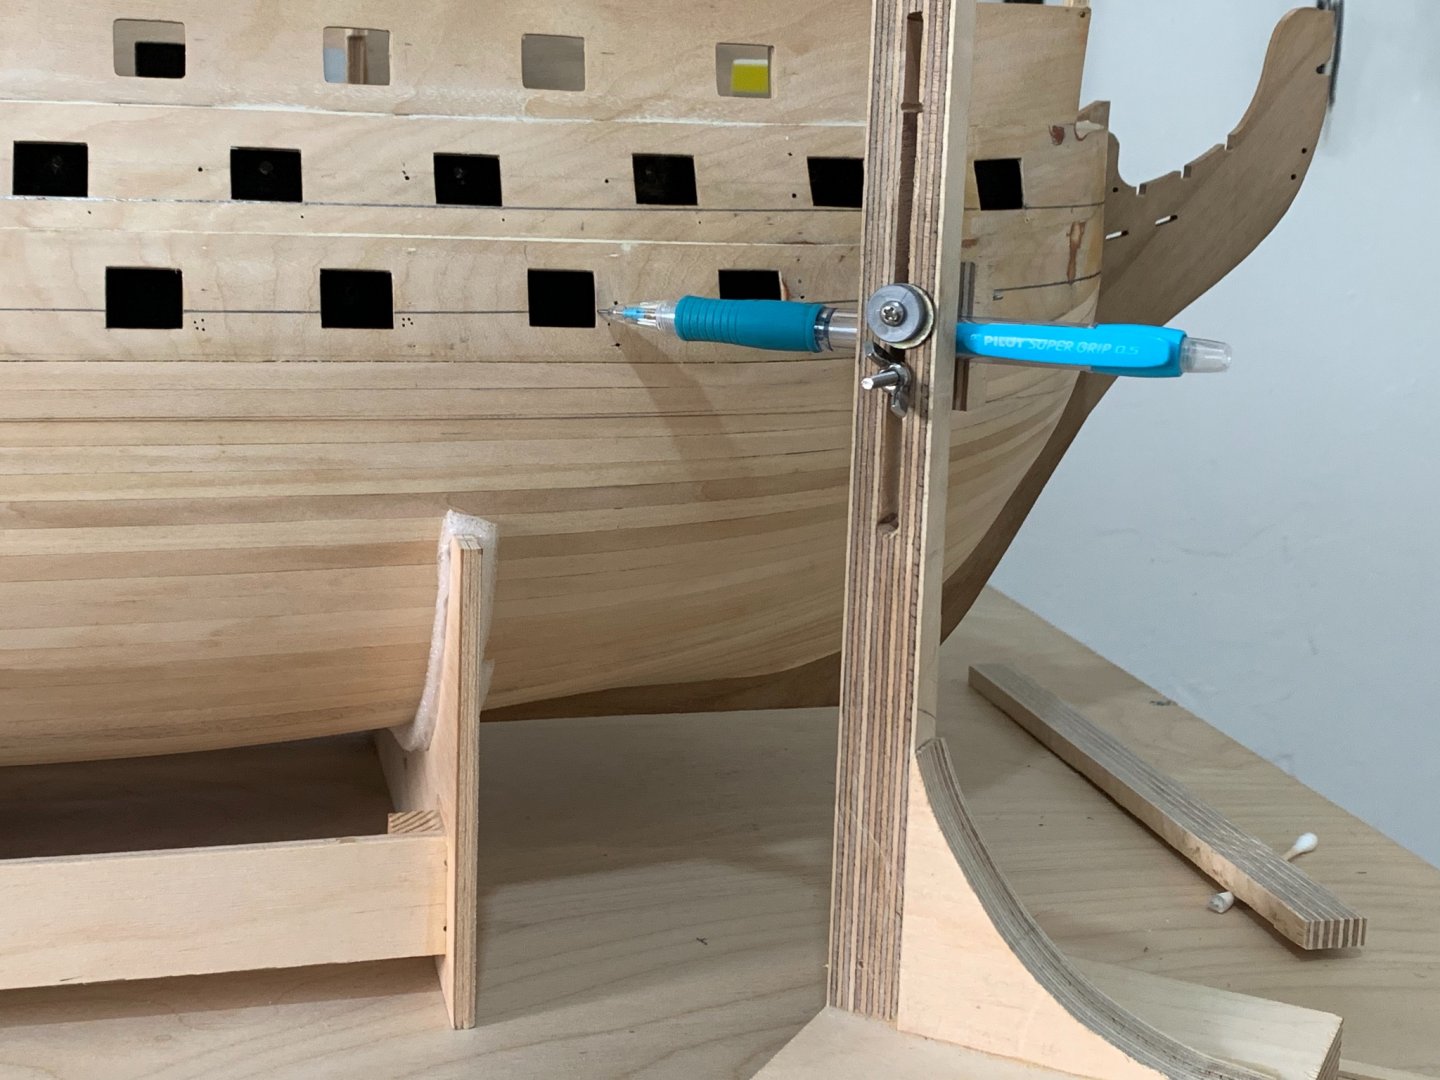
do the same for all the dots you need then put a temporary plank on the ship and connect all the dots by runing a pencil along the plank to get a beautiful line as the plans :
here is pictures after taking the planks out :

-
Hello friends,
here is a new update for my build log ,
at this days I had to mark the Wales on the ship..
the instruction says you need to take reference from each gunport to the wale from the plans and transfer it to the model
by marking a dot then just mark the lines and connect all the dots...
the problem is ; the gun-ports on the model they are far to be exact as the plans (I mean they are not on the same level as the plans but the good thing is they has the same distant between each other !)
and if you taking the reference from each gunport and try to transfer it to the model you getting line with steps and not a nice curve line !
so I decide to take the curve line from the plans and not to do it as a free style and transfer it to the ship ,even it will touch under the gun-ports in a different places and not like the plans
anyway each model plan give a different line even at the book : anatomy of the ship it show the line at different way and not like the caldercraft plan
(no one today can tall where was the line on the real ship because they change it several times when they did renovation to the ship at Portsmouth )
so first I have thinking to mark the waterline on the ship and the to take reference from this line to the wale at the plans then to transfer it to the model
but I wasn’t able to do it because at the model there is a lot of curves an the angel of the caliper wasn’t on the same angel as when you taking the measurement from the plans and it will give you the dot on another place and you will get again line with steps and not a nice curve line !
at the next topic I will show you a nice guide how to transfer lines from the plans to the ship in a perfect manner
-
Thank you friend for all your answers but still im very confuse..
RichardG - even with all the timbers at the front , when you building a big war ship it will be stronger to put long planks a the bow section , if you need to chose what is better 1. To make the 4 butt shift for the beauty of the ship ( and also no one will see that because its under the water aria ...)
2.to make a stronger war ship
im sure the second choice will be better for the risen of the strong war ship ...
————
Allen - I know that no one talk about minimum length of plank , but logical it no make any sense to build a war ship in this manner
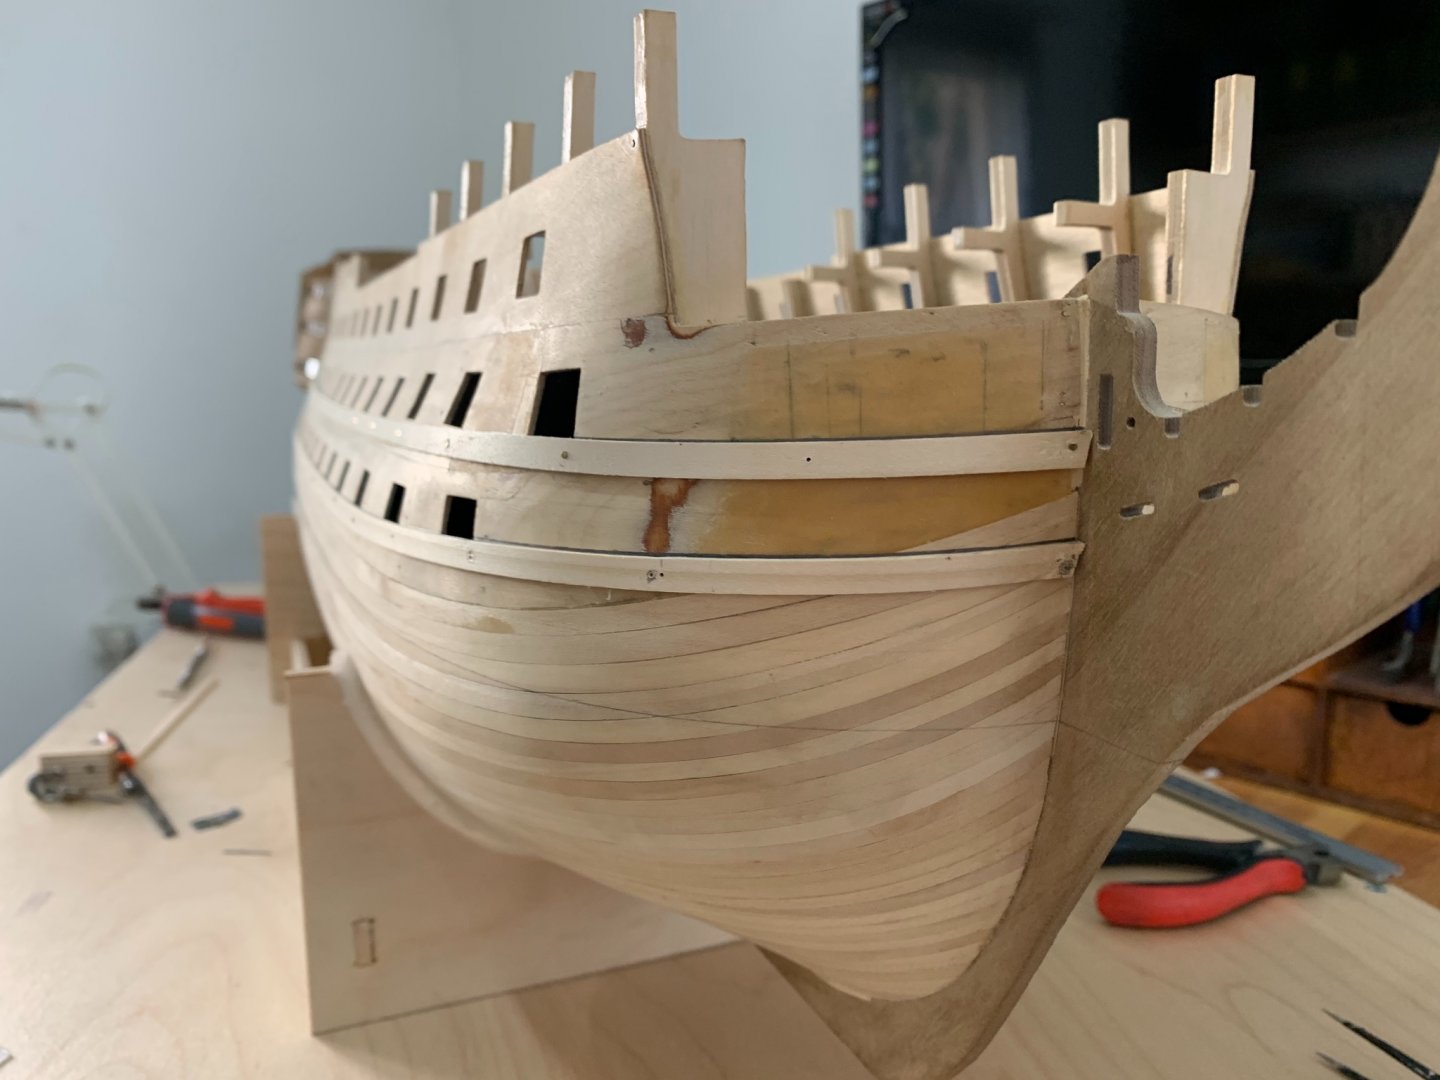
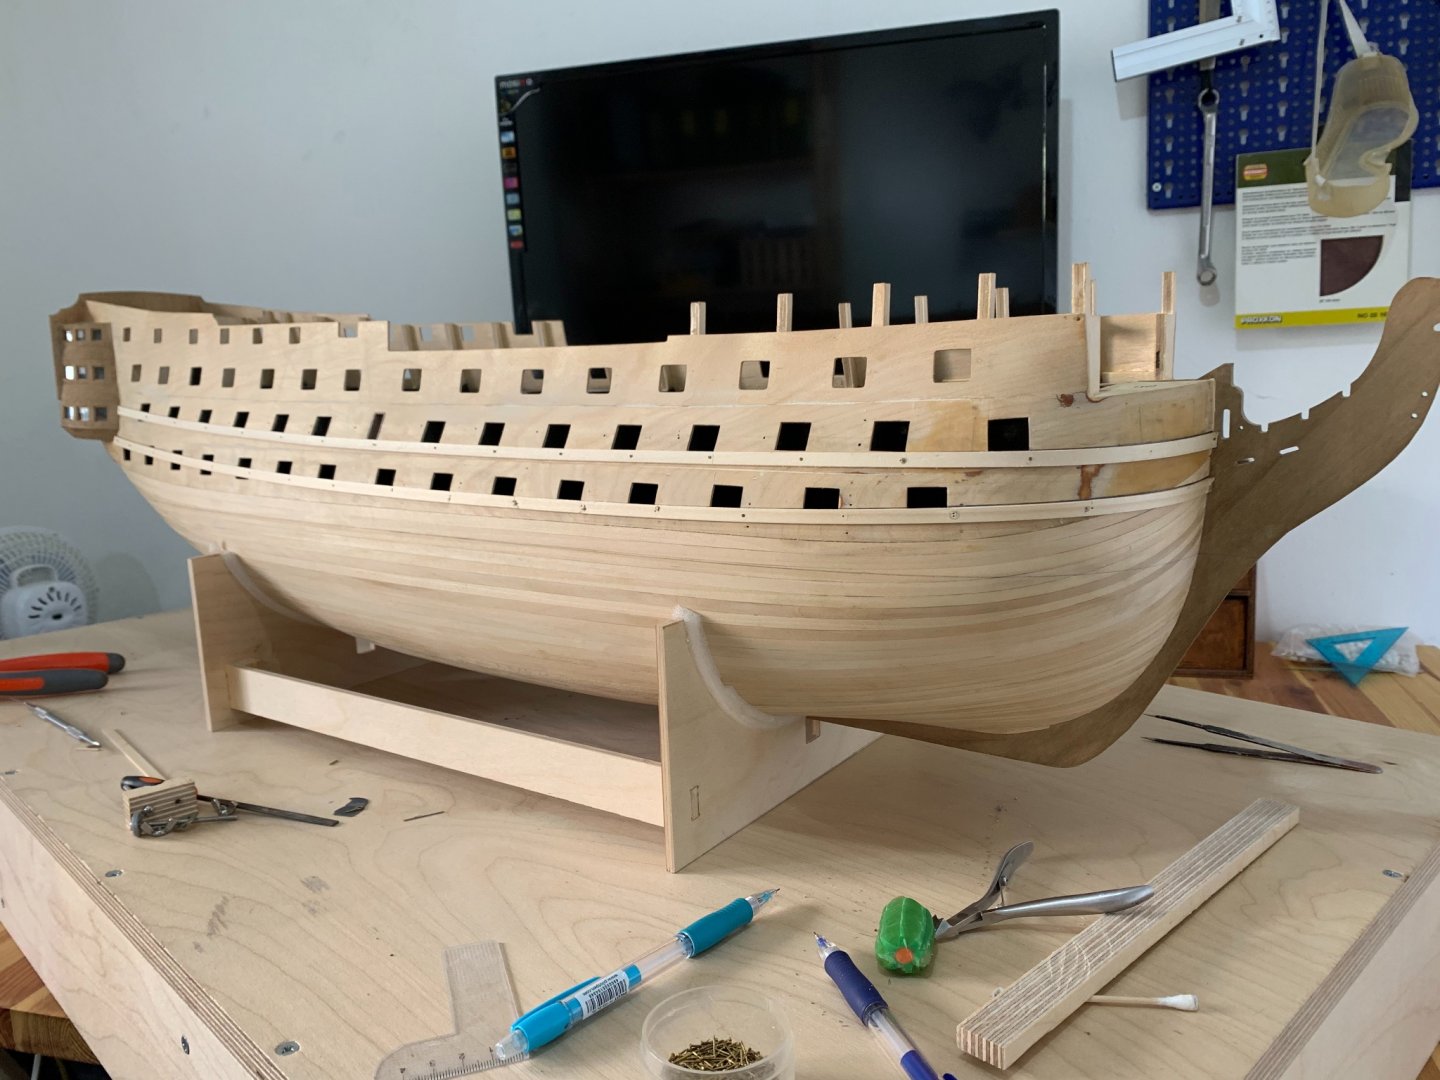
you can see a pictures of the Hms Victory hull, they didnt use the 4 butt shift , and i know that they change all the planks at this days on the victory but believe me .. if the original ship had this shift the museum had to do something similar ..
—————
druxey - im understating your unswear , so you agree with me that at the external planks there is no evidence for the 4 butt shift system
——————
Dziadeczek - it looks nice and i was thinking to do something like that (and avoiding the small planks at the bow aria )but im not sure if its correct because if you avoiding the small planks , it means you will make a big plank and it will be out of scale ..
-
-
51 minutes ago, allanyed said:
Michael,
Look on the RMG Collections site and you will find plank expansion drawings. You will see the butt patterns for both external planking and ceiling/sealing planking on a number of ships. https://collections.rmg.co.uk/collections.html#!csearch;searchTerm=plank_expansion
Allan
Thank you Allan
but you just give me a good example for the issue
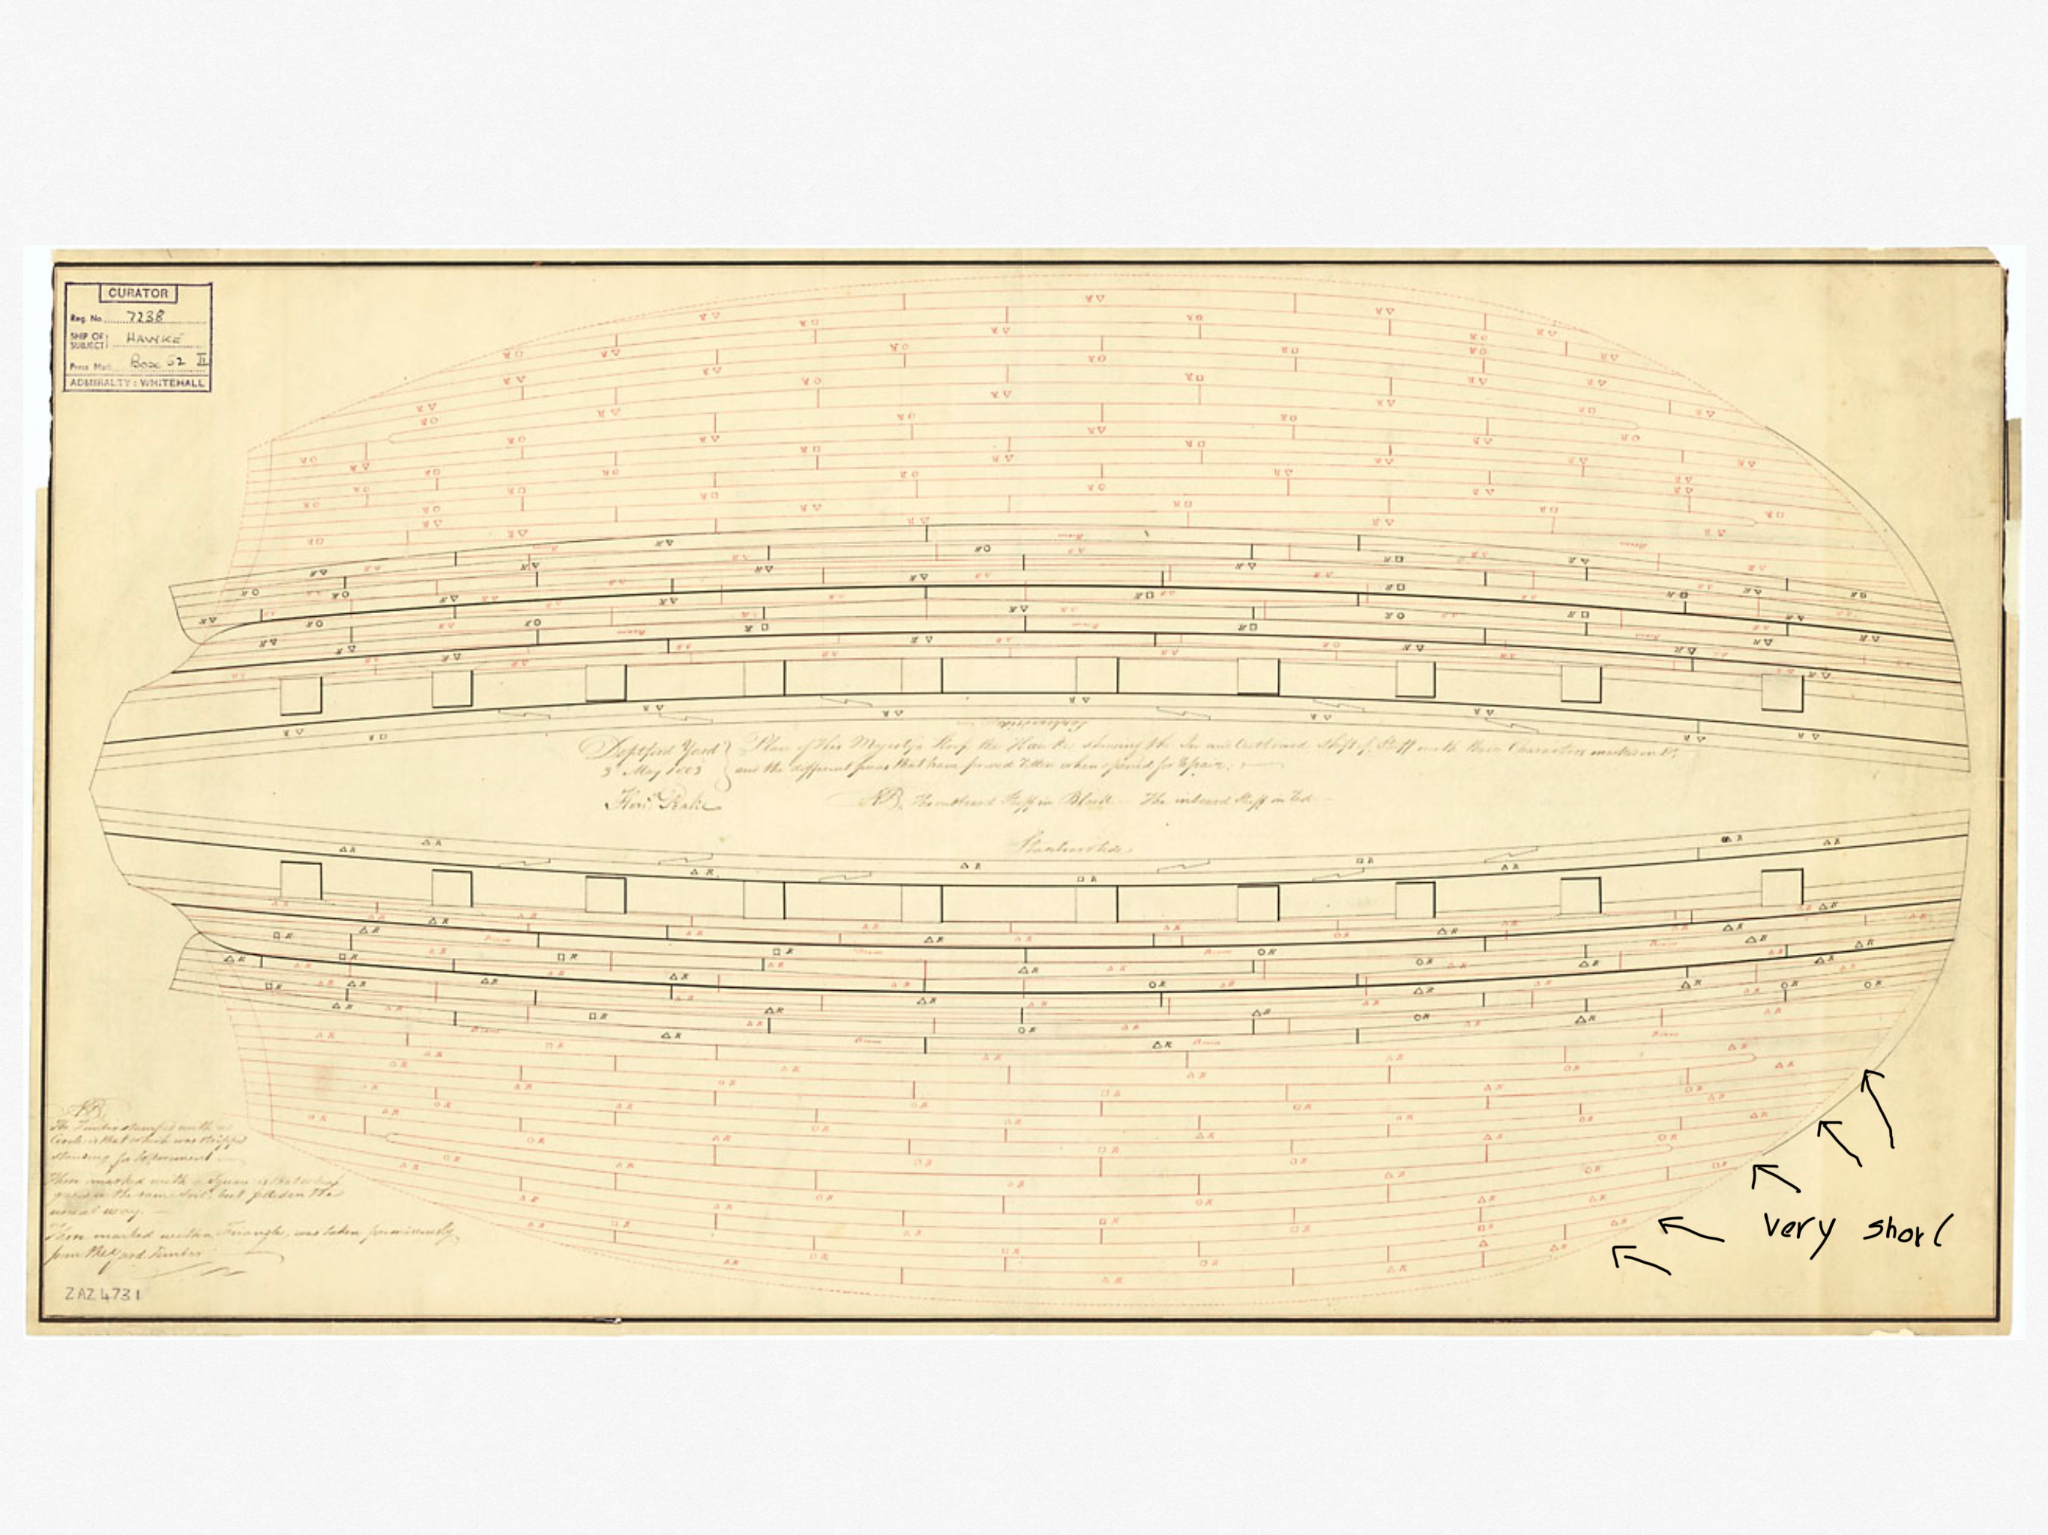
take a look at the first plan of Hawk
look how short they are at the bow section :
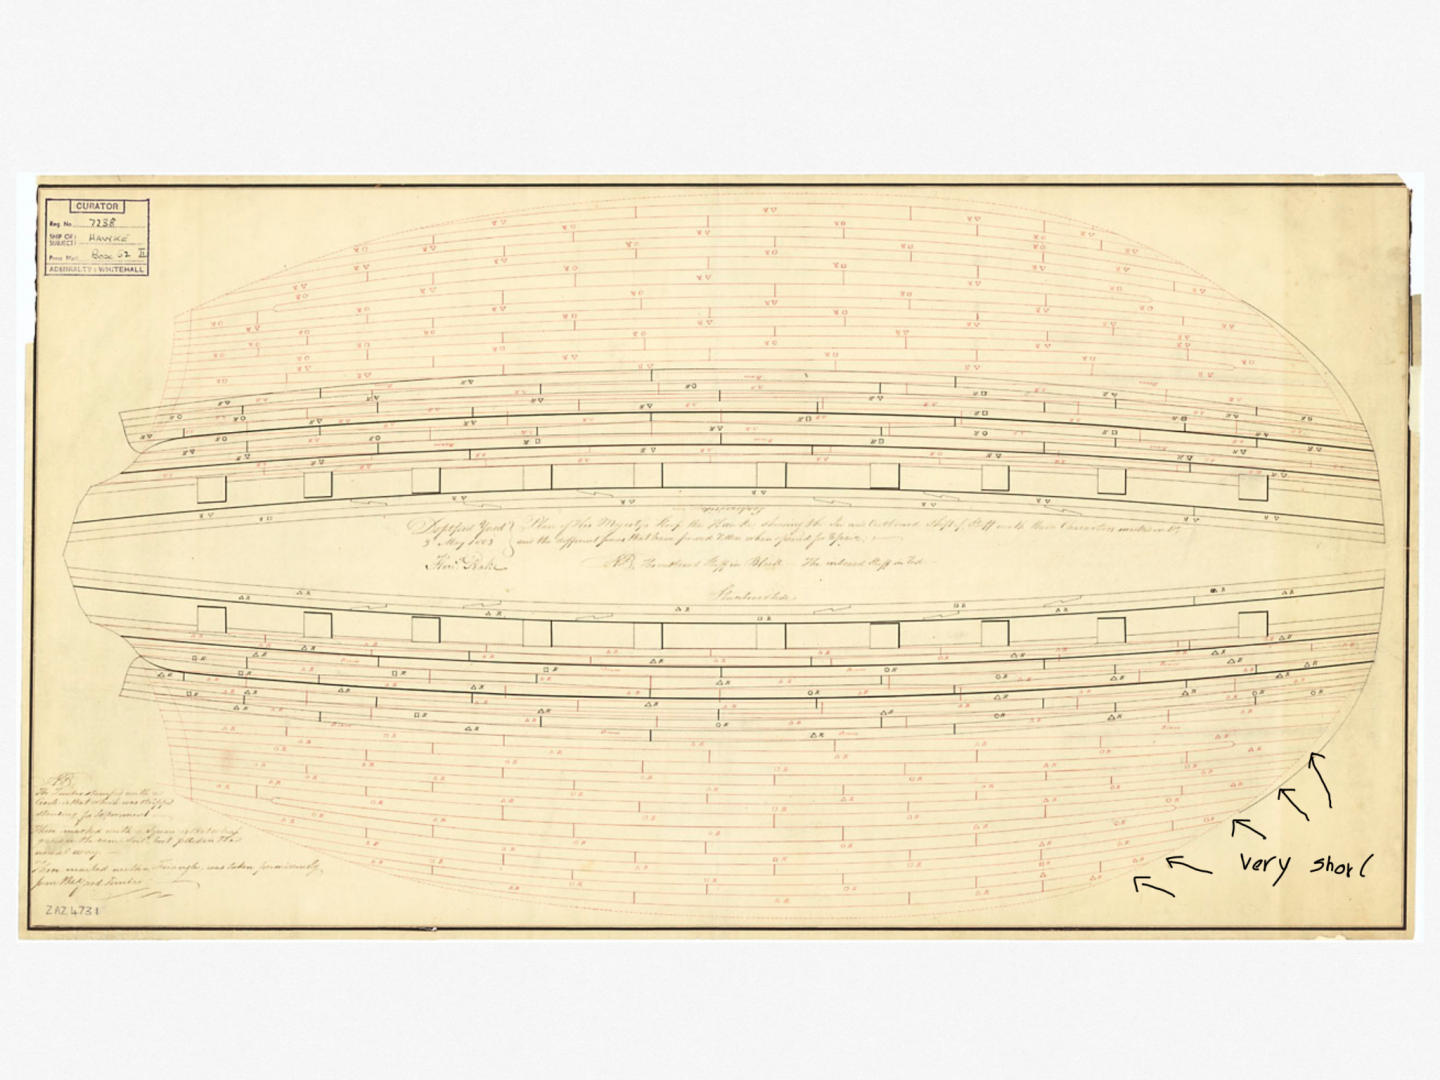
and if you will try to avoid this problem by making the next plank long
it will not have the scale of the real plank ... I mean it will be 1/4 bigger then the plank at the real ship
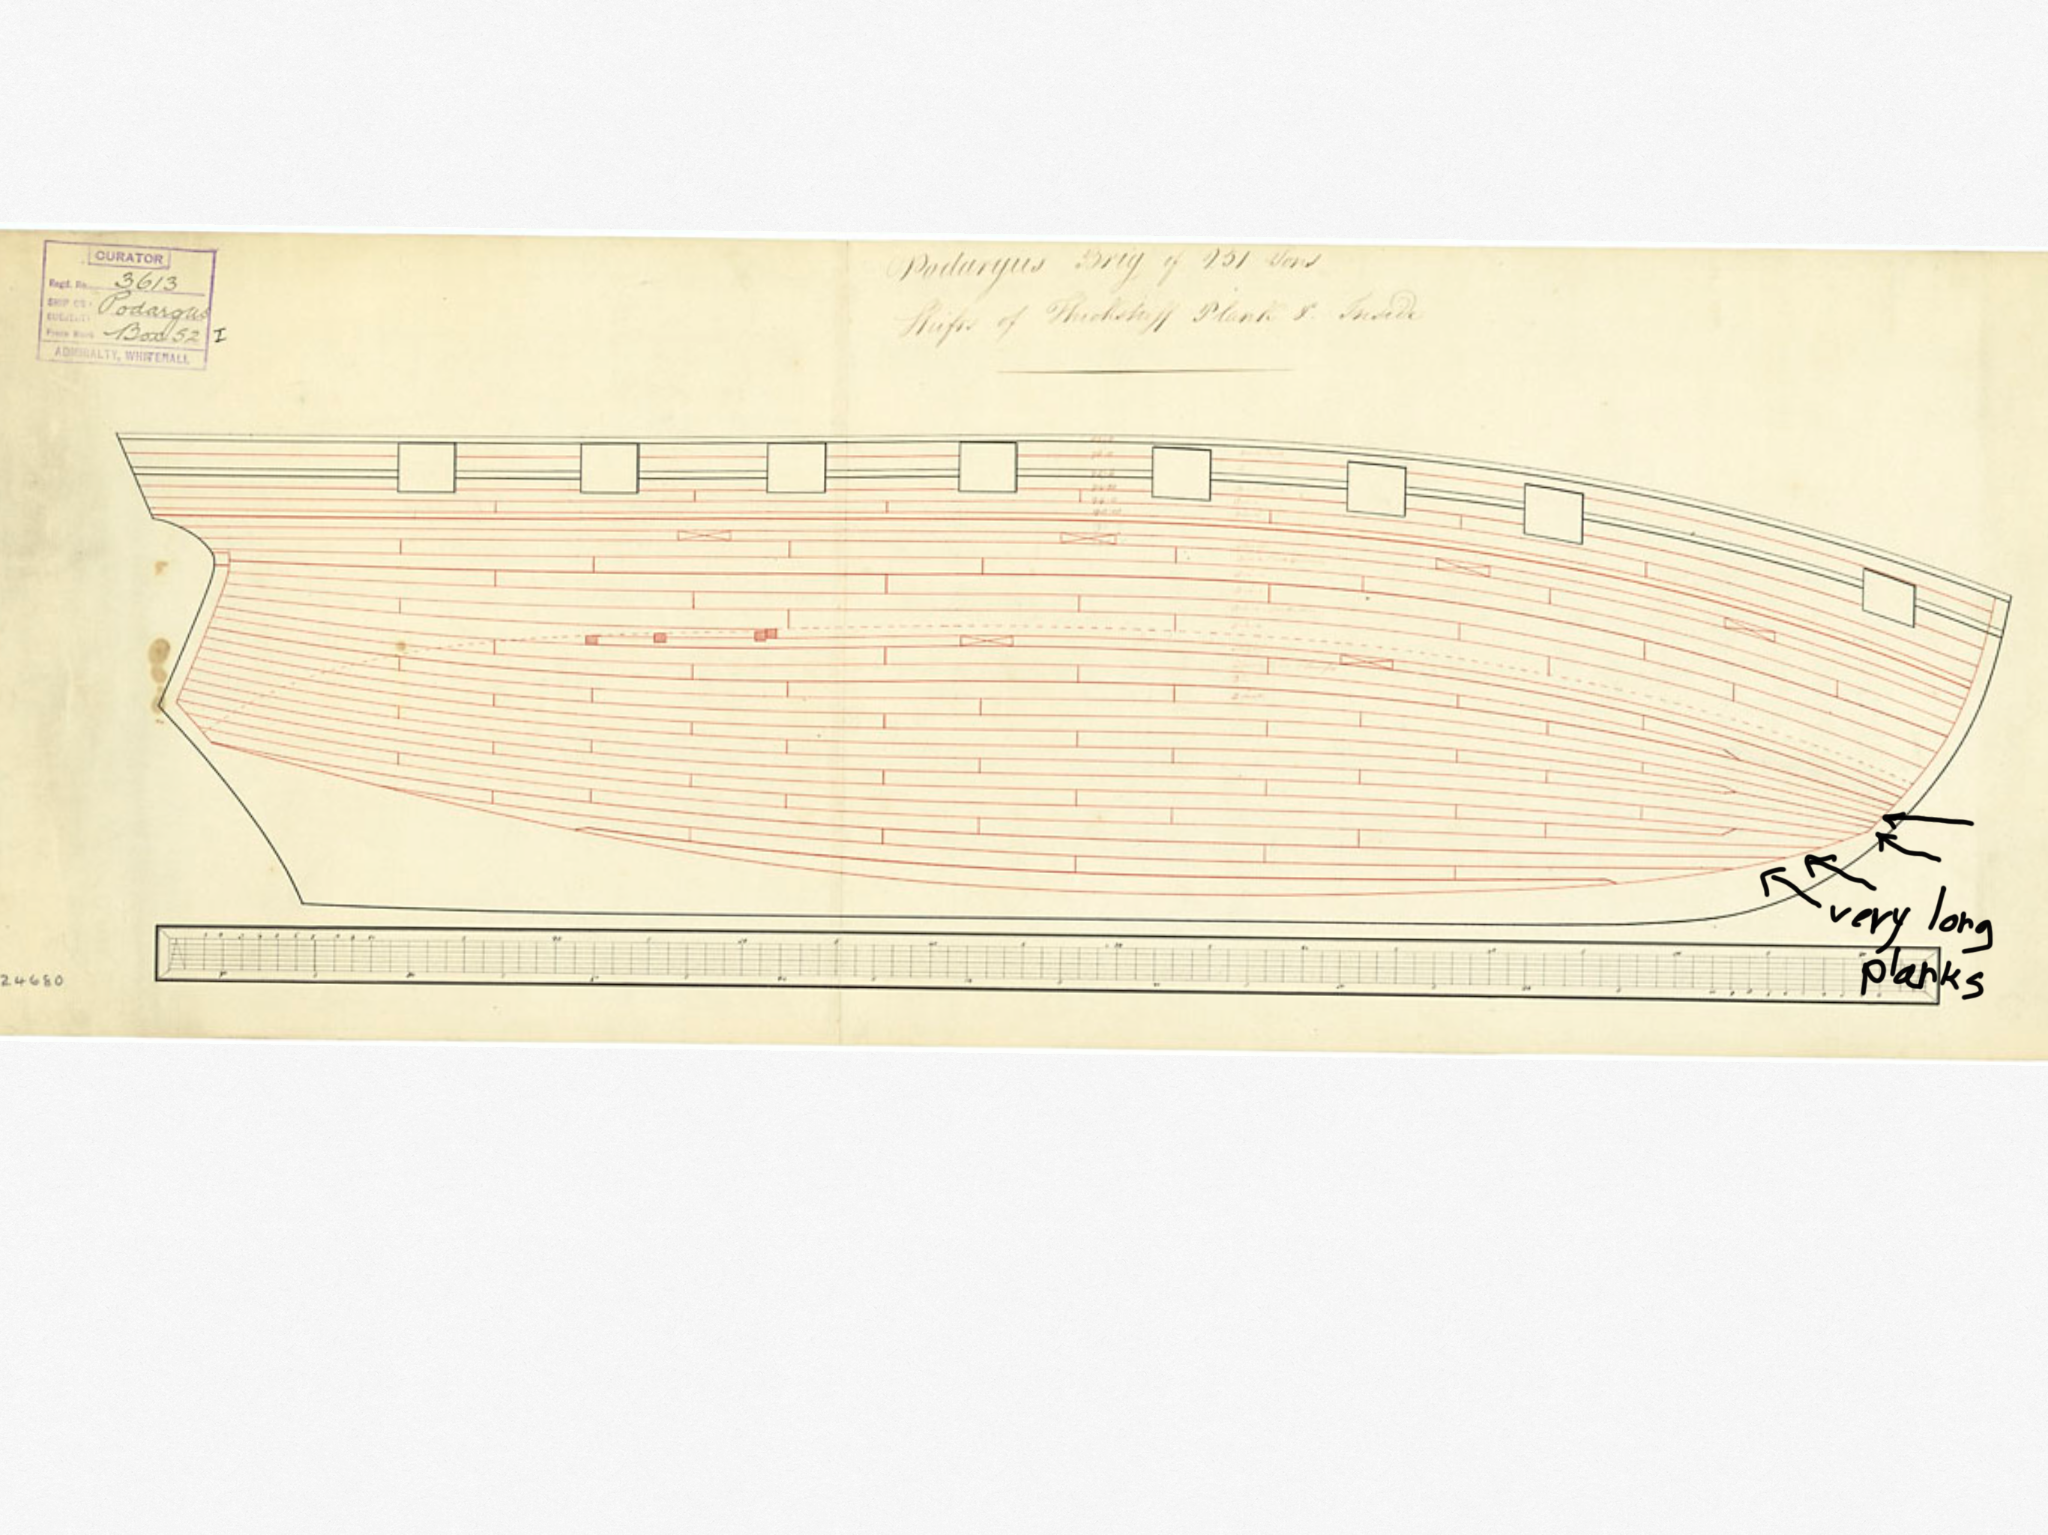
take a look at the Podargus plan:

-
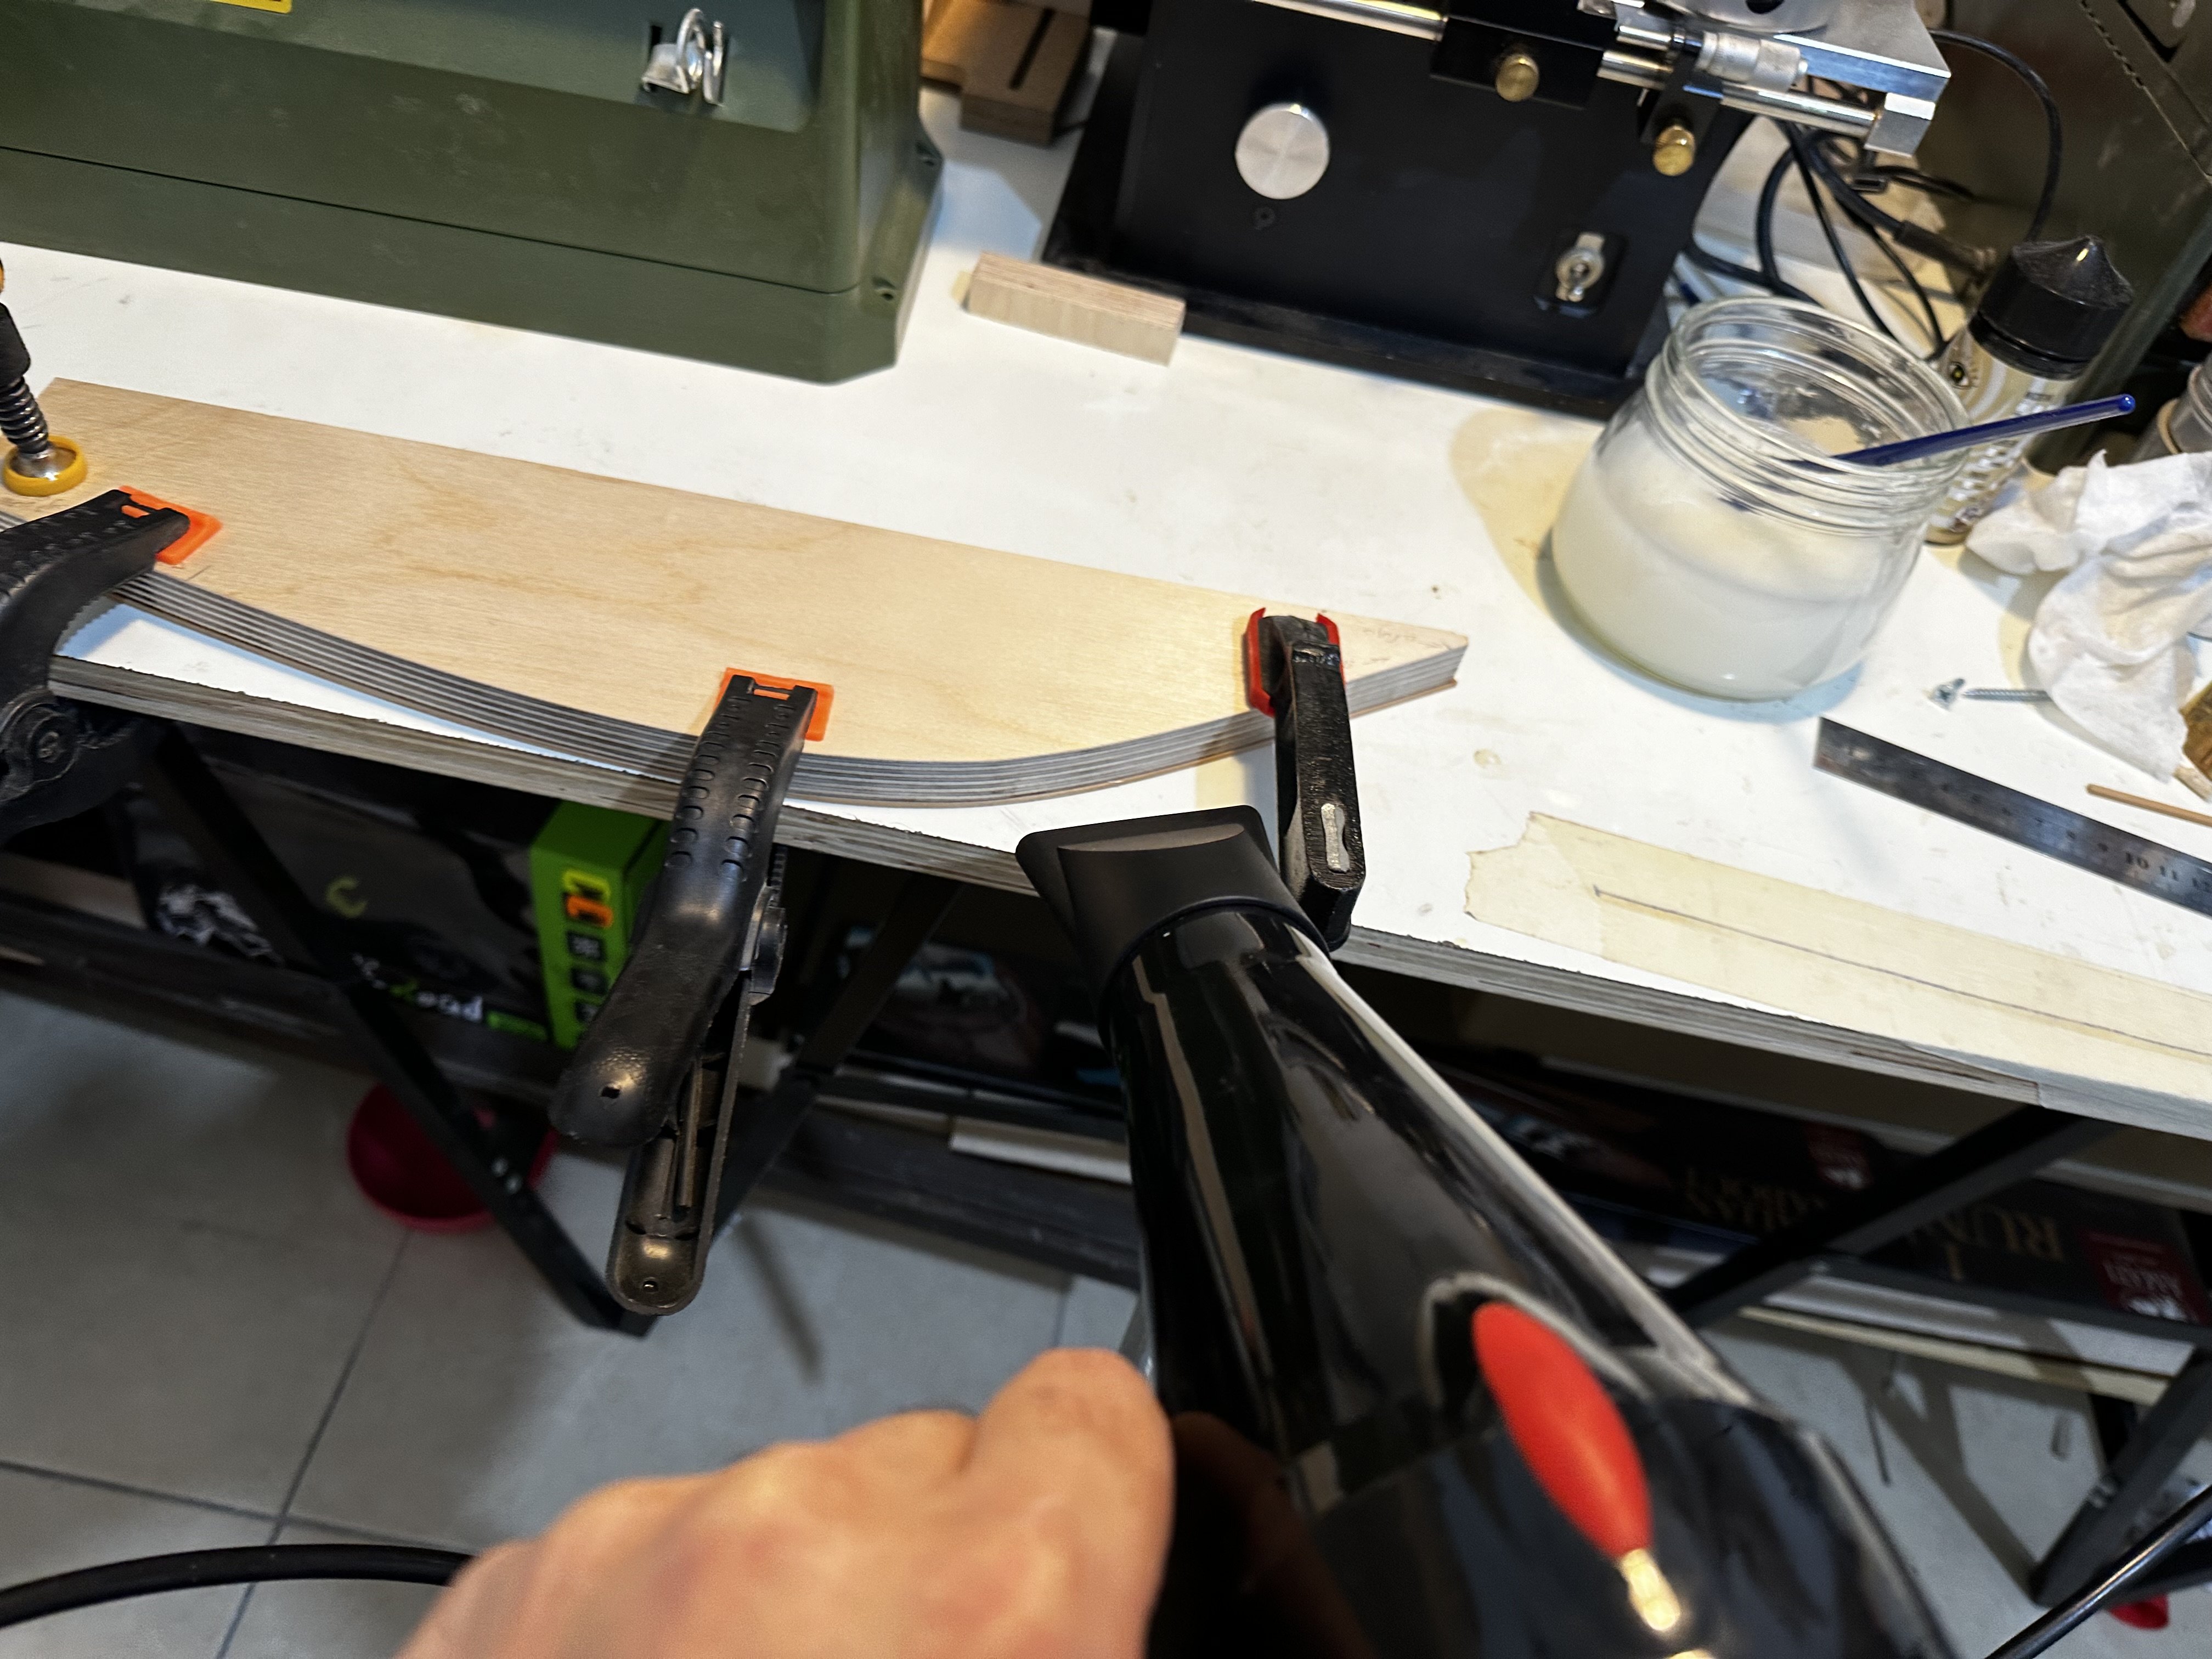
Hello friends ,
Im almost ready to start planking the second planks on my victory project ,
and I saw a lot of build logs (of the victory and other models ) who used the 4 butt shift system...
to be honest it looks beautiful .. but I don’t think they used this method on the real ships
because each plank need to be divided to 4 sections and at each raw the plank will starts his strike from another section
it means every 4 planks we will have1/4 plank how going to touch the keel at the bow aria
and I don’t think it was like this at the real ship
Because most of water pressure it’s on the front of the ship
Is it correct to install 1/4 of plank at the bow section ?!
I will be more than happy to see your comment here
it’s very important for me to discuss this matter with you friends before I will start marking the lines on the model
Best regards
Michael.
- mtaylor and Duanelaker
-
2
-
-
Hello friends ,
is there anyone who has experience with this tool
it looks fantastic for small aria ...
i know proxxon has something similar but the proxxon one it looks like a toy ,
also the vibration of proxxon its horizontal and that one its vertical ! So its much better !
- Moab and thibaultron
-
2
-
-
-
Plywood also getting this problem ..
you can see a lot of build log who had issues with the keel (right from the box !)
and believe me at the factory it was flat ,
dont forget your plywood its about 5-6mm ..(but you can see this problem even at 18mm plywood..)
and about the color black ..
its much better to have shadow inside the gun ports .. mor esthetic and impressive that to see the wood from some angles..
Regards
Michael


Riva Aquarama runabout by michael101 - Amati - 1/10
in - Kit build logs for subjects built from 1901 - Present Day
Posted
Thank you Alan
I think it will be much better with a nice keel to give a flat line for the connecting planks all over the boat