HOLIDAY DONATION DRIVE - SUPPORT MSW - DO YOUR PART TO KEEP THIS GREAT FORUM GOING!
×


Louie da fly
-
Posts
7,986 -
Joined
-
Last visited
Content Type
Profiles
Forums
Gallery
Events
Everything posted by Louie da fly
-
 Very nice work, Chuck. I'm enjoying following this build. Steven
- 130 replies
-
- 2
-

-
- wütender hund
- hanseatic
- (and 2 more)
-
Hi Slowhand. Looking good. You might find Cristiano's polacre buildlog helpful as a reference - https://modelshipworld.com/topic/7290-venetian-polacre-by-cristiano-finished-xviii-century-from-original-drawings/ Steven
-
Nice precise work Goetzi. The model is making good progress. Steven
-
Neither could I. It just might be missing - accounting for the titles every so often. Steven
-
I just came across this video with quite a bit of original footage of the Graf Spee: It might have some worthwhile information in it to helpyou with your build (sorry about the intrusive watermark). Steven
-
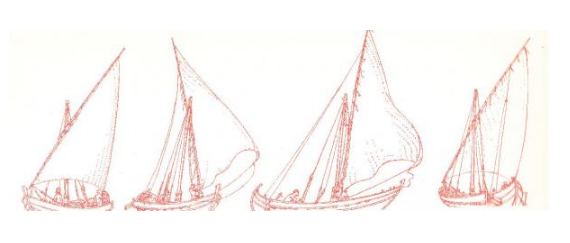
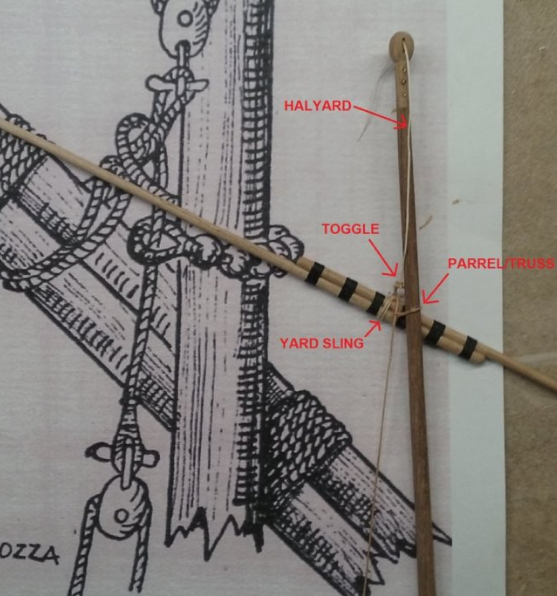
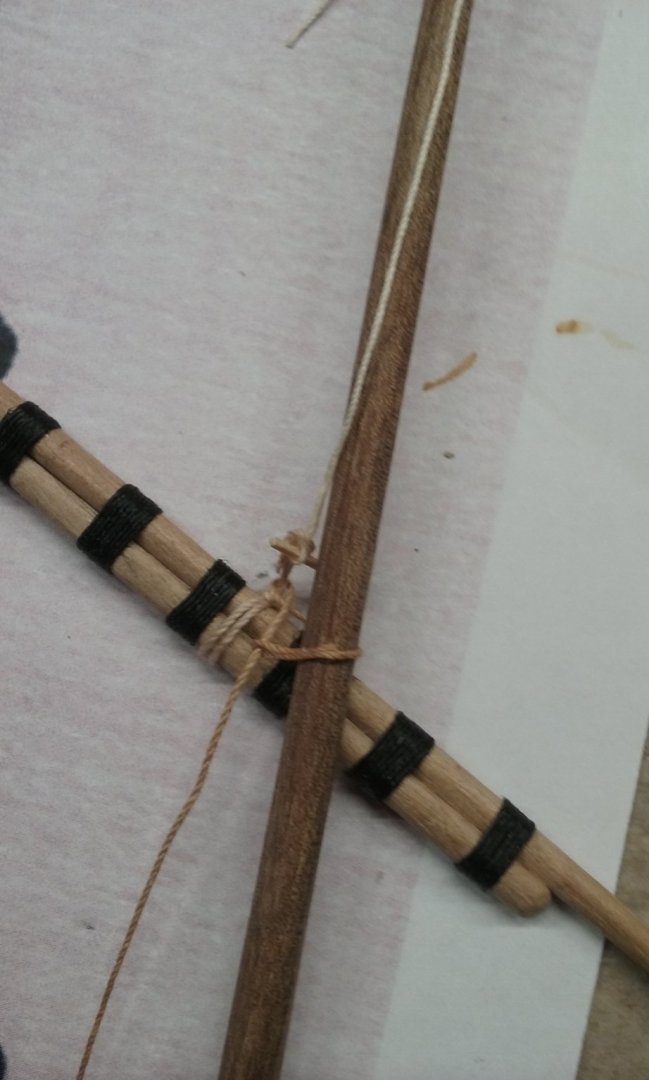
No, Mark. it's part of the "truss" which holds the yard to the mast, but is loosened when tacking to allow the yard to shift to the other side of the mast - per this illustration from Björn Landström's book The Ship. Pulling on the "downhaul" tightens the truss, pulling the yard to the mast. Loosening it allows the yard to swing free so the lower end can be pushed past the mast, over to the other side which is now the leeward side. That way the wind doesn't push the sail against the mast, which allows a better aerofoil shape and reduces chafing. Steven
-
Actually there are plenty of newbies on this forum - it covers a very wide range of skill levels. I have to admit looking at the best of them is a bit intimidating at first, but noblesse oblige - I find the best of them tend to be the most helpful (and tolerant of the dumb mistakes of us lesser beings!) Steven
-
Just did a test for the sling and parrel/truss for the lateen yards, following the Fonseca diagram so kindly sent to me by Woodrat. Like him, I haven't put a block between the halyard and the truss - with the layout I've got it's not needed. Also, no parrel truck, just a rope sling - there is no archaeological evidence for a truck with beads in this period and the very earliest pictorial image I can find for them dates to the beginning of the 15th century - 300 years or more after the date of my dromon. This was just to see if I could make it work - I'm terrible with knots etc and it took me ages to get it right. I'll add the lower toggle and block when I do this for real. At least now I know it can be done, and by me. Steven
-
Very nice work, Matt. Everything you always wanted to know about the designs on Viking shields (and many other things) is at http://members.ozemail.com.au/~chrisandpeter/shield/shield.html Steven
-
Hi Mark, First, welcome to MSW. A lot of Aussies here, and it's a really friendly bunch. If you've got ships a-building, favour us with photos in a build log in the "Kit Models" section. We're always suckers for pictures and you may pick up some helpful tips from the members regarding your model builds. And Bismarck and Graf Spee are classics. Steven
-
Golden Hind 1577 by goemon - 1:150
Louie da fly replied to goemon's topic in - Build logs for subjects built 1501 - 1750
Nice work, Goemon. That's going to be a very attractive model. Steven -
Beautiful work! Steven
-
The guns at Warrnambool still have their circular tracks. Looks like I'll have to take a trip there when all this Covid-19 stuff is over, and take some photos. Steven
-
Hi Rodolfo. Nice work on the model. As you're probably aware this model is based on a votive ship from Mataro in Spain of about 1450 AD. There are some good pictures at https://www.modelships.de/Museums_and_replicas/Maritiem_Museum_Rotterdam/Photos_Mataro_model.htm which may be of help to you. The original model has been damaged (and probably repaired) over the centuries, and it is thought a mizzen mast was added at some point. It appears the museum has at least removed the later additions, but obviously several parts are missing. Steven
-
Thanks, Pat. Next time I go to Warrnambool I'll take photos there, too. It's not Fort Nepean but Fort Queenscliffe that has the others - it is a bit harder to get to as it's a working military base, though there are reular guided tours it's a long drive from home, particularly if the tour isn't on when you get there. But it also has disappearing guns - in working order! I was told by the guy that ran the tour that they fired it off once and broke every window in the place. Thanks, Druxey - I'll look there too. Steven
-
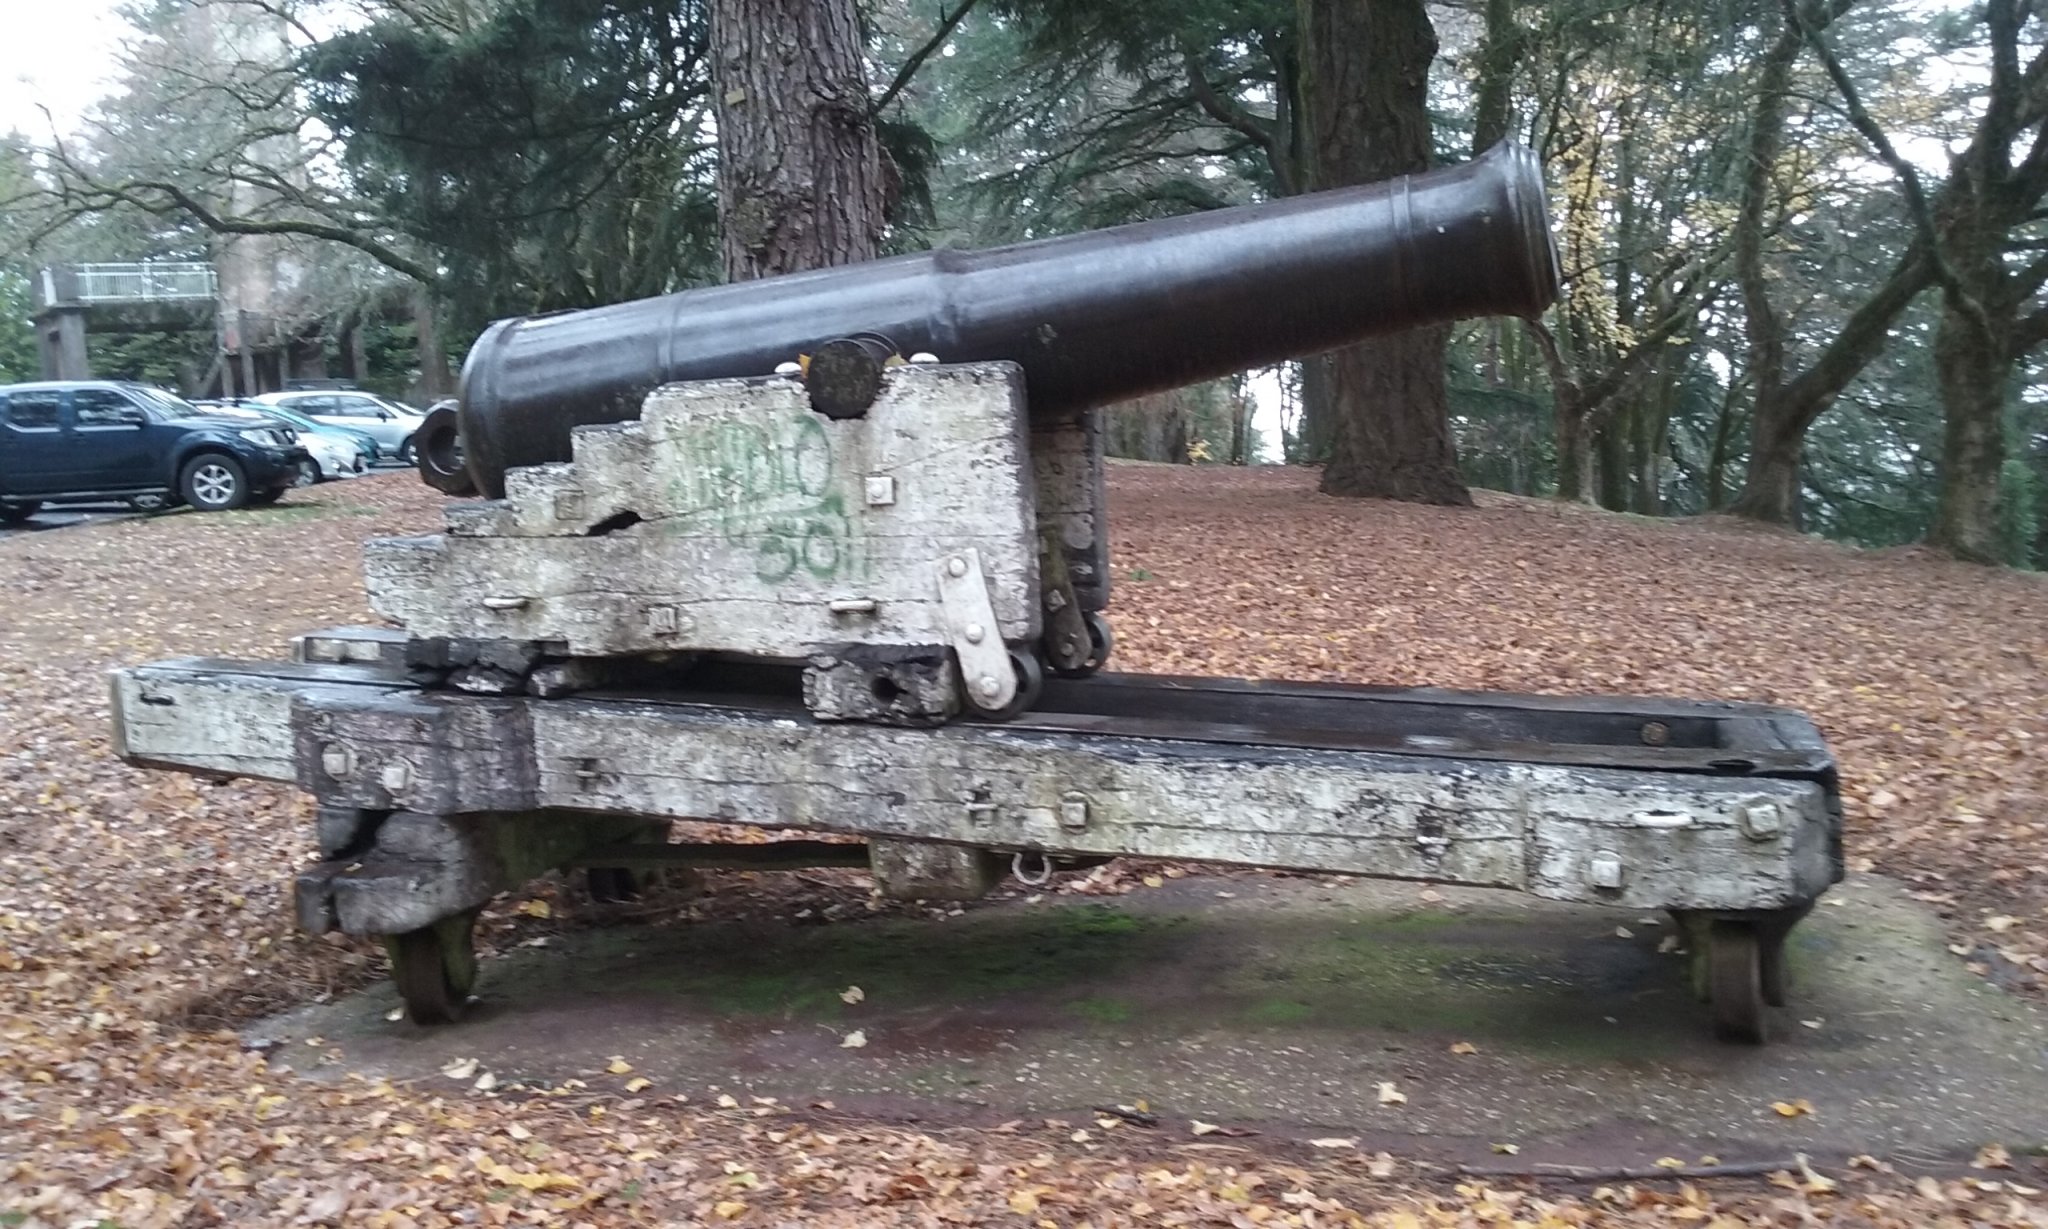
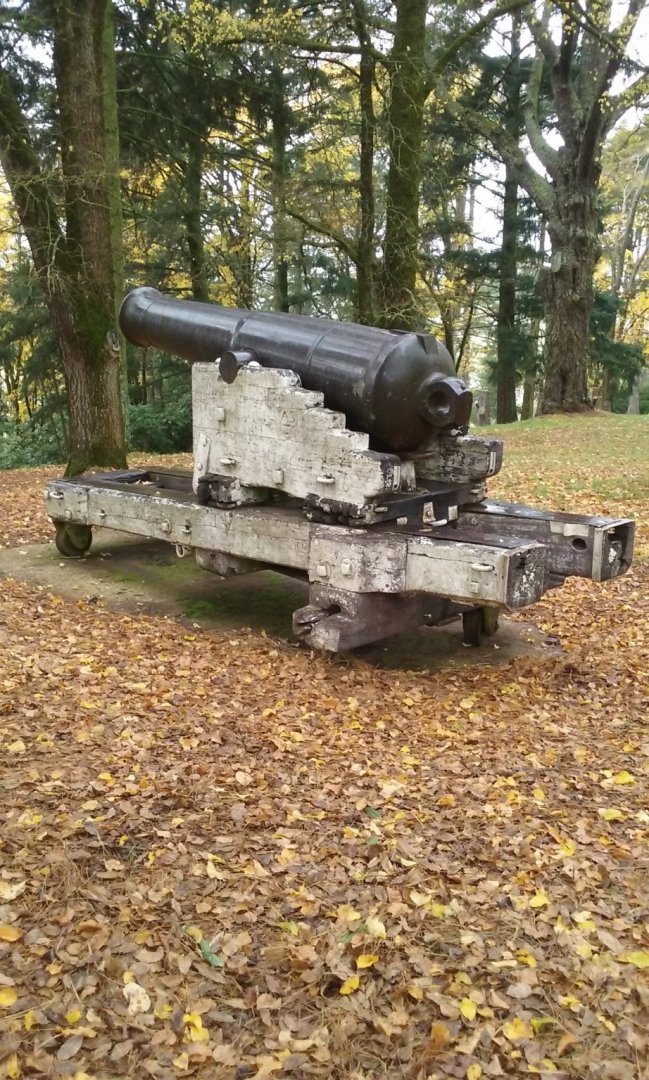
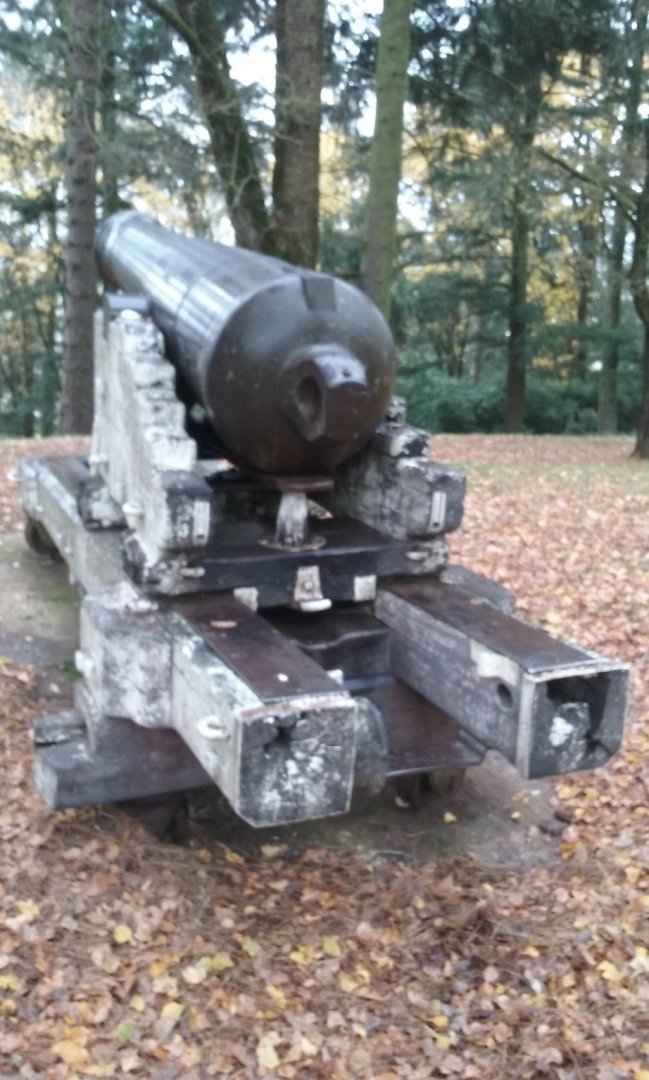
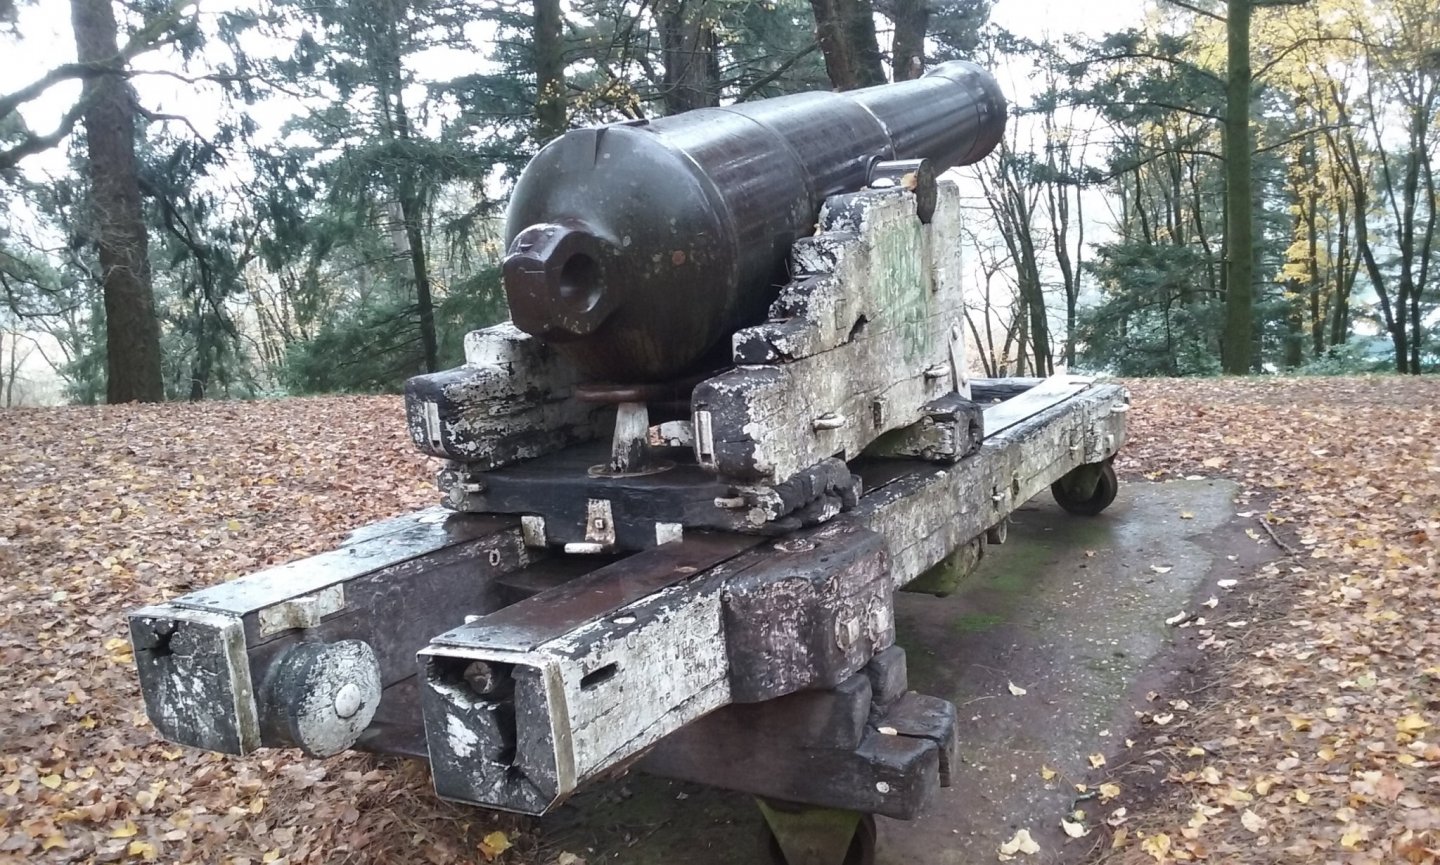
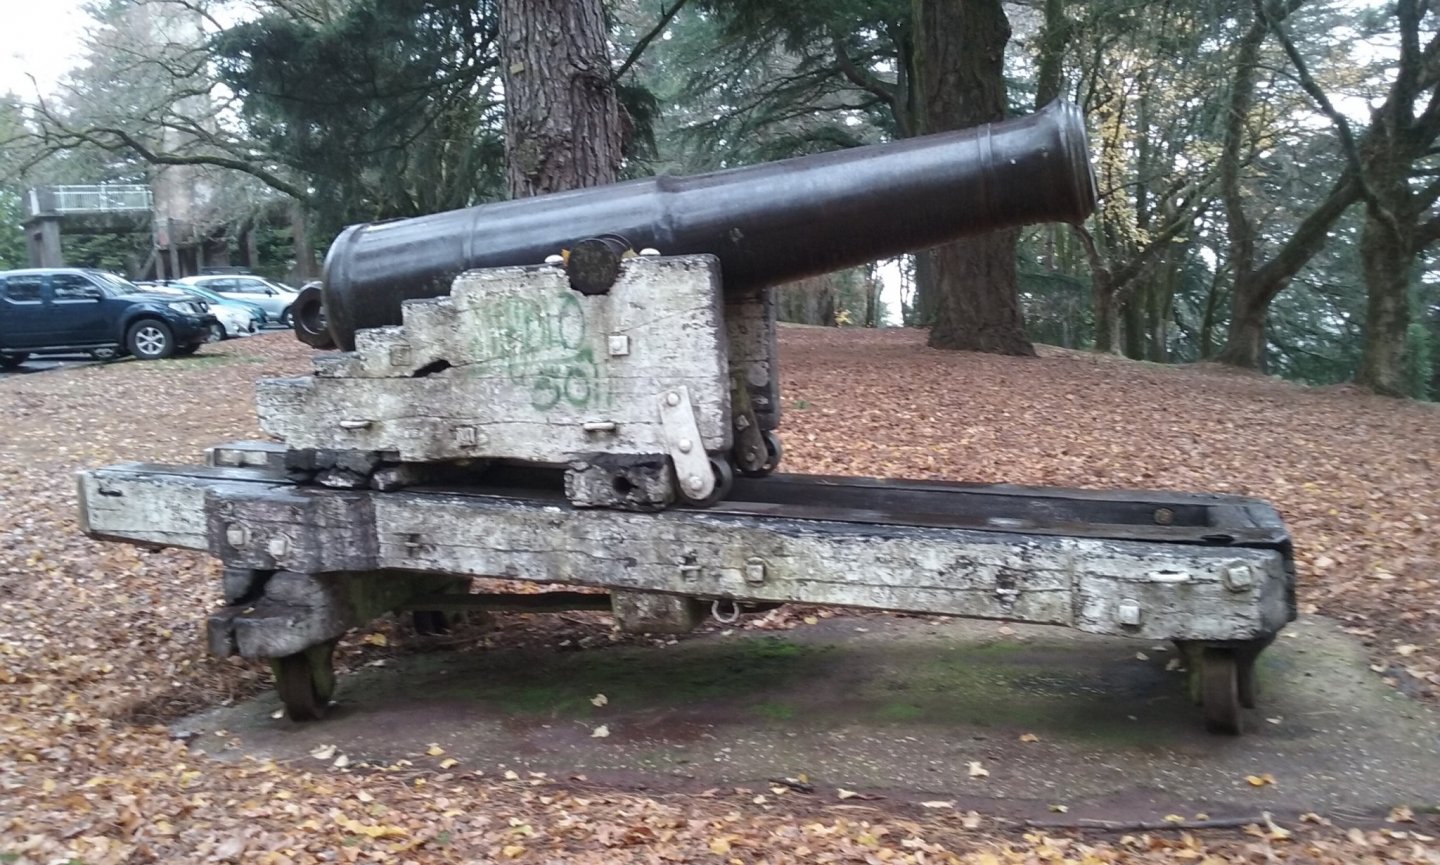
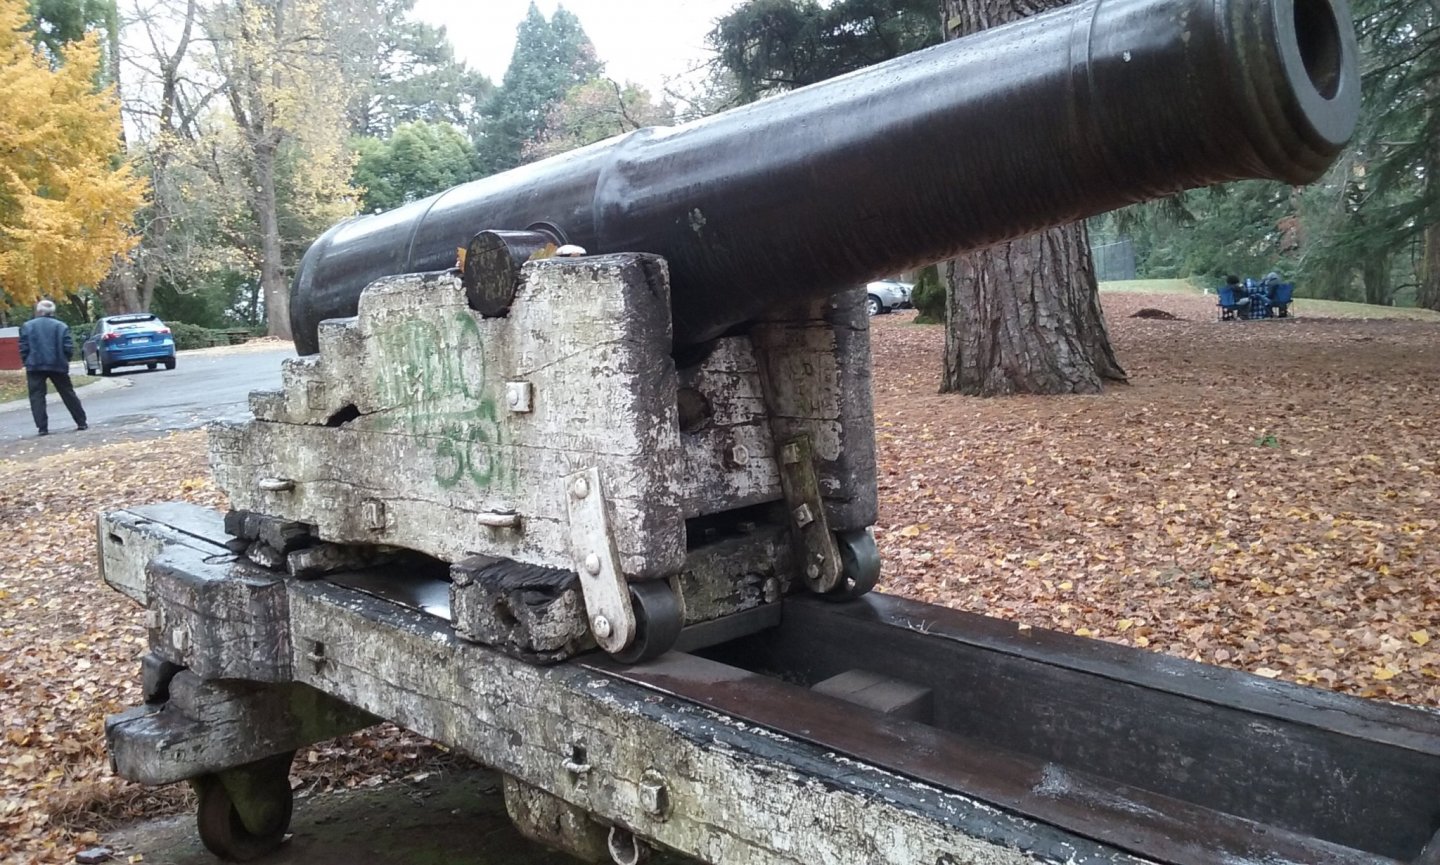
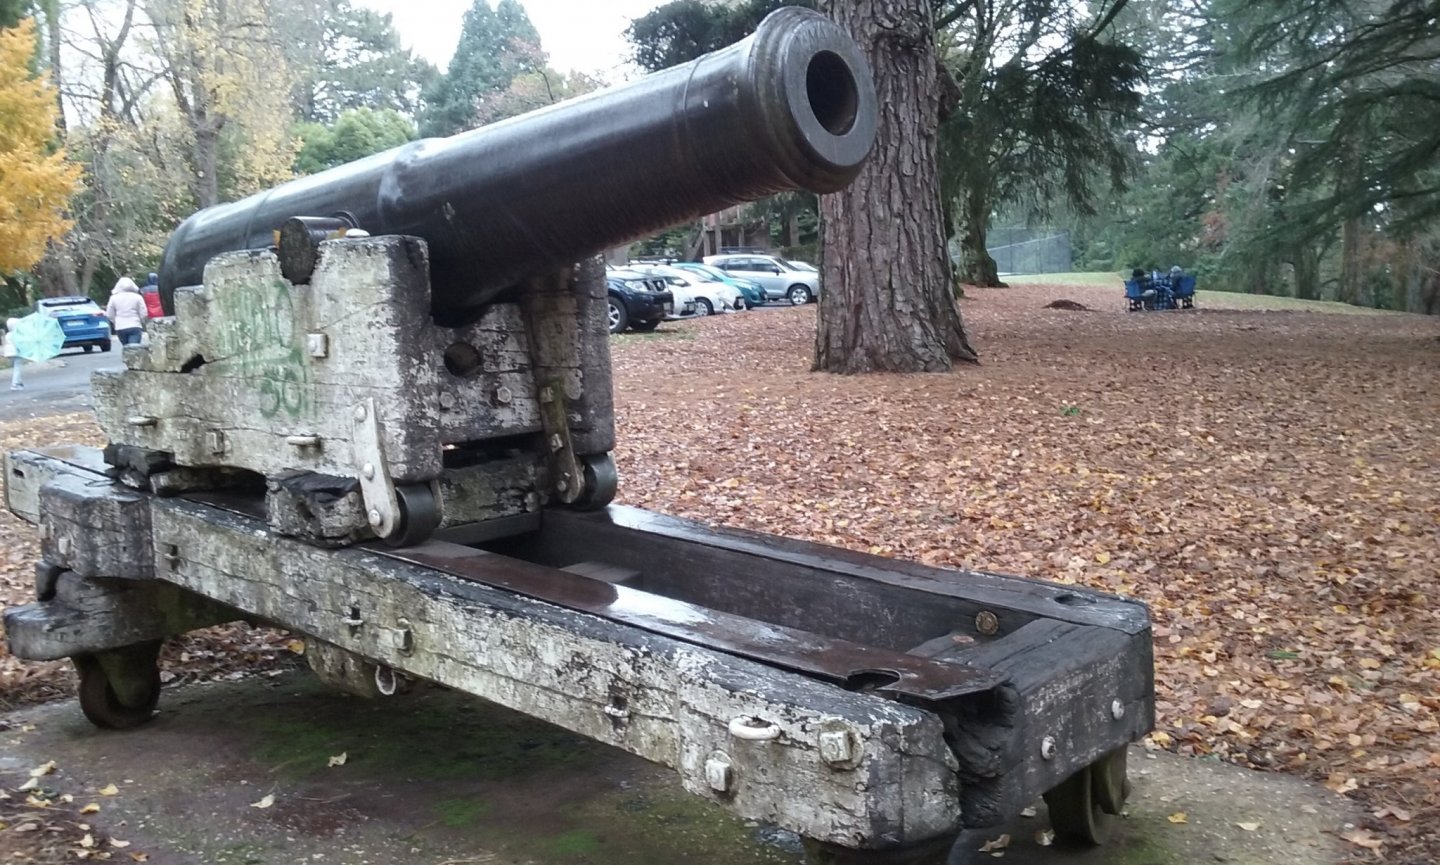
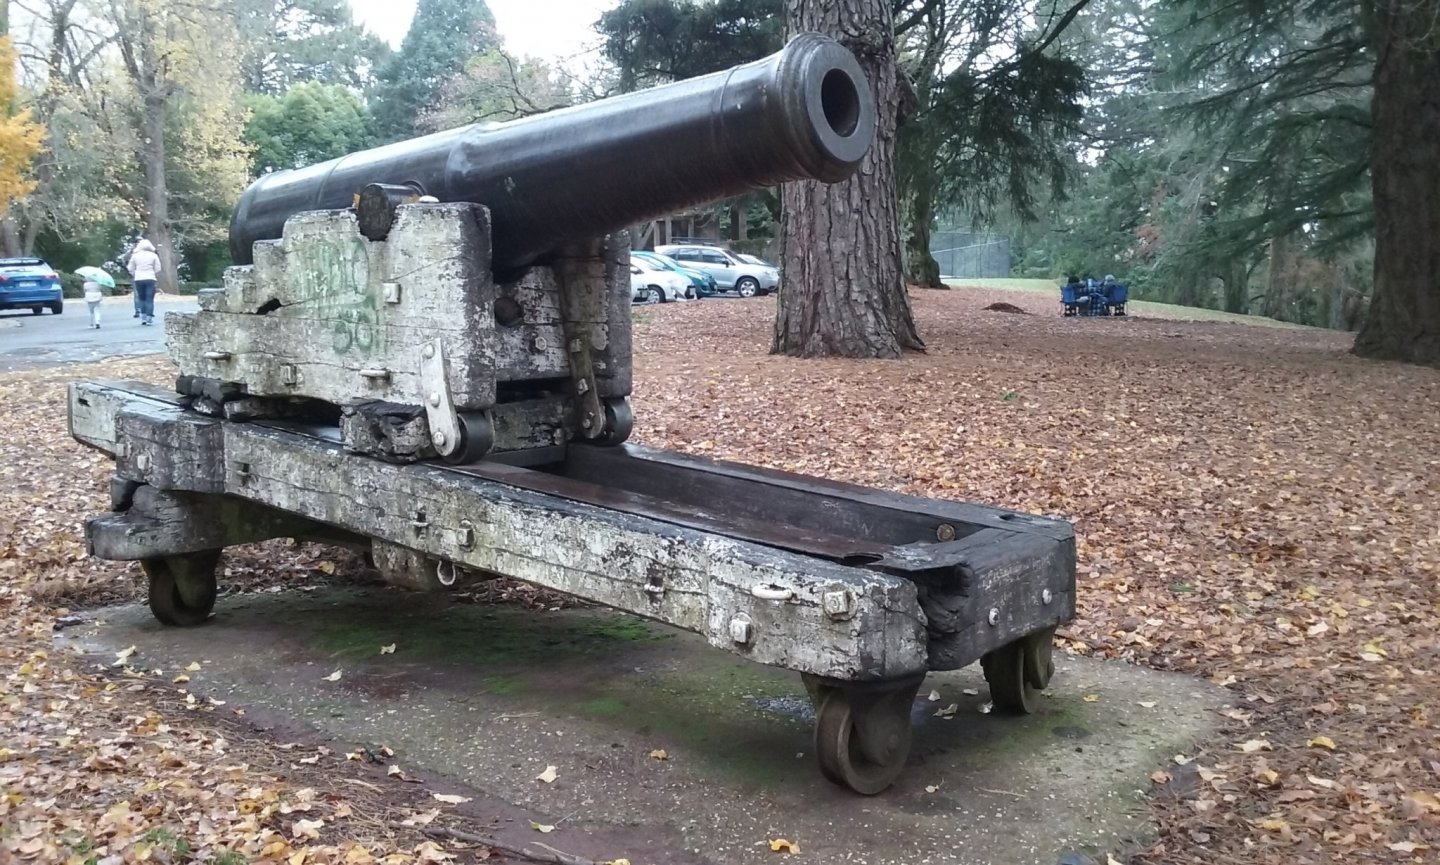
In a park at the top of Wombat Hill (yes, it's really called that!) in Daylesford about 40 minutes drive from my home is a cannon which looks to be from a coastal fort, judging by the carriage. Here are some photos. There are guns with similar carriages in the old coastal fort at Warrnambool and (IIRC) at Fort Nepean at Edgecliffe. I didn't think at the time to look at the barrel for an engraved date. I'll have a look next time I'm there. If anyone wants close-ups of particular details let me know. Steven An_Introduction_to_Hand-to-Hand_Combat_a.pdf
-
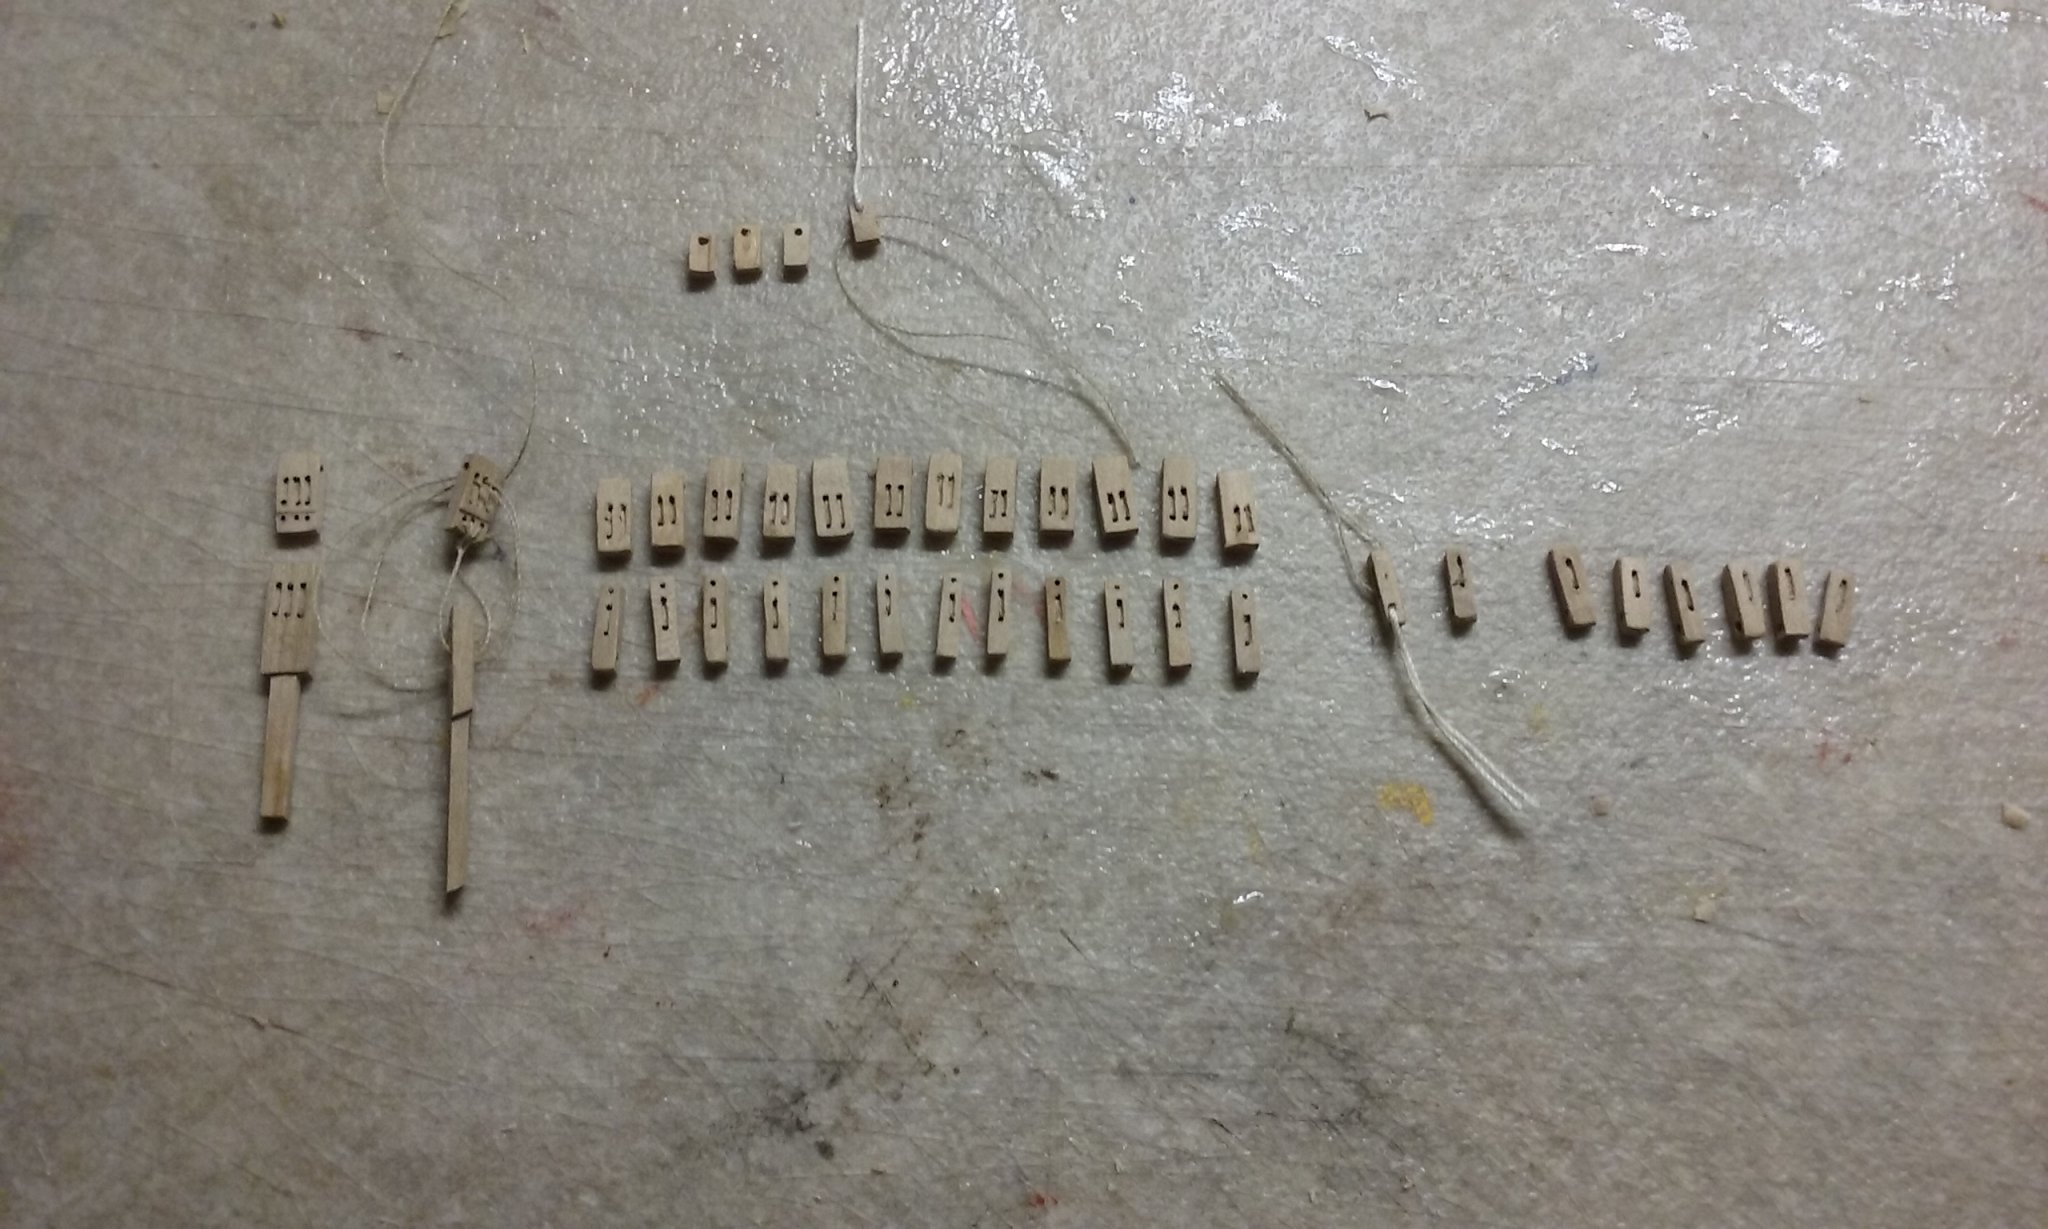
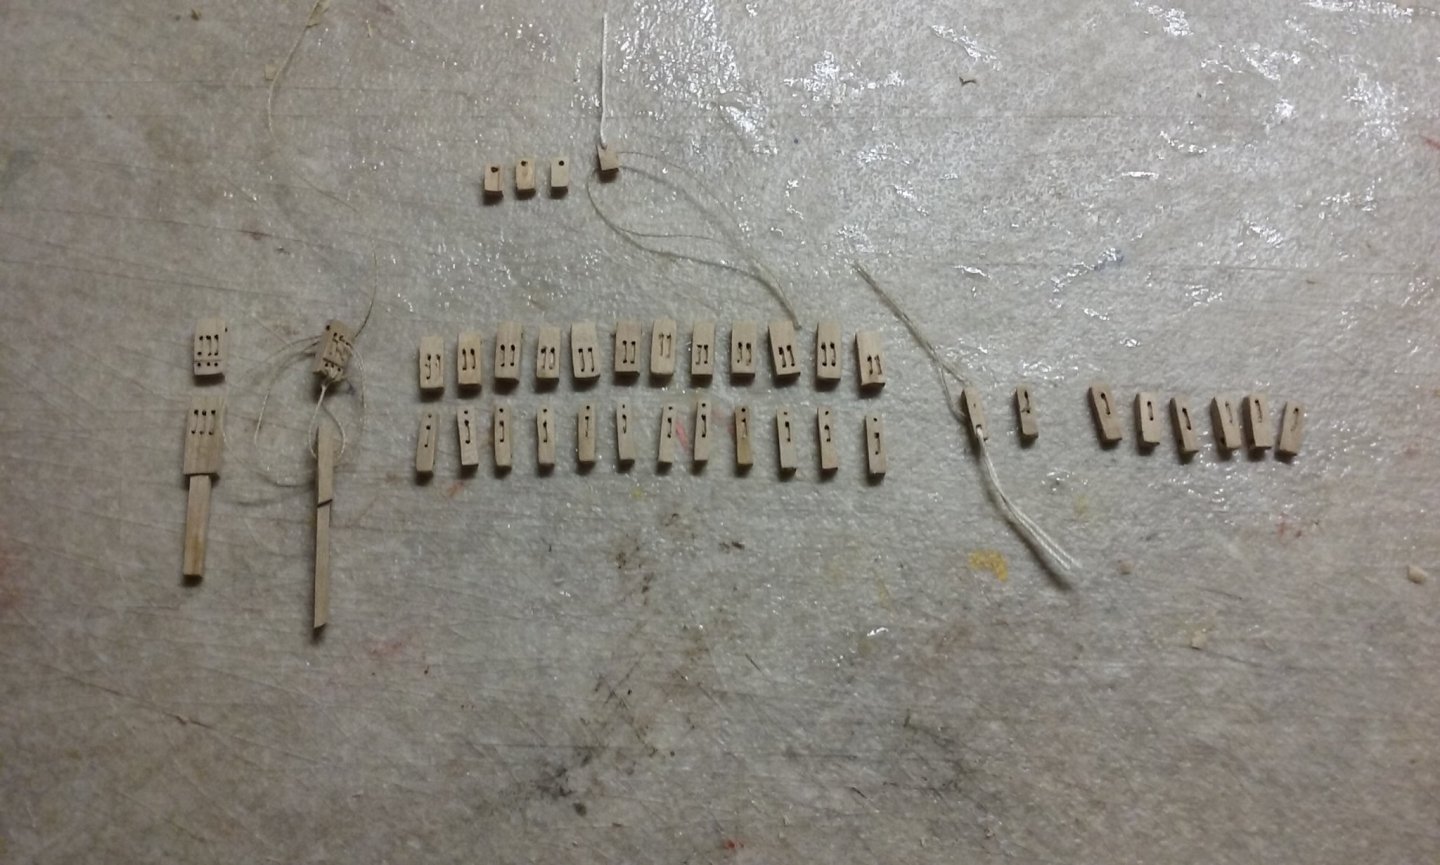
Curses! I have this enormous roll of thick(ish) thread that I don't want to waste. Maybe I can investigate dyeing it with fabric dye. By the way, all those blocks are either directly taken from or closely based on actual archaeological finds from Byzantine wrecks. The triple-sheaved block and the single-sheaved blocks at the top and on the right-hand side are direct copies. The halyard knight is based on the triple block (naturally), and the central row of single-sheaved blocks is the same as the ones on the right, with the addition of an extra hole for the end of the tackle joining them to the double-sheaved blocks. I haven't seen any finds of those, but they are made by merging the features of the triple and single. Now all I have to do is make 24 toggles . . . Steven
-
The technical term for those is machicolations. Steven
-
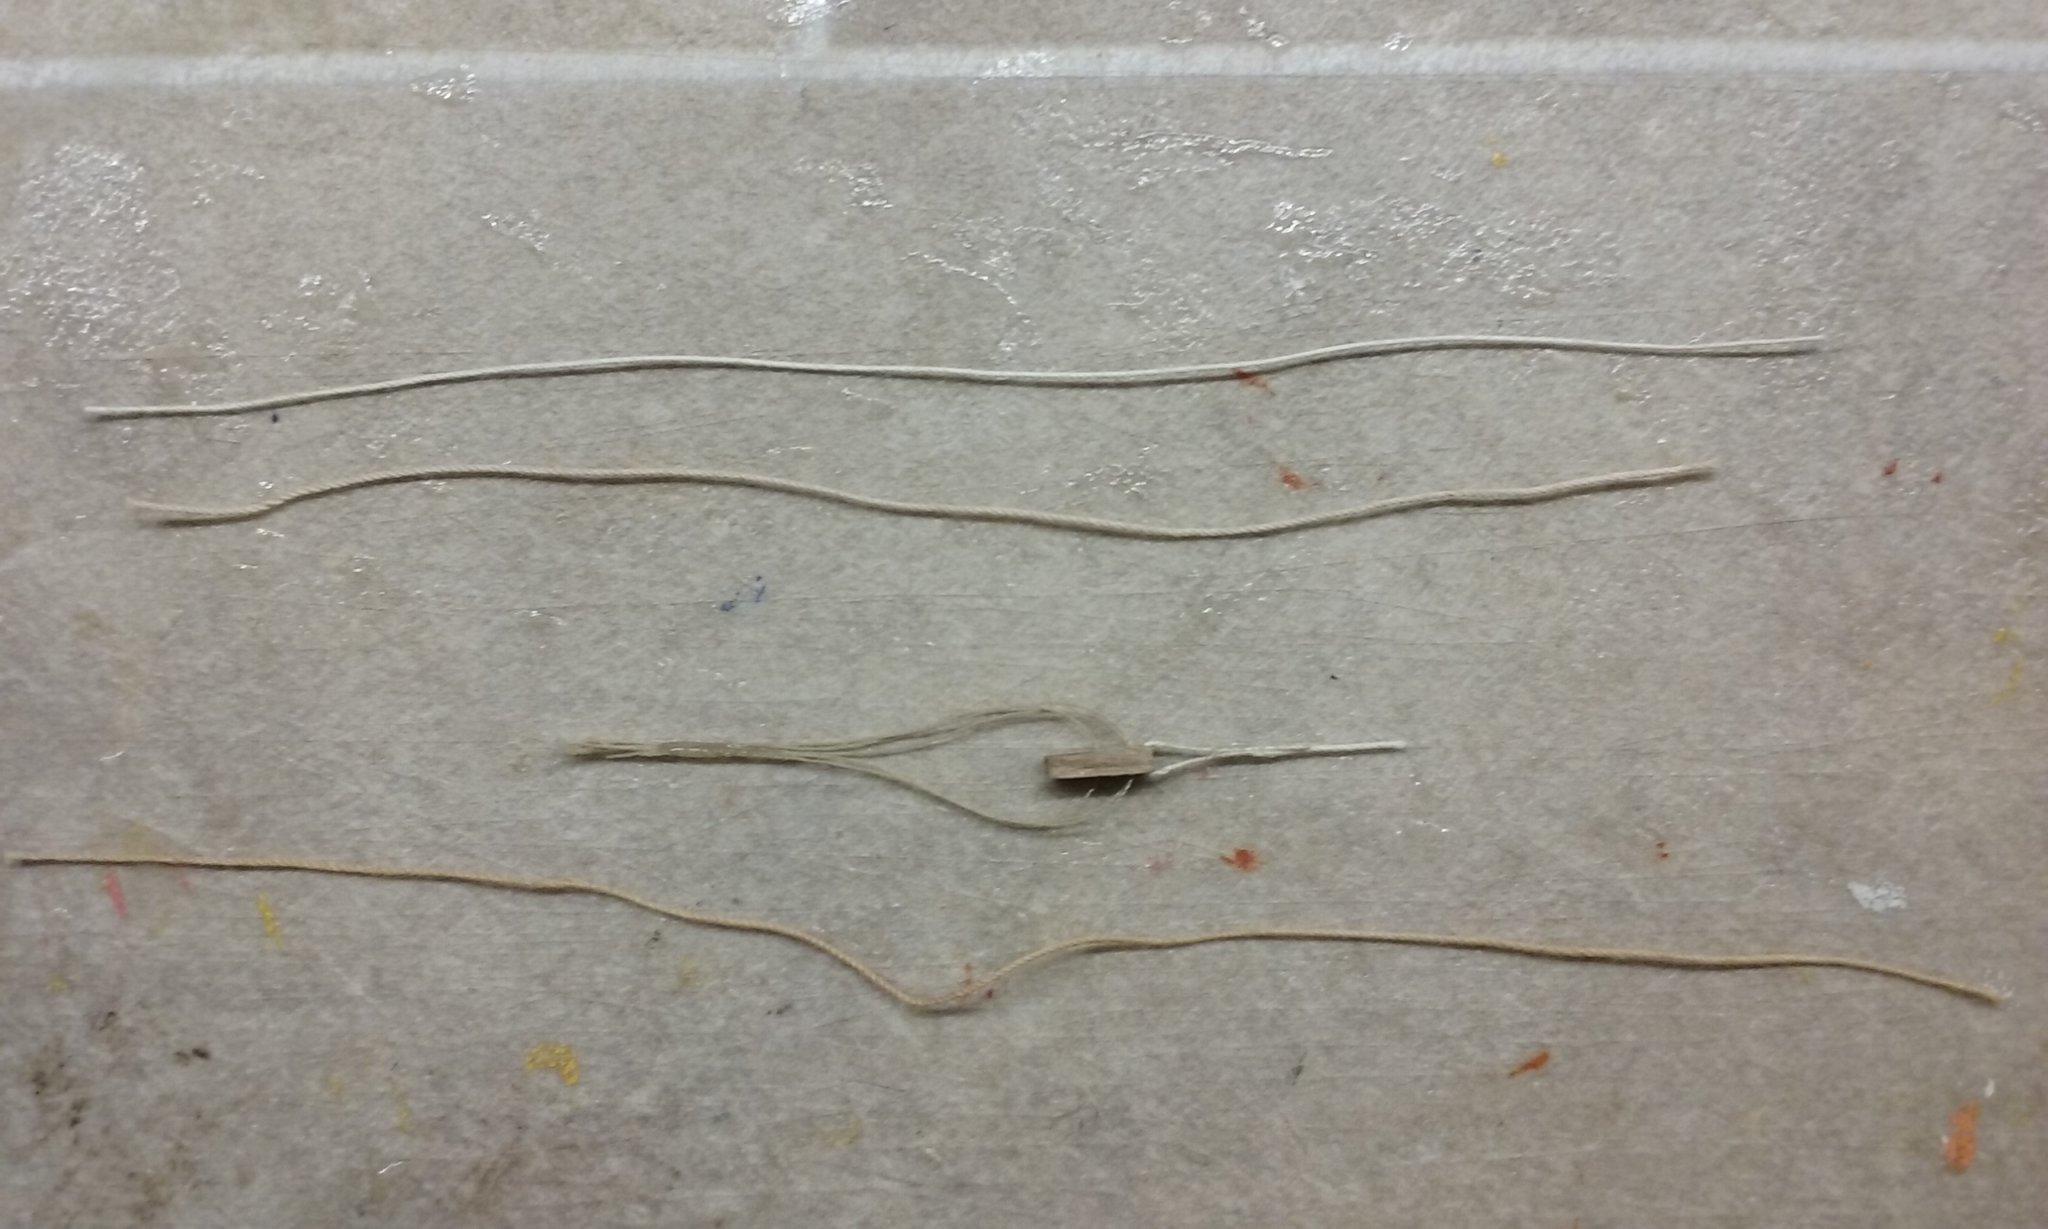
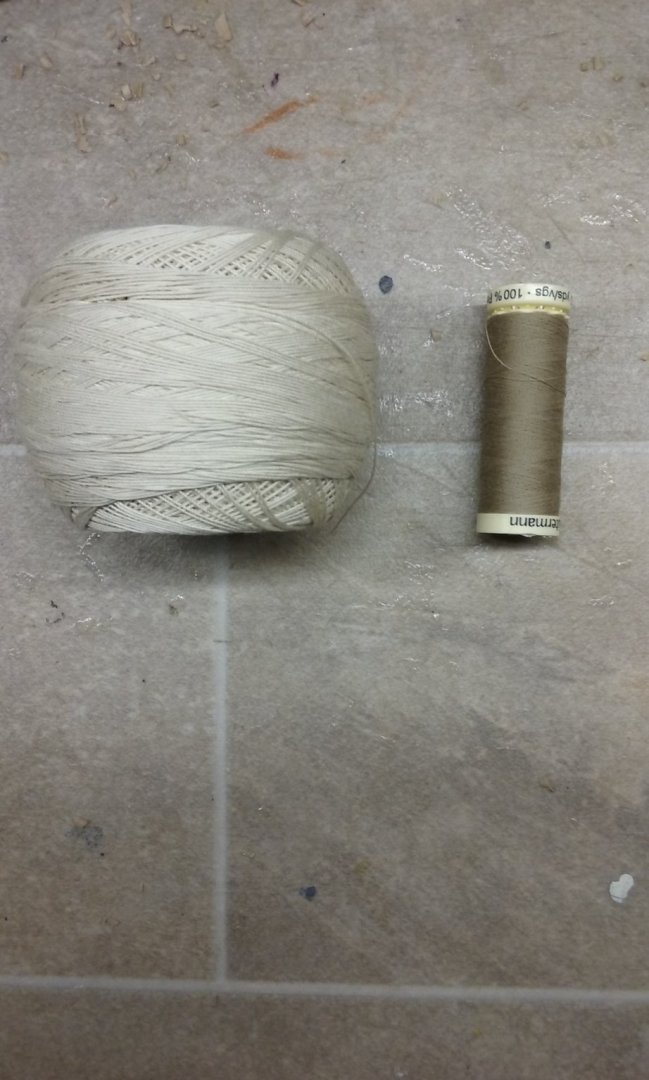
Here are all the blocks together, including the knights for the halyards. If I've got my maths right, that's the lot done. And I've been experimenting with dyeing the cordage for the heavier rigging. Here is the ball of cord - stark white - along with the cotton for the thinner stuff, which is the color I want the heavier stuff to be. Unfortunately, the colour values aren't all that good in this photo, but I think you get the idea. First I tried a teabag in boiling water - after 10 minutes, 20, 30, 40 and 50 minutes. There was almost no difference in colour between them all, but the white had turned to a rather pretty very light tan. Then I tried 4 teabags over 24 hours.The cord got considerably darker - but I discovered I liked the first one better. Top - undyed, second after 10 minutes, in the middle a block with the two different cord thicknesses (undyed), and the bottom one is after 24 hours with 4 teabags. Again the colour values aren't as good as I'd like them to be, but you can at least see that the colours are different. The 10 minute dyelot is a nice gentle colour, which I'm happy to use. I just hope the tannin doesn't do anything nasty to the (cotton) thread. Steven

-
Seats of Ease
Louie da fly replied to TKAM's topic in Discussion for a Ship's Deck Furniture, Guns, boats and other Fittings
SJSoane has just finished the Bellona's seats of ease, and the build log includes some very good photos of them from the contemporary model of the Bellona - see -
Goewulf, that appears to be a different ship - a French ship called the Saint Louis which is dated to the first third of the 17th century. The note at the bottom of the site Marco linked to says "El Galeón San Luis del S. XVII, participó en la Batalla de las Dunas, en la que luchó contra Francia y Holanda en la Guerra de los 80 años" The galleon San Luis participated in the battle of the Dunes (1600 AD) - [also known as the Battle of Nieuwpoort] in which she fought against France and Holland in the 80 years war. So the timing is similar to within a few decades, but the French ship of three gundecks is considerably bigger - and in my opinion, more modern - than the Spanish ship with only two. But apart from a river crossing in boats the battle of the Dunes was fought on land - see https://en.wikipedia.org/wiki/Battle_of_Nieuwpoort- so how a galleon was able to take part in it I don't know. I'd agree with Amateur that this model probably represents a "generic" galleon, rather than a specific vessel, even if it's been given a name. Regarding the plans, I found this - http://www.anb-online.it/navi-mercantili-e-navi-antiche/le-documentazioni-di-vincenzo-lusci/1403-galeone-spagnolo-175/ - apparently you can buy both plans and Vincenzo Lusci's monograph, though I don't know what the situation is regarding copyright. Or, and probably better still, you could buy Lusci's book from ebay at https://www.ebay.ca/sch/sis.html?_nkw=Spanish Galleon Galeone Spagnolo 1607 wooden model building book Vincenzo Lusci&_itemId=174195024314 . The price is fairly attractive, but the cost of shipping seems rather high. But if, as Amateur says, the drawings by Lusci don't match up with the Disar model, that may not be any help to you. If the booklet is all you have, it makes it a little difficult. Probably your best option is to start a build log in the Model Kits section. Post photos of the contents of the box - all the bits and pieces of the kit. There are many experienced modellers on this forum who will be able to help you step through the process. The other thing is to look at similar build logs, particularly of galleons - both kits and scratch built, - such as and pick up tips from how others did it. And have fun with it! Steven
-
Magnificent, George! You can be justly proud of this model and the research - and skill - that went into producing it. Steven
- 81 replies
-
- 3
-
-
- egyptian
- byblos ship
- (and 1 more)