Louie da fly
-
Posts
7,993 -
Joined
-
Last visited
Content Type
Profiles
Forums
Gallery
Events
Everything posted by Louie da fly
-
 That's good to hear. I hope evrything's ok for you and yours.
 -
That's looking very good, Rodolfo. I particularly liked your scarph joint for the last wale, making use of a broken piece of wood that would otherwise have been wasted.
-
Sorry to hear about you getting sick; glad to hear everything's good again and you're back onto the model. Looking forward to seeing your photos. Galleys are fascinating vessels (though I sometimes regret having taken one on myself). If you ever get the chance to get hold of a book called "Age of the Galley" I'd highly recommend it.
-
Hi, Nic and welcome. Even if you haven't yet got back to working on it, you might like to start a build log anyway, with "retrospective" photos of your Constitution so far. Always nice to see pics of people's work.
-
Welcome, Bill! Good to see you've started your build log - I'm looking forward to following it. You're off to a good start (and you've already started to "kit-bash" to take the model to a higher level than the kit provides - kudos for that!) I've never built anything that complex in plastic - the only 20th century ships I ever made were Airfix kits of the ships that took part in the battle of the River Plate - Graf Spee, Exeter, Achilles and Ajax - but they were even smaller scale than yours (1:600) and that was a very long time ago. So I'm not able to give any advice, but you're probably right in going for 1:350 next, and looking at the build logs for these ships to see which ones are better to build. As far as wooden models go, that question gets asked a lot and if you look at the threads on New Member Introductions you'll see a lot of good advice regarding what's a good "beginner's" model. Just don't do HMS Victory or Vasa as your first build!
-
It's a difficult decision, and one most modellers come up against (including me). Do I change the thing I did in good faith but now know better, involving all kinds of work and hassle, and possibly not a perfect result, or do I leave it as it is and put it down to experience, knowing it might sneer at me every time I look at it for the rest of eternity? You have to decide what's right for you. I've taken both those courses on different aspects of the same model at different times. But also remember that whichever course you take now, umpteen years from now you'll still look back on your first attempts and think "Wow! I've really come a long way!" Which is only right. Learn from mistakes and do better with every new build you do - but in my view the important thing is to enjoy the ride. This is a hobby, after all.
-
Interesting hull shape, too. So different from the normal run of models you see.
- 51 replies
-
- 3
-

-
- miss unlimited
- dumas
- (and 1 more)
-
This is a project after my own heart. It will take quite a bit of judgment to keep as close as possible to the client's brief (repaired but still looking aged) while replacing missing parts. Are you planning to "age" the new parts or leave them new-looking to show what's been replaced? And how about the cleaning? I expect even once cleaned the ship will retain much of its patina, but I'd say that would also be a judgment call. I'll be following with great interest.
- 71 replies
-
- 2
-
-
- great harry
- henry grace a dieu
- (and 3 more)
-
Hi Robin, Haven't heard from you in a while. How's it all going?
- 91 replies
-
- 1
-
-
- kolderstok
- duyfken
- (and 1 more)
-
Hi Paul, Just touching base to see how it's all going. I hope you're well on the mend by now. Stay safe, and I hope you can get back into modelling soon. Best wishes,
-
Hi David, Just revisiting after quite a while - I'd lost sight of this build. Did you get any further with it?
-
Hi mkmossop, I just came across this log after a reorganisation in the MSW site. That's a very cool Santa Maria. Did you ever finish it? If so, any chance of some photos?
- 29 replies
-
- 1
-
-
- santa maria
- amati
- (and 1 more)
-
Hi D_Mc, I've just been going through some old build logs and I came across yours, which I'd never seen before. Did you continue with this? For a first build it's very impressive. It would be great to see it finished.
-
Hi André, Haven't heard from you for quite a while. Are you still modelling? It'd be great to see your Santa Maria all completed - it was looking very good at last report.
-
G'day, Eddie. Haven't heard from you since 2017. Are you still out there? Any progress on your carrack since your last post?
-
Hi, Ships88. How's it all going? Do you think there's a chance of doing any more on your trireme? I was very much enjoying following your build log, but I can understand if other issues take priority. Best wishes,
-
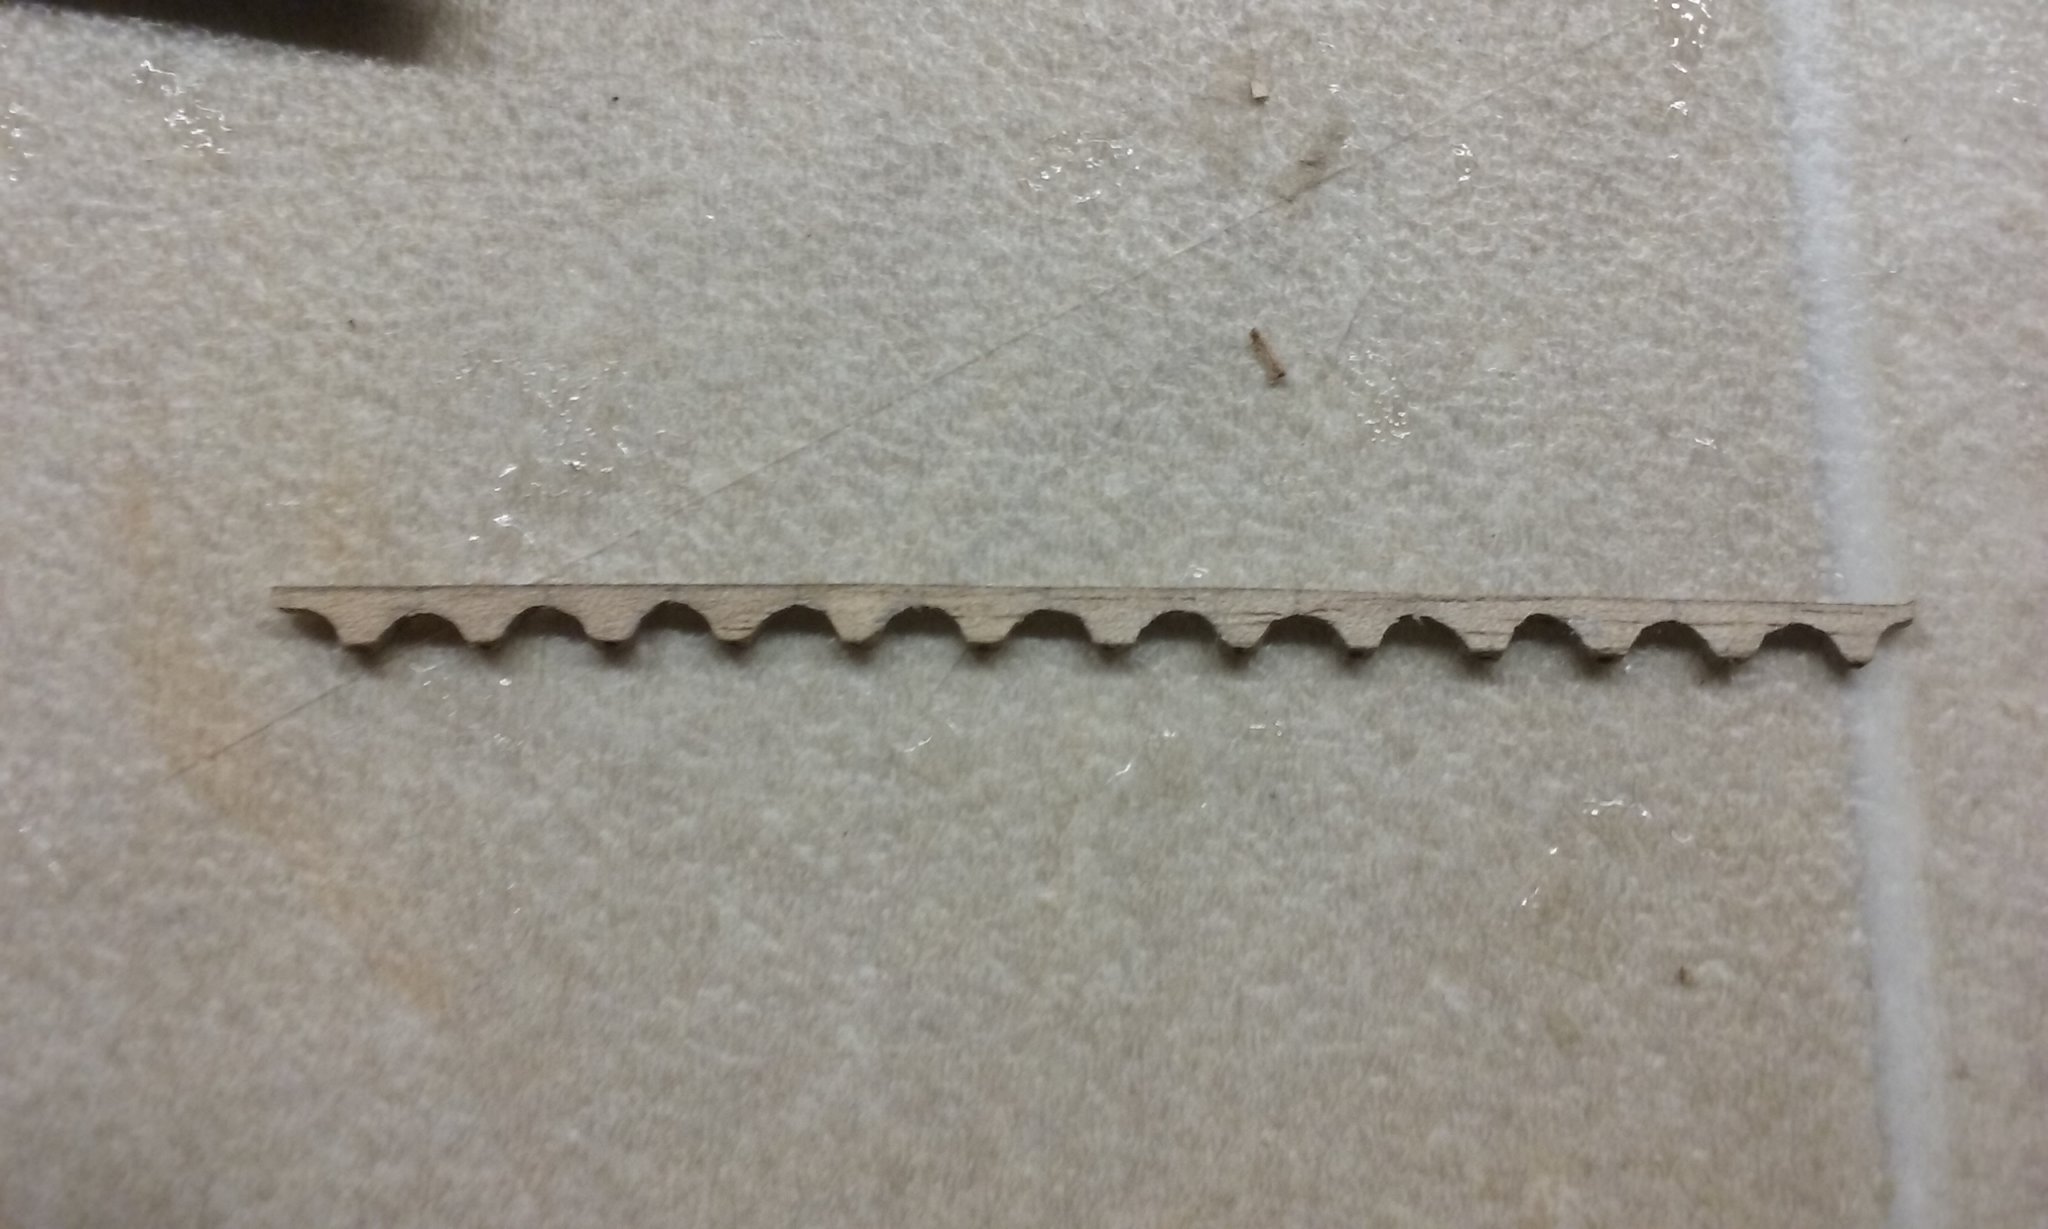
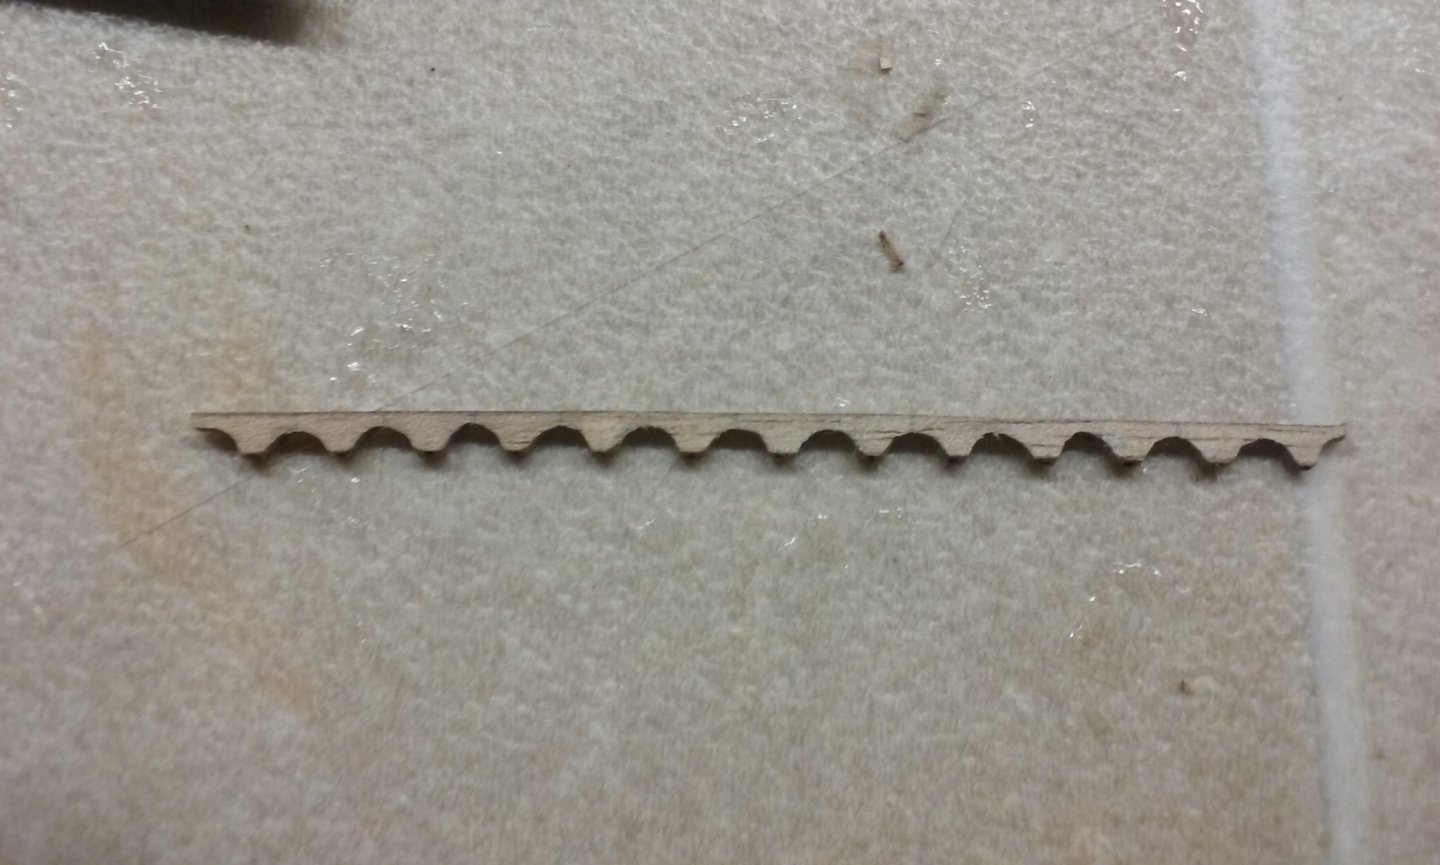
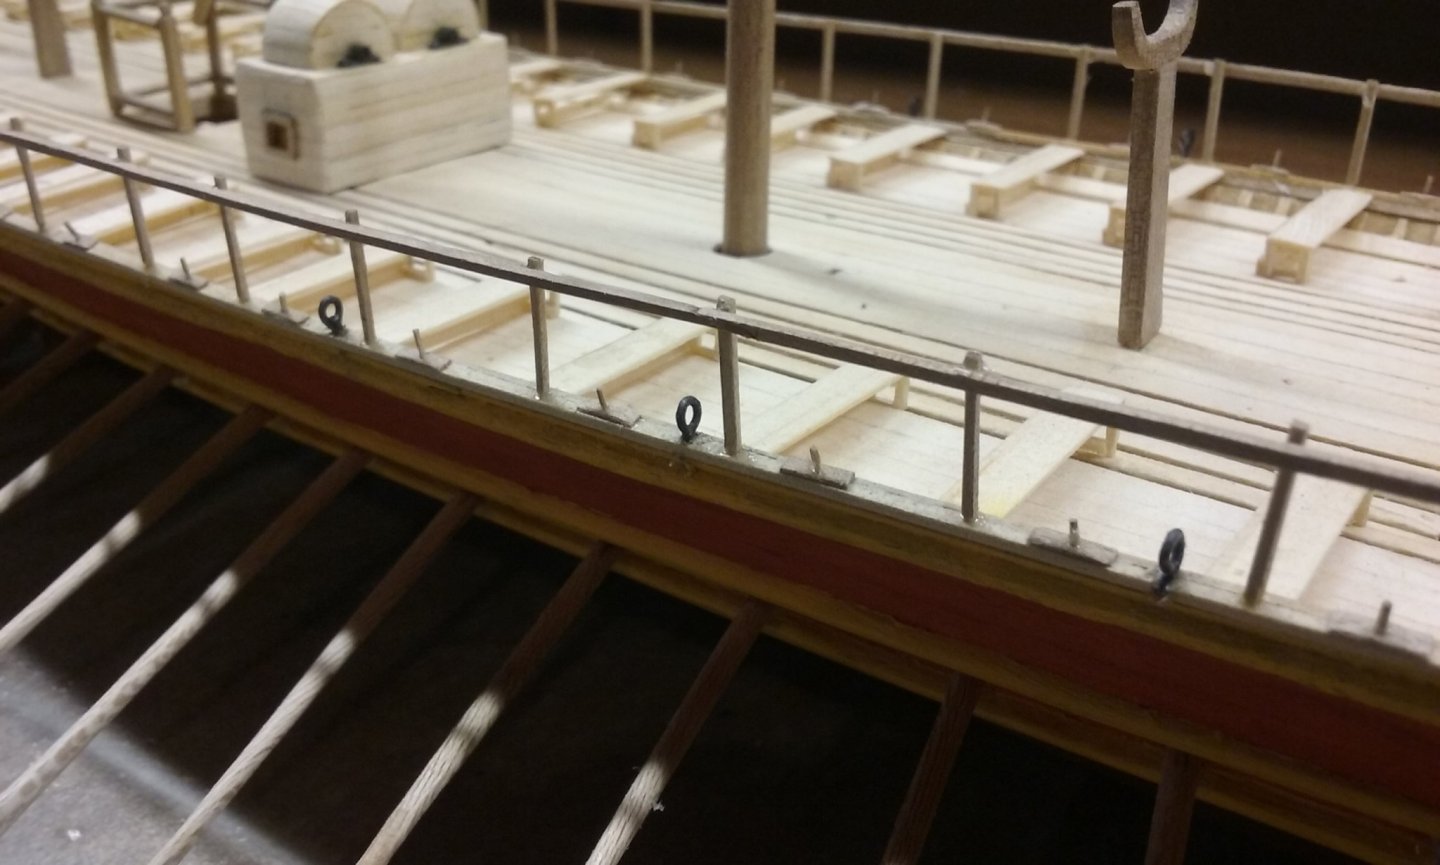
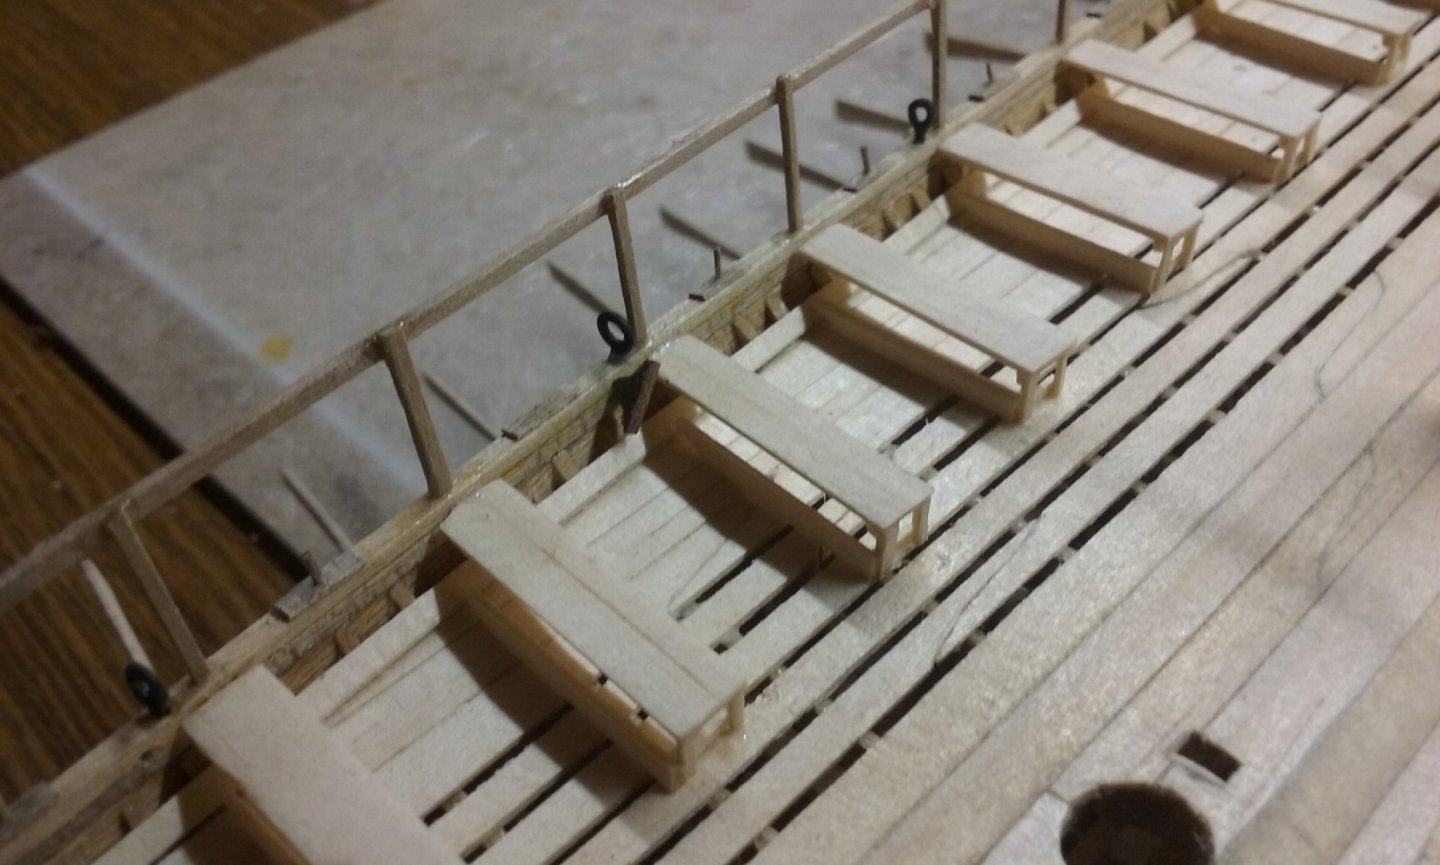
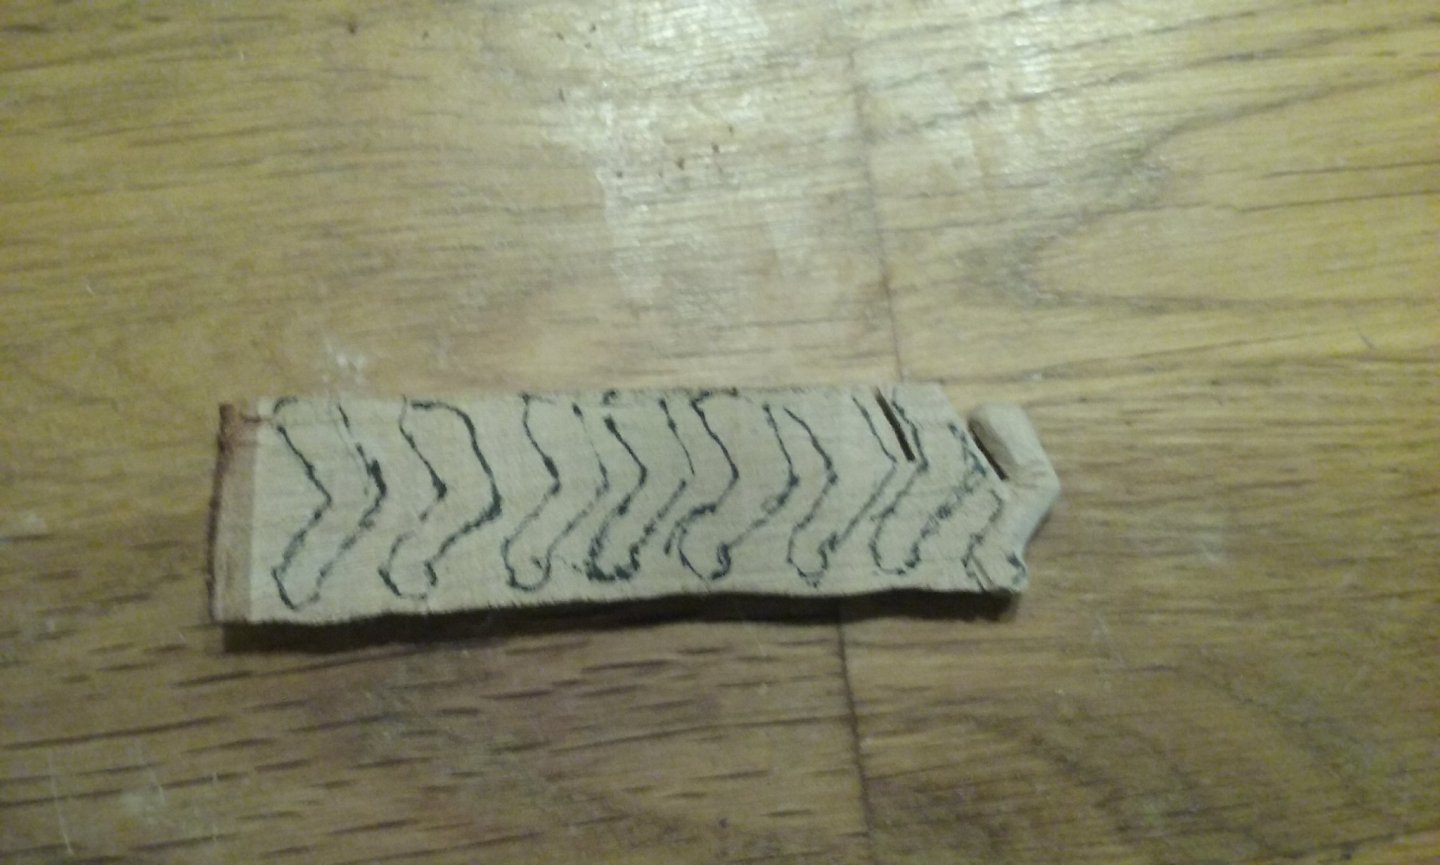
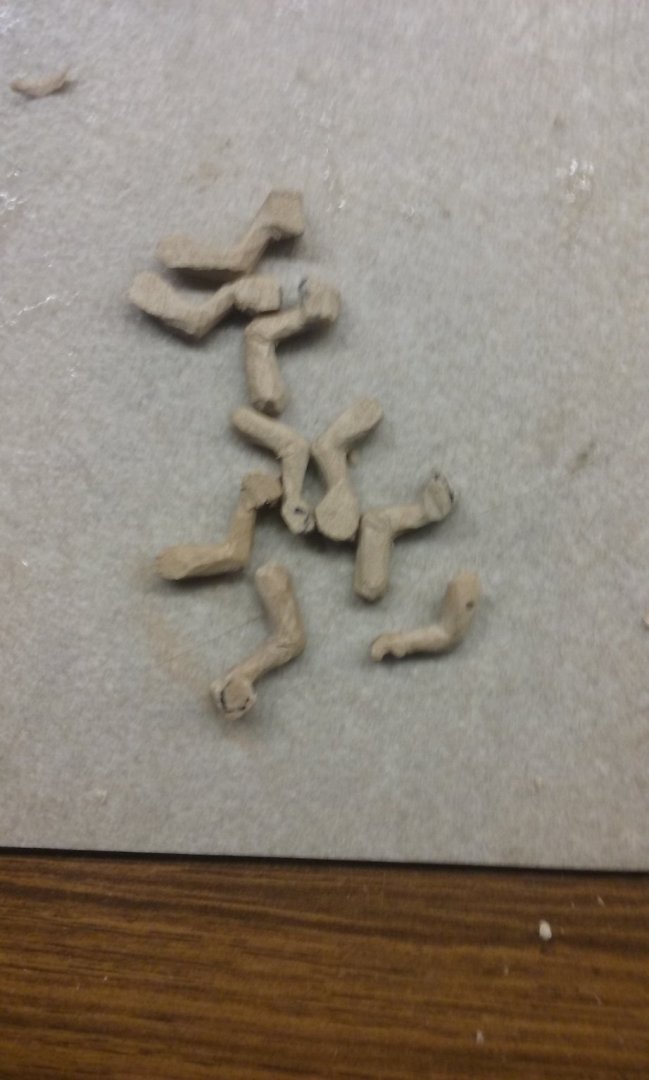
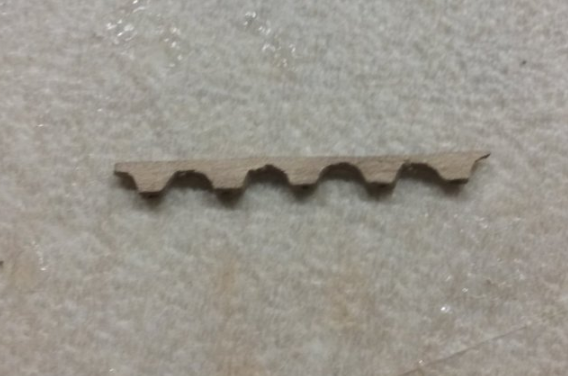
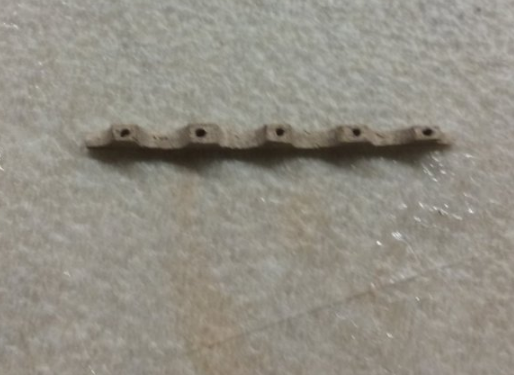
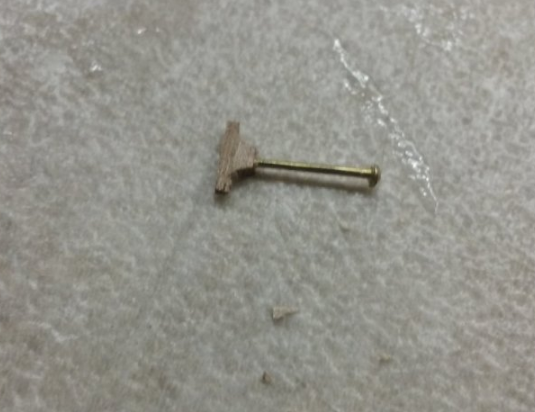
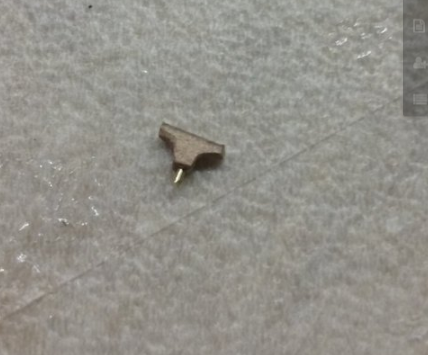
The ringbolts are complete and painted black: And I've put them in position: And here are the cleats under way. The only problem is that as far as I've been able to discover there are absolutely no cleats in the archaeological record for Byzantine vessels, so how lines were belayed is a bit of a mystery. It seems likely to me that the simple cleat I've made would be of a type that would suggest itself to anybody wanting to tie down a rope, and in the absence of any better evidence I'm going with these. And I'm committed now - they're glued on with CA. Holes for the pins that will locate the cleats into the sides of the ship. The holes were made before shaping the cleats, to minimise the risk of splitting (some of them did anyway). And separated out into individual cleats: Brass sequin pin inserted in the hole . . . and cut to length. And cleats in place: I put them on an angle because of the limited space - either vertical or horizontal there just wasn't enough room to get a rope around the "horns". Had I thought ahead better, I wouldn't have put that railing on before the ringbolts and cleats. It made my job almost impossible - in fact I had to bore the holes for the cleat pins by hand, with an awl. And I've been making arms for the oarsmen. At the current state of things there are a total of 96 needed. On reflection, I've realised that this makes me an arms manufacturer . . .

-
There certainly would. Looking forward to seeing your log. As it's a kit of a ship from the 20th century, go to Build logs for Ship Model Kits - by era - launch date and from there to 1901 - Present Day and then to Before you post your build log please read this - Starting and naming your build log. Follow the instructions, add appropriate tags so your log can be found easily (How to use and create TAGS ) and as it's your first build on MSW, include a tag to say so (members are extra helpful to new people). And you're on your way! Have fun with it.
-
I was going to comment on how fast you'd been making progress - then I realised you'd posted all but the last photos on a single day, so I'm assuming there was a bit of a backlog of already completed work that the log was catching up with - unless of course you really are Superman (it's possible ). But that's really beautiful work - you can be justly proud of the work you've done. The only thing I'd comment on (and it's very minor, and probably too late to do anythig about it) is that the thread fixing the sails to the yards looks a bit intrusive in black - perhaps a more neutral colour would have been better? But that's like the motor magazine writers complaining about the placement of the ashtrays in the new model car - they have to find something to offset the completely positive review . . .
- 41 replies
-
- 1
-
-
- thermopylae
- scientific models
- (and 3 more)
-
Hello from the San Francisco Bay Area
Louie da fly replied to ChuckJ's topic in New member Introductions
It would be Elizabeth, and as England had claimed to be the legitimate owners of the throne of France since the Hundred Years War, they also used the fleur de lis. They only relinquished that claim in (I think) the 19th century. However, it is just a decorator model - though one of the more attractive ones. It has quite elegant lines, and would probably be very decorative when repaired. -
Hullo from the Far Side of the World! The Thermopylae is a classic clipper, well worth building. By the time you've finished her you will be VERY familiar with what all the rigging does! You're bound to make mistakes - that's part of the journey - but most of them are repairable. (And at some point you'll probably realise what a boon wood filler is to the ship modeller). And yes, do start a build log. With lots of pictures!
-
That's quite a ship, with a long and glorious history. Though you're obviously going to find it more complex than PT 109, it will by no means be impossible. Just follow the steps, all the parts are already made (at least I hope they are!) and it's a matter of putting it together and you'll have a very impressive model. Read the build logs of others who've made this model - they will most likely give you ideas on how to progress with your build, and many of the problems you're likely to encounter may well have already been solved by others. But also, start your own build log, with LOTS of pictures! Depending on how seriously you want to get into it all, there are people on MSW who can give you advice on such things as the right colour scheme for the ship at the time you're portraying her, what equipment she might or might not have been carrying at the time . . . you name it. Or you can simply make her just as she's laid out in the kit. Your choice. Above all, have fun with it!
-
Is there an easy wooden tall ship out there to build?
Louie da fly replied to thegrindre's topic in Wood ship model kits
That sounds like a very good sequence. Ascending level of difficulty, absorbing and rewarding, will keep you off the streets, probably for the rest of your life . . . I'm looking forward to your African Queen. A fussy littel river steamer - wonderful! And wonderful memories of the movie. -
You're right, Chuck. Lisa is a carrack by the generally accepted definition. BUT . . . now we come up against the changes that language goes through from place to place and from era to era. Krewaal is a Northern corruption of the word caravel - but the ships called krewaal were nothing like Columbus' caravels. And the Mediterranean "cocca", whose name comes from "Cog", has probably only the stern rudder and the square sail in common with those of the north. There's an excellent paper which among other things deals with this issue. It's called "Bayonese cogs, Genoese carracks, English dromons and Iberian carvels: Tracing technology transfer in medieval Atlantic shipbuilding" by Daniel Zwick of the University of Kiel. If you put the title of the paper into Google you can find it easily - it's available free both on Researchgate and Academia.edu. I'd highly recommend you download and read it. I have it among my most valued reference material. Oh, and you might like to look at my Pinterest page - https://www.pinterest.com.au/lowe1847/boards/ - I've collected every contemporary representation I could find of cogs, carracks, nefs, Mediterranen lateeners and others, and put them into categories for easy reference - enjoy!
-
I think we all went through that feeling when we started out - it's natural enough, particularly when we mere mortals see some of the amazing builds that the really experienced modellers do. I know I still feel daunted by many of them, and very aware of my own shortcomings, and I've been on MSW for over 5 years! But I've never had an adverse comment, and certainly not ridicule - just supportive comments; and the occasional bit of "have you thought of doing it like this . . .?" which is usually very welcome. I have to say this is the best forum I've ever been on - others I've come across (which shall be nameless, but aren't to do with ship modelling) descend into namecalling and flame wars, which make one very unwilling to continue even with a subject you're really interested in. This has never happened on MSW in my experience - quite the contrary, everybody is supportive and those who are able to help, do so.