Louie da fly
-
Posts
7,990 -
Joined
-
Last visited
Content Type
Profiles
Forums
Gallery
Events
Everything posted by Louie da fly
-
 Welcome to the club! Your strategy for the keel sounds like the right thing to be doing. Building up out of bits that are nice and straight and square is (almost) always prefreable to carving to shape (don't ask me how I know) Way back when I was making armour, my signature on the armour forum was "It's not really armour unless you've bled on it". I fancy the same applies to ship modelling. Certainly several bits of my own model have little bloodstains on them.
 -
Ah, the wisdom of hindsight! If only we'd thought of that at the time . . . But the thing is to treat this model as a learning experience and transfer the lessons learned to the next build and the next . . .
- 41 replies
-
- 1
-

-
- thermopylae
- scientific models
- (and 3 more)
-
I know what you mean. Without a drill press it's not possible to get the holes perpendicular so that they line up with the outline of the deadeyes, and even with one it's probably pretty difficult without lining everything up perfectly. But even a few deadeyes at a time could be an advantage. I've hit the same problem - until I get my drill press set up I can't do that kind of thing.
- 756 replies
-
- 4
-
-
- galleon
- golden hind
- (and 2 more)
-
I've found that drilling the holes before shaping (or at least before cutting the deadeyes apart) reduces the chance of splitting.
- 756 replies
-
- 5
-
-
- galleon
- golden hind
- (and 2 more)
-
Hey Phil! Any progress since your last post? I was enjoying following the build and I hope it produced a good result for you.
-
The CAD drawing is very impressive and as far as I can see it would be hard to do a better job of turning the available information on this ship into an accurate model.
-
Kris, I'm really enjoying following this build, and your problem-solving procedure. It's really fascinating seeing how you're overcoming each obstacle as you encounter it. That and your thoroughgoing research and attention to detail are very impressive.
-
I did say it takes a special kind of insanity to build a model of a galley . . . but it's a glorious kind of madness.
-
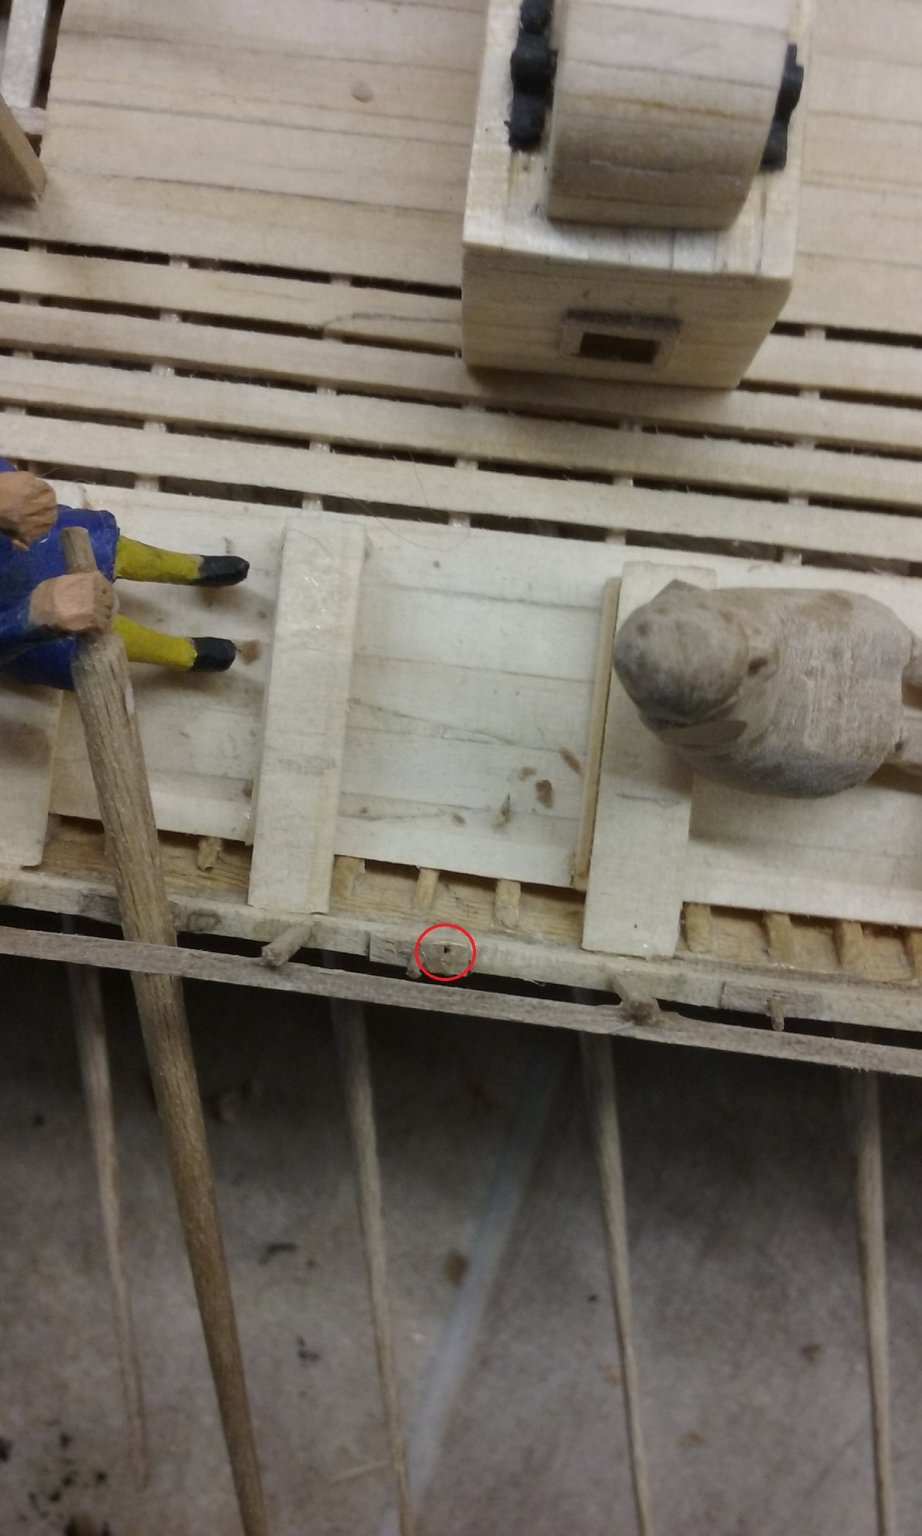
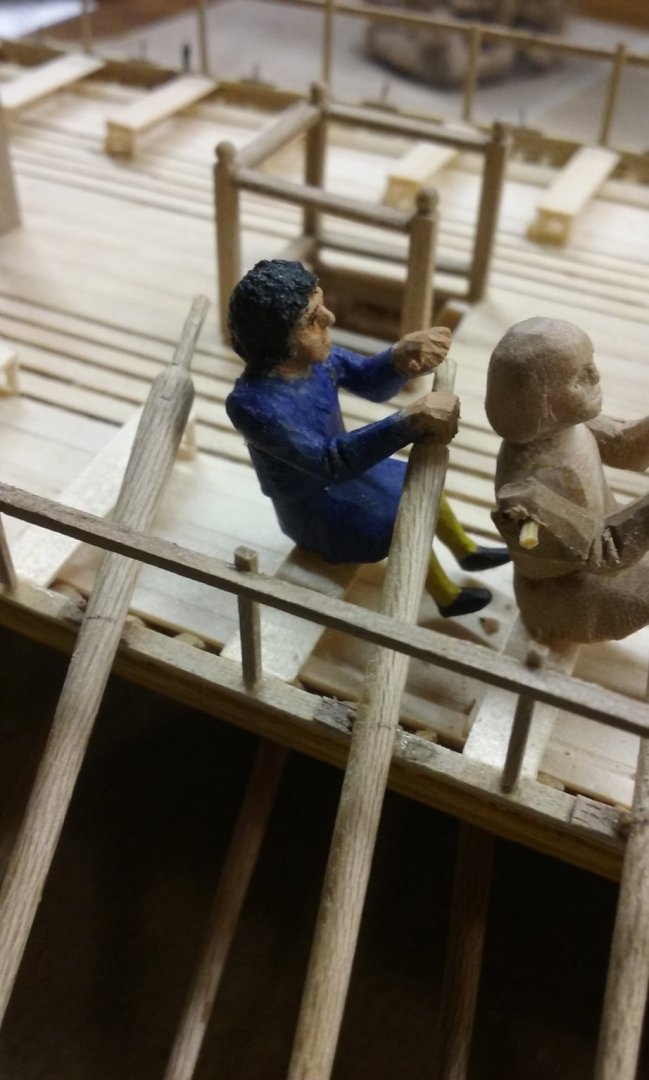
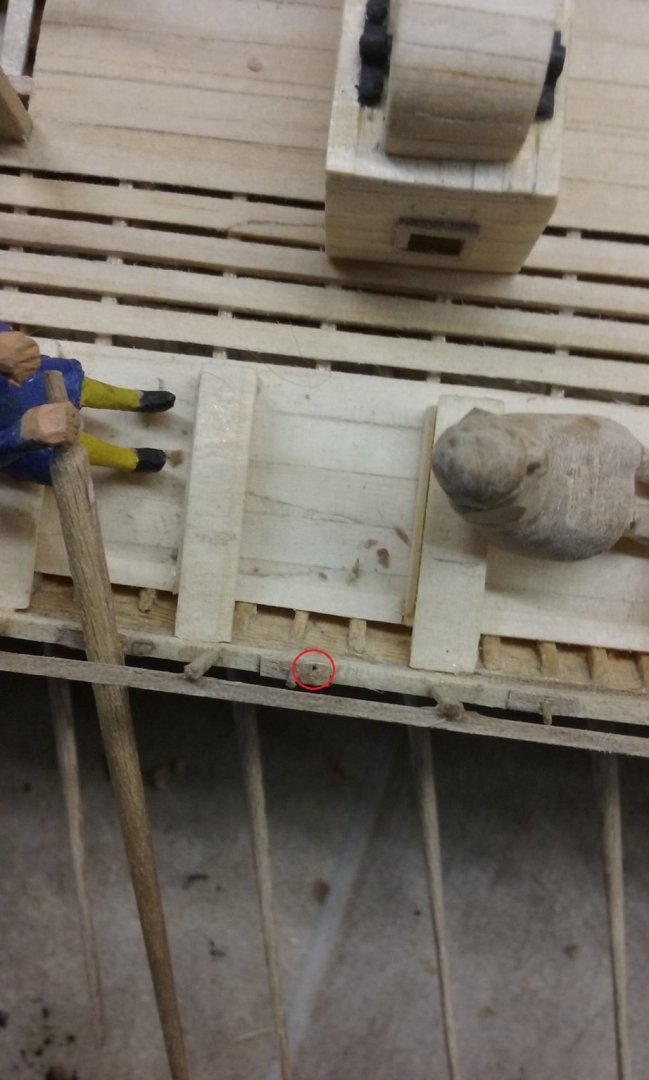
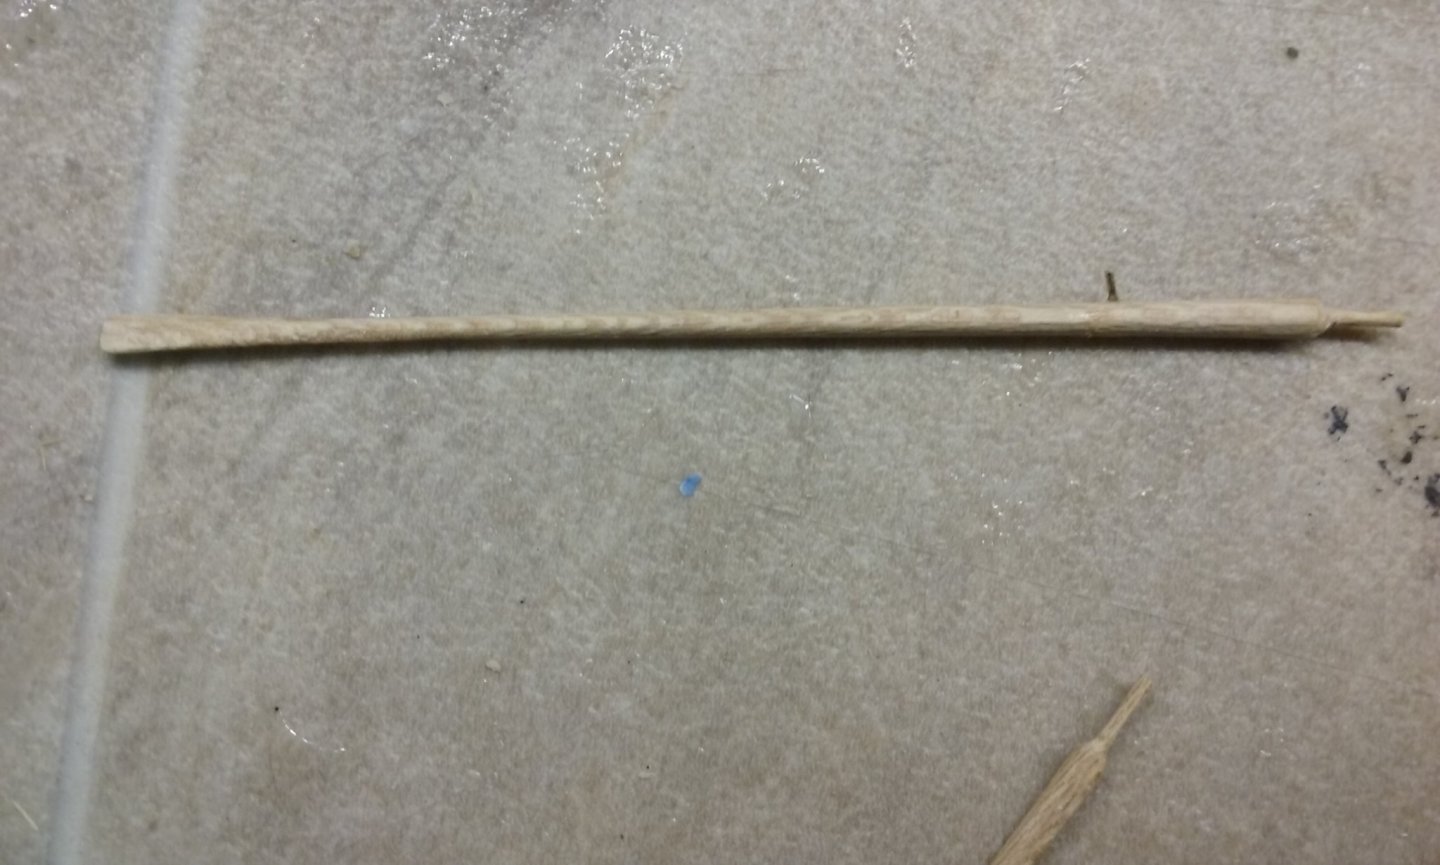
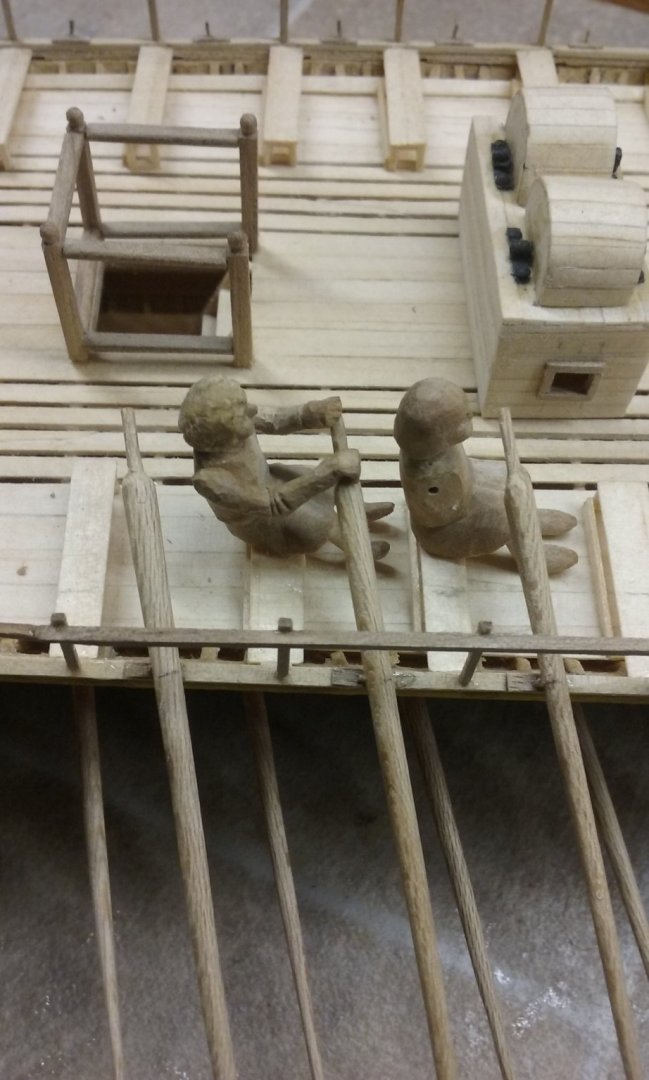
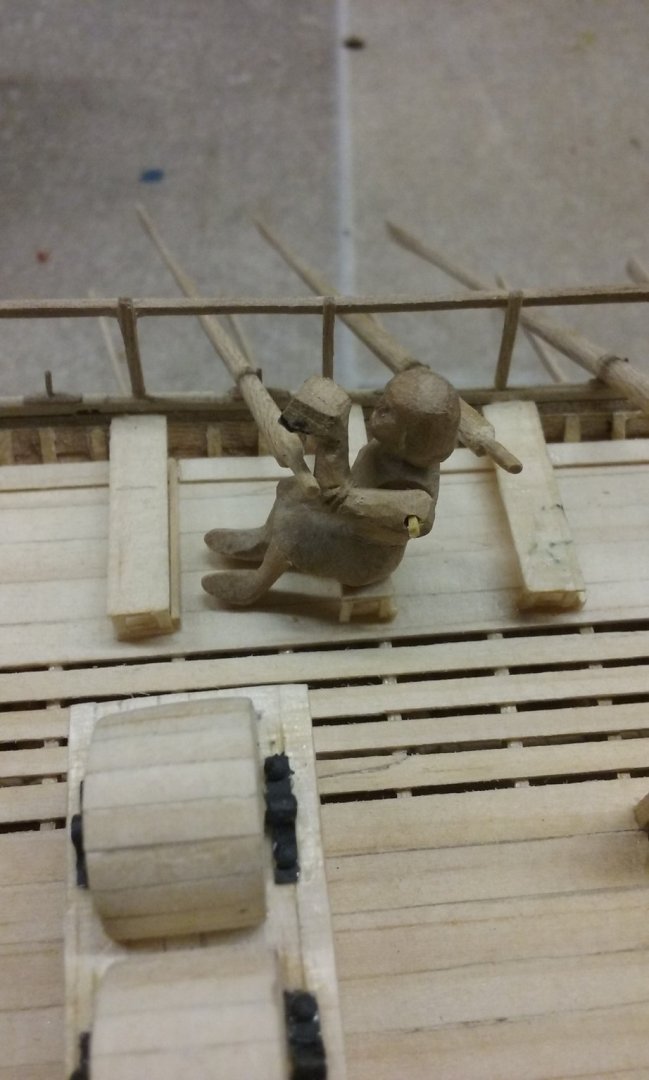
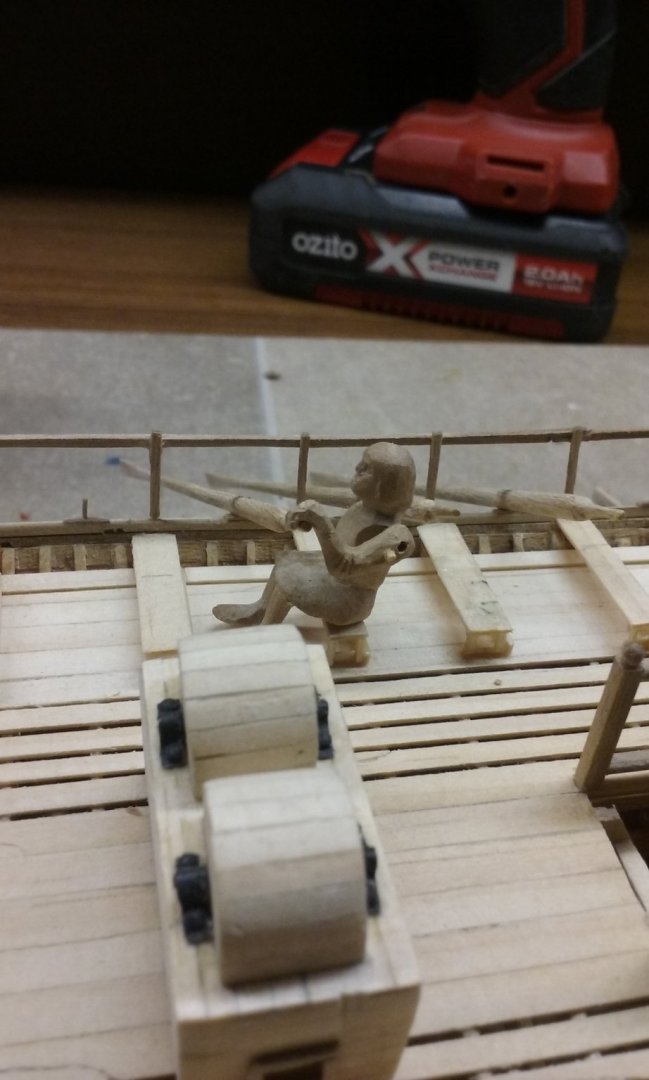
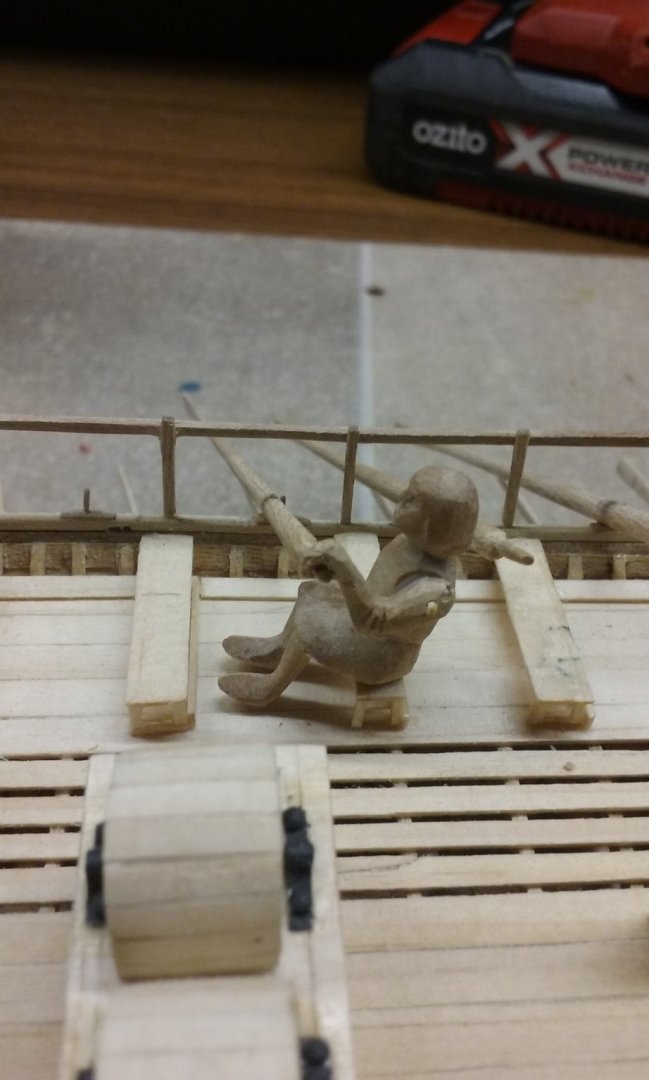
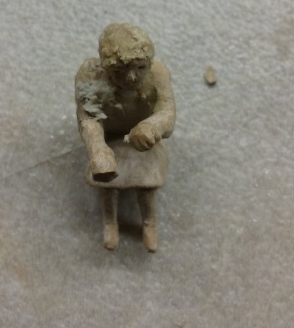
Just a small update. Here is how the oars are fixed to the "gunwale" (can it be a gunwale when guns haven't been invented yet?). A hole drilled into the gunwale just aft of the thole (see red circle). And a hole in the oar, with a brass pin inserted. Then the pin is put into the hole in the gunwale and the whole assembly glued in place - both at the gunwale and at the oarsman's hands. The handle didn't quite line up with the oarsman's hands, so I moved the oar's pivot point slightly further along the shaft - so the whole oar was slightly further outboard. I'm now regretting putting the pavesade (the railing that will hold the defensive shields) in place so early. It's made access rather difficult, particularly when drilling holes. It was a problem when I was trying to drill holes for the ringbolts, and now again trying to drill holes to pivot the oars - the home-made drill I made from a small brass pin wasn't long enough, and I had to make a longer one from a dressmaker's pin with the end cut off. The first oarsman is finally complete, painted and glued in place, holding his oar (note the lemon yellow hose!). Not totally happy about the inboard hand on this one, but as I get more experience with doing these I'm sure I will improve. I'm trying to work out the best way to portray the loop of leather or rope that holds the oar to the thole - as it would have been pretty thin I'll probably just use a bit of cotton glued around the oar.
-
I'd agree with you about the rectangular upper deck, Ships88, and your plan to"bash" it to a more believable shape sounds good. When making a model based on theoretical reconstructions this kind of thing is likely to come up every so often, and this probably won't be the last time on this build that you'll question the way the kit has configured the model. That's all part of life's rich tapestry Good to see you back again, by the way.
-
Nice work, Rodolfo. It's looking very clean and precise.
-
Making progress, Bill. It probably feels very slow at the moment but each small advance is one step further towards the completed model. It's good to see how you're improving your model compared to what was provided in the kit.
-
That's looking very good, Jamie. Couldn';t agree more . .
-
Hi Feathermerchant, That looks very good. They certainly had parrel trucks at that time (the earliest evidence I've found is the beginning of the 15th century). And they found a parrel truck among the aftefacts of the Mary Rose. I saw it when I was over there in 2009. That lateen rig looks very good. There's a diagram in my post of June 9 at (kindly supplied by Woodrat of this forum) of the support for a lateen yard, but this is specifically Mediterranean, with a fixed block (called a calcet) at the very top of the mast. I'm sure that wouldn't apply to the Great Harry, and that the one you're proposing is better for the job. Unfortunately as I've mentioned elsewhere on this forum, they're "relocating" the Powerhouse Museum to Parramatta, about 12 miles out of Sydney, on a floodplain, and as I read the information, making it "interactive" (i.e. dumbing it down to attract the kiddies). So their model is likely to vanish into some store-room oblivion like the crate at the end of Raiders of the Lost Ark. The photo they supply of the starboard side is probably the best you're going to get in the foreseeable future. Their model's rigging is nice and complete, but it's quite possible (considering how alike their model and yours are) that their yards are also wired on. Time will tell. I think you're best to go with what you have in mind.
- 71 replies
-
- 1
-
-
- great harry
- henry grace a dieu
- (and 3 more)
-
Mark, that's a very valid point and quite a few of the rowers on Olympias used an underhand grip. I hadn't taken that into account, but at this late stage I think it would all be too complicated. Chuck - nice. I hadn't thought of that one! I do remember that an inkeeper asked Lord Nelson for permission to rename his pub The Nelson Arms and Nelson said "But I only have one."
-
Hi, Dom. Did you ever finish the Royal Caroline? It was looking very good.
-
Hi RDL, Are you still out there? I only just came across this log and it looks really good. Then . . . nothing. Did you ever finish the model?
-
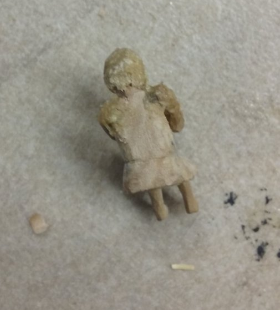
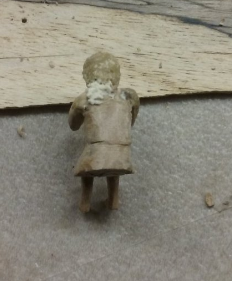
I've reached a bit of a breakthrough regarding the oarsmen. The major problem I've been up against is that neither the oarsmen nor the spacing of the benches and tholes are terribly consistent. The first because they were all hand-carved. The second because when I was first building the hull I didn't realise how important it would be later in the build to have all the frames at exactly the same spacing, and I've had to make adjustments around this initial error. Because of this, each oarsman has had to be dealt with separately - I haven't been able mass-produce a "standard" oarsman - and the same applies to the placement of their arms. A tiny variation in placement can have a huge effect on the relationship between the oar handle and the oarsman's hands. I can only mass-produce arms up to a certain point - I have to leave quite a bit of each arm unfinished till I can adjust it to the individual oarsman. This has been bugging me for quite a long time - how to get some stable reference point so I can put the hands in exactly the right places for each oarsman. Well, I've finally worked out a strategy. First I glue the oar in place on the gunwale so the blade is level with those of the lower oars (i.e. at "water level") and the oar is at the same position in the "sweep" as the lower oars - (so if you look down from above, all the oars are at the same angle with respect to the hull). That's our first reference point. Then put a spot of glue on the oarsman's "sit-upon", to temporarily fix him to his bench. That's our second reference point. Drill a hole through the top of the arm, which is then temporarily glued to the shoulder and the hole continued into the body. A bamboo pin fixes them together, then the arm (after breaking the glue bond) is swivelled till the hand is in place on the handle of the oar. Then bit by bit I carve the hand so it has a hollow to take the handle, and then shape it until it is as much like a human hand as I can make it. Then I can glue the arm onto the body permanently, and repeat the process for the other arm. After the first two figures (which was the experimental stage) I was able to improve the process. On the second figure I discovered the swivel hole in the arm was in the wrong place - the hand reached past the oar handle. I had to drill a second hole to get the swivel in the right place. So from now on I'll be lining up the arm against the shoulder first, to check that everything fits properly before I drill the hole. Finally, when everything's lined up and glued together, I go back and trim everything to shape. I put wood filler in the gaps between arm and shoulder and smooth it off when it's set. That way I don't have to spend forever trying to get the interface between the arm and the shoulder perfect - I can just bodge it a bit. Once it's painted no-one but me will know the difference (oh, except you guys, of course). Oh, and on the subject of arms, this is included for those Australians of a certain age who still remember the Aunty Jack Show on tv .
-
That's looking very good, Dave. A nice crisp job of planking, which will look even better with the poly. It really transforms the look of the boat.
- 51 replies
-
- 2
-
-
- miss unlimited
- dumas
- (and 1 more)
-
Very attractive Jo. Paint creeping past the tape is always a bugbear - you're certainly not alone. And it shouldn't be all that much trouble to touch up.
-
Hi Binho, Good to see you back at work. Coffee table? By the way, I was just looking again at the previous page. That is a seriously beautiful hull!
-
Hi Lemmydog and welcome. Aircraft carriers are completely outside my experience so I can't help with that, but what in particular attracted you to the Ameer and Emperor? Maybe following that line of reasonig could find you a model kit you'd like to build.
-
That's good to hear. I hope evrything's ok for you and yours.
-
That's looking very good, Rodolfo. I particularly liked your scarph joint for the last wale, making use of a broken piece of wood that would otherwise have been wasted.
-
Sorry to hear about you getting sick; glad to hear everything's good again and you're back onto the model. Looking forward to seeing your photos. Galleys are fascinating vessels (though I sometimes regret having taken one on myself). If you ever get the chance to get hold of a book called "Age of the Galley" I'd highly recommend it.