Louie da fly
-
Posts
7,574 -
Joined
-
Last visited
Content Type
Profiles
Forums
Gallery
Events
Everything posted by Louie da fly
-
She really is tiny, isn't she? (the ship, not Her Majesty the Queen). Steven
-
 To be honest, most of it isn't really much harder than in bigger scales - except the deadeyes! Oh, dear, they're a real problem (not threading them, making them small enough and drilling the holes so they don't split. Then finding fine enough thread to run the lanyards. In the end I gave up on the deadeyes for the topmasts and topgallants - just wasn't practical - I just left them off. They're so tiny you really have to look hard to see they're missing. Steven
- 739 replies
-
- 6
-

-
- Tudor
- restoration
- (and 4 more)
-
Brilliant work. This is a model to be proud of. Steven
-
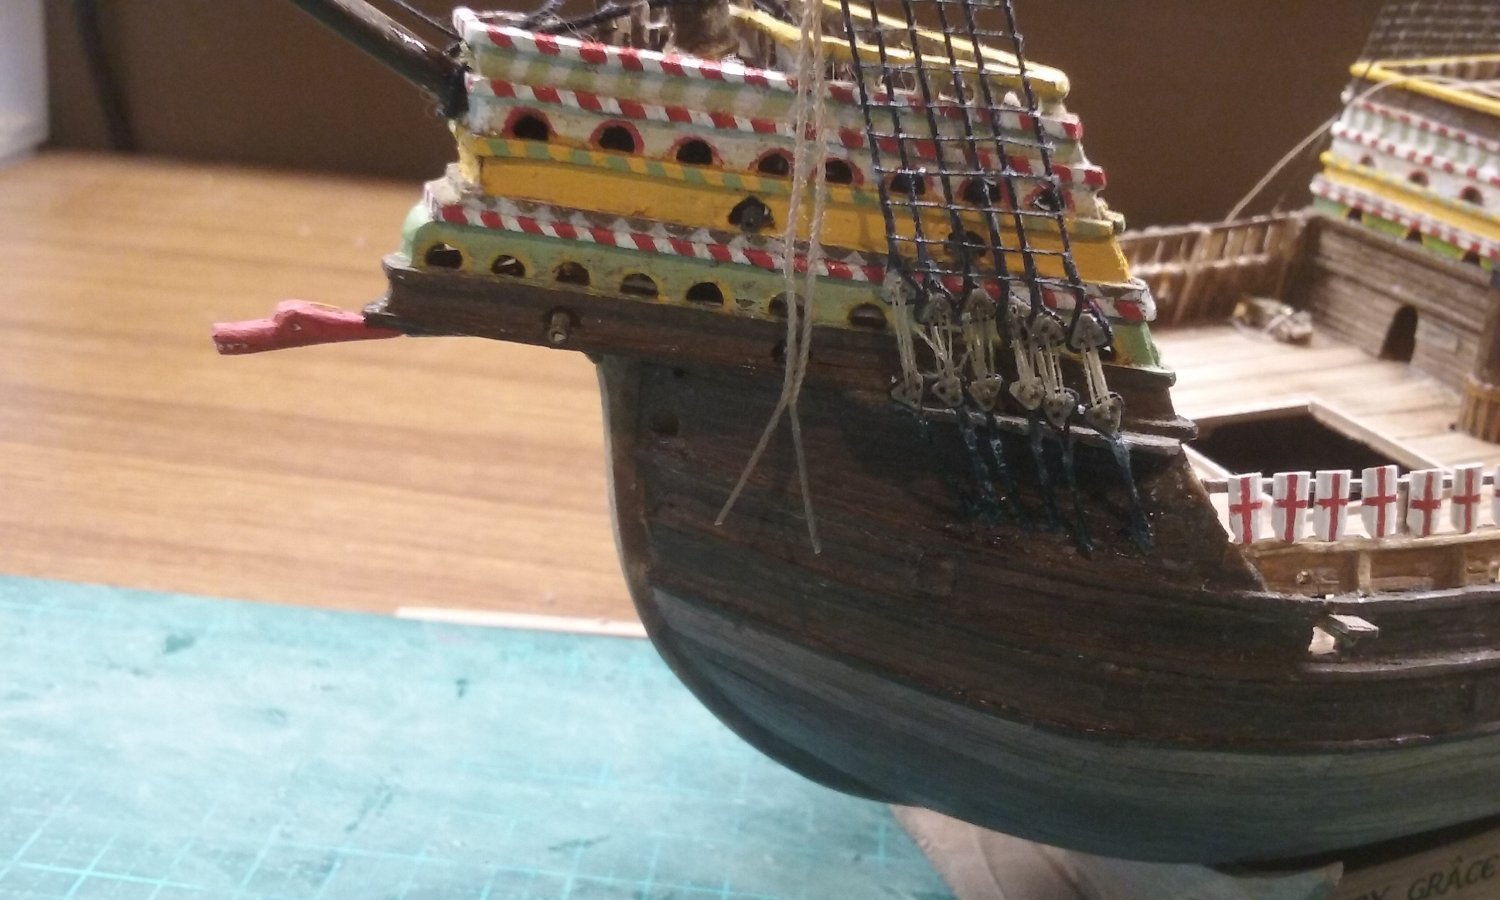
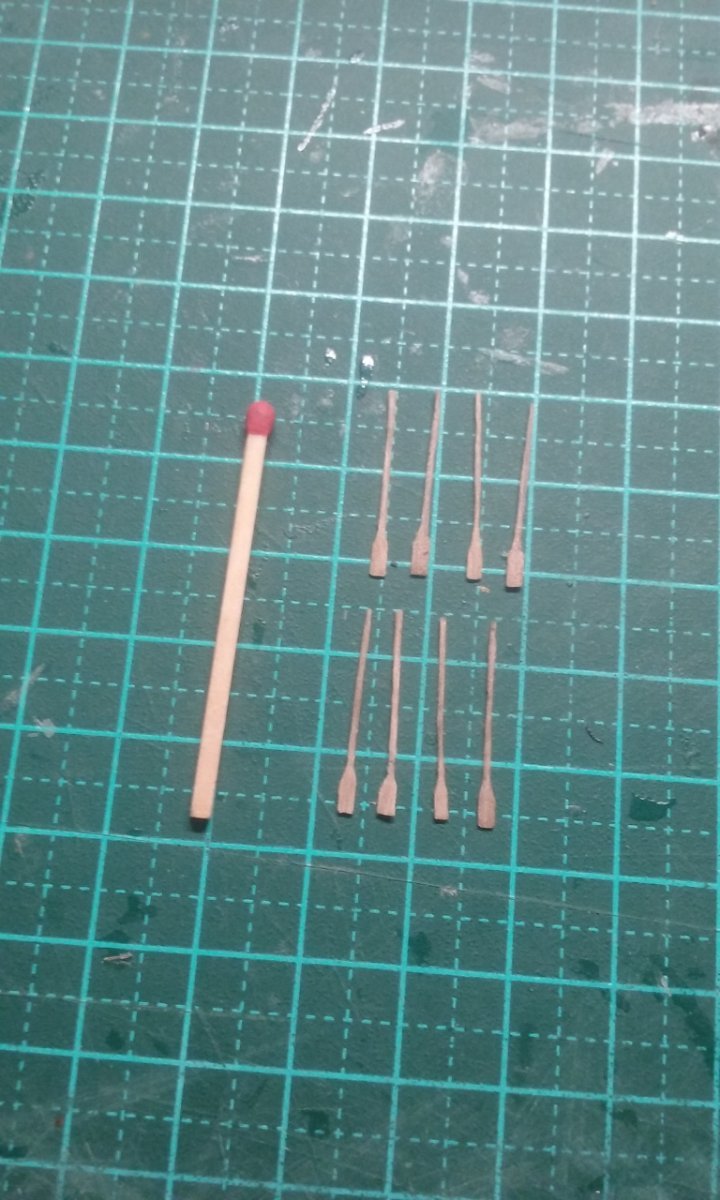
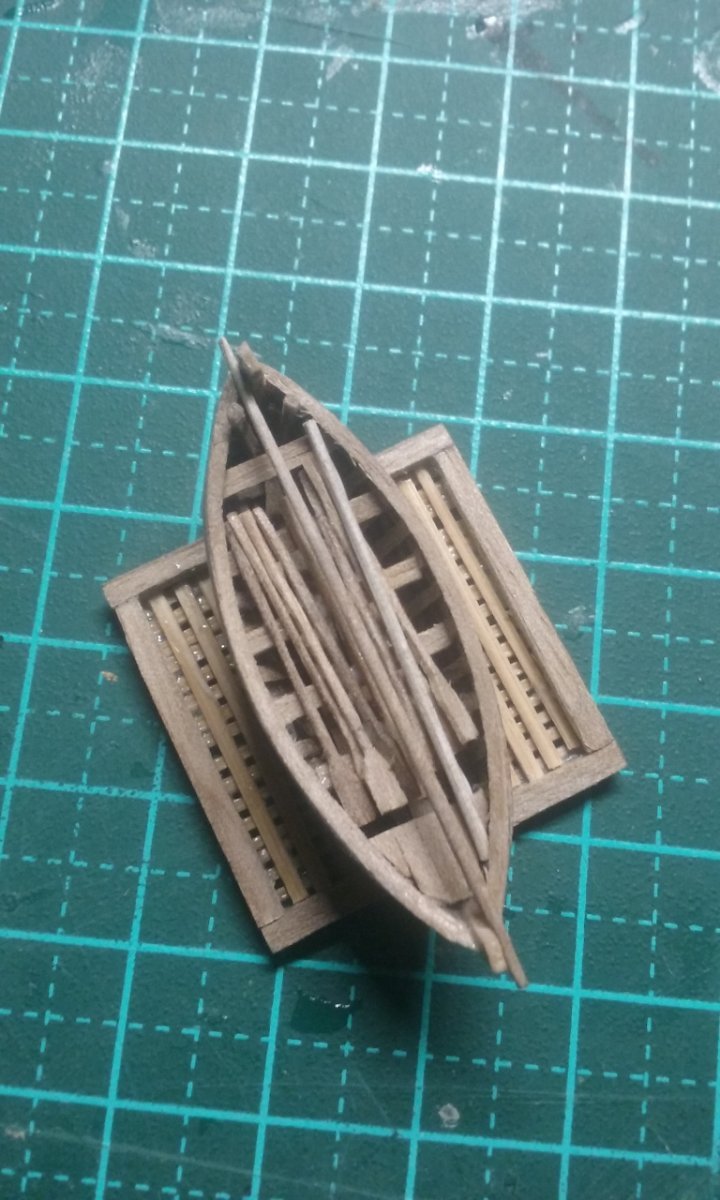
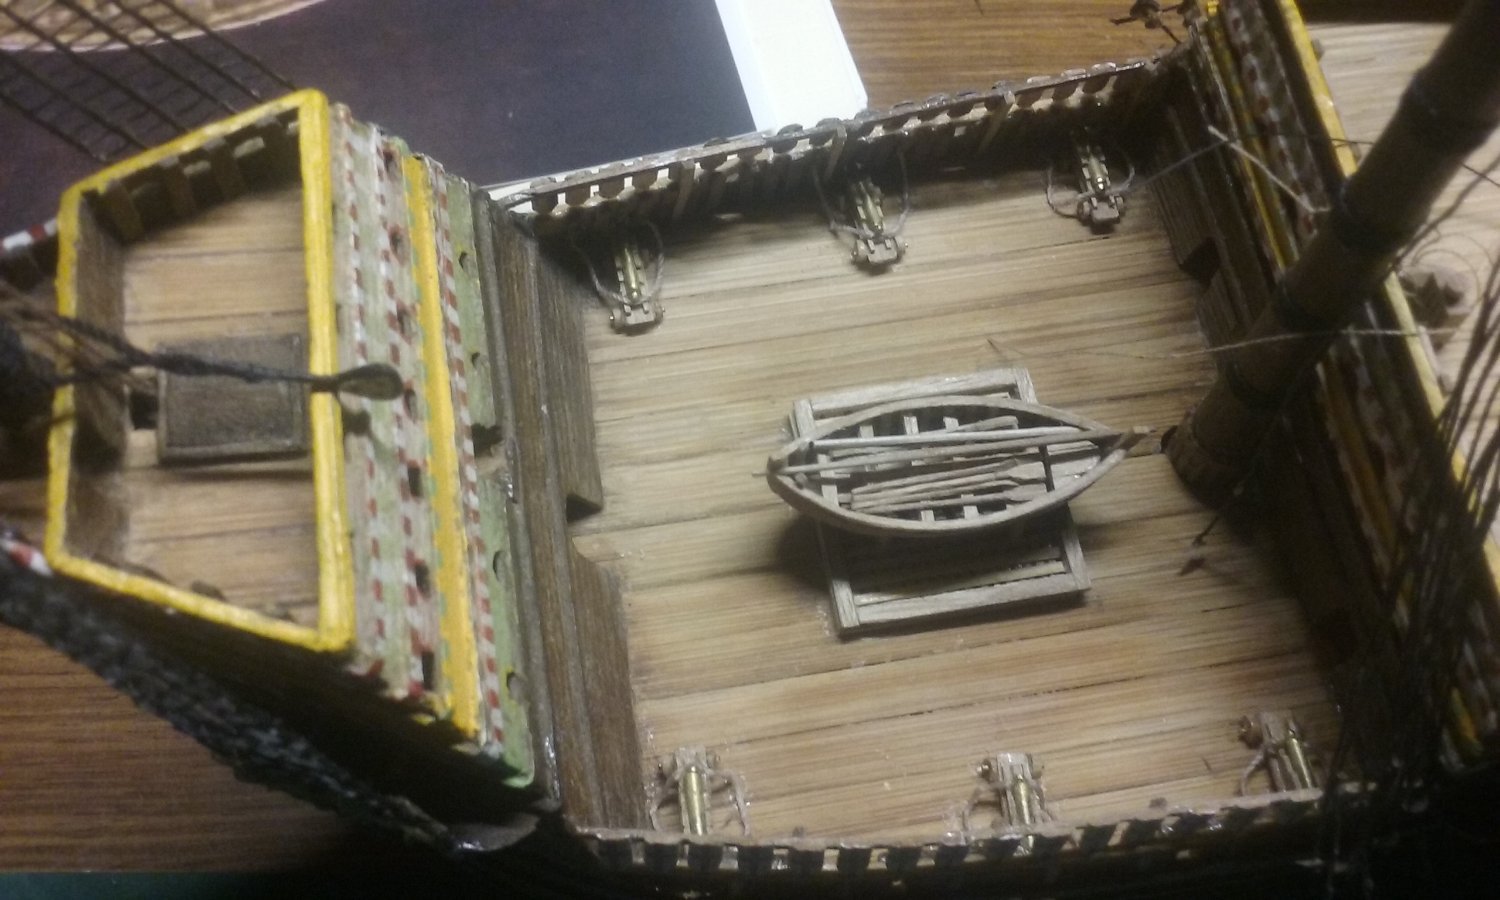
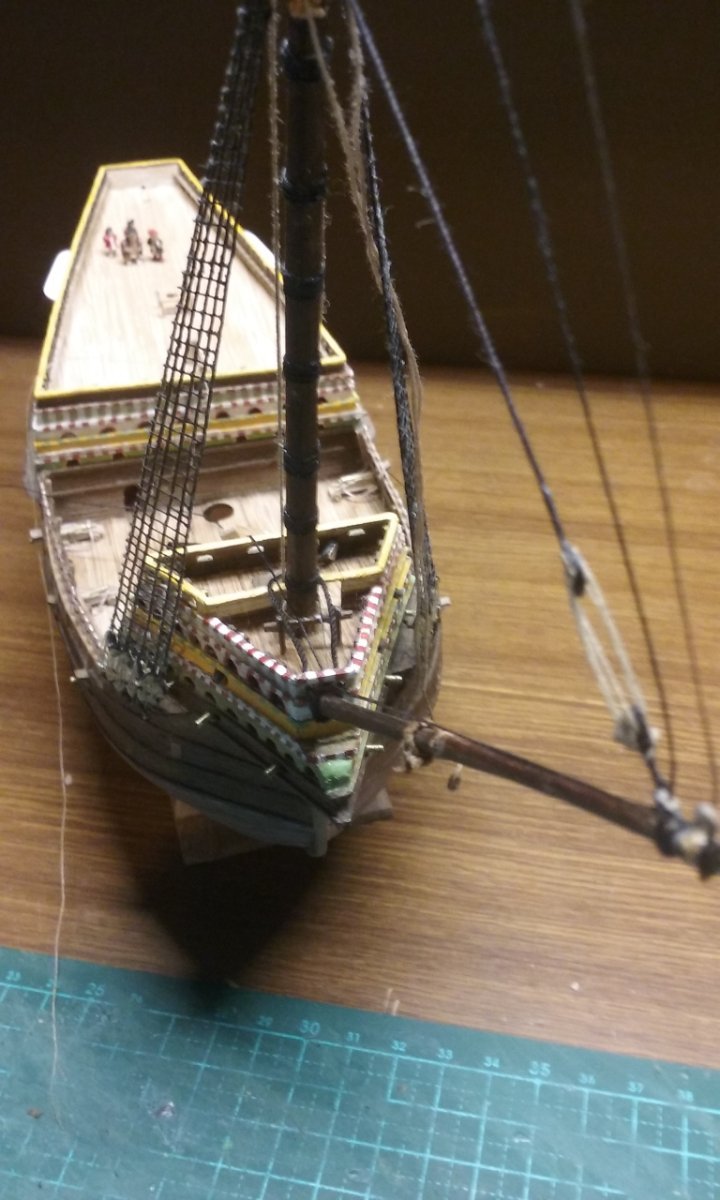
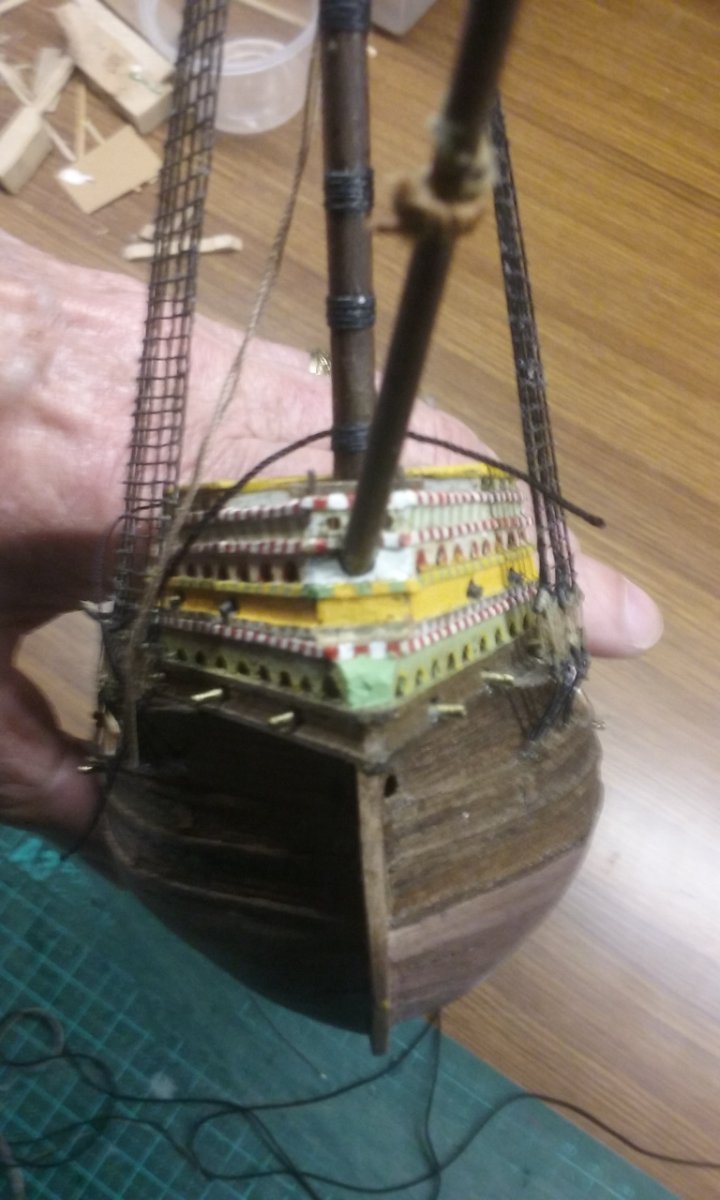
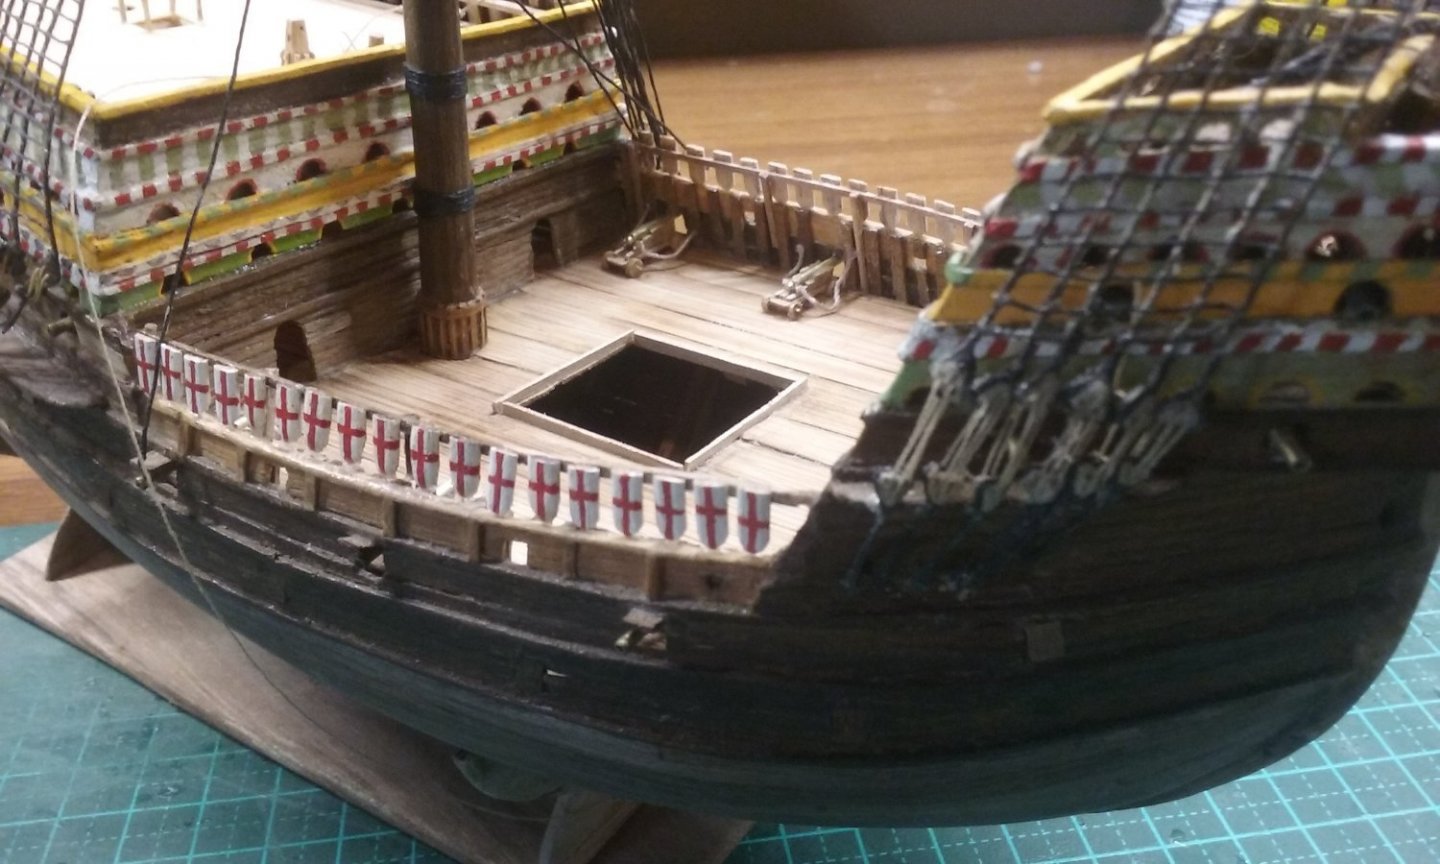
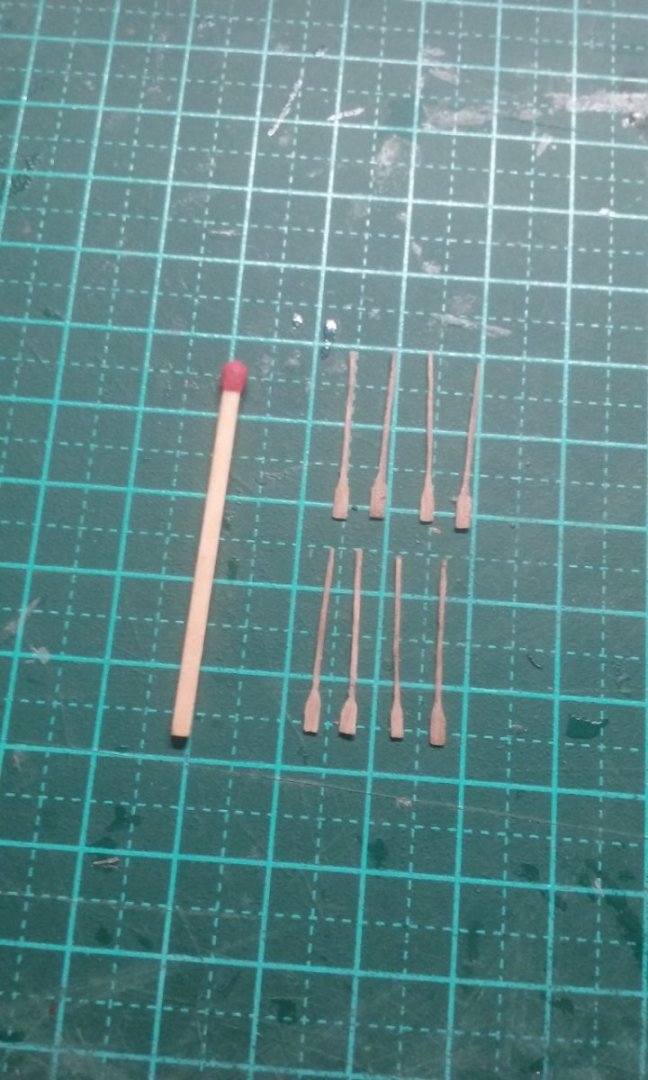
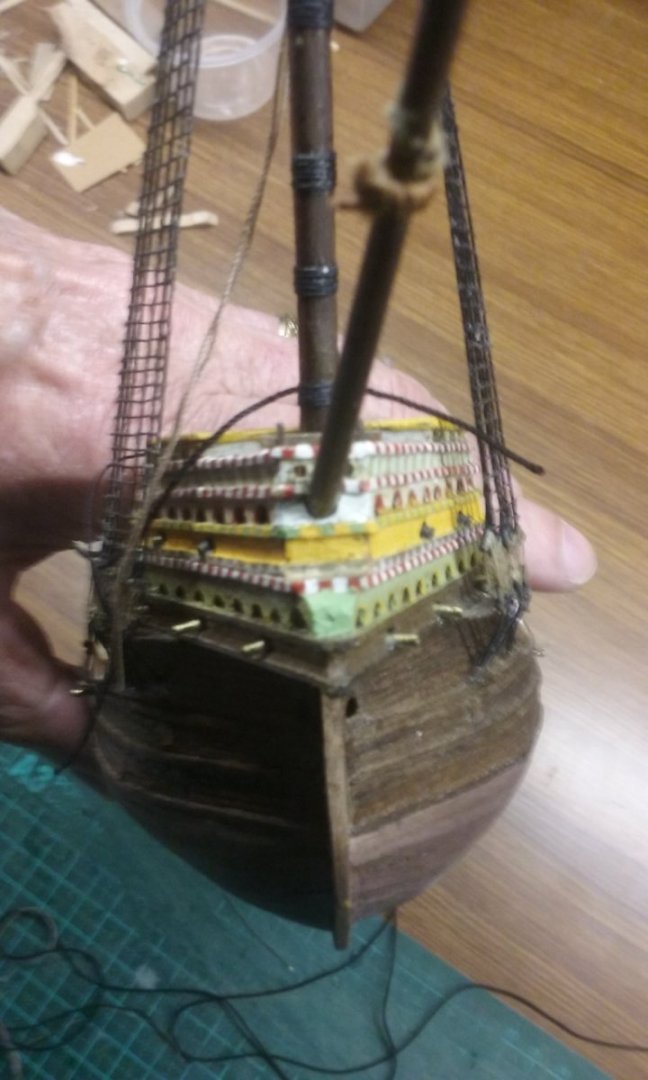
Gluing ratlines to the fore-topmast and fore-topgallant shrouds (to be trimmed later). Finally glued the mainmast in place, and added the lower main shrouds - the starboard ones already had ratlines glued on and deadeyes in place, but needing to be attached to the channel. Glued the dragon figurehead in place. Carved oars for the longboat And added the oars, the mast and spar (I haven't been able to find anything out about what rig these vessels would have had, so I've copied Dutch contemporary pictures and given her a spritsail rig) And glued the hatch cover and longboat in place on the main deck. I had to wait until the mainmast was glued in place before I could close up the hatch - otherwise I wouldn't have been able to see when I was slotting the bottom of the mast into the mast-step - it's been quite a wait. Steven


- 739 replies
-
- 13
-
-
- Tudor
- restoration
- (and 4 more)
-
Yes, the convexity (I'd forgotten its name - it's called the camber) is small, but it does make a difference to the look of the model and I feel it's worth the extra effort. Then there's the "sheer", the horizontal curve of the ship from aft forward via midships. Normally it curves down from one end to midships then back up to the other end. The sheer of the decks may not be as extreme as that of the gunwales, but it is certainly there. The height of the deck beams should be arranged to cause this sheer in the decks. It takes a bit of fiddling, but again, it's worth it. Steven
-
Sounds good. Once the deck beams are in place, they and the frames form a rigid triangle. However, it does make it even more important to get the deck beams horizontal and in line with each other, otherwise your deck won't have a smooth line to follow. And of course the deck beams need to be slightly convex upwards, to allow water to run off the deck. Steven
-
We've all been there. There's nothing wrong with the frames themselves, it's just a matter of ensuring they're all in line/perpendicular in each of the three possible dimensions. More work, but worth it. Steven
-
Yes, Carroll (Dodgson) effectively demolishes the argument that this is evidence that he wrote nonsense, by explaining how it happened in an even sillier set of circumstances than the original statement. Steven
- 186 replies
-
- 2
-
-
- keelless
- reverse clinker
- (and 4 more)
-
As we're getting close to the end of this build, perhaps a celebration is in order? (Hope this doesn't derail the thread too much). Steven
- 186 replies
-
- 3
-
-

-
- keelless
- reverse clinker
- (and 4 more)
-
Nice rescue. Steven
-
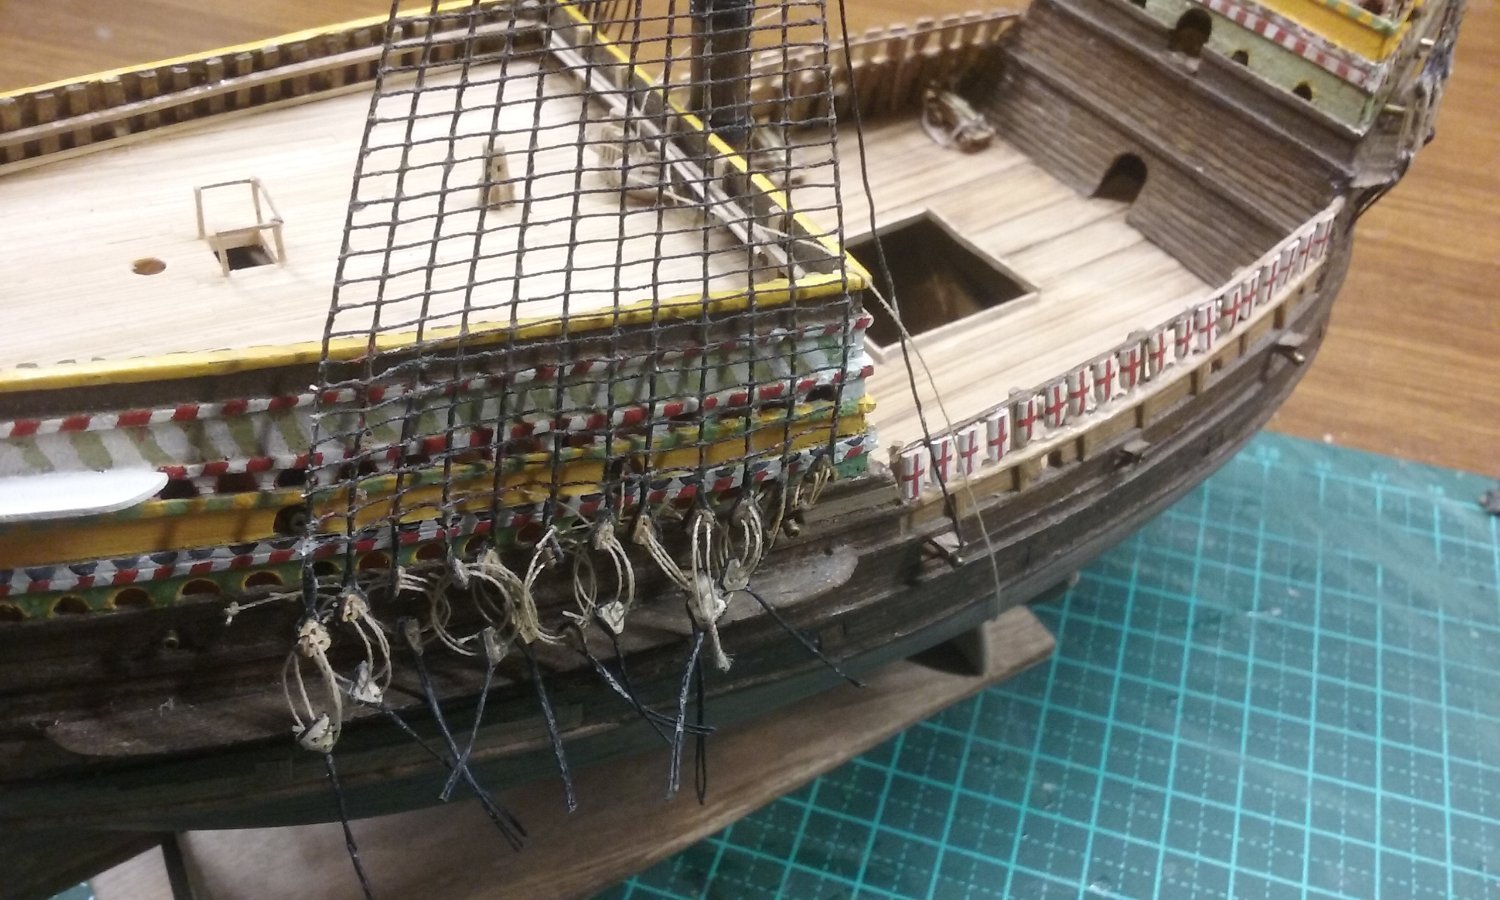
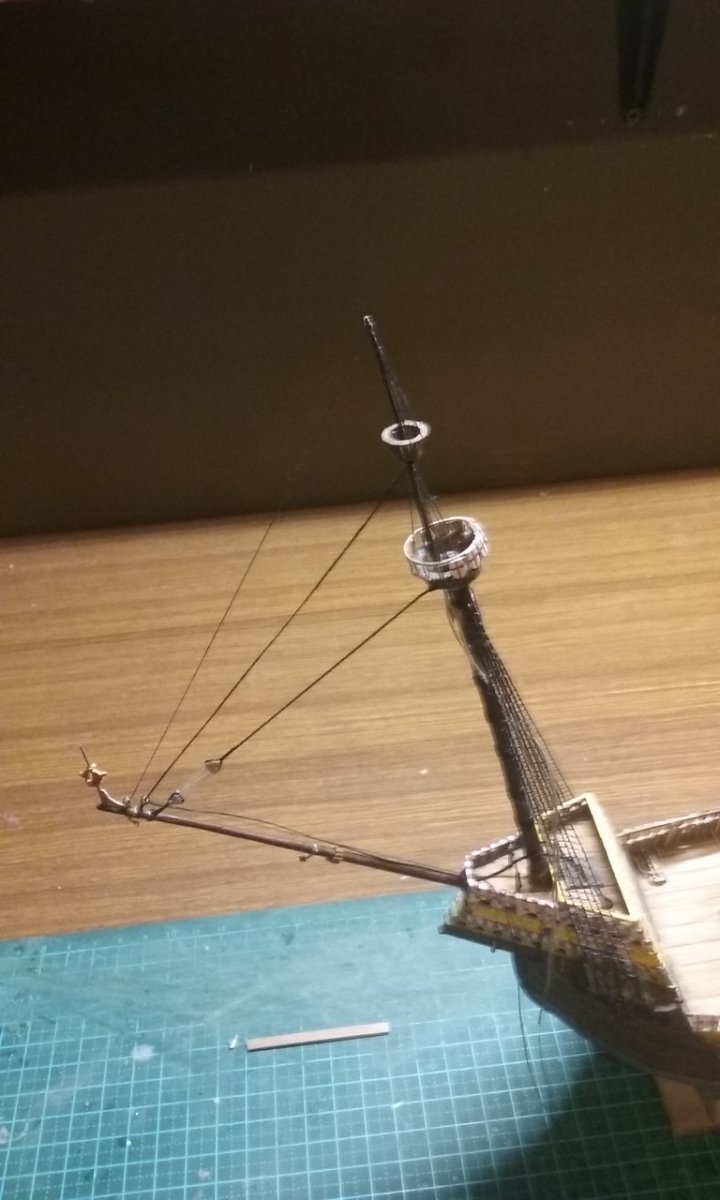
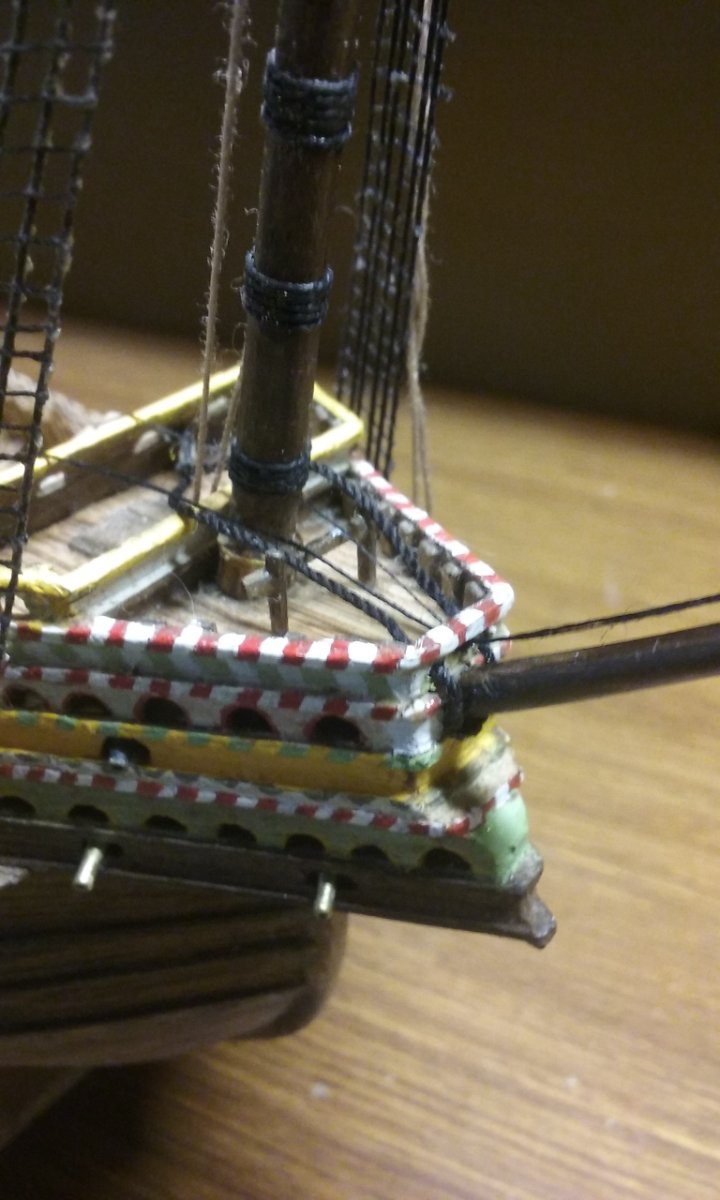
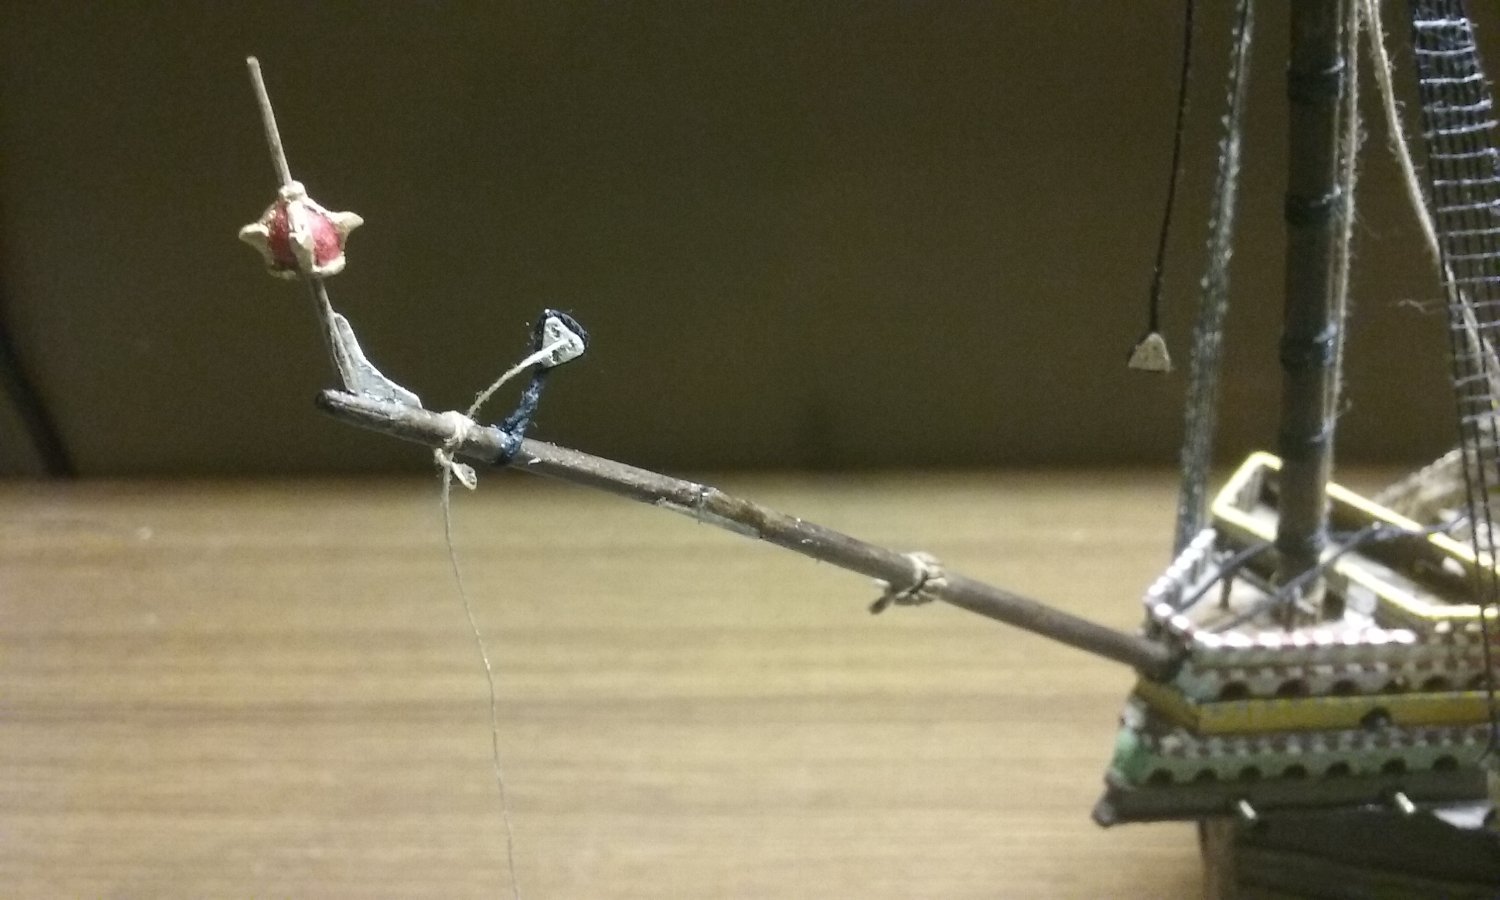
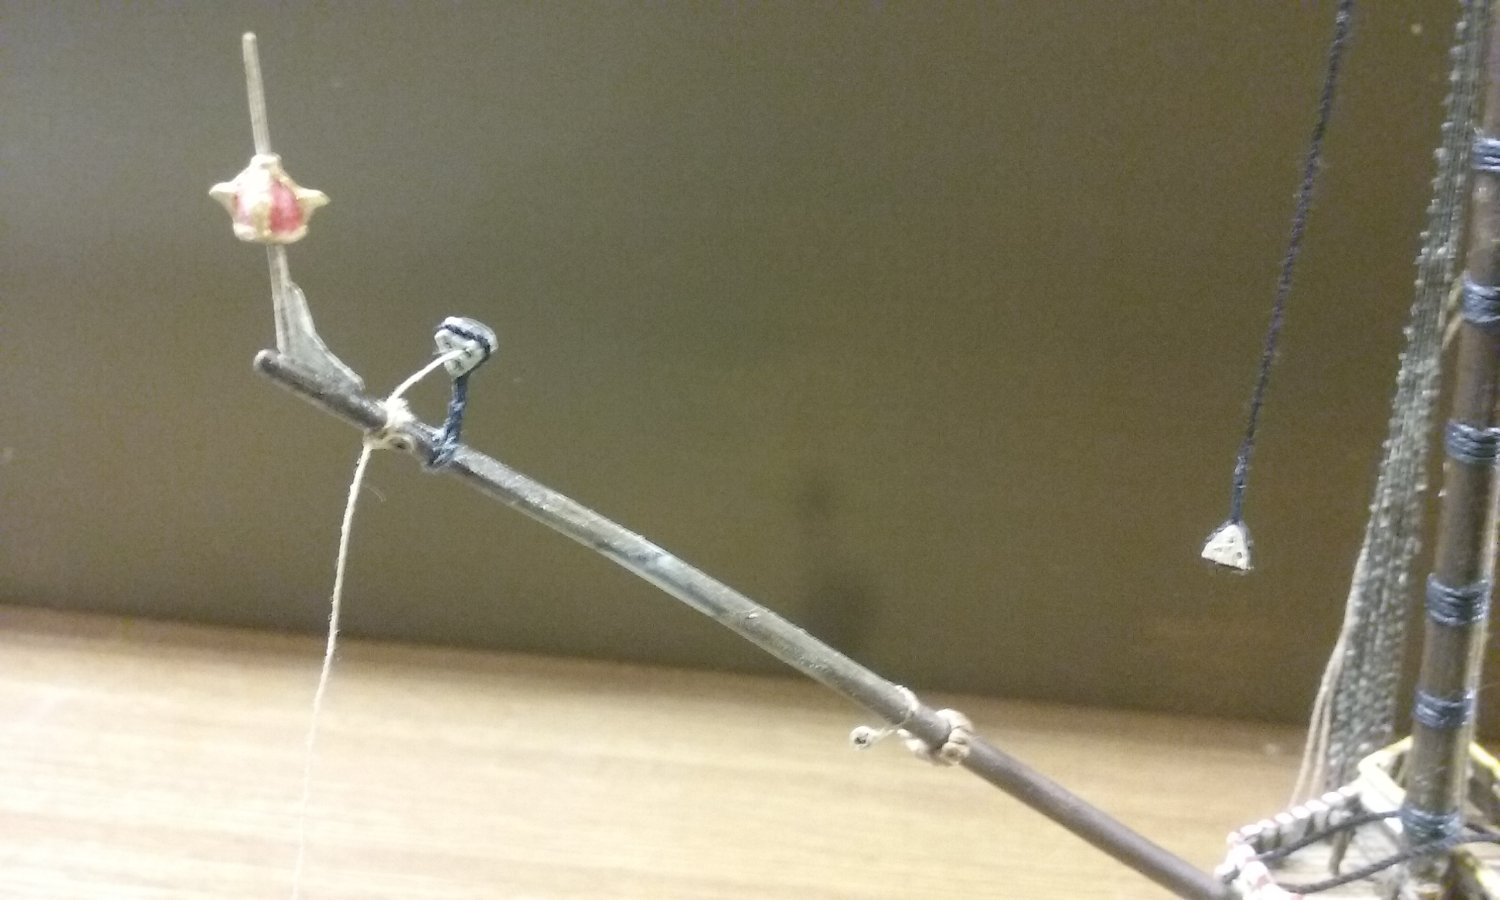
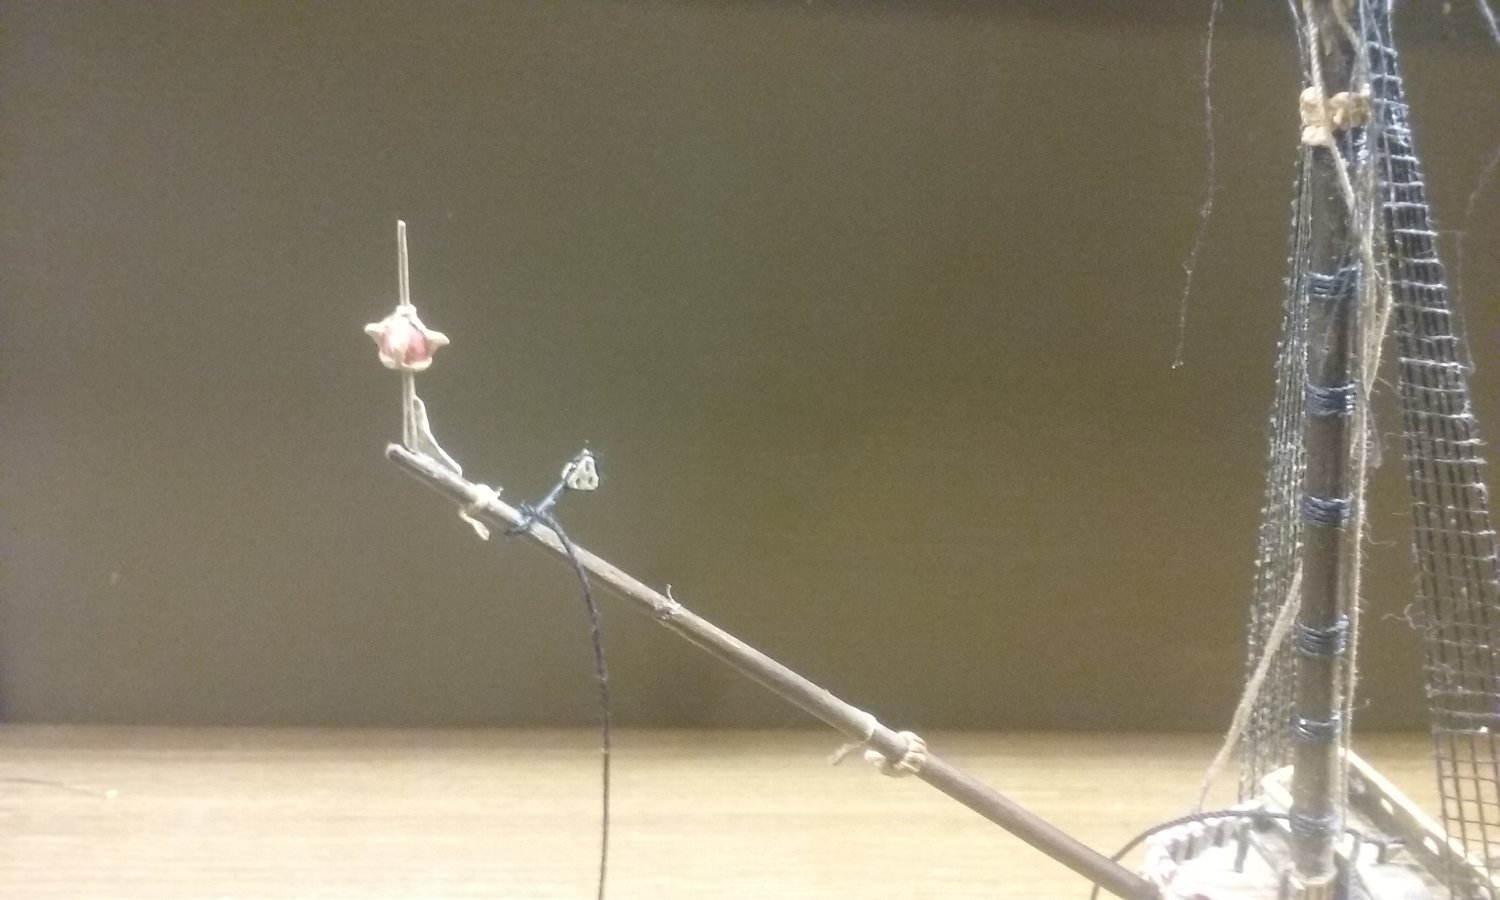
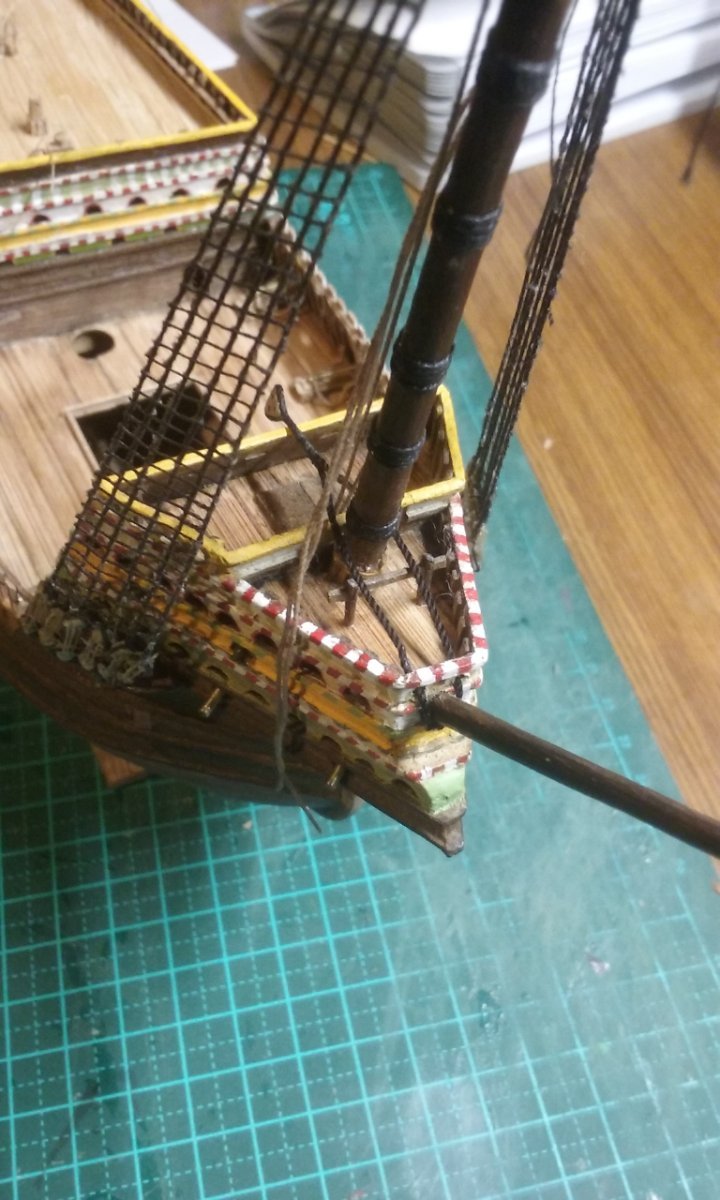
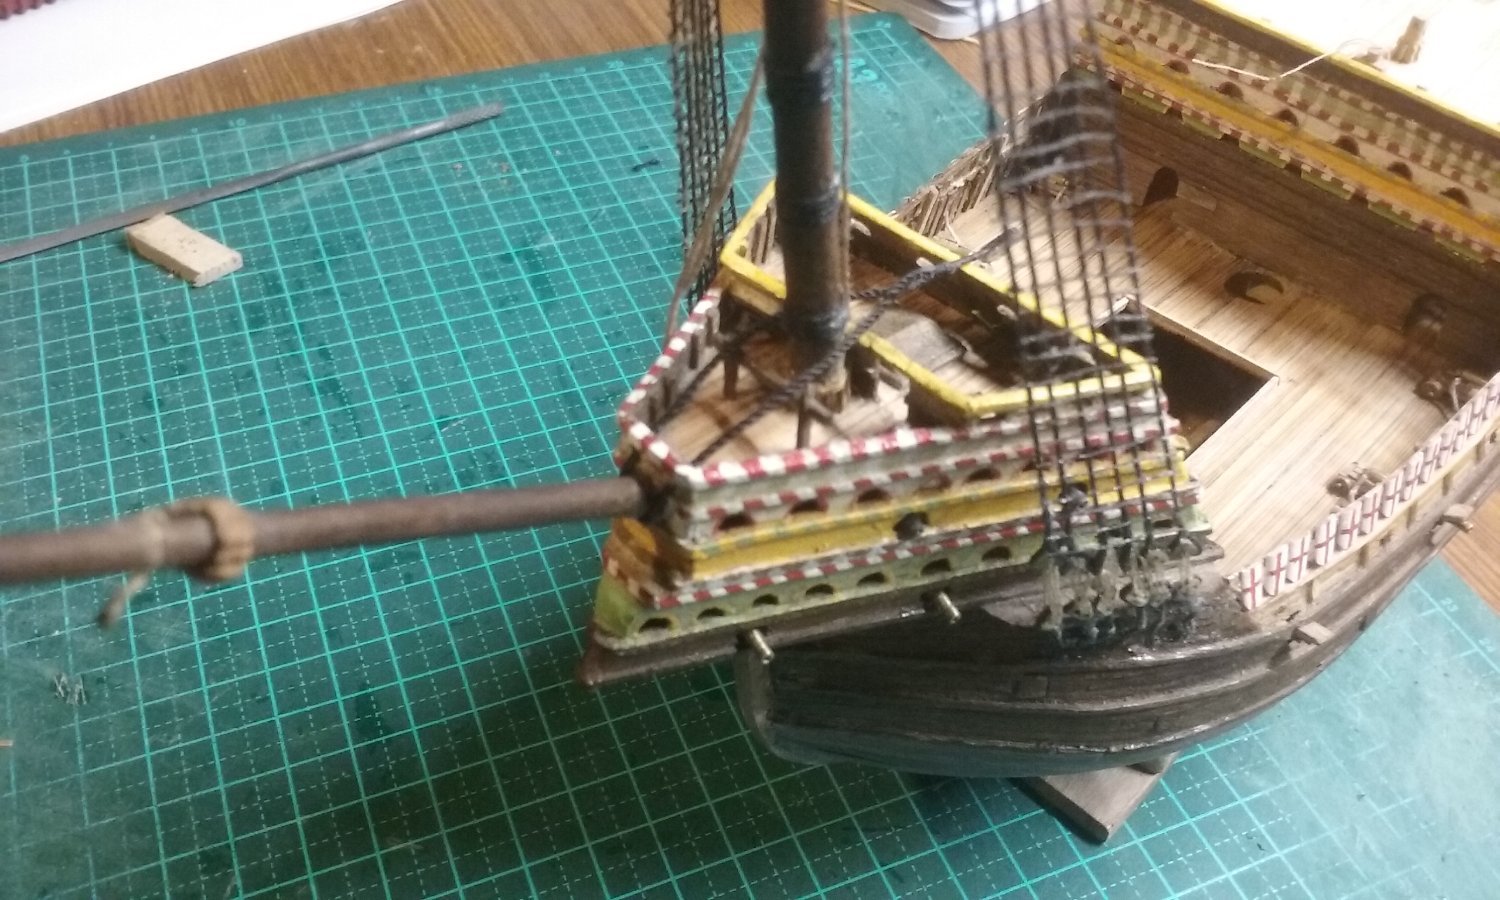
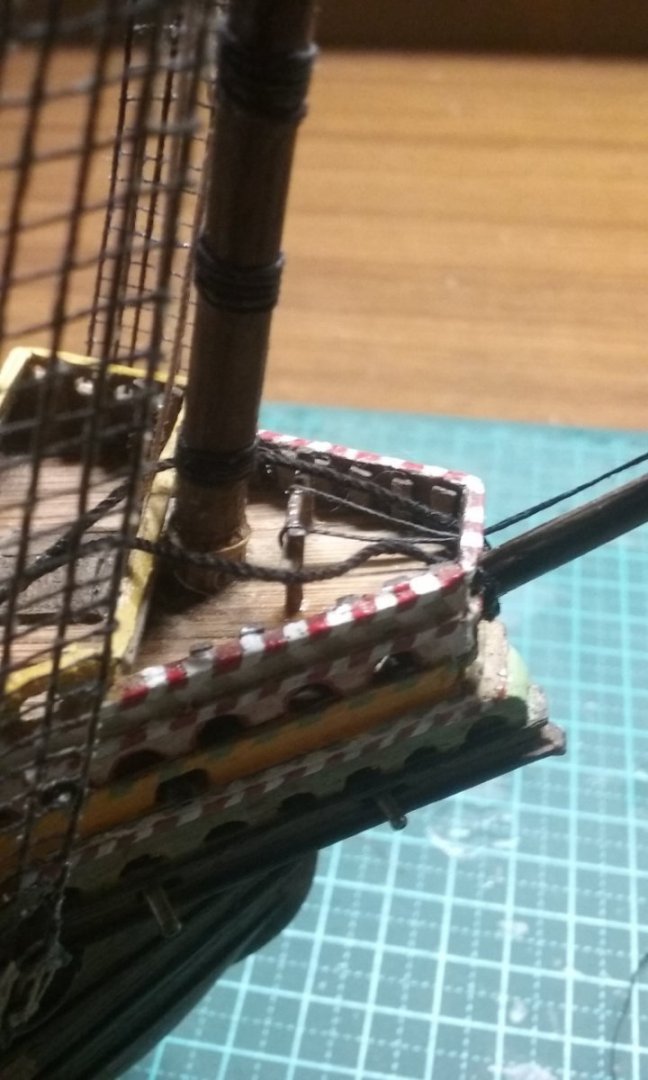
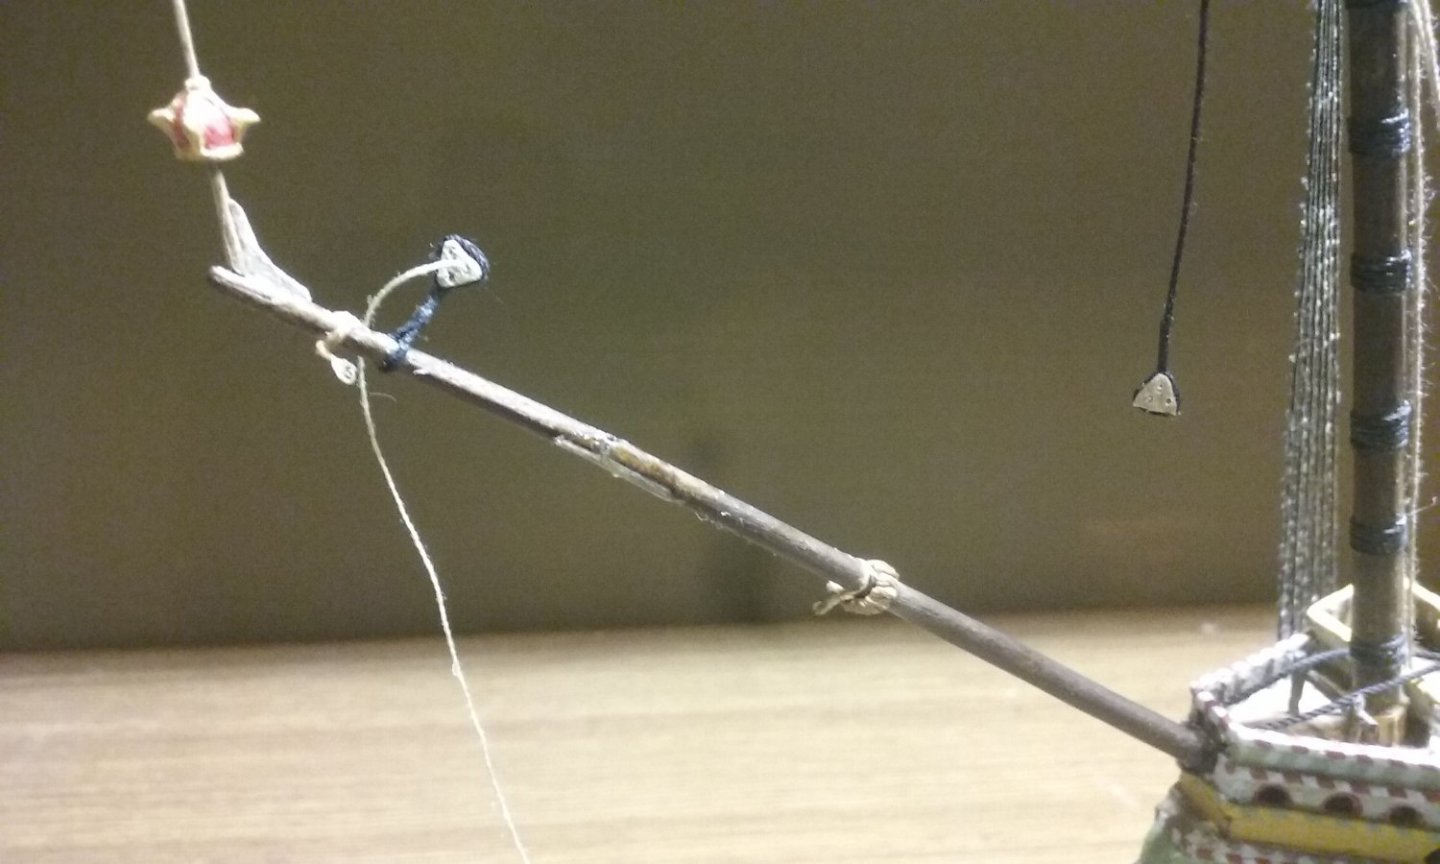
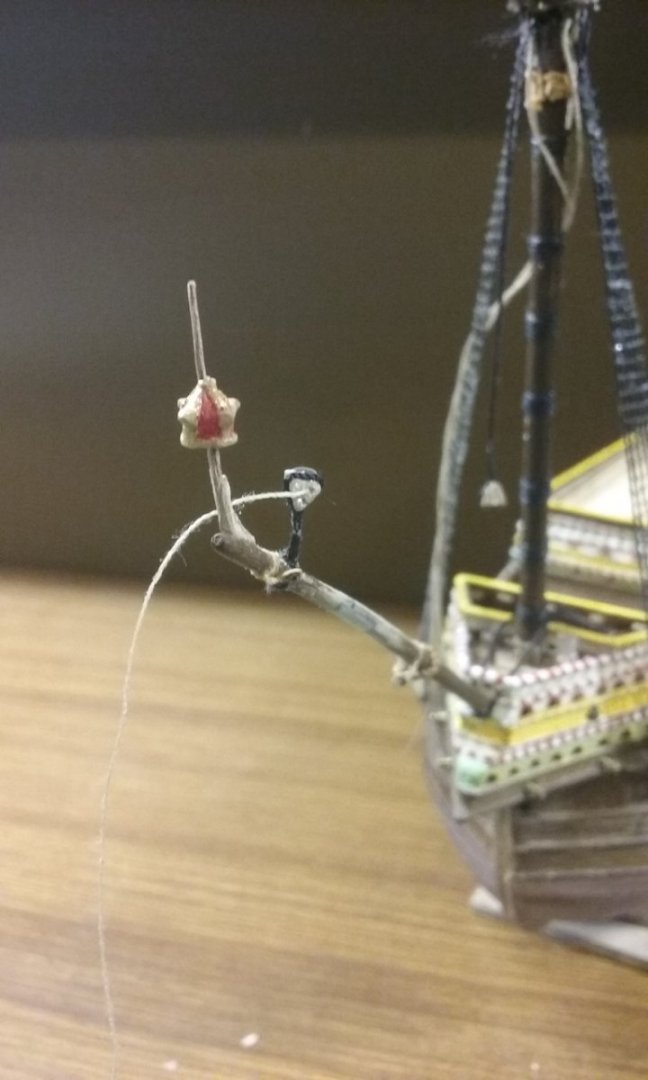
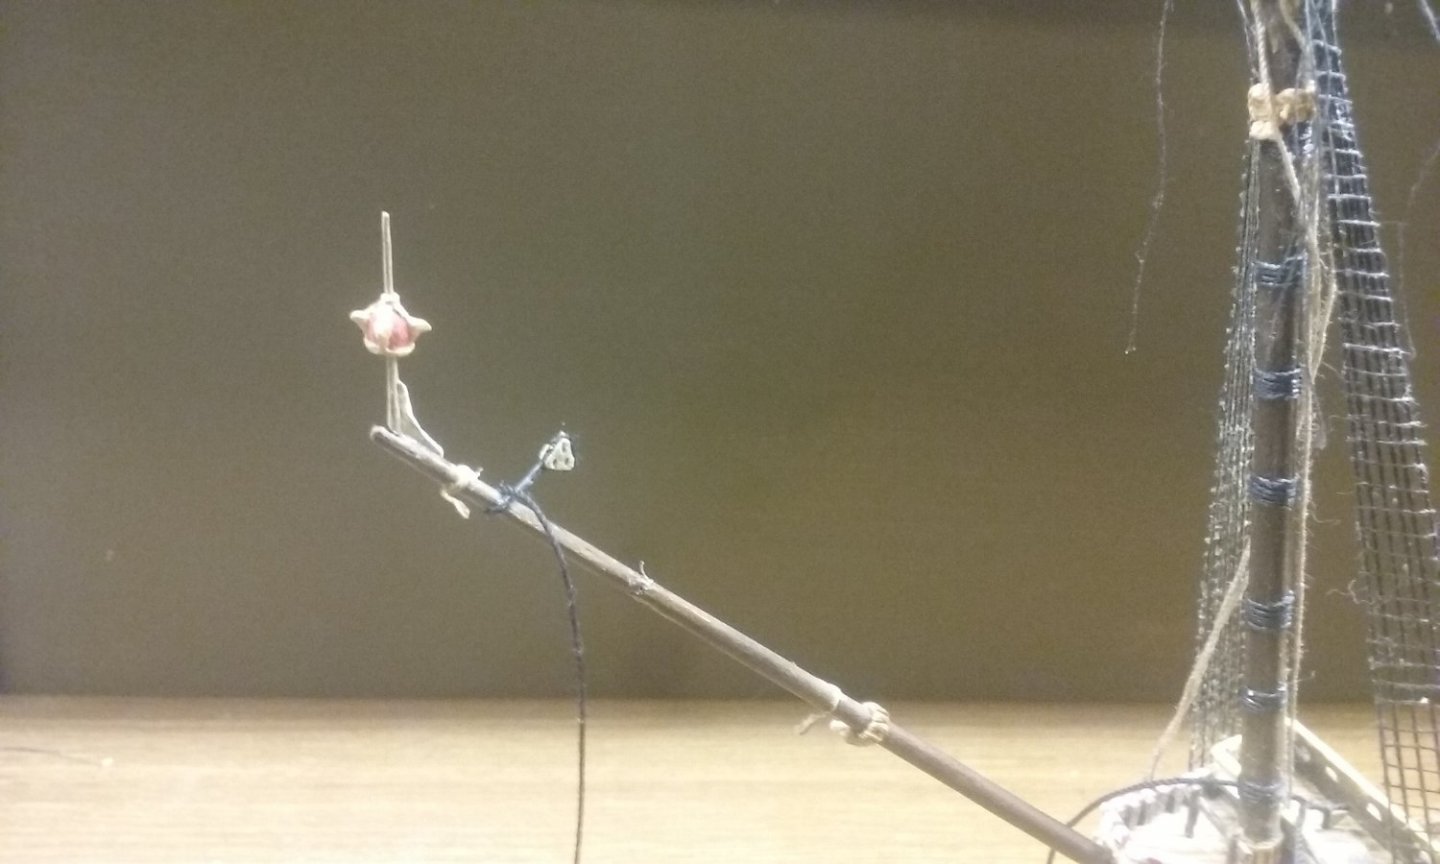
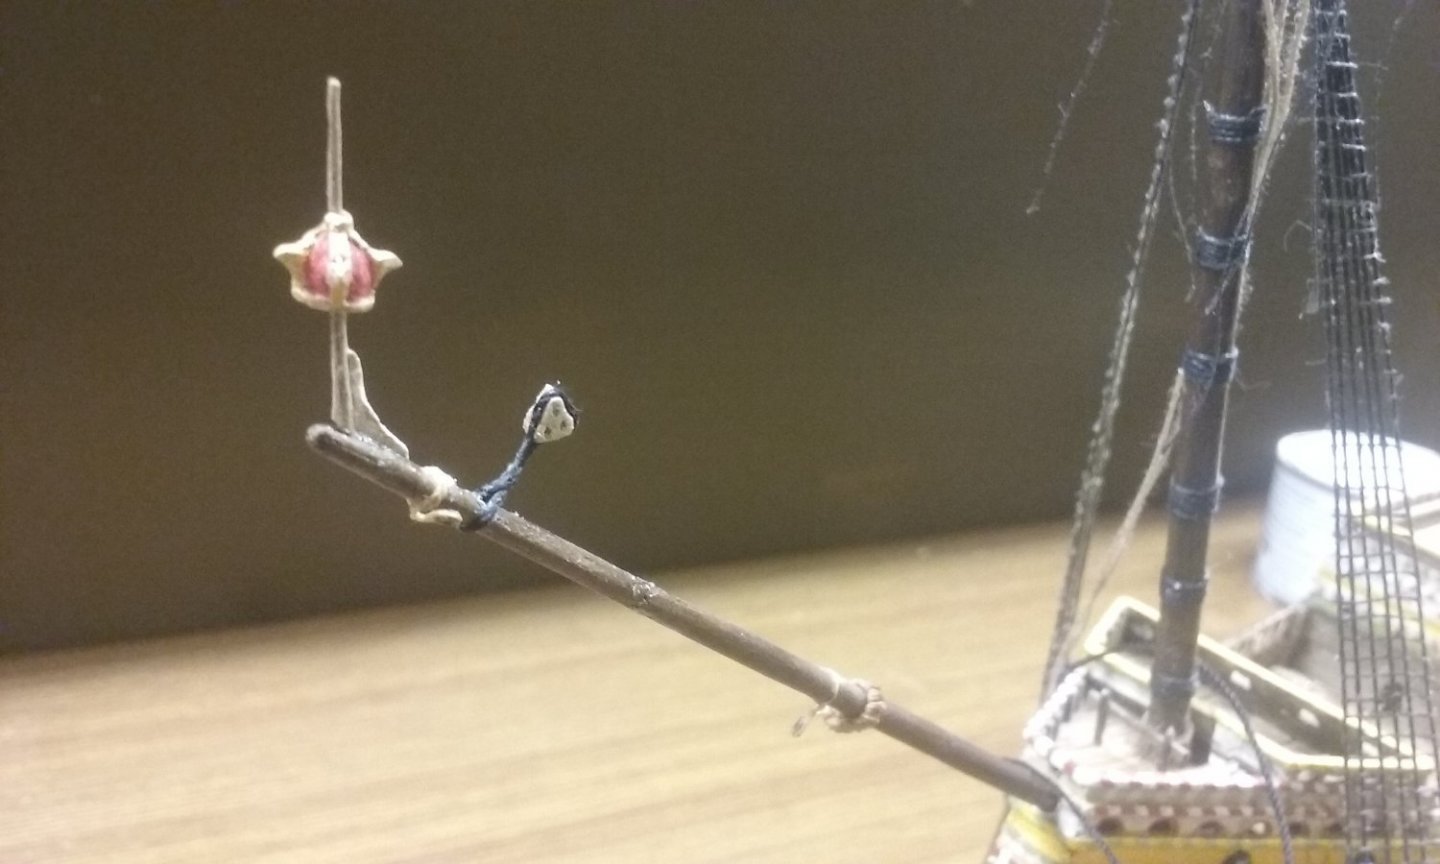
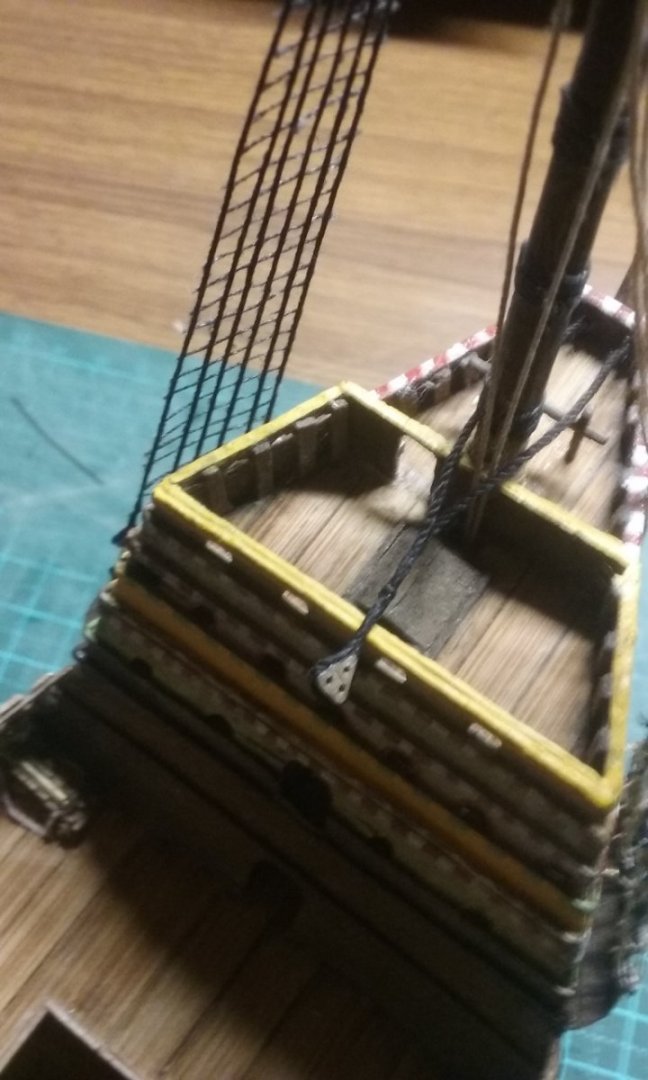
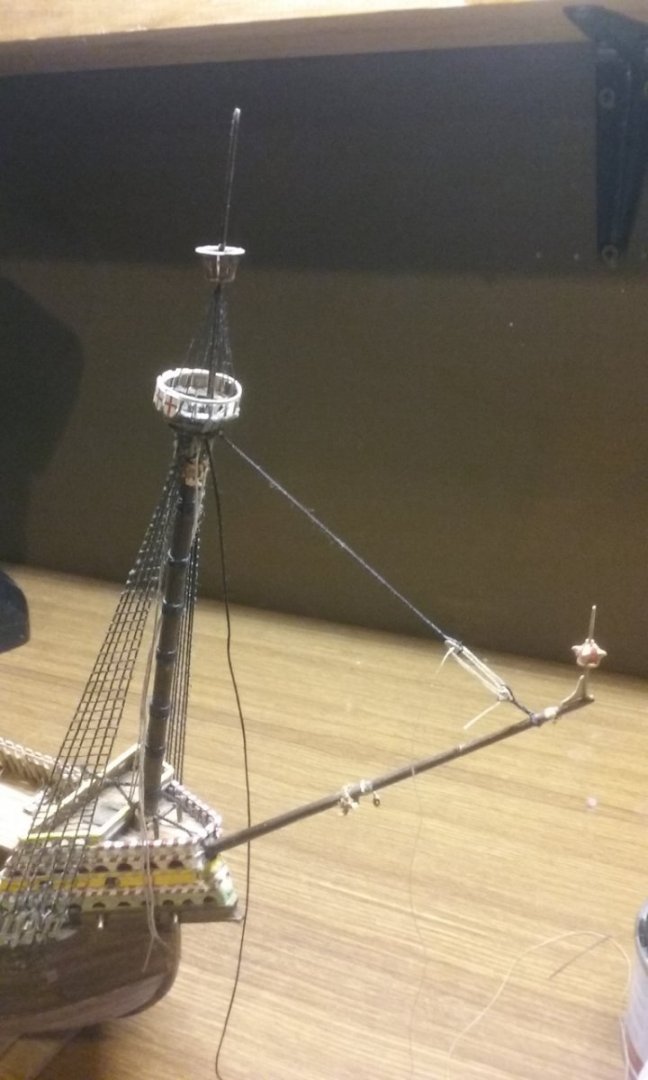
Bowsprit repair disguised with dark tan boot polish. I've added the fore topmast and topgallant mast stays with a block on the bowsprit for each, in line with Anderson's "The Rigging of Ships in the Days of the Spritsail topmast" (as there are no worthwhile texts on rigging for ships earlier than 1620, I've taken the simplest of Anderson's examples as being the most likely for 1545). And now the bowsprit doesn't bend when the lanyards are tightened. The two upper stays are taken through a hole in the front face of the forecastle, which acts as a fairlead. The stays pulled tight by weights hanging from the ends. They are tied off (glued) to bitts in front of the mast (which I'd put on the model way back when but never really thought of what I'd use them for). I won't be adding coiled ropes for the ends of the stays - I'm already going much further than I did when I first built the model, and I certainly wouldn't have done that back then. And starting on the ratlines for the fore topmast and topgallant shrouds. No clove hitches - to keep it all consistent I'm just gluing them on, as I did when I first built the model. I'm thinking of brushing the ropes with dilute PVA glue to remove the fuzziness. Steven


- 739 replies
-
- 8
-
-
- Tudor
- restoration
- (and 4 more)
-
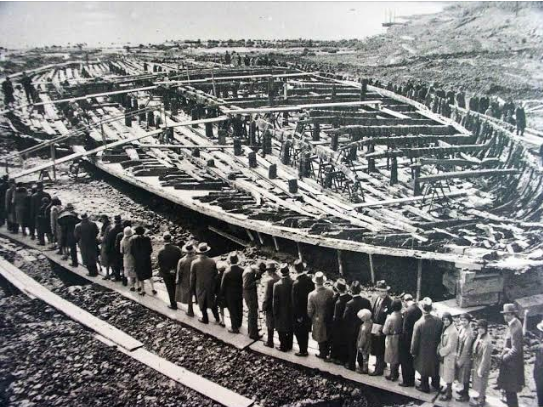
Public viewing an enormous pleasure vessel built for Roman Emperor Caligula, unearthed in 1929 - see https://en.wikipedia.org/wiki/Nemi_ships . Steven
-
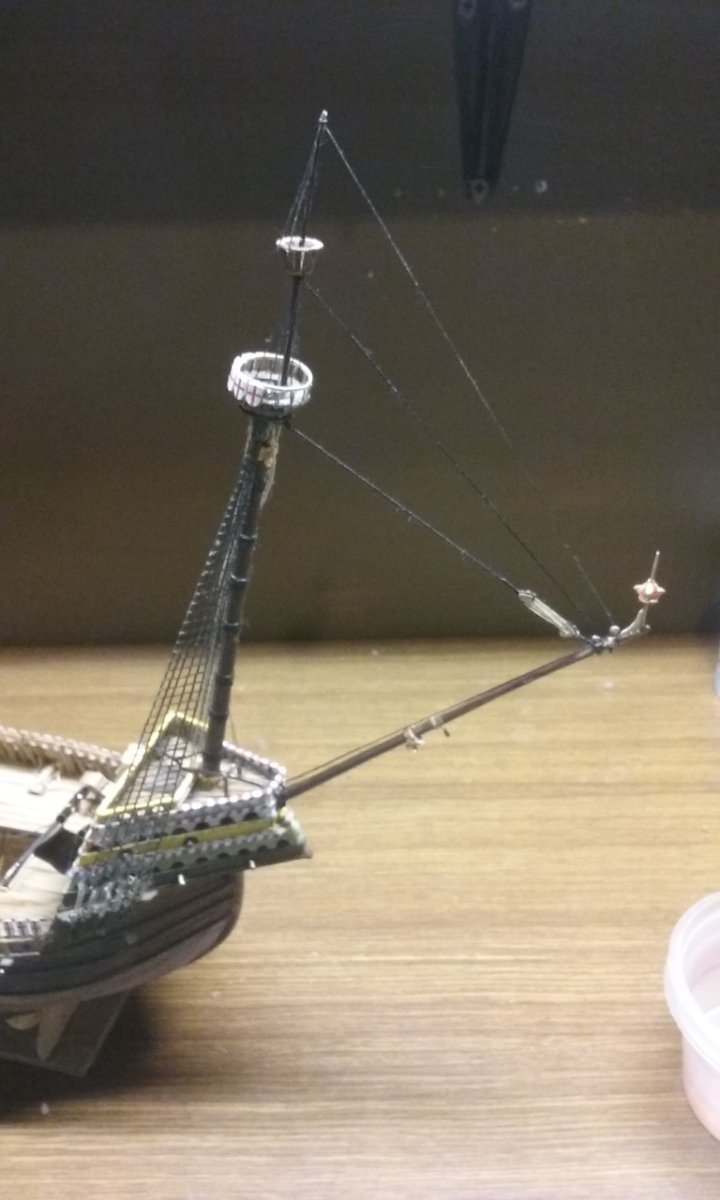
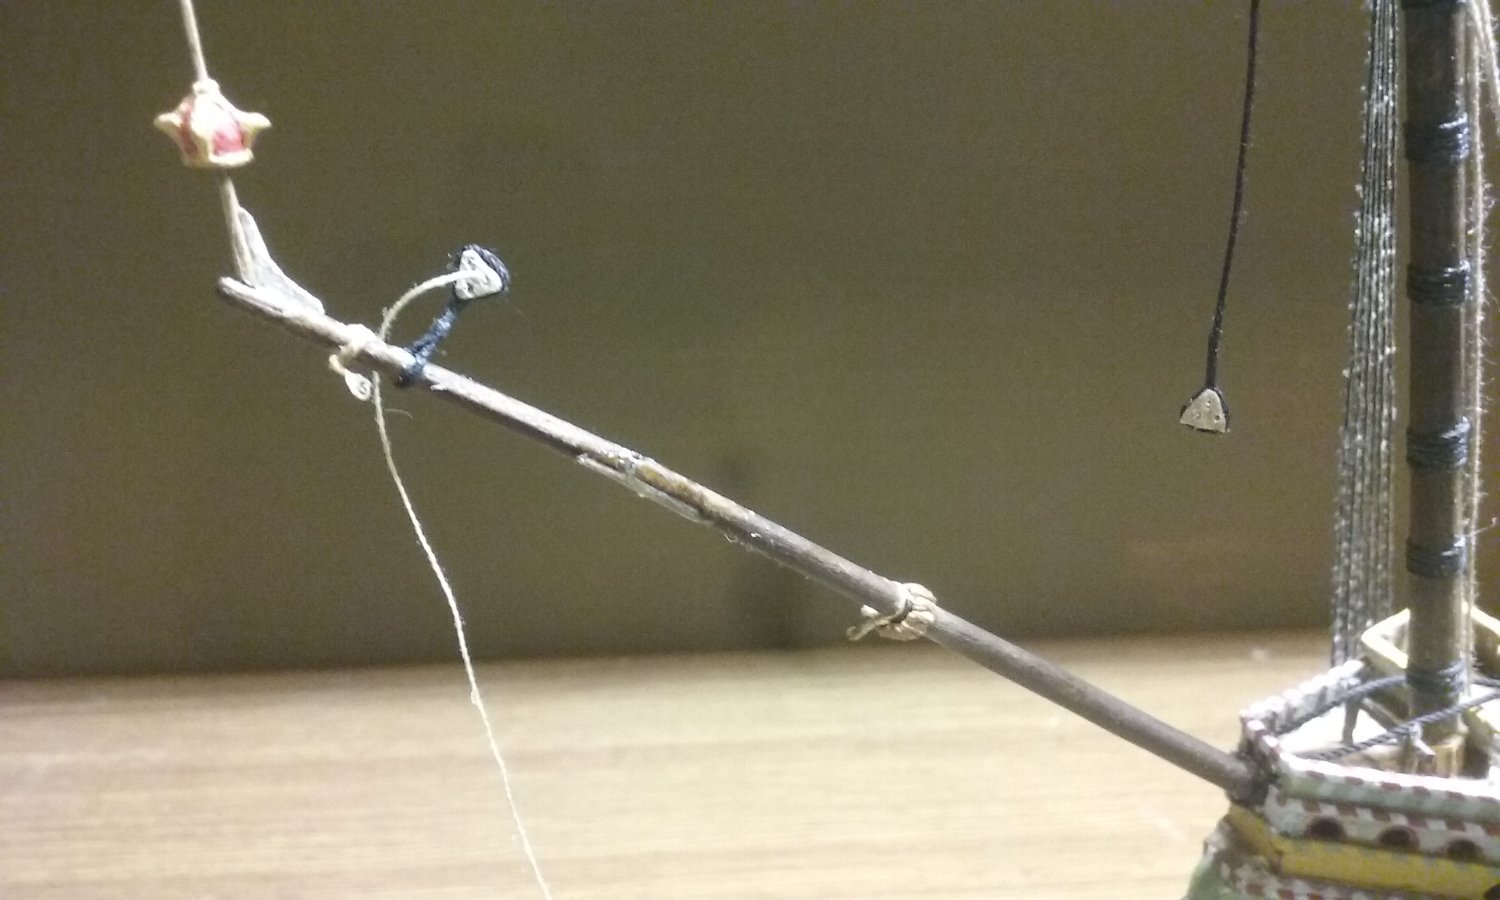
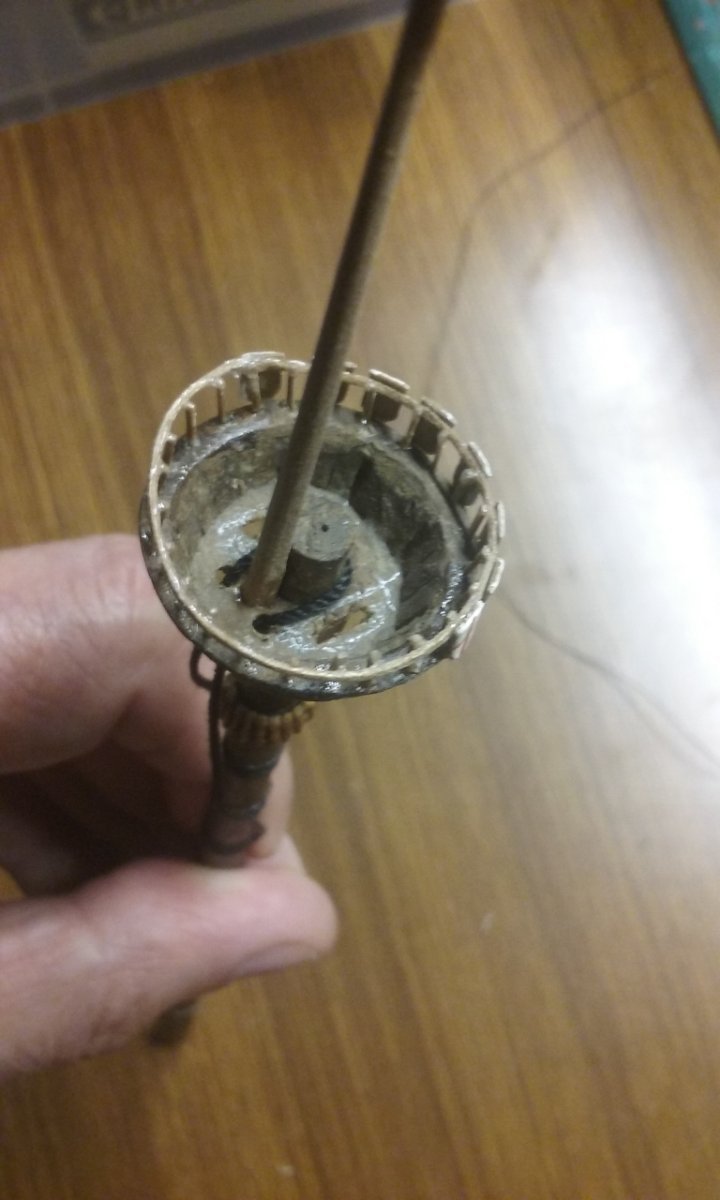
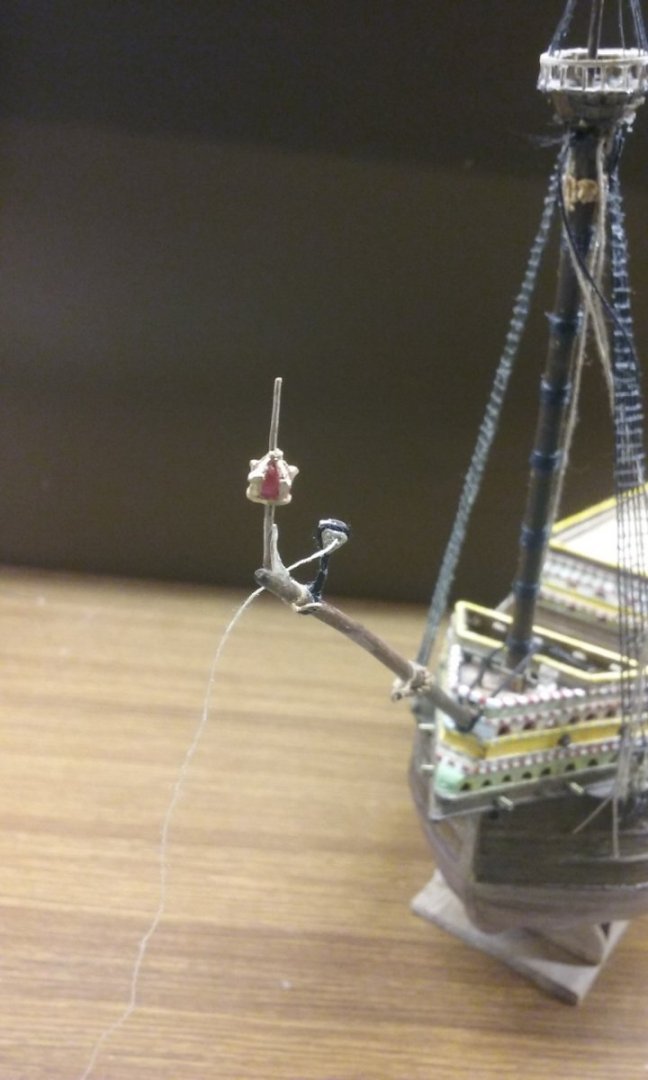
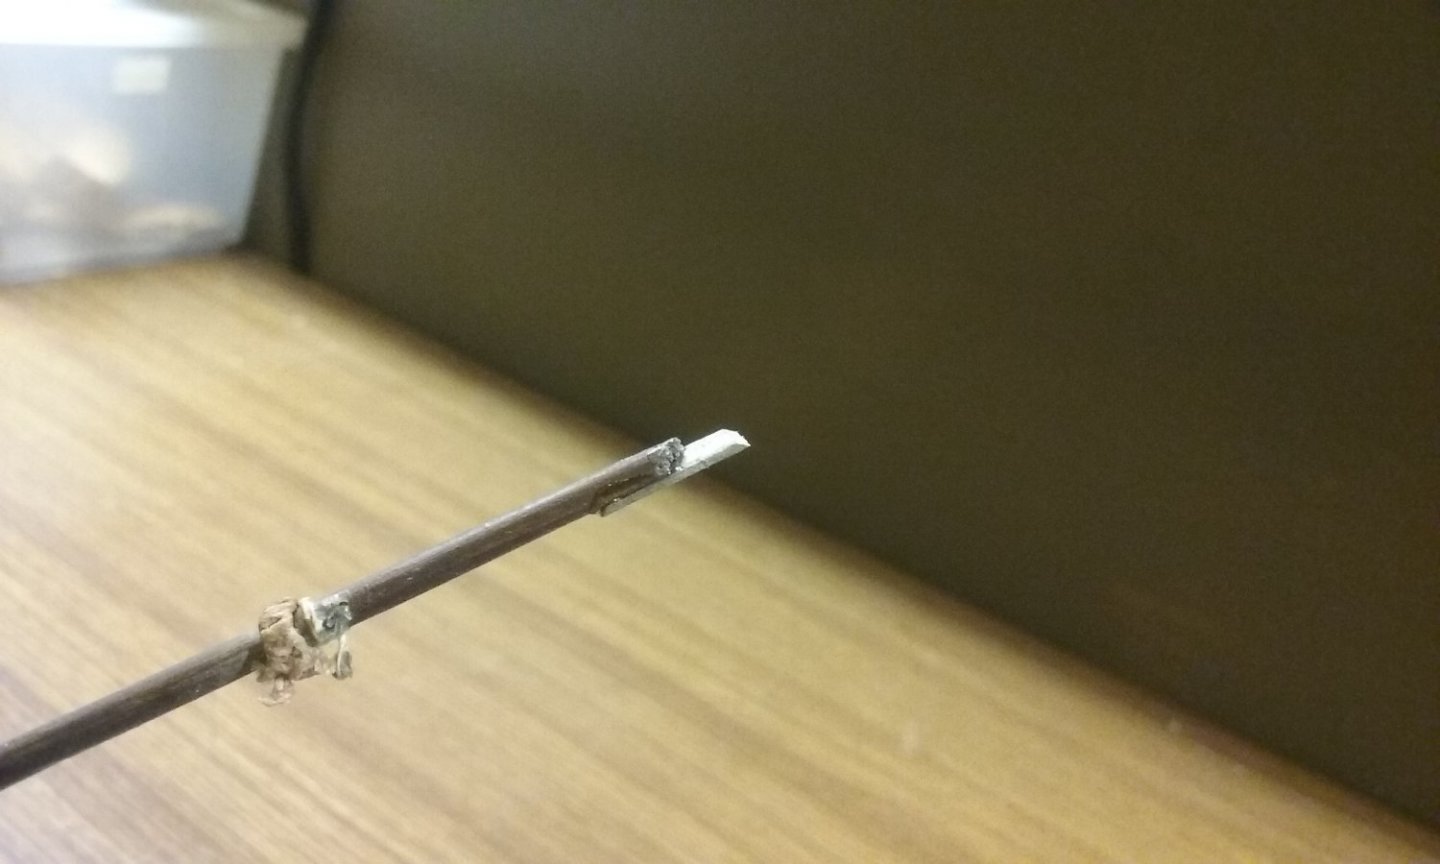
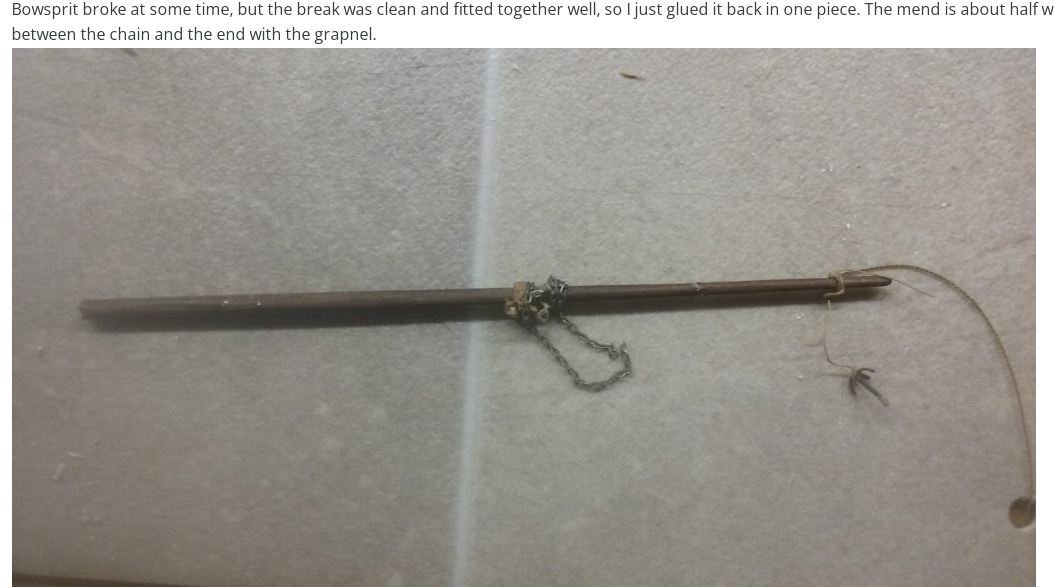
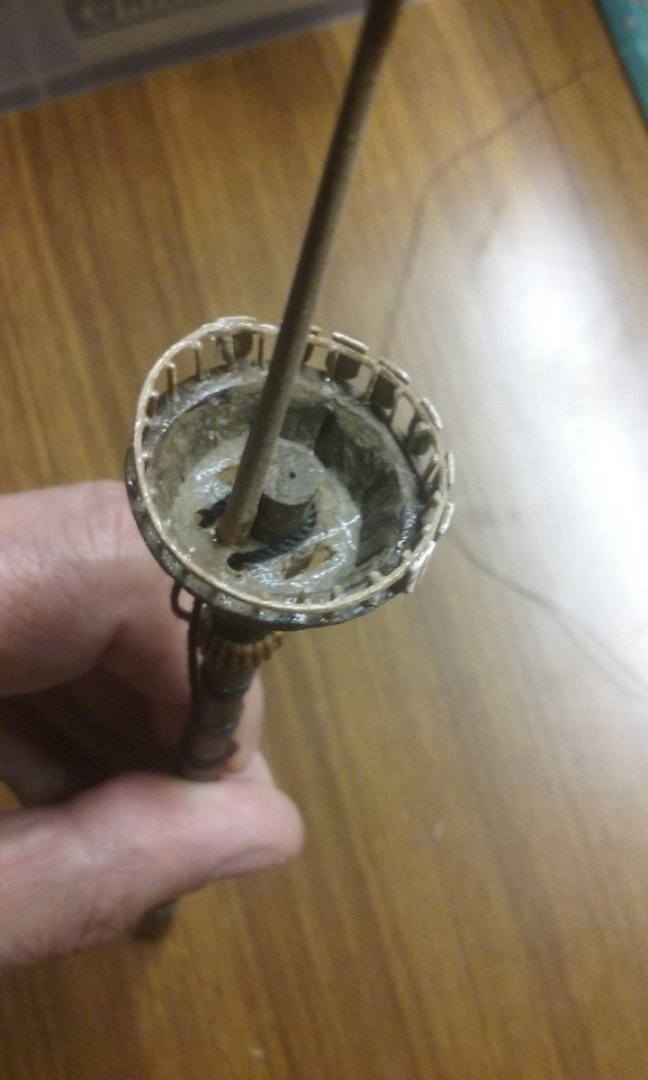
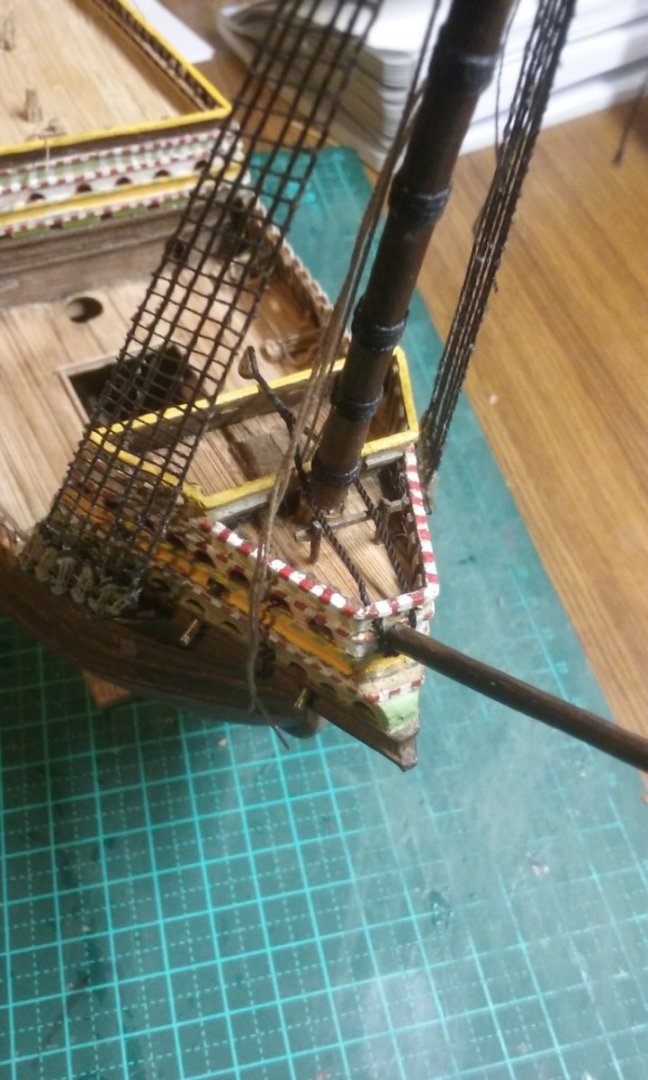
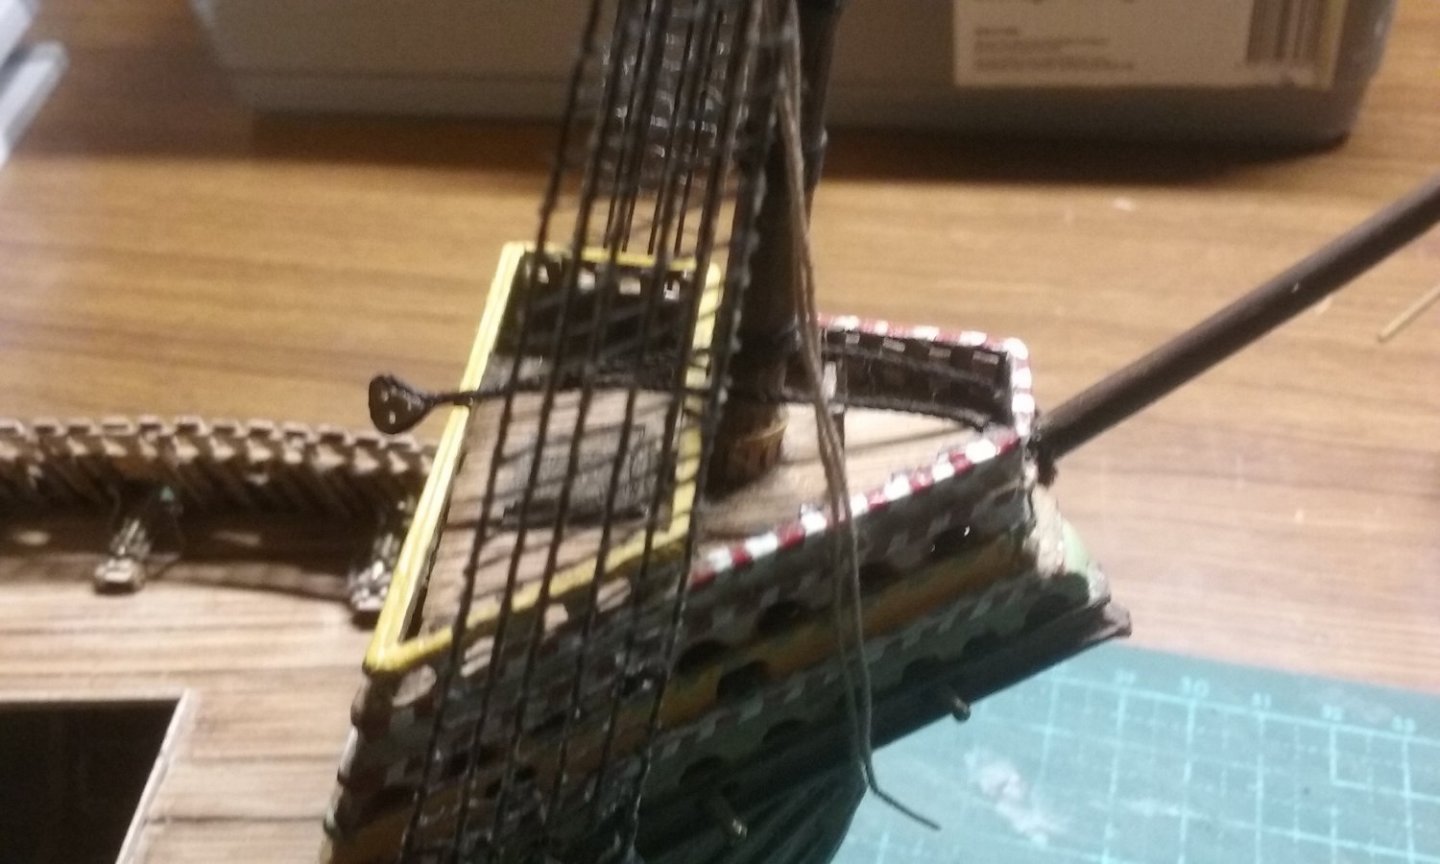
So I tried tightening up the lanyard on the deadeyes and for some reason they didn't tighten - then I looked at the bowsprit and discovered I had a problem. Way back on the first page of this build log (17 October 2018) I had to glue the bowsprit together. Trouble is, I used PVA (white) glue which is flexible. When I tightened up the lanyards, the bowsprit bent at the join. Wish I'd taken a photo - but here it is after I removed the lanyard. I cut a chunk out of the bowsprit each side of the join and inserted a piece of wood to support it (using CA, not PVA). I got the best colour match I could, but it wasn't perfect (though not as bad as it looks in the photo). And here it is with both sides joined Smoothed off It droops a tiny bit at the join, but I can't see I could have done a better job with all the constraints involved, so I'm satisfied enough with it. The only problem is that when I sanded it smooth it took the dark "aged" surface off the bowsprit. So I'll have to get clever and do a bit of colour matching. I'm currently thinking of using water colour paint. Steven


- 739 replies
-
- 11
-
-
- Tudor
- restoration
- (and 4 more)
-
How far could a ship of the line travel?
Louie da fly replied to Admiral Beez's topic in Nautical/Naval History
Strangely enough "lime juice" was lemon juice - much higher vitamin C content. Steven -
I had to look this one up on Wikipedia (the Source of All Knowledge). Why would an American ship be called "England"? Of course, it was the surname of a naval war hero. Makes sense now. Steven
-
Nice work, mate. She's looking good. By the way, if you want to remove the second duplicate photo, click on the 3 dots at the top right of your post, click on "Edit" in the dropdown menu, and just right click on the photo and select "cut". Then save the post. But if you have two of the same photo in the "uploads" at the bottom, just hit the X at the top of one of them, and it'll do the same thing. Steven
-
You might be interested in something like the jig Kikatinalong made for his carrack - see I thought it was pretty cool. Wish I'd thought of it. Steven
-
Looking good, mate. Do you have a jig to hold the frames at right angles to the keel (in all three dimensions)? If not, I'd highly recommend getting/making one before you start assembly. Steven
-
Wonderful to see you back at the workface! That's looking very good so far. By the way, now you're back into it, it might be time to change the title of this thread by taking out the word "clarification". You do it by going to the very first post you made and click on the three dots at the top right of the post, then select "edit" from the drop-down menu and change the wording of the title. Looking forward to more progress on this. Steven
-
Nah, just bad lighting. They're quite a decent light brown colour, not dissimilar to the colour of rope. Steven
- 739 replies
-
- 3
-
-
- Tudor
- restoration
- (and 4 more)
-
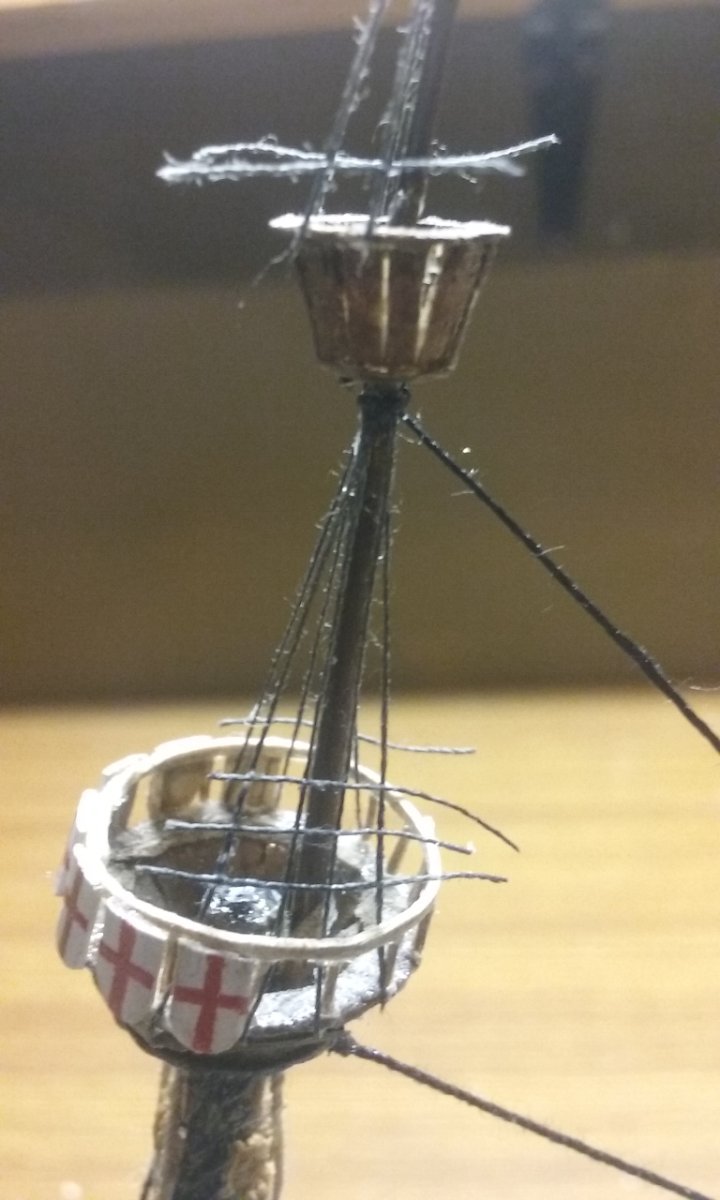
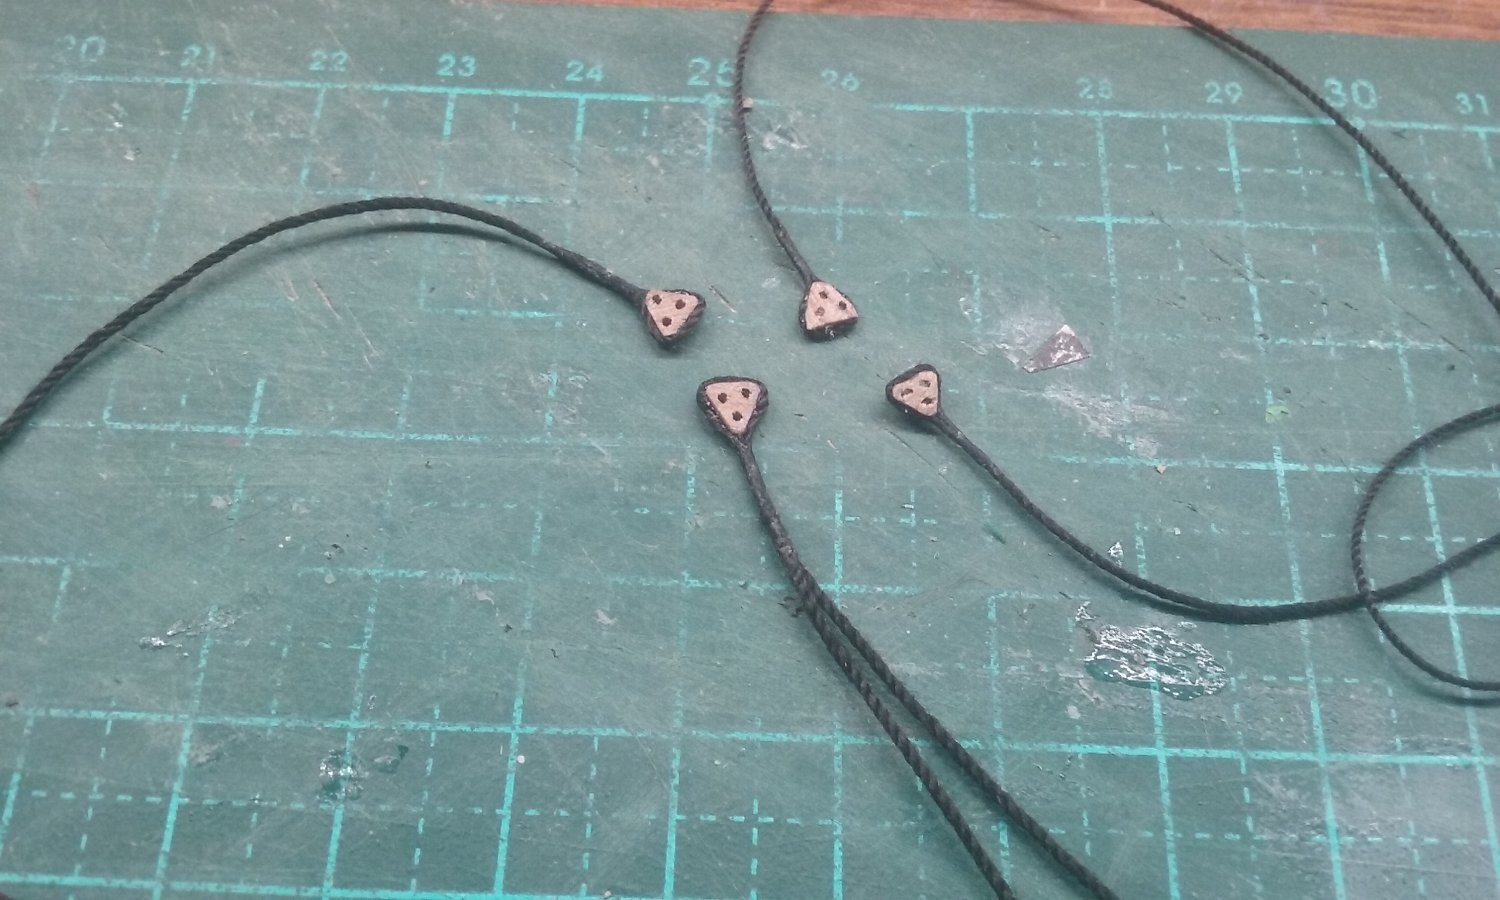
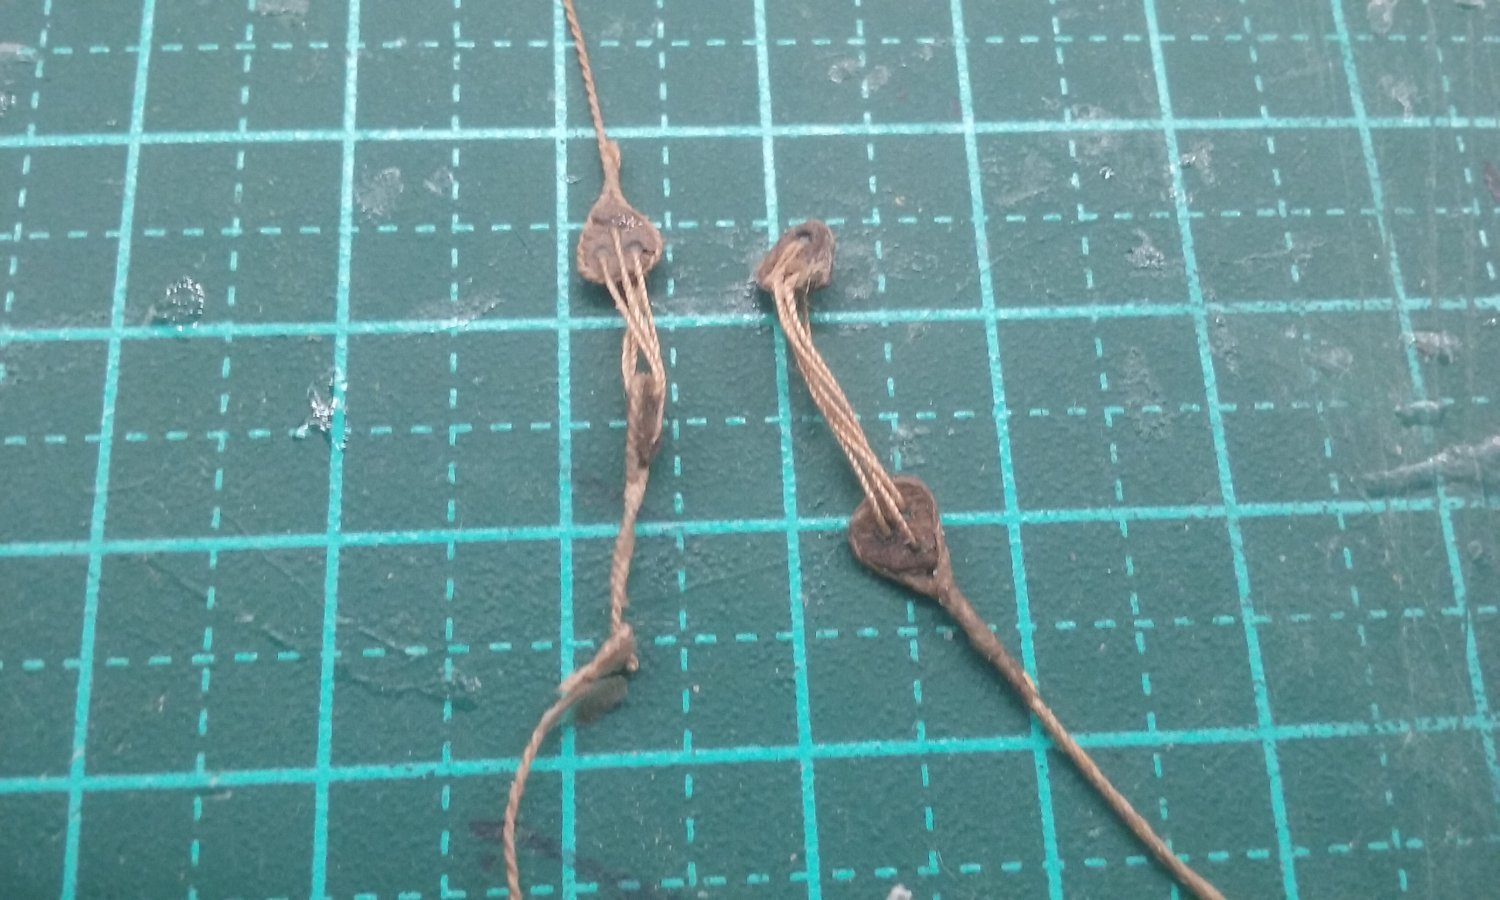
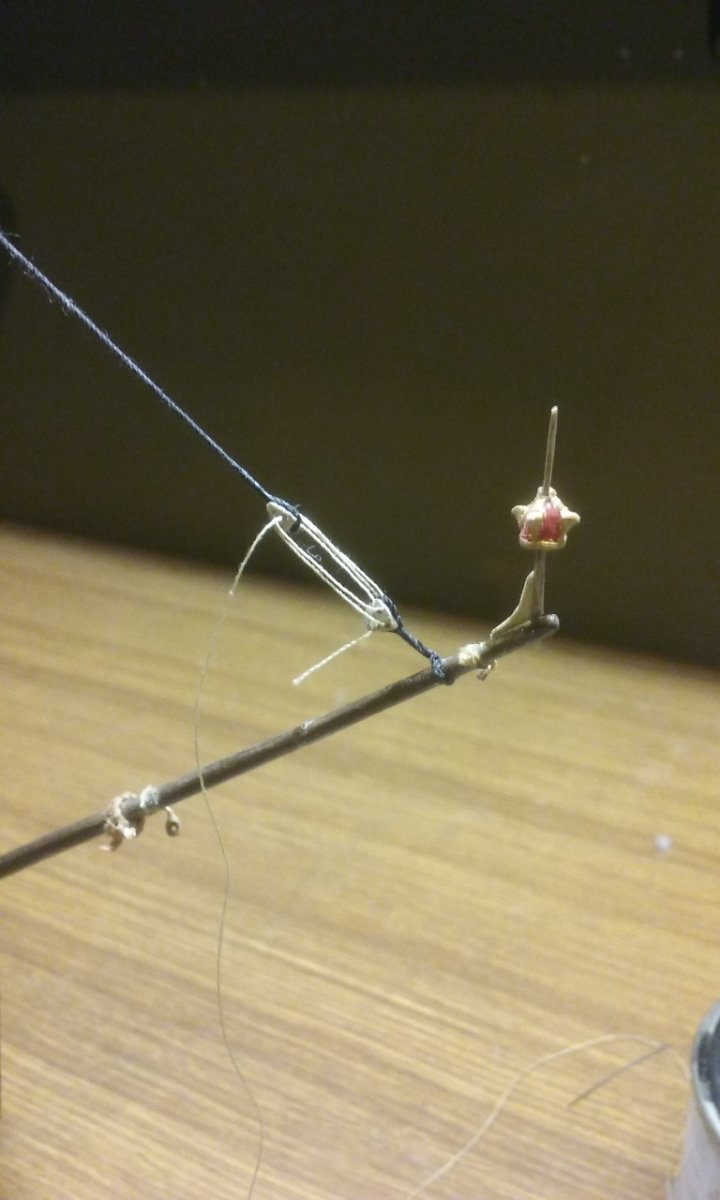
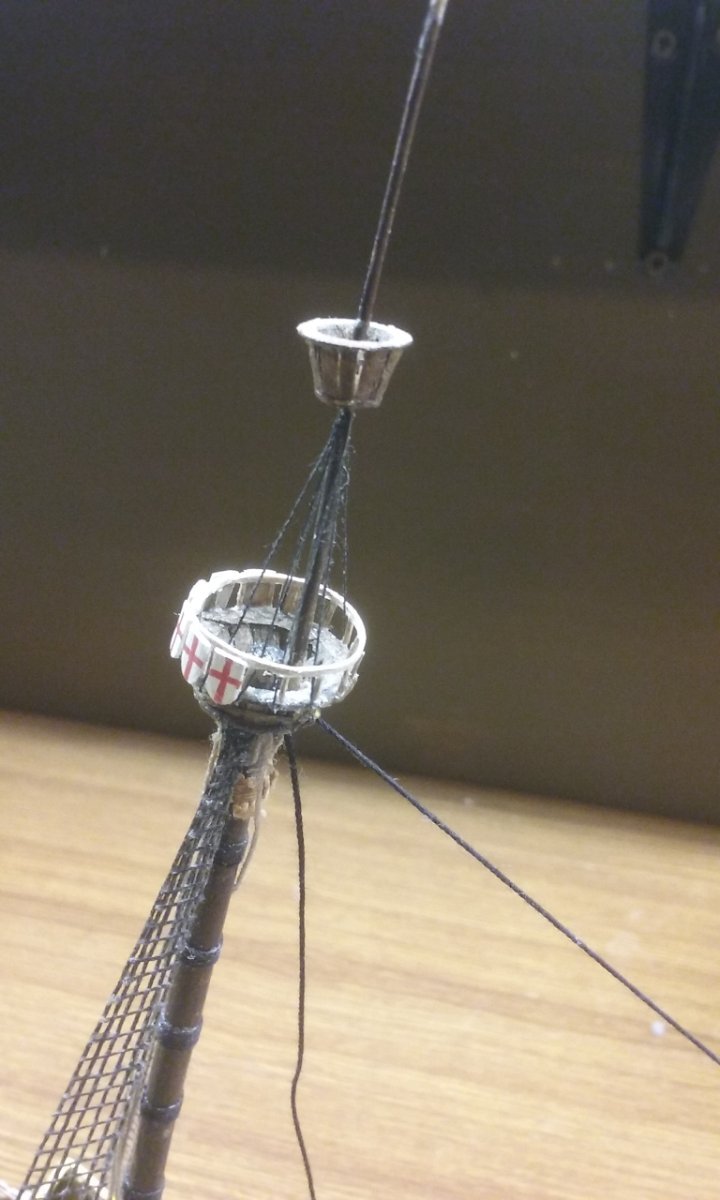
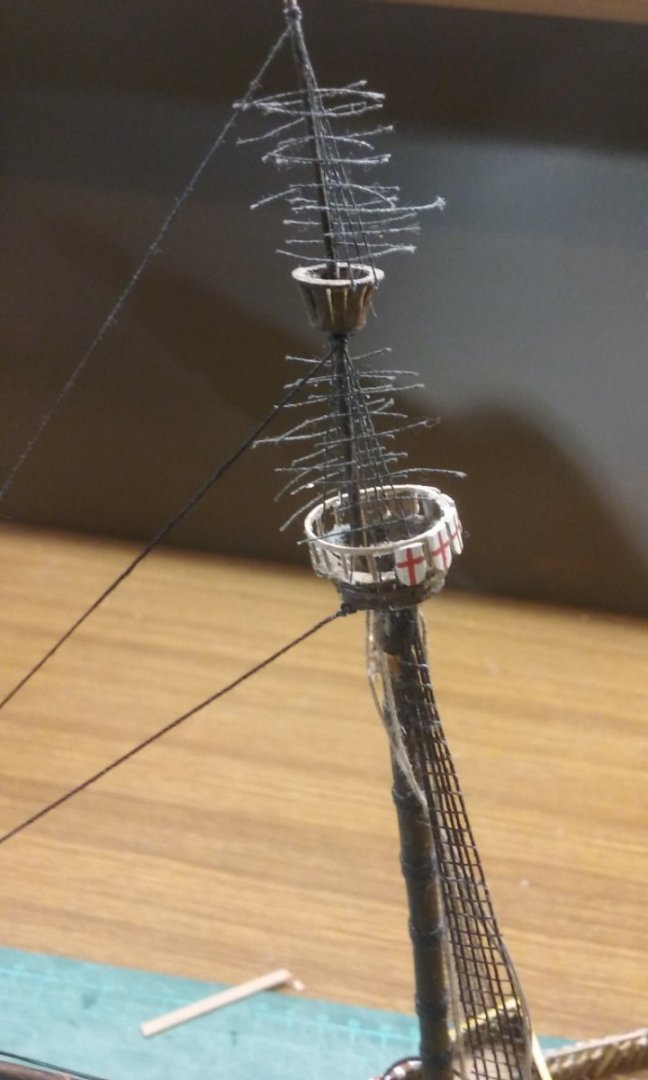
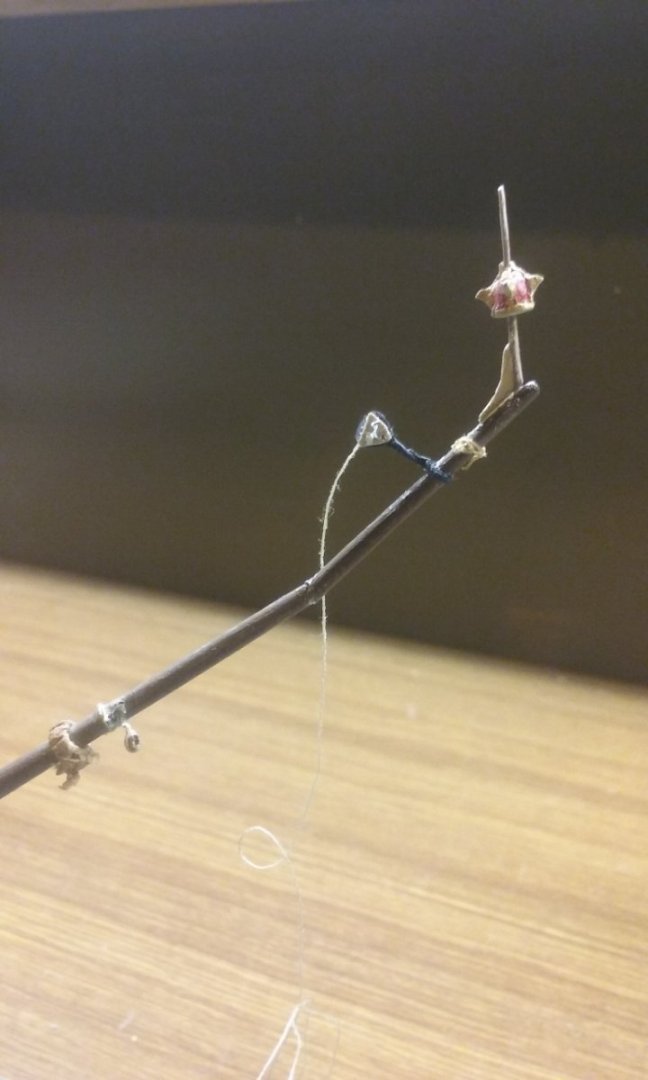
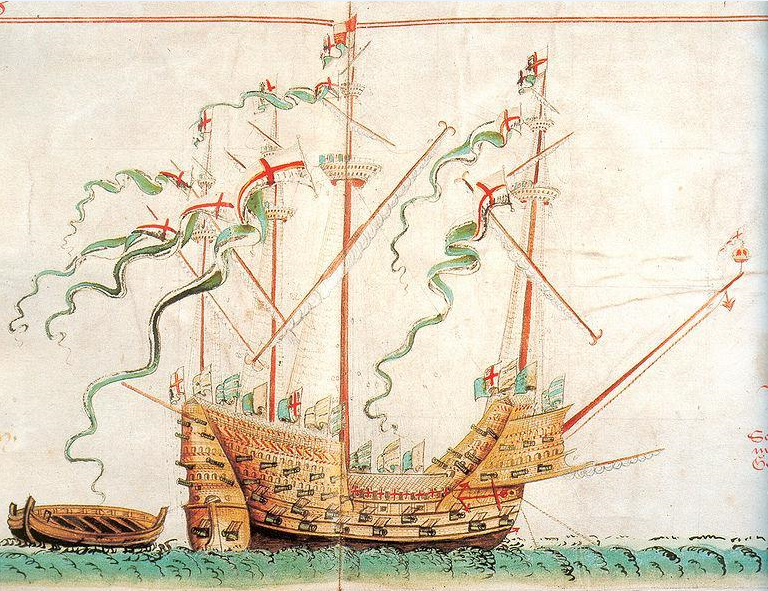
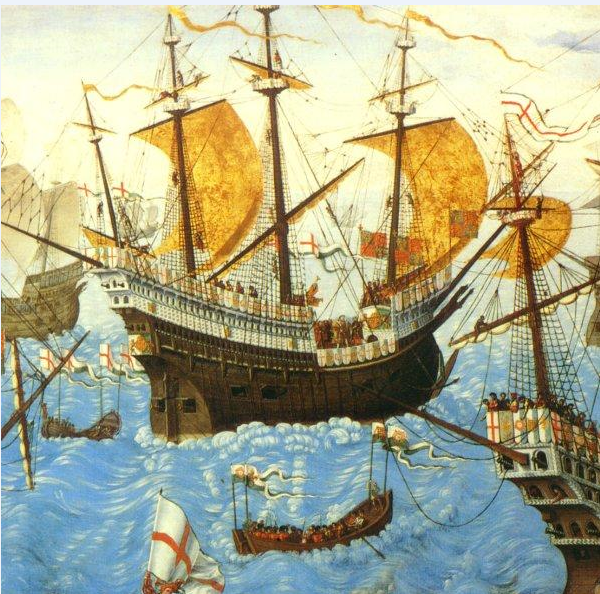
Well, the poor old Great Harry has been languishing while I've been working on the nef, but now I've been able get back to her. I hope she's not too upset with me. I've been puzzling over whether it's best to add stays first, or shrouds as all the texts seem to say. Seeing as the shrouds aren't standard anyway (when I first built the model I didn't know they looped around the top of the mast, so I just glued them to it just under the top and I also didn't know about cross-trees and trestle-trees), whatever I do will be a sort of bodge - but not visible unless you're really looking for it. There's some uncertainty about whether the stays were each kept tight with a pair of deadeyes, or pairs of blocks or hearts - I went with deadeyes. In fact I'd already made two pairs of way back when I built the ship - one pair for the main, and one pair for the fore - and I was planning to re-use them. Comes the time - I can't find them no matter how hard I look. Turned the whole workshop over - nothing! It must be those aliens again. So I decided I'd have to make new ones. And wouldn't you know it, just as I finished, the old ones turned up! But the new ones were nicer anyway, so I kept on with them. However, for the main I might as well put the stay on now and add the shrouds later. I drilled a hole in the floor of the top each side of the mast, then looped the stay through them. (I did the same for the foremast as well). At this point I made a mistake that I later had to go back and correct on all the masts. I tied the stay off in a loop at the top. What I should have done was to leave it loose for the time being, and only tie it off when I had the lower deadeye in place, and could work out the right position for the upper one. Fortunately I had enough loose cord that I could cut it and start again. So here's the lower deadeye for the forestay. For the mainstay I had to make a wide "loop" that passed each side of the foremast with the deadeye at the after end. I drilled two holes in the front face of the upper forecastle to take the loop, just above where the bowsprit comes out. And here's the loop and the lower deadeye: The loop passes under the bowsprit (not sure if this is correct, but it seemed to be the right thing to do) and the two ends joined together with a fake splice. The splice would probably be at the other end in the real world, but no-one will ever know - except you guys, of course. And here, finally, is the forestay with its deadeyes (lanyards not yet tightened up). And this is how I made sure the upper fore shrouds were taut - again, no room in the floor of the top for holes to do it properly, so I glued all four together at the upper end and glued the assembly to the mast just under the top. Once the glue was dry I threaded them through the railing of the lower top in the most appropriate places and hung a miniature clothes peg from each one to tighten it and glued it at the lower end. Then cut them to length once the glue was dry. Unfortunately, despite all the wonderful work henrythestaffy did 3d printing tiny deadeyes for me, after a lot of thought I've decided that trying to add them here is just too fiddly to be feasible. They would be minuscule and there's no way you could thread a lanyard through them, so I'm leaving them off. I'd also been agonising over how I was to do the futtock shrouds, but reading through R.C. Anderson's The Rigging of Ships in the Days of the Spritsail Topmast 1600-1720 I discovered that although from about 1620 "the deadeyes were connected to the lower shrouds by means of ropes called "puttocks" (later called futtock shrouds)" this was because "as soon as topsails began to be relatively large sails, it became impossible for the tops to stand the strain which would come on them if the deadeyes were fixed to them and them only." But in the early-mid 16th century, the time of the Great Harry, topsails were quite small, so there was no real need for the reinforcement provided by futtock shrouds. And checking on the only two contemporary pictures of her - from the Anthony Roll and the painting The Embarcation at Dover there's no sign of them! So I won't be fitting them. Steven


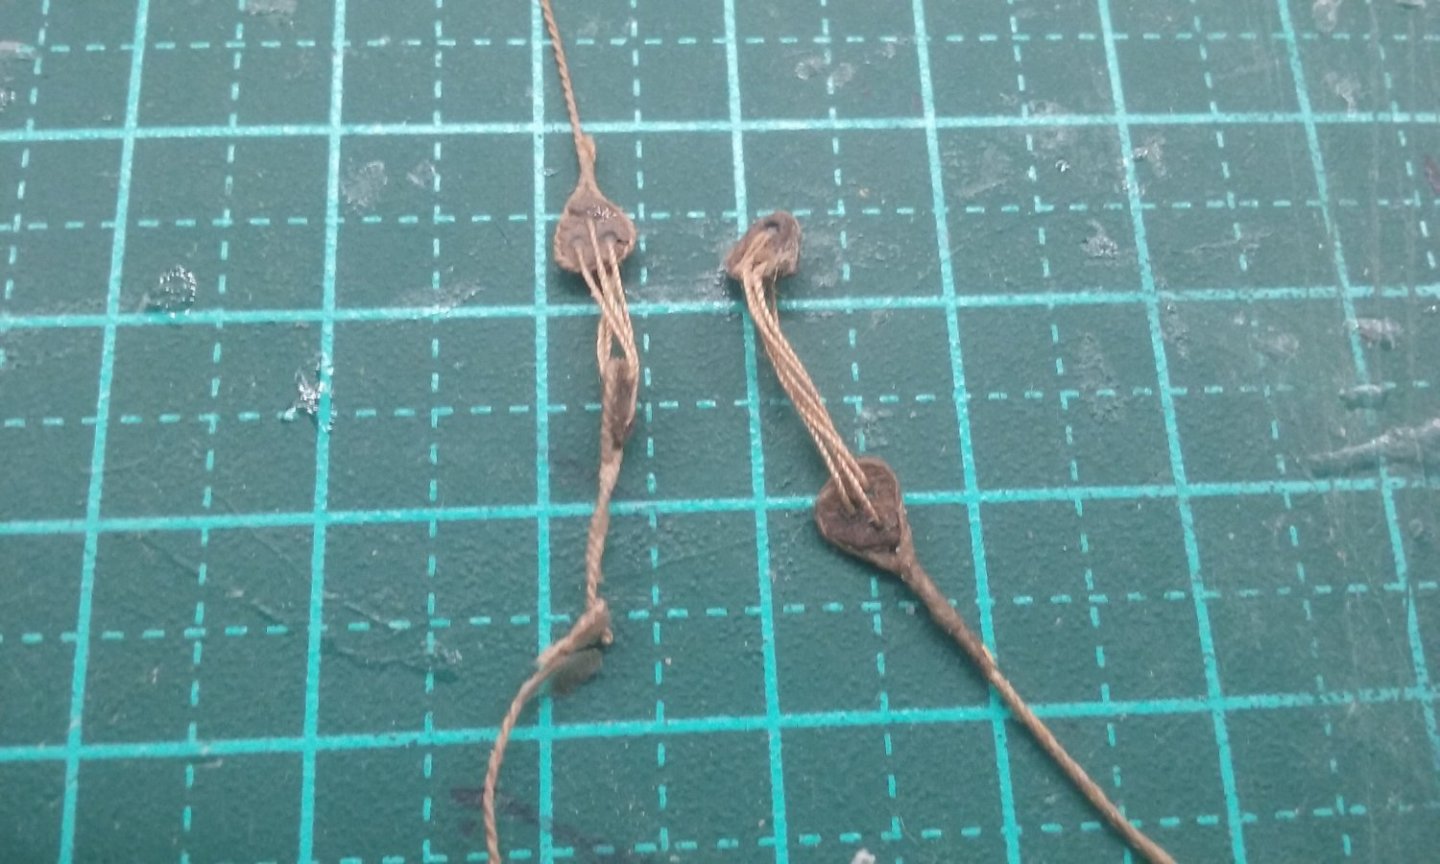
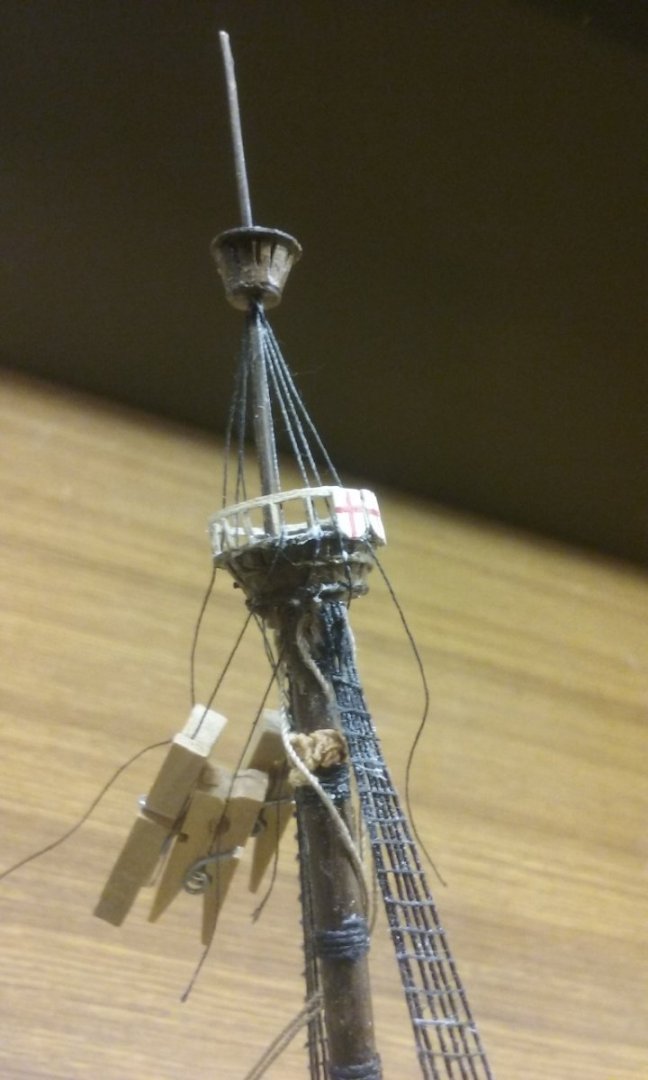


- 739 replies
-
- 12
-
-
- Tudor
- restoration
- (and 4 more)
-
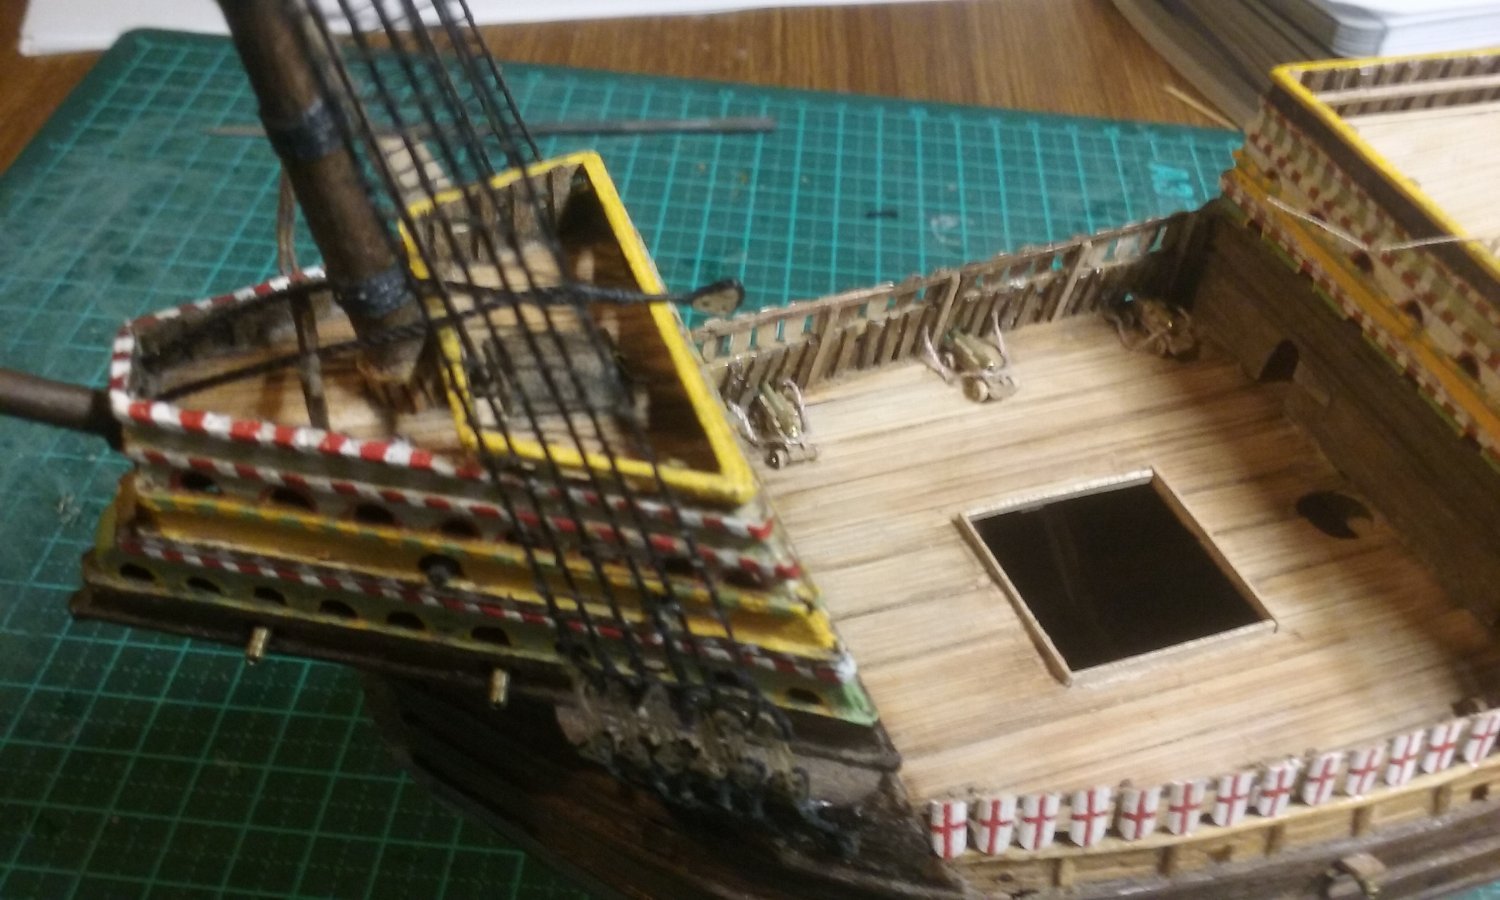
I love your moulding (is that the same thing as a waterway? I had a similar problem with my two most recent builds - if you have decking and exposed frames, unless you put in something like this moulding, water will get through the gaps between the decking and the frames and end up in the bilges. At the scale I was using I couldn't even get the decking to meet the external planking perfectly, let alone do this moulding. Even a moulding running along the inner edges of the frames would help, as it would be a barrier to water running off the decking and into the bilges. Steven
-
PHOTOS! We need PHOTOS!!! Steven
-
I'm coming back to this build after quite a gap. You've done an amazing job, Ekis. It really feels like you're there. Steven