


GuntherMT
-
Posts
2,213 -
Joined
-
Last visited
Content Type
Profiles
Forums
Gallery
Events
Posts posted by GuntherMT
-
-
As the above folks have said, really difficult to tell from the photo's. Break out another piece of planking and make sure it gives you a smooth run along the bulkheads. You should be able to start it at the keel and then slide it slowly up the bulkheads and have it make a nice clean run from stem to stern at any single spot while moving it along from bottom to top like that, on both sides. If you can't do that, then identify the areas that need work (pencil works good for marking spots that need help) and focus on making very small adjustments until they are right.
- Elijah and Ryland Craze
-
 2
2
-
I saw Mike Lonnecker's FA at the NRG conference (actually, helped carry it to the display room from the parking garage), and it's a fantastic model when fully rigged. I think you'll love it when you are done and not regret making this decision, Lou.
- mrshanks and Ryland Craze
-
2
-
-
Hello Michael, and hey, another AVS is born, cool.
On the stern, I found that the only way to really 'see' what it would look like was to put it together enough to temporarily set the window frames in, and then I could step back and take a look (and/or photograph it) and get a feel for how it would look. You can correct the angles somewhat by shimming and sanding as needed rather than tearing it apart, but as you probably know if you went through my log, I ended up completely tearing all the stern framing out and re-doing it after the first attempt. It seems that the stern is a tricky part on a large number of models, and sometimes you just have to be willing to take a do-over on it until you are happy with the result.
Happy building, and hope to find the time to follow along with you on this journey.
-
Hi Joe,
I'm behind in my build log following, so I completely missed that another AVS build had started. It's looking good so far, and agree with what the others have said about taking your time doing the fairing, it's really important.
One of the things that I used that helped me a lot on those bulkheads where the plank will lay across then in a curve, was to use a sanding block that had a rubber cushion under the sandpaper, allowing the sandpaper to bend around the bulkhead and naturally create a curve. Just use a light touch so that you aren't forcing a severe curve, and just work each bulkhead as needed.
As far as running out of planking, even if you do, you can get more from Model Shipways by just asking, or buy some from a hobby store, basswood is cheap. Alternatively, if you are crazy like me, you won't use any basswood on exposed planking anyway, and you'll end up with lots extra on the bench even after using a bunch of it for things that they aren't supposed to be used for.

Happy building, and I'll try to follow along as I have time!
- Landlocked123 and Elijah
-
2
-
I was pretty happy with how the walnut looked on my hull, and of course the keel & bow post are all walnut as well. Another good wood I believe would be cherry, although I only used it for contrast on some deck furniture.
There are a couple of logs here done by DocBlake (Dave) in the kit section, here:
and here:
Where he uses no paint, and only the wood for coloring, and his choices of woods were quite nice looking if you want to take a look at them.
-
-
-
-
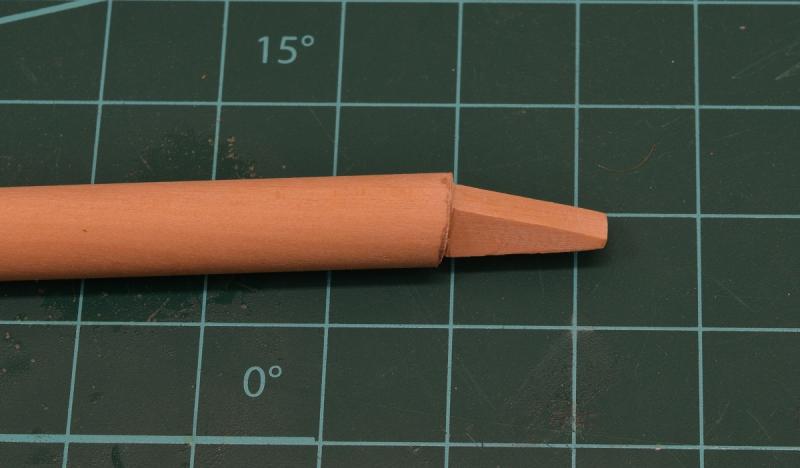
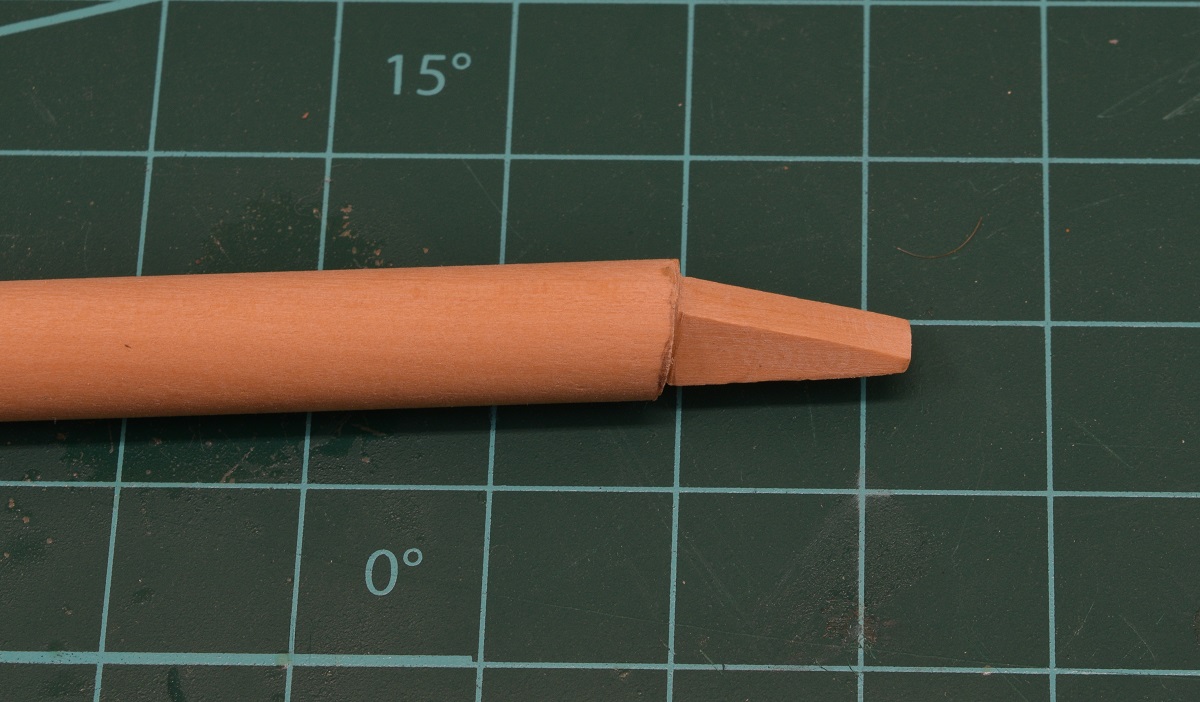
Thnx dg. The mast and yard arm I can deal with. The mast, mast ring and the portion that mounts into the deck is all one moulding. The part that mounts into the deck is angled so when you slide it into the hole it sets the correct step for the mast. I can't modify the mounting position of the hole to accept a straight mast. Envision a straight mast with a few degrees of bend in it where it mounts to the deck. Cutting this appart and attaching a straight mast to the lower section would be a weak point. Any ideas?
If you are replacing it with wood, you can just cut the mast step into the wood. This is how most mast steps in wooden models are done, you have to hand shape the mast step to fit at the correct angle.
This is what the base of the mast on my AVS looked like:
- Ryland Craze and Dubz
-
2
-
Karl,
Another thing that would help to bring people to your log is if you put a link to the log in your signature. Currently you have links to your finished ships in the Gallery, and to the Vasa log, but the "Pride of Baltimore II" at the bottom of your signature is not a link, so there is no way for people who see it in your signature if you post elsewhere on the forums to follow it to your build log.
Of course, if you aren't posting anywhere else, then that won't help at all.

-
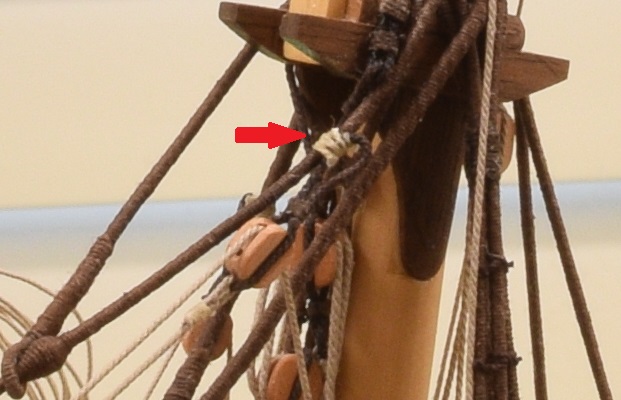
Oh, and now I have to migrate those 5 pairs of blocks from the topmast to the shroud, to which they should be seized. If anyone has any suggestions on how to securely tie the blocks to the shroud without allowing them to slide, I am all ears. The blocks have strops (probably not the right term to use) of varying length, that increase as you go toward the top. The stropping line forms an eye that I am currently using to tie the block to the shroud.
I had a couple of those connections. I just stropped the block to have a small eye at the end where it would connect to the larger line, and then seized them together with thread. I don't seem to have a very good picture of it, but maybe you can figure it out from this. I do not remember where I read about doing it this way, so no idea if it's even remotely accurate.
-
Hola:
Apparently nobody is watching my posts, probably because this is not a very popular ship whatever the reason. Anyway I will continue putting my advances on the Forum.
You only started the log 4 days ago. Be patient, it takes time for build logs to develop a following. Not everyone checks the forum every day, and many people don't look for new logs on a regular basis as there are just so many going on. I clicked on this one because I actually love this ship and plan to build it myself some day, and I know there are a few other logs going on, so I don't think it is an unpopular ship at all.
In any case, looks like you have a good start, and I'll try to check in once in a while to watch the progress, but my time has been quite limited recently, so no guarantees!
Have fun building her, she's got fantastic lines. I use the PoB II as my desktop background on my PC.
-
-
It seems to change with versions Frank. I used to use Firefox on Windows and then it stopped working so I switched to Chrome. It worked fine, but for at least one update of Chrome, it stopped working. I think it has to do with a browser update breaking Flash (or vs. versa) and until whichever one got broken by the other's update gets around to fixing it, you just have to switch browsers for a while. Luckily Chrome has been working well for over a year now without any problems *knocks on wood*.
-
-
-
-
Another variation on those clamps is to simply glue a short piece of wood into them rather than using the steel clamp handle, that gives you a softer surface pushing against your planks. You'll find a bunch of pictures of this in my build log, I made a couple dozen of them with wood instead of the other clamp handle.
Functionally they are the same thing though, and they are used in a fairly high number of build logs on MSW.
-
I'd say that is pretty good for an 18" long keel piece.
If you want to you could place it on a perfectly flat surface and put some heavy weight on it for a day or so and see if it gets 'perfect', but I personally wouldn't bother, as you'll have more variation than that in putting the bulkheads together on it I would guess.
- tasmanian, CaptainSteve, mtaylor and 2 others
-
5
-
-
-
-
The San Salvador in San Diego is now fully rigged, and I just happened to get a photo at the Festival of Sail a couple of weeks ago that I believe answers your question:
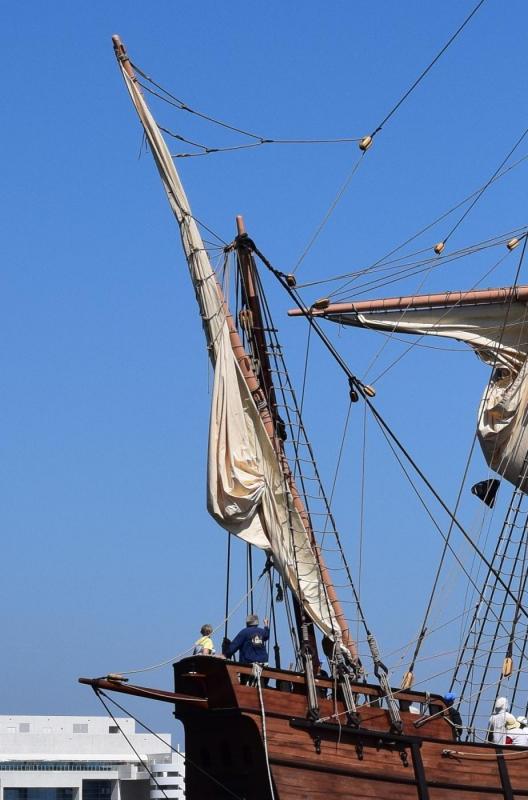
Behold, the inside the shrouds lateen yard!
- skipper1947, mtaylor and Archi
-
3

Armed Virginia Sloop by Hill202 - Model Shipways - scale 1:48
in - Kit build logs for subjects built from 1751 - 1800
Posted
Agree with Dave. Don't worry about fairing R until you've got all the other blocks installed so that you can fair it all together.