


GuntherMT
-
Posts
2,213 -
Joined
-
Last visited
Content Type
Profiles
Forums
Gallery
Events
Posts posted by GuntherMT
-
-
Looks like you've got a great start!
-
Brian,you have no scratch building in your mind?
That too!
- zoly99sask, mtaylor and cobra1951
-
 3
3
-
Looks like quite a nice kit Don! I keep spotting lots of awesome kits that I want to do, but need to resist spending money on more when I've got 10 years worth on the shelf now.

- cobra1951, mtaylor and zoly99sask
-
3
-
On another forum that I post this on (not a modeling forum, just a modeling thread) I was asked about fitting the ends of the planks on my bow decking to the margin plank, so I made a mini-tutorial on how I do that, so sharing it here as well in case someone might learn something from it (or tell me I'm making it way too hard on myself, who knows!).
-----------------
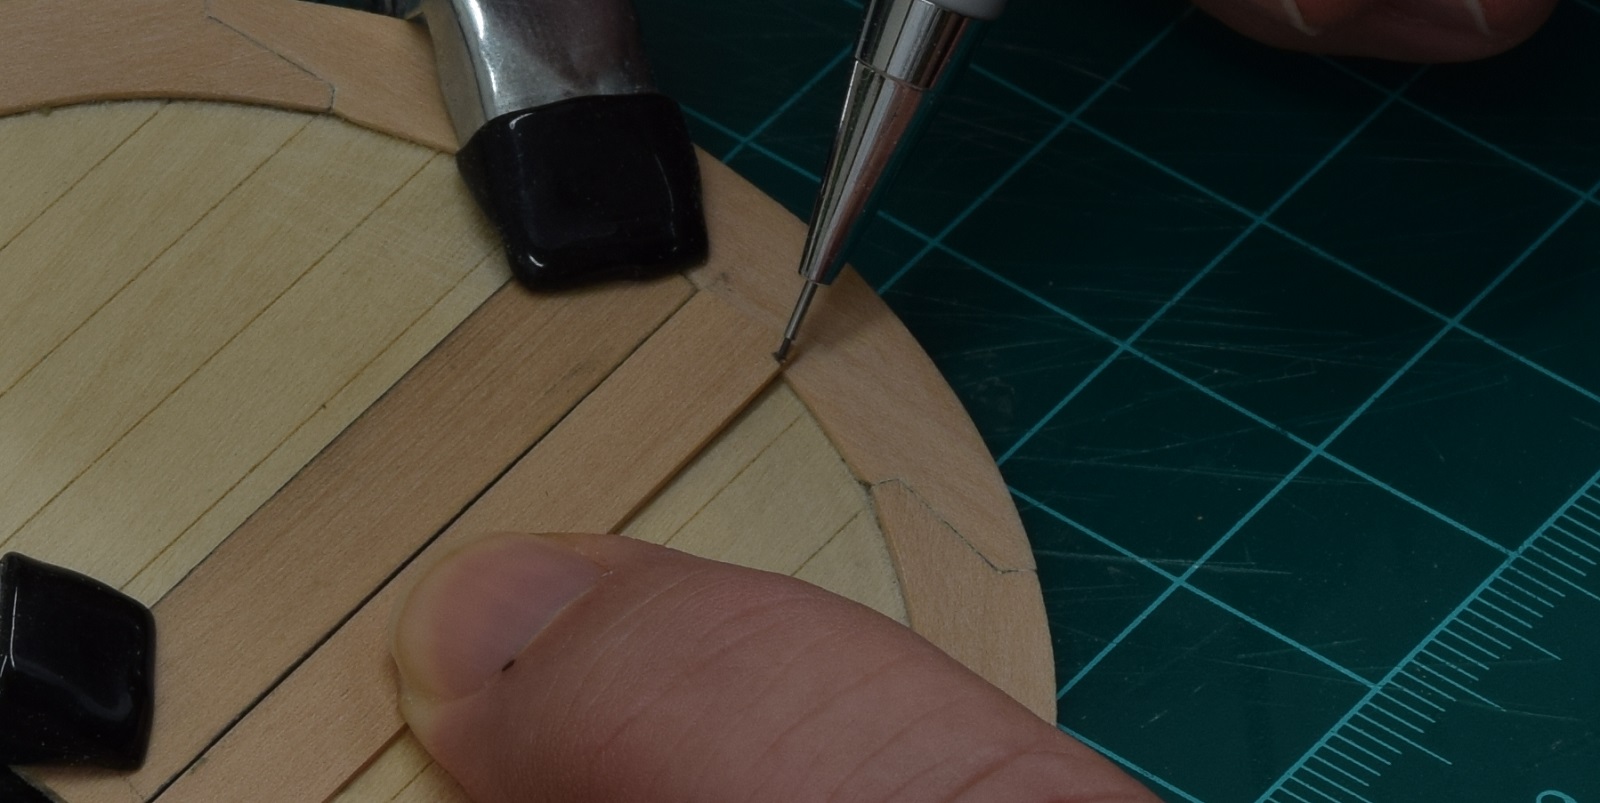
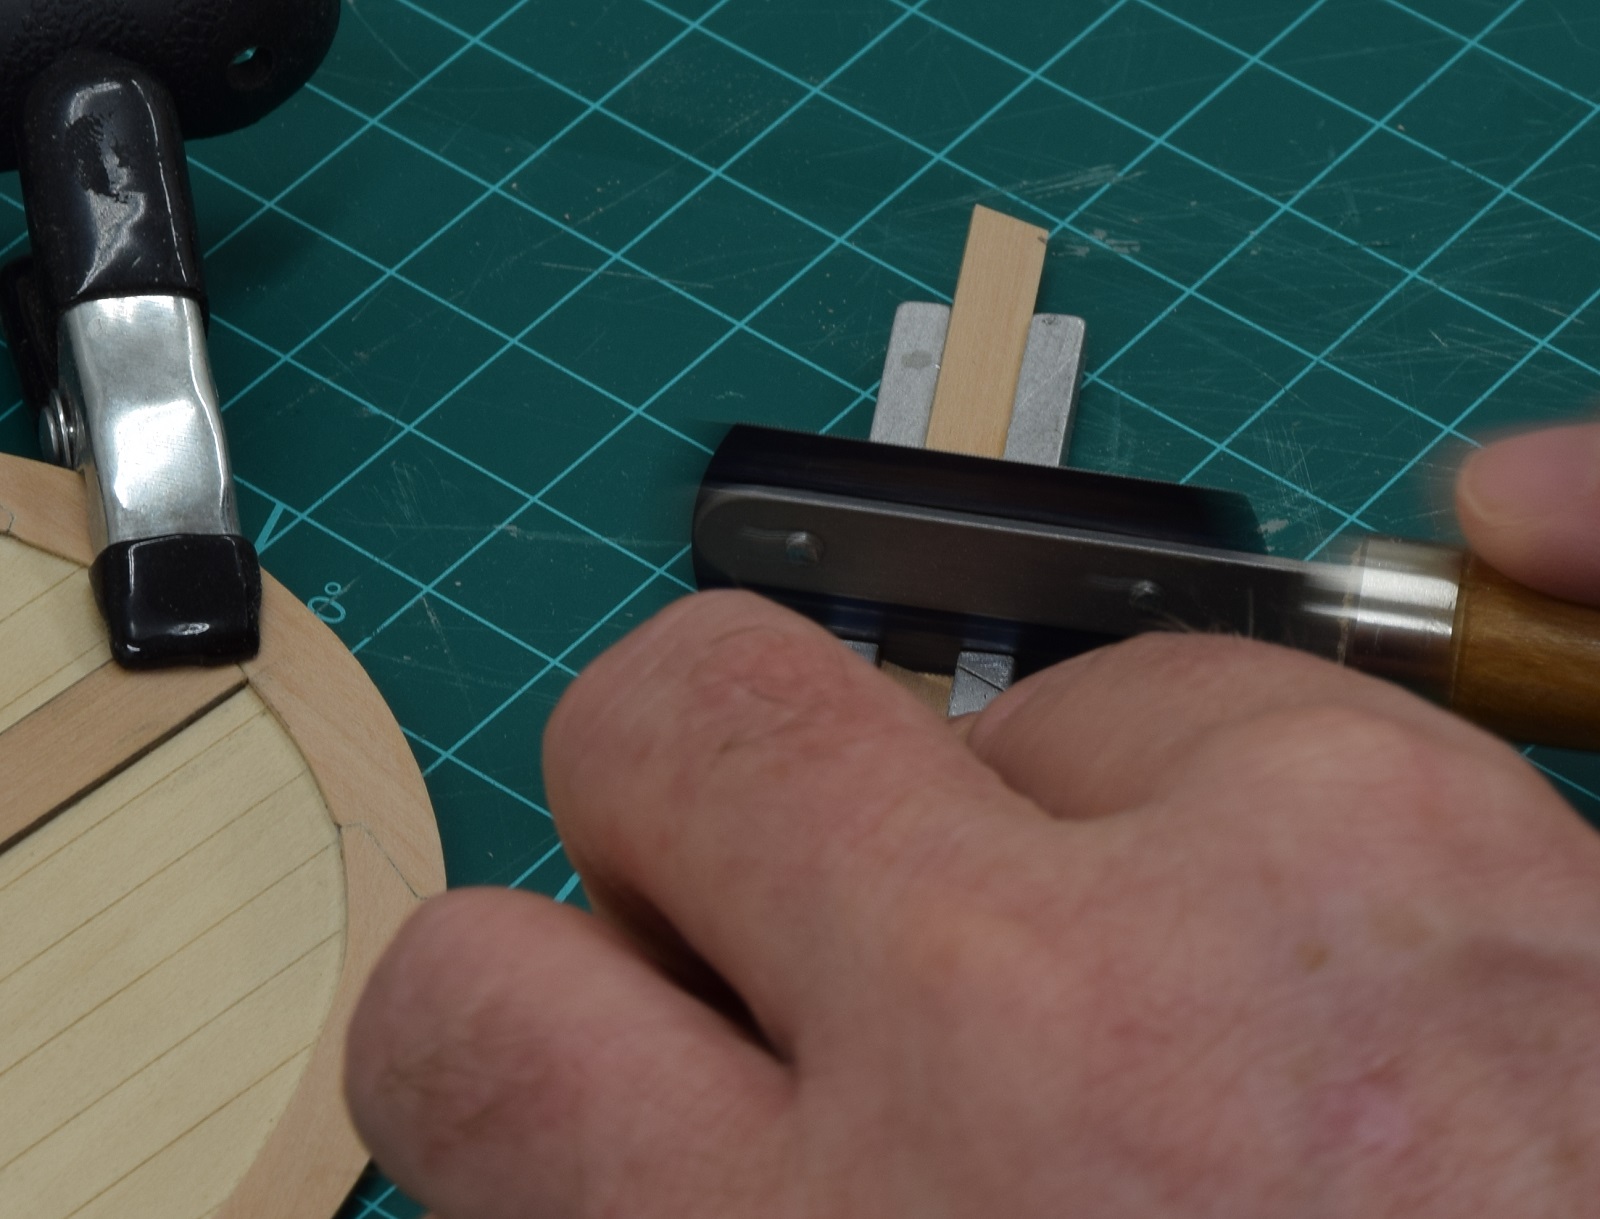
Here is that step-by-step thing on plank fitting that I promised last week and then didn't actually get to do until this morning. The plank in question isn't a very good example since it's a very slight angle/curve at this location, the the process doesn't change at all, just the angle and length of the joint.Step 1 - Place a piece of planking so that the end against the existing plank is right at the point it needs to be, and mark the opposite edge where it crosses over the margin plank. At this point I also mark the other end of the plank for length, leaving about 1/8" or so (better too much than too little) extra to allow for the shortening of this plank as I work the end. Step 2 - Using a small mitre-box I trim the piece to length. I sort of failed on the camera angle here, but you can get the idea.
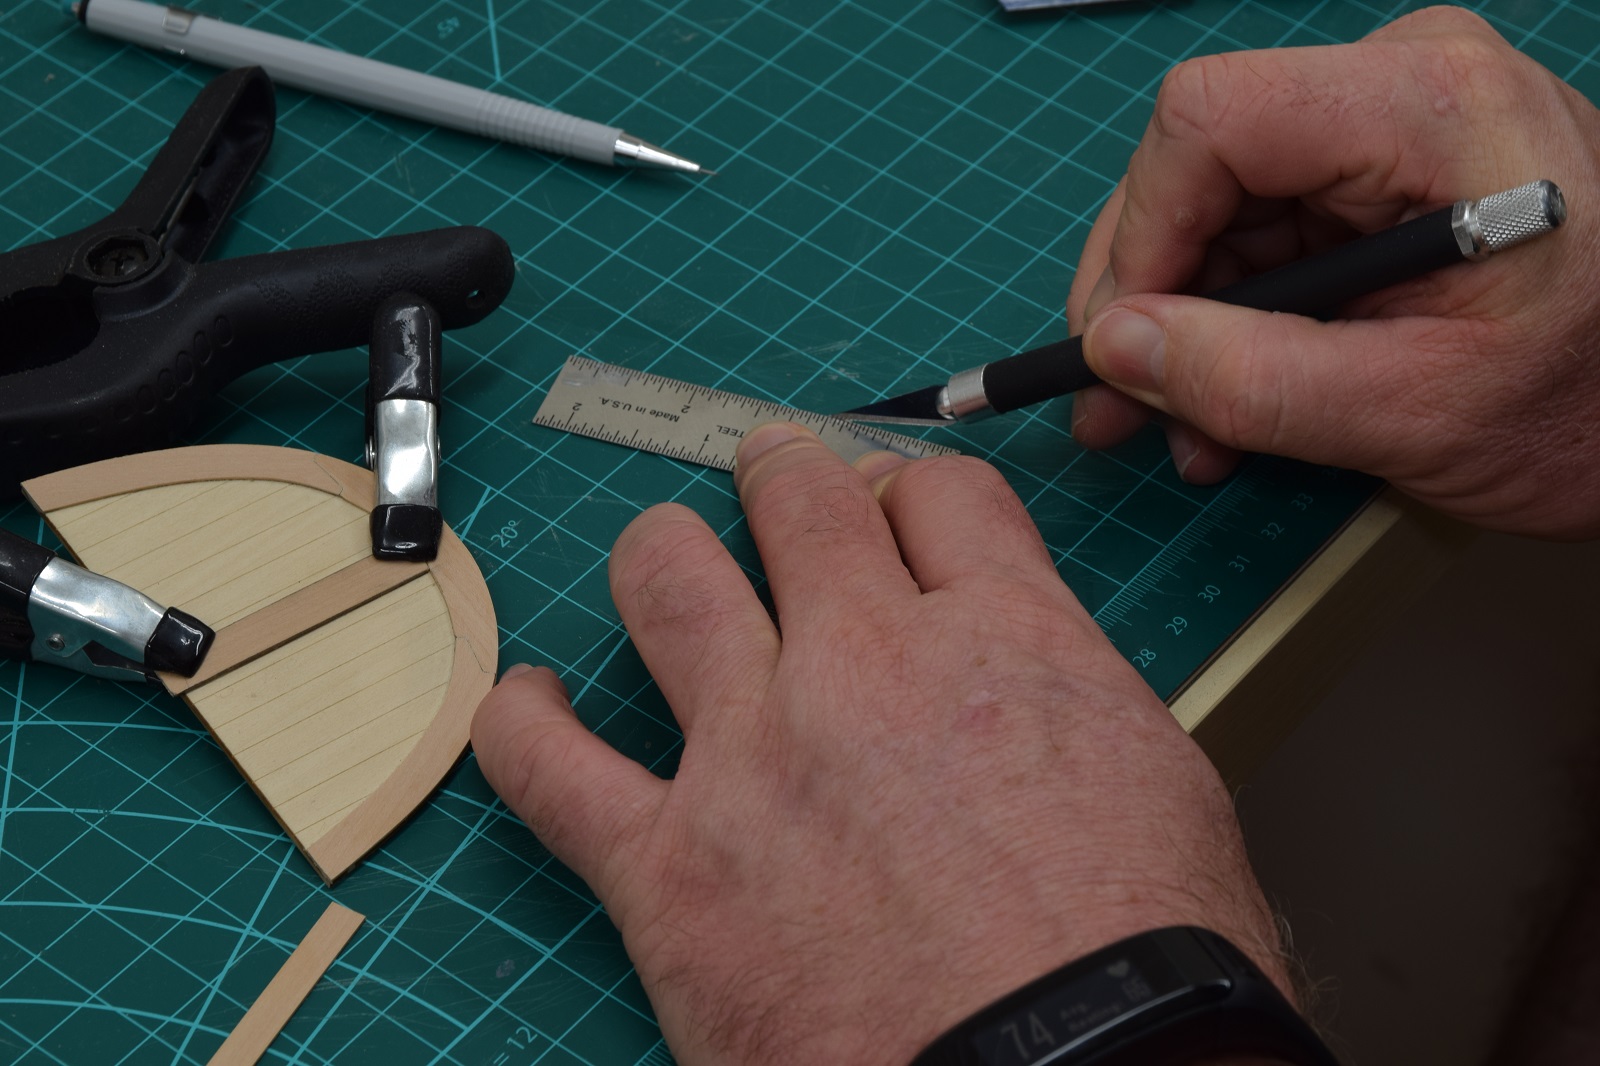
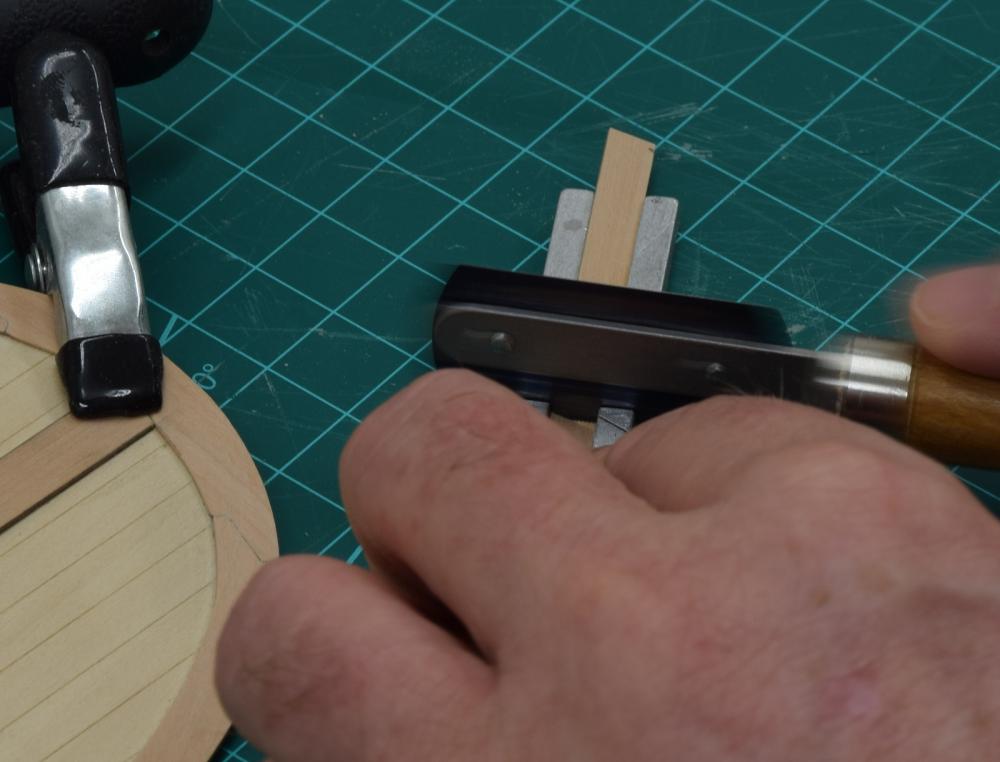 Step 3 - Also a failed camera angle. Using a steel straight edge, I use a #11 blade to trim the end of the plank based on the mark I made on the edge to the point that was against the existing plank. This leaves me with a slightly long plank with an angled end.
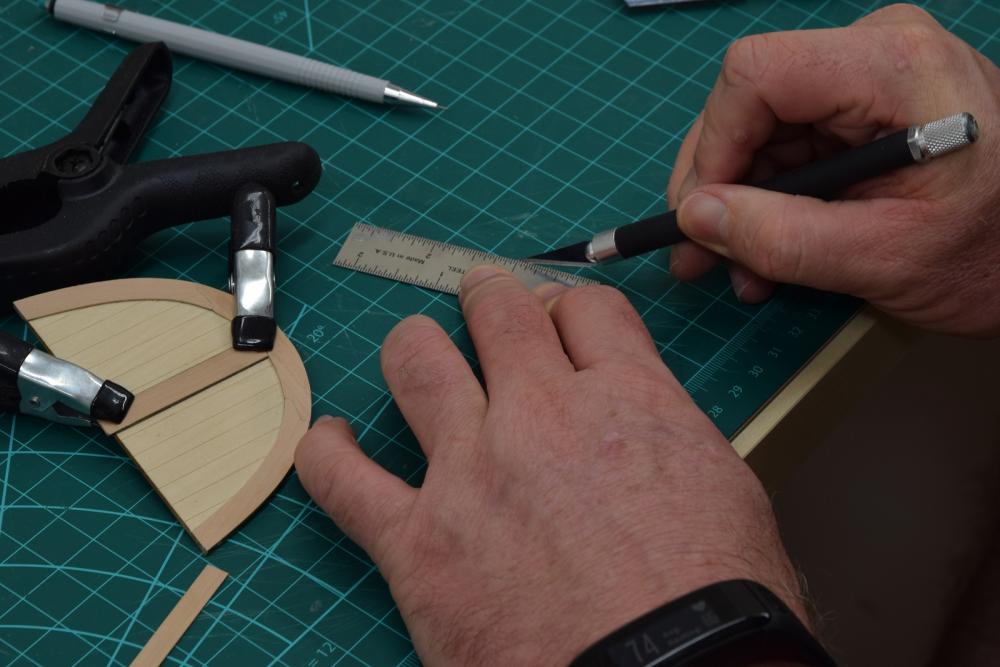 Step 4 - Place this cut piece into position and look at how it fits. As can be seen here, I made the angle a bit too sharp, so the plank it tight where it's against the existing plank (where the blade is pointing) but leaves a gap as you get to the opposite edge. This tells me that I am going to sand down the point of the angle, trying to curve it slightly to the opposite end where no sanding will be done.
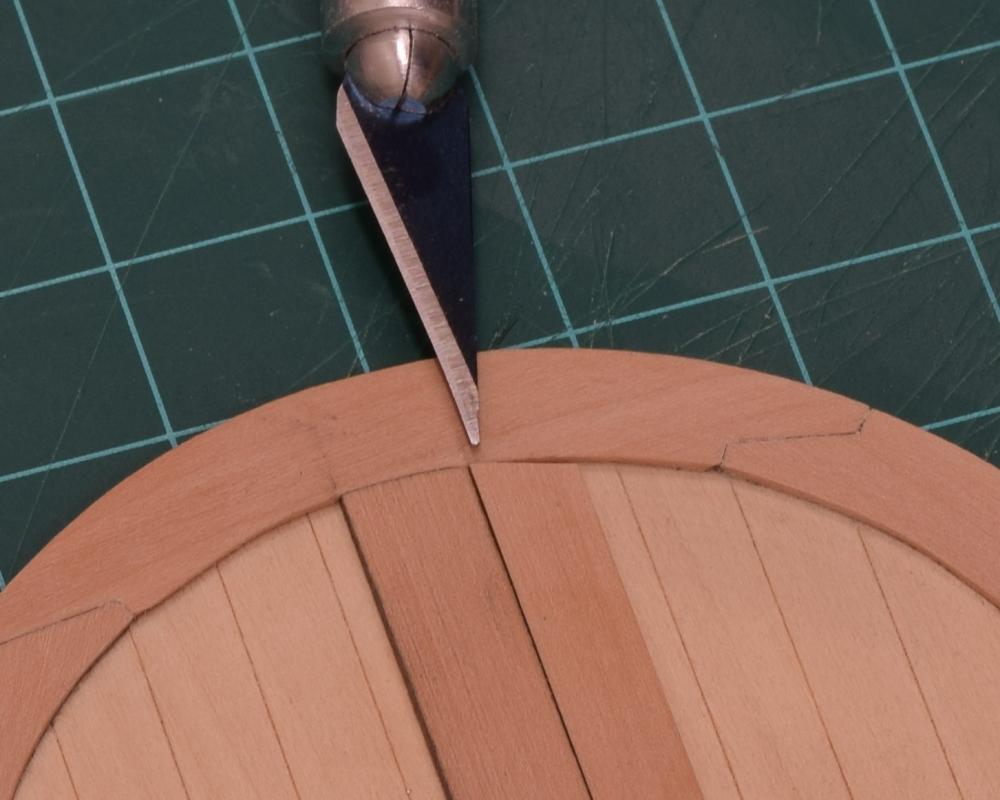 Step 5 - Sanding. I just do this by hand, using a 220 grit sandpaper, and kind of wing it based on how the fit was.
 Step 6 - Dry fit again, and see what corrections need to be made. In this case you can see that I over-sanded the 'point', but there is still a gap at the opposite edge (red arrows) so now it needs to be sanded in the center where it's now tightly fitting (black arrow). I just repeat this process until the fitment is good enough to make me happy.
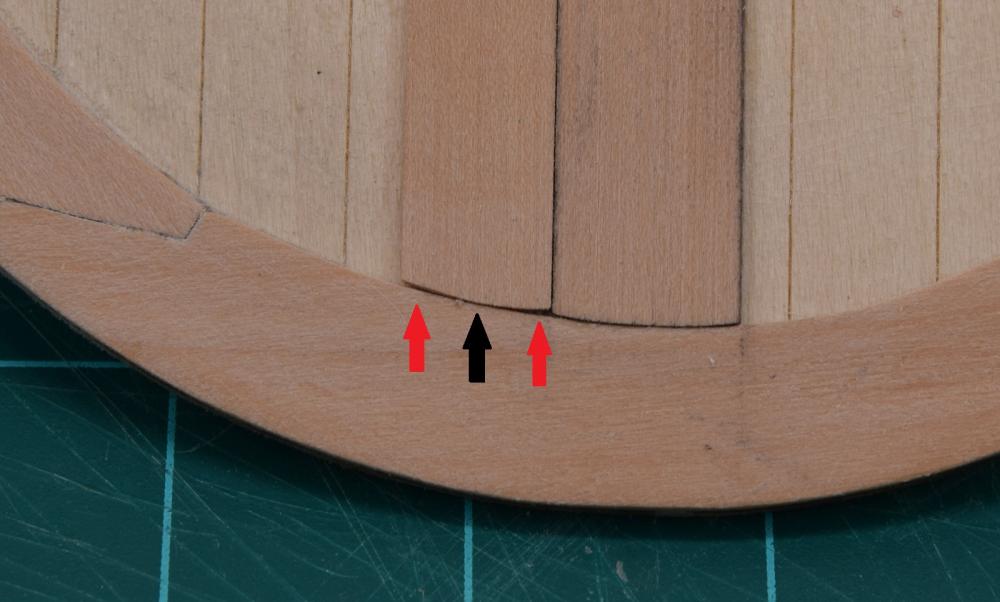 Step 7 - Final dry fit. To my eyes this looked really good. The camera close up reveals that I could have done a bit more sanding as there is still a slight oversanding at the 'point' of the angle, but it's not really something that will be visible to the eye, especially after final finishing.
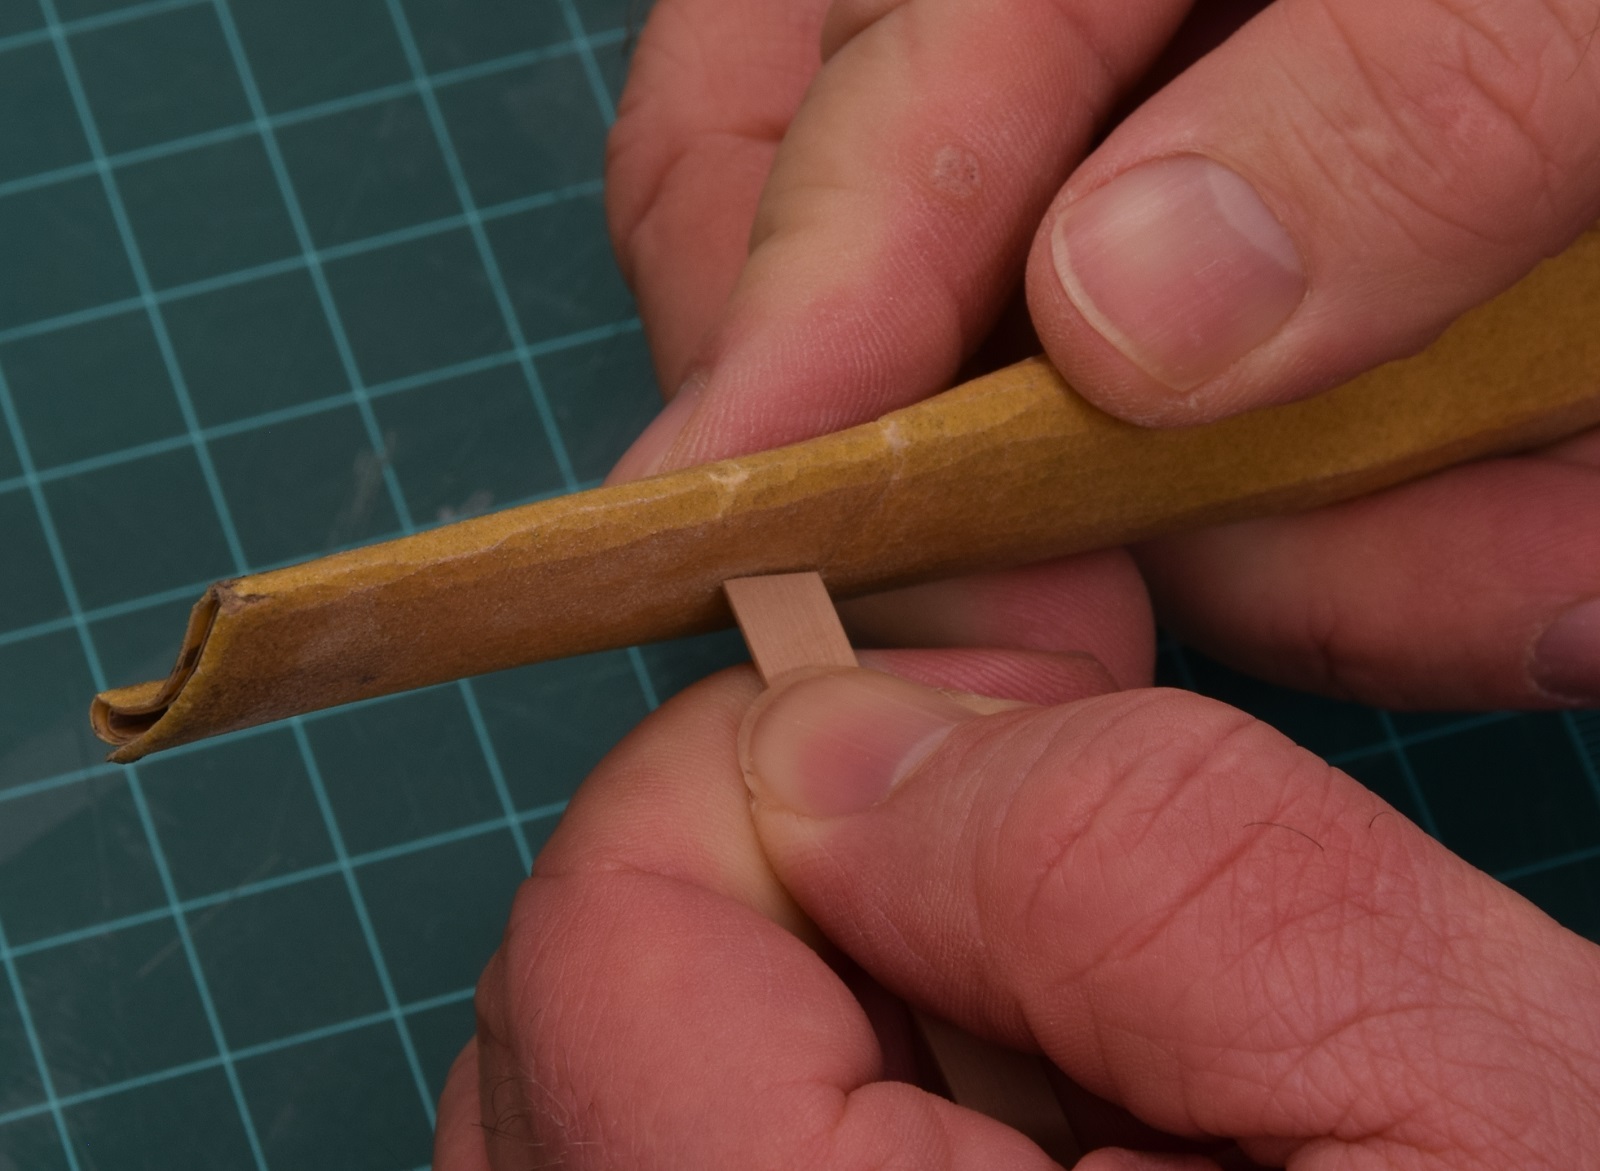
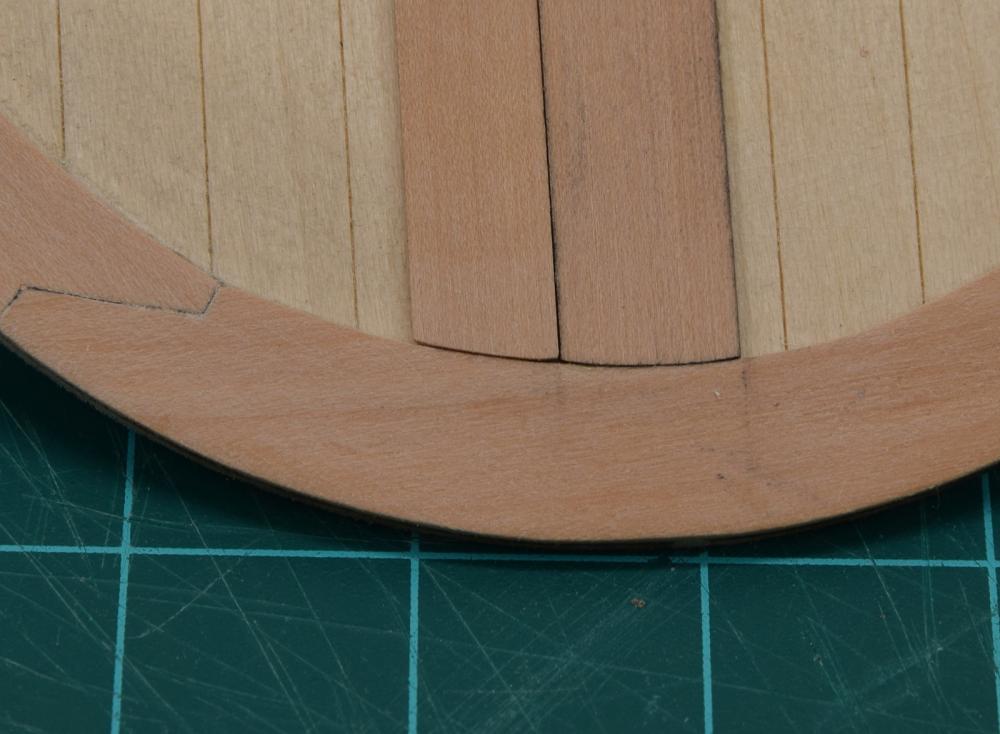 Step 8'ish - Not pictured - the center plank that was previously placed already has been coated with lead from a #4B artists pencil to simulate caulking in the finished deck. The new plank now gets the same treatment, but only on the end where it meets the margin plank, and the outside where the next plank will be laid. Coating both sides of a joint makes it too heavy for my taste. Before adding the lead, the entire side of the plank gets a very slight bevel sanded into it with 220 grit sandpaper so that the deck surface of the planks mate very closely together. The end where it will join with the margin plank was sanded with a bevel when I was shaping it.Step 9 - Plank is glued in place and clamped. Glue (yellow wood glue) is placed on the plank itself in a very thin layer using a flat end of a plank to smooth is and remove all excess. The same thing is done on the deck surface where it will be glued.
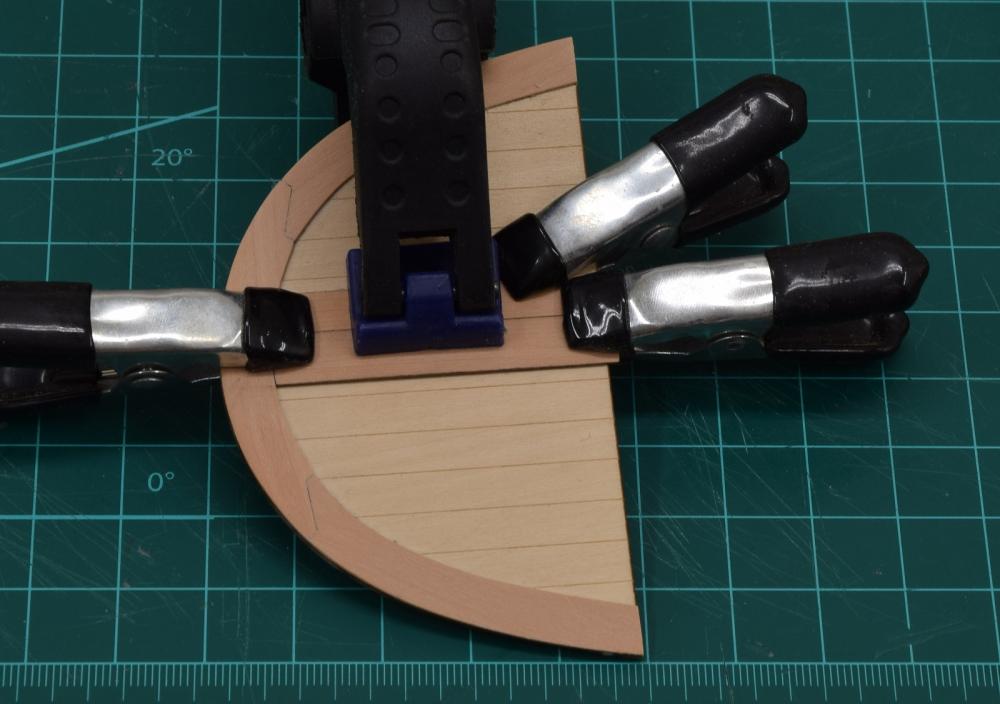 Step 10 - Remove clamps and see how it came out.
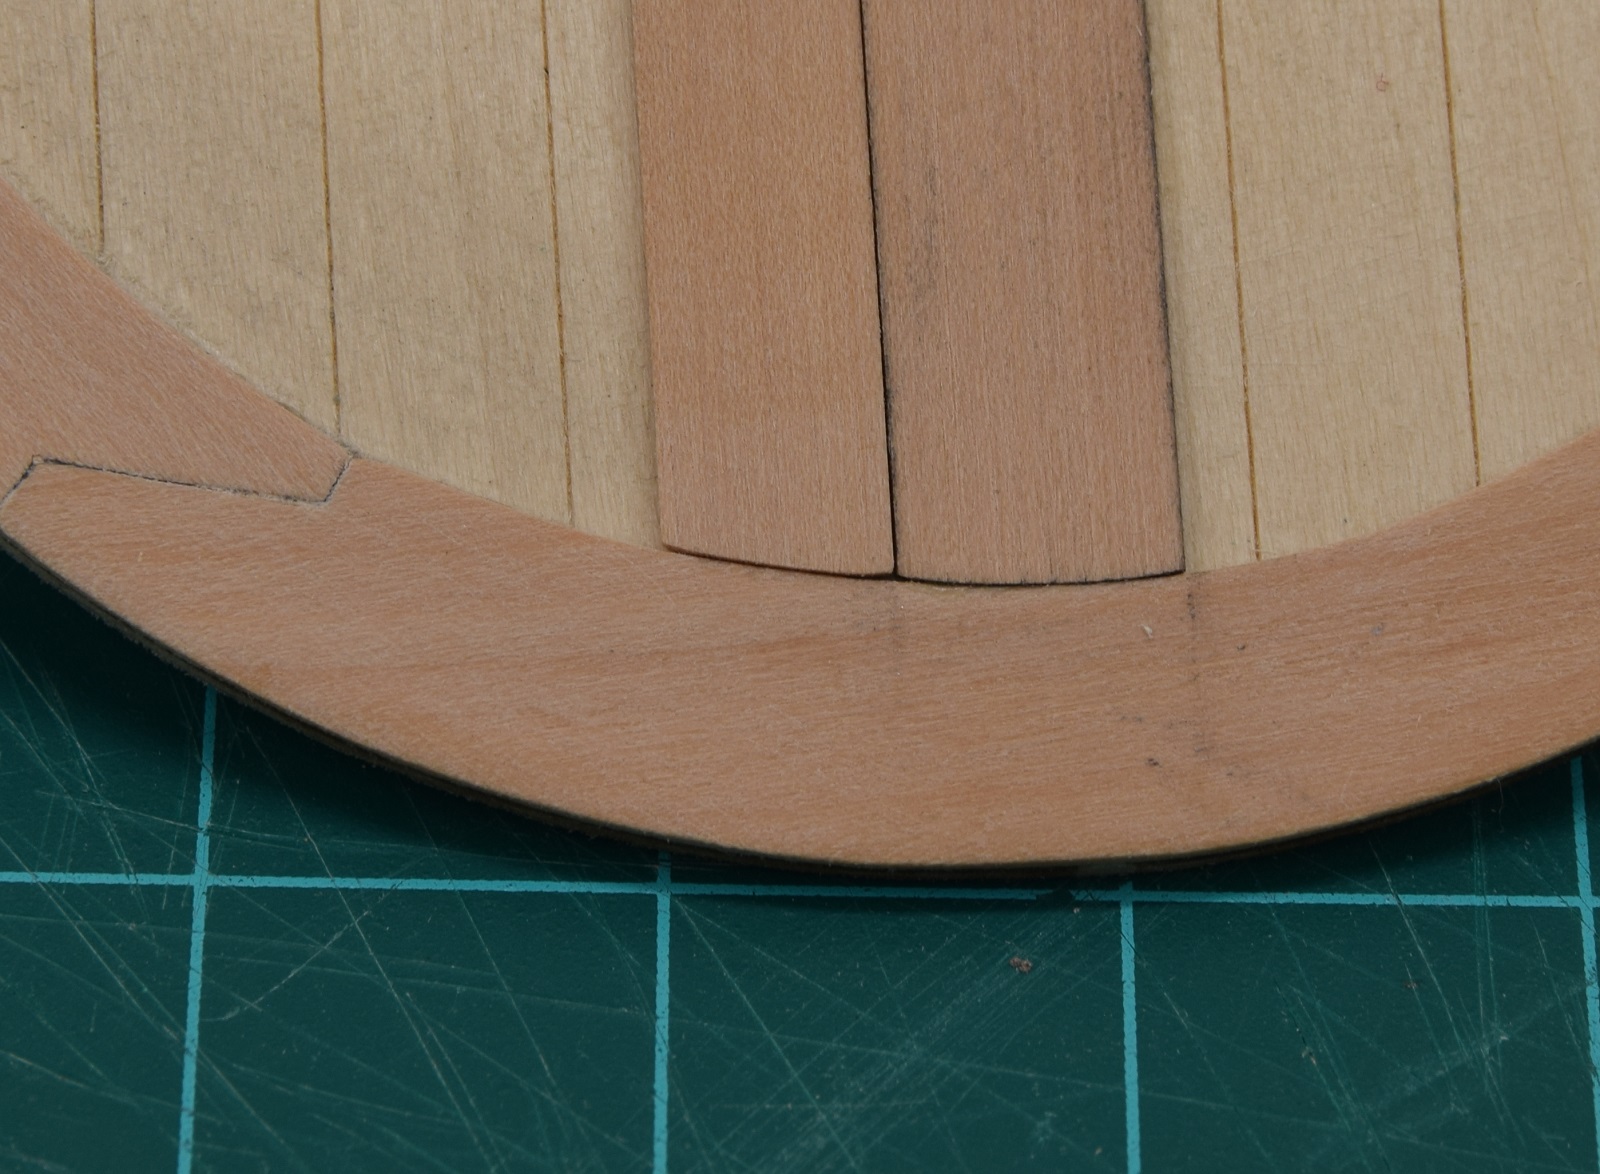
 The darkness of the joint along the margin plank will be reduced to something similar to what you see on the margin plank joints after sanding, and then hopefully be about the same as the bow planking came out once it's finished and wipe on poly is added.
- marktiedens, gerty, mrshanks and 19 others
-
22
-
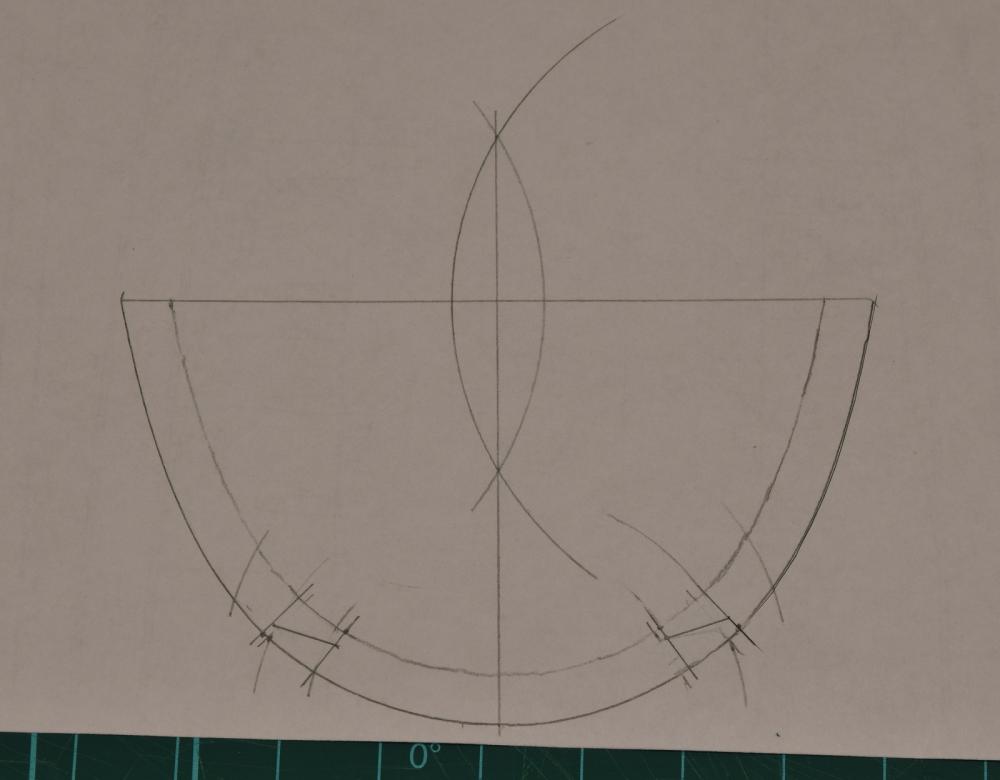
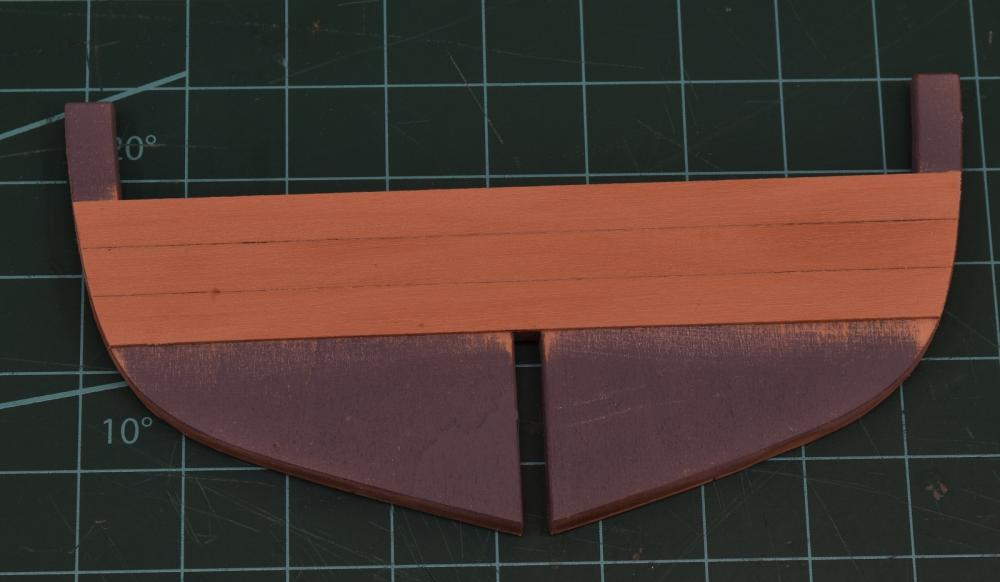
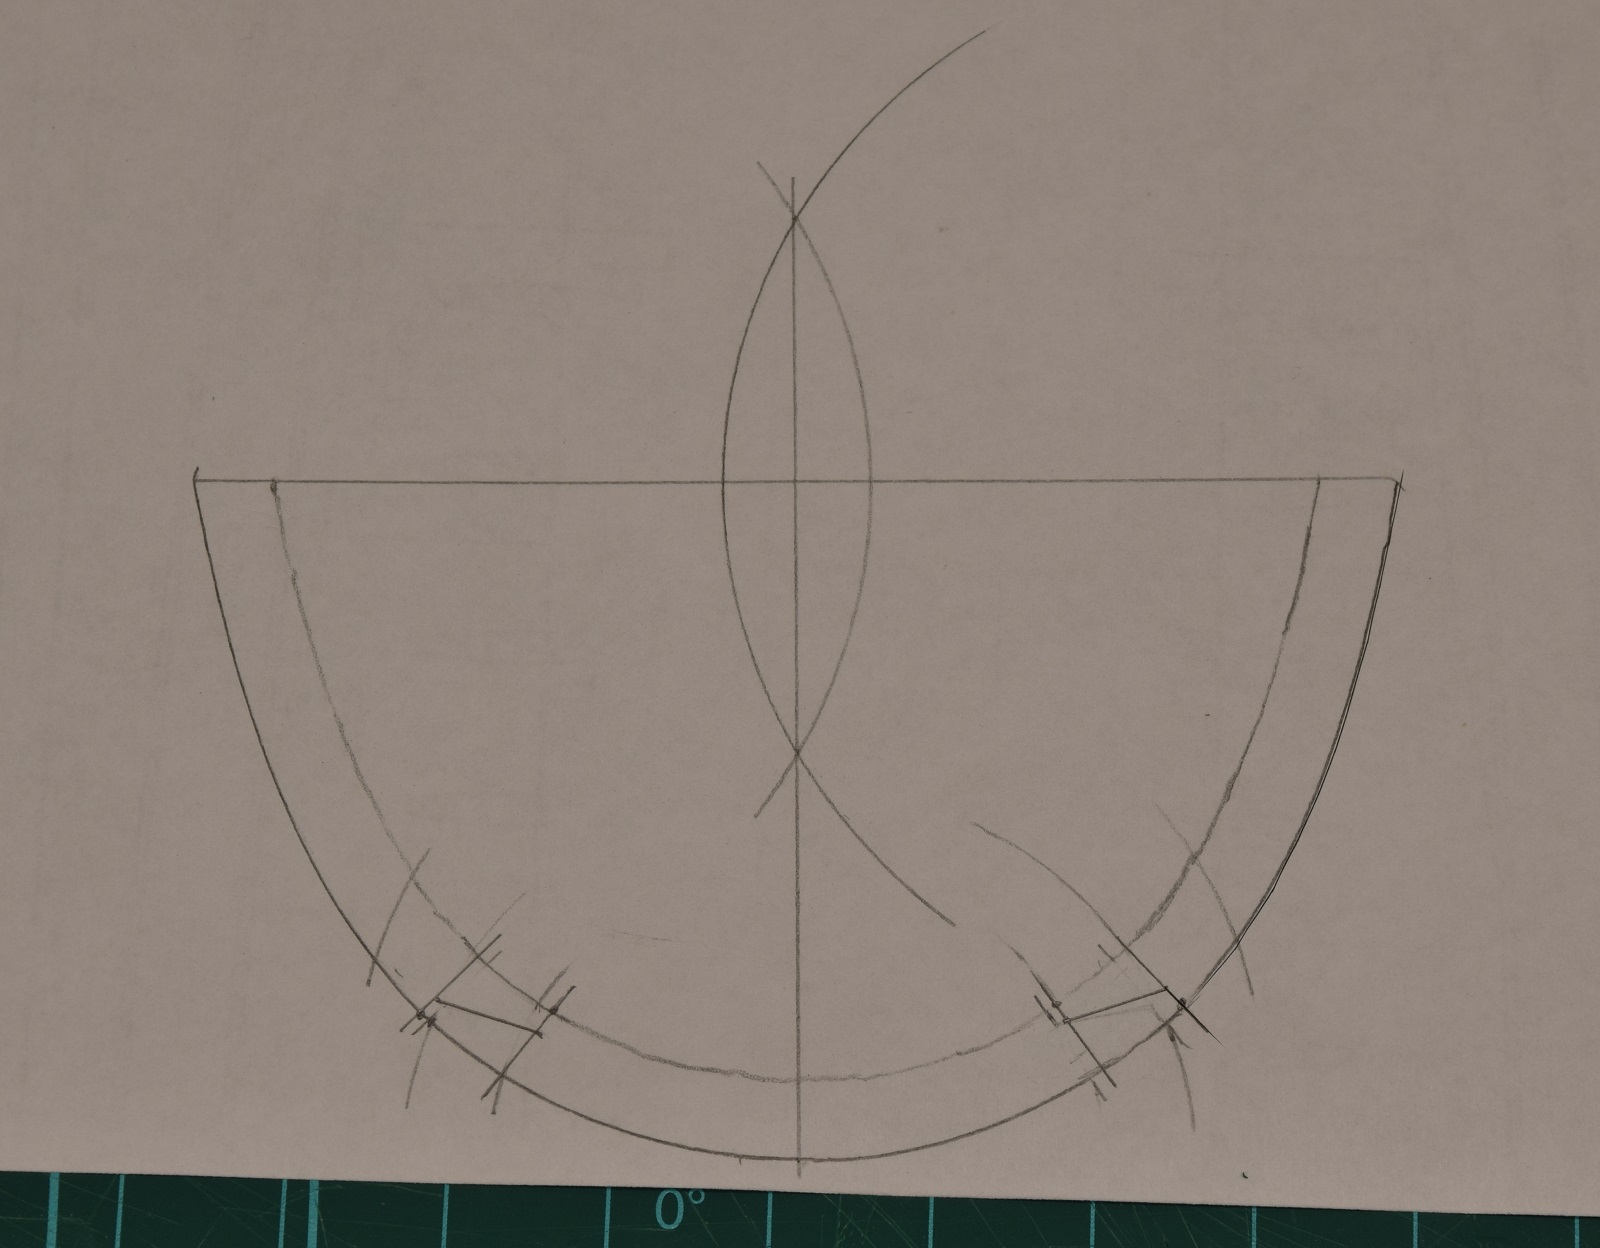
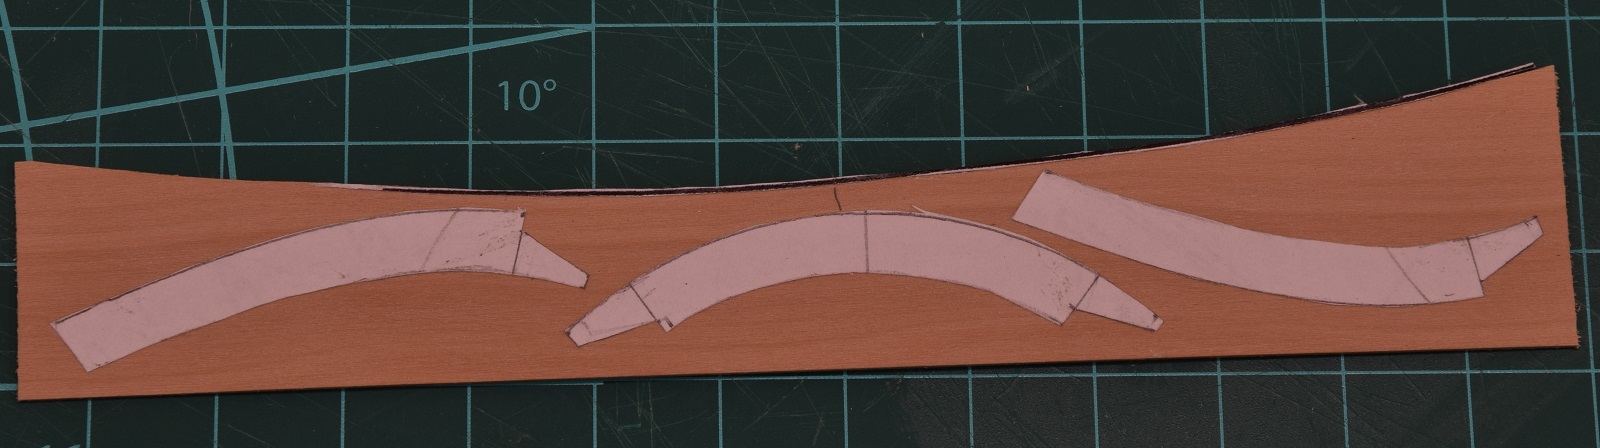
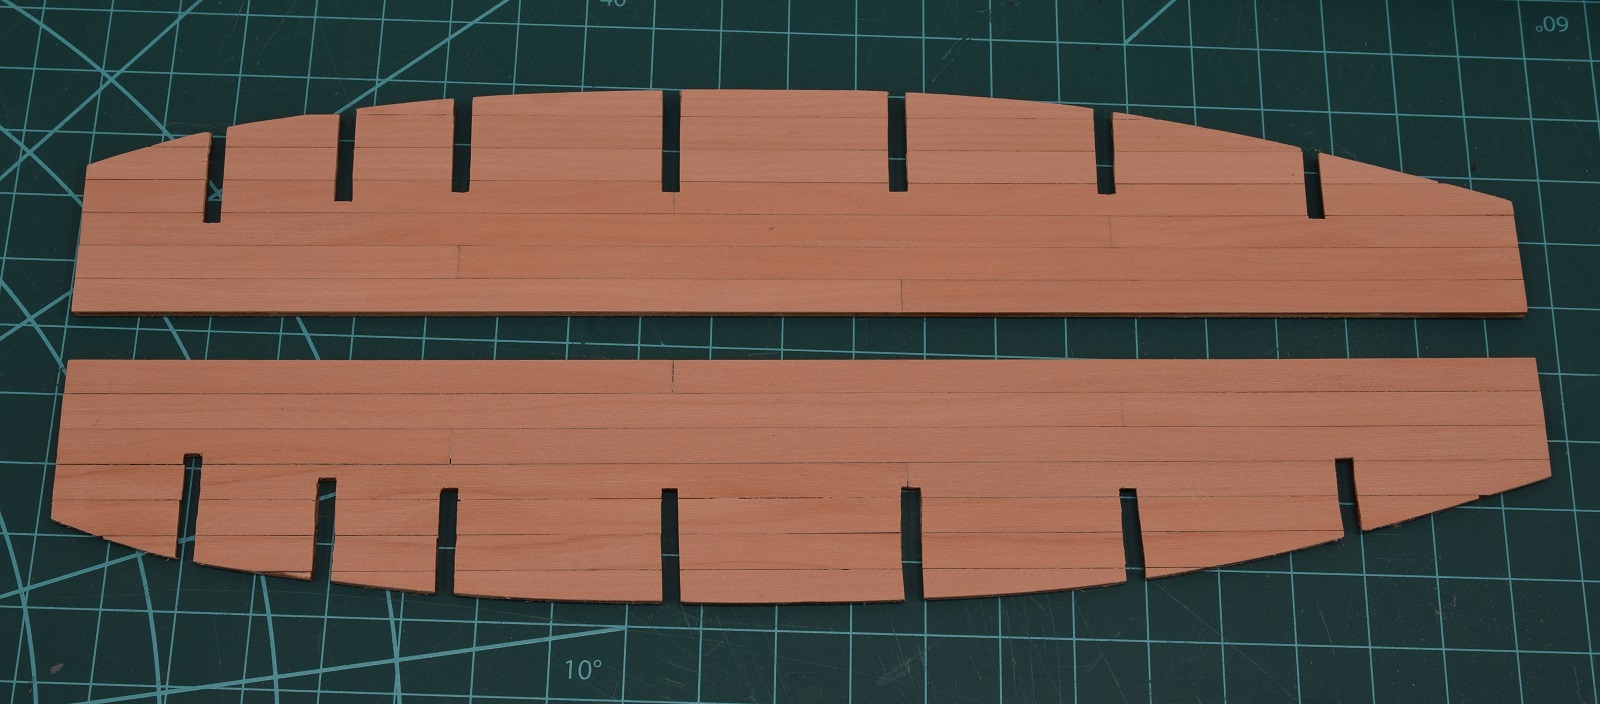
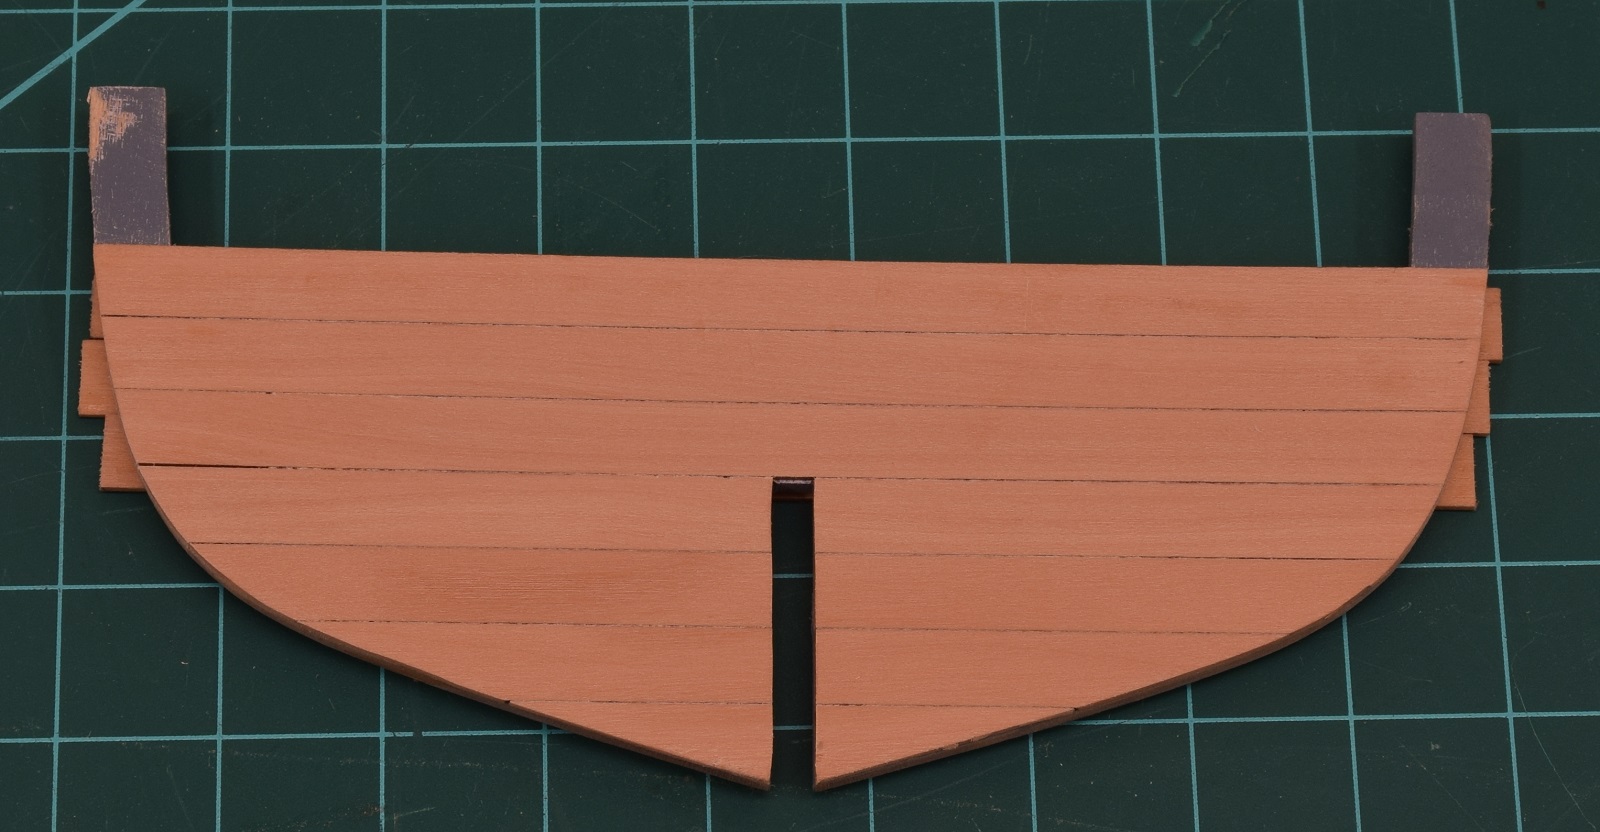
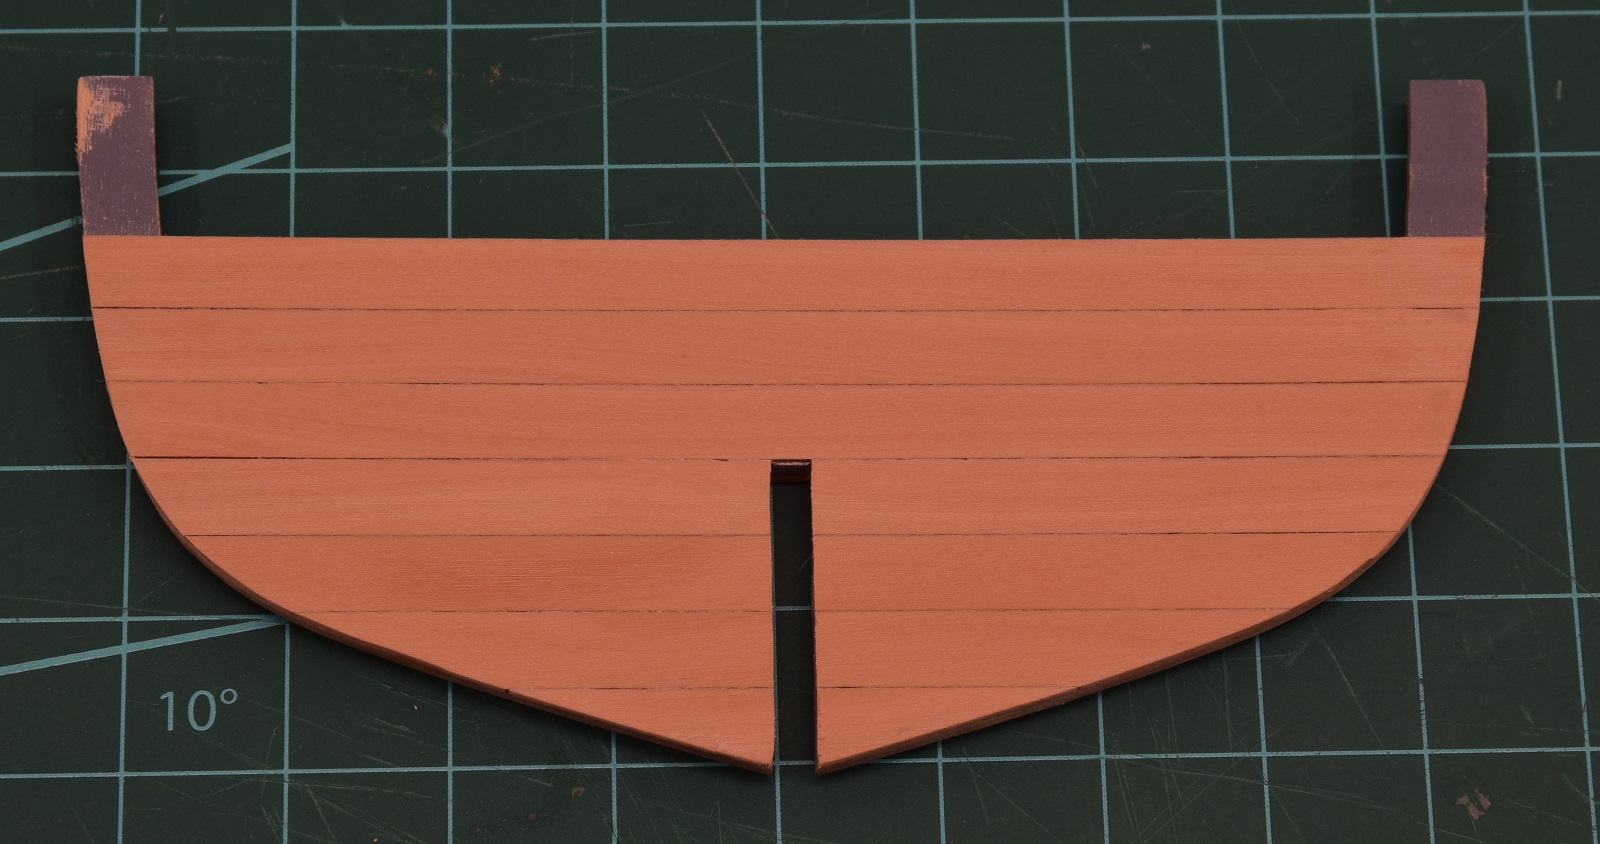
Mini-update with almost no progress!My margin plank on the stern decking failed miserably. I made a paper pattern by tracing the outside of the deck, and then using a compass to run the inside edge and determine the centerline and split. The two outside edge pieces came out great, but somehow the curve on the center piece is wrong. My guess is that the paper didn't get laid down onto the wood properly when it was glued, since it's just notebook paper. So now I'm going to re-do it using card-stock and see if that works better since it is much stiffer obviously, and should be much more resistant to being changed when glued to the wood.

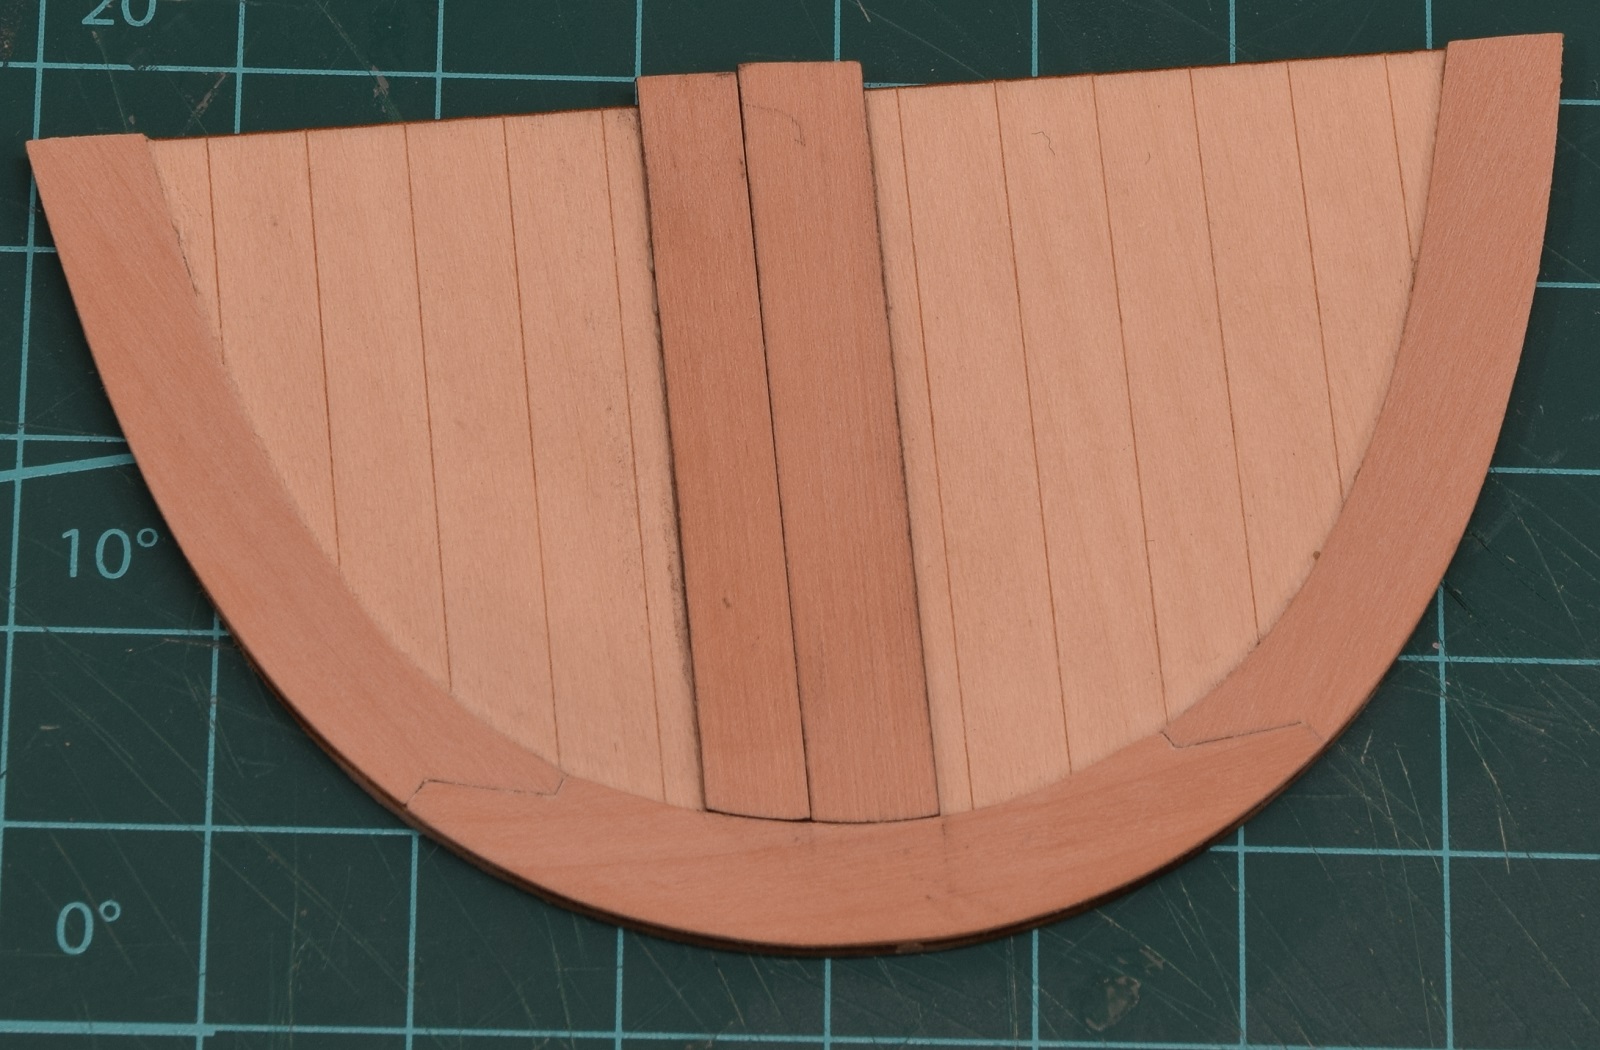
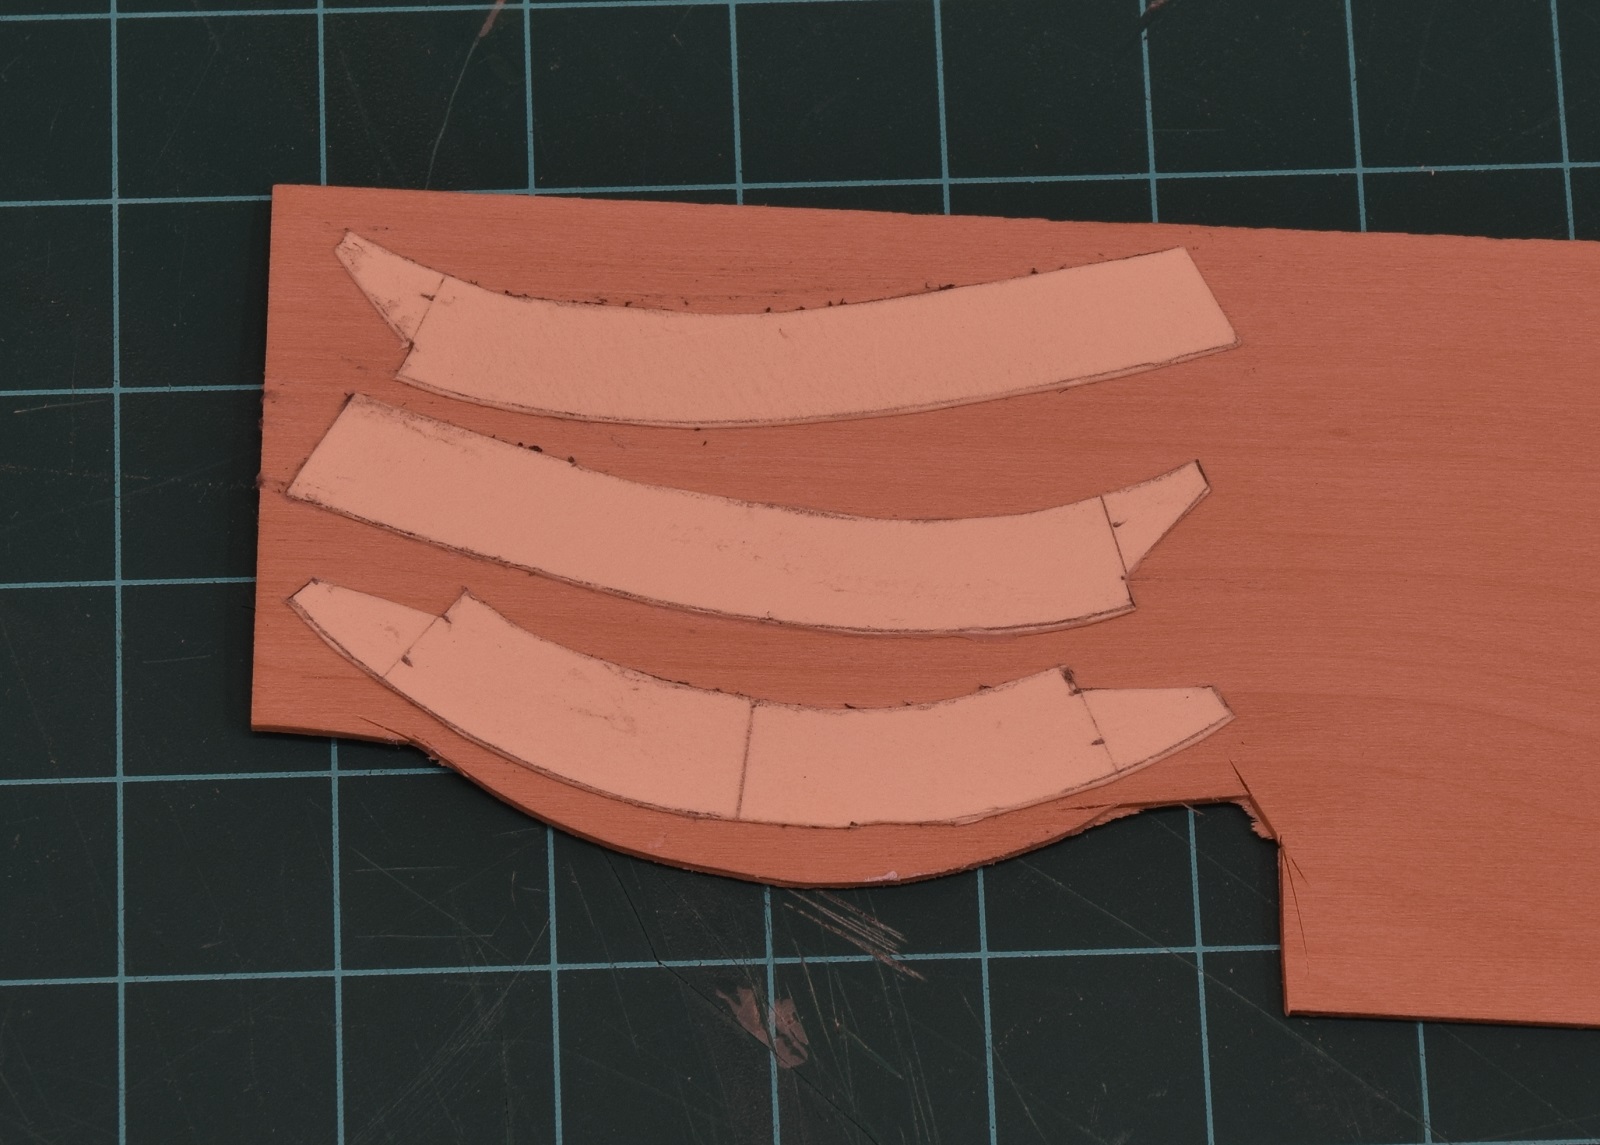
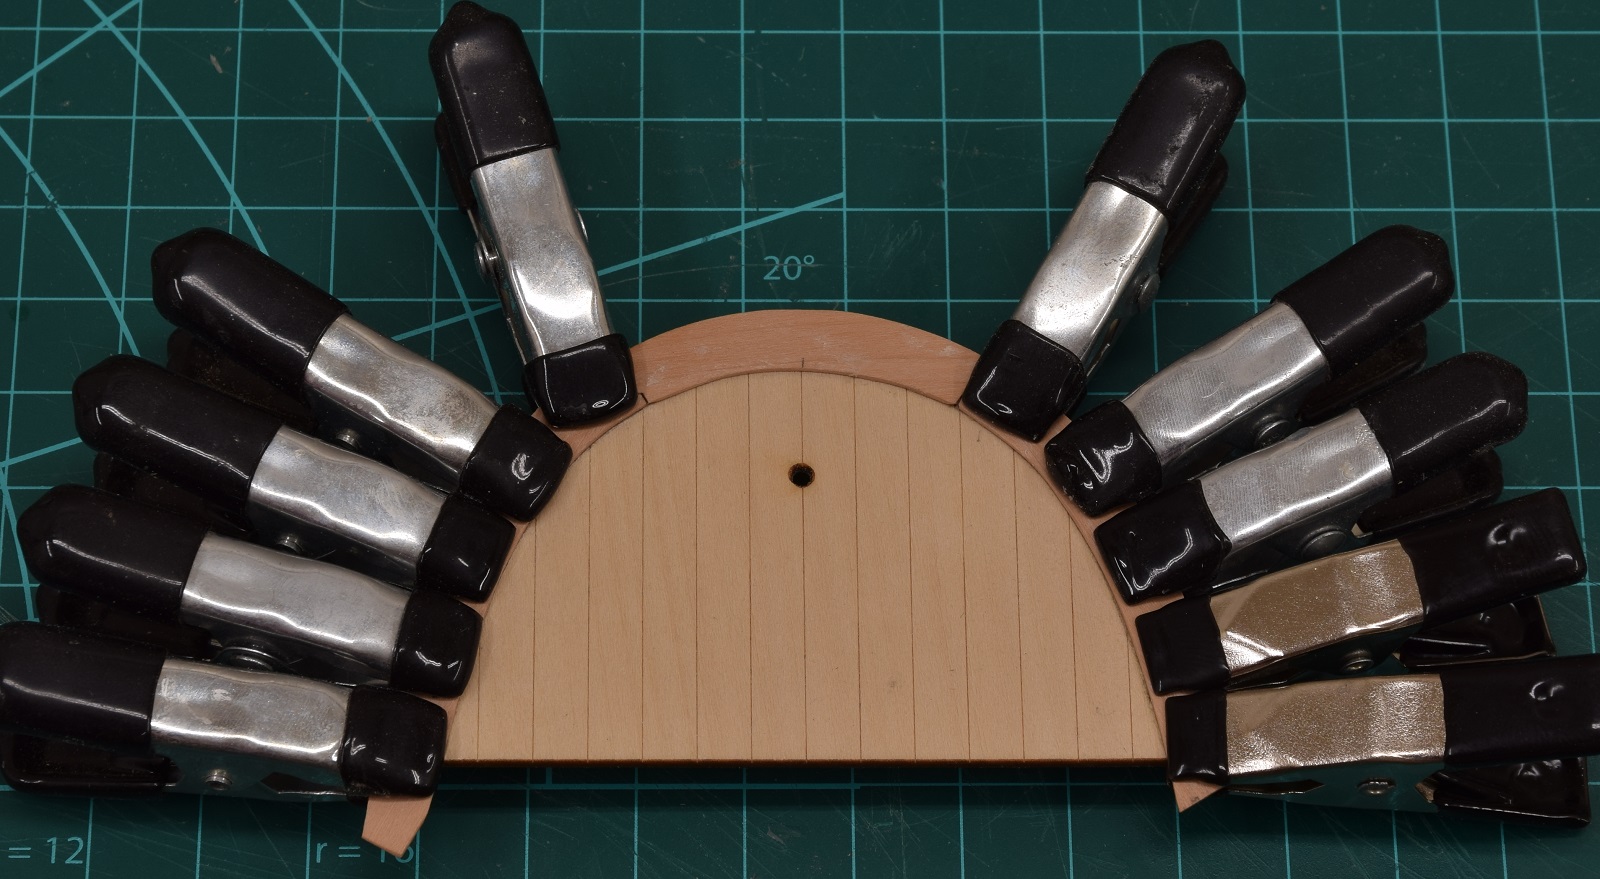
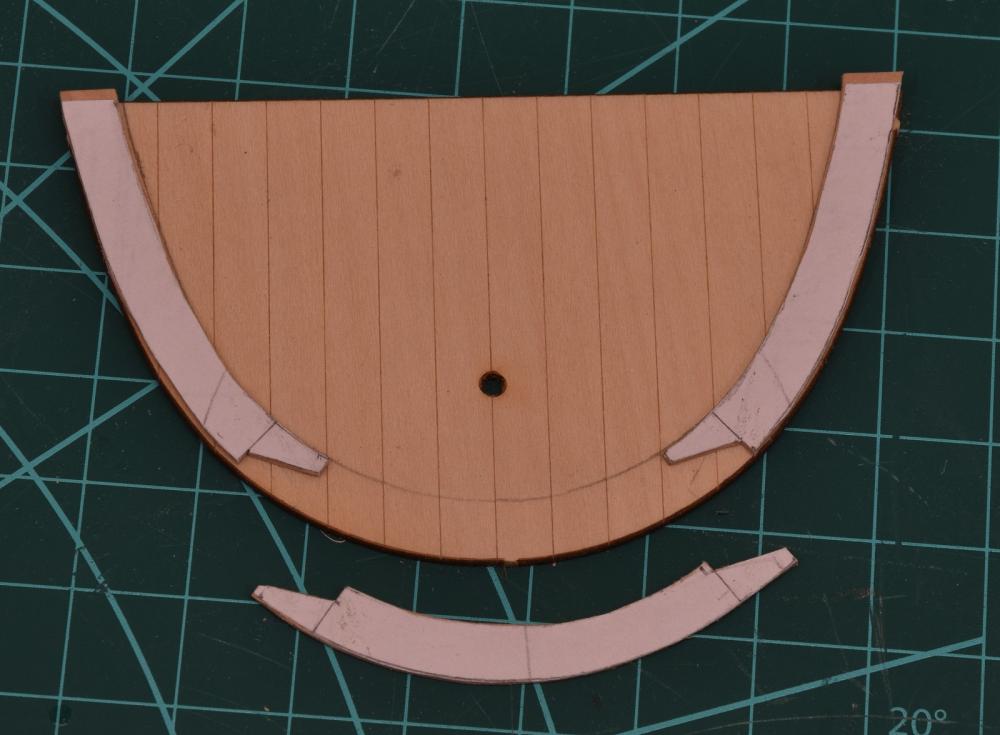 Stern margin planking, round 2!Made new patterns, this time out of card stock (manila folder) so that it would not deform when gluing it to the wood.
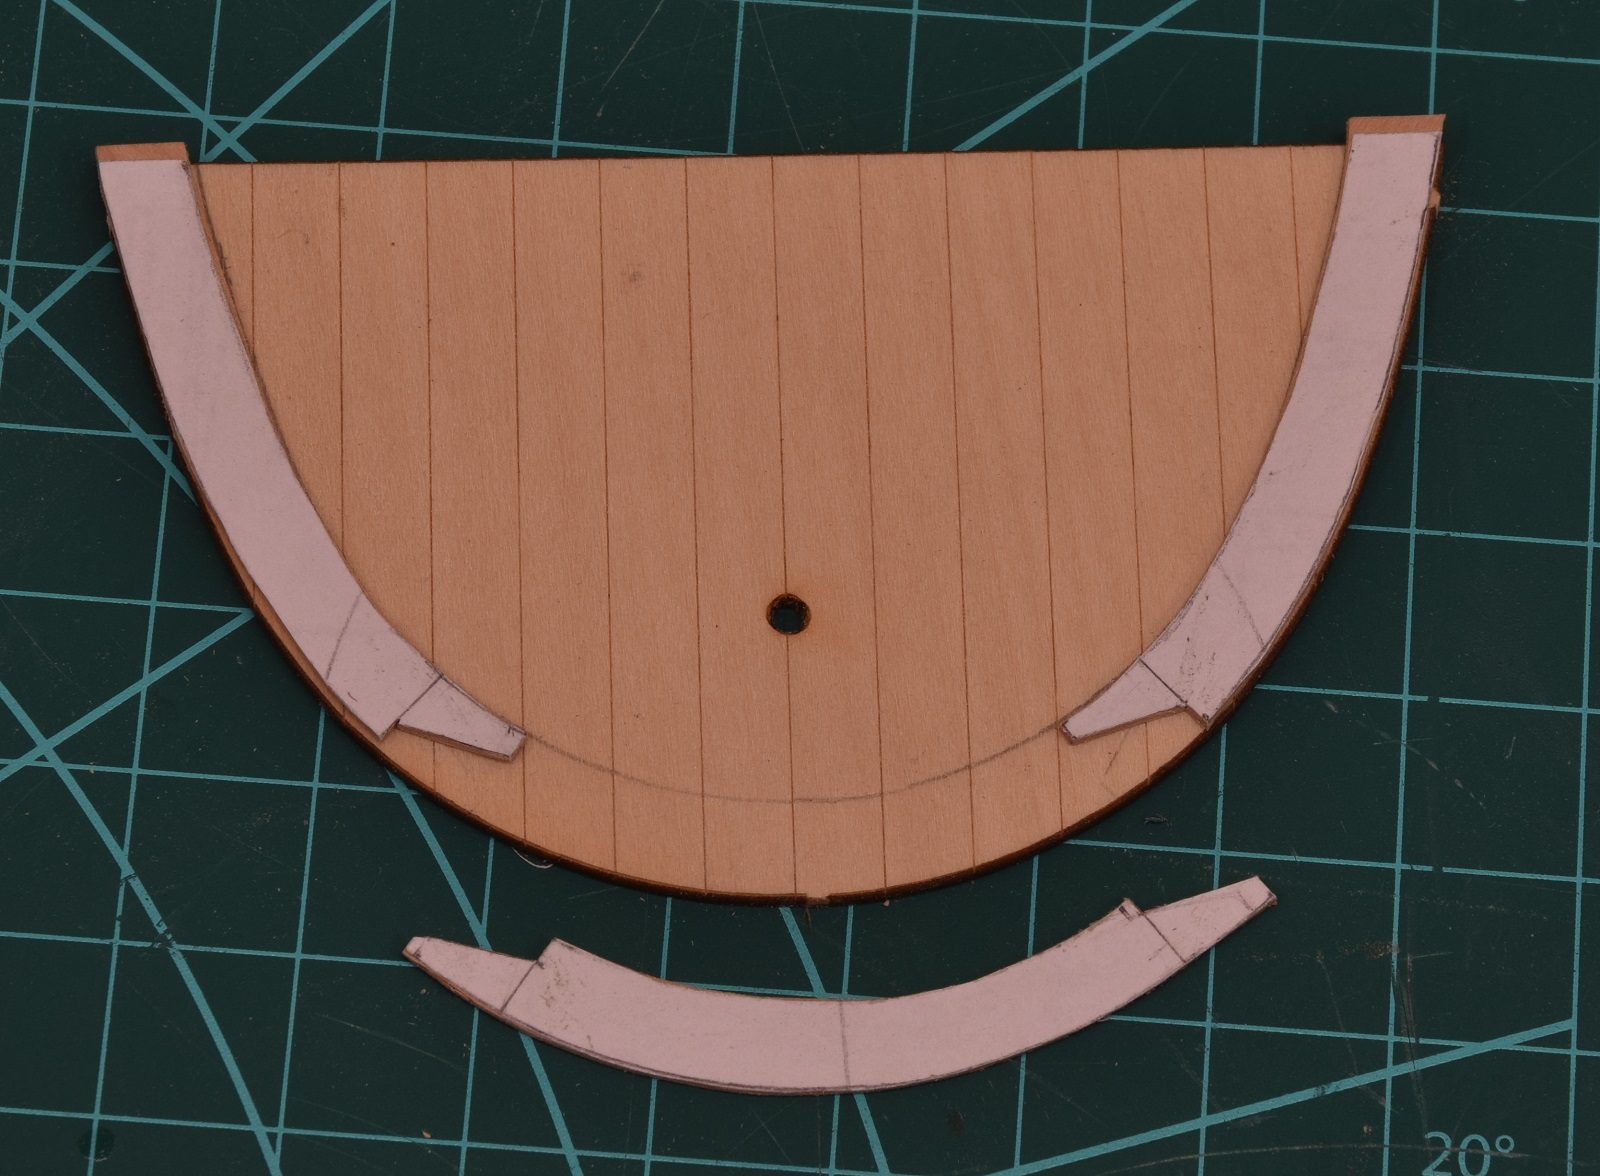
 After cutting the wood out, test fit with the patterns still on the wood, and it's much better, the curve is pretty spot on, just need to make the joints fit tight.
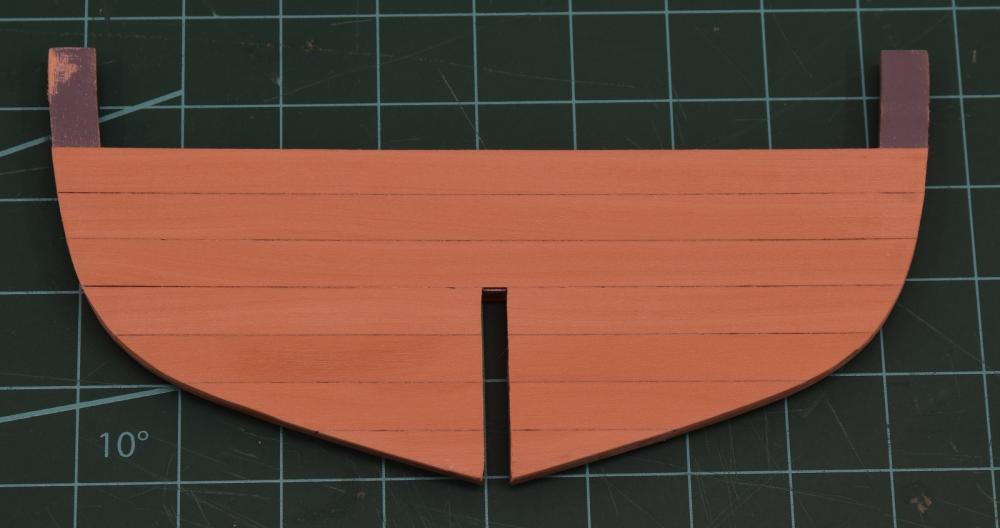
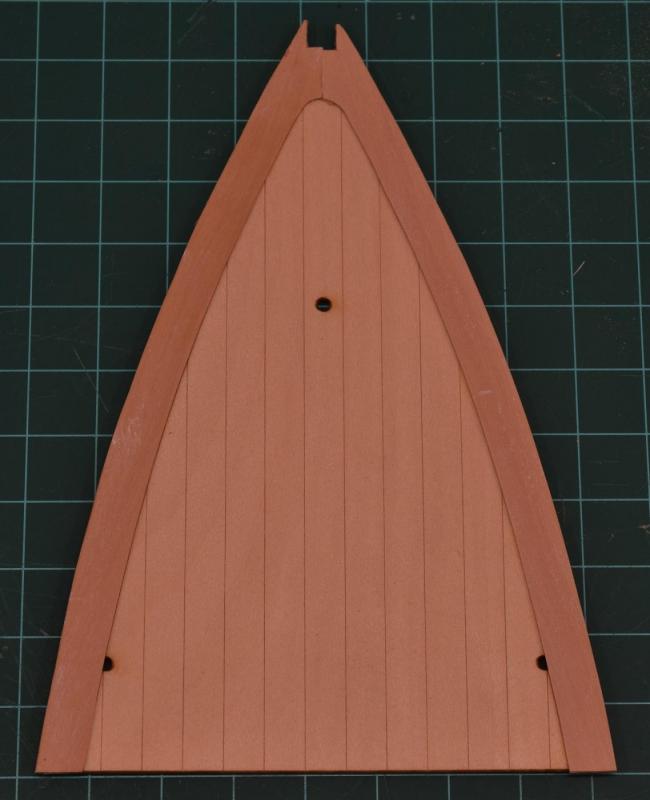
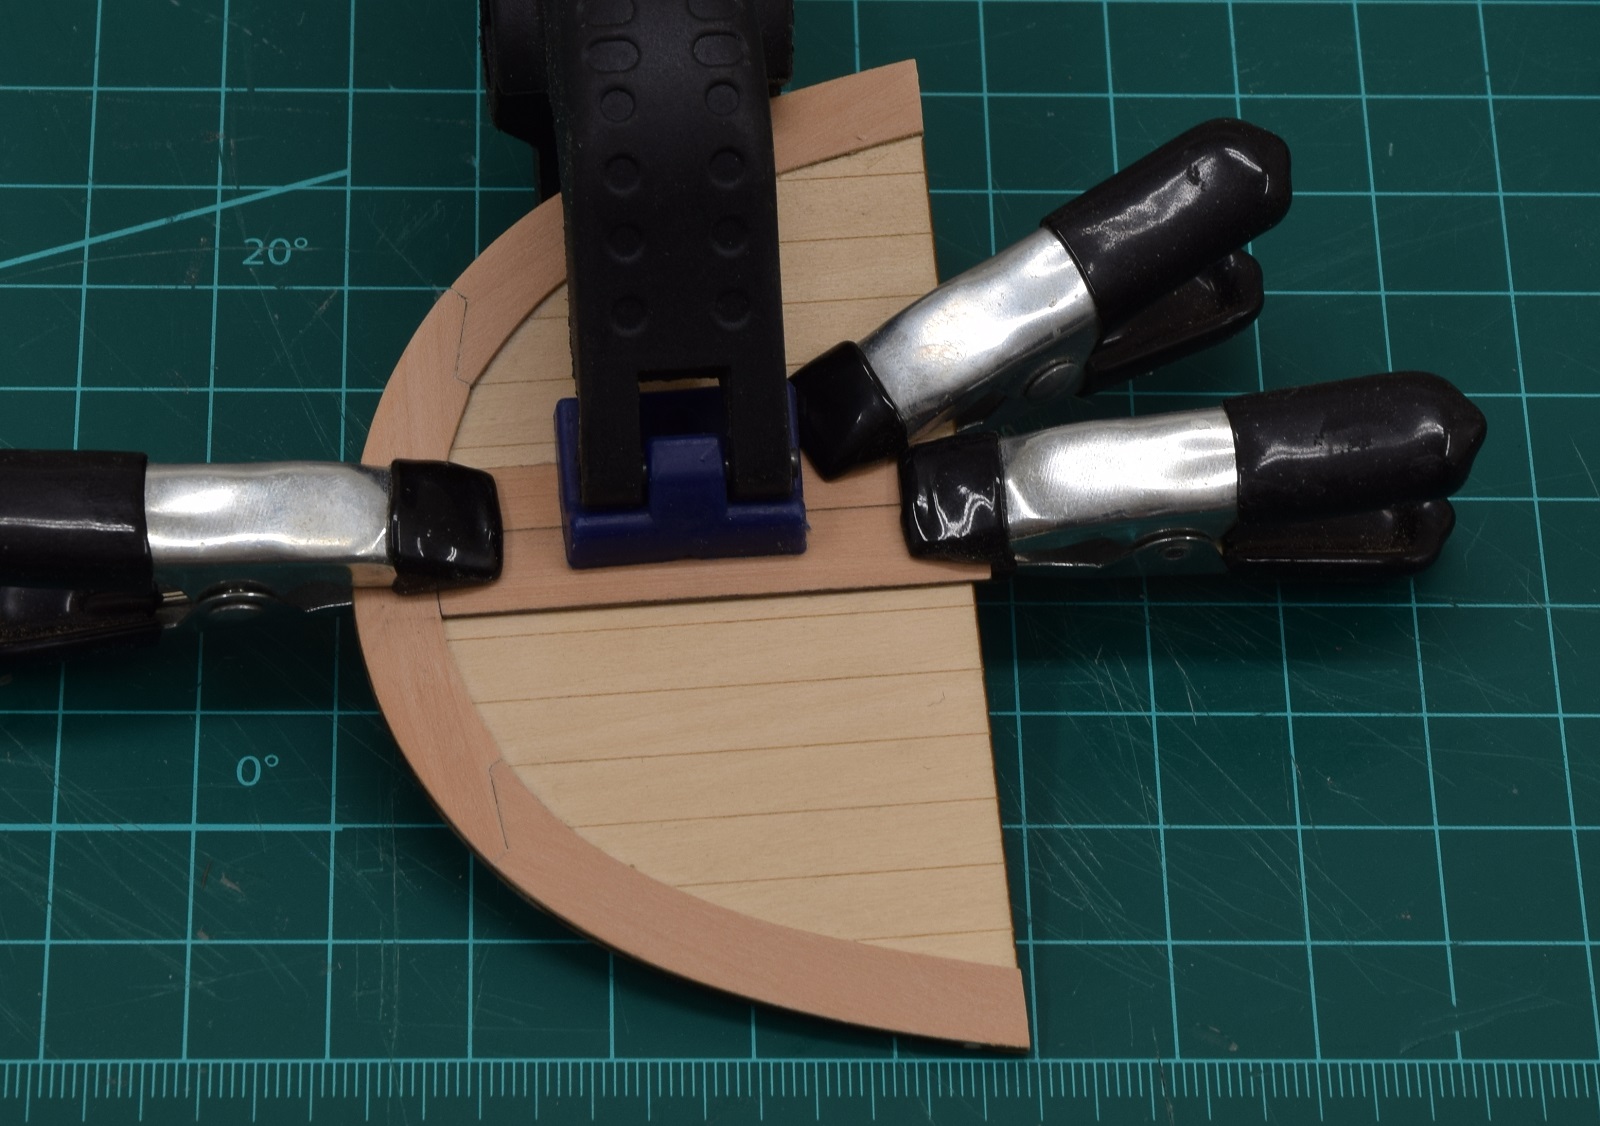
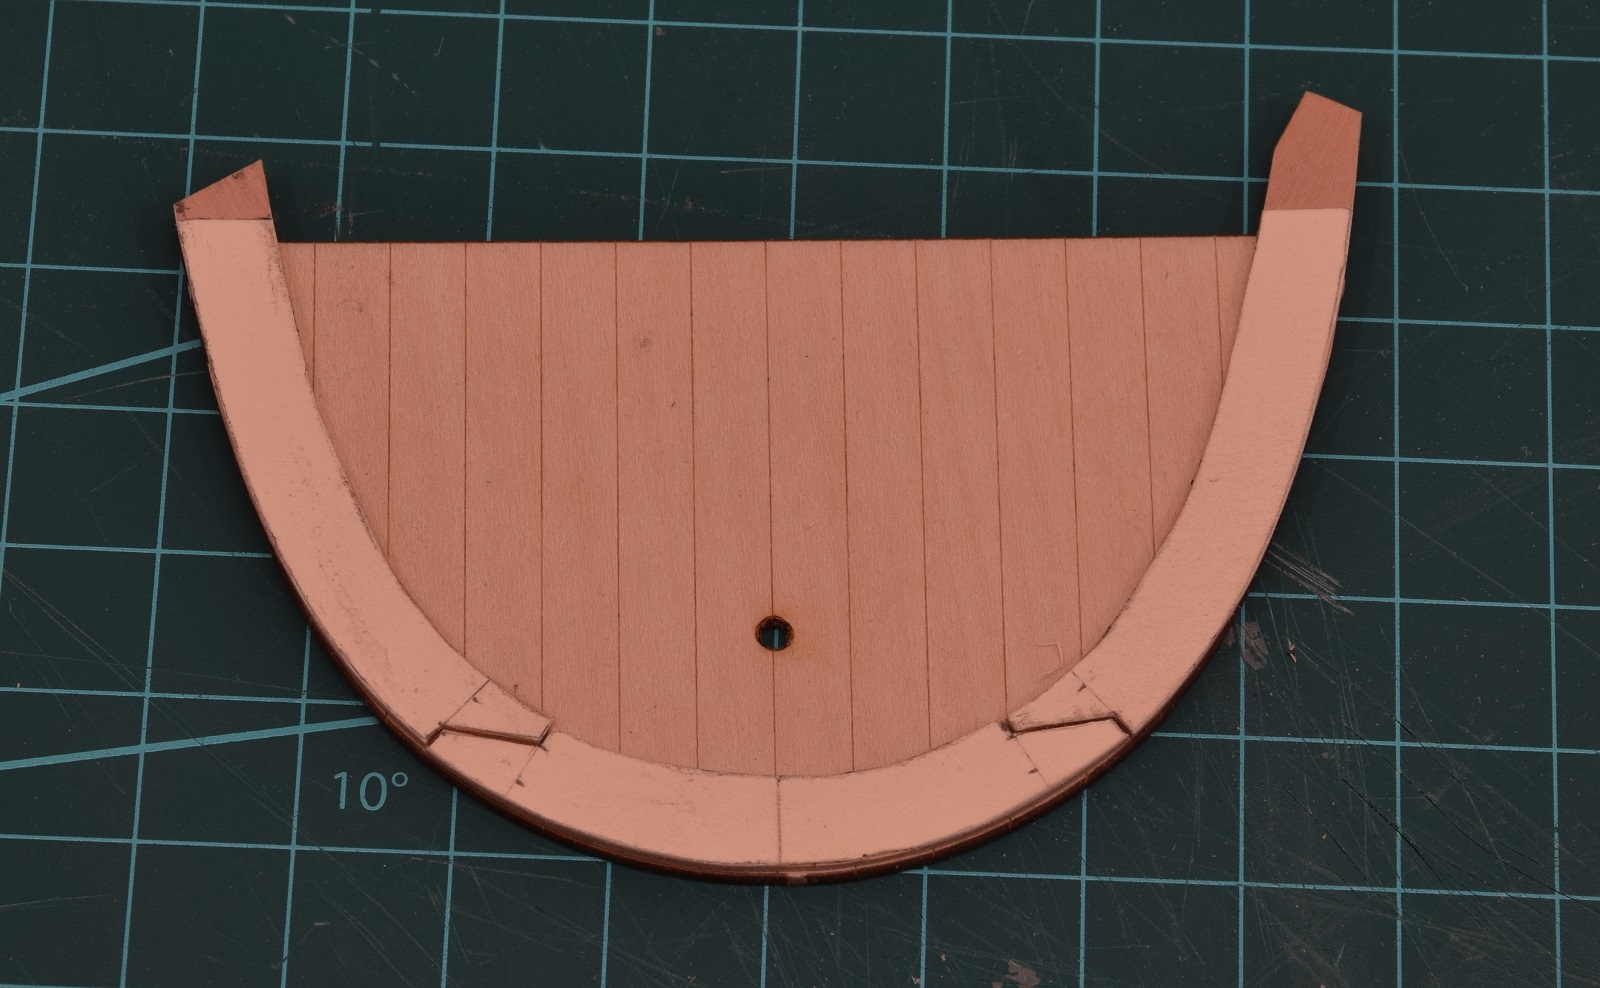
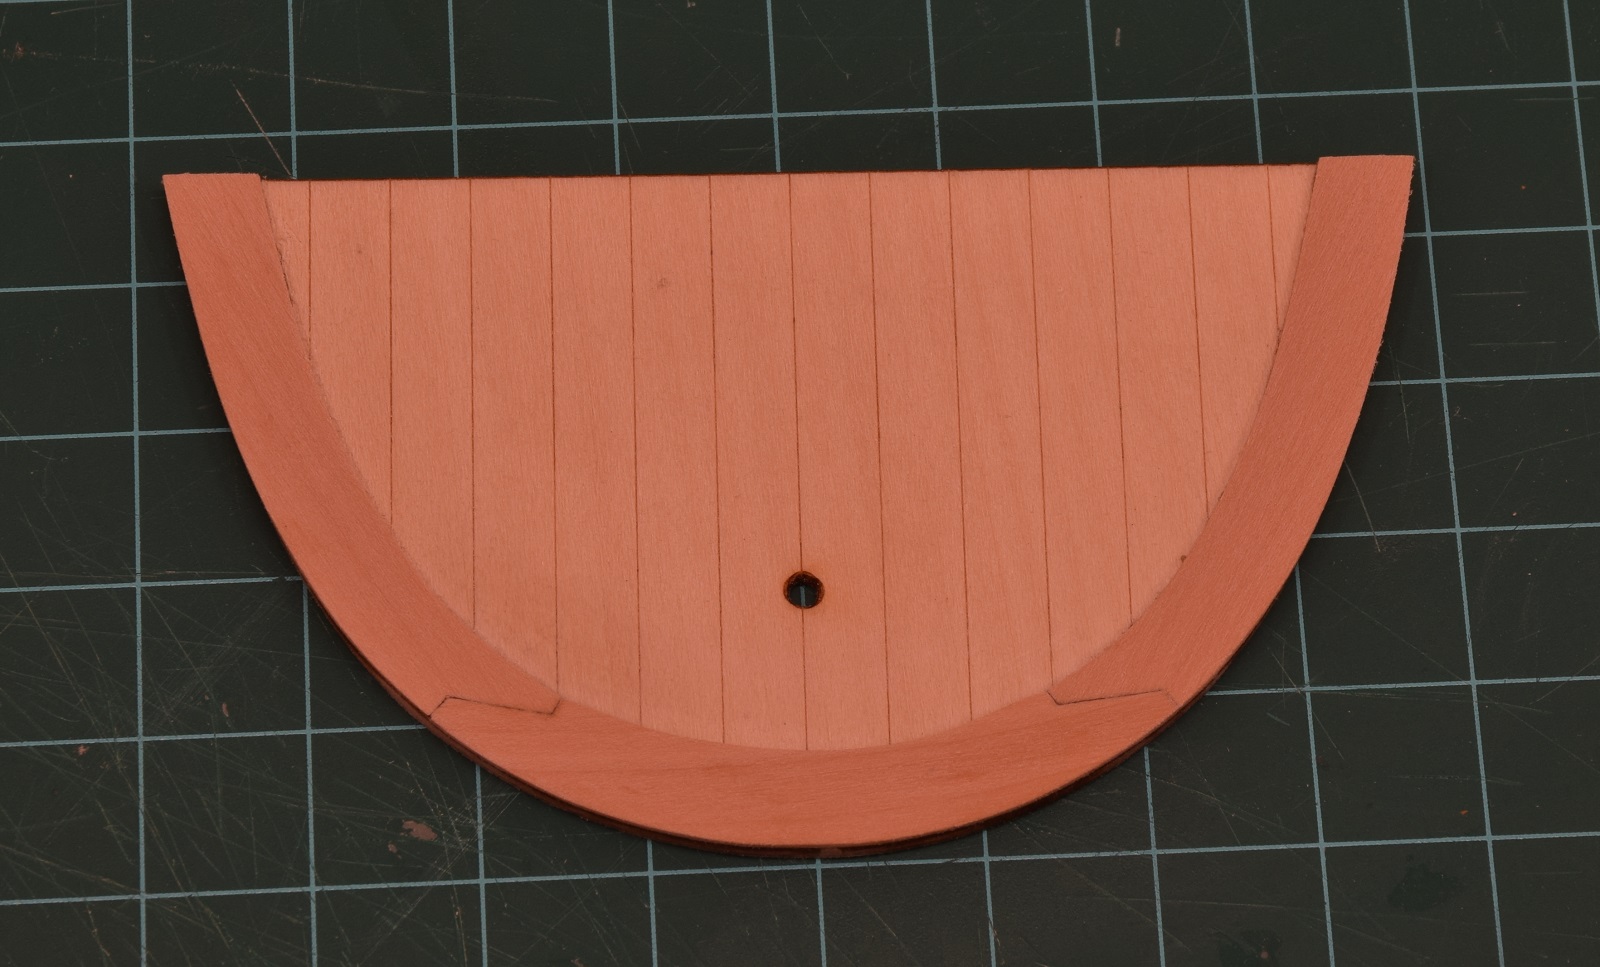
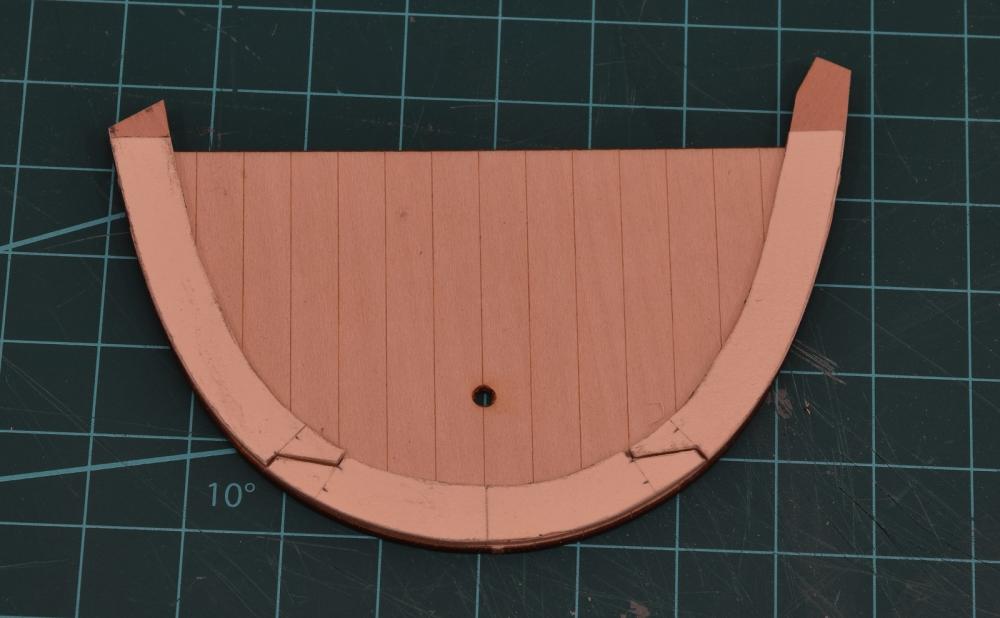 I glued the center curve into place, and then adjusted the joints on the side pieces to fit well, and then glued them in place and clamped.
 I can live with this.
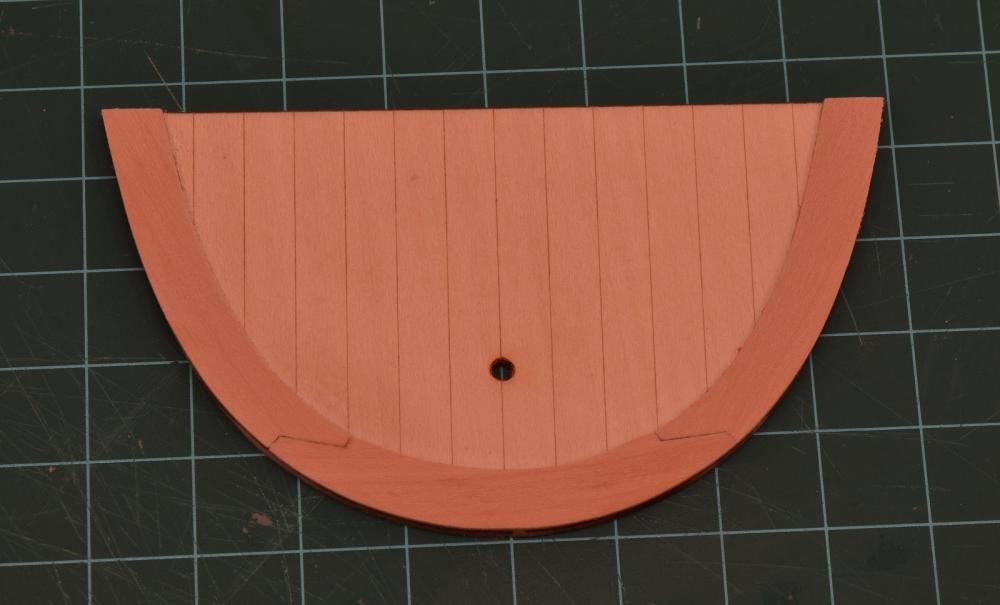 Now I can add the planks.I've found that all of the decks that I planked have developed a massive amount of warp, I'm guessing due to the stress as the glue dried between the layers, so now all of the completed pieces are beneath a big stack of heavy wood and steel weights to hopefully straighten them out.
-
-
I'm not smart enough to tell you want sizes to use on your model, but you could download the parts list from Model Shipways for their kit to find out what sizes they used, and then re-scale it accordingly.
Also, for the small scales we use, it typically looks better visually if you err on the side of smaller, rather than larger rigging line. When I built my AVS I downsized almost all of the rigging line from what the kit supplied (like .018 down to .015, not huge changes) depending on what sizes were available from Syren where I bought all of my rigging line. If the kit called for .045 and the only sizes available were .040 or .050, I would go with .040, etc.
By using an existing kit of the Bluenose II, and sizing your line from that, and downsizing as needed to get the sizes, I think you would end up with a pretty good approximation.
If all else fails, go with what looks good to you, since nobody is going to be measuring your lines and comparing them to the historical plans and figuring out if it's too big or small.
-
Jerry,
Don't worry too much about running out of planking, just do your best, and if you end up running out, one of the big selling points of Model Shipways, is that if you contact them (I just use their web contact form) and tell them that you messed up the decking and ran out, they'll just send you another batch. Takes anywhere from 10-14 days to show up in my personal experience, so if it looks like you are running low, and determine that you need to rip it out and have a re-do, go ahead and contact them at that point and get the replacements in the pipeline to you.
Only way to learn this is to have a go at it and keep trying, and re-do's are part of the process for all of us!
-
I referenced your photo's more than once when building mine, so fair's fair!
Looking forward to you continuing it.
- zoly99sask and Ryland Craze
-
2
-
Can't tell you what blade Don uses, but this is an excellent read on what blades to use for what size of wood you are cutting from Jeff at Hobbymill who used to be the go-to source for milled wood for the US builders - http://www.hobbymillusa.com/byrnes-saw-operation.php
-
-
Excellent work, and very nice progress Frank.
My opinion, based purely on the visual appearance is to leave the knee's. I think they add a very nice visual to the bottom of the hold area, and ship construction in that era wasn't particularly worried about how the construction affected the movement of sailors (or in this case passengers) in the hold, and the would provide no real issue as far as cargo as the area between the stanchions wouldn't really be much usable space regardless of the cargo.
-
-
Hello Keith,
Found this log yesterday, and finished catching up to the end just now. What a beautiful boat, and you are doing a fantastic job on her so far. Lovely.
Question - where did you source the plans? Your first post mentions who made them, but where would someone go to find plans like this?
-
That's a beautiful boat you have there.
The only things I saw that deserve any constructive criticism at all are pretty marginal. The nail/hooks that you already said you need to improve on, and the rope coils themselves. They don't really lay very naturally, which, depending on what sort of line you are working with might not even be possible. With Chuck's rope you can get them to lay pretty natural by a thorough soaking in white glue/water mix, but line like the stuff from Model Shipways is impossible to get to look natural in coils at scale (at least for me).
Everything else (those two items are minor at best) that I can see is simply stunning, and I'd proudly display that if it was my work. Bravo.
- Seventynet and Elijah
-
2
-
-
Making good progress there umm... whatever your name is.
I also just sanded it down, although I don't remember the exact tools I used. Probably just a sanding stick/block of some kind, and I just did it by eye and kept it even on both sides.
Looking at it now, it appears that I just tapered it to about 1/3 of the overall width, maybe just a bit wider than that, but pretty close it looks like.
-
-
-
I got all my little alligator clips from Amazon, because I'm too lazy to go to stores to look for them.
-
My time in the shop has been really limited, but I have made some slight progress on the picket boat.I finished the other main cockpit deck.
 And then I started working on planking the faces of the bulkheads that will be exposed when everything is completed.
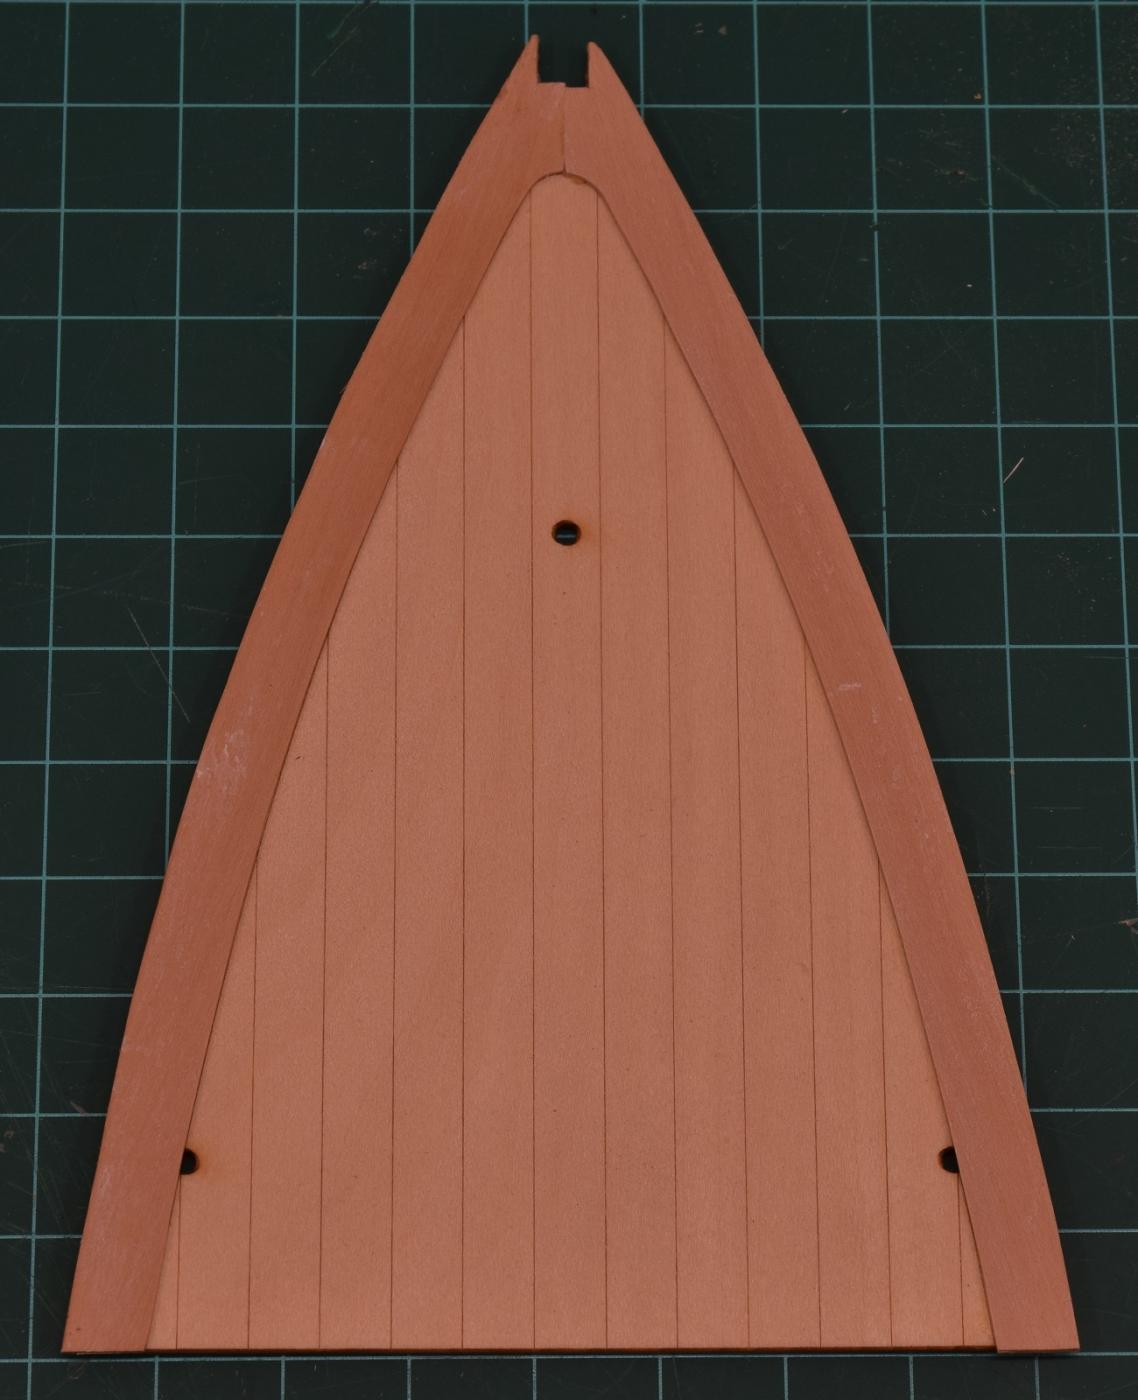
 I have a couple more bulkheads to plank, but they were stupidly already attached to the keel prior to realizing that they would be exposed, oops. I am going to try to plank them in place, we'll see how that goes. In the meantime I decided to work on one of the tricky pieces, the bow deck. This piece is tricky because of the two sections of margin plank that are curved and funky-shaped at the stem. Because of this, these pieces need to be custom cut out of a wider sheet of wood. I tried three times to get it right by tracing the outside of the deck and then measuring and tweaking, and this was the best of the three attempts:
 At this point was when I realized that I'm a stupid idiot. I have plans, I have a scanner, and I have a laser printer. Also, I'm apparently too stupid to think of using those tools to make a thing called a pattern. Anyway, I scanned in the part of the plans with the bow, then messed around with the printer settings until I nailed the proper settings to get it to print in exact scale (because for whatever stupid reason the image the scanner makes is not the right scale when printed actual size). I cut out the appropriate part of the printed plan, and pasted them to the sheet of wood.
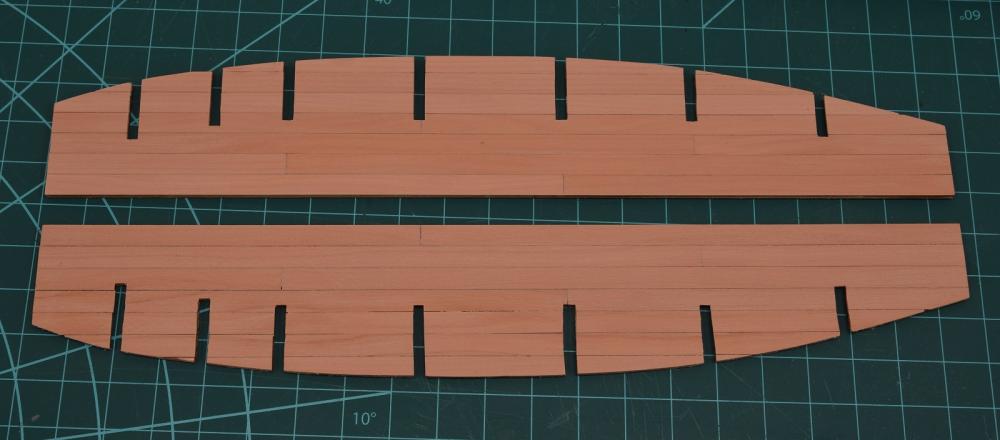
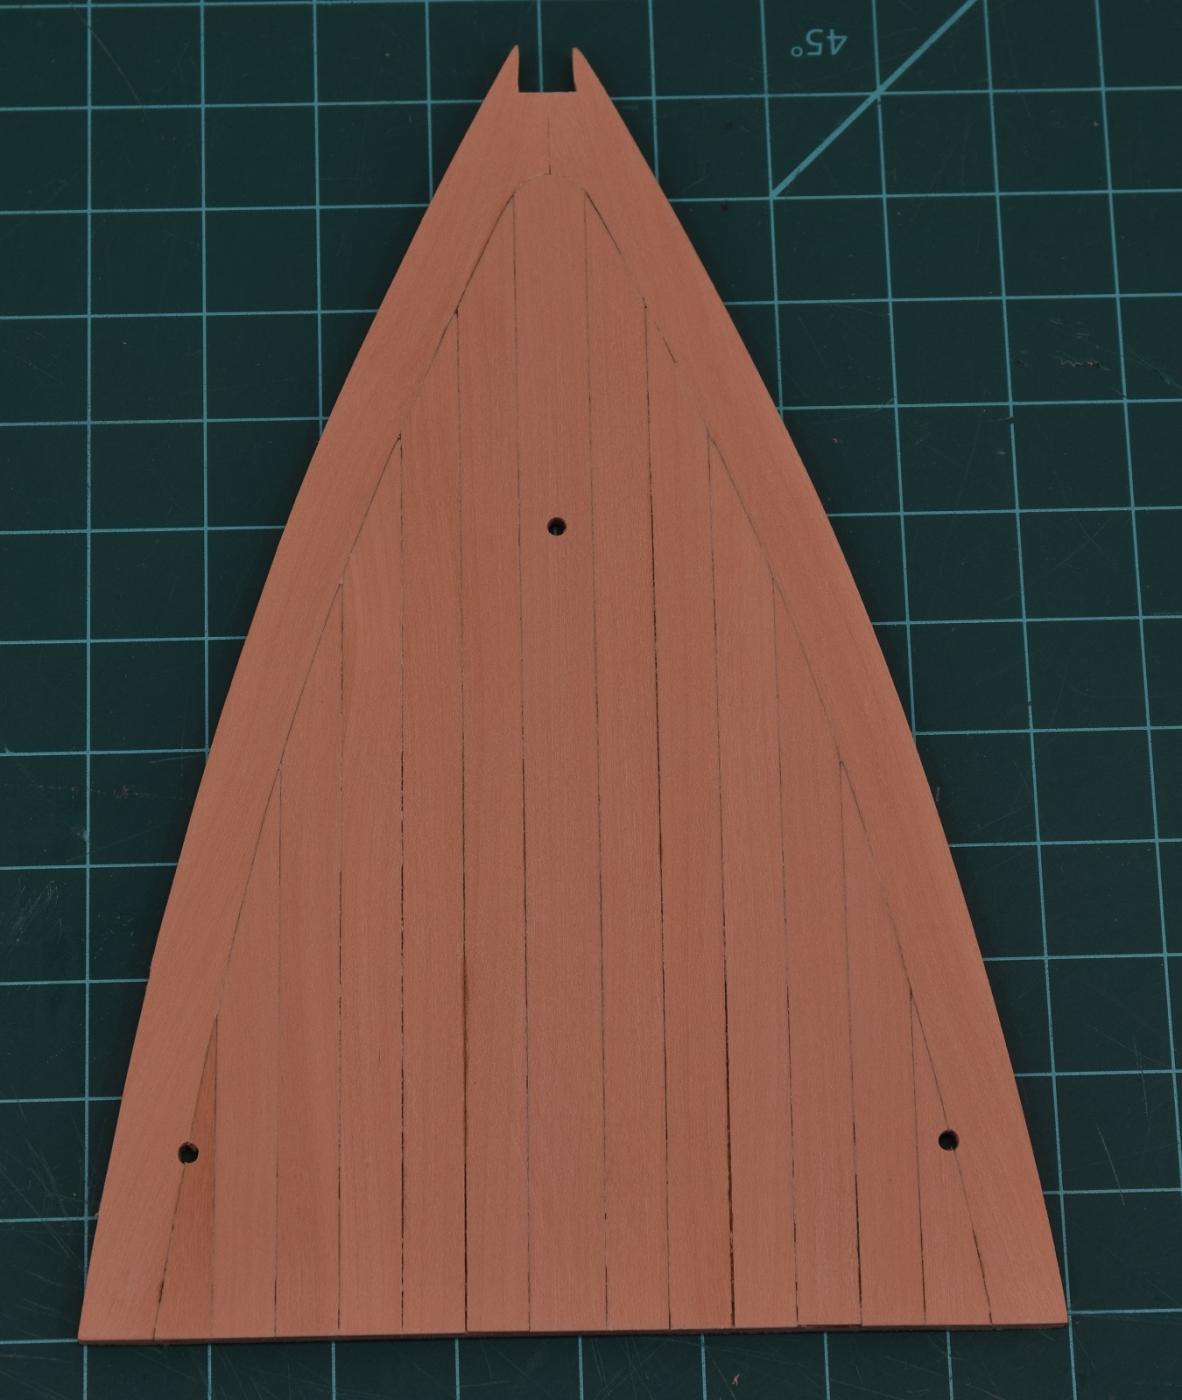
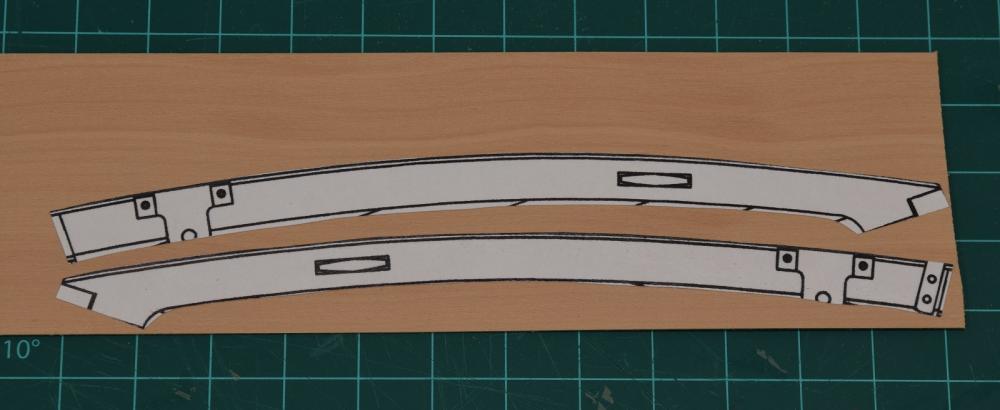 What do you know, using that 'pattern' thing is actually a pretty good way to make things. Who knew.This was the first piece cut out using the patterns.
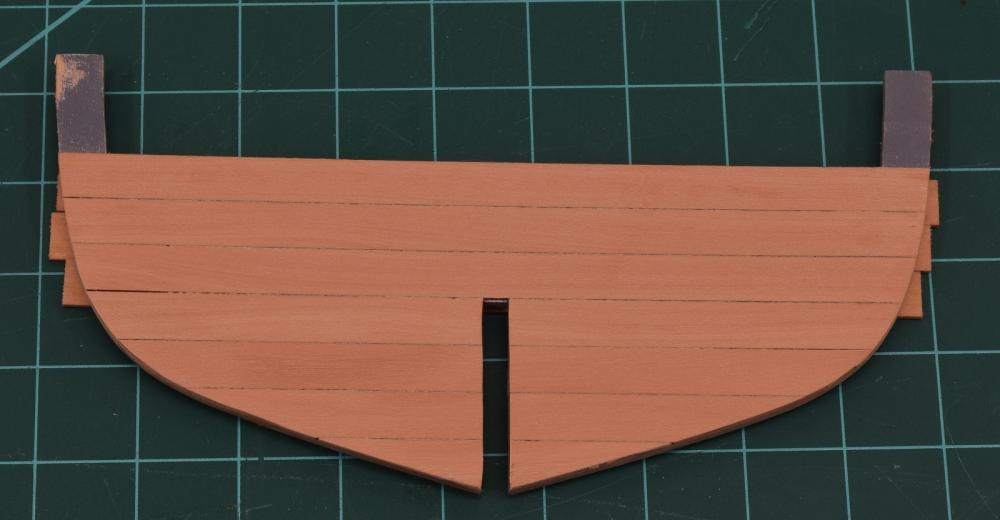
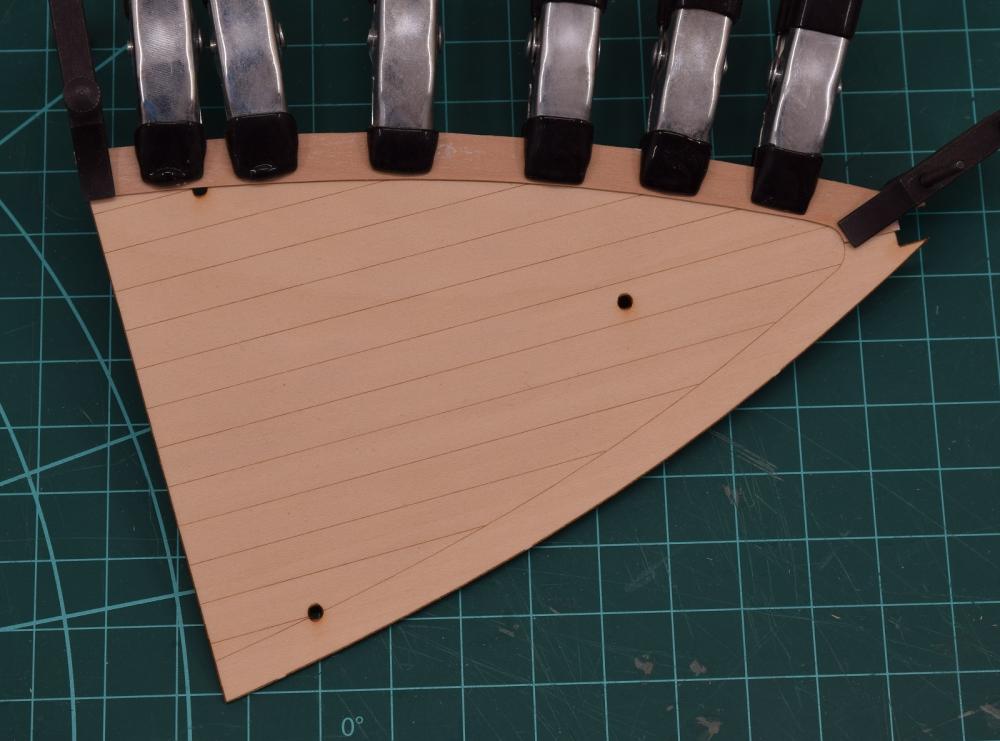 Other than cutting the front shape a little odd, it's almost perfect, and having the front over-sized isn't a big deal, I can trim it back when it's done.The second part glued up with pattern still attached, and then removed.
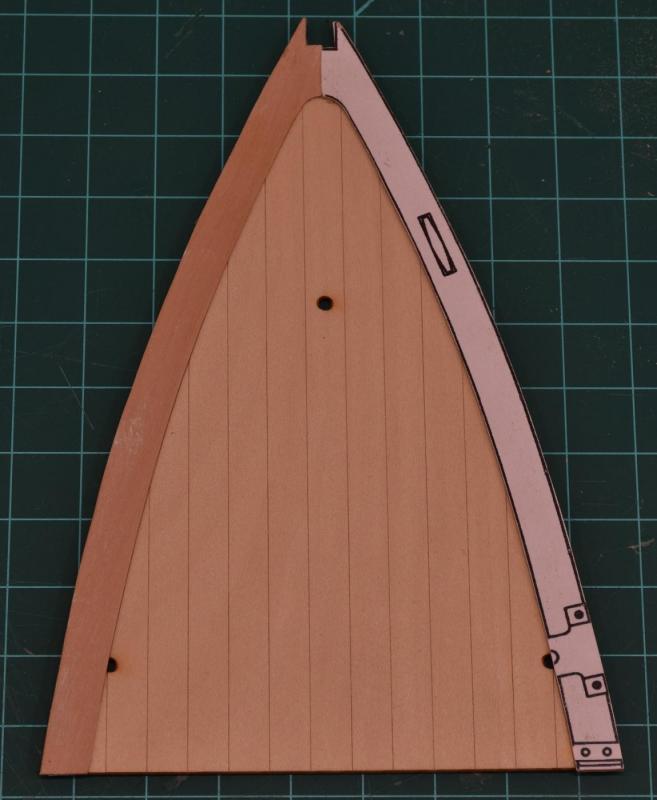
 I had to do a bit of careful trimming and sanding to the inside of the curve right at the bow because I managed to glue the 2nd piece in place slightly out of alignment with the first one, but some patience and sandpaper wrapped around the round end of a small file took care of it so that I could start the planking. I laid a 5/16" center plank and then started placing 1/4" planks to either side. Matching the curve at the end was easier than I thought, and this part went pretty well without a hitch.
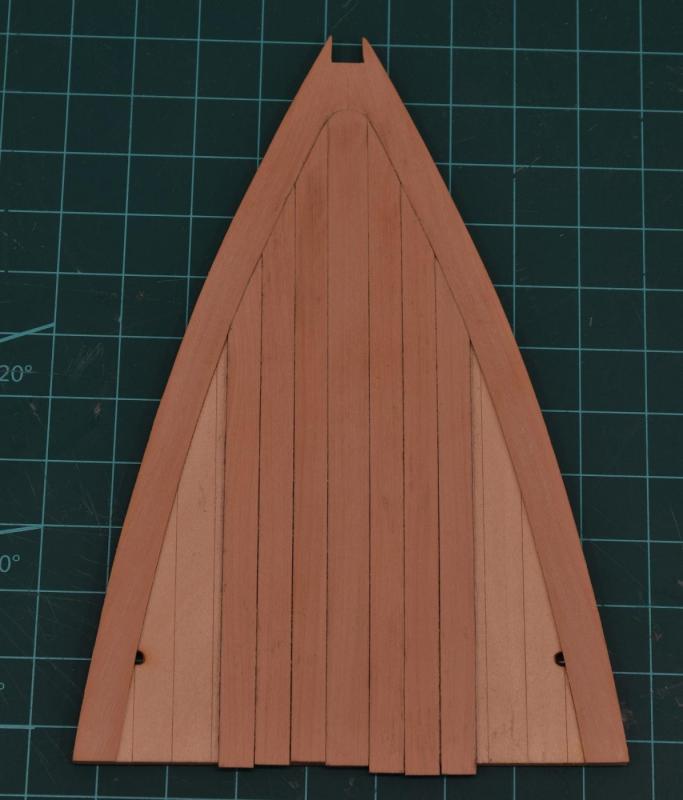
 And the finished bow deck with a coat of wipe on poly.
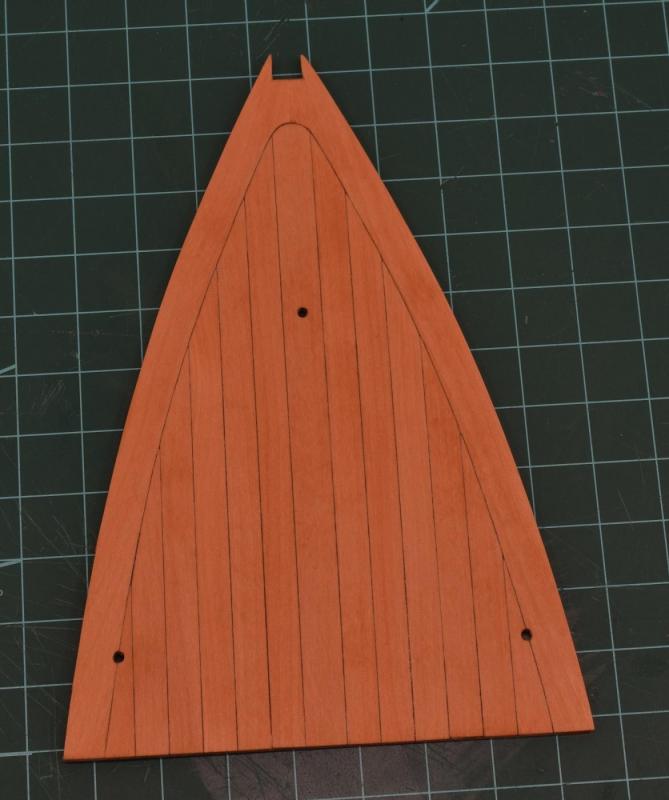 Still have to plank the stern which will require a 3-piece margin plank and then a couple of benches for the aft cockpit and the two bulkheads that are already attached to the keel I am also going to have to re-do one of the bulkheads because I realized that I didn't account for the propeller shaft coming through it, and made the planking notch way too high.
-
Great looking boat! You can't declare it's done until it's actually done though, I proclaim this!
- Elijah, cobra1951 and Seventynet
-
3
-
-
Just caught up with this one. Beautiful launch you have going here Mobbsie!
- mtaylor, Canute, CaptainSteve and 1 other
-
4


Armed Virginia Sloop by captgino - FINISHED - Model Shipways - 1/48
in - Kit build logs for subjects built from 1751 - 1800
Posted
I read somewhere (do not remember where, sorry) that the window frames should stand proud of the transom planking just slightly. What I did was get the windows fit about right, then removed them and sanded and finished the stern before reinstalling the windows.
If I was doing it over again, I would leave the windows out after finishing the stern until the entire model was just about finished, as I used Krystal Klear (or something similar) to make the 'glass', and the sawdust from later construction has them really dirty and they are impossible to clean since it's a water soluble product. Doesn't really detract from the model, but it bugs me. Another reason to leave them out until later was that I regularly messed up the paint on the stern and windows while handling the model, and I ended re-painting and re-finishing the entire stern probably 5 or 6 times because of my own clumsiness. If the windows had not been installed it would have been easier, but would have also opened up the possibility of doing something to make them not fit properly later, so sort of weigh the risks there.
In retrospect, I would re-install them after all the sanding and finishing was done, but before starting on the rigging so that if I made an error I could still easily handle the hull in any direction (upside down, etc.) while getting them installed properly.
To do this properly, you would likely want to install some small 'stops' inside the frame openings to prevent the windows from pushing inside the stern and being lost.