GuntherMT
-
Posts
2,213 -
Joined
-
Last visited
Content Type
Profiles
Forums
Gallery
Events
Everything posted by GuntherMT
-
How did you form the loops on the ends of those served pieces?
-
mini drill chuck for those small drill bits
GuntherMT replied to AON's topic in Modeling tools and Workshop Equipment
I've been looking for something like that 2nd one. Looking forward to what other options folks come up with in this thread before ordering. -
Essex - Process and corrections to the new Model Expo Kit
GuntherMT replied to samueljr's topic in Wood ship model kits
Not directly related, but a lot of MS prices changed - the AVS was $169 in September, went up to $189/$199 depending on when you looked in October/November, and in the new catalog is $249. Maybe they just decided that they can ask more for these kits, or they are testing the waters to see how high they can get the margins before sales fall off. -
Thanks Frank, I have several different popsicle stick sanding sticks, but for some odd reason it never occurred to me that I could thin and/or shape the end. Sometimes it's the simplest things that elude my brain.
-
Pretty sure neither of those are thinner than .030" I'll make it work with a combination of knife trimming of the rabbet itself and sanding blocks to smooth down the planking leading up to the rabbet.
-
Thanks Keith, The tape isn't an original idea, it's how Bob Hunt does it in his practicum, but I do like it as it's easy to play with and adjust until I get it where I like. The downside is of course that it doesn't give me any feedback as to how a real plank/batten would want to lay along that line. I won't need to do stealers 'just for practice', they will definitely be needed in the bottom band, and maybe one in the 3rd. I am absolutely trying to keep the side to side symmetry good, as I agree it's visually very important. Thanks for the tip on the rabbet, it took me a minute to understand your blade orientation description, but once the lightbulb came on, it makes perfect sense! I plan to use Min-Wax wipe on Poly, as that's what I've tested with, and I like the results.
- 831 replies
-
- 1
-

-
- Armed Virginia Sloop
- Model Shipways
- (and 1 more)
-
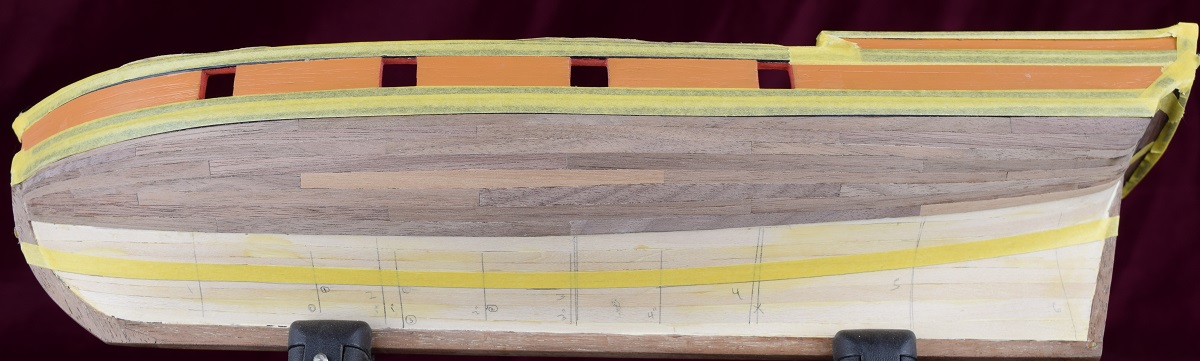
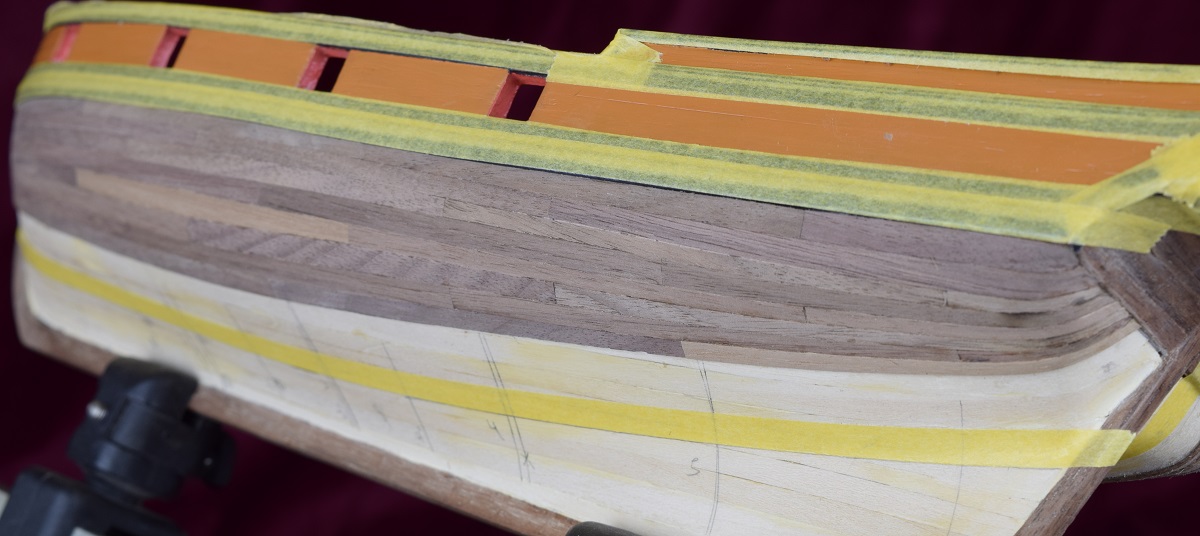
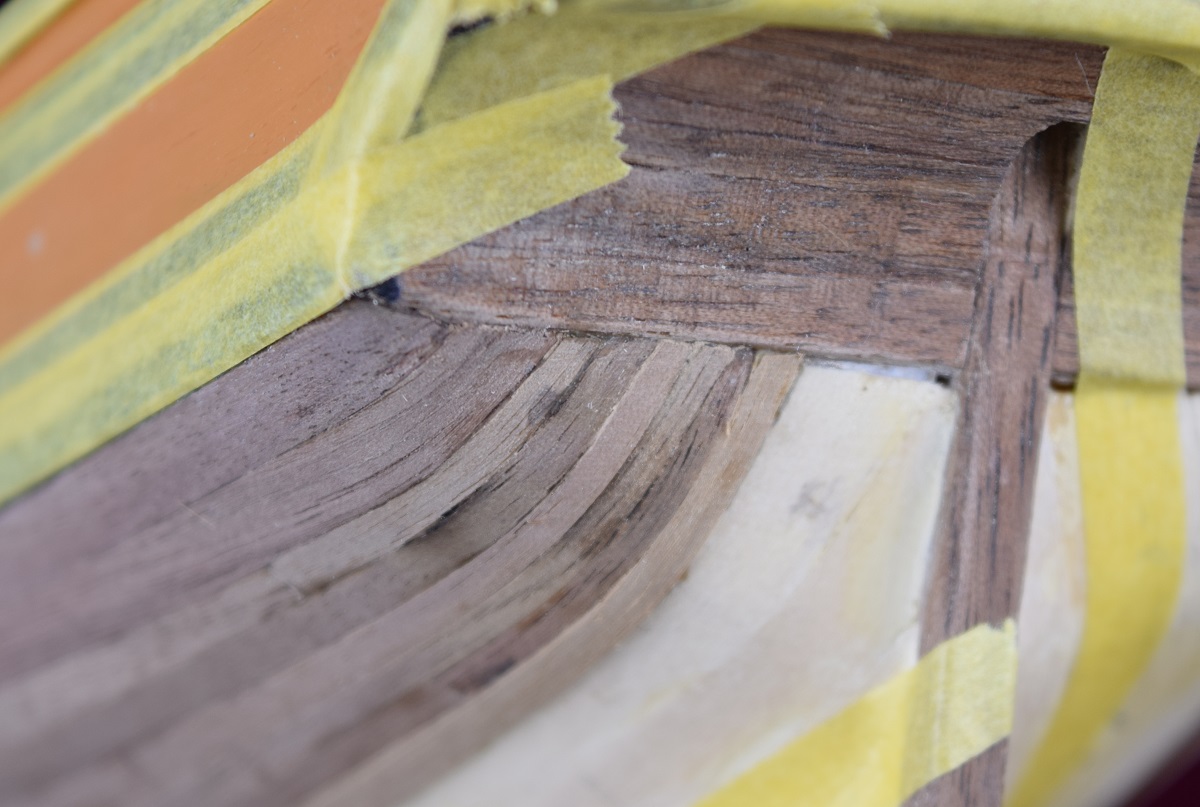
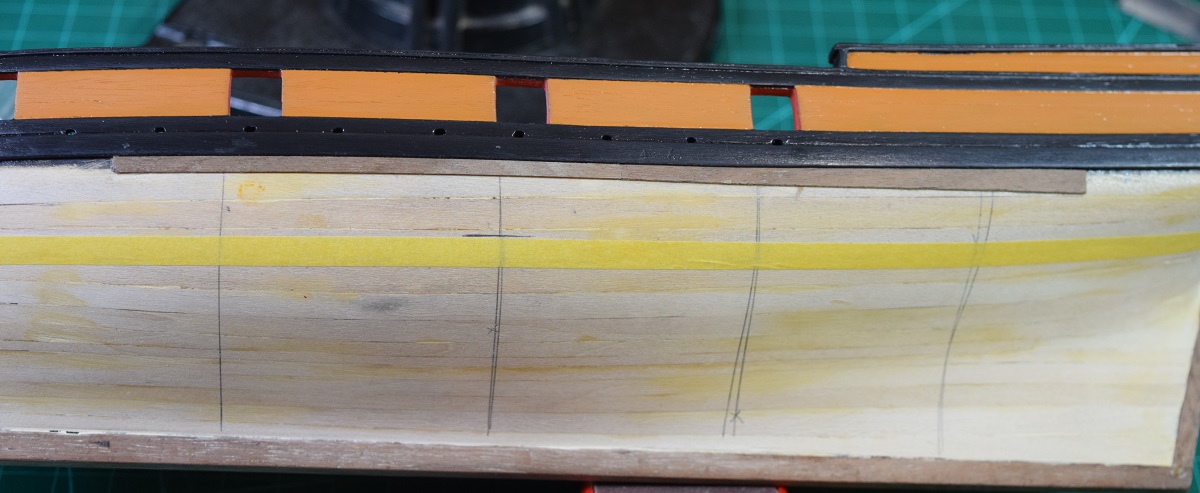
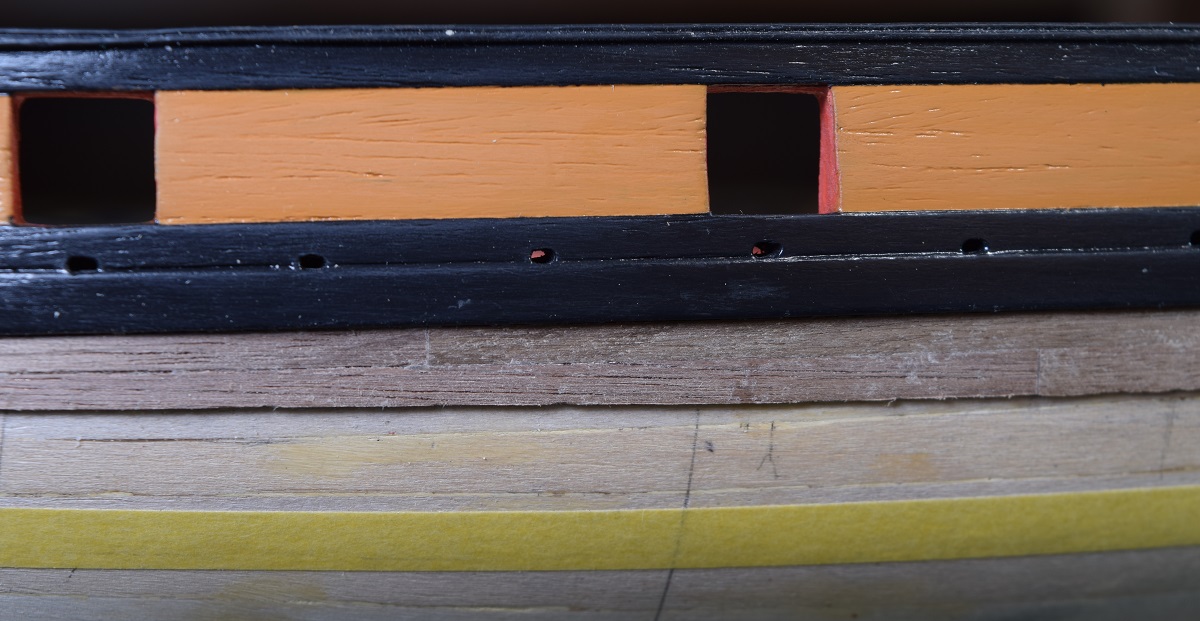
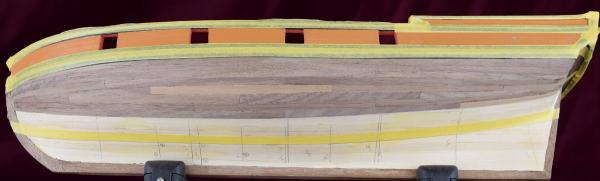
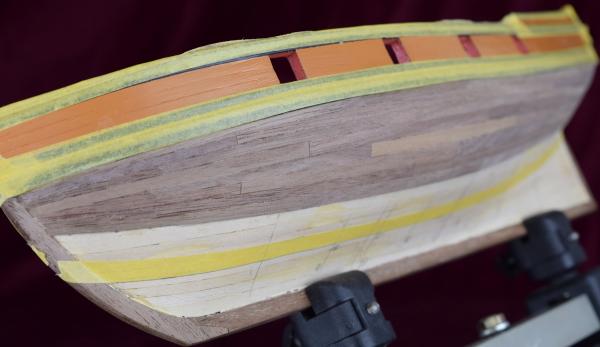
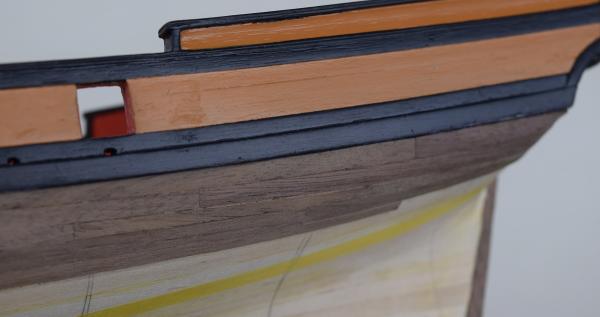
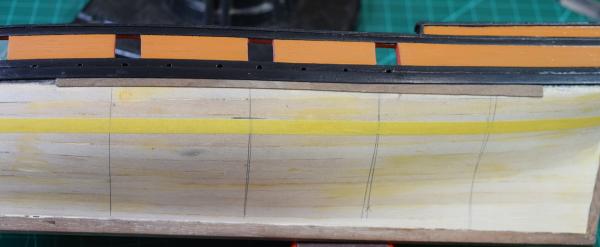
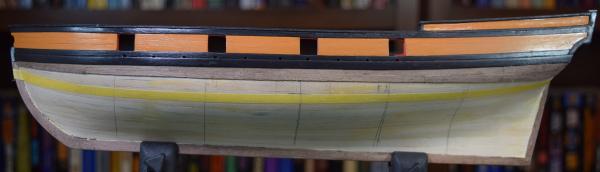
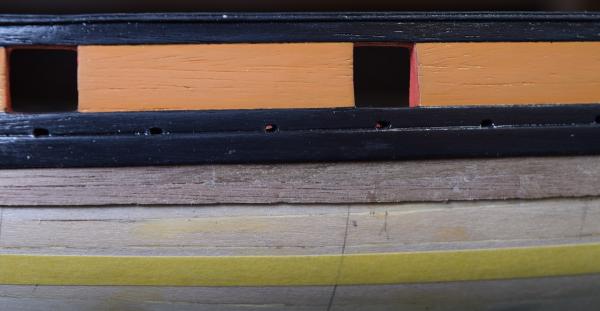
Planking progresses. Band 1 on the starboard side complete, band 1 and 2 on port side complete now, so 3 of 8 done. I'm liking the way it's coming together. As long as I don't make a massive mistake at some point along the line I fully expect to leave the hull below the wale natural. I may do something with the waterline (paint line) but still undecided at this point, not sure if it would look good or terrible with the natural above and below it. Still using just PVA, but I am using pins with collars to temporarily clamp some of the planks at the stem and stern to help me hold the trickier ones in place while the glue sets. Getting the curves mostly set into the planks using a heat gun makes things go pretty smoothly for the most part. I do need to figure out how to open up the rabbet a bit before laying the garboard strake, as I currently can't get the thickness of a plank into it along the keel, and I need to get these planks flush. Combination of sanding blocks and filing I imagine, but I've got band 2 on the starboard side to complete while I ponder that. Still not completely happy with how the planks meet the transom, but can't think of any way to improve it at this time. I'm thinking that it would look better with wider strakes landing on the transom, but I'm not going to deconstruct half the planking in order to add the drop planks needed to get wider strakes to it at this point.


- 831 replies
-
- 9
-
-
- Armed Virginia Sloop
- Model Shipways
- (and 1 more)
-
I've used (and read in plenty places where others have also) wipe-on poly finish (I use Min-wax) at various stages in the building process, and both glued and painted over it without any issues. That's the only one I have any personal experience with, so can't say what other finishes would work without problems.
-
What is this 'timber vice' you are waiting on? Do you have a link to one? Nice work on the deck fittings it appears. Thanks!
-
Were the deadeyes in the kit bad? You probably mentioned it already in your log and I missed it!
- 1,756 replies
-
- 1
-
-
- constitution
- constructo
- (and 1 more)
-
Whatever works Rich, it's the end result that matters, and they look good!
- 1,756 replies
-
- 2
-
-
- constitution
- constructo
- (and 1 more)
-
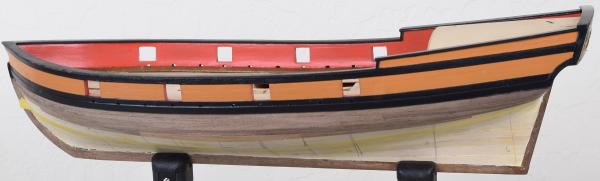
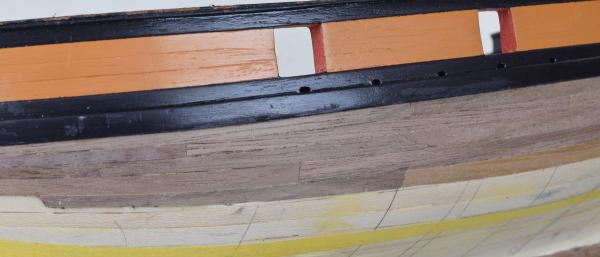
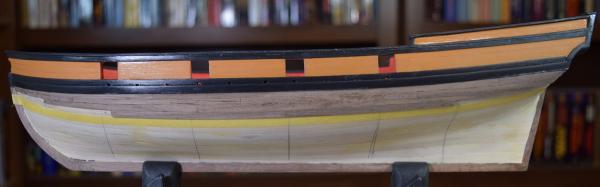
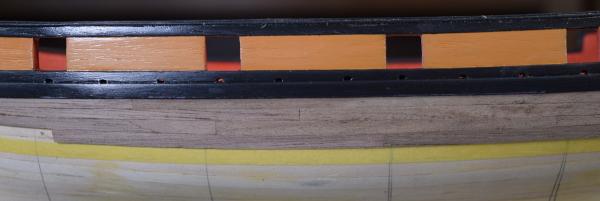
Brief early Saturday update. The first group of planking (of 4 planned sections) is complete on both sides, and the 2nd group is started on the port side. As I was cropping these pictures I realized how much damage I'm managing to inflict on my poor painted cap rails, so I'm going to need to do a lot of repainting when I'm done with all the heavy handling of the hull. In the meantime I'm going to cover the rails with tape to try to prevent further damage, since I'm apparently incapable of doing work on the hull and not beating up the already completed work.
- 831 replies
-
- 18
-
-
- Armed Virginia Sloop
- Model Shipways
- (and 1 more)
-
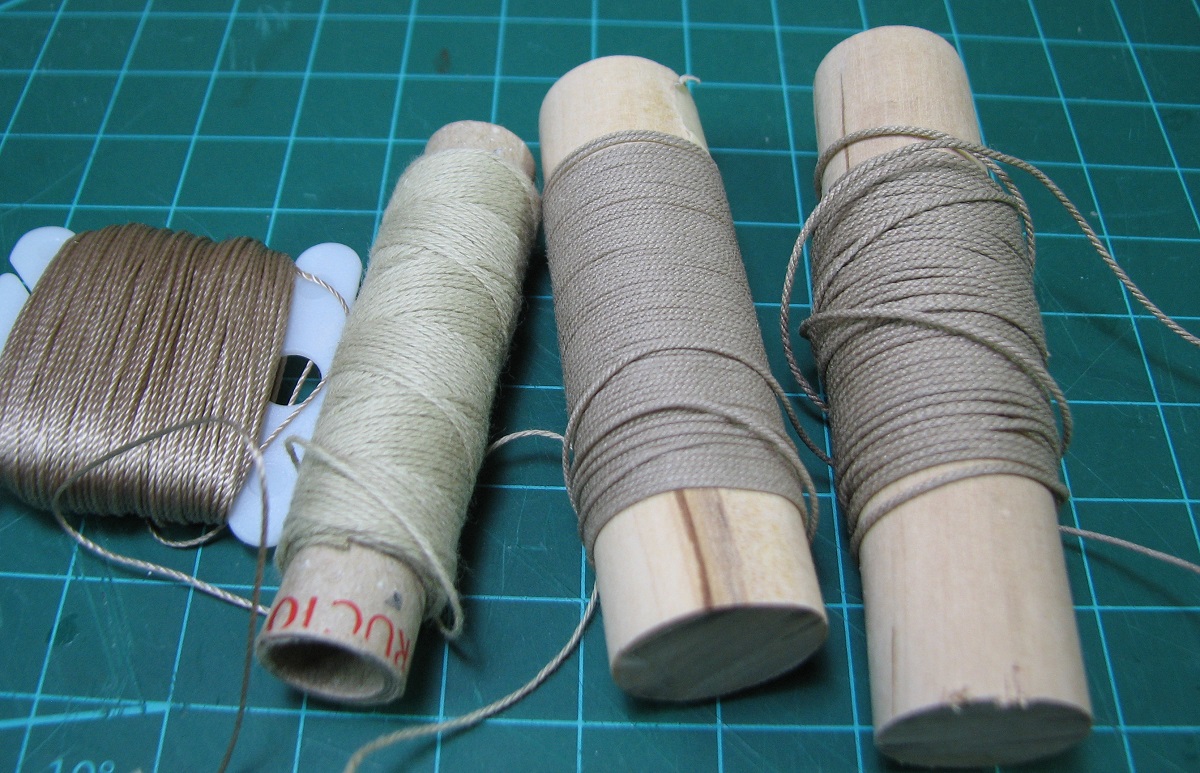
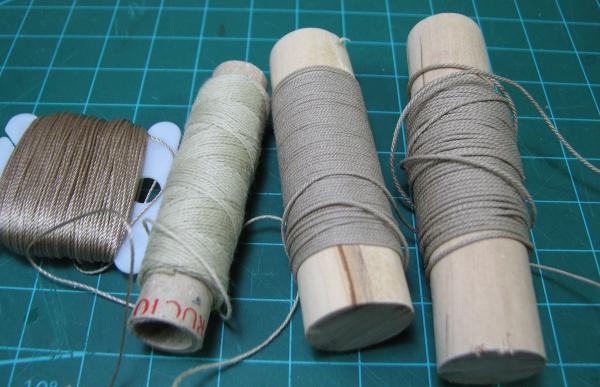
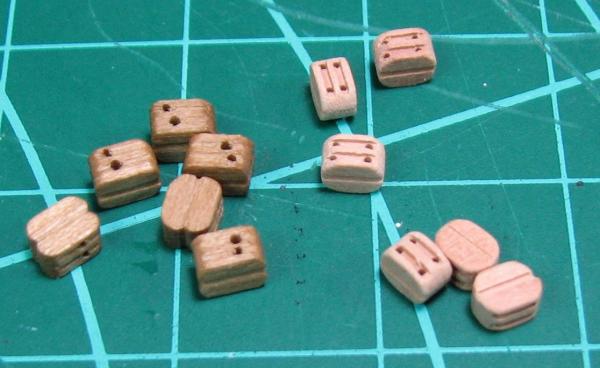
Dale - I took some photos a couple of months back comparing the ropes and blocks from Syren (Chuck) with the kit supplied items. First, the rope - I used Syren rope on my Carmen, and will use it on the AVS as well. From left to right in this photo: AVS (Model Shipways) rigging line - Carmen (Constructo) rigging line - Two different sizes of rigging line from Syren. Second, the blocks. I used the kit blocks on the Carmen, but for the AVS I purchased Syren blocks in pearwood to use. On the left in the photo are the kit blocks from the AVS. On the right are pearwood blocks from Syren. The rope from Syren is amazing. It's tight, doesn't fuzz, and when you cut it the ends don't fray or come untwisted.
- 468 replies
-
- 5
-
-
- niagara
- model shipways
- (and 1 more)
-
Frank, You can pretend one of them is for you, and go out and buy something that will make you happy if you want.
- 831 replies
-
- 1
-
-
- Armed Virginia Sloop
- Model Shipways
- (and 1 more)
-
On the bright side Robert, you got a free practice run, and MS is very good about shipping replacement parts pretty quickly. Most folks (including myself) have gotten them within a week of sending them a request. Good luck!
-
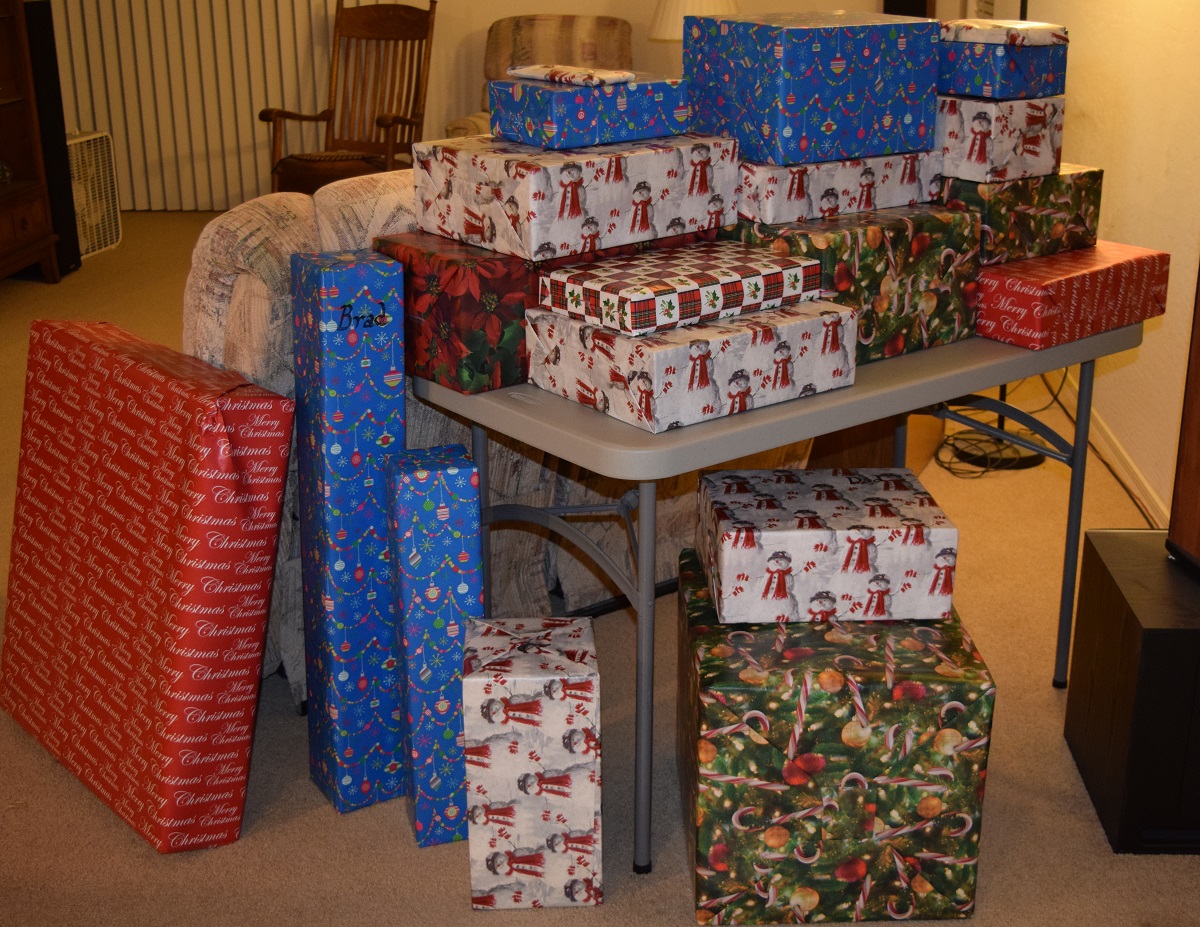
Thanks for all the nice comments. I didn't make any progress on the ship today as I was busy running errands, taking care of appointments, and then wrapping Christmas presents. Next year I'm considering the benefits of gift cards for everyone! Hehe.

- 831 replies
-
- 4
-
-
- Armed Virginia Sloop
- Model Shipways
- (and 1 more)
-
The transom curves aren't the problem per se', the problem is me being hamfisted, and or just plain screwing up. I'll get the shape and curve just perfect, and then lay it into position and realize that it's too narrow at one end because I oversanded it. I'll get impatient while forming the curve and apply too much force and tear the wood. I'll get the shape and curve done again, fit it perfectly at the transom, see that it's just fractionally too long at the other end, and then over trim it. Etc. I have no idea why it's happening on this piece, just a bad run of me being dumb I suppose. I've been busy most of the day finishing up Christmas (wrapping presents) and taking care of appointments and stuff, so I just set the boat aside for today, and I'll get back at it in the morning, since I'll be stuck here all day while the A/C repair guys are replacing my air handler (yay for home ownership bills... woop). For bending, I'm effectively using steam, just not directly. I'm not soaking the planks, I just dip them in water and then form the curve over the end of a heat gun. It works great, the wood becomes extremely pliable (probably very much like your steaming does). For minor bends just the heat works great. One lesson I learned from the Carmen was that wood will shrink and leave gaps if it's placed while wet, so I got the heat gun to use and pre-form all my bends off the ship instead of doing wet placement like I did on the Carmen. So far it's working great.
-
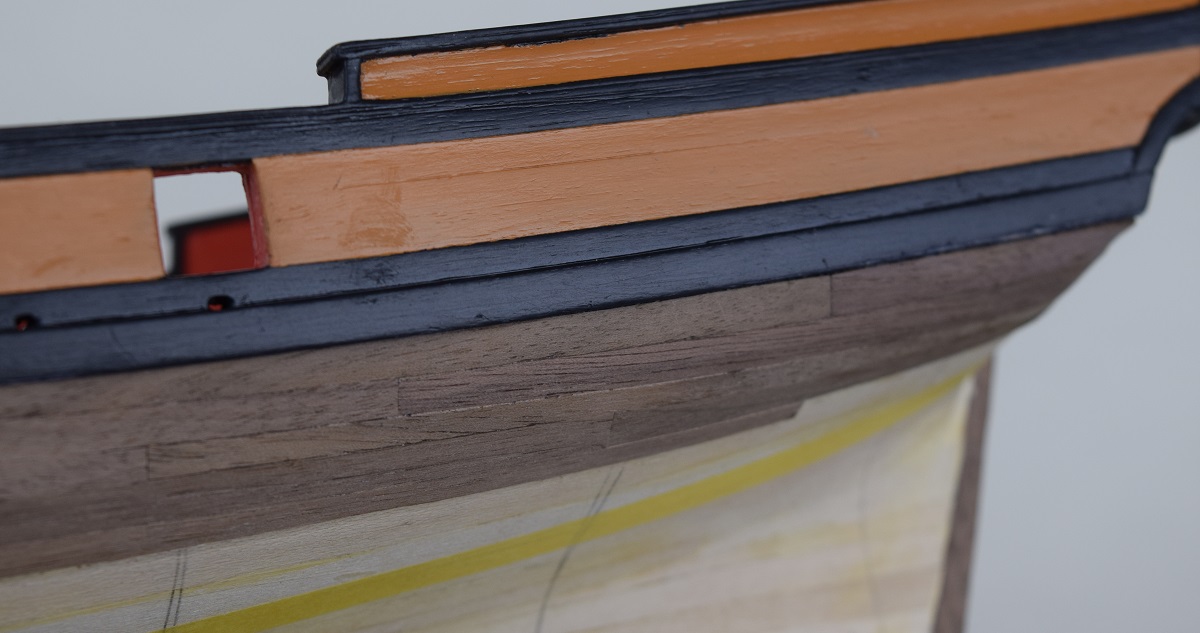
I'm interested in seeing how that beveling looks with a painted hull. I'd never heard of doing it that way, but if you are going to paint it, I can see how it might work. Worst case scenario, as you already said, fill/sand/paint - all covered up! I'm actually doing my beveling the other way in order to try to eliminate all the gaps as much as possible, but I'm also planning to leave my walnut hull below the wale natural finish. Are you using the thin .030" planks here? Pictures can be misleading, but with your bevels it almost looks like you are using the thicker 1/16" planking. I hate the curves over the stern/transom. I'm on my 6th attempt now on the 3rd plank. I keep spending 30 minutes getting a piece perfectly shaped and then being stupid and breaking it where it's narrow at the transom curve.
-
That finish is stunning. Now I want to make a more modern small boat just so I can make it look like that!
-
You have quite a nice looking start there, at least to my new-guy eyes. Very colorful! As far as the scale goes, there have been numerous threads in the past on this forum about how far off the scale is on many kits. I can't speak to this one specifically, but it's not an uncommon occurrence apparently.
-
I'll disagree with you, although it's your model - I think the furled sails were a great addition, and really help to bring her 'alive' compared to bare poles. You continue to do great work, and except for experts and people reading your log, nobody who sees your completed model will have any clue about the eye bolt locations being wrong!
-
Let the second planking begin! So far done completely with PVA glue and no clamps, just holding each plank in position until the CVA takes enough set to hold it. We'll see how far along I get with this system. For the stern, I've only gotten two of the planks wrapped to the transom so far, and I've used water and heat to get them into shape prior to gluing. Hopefully will be able to continue to get the shape of the planks at the stern very close to shape before placing. If not I'll likely have to resort to clamps at some point.
- 831 replies
-
- 13
-
-
- Armed Virginia Sloop
- Model Shipways
- (and 1 more)
-
USS Constitution by galf
GuntherMT replied to galf's topic in - Kit build logs for subjects built from 1751 - 1800
I used Sharpie on my wale on a boxwood strip. Even after weeks it would smear off when I wiped it, and wipe on poly wouldn't seem to seal it. I ended up sanding it off a fair amount and then priming and painting over it with acrylic paint and then wipe on poly before it would actually be 'dry' to the touch and not come off on anything that rubbed against it. Lesson learned. -
So the pattern on the mouse is actually 'weaved' by using an odd thread? Yikes. Do you use a different thread from the skeleton for each row of the weave, or just use a single thread and weave it around until the entire mouse is complete (i.e. spiral it)?
- 206 replies
-
- 1
-
-
- royal caroline
- panart
- (and 1 more)