HOLIDAY DONATION DRIVE - SUPPORT MSW - DO YOUR PART TO KEEP THIS GREAT FORUM GOING! (Only 24 donations so far out of 49,000 members - C'mon guys!)
×


GuntherMT
-
Posts
2,213 -
Joined
-
Last visited
Content Type
Profiles
Forums
Gallery
Events
Everything posted by GuntherMT
-
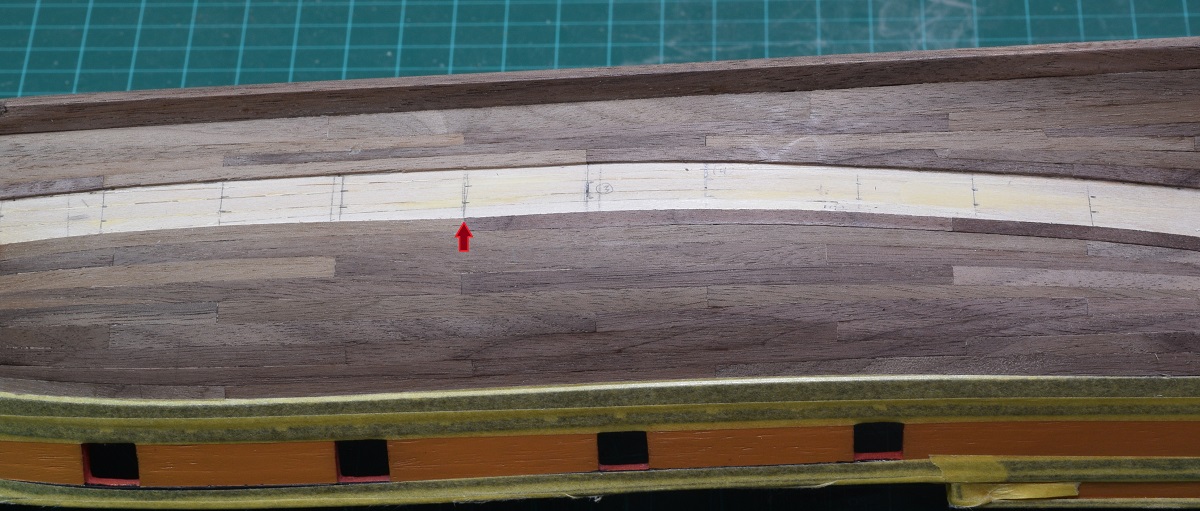
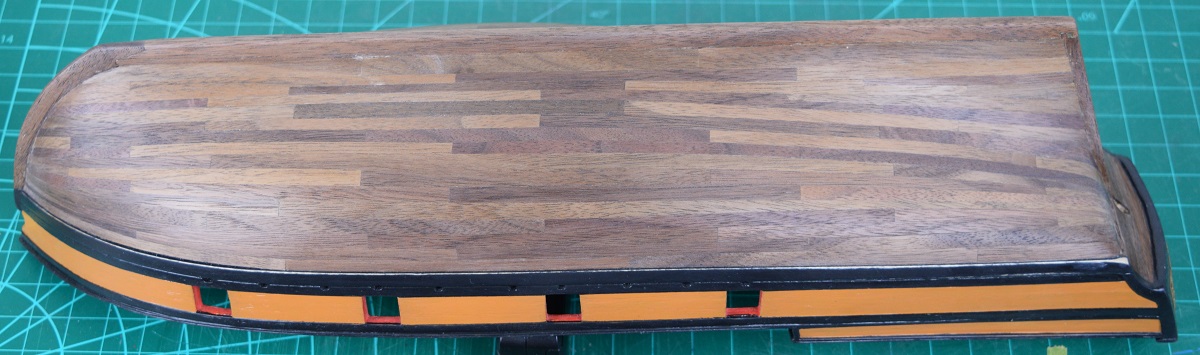
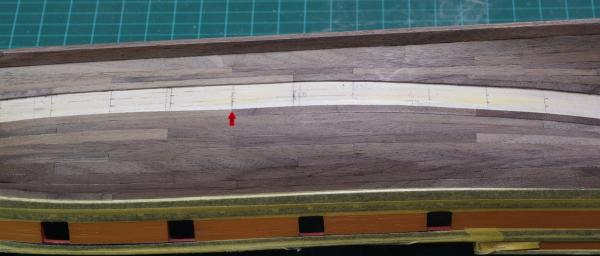
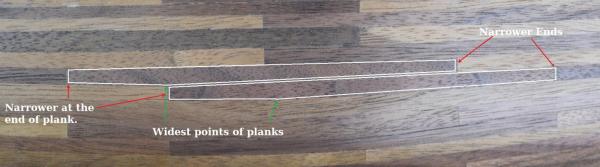
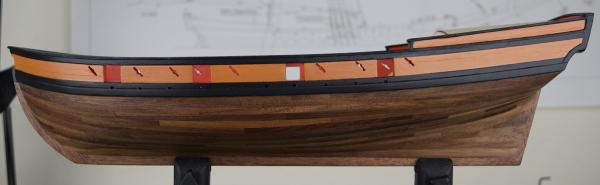
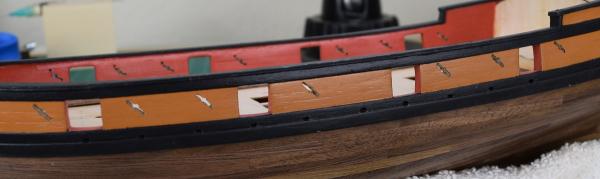
I see what you are talking about, and you can fix that by adding a plank that's wider in the middle. Instead of just making the plank narrower at one end or the other, make if full width at the point where it will hit the 'bottom' of the V, and then angle it to the appropriate length at each end. You just sand and work it until it fits snugly into the V, and if that makes the next planking strake narrower, because of filling the V, not a big deal. You can also correct this way across multiple strakes if needed. Because I'm horrible at explaining, I doodled on some pictures that hopefully will help you understand what I'm talking about. I had this exact same thing on my ship, and hopefully you can see the 'v' in the planking here: I corrected this across 2 strakes using the 'wider in the middle' planks as seen here on the finished hull: I sort of tried to paint in the shape of the planks to make it clearer, while leaving the edges clear to see the actual planks. Due to the curve of the hull, and angle of camera the 'top' edge of these planks doesn't look straight, but that edge is actually left completely untouched except for sanding it smooth, so you end up with a plank that actually has 5 edges, 2 on the bottom, 1 on the top, and of course the ends. Hopefully this makes sense and helps.
-
Have some more! Note that the last two have her under full sail, supposedly a fairly unusual thing to happen, unfortunately those are not in nearly as high-resolution as the others.


-
So I found this picture on Facebook of all places, and thought you might find it interesting (or inspiring!). It's my new desktop background. Click for huge-ish:

-
Nothing at all wrong with joggle planks, drop planks or stealers. The planking looks great.
-
Bravo! Congratulations on a job well done, and a ship that you can display proudly.
-
Wow.. that's quite a series of posts/updates, and some fantastic workmanship and problem solving. You and many others here on MSW continue to raise the bar for how to build kits. Not sure I'll be able to achieve many of these things (like that sheave!) for some time, but it's awesome to see how you are doing things like this.
- 269 replies
-
- 1
-

-
- Caldercraft
- First build
- (and 3 more)
-
Looking good Rich. I expect you to load her into the car and bring to the next meeting for personal inspection!
- 1,756 replies
-
- 2
-
-
- constitution
- constructo
- (and 1 more)
-
Stergios, On the Carmen I looked at all the pictures of actual ships (real or reproductions) I could find with Google image search, and then used the highly scientific method of "the size that looked good to me" based on the relationship of the shroud size vs. lanyards based on all the photo's I'd looked at. At the end of the day, nobody is going to be measuring your line, so if it looks good, it is good!
- 1,144 replies
-
- 1
-
-
- snake
- caldercraft
- (and 1 more)
-
Nigel, For the final plank, to prevent that last one to being too narrow, when you get down to 2 planks remaining, just split the difference, even if it makes that next to last plank narrower than was planned. If you go with a system where you use a planking fan to transfer the plank widths in bands with a tick strip, you shouldn't run into that situation, as you'll be trimming each strake to match the marked widths.
- 270 replies
-
- 1
-
-
- red dragon
- artesania latina
- (and 1 more)
-
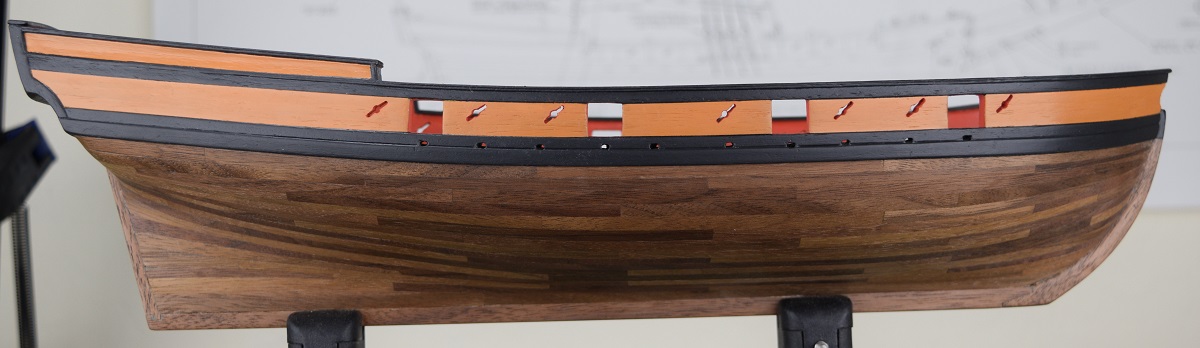
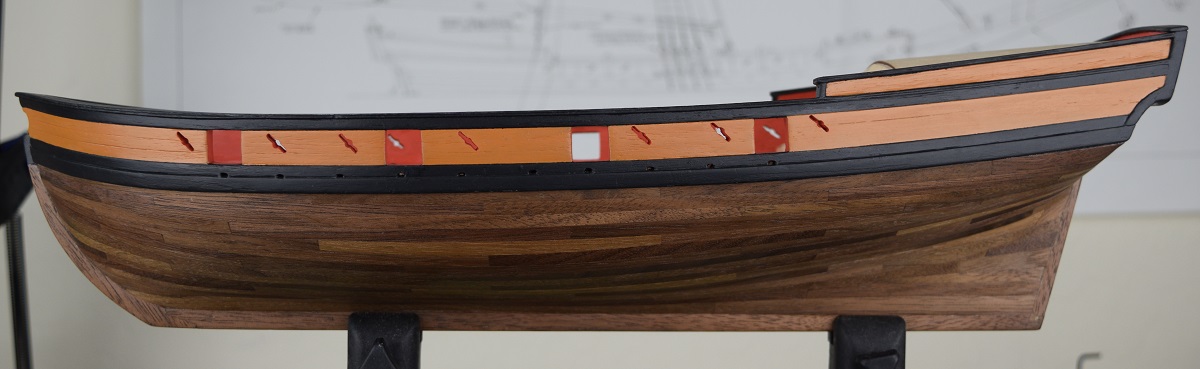
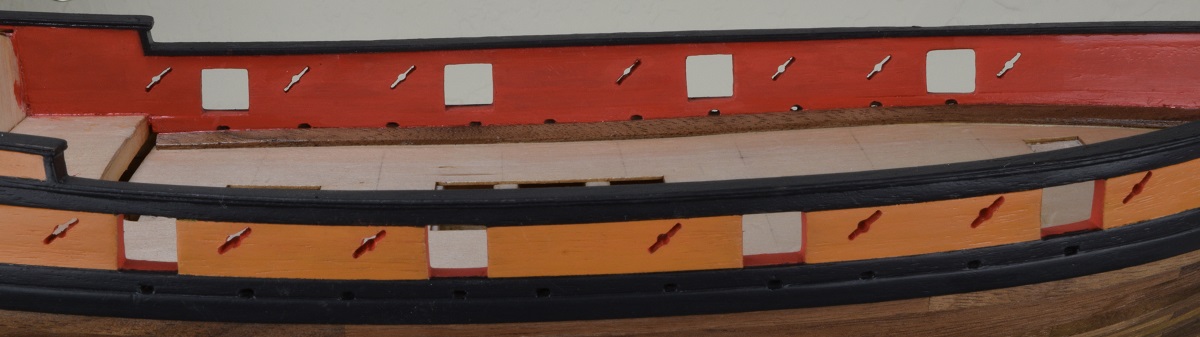
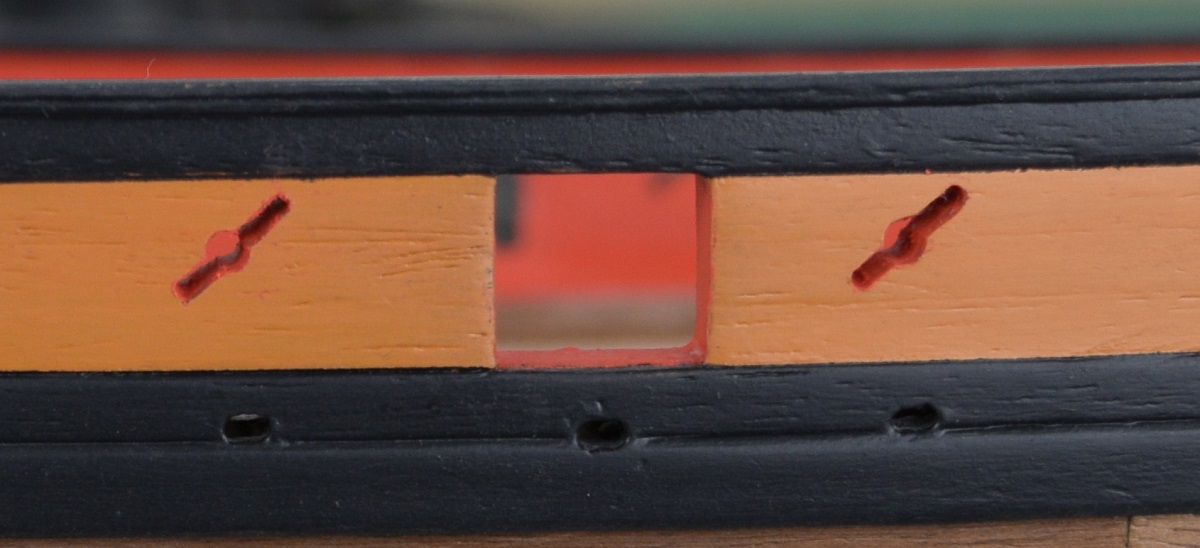
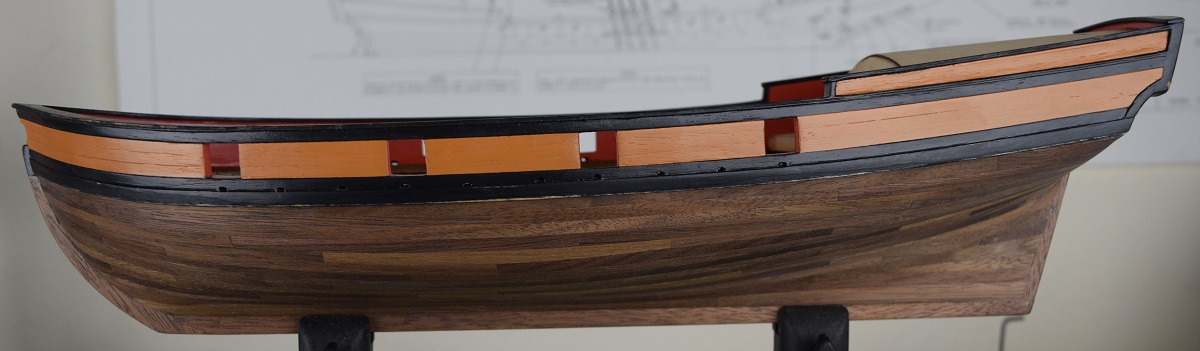
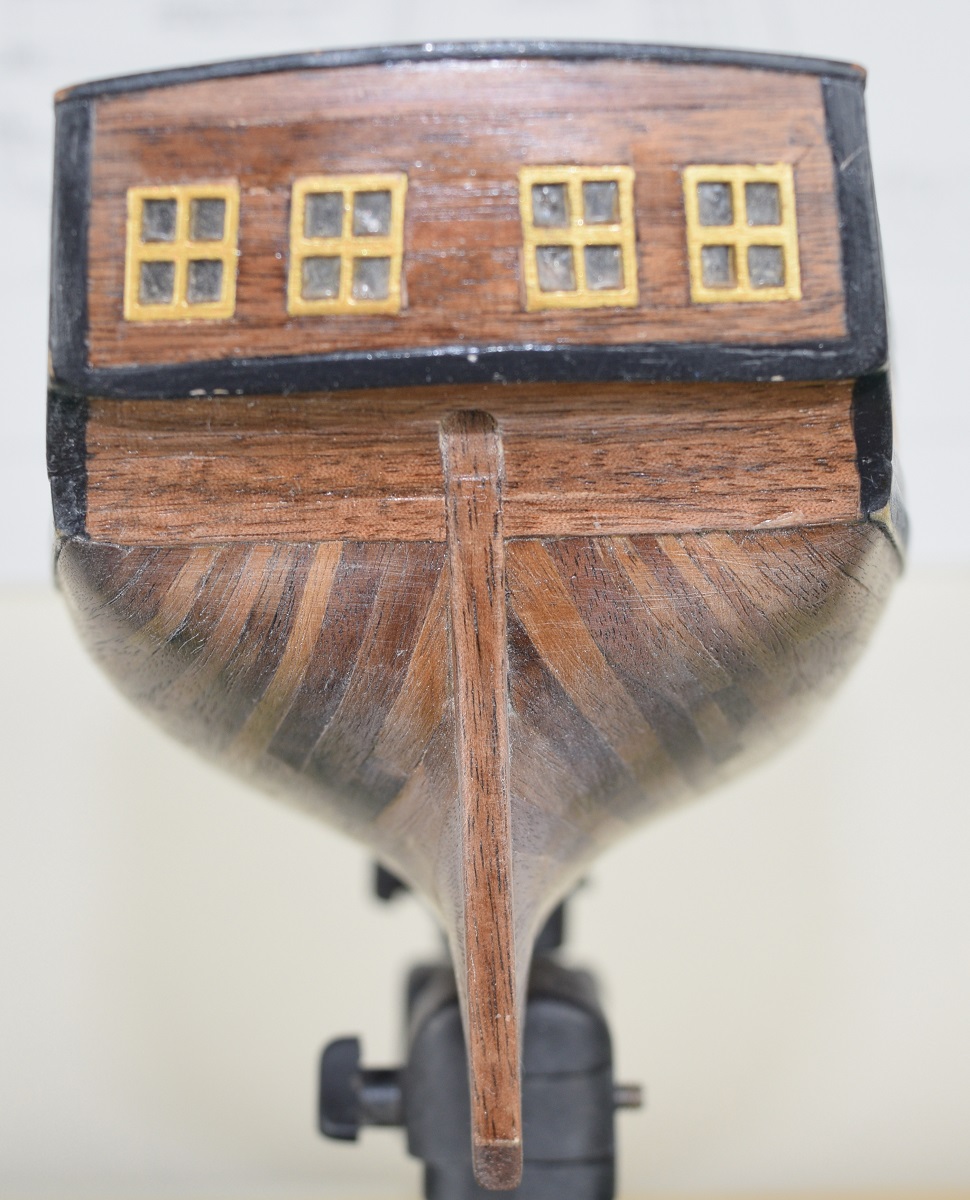
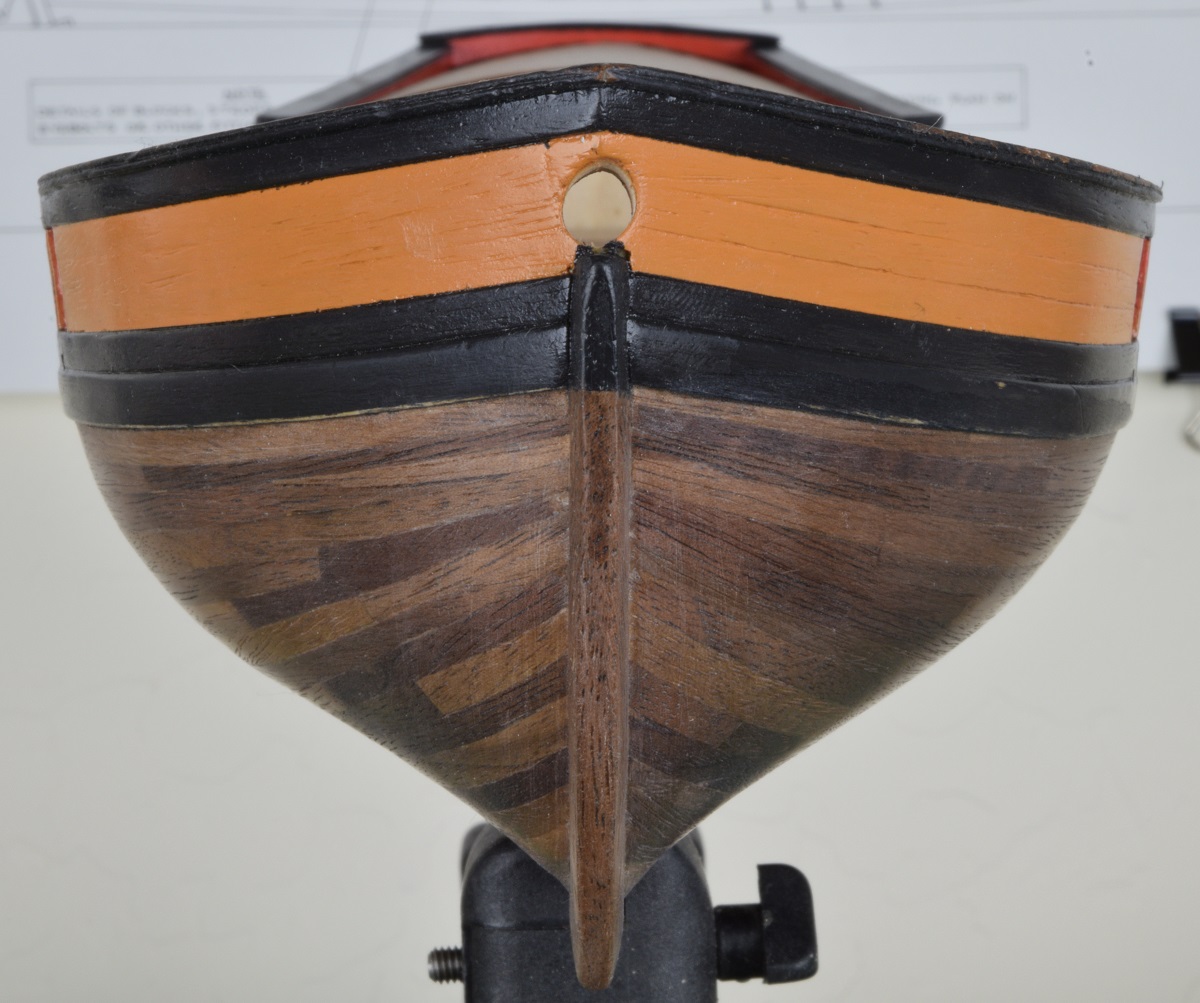
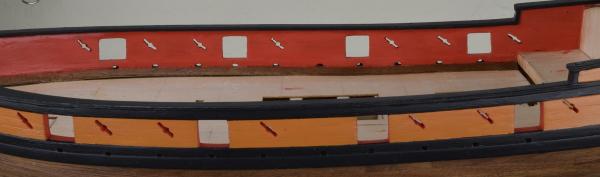
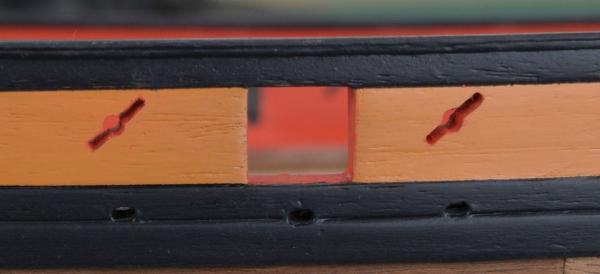
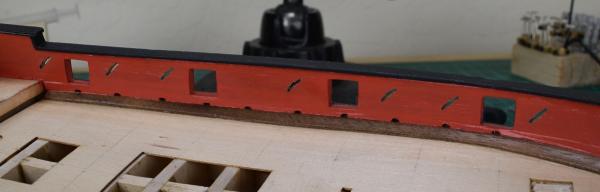
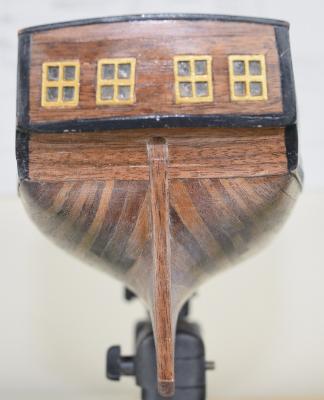
Thanks to everyone for the kind comments and encouragement, and for all the likes. -- I'm done with the sweep ports. Not because I'm particularly happy with how they came out, but because I kept trying to make them better and was at the point where I think I was starting to make things worse, rather than better. So I reached the 'good enough this time' point and called it done. A few of them came out pretty good, but there are a number that under the stare of the optivisor or macro lens, make me.. unhappy. Oh well. Close up of a pair of decent ones, before touch-up painting. And some generic shots of both sides. Now I get to start on what I hope is fun and interesting, building the deck furniture so that I can plank the deck!


- 831 replies
-
- 14
-
-
- Armed Virginia Sloop
- Model Shipways
- (and 1 more)
-
I vote for a log also, as the more modern style ships are a rarity here, and I enjoy seeing how they are built, even if there isn't one in my current build queue, you never know what might be in the future!
-
Very nice looking ship, of a subject that most of us in the ol' USA probably never heard of before! Thank you for sharing.
- 7 replies
-
- 1
-
-
- admiralen class destroyer
- pacific crossroads
- (and 2 more)
-
What camera do you use
GuntherMT replied to Scholzy's topic in Modeling tools and Workshop Equipment
Pretty much what Joe said. I use a Nikon D3300 DSLR, but for my first build I just used a Canon point and shoot and it worked quite well for build log photo's. In addition I've seen some really spectacular build log photo's (see Dubz build logs!) taken with an iPhone - the tiny lenses on cell phones and tablets are surprisingly good at taking photo's very close. -
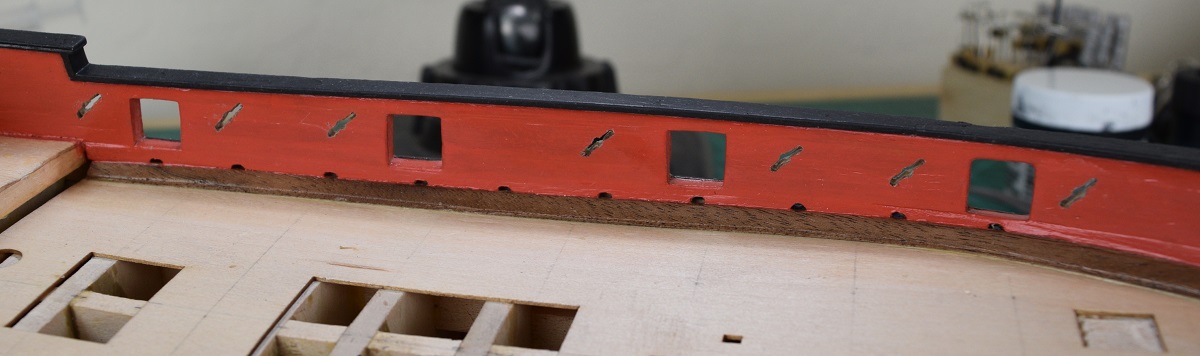
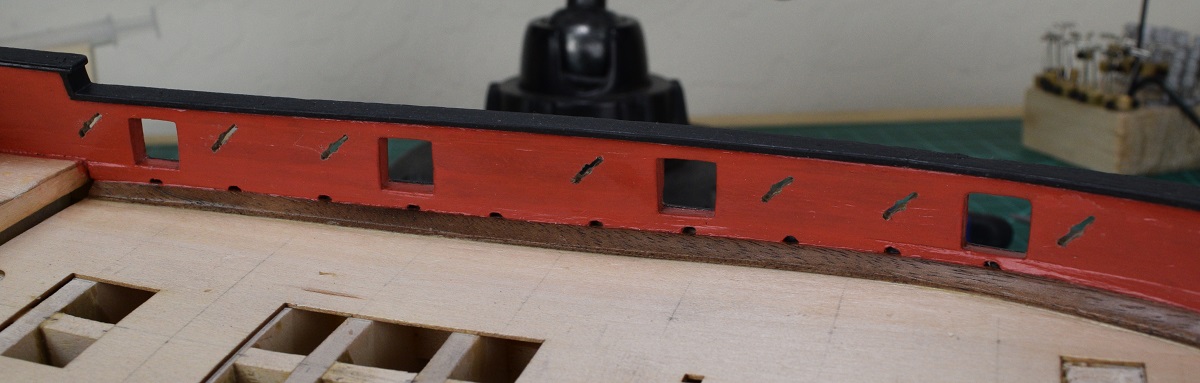
I think I may have a new criteria for kit buying. Does it have odd shaped sweep ports (i.e. not square)? If yes, run away! The entire time I'm working on these I'm deathly afraid of slipping and making a mistake that will wreck hours or days of work. I'm halfway home, and managed to get them ok looking, if not great, but also managed to mess up all three colors of paint so more touch-up will be coming down the road. Shocker! Will finish up the starboard side ports tomorrow. Here are the port side sweep ports, obviously not painted yet. I did these by first transferring the center point for each port by making a direct tracing of the plans, and just taping that tracing to the bulkhead and using a sharp point punch to mark. I did this while the bulkheads were masked, inside and out with masking tape for doing the black paint touch-up. I then made a small brass jig with the center and end holes in it, and then positioning the jig over the center punch marks and drilling the three holes with a 3/64" drill (actually 1.2mm, but that's only 0.01mm off). I then came back and drilled the center hole with a 3/32" drill. I connected the holes with a small X-acto saw while it was still masked. After finishing the touch-up work on the black paint, I removed all the masking, and enlarged the connecting line between the holes with a #10 X-acto blade, working very slowly and shaving a tiny bit off at a time, doing first the outside, then the inside, and then working to open up the middle to connect them evenly. The port farthest aft is pretty lopsided, but the rest came out decent.


- 831 replies
-
- 15
-
-
- Armed Virginia Sloop
- Model Shipways
- (and 1 more)
-
Congratulations on the completion of a beautiful ship. Best of luck on negotiating your next one!
-
Very nice looking project so far Cathead. I've had very good experience with MS as well, and have actually got 3 more MS kits on the shelf already waiting for my attention. There are so many interesting looking kits out there though, I'd really love to get some of the Midwest small kits, and maybe a Dusek run-about, but I keep forcing myself to not become one of those people with 20 years worth of kits in a stack in the closet! Love the job you've done on this style of planking, and look forward to watching your progress!
- 83 replies
-
- 1
-
-
- bounty launch
- model shipways
- (and 1 more)
-
Looks to me like you are doing a bang-up good job on the planking Nigel. I don't have any real feedback I can offer as I've only just today finished the planking on my 2nd ship, so I'm quite new at this, but from everything I've read, you just use stealers and drop planks as needed to make things work, and don't worry too much about whether that matches up with the plans or someone elses build, as long as the results are good. In your case, the results are looking quite good! Planking does seem to be one of those things that takes a good amount of time to get right, but it's also one of the most visible things on the finished model, so the time spent here is worth it. I don't track my time in a log, but I'm sure the amount of time I spent on my planking would be scary if I did!
- 270 replies
-
- 3
-
-
- red dragon
- artesania latina
- (and 1 more)
-
I have to say, that your little buckets are amazing. Thank you for sharing the technique used to construct them.
- 515 replies
-
- 1
-
-
- artesania latina
- whaleboat
- (and 1 more)
-
Looking sharp Brett, very close to the finish line now.
-
That's quite a stout holder you have built there, were you expecting the boat to be made out of depleted uranium? Progress on the model is looking good.
-
Nice looking ship Keith. The round parts are called 'pin collars' and I got these at Micro-Mark: http://www.micromark.com/pin-collar-set,9549.html I'm sure they (or something like them) could be found elsewhere, but even with the price I don't regret getting these, as I use them more than almost anything else for clamping of the planking.
-
Great idea Jim, and I think it makes a wonderful display!
- 226 replies
-
- 1
-
-
- ballahoo
- caldercraft
- (and 1 more)
-
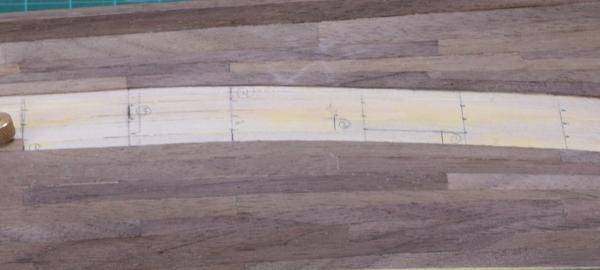
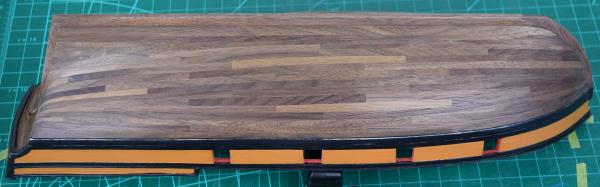
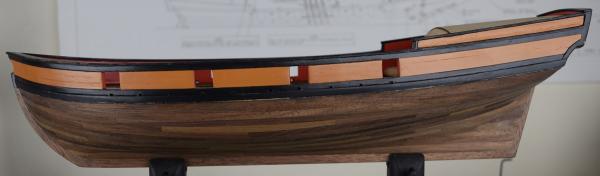
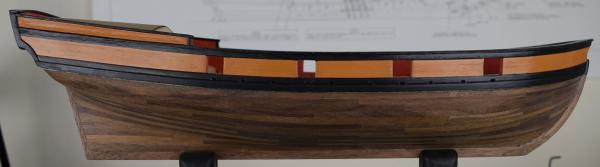
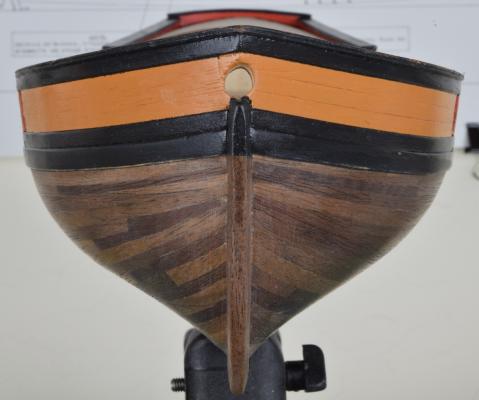
Thanks Ken, The video was kind of fun, but I don't think I'll do more of that, as stopping to get the photo between every little step is sort of annoying, and the result really isn't as cool as I was hoping for since even though I had the tripod location marked on the floor, and the hull location taped off on the bench, there was still quite a bit of movement between shots. I'm sure that could be adjusted in post by careful cropping, but I'm not a post-processing guru by any stretch, and the time and effort to learn how to do that wasn't something I was willing to do for this. As far a spiling, I guess it depends on how you define that word. The planks aren't truly spiled, in the sense that they are not individually cut from wider stock in a curved shape like true spiling. I used the kit .030 supplied planks strips. I'll see if I can describe my system. First, the hull was done in 4 'bands' which are approximately 4 planks wide at the widest point (not counting the stern). After masking off the band with tape, I used card stock (manila folders) cut into narrow strips and used the cards to transfer tick-marks from a planking fan to give myself a bunch of reference points for the plank widths needed at various spots along the hull. Here is a zoomed in image which corresponds to the first image in the video showing part of the middle section of the final band marked off. You can see the tick marks that I've transferred to the first layer of planking. You can also see some lines marked 1 through 4, which are where I planned the locations for the butt-ends to fall for this band. I plotted them on this band because I shifted them from the previous band so that they would not end up with the same issue I had on the other side where I had a pair of rows where the butts were in the same spot. Except for the stem and stern planks, I use pre-cut 4" plank lengths that I cut in a little jig I made up. As I got towards the end I ran out of pre-cut pieces, and would just cut another 4" plank length as I went. Starting with the 4" x 3/16" plank piece, I would lay it on the hull and mark both ends with the nearest tick-mark to get the required taper. I then trimmed the plank using a straight edge and razor knife and laid it back onto the hull to see how it fit. If it was reasonably close I would then bevel the trimmed edge to fit up tight against the existing planks using a sanding block with 320 grit sandpaper. I would sand as needed until the plank edge matched up with all the tick marks along the edge, and then glue it in place. In the middle I had a few planks that needed to be wider somewhere in the middle than on the ends. For those I marked the wide spot, and then marked the tick marks at each end. I would trim with the razor knife from the tick mark to the edge of the plank at the middle mark, from both ends, giving me a plank that was wider in the middle at the mark, and then repeat the beveling/sanding process until it fit nicely to the existing planks, and matched up with the tick marks fairly close. Hopefully that's understandable. I didn't really photo-document that process very well, since it's mostly lifted from planking tutorials here, or practicums like Bob Hunts that give various methods of doing this. I think my personal system is something of a hybrid between all the stuff I've read, but it seemed to mostly work out fairly well for me. Yesterday I sanded down the final planking until I was reasonably happy with the final finish, and applied a coat of wipe-on poly and let it dry for about 6 hours. I then buffed that and applied a 2nd coat to let it dry overnight. This morning I buffed that coat, and after looking at the new photo's, I'll need to re-sand with a very fine paper to remove the light scratches left from using the wrong buffing material, and refinish, but that can be done down the road. For now, here is what it looks like with the 2 coats of poly and a buffing (or scratching in some photos!). As you can see, I failed at the symmetry at the stern, which I'm not terribly happy about, but the rest looks pretty good to me, and I am not going to cover it with paint as I really like the way the different colors of walnut came out. I'm also happy that I mis-read an instruction and used 4" planks instead of 5", as even though they are fairly short in scale (16'), I think they make the hull look quite nice. I also used a 4-butt shift pattern for the planking, which came out quite well except for the aforementioned mistake when I laid the garboard strake at the wrong shift point. I've now got it all re-masked for touching up the black paint, and am about to start working on marking the locations for the sweep ports, and making a jig for drilling them.

- 831 replies
-
- 14
-
-
- Armed Virginia Sloop
- Model Shipways
- (and 1 more)
-
Knowing exactly what it's called and who makes it helps greatly. Thank you!